
Job Aid
BD FACSDiva™ Software:
Exporting and importing templates
This job aid contains instructions for creating and using templates in BD FACSDiva™ Software. For more information about templates,
see the BD FACSDiva™ Software Reference Manual.
Cytometer settings: Remove embedded cytometer settings from your experimental elements before exporting as a template to
ensure that the latest cytometer settings are applied to any imported templates. Ensure that the cytometer settings parameters
match to avoid mismatched parameters and greyed out plots.
Categorizing your templates:
• Template names: Give meaningful names to your templates to make them easily recognizable later.
• Types: Group templates by type, so they are easier to find later. Type names cannot include any of the following characters:
\ / : * ? " < > | , .
• Comments: Add comments to provide additional information about your template. The comments are displayed in the
import template wizard to help define the template.
Locked templates: Select the Lock Template checkbox to lock exported templates. A locked template means that it cannot be
overwritten by a template with the same name. Changes can still be made to a locked template once it is imported into the
browser.
Managing templates: Manage the template files to remove outdated templates, fix errors, and ensure that the latest version of
each template is being used.
Templates overview
1
Guidelines
Template type When to use See page
Experiment To reuse a defined experimental setup for subsequent experiments 2
Panel (specimen) To run the same panel of tubes in another experiment or combine different panels
in a single experiment. Use as an analysis template, or prior to analysis to use as a
panel analysis template.
3
Plate To reuse a defined plate for subsequent experiments 5
Analysis To reuse the same worksheet for subsequent experiments 6
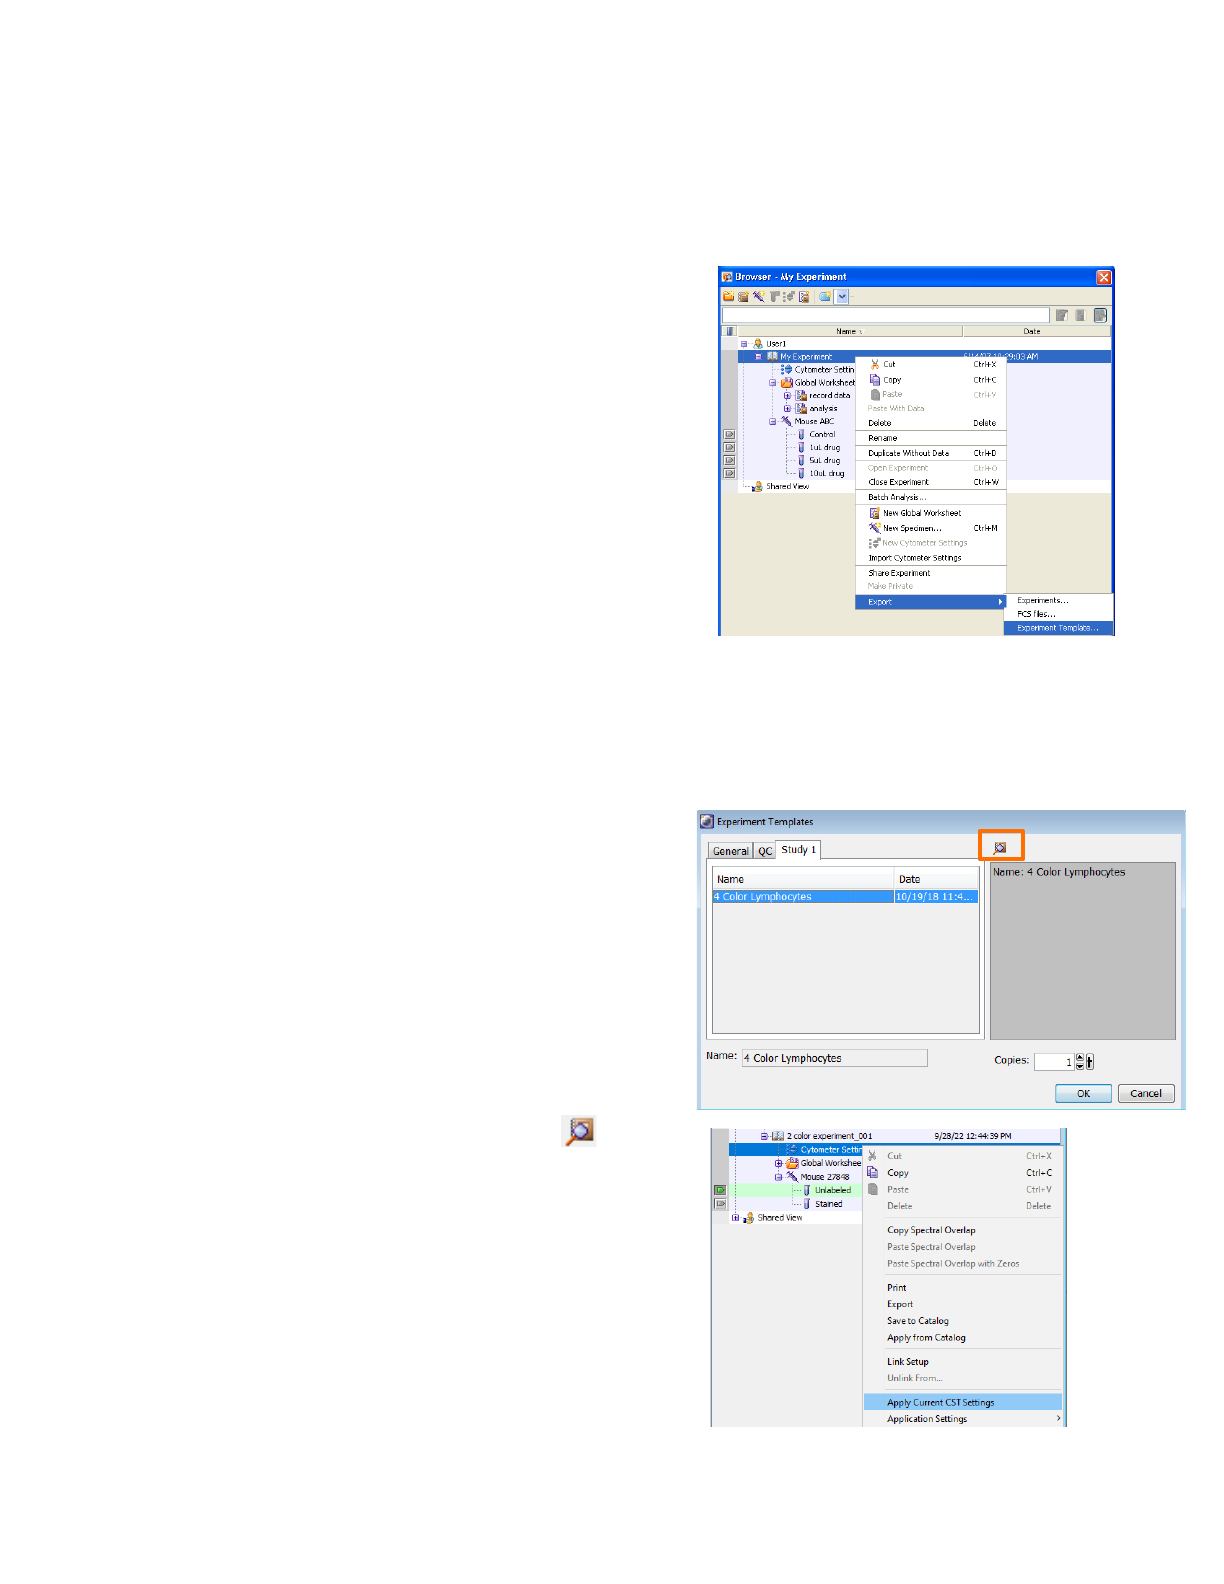
Importing an experiment template
In the Browser, select the folder where you want the new
experiment to be placed.
Select Experiment > New Experiment.
The Experiment Templates dialog opens.
Navigate to the correct tab in the Experiment Template dialog,
then select the template name.
(Optional) Click the View the template details button ( )to
review the Experiment Layout associated with the template.
Specify the number of copies you need, then click OK.
A new experiment opens in the browser.
Prepare the imported template by applying current CS&T settings,
creating compensation controls, and renaming generic element
names.
Exporting an experiment template
In the Browser, right-click an experiment and select Export >
Experiment Template.
The Export Experiment Template Wizard opens.
Select the template type and type a template name.
(Optional) Select the Lock Template checkbox.
(Optional) Click Next and enter optional information in the
Notes, Cytometer Operator, and Investigator tabs.
Click Finish.
Exporting and importing an experiment template
Once your experiment has been prepared to become a template, you can export
the experiment as an experiment template.
Experiment templates are cytometer configuration specific, ensure that you are using the correct configuration prior to creating or
using an experiment template.
2
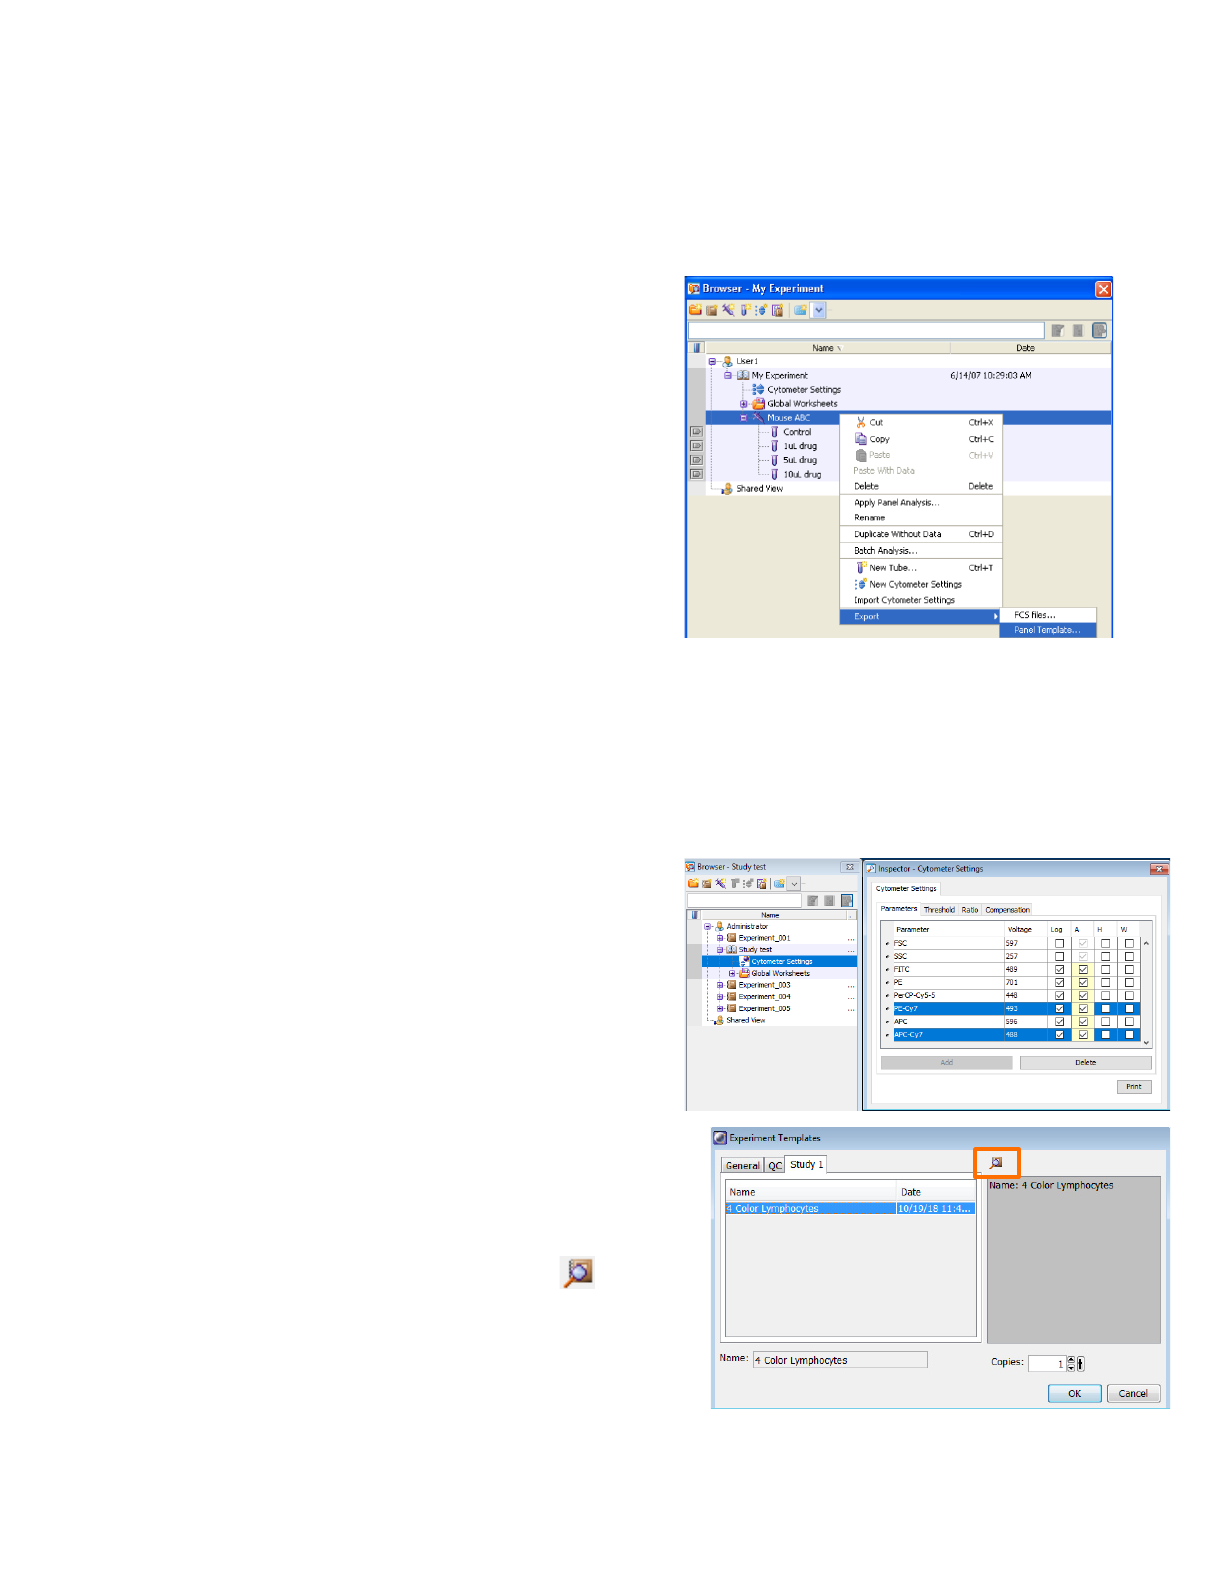
Importing a panel template
In the Browser, create a new experiment or select an open
experiment.
Select the appropriate cytometer settings parameters to
match your template parameters.
Select Experiment > New Specimen.
Navigate to the correct tab in the Specimen Template dialog,
then select the template name.
(Optional) Click the View the template details button ( )
to review the Experiment Layout associated with the
template.
Specify the number of copies you need, then click OK.
A new specimen is added to the experiment.
Exporting a panel template
In the Browser, right-click a specimen in an open
experiment and select Export > Panel Template.
The Panel Template Wizard opens.
Select which (if any) global worksheets to be included in the
template. Click
Next.
Select or enter a template type and enter a name.
(Optional) Select the Lock Template checkbox.
(Optional) Click Next and enter optional information in the
Comments.
Click Finish.
Exporting and importing a panel template
Export a specimen as a panel template to reuse experimental elements.
A panel template can be applied to an experiment to create specimens and tubes for acquisition and analysis, or it can be applied
as a panel analysis to a specimen with data for normal worksheet analysis.
Apply a panel template to apply a specimen, tubes and other
experimental elements to an experiment.
3
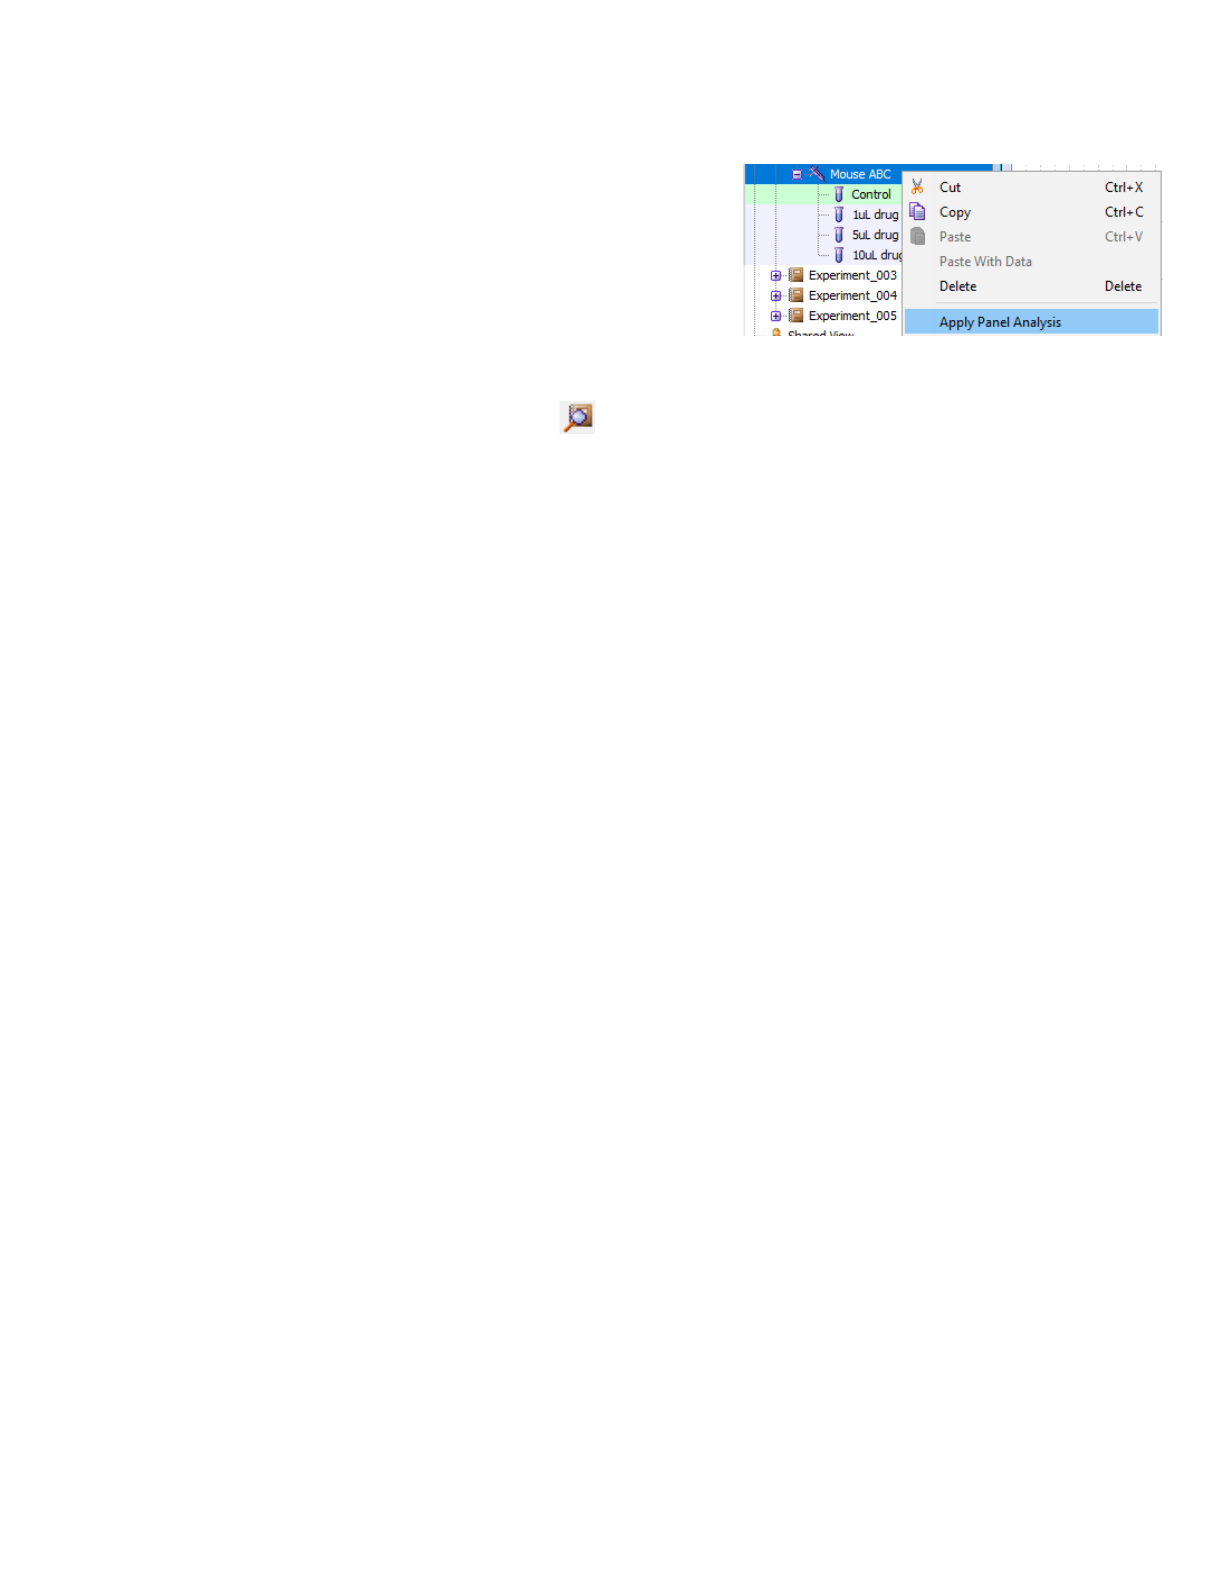
Applying a panel analysis
In the Browser, select an open experiment with tubes that
match your template.
Right-click the specimen and select Apply Panel Analysis.
Navigate to the correct tab in the Specimen Template dialog,
then select the template name.
(Optional) Click the View the template details button ( )
to review the Experiment Layout associated with the
template.
Click OK.
The panel's normal worksheets are applied to the tubes, no
other elements are transferred to the experiment.
Apply a panel analysis to apply normal worksheets to an existing
specimen and tubes.
4
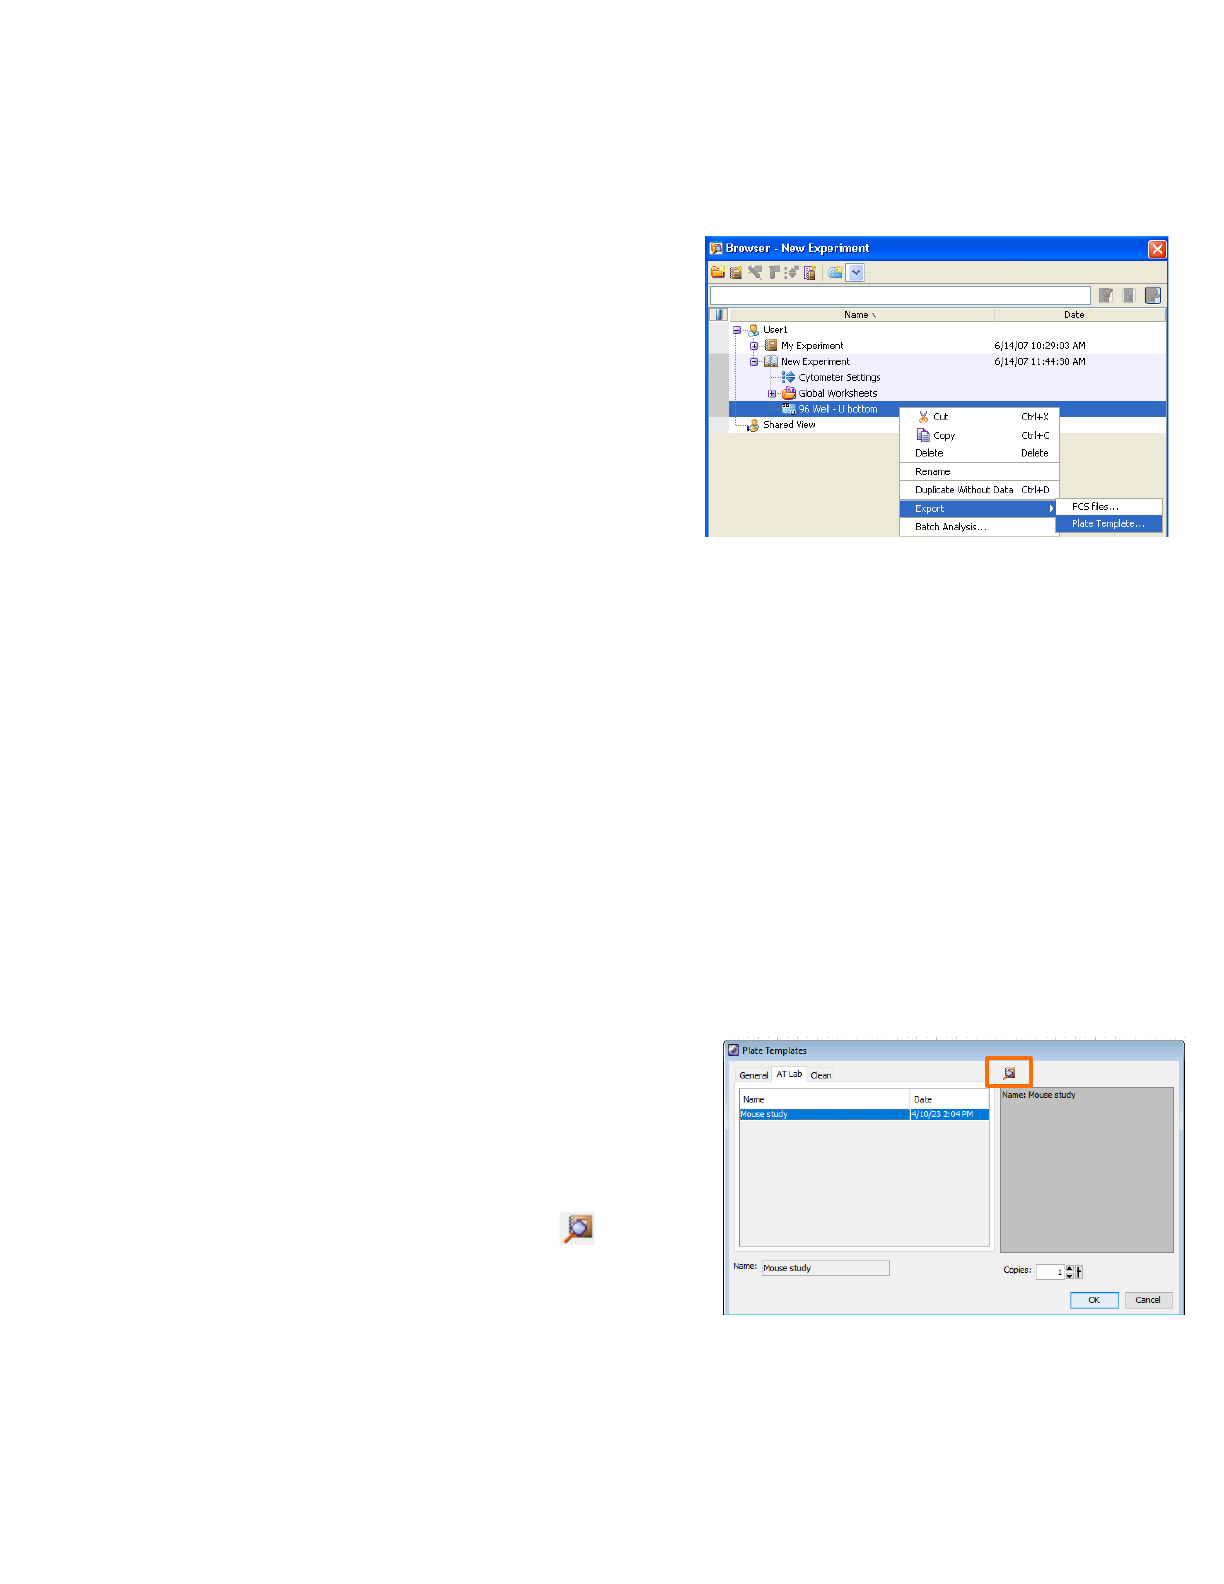
Importing a plate template
In the Browser, create a new experiment or select an open
experiment.
Select the appropriate cytometer settings parameters to
match your template parameters.
Select Experiment > New Plate.
Navigate to the correct tab in the Plate Template dialog, then
select the template name.
(Optional) Click the View the template details button ( )
to review the Experiment Layout associated with the
template.
Specify the number of copies you need, then click OK.
A new plate is added to the experiment.
Exporting a plate template
In the Browser, right-click an open experiment and select
Export > Plate Template.
The Plate Template Wizard opens.
Select which (if any) global worksheets to be included in the
template. Click
Next.
Select or enter a template type and enter a name.
(Optional) Select the Lock Template checkbox.
(Optional) Click Next and enter optional information in the
Comments.
Click Finish.
Exporting and importing a plate template
A plate template is available for the BD
®
High Throughput Sampler option (HTS) to save and apply plate setups for reuse.
Apply a plate template to apply a plate and all associated elements to
an experiment.
5
BD, the BD Logo and BD FACSDiva are trademarks of Becton, Dickinson and Company or its affiliates.
©2023 BD. All rights reserved. NPM-1060
This material is for training purposes.
For Research Use Only. Not for use in diagnostic or therapeutic procedures.
BD Life Sciences, San Jose, CA, 95131, USA
bdbiosciences.com
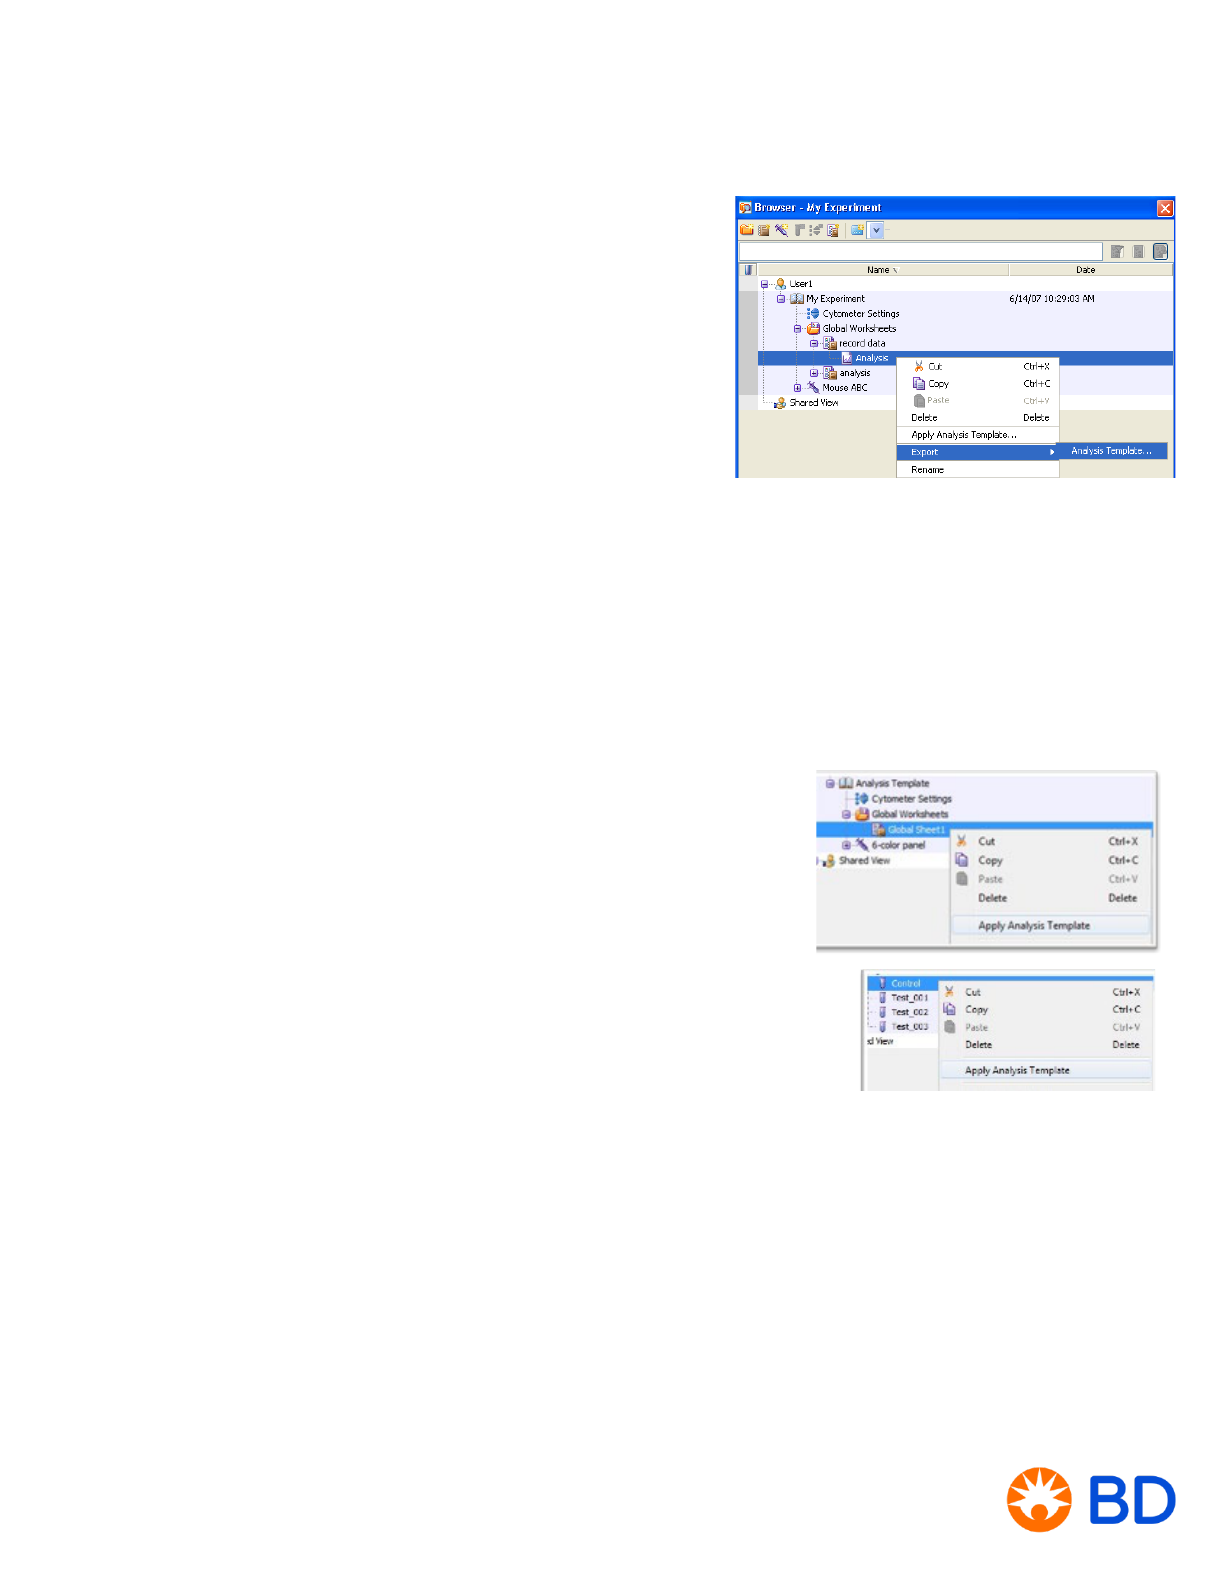
Importing an analysis template
Determine if you want the template applied to a worksheet or
tube:
• To create a global worksheet, right-click a Global Sheet in
the Global Worksheets folder and select
Apply Analysis
Temple or select Experiment > New Worksheet.
• To create a normal worksheet, right-click a tube and select
Apply Analysis Template or by select
Experiment > New
Tube.
Navigate to the correct tab in the Analysis Templates dialog,
then select the template name.
Click OK.
Adjust, edit, add or remove any element to customize the
worksheet.
Exporting an analysis template
In the Browser, right-click an analysis object in an open
experiment and select
Export > Analysis Template.
The Plate Template Wizard opens.
Select or enter a template type and enter a name.
(Optional) Select the Lock Template checkbox.
(Optional) Click Next and enter optional information in the
Comments.
Click Finish.
Exporting and importing an analysis template
Analysis templates are linked to the parameters in the experiment. Categorize and name the templates appropriately to avoid
applying a template with the wrong plot parameters.
Before importing an analysis template, determine if you want the analysis to be
applied to a global worksheet or a tube (to create a normal worksheet)
