1
OnBase Quick Reference Guide
Scanning Documents
This Quick Reference Guide covers setting up the scan station and using a scanner to
import batches of documents into OnBase using the Unity client installed on a Windows
PC. Departments are generally licensed for one to two scanners per group. To install the
Unity client, refer to the OnBase Web URLs and Unity Client ClickOnce URLs.
Batch Indexing is covered in separate guides (Indexing documents – Unity Client and
Indexing documents – Web Client).
Configuring your Scan Station
Perform these steps to configure your scan station. Not all users will have access to
make these changes; contact your departmental administrator or UIS for assistance if
necessary. You should only have to perform these steps once for each scan station.
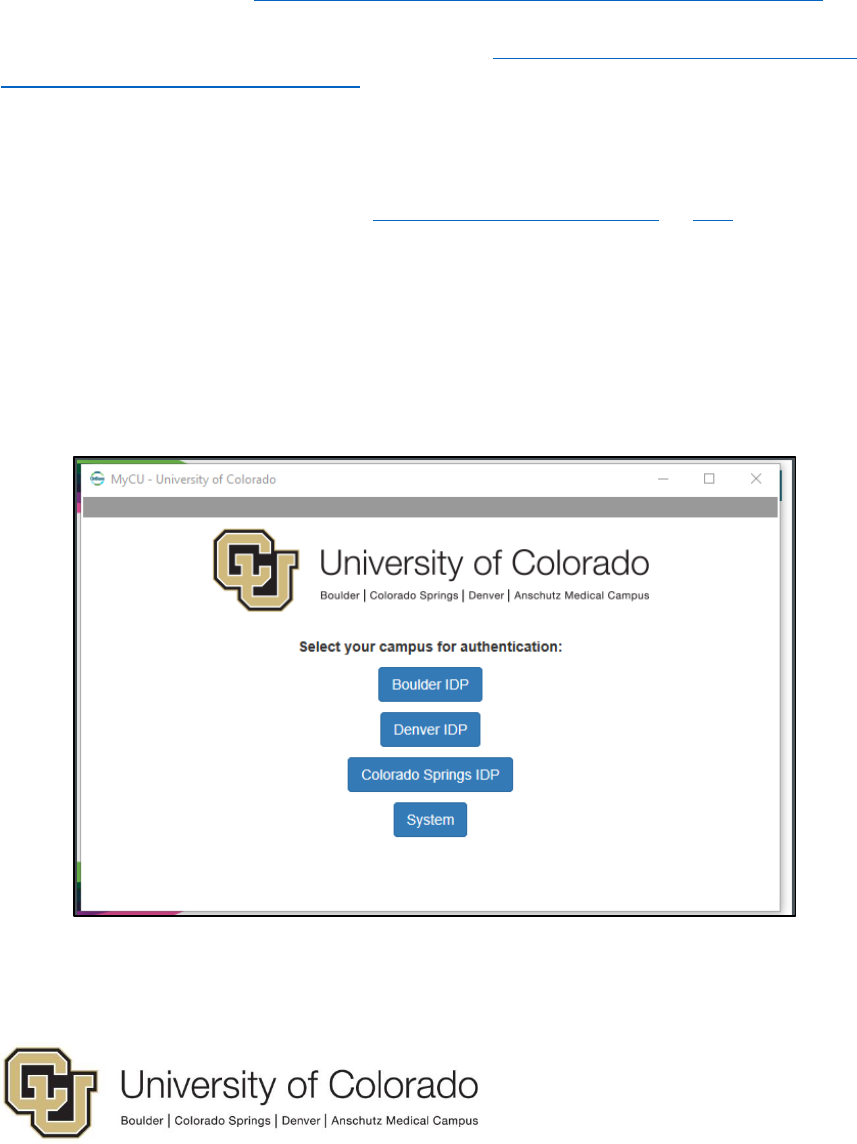
1. Login into the Unity Client with your campus credentials.
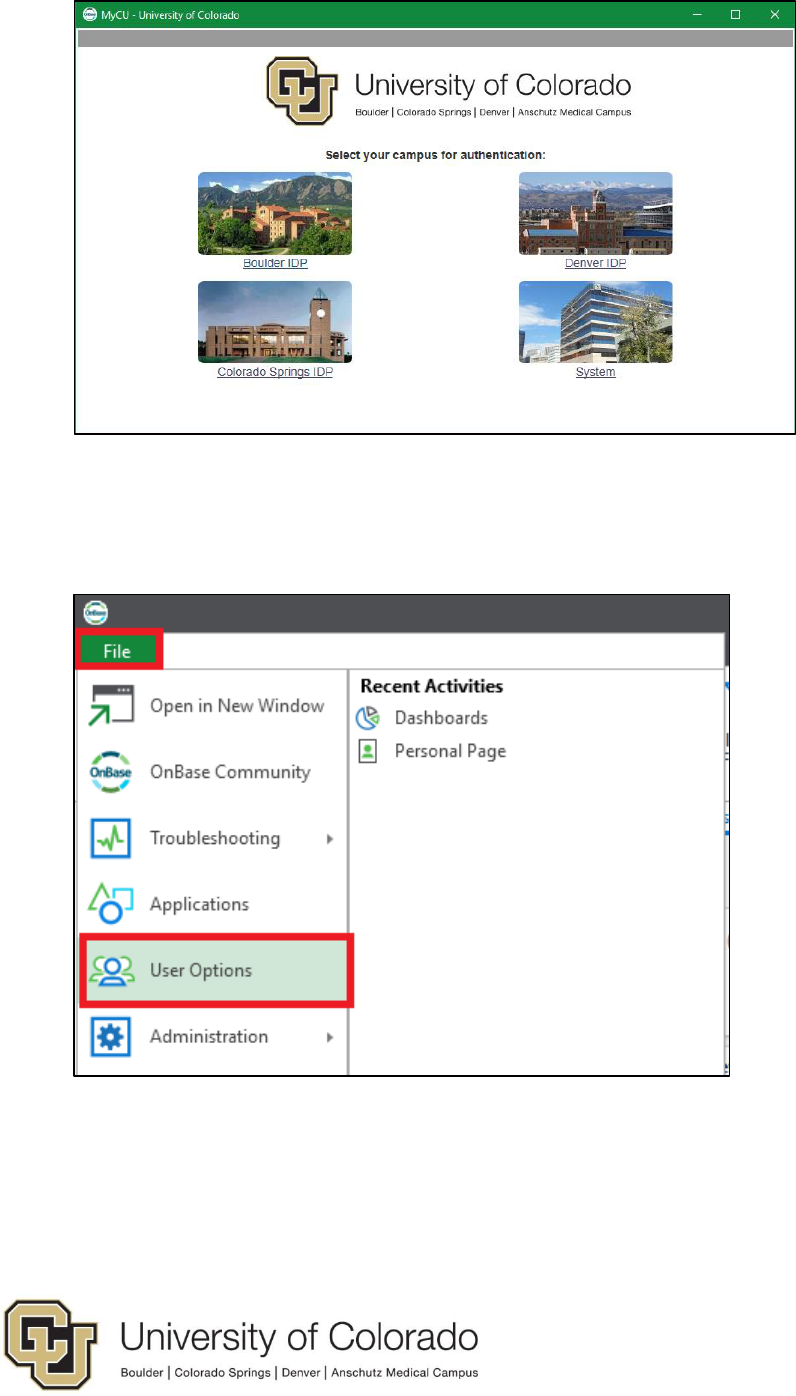
First, select your campus. Depending on the size of the window, you may see campus
names only or the campus names along with pictures. Single click on campus names or
double click if the picture is displayed.
Single click to select the desired campus.
2
Double click to select the desired campus.
2. Enter your campus credentials. For assistance with your campus credentials,
refer to the links on the login page for your campus. Go to the File menu and select
User Options.
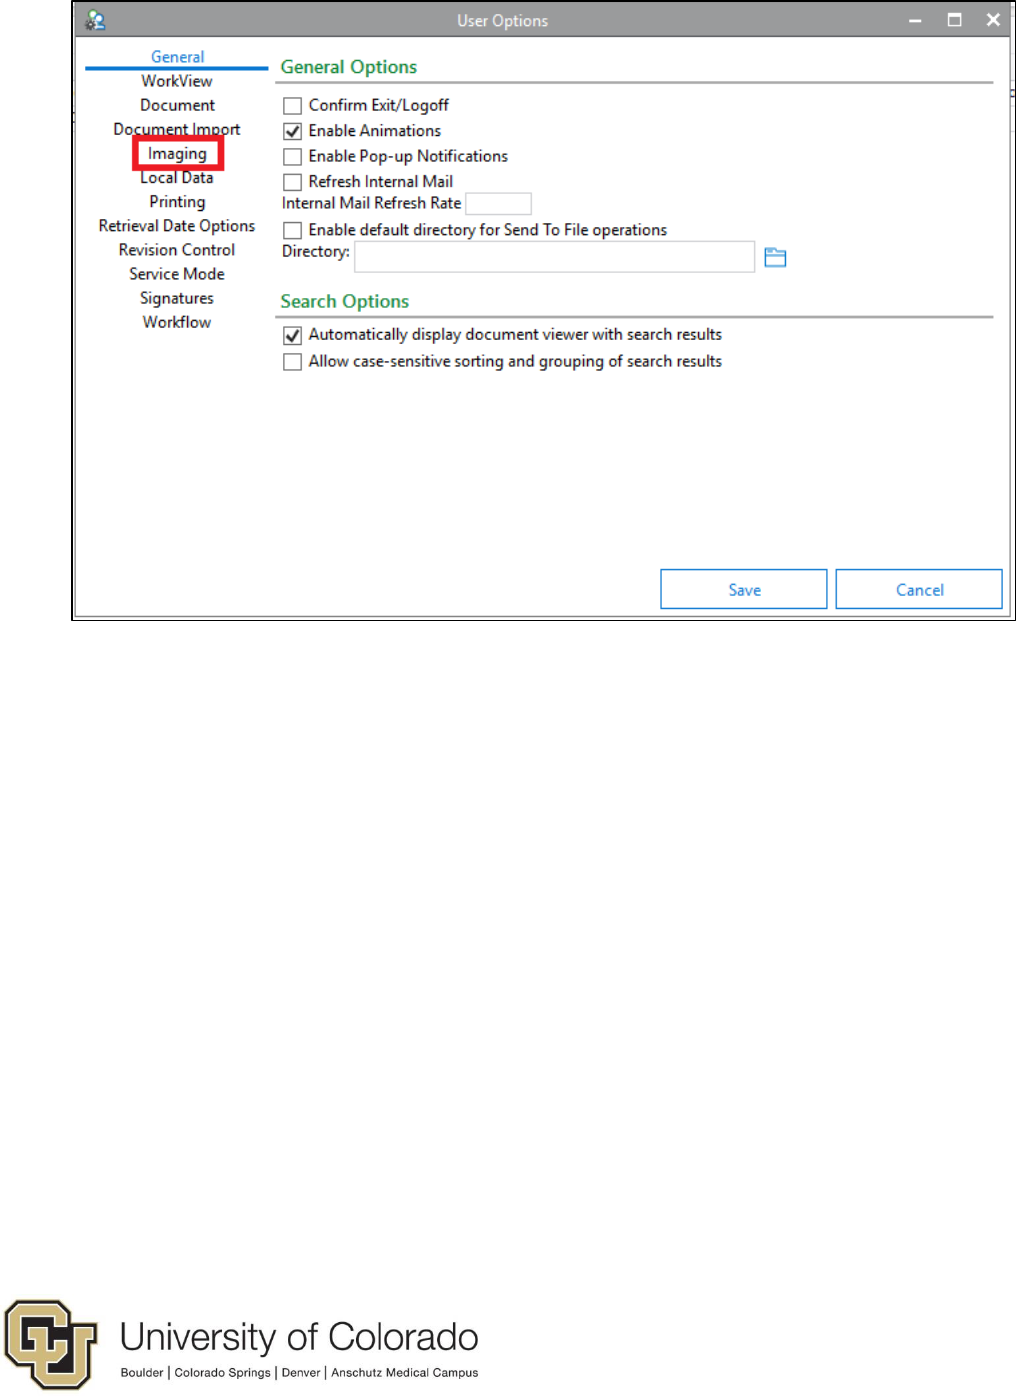
3. Select Imaging from the list at the left of the User Options window.
3
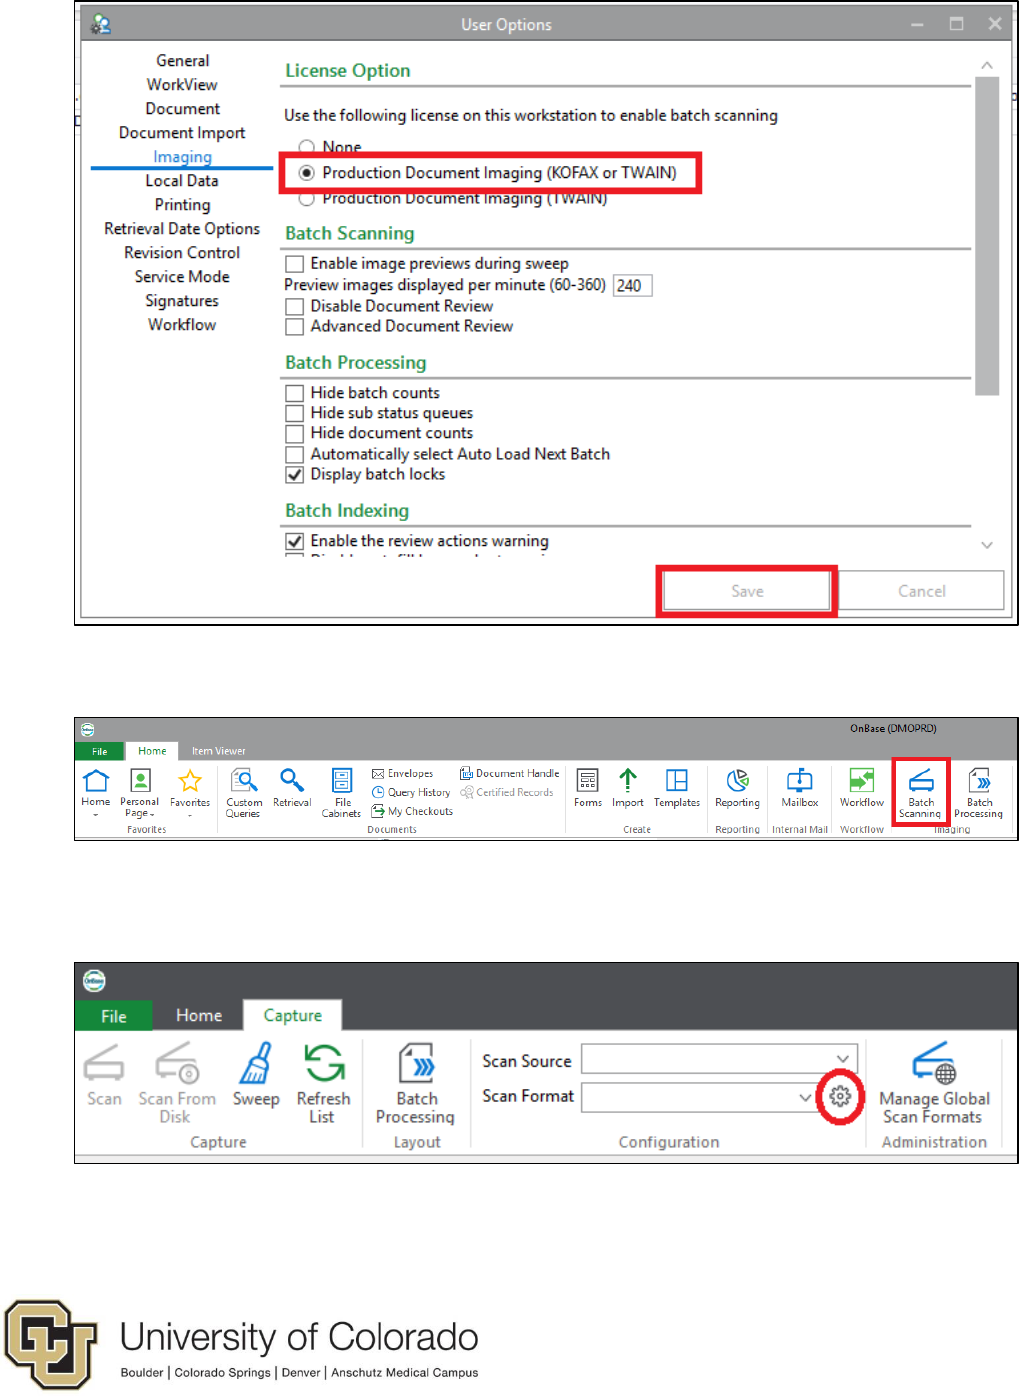
4. Select Production Document Imaging (KOFAX or TWAIN) and click Save.
4
5. Click Batch Scanning on the Home tab of the menu
6. Click the gear icon for Manage Scan Formats on the Batch Scanning tab of the
menu.
7. Click New to create a new scan format.
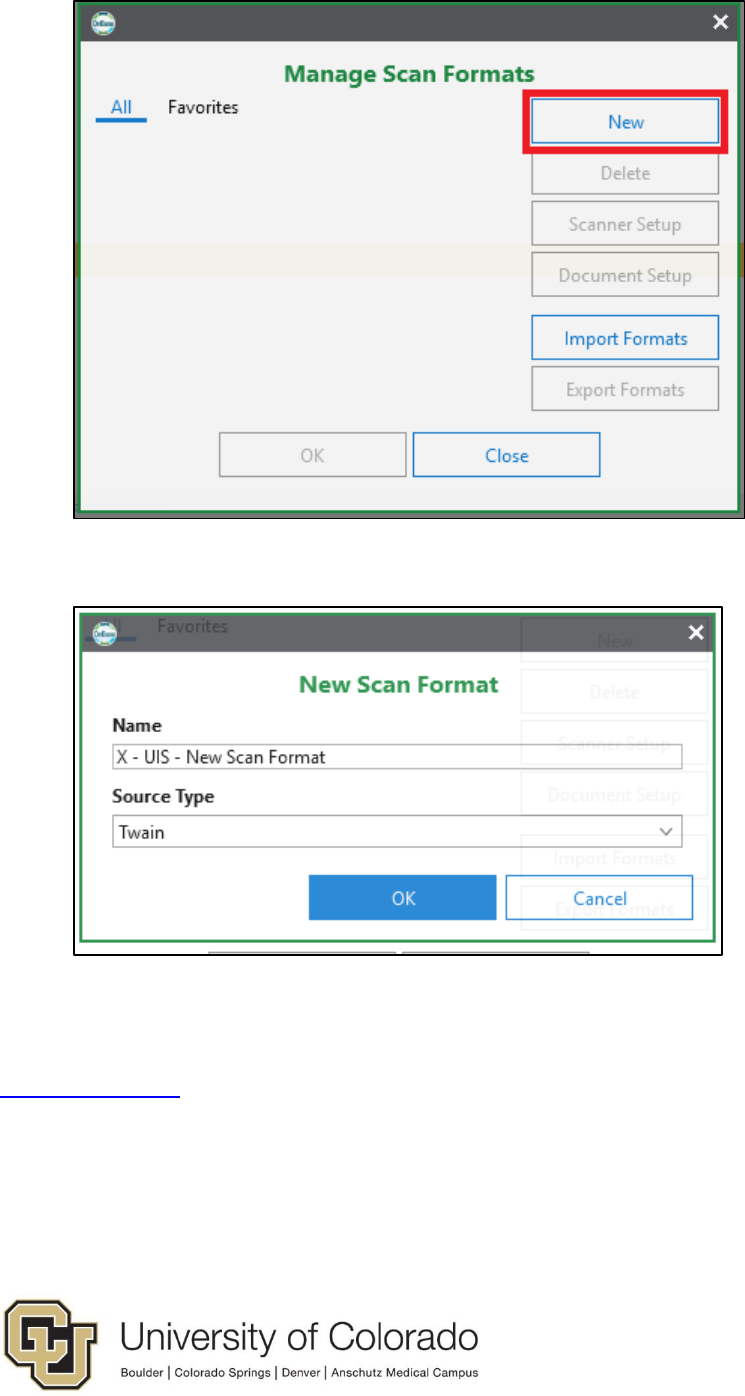
5
8. Type a name for your new scan format and select the Source Type.
9. Choose your scanner from the available scanners list and click OK.
10. If needed, refer to the appropriate guide in the Scanning/Sweeping section of the
OnBase Training page for instructions on setting up your scanner’s profile.
Scanning Documents
Now that your scanner is configured, you are ready to scan your documents. Perform
these steps to scan into OnBase.
6
1. Open the Unity client and log in.
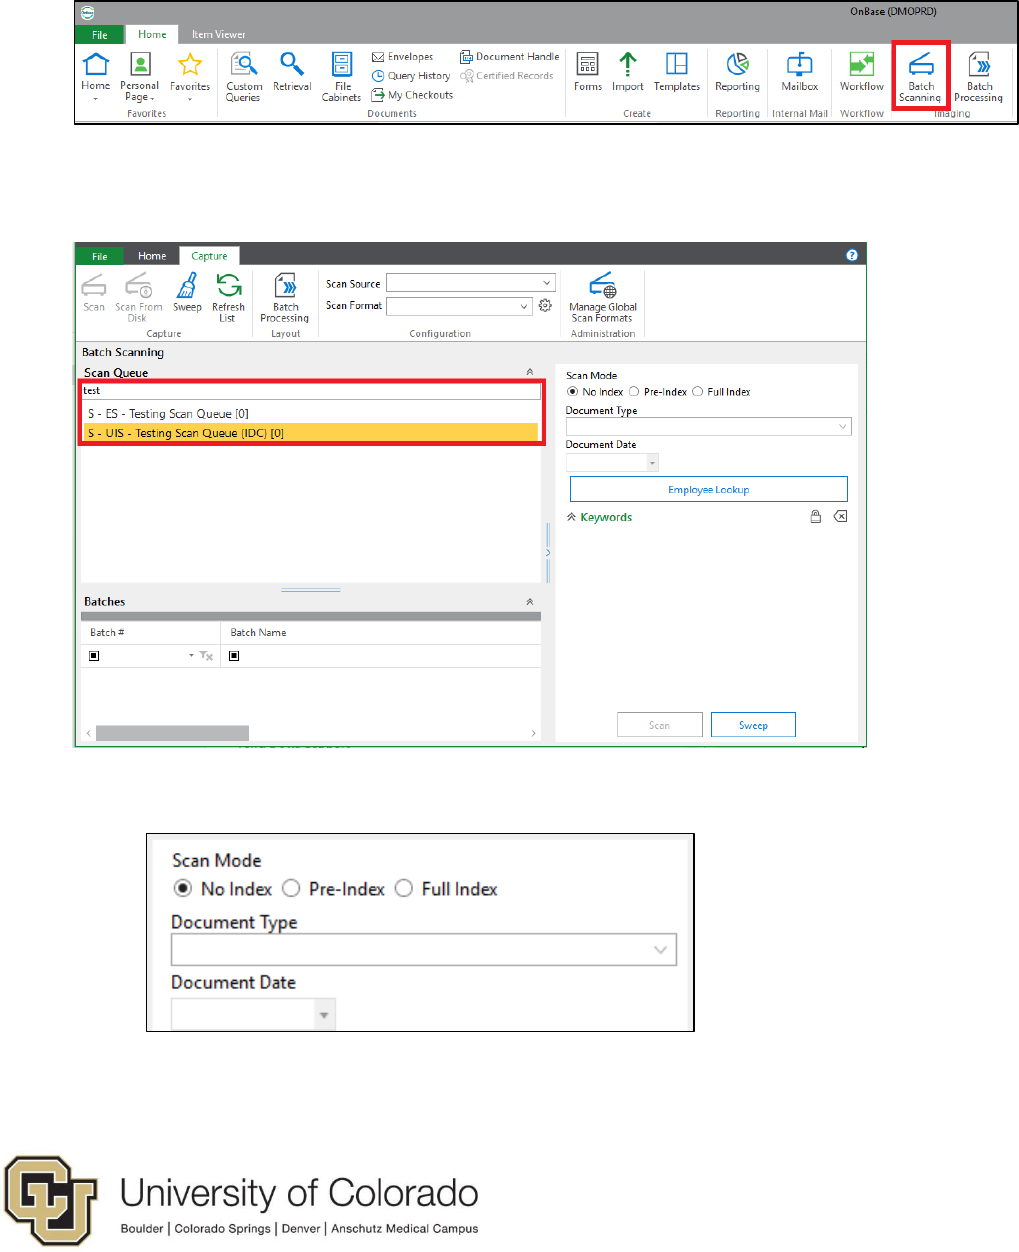
2. Click Batch Scanning on the Home tab of the menu
3. Choose the appropriate scan queue for the documents being scanned. You can
use the search bar at the top of the list to help find the desired scan queue.
4. Choose one of the following scan modes.
a. No index: All document type selection and keyword value indexing will
occur in Batch Processing after the batch is scanned.

7
b. Pre-index: The document type will be selected prior to scanning the
batch. Keyword values can be entered as well, but the batch will still
require additional indexing for other keyword values.
c. Full Index: The document type and all keyword values will be entered
prior to scanning the batch. The batch will bypass the initial indexing status
queue and will move straight to the Awaiting Commit status if no other
indexing is required.
5. Click Scan in the lower right-hand panel or on the Capture tab of the menu.
6. Enter a name for your batch (if prompted, some scan queues will create the name
automatically) and select your scan format.
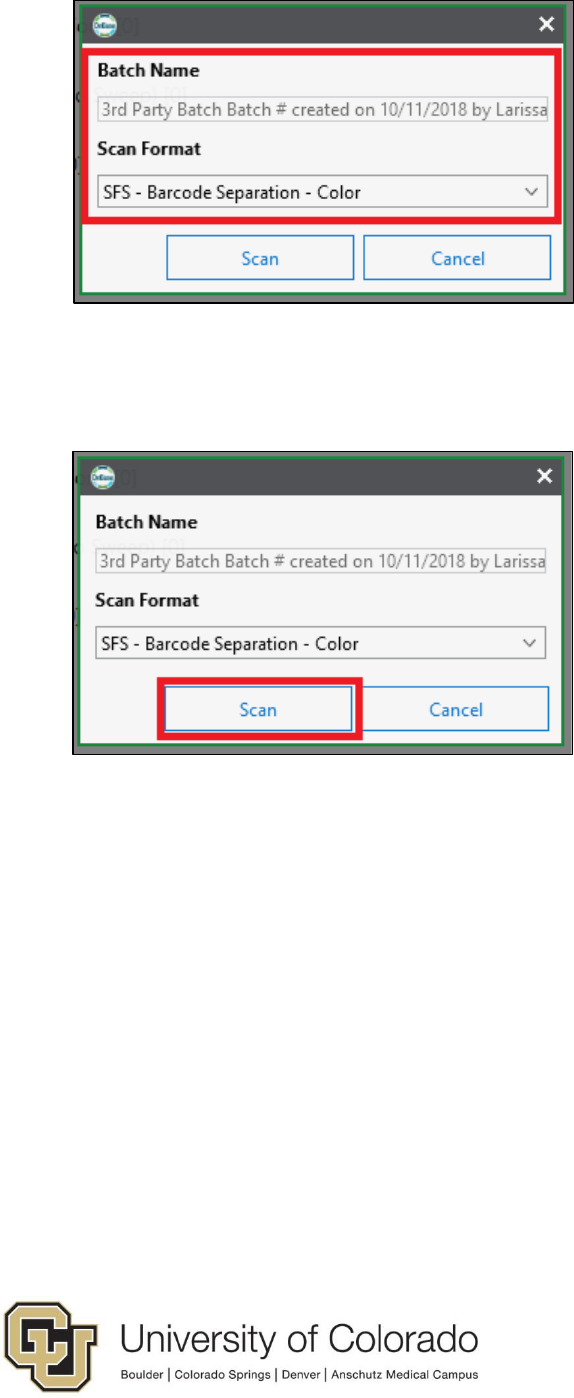
8
7. At this time, make sure the documents have been placed into the scanner’s
feeder tray and are ready for scanning (staples, paper clips and sticky notes removed).
Then click Scan.
8. When all pages have been scanned, you will be prompted with the following
options. Most of the time “Done” should be used.
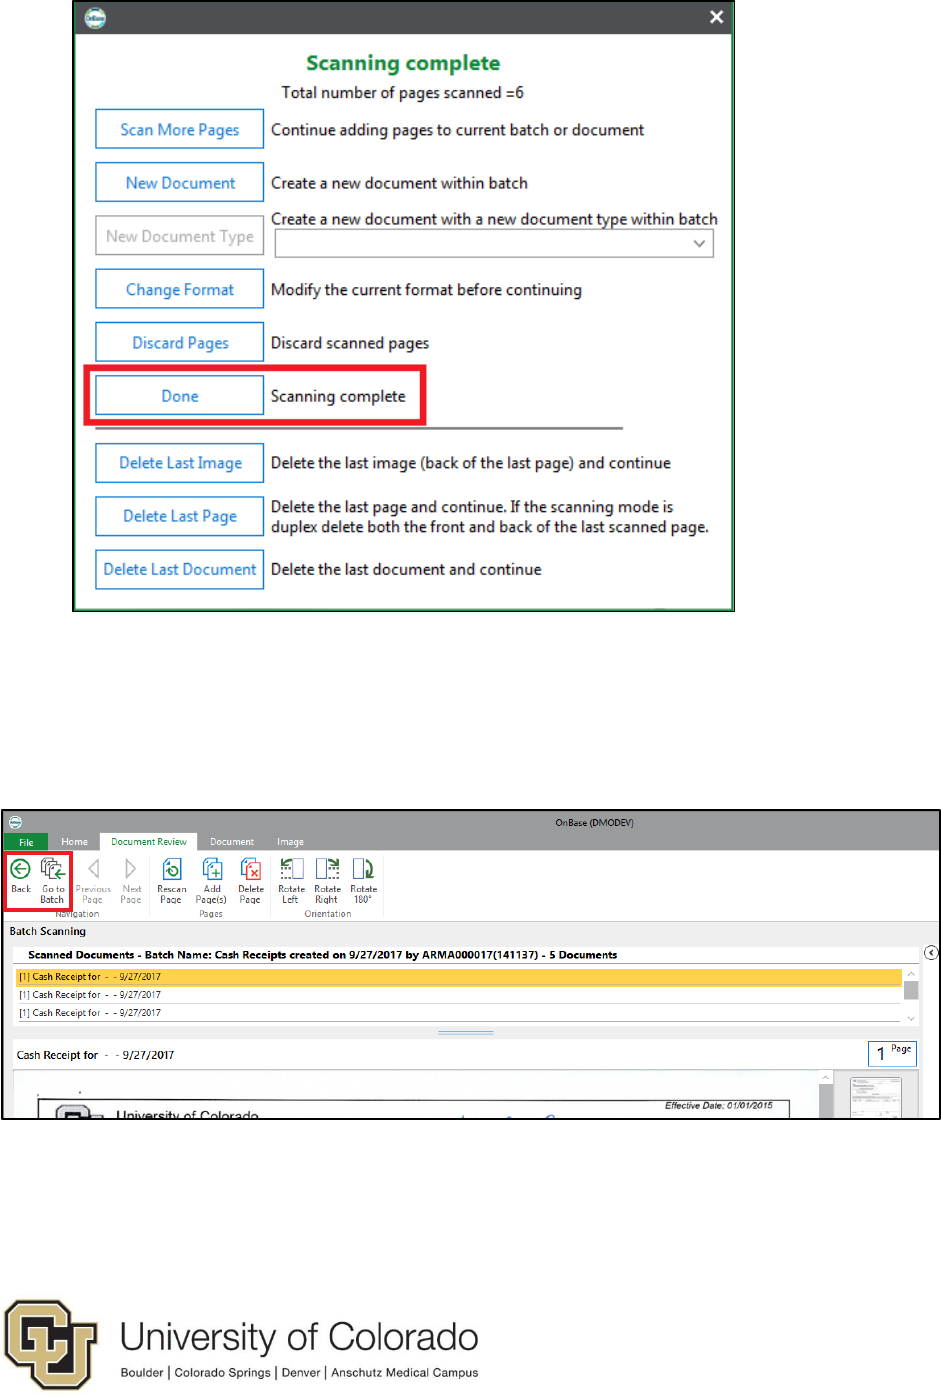
9
9. At this time, you can review pages and make any necessary changes. If
Advanced Document Review is enabled in User Options, that will be displayed at this
time. When you are ready to send the batch to indexing, click Back to go back to Batch
Scanning to scan another batch or Go to Batch to go to Batch Processing and begin
indexing.
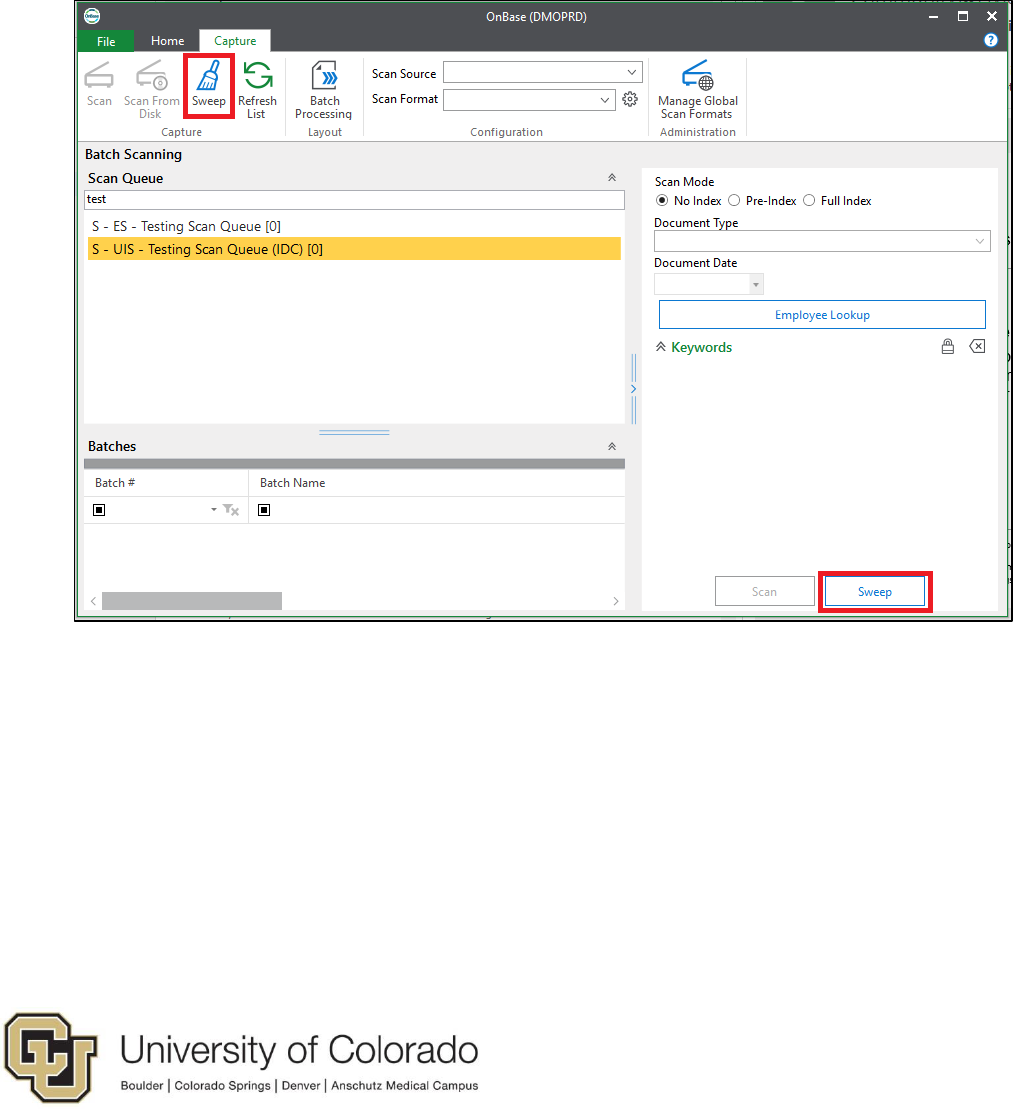
Sweeping Documents
In addition to scanning paper copies, OnBase also allows for documents that already
exist electronically to be imported as batches from a folder on your computer or network.
Perform these steps to sweep into OnBase.

10
1. Open the Unity client and log in.
2. Click Batch Scanning on the Home tab of the menu
3. Choose the appropriate scan queue for the documents being scanned. You can
use the search bar at the top of the list to help find the desired scan queue.
4. Choose one of the following scan modes.
a. No index: All document type selection and keyword value indexing will
occur in Batch Processing after the batch is scanned.
11
b. Pre-index: The document type will be selected prior to scanning the
batch. Keyword values can be entered as well, but the batch will still
require additional indexing for other keyword values.
c. Full Index: The document type and all keyword values will be entered
prior to scanning the batch. The batch will bypass the initial indexing status
queue and will move straight to the Awaiting Commit status if no other
indexing is required.
5. Click Sweep in the lower right-hand panel or on the Capture tab of the menu.
6. Choose whether you would like to sweep all files in a folder, or just one file.
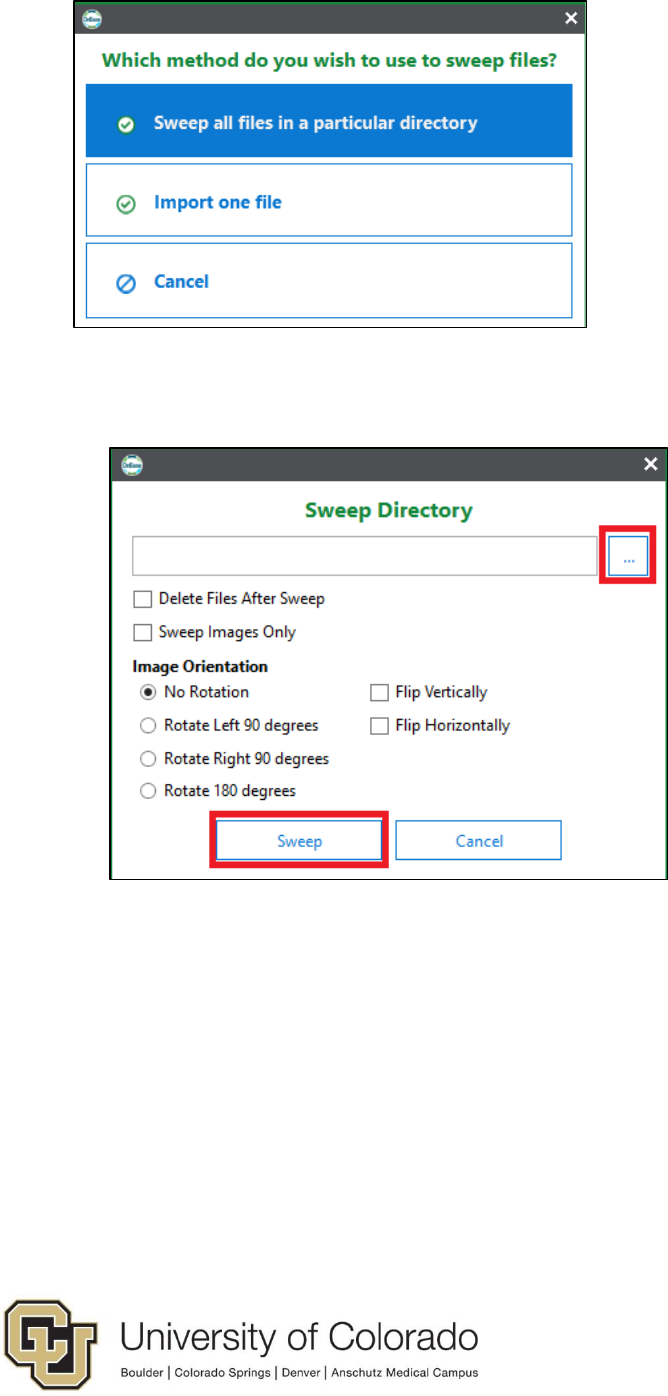
12
• To sweep all files in a folder, click the browse button at the right and navigate
to the desired folder. Make any optional selections, then click Sweep.
• If you choose to sweep only one file, a file browser window will open. Navigate
to the desired document and click Open.
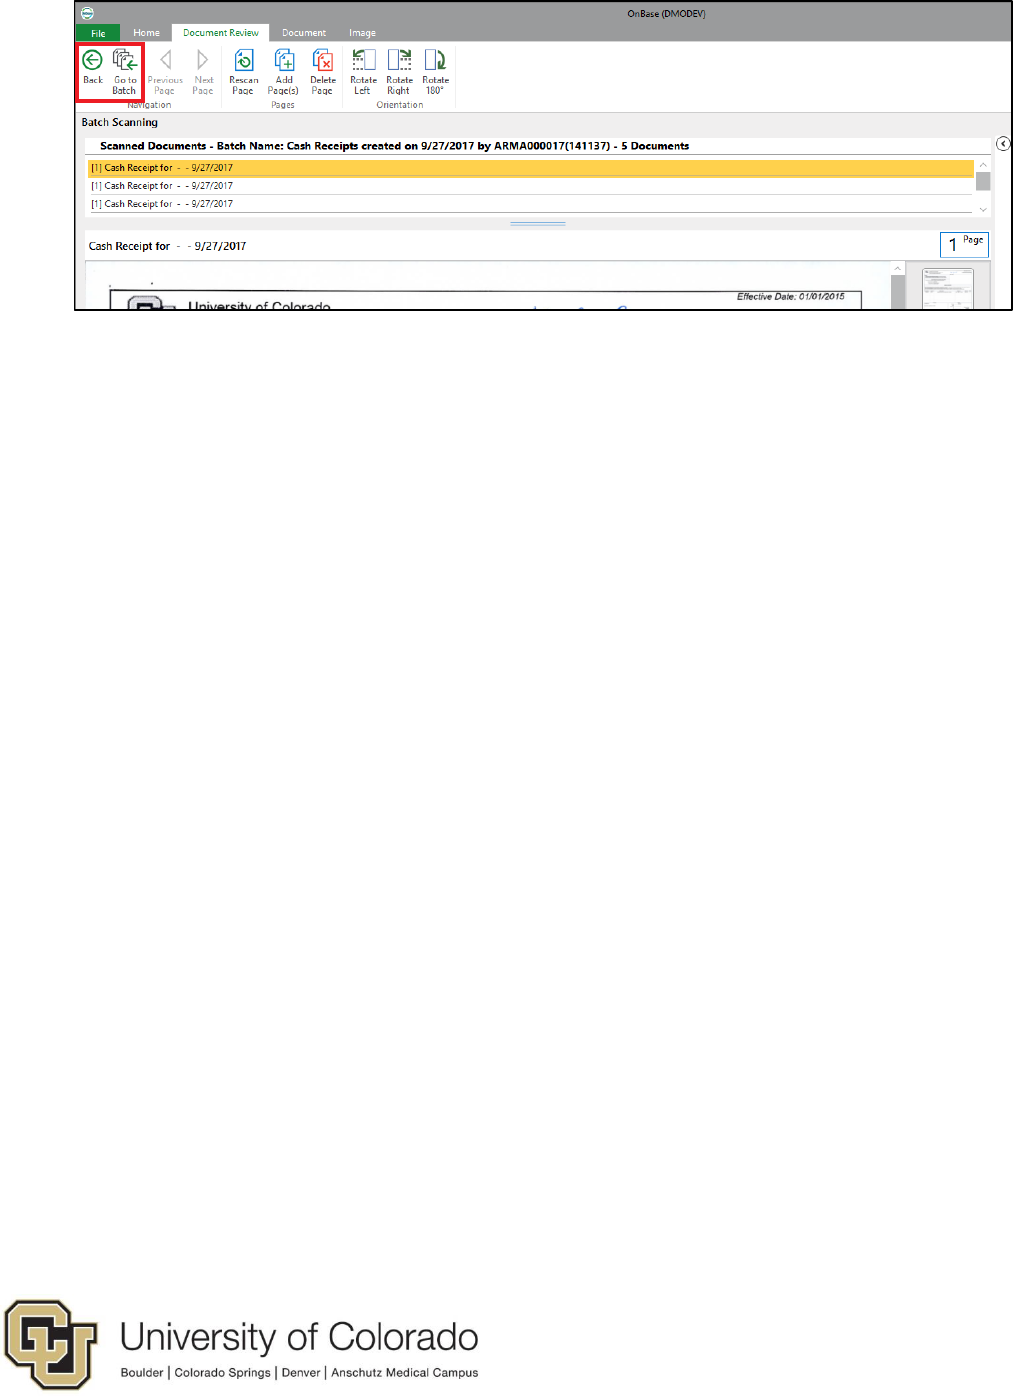
7. At this time, you can review pages and make any necessary changes. If
Advanced Document Review is enabled in User Options, that will be displayed at this
time. When you are ready to send the batch to indexing, click Back to go back to Batch
Scanning to scan another batch or Go to Batch to go to Batch Processing and begin
indexing.
13
