
Avigilon Unity Video Mobile App
User Guide for Android™
2
© 2024, Avigilon Corporation. All rights reserved. MOTOROLA, MOTO, MOTOROLA SOLUTIONS, and the
Stylized M Logo are trademarks or registered trademarks of Motorola Trademark Holdings, LLC and are used under
license. All other trademarks are the property of their respective owners. Unless stated explicitly and in writing, no
license is granted with respect to any copyright, industrial design, trademark, patent or other intellectual property
rights of Avigilon Corporation or its licensors.
This document has been compiled and published using product descriptions and specifications available at the time
of publication. The contents of this document and the specifications of the products discussed herein are subject to
change without notice. Avigilon Corporation reserves the right to make any such changes without notice. Neither
Avigilon Corporation nor any of its affiliated companies: (1) guarantees the completeness or accuracy of the
information contained in this document; or (2) is responsible for your use of, or reliance on, the information. Avigilon
Corporation shall not be responsible for any losses or damages (including consequential damages) caused by
reliance on the information presented herein.
Avigilon Corporation
avigilon.com
PDF-MOBILE-ANDROID-D
Revision: 3 – EN
20240531

3
Contents
What is the Avigilon Unity Video Mobile App? 5
Device Requirements 5
System Requirements 5
Signing In With the Avigilon Unity Cloud Platform 6
Switching Organizations and Sites 7
Switching Organizations 7
Switching Sites 7
Viewing Cameras 8
Accessing Live and Recorded Video 8
Viewing Video from a Camera 9
Viewing Video from a Video View 9
Playing Recorded Video Using the Timeline 9
Using the Timeline 9
Using Video Views 11
Creating a Video View 11
Monitoring Video with a View 11
Modifying a Video View 12
Renaming a Video View 12
Adding or Removing Cameras in a Video View 12
Deleting a Video View 12
Using a PTZ Camera 13
Moving a PTZ Camera 13
PTZ Presets 14
PTZ Tours 14
PTZ Camera Zoom Controls 15
Locking the PTZ Controls 15
Using a Fisheye Camera 16
Triggering a Digital Output 17
Alerts 18
Alerts Drop-down Menu 18
Alert Notifications 18
Alert Details 19
Alert Video Playback 19
Alert Actions 19
Video Analytic Overlay 20
Settings 21
Controlling Bandwidth Quality 21

4
Allowing Alarms 21
Configuring Video Analytic Overlays 21
Using iPv6 and UDP Settings 22
Disabling iPv6 22
Disabling UDP 22
Managing Log Level Settings 22
Recommendations and Known Limitations 23
Troubleshooting 24
Mobile Device is not Receiving Expected Alarms 24
My Alarm is not Showing any Footage 24
Camera is not Displaying Recorded Footage in my Mobile Device 24
How to Force Close or Shut Down the App 24
More Information & Support 25

What is the Avigilon Unity Video Mobile App? 5
What is the Avigilon Unity Video Mobile App?
The Avigilon Unity Video app lets you monitor event alerts, view live and recorded video, use PTZ functions, and
respond to alerts from your mobile device.
Device Requirements
l
Android smartphone or tablet (version 10.0 or later).
System Requirements
To access your Avigilon Unity Video system from a mobile device, the following are required:
l
Avigilon Unity Video app, version 4.0.
l
Avigilon Unity Video software. The Software Manager installs all Avigilon Unity Video components and
firmware at once. To download the latest version, see https://www.avigilon.com/software-downloads.
o
Avigilon Unity Video software 8.0.4 or later.
o
The Unity Web Endpoint must be installed on the same computer as the Unity Server.
o
The Unity Web Endpoint is pre-installed on most Avigilon network video recorders and
appliances. For ES Recorders and ES Analytics Appliances, a firmware release that includes Avigilon
Unity software is required.
o
The Unity Web Endpoint communication port must be open and accessible to mobile devices. The
Unity Web Endpoint uses port 443 on the ES Recorder and the ES Analytics Appliance. The Unity
Web Endpoint uses port 8443 on Windows servers.
o
Camera streaming format should be set to H.264 or H.265, which are the streaming formats that are
fully supported by the Mobile app.
NOTE
If using a Verizon or Rogers cellular connection, go to Settings > Advanced Options >
Disable iPv6.
Signing In With the Avigilon Unity Cloud Platform 6
Signing In With the Avigilon Unity Cloud Platform
To use the Avigilon Unity Video app, you need a cloud account organized by your administrator. Also,
administrators must have already established the connection from the Avigilon Unity Video site to the Avigilon Unity
Cloud platform by claiming a site. For more information, see the documentation on Avigilon Unity Cloud.
1. Download the Mobile app from the Google Play™ store.
2.
From your mobile device, tap Avigilon Unity Video.
3. Tap the Email address box, and enter your cloud credentials.
4. Read and accept the Terms and Conditions.
5. Tap the Region: {region} drop-down list, and select a region.
6. Tap Next.
NOTE
If your Avigilon Unity Cloud registration is incomplete, you will first need to open a browser
and log in to Unity Cloud to complete the registration. An important part of registration
includes accepting the Cloud EULA and verifying your email address.
Federated authentication from a trusted identity provider can be used to sign in to your
sites on your mobile device, enforcing your company's corporate security policy. To use
federated authentication, your Avigilon site (including ACC 7 and/or Avigilon Unity) must
be claimed with Mobile, and your user must be configured as a federated user in Cloud and
Microsoft Azure™ Active Directory.
After signing in, the Avigilon Unity Video app will register for alert notifications for each of your sites. Registering for
alert notifications will happen each time your submit your credentials at login. For large numbers of sites, it may take
several minutes. If you close your app and re-open it, the app will continue from where it left off until all sites are
registered. You will not receive alert notifications from any given site until the app has finished registering that
particular site.
The Home screen displays the following:
l
The name of your organization listed under the menu icon. If you have multiple organizations associated
with your cloud account, you can switch organizations to monitor the sites in another organization. For more
information, see
Switching Organizations and Sites
on the next page.
l
Sites. Tap the site drop-down menu, to view a list of sites you have access to in the selected organization.
For information on changing sites, see
Switching Organizations and Sites
on the next page.
l
Alerts drop-down menu. If there are no active alerts, the area is empty. Alerts and authorization to receive
alerts are configured in the Unity Client software. For more information, see
Alerts
on page 18.
l
Video views drop-down menu. This area is empty until you create views. For more information, see
Using
Video Views
on page 11.
l
Recently viewed cameras drop-down menu. This area is empty until you view multiple cameras. Six
thumbnails of recently viewed cameras are displayed in this area. For more information, see
Viewing
Cameras
on page 8.
l
All Cameras button or . Tap to view all cameras in the site.

Switching Organizations and Sites 7
Switching Organizations and Sites
If you have access to multiple organizations, you can quickly switch organizations and sites.
Switching Organizations
1.
In the top-left corner of the Home page, tap .
2.
Tap to expand the list of organizations, and then tap an organization.
Switching Sites
l
On the Home screen, below the Avigilon Unity header, tap the site drop-down menu to expand the list
and select a new site. You can use the Search box to search for the site if it is not displayed in the list.
Viewing Cameras 8
Viewing Cameras
On the Home page, you can view cameras that you have access to in a site from the Recently viewed cameras
drop-down menu or by selecting the
All cameras
button.
You can also create a view that consists of one or more cameras, useful when overseeing many cameras. For more
information, see
Creating a Video View
on page 11. Camera views in sites that are disconnected are grayed-out. To
immediately view a camera in a site that has not yet loaded, tap the grayed-out view. This only works with ten or
more sites. Any other time, tapping a grayed-out view has no effect.
Action Task or Result
Tap on a connected site By default, sites are listed alphabetically by name and views are
displayed in the order they were created. Scroll vertically through the
views in a site.
Tap a camera from Recently viewed
cameras,
Saved views
, and All
Cameras
Displays the camera in full screen, by default.
l
Recently viewed cameras displays up to 6 of the most recently
viewed cameras.
l
All Cameras or displays all cameras associated with a site.
Tap on a view tile Lists cameras added to the video view. Each view displays:
l
View name
l
Number of cameras in the View
l
A view cycles through the cameras in the view and displays the
following information for each camera in sequence:
o
Camera name
o
Camera model
o
Thumbnail preview of the camera video
Tap the Thumbnail selector Displays a list of thumbnail cameras at the top of the screen that enables
you to swipe left or right to select another camera.
(In All Cameras) Tap and enter
the search criteria in the Search box.
Use to find a specific camera.
Pull-to-refresh the screen Displays the latest cameras grouped by connected sites and video
thumbnails.
To learn more about the recommended settings for improved streaming and the known limitations, see
Recommendations and Known Limitations
on page 23.
Accessing Live and Recorded Video
You can view live and recorded video from any camera or a View made up of multiple cameras.
Viewing Video from a Camera 9
Viewing Video from a Camera
1.
Tap , and then tap a camera.
The live camera stream is displayed. From the live video page you can:
l
Zoom in to the image using a pinch-to-zoom action.
l
Use PTZ controls with connected PTZ cameras. For more information, see
Using a PTZ Camera
on
page 13.
2.
To view recorded video, tap the (timestamp) to switch to recorded video and
use the timeline controls to find video at a specific time.
For more information, see
Playing Recorded Video Using the Timeline
below.
3.
To switch back to the camera's live video stream, tap .
Viewing Video from a Video View
l
From the Video views, tap a camera view to view cameras images.
The live camera streams from the view are displayed. From the live video page you can:
o
Swipe down the list of cameras in the View. The Views you see when swiping will appear in the same
order as in the Recently view list.
o
Modify or delete the View. For more information, see
Modifying a Video View
on page 12.
o
Tap a camera stream to open that camera's live video page.
o
Use PTZ controls with connected PTZ cameras. For more information, see
Using a PTZ Camera
on
page 13.
For more information, see
Monitoring Video with a View
on page 11.
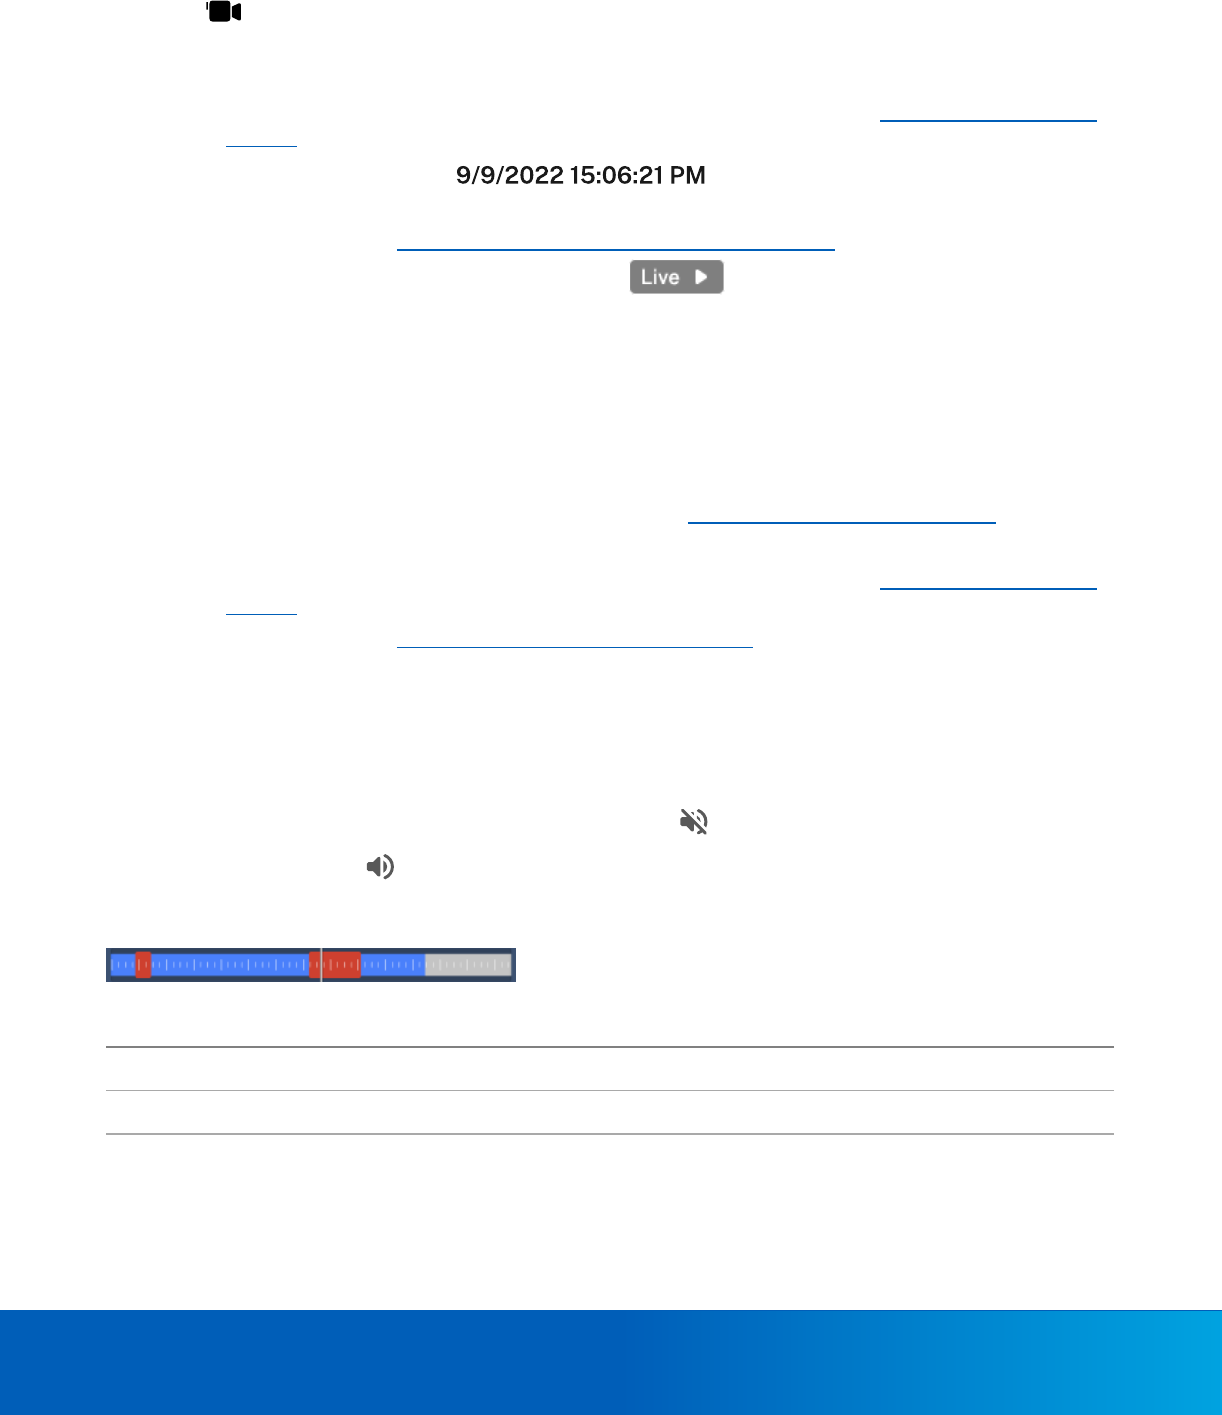
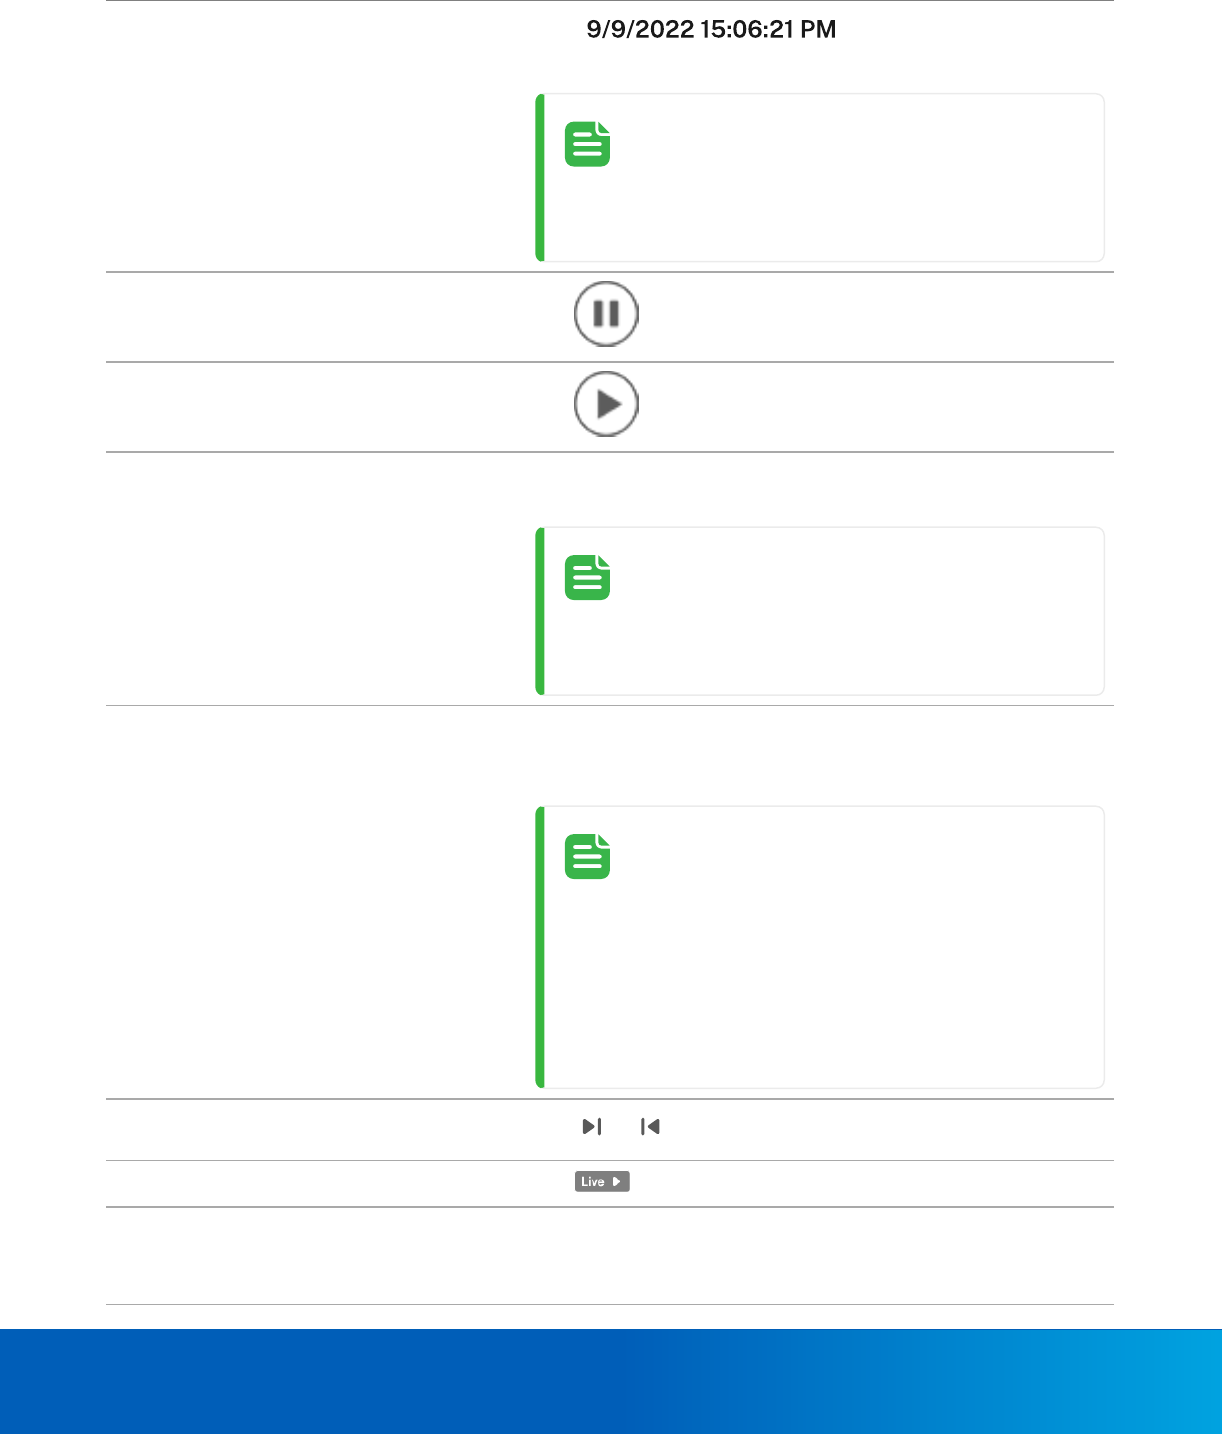
Playing Recorded Video Using the Timeline
The AvigilonUnityVideo app gives you the ability to see when and what type of video was recorded and to control
video playback with the timeline. You can scroll through recorded video to find specific events. If audio was
recorded in the video and if supported in the camera, you can tap to hear the audio (disabled by default) during
playback. To mute audio, tap .
The colored bars on the timeline shows the camera's recording history and the type of recordings available:
Color Type of Recorded Video
Gray No recorded video
Light blue Recorded video
Red Motion recorded in the event
Using the Timeline
Use the timeline and playback controls to find recorded video clips:
Using the Timeline 10
To... Do this...
Select a playback time and date
Tap (time stamp). Then, pick a
date and time from the calendar pop-up > Submit.
NOTE
After selecting a date and time, the playback
position for the timeline will continue to
advance if video was already playing.
Pause playback Tap .
Start playback Tap .
Pan the timeline Swipe the timeline left or right to scroll through video and find the
desired time and date.
NOTE
After panning to a new date and time, the
playback position for the timeline will continue
to advance if video was already playing.
Zoom in or out of the timeline Place two fingers on the timeline and pinch together to zoom out
or pull apart to zoom in. You can zoom the timeline to show as
little as one minute or as much as one day.
NOTE
The position and size of the recording color
bars may change as you zoom in or out of the
timeline. When zooming in you will see
segments of recorded video on the timeline in
greater detail. When zooming out you will see
less detail, as multiple colored bars may
combine into one solid bar.
To skip to the next or previous event Tap or .
Go to live video
Tap to switch to the camera's live video stream.
Zoom in and pan the video Place two fingers on the video image and pull apart to zoom in or
pinch together to zoom out.
When video is zoomed in you can pan around the image by
Using Video Views 11
To... Do this...
dragging your finger in the pan direction.
Reset a view after zooming in Double-tap the camera view.
Display video in fullscreen Single tap the video stream to display the video in fullscreen
mode. This hides the controls on the screen such as the timeline
and the alert details.
Using Video Views
The Avigilon Unity Video app lets you view video from multiple cameras at connected sites in views. Use views to
group related cameras that require frequent monitoring. These views will only appear on your personal device, and
cannot be shared.
Creating a Video View
Create video views in a site that can be saved and accessed any time for fast video monitoring. You can create 16
saved video views per site.
1. Open the Video views drop-down menu.
2. Do one of the following:
l
To create a view for the first time, tap Create your first view.
l
To create additional views, tap .
3. In the Name the view… box, enter a name.
4. Tap the check boxes of the cameras you want to add to the new view.
You can use the Search box to search for cameras in the site by name or by description. The order of your
selection determines the order shown in the view; for example, the first camera you select for the view will
display as the top camera thumbnail in the view.
5.
After selecting all the cameras for the view, tap .
The new view will appear in the Video views drop-down menu.
Monitoring Video with a View
You can monitor live video streams from multiple cameras from a single view. This makes it quick and easy to check
key cameras at your site from your mobile device.
1. Open the Video views drop-down menu. The current views are displayed at the top of the list.
l
Each view tile displays:
o
The name of the view.
o
Dots represent the number of cameras in the view that you can swipe through. You can scroll
through a maximum of 10 cameras in a view.
o
The camera model.
o
Alerts if available.
Modifying a Video View 12
2. Tap a view tile to open the view's live camera streams.
TIP
Tap on the Grid icon to view available cameras, and then select the desired camera.
3. Tap a camera stream to view that camera's live video.
Modifying a Video View
The Avigilon Unity Video app allows you to rename or change the camera thumbnails displayed in the video view.
Renaming a Video View
1. Open the Video views drop-down menu, and tap a view.
2.
Tap the three vertical dots button, and tap Edit.
3. Tap the View name box, and enter a new name.
4.
Tap to rename the view.
Adding or Removing Cameras in a Video View
1. Open the Video views drop-down menu, and tap a view.
2.
Tap the three vertical dots button, and tap Edit.
3. Select or clear the check boxes to add or remove cameras from the view, as desired.
4.
Tap to make the changes.
Deleting a Video View
If you no longer want to monitor any of the cameras in a view, you can delete the view.
1. Open the Video views drop-down menu, and tap a view.
2.
Tap the three vertical dots button, and tap Delete.
3.
To confirm that you want to delete the view, tap .
Using a PTZ Camera 13
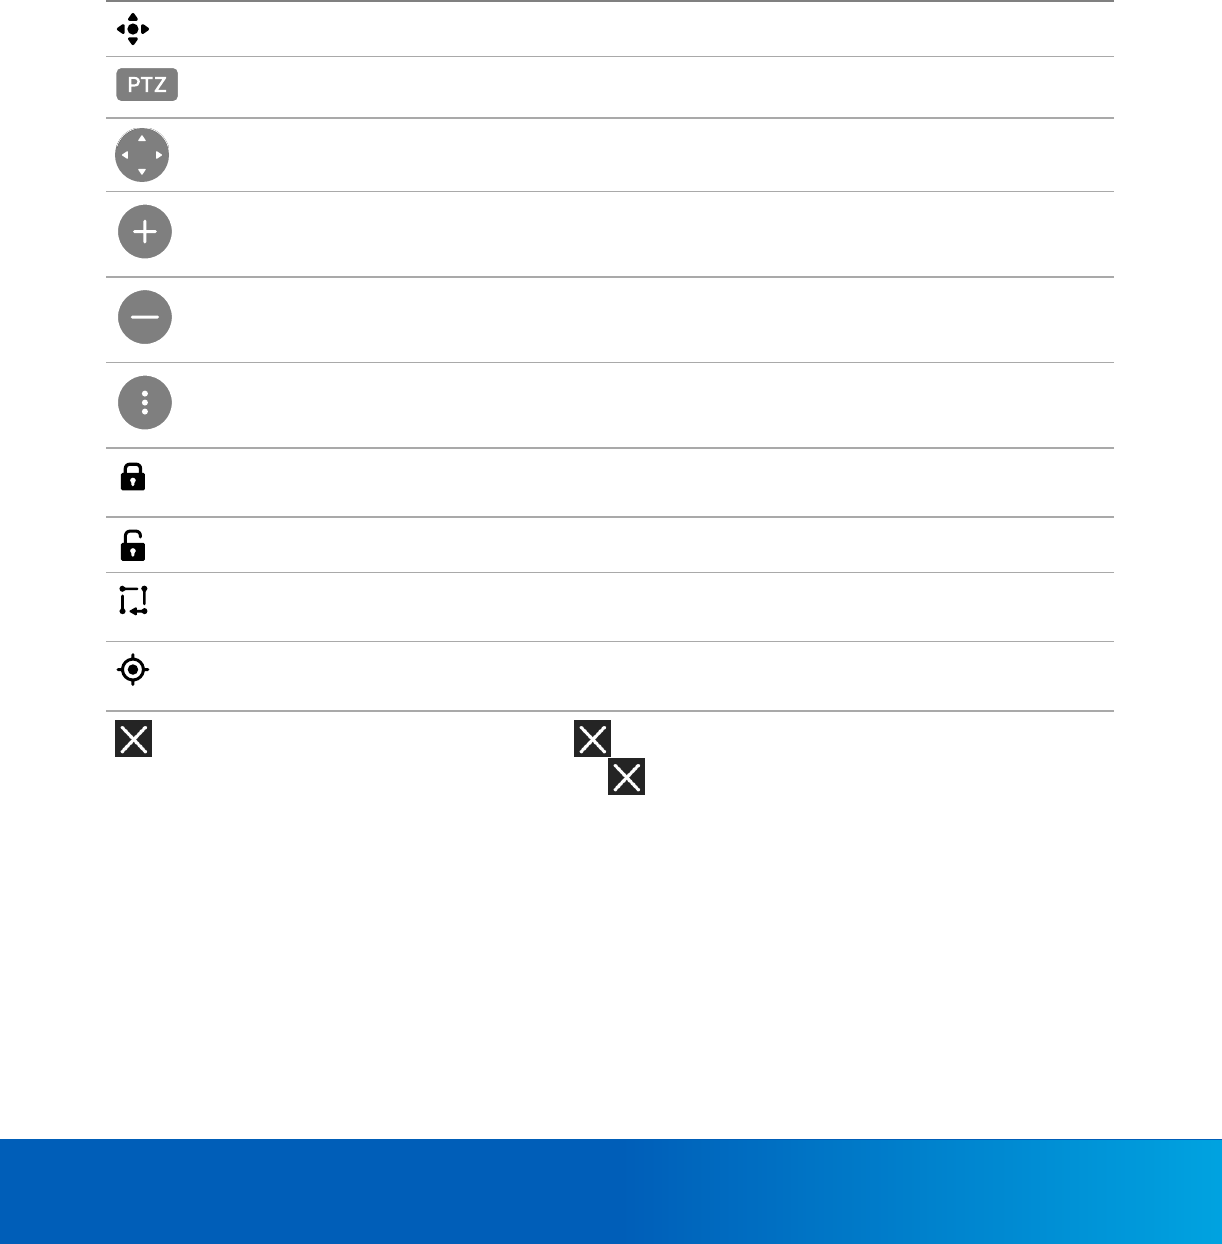
Using a PTZ Camera
If you are viewing live video from a PTZ camera, you can control these cameras using the built-in PTZ functions:
tours, presets, panning, zooming and locking. At least one PTZ camera must be connected to view the PTZ
controls.
The table below describes each of the PTZ control buttons:
Control Description
Indicates a PTZ camera.
Tap to display the manual settings for the PTZ camera controls.
Press and hold a directional arrow to move the camera in a particular direction.
Press and hold the button to zoom in to the live camera stream.
Press and hold the button to zoom out of the live camera stream.
Tap to access the advanced PTZ controls: Lock, Unlock, Tours, and Presets. If advanced controls are
disabled, an unlock button is displayed.
Tap to lock to have exclusive control over the PTZ controls. When a user navigates away from the
camera, the camera is unlocked.
Tap to unlock. Other users with permission can lock the camera to use tours or presets.
Tap to view the Tour options. If no tours exist, or if not supported in the camera, the Tour button will
not appear.
Tap to view the Preset options. If no presets exist, or if not supported in the camera, the Preset button
will not appear.
On the video camera live PTZ mode, tap to hide the PTZ controls and to exit the full-screen
camera mode. In Tour and Preset mode, tap to exit to close the Tour or Preset menu.
Moving a PTZ Camera
You can control and move a PTZ camera with the app's PTZ controls:
PTZ Presets 14
1.
Tap a camera image showing a PTZ icon. The live camera stream is displayed.
2.
Tap to display the manual settings for the PTZ controls.
3.
Press and hold one of the directional arrows to move the camera in a particular direction.
NOTE
While controlling the PTZ camera, you can perform zoom functions to zoom in or out of the
scene. For more information, see
PTZ Camera Zoom Controls
on the next page.
4.
To hide the PTZ controls and to exit the full screen, tap .
PTZ Presets
You can control PTZ camera movement by directing the camera to move to preset positions. A preset is a saved
position; for example, a camera set to pan left to right, tilt up or down, zoom in our out, or focused in a specific
position.
NOTE
PTZ presets are configured in the Unity software.
1.
Tap a camera with a PTZ icon displayed in the camera name header. The live camera stream is
displayed in full-screen mode.
2.
Tap to display the manual settings for the PTZ controls.
3.
Tap to display the advanced PTZ control panel.
4.
Tap to open a list of available preset positions.
5. Tap the preset that you want the camera to move to. The video image will move to the preset position.
6. To exit the preset, click STOP.
7.
To hide the PTZ controls and to exit the full screen, tap .
PTZ Tours
You can control PTZ camera movement by directing the camera to run a PTZ tour. Tours allow the PTZ camera to
automatically move between a series of preset positions, and can be set to pause at each preset for a specific
amount of time. The tour will repeat until stopped or other PTZ controls are used.
NOTE
PTZ tours and presets are configured in the Unity Video software.
PTZ Camera Zoom Controls 15
1.
Tap a camera image with a PTZ icon displayed in the camera name header. The live camera stream is
displayed in full-screen mode.
2.
Tap to display the manual settings for the PTZ controls.
3.
Tap to display the advanced PTZ control panel.
4.
Tap to open a list of available Tours.
5. Tap the tour that you want the camera to follow.
The video image will move between preset positions, as programmed in the tour. The tour will repeat until stopped
by tapping STOP. This will allow you to select another tour.
PTZ Camera Zoom Controls
You can control the PTZ camera zoom with the PTZ controls. Zoom in to see more detail in the video or zoom out to
see more of the scene from a wide angle view.
1.
Tap a camera image showing a PTZ icon.
The live camera stream is displayed.
2.
Tap the button to display the manual settings for the PTZ controls.
3.
Press and hold the button to zoom in to the live camera stream.
4.
Press and hold the button to zoom out of the live camera stream.
5.
To hide the PTZ controls and to exit the full screen, tap .
Locking the PTZ Controls
While operating PTZ controls with the mobile app, you can lock the camera's PTZ functions so that no other users
can use the PTZ controls while you are controlling the camera.
1.
Tap a camera image showing a PTZ icon.
2.
Tap to display the PTZ controls.
3.
Tap the Unlock button to lock the PTZ camera controls for all other users.
The icon will change to the Lock button to indicate the PTZ controls are locked for other users while you
control the camera.
4. Use the PTZ camera controls, as needed.
5.
Tap the Lock button to unlock the PTZ camera controls when you are finished using the PTZ camera.
Using a Fisheye Camera 16
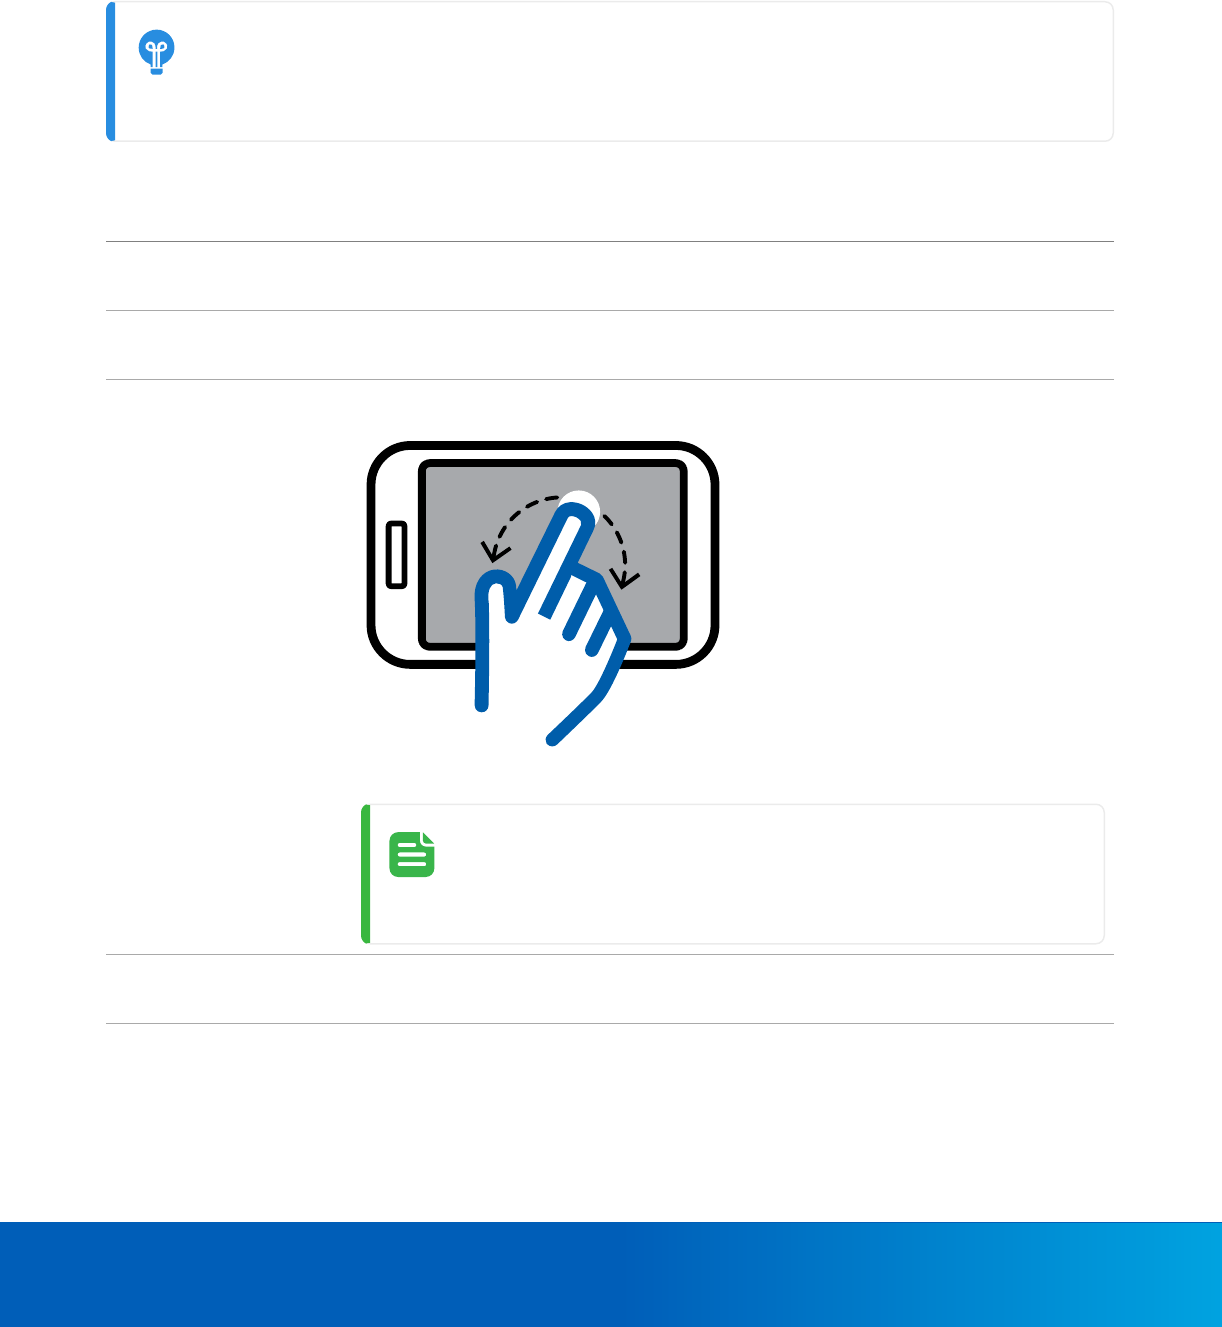
Using a Fisheye Camera
If you are viewing video from a fisheye camera that is configured for dewarping, you can zoom and pan around the
fisheye image in the Mobile app. Fisheye video automatically dewarps when you zoom and pan. Client Dewarping
must be enabled and the Perspective setting must be set to one of the available options in the Unity Client.
TIP
When you zoom in on an Avigilon fisheye camera, High Definition Stream Management™ is used
to generate a higher quality video stream when using H.264 or H.265 streaming formats.
The following controls can be used to view the fisheye video:
To... Do this...
Zoom in or out of the
video
Place two fingers on the video image and pull apart to zoom in or pinch together to
zoom out.
Pan the video When video is zoomed in you can pan around the image by dragging your finger in
the pan direction.
Rotate the video Place one finger on the edge of the image and swipe clockwise or counter-clockwise.
NOTE
You can only rotate fisheye video if the fisheye camera orientation
is configured for the ceiling or floor view perspectives.
Return to the default
fisheye view
Double-tap the video image to return to the original fisheye view.
Triggering a Digital Output 17
NOTE
l
Fisheye Dewarping options must be set in the Unity Client to use the fisheye controls.
Client Dewarping must be enabled and the Perspective setting must be set to one of the
available options.
l
Bounding boxes do not display in fisheye camera video.
l
For HDSM™ tiling on Avigilon fisheye cameras, the streaming format must be set to H.264
or H.265.
Triggering a Digital Output
If digital outputs are supported, you can activate a digital output in live mode.
NOTE
This feature is only available if digital outputs have been configured in Avigilon Unity Client
software.
1.
At the top of the screen, toggle the Digital Output button to on .
Digital outputs are listed at the bottom of the screen.
2. Tap the digital output you want to trigger.
A confirmation appears when the digital output successfully triggers.
Alerts 18
Alerts
NOTE
Device notifications may behave differently depending on the mobile device and device settings.
Alerts are notifications or active alarms configured in the Avigilon Unity Video software. You will only receive alerts if
you are granted permission in the Avigilon Unity Video software to monitor alerts.
To view an alert details page, tap:
l
A camera thumbnail on the Alerts tab.
l
An alert notification banner.
l
A camera image showing an Alerts icon in the header. A numbered badge indicates multiple alert
events. Tap to view a list of thumbnails of all alert events for a camera.
Alerts Drop-down Menu
The Alerts drop-down menu displays alert cards that can contain up to 10 events triggered and recorded by the
same alert.
l
To view previous alert events, swipe through the alert card.
NOTE
If users take an action on one event, the action will be applied to the entire alert. For example,
purging an alert event will result in the removal of the entire Alert card from the Alert section.
Alert Notifications
Alert notifications are sent when a security or system health events occurs, so you can stay informed of site activity
while you're away. You are notified of alerts through the app and through your mobile device. When you have the
Avigilon Unity Video app open, you are notified of new alert notifications, associated with the site that you are
connected to, via a banner that appears at the bottom of the screen. When the app is minimized or only running in
the background, you are notified of new alert notifications associated with your organizations, through the device
notifications area. If the mobile device is idle, the alert notifications are displayed on the lock screen.
l
Tap the banner to go directly to the alert details page.
l
Tap x or swipe left to dismiss the alert notification. The banner auto-hides if it is ignored.
Alert Details 19
IMPORTANT
You will only receive alert notifications from the connected sites in the organization you currently
have selected. If you switch to a different organization, you will receive alert notifications from
sites in the new organization you have now selected, and no longer receive notifications from
sites in the previous organization.
Alert Details
When you tap on an alert, you are taken to the alert details page. This page gives you access to the alert history and
video recording of each trigger. The alert details page shows the date, time and video of the most recent alert
trigger.
l
To view previous alert events, swipe through the alert card.
l
Select or swipe the smaller camera thumbnails in the horizontal panel.
Alert Video Playback
In the video player, you can find and playback event video using the timeline and video controls. For more
information, see
Playing Recorded Video Using the Timeline
on page 9.
l
Tap the video image to play the recorded video.
TIP
You can zoom and pan the video while it is playing.
l
Tap the blue timestamp to go directly to the recorded video at the time the alert was
triggered. In the video player, you can find and playback event video using the timeline and video controls.
For more information, see
Playing Recorded Video Using the Timeline
on page 9.
l
Swipe the timeline left or right to scroll through video and find the desired time and date to start playback.
TIP
Place two fingers on the timeline and pinch together to zoom out of the timeline or pull
apart to zoom in. When zooming in on the timeline you will see the segments of recorded
video on the timeline in greater detail. When zooming out you will see less detail. You can
zoom the timeline to show as little as one minute or as much as one day.
l
Tap to switch to the camera's live video stream.
l
Tap the to pause playback.
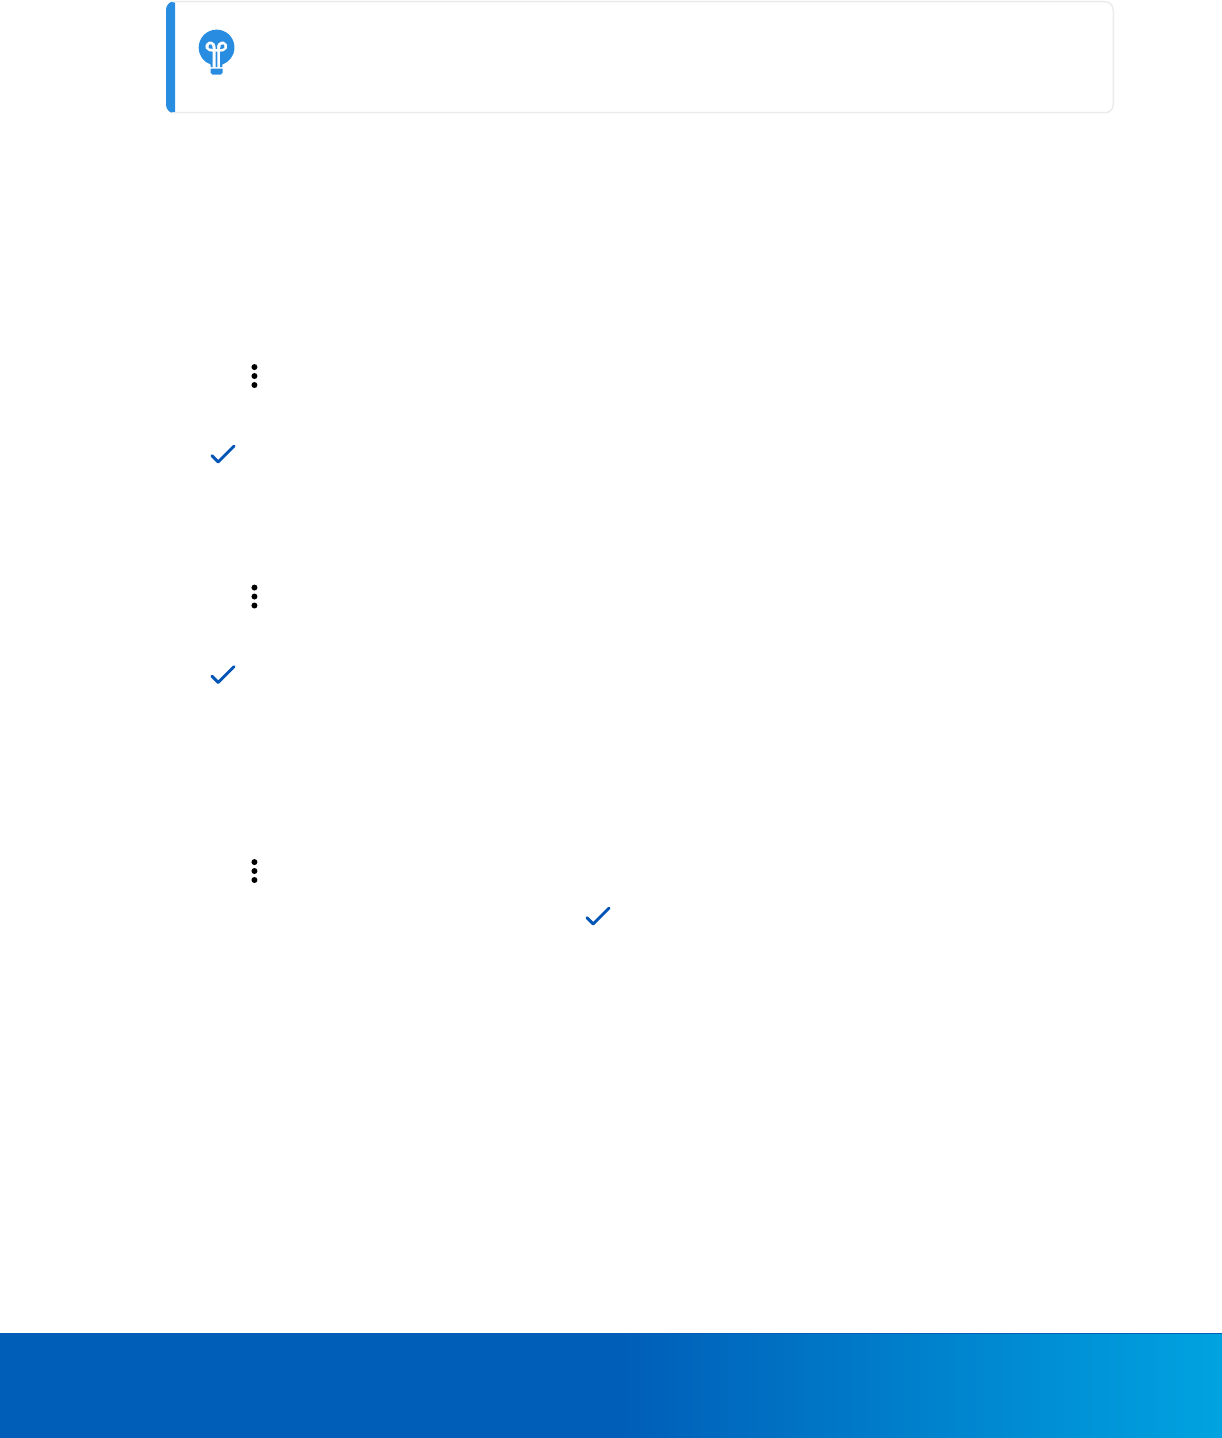
Alert Actions
The alert status is displayed below the alert name at the top of the page. From an alert view, you can perform the
following actions:

Video Analytic Overlay 20
l
When you click an alert, the system loads the video at the time the alert was triggered.
l
Tap Assigned to me to assign the alert to yourself. This lets other users know that you are investigating the
event.
l
Tap Unassign to unassign the alert and return it to an active status.
l
Tap Acknowledge to acknowledge the alert. This lets other users know that the alert has been reviewed and
is no longer active.
l
After an alert has been acknowledged, tap Purge to purge the alert from the list. Once purged, you will no
longer be able to access the event from the Alerts tab.
l
Click X on the alert banner to dismiss an alert notification. Can this alert be retrieved?
Video Analytic Overlay
You can choose to display bounding boxes around classified objects — people or vehicles — in a scene using the
video analytic overlay button. Blue bounding boxes will track vehicles while red bounding boxes will track people.
This feature overrides the general video analytic overlay enabled in Settings.
To display bounding boxes around people or vehicles in a camera view:
l
Tap , and then select People bounding boxes, Vehicle bounding boxes, or both.
Analytic bounding boxes for the selected classified objects are displayed.
To hide bounding boxes around people or vehicles in a camera view:
l
Tap , and then deselect People bounding boxes or Vehicle bounding boxes, or both.
Analytic bounding boxes for the deselected classified objects are hidden.
Settings 21
Settings
In Settings, you can control bandwidth, enable alarms, make changes to iPv6 and UDP settings as well as manage
log level settings.
Controlling Bandwidth Quality
To control the bandwidth used by the app, you can set the display quality according to the type of wireless network
you are connected to. By default, both Wi-Fi and Cellular quality settings are set to Auto.
1.
Tap > Settings.
There are two quality settings for controlling bandwidth:
l
Wi-Fi— used when you are connected to a local Wi-Fi network.
l
Cellular — used when you are connected to a mobile network.
2. Change a quality setting, as needed.
l
Low — Displays video from the camera's low quality stream.
l
Auto — Determines which video stream quality to display based on the zoom level and display
resolution of the mobile device.
l
High — Displays video from the camera's high quality stream.
Allowing Alarms
If you are not receiving alerts, you may need to enable the setting in your mobile app.
1.
Tap > Settings.
2. Tap Alarms and reminders.
3. Check that Allow setting alarms and reminders is enabled.
Configuring Video Analytic Overlays
When the video analytic overlay setting is enabled, bounding boxes are displayed around classified objects (people
or vehicles) on live and recorded video. The video analytic overlay setting is enabled, by default.
To disable the video analytic overlay:
1.
In the top-left corner of the Home page, tap > Settings.
2. In the Video options section, tap the Show analytic overlays toggle.
NOTE
Users can override this analytic overlay setting in a camera view. For more information, see
Video
Analytic Overlay
on page 20.
Using iPv6 and UDP Settings 22
Using iPv6 and UDP Settings
You can use these settings if you experience compatibility issues with a cell network or with streaming quality on
your device.
Disabling iPv6
Use this setting to help with viewing video in your cell network. It forces the use of iPv4.
1.
Tap > Settings.
2. Tap Show advanced options.
3. Toggle Disable iPv6 to enable the setting.
Disabling UDP
Use this setting to improve streaming performance in certain cell networks.
1.
Tap > Settings.
2. Tap Show advanced options.
3. Toggle Disable UDP to enable the setting.
Managing Log Level Settings
Log level settings determine the level of detail and information captured in logs generated by your mobile
applications. Logs can be records of events and errors that you can share for troubleshooting and debugging.
NOTE
We recommend keeping
Enable file logging
turned off. Turning this option on causes the app to
capture logs for all tasks.
1.
Tap > Settings.
2. Tap Show advanced options.
3. To change the level of log detail, tap the Info drop-down, and choose an option.
The options below are listed according to the least detail provided (Error) to the most detail logged (Verbose.
l
Error — logs critical errors or failures related to the operation of the device to resolve issues.
l
Warning — logs potential issues or conditions that may impact the device's performance in the future.
l
Info (Informational) — logs general information about the device's normal state of operation.
l
Debug — logs detailed information to help with troubleshooting specific issues.
l
Verbose — logs the highest level of detail about system activities, data-related information used for
extensive troubleshooting of the device. This level of detail could affect device performance and
storage.
If your device has recorded logs, a
Share
button appears in the top-right corner that you can tap to share logs with
Avigilon Customer Service.

Recommendations and Known Limitations 23
Recommendations and Known Limitations
l
Direct site connection is not available at this time.
l
The camera streaming performance on Avigilon Unity Video app is dependent on the maximum network
streaming performance rate of the deployed Unity server or appliance. The calculation of the total bandwidth
required must also include the bandwidth consumed by Unity clients and Avigilon Unity Video app at the
same time.
To improve camera streaming performance when using multiple devices running the Avigilon Unity Video
app, it is recommended to:
o
Reduce the number of streams in a saved view grid layout
o
Reduce the number of mobile devices showing saved Views at the same time
o
Enable secondary streams on all devices
o
Reduce the resolution of secondary streams if necessary to achieve smooth streaming.

Troubleshooting 24
Troubleshooting
Below are some troubleshooting steps for troubleshooting the mobile app. For other issues, check the following
items before contacting Avigilon Customer Support:
☐ Correct mobile version
☐ Current Unity Cloud account password
☐ Your organization includes all ACC 7 sites or all Avigilon Unity Video sites
Mobile Device is not Receiving Expected Alarms
l
Ensure you are logged in with a user with permissions to receive the desired alarm.
l
Ensure ACC or Avigilon Unity is connected to the Avigilon Unity Cloud platform.
l
Check the alarm rule setup in ACC or Avigilon Unity.
l
Allow for alert or push notifications on the phone.
My Alarm is not Showing any Footage
1. Make sure alarm recordings are enabled.
2. Navigate to the recording schedule page in the ACC or Unity Server site setup.
Camera is not Displaying Recorded Footage in my Mobile
Device
1. On the ACC or Unity Client, view the camera on the image panel.
2. Select the Recorded tab.
3. Scroll the recorded timeline to ensure camera recordings are present.
How to Force Close or Shut Down the App
1. Place the app in the background.
2. Tap on the App Overview button. And then swipe up to dismiss the Avigilon Unity Video app.