Read all instructions BEFORE
assembly and USE of product.
KEEP INSTRUCTIONS FOR
FUTURE USE.
Owner's Manual
www.chiccousa.com
IS0210E_03
©2021 Artsana USA, INC. 07/21
2 3
Additional Warnings:
• Discontinue use if child, when
seated in hook-on chair, is able to
move the hook-on chair arms on
the table top.
• Before removing child from hook-
on chair, be sure child's legs are free
from hook-on chair lower arms.
• Discontinue use if hook-on chair is
broken or missing any components.
Contact Chicco immediately for
replacement parts or service.
• Do not use without all rubber on
the arms attached securely to table
surface.
• Keep table and seat clean and dry
to prevent slipping.
• Do not allow other children to play
near or walk under hook-on chair
while in use.
Your child's safety is very important
to us, so we urge you to take the
following precautions when using
this product:
• Do not use replacement parts other
than those approved by Chicco.
• Frequently check the arm clamps
and tighten them if required.
• Do not attach objects to the hook-
on chair, since they might affect
the stability and safety of the
product.
• Do not fit or lock the hook-on chair
to a table with the child sitting in
the hook-on chair.
• Do not seat more than one child at
a time in the hook-on chair.
• Do not attach the hook-on chair to
drawers or movable parts of tables.
• Before use, remove and dispose
of all plastic bags and packaging
materials and keep them out of
reach of children.
• Keep hot liquids/foods away from
table while child is in hook-on
chair.
Failure to follow all warnings and instructions could result in serious injury
or death.
Fall Hazard. To prevent falls:
• ALWAYS use restraints. Adjust to fit snugly.
• Keep child in view.
• To prevent tip over, check stability of table before and after
seating child.
• NEVER use with:
• glass table top
• loose table top
• single pedestal table
• card table
• table leaf
• table cloths or placemats
• Child can use nearby structures to kick or push chair off.
NEVER use hook-on chair:
• with ordinary chair underneath
• in reach of table legs
• near island below countertop
Use only for:
• child who can sit upright without help.
• child up to 37 pounds (16.8 kg).
• tables 3/4 to 1 1/2 in. thick (19 to 38 mm).
WARNING
WARNING
4 5
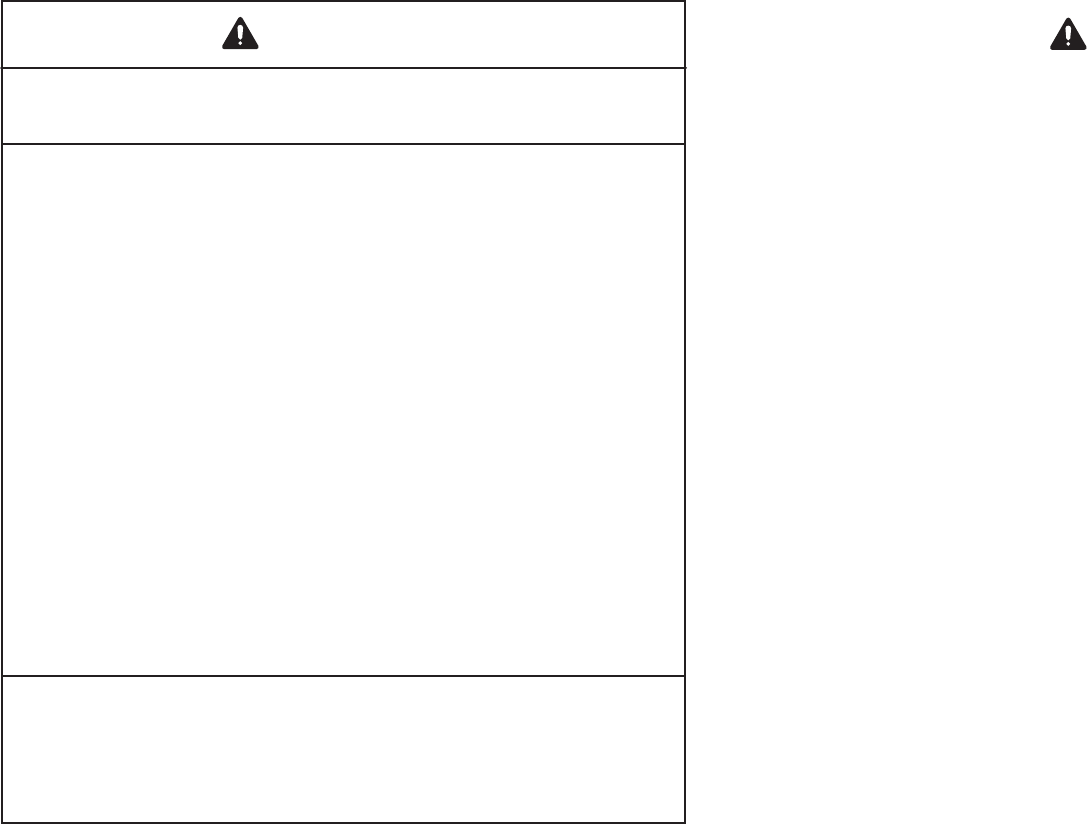
Components
A. - Hook-on Chair Frame
B. - Child Seat
C. - Arms
D. - Lower Locking Arms
E. - Tray
A.
D.
B.
C.
E.
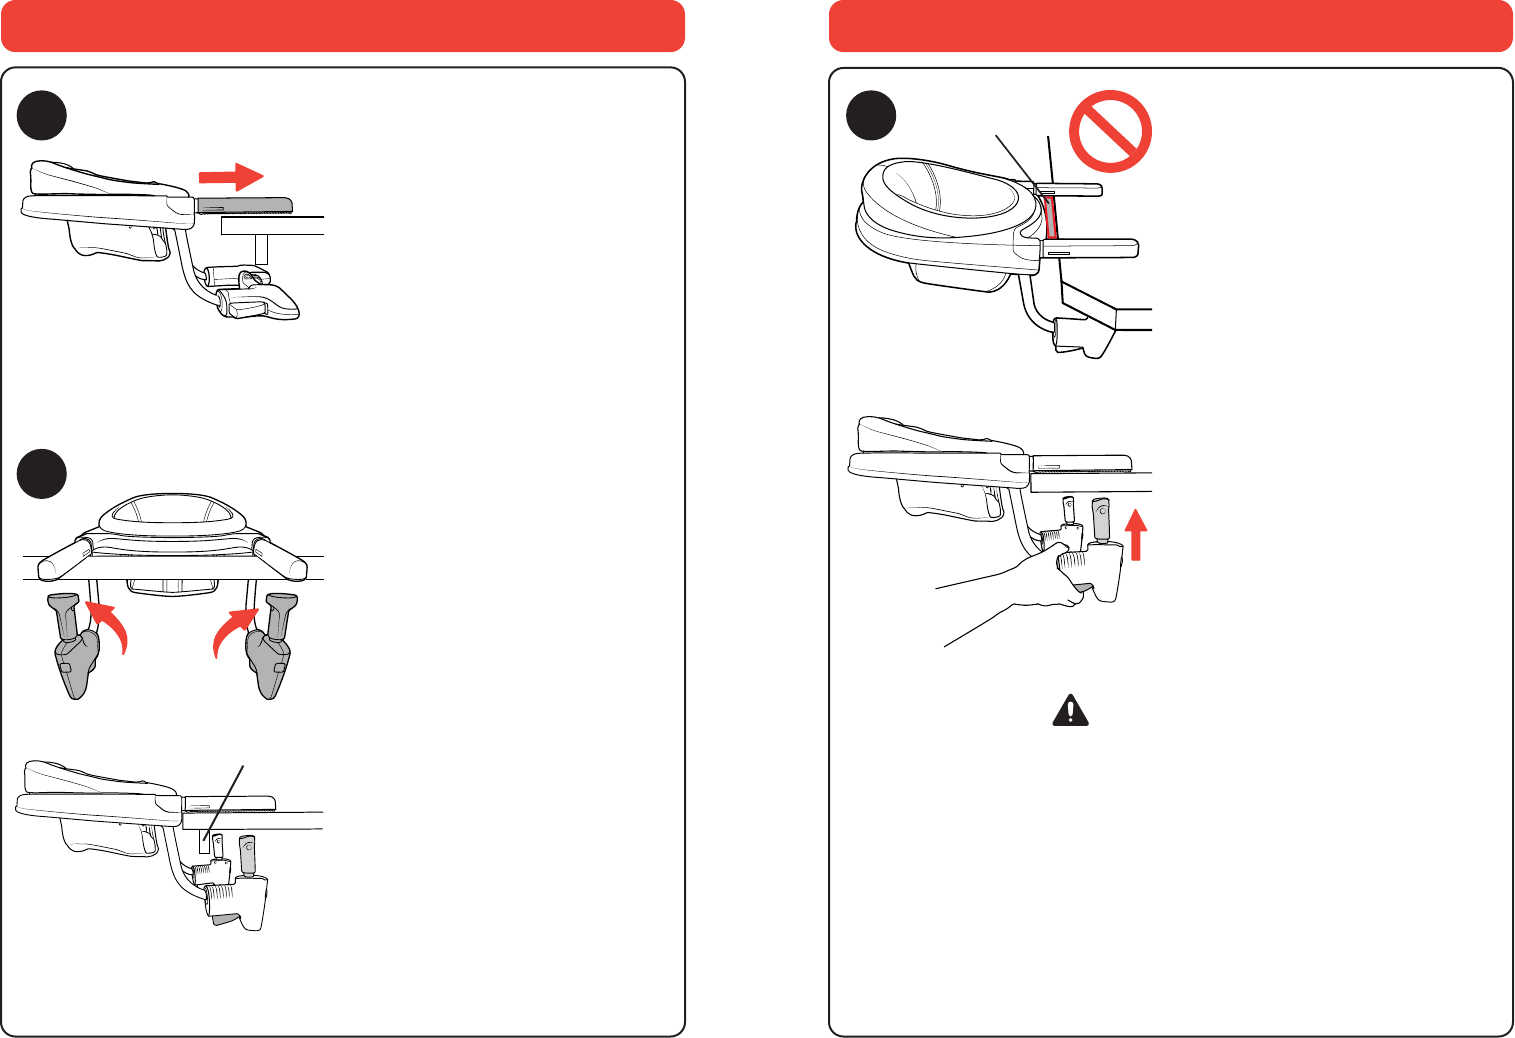
How to Assemble the Hook-on Chair
1. Place the Hook-on Chair Frame on
a flat surface. Locate two mounting
tabs on the Child Seat. Slide the front
edge of the Child Seat into the Hook-
on Chair Frame at an angle. Make
sure the mounting tabs are below the
Hook-on Chair Frame. Press down on
the back of the Child Seat frame to
lock it into place.
1
“CLICK!”
6 7
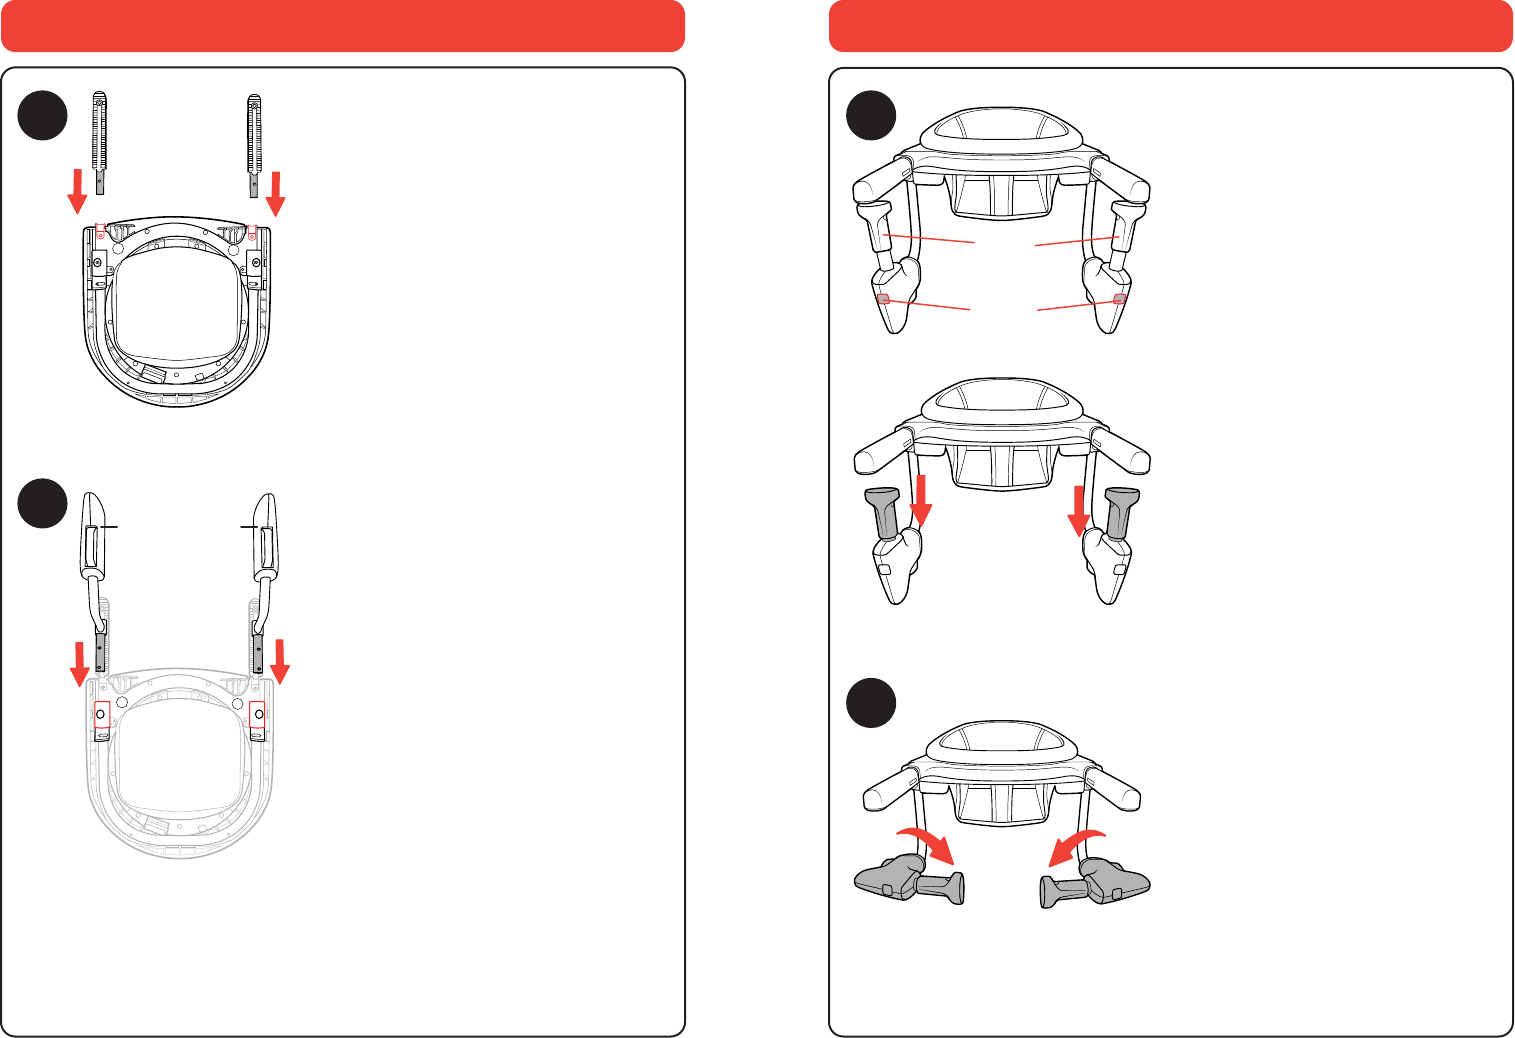
3A. If the Clamp Bar is up, it must be
lowered all the way before you attach
hook-on chair to the table. To lower
the Clamp Bar, push in on the release
button on the front of the Lower
Locking Arm. The Clamp Bar may
need to be pushed down while
pressing the release button.
3B. The Locking Clamps must be
rotated inward before you attach
hook-on chair to the table. Twist the
Locking Clamps in as shown.
Release
Button
How to Attach the Hook-on Chair
3B
3A
Clamp
Bar
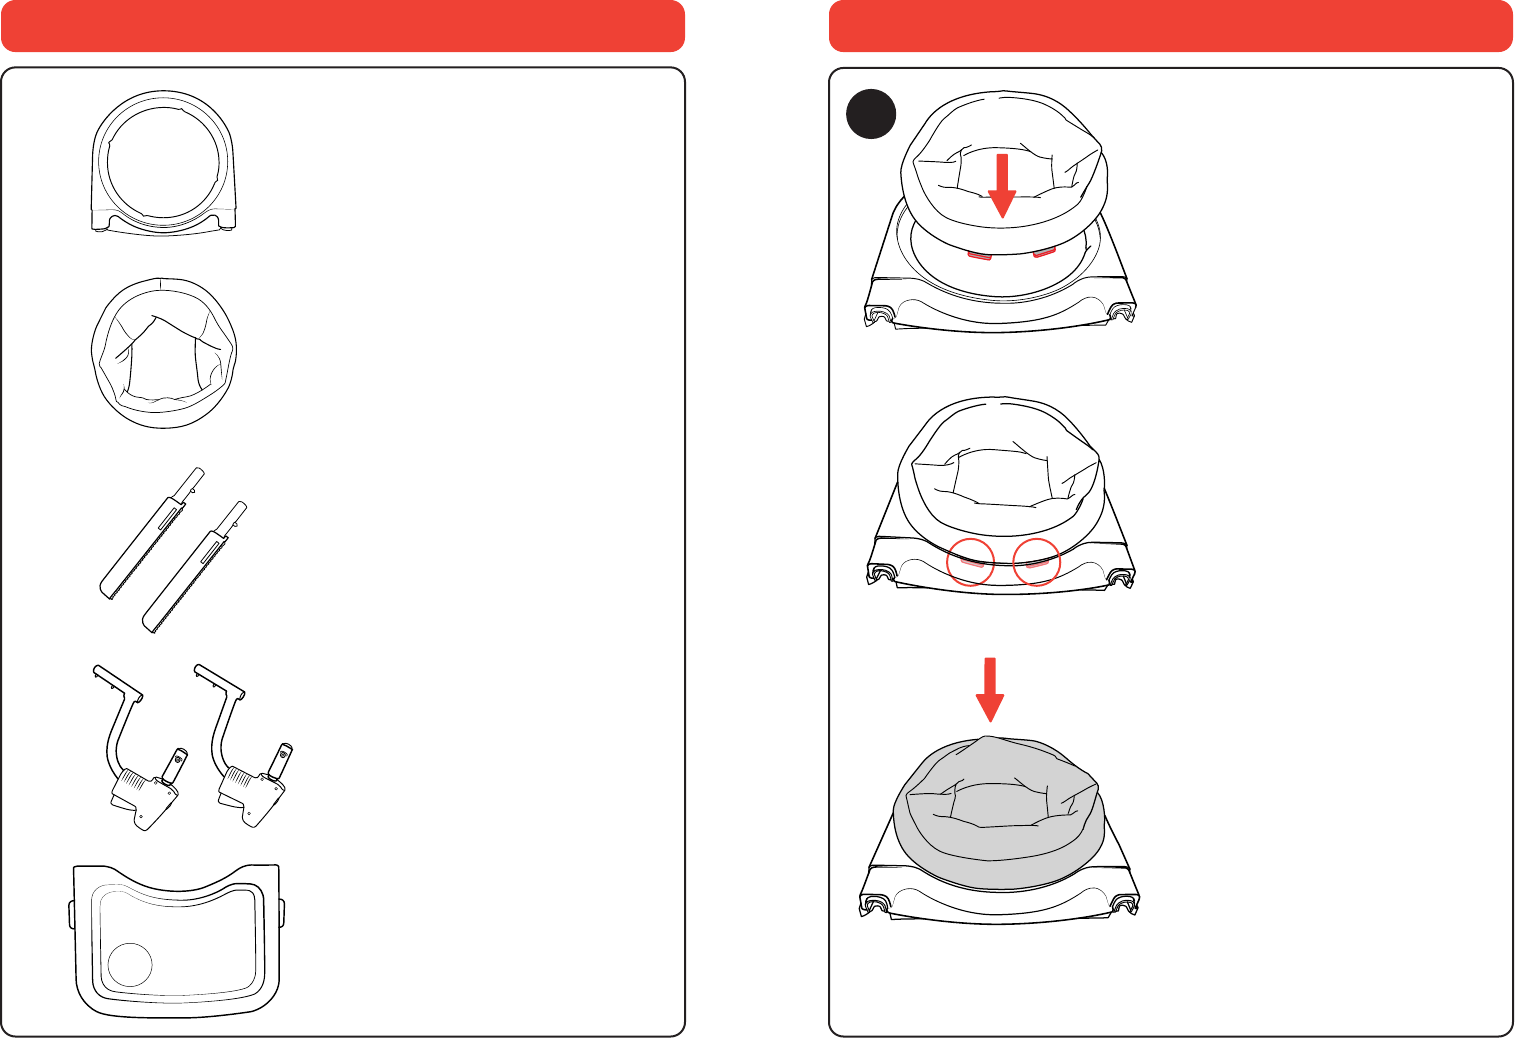
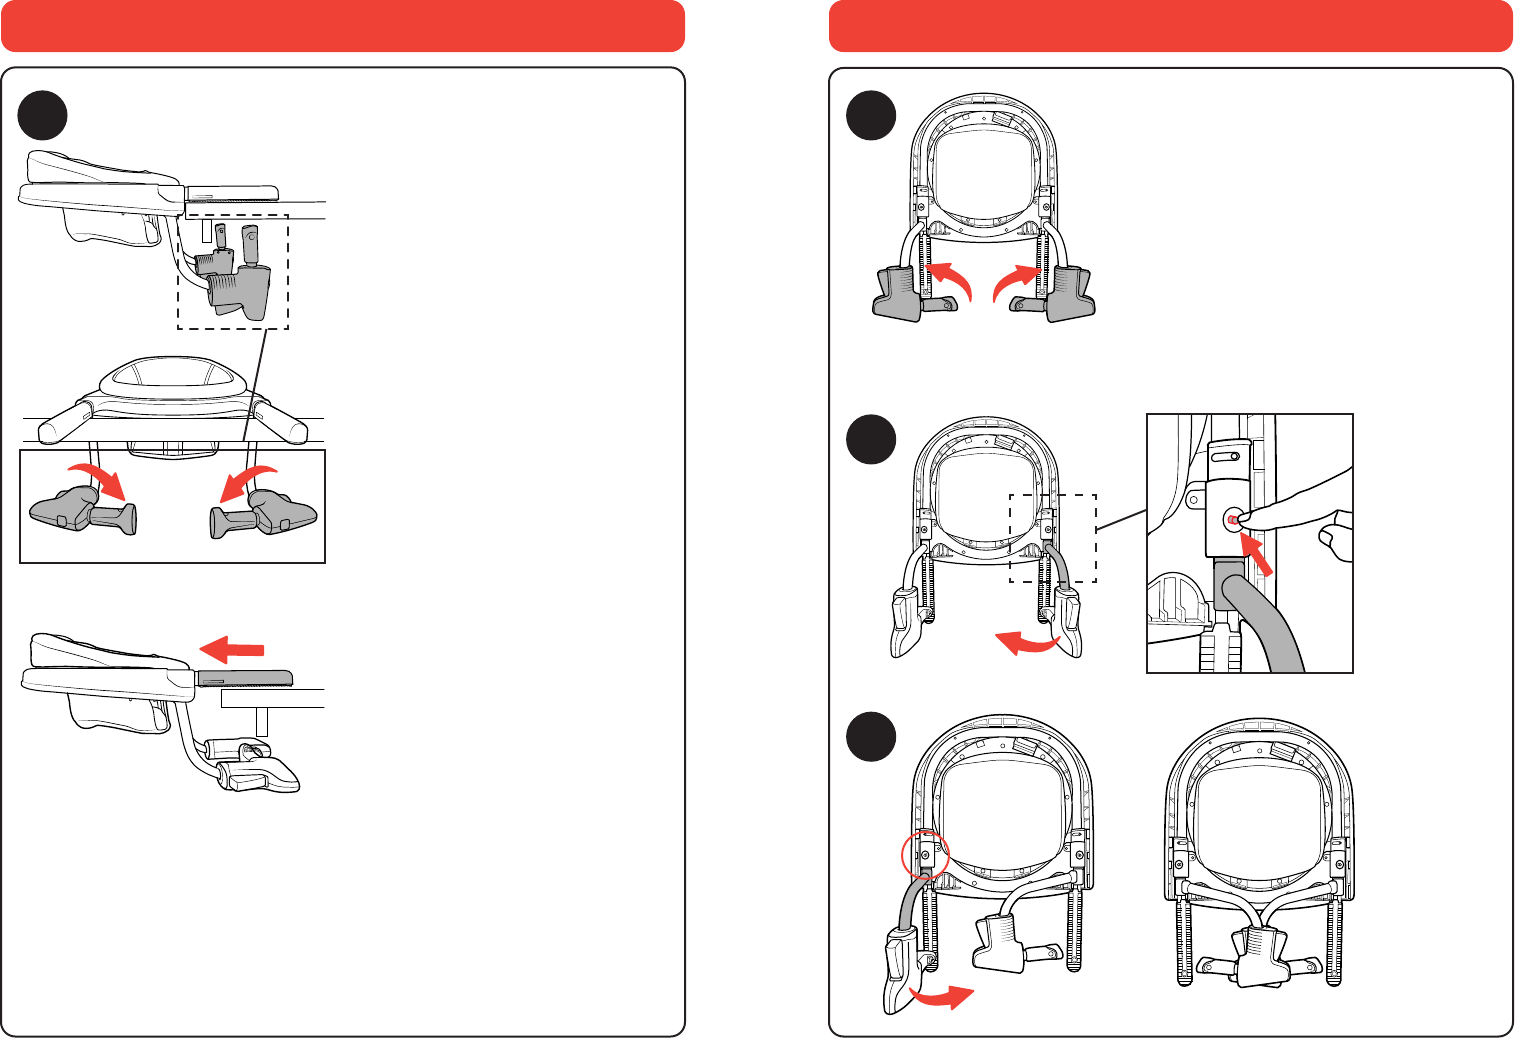
How to Assemble the Hook-on Chair
2a. Flip the Hook-on Chair over and
insert one Arm into the Hook-on Chair,
as shown. Repeat for the other side.
2b. Match up the Lower Locking Arms
"A" and "B" with the letters on the
bottom of the Chair Frame. Insert
Lower Locking Arms into the Hook-on
Chair seat, as shown.
2B
2A
“CLICK!”
“CLICK!”
A
B
A
B
“CLICK!”
“CLICK!”
A B
8 9
5. Check to make sure there is not a
gap between the front of the Hook-
On Chair and the edge of the table
top.
To secure the Hook-On Chair to
the table, squeeze the ratchet button
until the clamp bar meets the
underside of the table. Repeat for the
other side. Check to make sure that
the arms on the table top are flat and
that the Hook-On Chair is secure.
How to Attach the Hook-on Chair
5
WARNING
Pull/Push on hook-on chair to make sure it is firmly attached to table.
How to Attach the Hook-on Chair
4A. Slide the Hook-On Chair onto the
table top. Make sure the Upper Arms
are on top of the table and the Lower
Locking Arms are folded downwards
and below the table top.
4B. Rotate both Locking Clamps up,
as shown, until they click into an
upright position. Check to make sure
both Locking Clamps are fully rotated
up.
If the underside of your table has an
apron, make sure the Lower Locking
Arms are completely over it before
securing.
4A
4B
Apron
Gap
10 11
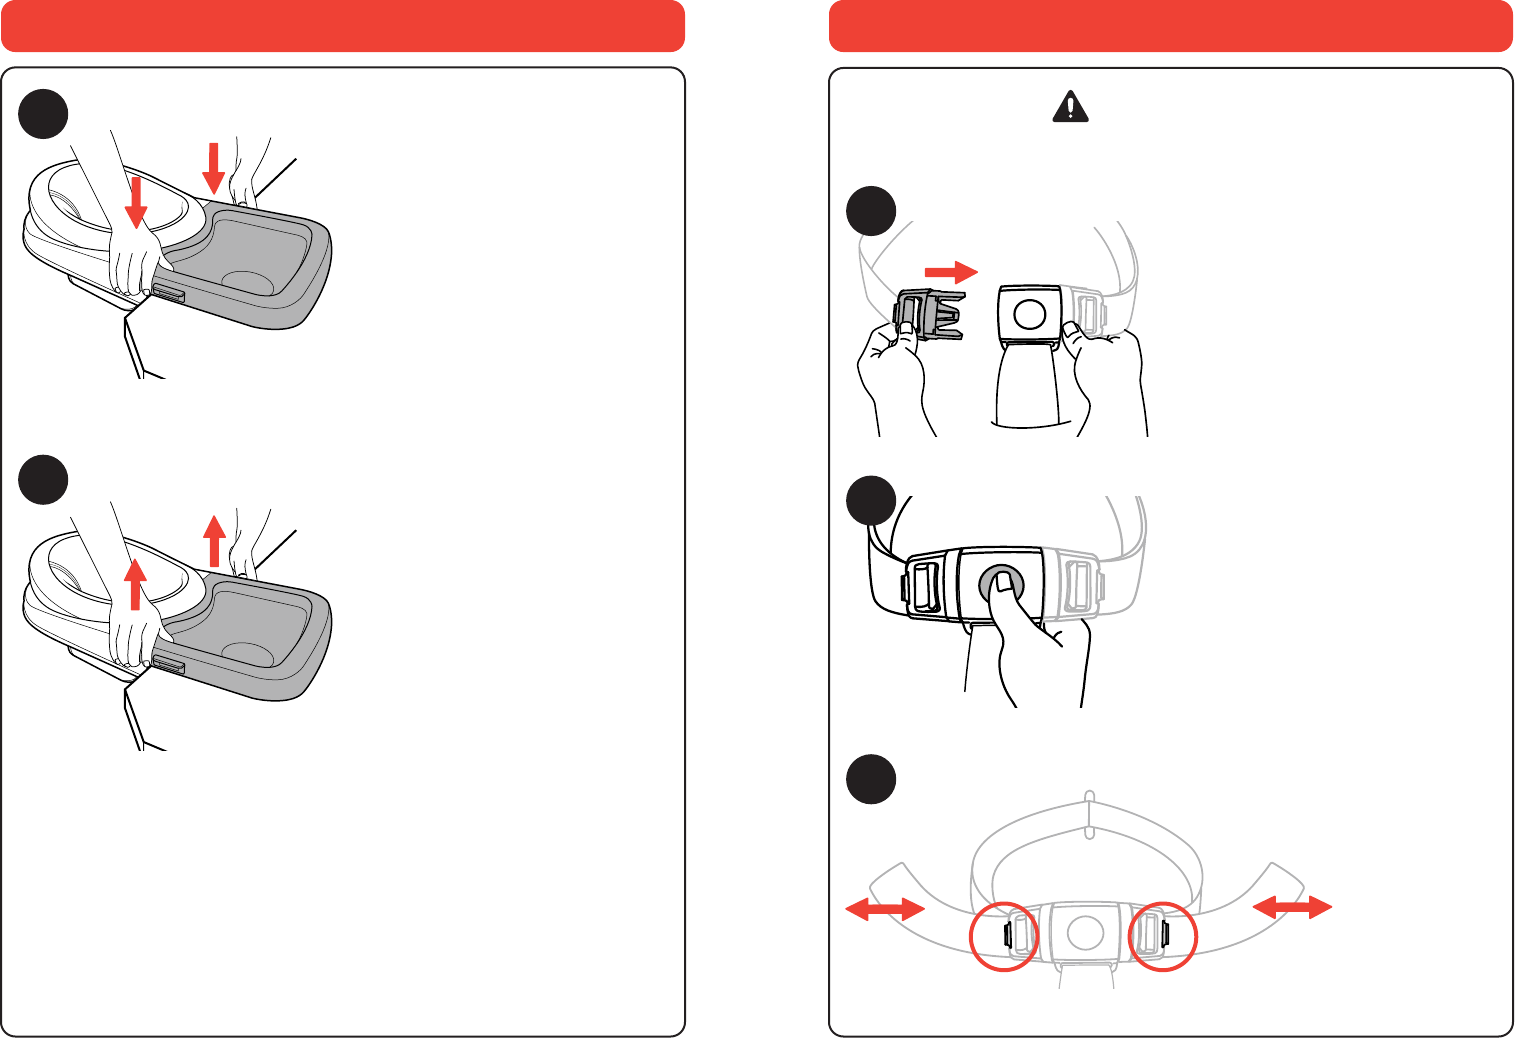
7B. The safety harness can be released
by pressing the button on the center
of the Crotch Strap Buckle and pulling
both Waist Clips out.
7A. Slide both Waist Clips into the
Crotch Strap Buckle as shown. Pull on
both sides to make sure the Clips are
secured to the Buckle.
How to Use the Safety Belt
WARNING
Always secure child in the restraint. Never leave child unattended in hook-on
chair. Always keep child in view.
7B
6A. Attach the Tray to the Arms on
the Hook-On Chair by lining up the
Tray with the Arms on the table. Push
down firmly on both side tabs to snap
the Tray into place.
How to Attach and Remove the Tray
6B. Remove the Tray from the Arms,
grasp the Tray on both side tabs and
pull up.
6A
6B
8. The length of the Waist Straps can
be adjusted by pressing the tab at the
end of the Waist Strap Clip and pulling
on the strap to tighten or loosen to
better fit your child.
8
“CLICK!”
7A
12 13
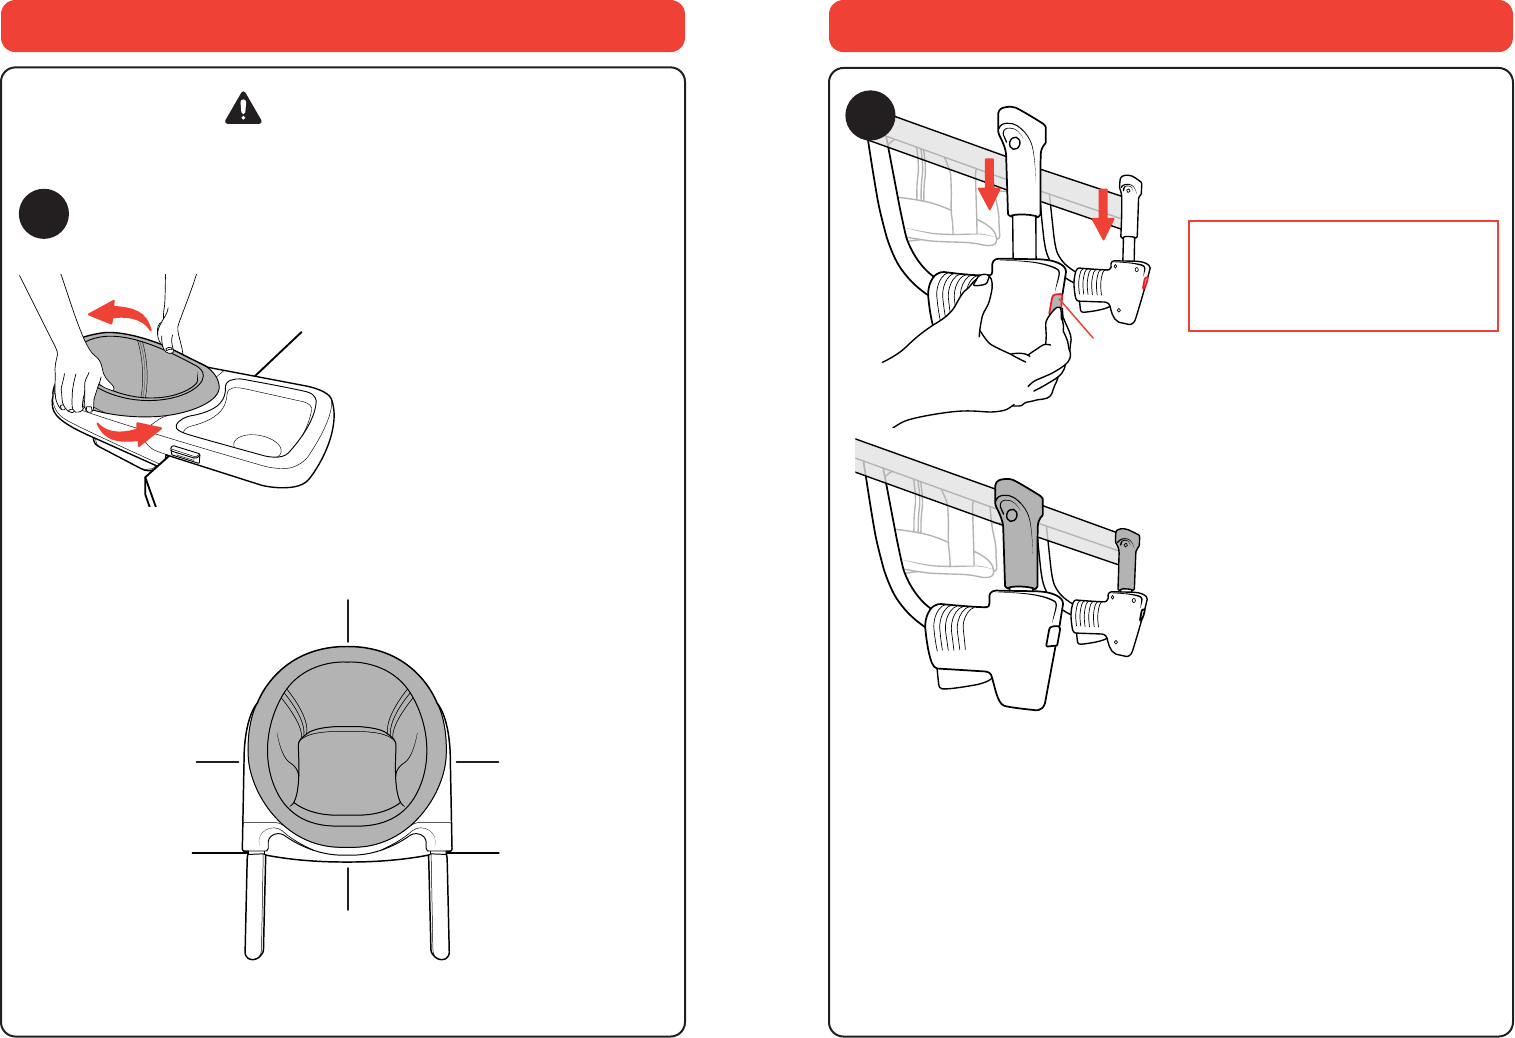
How to Use the Hook-on Chair
The Hook-On Chair can be adjusted
to 4 different positions.
9. To adjust the seat position, hold
onto both sides of the Seat and rotate
the Seat in the desired direction. The
Seat can be rotated 360° and clicks
into 4 positions.
9
WARNING
Do not adjust the hook-on chair to a position not shown in this owner's manual.
1
2
3
4
How to Remove the Hook-on Chair
10A. Push in on the release buttons on
the front of the Lower Locking Arms
to unlock the Clamp Bars, as shown.
Release
Button
10A
Tip: If the release button is hard to
push, lightly squeeze the ratchet
button and press the release button
at the same time.
14 15
Folding for Storage
11A. Rotate the Locking Clamps to the
upright position.
11B. Place the Hook-on Chair upside
down on a flat surface. Locate and
press in on the snap lock button, as
shown.
11C. Rotate the Locking Arm down.
Repeat for the other side.
11C
11B
11A
How to Remove the Hook-on Chair
10B. Rotate the Locking Clamps down
and slide the Hook-On Chair off of the
table top.
10B
16 17
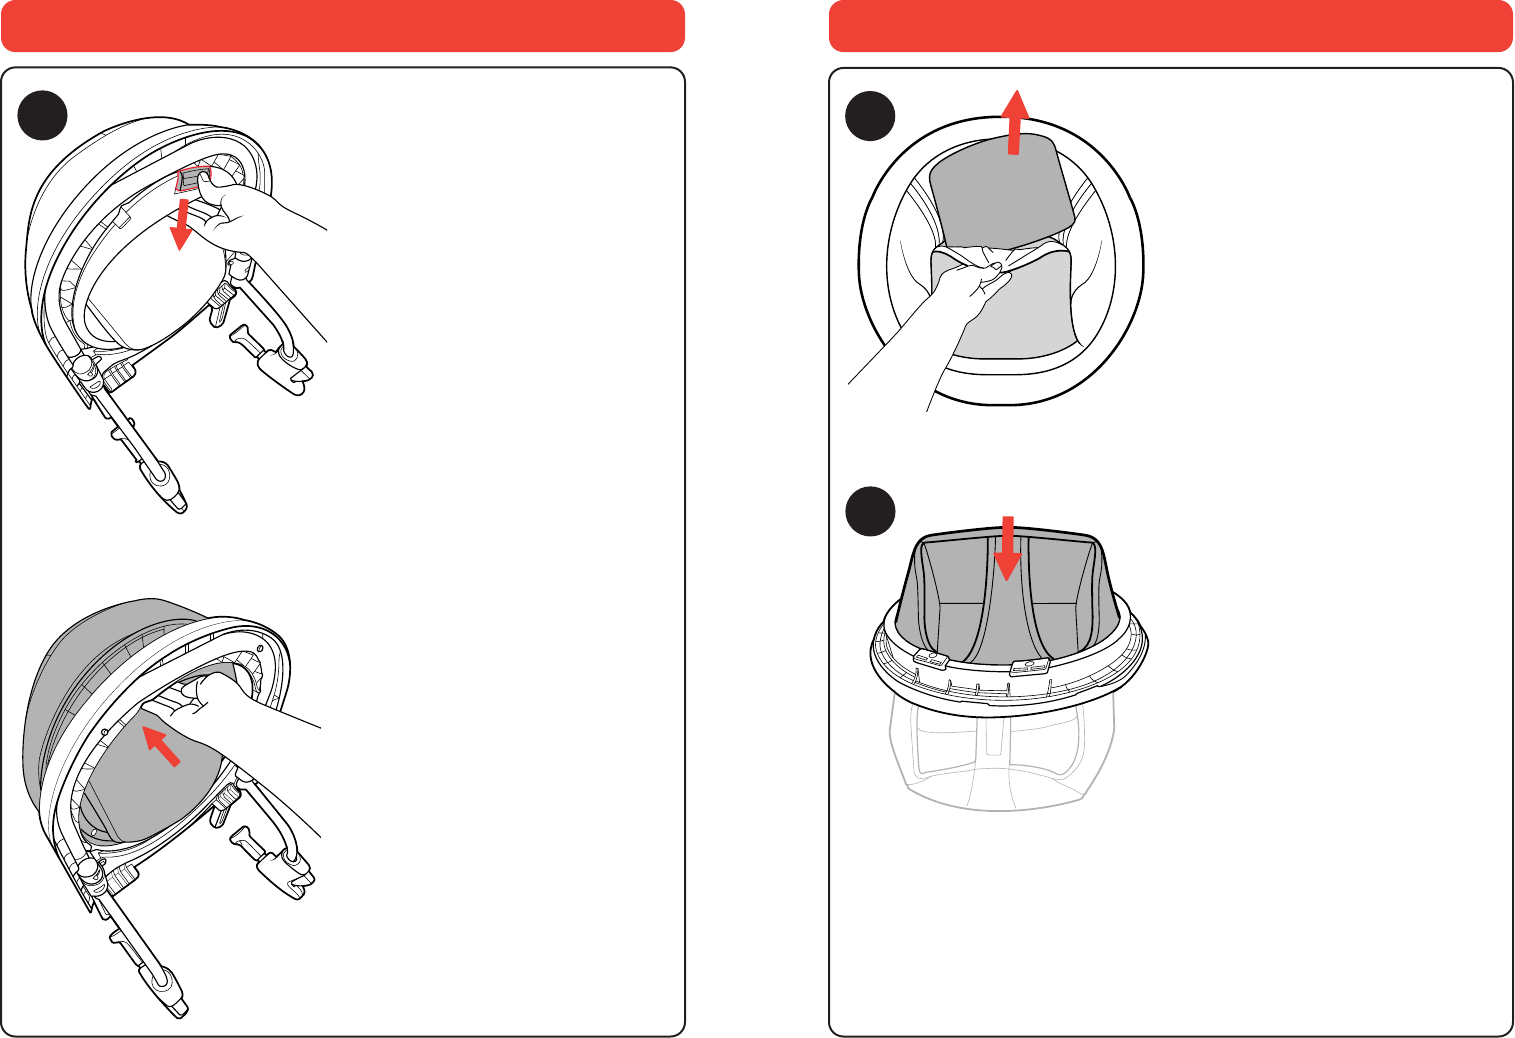
How to Remove the Fabric Seat
13A. Locate the seat board inside the
seat bottom pocket. Lift up on the
back edge of the seat fabric and pull
out the seat board.
13B. Hold the Child Seat upsidedown
and push the seat fabric down through
the Seat Frame. Start with the back
edge of the seat, and carefully guide
the leg opening wire through the
frame. Do not force or bend the
leg opening wire while inverting the
fabric.
13A
13B
The fabric seat cover on the Hook-On
Chair can be removed for cleaning.
12. Slide the release button on the
underside of the frame with your
thumb and push up on the Child
Seat. Remove the Child Seat from the
Hook-on Chair Frame.
How to Remove the Child Seat
12
18 19
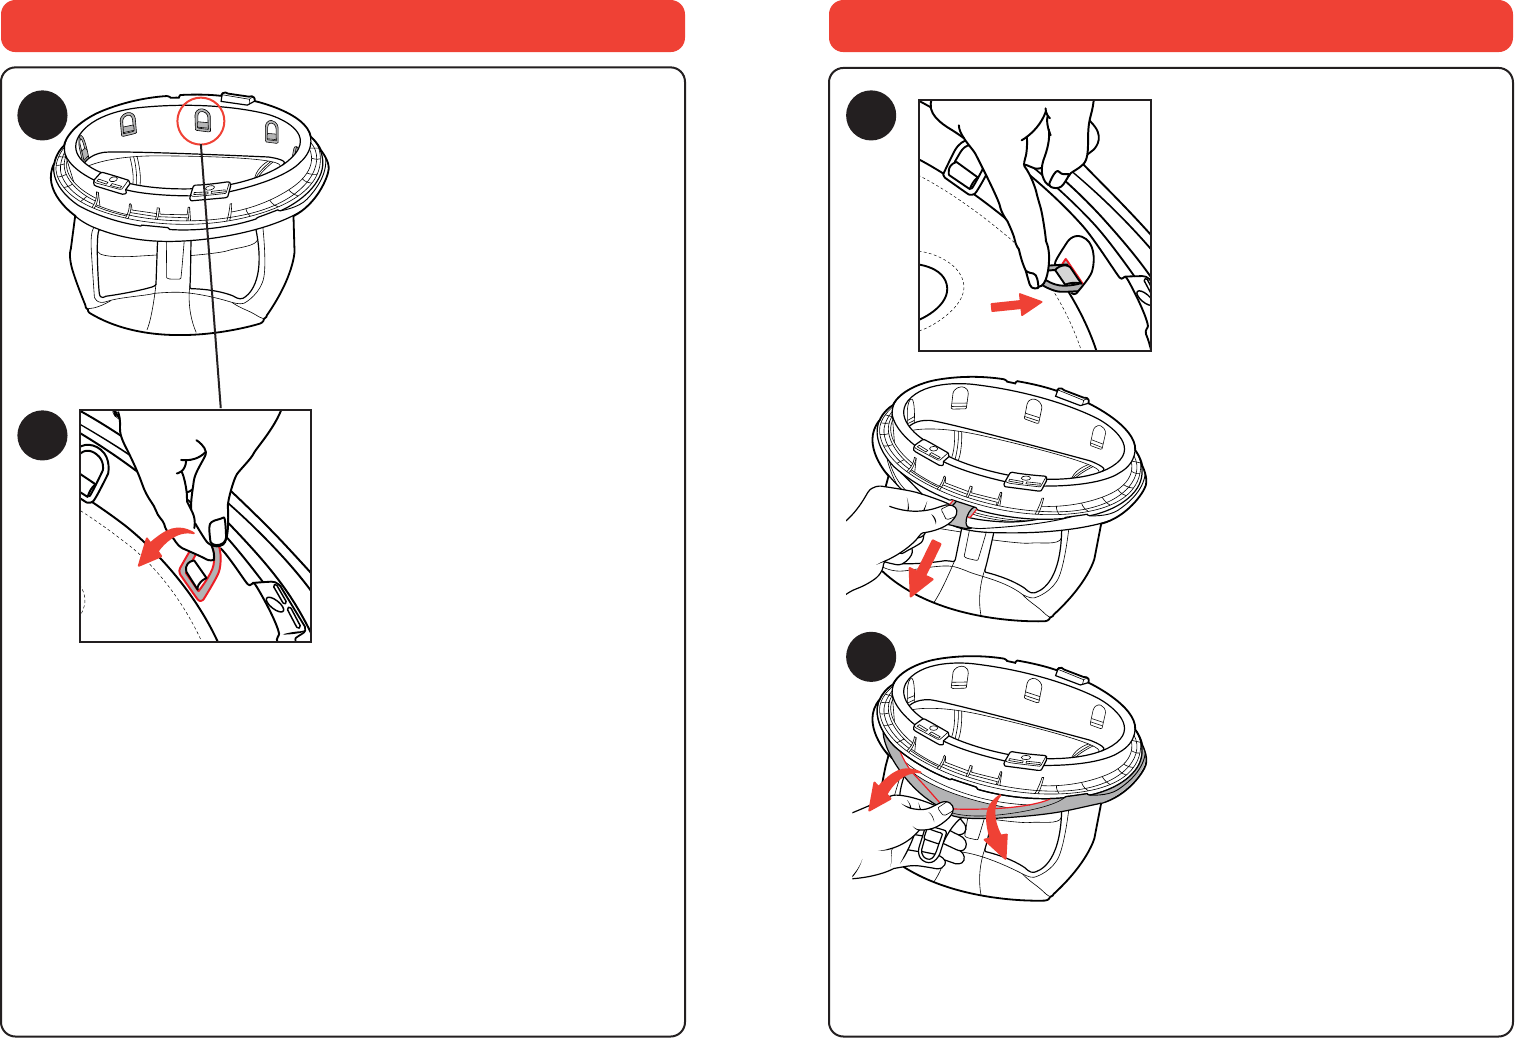
How to Remove the Fabric Seat
14C. While pushing the ring through
the opening on the Seat Frame, at the
same time, pull the strap from the
opposite side of the opening. Next,
remove both rings on either side of
the first ring. Alternate removing a
ring from each side until you have
removed all of the rings.
14C
How to Remove the Fabric Seat
14A. Locate 8 plastic rings on the
inside of the Seat Frame.
14B. Pull/flip out one of the rings to
release the strap.
14B
14A
14D
14D. Remove the edge of the Seat
Fabric from the Seat Frame.
2120
Cleaning and Maintenance
The cleaning and maintenance of the Hook-on Chair must only be carried out by an
adult.
CLEANING
The fabric seat can be removed (please refer to the section “How to Remove the
Fabric Seat”). Please refer to the care label on the fabric seat for instructions on how
to clean.
It is recommended to periodically clean between the movable and fixed plastic parts
of the seat with a toothbrush to remove any possible food residues. Always dry the
metal parts to prevent the formation of rust.
Plastic can be cleaned with mild detergent and warm water, no bleach or harsh
cleaners/abrasives.
MAINTENANCE
This product requires regular maintenance. Periodically check the Hook-on Chair for
wear, damage, or missing components. Should any parts be missing or damaged, the
Hook-on Chair must not, under any circumstances, be used.
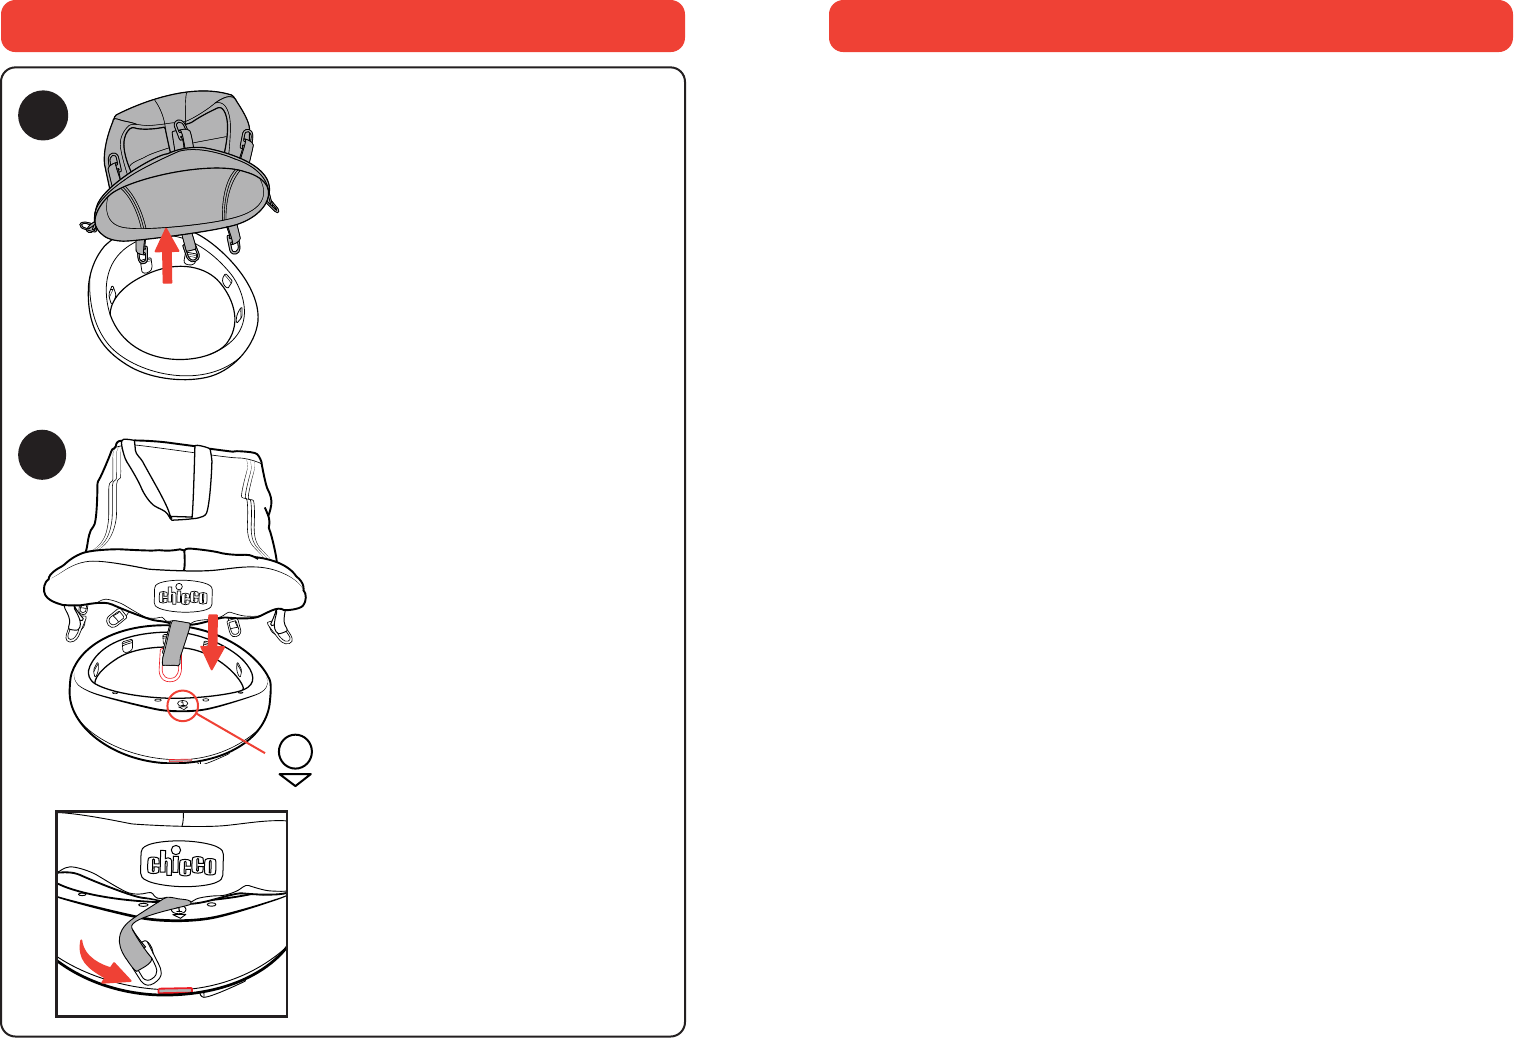
16
16. To replace the fabric seat cover,
follow steps 14 thru 15 in reverse.
Hint: Make sure to line up the fabric
seat cover to the Seat Frame correctly.
Line up the Chicco logo with the
number 1 symbol, as shown. Thread
the back plastic ring into the correct
opening, and work your way around
the frame alternating side rings.
How to Remove the Fabric Seat
15. Remove the fabric seat covering
from the Seat Frame, as shown.
15
1
22
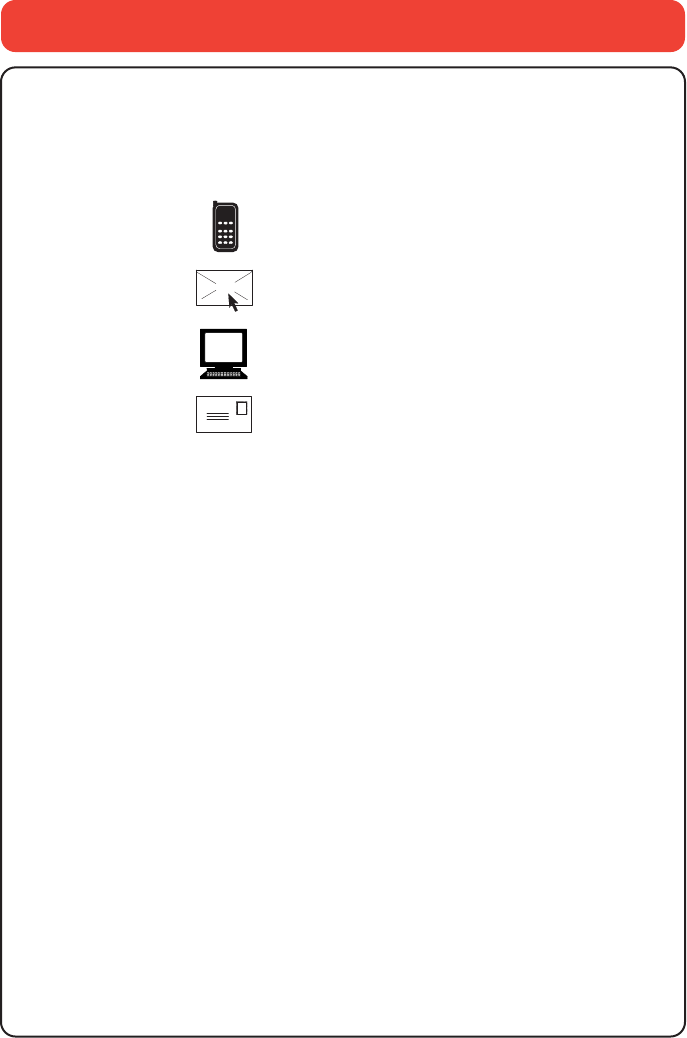
If you have any questions or comments about this product, or are missing any
of the parts, please contact us in one of the following ways:
@
(877)-424-4226
1826 William Penn Way
Lancaster, PA 17601
www.chiccousa.com
For More Information

www.chiccousa.com
Watch how to
attach and remove
the FastLock 360˚
