
Rapid SQL User Guide

Copyright © 1994-2007 Embarcadero Technologies, Inc.
Embarcadero Technologies, Inc.
100 California Street, 12th Floor
San Francisco, CA 94111 U.S.A.
All rights reserved.
All brands and product names are trademarks or registered trademarks of their respective owners.
This software/documentation contains proprietary information of Embarcadero Technologies, Inc.; it is provided under a license
agreement containing restrictions on use and disclosure and is also protected by copyright law. Reverse engineering of the software
is prohibited.
If this software/documentation is delivered to a U.S. Government Agency of the Department of Defense, then it is delivered with
Restricted Rights and the following legend is applicable:
Restricted Rights Legend Use, duplication, or disclosure by the Government is subject to restrictions as set forth in subparagraph
(c)(1)(ii) of DFARS 252.227-7013, Rights in Technical Data and Computer Software (October 1988).
If this software/documentation is delivered to a U.S. Government Agency not within the Department of Defense, then it is delivered
with Restricted Rights, as defined in FAR 552.227-14, Rights in Data-General, including Alternate III (June 1987).
Information in this document is subject to change without notice. Revisions may be issued to advise of such changes and additions.
Embarcadero Technologies, Inc. does not warrant that this documentation is error-free.


EMBARCADERO TECHNOLOGIES > RAPID SQL USER GUIDE 4
Contents
Welcome to Rapid SQL . . . . . . . . . . . . . . . . . . . . . . . . . . . . . . . . . . . . . . . . . . . . . . . . . . . . . . . . . . . . . . . . . . . . . . . . 13
Technical Requirements . . . . . . . . . . . . . . . . . . . . . . . . . . . . . . . . . . . . . . . . . . . . . . . . . . . . . . . . . . . . . . . . . . . . . 13
Licensing Rapid SQL . . . . . . . . . . . . . . . . . . . . . . . . . . . . . . . . . . . . . . . . . . . . . . . . . . . . . . . . . . . . . . . . . . . . . . . 14
Additional Product Resources. . . . . . . . . . . . . . . . . . . . . . . . . . . . . . . . . . . . . . . . . . . . . . . . . . . . . . . . . . . . . . . . . 14
Embarcadero Technologies Technical Support. . . . . . . . . . . . . . . . . . . . . . . . . . . . . . . . . . . . . . . . . . . . . . . . . . . . 14
Rapid SQL Tutorial . . . . . . . . . . . . . . . . . . . . . . . . . . . . . . . . . . . . . . . . . . . . . . . . . . . . . . . . . . . . . . . . . . . . . . . . . . . . 17
About This Tutorial . . . . . . . . . . . . . . . . . . . . . . . . . . . . . . . . . . . . . . . . . . . . . . . . . . . . . . . . . . . . . . . . . . . . . . . . . 17
Session 1: Getting Started with Rapid SQL . . . . . . . . . . . . . . . . . . . . . . . . . . . . . . . . . . . . . . . . . . . . . . . . . . . . . . 17
Overview. . . . . . . . . . . . . . . . . . . . . . . . . . . . . . . . . . . . . . . . . . . . . . . . . . . . . . . . . . . . . . . . . . . . . . . . . . . . . . 18
Session 2: Productivity Enhancers . . . . . . . . . . . . . . . . . . . . . . . . . . . . . . . . . . . . . . . . . . . . . . . . . . . . . . . . . . . . . 19
Creating an Object Using the Object Creation Wizard . . . . . . . . . . . . . . . . . . . . . . . . . . . . . . . . . . . . . . . . . . . 19
Working With an Existing Object Using the Object Editor. . . . . . . . . . . . . . . . . . . . . . . . . . . . . . . . . . . . . . . . . 20
Working With Code, Files and Data . . . . . . . . . . . . . . . . . . . . . . . . . . . . . . . . . . . . . . . . . . . . . . . . . . . . . . . . . 20
Working with Scripts and Files . . . . . . . . . . . . . . . . . . . . . . . . . . . . . . . . . . . . . . . . . . . . . . . . . . . . . . . . . . . . . 21
Session 3: Scripting . . . . . . . . . . . . . . . . . . . . . . . . . . . . . . . . . . . . . . . . . . . . . . . . . . . . . . . . . . . . . . . . . . . . . . . . 23
Generating Code. . . . . . . . . . . . . . . . . . . . . . . . . . . . . . . . . . . . . . . . . . . . . . . . . . . . . . . . . . . . . . . . . . . . . . . . 23
Code Assistance . . . . . . . . . . . . . . . . . . . . . . . . . . . . . . . . . . . . . . . . . . . . . . . . . . . . . . . . . . . . . . . . . . . . . . . . 25
Session 4: Building a Database Project . . . . . . . . . . . . . . . . . . . . . . . . . . . . . . . . . . . . . . . . . . . . . . . . . . . . . . . . . 25
Creating a New Rapid SQL Project. . . . . . . . . . . . . . . . . . . . . . . . . . . . . . . . . . . . . . . . . . . . . . . . . . . . . . . . . . 25
Adding a Project to Version Control (Sample - Microsoft Visual Source Safe). . . . . . . . . . . . . . . . . . . . . . . . . 26
Section 5: Visual Query Builder and Data Editor . . . . . . . . . . . . . . . . . . . . . . . . . . . . . . . . . . . . . . . . . . . . . . . . . . 27
Section 6: SQL Debugging and Profiling . . . . . . . . . . . . . . . . . . . . . . . . . . . . . . . . . . . . . . . . . . . . . . . . . . . . . . . . 28
Additional Evaluation Resources . . . . . . . . . . . . . . . . . . . . . . . . . . . . . . . . . . . . . . . . . . . . . . . . . . . . . . . . . . . . . . 29
Application Basics . . . . . . . . . . . . . . . . . . . . . . . . . . . . . . . . . . . . . . . . . . . . . . . . . . . . . . . . . . . . . . . . . . . . . . . . . . . . 31
Product Design . . . . . . . . . . . . . . . . . . . . . . . . . . . . . . . . . . . . . . . . . . . . . . . . . . . . . . . . . . . . . . . . . . . . . . . . . . . . 31
Database Explorer . . . . . . . . . . . . . . . . . . . . . . . . . . . . . . . . . . . . . . . . . . . . . . . . . . . . . . . . . . . . . . . . . . . . . . 31
Rapid SQL Windows. . . . . . . . . . . . . . . . . . . . . . . . . . . . . . . . . . . . . . . . . . . . . . . . . . . . . . . . . . . . . . . . . . . . . 36
Menus . . . . . . . . . . . . . . . . . . . . . . . . . . . . . . . . . . . . . . . . . . . . . . . . . . . . . . . . . . . . . . . . . . . . . . . . . . . . . . . . 46
Toolbars . . . . . . . . . . . . . . . . . . . . . . . . . . . . . . . . . . . . . . . . . . . . . . . . . . . . . . . . . . . . . . . . . . . . . . . . . . . . . . 48
Keyboard Shortcuts. . . . . . . . . . . . . . . . . . . . . . . . . . . . . . . . . . . . . . . . . . . . . . . . . . . . . . . . . . . . . . . . . . . . . . 53
Full Screen Mode . . . . . . . . . . . . . . . . . . . . . . . . . . . . . . . . . . . . . . . . . . . . . . . . . . . . . . . . . . . . . . . . . . . . . . . 55
Configuring Rapid SQL. . . . . . . . . . . . . . . . . . . . . . . . . . . . . . . . . . . . . . . . . . . . . . . . . . . . . . . . . . . . . . . . . . . . . . 56
Options Editor - Datasource Tab . . . . . . . . . . . . . . . . . . . . . . . . . . . . . . . . . . . . . . . . . . . . . . . . . . . . . . . . . . 57
Options Editor - General Tab . . . . . . . . . . . . . . . . . . . . . . . . . . . . . . . . . . . . . . . . . . . . . . . . . . . . . . . . . . . . . . 58
Options Editor - Connection Tab . . . . . . . . . . . . . . . . . . . . . . . . . . . . . . . . . . . . . . . . . . . . . . . . . . . . . . . . . . 59

CONTENTS >
EMBARCADERO TECHNOLOGIES > RAPID SQL USER GUIDE 5
Options Editor - Logging Tab . . . . . . . . . . . . . . . . . . . . . . . . . . . . . . . . . . . . . . . . . . . . . . . . . . . . . . . . . . . . . . 60
Options Editor - Licensing Tab . . . . . . . . . . . . . . . . . . . . . . . . . . . . . . . . . . . . . . . . . . . . . . . . . . . . . . . . . . . . . 61
Options Editor - Explorer Tab . . . . . . . . . . . . . . . . . . . . . . . . . . . . . . . . . . . . . . . . . . . . . . . . . . . . . . . . . . . 61
Options Editor - ISQL Tab . . . . . . . . . . . . . . . . . . . . . . . . . . . . . . . . . . . . . . . . . . . . . . . . . . . . . . . . . . . . . . . 62
Options Editor - Debug Tab . . . . . . . . . . . . . . . . . . . . . . . . . . . . . . . . . . . . . . . . . . . . . . . . . . . . . . . . . . . . . . 63
Options Editor - DDL Extract Tab . . . . . . . . . . . . . . . . . . . . . . . . . . . . . . . . . . . . . . . . . . . . . . . . . . . . . . . . . . . 64
Options Editor - Editor Tab . . . . . . . . . . . . . . . . . . . . . . . . . . . . . . . . . . . . . . . . . . . . . . . . . . . . . . . . . . . . . . . 66
Options Editor - Results Tab. . . . . . . . . . . . . . . . . . . . . . . . . . . . . . . . . . . . . . . . . . . . . . . . . . . . . . . . . . . . . . . 68
Options Editor - Auto Format Tab . . . . . . . . . . . . . . . . . . . . . . . . . . . . . . . . . . . . . . . . . . . . . . . . . . . . . . . . . . . 70
Options Editor - Browsers Tab . . . . . . . . . . . . . . . . . . . . . . . . . . . . . . . . . . . . . . . . . . . . . . . . . . . . . . . . . . . . . 72
Options Editor - Version Control Tab . . . . . . . . . . . . . . . . . . . . . . . . . . . . . . . . . . . . . . . . . . . . . . . . . . . . . . . . 73
Options Editor- Directories Tab. . . . . . . . . . . . . . . . . . . . . . . . . . . . . . . . . . . . . . . . . . . . . . . . . . . . . . . . . . . . . 74
Options Editor - Java Tab . . . . . . . . . . . . . . . . . . . . . . . . . . . . . . . . . . . . . . . . . . . . . . . . . . . . . . . . . . . . . . . . . 75
Options Editor - Data Editor Tab . . . . . . . . . . . . . . . . . . . . . . . . . . . . . . . . . . . . . . . . . . . . . . . . . . . . . . . . . . . 76
Options Editor - Query Builder Tab. . . . . . . . . . . . . . . . . . . . . . . . . . . . . . . . . . . . . . . . . . . . . . . . . . . . . . . . . . 77
Options Editor - Code Analyst Tab . . . . . . . . . . . . . . . . . . . . . . . . . . . . . . . . . . . . . . . . . . . . . . . . . . . . . . . . . . 79
Using . . . . . . . . . . . . . . . . . . . . . . . . . . . . . . . . . . . . . . . . . . . . . . . . . . . . . . . . . . . . . . . . . . . . . . . . . . . . . . . . . . . . . . 81
Datasource Management . . . . . . . . . . . . . . . . . . . . . . . . . . . . . . . . . . . . . . . . . . . . . . . . . . . . . . . . . . . . . . . . . . . . 81
Datasources . . . . . . . . . . . . . . . . . . . . . . . . . . . . . . . . . . . . . . . . . . . . . . . . . . . . . . . . . . . . . . . . . . . . . . . . . . . 81
Datasource Catalog . . . . . . . . . . . . . . . . . . . . . . . . . . . . . . . . . . . . . . . . . . . . . . . . . . . . . . . . . . . . . . . . . . . . . 82
Automatically Discovering Datasources . . . . . . . . . . . . . . . . . . . . . . . . . . . . . . . . . . . . . . . . . . . . . . . . . . . . . 83
Changing Datasource Groups . . . . . . . . . . . . . . . . . . . . . . . . . . . . . . . . . . . . . . . . . . . . . . . . . . . . . . . . . . . . 83
Connect . . . . . . . . . . . . . . . . . . . . . . . . . . . . . . . . . . . . . . . . . . . . . . . . . . . . . . . . . . . . . . . . . . . . . . . . . . 84
Disconnect . . . . . . . . . . . . . . . . . . . . . . . . . . . . . . . . . . . . . . . . . . . . . . . . . . . . . . . . . . . . . . . . . . . . . . . . . . 85
Discover Datasource. . . . . . . . . . . . . . . . . . . . . . . . . . . . . . . . . . . . . . . . . . . . . . . . . . . . . . . . . . . . . . . . . . . . . 85
Edit Datasource . . . . . . . . . . . . . . . . . . . . . . . . . . . . . . . . . . . . . . . . . . . . . . . . . . . . . . . . . . . . . 87
Managing Datasource Properties . . . . . . . . . . . . . . . . . . . . . . . . . . . . . . . . . . . . . . . . . . . . . . . . . . . . . . . . . 90
Registering Datasource . . . . . . . . . . . . . . . . . . . . . . . . . . . . . . . . . . . . . . . . . . . . . . . . . . . . . . . . . . . . . . . . 90
Selecting Datasources . . . . . . . . . . . . . . . . . . . . . . . . . . . . . . . . . . . . . . . . . . . . . . . . . . . . . . . . . . . . . . . . 93
Unregistering Datasource . . . . . . . . . . . . . . . . . . . . . . . . . . . . . . . . . . . . . . . . . . . . . . . . . . . . . . . . . . . . . . . . . 93
Datasource Groups . . . . . . . . . . . . . . . . . . . . . . . . . . . . . . . . . . . . . . . . . . . . . . . . . . . . . . . . . . . . . . . . . . . 94
Delete . . . . . . . . . . . . . . . . . . . . . . . . . . . . . . . . . . . . . . . . . . . . . . . . . . . . . . . . . . . . . . . . . . . . . . . . . . . . . . . . 94
New Datasource Group. . . . . . . . . . . . . . . . . . . . . . . . . . . . . . . . . . . . . . . . . . . . . . . . . . . . . . . . . . . . . . . . . . . 94
Rename Datasource Group . . . . . . . . . . . . . . . . . . . . . . . . . . . . . . . . . . . . . . . . . . . . . . . . . . . . . . . . . . . . . . . 95
Supported Objects . . . . . . . . . . . . . . . . . . . . . . . . . . . . . . . . . . . . . . . . . . . . . . . . . . . . . . . . . . . . . . . . . . . . . . . . . 98
Aliases. . . . . . . . . . . . . . . . . . . . . . . . . . . . . . . . . . . . . . . . . . . . . . . . . . . . . . . . . . . . . . . . . . . . . . . . . . . . . . . . 99
Check Constraints . . . . . . . . . . . . . . . . . . . . . . . . . . . . . . . . . . . . . . . . . . . . . . . . . . . . . . . . . . . . . . . . . . 100
Clusters . . . . . . . . . . . . . . . . . . . . . . . . . . . . . . . . . . . . . . . . . . . . . . . . . . . . . . . . . . . . . . . . . . . . . . . . . . . . . 100
Database Links . . . . . . . . . . . . . . . . . . . . . . . . . . . . . . . . . . . . . . . . . . . . . . . . . . . . . . . . . . . . . . . . . . . . . . . . 101
Databases. . . . . . . . . . . . . . . . . . . . . . . . . . . . . . . . . . . . . . . . . . . . . . . . . . . . . . . . . . . . . . . . . . . . . . . . . . . . 102

CONTENTS >
EMBARCADERO TECHNOLOGIES > RAPID SQL USER GUIDE 6
DBRM . . . . . . . . . . . . . . . . . . . . . . . . . . . . . . . . . . . . . . . . . . . . . . . . . . . . . . . . . . . . . . . . . . . . . . . . . . . . . . . 103
Defaults. . . . . . . . . . . . . . . . . . . . . . . . . . . . . . . . . . . . . . . . . . . . . . . . . . . . . . . . . . . . . . . . . . . . . . . . . . . . . . 103
Extended Procedures . . . . . . . . . . . . . . . . . . . . . . . . . . . . . . . . . . . . . . . . . . . . . . . . . . . . . . . . . . . . . . . . . . . 104
Foreign Keys. . . . . . . . . . . . . . . . . . . . . . . . . . . . . . . . . . . . . . . . . . . . . . . . . . . . . . . . . . . . . . . . . . . . . . . . . . 104
Functions . . . . . . . . . . . . . . . . . . . . . . . . . . . . . . . . . . . . . . . . . . . . . . . . . . . . . . . . . . . . . . . . . . . . . . . . . . . 105
Indexes . . . . . . . . . . . . . . . . . . . . . . . . . . . . . . . . . . . . . . . . . . . . . . . . . . . . . . . . . . . . . . . . . . . . . . . . . . . . . . 106
Instance. . . . . . . . . . . . . . . . . . . . . . . . . . . . . . . . . . . . . . . . . . . . . . . . . . . . . . . . . . . . . . . . . . . . . . . . . . . . . . 109
Java Classes. . . . . . . . . . . . . . . . . . . . . . . . . . . . . . . . . . . . . . . . . . . . . . . . . . . . . . . . . . . . . . . . . . . . . . . . . . 110
Java Resources . . . . . . . . . . . . . . . . . . . . . . . . . . . . . . . . . . . . . . . . . . . . . . . . . . . . . . . . . . . . . . . . . . . . . . . 110
Java Sources . . . . . . . . . . . . . . . . . . . . . . . . . . . . . . . . . . . . . . . . . . . . . . . . . . . . . . . . . . . . . . . . . . . . . . . . . 110
Job Queues. . . . . . . . . . . . . . . . . . . . . . . . . . . . . . . . . . . . . . . . . . . . . . . . . . . . . . . . . . . . . . . . . . . . . . . . . . . 110
Libraries . . . . . . . . . . . . . . . . . . . . . . . . . . . . . . . . . . . . . . . . . . . . . . . . . . . . . . . . . . . . . . . . . . . . . . . . . . . . . 111
Logins . . . . . . . . . . . . . . . . . . . . . . . . . . . . . . . . . . . . . . . . . . . . . . . . . . . . . . . . . . . . . . . . . . . . . . . . . . . . . . . 111
Materialized Query Tables . . . . . . . . . . . . . . . . . . . . . . . . . . . . . . . . . . . . . . . . . . . . . . . . . . . . . . . . . . . . . . . 112
Materialized Views . . . . . . . . . . . . . . . . . . . . . . . . . . . . . . . . . . . . . . . . . . . . . . . . . . . . . . . . . . . . . . . . . . . . . 113
Materialized View Logs . . . . . . . . . . . . . . . . . . . . . . . . . . . . . . . . . . . . . . . . . . . . . . . . . . . . . . . . . . . . . . . . . . 113
Oracle Job Queues . . . . . . . . . . . . . . . . . . . . . . . . . . . . . . . . . . . . . . . . . . . . . . . . . . . . . . . . . . . . . . . . . . . . . 114
Outlines. . . . . . . . . . . . . . . . . . . . . . . . . . . . . . . . . . . . . . . . . . . . . . . . . . . . . . . . . . . . . . . . . . . . . . . . . . . . . . 114
Packages . . . . . . . . . . . . . . . . . . . . . . . . . . . . . . . . . . . . . . . . . . . . . . . . . . . . . . . . . . . . . . . . . . . . . . . . . . . . 115
Package Bodies . . . . . . . . . . . . . . . . . . . . . . . . . . . . . . . . . . . . . . . . . . . . . . . . . . . . . . . . . . . . . . . . . . . . . . . 116
Plans . . . . . . . . . . . . . . . . . . . . . . . . . . . . . . . . . . . . . . . . . . . . . . . . . . . . . . . . . . . . . . . . . . . . . . . . . . . . . . . . 116
Primary Keys. . . . . . . . . . . . . . . . . . . . . . . . . . . . . . . . . . . . . . . . . . . . . . . . . . . . . . . . . . . . . . . . . . . . . . . . . . 116
Procedures . . . . . . . . . . . . . . . . . . . . . . . . . . . . . . . . . . . . . . . . . . . . . . . . . . . . . . . . . . . . . . . . . . . . . . . . . . . 117
Profiles . . . . . . . . . . . . . . . . . . . . . . . . . . . . . . . . . . . . . . . . . . . . . . . . . . . . . . . . . . . . . . . . . . . . . . . . . . . . 118
Rollback Segments . . . . . . . . . . . . . . . . . . . . . . . . . . . . . . . . . . . . . . . . . . . . . . . . . . . . . . . . . . . . . . . . . . . . . 119
Rules. . . . . . . . . . . . . . . . . . . . . . . . . . . . . . . . . . . . . . . . . . . . . . . . . . . . . . . . . . . . . . . . . . . . . . . . . . . . . . . . 120
Segments . . . . . . . . . . . . . . . . . . . . . . . . . . . . . . . . . . . . . . . . . . . . . . . . . . . . . . . . . . . . . . . . . . . . . . . . . . . . 121
Sequences . . . . . . . . . . . . . . . . . . . . . . . . . . . . . . . . . . . . . . . . . . . . . . . . . . . . . . . . . . . . . . . . . . . . . . . . . . . 121
Snapshots . . . . . . . . . . . . . . . . . . . . . . . . . . . . . . . . . . . . . . . . . . . . . . . . . . . . . . . . . . . . . . . . . . . . . . . . . . . . 121
Snapshot Logs . . . . . . . . . . . . . . . . . . . . . . . . . . . . . . . . . . . . . . . . . . . . . . . . . . . . . . . . . . . . . . . . . . . . . . . . 122
Stogroups . . . . . . . . . . . . . . . . . . . . . . . . . . . . . . . . . . . . . . . . . . . . . . . . . . . . . . . . . . . . . . . . . . . . . . . . . . . . 122
Structured Types . . . . . . . . . . . . . . . . . . . . . . . . . . . . . . . . . . . . . . . . . . . . . . . . . . . . . . . . . . . . . . . . . . . . . . 123
Summary Tables. . . . . . . . . . . . . . . . . . . . . . . . . . . . . . . . . . . . . . . . . . . . . . . . . . . . . . . . . . . . . . . . . . . . . . . 123
Synonyms . . . . . . . . . . . . . . . . . . . . . . . . . . . . . . . . . . . . . . . . . . . . . . . . . . . . . . . . . . . . . . . . . . . . . . . . . . . 124
Tables . . . . . . . . . . . . . . . . . . . . . . . . . . . . . . . . . . . . . . . . . . . . . . . . . . . . . . . . . . . . . . . . . . . . . . . . . . . . . 124
Tablespaces . . . . . . . . . . . . . . . . . . . . . . . . . . . . . . . . . . . . . . . . . . . . . . . . . . . . . . . . . . . . . . . . . . . . . . . 126
Triggers . . . . . . . . . . . . . . . . . . . . . . . . . . . . . . . . . . . . . . . . . . . . . . . . . . . . . . . . . . . . . . . . . . . . . . . . . . . . . 127
Types . . . . . . . . . . . . . . . . . . . . . . . . . . . . . . . . . . . . . . . . . . . . . . . . . . . . . . . . . . . . . . . . . . . . . . . . . . . . . . . 127
Type Bodies . . . . . . . . . . . . . . . . . . . . . . . . . . . . . . . . . . . . . . . . . . . . . . . . . . . . . . . . . . . . . . . . . . . . . . . . . . 128
Unique Keys . . . . . . . . . . . . . . . . . . . . . . . . . . . . . . . . . . . . . . . . . . . . . . . . . . . . . . . . . . . . . . . . . . . . . . . . . . 129

CONTENTS >
EMBARCADERO TECHNOLOGIES > RAPID SQL USER GUIDE 7
User Datatypes . . . . . . . . . . . . . . . . . . . . . . . . . . . . . . . . . . . . . . . . . . . . . . . . . . . . . . . . . . . . . . . . . . . . . . . . 129
Users . . . . . . . . . . . . . . . . . . . . . . . . . . . . . . . . . . . . . . . . . . . . . . . . . . . . . . . . . . . . . . . . . . . . . . . . . . . . . . . 130
Views . . . . . . . . . . . . . . . . . . . . . . . . . . . . . . . . . . . . . . . . . . . . . . . . . . . . . . . . . . . . . . . . . . . . . . . . . . . . . . . 131
Object Editors . . . . . . . . . . . . . . . . . . . . . . . . . . . . . . . . . . . . . . . . . . . . . . . . . . . . . . . . . . . . . . . . . . . . . . . . . . . . 132
IBM DB2 UDB for Linux, Unix, and Windows Object Editors . . . . . . . . . . . . . . . . . . . . . . . . . . . . . . . . . . . . . 132
IBM DB2 UDB for OS/390 and z/OS Object Editors . . . . . . . . . . . . . . . . . . . . . . . . . . . . . . . . . . . . . . . . . . . . 169
Microsoft SQL Server Object Editors . . . . . . . . . . . . . . . . . . . . . . . . . . . . . . . . . . . . . . . . . . . . . . . . . . . . . . . 218
Oracle Object Editors . . . . . . . . . . . . . . . . . . . . . . . . . . . . . . . . . . . . . . . . . . . . . . . . . . . . . . . . . . . . . . . . . . . 253
Sybase ASE Object Editors . . . . . . . . . . . . . . . . . . . . . . . . . . . . . . . . . . . . . . . . . . . . . . . . . . . . . . . . . . . . . . 317
Functionality . . . . . . . . . . . . . . . . . . . . . . . . . . . . . . . . . . . . . . . . . . . . . . . . . . . . . . . . . . . . . . . . . . . . . . . . . . . . . 352
Completing a Dialog Box. . . . . . . . . . . . . . . . . . . . . . . . . . . . . . . . . . . . . . . . . . . . . . . . . . . . . . . . . . . . . . . . . 356
Creating an Object . . . . . . . . . . . . . . . . . . . . . . . . . . . . . . . . . . . . . . . . . . . . . . . . . . . . . . . . . . . . . . . . . . . . . 356
IBM DB2 UDB for Linux, Unix, and Windows Object Wizards . . . . . . . . . . . . . . . . . . . . . . . . . . . . . . . . . . . . 357
IBM DB2 UDB for OS/390 and z/OS Object Wizards . . . . . . . . . . . . . . . . . . . . . . . . . . . . . . . . . . . . . . . . . . . 391
Microsoft SQL Server Object Wizards . . . . . . . . . . . . . . . . . . . . . . . . . . . . . . . . . . . . . . . . . . . . . . . . . . . . . . 420
Oracle Object Wizards . . . . . . . . . . . . . . . . . . . . . . . . . . . . . . . . . . . . . . . . . . . . . . . . . . . . . . . . . . . . . . . . . . 451
Sybase ASE Object Wizards. . . . . . . . . . . . . . . . . . . . . . . . . . . . . . . . . . . . . . . . . . . . . . . . . . . . . . . . . . . . . . 526
Activate Logging . . . . . . . . . . . . . . . . . . . . . . . . . . . . . . . . . . . . . . . . . . . . . . . . . . . . . . . . . . . . . . . . . . . . . . . 552
Add/Modify Database File. . . . . . . . . . . . . . . . . . . . . . . . . . . . . . . . . . . . . . . . . . . . . . . . . . . . . . . . . . . . . . . . 552
Add Database Fragment. . . . . . . . . . . . . . . . . . . . . . . . . . . . . . . . . . . . . . . . . . . . . . . . . . . . . . . . . . . . . . . . . 553
Add, Insert, or Modify Column . . . . . . . . . . . . . . . . . . . . . . . . . . . . . . . . . . . . . . . . . . . . . . . . . . . . . . . . . 554
Add, Insert, or Modify Parameter . . . . . . . . . . . . . . . . . . . . . . . . . . . . . . . . . . . . . . . . . . . . . . . . . . . . . . . 561
Add, Insert, or Modify Partition . . . . . . . . . . . . . . . . . . . . . . . . . . . . . . . . . . . . . . . . . . . . . . . . . . 561
Add or Modify Cluster Column . . . . . . . . . . . . . . . . . . . . . . . . . . . . . . . . . . . . . . . . . . . . . . . . . . . . . . . . . . . . 564
Add or Modify Datafile. . . . . . . . . . . . . . . . . . . . . . . . . . . . . . . . . . . . . . . . . . . . . . . . . . . . . . . . . . . . . . . . . . . 565
Allocate Extent . . . . . . . . . . . . . . . . . . . . . . . . . . . . . . . . . . . . . . . . . . . . . . . . . . . . . . . . . . . . . . . . . . 566
Analyze . . . . . . . . . . . . . . . . . . . . . . . . . . . . . . . . . . . . . . . . . . . . . . . . . . . . . . . . . . . . . . . . 568
Bind Data Cache. . . . . . . . . . . . . . . . . . . . . . . . . . . . . . . . . . . . . . . . . . . . . . . . . . . . . . . . . . . . . . . . . . . . . . . 572
Bind Package . . . . . . . . . . . . . . . . . . . . . . . . . . . . . . . . . . . . . . . . . . . . . . . . . . . . . . . . . . . . . . . . . . . . . . . . . 572
Bind Plan. . . . . . . . . . . . . . . . . . . . . . . . . . . . . . . . . . . . . . . . . . . . . . . . . . . . . . . . . . . . . . . . . . . . . . . . . . . . . 575
Build Query . . . . . . . . . . . . . . . . . . . . . . . . . . . . . . . . . . . . . . . . . . . . . . . . . . . . . . . . . . . . . . . . . . . . . . . . . 579
Change Category . . . . . . . . . . . . . . . . . . . . . . . . . . . . . . . . . . . . . . . . . . . . . . . . . . . . . . . . . . . . . . . . . . . . . . 579
Change Container Size. . . . . . . . . . . . . . . . . . . . . . . . . . . . . . . . . . . . . . . . . . . . . . . . . . . . . . . . . . . . . . . . . . 580
Change Database Comment. . . . . . . . . . . . . . . . . . . . . . . . . . . . . . . . . . . . . . . . . . . . . . . . . . . . . . . . . . . . . . 581
Change Password . . . . . . . . . . . . . . . . . . . . . . . . . . . . . . . . . . . . . . . . . . . . . . . . . . . . . . . . . . . . . . . . . . . . 581
Change Status . . . . . . . . . . . . . . . . . . . . . . . . . . . . . . . . . . . . . . . . . . . . . . . . . . . . . . . . . . . . . . . . . . 582
Checkpoint . . . . . . . . . . . . . . . . . . . . . . . . . . . . . . . . . . . . . . . . . . . . . . . . . . . . . . . . . . . . . . . . . . . . . . . 584
Clone Partition. . . . . . . . . . . . . . . . . . . . . . . . . . . . . . . . . . . . . . . . . . . . . . . . . . . . . . . . . . . . . . . . . . . . . . . . . 584
Clone Table. . . . . . . . . . . . . . . . . . . . . . . . . . . . . . . . . . . . . . . . . . . . . . . . . . . . . . . . . . . . . . . . . . . . . . . . . . . 585
Coalesce . . . . . . . . . . . . . . . . . . . . . . . . . . . . . . . . . . . . . . . . . . . . . . . . . . . . . . . . . . . . . . . . . . . . . . . . . . . . 585

CONTENTS >
EMBARCADERO TECHNOLOGIES > RAPID SQL USER GUIDE 8
Compile . . . . . . . . . . . . . . . . . . . . . . . . . . . . . . . . . . . . . . . . . . . . . . . . . . . . . . . . . . . . . . . . . . . 586
Connection Editor . . . . . . . . . . . . . . . . . . . . . . . . . . . . . . . . . . . . . . . . . . . . . . . . . . . . . . . . . . . . . . . . . . . . . . 589
Convert to Partitioned . . . . . . . . . . . . . . . . . . . . . . . . . . . . . . . . . . . . . . . . . . . . . . . . . . . . . . . . . . . . . . . . . . . 589
Copy Object Names . . . . . . . . . . . . . . . . . . . . . . . . . . . . . . . . . . . . . . . . . . . . . . . . . . . . . . . . . . . . . . . . . . . . 591
Create Alias . . . . . . . . . . . . . . . . . . . . . . . . . . . . . . . . . . . . . . . . . . . . . . . . . . . . . . . . . . . . . . . . . . . 591
Create Insert Statements . . . . . . . . . . . . . . . . . . . . . . . . . . . . . . . . . . . . . . . . . . . . . . . . . . . . . . . . . . . . . . . . 593
Create or Edit Java Source. . . . . . . . . . . . . . . . . . . . . . . . . . . . . . . . . . . . . . . . . . . . . . . . . . . . . . . . . . . . . . . 594
Create Like . . . . . . . . . . . . . . . . . . . . . . . . . . . . . . . . . . . . . . . . . . . . . . . . . . . . . . . . . . . . . . . . . . . . . . . . . . . 594
Create or Edit User Accounts . . . . . . . . . . . . . . . . . . . . . . . . . . . . . . . . . . . . . . . . . . . . . . . . . . . . . . . . . . . . . 600
Create or Modify Constraint . . . . . . . . . . . . . . . . . . . . . . . . . . . . . . . . . . . . . . . . . . . . . . . . 600
Create or Modify User Message Text . . . . . . . . . . . . . . . . . . . . . . . . . . . . . . . . . . . . . . . . . . . . . . . . . . . . . . . 601
Create Synonym . . . . . . . . . . . . . . . . . . . . . . . . . . . . . . . . . . . . . . . . . . 601
DataLink Options. . . . . . . . . . . . . . . . . . . . . . . . . . . . . . . . . . . . . . . . . . . . . . . . . . . . . . . . . . . . . . . . . . . . . . . 603
DBCC . . . . . . . . . . . . . . . . . . . . . . . . . . . . . . . . . . . . . . . . . . . . . . . . . . . . . . . . . . . . . . . . . . . . . . . . . . . . . . 603
Deallocate Unused Space . . . . . . . . . . . . . . . . . . . . . . . . . . . . . . . . . . . . . . . . . . . . . . . . . . . . . . . . . 611
Dependencies . . . . . . . . . . . . . . . . . . . . . . . . . . . . . . . . . . . . . . . . . . . . . . . . . . . . . . . . . . . . . . . . . . . . . . . 613
Detach/Attach . . . . . . . . . . . . . . . . . . . . . . . . . . . . . . . . . . . . . . . . . . . . . . . . . . . . . . . . . . . . . . . . . . . . . . . . . 613
Disable/Enable Job Queues . . . . . . . . . . . . . . . . . . . . . . . . . . . . . . . . . . . . . . . . . . . . . . . . . . . . . . . . . . . . . . 616
Disable/Enable Triggers . . . . . . . . . . . . . . . . . . . . . . . . . . . . . . . . . . . . . . . . . . . . . . . . . . . . . . . . . . . . . . . . . 617
Disk Resize . . . . . . . . . . . . . . . . . . . . . . . . . . . . . . . . . . . . . . . . . . . . . . . . . . . . . . . . . . . . . . . . . . . . . . . . . . 618
Drop . . . . . . . . . . . . . . . . . . . . . . . . . . . . . . . . 619
Edit Data . . . . . . . . . . . . . . . . . . . . . . . . . . . . . . . . . . . . . . . . . . . . . . . . . . . . . . . . . . . . . . . . . . . . . . . . . . . 620
Error . . . . . . . . . . . . . . . . . . . . . . . . . . . . . . . . . . . . . . . . . . . . . . . . . . . . . . . . . . . . . . . . . . . . . . . . . . . . . . . . 620
Estimate Size . . . . . . . . . . . . . . . . . . . . . . . . . . . . . . . . . . . . . . . . . . . . . . . . . . . . . . . . . . . . . . . . . . . . . . . . . 621
Execute . . . . . . . . . . . . . . . . . . . . . . . . . . . . . . . . . . . . . . . . . . . . . . . . . . . . . . . . . . . . . . . . . . . . . . . . . . . . . . 622
Extract. . . . . . . . . . . . . . . . . . . . . . . . . . . . . . . . . . . . . . . . . . . . . . . . . . . . . . . . . . . . . . . . . . . . . . . . . . . . . . . 625
Extract Data as XML. . . . . . . . . . . . . . . . . . . . . . . . . . . . . . . . . . . . . . . . . . . . . . . . . . . . . . . . . . . . . . . . . . . . 626
Filter . . . . . . . . . . . . . . . . . . . . . . . . . . . . . . . . . . . . . . . . . . . . . . . . . . . . . . . . . . . . . . . . . . . . . . . . . . . . . . . . 626
Flush Cache . . . . . . . . . . . . . . . . . . . . . . . . . . . . . . . . . . . . . . . . . . . . . . . . . . . . . . . . . . . . . . . . . . . . . . . . . . 627
Free Packages . . . . . . . . . . . . . . . . . . . . . . . . . . . . . . . . . . . . . . . . . . . . . . . . . . . . . . . . . . . . . . . . . . . . . . . . 627
Free Plans. . . . . . . . . . . . . . . . . . . . . . . . . . . . . . . . . . . . . . . . . . . . . . . . . . . . . . . . . . . . . . . . . . . . . . . . . . . . 628
Generate Anonymous Block . . . . . . . . . . . . . . . . . . . . . . . . . . . . . . . . . . . . . . . . . . . . . . . . . . . . . . . . . . . . . . 628
Generating Packages, Procedures, and Statements from Tables and Views . . . . . . . . . . . . . . . . . 629
Grant Roles. . . . . . . . . . . . . . . . . . . . . . . . . . . . . . . . . . . . . . . . . . . . . . . . . . . . . . . . . . . . . . . . . . . . . . . . . . . 630
Index Constraint . . . . . . . . . . . . . . . . . . . . . . . . . . . . . . . . . . . . . . . . . . . . . . . . . . . . . . . . . . . . . . . . 631
Load Java . . . . . . . . . . . . . . . . . . . . . . . . . . . . . . . . . . . . . . . . . . . . . . . . . . . . . . . . . . . . . . . . . . . . . . . . . . . . 631
Lob Storage Definition . . . . . . . . . . . . . . . . . . . . . . . . . . . . . . . . . . . . . . . . . . . . . . . . . . . . . . . . . . . . . . . . . . 633
Lock . . . . . . . . . . . . . . . . . . . . . . . . . . . . . . . . . . . . . . . . . . . . . . . . . . . . . . . . . . . . . . . . . . . . . . . . . . . . . . . . 633
Modify Constraint . . . . . . . . . . . . . . . . . . . . . . . . . . . . . . . . . . . . . . . . . . . . . . . . . . . . . . . . . . . . . . . . . . . . . . 634
Move Log . . . . . . . . . . . . . . . . . . . . . . . . . . . . . . . . . . . . . . . . . . . . . . . . . . . . . . . . . . . . . . . . . . . . . . . . . . 635

CONTENTS >
EMBARCADERO TECHNOLOGIES > RAPID SQL USER GUIDE 9
Open . . . . . . . . . . . . . . . . . . . . . . . . . . . . . . . . . . . . . . . . . . . . . . . . . . . . . . . . . . . . . . . . . . . . . . . . . . . . . . . . 636
Package Editor . . . . . . . . . . . . . . . . . . . . . . . . . . . . . . . . . . . . . . . . . . . . . . . . . . . . . . . . . . . . . . . . . . . . . . . . 636
Partitioned Columns . . . . . . . . . . . . . . . . . . . . . . . . . . . . . . . . . . . . . . . . . . . . . . . . . . . . . . . . . . . . . . . . . . . . 637
Partition Editor. . . . . . . . . . . . . . . . . . . . . . . . . . . . . . . . . . . . . . . . . . . . . . . . . . . . . . . . . . . . . . . . . . . . . . . . . 637
Partition Upper Bound. . . . . . . . . . . . . . . . . . . . . . . . . . . . . . . . . . . . . . . . . . . . . . . . . . . . . . . . . . . . . . . . . . . 638
Paste Columns for Check Constraint . . . . . . . . . . . . . . . . . . . . . . . . . . . . . . . . . . . . . . . . . . . . . . . . . . . . . . 639
Place . . . . . . . . . . . . . . . . . . . . . . . . . . . . . . . . . . . . . . . . . . . . . . . . . . . . . . . . . . . . . . . . . . . . . . . . . . . . . . . 640
Preview: Create . . . . . . . . . . . . . . . . . . . . . . . . . . . . . . . . . . . . . . . . . . . . . . . . . . . . . . . . . . . . . . . . . . . . . . . 641
Preview . . . . . . . . . . . . . . . . . . . . . . . . . . . . . . . . . . . . . . . . . . . . . . . . . . . . . . . . . . . . . . . . . . . . . . . . . . . . 641
Quiesce Tablespaces . . . . . . . . . . . . . . . . . . . . . . . . . . . . . . . . . . . . . . . . . . . . . . . . . . . . . . . . . . . . . . . . . . . 642
Reassign by Category. . . . . . . . . . . . . . . . . . . . . . . . . . . . . . . . . . . . . . . . . . . . . . . . . . . . . . . . . . . . . . . . . . . 643
Rebind Packages . . . . . . . . . . . . . . . . . . . . . . . . . . . . . . . . . . . . . . . . . . . . . . . . . . . . . . . . . . . . . . . . . . . 644
Rebind Plans. . . . . . . . . . . . . . . . . . . . . . . . . . . . . . . . . . . . . . . . . . . . . . . . . . . . . . . . . . . . . . . . . . . . . . . . . . 645
Rebuild Indexes . . . . . . . . . . . . . . . . . . . . . . . . . . . . . . . . . . . . . . . . . . . . . . . . . . . . . . . . . . . . . . . . . . . . 646
Rebuild Outlines . . . . . . . . . . . . . . . . . . . . . . . . . . . . . . . . . . . . . . . . . . . . . . . . . . . . . . . . . . . . . . . . . . . . . . . 648
Recompile . . . . . . . . . . . . . . . . . . . . . . . . . . . . . . . . . . . . . . . . . . . . . . . . . . . . . . . . . . . . . . . . . . . . . . . . . . . 648
Redistribute . . . . . . . . . . . . . . . . . . . . . . . . . . . . . . . . . . . . . . . . . . . . . . . . . . . . . . . . . . . . . . . . . . . . . . . . . . 649
Refresh Summary Table . . . . . . . . . . . . . . . . . . . . . . . . . . . . . . . . . . . . . . . . . . . . . . . . . . . . . . . . . . . . . . . . . 649
Rename . . . . . . . . . . . . . . . . . . . . . . . . . 650
Reorganize . . . . . . . . . . . . . . . . . . . . . . . . . . . . . . . . . . . . . . . . . . . . . . . . . . . . . . . . . . . . . . . . . . . . . . . . . . . 652
Report . . . . . . . . . . . . . . . . . . . . . . . . . . . . . . . . . . . . . . . . . . . . . . . . . . . . . . . . . . . . . . . . . . . . . . . . . 656
Restart. . . . . . . . . . . . . . . . . . . . . . . . . . . . . . . . . . . . . . . . . . . . . . . . . . . . . . . . . . . . . . . . . . . . . . . . . . . . . . . 657
Revoke Role . . . . . . . . . . . . . . . . . . . . . . . . . . . . . . . . . . . . . . . . . . . . . . . . . . . . . . . . . . . . . . . . . . . . . . . . . . 658
Select * From . . . . . . . . . . . . . . . . . . . . . . . . . . . . . . . . . . . . . . . . . . . . . . . . . . . . . . . . . . . . . . . . . . . . . . . . . 659
Set Online/Offline . . . . . . . . . . . . . . . . . . . . . . . . . . . . . . . . . . . . . . . . . . . . . . . . . . . . . . . . . . . . . . . . . . 659
Set Tablespaces Quota . . . . . . . . . . . . . . . . . . . . . . . . . . . . . . . . . . . . . . . . . . . . . . . . . . . . . . . . . . . . . . . . . 660
Set UNDO Tablespace . . . . . . . . . . . . . . . . . . . . . . . . . . . . . . . . . . . . . . . . . . . . . . . . . . . . . . . . . . . . . . . . . . 661
Shrink . . . . . . . . . . . . . . . . . . . . . . . . . . . . . . . . . . . . . . . . . . . . . . . . . . . . . . . . . . . . . . . . . . . . . . . . . . . . . 662
Status . . . . . . . . . . . . . . . . . . . . . . . . . . . . . . . . . . . . . . . . . . . . . . . . . . . . . . . . . . . . . . . . . . . . . . . . . 663
Summary Definition. . . . . . . . . . . . . . . . . . . . . . . . . . . . . . . . . . . . . . . . . . . . . . . . . . . . . . . . . . . . . . . . . . . . . 666
Switch Online . . . . . . . . . . . . . . . . . . . . . . . . . . . . . . . . . . . . . . . . . . . . . . . . . . . . . . . . . . . . . . . . . . . . . . . . . 666
Truncate . . . . . . . . . . . . . . . . . . . . . . . . . . . . . . . . . . . . . . . . . . . . . . . . . . . . . . . . . . . . . . . . . . . . . . . . . . . . 667
Update Statistics . . . . . . . . . . . . . . . . . . . . . . . . . . . . . . . . . . . . . . . . . . . . . . . . . . . . . . . . . . . . . . . . . . . . . . . 671
SQL Scripting . . . . . . . . . . . . . . . . . . . . . . . . . . . . . . . . . . . . . . . . . . . . . . . . . . . . . . . . . . . . . . . . . . . . . . . . 676
ISQL Editor . . . . . . . . . . . . . . . . . . . . . . . . . . . . . . . . . . . . . . . . . . . . . . . . . . . . . . . . . . . . . . 676
Results Editor . . . . . . . . . . . . . . . . . . . . . . . . . . . . . . . . . . . . . . . . . . . . . . . . . . . . . . . . . . . . . . . . . . . . . . . . . 711
Permissions Management . . . . . . . . . . . . . . . . . . . . . . . . . . . . . . . . . . . . . . . . . . . . . . . . . . . . 725
Explicit Permissions . . . . . . . . . . . . . . . . . . . . . . . . . . . . . . . . . . . . . . . . . . . . . . . . . . . . . . . . . . . . . . . . . . . . 726
Cascading Permissions. . . . . . . . . . . . . . . . . . . . . . . . . . . . . . . . . . . . . . . . . . . . . . . . . . . . . . . . . . . . . . . . . . 726
Using Roles to Grant Permissions and Privileges. . . . . . . . . . . . . . . . . . . . . . . . . . . . . . . . . . . . . . . . . . . . . . 726

CONTENTS >
EMBARCADERO TECHNOLOGIES > RAPID SQL USER GUIDE 10
Using Roles to Revoke Permissions and Privileges . . . . . . . . . . . . . . . . . . . . . . . . . . . . . . . . . . . . . . . . . . . . 726
Grant Privilege(s) To . . . . . . . . . . . . . . . . . . . . . . . . . . . . . . . . . . . . . . . . . . . . . . . . . . . . . . . . . . . 727
Revoke Privilege(s) From . . . . . . . . . . . . . . . . . . . . . . . . . . . . . . . . . . . . . . . . . . . . . . . . . . . . . . . . . . . . . . 728
Deny Privileges From . . . . . . . . . . . . . . . . . . . . . . . . . . . . . . . . . . . . . . . . . . . . . . . . . . . . . . . . . . . . . . . . . . . 728
Project Management. . . . . . . . . . . . . . . . . . . . . . . . . . . . . . . . . . . . . . . . . . . . . . . . . . . . . . . . . . . . . . . . . . . . . . . 728
Create a New Project . . . . . . . . . . . . . . . . . . . . . . . . . . . . . . . . . . . . . . . . . . . . . . . . . . . . . . . . . . . . . . . . . . . 729
Working with Projects . . . . . . . . . . . . . . . . . . . . . . . . . . . . . . . . . . . . . . . . . . . . . . . . . . . . . . . . . . . . . . . . . . . 736
Version Control . . . . . . . . . . . . . . . . . . . . . . . . . . . . . . . . . . . . . . . . . . . . . . . . . . . . . . . . . . . . . . . . . . . . . . . . . . . 748
Version Control Integration . . . . . . . . . . . . . . . . . . . . . . . . . . . . . . . . . . . . . . . . . . . . . . . . . . . . . . . . . . . . . . . 749
Version Control Configuration. . . . . . . . . . . . . . . . . . . . . . . . . . . . . . . . . . . . . . . . . . . . . . . . . . . . . . . . . . . . . 750
Using Version Control. . . . . . . . . . . . . . . . . . . . . . . . . . . . . . . . . . . . . . . . . . . . . . . . . . . . . . . . . . . . . . . . . . . 753
Tools . . . . . . . . . . . . . . . . . . . . . . . . . . . . . . . . . . . . . . . . . . . . . . . . . . . . . . . . . . . . . . . . . . . . . . . . . . . . . . . . . . . . . . 767
Find in Files. . . . . . . . . . . . . . . . . . . . . . . . . . . . . . . . . . . . . . . . . . . . . . . . . . . . . . . . . . . . . . . . . . . . . . . . . . . . . . 769
Database Search . . . . . . . . . . . . . . . . . . . . . . . . . . . . . . . . . . . . . . . . . . . . . . . . . . . . . . . . . . . . . . . . . . . . . . . . . 769
Database Search Wizard - Panel 1. . . . . . . . . . . . . . . . . . . . . . . . . . . . . . . . . . . . . . . . . . . . . . . . . . . . . . . . . 770
Database Search Wizard - Panel 2. . . . . . . . . . . . . . . . . . . . . . . . . . . . . . . . . . . . . . . . . . . . . . . . . . . . . . . . . 770
Database Search Results . . . . . . . . . . . . . . . . . . . . . . . . . . . . . . . . . . . . . . . . . . . . . . . . . . . . . . . . . . . . . . . . 771
Script Execution Facility . . . . . . . . . . . . . . . . . . . . . . . . . . . . . . . . . . . . . . . . . . . . . . . . . . . . . . . . . . . . . . . . . . . . 771
File Execution Facility. . . . . . . . . . . . . . . . . . . . . . . . . . . . . . . . . . . . . . . . . . . . . . . . . . . . . . . . . . . . . . . . . . . . . . 771
Completing the Script/File Execution Facility . . . . . . . . . . . . . . . . . . . . . . . . . . . . . . . . . . . . . . . . . . . . . . . . . 772
Script Execution Facility - Script Tab . . . . . . . . . . . . . . . . . . . . . . . . . . . . . . . . . . . . . . . . . . . . . . . . . . . . 772
File Execution Facility - Files Tab . . . . . . . . . . . . . . . . . . . . . . . . . . . . . . . . . . . . . . . . . . . . . . . . . . . . . . . . . 772
File/Script Execution Facility - Target Tab . . . . . . . . . . . . . . . . . . . . . . . . . . . . . . . . . . . . . . . . . . . . . . . . . . . 773
File/Script Execution Facility - Output Tab . . . . . . . . . . . . . . . . . . . . . . . . . . . . . . . . . . . . . . . . . . . . . . . . . . . 773
File/Script Execution Facility - Notify Tab . . . . . . . . . . . . . . . . . . . . . . . . . . . . . . . . . . . . . . . . . . . . . . . . . . . . 774
Scheduling . . . . . . . . . . . . . . . . . . . . . . . . . . . . . . . . . . . . . . . . . . . . . . . . . . . . . . . . . . . . . . . . . . . . . . . . 774
Embarcadero Job Scheduler . . . . . . . . . . . . . . . . . . . . . . . . . . . . . . . . . . . . . . . . . . . . . . . . . . . . . . . . . . . . . 775
Microsoft Task Scheduler . . . . . . . . . . . . . . . . . . . . . . . . . . . . . . . . . . . . . . . . . . . . . . . . . . . . . . . . . . . . . . . . 776
Scheduling a Job. . . . . . . . . . . . . . . . . . . . . . . . . . . . . . . . . . . . . . . . . . . . . . . . . . . . . . . . . . . . . . . . . . . . . . . 777
ETSQLX Command Line Utility. . . . . . . . . . . . . . . . . . . . . . . . . . . . . . . . . . . . . . . . . . . . . . . . . . . . . . . . . . . . 777
Visual Difference . . . . . . . . . . . . . . . . . . . . . . . . . . . . . . . . . . . . . . . . . . . . . . . . . . . . . . . . . . . . . . . . . . . . . . . . . 777
Comparing Files . . . . . . . . . . . . . . . . . . . . . . . . . . . . . . . . . . . . . . . . . . . . . . . . . . . . . . . . . . . . . . . . . . . . . . . 778
Comparing Database Objects . . . . . . . . . . . . . . . . . . . . . . . . . . . . . . . . . . . . . . . . . . . . . . . . . . . . . . . . . . . 779
Navigating in the Visual Difference Dialog Box. . . . . . . . . . . . . . . . . . . . . . . . . . . . . . . . . . . . . . . . . . . . . . . . 779
Printing a Pane of the Visual Difference Dialog Box. . . . . . . . . . . . . . . . . . . . . . . . . . . . . . . . . . . . . . . . . . . . 779
Searching in the Visual Difference Dialog Box . . . . . . . . . . . . . . . . . . . . . . . . . . . . . . . . . . . . . . . . . . . . . . . . 780
Setting Options in the Visual Difference Dialog Box . . . . . . . . . . . . . . . . . . . . . . . . . . . . . . . . . . . . . . . . . . . 780
Query Builder . . . . . . . . . . . . . . . . . . . . . . . . . . . . . . . . . . . . . . . . . . . . . . . . . . . . . . . . . . . . . . . . . . . . . . . . . . 781
Query Builder Design . . . . . . . . . . . . . . . . . . . . . . . . . . . . . . . . . . . . . . . . . . . . . . . . . . . . . . . . . . . . . . . . . . . 782

CONTENTS >
EMBARCADERO TECHNOLOGIES > RAPID SQL USER GUIDE 11
Using Query Builder . . . . . . . . . . . . . . . . . . . . . . . . . . . . . . . . . . . . . . . . . . . . . . . . . . . . . . . . . . . . . . . . . . . . 790
Data Editor . . . . . . . . . . . . . . . . . . . . . . . . . . . . . . . . . . . . . . . . . . . . . . . . . . . . . . . . . . . . . . . . . . . . . . . . . . . . . 817
Data Editor Design . . . . . . . . . . . . . . . . . . . . . . . . . . . . . . . . . . . . . . . . . . . . . . . . . . . . . . . . . . . . . . . . . . . . . 817
Code Generation Facility . . . . . . . . . . . . . . . . . . . . . . . . . . . . . . . . . . . . . . . . . . . . . . . . . . . . . . . . . . . . . . . . . 824
Import Data . . . . . . . . . . . . . . . . . . . . . . . . . . . . . . . . . . . . . . . . . . . . . . . . . . . . . . . . . . . . . . . . . . . . . . . . . . . . . . 826
Import Data Wizard - Panel 1 . . . . . . . . . . . . . . . . . . . . . . . . . . . . . . . . . . . . . . . . . . . . . . . . . . . . . . . . . . . . . 827
Import Data Wizard - Panel 2 for Text Files . . . . . . . . . . . . . . . . . . . . . . . . . . . . . . . . . . . . . . . . . . . . . . . . . . 827
Import Data Wizard - Panel 3 for Text Files . . . . . . . . . . . . . . . . . . . . . . . . . . . . . . . . . . . . . . . . . . . . . . . . . . 827
Import Data Wizard - Panel 2 for Excel Files . . . . . . . . . . . . . . . . . . . . . . . . . . . . . . . . . . . . . . . . . . . . . . . . . 827
Embarcadero Products. . . . . . . . . . . . . . . . . . . . . . . . . . . . . . . . . . . . . . . . . . . . . . . . . . . . . . . . . . . . . . . . . . . . . 828
Code Workbench . . . . . . . . . . . . . . . . . . . . . . . . . . . . . . . . . . . . . . . . . . . . . . . . . . . . . . . . . . . . . . . . . . . . . . . 828
Code Workbench Tutorial . . . . . . . . . . . . . . . . . . . . . . . . . . . . . . . . . . . . . . . . . . . . . . . . . . . . . . . . . . . . . . . . 830
Using Column Auto Lookup in the ISQL Window . . . . . . . . . . . . . . . . . . . . . . . . . . . . . . . . . . . . . . . . . . . . . . 831
Creating and Modifying Code Workbench Code Templates. . . . . . . . . . . . . . . . . . . . . . . . . . . . . . . . . . . . . . 832
Defining the Hot Key for the Code Templates Dialog Box . . . . . . . . . . . . . . . . . . . . . . . . . . . . . . . . . . . . . . . 832
Using Code Templates in the ISQL Window. . . . . . . . . . . . . . . . . . . . . . . . . . . . . . . . . . . . . . . . . . . . . . . . . . 832
Creating and Modifying Code Workbench Auto Replace Shortcuts . . . . . . . . . . . . . . . . . . . . . . . . . . . . . . . . 833
Using Code Workbench Auto Replace Shortcuts in the ISQL Window. . . . . . . . . . . . . . . . . . . . . . . . . . . . . . 833
Importing and Exporting Settings in Code Workbench . . . . . . . . . . . . . . . . . . . . . . . . . . . . . . . . . . . . . . . . . . 833
Code Analyst . . . . . . . . . . . . . . . . . . . . . . . . . . . . . . . . . . . . . . . . . . . . . . . . . . . . . . . . . . . . . . . . . . . . . . . . 834
Code Analyst DBMS Notes. . . . . . . . . . . . . . . . . . . . . . . . . . . . . . . . . . . . . . . . . . . . . . . . . . . . . . . . . . . . . . . 835
Code Analyst Requirements . . . . . . . . . . . . . . . . . . . . . . . . . . . . . . . . . . . . . . . . . . . . . . . . . . . . . . . . . . . . . . 837
Installing Code Analyst . . . . . . . . . . . . . . . . . . . . . . . . . . . . . . . . . . . . . . . . . . . . . . . . . . . . . . . . . . . . . . . . . . 838
Uninstalling Code Analyst . . . . . . . . . . . . . . . . . . . . . . . . . . . . . . . . . . . . . . . . . . . . . . . . . . . . . . . . . . . . . . . . 839
Code Analyst Product Design . . . . . . . . . . . . . . . . . . . . . . . . . . . . . . . . . . . . . . . . . . . . . . . . . . . . . . . . . . . . . 839
Code Analyst Tutorial . . . . . . . . . . . . . . . . . . . . . . . . . . . . . . . . . . . . . . . . . . . . . . . . . . . . . . . . . . . . . . . . . . . 842
Using the Code Analyst. . . . . . . . . . . . . . . . . . . . . . . . . . . . . . . . . . . . . . . . . . . . . . . . . . . . . . . . . . . . . . . . . . 846
Rapid SQL Add-On Tools . . . . . . . . . . . . . . . . . . . . . . . . . . . . . . . . . . . . . . . . . . . . . . . . . . . . . . . . . . . . . . . . . . . . . . 854
Embarcadero SQL Debugger for IBM DB2 UDB for Linux, Unix, and Windows . . . . . . . . . . . . . . . . . . . . . . . . . 854
Embarcadero SQL Debugger for IBM DB2 UDB for Linux, Unix, and Windows Features . . . . . . . . . . . . . . . 854
Embarcadero SQL Debugger for IBM DB2 UDB for Linux, Unix, and Windows Interface . . . . . . . . . . . . . . . 857
Embarcadero SQL Debugger for IBM DB2 UDB for Linux, Unix, and Windows Functionality . . . . . . . . . . . . 861
Using the Embarcadero SQL Debugger for IBM DB2 UDB for Linux, Unix, and Windows. . . . . . . . . . . . . . . 868
Embarcadero SQL Debugger for Microsoft SQL Server. . . . . . . . . . . . . . . . . . . . . . . . . . . . . . . . . . . . . . . . . . . . 870
Embarcadero SQL Debugger for Microsoft Features . . . . . . . . . . . . . . . . . . . . . . . . . . . . . . . . . . . . . . . . . . . 871
Embarcadero SQL Debugger for Microsoft Interface . . . . . . . . . . . . . . . . . . . . . . . . . . . . . . . . . . . . . . . . . . . 876
Embarcadero SQL Debugger for Microsoft Functionality . . . . . . . . . . . . . . . . . . . . . . . . . . . . . . . . . . . . . . . . 879
Using the Embarcadero SQL Debugger for Microsoft. . . . . . . . . . . . . . . . . . . . . . . . . . . . . . . . . . . . . . . . . . . 886
Debugging a Sample Script . . . . . . . . . . . . . . . . . . . . . . . . . . . . . . . . . . . . . . . . . . . . . . . . . . . . . . . . . . . . . . 888

CONTENTS >
EMBARCADERO TECHNOLOGIES > RAPID SQL USER GUIDE 12
Embarcadero SQL Debugger for Oracle. . . . . . . . . . . . . . . . . . . . . . . . . . . . . . . . . . . . . . . . . . . . . . . . . . . . . . . . 896
Debugging Features . . . . . . . . . . . . . . . . . . . . . . . . . . . . . . . . . . . . . . . . . . . . . . . . . . . . . . . . . . . . . . . . . . . . 897
Embarcadero SQL Debugger for Oracle Interface . . . . . . . . . . . . . . . . . . . . . . . . . . . . . . . . . . . . . . . . . . . . . 899
Embarcadero SQL Debugger for Oracle Functionality . . . . . . . . . . . . . . . . . . . . . . . . . . . . . . . . . . . . . . . . . . 901
Using the Embarcadero SQL Debugger for Oracle. . . . . . . . . . . . . . . . . . . . . . . . . . . . . . . . . . . . . . . . . . . . . 909
Debugging a Sample Script . . . . . . . . . . . . . . . . . . . . . . . . . . . . . . . . . . . . . . . . . . . . . . . . . . . . . . . . . . . . . . 910
Embarcadero SQL Debugger for Sybase ASE. . . . . . . . . . . . . . . . . . . . . . . . . . . . . . . . . . . . . . . . . . . . . . . . . . . 919
Embarcadero SQL Debugger for Sybase Features . . . . . . . . . . . . . . . . . . . . . . . . . . . . . . . . . . . . . . . . . . . . 920
Embarcadero SQL Debugger for Sybase Interface . . . . . . . . . . . . . . . . . . . . . . . . . . . . . . . . . . . . . . . . . . . . 921
Embarcadero SQL Debugger for Sybase Functionality . . . . . . . . . . . . . . . . . . . . . . . . . . . . . . . . . . . . . . . . . 924
Using Embarcadero SQL Debugger for Sybase . . . . . . . . . . . . . . . . . . . . . . . . . . . . . . . . . . . . . . . . . . . . . . . 931
Rapid SQL PL/SQL Profiler . . . . . . . . . . . . . . . . . . . . . . . . . . . . . . . . . . . . . . . . . . . . . . . . . . . . . . . . . . . . . . . . . 933
Setting Up Rapid SQL PL/SQL Profiler. . . . . . . . . . . . . . . . . . . . . . . . . . . . . . . . . . . . . . . . . . . . . . . . . . . . . . 934
Rapid SQL PL/SQL Profiler Explorer . . . . . . . . . . . . . . . . . . . . . . . . . . . . . . . . . . . . . . . . . . . . . . . . . . . . . . . 934
Rapid SQL PL/SQL Profiler Functionality . . . . . . . . . . . . . . . . . . . . . . . . . . . . . . . . . . . . . . . . . . . . . . . . . . . . 934
Using Rapid SQL PL/SQL Profiler . . . . . . . . . . . . . . . . . . . . . . . . . . . . . . . . . . . . . . . . . . . . . . . . . . . . . . . . . 940
Index. . . . . . . . . . . . . . . . . . . . . . . . . . . . . . . . . . . . . . . . . . . . . . . . . . . . . . . . . . . . . . . . . . . . . . . . . . . . . . . . . . . . . . 946

EMBARCADERO TECHNOLOGIES > BOOKNAMEVARIABLE 13
Welcome to Rapid SQL
Rapid SQL is an integrated cross-platform database development environment that provides a highly-intuitive and
well-integrated interface. Its graphical facilities simplify SQL scripting, object management, reverse-engineering,
database project management, version control, and schema deployment. Additionally, it provides comprehensive tools
for tuning and editing code to ensure high-performance and quality.
Rapid SQL offers support for all major databases including IBM DB2, Microsoft SQL Server, MySQL, Oracle, and
Sybase.
Technical Requirements
Rapid SQL is a 32-bit application that runs in a Microsoft Windows environment. Before using Rapid SQL, ensure that
your environment meets the following requirements:
Hardware Requirements
Embarcadero Technologies recommends the following minimum hardware requirements:
• 128 MB of memory
• 125 MB of disk space
Operating System Requirements
Rapid SQL supports the following Windows versions:
• Windows 2000 with Microsoft Internet Explorer 5.5 or later
• Windows XP Pro
Database
The table below describes the database platforms Rapid SQL supports and the server and client requirements:
Platform Server Client
IBM DB2 z/OS IBM DB2 z/OS 7 and 8 When going through a DB2 Connect gateway,
DB2 UDB Client for Windows 6.0 or later.
When going directly to the mainframe from
the client, DB2 Connect Personal Edition v6
or higher on the client machine.
IBM DB2 LUW IBM DB2 LUW 8 and 9 IBM DB2 UDB Client for Windows 7.0 or later.
NOTE: When using a v8 client, Rapid SQL
only supports connecting to a v8 Database on
Windows, Linux and Unix.
Microsoft SQL Server Microsoft SQL 2000 and 2005 Microsoft SQL Server Client Library
MySQL MySQL 4 MySQL ODBC driver 3.5.1 and above
Oracle Oracle 8i, 9i, and 10g Oracle SQL*Net Client
Sybase Sybase System 12.5 and 15 Sybase Open Client

WELCOME TO RAPID SQL > LICENSING RAPID SQL
EMBARCADERO TECHNOLOGIES > BOOKNAMEVARIABLE 14
Licensing Rapid SQL
Rapid SQL includes a trial period in which the application can be used without a license. To use Rapid SQL after the
trial period, a license must be obtained. It is recommended that you license the application as soon as possible, in
order to continue to use Rapid SQL without interruption once the trial period has passed.
For more information on licensing Rapid SQL, see the Rapid SQL Installation Guide.
Additional Product Resources
The Embarcadero Web site is an excellent source for additional product information, including white papers, articles,
FAQs, discussion groups, and the Embarcadero Knowledge Base.
Go to www.embarcadero.com/support
, or click any of the links below, to find:
• Documentation
• Online Demos
• Technical Papers
• Discussion Forums
• Knowledge Base
Embarcadero Technologies Technical Support
If you have a valid maintenance contract with Embarcadero Technologies, the Embarcadero Technical Support team
is available to assist you with any problems you have with our applications. Our maintenance contract also entitles
registered users of Embarcadero Technologies’ products to download free software upgrades during the active
contract period.
To save you time, Embarcadero Technologies maintains a Knowledge Base of commonly-encountered issues and
hosts Discussion Forums that allow users to discuss their experiences using our products and any quirks they may
have discovered.
To speak directly with Embarcadero Technical Support, see Contacting Embarcadero Technologies Technical Support
below.
NOTE: Evaluators receive free technical support for the term of their evaluation (14 days).
Contacting Embarcadero Technologies Technical Support
When contacting Embarcadero Technologies Technical Support please provide the following to ensure swift and
accurate service:
Personal Information
•Name
• Company name and address
• Telephone number
• Fax number
• Email address

WELCOME TO RAPID SQL > EMBARCADERO TECHNOLOGIES TECHNICAL SUPPORT
EMBARCADERO TECHNOLOGIES > BOOKNAMEVARIABLE 15
Product and System Information
• Embarcadero product name and version number. This information is found under Help, About.
• Your client operation system and version number.
• Your database and version number.
Problem Description
A succinct but complete description of the problem is required. If you are contacting us by telephone, please have the
above information, including any error messages, available so that an Embarcadero Technical Support Engineer can
reproduce the error and clearly understand the problem.
There are three ways to contact Embarcadero’s Technical Support department:
• Via the Web
•Via Phone
•Via Email
Via the Web
Embarcadero Technical Support provides an online form that lets you open a Support case via the Web. To access
this form, go to http://www.embarcadero.com/support/open_case.jsp.
We normally acknowledge the receipt of every case on the same day, depending on the time of submission.
Via Phone
United States
Embarcadero Technologies Technical Support phone number is (415) 834-3131 option 2 and then follow the prompts.
The hours are Monday through Friday, 6:00 A.M. to 6:00 P.M. Pacific time.
For licensing issues, including Product Unlock Codes, call (415) 834-3131 option 2 and then follow the prompts. The
hours are Monday through Friday, 6:00 A.M. to 6:00 P.M. Pacific time.
The Embarcadero Technologies Technical Support fax number is (415) 495-4418.
EMEA
Embarcadero Technologies Technical Support phone number is +44 (0)1628 684 499. The hours are Monday to
Friday, 9 A.M. to 5:30 P.M. U.K. time.
For licensing issues, including Product Unlock Codes, call +44 (0)1628-684 494. The hours are Monday to Friday, 9
A.M. to 5:30 P.M. U.K. time
The Embarcadero Technologies Technical Support fax number is +44 (0)1628 684 401.
Via Email
United States
Depending on your needs, send your email to one of the following:
- Get technical support for users and evaluators
- Request upgrade information
- Request a product key
- Make a suggestion about one of our products
EMEA

WELCOME TO RAPID SQL > EMBARCADERO TECHNOLOGIES TECHNICAL SUPPORT
EMBARCADERO TECHNOLOGIES > BOOKNAMEVARIABLE 16
Depending on your needs, send your email to one of the following:
• uk.support@embarcadero.com
- Get technical support for users and evaluators
• uk.upgrade@embarcadero.com
- Request upgrade information
- Request a product key
- Make a suggestion about one of our products

RAPID SQL TUTORIAL > ABOUT THIS TUTORIAL
EMBARCADERO TECHNOLOGIES > BOOKNAMEVARIABLE 17
Rapid SQL Tutorial
Embarcadero Rapid SQL® is an integrated development environment that enables developers to create, edit, version,
tune, and deploy server-side objects residing on Microsoft® SQL Server, Oracle®, Sybase Adaptive Server®, IBM®
UDB DB2®, and IBM® DB2® for OS/390® databases. Its unified database development environment provides
extensive graphical facilities that simplify SQL scripting, object management, reverse engineering, database project
management, version control, and schema deployment. With Rapid SQL, programmers can develop and maintain
high-quality, high-performance client/server and Web-based applications in less time, and with greater accuracy.
About This Tutorial
This tutorial is intended to help you get started using Embarcadero Rapid SQL.
After completing this tutorial, you will have the foundation you need to explore the many features of Rapid SQL. You
will have learned how to register and connect cross-platform datasources; navigate the database Explorer; work with
the individual object browsers, editors, and wizards; build and manage projects; and leverage many of the
productivity-focused features offered throughout Rapid SQL. Rapid SQL allows you to concentrate more on what
needs to be done and less on how it should be done.
This tutorial is divided into six sessions. Do them all at once, or complete them individually as you have time.
•
Session 1: Getting Started with Rapid SQL
• Session 2: Productivity Enhancers
• Session 3: Database Object Management Made Easy
• Session 4: Building a Database Project
• Session 5: Visual Query Builder and Data Editor
• Session 6: SQL Debugging and Profiling
You can use this tutorial as a road map of product highlights, and to help familiarize yourself with key product features.
Once you begin, select Help from the Toolbar to browse additional online help resources, including documentation
that complements and builds upon the activities outlined in this tutorial.
Session 1: Getting Started with Rapid SQL
Download and Install
You can obtain the latest version of the Rapid SQL software from the Embarcadero Web site at
www.embarcadero.com
.
Click Download and follow the steps as indicated. Save the executable file to your local machine and double-click it to
launch the self-extracting program to guide you through the Rapid SQL installation process.
When you first install an evaluation copy of Rapid SQL, you can use it for 14 days. After that time a permanent license
is required.

RAPID SQL TUTORIAL > SESSION 1: GETTING STARTED WITH RAPID SQL
EMBARCADERO TECHNOLOGIES > BOOKNAMEVARIABLE 18
Overview
Rapid SQL allows you to view and manage datasources via the Database Explorer. The Database Explorer enables
navigation between different datasource platforms from the same window. Additionally, the Rapid SQL environment
enables multiple workspaces to be opened at the same time, allowing you to work while application processes run in
the background.
Start Rapid SQL
1 On the Start menu, navigate to Programs, Embarcadero Rapid SQL 7.5.0, and select Rapid SQL.
The first time Rapid SQL starts, a dialog appears prompting a search for pre-existing datasources that have
been registered in other Embarcadero applications. Selecting Yes prompts Rapid SQL to search and locate any
datasources defined in the datasource catalog (defined on the machine identified in the Options field). For the
purposes of this tutorial, select No.
2 Click OK to continue.
Rapid SQL provides a feature that automatically searches the DBMS configurations on the network or installation
machine and finds datasources residing on the system that are not currently registered. The Discover Datasources
dialog contains a list of these datasources that includes the name of the datasource server or instance, and the type of
DBMS. Use the Discover Datasources dialog to register datasources in Rapid SQL.
Registering Cross-Platform Datasources
Datasource registration is performed via the Datasource Registration Wizard. It opens automatically via the
Discover Datasources dialog (when you click OK), and can also be opened manually from Rapid SQL’s Main Menu.
(Datasource>Register Datasource.)
Registering a Datasource
Rapid SQL provides the same interface for IBM DB2, Microsoft SQL Server, Oracle, Sybase, and ODBC datasource
registration. Each datasource’s connection information and log on details only need to be set up once per datasource
instance. This connection information can be saved locally, or in a common datasource catalog for use in other
Embarcadero products requiring datasource registration.
You can configure Embarcadero products to use a datasource catalog stored in the system registry of your machine
(locally), or use a datasource catalog located in the registry of a remote machine. This capability provides the ability to
easily share datasource catalogs among multiple users and workstations, and creates a highly-maintainable
development environment.
All Embarcadero database management products share the datasource catalog. You can set up your datasource
catalog using one product (such as Rapid SQL), and the same list of datasource will be made available in other
Embarcadero Technologies products. Any changes you make to the datasource catalog are reflected in all
Embarcadero database management products.
To register a Microsoft SQL Server datasource
1 On the first panel of the Datasource Registration Wizard, enter the appropriate information in the fields
provided to define the datasource:
• In the What is the DBMS type? field, select Microsoft SQL Server.
• In the Specify a SQL*Net Connection String box, type or use the Browse button to specify the connection
string.
• In the Datasource Name text box, type SAMPLE_DATASOURCE.
Click Next to continue.

RAPID SQL TUTORIAL > SESSION 2: PRODUCTIVITY ENHANCERS
EMBARCADERO TECHNOLOGIES > BOOKNAMEVARIABLE 19
2 Enter the appropriate log on information in the fields provided:
• In the User ID field, type a valid user ID to log on to the datasource.
• In the Password field, type a valid password for the user ID defined in the User ID field.
• If you want to save and encrypt the password, choose Auto-Connect?
Click Next to continue.
3 In the Datasource Group tree, indicate where the datasource you are currently registering will sit, and click
Register to complete the Wizard. The datasource is registered with the instance of Rapid SQL, and it can now be
manipulated via the Rapid SQL interface.
Session 2: Productivity Enhancers
Database Object Management Made Easy
Rapid SQL provides the Database Explorer Tree to provide an easy and intuitive way to drill down into atomic
database objects. The Database Explorer Tree displays all registered datasources and serves as the entry-point to
much of Rapid SQL’s advanced functionality.
Viewing Datasources and Datasource Objects in the Explorer Tree
1 On the Explorer, select By Object Type.
The Explorer displays objects organized by type.
2 Navigate to SAMPLE_DATASOURCE, Databases, Pubs. The datasource objects for the database named
SAMPLE_DATASOURCE are displayed.
3 Expand the Tables node to view a list of table objects contained in the SAMPLE_DATASOURCE database.
Creating an Object Using the Object Creation Wizard
You can create database objects via Object Creation Wizards accessed from the Database Explorer.
The following steps provide an example on how to use the Table Object Creation Wizard to create a new Oracle table.
Using the Table Object Creation Wizard
1 On the Explorer, navigate to the Tables node of an Oracle datasource.
2 Right-click the Tables node and select New from the menu. The Table Object Creation Wizard appears.
3 Enter the appropriate information in the fields provided:
• In the Who Owns the Table? field, type in manually, or click Browse and navigate to define the target owner
of the table.
• In the What is the Name of the Table? field, type SAMPLE_TABLE.
• In the How do you want the table organized? field, select the target option.
Click Next to continue. Rapid SQL opens the Add Column dialog box.
•In the Column Name: field, add the column: sample_column1, char(5), and select the defaults for the rest of
the parameter definitions. Click Next. A generated script preview appears. This is standard for all
object-related scripts.

RAPID SQL TUTORIAL > SESSION 2: PRODUCTIVITY ENHANCERS
EMBARCADERO TECHNOLOGIES > BOOKNAMEVARIABLE 20
4 Click Execute. Rapid SQL builds the platform-specific SQL code.
NOTE: Rapid SQL build ccode syntactically-correct and ready to run the first time it is generated. Manual
coding is not required in any of the Object Creation Wizards.
Working With an Existing Object Using the Object Editor
Once an object is created, it can be modified via the same Object Editor. Object Editors perform modification
operations that would normally require painstaking and error-prone scripting, such as deleting or inserting columns in
a table while preserving data, dependencies, and permissions. Rapid SQL analyzes the database catalog to
determine its structure, and then automatically generates the appropriate SQL script required for the extended
alteration.
For example, when a full table alteration is required, Rapid SQL automatically unloads and reloads the data,
eliminating most of the tedious work a manual alteration would require.
When an object is created, Rapid SQL automatically opens an individual Object Editor for the newly-created object.
To modify an existing object
1 On the Explorer, navigate to the Tables node of the datasource defined previously and select the table you
created in the previous exercise.
2 Double-click the object.
OR
From the Command menu, select Open.
Rapid SQL opens the Table Object Editor and you can proceed to modify the selected object.
Object Documentation and Reporting
Rapid SQL can provide HTML reports for all database objects. The reports are automatically displayed in the Rapid
SQL application workspace, but can be saved as a new file, or referenced in the original file. All HTML reports are
browser-ready and suitable for posting directly to the Web.
To generate an HTML report
1 On the Explorer, open any datasource and navigate to the Tables node.
2 Right-click an object and select Report from the menu. The Report dialog appears.
3 Enter the appropriate information in the fields provided:
• In the Report Home Page File Name field, type the directory path and file name of the report manually, or
click Browse and navigate to the path and file name. This value supports network Web server paths.
• In the Report Title dialog, type the name of the report.
4 Click Execute. The HTML report is automatically generated to the path defined in the Report Home Page File
Name field in Step 3 and displayed in the Rapid SQL application workspace.
Working With Code, Files and Data
Rapid SQL provides many features and powerful development tools for creating and executing SQL code and working
with data. This section of the tutorial will provide a high-level functionality overview of the major development features
and tools within Rapid SQL.

RAPID SQL TUTORIAL > SESSION 2: PRODUCTIVITY ENHANCERS
EMBARCADERO TECHNOLOGIES > BOOKNAMEVARIABLE 21
Setting Environment Options
The Options Editor provides an interface for you to set Rapid SQL environment parameters to meet your
development requirements.
To set development environment parameters
1 On the main toolbar, select File>Options. The Options Editor dialog opens.
2 Click on the General Tab. General settings are displayed and modified by selecting them from the dropdown
menu or via the tabbed window.
3 Adjust the development parameters as required and click OK. The environment options are automatically applied
to all registered datasources.
Using the Favorites Tab
The Favorites Tab provides a drag-and-drop library interface of all supported DBMS syntax, SQL syntax, built-in
functions, optimizer hints, and SQL-conditional syntax. Additionally, it provides the ability to create custom folders to
store commonly-used code for quick and efficient access, as needed.
To open the Favorites Explorer
1 At the bottom of the Explorer pane, click Favorites. The Favorites Explorer appears.
2 Expand the Microsoft SQL Server node and select the Schema subnode.
3 Click the Procedures node and select Open. The selected code opens in the SQL Editor window and is ready for
execution.
To add a custom folder to the Favorites Explorer
1 Open the Favorites Explorer and right-click the Favorites folder.
2Select New Folder from the menu. A new folder is added to the bottom of the tree view.
To add an existing script to the Favorites Tab
1 In the SQL Editor window, open the target script and right-click anywhere on the workspace.
2Select Add to Favorites. The Favorite Properties dialog box opens.
3 Enter the appropriate information in the fields provided. The script is added to the Favorites Explorer.
NOTE: Code from the Paste SQL, Paste SQL Syntax, and Favorites Tab are available from any SQL
or DDL Editing window.
Working with Scripts and Files
Rapid SQL extends the auto-generation of SQL code by allowing you to run your scripts across multiple databases at
the same time. Additionally, Rapid SQL provides the option to execute code immediately, or schedule it to run later via
the Windows NT Event Scheduler or Embarcadero Job Scheduler.
Using the Script Execution Facility
1 On the Favorites Explorer, navigate to the Microsoft SQL Server node and select the Schema subnode.
2 Double-click the Procedures node.
3 On the Script Execution toolbar, click Script Execution Facility. The Script Execution Facility dialog box
appears.

RAPID SQL TUTORIAL > SESSION 2: PRODUCTIVITY ENHANCERS
EMBARCADERO TECHNOLOGIES > BOOKNAMEVARIABLE 22
4 Click the Target Tab and select the datasources against which the script will run.
5 Click the Output Tab and select a type of output format. For the purposes of this example, select Graphical
Output.
6 If you want to send a notification message indicating that the script has executed, click the Notify Tab and enter
the appropriate information in the fields provided.
7 Click Execute. Rapid SQL runs the script against the datasources specified on the Target Tab.
NOTE: Separate script output windows are created for each selected datasource.
Using the File Execution Facility
Similar to the Script Execution Facility, files containing SQL scripts can be added to the File Execution Facility and
executed immediately or scheduled to run later. Other than code’s origin, all supporting functionality is the same.
1 On the Tools toolbar, click File Execution Facility.
Rapid SQL opens the File Execution Facility dialog box.
2 To locate the file you want to execute, click Add.
3 On the Target Tab, select the datasources to run the script against.
4 On the Output Tab, and select the desired output option. For the purposes of this example, select Graphical
Output.
NOTE: To enable the scheduling function for the script, you must select the File Output option.
5 If you want to send notification that the script has executed, on the Notify Tab, complete the target information.
6 Click Execute.
Rapid SQL runs the script against the target datasources.
NOTE: Separate script output windows are created for each selected datasource.
Viewing Data
Rapid SQL provides several options for browsing data. In addition, it gives you the ability to construct even the most
complex SQL statements with point-and-click ease.
Select * Browsing (SQL Server Example)
1 On the Database Explorer, expand the MS SQL server node.
2 Expand any database, and then expand the pubs node.
3 Expand the Tables node, and right-click any table, and then click SELECT * FROM.
All columns and rows from the table are displayed in the active workspace.
Retaining Datasource Explorer View Settings
1 On the Explorer toolbar, select Retain View Setting.
The next time you open the Explorer, it will open just as you left it. All connections that were present when you closed
Rapid SQL will be reestablished.

RAPID SQL TUTORIAL > SESSION 3: SCRIPTING
EMBARCADERO TECHNOLOGIES > BOOKNAMEVARIABLE 23
Datasource Explorer Bookmarks
Rapid SQL allows you to set bookmarks for frequently visited database objects.
1 On the Datasource Explorer, right-click any node.
2Select Add Bookmark.
You can modify the bookmark name as desired.
After Bookmarks are defined you can use them to easily navigate to commonly used datasource resources via the
main menu Bookmarks item.
You can use the Bookmark Manager to maintain your Bookmarks.
1 From the main Toolbar, select Bookmarks, and then select the Bookmark Manager.
The Bookmark Manager dialog box opens where you can rename, move, and delete bookmarks.
Setting Keyboard Shortcuts and Hot Keys
1 In any open space above the Explorer, right-click.
A pop-up menu opens
2 From the pop-up menu, select Customize.
The Customize dialog box opens.
3 In the Customize dialog box, open the Keyboard Tab.
• The Keyboard Tab can be used to set Keyboard shortcut hot keys for all areas of Rapid SQL functionality.
Referencing Most Recently Used Datasources
1 From the File menu, select Recent Datasources, and then choose a datasource.
This will automatically place you on the datasource within the Explorer, ready to work with an active connection.
Session 3: Scripting
Generating Code
By providing several code generation and assistance options, Rapid SQL makes cross-platform development easy for
developers of all experience levels.
NOTE: The following examples build on the MS SQL Server SAMPLE_DATASOURCE registered earlier
in this tutorial. These examples can be applied to any registered datasource for any of the
supported platforms.
Code Generation Facility
The Code Generation Facility can be used to create complete procedures, functions or packages revolving around
views or tables.

RAPID SQL TUTORIAL > SESSION 3: SCRIPTING
EMBARCADERO TECHNOLOGIES > BOOKNAMEVARIABLE 24
To open the Code Generation Facility:
1 From the Tools toolbar, click Code Generation Facility.
Rapid SQL opens the Embarcadero Code Generator dialog box.
2 In the datasource list box, select the target datasource from the drop-down list.
3 In the database list box, select pubs.
4 In the Table/View pane, click Tables, and then select authors.
5 In the Select 1 or More Where Clause Columns box, select state.
6 In the Select 1 or More Output Columns box, select all columns.
7 In the Generate box, choose Select (this is the code option).
8 In the Provide an Output File Name, type or browse and locate a target file where you want to save the
generated script, and then click Open.
9 Click OK.
The DDL to create the procedure is generated and displayed in an editable window called the DDL Editor. You
can edit the name of the new procedure and any of the generated code at this time.
10 Name the new procedure sample_select_authors.
11 To submit the DDL and create the procedure, click Execute or Step Execute.
The indicated file will be saved on the selected directory.
NOTE: No SQL statement coding is required to generate complete stored procedures and packages. If
applicable, Rapid SQL allows all generated code to be previewed and edited to fit any
development need.
Right-Click Feature
Similar to the Code Generation Facility, the right-click code generation feature can be used to create complete
procedures, functions, or packages revolving around views or tables.
1 On the Database Explorer, expand the MS SQL server node.
2 Expand any database, and then expand the pubs node.
3 Expand the Tables node, and right-click the authors table.
4 From the pop-up list, select Generate, Procedure, and then Select.
5 In the Input Columns pane, select state.
6 In the Output Columns
pane, leave all output columns selected.
7 Click OK.
The DDL to create the procedure is generated and displayed in an editable window, called the DDL Editor. You
can edit the name of the new procedure and any of the generated code.
To submit the DDL and create the procedure, click Execute or Step Execute.
NOTE: No SQL statement coding is required to generate complete stored procedures and packages. If
applicable, Rapid SQL allows all generated code to be previewed and edited to fit any
development need.

EMBARCADERO TECHNOLOGIES > BOOKNAMEVARIABLE 25
Code Assistance
Rapid SQL provides extensive, easy-to-use code assistance features for all supported DBMS platforms, throughout
the application. Assistance is provided in the form of ready-to-use code templates and blocks of syntactically correct
code.
Paste SQL
1 On the Database Explorer, expand the MS SQL server node.
2 Expand any database, and then expand the pubs node.
3 To open a SQL Editor window, from the main toolbar, select File, New, and then SQL (Ctrl+N).
4 On the Edit toolbar, select Paste SQL.
The Paste SQL dialog box opens.
5 In the Tables pane, select the authors table.
6 In the Columns pane, select all columns.
7 In the Statement column, click Select as the generation option.
8 To copy the generated code to the SQL Editor workspace, click Paste Statement.
NOTE: You can use the statement as is, or modify the code as needed.
Paste SQL Syntax
1 On the Database Explorer, expand the MS SQL server node.
2 Expand any database, and then expand the pubs node.
3 To open a SQL Editor window, from the main toolbar, select File, New, and then SQL (Ctrl+N).
4 On the Edit toolbar, select Paste SQL.
The SQL Syntax for SQL Server dialog box opens.
5 In the SQL Statements: pane, click a target template.
The template syntax appears in the Syntax pane.
6 To copy the code into the SQL Editor workspace, click Paste.
NOTE: You can add your own code to complete the needed operation.
Session 4: Building a Database Project
Creating a New Rapid SQL Project
Rapid SQL provides an excellent team development environment that allows you to reverse engineer live database
objects into off-line SQL source code files that can then be easily added to a version control system (VCS). Rapid
SQL’s seamless VCS integration offers all version control operations, such as get, check-out, check-in, history, and
diff. The example below reverse engineers the table objects from the Microsoft SQL Server pubs database into a
Rapid SQL project, and then adds the project to version control using Microsoft Visual Source Safe.

RAPID SQL TUTORIAL > SESSION 4: BUILDING A DATABASE PROJECT
EMBARCADERO TECHNOLOGIES > BOOKNAMEVARIABLE 26
To create a new project:
1 On the main toolbar, select File, New, and then Project.
The New Project dialog box opens.
2 In the Name text box, type sample_project.
3 In the Location text box, type or browse and locate a directory that contains a VSS database.
4 Optionally, enter a description.
5 Under Initialize New Project, select From Database.
6 Click OK.
The New Project Reverse Engineering Wizard opens.
7 In the Select a Datasource box, select the target datasource.
8 Click Next.
The next panel of the wizards opens.
9 In the Select Database to reverse-engineer window, select pubs.
10 Click Next.
The next panel of the wizard opens.
11 From the Owners list box, select dbo.
12 In the Object Type box, right-click to unselect all options, and then select Tables.
13 In the Extract Scope box, select Selected Objects Only.
14 Click Next.
The next panel of the wizard opens.
15 In the Object Type box, select Tables from the drop-down list, and then select the authors, discounts, and
employees tables.
16 In the Options for Tables box, right-click to Unselect All.
17 Click Next.
The next panel of the wizard opens.
18 18.For Object Ownership, select Retain.
19 Click Next.
The Preview panel of the wizard opens so you can review the project you are creating.
20 Click Execute.
You have now successfully created a working database project. At this point, the project is available to be added to
Version Control. This can be done by clicking Yes when prompted and following the dialog, or by right- clicking the
project on the Project Explorer. Select Yes for the purpose of this example.
Adding a Project to Version Control (Sample - Microsoft Visual Source

RAPID SQL TUTORIAL > SECTION 5: VISUAL QUERY BUILDER AND DATA EDITOR
EMBARCADERO TECHNOLOGIES > BOOKNAMEVARIABLE 27
Safe)
When a project is created Rapid SQL will automatically prompt you to add the project files to the selected VCS (see
Setting Environment Options below).The dialog you see is displayed below:
1 In the Visual SourceSafe Login dialog box, enter the Username and Password.
2 Type or browse and locate the target database, and then click Open.
The Add to SourceSafe Project dialog box opens.
3 To name your project, in the Project text box type “sample_project.”
4 Click OK.
You receive the message below to indicate that your project was successfully placed in the VSS.
Section 5: Visual Query Builder and Data Editor
Rapid SQL gives you the ability to construct complex SQL statements with point-and-click ease using the Visual Query
Builder.
Visual Query Builder
1 On the Database Explorer, expand the MS SQL Server node, and then select pubs.
2 Expand the pubs node, and then select Tables.
3 Right-click the authors table and select Build Query.
The authors table is automatically added to the Query Builder workspace.
4 Right-click the titleauthor table and select Add.
NOTE: Note that the tables are automatically identified as being joined by any columns with the same
name and datatype.
5 To expose the Visual Query Building clauses and options, open the DML Tab.
6 To add code the query, right-click on any clause.
7 Click Execute.
The query executes and the lower window displays the results.
NOTE: Any visual query builder session can easily be saved to a file for later use.
Live Data Editor
1 On the Database Explorer, expand the MS SQL Server node, and then select pubs.
2 Expand the pubs node, and then select Tables.
3 Right-click the authors table and select Edit Data.
Rapid SQL opens the Data Editor Filter dialog box.
4 In the Columns box, select Add All.
5 Optionally, you can add a WHERE clause that will filter for only the desired data.
NOTE: Rapid SQL builds the SQL to retrieve the data to be edited in the lower window.

RAPID SQL TUTORIAL > SECTION 6: SQL DEBUGGING AND PROFILING
EMBARCADERO TECHNOLOGIES > BOOKNAMEVARIABLE 28
• The editing window has LIVE and BATCH modes. LIVE mode commits your changes each time you move to a
new row. BATCH mode will allow you to move within the window and commit your changes when ready.
• Changes made in BATCH mode can be cancelled by selecting Reload Data.
Section 6: SQL Debugging and Profiling
SQL Debugging
The SQL Debugger is another database productivity tool that lets you debug SQL Server, Oracle, Sybase or IBM DB2
UDB for Open Systems stored procedures as well as Oracle functions. SQL Debugger simplifies the task of finding
coding errors.
1 On the Database Explorer, expand the MS SQL Server node, and then select pubs.
2 Expand the pubs node, and then select Procedures.
3 Right-click the target Procedure and select Debug.
• If the procedure/function contains input variables, the Procedure Execution window prompts for entry of these
values.
4 Enter the value(s) for the input variable(s) and press Continue.
NOTE: Pressing the Debug button or selecting Debug from the Command menu invokes The SQL
Debugger.
TIP: Rapid SQL allows the user to save the input variable values to a file for later use. This is very
helpful for procedures/functions with many input variables that need to be run repeatedly.
The application opens the SQL Debugger Interface.
SQL Profiling- Oracle Only
The SQL Profiler within Rapid SQL provides the ability to capture the metrics of various PL/SQL programmable
objects as they are executed in the database. It quickly identifies performance bottlenecks by first calculating the
overall runtimes of objects like Oracle packages, and then computing the amount of time each line of PL/SQL code
spends executing. Information is presented in an easily viewed, drill-down format.
To start a profiling session:
1 From the Tools menu select SQL Profiler, Start.
OR
From the SQL Profiler toolbar, click the Start Profiling button Execute.
The Profiler Start dialog box opens.
2 Enter a name for the profiling session, or select an existing name from the drop-down list.
3 Click OK.
The Profiler session is now active.
4 Select the programmable object you want to capture metrics for, and click Execute

RAPID SQL TUTORIAL > ADDITIONAL EVALUATION RESOURCES
EMBARCADERO TECHNOLOGIES > BOOKNAMEVARIABLE 29
5 When finished, from the SQL Profiler toolbar, click Stop.
The SQL Profiler Stop dialog box opens.
• Stop & Analyze – Stops the profiling session and presents the detail profiling information.
• Stop – Stops the profiling and leave the user on the current screen.
• Cancel – Cancels the stop command.
• Help – Displays SQL Profiler Help
6 Click Stop.
7 Expand the PL/SQL Code Profiling section.
8 Right-click the profile session, and then select Run Summary.
The Run Summary appears.
9 Right-click a session and select Run Detail.
The Run Detail screen appears and allows you to view the metrics for the run in both a graphical and text format.
10 To drill down further into the data, right-click a unit, select Unit Detail.
NOTE: You can scroll through the Source window to view the execution times for each statement.
To compare two cases:
1From the Run Summary screen, select the two cases you wish to compare (SHIFT+CLICK to select the second
case), and then right-click and select Compare.
Additional Evaluation Resources
Embarcadero Technologies provides a variety of resources to help support your evaluation and selection
of a development tool for your organization.
Evaluation Guides
Select the link for the evaluation guide.
• Embarcadero SQL Debugger
• Embarcadero SQL Tuner
Web site
Visit our Web site for current product and company information, educational materials and supporting information. Visit
www.embarcadero.com
Electronic Documentation
Detailed reference documentation is available on the Rapid SQL Evaluation CD or online at
www.embarcadero.com/support
Online FAQ
The Rapid SQL online FAQ provides answers to commonly asked questions regarding licensing, installation and other
helpful topics.

RAPID SQL TUTORIAL > ADDITIONAL EVALUATION RESOURCES
EMBARCADERO TECHNOLOGIES > BOOKNAMEVARIABLE 30
E-mail Support
You can contact Rapid SQL support engineers, consultants and engineers directly by sending inquiries to
Telephone Support
We encourage you to call us anytime you would like help or have questions during your evaluation. Please call
415.834.3131 ext. 2, Monday to Friday, 6:00am - 6:00pm PST, Saturday and Sunday, 8:00am - 5:00 PST.

APPLICATION BASICS > PRODUCT DESIGN
EMBARCADERO TECHNOLOGIES > BOOKNAMEVARIABLE 31
Application Basics
Application Basics is designed to situate you within the application and to provide information about what Rapid SQL
offers in the way of design, navigation, and application features. The information presented here is high-level and
conceptual. For information on how to use Rapid SQL, see Using Rapid SQL.
Application Basics is divided into two sections, the table below describes each section:
Product Design
The Rapid SQL window opens with the Database Explorer on the left, the Workspace on the right, and all toolbars
docked at the top of the application. The Output Window
is not automatically displayed. Rapid SQL also offers you a
number of desktops, or workspaces, that you can toggle among while you work.
Database Explorer
Rapid SQL organizes the wealth of information pertaining to your servers through its Database Explorer. The
Database Explorer provides a fast and efficient way to access your database objects and scripts. The Database
Explorer is a separate window containing a tree object that you can select and expand. The tree object organizes and
nests subjects as branches. By expanding or collapsing the tree, you can efficiently browse multiple datasources. The
Database Explorer window is dockable so that you can maneuver through the application efficiently.
The Database Explorer includes three tabs:
•
Explorer
• Favorites
• Project
•VC Files
Explorer Tab
The Explorer Tab provides a visual method for browsing, accessing and manipulating your database objects. The
Explorer Tab lets you:
• Connect, disconnect, and browse the objects in the supported datasources on your network.
• Drag objects to the Rapid SQL workspace.
• Create new objects.
Section Description
Product Design This section describes the Rapid SQL user interface.
Configuring Rapid SQL
This section describes how to customize Rapid SQL’s
configuration to suit your specific needs.
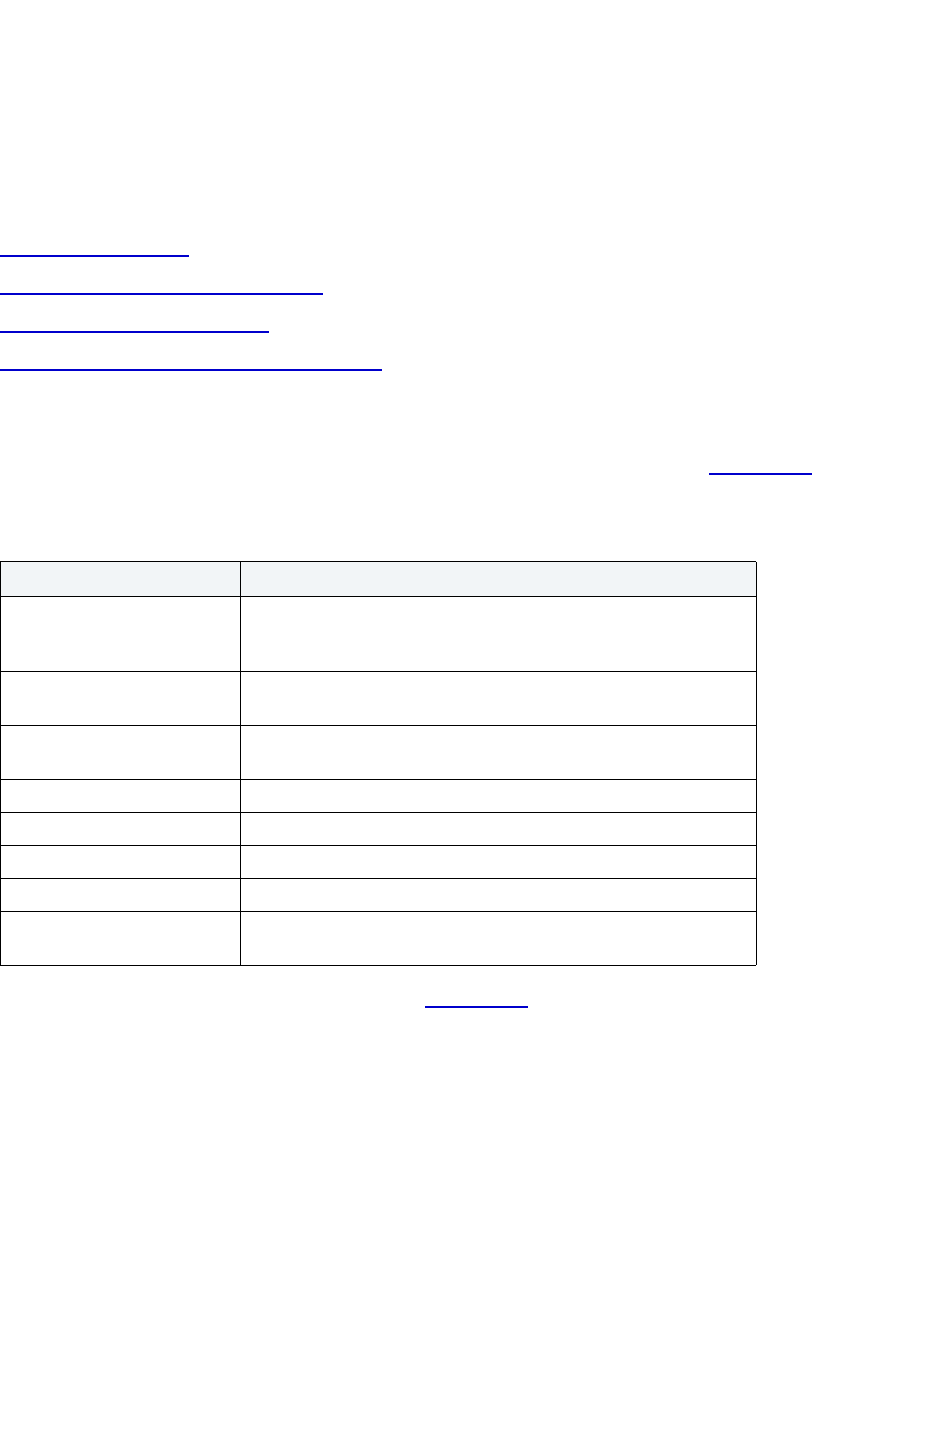
APPLICATION BASICS > PRODUCT DESIGN
EMBARCADERO TECHNOLOGIES > BOOKNAMEVARIABLE 32
Datasource Node
When you click the datasource node of the Explorer Tab tree, Rapid SQL lists all the databases available for that
datasource. When you click a database node, you can view all the database object types available for that datasource.
When expand an object type node, Rapid SQL displays available objects. You can collapse any portion of a
datasource to concentrate on a particular portion of your database.
For more information, see:
Organizing the Explorer
Creating New Objects from the Explorer
Extracting DDL from the Explorer
Displaying Dependencies from the Explorer Tab
Organizing the Explorer
Rapid SQL contains functionality that lets you configure how objects are organized in the Explorer Tab. The table
below explains the available options:
TIP: You can also set these option on the Explorer Tab
of the Options Editor.
Organizing the Explorer by Object Owner
1 On the Explorer Tab, click the Explorer list above the list of datasource groups.
2 Click Organize by Owner.
Rapid SQL dynamically reorganizes the display of the Explorer Tab, sorting database objects by object owner.
Functionality Description
Organize by Object Type Select to display objects by object type for all users in the same
list. This display mode cuts performance in databases that contain
many objects.
Organize by Owner Select to display objects by owner. Most efficient if you are working
with databases containing a high number of objects.
Show Only My Objects Select to display the objects you own in the Explorer Tab. Available
if you are organizing the Explorer Tab by object type.
Show System Objects Select to display system objects.
Full Refresh Select to refresh.
Expand All Groups Select to expand all groups.
Collapse Select to collapse all datasources or collapse all groups.
Retain Group View Settings Select to retain the current state of the Explorer Tab so that the it
opens the same way the next time you start Rapid SQL.

APPLICATION BASICS > PRODUCT DESIGN
EMBARCADERO TECHNOLOGIES > BOOKNAMEVARIABLE 33
Organizing the Explorer by Object Type
To organize the Explorer by Object Type, do the following:
1 On the Explorer
Tab, click the Explorer list above the list of datasource groups.
2 Click Organize by Object Type.
Rapid SQL dynamically reorganizes the display of the Explorer Tab, sorting database objects by type.
Showing or Hiding System Objects
To show or hide system objects, do the following:
1 On the Explorer Tab, click the Explorer list above the list of datasource groups.
2 Click Show System Objects to show all system objects.
3 Click the Show System Objects again to hide all system objects.
Creating New Objects from the Explorer
Rapid SQL lets you create new database objects from the Explorer Tab. When you create an object from the Explorer
Tab, Rapid SQL does the following:
• Automatically brings up the Object Attachment Facility which associates the new object with an object type.
• Opens a DDL Editor containing a shell script based on the object type you select.
• Automatically ties that object to the current database.
Creating a New Object from the Explorer
To create a new object from the Explorer, do the following:
1 In the Explorer Tab, right-click the object type node for the object to create and then click New to open the
wizard associated with that object.
The Object Type Information dialog box displays. The object type and owner are automatically assigned based
on the object type you selected in the previous step.
2 Enter the name of the object.
3 Click OK.
Rapid SQL opens an editor containing a template for the object type.
Extracting DDL from the Explorer
Rapid SQL's Explorer Tab provides a quick, convenient method for extracting object DDL. Rapid SQL lets you extract
the DDL for multiple or individual database objects. SQL scripts are the text of statements that are used to create
database objects. Rapid SQL also lets you run SQL scripts against other databases to recreate the database objects.
You can also extract scripts to create a record of how an object was created. Rapid SQL lets you extract the CREATE
statements for any object into a DDL Editor. If you are extracting the DDL of an Oracle procedural logic object, an SQL
Editor automatically opens instead, saving you the trouble of inserting PL/SQL tags.
Rapid SQL offers two ways to extract DDL from the Explorer Tab:

APPLICATION BASICS > PRODUCT DESIGN
EMBARCADERO TECHNOLOGIES > BOOKNAMEVARIABLE 34
Using the Shortcut Menu
1 Select one or more objects in the Explorer Tab. To select contiguous objects, hold SHIFT and select multiple
objects. To select noncontiguous objects, hold ALT and select specific objects.
2 Right-click to display the shortcut menu and then click Extract.
Dragging Objects
1 Select one or more objects in the Explorer Tab. To select contiguous objects, hold SHIFT and select multiple
objects. To select non-contiguous objects, hold ALT and select specific objects.
2 Drag the script(s) to the desired position in the Rapid SQL workspace.
Displaying Dependencies from the Explorer Tab
Rapid SQL lets you open a result set window, directly from the Explorer Tab, to display dependencies for an object.
Displaying Dependencies from the Explorer Tab
1 On the Explorer Tab, double-click the object node.
Rapid SQL displays the list of objects.
2 Right-click the target object and then click Dependencies.
Rapid SQL opens the Dependencies window which lists all dependent objects.
NOTE: Rapid SQL does not retrieve dependencies if objects are created out of order.
Favorites Tab
Rapid SQL provides the Favorites Tab for designating and accessing favorite scripts. On the Favorite Scripts Tab you
can do the following with frequently used SQL scripts:
•View
• Navigate
•Save
• Recall
• Execute
TIP: Sample Favorite Scripts are installed for Microsoft SQL Server, Oracle, and Sybase Adaptive
Server.
For more information, see Favorite Properties Dialog Box
.
Favorite Properties Dialog Box
The table below describes the options and functionality on the Favorite Properties dialog box:
Option Description
Description Lets you enter a description.
File Name Lets you type or browse and locate a file.

APPLICATION BASICS > PRODUCT DESIGN
EMBARCADERO TECHNOLOGIES > BOOKNAMEVARIABLE 35
Subsystem Node
NOTE: The Subsystem node is available for IBM DB2 UDB for OS/390 and z/OS only.
The Subsystem node displays detailed information about the DB2 subsystem. Subsystem objects include:
• Connections
• DDF
• Parameters
Connections
Connections displays the current connections to the subsystem.
NOTE: The information is read-only.
For more information, see Subsystem Node.
DDF
DDF (distributed data facility) displays the information regarding the status and configuration of the DDF, a set of DB2
UDB for OS/390 components through which DB2 UDB for OS/390 communicates with another RDBMS.
NOTE: The information is read-only.
For more information, see Subsystem Node
.
Parameters
Parameters displays the DB2 subsystem parameters.
NOTE: The information is read-only.
For more information, see Subsystem Node.
Project Tab
The Project Tab provides a visual method for browsing, accessing, and manipulating your projects. The Project Tab
lets you:
• Open, close, modify, and browse projects.
• Drag project items to the Rapid SQL workspace.
Hot Key Lets you enter a Hot Key.
Hot Keys must begin with CTRL or be stand-alone function keys.
Rapid SQL automatically places the CTRL command in front of
any character.
File Type Lets you select a file type.
Option Description

APPLICATION BASICS > PRODUCT DESIGN
EMBARCADERO TECHNOLOGIES > BOOKNAMEVARIABLE 36
• Create new projects.
NOTE: The Project Tab is available after you create or open a project.
For more information on working with projects, see Project Management.
VC Files Tab
The VC Files Tab displays open version control files. This tab displays files listed in the *.xml file for the version control
files. The tab displays a checkbox icon for files that are checked-out.
For more information, see Version Control
.
Rapid SQL Windows
The Rapid SQL interface includes several windows to help you develop your program. The windows include:
Topics
• Describe Window
• Output Window
• Browsers
• Workspaces
• Preview Dialog Boxes
Describe Window
Rapid SQL offers a floating Describe window for procedures, tables, views, and functions (Oracle and IBM DB2 UDB
for Open Systems only). In the Describe window, you can view columnar information (for tables and views) or input
parameter information (for procedures and functions).
Opening the Describe Window
Rapid SQL offers three ways to open the Describe window:
1 In an editor, right-click an object and then click Describe from Cursor.
2 On the Explorer Tab, select an object and then click Describe.
3 On the Explorer Tab or in an editor, select an object and then press CTRL+D.
Using the Describe Window
In the Describe window:
1 Click the Name list and then click a name to view a list of types of objects in the database.
2 Click the Owner list and then click an owner to view a list of all owners of objects in the database.
3 Click the Type list and then click a type to view columnar information (for tables and views) or input parameter
information (for functions and procedures).

APPLICATION BASICS > PRODUCT DESIGN
EMBARCADERO TECHNOLOGIES > BOOKNAMEVARIABLE 37
Output Window
Rapid SQL incorporates a separate window to capture all messages returned by the server and to log entries about
the progress of operations started by the application.
For more information, see Configuring the Output Window
Configuring the Output Window
Rapid SQL lets you display, hide, or dock the Output Window anywhere in the application.
Displaying the Output Window
1 On the View menu, click Output.
OR
On the Main toolbar, click Output.
Rapid SQL displays the Output Window.
Hiding the Output Window
1 On the View menu, click Output.
OR
On the Main toolbar, click Output.
OR
Right-click the Output Window and then click Hide.
Rapid SQL hides the Output Window.
Docking the Output Window
Right-click the Output Window and then click Docking View.
Rapid SQL docks the Output Window to the bottom of the application frame.
Undocking the Output Window
Right-click the Output Window and then click Docking View.
Rapid SQL displays the Output Window as a floating window in the application.
Messages in the Output Window
The Output Window lets you save, print, copy, and clear server messages.
Saving Server Messages
1 Right-click the Output Window and then click Save.
Rapid SQL opens the Save As dialog box.
2 Enter the location and name of the file in the File Name box.
NOTE: Rapid SQL defaults the file extension to .msg.
3 To save the file, click OK.

APPLICATION BASICS > PRODUCT DESIGN
EMBARCADERO TECHNOLOGIES > BOOKNAMEVARIABLE 38
Printing Server Messages
1 Right-click the Output Window and then click Print.
Rapid SQL opens the Print dialog box.
NOTE: Rapid SQL prompts you with information on the size of the print job before opening the Print
dialog box.
2 Configure your print job.
3 Click OK to print the file.
Copying Server Messages
1 Right-click the target Server Messages and then click Copy.
Rapid SQL copies the selected text to the Microsoft Windows Clipboard.
2 Paste the contents of the clipboard into target applications.
Clearing Server Messages
1 Right-click the Output Window and then click Clear.
Rapid SQL clears your Server Messages
.
Browsers
Browsers are a flexible environment where you can examine, extract, and execute database objects and their
dependencies. Browsers provide the means to view objects types across multiple database platforms and
connections. You can simultaneously view and work with objects from Oracle, Microsoft SQL Server, Sybase Adaptive
Server, and IBM DB2 UDB for Open Systems.
The benefit of using Browsers is the ability to see detailed information about specific object types. You can also print,
search, copy, and sort the contents of a Browser window.
Topics
•
Browser Toolbar
• Opening Browsers
• Browser Object Types
• Extracting DDL from Browsers
• Displaying Dependencies from Browsers
• Refreshing Browsers
Browser Toolbar
You can place the floating Browser toolbar anywhere on the Rapid SQL workspace.
For more information, see Browsers
.

EMBARCADERO TECHNOLOGIES > BOOKNAMEVARIABLE 39
Opening Browsers
Browsers let you view all types of database objects, including the SQL procedures used to build them. Browsers let
you:
• Copy database objects
• Modify database objects
• Test database objects
The ability to browse dependencies is especially useful, particularly when modifying SQL code in procedures and
triggers. For example, in a situation where a trigger enforces a rule that does not let you update a particular box, you
can use the Browser to do the following:
• Browse the triggers to find the offending trigger.
• Extract the DDL for that trigger into one window.
• In another window, drop the offending trigger, make your update to the box, then execute the corrected trigger
DDL to replace the trigger in the database.
Opening a Browser Window
Rapid SQL offers two ways to open a Browser:
1 On the Browse menu, click the target object type.
OR
In the workspace, right-click, click Browser, then click the target object.
Rapid SQL opens a Browser.
For more information, see Browsers
.
Browser Object Types
Rapid SQL's Browsers read the appropriate object types for specific databases. A select statement is issued against
the appropriate systems table based on the requested object to bring back a listing of the objects in the database. The
table below contains a list of the Browsers available for each database platform:
Object Type IBM DB2 UDB
for Open
Systems
IBM DB2 UDB
for z/OS and
OS/390
Microsoft SQL
Server
Oracle Sybase
Adaptive
Server
Aliases
Check
Constraints
Clusters
Databases
Database
Links
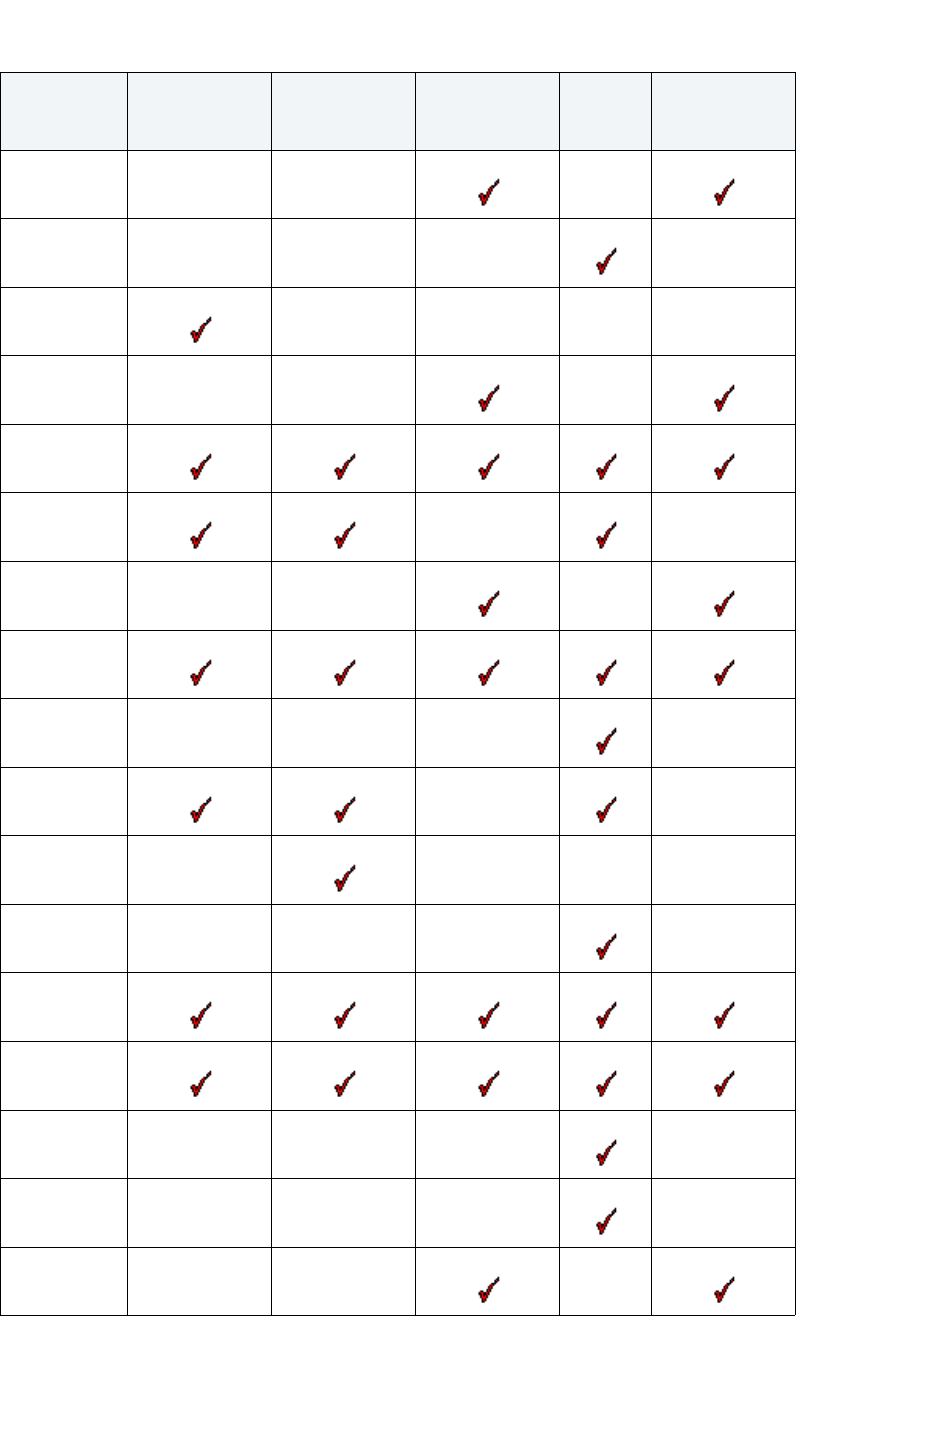
APPLICATION BASICS > PRODUCT DESIGN
EMBARCADERO TECHNOLOGIES > BOOKNAMEVARIABLE 40
Defaults
Directories
Event
Monitors
Extended
Procedures
Foreign Keys
Functions
Groups
Indexes
Libraries
Packages
Plans
PL/SQL Code
Profiling
Primary Keys
Procedures
Profiles
Roles
Rules
Object Type IBM DB2 UDB
for Open
Systems
IBM DB2 UDB
for z/OS and
OS/390
Microsoft SQL
Server
Oracle Sybase
Adaptive
Server
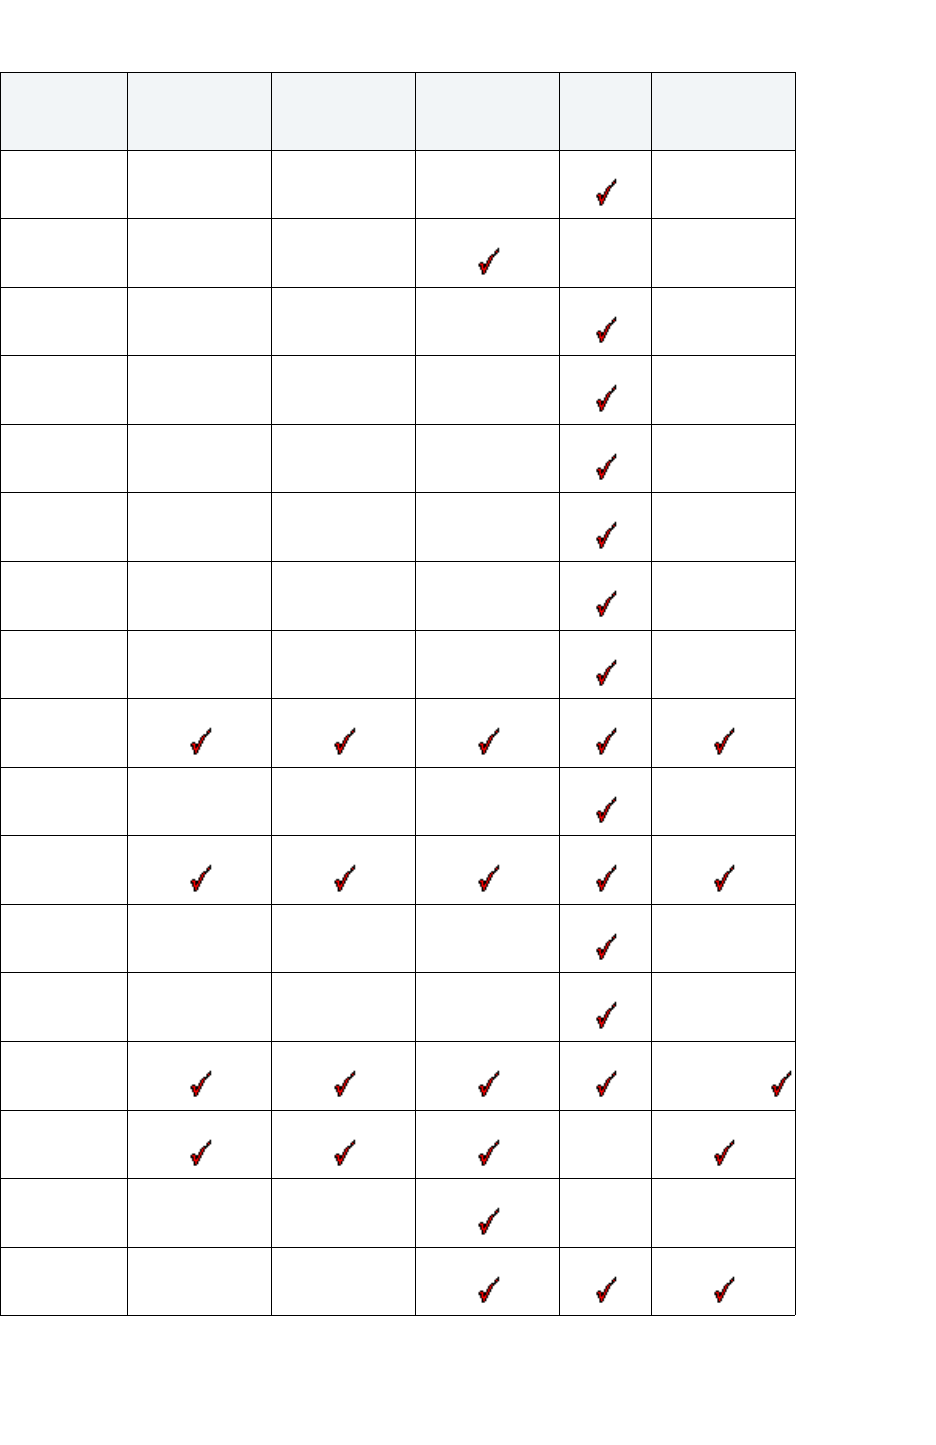
APPLICATION BASICS > PRODUCT DESIGN
EMBARCADERO TECHNOLOGIES > BOOKNAMEVARIABLE 41
Rollback
Segments
Segments
Sequences
Snapshots
Snapshot
Logs
Materialized
Views
Materialized
View Logs
Synonyms
Tables
Tablespaces
Triggers
Types
Type Bodies
Unique Keys
User
Datatypes
User
Messages
Users
Object Type IBM DB2 UDB
for Open
Systems
IBM DB2 UDB
for z/OS and
OS/390
Microsoft SQL
Server
Oracle Sybase
Adaptive
Server

APPLICATION BASICS > PRODUCT DESIGN
EMBARCADERO TECHNOLOGIES > BOOKNAMEVARIABLE 42
Working with Browsers
Browsers offer a versatile method of browsing and managing the contents of your databases. To help you maintain
and organize your databases, you can:
• Print the contents of a Browser
• Search the contents of a Browser
• Copy the contents of a Browser
• Sort the contents of a Browser
Printing Browsers
1 Open a Browser for the desired object type.
2 On the File menu, click Print to open the Print dialog box.
3 In the Name box, click the list, which contains a list of local and network printers that you can access (if you do
not see any listed, then your computer is not configured for any printers).
4 Click the target printer.
5 In the Print Range box, click the appropriate option button to indicate print range.
6 In the Number of copies text box of the Copies box, click the Up or Down arrow or enter the number of copies.
7 Click OK.
Rapid SQL prints the selection.
Searching Browsers
1 Open a Browser for the desired object type.
2 On the Edit menu, click Find.
Rapid SQL opens the Find box.
3 In the Find What text box, enter the search string.
4 To make the search case sensitive, select the Match Case check box.
5 To specify the direction to search, in the Direction box, click the Up or Down option button.
6 Click Find Next.
Rapid SQL finds the next occurrence of your search string.
Copying Browsers
1 Open a Browser for the desired object type.
2 Select the objects to copy.
Views
Object Type IBM DB2 UDB
for Open
Systems
IBM DB2 UDB
for z/OS and
OS/390
Microsoft SQL
Server
Oracle Sybase
Adaptive
Server

APPLICATION BASICS > PRODUCT DESIGN
EMBARCADERO TECHNOLOGIES > BOOKNAMEVARIABLE 43
3 On the Edit menu, click Copy.
4 Place the pointer at the position where you want to paste the objects, and then on the Edit menu, click Paste.
Sorting Browsers
1 Open or create
a Browser for the desired object type.
2 Double-click the column header for the column of data to sort and Rapid SQL lists the contents of the column in
ascending order.
3 Double-click the column header again and Rapid SQL lists the contents of the column in descending order.
For more information, see Browsers
.
Extracting DDL from Browsers
For each database type, Rapid SQL provides an appropriate Browser. The Browsers are mutually exclusive object
windows, showing only objects of a given type. If you connect to multiple datasources, you have access to a number
of objects that are not available based on the database platform. Rapid SQL includes intelligence to determine the
valid object types in the underlying datasource.
Using the Main Menu
1 On the Browse menu, click the target object type.
Rapid SQL opens the appropriate Browser:
2 In the Browser, double-click the target object type to extract the object type DDL into a DDL Editor.
Using the Browser Toolbar
1 On the Browser toolbar, click Tables.
Rapid SQL opens the Table Browser:
2 Click the scroll bar arrow to locate the target table.
3 Double-click the target table.
Rapid SQL extracts the schema DDL into a DDL Editor.
Using the Shortcut Menu
1 Right-click an open area of the workspace, click Browsers, and then click the target object type.
2 In the Browser, double-click the target object type.
Rapid SQL extracts the schema DDL into a DDL Editor.
For more information, see Browsers
.
Displaying Dependencies from Browsers
You can display object dependencies for an object from its corresponding object Browser. Rapid SQL displays the
dependencies in a separate result set window.

APPLICATION BASICS > PRODUCT DESIGN
EMBARCADERO TECHNOLOGIES > BOOKNAMEVARIABLE 44
Displaying Dependencies
Rapid SQL offers three ways to display dependencies from Browsers:
1 Open a Browser for an object type.
2 In the Browser, click the target object.
3 On the Object menu, click Dependencies.
OR
On the Browser toolbar, click Dependencies.
OR
Right-click the target object and then click Dependencies.
Rapid SQL displays dependencies in a separate window.
For more information, see Browsers
.
Refreshing Browsers
Rapid SQL lets you refresh and display the results of a Browser operation.
Refreshing the Browser
1 On the Object menu, click Refresh.
OR
On the Browser toolbar, click Refresh.
OR
Right-click the Browser workspace and then click Refresh.
Rapid SQL refreshes the results of the browser operation.
For more information, see Browsers.
Workspaces
Workspaces are a convenient way to maximize your desktop. You can use workspaces to multiply the amount of
scripting, script execution, and development resources you have available at any one time. Rapid SQL lets you open
and use several workspaces at one time. Using more than one workspace lets you:
• Execute long running scripts in one workspace while working in other workspaces.
• Develop strategies for working on scripts and result sets in one workspace while other scripts reside in one or
more of the other workspaces.
Toggling Between Workspaces
Rapid SQL offers two ways to toggle between workspaces:
1 On the Main toolbar, click Workspace.
OR
Right-click the current workspace and then click the target workspace.
Rapid SQL brings the target workspace forward.

APPLICATION BASICS > PRODUCT DESIGN
EMBARCADERO TECHNOLOGIES > BOOKNAMEVARIABLE 45
For more information, see:
Setting Workplace Options
Managing Workspaces
Managing Workspaces
Rapid SQL provides you with three default workspaces. You manage the workspaces in the Workspace dialog box.
Using the Workspace dialog box you can:
• Differentiate between workspaces by changing the background color or wallpaper.
• Toggle among workspaces.
• Create, delete, rename, and specify the order of workspaces.
Managing Workspaces
The Workspace dialog box lets you manage all open windows in your workspace.
1 On the Windows menu, click Windows.
Rapid SQL displays the Workspace dialog box. Any open windows in the current workspace display in the list.
The table below describes the options and functionality on the Workspace dialog box:
Set Sort Columns Dialog Box
The Set Sort Columns dialog box lets you sort multiple columns, and sort column identification, in the Right Pane of
the application.
For more information, see Completing the Set Columns Dialog Box.
Completing the Set Columns Dialog Box
To complete the Set Columns dialog box, do the following:
1 In the right pane of the application, right-click a column heading and select Sort Multiple Columns.
Rapid SQL opens the Set Sort Columns dialog box.
2In Column Name select the column(s) to use to sort the information in the right pane of the application.
Option Description
Activate Sets the focus onto the window you have selected in the list and
closes the Workspace dialog box.
OK Closes the Workspace dialog box and accepts any changes you
have made to the windows in the current workspace.
Save Saves the contents of the window you have selected in the list. You
are prompted to provide a name and location for the file you are
saving if you have not done so already.
Close Window Closes the window you have selected from the list. If you have not
saved the contents of the window, you are prompted with a save
file alert.
Help Initiates and displays this Help topic in the Rapid SQL Help.
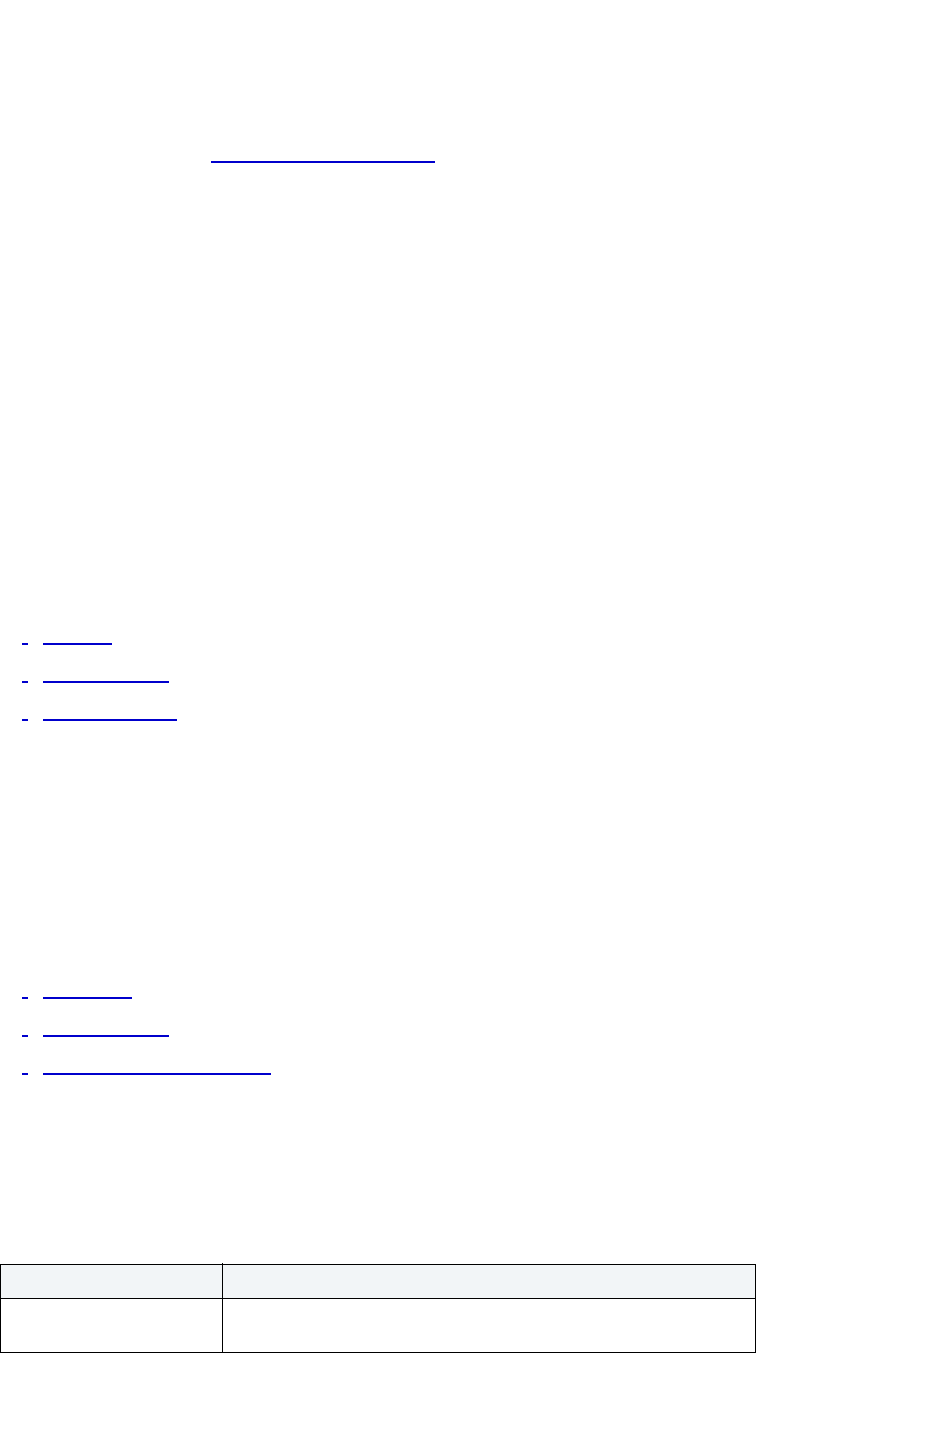
APPLICATION BASICS > PRODUCT DESIGN
EMBARCADERO TECHNOLOGIES > BOOKNAMEVARIABLE 46
3 Click the right arrow to move the column(s) to the Column Name box.
4 Click the up and down arrows to change the order of the sort columns.
For more information, see Set Sort Column Dialog Box.
Preview Dialog Boxes
Before executing any code, Rapid SQL offers Preview dialog boxes to let you confirm actions before execution. In the
Preview dialog boxes, you can:
• Preview the code to execute.
• View the SQL of the code on your database.
• Create a report detailing the affect of executing code on your database.
• Schedule execution of the code.
• Save the code to execute.
• Open your e-mail program with the code to execute as an attachment.
• Print the code to execute.
Topics:
•
Preview
• Impact Analysis
• Generate Report
Menus
Rapid SQL offers two context-sensitive menus to let you access all the application’s features. The Main Menu is
always on the top of the application window. The shortcut menu is accessible from almost anywhere in the application.
Right-click to view the available shortcut menu. Rapid SQL lets you customize the Tools menu to help you tailor the
application to your needs.
Topics
•
Main Menu
• Shortcut menus
• Customizing the Tools Menu
Main Menu
Rapid SQL's features can all be accessed from the Main Menu by clicking the menu name and selecting from the
submenu. The menus are context sensitive and change based on the tasks you want to perform. The table below
describes the Rapid SQL menus:
Menu Item Description
File Create, open, close, print, send, and save script files and result sets.
Set application options and defaults.

APPLICATION BASICS > PRODUCT DESIGN
EMBARCADERO TECHNOLOGIES > BOOKNAMEVARIABLE 47
For more information, see Menus.
Explorer Bookmarks
The Bookmarks menu lets you access and manage explorer bookmarks. Explorer bookmarks let you quickly access
nodes in the Database Explorer.
Creating Explorer Bookmarks
1 On the Database Explorer, right-click the target node, and then select Add Bookmark.
Rapid SQL opens the Add Friendly Bookmark Name dialog box.
2 Type the explorer bookmark name.
3 Click OK.
Rapid SQL displays the explorer bookmark under the Bookmarks menu. Explorer bookmarks are organized by
platform.
Editing Explorer Bookmarks
1 On the Main Menu, select Bookmarks.
2Select Bookmark Manager.
Rapid SQL opens Bookmark Manager.
Datasource Create, modify, select, connect to, and disconnect from datasources.
Access the database search facility.
Project Available only when a project is open. Configure project
management, build projects, and use version control functions.
Browse Browse any object type a datasource connection.
Logfile Activate/deactivate, open, set options, and flush the Rapid SQL
application log.
View Arrange the Rapid SQL environment. Display or hide the Database
Explorer, toolbars, Output Window, Describe window, activate
full-screen mode.
Tools Choose any of Rapid SQL's tools, such as Database Search and the
Visual Diff Utility. Customize and add tools of your own.
Bookmarks Access and manage bookmarks.
Help Access HTML Help.
Query Available only when an Editor is open. Execute and set options for
your SQL scripts.
Object Available only when a browser is open. Execute, view dependencies,
extract, and refresh objects in a database.
Edit Available only when an Editor is open. Edit and manipulate the text in
your scripts.
Format Available only when a Result Window is active. Format the contents
of result sets.
Window Cascade and tile open windows. Toggle among open windows.
Menu Item Description
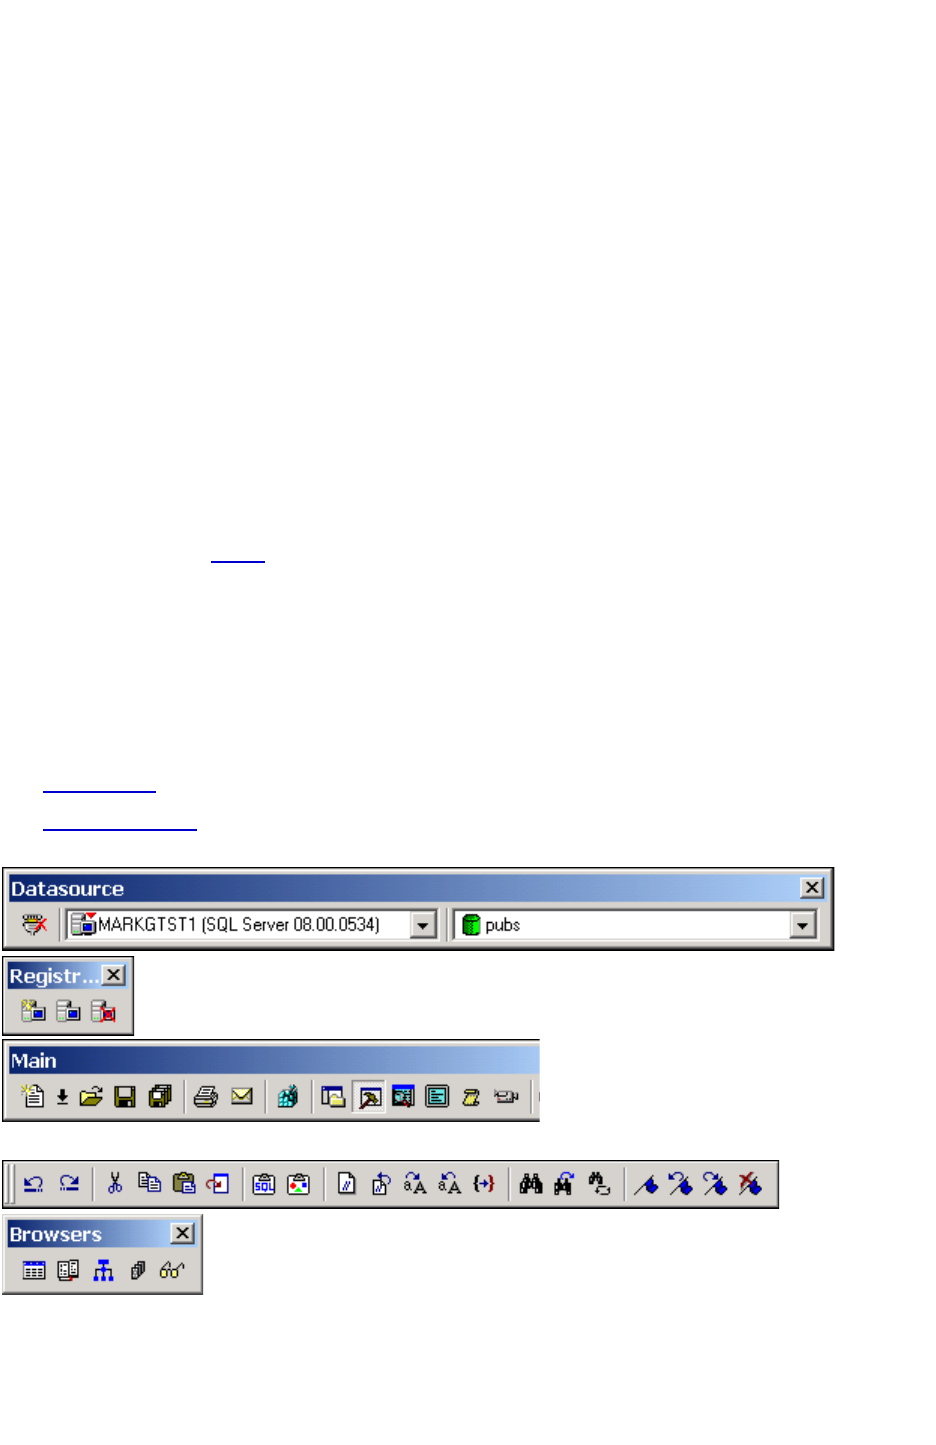
APPLICATION BASICS > PRODUCT DESIGN
EMBARCADERO TECHNOLOGIES > BOOKNAMEVARIABLE 48
3 To rename the explorer bookmark, select the target explorer bookmark, and then click Rename.
Rapid SQL opens the Edit Bookmark Name dialog box.
4 Type the new explorer bookmark name.
5 Click OK.
6 To delete an explorer bookmark, select the target explorer bookmark, and then click Delete.
TIP: To add explorer bookmarks without using the Add Friendly Bookmark Name dialog box, select Do
not show ‘Add Friendly Bookmark Name’ dialog option.
Shortcut Menus
Rapid SQL incorporates context-sensitive menus to give you another way to access object functionality. These menus
mirror the functionality that you can access from application toolbars or the main menu.
Opening Shortcut Menus
1 Right-click anywhere on the Rapid SQL desktop to open the appropriate shortcut menu.
For more information, see Menus
.
Toolbars
Rapid SQL toolbars change to reflect the element of the application you are using. The toolbars contain icons that are
the fastest way to access commonly used features of Rapid SQL. You can move the toolbars to horizontal or vertical
positions anywhere on the screen, and you can toggle them off and on by using the shortcut menu when the pointer is
positioned over one of Rapid SQL's toolbars. Rapid SQL lets you easily:
• Move toolbars
.
• Customize toolbars
.
The following list represents Rapid SQL's toolbars:
Datasource Toolbar
Registration Toolbar
Main Toolbar
Edit Toolbar
Browsers Toolbar
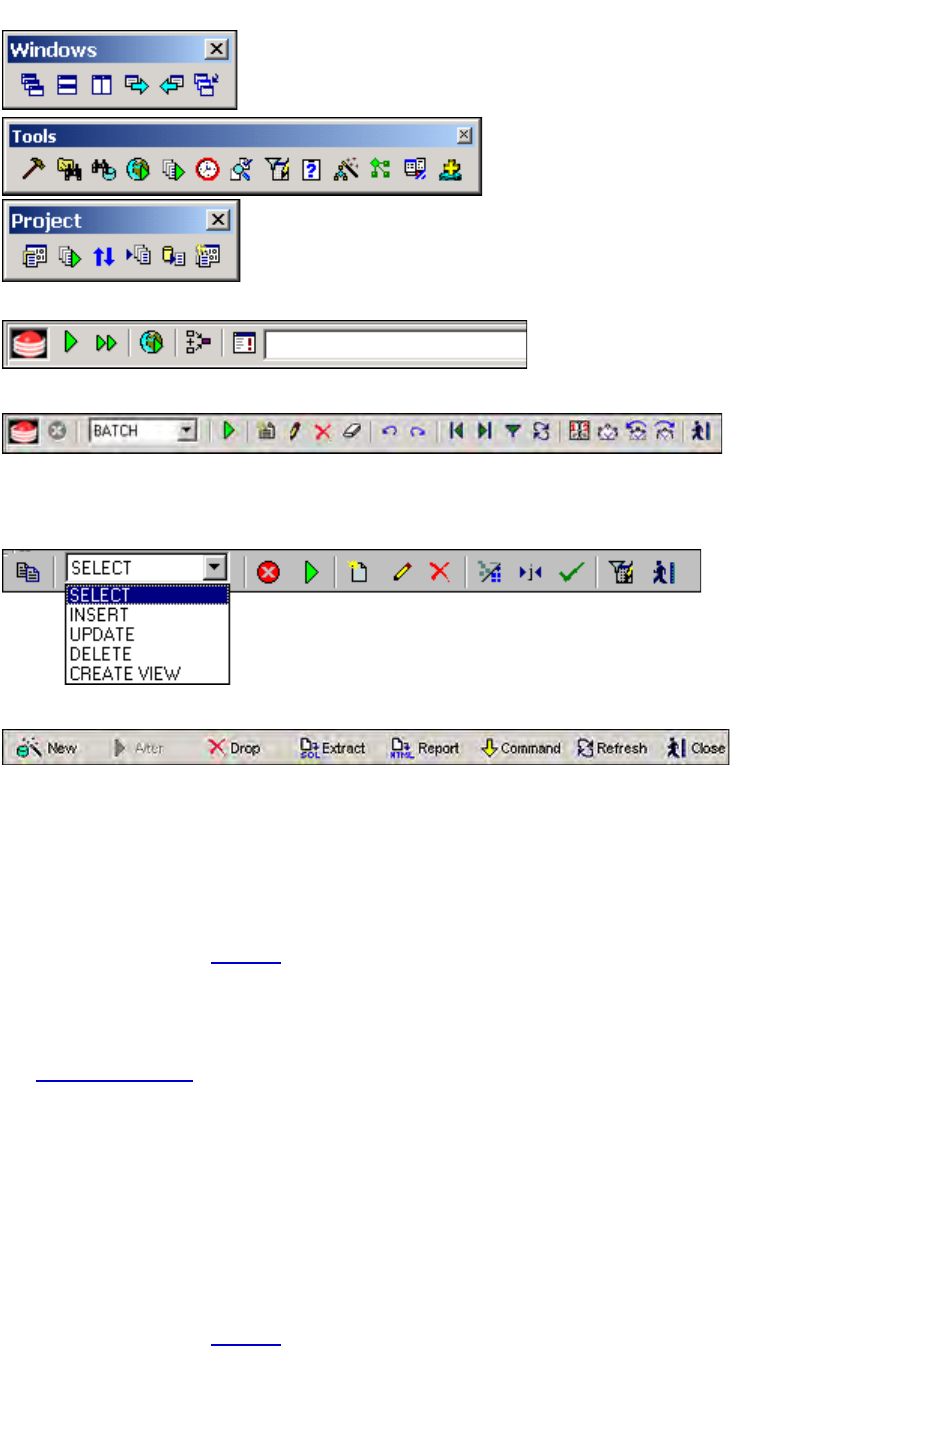
APPLICATION BASICS > PRODUCT DESIGN
EMBARCADERO TECHNOLOGIES > BOOKNAMEVARIABLE 49
Windows Toolbar
Tools Toolbar
Project Management Toolbar
SQL Editor Toolbar
Data Editor Toolbar
Query Builder Toolbar
Object Editor Toolbar
Moving Toolbars
1 Click the pointer at the right edge of any toolbar.
2 Drag the toolbar to the new position.
For more information, see Toolbars
.
Customizing Toolbars
The Toolbars dialog box lets you:
• Customize and organize toolbars.
• Display or hide toolbars.
• Create new toolbars.
• Reset toolbars original defaults.
TIP: If you use certain functions frequently, you might consider creating your own custom toolbar
containing command buttons you use most often.
For more information, see Toolbars
.
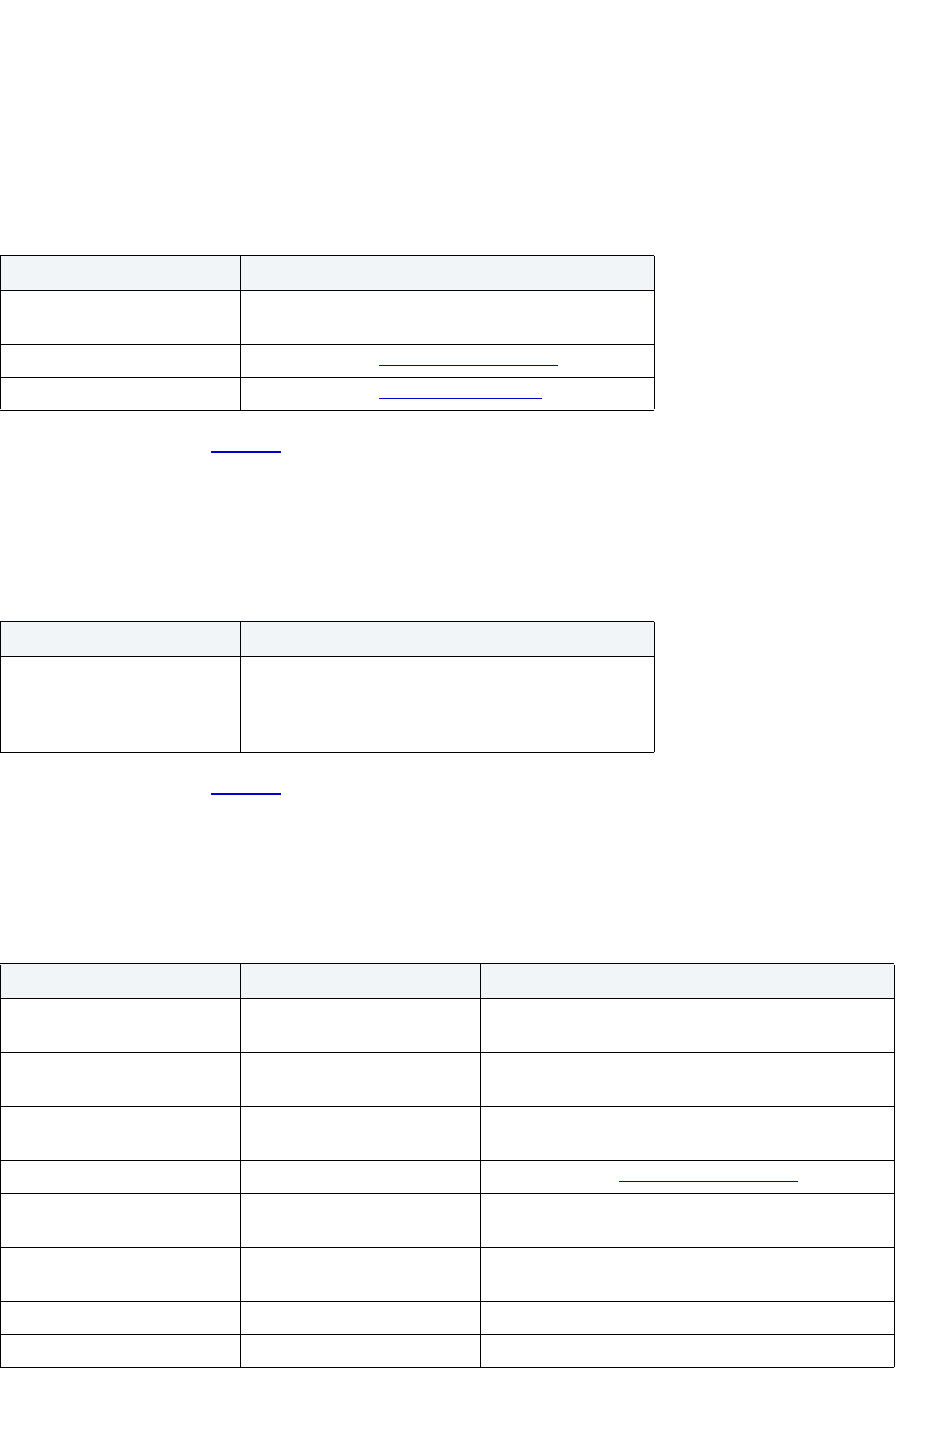
APPLICATION BASICS > PRODUCT DESIGN
EMBARCADERO TECHNOLOGIES > BOOKNAMEVARIABLE 50
Toolbars Dialog Box
1 On the View menu, click Toolbars.
Rapid SQL opens the Toolbars dialog box.
The table below describes the options and functionality on the Toolbars dialog box:
For more information, see Toolbars.
New Toolbar Dialog Box
The table below describes the options and functionality on the New Toolbar dialog box:
For more information, see Toolbars.
Customize Dialog Box
The table below describes the options and functionality on the tabs of the Customize dialog box:
Option Description
Toolbars Lets you select the toolbar check box for the toolbars
you want to hide or display.
New Button Click to open the New Toolbar dialog box
.
Customize Button Click to open the Customize dialog box
.
Option Description
Toolbar name In the box, type the name of the new toolbar, which
can be any combination of valid keyboard
characters, including special characters, numbers
and spaces.
Tab Option Description
Toolbars Tab Toolbars Select the toolbars you want to display in the
application.
Show Tool Tips Select to show the yellow hints that appear when you
pass the pointer over toolbar icons.
Cool Look Select to give the buttons a flat appearance. Clear
this check box to give the buttons a 3D appearance.
New Button Click to open the New Toolbar dialog box
.
Reset Button Click to reset the standard toolbars to their original
defaults.
Commands Tab Categories Select a category, then click a button to see it’s
description. Drag the button to any toolbar.
Keyboard Tab Category Select a general category.
Commands Select a command, based on the general category.
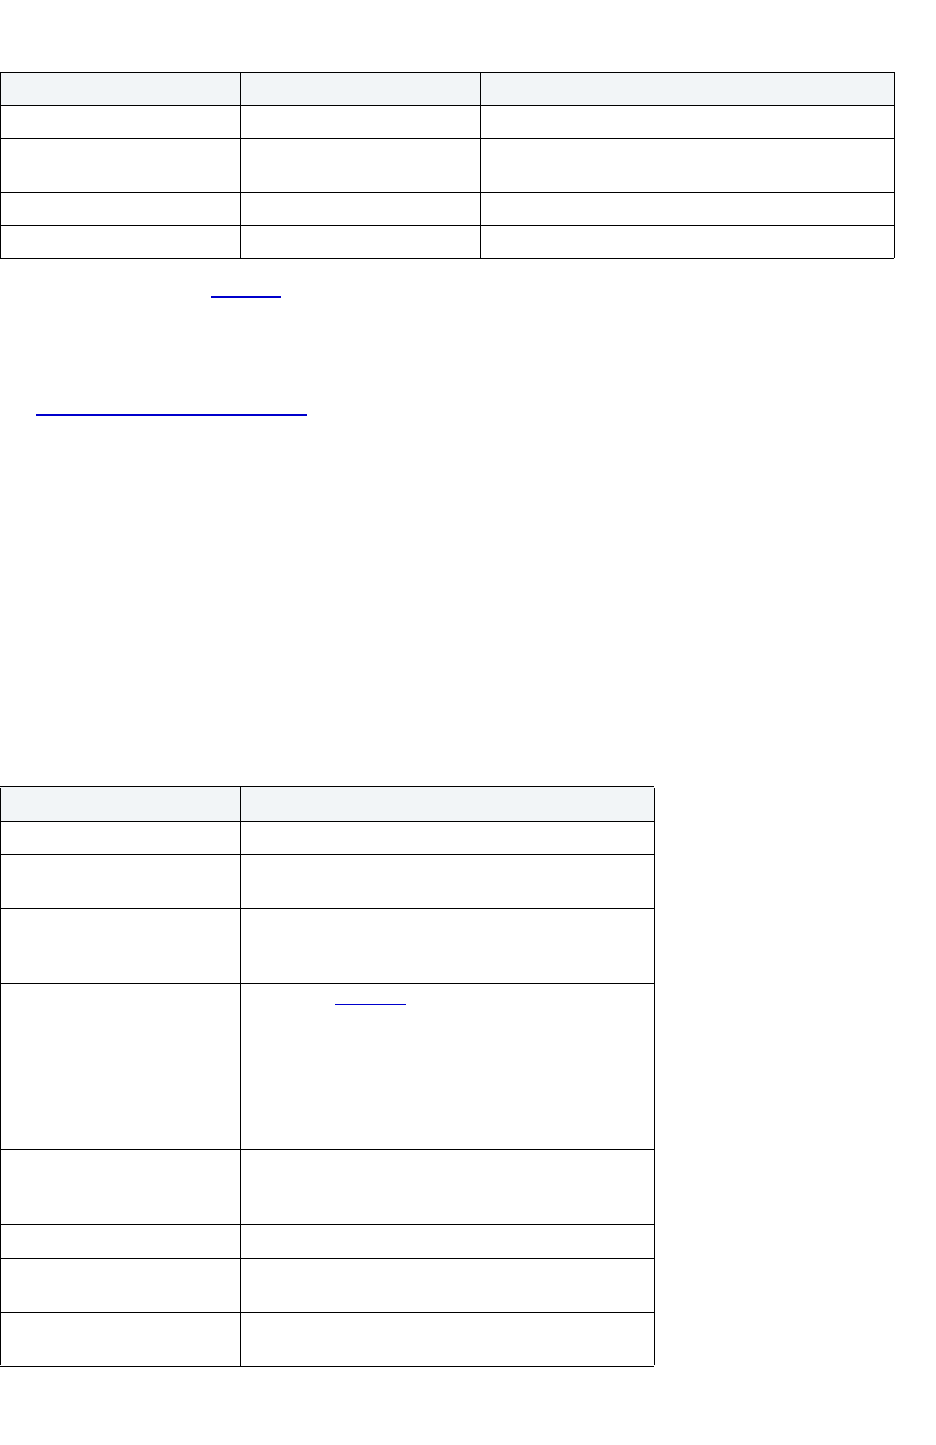
APPLICATION BASICS > PRODUCT DESIGN
EMBARCADERO TECHNOLOGIES > BOOKNAMEVARIABLE 51
For more information, see Toolbars.
Customizing the Tools Menu
The Customize Tools Menu dialog box lets you add up to sixteen commands to the Tools menu. You can associate
any program that running on your local machine. You can use this feature to associate frequently used programs and
commands, thereby adding functionality directly to the Rapid SQL application. In addition, you can specify arguments
for any command that you add to the Tools menu. You can use these arguments to decipher how you want to execute
commands. Rapid SQL includes many pre-defined arguments that let you customize the application.
Customize Tools Menu Dialog Box
Rapid SQL lets you customize the Tools menu.
1 On the Tools menu, click Customize.
Rapid SQL opens the Customize dialog box.
The table below describes the options and functionality on the Customize Tools Menu dialog box:
Description Displays the command description.
Set Accelerator for Select application area where you want new hot key
to be active.
Current Keys Displays current hot key.
Press New Shortcut Key Press keyboard key or unassigned F key.
Option Description
Menu Contents In the box, click the target command.
Menu Text In the box, type the name of the tool as you want to
appear on the Tools menu.
Command In the box, type the path and name of the program for
the new tool or click Browse to locate the program.
For example, C:\WINDOWS\NOTEPAD.EXE
Arguments To pass an argument
to the command, in the box,
type any argument or click the Arrow, and then click
the target argument.
NOTE: To display a menu of pre-defined arguments,
click the drop-down arrow next to the Argument box,
and then select an argument from the list to insert the
syntax into the box.
Initial Directory To specify an initial directory, in the box, type the path
and name of the file directory or click Browse to
locate the file directory.
Add Button Click to add a new command to Tools menu.
Remove Button In the Menu Contents box, click the command you
want to remove, and then click the button.
Move Up Button Click to move the command up one position in the
menu.
Tab Option Description
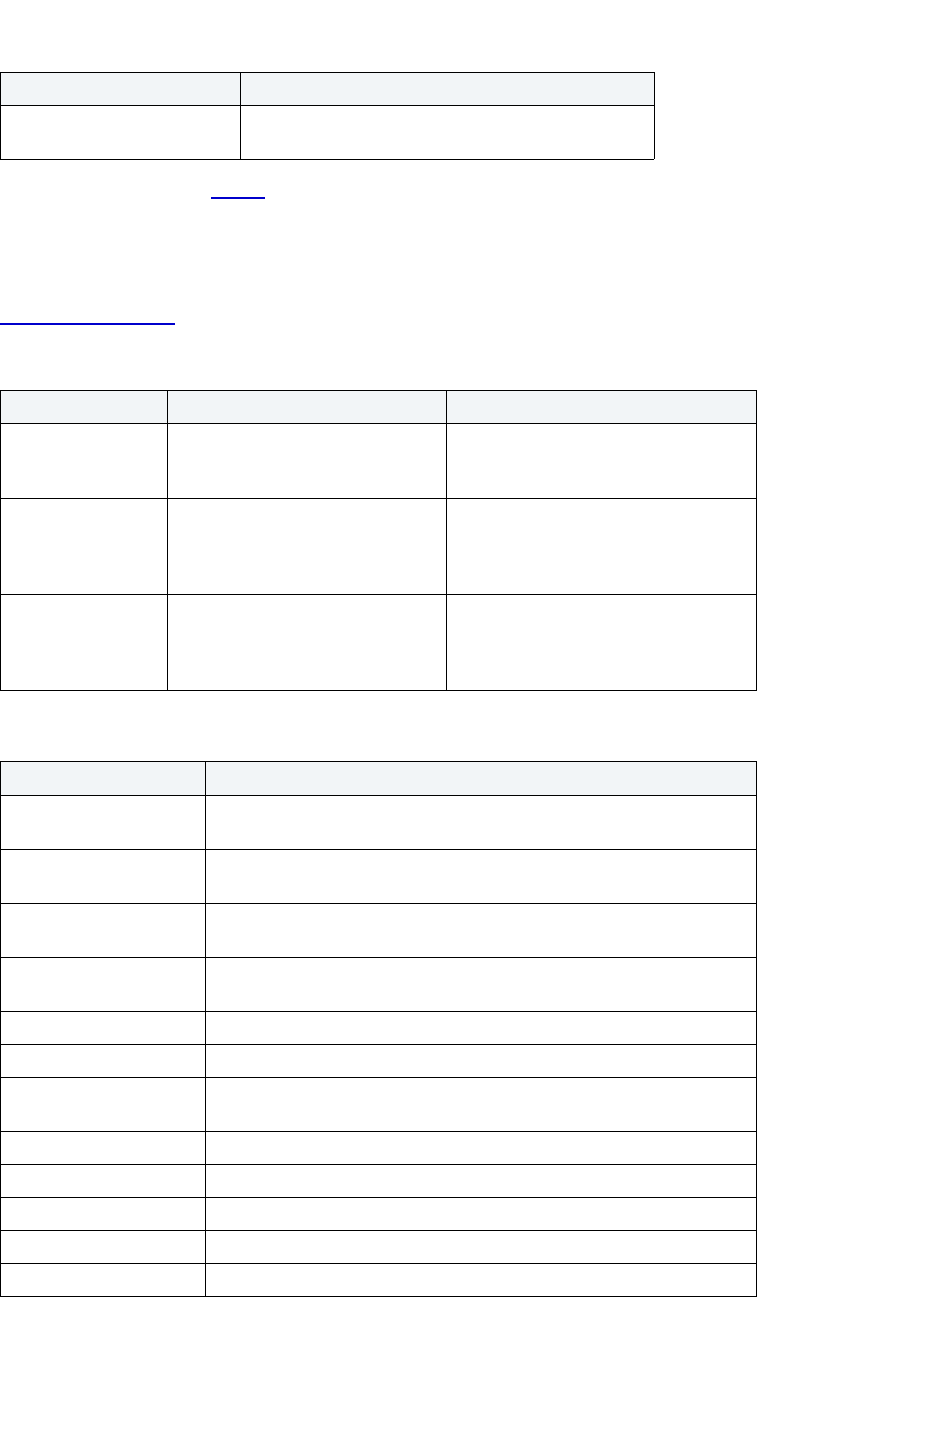
APPLICATION BASICS > PRODUCT DESIGN
EMBARCADERO TECHNOLOGIES > BOOKNAMEVARIABLE 52
For more information, see Menus.
Specifying an Argument for a Tools Menu Command
You can specify an argument to be passed to a program for newly added commands by choosing one of Rapid SQL's
predefined arguments or entering a command-line argument.
The table below provides scenarios of how to use command-line arguments:
The table below provides scenarios of how to use Rapid SQL’s predefined arguments:
Move Down Button Click to move the command down one position in the
menu.
Command Argument Description
NOTEPAD.EXE $$FilePath$$ Starts Microsoft Notepad displaying the
contents of the $$FilePath$$
argument.
ISQL.EXE -U$$CurUserID$$ -P$$CurPwd$$
-S$$CurConString$$
-i$$FilePath$$
Starts ISQL, automatically connects to
the current datasource using the
current user name and password, and
executes the contents of $$FilePath$$.
SQLPLUS.EXE $$CurUserID$$/$$CurPwd$$@$$
CurConString$$ @$$FilePath$$
Starts SQL*Plus, connects to the
current datasource using the current
user name and password, and
executes the contents of $$FilePath$$.
Argument Description
$$FilePath$$ The complete filename of the current source (defined as
drive+path+filename); blank if a non-source window is active.
$$FileDir$$ The directory of the current source (defined as drive+path); blank if a
non-source window is active.
$$FileName$$ The filename of the current source (defined as filename); blank if the
non-source window is active.
$$FileExt$$ The filename extension of the current source; blank if a non-source
window is active.
$$CurLine$$ The current cursor line position within the active window.
$$CurCol$$ The current cursor column position within the active window.
$$CurText$$ The current text (the word under the current cursor position, or the
currently selected text, if there is one).
$$CurDir$$ The current working directory (defined as drive+path).
$$CurDatasource$$ The name of the current datasource as defined in Rapid SQL.
$$CurUserID$$ The name of the current datasource user.
$$CurPwd$$ The current datasource password.
$$CurConString$$ The current connection string or server name.
Option Description
APPLICATION BASICS > PRODUCT DESIGN
EMBARCADERO TECHNOLOGIES > BOOKNAMEVARIABLE 53
Predefined Arguments
Rapid SQL provides a number of predefined arguments that you can pass to programs that you have added to the
Tools menu. The table below lists the available predefined arguments:
NOTE: Arguments are case-sensitive.
Keyboard Shortcuts
Rapid SQL provides a number of keyboard shortcuts to help you expedite your tasks. The table below lists the taxes
and related shortcuts:
Argument Description
$$FilePath$$ The complete filename of the current source (defined as
drive+path+filename); blank if a non-source window is active.
$$FileDir$$ The directory of the current source (defined as drive+path); blank if a
non-source window is active.
$$FileName$$ The filename of the current source (defined as filename); blank if the
non-source window is active.
$$FileExt$$ The filename extension of the current source; blank if a non-source
window is active.
$$CurLine$$ The current cursor line position within the active window.
$$CurCol$$ The current cursor column position within the active window.
$$CurText$$ The current text (the word under the current cursor position, or the
currently selected text, if there is one).
$$CurDir$$ The current working directory (defined as drive+path).
$$CurDatasource$$ The name of the current datasource as defined in Rapid SQL.
$$CurUserID$$ The name of the current datasource user.
$$CurPwd$$ The current datasource password.
$$CurConString$$ The current connection string or server name.
General Editing Keyboard Command
Delete one character to the left BACKSPACE
Delete one character to the right DELETE
Cut selected text to the Clipboard CTRL+X
Undo the last action CTRL+Z
Redo the last undo operation CTRL+Y
Copy text CTRL+C
Paste the Clipboard contents CTRL+V
To Extend a Selection Keyboard Command
One character to the right SHIFT+RIGHT ARROW
One character to the left SHIFT+LEFT ARROW
APPLICATION BASICS > PRODUCT DESIGN
EMBARCADERO TECHNOLOGIES > BOOKNAMEVARIABLE 54
To the end of a word CTRL+SHIFT+RIGHT ARROW
To the beginning of a word CTRL+SHIFT+LEFT ARROW
To the end of a line SHIFT+END
To the beginning of a line SHIFT+HOME
One line down SHIFT+DOWN ARROW
One screen up SHIFT+PAGE UP
To the beginning of a document CTRL+SHIFT+HOME
To the end of a document CTRL+SHIFT+END
To include the entire document CTRL+A
To Move the Insertion Point Keyboard Command
One character to the left LEFT ARROW
One character to the right RIGHT ARROW
One word to the left CTRL+LEFT ARROW
One word to the right CTRL+RIGHT ARROW
One line up UP ARROW
One line down DOWN ARROW
To the end of a line END
To the beginning of a line HOME
One screen up (scrolling) PAGE UP
One screen down (scrolling) PAGE DOWN
To the end of a document CTRL+END
To the beginning of a document CTRL+HOME
Bookmarks Keyboard Command
Toggle bookmark on/off CTRL+F2
Go to next bookmark F2
Go to previous bookmark SHIFT+F2
Splitter Windows Keyboard Command
Go to next pane F6
Go to previous pane SHIFT+F6
To Extend a Selection Keyboard Command
APPLICATION BASICS > PRODUCT DESIGN
EMBARCADERO TECHNOLOGIES > BOOKNAMEVARIABLE 55
Full Screen Mode
Rapid SQL has full screen mode capabilities so you can conceal the application framework and use the entire monitor
area. Full screen mode hides any other applications running on the computer and uses every available pixel for the
application. Main menu functionality is accessible through keyboard commands when you use full screen mode.
Debugger Operations Keyboard Command
Start Debugging CTRL+F5
Stop Debugging SHIFT+F5
Step Over F10
Step Into F11
Run to Cursor CTRL+F10
Step Out SHIFT+F11
Describe from Cursor CTRL+D
Insert or Remove Breakpoint F9
Toggle (Enable or Disable) Breakpoint CTRL+F9
Edit Breakpoint ALT+F9
Go F5
Restart CTRL+SHIFT+F5
Debugger Windows Keyboard Command
Open or Close Watch Window ALT+3
Open or Close Variables Window ALT+4
Open or Close Call Stack Window ALT+5
Open or Close Dependency Tree Window ALT+6
Other Windows Keyboard Command
Go to the Result Tab CTRL+ALT+R
Go to the Query Tab CTRL+ALT+Q
Open the Describe window (for highlighted
object)
CTRL+D
Toggle between Workspaces CTRL+W
Toggle between Datasource Explorer and
ISQL Window.
CTRL+ALT+E
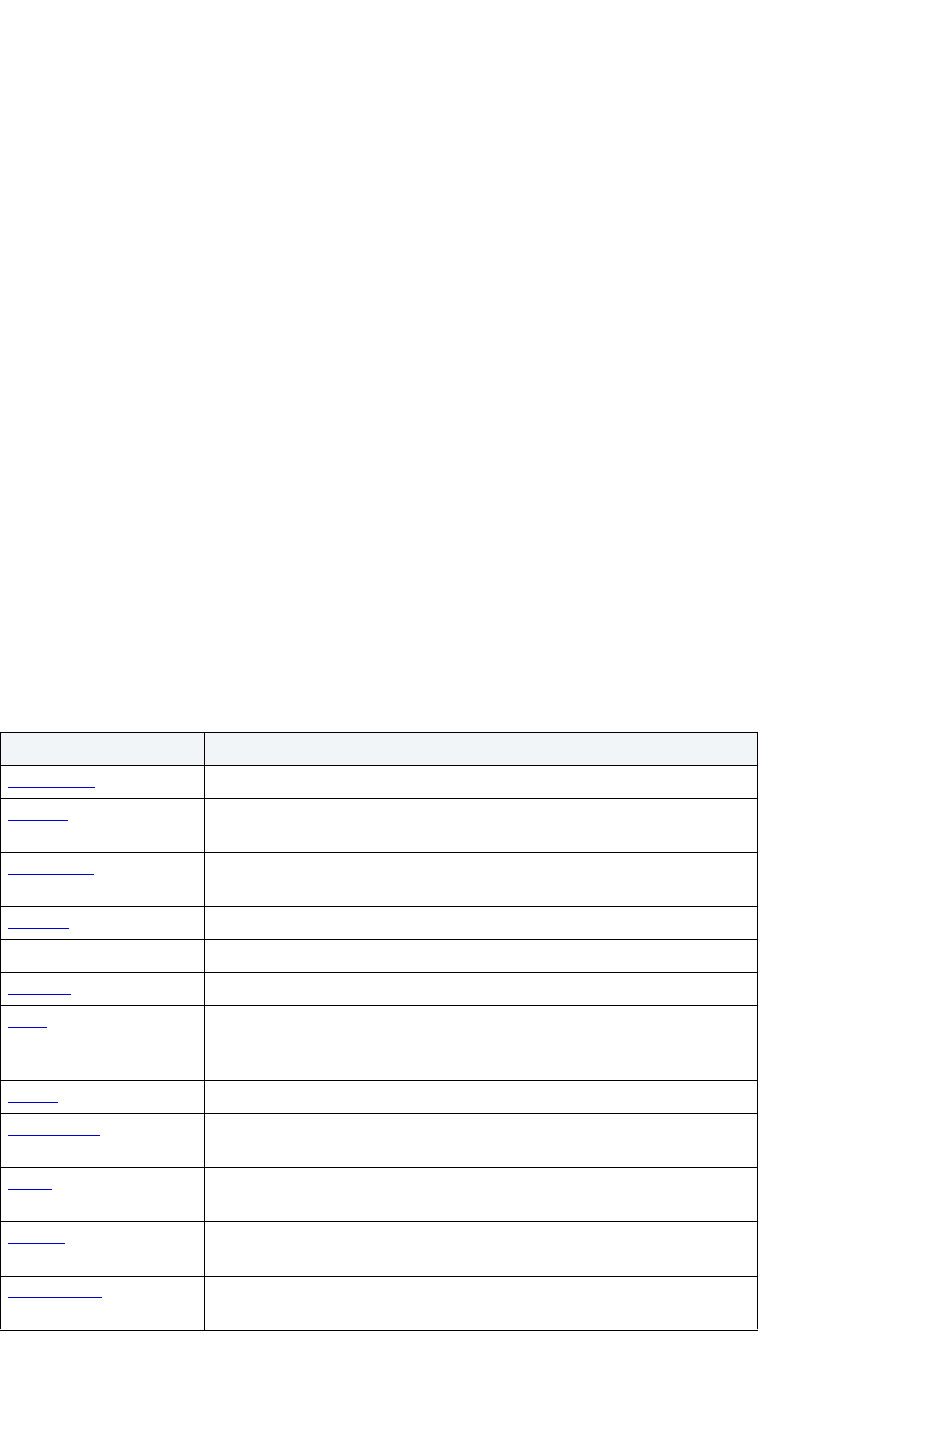
APPLICATION BASICS > CONFIGURING RAPID SQL
EMBARCADERO TECHNOLOGIES > BOOKNAMEVARIABLE 56
Activating Full Screen Mode
Rapid SQL offers two ways to activate full screen mode:
1 On the View menu, click Full Screen.
OR
On the Main toolbar, click Full Screen.
Rapid SQL expands the application to fit the entire monitor area.
NOTE: The Full Screen mode icon is a stand-alone floating toolbar.
Dismissing Full Screen Mode
1 Click Full Screen to expand the application to fit the entire monitor area.
TIP: If you closed the Full Screen mode toolbar, right-click the top of the Rapid SQL desktop to bring
the toolbar back.
2 Click Full Screen to restore the application to the default size.
Configuring Rapid SQL
Rapid SQL lets you customize the application configuration for your specific needs. All Rapid SQL application settings
are available in the Options Editor, which is organized in a tabular format based on feature sets.
The table below describes the Options Editor tabs:
Tabs Description
Datasource Specifies how to store datasource registry in the local registry.
General
Specifies the defaults for automatic login and other general application
options.
Connection
Specifies the timeout parameters, packet size for a connection, and
ANSI to OEM settings.
Logging
Specifies the defaults for SQL Logging.
Licensing Specifies different logging options for the licensing data.
Explorer
Sets defaults for the organization of objects in the Explorer Tab.
ISQL
Specifies the defaults for platform-specific SQL batch delimiters, the
execute selected text option, and the maximum allowable errors before
aborting the execution of an SQL script.
Debug
Configures the Embarcadero SQL Debugger.
DDL Extract
Specifies whether or not Rapid SQL should include DROP statements
when extracting schema.
Editor
Specifies the defaults for line numbers, command history, formatting,
and file tracking in the SQL Editors.
Results
Specifies the autoformatting of result sets, how to display Result
Windows, the mail file type, and set default fonts.
Auto Format
Formats the PL/SQL in your SQL window if you are connected to an
Oracle datasource.
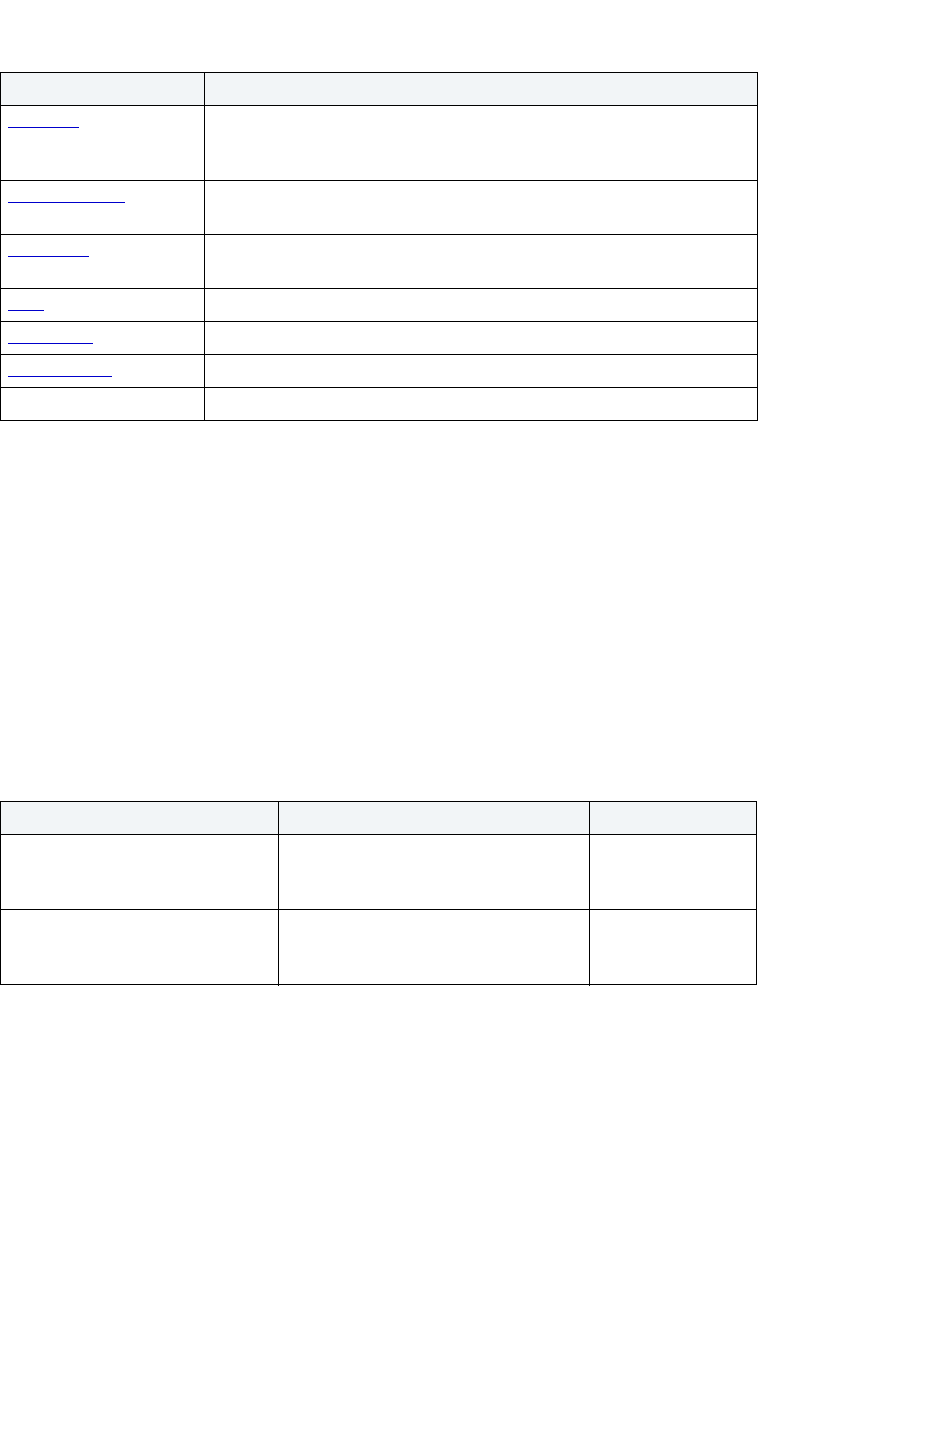
APPLICATION BASICS > CONFIGURING RAPID SQL
EMBARCADERO TECHNOLOGIES > BOOKNAMEVARIABLE 57
Configuring Rapid SQL
1 On the File menu, click Options.
OR
On the Main toolbar, click Options.
Rapid SQL opens the Options Editor.
Options Editor - Datasource Tab
The Datasource Tab of the Options Editor lets you specify number of datasources to display in the datasource list.
The table below describes Datasource options:
Setting Datasource Options
1 On the File menu, click Options.
OR
On the Main toolbar, click Options.
Rapid SQL opens the Options Editor.
2 Click the Datasource Tab.
3 Select the appropriate Datasource options.
4 Click OK.
Rapid SQL accepts your selections and closes the Options Editor.
Browsers Specifies the default display properties of the browsers, the default font
and color for a specific browser type, the mail file type, and the default
browser owner to display object browsers.
Version Control
Specifies which Version Control system you want to integrate with
Rapid SQL.
Directories
Specifies default directories for ETSQLX Job Configuration files and
report templates.
Java
Specifies location of Java Compiler.
Data Editor
Specifies settings for Data Editor.
Query Builder
Specifies global settings for Query Builder.
Code Analyst Specifies setting for the Code Analyst.
Option Description Default
Recent Datasource List Contains Lets you specify number of
datasources to display in the
datasource list.
8
Check Server Component When
Connect to DB2/OS390
Datasource
Rapid SQL checks server component
when connecting to an IBM DB2 UDB
for OS/390 datasource.
Selected
Tabs Description

APPLICATION BASICS > CONFIGURING RAPID SQL
EMBARCADERO TECHNOLOGIES > BOOKNAMEVARIABLE 58
For more information, see Configuring Rapid SQL.
Options Editor - General Tab
The General Tab of the Options Editor lets you specify general application options. The table below describes General
Application options for all supported platforms:
Setting General Application Options
1 On the File menu, click Options.
OR
On the Main toolbar, click Options.
Rapid SQL opens the Options Editor.
2 Click the General Tab.
3 Select the appropriate General options.
4 Click OK.
Rapid SQL accepts your selections and closes the Options Editor.
For more information, see Configuring Rapid SQL
.
Option Description Default
Confirm on Exit Rapid SQL displays a message confirming the operation
before exiting the application.
Selected
Default Job
Scheduler
Lets you select the default job scheduler, either
Embarcadero Job Scheduler or Microsoft's Task
Manager.
Embarcadero Job
Scheduler (if
installed)
Always prompt
for Scheduler
When you schedule a task, Rapid SQL displays an dialog
box that lets you select a scheduler.
NOTE: This option is only available if you have installed
Embarcadero Job Scheduler.
Selected
Max Editors in a
Single Open
Operation
Specifies the maximum number of editors allowable from
a single Open operation.
5
Max Entries in
Output Window
Specifies the maximum number of messages that can
appear in the Message Window before the contents are
flushed. This option conserves memory resources. You
can clear the output window or raise the maximum
number allowed at any time.
1500
DBA Views ORACLE ONLY: Allows users with DBA role/privileges to
view Data Dictionary Usage.
Selected
ALL Views ORACLE ONLY: Allows all users regardless of assigned
privileges to view Data Dictionary Usage.
Not selected
Preserve Case in
Object Identifiers
ORACLE ONLY: Preserves case of the database object. Not selected

APPLICATION BASICS > CONFIGURING RAPID SQL
EMBARCADERO TECHNOLOGIES > BOOKNAMEVARIABLE 59
Options Editor - Connection Tab
NOTE: This option is available for Sybase Adaptive Server and Microsoft SQL Server only.
You can configure a number of server parameters for interacting with your platform’s datasources in the Connection
Tab of the Options Editor. The table below describes Connection options:
Setting Connection Options
1 On the File menu, click Options.
OR
On the Main toolbar, click Options.
Rapid SQL opens the Options Editor.
2 Click the Connection Tab.
3 Select the appropriate Connection options.
4 Click OK.
Rapid SQL accepts your selections and closes the Options Editor.
For more information, see Configuring Rapid SQL
.
Option Description Default
Login Timeout Specifies the number of seconds that the
application should wait for a response to a
connection request from SQL server. If SQL server
does not respond within the specified period, the
application aborts the connection and returns an
error message.
30
Query Timeout Specifies the number of seconds that the
application should wait for a response to a query
from your server. If your server does not respond
within the specified period, the application
terminates its query process and returns an error.
0
Packet Size Specifies in bytes the network packet size to be
used when communicating with your server.
512
Client Character Set Character set of client computer. Local character
set
Host Name Name of the client computer. Applicable to Sybase
Adaptive Server and Microsoft SQL Server only.
Local name
Use Quoted Identifier If you plan to use delimited identifiers, this option
must be selected.
Not selected

APPLICATION BASICS > CONFIGURING RAPID SQL
EMBARCADERO TECHNOLOGIES > BOOKNAMEVARIABLE 60
Options Editor - Logging Tab
The Logging Tab of the Options Editor lets you set defaults that specify the behavior and placement of SQL Logging
and Output Logging. The table below describes Logging options:
Setting Logging Options
1 On the File menu, click Options.
OR
On the Main toolbar, click Options.
Rapid SQL opens the Options Editor.
2 Click the Logging Tab.
3 Select the appropriate Logging options.
4 Click OK.
Rapid SQL accepts your selections and closes the Options Editor.
For more information, see Configuring Rapid SQL
.
Option Description Default
Log all SQL Statements to a
File
Indicates that the application should log all of
the SQL that it executes to a file. SQL logging
provides an audit trail for Rapid SQL. You can
examine this log to determine what SQL the
application executed to complete a task.
Not selected
Logfile Path If you choose to log the SQL generated by the
application, then you must specify the drive,
directory and file name in this box.
None
Max File Size Specifies the maximum size for the log file.
When the log file reaches this threshold, it
automatically starts deleting lines in the log file,
starting with the oldest statements, to remain
within the specified size limit.
1024 KB
Truncate Empties the entire contents of the Log File. Not available
Log all Output Messages to a
File
Indicates that the application should log all
server messages sent to the output window.
This type of logging lets you monitor only
messages issued by the server versus all SQL
logged by the application. You can examine
this log to determine what server messages the
server issued.
Not selected
Logfile Path If you choose to log the server messages
generated in the output window, then you must
specify the drive, directory, and file name in this
box.
None
Max File Size Specifies the maximum size for the output log
file. When the output log file reaches this
threshold, it automatically starts deleting lines
in the file, starting with the oldest statements, to
remain within the specified size limit.
1024 KB
Truncate Empties the entire contents of the Output Log
File.
Not available

APPLICATION BASICS > CONFIGURING RAPID SQL
EMBARCADERO TECHNOLOGIES > BOOKNAMEVARIABLE 61
Options Editor - Licensing Tab
The Licensing Tab of the Options Editor lets you specify different logging options for the licensing data.
NOTE: License log file options should only be modified when you are working with Embarcadero Support
to identify licensing errors.
The table below describes the options and functionality on the Licensing Tab:
For more information, see Configuring Rapid SQL
.
Options Editor - Explorer Tab
The Explorer Tab of the Options Editor lets you configure how objects are organized in the Database Explorer. The
table below describes Explorer options:
Option Description Default
Filename: Displays the name of the
license log file. Browse to
identify where it is located.
guardian.log
Max Log Size (bytes) Indicates the maximum size
in bytes to which the file can
grow.
1048576 bytes
Errors Lets you log license error
data.
Selected
Info Lets you log license
information data
Not selected
Debugging Lets you log license
debugging data.
Not selected
Option Description Default
Organize by Object
Owner
Groups objects by object type for each user.
This display mode is more efficient if you are
working with databases containing a high
number of objects.
Not selected
Organize by Object Type Groups objects by object type for all users in the
same list.
Selected
Show Only My Objects Available if you are organizing the Explorer Tab
by object type. Shows only the objects you own
in the Explorer Tab.
Not selected
Show System Objects Shows all system objects in the Explorer Tab. Not selected
Refresh after Object
Commands
Refreshes the Explorer Tab automatically after
an object has been modified or created.
Selected
Retain Group View
Settings
Select to retain the current state of the Explorer
Tab so that the it opens the same way the next
time you start Rapid SQL.
Selected

APPLICATION BASICS > CONFIGURING RAPID SQL
EMBARCADERO TECHNOLOGIES > BOOKNAMEVARIABLE 62
Setting Explorer Options
1 On the File menu, click Options.
OR
On the Main toolbar, click Options.
Rapid SQL opens the Options Editor.
2 Click the Explorer Tab.
3 Select the appropriate Explorer options.
4 Click OK.
Rapid SQL accepts your selections and closes the Options Editor.
For more information, see Configuring Rapid SQL
.
Options Editor - ISQL Tab
Rapid SQL lets you set ISQL Execution parameters. The table below describes the ISQL options:
Option Description Default
Max Errors
Before
Aborting
Sets the maximum number of errors allowed before aborting
the execution of a script. A zero (0) indicates that the option is
inactive and that you recognize no limit to the number of
errors allowed. Rapid SQL refers to this value when step
executing SQL scripts.
0
Execute
Selected Text
Executes a portion of a highlighted SQL script. Turning this
option off disables the execution of selected text.
Selected
Check Syntax
When
Executing
For DB2, required to execute DB2 call statements in the ISQL
Window.
Not Select
Tabs Sets the appearance of your ISQL Window tabs to either the
top or bottom of the ISQL Window.
Top
File
Association
Specifies whether the application should open an unknown
file type automatically into an ISQL Window or prompt you
with a message that Rapid SQL does not recognize the file
type.
Open unknown
files into an
ISQL Window
Delimiter Tab:
DB2
Set the type of batch delimiters to use for IBM DB2 UDB for
Open Systems.
NOTE: You cannot use a semi-colon because it is reserved
for use as an intra-block delimiter
;
Delimiter Tab:
Oracle
Sets the type of batch delimiter for Oracle.
Enable DBMS Output - Displays text sent via the Oracle
dmbs_output package and lets PL/SQL Developers see their
output messages.
Auto-Commit changes - Automatically commits SQL
statements as soon as the statements are run.
Buffer Size - Lets you specify buffer size.
NOTE: If you leave the buffer at 0, Oracle assigns a default
buffer size of 2000.
/
Selected
Not selected
0

APPLICATION BASICS > CONFIGURING RAPID SQL
EMBARCADERO TECHNOLOGIES > BOOKNAMEVARIABLE 63
Setting ISQL Execution Options
1 On the File menu, click Options.
OR
On the Main toolbar, click Options.
Rapid SQL opens the Options Editor.
2 Click the ISQL Tab.
3 Select the appropriate ISQL options.
4 Click OK.
Rapid SQL accepts your selections and closes the Options Editor.
For more information, see Configuring Rapid SQL
.
Options Editor - Debug Tab
The Debug Tab of the Options Editor lets you set the duration of your debug initialization and debug session, enable or
disable DBMS_OUTPUT, and enable the refresh option. The table below describes Debugger options:
Delimiter Tab:
SQL Server
Sets the type of batch delimiter for Microsoft SQL Server.
NOTE: You cannot use a semi-colon because it is reserved
for use as an intra-block delimiter.
go
Delimiter Tab:
Sybase
Sets the type of batch delimiter for Sybase ASE. go
Tab Option Description Default
General Dependency Tree Option SYBASE DEBUGGER ONLY:
Lets you select pre-fetch options.
Pre-Fetch All
Dependencies
Profiler Profiler Time Unit Lets you select the milliseconds, seconds or minutes. Milliseconds
Save Profiler Reports Lets you save profiler reports and type or browse for the
report path.
Not Selected
Oracle Initialization Timeout
(seconds)
Specifies the point at which the application stops trying
to initialize the debugger. If it cannot initialize the
debugger in the specified time, it displays message in
the Debug Output window.
60
Debug Session Timeout
(seconds)
Specifies the point at which the application terminates
your debug session due to idle time.
7200
Enable DBMS Output Enables the Oracle built-in package, DBMS_OUTPUT,
letting you send messages from stored procedures,
packages, and triggers.
Selected
Refresh Dependencies
for each run
Refreshes the dependencies each time you run the
debugger.
Not selected
Compile with Debug
Option
Select options to compile dependent objects while
debugging.
Compile dependent
options
Option Description Default
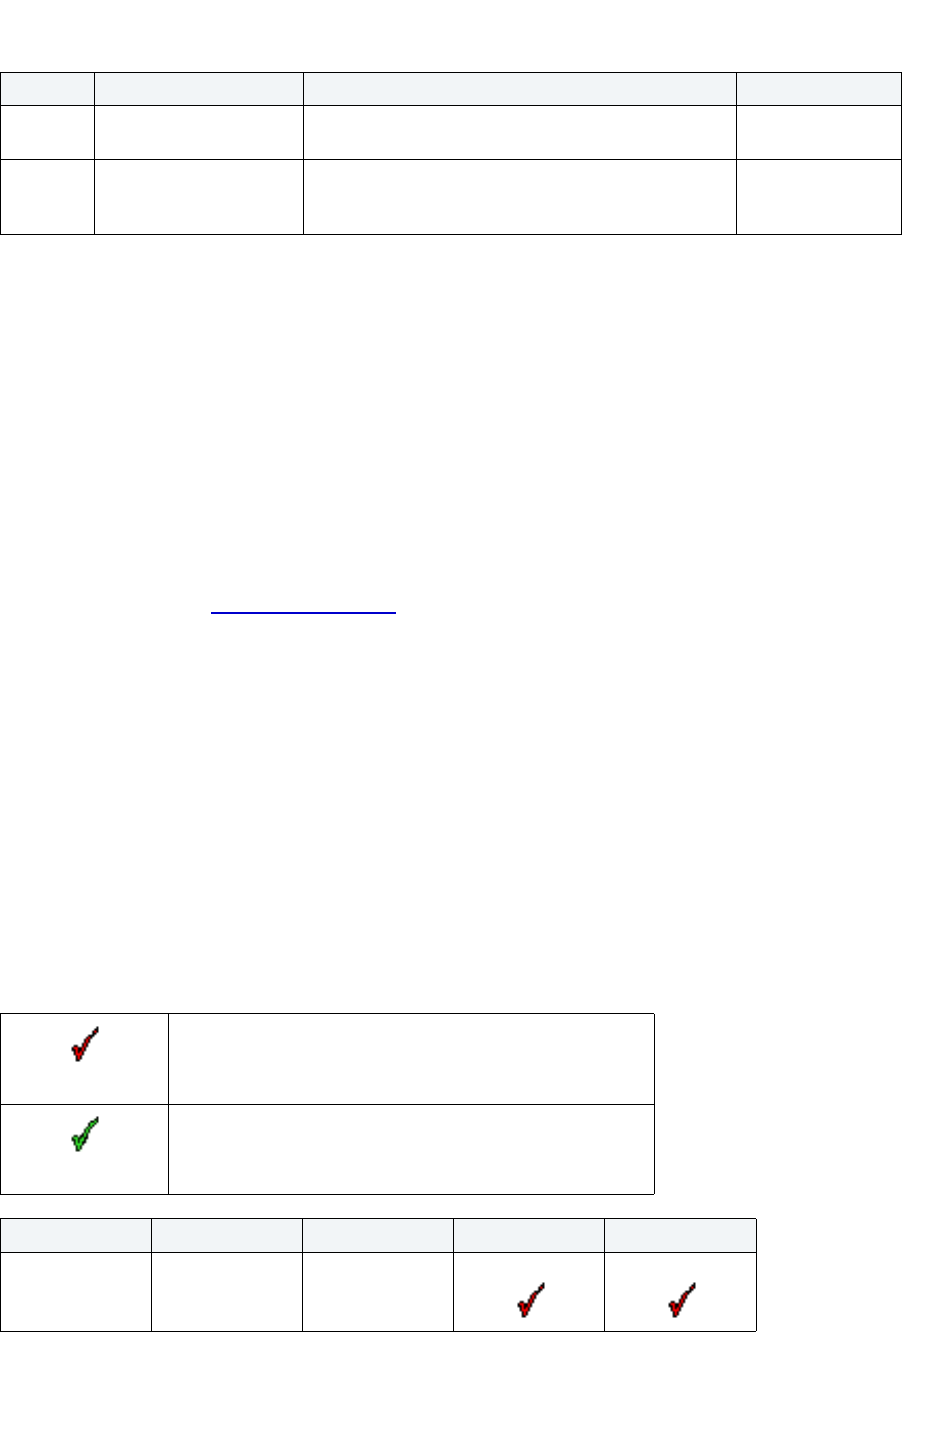
APPLICATION BASICS > CONFIGURING RAPID SQL
EMBARCADERO TECHNOLOGIES > BOOKNAMEVARIABLE 64
Setting Debug Execution Options
1 On the File menu, click Options.
OR
On the Main toolbar, click Options.
Rapid SQL opens the Options Editor.
2 Click the Debug Tab.
3 Select the appropriate Debug options.
4 Click OK.
Rapid SQL accepts your selections and closes the Options Editor.
For more information, see Configuring Rapid SQL
.
Options Editor - DDL Extract Tab
Rapid SQL lets you extract the schema of any database object into an interactive SQL window. The DDL Extraction
Tab of the Options Editor lets you specify if Rapid SQL should include object type drop statements when extracting
schema. This feature is generally used to modify and to recompile database objects; however, you must drop a
database object before recreating it.
The DDL Extraction Tab of the Options Editor lets you specify the object types for which Rapid SQL should include
DROP statements when extracting their schema. Selecting the check boxes instructs Rapid SQL to include DROP
statements.
The table below shows the object types you can include a DROP statement with when performing an ad hoc DDL
extraction:
DB2 Debug Session Timeout
(seconds)
Specifies the point at which the application terminates
your debug session due to idle time.
300
Compile with Debug
Option before Debug
Session
Lets you specify options. Prompt Always
Indicates object type available to drop and is set as default.
Indicates object type available to drop.
Option DB2 Oracle SQL Server Sybase
Defaults
Tab Option Description Default
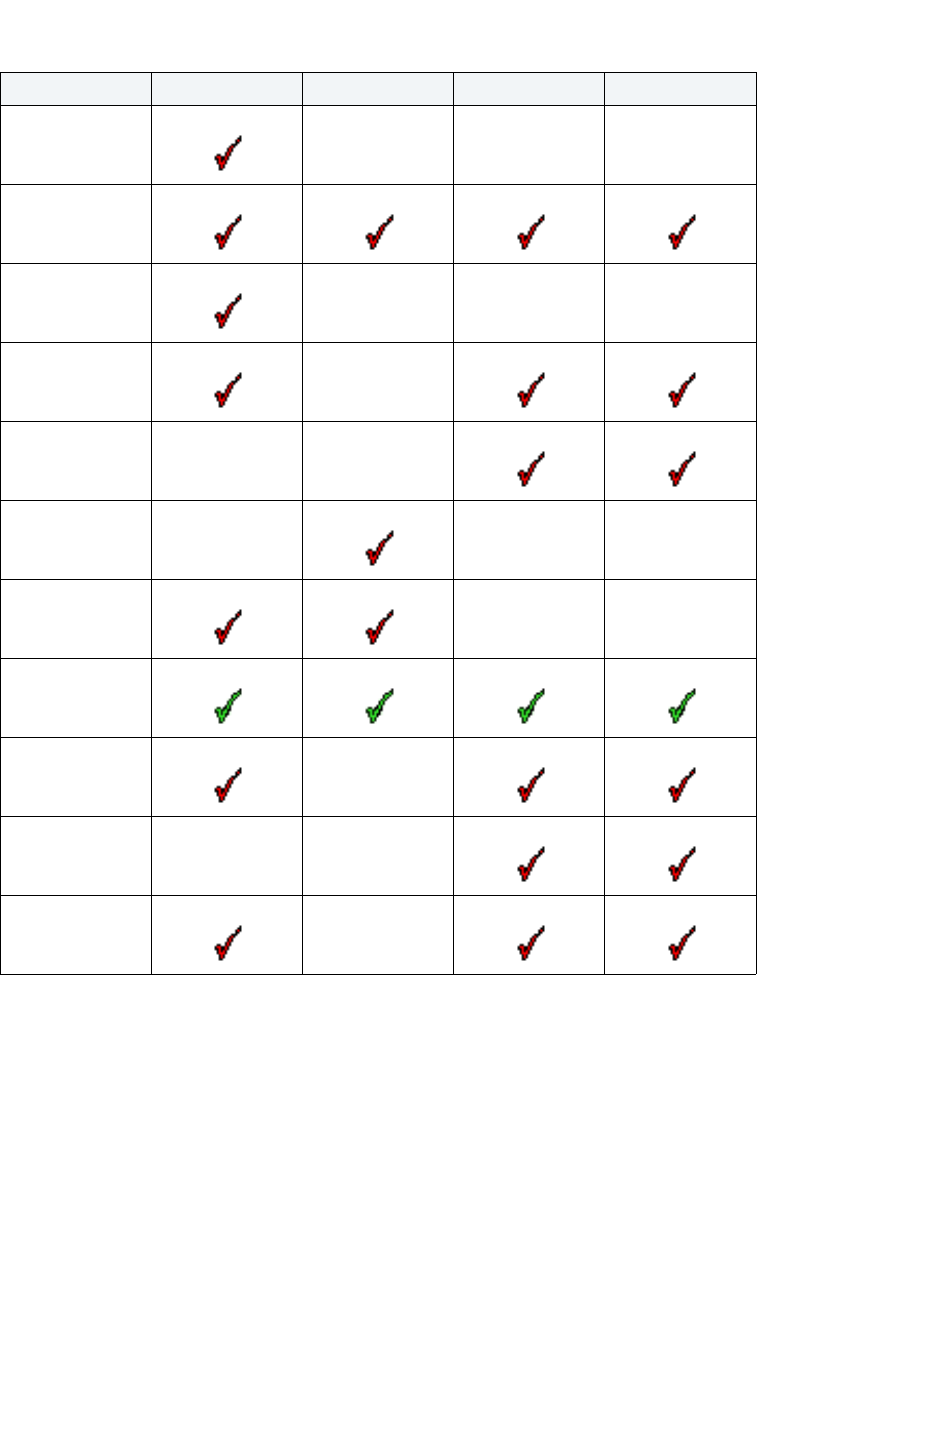
APPLICATION BASICS > CONFIGURING RAPID SQL
EMBARCADERO TECHNOLOGIES > BOOKNAMEVARIABLE 65
Setting DDL Extraction Options
1 On the File menu, click Options.
OR
On the Main toolbar, click Options.
Rapid SQL opens the Options Editor.
2 Click the DDL Extract Tab.
3 Click the Select RDBMS list and then click the appropriate platform.
Rapid SQL displays available object types.
Functions
Indexes
Packages
Procedures
Rules
Sequences
Synonyms
Tables
Triggers
User Datatypes
Views
Option DB2 Oracle SQL Server Sybase

APPLICATION BASICS > CONFIGURING RAPID SQL
EMBARCADERO TECHNOLOGIES > BOOKNAMEVARIABLE 66
4 Select the check boxes next to the object types whose DROP statements you want included when extracting their
schema.
• To make Rapid SQL extract the schema for each object into separate DDL windows, click Extract to multiple
window.
• For Oracle, if you want DDL Extract display format default to Auto Format Parameters, click Auto Format
Oracle Objects.
5 Click OK.
Rapid SQL accepts your selections and closes the Options Editor.
CAUTION: Because dropping an object is a destructive action, you should carefully consider including DROP
statements before activating this option.
For more information, see Configuring Rapid SQL
.
Options Editor - Editor Tab
Rapid SQL lets you set ISQL Window options listed below:
• Editor appearance of the editor
• Syntax coloring and font for SQL scripts
• File tracking
• Line numbers
• Auto-save
• Parameters for the command history feature.
The table below describes ISQL Editor options:
Interface
Element
Option Description Default
Window Show Toolbar Indicates whether or not the ISQL
Window toolbar should be displayed.
Selected
Show Status Bar Indicates whether or not the ISQL
Window status bar should be displayed.
Selected
Maximize on
new or open
Indicates that Rapid SQL should
maximize the SQL Editor when one is
opened or created. If you already have
an active MDI Window that is maximized
the default behavior is to maximize a
new child window. To deactivate this
option, make sure that you do not have
any active MDI Windows, such as the
Explorer.
Selected
Auto-Save File Indicates that files in the SQL Editor
should automatically be saved at the
indicated time interval. Specify in
minutes the time interval in which files
should be saved.
Selected
Every 5 minutes

APPLICATION BASICS > CONFIGURING RAPID SQL
EMBARCADERO TECHNOLOGIES > BOOKNAMEVARIABLE 67
Auto-Reload File Applies if File Tracking is enabled.
Indicates that the application should
automatically reload a file that has been
externally modified without prompting
you. If you turn this option off, Rapid
SQL prompts you before reloading your
file if external changes have been
saved.
Not selected
File Tracking Indicates that the SQL Editor should use
the File Tracking Facility to monitor the
status of a file. If a file has been modified
and saved outside the application, the
application loads the most current
version of the file into the SQL Editor
based on the options set for
Auto-Reload File (see above).
Selected
Command
History
Save file before
Overwriting
Specifies the action you want the
application to take when selecting a
command from the command history
box. You have the option to be reminded
to save a file before overwriting (Ask
First), to automatically save a file before
overwriting (Always), or to automatically
overwrite the file with the command
(Never).
Ask First
Save Most
Recent
Specifies the number of commands you
want saved in the command history drop
down list on the upper right side of the
ISQL window toolbar. The maximum
allowable value is 99.
15
Appearance Enable Syntax
Highlighting
Sets syntax highlighting on so that all
key words and comments are in color for
easier reading and debugging.
Selected
Show Line
Numbers
Places line numbers in the left hand
column of an ISQL Window.
Selected
Enable Outlining Makes SQL statements collapsible Selected
Enable Text
Wrapping
Wraps long lines to ISQL window. Selected
Background
Color
Sets the background color of the ISQL
window.
White
Editor Font Sets the font for SQL scripts. Select the
font face, style, and size from the lists.
Available
Printer Font Lets you specify the font face, style, and
size for printing.
Available
Syntax Coloring Opens the Syntax Coloring dialog box
where you can set syntax coloring for
keywords, comments, quotes, and
default text for various file types and
scripts.
Available
Interface
Element
Option Description Default

APPLICATION BASICS > CONFIGURING RAPID SQL
EMBARCADERO TECHNOLOGIES > BOOKNAMEVARIABLE 68
Setting SQL Editor Options
1 On the File menu, click Options.
OR
On the Main toolbar, click Options.
Rapid SQL opens the Options Editor.
2 Click the Editor Tab.
3 Select the appropriate Editor options.
4 Click OK.
Rapid SQL accepts your selections and closes the Options Editor.
For more information, see Configuring Rapid SQL
.
Options Editor - Results Tab
Rapid SQL lets you use the Results Tab to set the SQL Results Window options listed below:
• Default font
• Row separators
• Mail file type
The table below describes Results options:
Formatting Auto Indent Sets automatic indentation for each
carriage return and new line in your SQL
script.
Selected
Expand Tabs Sets tabs as spaces in result sets. See
Tab Size option.
Selected
Tab Size Indicates the number of spaces you
want to substitute for tabs in result sets.
4
Interface
Element
Option Description Default
Result Window Single Window Displays all results in one tabbed result
window. Multiple result sets are
appended together in the window.
Single Window and Multiple Windows
options are mutually exclusive.
Selected
Multiple
Windows
Displays multiple result sets one result
set per window. Single Window and
Multiple Windows options are mutually
exclusive.
Not selected
Interface
Element
Option Description Default

APPLICATION BASICS > CONFIGURING RAPID SQL
EMBARCADERO TECHNOLOGIES > BOOKNAMEVARIABLE 69
Attached to
Editor
Used in conjunction with Single Window
option or Multiple Window option.
Indicates that results appear as tabbed
windows attached to the ISQL Window.
Attached to Editor and Unattached
options are mutually exclusively.
Selected
Unattached Used in conjunction with Single Window
option or Multiple Windows option.
Indicates that results appear in windows
separate from the ISQL Window.
Attached to Editor and Unattached
options are mutually exclusive.
Not Selected
Reuse Window Indicates that new result sets should
overwrite any current result sets in an
open Result Window. Only valid for
Single and Attached to Editor
combination.
Selected
Results File Mail File Type Selects the file type that you want Rapid
SQL to use when mailing result sets via
a MAPI-compliant mail package. Valid
formats include the proprietary Results
type, Tab delimited, Comma separated,
and HTML.
Results
Schedule File
Type
Selects the file type that you want Rapid
SQL to use when schedule result sets
via a MAPI-compliant mail package.
Valid formats include Tab delimited,
Comma separated, and HTML.
Include column
titles when
saving
Indicates that column titles should be
included when saving a result set. If this
option is turned off, column titles is not
saved.
Not selected
Result Set
Options
Default
Rowcount
Specify number of rowcounts in results. 0
Text Size SYBASE and MICROSOFT SQL
SERVER ONLY: Specifies text size in
results.
8192
LONG Size
(bytes)
ORACLE ONLY: Specifies LONG size in
bytes.
8192
Skip Row
Between Result
Sets
Leaves a blank row between one result
set and another when results are
displayed in a single window.
Selected
Column
Formatting
Auto Format
(Best Fit)
Sets column widths automatically to
accommodate the longest piece of data
in a column. Large queries depend on
the longest row for formatting, so
activating this option can affect
performance.
Selected
Use pre-defined
column length
Lets you specify column type and
character length.
Not selected
Interface
Element
Option Description Default

APPLICATION BASICS > CONFIGURING RAPID SQL
EMBARCADERO TECHNOLOGIES > BOOKNAMEVARIABLE 70
Setting Result Window Options
1 On the File menu, click Options.
OR
On the Main toolbar, click Options.
Rapid SQL opens the Options Editor.
2 Click the Results Tab.
3 Select the appropriate Results options.
4 Click OK.
Rapid SQL accepts your selections and closes the Options Editor.
For more information, see Configuring Rapid SQL
.
Options Editor - Auto Format Tab
NOTE: This option is for Oracle only.
Enable
Date/Time
Format
Lets you select the date/time format. Not selected.
Format Standard Grid Displays all result sets in a standard grid
format. Result sets are only displayed in
grid format in SQL Editors that are
opened after you have selected this
option. It does not apply to SQL Editors
that are already open.
Selected
HTML Displays all result sets as HTML tables.
Result sets are only displayed in HTML
format in SQL Editors that are opened
after you have selected this option. It
does not apply to SQL Editors that are
already open.
Not selected
ASCII Text Displays all result sets as ASCII Text.
Result sets are only displayed in ASCII
Text format in SQL Editors that are
opened after you have selected this
option. It does not apply to SQL Editors
that are already open.
Not selected
Grid Font Displays the Font dialog box. Select the
font, style, and size for the grid
displayed in result sets.
Available
Printer Font Displays the Font dialog box. Select the
font, style, and size of the printer font for
your result sets. If no fonts are available,
Rapid SQL prompts you to open the
Fonts dialog box from the Windows
Control Panel and install printer fonts.
Available
Interface
Element
Option Description Default

APPLICATION BASICS > CONFIGURING RAPID SQL
EMBARCADERO TECHNOLOGIES > BOOKNAMEVARIABLE 71
Rapid SQL lets you set a number of formatting options when you chose to auto format Oracle objects. These options
are:
• Show or hide dependencies or recommendations.
• Set the style for built in packages, variables, and keywords.
• Set the spacing for your scripts.
The table below describes Auto Format options:
Tab Item Description Default
Style Keywords Specifies whether to display
Oracle keywords, such as
BEGIN, LOOP, and INSERT in
uppercase or lowercase.
Upper Case
Variables Specifies whether to display all
non-Oracle keywords, such as
object names and variables, in
uppercase or lowercase.
Lower Case
Built-ins Specifies whether to display
Oracle built-ins, such as NVL,
DECODE, SIN in uppercase or
lowercase.
Upper Case
Built-in Packages Specifies whether to display
Oracle built-in packages, such
as DBMS_OUTPUT,
DBMS_SQL, and UTL_FILE, in
uppercase or lowercase.
Upper Case
Spacing Keep Tabs Keeps the original tabs in the
PL/SQL script.
Not selected
Insert Spaces Replaces tabs from the original
PL/SQL script with spaces.
Selected
Extra tabs Specifies the number of extra
tabs.
Spaces per tab Specifies the number of spaces
per tab
Retain whitespace
after new line
Retains whitespace after a new
line.
Selected
Indent Size Specifies the number of spaces
a line indents after a line wrap.
3
Right Margin Specifies the maximum number
characters per line.
80
Defaults Resets the options on the page
back to the original settings.
Available
Stacking Parameter Stacking Specifies whether to display the
embedded parameters in your
script by line (compact) or in a
staggered list (standard).
Standard
(Wrapped)
Column Stacking Specifies whether to display
columns in your script by line
(compact) or in a staggered list
(standard).
Standard
(Wrapped)

APPLICATION BASICS > CONFIGURING RAPID SQL
EMBARCADERO TECHNOLOGIES > BOOKNAMEVARIABLE 72
Setting Oracle Auto Format Options
1 On the File menu, click Options.
OR
On the Main toolbar, click Options.
Rapid SQL opens the Options Editor.
2 Click the Auto Format Tab.
3 Select the appropriate Auto Format options.
4 Click OK.
Rapid SQL accepts your selections and closes the Options Editor.
For more information, see Configuring Rapid SQL
.
Options Editor - Browsers Tab
The Browsers Tab of the Options Editor lets you set a number of options for your browser windows, including browser
appearance, mail file type options, and default object owner.The table below describes Browser options:
Interface
Element
Option Description Default
Window Show Toolbar Toggles the Browser window toolbar.
Commands can also be activated from the
shortcut menu that displays when you
right-click in an open Browser window.
Selected
Show Status Bar Toggles the status bar at the bottom of the
Browser window. The status bar displays
the cell location of the current focus and
the number of rows in the Browser window
itself.
Selected
Detailed Listing Toggles detail columns for a given object
type. Each object contains object specific
details, such as creation date, segment,
and so on. When Detailed Listing is turned
off, only the names of objects and the
numbers of rows of data for a table are
displayed.
Not selected
Text Color Sets the text color for all Browsers of that
object type. Select the row appropriate to
a particular object type, then click a color
in the Text column. Remember that text
colors appear best against contrasting
background colors, such as black on
white.
Available
Background
Color
Sets the background color for all Browsers
of that object type. Select the row
appropriate to a particular object type,
then click a color in the Background
column. Remember that text colors
appear best against contrasting
background colors, such as black on
white.
Available

APPLICATION BASICS > CONFIGURING RAPID SQL
EMBARCADERO TECHNOLOGIES > BOOKNAMEVARIABLE 73
Setting Browsers Options
1 On the File menu, click Options.
OR
On the Main toolbar, click Options.
Rapid SQL opens the Options Editor.
2 Click the Browsers Tab.
3 Select the appropriate browser options.
4 Click OK.
Rapid SQL accepts your selections and closes the Options Editor.
For more information, see Configuring Rapid SQL
.
Options Editor - Version Control Tab
The Version Control Tab of the Options Editor lets you select which version control system you want Rapid SQL to use
as the underlying version control system.The table below describes Version Control options:
Browser File Mail File Type Specifies what file type you want the
browser file saved as when sent as e-mail
to another user on a MAPI compliant mail
system. The valid types are the
proprietary Rapid SQL Results type, Tab
delimited, Comma separated, and HTML,
which formats the results in a simple
HTML table.
Results
Default Owner All Owners Indicates that the Browser Window should
default to displaying database objects in
the browsers for all owners in the
database.
Not Selected
Current User Indicates that the Browser Window should
default to displaying database objects
owned exclusively by the current user.
Selected
Specific Owner Indicates that the Browser Window should
default to displaying only the database
objects owned by a specific owner. If you
select this option, you must provide an
owner name in the box.
Not Selected
Item Description Default
Specify Version Control
System
Lists the Version Control systems that integrate with
Rapid SQL. Select the option button for the product
you want Rapid SQL to use.
None
Interface
Element
Option Description Default
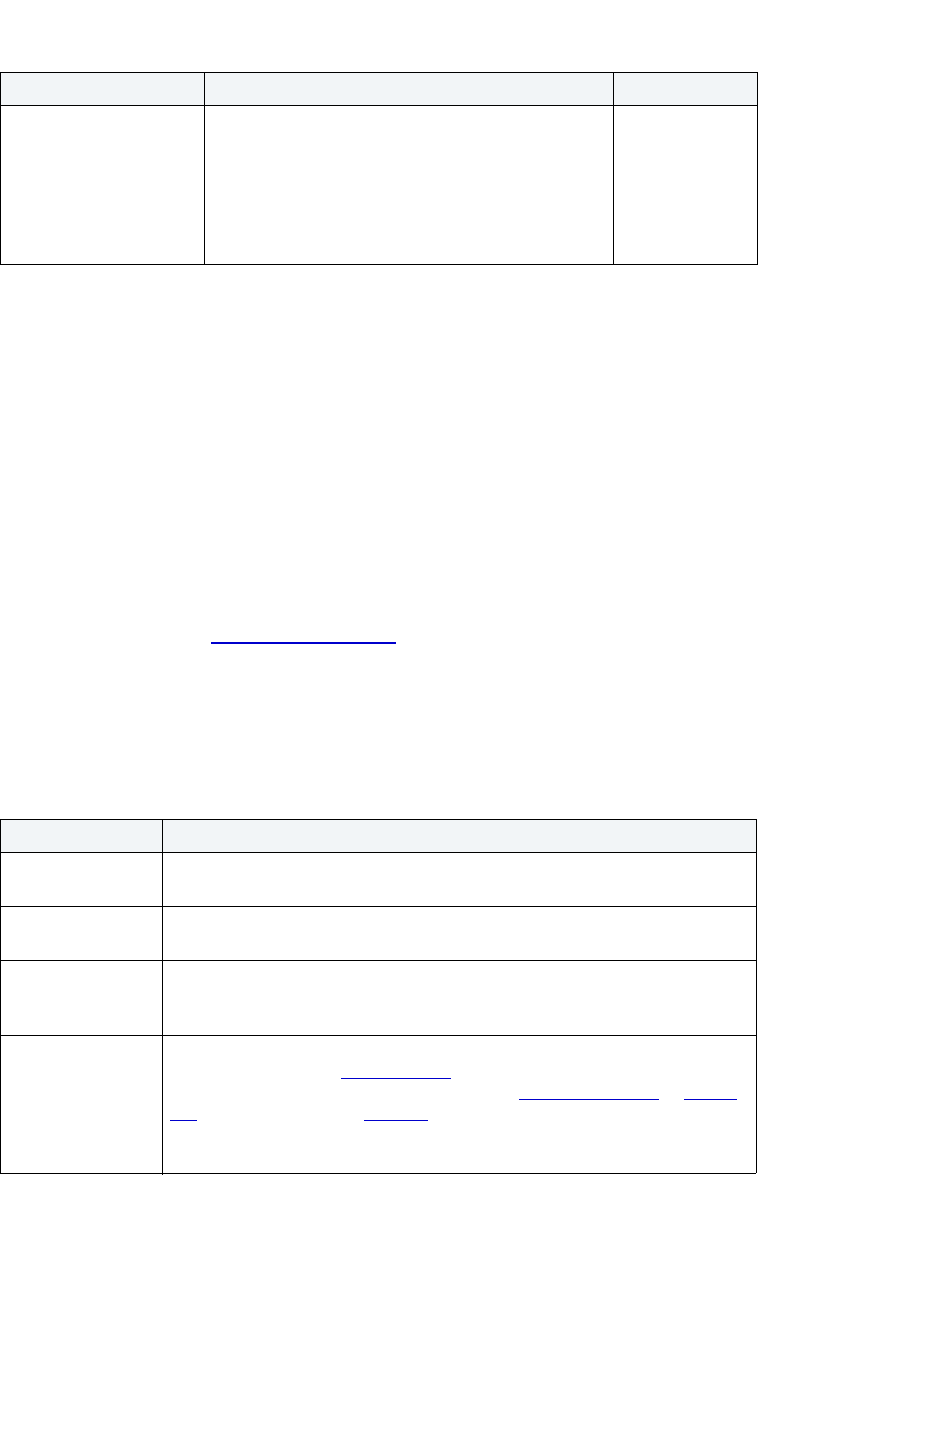
APPLICATION BASICS > CONFIGURING RAPID SQL
EMBARCADERO TECHNOLOGIES > BOOKNAMEVARIABLE 74
Setting Version Control Options
1 On the File menu, click Options.
OR
On the Main toolbar, click Options.
Rapid SQL opens the Options Editor.
2 Click the Version Control Tab.
3 Select the appropriate version control options.
4 Click OK.
Rapid SQL accepts your selections and closes the Options Editor.
For more information, see Configuring Rapid SQL
.
Options Editor- Directories Tab
The Directories Tab of the Options Editor lets you set the locations of your ETSQLX and HTML template files and
version control working directory. The table below describes Directories options:
Optional Fields If you select Microsoft Visual SourceSafe, Rapid
SQL uses your default SourceSafe database unless
you override this setting by entering the path for the
SourceSafe file associated with the desired
database. To use a SourceSafe database other than
the default, provide a user name, password, and the
location of a scrsafe.ini file.
Optional
Item Description
ETSQLX Job
Configuration Files
Specifies the location of any ETSQLX job configuration files you have set on
your local machine.
Report Templates Specifies the location of the HTML templates the application uses when
generating reports.
User SQL Scripts Specifies the name and location of the default directory for SQL Scripts.
Default is C:\Documents and Settings\Administrator\Application
Data\Embarcadero\RapidSQL\UserSQLScripts
Version Control
Working Directory
Specifies directory where the version control file will be opened to when the
file is opened from the version control
system. This is the directory where the
version control file is stored when you use the Get Latest Version
or Check
Out functionality from the VC Files Tab. It will also be the folder used for files
in the VC Files Tab when they are opened, executed, checked in, or their
checkouts are undone.
Item Description Default

APPLICATION BASICS > CONFIGURING RAPID SQL
EMBARCADERO TECHNOLOGIES > BOOKNAMEVARIABLE 75
Setting Directories Options
1 On the File menu, click Options.
OR
On the Main toolbar, click Options.
Rapid SQL opens the Options Editor.
2 Click the Directories Tab.
3 Select the appropriate directory options.
4 Click OK.
Rapid SQL accepts your selections and closes the Options Editor.
For more information, see Configuring Rapid SQL
.
Options Editor - Java Tab
The Java Tab of the Options Editor lets you set the path of your Java compiler. The table below describes Java
Options:
Setting Java Options
1 On the File menu, click Options.
OR
On the Main toolbar, click Options.
Rapid SQL opens the Options Editor.
2 Click the Java Tab.
3 Select the appropriate Java options.
4 Click OK.
Rapid SQL accepts your selections and closes the Options Editor.
For more information, see Configuring Rapid SQL
.
Item Description Default
Load Java Files Lets you select an option:
Use the DBMS_JAVA package - Select to
execute these commands as if they were regular
SQL statements.
Use batch file - Select to use the batch files
provided by Oracle.
Default Encoding Option - Lets you select a
default encoding option.
Use the DBMS_JAVA
package
Drop Java Files Lets you select an option:
Use the DBMS_JAVA package - Select to
execute these commands as if they were regular
SQL statements.
Use batch file - Select to use the batch files
provided by Oracle.
Use the DBMS_JAVA
package

APPLICATION BASICS > CONFIGURING RAPID SQL
EMBARCADERO TECHNOLOGIES > BOOKNAMEVARIABLE 76
Options Editor - Data Editor Tab
Data Editor options are set on the Options Editor. Option parameters set on the Options Editor override options set
within Query Builder and Data Editor. The table below describes Data Editor options:
Interface
Element
Option Description Default
Default
Execution
Mode
Live Mode Sets the default for Data Editor as
Live Mode. Lets you execute changes
one row at a time.
Selected
Batch Mode Sets the default for Data Editor as
Batch Mode. Lets you make unlimited
changes prior to execution.
Not selected
Ignore errors-continue
processing
Executes the insert statement up to
the number of errors set in the Stop
after x errors limit.
Not available;
available when
Batch mode is
selected
Prompt on Error Prompts you every time there is an
error in execution.
Not available;
available when
Batch mode is
selected.
Stop after error(s) Sets the number of errors allowed
before stopping execution in the
number of errors box.
Not available;
available when
Batch mode is
selected. The
default setting is
one.
Data Editor
File
Mail File Type Sets the default mail output style as
Results, Tab Delimited, Comma
Separated, or HTML.
Results
Include column titles
when saving
Includes column titles when saving. Not selected
Specify Data
Editor Options
Printer Font Sets font, style, and size for printing
output.
Available
Grid Font Customizes font, style, and size for
the Data Editor and the Results Grid.
Available
Auto Format (Best Fit) Fits formatting to match your desktop. Selected
Begin and End
Transaction
Statements
Sets a beginning and ending
transaction on each statement.
Selected
Default
Date/Time
Format
Default Date/Time
Format
Displays the current date/time format
and lets you customize your date/time
display.
Results
Use Calendar Control
as default
If selected, Rapid SQL uses the
Calendar Control window.
Not selected
2 digit year system
setting warning
If selected, Rapid SQL sends a
warning when you use a two-digit
year system setting.
Selected
Confirmation
Dialog
Options
Show Delete
Confirmation Dialog
Displays the Delete Confirmation
dialog box every time you use a
delete command.
Selected

APPLICATION BASICS > CONFIGURING RAPID SQL
EMBARCADERO TECHNOLOGIES > BOOKNAMEVARIABLE 77
Setting Data Editor Options
1 On the File menu, click Options.
OR
On the Main toolbar, click Options.
OR
In the Data Editor Edit Window, right-click and then click Options.
The application opens the Options Editor.
2 Click the Data Editor Tab.
3 Select the appropriate Data Editor options.
4 Click OK.
Rapid SQL accepts your selections and closes the Options Editor.
For more information, see Configuring Rapid SQL
.
Options Editor - Query Builder Tab
Rapid SQL lets you customize Query Builder options on the Options Editor.
Option parameters set on the Options Editor elicit a prompt if there are different options set on an open individual
session. Global options override properties set within individual Query Builder sessions. The table below describes
Query Builder options:
Show Update
Confirmation Dialog
Displays the Update Confirmation
dialog box every time you update a
row in your table.
Selected
Show Update LOB
Confirmation Dialog
Displays the Update Confirmation
dialog box when you update a LOB.
Selected
Interface
Element
Option Description Default
Code Generation Generate Use
Database
statement
Adds a line of SQL code indicating
which database or instance is used in
the statement.
Selected
Generate owner
names
Adds a line of SQL code showing the
table owner name as part of the query.
Selected
Include Row
Count limits
Includes the output row limit set in the
Execution settings.
Not selected
Execution Max Row Count in
Results Set
Lessens congestion of server processes
when queries execute by setting row
count limits.
1000 rows
General Show Column
Data types in
Query Diagram
Reveals the data type in each column
for tables in the SQL Diagram pane.
Not selected
Interface
Element
Option Description Default

APPLICATION BASICS > CONFIGURING RAPID SQL
EMBARCADERO TECHNOLOGIES > BOOKNAMEVARIABLE 78
Setting Query Builder Options
1 On the File menu, click Options.
OR
On the Main toolbar, click Options.
The appplications opens the Options Editor.
2 Click the Query Builder Tab.
3 Select the appropriate Query Builder options.
4 Click OK.
Rapid SQL accepts your selections and closes the Options Editor.
For more information, see Configuring Rapid SQL
.
Confirm on Item
delete
Opens a Confirm Delete dialog box
when an item is deleted.
Selected
Auto Populate
Views
Checks syntax every time an execute
statement, refresh or copy statement
begins.
Not Selected
Auto Format Automatically sets style and spacing of
display.
Selected
Auto Join Run Automatically Automatically detects like names and
data types and create joins for multiple
tables.
Selected
Require Indexes Joins only indexed columns. Requires
an indexed column for joins.
Selected
Require same
data type
Automatically joins columns with the
same data type.
Selected
Syntax Checker Automatic Syntax
Check
Automatically checks over SELECT and
CREATE VIEW statements for errors.
Selected
Warn on non
index join
Returns a warning when it detects a join
against a non-indexed column, or a
column not participating in a primary key
Not selected
Display Table Color Sets the background color of your tables
in the SQL Diagram Pane.
Available
Title Font Sets the font, font style, size, and color
of table/view title fonts.
Available
Columns Font Sets the font, font style, size, and color
of column fonts.
Available
Interface
Element
Option Description Default

APPLICATION BASICS > CONFIGURING RAPID SQL
EMBARCADERO TECHNOLOGIES > BOOKNAMEVARIABLE 79
Options Editor - Code Analyst Tab
The Code Analyst Tab of the Options Editor lets you set preferences for Code Analyst. The table below describes
Code Analyst options:
Setting Code Analyst Options
1 On the File menu, click Options.
OR
On the Main toolbar, click Options.
Rapid SQL opens the Options Editor.
2 Click the Code Analyst Tab.
3 Select the appropriate Code Analyst options.
4 Click OK.
Rapid SQL accepts your selections and closes the Options Editor.
For more information, see Configuring Rapid SQL
.
Area Option Description
Dependency
profiling level
All Dependencies Code Analyst witll use all levels of dependencies
when profiling the session.
Dependencies up to level Lets you specify how many levels of
dependencies the Code Analyst will use when
profiling the session.
Oracle List Package objects Code Analyst lists the procedures within a
package and functions that are found in the
Oracle database.
Use SQL Profiler Code Anlsyt uses Oracle's DBMS_Profiler
package to collect time metrics.
Code Analyst displays the actual run time on the
database, and does not include the time it takes
to get to the server.
Alarms and
Thresholds
Object Type Lets you set an alarm for each type of object that
is collected. The end result would be that An
additional field would allow the user to exclude
those process that use 100%.
Alarm % Lets you specify the percentage of total run time
a line of code takes when an alarm appears. If
the object took more than specified percent of
total time, Code Analyst alerts the user by
changing the color of the text.
Ignore 100% Lets you ignore lines of code that take all of the
total run time.
Show Code Analyst
Confirmation Dialog
When you create or execute a session, Code
Analyst displays a message that the Code
Analyst will run longer than the actual code. You
can also select the "Please do not show me this
dialog again" option in the dialog box.

APPLICATION BASICS > CONFIGURING RAPID SQL
EMBARCADERO TECHNOLOGIES > BOOKNAMEVARIABLE 80
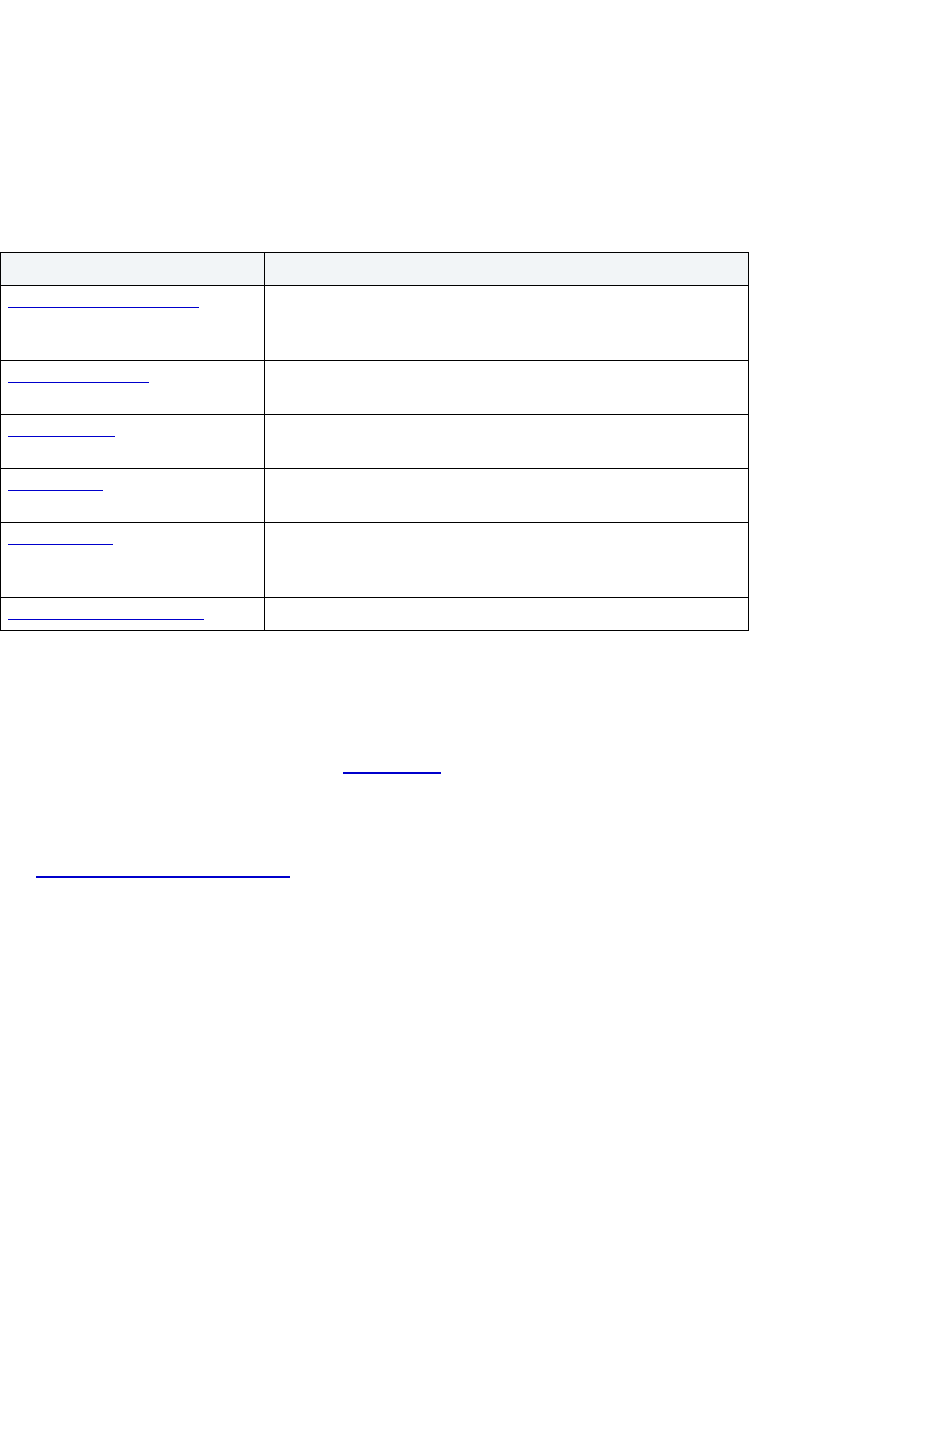
USING > DATASOURCE MANAGEMENT
EMBARCADERO TECHNOLOGIES > BOOKNAMEVARIABLE 81
Using
Using shows how to use each component of the application. Using breaks each process and procedure into simple
step-by-step instructions.
Using is divided into sections. The table below describes each section:
Datasource Management
After installing Rapid SQL, you must set up datasources to establish reusable connections to your database servers. A
datasource is a database connection profile that is similar to the connection information that you have stored in your
SQL.INI or WIN.INI files. Rapid SQL stores information about the datasource specification in the system registry and
provides a visual interface for maintaining it.
The Datasource Registration Wizard guides you through the required steps to establish a connection to your server
and makes the process of setting up datasources, easier.
This section describes the function of datasources, the process of establishing datasource connections and managing
your datasources and datasource groups.
Datasources
A datasource is a database connection profile. A datasource includes:
•Name
• Connection String
• Default User ID
• Optional Password Specification
Section Description
Datasource Management This section describes the purpose of datasources, the
process of establishing datasource connections, and
managing your datasources and datasource groups.
Supported Objects
This section describes the different platform objects the
application supports.
Object Editors
This section describes Object editors. Editors let you modify
existing objects.
Functionality
This section describes the different platform object
functionalities.
SQL Scripting
This section describes the SQL scripting environment, that lets
you write, debug, test and deploy solid SQL code for your
database applications.
Permissions Management
This section describes the Permissions Management features.

USING > DATASOURCE MANAGEMENT
EMBARCADERO TECHNOLOGIES > BOOKNAMEVARIABLE 82
All database operations are performed through datasources. You can create a datasource profile for each database
instance (or database server) in your enterprise, and you can create multiple datasource profiles with different logins
for a single database. The table below describes the data items stored for each datasource:
Available Functionality
Rapid SQL offers the following functionality for the Datasource Explorer:
• Change Group
• Connect
• Disconnect
• Drop
• Edit Datasource Registration
• New UDB Datasource
• Register Datasource
• Unregister Datasource
Related Topics
•
Selecting Datasources
• Viewing Datasource Properties
Datasource Catalog
The Datasource Catalog is a collection of defined datasources. It is stored in the system registry of your computer. All
Embarcadero database management products share the datasource catalog, which means that when you set up your
datasource catalog using one product such as Rapid SQL, the same list of datasources is available in other
Embarcadero Technologies products. Any changes you make to the datasource catalog are reflected in all
Embarcadero database management products.
Sharing a Datasource Catalog
You can configure Embarcadero database applications to use a datasource catalog stored in the system registry of
your machine (local).
You can determine the location of your datasource catalog by inspecting the application status bar. The 'Catalog'
indicator displays 'Local' if the catalog is stored in your local system registry.
Data Item Description
Name A unique, user-defined name for the datasource.
Connection
String
For Oracle: the SQL*Net connect string, for Sybase ASE: the database server
name.
Default User Default user ID to use when logging in to the datasource. Can be null.
Default
Password
Default password to use when logging in to the datasource. This is encrypted.
Can be null.
Auto-Connect
Flag
If Yes, then automatically login using default user and password. If No, open
Login dialog box.
Default
Database
SYBASE ASE ONLY: Database to automatically use after logging in.

USING > DATASOURCE MANAGEMENT
EMBARCADERO TECHNOLOGIES > BOOKNAMEVARIABLE 83
When you configure the location of the datasource catalog, you are affecting all Embarcadero datasource applications
as they all read and maintain the same datasource catalog.
NOTE: You need the proper permissions to read/write registry entries on another computer. See your
network administrator if you have problems.
Automatically Discovering Datasources
The first time you run Rapid SQL a dialog box displays, giving you the option to Auto-Discover all configured
datasources. If you click Yes, the Rapid SQL Auto-Discover feature searches the DBMS configuration files on your
computer and automatically discovers all the datasources that you are licensed for. For example, if you have a
cross-platform license, Discover Datasources finds all unregistered datasources. If you have an Oracle only license,
Discover Datasources finds all unregistered Oracle datasources.
NOTE: Microsoft SQL Server datasources are registered through a Windows NT system call to your
network. Provide login information (user name and password) the first time you connect
to a
datasource.
NOTE: IBM DB2 UDB for Linux, Unix, and Windows databases use ODBC/CLI or DB2 (attach) to
connect. Therefore, you need the proper ODBC/CLI Connection established in order for the
auto-discover feature to find your IBM DB2 UDB for Linux, Unix, and Windows databases,
including registering the DB2 datasource to ODBC as a system datasource. Although your
datasources are auto-discovered, provide login information (user name and password) the first
time you connect to a datasource.
In addition to Auto-Discovering your database servers, the application creates Datasource Groups based on RDBMS
type. Each registered datasource is placed in its respective Datasource Group. For example, all Microsoft SQL Server
datasources are added to the Microsoft SQL Server Group. Each registered datasource is placed in its respective
Datasource Group.
For more information on how to configure your datasources, see Working with Datasources.
Changing Datasource Groups
Rapid SQL lets you change datasource groups by:
• Dragging the datasource between groups.
• Invoking the Change Group dialog box.
Dragging and Dropping Between Groups
1 On the Datasource Explorer, left-click the datasource group you want to move, drag it over the folder for the new
group, and release the pointer.
Using the Change Group Dialog Box
Disconnect your datasource before changing groups.
1 On the Datasource Explorer, right-click the datasource you want to move, and then click Change Group.
Rapid SQL opens the Change Group dialog box.
2 In the Select Group tree, click new group.
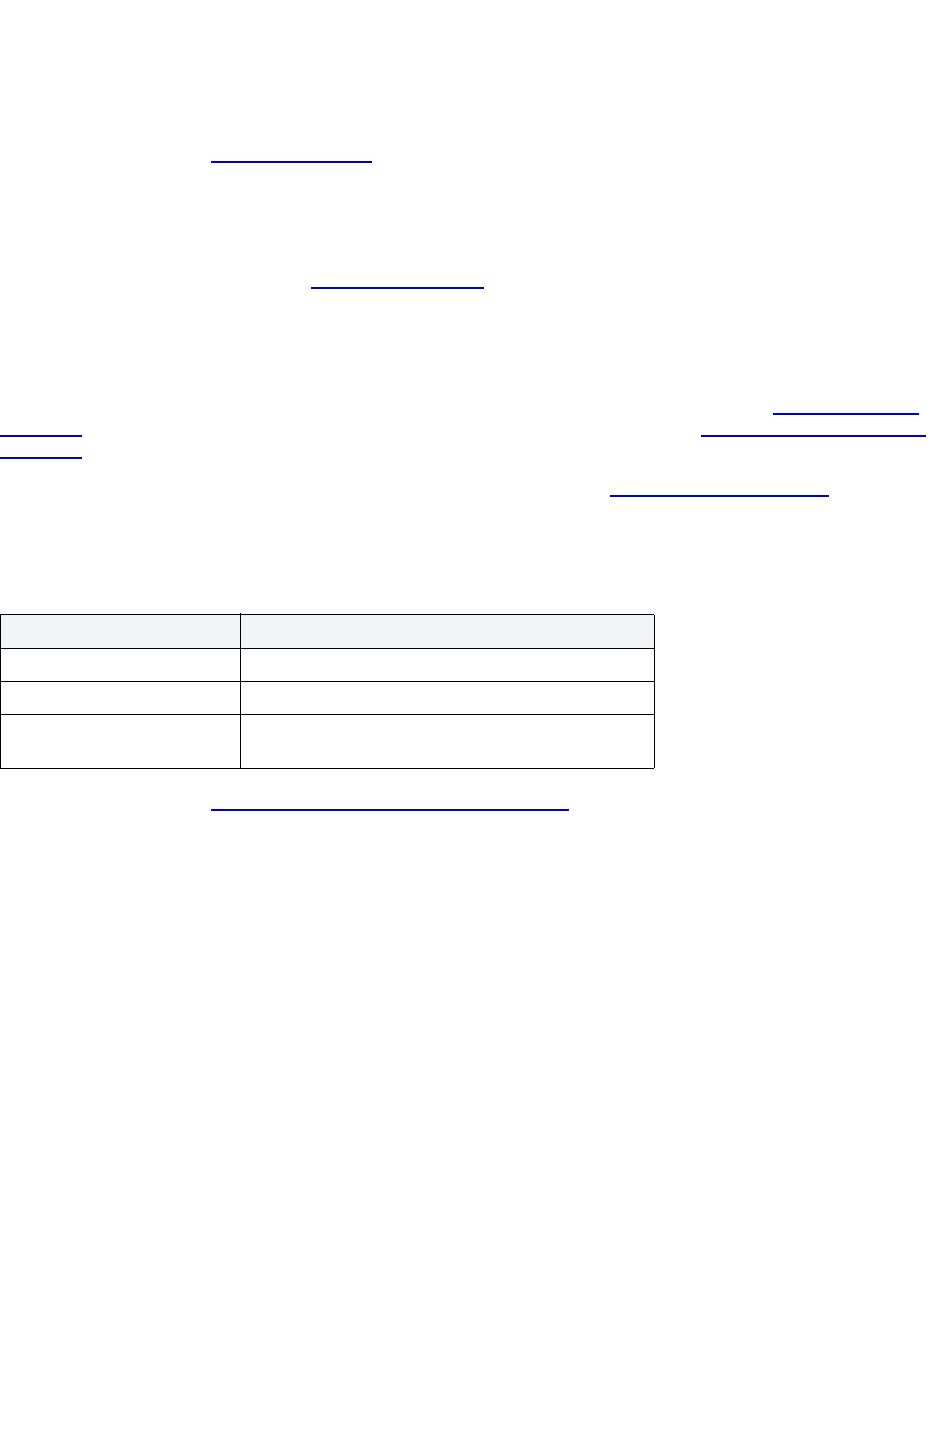
USING > DATASOURCE MANAGEMENT
EMBARCADERO TECHNOLOGIES > BOOKNAMEVARIABLE 84
3 Click OK.
Rapid SQL changes groups.
For more information, see Datasource Groups.
Connect
Rapid SQL lets you set datasources to automatically connect each time you open the application.The first time you
start the application, Rapid SQL prompts you to register your datasources. During this process, you can select the
Auto Connect check box, which automatically connects all registered datasource each subsequent time you open the
application.
If you did not check the Auto Connect box, or if you clicked No when prompted to connect to a database after
registering, you must connect manually, each time you want to access that datasource, using the Datasource Login
dialog box. If you later want to automatically connect your datasources, you can use the Edit Datasource on Catalog
dialog box.
TIP: To configure your datasource to login automatically, use the Edit Registration dialog box
.
The table below describes the options and functionality on the Datasource Login dialog box:
For more information, see Completing the Datasource Login Dialog Box.
Completing the Datasource Login Dialog Box
To complete the Datasource Login dialog box, do the following:
1On the Datasource menu, click Connect.
OR
On the Datasource tool bar, click Connect.
OR
On the Datasource Explorer tool bar, click Connect.
OR
On the Datasource Explorer, right-click the datasource, and then click Connect.
OR
On the Datasource Explorer, double-click the datasource.
Rapid SQL opens the Datasource Login dialog box.
2In Login ID type the Login ID.
Option Description
Login ID Lets you type the Login ID.
Password Lets you type the password.
Auto Connect Select to automatically connect to the datasource in
the future, select the check box.

USING > DATASOURCE MANAGEMENT
EMBARCADERO TECHNOLOGIES > BOOKNAMEVARIABLE 85
3In Password type the password.
4Select Auto Connect to automatically connect to the datasource in the future.
5 Click Connect.
Rapid SQL opens the Datasource Landing Page in the right pane of the application.
For more information, see Working with Datasources
.
Disconnect
When you disconnect from a server, the application immediately breaks the connection between any open ISQL
Windows, the servers, and databases. Although your ISQL Windows are still visible, the connections are no longer
valid. If you attempt to execute a script, Rapid SQL attempts to reconnect to a registered datasource, if available.
For more information, see Completing the Disconnect Dialog Box
.
Completing the Disconnect Dialog Box
To complete the Datasource Login dialog box, do the following:
1On the Datasource menu, click Disconnect.
OR
On the Datasource tool bar, click Disconnect.
OR
On the Datasource Explorer tool bar, click Disconnect.
In the right pane of the Datasource Explorer window, right-click the datasource, and then click Disconnect.
Rapid SQL opens a dialog box asking if you want to commit all pending transactions for that connection or to
rollback all before disconnecting. You cannot disconnect if there is an uncommitted transaction.
2 Click Yes.
Rapid SQL confirms you want to disconnect and closes the dialog box.
Discover Datasource
Rapid SQL discovers datasources residing on your system that are not currently registered datasources through a
Windows NT system call to your network. The Discover Datasource dialog box
includes a list, which includes the
name of the server or instance and the type of DBMS of all unregistered datasources found on your network or local
machine. Once discovered, you have the option to register datasources.
Completing the Discover Datasources Dialog Box
1 On the Datasource menu, click Discover Datasource.
Rapid SQL opens the Discover Datasources dialog box.
2 Select the check box next to the datasource you want to register.
3 Click Select All to select all the datasources on the list.


USING > DATASOURCE MANAGEMENT
EMBARCADERO TECHNOLOGIES > BOOKNAMEVARIABLE 87
Edit Datasource
The table below describes the options and functionality on the Edit Datasource dialog box:
NOTE: Any modifications you make in the Edit Datasource dialog box
affects your datasource registration
information in all Embarcadero database management tools.
For more information, see Completing the Edit Datasource Dialog Box
.
Tab Option Description
Definition Name Type the new datasource name. *This option is grayed out if you have an active
datasource connection.
NOTE: The datasource name cannot include a ”\" because this name is used in
the registry setting for the datasource, and the function that sets the registry uses
the backslash as a delimiter. The backslash means go to a new level in the
registry key.
DBMS Type Click the list box next to the DBMS Type box, and then click the new DBMS type.
Connect String For Oracle: the SQL*Net connect string, for Sybase ASE: the database server
name.
User ID Lets you type the new login. *Remember to change the Password.
Password If you change the Login ID, change the password as well.
Login As ORACLE ONLY:
Lets you select one of three Oracle login modes:
Default - Establishes connection with no system roles.
SYSDBA - Lets you perform all DBA-related functions, like startup and shutdown.
NOTE: SYSDBA is required for the SYS id when you log into a 9i instance.
SYSOPER - Lets you perform many DBA-related functions, like startup and
shutdown.
Default
Schema ID
DB2 ONLY:
Lets you set the current schema (SQLID) as part of the datasource connection
properties. This lets you users to set the implicit schema for unqualified object
references to schema different from the user's login id.
Default
Database
Lets you type the new database name.
Auto-Connect Select the Auto-Connect check box. Stores the password in encrypted form in
the registry, which could expose you to security risks.
Test Database
Connection
Click to confirm that the datasource connection information is accurate and valid.
Group Select the
datasource
group folder
Lets you select the datasource group folder to change the datasource group.
JDBC
Connection
Supply
information
about the host
computer
Lets you specify the JDBC (Java Database Connectivity) host name. Java
Database Connectivity is a Java API that enables Java programs to execute SQL
statements.
Acquire
Parameters
Lets you view JDBC (Java Database Connectivity) connection parameters.
Test
Connection
Lets you test the JDBC (Java Database Connectivity) connection.

USING > DATASOURCE MANAGEMENT
EMBARCADERO TECHNOLOGIES > BOOKNAMEVARIABLE 88
Completing the Edit Datasource Dialog Box
1On the Datasource menu, click Edit Registration.
OR
On the Registration tool bar, click Edit Registration.
OR
On the Datasource Explorer tool bar, click Command, and then click Edit Registration.
OR
On the Datasource Explorer, right-click the datasource, and then click Edit Registration.
Rapid SQL opens the Edit Datasource on Catalog dialog box.
For more information, see:
Datasources
Working with Datasources
2On the Datasource Explorer menu, click Extract.
OR
On the Datasource Explorer tool bar, click Command, and then click Extract.
OR
In the right pane of the Datasource Explorer window, right-click the server configuration parameters, and then
click Extract.Managing Datasources
The Manage Datasources dialog box
:
• Lets you manage and datasources throughout your enterprise from a single vantage point.
• Displays in grid format all relevant registered datasource information.
• Unifies complicated and widespread information about your datasources.
• Lets you directly access other datasource features such as adding, modifying, deleting and discovering
datasources.
Completing the Manage Datasources Dialog Box
1 On the Datasource menu, click Manage Datasources.
Rapid SQL opens the Manage Datasources dialog box.
The Manage Datasources grid format lets you access and view datasource specifications. The table below describes
the options and functionality on the grid:
Column Description
Datasource Name Uses an explorer-like interface to display all registered datasources and their
groups. You can navigate this column in the same manner as the datasource
explorer, by clicking on nodes to expand or collapse your view of the
datasources.
Connect String Displays the full connection string for the datasource.
Default User Id Displays the Default User ID for the datasource.

EMBARCADERO TECHNOLOGIES > BOOKNAMEVARIABLE 89
For more information, see:
Datasources
Using the Manage Datasources Dialog Box
Manage Datasources Dialog Box
The Manage Datasource dialog box lets you access most datasource management tasks. The Manage Datasource
dialog box lets you:
• Register datasources
• Edit datasources
• Discover datasources
• Delete datasources
Editing a Datasource
1 On the Datasource menu, click Manage Datasources.
Rapid SQL opens the Manage Datasources dialog box.
2 Click a datasource from the Datasource Name column, and then click the Edit button.
OR
Double-click the datasource from the grid.
Rapid SQL opens the Edit Registration dialog box
.
Discovering Datasources
1 On the Datasource menu, click Manage Datasources.
Rapid SQL opens the Manage Datasources dialog box.
2 Click a datasource from the Datasource Name column, and then click Discover.
Rapid SQL opens the Discover Datasource dialog box.
Deleting a Datasource
1 On the Datasource menu, click Manage Datasources.
Rapid SQL opens the Manage Datasources dialog box.
2 Click one or more datasource(s) from the Deleting a Datasource Name column.
3 Click Delete.
Rapid SQL displays a message.
Auto-Connect? Indicates whether the Auto Connect feature is turned on or off.
Host Computer Displays the name of the Host Computer if one has been configured.
Default Schema Displays view default schemas for your DB2 datasources.
Column Description

USING > DATASOURCE MANAGEMENT
EMBARCADERO TECHNOLOGIES > BOOKNAMEVARIABLE 90
4 Click Yes.
Rapid SQL confirms you want to unregister the datasource.
For more information, see Managing Datasources.
Managing Datasource Properties
The Datasource Properties dialog box displays the name, type, version, status and mode of the datasource. The
Datasource Properties box also lets you view the middleware or connectivity software that is being used to establish a
particular datasource connection. You can use this information to troubleshoot connectivity problems, determining vital
information such as the server version, connectivity library used, and library version and date.
Completing the Datasource Properties Dialog Box
1 On the Datasource Explorer, click a datasource with an established connection.
2 On the Datasource menu, click Properties.
Rapid SQL opens the Datasource Properties dialog box.
For more information, see:
Datasources
Working with Datasources
Registering Datasource
After installing Rapid SQL, set up datasources to establish reusable connections to your database servers. Rapid SQL
provides a common interface for all server platforms to address the different RDBMS conventions. You can easily alias
datasources, so that you can register multiple connections to the same datasource. For example, you can connect to
the same Microsoft SQL Server more than once using different logins and permissions.
The Datasource Registration Wizard lets you:
• Specify the database platform and the connection information for the target datasource.
• Specify the user ID and password to use when connecting to the datasource.
• Select the group to which the new datasource should belong.
Important Notes
•None
Opening the Datasource Registration Wizard
1On the Datasource menu, click Register Datasource.
OR
On the Registration tool bar, click Register Datasource.
OR
On the Datasource Explorer, right-click a datasource node, and then click Register Datasource.
Rapid SQL opens the first panel of the Datasource Registration Wizard.

USING > DATASOURCE MANAGEMENT
EMBARCADERO TECHNOLOGIES > BOOKNAMEVARIABLE 91
Datasource Registration Wizard - Panel 1
The table below describes the options and functionality on the first panel of the Datasource Registration Wizard.
For more information, see Datasource Registration Wizard
.
Datasource Registration Wizard - Panel 2
The table below describes the options and functionality on the second panel of the Datasource Registration Wizard.
Option Description
What is the DBMS Type? Lets you select the target datasource platform. Click
the datasource list, and then click the target
datasource, or type the datasource name in the box.
NOTE: For Oracle datasources, specify the SQL*Net
connection string.
Select a DB2 Datasource IBM DB2 UDB for Linux, Unix, and Windows ONLY:
Lets you select a datasource from the databases that
have been defined via the DB2 Client Configuration
utility
Select a Microsoft SQL
Server
MICROSOFT SQL SERVER ONLY:
Lets you select a Microsoft SQL server.
Specify a SQL*Net
Connection String
ORACLE ONLY:
Lets you specify a SQL*Net Connection String.
Select a Sybase Server SYBASE ASE ONLY:
Lets you select a Sybase server.
Specify a Datasource Name Lets you type the target datasource name to display
in the application.
NOTE: You cannot have duplicate datasource
names.
NOTE: The datasource name cannot include a ”\"
because this name is used in the registry setting for
the datasource, and the function that sets the registry
uses the backslash as a delimiter. The backslash
means go to a new level in the registry key.
Option Description
User ID Lets you type the target User ID.
Password Lets you type the target user’s password.

USING > DATASOURCE MANAGEMENT
EMBARCADERO TECHNOLOGIES > BOOKNAMEVARIABLE 92
For more information, see Datasource Registration Wizard.
Datasource Registration Wizard - Panel 3
The table below describes the options and functionality on the third panel of the Datasource Registration Wizard.
For more information, see Datasource Registration Wizard
.
2On the Datasource Explorer menu, click Report.
OR
On the Datasource Explorer tool bar, click Command, and then click Report.
OR
In the right pane of the Datasource Explorer window, right-click the selected parameters, and then click
Report.Report Dialog Box
The table below describes the options and functionality on the Report dialog box:
Login As ORACLE ONLY:
Lets you select one of three Oracle login modes:
Default - Establishes connection with no system
roles.
SYSDBA - Lets you perform all DBA-related
functions, like startup and shutdown.
NOTE: SYSDBA is required for the SYS id when you
log into a 9i instance.
SYSOPER - Lets you perform many DBA-related
functions, like startup and shutdown.
Auto-connect? Select to connect automatically each time you
access the datasource.
NOTE: To prevent unauthorized access and protect
the integrity of your database, you should change the
default passwords for SYS and SYSTEM
immediately after you create the database.
NOTE: You can also configure Auto-connect in the
Edit Datasource dialog box
.
Option Description
Select a Datasource Group NOTE: This only applies if you have multiple
datasource groups. If you do not have multiple
datasource groups, Rapid SQL creates a group,
Registered Datasources, and places the new
datasource into this group.
Option Description

USING > DATASOURCE MANAGEMENT
EMBARCADERO TECHNOLOGIES > BOOKNAMEVARIABLE 93
Selecting Datasources
The Rapid SQL Select Datasource dialog box lets you select a datasource and connect to it.
Completing the Select Datasource Dialog Box
1 On the Datasource menu, click Select to open the Select Datasource dialog box.
2 Click the Datasource list box, and then click the target datasource.
3 Click Connect to connect to the datasource.
4 Click the Database list, and then click the target database.
5 Click OK to close the Select Datasource dialog box.
For more information, see:
Datasources
Working with Datasources1
Unregistering Datasource
Rapid SQL lets you unregister datasources when you no longer need them.
TIP: Removing a datasource from Rapid SQL does not delete the physical database. It simply removes
the datasource definition, and connection information, from the Rapid SQL catalog.
1On the Datasource menu, click Unregister.
OR
On the Registration tool bar, click Unregister.
OR
On the Datasource Explorer, right-click the datasource, and then click Unregister Datasource.
Rapid SQL opens a dialog box.
2 Click Yes.
Rapid SQL confirms you want to unregister the datasource.
NOTE: The datasource manager is shared across Embarcadero's database management products.
When you remove a datasource in any of Embarcadero's database management tools the
datasource is removed across all relevant products.
For more information, see:
Option Description
Report Home Page File
Name
Lets you specify the name of the .htm report or click
the browse button to open the Save As dialog box.
Report Title Lets you specify a report title.

USING > DATASOURCE MANAGEMENT
EMBARCADERO TECHNOLOGIES > BOOKNAMEVARIABLE 94
Datasources
Working with Datasources
Datasource Groups
Rapid SQL lets you define datasource groups to organize the datasources in your enterprise. Datasource Groups
behave as folders in the Windows Explorer, allowing you to group related datasources together. If you manage or
monitor many Microsoft SQL Servers, datasource groups are a great mechanism for alleviating desktop clutter.
Anywhere that datasources are presented in a hierarchical tree format, datasource group folders expand to display
one or more contained datasources. Upon installation of the first Embarcadero database management product, an
initial datasource group is called Managed Datasources. You can rename this group.
Available Functionality
Rapid SQL offers the following functionality for Datasource Groups:
•
Delete
• New Datasource Group
• Rename Datasource Group
Delete
Rapid SQL lets you remove database groups that you no longer need to access, or that have become obsolete.
1 On the Datasource Explorer, click the datasource.
2 On the Datasource Explorer tool bar, click Delete.
OR
Click the Delete button.
OR
Right-click the datasource, and then click Remove Datasource Group.
Rapid SQL removes the Datasource Groups.
3 Click Yes.
Rapid SQL confirms you want to remove the Datasource Group.
For more information, see Datasource Groups.
New Datasource Group
Rapid SQL lets you define datasource groups to organize the datasources in your enterprise. Datasource Groups
behave as folders in the Windows Explorer, allowing you to group related datasources together. If you manage or
monitor many Microsoft SQL Servers, datasource groups are a great mechanism for alleviating desktop clutter.
Anywhere that datasources are presented in a hierarchical tree format, datasource group folders expand to display
one or more contained datasources. Upon installation of the first Embarcadero database management product, an
initial datasource group is called Managed Datasources. You can rename this group.

USING > DATASOURCE MANAGEMENT
EMBARCADERO TECHNOLOGIES > BOOKNAMEVARIABLE 95
Completing the New Datasource Group Dialog Box
1 On the Datasource Explorer, right-click the datasource group folder, and then click New Datasource Group.
Rapid SQL opens the New Datasource Group dialog box.
2In the Datasource Group Name box, type the new name of the datasource group.
3 Click OK.
Rapid SQL closes the New Datasource Group dialog box.
Rename Datasource Group
Rapid SQL lets you:
• Rename a datasource group.
• Change the members of a datasource group.
• Change the group to which a datasource belongs.
Completing the Rename Datasource Group
1 On the Datasource Explorer, right-click the datasource group folder, and then click Rename Datasource
Group.
Rapid SQL opens the Rename Datasource Group.
2In the Datasource Group Name box, type the new name of the datasource group.
3 Click OK.
Rapid SQL closes the Rename Datasource Group dialog box.
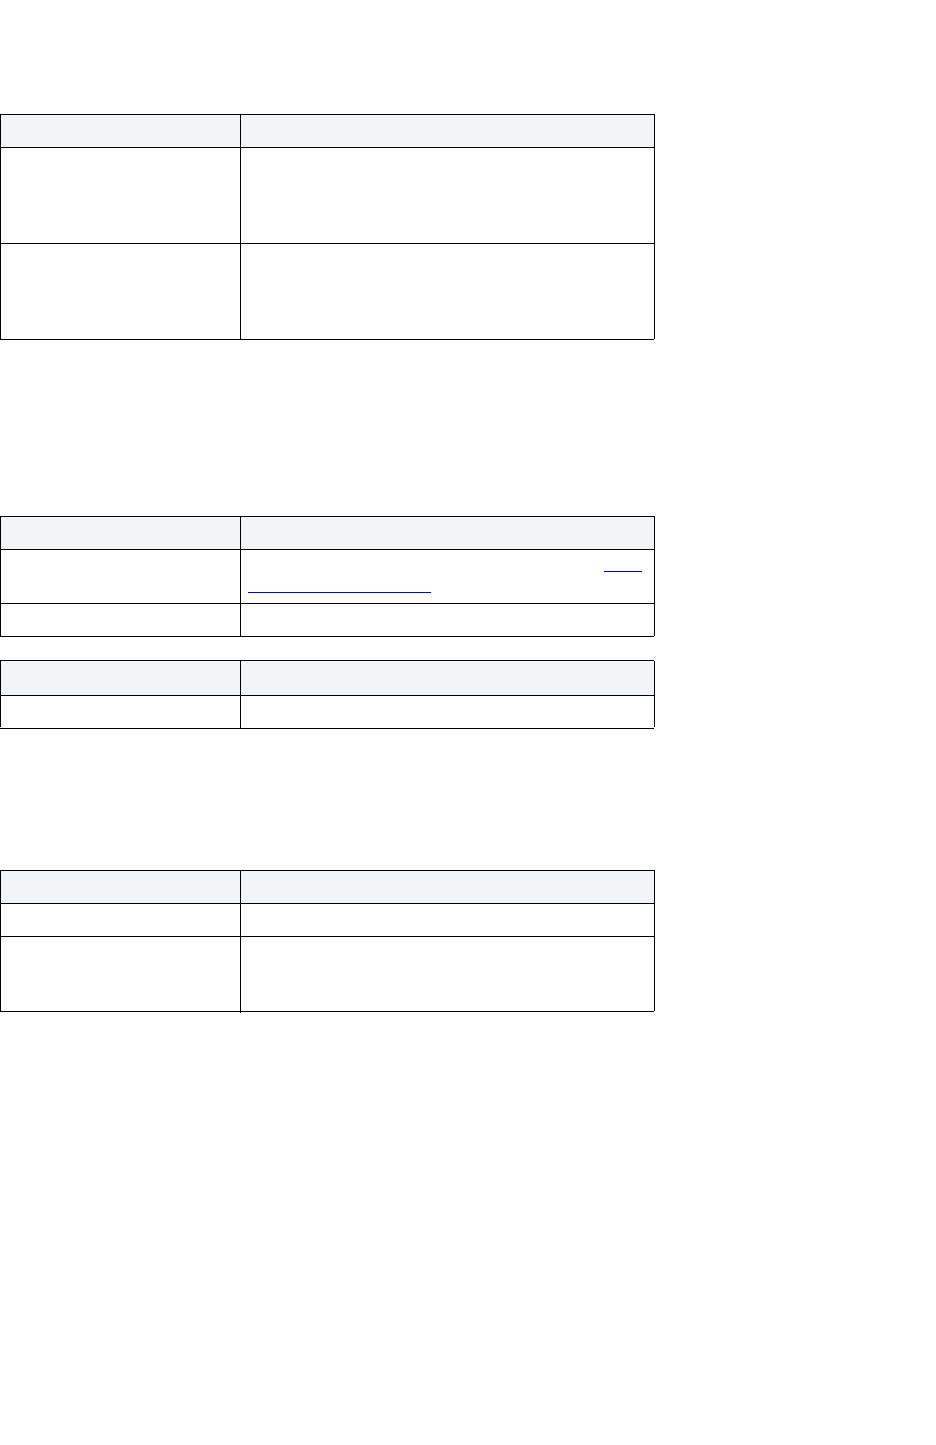
USING > DATASOURCE MANAGEMENT
EMBARCADERO TECHNOLOGIES > BOOKNAMEVARIABLE 96
4On the Datasource menu, click Shutdown.On the Datasource menu, click Configure.
OR
On the Utilities tool bar, click Configure to open the Server Configuration dialog box.
OR
On the Datasource Explorer tool bar, click Configure to open the Server Configuration dialog box. On the
Datasource menu, click Session Recording.
OR
On the Main tool bar, click Session Recording.On the Datasources menu, click Session Recording.
OR
On the Main tool bar, click Session Recording.On the File menu, click Open.
OR
On the Main tool bar, click Open.On the Datasource menu, click Find Object.
OR
On the Main tool bar, click Find.
OR
On the Datasource Explorer, right-click a database, and then click Find Object.
Option Description
Normal Shuts down the server in an orderly fashion. disables
logins, and waits for currently executing
Transact-SQL statements and stored procedures to
finish.
Immediate Shuts down the server immediately. does not
perform checkpoints in every database. The server
terminates all user processes and rolls back any
active transactions.
Option Description
Edit Button Click to modify the target parameter. Opens the Edit
Configuration dialog box.
New Value Lets you type the value for the parameter.
Option Description
New Value Lets you type the value for the parameter.
Option Description
Session Name Lets you type the name of the session.
Session File Lets you type the location and session file name or
click the browse button.
uses *.ses file extension for
session files.
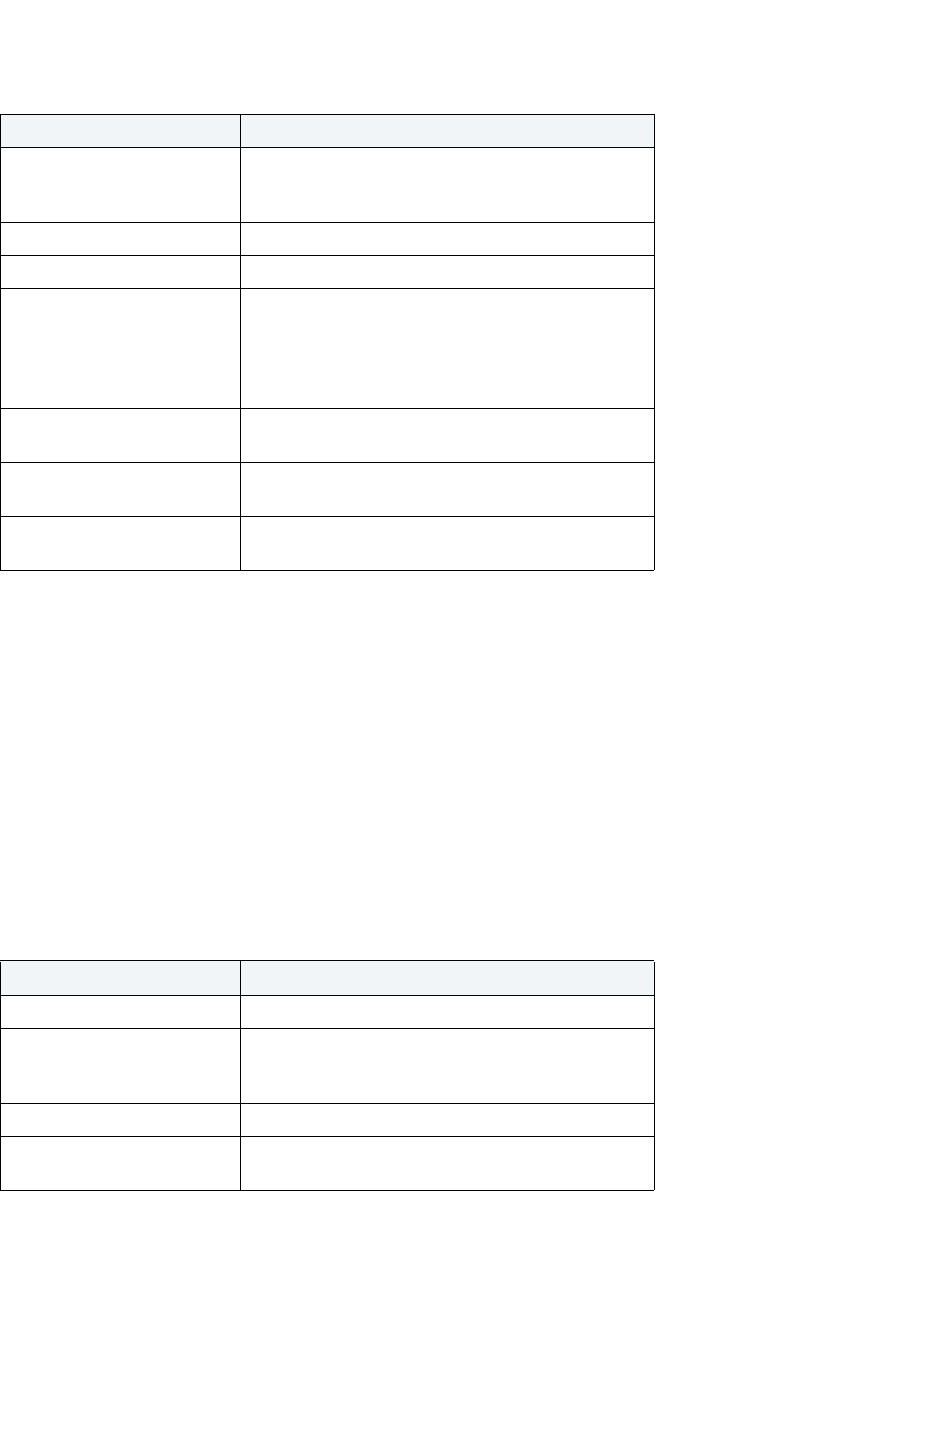
USING > DATASOURCE MANAGEMENT
EMBARCADERO TECHNOLOGIES > BOOKNAMEVARIABLE 97
Changing an ODBC Datasource to a Native Datasource
CAUTION: The section below refers only to Microsoft SQL Server connectivity.
Microsoft SQL Server uses ODBC to connect to Microsoft SQL Servers. Rapid SQL requires native connectivity. To
connect through Rapid SQL, register your Microsoft SQL Server(s) using native connectivity in the Microsoft SQL
Server Client Utility.
To change your ODBC servers to native connectivity, do the following:
1 Open the Microsoft SQL Server Client Network Utility dialog box, CLICONFG.exe.
2 On the General Tab, click Add.
Microsoft SQL Server opens the Add Network Library Configuration dialog box.
The table below describes the options and functionality on the Add Network Library Configuration dialog box:
3 Click OK.
Rapid SQL returns to the Client Network Utility dialog box.
4 In the Client Network Utility dialog box, click Apply.
Rapid SQL adds the server.
Option Description
Object to Find Lets you type the target string of text. You can also
click the list to choose from a list of up to ten previous
search strings.
Type of Object Lets you select the target database object type.
Object Owner Lets you select the target database object owner.
Search Direction Lets you select a search direction:
From Beginning
Down
Up
Case-Sensitive Search Select to perform the search with the same
capitalization as the search string.
Find Entire String Only Select to perform the search using the entire search
string, not partial strings.
Search My Objects Only Select to perform the search only on your database
objects.
Option Description
Server alias In the box, type the unique name of the server.
Network libraries In the box, click the appropriate option button to
specify the network library that connects to the
server.
Computer name In the box, type the name of the target computer.
Port number In the box, type the port number of the target
computer.
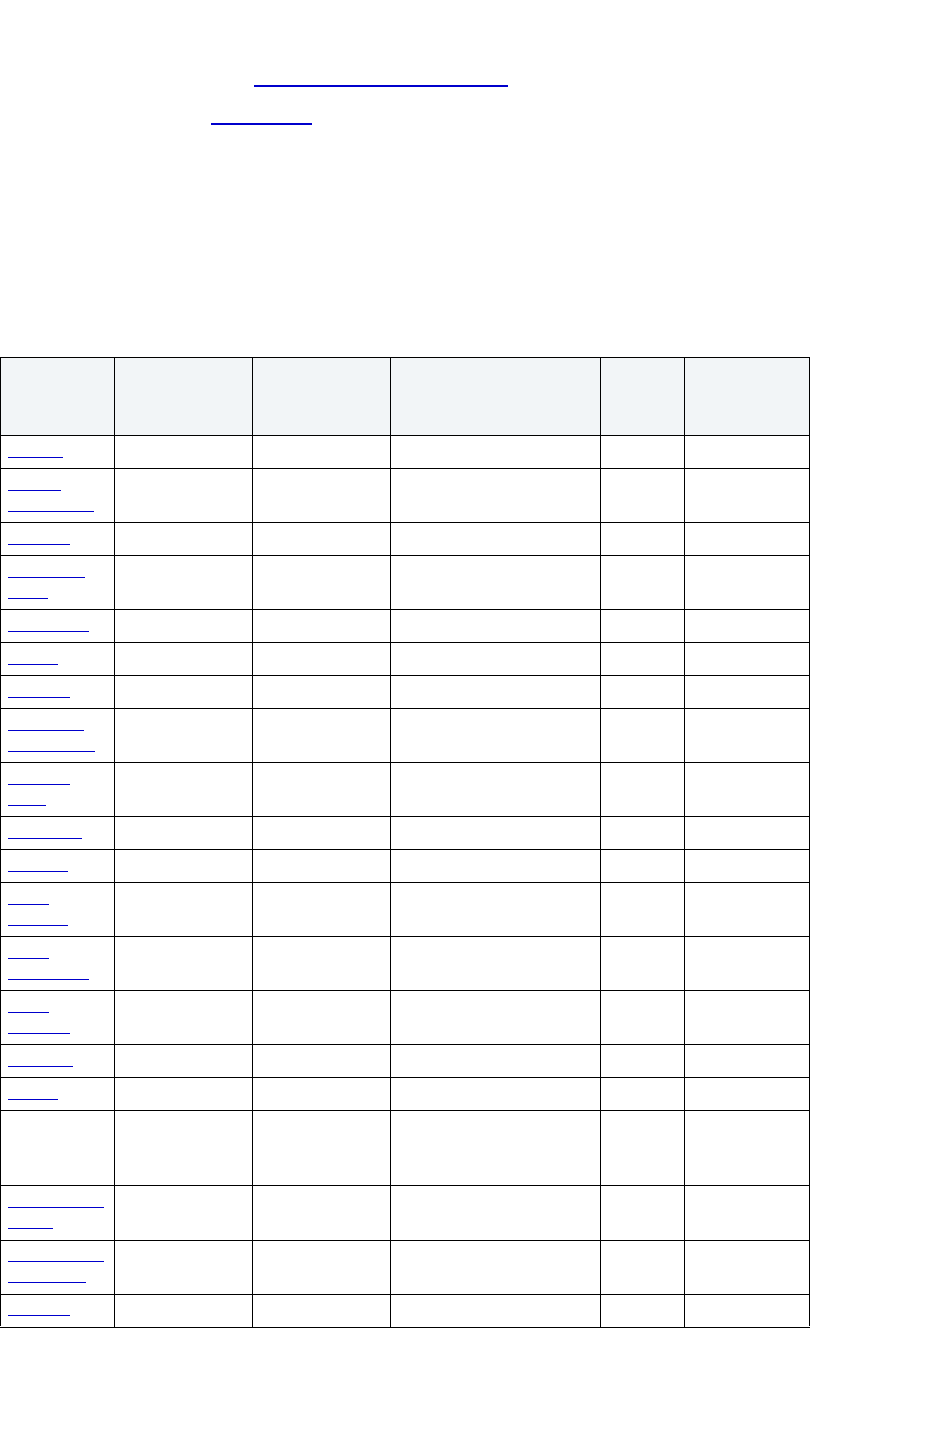
USING > SUPPORTED OBJECTS
EMBARCADERO TECHNOLOGIES > BOOKNAMEVARIABLE 98
5 Open Rapid SQL and the Datasource Registration Wizard.
For more information, see Datasources
.
Supported Objects
Rapid SQL lets you manage database objects across different database platforms. The table below indicates the
objects that Rapid SQL supports by platform:
Objects IBM DB2 UDB
for Open
Systems
IBM DB2 UDB
for OS/390
Microsoft SQL Server Oracle Sybase ASE
Aliases XXX X
Check
Constraints
XXX XX
Clusters
X
Database
Links
XX
Databases
XX
DBRM
X
Defaults
XX
Extended
Procedures
X
Foreign
Keys
XXX XX
Functions
XXX XX
Indexes
XXX XX
Java
Classes
X
Java
Resources
X
Java
Sources
X
Libraries
X
Logins
X
Materialized
Query
Tables
X
Materialized
Views
X
Materialized
View Logs
X
Outlines
X
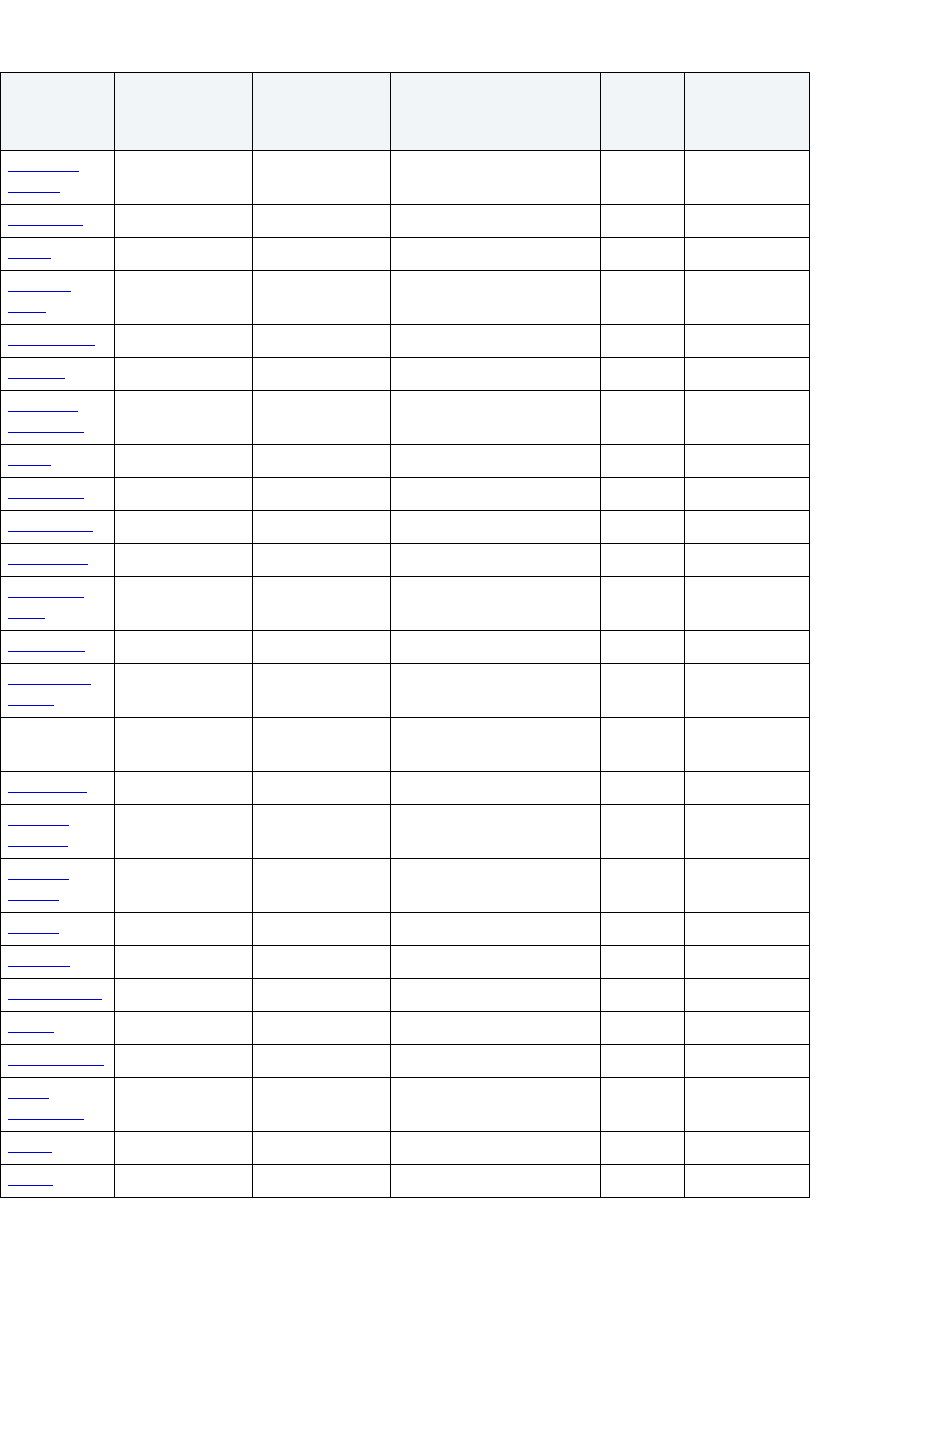
USING > SUPPORTED OBJECTS
EMBARCADERO TECHNOLOGIES > BOOKNAMEVARIABLE 99
Aliases
NOTE: This object is supported by IBM DB2 UDB for Linux, Unix, and Windows, IBM DB2 UDB for
OS/390 and z/OS, Microsoft SQL Server, and Sybase ASE.
Package
Bodies
X
Packages
XX X
Plans
X
Primary
Keys
XXX XX
Procedures
XXX XX
Profiles
X
Rollback
Segments
X
Rules
XX
Segments
XX
Sequences
X
Snapshots
X
Snapshot
Logs
X
Stogroups
X
Structured
Types
XX
Summary
Tables
X
Synonyms
X
System
Indexes
XXX XX
System
Tables
XXX XX
Tables
XXX XX
Triggers
XXX XX
Type Bodies
X
Types
X
Unique Keys
XXX XX
User
Datatypes
XXX X
Users
XXX XX
Views
XXX XX
Objects IBM DB2 UDB
for Open
Systems
IBM DB2 UDB
for OS/390
Microsoft SQL Server Oracle Sybase ASE

USING > SUPPORTED OBJECTS
EMBARCADERO TECHNOLOGIES > BOOKNAMEVARIABLE 100
Aliases let you assume the permissions of another database user without creating a separate user identity. You can
use an alias when a users requires only temporary access to a database. You can also use an alias to mask a user’s
identity.
Available Functionality
Rapid SQL offers the following functionality for this object:
•
Drop
• Extract
•Filter
•
New
• Open
• Report
Check Constraints
NOTE: This object is supported by all platforms.
Check constraints are data values that are acceptable in a column. They are logical expressions that verify column
values meet defined acceptance criteria.
Available Functionality
Rapid SQL offers the following functionality for this object:
NOTE: Functionalities differ by platform.
•
Drop
• Extract
•Filter
•
New
• Open
• Rename
• Report
•Status
Clusters
NOTE: This object is supported by Oracle only.
Clusters provide an optional method of storing table data. A cluster comprises of a group of tables that share the same
data blocks, and which are grouped together because they share common columns and are often used together. The
related columns of tables stored in a cluster are known as the cluster key.
There are two types of clusters:

USING > SUPPORTED OBJECTS
EMBARCADERO TECHNOLOGIES > BOOKNAMEVARIABLE 101
• Index
• Hash
Index clusters store the cluster data together and index the cluster key, which should make them faster at retrieving a
range of data rows.
Hash clusters apply hashing functions to the cluster key to determine the physical location of a data row, which should
make them faster at retrieving specific data rows.
NOTE: To place a table on a cluster, 6 include the ON CLUSTER syntax within the CREATE TABLE
statement. Placing a table on a cluster precludes you from placing it on a tablespace or defining
the associated storage parameters.
Available Functionality
Rapid SQL offers the following functionality for this object:
•
Allocate Extent
• Analyze
• Deallocate Unused Space
• Drop
• Extract
• New
• Open
• Report
• Truncate
Database Links
NOTE: This object is supported by Oracle and Sybase only.
Database links are named schema objects that describe a path from one database to another. Database links are
implicitly used when a reference is made to a global object name in a distributed database. To use a database link,
either it is public or you own it.
NOTE: Oracle syntax does not let you alter an existing database link. To change its definition, drop and
re-create it.
Available Functionality
Rapid SQL offers the following functionality for this object:
•
Drop
• Extract
• New
• Open
• Rename
• Report

USING > SUPPORTED OBJECTS
EMBARCADERO TECHNOLOGIES > BOOKNAMEVARIABLE 102
Databases
NOTE: Databases are available for Microsoft SQL Server and Sybase ASE. For Oracle and IBM DB2
UDB for Linux, Unix, and Windows, IBM DB2 UDB for OS/390 and z/OS databases are called
Instances.
Databases are a collection of tables, or a collection of index spaces and tablespaces. The goals of a database system
are straightforward but challenging. In general, a database aims to manage large amounts of data in a multi-user
environment. It should achieve high performance while letting many users access the same information concurrently
without compromising data integrity. A database also must protect against unauthorized access and provide reliable
solutions for failure recovery.
For more information, see Available Functionality
.
IBM DB2 UDB for Linux, Unix, and Windows Instances
Databases are a collection of tables, or a collection of index spaces and tablespaces. The goals of a database system
are straightforward but challenging. In general, a database aims to manage large amounts of data in a multi-user
environment. It should achieve high performance while letting many users access the same information concurrently
without compromising data integrity. A database also must protect against unauthorized access and provide reliable
solutions for failure recovery.
For more information, see Available Functionality.
Microsoft SQL Server Databases
Databases are a collection of tables, or a collection of index spaces and tablespaces. The goals of a database system
are straightforward but challenging. In general, a database aims to manage large amounts of data in a multi-user
environment. It should achieve high performance while letting many users access the same information concurrently
without compromising data integrity. A database also must protect against unauthorized access and provide reliable
solutions for failure recovery.
For more information, see Available Functionality.
IBM DB2 UDB for OS/390 and z/OS Instances
Databases are a collection of tables, or a collection of index spaces and tablespaces. The goals of a database system
are straightforward but challenging. In general, a database aims to manage large amounts of data in a multi-user
environment. It should achieve high performance while letting many users access the same information concurrently
without compromising data integrity. A database also must protect against unauthorized access and provide reliable
solutions for failure recovery.
For more information, see Available Functionality
.
Sybase ASE Databases
Databases are a collection of tables, or a collection of index spaces and tablespaces. The goals of a database system
are straightforward but challenging. In general, a database aims to manage large amounts of data in a multi-user
environment. It should achieve high performance while letting many users access the same information concurrently
without compromising data integrity. A database also must protect against unauthorized access and provide reliable
solutions for failure recovery.

USING > SUPPORTED OBJECTS
EMBARCADERO TECHNOLOGIES > BOOKNAMEVARIABLE 103
Available Functionality for Databases
Rapid SQL offers the following functionality for databases:
NOTE: Functionalities differ by platform.
•
Checkpoint
• Coalesce
• DBCC
• Detach/Attach
• Drop
•Filter
•
Extract
• Move Log
• New
• Open
• Rename
• Report
• Set Online/Offline
• Shrink
• Update Statistics
DBRM
NOTE: This object is supported by IBM DB2 UDB for OS/390 and z/OS only.
A Database Request Module (DBRM) is an application containing information on SQL statements extracted from the
DB2 precompiler. A DBRM refers to a specific database and is stored outside of the DB2 directory.
Available Functionality
Rapid SQL offers the following functionality for this object:
•
Drop
• Extract
• New
• Open
• Report
Defaults
NOTE: This object is supported by Microsoft SQL Server and Sybase only.

USING > SUPPORTED OBJECTS
EMBARCADERO TECHNOLOGIES > BOOKNAMEVARIABLE 104
Defaults promote data integrity by supplying a default value to a table column if the user does not explicitly provide
one. They are reusable objects that you can bind to table columns or user datatypes.
Available Functionality
Rapid SQL offers the following functionality for this object:
•
Drop
• Extract
• New
• Open
• Rename
• Report
Extended Procedures
NOTE: This object is supported by Sybase ASE only.
Extended Procedures are dynamic link libraries that can be used to load and execute application routines written in
other programming languages, such as C or Visual Basic. Extended Procedures function and appear in the same
manner as normal stored procedures in that you can pass parameters to them and obtain results.
NOTE: Extended Procedures can only be accessed on the Master database.
Available Functionality
Rapid SQL offers the following functionality for this object:
•
Dependencies
• Drop
• Execute
•
Extract
• New
• Open
• Rename
• Report
Foreign Keys
NOTE: This object is supported by all platforms.
Foreign keys enforce referential integrity between tables by verifying the existence of foreign key values in the parent
table before letting you insert or update foreign key values in the child table.
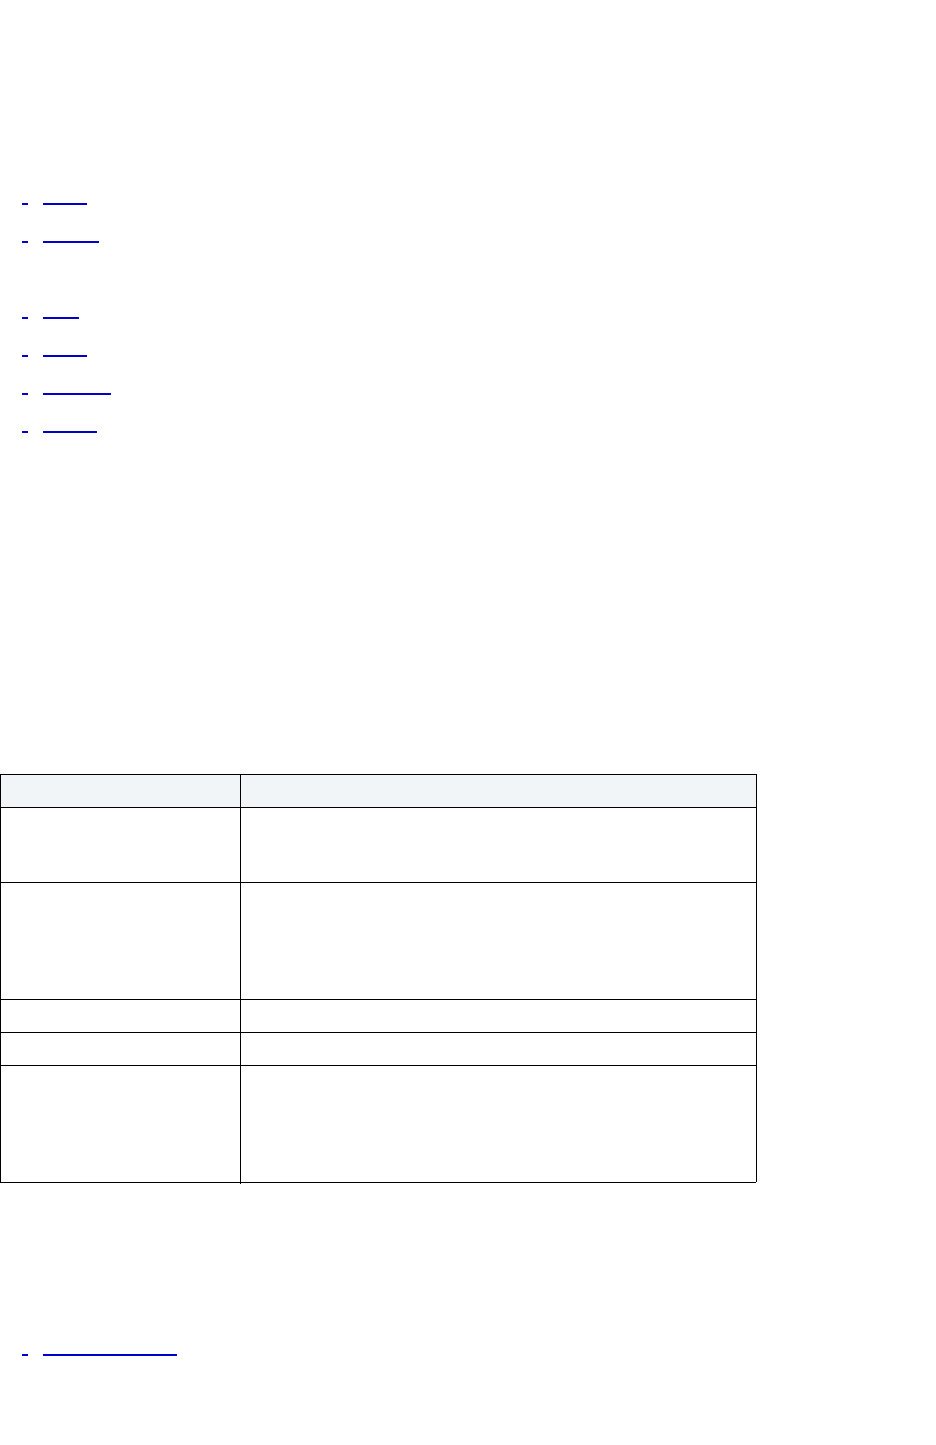
USING > SUPPORTED OBJECTS
EMBARCADERO TECHNOLOGIES > BOOKNAMEVARIABLE 105
Available Functionality
Rapid SQL offers the following functionality for this object:
NOTE: Functionality differs by platform.
•
Drop
• Extract
•Filter
•
New
• Open
• Rename
• Report
•Status
Functions
NOTE: This object is supported by all platforms.
Functions are subroutines that you define. Functions are useful for reusable application logic. You can use functions to
determine the best methods for controlling access and manipulation of the underlying data contained in an object.
The table below describes the types of user-defined functions that Rapid SQL lets you create:
Available Functionality
Rapid SQL offers the following functionality for this object:
NOTE: Functionalities differ by platform.
•
Create Synonym
Function Description
Column or External Table
Function
You can write in a host programming language, such as C. This
function can act on a table and returns a table value rather than a
scalar value.
External Scalar Function You can write in a language other than SQL, such as C++ or Java
and returns a scalar value to the program. This type of function is
referenced by the CREATE FUNCTION statement and can be
used to perform computations on data contained in the database
but cannot directly reference the data.
OLEDB Function Accesses OLE DB data in user-defined OLE DB external tables.
Sourced Function Inherits the semantics of another function and can be an operator.
Template Function Partial functions that do not contain any executable code. Mainly
used in a federated database to map the template function to a
data source function -Oracle, SQL Server, Sybase, etc. A function
mapping needs to be created in conjunction with the template
function.

USING > SUPPORTED OBJECTS
EMBARCADERO TECHNOLOGIES > BOOKNAMEVARIABLE 106
• Dependencies
•
• Drop
• Extract
•Filter
•
Generate Anonymous Block
• New
• Open
• Report
Indexes
NOTE: This object is supported by all platforms.
Indexes are optional structures associated with tables. You can create indexes specifically to speed SQL statement
execution on a table. When properly used, Indexes are the primary means of reducing disk I/O. Indexes are logically
and physically independent of the data in the associated table. Unique Indexes guarantee that no two rows of a table
have duplicate values in the columns that define the index.
For more information, see:
IBM DB2 UDB for Linux, Unix, and Windows Indexes
IBM DB2 UDB for OS/390 and z/OS Indexes
Microsoft SQL Server Indexes
Oracle Indexes
Sybase ASE
Available Functionality
IBM DB2 UDB for Linux, Unix, and Windows Indexes
IBM DB2 UDB for Linux, Unix, and Windows offers two types of indexes:
• Unique
• Non-Unique
Unique Indexes guarantee that no two rows of a table have duplicate values in the columns that define the index.
For more information, see Available Functionality.
Microsoft SQL Server Indexes
Microsoft SQL Server offers two types of indexes: clustered and non-clustered. Clustered indexes physically sort table
data to match their logical order. Non-clustered indexes only order the table data logically. In a database, an index lets
you speed queries by setting pointers that allow you to retrieve table data without scanning the entire table. An index
can be unique or non-unique.
USING > SUPPORTED OBJECTS
EMBARCADERO TECHNOLOGIES > BOOKNAMEVARIABLE 107
Microsoft SQL Server creates indexes as B-Trees, which are a series of pointers mapping index pages to their
underlying data pages. As tables and, therefore, indexes grow, the number of levels in the B-Tree increases. The
B-Tree of a clustered index is shorter than that of a non-clustered index because the leaf level of a clustered index is
the data page.
A sound indexing strategy is critical to overall system performance. One pitfall to avoid is placing many indexes on a
table without regard for their cumulative cost. Remember that indexes improve read but slow write performance
because Microsoft SQL Server must update more information in the system catalog. Consequently, extra indexes can
actually slow overall performance if data modification occurs frequently on the table. To determine the efficacy of
indexes, you should tune your queries using SHOWPLAN and IO STATISTICS and analyze the selectivity of indexes
using DBCC SHOW_STATISTICS.
Rapid SQL separates system indexes from user-defined indexes in the Datasource Explorer to ensure that system
indexes are not accidentally altered or dropped.
For more information, see Available Functionality
.
Oracle Indexes
Oracle offers two types of indexes. The table below describes these indexes:
The indexing strategy, particularly with large, active tables, is critical to overall system performance. The optimal
definition and number of indexes for a given table is determined by the mix of access paths to that table performing
insert, update, delete and select operations. For example, adding or changing an index can speed up your selects but
slow your inserts, updates and deletes. Careful tuning and testing helps you achieve the best overall performance.
TIP: Indexes generally improve read operations in a database, but you should not place too many
indexes on some tables. Since Oracle must maintain each index along with its referenced table,
placing too many indexes on a table that is the object of much insert, update, and delete activity,
can actually degrade performance.
Even when an index exists on a table, the way a SQL statement is coded can actually disallow the use of the index. To
prevent this from happening, follow these rules of thumb:
• Try not to use SQL statements that include the NOT IN, NOT LIKE, <>, IS NULL operators because they typically
suppress the use of indexes.
• When referencing concatenated indexes with queries, be sure the leading column in the index is used. If it isn't,
the index won't be used at all.
• Avoid using functions in WHERE predicates.
If you must use functions, and you are using Oracle8i, investigate the use of function-based indexes.
For more information, see Available Functionality
.
Index Description
Table A table index is defined on an individual table.
Cluster A cluster index is defined on a set of tables physically stored
together in a cluster. In an Oracle database, both table and cluster
indexes use a B-tree structure.

USING > SUPPORTED OBJECTS
EMBARCADERO TECHNOLOGIES > BOOKNAMEVARIABLE 108
Index Partitions
Index partitions are similar to table partitions. There are three types of partitioned indexes that Oracle supports:
1
Local prefixed
2 Local nonprefixed
3 Global prefixed
NOTE: An index cannot be partitioned if it is a cluster index or if the index is defined on a clustered table.
Local prefixed and nonprefixed indexes
A local partitioned index has keys that refer to rows in a single table partition. A local partitioned index is automatically
partitioned to mirror the underlying table. The number of partitions or subpartitions and the partition bounds for the
partitioned index correspond with the partitions on the table. Oracle maintains this correspondence. If the table
partitions are altered, the index partitions are altered accordingly.
A local partitioned index is prefixed if it is partitioned on the same column as the underlying table. The local partitioned
index is nonprefixed if it is partitioned on a different column.
Global prefixed indexes
A global partitioned index can refer to rows in more than one table partition or subpartition. Global partitioned indexes
are more difficult to manage than local partitioned indexes because any change in the underlying table partition affects
all partitions in a global index. As a result, there is increased partition maintenance.
NOTE: A global index can only be range partitioned but it can be defined on any kind of partitioned table.
IBM DB2 UDB for OS/390 and z/OS Indexes
IBM DB2 UDB for OS/390 and z/OS offers two types of indexes:
• Unique
• Non-Unique
Unique Indexes guarantee that no two rows of a table have duplicate values in the columns that define the index.
Non-Unique indexes let table rows have duplicate values in the columns that define the indexes.
For more information, see Available Functionality
.
Sybase ASE Indexes
Sybase ASE offers two types of indexes: clustered and non-clustered. Clustered indexes physically sort table data to
match their logical order. Non-clustered indexes only order the table data logically. In a database, an index lets you
speed queries by setting pointers that let you retrieve table data without scanning the entire table. An index can be
unique or non-unique.
Sybase ASE creates indexes as B-Trees, which are a series of pointers mapping index pages to their underlying data
pages. As tables and, therefore, indexes grow, the number of levels in the B-Tree increases. The B-Tree of a clustered
index is shorter than that of a non-clustered index because the leaf level of a clustered index is the data page.
A sound indexing strategy is critical to overall system performance. One pitfall to avoid is placing many indexes on a
table without regard for their cumulative cost. Remember that indexes improve read but slow write performance
because Sybase ASE must update more information in the system catalog. Consequently, extra indexes can actually
slow overall performance if data modification occurs frequently on the table. To determine the efficacy of indexes, you
should tune your queries using SHOWPLAN and IO STATISTICS and analyze the selectivity of indexes using DBCC
SHOW_STATISTICS.

USING > SUPPORTED OBJECTS
EMBARCADERO TECHNOLOGIES > BOOKNAMEVARIABLE 109
Available Functionality for Indexes
Rapid SQL offers the following functionality for indexes:
NOTE: Functionality differs by platform.
•
Analyze
• Allocate Extent
• Convert to Partitioned
• Deallocate Unused Space
• Drop
• DBCC
• Estimate Size
• Extract
•Filter
•
•
• New
• Open
• Place
• Rebuild (Oracle)
• Rename
• Reorganize
• Report
• Update Statistics
Instance
NOTE: This object is support for IBM DB2 and Oracle.
Rapid SQL places Instance as the first level of information under the Datasource node in the Database Explorer.
Instance includes:
• DB Manager Configuration
• Datasources
Available Functionality
Rapid SQL offers the following functionality for this object:
• New UDB Database

USING > SUPPORTED OBJECTS
EMBARCADERO TECHNOLOGIES > BOOKNAMEVARIABLE 110
Java Classes
NOTE: This object is supported by Oracle 8i or later only.
The Java Classes contain compiled Java code. Java Classes are made up of a group of data items, with associated
functions that perform operations. The data items are called fields or variables; the functions are referred to as
methods.
TIP: Oracle is shipped with a JVM(Java Virtual Machine). The JVM provided by Oracle sits atop the
Oracle RDBMS and interacts directly with the RDBMS instead of the operating system.
Available Functionality
•
Drop
Java Resources
NOTE: This object is supported by Oracle only.
The Java Resources node of the Explorer tab offers support for browsing Java resources.
Available Functionality
•
Drop
Java Sources
NOTE: This object is supported by Oracle 8i or later only.
Java Sources contain the uncompiled Java source code.
TIP: Oracle is shipped with a JVM(Java Virtual Machine). The JVM provided by Oracle sits atop the
Oracle RDBMS and interacts directly with the RDBMS instead of the operating system.
Available Functionality
•
Compile
• Create
• Edit
• Load Java
• Drop
Job Queues
NOTE: This object is supported by Oracle only.
Job Queues are built-in mechanisms that let you schedule a variety of SQL-based or command-line driven tasks.

USING > SUPPORTED OBJECTS
EMBARCADERO TECHNOLOGIES > BOOKNAMEVARIABLE 111
Available Functionality
Rapid SQL offers the following functionality for this object:
•Run
•
New
• Open
• Enable
• Disable
Libraries
NOTE: This object is supported by Oracle only.
Libraries are an object type introduced in Oracle8 that represent a call to an operating system shared library. After the
call is made, libraries can be used by SQL or PL/SQL to link to external procedures or functions. Libraries are only to
be used on operating systems that support shared libraries and dynamic linking. Libraries serve as pointers or aliases
to physical operating system shared library files and do not have existence as a physical object on their own, rather
they rely on the physical existence of the files in the external operating system library to which they refer. To access
the function or procedures stored in the library, you need execute privileges at the operating system level where the
shared library resides.
Available Functionality
Rapid SQL offers the following functionality for this object:
•
Drop
• Extract
• New
• Open
• Rename
• Report
Logins
NOTE: This object is supported by Microsoft SQL Server and Sybase only.
Logins let you access your account. Your login account controls access to the server and all of the databases within it.
Only the System Administrator or System Security Officer can create logins. Once you can log into a server, you need
additional privileges to access user databases. Specifically, each database owner adds the login as a user or alias to
the database.
NOTE: Logins are available for Microsoft SQL Server
and Sybase ASE.

USING > SUPPORTED OBJECTS
EMBARCADERO TECHNOLOGIES > BOOKNAMEVARIABLE 112
Microsoft SQL Server Logins
Logins let you access your account. Your login account controls access to the server and all of the databases within it.
Only the System Administrator or System Security Officer can create logins. Once you can log into a server, you need
additional privileges to access user databases. Specifically, each database owner adds the login as a user or alias to
the database.
For more information, see Available Functionality.
Sybase ASE Logins
Logins let you access your account. Your login account controls access to the server and all of the databases within it.
Only the System Administrator or System Security Officer can create logins. Once you can log into a server, you need
additional privileges to access user databases. Specifically, each database owner adds the login as a user or alias to
the database.
For more information, see Available Functionality
.
Available Functionality
Rapid SQL offers the following functionality for this object:
•
Change Password
• Drop
• Extract
• New
• Open
• Report
Materialized Query Tables
NOTE: This object is supported by IBM DB2 UDB for Linux, Unix, and Windows version 8.
A materialized query table is a table whose definition is based on the result of a query. The materialized query table
typically contains pre-computed results based on the data existing in the table or tables that its definition is based on.
If the SQL compiler determines that a query will run more efficiently against a materialized query table than the base
table or tables, the query quickly executes against the materialized query table.
Available Functionality
Rapid SQL offers the following functionality for this object:
•
Create Insert Statements
• Create Synonym
• Drop
• Edit Data
• Extract
• New
• Open

USING > SUPPORTED OBJECTS
EMBARCADERO TECHNOLOGIES > BOOKNAMEVARIABLE 113
• Refresh Summary Table
• Rename
• Report
Materialized Views
NOTE: This object is supported by Oracle only.
Materialized views are used to dynamically copy data between distributed databases. There are two types of
materialized views:
• Complex
•Simple
Complex materialized views copy part of a master table or data from more than one master table. Simple materialized
views directly copy a single table. You cannot directly update the underlying data contained in materialized views.
NOTE: Materialized Views are only in Oracle 8.1 or later. If you are using Oracle 8.0 or earlier, see
Snapshots
.
Available Functionality
Rapid SQL offers the following functionality for this object:
• Create Synonym
• Drop
• Extract
• New
• Open
• Rename
•
Report
Materialized View Logs
NOTE: This object is supported by Oracle only.
Materialized View logs are tables that maintain a history of modifications to the master table, and they are used to
refresh simple materialized views. When you create a materialized view log, Oracle automatically creates a log table
to track data changes in the master table and a log trigger to maintain the data in the log table.
NOTE: Materialized View Logs are in Oracle 8i or later. If you are using Oracle 8.0 or earlier, see
Snapshot Logs
.
Available Functionality
Rapid SQL offers the following functionality for this object:
•
Drop
• Extract

USING > SUPPORTED OBJECTS
EMBARCADERO TECHNOLOGIES > BOOKNAMEVARIABLE 114
• New
• Open
• Report
Oracle Job Queues
NOTE: This object is supported by Oracle only.
Oracle job queues are built-in mechanisms in the Oracle database that let you schedule a variety of SQL-based or
command-line driven tasks. Basically, they are database-driven schedulers.
Available Functionality
Rapid SQL offers the following functionality for this object:
• Drop
• Extract
• New
• Open
• Report
Outlines
NOTE: This object is supported by Oracle 8.1 or later only.
Outlines are a set of results for the execution plan generation of a particular SQL statement. When you create an
outline, plan stability examines the optimization results using the same data used to generate the execution plan. That
is, Oracle uses the input to the execution plan to generate an outline, and not the execution plan itself.
Available Functionality
Rapid SQL offers the following functionality for this object:
•
Change Category
• Drop
• Extract
• New
• Open
• Reassign by Category
• Rebuild
• Rename
• Report

USING > SUPPORTED OBJECTS
EMBARCADERO TECHNOLOGIES > BOOKNAMEVARIABLE 115
Packages
NOTE: This object is supported by IBM DB2 UDB for Linux, Unix, and Windows, IBM DB2 UDB for
OS/390 and z/OS, and Oracle only.
Packages contain all the information needed to process SQL statements from a single source file. You can use
packages to process and call batches of SQL. Depending on the platform, packages can include:
•
Procedures
• Functions
• Types
• Variables
• Constants
• Exceptions
•Cursors
• Subprograms
Packages offer a number of important advantages over using standalone procedures and functions, including the
ability to:
• Modify package objects without recompiling dependent database objects.
• Declare global variables and cursors that can be shared within the package.
• Grant privileges more efficiently.
• Load multiple package objects into memory at once.
Packages usually have two parts: a header or specification and a body, although sometimes the body is unnecessary.
The package header declares the members of the package while the body details the logic underlying each of the
package components.
Available Functionality
Rapid SQL offers the following functionality for this object:
NOTE: Functionalities differ by platform.
•
Bind
• Create Synonym
• Dependencies
• Drop
• Explain Plan
• Extract
•Filter
•
New
• Open
• Rebind

USING > SUPPORTED OBJECTS
EMBARCADERO TECHNOLOGIES > BOOKNAMEVARIABLE 116
• Report
Package Bodies
NOTE: This object is supported by Oracle only.
Package Bodies implement the package specification in that the package body includes the definition of every cursor
and subprogram declared in the package specification. While Package Bodies are listed as a separate object in the
Datasource Explorer, they are created on the Packages Editor
in conjunction with Packages.
Available Functionality
Rapid SQL offers the following functionality for this object:
• Create Synonym
• Dependencies
• Drop
• Extract
• New
• Open
• Report
Plans
NOTE: This object is supported by IBM DB2 UDB for OS/390 and z/OS only.
A Plan is an executable application created in the bind process. It can include one or more packages or debris.
Available Functionality
Rapid SQL offers the following functionality for this object:
•
Bind
• Copy Object Names
• Drop
• Filter
• Free
• Open
• Rebind
• Report
Primary Keys
NOTE: This object is supported by all platforms.

USING > SUPPORTED OBJECTS
EMBARCADERO TECHNOLOGIES > BOOKNAMEVARIABLE 117
Primary Keys are a set of table columns that can uniquely identify every row of a table.
Available Functionality
Rapid SQL offers the following functionality for this object:
NOTE: Functionalities differ by platform.
•
Drop
• Extract
•Filter
•
New
• Open
• Rename
• Report
•Status
Procedures
NOTE: This object is supported by all platforms.
Procedures are a reusable block of PL/SQL, stored in the database, that applications can call. Procedures streamline
code development, debugging and maintenance by being reusable. Procedures enhance database security by letting
you write procedures granting users execution privileges to tables rather than letting them access tables directly.
NOTE: Only IBM DB2 UDB for OS/390 and z/OS SQL stored procedures created by Rapid SQL,
DBArtisan, or IBM's Stored Procedure Builder can be retrieved by Rapid SQL or DBArtisan.
Sybase ASE
Procedures perform procedural logic in your Sybase ASE applications. They are batches of SQL statements that are
compiled and stored in the system catalog. Procedures execute faster than embedded SQL statements because they
are pre-compiled and have execution plans for use by the optimizer. When you create a procedure, Sybase ASE
builds a query tree, which it stores in a system table. When you execute a procedure for the first time, Sybase ASE
loads it from the system table, compiles, and optimizes it. Sybase ASE places the resulting query plan in the
procedure cache where it remains on a most recently used basis. In addition to better performance, procedures yield
other benefits, including easier code maintenance, additional security and reduced network traffic.
In addition, Rapid SQL now supports extended procedures
. Extended procedures are dynamic link libraries that can
be used to load and execute application routines written in other programming languages, such as C or Visual Basic.
Extended procedures function and appear in the same manner as normal procedures in that you can pass parameters
to them and obtain results.
Available Functionality
Rapid SQL offers the following functionality for this object:
NOTE: Functionalities differ by platform.
•
Create Synonym
• Drop

USING > SUPPORTED OBJECTS
EMBARCADERO TECHNOLOGIES > BOOKNAMEVARIABLE 118
• Extract
• Filter
• Generate Anonymous Block
• New
• Open
• Rename
• Report
Profiles
NOTE: This object is supported by Oracle only.
Profiles are a mechanism for allocating system and database resources to users. Profiles let you specify limits on:
• Number of sessions
•CPU time
• Connect time
•Idle time
• Logical reads and space in the SGA's shared pool
You can assign profiles to one or more users. The database's default profile and all of its resource limits are assigned
to users without a specific profile assignment.
Available Functionality
Rapid SQL offers the following functionality for this object:
•
Drop
• Extract
• New
• Open
• Report
USING > SUPPORTED OBJECTS
EMBARCADERO TECHNOLOGIES > BOOKNAMEVARIABLE 119
Rollback Segments
NOTE: This object is supported by Oracle only.
Rollback segments manage all transactions in your Oracle databases. They maintain read consistency among
concurrent users in a database and can rollback transactions. They are transaction logs that maintain discrete records
of changes to data. By maintaining a history of data changes, rollback segments can rollback uncommitted
transactions so that data is rolled back to their prior state.
TIP: Databases with large user bases and intensive data manipulation characteristics can benefit from
having multiple rollback tablespaces that are placed on different server drives or file systems. This
strategy aids in the reduction of I/O and rollback segment contention.
Microsoft SQL Server 7
Column Name Description
Remote Server Name Name of the server
Net Name Reserved (name of the server)
Product Name Product name for the remote server(e.g. Microsoft SQL
Server)
Ole Provider Name Name of the Ole provider accessing the server
Sybase ASE
Column Name Description
Remote Server Name Name of the server
Network Name Name of the network on which the Remote Server resides
Timeouts Shows whether or not the Timeout option has been enabled. If it is
set to 1 then the site handler for the remote login will timeout if there
is no remote user activity for one minute.
Column Name Description
Role Name Name of the role
Role Type Whether the role is a standard Microsoft SQL Server role or
an application role
Created When the role was created
Updated When the role was last updated
Column Name Description
Role Name Name of the role
Password Required Password authentication for the role. The valid values are
Yes (specific password required), No (no password
required), External (password is authenticated through the
operating system) or Global (password is authenticated
through the security domain central authority).
Column Name Description
Role Name Name of the role

USING > SUPPORTED OBJECTS
EMBARCADERO TECHNOLOGIES > BOOKNAMEVARIABLE 120
Because all changes are logged to a rollback segment, they can become a performance bottleneck as the number of
concurrent users and transaction activity increases. You can tune rollback segment performance by creating additional
ones to handle increased traffic. To determine whether rollback segment performance is satisfactory, you should
monitor the ratio of gets to waits. If you see that the number of waits is climbing, create another rollback segment to
further spread concurrency.
NOTE: The analysis for determining when to add a rollback segment can be quite complicated. As a
rule-of-thumb, however, many DBAs simply plan on allocating a rollback segment for every four
concurrent users.
The proper sizing of rollback segments is critical to their overall performance. Performance degrades whenever a
rollback segment must extend, wrap or shrink in response to transaction loads. Ideally, you want to make their extents
as small as possible while ensuring that each transaction fits into a single extent, which in practice is very difficult to
achieve.
NOTE: You should carefully monitor each rollback segments for the occurrence of extends, wraps and
shrinks. If you see a high level of extends and wraps, then the rollback segment is probably too
small. If you see a high level of shrinks, then you should increase the rollback segment's optimal
size.
Available Functionality
Rapid SQL offers the following functionality for this object:
•
Drop
• Extract
• New
• Open
• Report
•Shrink
Rules
NOTE: This object is supported by Microsoft SQL Server and Sybase only.
Rules promote data integrity by allowing you to validate the values supplied to a table column. They are reusable
objects that you can bind to table columns or user datatypes. For example, you can create a rule, bind it to a column in
a table and have it specify acceptable values that can be inserted into that column.
Available Functionality
Rapid SQL offers the following functionality for this object:
•
Drop
• Extract
• New
• Open
• Rename
• Report

USING > SUPPORTED OBJECTS
EMBARCADERO TECHNOLOGIES > BOOKNAMEVARIABLE 121
Segments
NOTE: This object is supported by Sybase only.
Segments are a mechanism for placing tables and indexes on specific logical partitions. You create segments on one
or more fragments of a database. You can map segments to specific database fragments, which in turn reside on
specific hard disks; and, mapping segments lets you increase i/o throughput by placing intensively used tables and
indexes on different physical devices. You can allocate tables and indexes to segments by including placement
statements at the end of CREATE TABLE or CREATE INDEX statements.
Available Functionality
Rapid SQL offers the following functionality for this object:
•
Drop
• Extract
• New
• Open
• Report
Sequences
Sequences are programmable database objects that generate a definable sequence of values. Once defined, a
sequence can be made available to many users. A sequence can be accessed and incremented by multiple users
with no waiting. A sequence can be used to automatically generate primary key values for tables. When you create a
sequence, you can define its initial value, increment interval and maximum value.
Available Functionality
Rapid SQL offers the following functionality for this object:
•
Create Alias
• Create Synonym
• Dependencies
• Drop
• Extract
•Filter
•
New
• Open
• Rename
• Report
• Restart
Snapshots
NOTE: This object is supported by Oracle only.

USING > SUPPORTED OBJECTS
EMBARCADERO TECHNOLOGIES > BOOKNAMEVARIABLE 122
Snapshots are used to dynamically copy data between distributed databases. There are two types of snapshots:
• Complex
•Simple
NOTE: Snapshots are available in Oracle 8.0 and earlier. For Oracle 8i or later, see Materialized Views
.
Complex snapshots copy part of a master table or data from more than one master table. Simple snapshots directly
copy a single table. You cannot directly update the underlying data contained in snapshots.
NOTE: To use snapshots, use the Oracle 7 Distributed Option.
Available Functionality
Rapid SQL offers the following functionality for this object:
• Create Synonym
•
Drop
• Extract
• New
• Open
• Rename
•
Report
Snapshot Logs
NOTE: This object is supported by Oracle only.
Snapshot logs are tables that maintain a history of modifications to the master and they are used to refresh simple
snapshots. When you create a snapshot log, Oracle automatically creates a log table to track data changes in the
master table and a log trigger to maintain the data in the log table.
NOTE: Snapshot Logs are available in Oracle 8.0 or earlier. For Oracle 8i or later, see Materialized View
Logs.
Available Functionality
Rapid SQL offers the following functionality for this object:
•
Drop
• Extract
• New
• Open
• Report
Stogroups
NOTE: This object is supported by IBM DB2 UDB for OS/390 and z/OS only.

USING > SUPPORTED OBJECTS
EMBARCADERO TECHNOLOGIES > BOOKNAMEVARIABLE 123
Stogroups are storage groups, named sets of volumes on which DB2 UDB for OS/390 data is stored.
Available Functionality
Rapid SQL offers the following functionality for this object:
•
Drop
• Extract
•Filter
•
New
• Open
• Report
Structured Types
NOTE: This object is supported by IBM DB2 UDB for Linux, Unix, and Windows and IBM DB2 UDB for
OS/390 and z/OS only.
Structured types define an abstract data type or object composed of a collection of similar types of data. For example,
create an structured type that defines a full address rather than the pieces of an address, such as city, state and postal
code. An structured type stores the pieces of an address in a single type, storing them in the same location and
allowing the full address to be accessed and manipulated as single unit rather than multiple units.
Structured types are useful for ensuring uniformity and consistency as they are defined as single encapsulated entity
that can be reused in other structured types and objects. They also offer flexibility by allowing for the creation of
objects that represent real-world situations which is limited in relational objects.
Available Functionality
Rapid SQL offers the following functionality for this object:
• Dependencies
• Drop
• Extract
•Filter
•
New
• Report
Summary Tables
NOTE: This object is supported by IBM DB2 UDB for Linux, Unix, and Windows version 7.
A summary table is a table whose definition is based on the result of a query. The summary table typically contains
pre-computed results based on the data existing in the table or tables that its definition is based on. If the SQL
compiler determines that a query will run more efficiently against a summary table than the base table or tables, the
query quickly executes against the materialized query table.

USING > SUPPORTED OBJECTS
EMBARCADERO TECHNOLOGIES > BOOKNAMEVARIABLE 124
Available Functionality
Rapid SQL offers the following functionality for this object:
• Create Synonym
•
Drop
• Extract
• New
• Open
• Rename
•
Report
Synonyms
NOTE: This object is supported by IBM DB2 UDB for OS/390 and z/OS and Oracle only.
Synonyms are an alternate name for an object in the database. Depending on the platform, you can define synonyms
on tables, views, sequences, procedures, functions, packages and materialized views. There are two types of
synonyms:
• Public
• Private
Public synonyms can be used by everyone in the database. Private synonyms belong to the synonym owner.
Synonyms simplify object names and let you:
• Reference an object without needing to specify its owner.
• Reference a remote object without needing to specify its database.
• Alias an object so its purpose becomes more understandable.
Available Functionality
Rapid SQL offers the following functionality for this object:
•
Drop
• Extract
•Filter
•
New
• Open
• Rename
• Report
Tables
NOTE: This object is supported by all platforms.

USING > SUPPORTED OBJECTS
EMBARCADERO TECHNOLOGIES > BOOKNAMEVARIABLE 125
Tables are a the basic unit of data storage. Tables store all the data accessible to users in rows and columns. Each
column has a name, datatype and other associated properties. After you define a table, users can insert valid data into
the table, which you can later query, update and delete.
NOTE: Available Functionality
Rapid SQL offers the following functionality for this object:
NOTE: Functionalities differ by platform.
•
Activate Logging
• Allocate Extent
• Analyze
• Build Query
• Clone
• Convert to Partitioned
• Copy Name
• Create Alias
• Create Insert Statements
• Create Like
• Create Synonym
• Create View
• DBCC
• Deallocate Unused Space
• Dependencies
• Disable Triggers
• Enable Triggers
• Drop
• Edit Data
• Estimate Size
• Extract
• Generate Packages
• Generate Procedures
• Generate Statements
• Indexes
• Lock
• New
• Open

USING > SUPPORTED OBJECTS
EMBARCADERO TECHNOLOGIES > BOOKNAMEVARIABLE 126
• Place
• Quiesce Tablespaces
• Rename
• Reorganize
• Report
• Schema
• Select * From
• Triggers
• Truncate
• Update Statistics
Tablespaces
NOTE: This object is supported by IBM DB2 UDB for OS/390 and z/OS, IBM DB2 UDB for Linux, Unix,
and Windows, and Oracle only.
Tablespaces are storage structures that act as partitions for the database. You can create a tablespace to store table
data and other objects related to table performance such as indexes or large object data. Tablespaces are used to
manage large complex databases. Once you have created a tablespace, you can place objects on it.
TIP: Create separate tablespaces for your tables and indexes and put each tablespace on a different
drive or file system. Segmenting tables and their corresponding indexes in this manner helps
eliminate I/O contention at the server level.
NOTE: IBM DB2 UDB for Linux, Unix, and Windows lets you assign a location for table or index data
directly to physical storage devices. Each tablespace can also be broken down into a collection
of containers which are the actual physical storage files or devices. You can then spread the data
or database objects across multiple file systems, thereby giving you the necessary space for
objects that require it.
Once you have created a tablespace, you can place individual tables and indexes on it. Because tablespaces map to
physical drives, you can improve i/o performance by placing tables and their indexes on physically separated table
spaces.
Available Functionality
Rapid SQL offers the following functionality for this object:
NOTE: Functionalities differ by platform.
• Change Status
• Coalesce
• Drop
• Extract
•Filter
• New

USING > SUPPORTED OBJECTS
EMBARCADERO TECHNOLOGIES > BOOKNAMEVARIABLE 127
• Open
• Quiesce (IBM DB2 UDB for Linux, Unix, and Windows)
• Rename
• Report
• Switch Online
Triggers
NOTE: This object is supported by all platforms.
Triggers are a special type of procedure that automatically fire when defined data modification operations (insert,
update or delete) occur on a target table. Triggers fire after an insert, update or delete, but belong to the same
transaction as the data modification operation.
Because triggers fire automatically and are part of the same transaction as the initiating SQL statement, they are often
used to enforce referential integrity in a database. For example, an insert trigger can validate that a foreign key value
exists in the primary key of the parent table. Similarly, you can write a trigger to cascade the deletion or update of data
in a parent table to all corresponding data rows in child tables.
While triggers are a powerful data validation mechanism, they do complicate the task of debugging and tuning SQL.
Because triggers fire inside transactions, they hold open transactions, contributing to concurrency problems.
Accordingly, you should move all non-critical data validation outside of triggers to shorten transaction lengths to their
minimum.
Available Functionality
Rapid SQL offers the following functionality for this object:
NOTE: Functionalities differ by platform.
•
Dependencies
• Disable/Enable
• Drop
• Extract
•Filter
•
New
• Open
• Rename
• Report
Types
NOTE: This object is supported by Oracle only.

USING > SUPPORTED OBJECTS
EMBARCADERO TECHNOLOGIES > BOOKNAMEVARIABLE 128
Types define an abstract data type or object composed of a collection of similar types of data. For example, create an
object type that defines a full address rather than the pieces of an address, such as city, state and postal code. An
object type stores the pieces of an address in a single type, storing them in the same location and allowing the full
address to be accessed and manipulated as single unit rather than multiple units.
Object types are useful for ensuring uniformity and consistency as they are defined as single encapsulated entity that
can be reused in other object types and objects. They also offer flexibility by allowing for the creation of objects that
represent real-world situations which is limited in relational objects.
You can choose to create a type that is incomplete, complete, a VARRAY, or a nested table or any combination of the
above. An incomplete type specifies no attributes and can be used for circular references such as person - female. It
lets the type be referenced before it is complete. The VARRAY type can be used to store small sets of related data.
For example, if you have ten offices (each one with a different description) at a particular division in your company, you
could create a VARRAY of 10 to hold the details of these offices. The values for a VARRAY type must be fixed and
known and small values as they are stored in RAW format. A nested table type can be used when data is repeated for
the same entity an unknown number of times and storage is a concern.
Available Functionality
Rapid SQL offers the following functionality for this object:
•
Dependencies
• Drop
• Extract
• New
• Open
• Report
Type Bodies
NOTE: This object is supported by Oracle only.
Type Bodies implement object type specification by containing the definition of every cursor and subprogram declared
in the object type specification. While Type Bodies are listed as a separate object in the Datasource Explorer, they are
created on the Types Editor
in conjunction with Types.
Available Functionality
Rapid SQL offers the following functionality for this object:
•
Dependencies
• Drop
• Extract
• New
• Open
• Report

USING > SUPPORTED OBJECTS
EMBARCADERO TECHNOLOGIES > BOOKNAMEVARIABLE 129
Unique Keys
NOTE: This object is supported by all platforms.
Unique keys can enforce logical keys that are not chosen as the primary key. They enforce uniqueness for specified
columns in a table.
Available Functionality
Rapid SQL offers the following functionality for this object:
NOTE: Functionalities differ by platform.
•
Drop
• Extract
•Filter
•
New
• Open
• Rename
• Report
•Status
User Datatypes
NOTE: This object is supported by IBM DB2 UDB for Linux, Unix, and Windows, IBM DB2 UDB for
OS/390 and z/OS, Microsoft SQL Server, and Sybase only.
User-defined datatypes promote domain consistency by streamlining the definition of commonly used table columns in
a database. You can build a customized datatype from system datatypes and bind defaults and rules to it to enhance
integrity. When you reference the user datatype in a column, the column assumes all of the properties of the user
datatype.
Available Functionality
Rapid SQL offers the following functionality for this object:
NOTE: Functionalities differ by platform.
•
Drop
• Extract
•Filter
•
New
• Open
• Rename
• Report

USING > SUPPORTED OBJECTS
EMBARCADERO TECHNOLOGIES > BOOKNAMEVARIABLE 130
Users
NOTE: This object is supported by all platforms.
A user is an individual with access to the DBMS.
For more information, see:
•
IBM DB2 UDB for Linux, Unix, and Windows Users
• IBM DB2 UDB for OS/390 and z/OS Users
• Microsoft SQL Server Users
• Oracle Users
• Sybase ASE Users
• Available Functionality
IBM DB2 UDB for Linux, Unix, and Windows Users
IBM DB2 UDB for Linux, Unix, and Windows relies on your machine’s operating system to define users for the server.
You create and maintain users through your operating system. For example, for Windows NT, you create users in the
User Manager.
For more information, see Available Functionality
.
IBM DB2 UDB for OS/390 and z/OS Users
IBM DB2 UDB relies on the operating system you are running to define users for the server. This means that users are
created and maintained through your operating system. For example, if you are running Windows NT, the User
Manager is the utility where users should be created.
For more information, see Available Functionality.
Microsoft SQL Server Users
Microsoft SQL Server controls access at the database level by requiring the System Administrator or Database Owner
to add a login as a database user or alias. After you create a database user, you can implement further security by the
granting or revoking the privileges for that user on specific database objects. To consolidate the process of granting or
revoking permissions to many users, the database owner can assign users to groups.
For more information, see Available Functionality.
Oracle Users
To access an Oracle database, you need a user account authenticated with a password. A user account is what
Oracle uses to permit access by the user. You can assign the following optional properties to the user:
• Default tablespace
• Temporary tablespace
• Quotas for allocating space in tablespaces
• Profile containing resource limits

USING > SUPPORTED OBJECTS
EMBARCADERO TECHNOLOGIES > BOOKNAMEVARIABLE 131
For more information, see Available Functionality.
Sybase ASE Users
Sybase ASE controls access at the database level by requiring the System Administrator or Database Owner to add a
login as a database user or alias. After you create a database user, you can implement further security by granting or
revoking the privileges for that user on specific database objects. To consolidate the process of granting or revoking
permissions to many users, the database owner can assign users to groups.
For more information, see Available Functionality.
Available Functionality for Users
Rapid SQL offers the following functionality for users:
NOTE: Functionalities differ by platform.
• Change Password
• Drop
• Extract
•Filter
•
New
• Open
• Report
Views
NOTE: This object is supported by all platforms.
Views are SQL queries stored in the system catalog that customize the display of data contained in one or more
tables. Views behave like tables because you can query views and perform data manipulation operations on them.
However, views do not actually store any data. Instead, they depend on data contained in their base tables. Views let
you:
• View a customized selection of data from one or more tables. As a result, you can display data more cogently to
different sets of users, even though the underlying data is the same.
• Restricting access to a defined set of rows and columns.
Available Functionality
Rapid SQL offers the following functionality for this object:
NOTE: Functionalities differ by platform.
•
Build Query
• Copy Name
• Create Alias

USING > OBJECT EDITORS
EMBARCADERO TECHNOLOGIES > BOOKNAMEVARIABLE 132
• Create Synonym
• Dependencies
• Drop
•Filter
•
Extract
• Generate Select Statements
• New
• Open
• Rename
• Report
• Select * From
Object Editors
Rapid SQL stores information about server and object types in object editors. An editor is a tabbed dialog box that
groups related information together. Each editor contains a context-sensitive Commands menu with pertinent
functionality for the object. Many of the object editors contain a DDL Tab. This tab displays the underlying target
object's SQL.
TIP: The Object Editor tool bar has a refresh button, that lets you refresh Object Editor contents, clear
the Object Editors, and log SQL if SQL Logging is turned on.
TIP:
If an objects has dependent objects, such as tables, triggers, procedures and views, you can view and access their
dependent objects in the editor.
Related Topics:
IBM DB2 UDB for Linux, Unix, and Windows Object Editors
IBM DB2 UDB for OS/390 and z/OS Object Editors
Microsoft SQL Server Object Editors
Oracle Object Editors
Sybase ASE Object Editors
IBM DB2 UDB for Linux, Unix, and Windows Object Editors
Rapid SQL includes an Object Editor for all supported IBM DB2 UDB for Linux, Unix, and Windows objects. To see an
Editor for a specific object, click the corresponding link in the table below:
NOTE: If an objects has dependent objects, such as tables, triggers, procedures and views, you can view
and access their dependent objects in the editor.
USING > OBJECT EDITORS
EMBARCADERO TECHNOLOGIES > BOOKNAMEVARIABLE 133
Aliases Editor for IBM DB2 UDB for Linux, Unix, and Windows
The Aliases Editor lets you:
• Enter a comment.
• View alias DDL.
TIP: The r
efresh button lets you refresh or clear the editor’s contents, and log SQL.
The following tabs are available in the Aliases Editor:
• Definition
• Comment
• DDL
After making changes on the tab, on the editor tool bar, click .
Rapid SQL opens the Preview:Alter dialog box
.
Aliases Editor for IBM DB2 UDB for Linux, Unix, and Windows - Definition Tab
The Definition Tab of the Aliases Editor displays object type, owner and name for any alias on the datasource.
For more information, see Aliases Editor
.
Aliases Editor for IBM DB2 UDB for Linux, Unix, and Windows - Comment Tab
The Comment Tab of the Aliases Editor lets you enter a comment which can be up to 254 characters long. The
comments are stored in the REMARKS column of the objects' system catalog table.
After making changes on the tab, on the editor tool bar, click .
Rapid SQL opens the Preview:Alter dialog box
.
For more information, see Aliases Editor
.
Aliases Editor for IBM DB2 UDB for Linux, Unix, and Windows - DDL Tab
The DDL Tab of the Aliases Editor lets you view the SQL code for every alias on the current datasource. To view DDL
for another alias, click the lists, click the target owner, and then click the target alias.
TIP: To turn line numbers on and off, right-click any line, and then select Line Numbers.
Aliases Editor Check Constraints
Editor
Foreign Keys Editor Functions Editor
Indexes Editor Materialized Query
Table Editor
Packages Editor Primary Keys Editor
Procedures Editor Tables Editor Tablespaces Editor Triggers Editor
Unique Keys Editor User Datatypes Editor Views Editor
USING > OBJECT EDITORS
EMBARCADERO TECHNOLOGIES > BOOKNAMEVARIABLE 134
After making changes on the tab, on the editor tool bar, click .
Rapid SQL opens the Preview:Alter dialog box
.
For more information, see Aliases Editor
.
Check Constraints Editor for IBM DB2 UDB for Linux, Unix, and Windows
The Check Constraints Editor lets you:
• View and modify check constraints.
• View check constraint DDL.
TIP: The r
efresh button lets you refresh or clear the editor’s contents, and log SQL.
The following tabs are available in the Check Constraints Editor:
• Definition
• DDL
Check Constraints Editor for IBM DB2 UDB for Linux, Unix, and Windows - Definition Tab
The table below describes the options and functionality on the Definition Tab on the Check Constraints Editor:
After making changes on the tab, on the editor tool bar, click .
Rapid SQL opens the Preview:Alter dialog box
.
For more information, see Check Constraints Editor
.
Check Constraints Editor for IBM DB2 UDB for Linux, Unix, and Windows - DDL Tab
The DDL Tab of the Check Constraints Editor lets you view the SQL code for every check constraint on the current
datasource. To view DDL for another check constraint, click the lists, click the target owner, and then click the target
check constraint.
After making changes on the tab, on the editor tool bar, click .
Rapid SQL opens the Preview:Alter dialog box
.
For more information, see Check Constraints Editor
.
Option Description
Owner To change the check constraint owner, click the
Owner list, and then click the new owner.
Table To change the table on which the check constraint is
placed, click the Table list, and then click the new
table.
Check Condition To modify the check constraint condition, in the text
box, type the new check condition.
Table Columns button Click to open the Paste Columns for Check
Constraint dialog box.
USING > OBJECT EDITORS
EMBARCADERO TECHNOLOGIES > BOOKNAMEVARIABLE 135
Databases Editor for IBM DB2 UDB for Linux, Unix, and Windows
The Databases Editor lets you:
• Manage database placement.
• Manage database options.
• Manage database space.
• View database DDL.
TIP: The r
efresh button lets you refresh or clear the editor’s contents, and log SQL.
The following tabs are available in the Databases Editor:
• Placement
• Options
• Space
• DDL
Databases Editor for IBM DB2 UDB for Linux, Unix, and Windows - Placement Tab
The Placement Tab of the Databases Editor lets you manage following for database on the current datasource:
• Database Owner
• Database File
When changing the database owner (dbo) select the check box to transfer the existing aliases of users who could act
as the old dbo (including their permissions) to the new dbo.
After making changes on the tab, on the editor tool bar, click .
Rapid SQL opens the Preview:Alter dialog box
.
For more information, see Databases Editor
.
Databases Editor for IBM DB2 UDB for Linux, Unix, and Windows - Options Tab
The Options Tab of the Databases Editor lets you view and modify the database options for every database on the
current datasource. To set database options for all future databases, set the database options on the model database.
After making changes on the tab, on the editor tool bar, click .
Rapid SQL opens the Preview:Alter dialog box
.
For more information, see Databases Editor
.
Databases Editor for IBM DB2 UDB for Linux, Unix, and Windows - Space Tab
The Space Tab of the Databases Editor lets you view pie charts showing the data space usage and the transaction log
(if available) space usage for every database on the current datasource.
TIP: Double-click a slice in the pie chart for detailed statistics.
After making changes on the tab, on the editor tool bar, click .
Rapid SQL opens the Preview:Alter dialog box
.
USING > OBJECT EDITORS
EMBARCADERO TECHNOLOGIES > BOOKNAMEVARIABLE 136
For more information, see Databases Editor.
Databases Editor for IBM DB2 UDB for Linux, Unix, and Windows - DDL Tab
The DDL Tab of the Databases Editor lets you view the SQL code for every database on the current datasource. To
view DDL for another database, click the list, and then click the target database.
After making changes on the tab, on the editor tool bar, click .
Rapid SQL opens the Preview:Alter dialog box
.
For more information, see Databases Editor
.
• Foreign Keys Editor for IBM DB2 UDB for Linux, Unix, and Windows
The Foreign Keys Editor lets you:
• Manage foreign key columns.
• View foreign key DDL.
TIP: The r
efresh button lets you refresh or clear the editor’s contents, and log SQL.
The following tabs are available in the Foreign Keys Editor:
• Columns
• DDL
Foreign Keys Editor for IBM DB2 UDB for Linux, Unix, and Windows - Columns Tab
The Columns Tab of the Foreign Keys Editor lets you manage columns for every foreign key on the current
datasource. The table below describes the options and functionality on the columns tab of the Foreign Keys Editor:
After making changes on the tab, on the editor tool bar, click .
Rapid SQL opens the Preview:Alter dialog box
.
For more information, see Foreign Keys Editor
.
Foreign Keys Editor for IBM DB2 UDB for Linux, Unix, and Windows - DDL Tab
The DDL Tab of the Foreign Keys Editor lets you view the SQL code for every foreign key on the current datasource.
To view DDL for another foreign key, click the lists, click the target owner, and then click the target foreign key.
Option Description
Table Owner To change the table owner, click the list, and then click the new table owner.
Table Name To change the table name, click the list, and then click the new table name.
Primary/Unique
Key
To change the primary/unique key, click the list, and then click the new
primary/unique key.
On Delete To change the constraint state action on delete, click the list, and then click
the new action.
On Update To change the constraint state action on update, click the list, and then click
the new action.
USING > OBJECT EDITORS
EMBARCADERO TECHNOLOGIES > BOOKNAMEVARIABLE 137
After making changes on the tab, on the editor tool bar, click .
Rapid SQL opens the Preview:Alter dialog box
.
For more information, see Foreign Keys Editor
.
Functions Editor for IBM DB2 UDB for Linux, Unix, and Windows
The Functions Editor lets you:
• View and modify function definitions.
• Manage function dependencies.
• Manage function privileges.
TIP: The refresh button lets you refresh or clear the editor’s contents, and log SQL.
The following tabs are available in the Functions Editor:
• Parameters
• Definition
• Comment
• Dependencies
• Privileges
• DDL
Functions Editor for IBM DB2 UDB for Linux, Unix, and Windows - Parameters Tab
The Parameters Tab of the Functions Editor lets you:
• Add parameters
• Insert parameters
• Modify parameters
The table below describes the options and functionality on the Parameters Tab of the Functions Editor:
Option Description
Owner Lets you select any owner on the connected
datasource.
Function Lets you select any function on the connected
datasource.
Specific Name Lets you select any function by specific name on the
connected datasource.
Add Button Click to open the Add Parameter dialog box
.
Insert Button Click to open the
Rapid SQL opens the Insert
Parameter dialog box.
Edit Button Click to open the Modify Parameter dialog box
.
USING > OBJECT EDITORS
EMBARCADERO TECHNOLOGIES > BOOKNAMEVARIABLE 138
After making changes on the tab, on the editor tool bar, click .
Rapid SQL opens the Preview:Alter dialog box
.
For more information, see Functions Editor
.
Functions Editor for IBM DB2 UDB for Linux, Unix, and Windows - Definition Tab
The Definition Tab of the Functions Editor lets you modify a function to change its definition by constructing a DROP
and CREATE FUNCTION script. The table below describes the options and functionality on the Definition Tab of the
Functions Editor:
NOTE: Options differ by type of function.
Drop Button Click do delete the parameter.
Up Click to move the parameter up in the grid.
Down Click to move the parameter down in the grid.
Option Description
Owner Lets you select any owner on the connected
datasource.
Function Lets you select any function on the connected
datasource.
Specific Name Lets you select any function by specific name on the
connected datasource.
External Name To change the external name of the function, type the
new external name.
Language To change the language in which the function body is
written, select the new language.
If the function body is written in C, select DB2SQL.
If the function body is written in JAVA, select
DB2GENERAL.
NOTE: If the function body is written in OLEDB, this
parameter cannot be changed.
Parameter Style To change the parameter style of the function, select
the new parameter style.
NOTE: If the function body is written in OLEDB, this
parameter cannot be changed.
Deterministic Select to make the function return different results
from calls with the same parameters.
Fenced Select to make the function run in a memory space
separate from the database.
Null Call Select to make the function executed if a null value is
passed as an argument.
External Action
Option Description
USING > OBJECT EDITORS
EMBARCADERO TECHNOLOGIES > BOOKNAMEVARIABLE 139
After making changes on the tab, on the editor tool bar, click .
Rapid SQL opens the Preview:Alter dialog box
.
For more information, see Functions Editor
.
Functions Editor for IBM DB2 UDB for Linux, Unix, and Windows - Comment Tab
The Comment Tab of the Functions Editor lets you enter a comment which can be up to 254 characters long. The
comments are stored in the REMARKS column of the objects' system catalog table.
After making changes on the tab, on the editor tool bar, click .
Rapid SQL opens the Preview:Alter dialog box
.
For more information, see Functions Editor
.
Functions Editor for IBM DB2 UDB for Linux, Unix, and Windows - Dependencies Tab
The Dependencies Tab of the Functions Editor lets you manage database objects dependent on each function on the
current datasource. Rapid SQL arranges the objects in a tree structure. The objects are organized in folders based on
the dependency relationship. These folders contain all of the associated objects. The table below describes the
dependency relationship types:
TIP: Click one of the referenced objects to open that object’s editor.
After making changes on the tab, on the editor tool bar, click .
Rapid SQL opens the Preview:Alter dialog box
.
For more information, see Functions Editor
.
Functions Editor for IBM DB2 UDB for Linux, Unix, and Windows - Privileges Tab
The Privileges Tab of the Functions Editor lets you manage permissions for every function on the current datasource.
This tab displays if a privilege was inherited from a role or group, or if it was granted explicitly by a user. Rapid SQL
also shows if the privilege is grantable (granted with the GRANT OPTION.)
There is a table on every Privileges Tab. Rapid SQL populates each row of the table with every user, group, and role
in the database. The legend, on every Privileges Tab, explains the marks in the table.
Scratchpad IBM DB2 UDB for Linux, Unix, and Windows 8
ONLY: Lets you type the length of the scratchpad.
NOTE: External scalar and external table functions
default is 100.
Contains SQL If deselected, the Function has the parameter NO
SQL.
Reads SQL If deselected, the Function has the parameter NO
SQL.
Relationship Description
Referencing Objects The target view is dependent on these objects.
Referenced Objects These objects are dependent on the target view.
Option Description
USING > OBJECT EDITORS
EMBARCADERO TECHNOLOGIES > BOOKNAMEVARIABLE 140
The table below describes the icons in the legend:
After making changes on the tab, on the editor tool bar, click .
Rapid SQL opens the Preview:Alter dialog box.
For more information, see:
Granting Permissions
Revoking Permissions
Functions Editor
Functions Editor for IBM DB2 UDB for Linux, Unix, and Windows - DDL Tab
The DDL Tab of the Functions Editor lets you view the SQL code for every function on the current datasource. To view
DDL for another table, click the lists, click the target owner, and then click the target table.
After making changes on the tab, on the editor tool bar, click .
Rapid SQL opens the Preview:Alter dialog box.
For more information, see Functions Editor
.
for IBM DB2 UDB for Linux, Unix, and Windows Indexes
Editor for IBM DB2 UDB for Linux, Unix, and Windows
The Indexes Editor lets you:
Icon Label Description
Black check mark User The privilege(s) was granted explicitly by a user.
Blue check mark Group The privilege(s) was inherited from a group.
Green check mark Role The privilege(s) was inherited from a role.
White check mark Revoked The privilege(s) was inherited from another
source, but has been revoked by a user. In
Rapid SQL, a user cannot revoke a privilege that
has been granted by a role.
Two black check marks With Grant The privilege(s) was granted with the
GRANTABLE option.
Icon Label Description
Black check mark User The privilege(s) was granted explicitly by a user.
Blue check mark Group The privilege(s) was inherited from a group.
Green check mark Role The privilege(s) was inherited from a role.
White check mark Revoked The privilege(s) was inherited from another
source, but has been revoked by a user. In
DBArtisan, a user cannot revoke a privilege that
has been granted by a role.
Two black check marks With Grant The privilege(s) was granted with the
GRANTABLE option.

USING > OBJECT EDITORS
EMBARCADERO TECHNOLOGIES > BOOKNAMEVARIABLE 141
• Manage index columns.
• View and modify index attributes.
• Manage index storage.
• Add a comment.
• View index DDL.
TIP: The r
efresh button lets you refresh or clear the editor’s contents, and log SQL.
The following tabs are available in the Indexes Editor:
• Columns
• Properties
• Storage
• Comment
•
Privileges
• DDL
Indexes Editor for IBM DB2 UDB for Linux, Unix, and Windows - Columns Tab
The Columns Tab of the Indexes Editor lets you manage columns for every index on the current datasource. The
Columns Tab lets you:
• Add columns
• Insert columns
•Edit columns
• Drop columns
• Order columns
After making changes on the tab, on the editor tool bar, click .
Rapid SQL opens the Preview:Alter dialog box
.
For more information, see Indexes Editor
.
Indexes Editor for IBM DB2 UDB for Linux, Unix, and Windows - Properties Tab
The Properties Tab of the Indexes Editor lets you set properties. The table below describes the options and
functionality on the Properties Tab of the Indexes Editor:
After making changes on the tab, on the editor tool bar, click .
Rapid SQL opens the Preview:Alter dialog box.
Option Description
Index Properties Lets you switch between unique and non-unique
indexes.
USING > OBJECT EDITORS
EMBARCADERO TECHNOLOGIES > BOOKNAMEVARIABLE 142
For more information, see Indexes Editor.
Indexes Editor for IBM DB2 UDB for Linux, Unix, and Windows - Storage Tab
The Storage Tab of the Indexes Editor lets you manage storage for every index on the current datasource. The table
below describes storage options:
After making changes on the tab, on the editor tool bar, click .
Rapid SQL opens the Preview:Alter dialog box
.
For more information, see Indexes Editor
.
Indexes Editor for IBM DB2 UDB for Linux, Unix, and Windows - Comment Tab
The Comment Tab of the Indexes Editor lets you enter a comment which can be up to 254 characters long.The
comments are stored in the REMARKS column of the objects' system catalog table.
After making changes on the tab, on the editor tool bar, click .
Rapid SQL opens the Preview:Alter dialog box
.
For more information, see Indexes Editor
.
Indexes Editor for IBM DB2 UDB for Linux, Unix, and Windows - Privileges Tab
The Privileges Tab of the Indexes Editor lets you manage permissions for every index on the current datasource.
This Tab displays if a privilege was inherited from a role or group, or if it was granted explicitly by a user. Rapid SQL
also shows if the privilege is grantable (granted with the GRANT OPTION.)
There is a table on every Privileges Tab. Rapid SQL populates each row of the table with every user, group, and role
in the database. The legend, on every Privileges Tab, explains the marks in the table.
The table below describes the icons in the legend:
Option Description
Data Block Storage Lets you select parameters.
Extents The unit of space allocated to an object whenever the object needs more
space.
Initial Extent - The initial space extent (in bytes) allocated to the object.
Next Extent - The next extent (in bytes) that the object will attempt to
allocate when more space for the object is required.
Minimum Extents - The appropriate minimum extents value for the
object.
Maximum Extents - The appropriate maximum extents value for the
object.
Percent Increase - Magnifies how an object grows and, can materially
affect available free space in a tablespace. Select a value in the
corresponding box.
Free Lists Lets you select parameters.
Icon Label Description
Black check mark User The privilege(s) was granted explicitly by a user.

USING > OBJECT EDITORS
EMBARCADERO TECHNOLOGIES > BOOKNAMEVARIABLE 143
After making changes on the tab, on the editor tool bar, click .
Rapid SQL opens the Preview:Alter dialog box
.
For more information, see:
Granting Permissions
Revoking Permissions
Indexes Editor
Indexes Editor for IBM DB2 UDB for Linux, Unix, and Windows - DDL Tab
The DDL Tab of the Indexes Editor lets you view the SQL code for every index on the current datasource. To view
DDL for another index, click the lists, click the target owner, and then click the target index.
For more information, see Indexes Editor
.
Materialized Query Tables Editor for IBM DB2 UDB for Linux, Unix, and Windows
The Materialized Query Tables Editor lets you:
• Manage table columns.
• Manage table constraints.
• Manage performance constraints.
• Manage table storage.
• Add a comment.
• Manage table dependencies.
• Manage table privileges.
• View table DDL.
TIP: The r
efresh button lets you refresh or clear the editor’s contents, and log SQL.
The following tabs are available in the Materialized Query Tables Editor:
•
Columns
• Definition
•
Performance
Blue check mark Group The privilege(s) was inherited from a group.
Green check mark Role The privilege(s) was inherited from a role.
White check mark Revoked The privilege(s) was inherited from another
source, but has been revoked by a user. In
Rapid SQL, a user cannot revoke a privilege that
has been granted by a role.
Two black check marks With Grant The privilege(s) was granted with the
GRANTABLE option.
Icon Label Description
USING > OBJECT EDITORS
EMBARCADERO TECHNOLOGIES > BOOKNAMEVARIABLE 144
• Space
• Comment
• Dependencies
• Privileges
• DDL
Materialized Query Tables Editor for IBM DB2 UDB for Linux, Unix, and Windows - Columns Tab
The Columns Tab of the Materialized Query Tables Editor lets you manage columns for every table on the current
datasource. The Columns Tab lets you:
• Add columns
• Insert columns
•Edit columns
• Drop columns
• Order columns
The table below describes the options and functionality on the Columns Tab of the Materialized Query Tables Editor:
After making changes on the tab, on the editor tool bar, click .
Rapid SQL opens the Preview:Alter dialog box
.
For more information, see Materialized Query Tables Editor
.
Materialized Query Tables Editor for IBM DB2 UDB for Linux, Unix, and Windows - Definition Tab
The Definition Tab of the Materialized Query Tables Editor lets you manage the SQL for every table on the current
datasource. The table below describes the options and functionality on the Definition Tab of the Materialized Query
Tables Editor:
After making changes on the tab, on the editor tool bar, click .
Rapid SQL opens the Preview:Alter dialog box
.
For more information, see Materialized Query Tables Editor
.
Option Description
Add Button Select the column and click to open the Add Column dialog box.
Edit Button Select the column and click to open the Modify Column dialog box
.
Option Description
Base Query Lets you view and modify the base query.
Materialized Query
Table Options
Lets you select options.
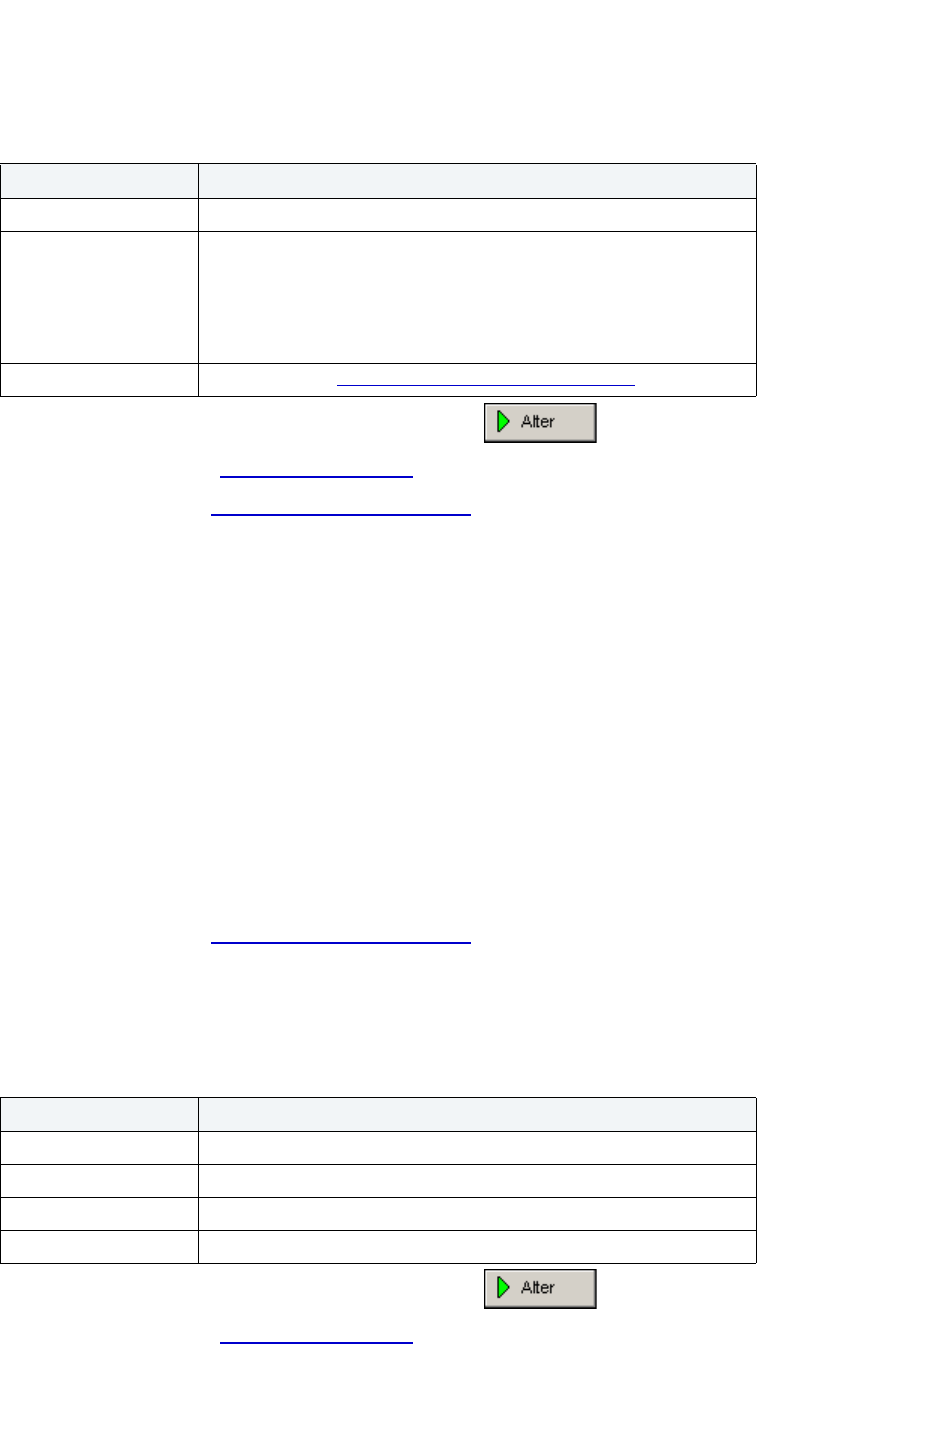
USING > OBJECT EDITORS
EMBARCADERO TECHNOLOGIES > BOOKNAMEVARIABLE 145
Materialized Query Tables Editor for IBM DB2 UDB for Linux, Unix, and Windows - Performance Tab
The Performance Tab of the Materialized Query Tables Editor lets you manage performance for every table on the
current datasource. The table below describes performance options:
After making changes on the tab, on the editor tool bar, click .
Rapid SQL opens the Preview:Alter dialog box
.
For more information, see Materialized Query Tables Editor
.
Select Columns for Partition Dialog Box
The Select Columns for Partition Dialog Box lets you select any or all target columns for partitioning.
Completing the Select Columns for Partition Dialog Box
1 In the Columns window, do one of the following:
• To select a single column, click the target column.
• To select multiple columns, click the first target column, then press CTRL, and then click all remaining target
columns.
• To select all available columns, click Select All.
2 Click OK.
Rapid SQL selects the target columns for partitioning and closes the Select Columns for Partitioning Dialog Box.
For more information, see Materialized Query Tables Editor.
Materialized Query Tables Editor for IBM DB2 UDB for Linux, Unix, and Windows - Space Tab
The Storage Tab of the Materialized Query Tables Editor lets you manage storage for every table on the current
datasource. The table below describes storage options:
After making changes on the tab, on the editor tool bar, click .
Rapid SQL opens the Preview:Alter dialog box
.
Option Description
Tablespace Placement Displays placement information.
Log Options Lets you select log options:
Data Capture - Lets you select none or change to include LONGVAR
columns.
NOTE: If you select the Data Capture option, the table name / column
name cannot be longer than 18 bytes.
Add Button Click to open the Select Columns for Partition Dialog Box
.
Option Description
Page Information Displays parameters.
Row Information Displays parameters.
Append Table Data Select to append table data at the end of the last table page.
Cardinality Varies Select if cardinality varies at runtime.
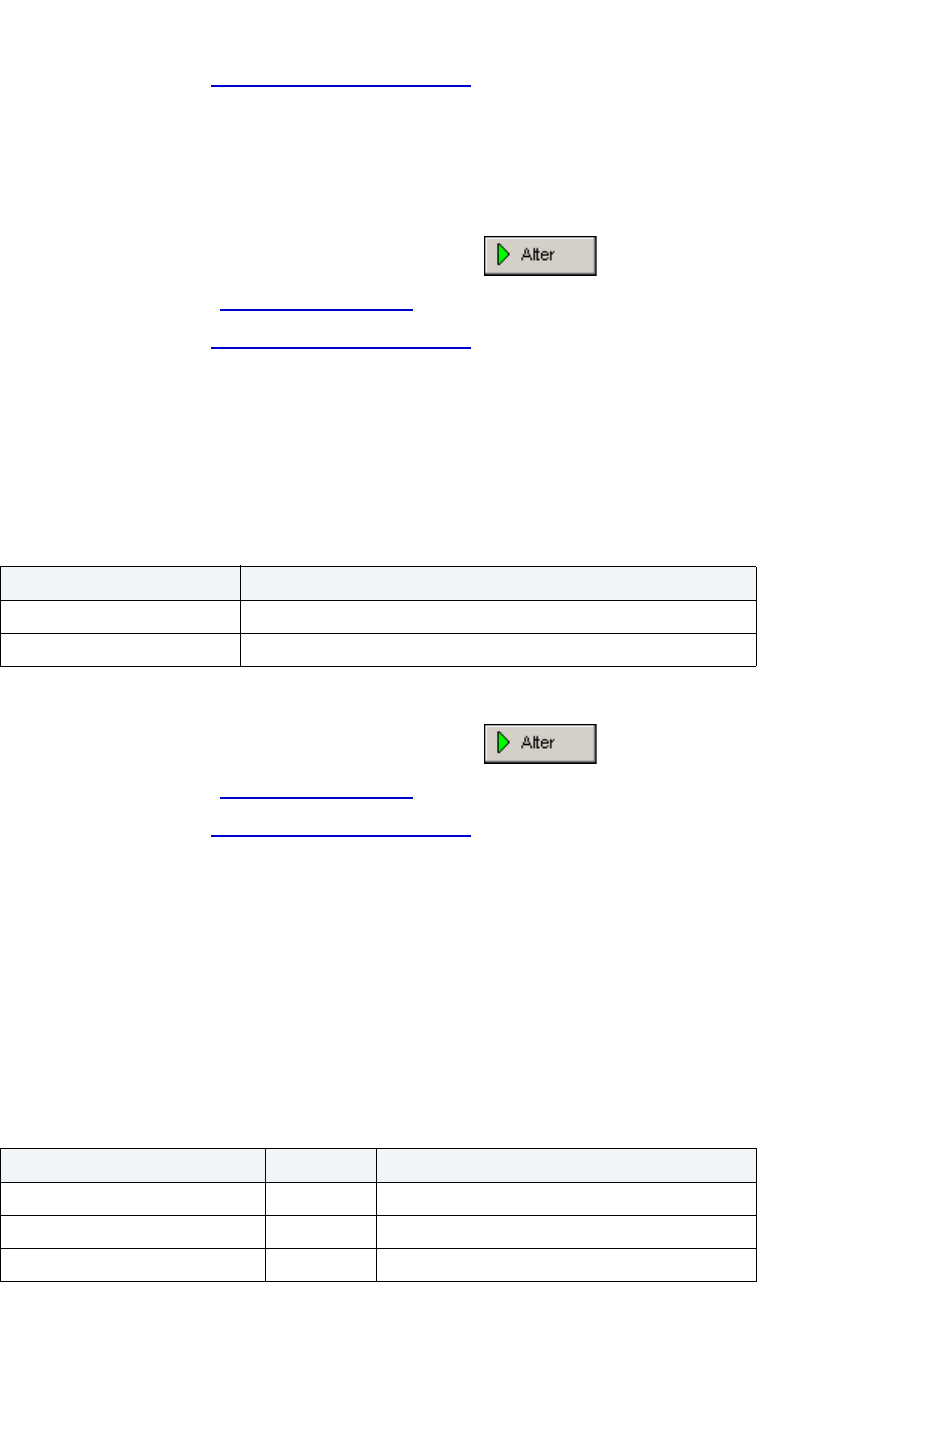
USING > OBJECT EDITORS
EMBARCADERO TECHNOLOGIES > BOOKNAMEVARIABLE 146
For more information, see Materialized Query Tables Editor.
Materialized Query Tables Editor for IBM DB2 UDB for Linux, Unix, and Windows - Comment Tab
The Comment Tab of the Materialized Query Tables Editor lets you enter explanatory comments to a table. The
comment can be up to 254 characters long. The comments are stored in the REMARKS column of the objects' system
catalog table.
After making changes on the tab, on the editor tool bar, click .
Rapid SQL opens the Preview:Alter dialog box
.
For more information, see Materialized Query Tables Editor
.
Materialized Query Tables Editor for IBM DB2 UDB for Linux, Unix, and Windows - Dependencies
Tab
The Dependencies Tab of the Materialized Query Tables Editor lets you manage database objects dependent on each
table on the current datasource. Rapid SQL arranges the objects in a tree structure. The objects are organized in
folders based on the dependency relationship. These folders contain all of the associated objects. The table below
describes the dependency relationship types:
TIP: Click one of the referenced objects to open that object’s editor.
After making changes on the tab, on the editor tool bar, click .
Rapid SQL opens the Preview:Alter dialog box
.
For more information, see Materialized Query Tables Editor
.
Materialized Query Tables Editor for IBM DB2 UDB for Linux, Unix, and Windows - Privileges Tab
The Privileges Tab of the Materialized Query Tables Editor lets you manage permissions for every table on the current
datasource.
This tab displays if a privilege was inherited from a role or group, or if it was granted explicitly by a user. Rapid SQL
also shows if the privilege is grantable (granted with the GRANT OPTION.)
There is a table on every Privileges Tab. Rapid SQL populates each row of the table with every user, group, and role
in the database. The legend, on every Privileges Tab, explains the marks in the table.
The table below describes the icons in the legend:
Relationship Description
Referencing Objects The target procedure is dependent on these objects.
Referenced Objects These objects are dependent on the target procedure.
Icon Label Description
Black check mark User The privilege(s) was granted explicitly by a user.
Blue check mark Group The privilege(s) was inherited from a group.
Green check mark Role The privilege(s) was inherited from a role.
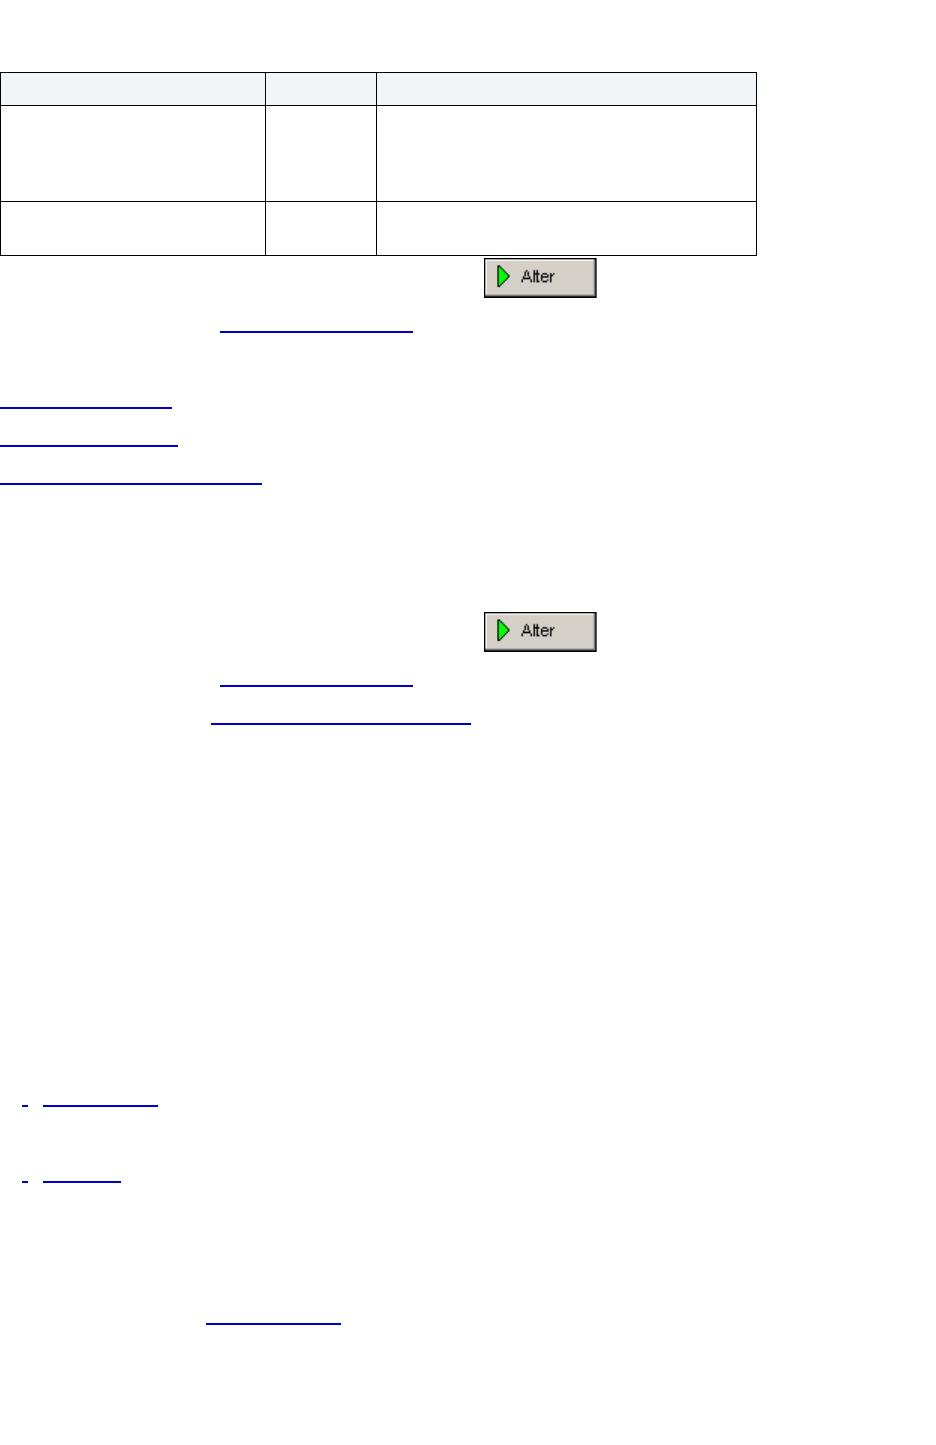
USING > OBJECT EDITORS
EMBARCADERO TECHNOLOGIES > BOOKNAMEVARIABLE 147
After making changes on the tab, on the editor tool bar, click .
Rapid SQL opens the Preview:Alter dialog box
.
For more information, see:
Granting Permissions
Revoking Permissions
Materialized Query Tables Editor
Materialized Query Tables Editor for IBM DB2 UDB for Linux, Unix, and Windows - DDL Tab
The DDL Tab of the Materialized Query Tables Editor lets you view the SQL code for every table on the current
datasource. To view DDL for another table, click the lists, click the target owner, and then click the target table.
After making changes on the tab, on the editor tool bar, click .
Rapid SQL opens the Preview:Alter dialog box
.
For more information, see Materialized Query Tables Editor
.
Packages Editor for IBM DB2 UDB for Linux, Unix, and Windows
The Packages Editor lets you:
• View and modify package dependencies.
• Add a comment.
• View and manage package privileges.
TIP: The Object Editor tool bar refresh button lets you refresh Object Editor contents, clear the Object
Editors, and log SQL if SQL Logging is turned on.
The following tabs are available in the Packages Editor:
•
Dependencies
• Comment
•
Privileges
Packages Editor for IBM DB2 UDB for Linux, Unix, and Windows - Definition Tab
The Definition Tab of the Aliases Editor displays definition data for any package on the datasource.
For more information, see Packages Editor
.
White check mark Revoked The privilege(s) was inherited from another
source, but has been revoked by a user. In
Rapid SQL, a user cannot revoke a privilege that
has been granted by a role.
Two black check marks With Grant The privilege(s) was granted with the
GRANTABLE option.
Icon Label Description
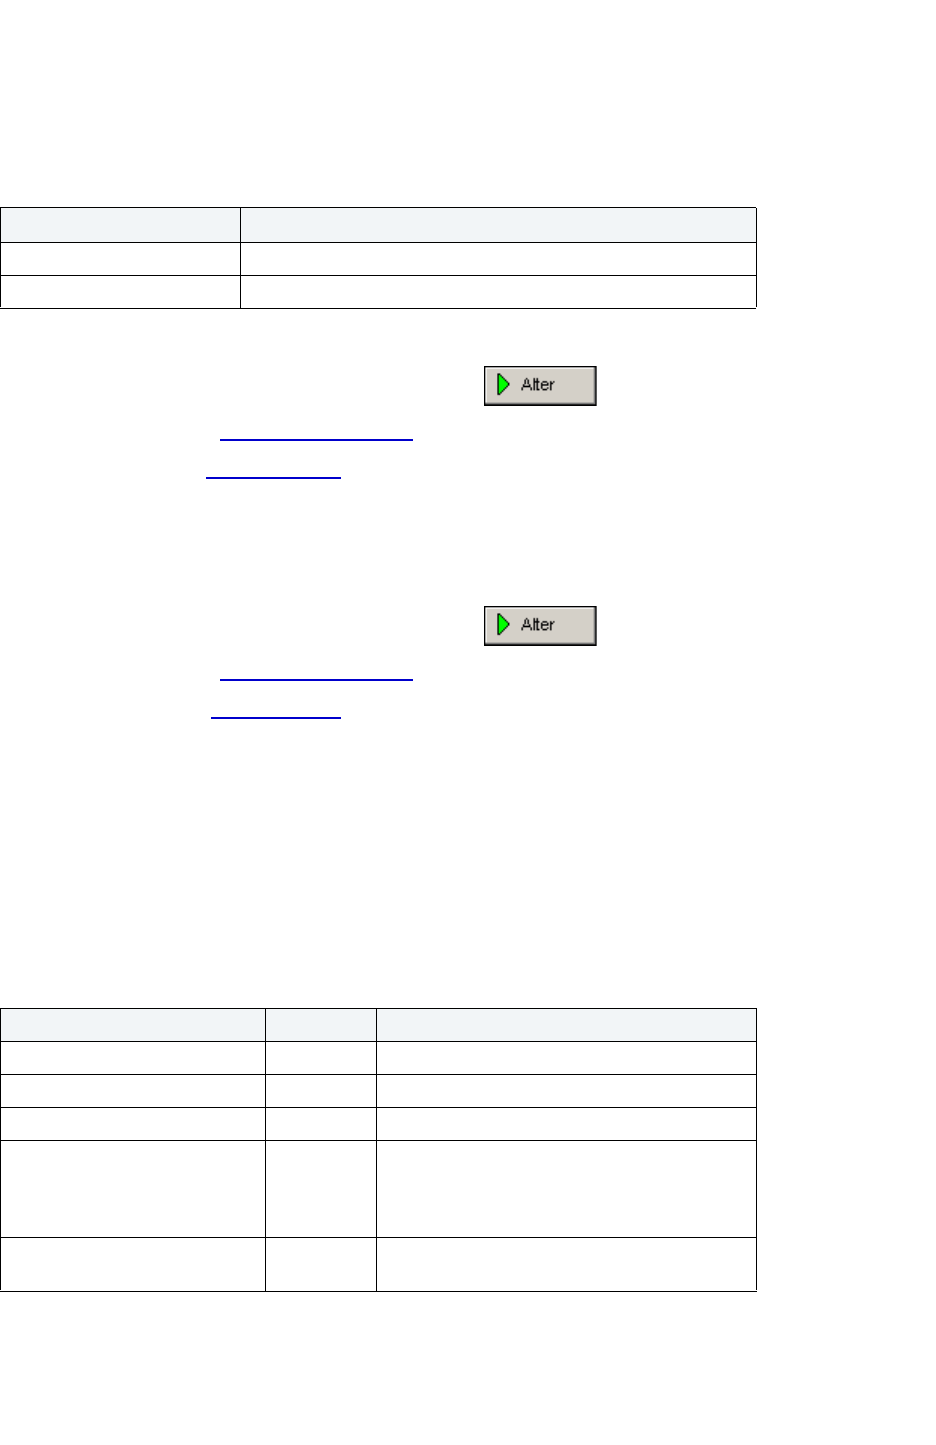
USING > OBJECT EDITORS
EMBARCADERO TECHNOLOGIES > BOOKNAMEVARIABLE 148
Packages Editor for IBM DB2 UDB for Linux, Unix, and Windows - Dependencies Tab
The Dependencies Tab of the Packages Editor lets you manage database objects dependent on each package on the
current datasource. Rapid SQL arranges the objects in a tree structure. The objects are organized in folders based on
the dependency relationship. These folders contain all of the associated objects. The table below describes the
dependency relationship types:
TIP: Click one of the referenced objects to open that object’s editor.
After making changes on the tab, on the editor tool bar, click .
Rapid SQL opens the Preview:Alter dialog box
.
For more information, see Packages Editor
.
Packages Editor for IBM DB2 UDB for Linux, Unix, and Windows - Comment Tab
The Comment Tab of the Packages Editor lets you add explanatory comments to a package. The comment can be up
to 254 characters long. The comments are stored in the REMARKS column of the objects' system catalog table.
After making changes on the tab, on the editor tool bar, click .
Rapid SQL opens the Preview:Alter dialog box
.
For more information, see Packages Editor
.
Packages Editor for IBM DB2 UDB for Linux, Unix, and Windows - Privileges Tab
The Privileges Tab of the Packages Editor lets you manage permissions for every package on the current datasource.
This tab displays if a privilege was inherited from a role or group, or if it was granted explicitly by a user. Rapid SQL
also shows if the privilege is grantable (granted with the GRANT OPTION.)
There is a table on every Privileges Tab. Rapid SQL populates each row of the table with every user, group, and role
in the database. The legend, on every Privileges Tab, explains the marks in the table.
The table below describes the icons in the legend:
Relationship Description
Referencing Objects The target procedure is dependent on these objects.
Referenced Objects These objects are dependent on the target procedure.
Icon Label Description
Black check mark User The privilege(s) was granted explicitly by a user.
Blue check mark Group The privilege(s) was inherited from a group.
Green check mark Role The privilege(s) was inherited from a role.
White check mark Revoked The privilege(s) was inherited from another
source, but has been revoked by a user. In
Rapid SQL, a user cannot revoke a privilege that
has been granted by a role.
Two black check marks With Grant The privilege(s) was granted with the
GRANTABLE option.
USING > OBJECT EDITORS
EMBARCADERO TECHNOLOGIES > BOOKNAMEVARIABLE 149
After making changes on the tab, on the editor tool bar, click .
Rapid SQL opens the Preview:Alter dialog box
.
For more information, see:
Granting Permissions
Revoking Permissions
Packages Editor
Primary Keys Editor for IBM DB2 UDB for Linux, Unix, and Windows
The Primary Keys Editor lets you:
• Manage primary key columns.
• View primary key DDL.
TIP: The r
efresh button lets you refresh or clear the editor’s contents, and log SQL.
The following tabs are available in the Primary Keys Editor:
• Columns
• DDL
Primary Keys Editor for IBM DB2 UDB for Linux, Unix, and Windows - Columns Tab
The Columns Tab of the Primary Keys Editor lets you specify the columns in the index for any primary key on the
datasource.
After making changes on the tab, on the editor tool bar, click .
Rapid SQL opens the Preview:Alter dialog box
.
For more information, see Primary Keys Editor
.
Primary Keys Editor for IBM DB2 UDB for Linux, Unix, and Windows - DDL Tab
The DDL Tab of the Primary Keys Editor lets you view the SQL code for every primary key on the current datasource.
To view DDL for another primary key, click the lists, click the target owner, and then click the target primary.
After making changes on the tab, on the editor tool bar, click .
Rapid SQL opens the Preview:Alter dialog box
.
For more information, see Primary Keys Editor
.
Procedures Editor for IBM DB2 UDB for Linux, Unix, and Windows
The Procedures Editor lets you:
• View and modify procedure definitions.
• Manage procedure dependencies.
• Manage procedure parameters.
USING > OBJECT EDITORS
EMBARCADERO TECHNOLOGIES > BOOKNAMEVARIABLE 150
• Manage procedure partitions.
• Manage procedure privileges.
• Add a comment.
• View procedure DDL.
The following tabs are available in the Procedures Editor:
•
Definition
• Dependencies
• Parameters
• Partitions
• Privileges
• Comment
• DDL
Procedures Editor for IBM DB2 UDB for Linux, Unix, and Windows - Definition Tab
The Definition Tab of the Procedures Editor lets you modify a procedure to change its definition. To modify a
procedure, Rapid SQL must drop then re-create the procedure.
The table below describes the options and functionality of the Definition Tab of the Procedure Editor:
External Name To change the external name of the function, in the
box, type the new external name.
Result Sets To change the estimated upper bound for result sets
returned by the procedure, in the box, type the new
upper bound number.
Language To change the language in which the function body is
written, click the list, and then click the new
language.
Options for Language are: C, Java, COBOL, and
OLE (OLE is available for IBM DB2 UDB for Linux,
Unix, and Windows 8 only.)
Parameter Style To change the parameter style of the function, click
the list, and then click the new parameter style.
Options for Parameter Style are: DB2DARI,
DB2GENERAL, DB2SQL, GENERAL, GENERAL
w/NULLS, JAVA, and SQL.
NOTE: SQL is available for IBM DB2 UDB for Linux,
Unix, and Windows 8 only.
SQL Data Lets you change the option: Modifies, No, Contains,
Reads, and SQL.
USING > OBJECT EDITORS
EMBARCADERO TECHNOLOGIES > BOOKNAMEVARIABLE 151
After making changes on the tab, on the editor tool bar, click .
Rapid SQL opens the Preview:Alter dialog box
.
For more information, see Procedures Editor
.
Procedures Editor for IBM DB2 UDB for Linux, Unix, and Windows - Dependencies Tab
The Dependencies Tab of the Procedures Editor lets you manage database objects dependent on each procedure on
the current datasource. Rapid SQL arranges the objects in a tree structure. The objects are organized in folders based
on the dependency relationship. These folders contain all of the associated objects. The table below describes the
dependency relationship types:
TIP: Click one of the referenced objects to open that object’s editor.
After making changes on the tab, on the editor tool bar, click .
Rapid SQL opens the Preview:Alter dialog box
.
For more information, see Procedures Editor
.
Procedures Editor for IBM DB2 UDB for Linux, Unix, and Windows - Parameters Tab
The table below describes the options and functionality on the Parameters Tab of the Procedures Editor:
NOTE: You cannot use host variables in the CALL statement for the name of the procedure.
Fenced To make the function run in a memory space
separate from the database, select the check box.
NOTE: Threadsafe is available for IBM DB2 UDB for
Linux, Unix, and Windows 8 only.
Parameter type To change the parameter type of the function, click
the list, and then click the new parameter type.
Options for Parameter type are Sub and Main.
Deterministic To make the function return different results from
calls with the same parameters, select the check
box.
Inherit Special Registers IBM DB2 UDB 8 ONLY: To inherit special registers,
select the check box.
Relationship Description
Referencing Objects The target procedure is dependent on these objects.
Referenced Objects These objects are dependent on the target procedure.
Option Description
Add Button Click to open the Add Parameter dialog box.
Insert Button Click to open the Insert Parameter dialog box
.
Edit Button Click to open the Modify Parameter dialog box
.
USING > OBJECT EDITORS
EMBARCADERO TECHNOLOGIES > BOOKNAMEVARIABLE 152
After making changes on the tab, on the editor tool bar, click .
Rapid SQL opens the Preview:Alter dialog box
.
For more information, see Procedures Editor
.
Procedures Editor for IBM DB2 UDB for Linux, Unix, and Windows - Partitions Tab
The Partitions Tab of the Procedures Editor lets you partition procedures on the current datasource. The table below
describes the option of this tab:
After making changes on the tab, on the editor tool bar, click .
Rapid SQL opens the Preview:Alter dialog box.
For more information, see Procedures Editor
.
Procedures Editor for IBM DB2 UDB for Linux, Unix, and Windows - Privileges Tab
The Privileges and System Privileges tabs of the Object Editor let you manage permissions for every user on the
current datasource.
These tabs display if a privilege was inherited from a role or group, or if it was granted explicitly by a user. Rapid SQL
also shows if the privilege is grantable (granted with the GRANT OPTION.)
There is a table on every Privileges Tab. On the Object Privileges Tab, Rapid SQL populates each row of the table
with every available database object. On the System Privileges Tab, Rapid SQL populates each row of the table with
the system privileges. The legend, on every Privileges Tab, explains the marks in the table.
The table below describes the icons in the legend:
After making changes on the tab, on the editor tool bar, click .
Rapid SQL opens the Preview:Alter dialog box
.
For more information, see:
Granting Permissions
Option Description
Partition Button Click to open the Convert to Partitioned Index
Wizard.
Icon Label Description
Black check mark User The privilege(s) was granted explicitly by a user.
Blue check mark Group The privilege(s) was inherited from a group.
Green check mark Role The privilege(s) was inherited from a role.
White check mark Revoked The privilege(s) was inherited from another
source, but has been revoked by a user. In
Rapid SQL, a user cannot revoke a privilege that
has been granted by a role.
Two black check marks With Grant The privilege(s) was granted with the
GRANTABLE option.

USING > OBJECT EDITORS
EMBARCADERO TECHNOLOGIES > BOOKNAMEVARIABLE 153
Revoking Permissions
Procedures Editor
Procedures Editor for IBM DB2 UDB for Linux, Unix, and Windows - Comment Tab
The Comment Tab of the Procedures Editor lets you enter a comment. Comments can be up to 254 characters long.
The comments are stored in the REMARKS column of the objects' system catalog table.
After making changes on the tab, on the editor tool bar, click .
Rapid SQL opens the Preview:Alter dialog box
.
For more information, see Procedures Editor
.
Procedures Editor for IBM DB2 UDB for Linux, Unix, and Windows - DDL Tab
The DDL Tab of the Procedures Editor lets you view the SQL code for every table on the current datasource. To view
DDL for another table, click the lists, click the target owner, and then click the target table.
After making changes on the tab, on the editor tool bar, click .
Rapid SQL opens the Preview:Alter dialog box
.
For more information, see Procedures Editor
.
Sequences Editor for IBM DB2 UDB for Linux, Unix, and Windows
The Sequences Editor lets you:
• Manage parameters for every sequence on the current datasource.
• Manage database objects dependent on each sequence on the current datasource.
• View sequence DDL.
TIP: The Object Editor tool bar refresh button lets you refresh Object Editor contents, clear the Object
Editors, and log SQL if SQL Logging is turned on.
The following tabs are available in the Sequences Editor:
•
Definition
• Dependencies
• DDL
Sequences Editor for IBM DB2 UDB for Linux, Unix, and Windows - Definition Tab
The Definition Tab of the Sequences Editor lets you manage parameters for every sequence on the current
datasource. The table below describes the options and functionality on the Definition Tab of the Sequences Editor:

USING > OBJECT EDITORS
EMBARCADERO TECHNOLOGIES > BOOKNAMEVARIABLE 154
After making changes on the tab, on the editor tool bar, click .
Rapid SQL opens the Preview:Alter dialog box
.
For more information, see Sequences Editor
.
Sequences Editor for IBM DB2 UDB for Linux, Unix, and Windows - Dependencies Tab
The Dependencies Tab of the Sequences Editor lets you manage database objects dependent on each sequence on
the current datasource. Rapid SQL arranges the objects in a tree structure. The objects are organized in folders based
on the dependency relationship. These folders contain all of the associated objects. The table below describes the
dependency relationship types:
TIP: Click one of the referenced objects to open that object’s editor.
After making changes on the tab, on the editor tool bar, click .
Rapid SQL opens the Preview:Alter dialog box
.
For more information, see Sequences Editor
.
Sequences Editor for IBM DB2 UDB for Linux, Unix, and Windows - DDL Tab
The DDL Tab of the Sequences Editor lets you view the SQL code for every sequence on the current datasource. To
view DDL for another sequence, click the lists, click the target owner, and then click the target sequence.
For more information, see Sequences Editor
.
Option Description
Parameters Increment By - Lets you specify the interval between sequence
numbers. This integer value can be any positive or negative
integer, but it cannot be 0. This value can have 28 or fewer digits.
The absolute of this value must be less than the difference of
MAXVALUE and MINVALUE. If this value is negative, then the
sequence descends. If the increment is positive, then the
sequence ascends. If you omit this clause, the interval defaults to
1.
Minimum Value - Lets you specify the minimum value of the
sequence. This integer value can have 28 or fewer digits.
Maximum Value - Lets you specify the maximum value the
sequence can generate. This integer value can have 28 or fewer
digits.
Current/Next Sequence
Numbers
Lets you make the sequence cycle and continue to generate
numbers.
Options Generate Numbers in Order - Useful when you are using the
sequence number as a timestamp.
Relationship Description
Referencing Objects The target sequence is dependent on these objects.
Referenced Objects These objects are dependent on the target sequence.

USING > OBJECT EDITORS
EMBARCADERO TECHNOLOGIES > BOOKNAMEVARIABLE 155
Structured Types Editor for IBM DB2 UDB for Linux, Unix, and Windows
The Structured Types Editor lets you:
• Manage attributes for every structured type on the current datasource.
• View structured type DDL.
TIP: The Object Editor tool bar refresh button lets you refresh Object Editor contents, clear the Object
Editors, and log SQL if SQL Logging is turned on.
The following tabs are available in the Sequences Editor:
•
Attributes
• Methods
• Method Body
• DDL
Structured Types Editor for IBM DB2 UDB for Linux, Unix, and Windows - Attributes Tab
The Attributes Tab of the Structured Types Editor lets you manage attributes for every structured type on the current
datasource.
For more information, see Structured Types Editor
.
Structured Types Editor for IBM DB2 UDB for Linux, Unix, and Windows -Methods Tab
The Methods Tab of the Structured Types Editor lets you create and manage methods. A database method of a
structured type is a relationship between a set of input data values and a set of result values, where the first input
value (or subject argument) has the same type, or is a subtype of the subject type (also called the subject parameter),
of the method. For example, a method called CITY, of type ADDRESS, can be passed input data values of type
VARCHAR, and the result is an ADDRESS (or a subtype of ADDRESS).
For more information, see Structured Types Editor
.
Structured Types Editor for IBM DB2 UDB for Linux, Unix, and Windows - Method Body Tab
The Method Body Tab of the Structured Types Editor lets you type a method body associated with a method.
For more information, see Structured Types Editor
.
Structured Types Editor for IBM DB2 UDB for Linux, Unix, and Windows - DDL Tab
The DDL Tab of the Structured Types Editor lets you view the SQL code for every structured type on the current
datasource. To view DDL for another structured type, click the lists, click the target owner, and then click the target
structured type.
For more information, see Structured Types Editor.
Tables Editor for IBM DB2 UDB for Linux, Unix, and Windows
The Tables Editor lets you:
• Manage table columns.

USING > OBJECT EDITORS
EMBARCADERO TECHNOLOGIES > BOOKNAMEVARIABLE 156
• Manage table constraints.
• Manage performance constraints.
• Manage table storage.
• Add a comment.
• Manage table dependencies.
• Manage table privileges.
• View table DDL.
TIP: The r
efresh button lets you refresh or clear the editor’s contents, and log SQL.
The following tabs are available in the Tables Editor:
• Columns
• Constraints
• Performance
• Space
• Comment
• Dependencies
• Privileges
• DDL
Altering Tables for IBM DB2 UDB for Linux, Unix, and Windows
The ALTER TABLE command of Transact-SQL is limited to adding NULL columns to the end of a table and to adding
or dropping constraints. Unfortunately, this scenario does not address many requirements of administrators and
developers who need to add, delete or modify columns more broadly:
• Add columns anywhere in a table, not just the end
• Add columns that do not permit a NULL value.
• Change the NULL/NOT NULL status of table columns
• Change column datatypes to other compatible types
• Change the length of datatypes
• Delete a column
Due to the limitations of the ALTER TABLE command, the only way to make broader modifications is to write SQL
scripts that step through all desired changes. To perform an enhanced table alter, Rapid SQL constructs an SQL script
that completes the following steps:
1 Renames the existing table so that the original and its data remain intact
2 Builds a CREATE TABLE statement with the new table definition, including declared defaults, primary key and
check constraints
3 Builds an INSERT statement to copy data from the original, renamed table to the new one
4 Builds foreign keys on the new table
USING > OBJECT EDITORS
EMBARCADERO TECHNOLOGIES > BOOKNAMEVARIABLE 157
5 Reapplies any privileges granted on the table
6 Rebuilds all dependencies on the new table, including indexes, triggers, procedures, packages, functions and
views. When rebuilding procedures, functions, packages and views, Rapid SQL also rebuilds any permissions on
them.
For more information, see Columns Tab of the Tables Editor
.
Tables Editor for IBM DB2 UDB for Linux, Unix, and Windows - Columns Tab
The Columns Tab of the Tables Editor lets you manage columns for every table on the current datasource. The
Columns Tab lets you:
• Add columns
• Insert columns
•Edit columns
• Drop columns
• Order columns
The table below describes the options and functionality on the Columns Tab of the Tables Editor:
After making changes on the tab, on the editor tool bar, click .
Rapid SQL opens the Preview:Alter dialog box.
For more information, see Tables Editor
.
Tables Editor for IBM DB2 UDB for Linux, Unix, and Windows - Constraints Tab
The Constraints Tab of the Tables Editor lets you manage constraints for every table on the current datasource. Rapid
SQL arranges the constraints in a tree structure. The tree contains folders which contain all constraints associated
with the target table. The objects are organized in folders based on the type of constraint:
• Primary Key
• Unique Key
• Check Constraint
• Foreign Key
TIP: Double-click a constraint to open a dialog box with detailed information on the target constraint.
The table below describes the options and functionality on the Constraints Tab of the Table Editor:
Option Description
Add Button Select the column and click to open the Add Column dialog box.
Edit Button Select the column and click to open the Modify Column dialog box
.
Option Description
Add Button Click the constraint folder and then click the button to
open the Index Constraint dialog box
.
USING > OBJECT EDITORS
EMBARCADERO TECHNOLOGIES > BOOKNAMEVARIABLE 158
After making changes on the tab, on the editor tool bar, click .
Rapid SQL opens the Preview:Alter dialog box
.
For more information, see Tables Editor
.
Tables Editor for IBM DB2 UDB for Linux, Unix, and Windows - Performance Tab
The Performance Tab of the Tables Editor lets you manage performance for every table on the current datasource.
The table below describes performance options:
After making changes on the tab, on the editor tool bar, click .
Rapid SQL opens the Preview:Alter dialog box
.
For more information, see Tables Editor
.
Select Columns for Partition Dialog Box
The Select Columns for Partition Dialog Box lets you select any or all target columns for partitioning.
Completing the Select Columns for Partition Dialog Box
1 In the Columns window, do one of the following:
• To select a single column, click the target column.
• To select multiple columns, click the first target column, then press CTRL, and then click all remaining target
columns.
• To select all available columns, click Select All.
2 Click OK.
Rapid SQL selects the target columns for partitioning and closes the Select Columns for Partitioning Dialog Box.
For more information, see Tables Editor.
Edit Button Click the constraint folder and then click the button to
open the Index Constraint dialog box
.
Option Description
Tablespace Placement Displays placement information.
Log Options Lets you select log options:
Data Capture - Lets you select none or change to include LONGVAR
columns.
NOTE: If you select the Data Capture option, the table name / column
name cannot be longer than 18 bytes.
Add Button Click to open the Select Columns for Partition Dialog Box
.
Option Description
USING > OBJECT EDITORS
EMBARCADERO TECHNOLOGIES > BOOKNAMEVARIABLE 159
Tables Editor for IBM DB2 UDB for Linux, Unix, and Windows - Space Tab
The Storage Tab of the Tables Editor lets you manage storage for every table on the current datasource. The table
below describes storage options:
After making changes on the tab, on the editor tool bar, click .
Rapid SQL opens the Preview:Alter dialog box
.
For more information, see Tables Editor
.
Tables Editor for IBM DB2 UDB for Linux, Unix, and Windows - Comment Tab
The Comment Tab of the Tables Editor lets you enter explanatory comments to a table. The comment can be up to
254 characters long. The comments are stored in the REMARKS column of the objects' system catalog table.
After making changes on the tab, on the editor tool bar, click .
Rapid SQL opens the Preview:Alter dialog box
.
For more information, see Tables Editor
.
Tables Editor for IBM DB2 UDB for Linux, Unix, and Windows - Dependencies Tab
The Dependencies Tab of the Tables Editor lets you manage database objects dependent on each table on the current
datasource. Rapid SQL arranges the objects in a tree structure. The objects are organized in folders based on the
dependency relationship. These folders contain all of the associated objects. The table below describes the
dependency relationship types:
TIP: Click one of the referenced objects to open that object’s editor.
After making changes on the tab, on the editor tool bar, click .
Rapid SQL opens the Preview:Alter dialog box
.
For more information, see Tables Editor
.
Tables Editor for IBM DB2 UDB for Linux, Unix, and Windows - Privileges Tab
The Privileges Tab of the Tables Editor lets you manage permissions for every table on the current datasource.
This tab displays if a privilege was inherited from a role or group, or if it was granted explicitly by a user. Rapid SQL
also shows if the privilege is grantable (granted with the GRANT OPTION.)
Option Description
Page Information Displays parameters.
Row Information Displays parameters.
Append Table Data Select to append table data at the end of the last table page.
Cardinality Varies Select if cardinality varies at runtime.
Relationship Description
Referencing Objects The target procedure is dependent on these objects.
Referenced Objects These objects are dependent on the target procedure.
USING > OBJECT EDITORS
EMBARCADERO TECHNOLOGIES > BOOKNAMEVARIABLE 160
There is a table on every Privileges Tab. Rapid SQL populates each row of the table with every user, group, and role
in the database. The legend, on every Privileges Tab, explains the marks in the table.
The table below describes the icons in the legend:
After making changes on the tab, on the editor tool bar, click .
Rapid SQL opens the Preview:Alter dialog box
.
For more information, see:
Granting Permissions
Revoking Permissions
Tables Editor
Tables Editor for IBM DB2 UDB for Linux, Unix, and Windows - DDL Tab
The DDL Tab of the Tables Editor lets you view the SQL code for every table on the current datasource. To view DDL
for another table, click the lists, click the target owner, and then click the target table.
After making changes on the tab, on the editor tool bar, click .
Rapid SQL opens the Preview:Alter dialog box.
For more information, see Tables Editor
.
Tablespaces Editor for IBM DB2 UDB for Linux, Unix, and Windows
The Tablespaces Editor lets you:
• Add containers.
• Manage performance.
• Add a comment.
• View tablespace DDL.
TIP: The Object Editor tool bar refresh button lets you refresh Object Editor contents, clear the Object
Editors, and log SQL if SQL Logging is turned on.
The following tabs are available in the Tablespaces Editor:
• Container
Icon Label Description
Black check mark User The privilege(s) was granted explicitly by a user.
Blue check mark Group The privilege(s) was inherited from a group.
Green check mark Role The privilege(s) was inherited from a role.
White check mark Revoked The privilege(s) was inherited from another
source, but has been revoked by a user. In
Rapid SQL, a user cannot revoke a privilege that
has been granted by a role.
Two black check marks With Grant The privilege(s) was granted with the
GRANTABLE option.
USING > OBJECT EDITORS
EMBARCADERO TECHNOLOGIES > BOOKNAMEVARIABLE 161
•Performance
• Comment
• DDL
Tablespaces Editor for IBM DB2 UDB for Linux, Unix, and Windows - Container Tab
The Container Tab of the Tablespace Editor lets you add containers to a tablespace.
NOTE: This option is only available for database managed tablespaces.
The table below describes the options and functionality on the Container Tab of the Tablespaces Editor:
After making changes on the tab, on the editor tool bar, click .
Rapid SQL opens the Preview:Alter dialog box
.
For more information, see Tablespaces Editor
.
Add Container Dialog Box
You can increase the size of a tablespace by adding one or more containers to the tablespace.
The table below describes the options and functionality on the Add Container dialog box:
Option Description
Add Button Click to open the Add Container dialog box.
Edit Button Click to open the Change Container Size dialog box
.
Option Description
Nodes Lets you select the node(s).
Container Parameters File - Lets you add a file container across the primary
and sub nodes of the EEE environment.
Device - Lets you add a device container across the
primary and sub nodes of the EEE environment.
Size - For Database Managed Space, you can assign
and update container size parameters in KB, MB, GB
and Page increments.
Stripe Set - In a tablespace, each vertical line
corresponds to a container, and each horizontal line
is a stripe.
File Information Directory - Lets you specify the file directory.
File Name - Lets you specify the file name.
USING > OBJECT EDITORS
EMBARCADERO TECHNOLOGIES > BOOKNAMEVARIABLE 162
After making changes on the tab, on the editor tool bar, click .
Rapid SQL opens the Preview:Alter dialog box
.
For more information, see:
Tablespaces Editor
Modifying Container Stripe Set
Modifying Container Stripe Set
When a tablespace is created, its tablespace map is created and all of the initial containers are lined up such that they
all start in stripe 0. This means that data will be striped evenly across all of the table space containers until the
individual containers fill up.
The Tablespaces Editor lets you add a container to an existing table space or extend a container to increase its
storage capacity.
Adding a container which is smaller than existing containers results in a uneven distribution of data. This can cause
parallel I/O operations, such as prefetching data, to perform less efficiently than they otherwise could on containers of
equal size.
When adding a new container, the placement of that container within the new map depends on its size and the size of
the other containers in its stripe set. If the container is large enough such that it can start at the first stripe in the stripe
set and end at (or beyond) the last stripe in the stripe set, then it will be placed that way. If the container is not large
enough to do this, it will be positioned in the map such that it ends in the last stripe of the stripe set. This is done to
minimize the amount of data that needs to be rebalanced.
Tablespaces Editor for IBM DB2 UDB for Linux, Unix, and Windows - Performance Tab
The Performance Tab of the Tablespaces Editor lets you manage performance for every tablespace on the current
datasource.
After making changes on the tab, on the editor tool bar, click .
Rapid SQL opens the Preview:Alter dialog box
.
For more information, see Tablespaces Editor
.
Tablespaces Editor for IBM DB2 UDB for Linux, Unix, and Windows - Comment Tab
The Comment Tab of the Tablespaces Editor lets you enter a comment which can be up to 254 characters long. The
comments are stored in the REMARKS column of the objects' system catalog table.
After making changes on the tab, on the editor tool bar, click .
Rapid SQL opens the Preview:Alter dialog box
.
Device Information Raw Partition - Lets you specify the raw partition. The
application takes control of the entire device and
always ensures the pages in an extent are
contiguous.
Raw Drive - Lets you specify the raw drive. The
application takes control of the entire device and
always ensures the pages in an extent are
contiguous.
Option Description
USING > OBJECT EDITORS
EMBARCADERO TECHNOLOGIES > BOOKNAMEVARIABLE 163
For more information, see Tablespaces Editor.
Tablespaces Editor for IBM DB2 UDB for Linux, Unix, and Windows - DDL Tab
The DDL Tab of the Tablespaces Editor lets you view the SQL code for every tablespace on the current datasource. To
view DDL for another table, click the lists, click the target owner, and then click the target table.
After making changes on the tab, on the editor tool bar, click .
Rapid SQL opens the Preview:Alter dialog box
.
For more information, see Tablespaces Editor
.
Triggers Editor for IBM DB2 UDB for Linux, Unix, and Windows
The Triggers Editor lets you:
• View and modify trigger definitions.
• Manage trigger dependencies.
• Add a comment.
• View trigger DDL.
TIP: The r
efresh button lets you refresh or clear the editor’s contents, and log SQL.
The following tabs are available in the Triggers Editor:
• Definition
• Type
•
Comment
• Dependencies
Triggers Editor for IBM DB2 UDB for Linux, Unix, and Windows - Definition Tab
The Definition Tab of the Triggers Editor lets you modify a trigger. To modify a trigger, Rapid SQL must drop then
create the trigger. The table below describes the options and functionality on the Definition Tab of the Triggers Editor:
After making changes on the tab, on the editor tool bar, click .
Rapid SQL opens the Preview:Alter dialog box.
For more information, see Triggers Editor
.
Triggers Editor for IBM DB2 UDB for Linux, Unix, and Windows - Type Tab
The Type Tab of the Triggers Editor lets you view the SQL code for every trigger on the current datasource. To view
DDL for another trigger, click the lists, click the target owner, and then click the target trigger.
Option Description
Trigger Definition In the text box, type the changes to the trigger body.
USING > OBJECT EDITORS
EMBARCADERO TECHNOLOGIES > BOOKNAMEVARIABLE 164
For more information, see Triggers Editor.
Triggers Editor for IBM DB2 UDB for Linux, Unix, and Windows - Comment Tab
The Comment Tab of the Triggers Editor lets you enter a comment which can be up to 254 characters long. The
comments are stored in the REMARKS column of the objects' system catalog table.
After making changes on the tab, on the editor tool bar, click .
Rapid SQL opens the Preview:Alter dialog box
.
For more information, see Triggers Editor
.
Triggers Editor for IBM DB2 UDB for Linux, Unix, and Windows - Dependencies Tab
The Dependencies Tab of the Triggers Editor lets you manage database objects dependent on each trigger on the
current datasource. Rapid SQL arranges the objects in a tree structure. The objects are organized in folders based on
the dependency relationship. These folders contain all of the associated objects. The table below describes the
dependency relationship types:
TIP: Click one of the referenced objects to open that object’s editor.
After making changes on the tab, on the editor tool bar, click .
Rapid SQL opens the Preview:Alter dialog box
.
For more information, see Triggers Editor
.
Unique Keys Editor for IBM DB2 UDB for Linux, Unix, and Windows
The Unique Keys Editor lets you:
• Manage unique key columns.
• View unique key DDL.
TIP: The r
efresh button lets you refresh or clear the editor’s contents, and log SQL.
The following tabs are available in the Unique Keys Editor:
• Columns
• DDL
Unique Keys Editor for IBM DB2 UDB for Linux, Unix, and Windows - Columns Tab
The Columns Tab of the Unique Keys Editor lets you manage columns for every unique key on the current datasource.
The Columns tab lets you:
• Add columns
• Insert columns
Relationship Description
Referencing Objects The target procedure is dependent on these objects.
Referenced Objects These objects are dependent on the target procedure.
USING > OBJECT EDITORS
EMBARCADERO TECHNOLOGIES > BOOKNAMEVARIABLE 165
•Edit columns
• Drop columns
• Order columns
After making changes on the tab, on the editor tool bar, click .
Rapid SQL opens the Preview:Alter dialog box
.
For more information, see Unique Keys Editor
.
Unique Keys Editor for IBM DB2 UDB for Linux, Unix, and Windows - DDL Tab
The DDL Tab of the Unique Keys Editor lets you view the SQL code for every unique key on the current datasource.
To view DDL for another unique key, click the lists, click the target owner, and then click the target unique key.
After making changes on the tab, on the editor tool bar, click .
Rapid SQL opens the Preview:Alter dialog box
.
For more information, see Unique Keys Editor
.
User Datatypes Editor for IBM DB2 UDB for Linux, Unix, and Windows
The User Datatypes Editor lets you:
• View user datatype definitions.
• Add a comment.
• View user datatype DDL.
TIP: The refresh button lets you refresh or clear the editor’s contents, and log SQL.
The following tabs are available in the User Datatypes Editor:
• Definition
• Comment
• DDL
User Datatypes Editor for IBM DB2 UDB for Linux, Unix, and Windows - Definition Tab
The Definition Tab of the User Datatypes Editor lets you modify a user datatype to change its base datatype
properties.
The table below describes the options and functionality on the Definition Tab of the User Datatypes Editor:
Option Description
Base Datatype To modify the base datatype properties, click the list,
and then click the new base datatype.
Size To change the base datatype size, in the new box,
type the new base datatype size.
USING > OBJECT EDITORS
EMBARCADERO TECHNOLOGIES > BOOKNAMEVARIABLE 166
After making changes on the tab, on the editor tool bar, click .
Rapid SQL opens the Preview:Alter dialog box
.
For more information, see User Datatypes Editor
.
User Datatypes Editor for IBM DB2 UDB for Linux, Unix, and Windows - Comment Tab
The Comment Tab of the User Datatypes Editor lets you enter a comment which can be up to 254 characters long.
The comments are stored in the REMARKS column of the objects' system catalog table.
After making changes on the tab, on the editor tool bar, click .
Rapid SQL opens the Preview:Alter dialog box
.
For more information, see User Datatypes Editor
.
User Datatypes Editor for IBM DB2 UDB for Linux, Unix, and Windows - DDL Tab
The DDL Tab of the User Datatypes Editor lets you view the SQL code for every user datatype on the current
datasource. To view DDL for another user datatype, click the lists, click the target owner, and then click the target user
datatype.
After making changes on the tab, on the editor tool bar, click .
Rapid SQL opens the Preview:Alter dialog box
.
For more information, see User Datatypes Editor
.
•Objects
• Users Editor for IBM DB2 UDB for Windows/Unix - Objects Tab
The Objects Tab of the Users Editor lets you view information for every object on the current datasource.
After making changes on the tab, on the editor tool bar, click .
Rapid SQL opens the Preview:Alter dialog box
.
Views Editor for IBM DB2 UDB for Linux, Unix, and Windows
The Views Editor lets you:
• Manage view columns.
• View and modify view definitions.
• Add a comment.
• Manage view privileges.
• Manage objects dependent on views.
TIP: The r
efresh button lets you refresh or clear the editor’s contents, and log SQL.
Width To change the base datatype size, in the new box,
type the new base datatype width.
Unit To change the base datatype unit, click the list, and
then click the new base datatype unit.
Option Description

USING > OBJECT EDITORS
EMBARCADERO TECHNOLOGIES > BOOKNAMEVARIABLE 167
The following tabs are available in the Views Editor:
•
Definition
• Columns
• Comment
•
Dependencies
• Privileges
Views Editor for IBM DB2 UDB for Linux, Unix, and Windows - Definition Tab
The Definition Tab of the Views Editor lets you modify a view. To modify a view, Rapid SQL must drop then create the
view.
The table below describes the options and functionality on the Definition Tab of the Views Editor:
After making changes on the tab, on the editor tool bar, click .
Rapid SQL opens the Preview:Alter dialog box
.
For more information, see Views Editor
.
Views Editor for IBM DB2 UDB for Linux, Unix, and Windows - Dependencies Tab
The Dependencies Tab of the Views Editor lets you manage database objects dependent on each view on the current
datasource. Rapid SQL arranges the objects in a tree structure. The objects are organized in folders based on the
dependency relationship. These folders contain all of the associated objects. The table below describes the
dependency relationship types:
TIP: Click one of the referenced objects to open that object’s editor.
After making changes on the tab, on the editor tool bar, click .
Rapid SQL opens the Preview:Alter dialog box
.
For more information, see Views Editor
.
Views Editor for IBM DB2 UDB for Linux, Unix, and Windows - Columns Tab
The Columns Tab of the Views Editor lets you manage columns for every table on the current datasource. The
Columns Tab lets you:
• Add columns
• Insert columns
Option Description
View Text In the box, type the changes.
Relationship Description
Referencing Objects The target procedure is dependent on these objects.
Referenced Objects These objects are dependent on the target procedure.
USING > OBJECT EDITORS
EMBARCADERO TECHNOLOGIES > BOOKNAMEVARIABLE 168
•Edit columns
• Drop columns
• Order columns
The table below describes the information that Rapid SQL displays on the Columns Tab of the Views Editor:
After making changes on the tab, on the editor tool bar, click .
Rapid SQL opens the Preview:Alter dialog box.
For more information, see Views Editor
.
Views Editor for IBM DB2 UDB for Linux, Unix, and Windows - Comment Tab
The Comment Tab of the Views Editor lets you enter a comment which can be up to 254 characters long. The
comments are stored in the REMARKS column of the objects' system catalog table.
After making changes on the tab, on the editor tool bar, click .
Rapid SQL opens the Preview:Alter dialog box.
For more information, see Views Editor
.
Views Editor for IBM DB2 UDB for Linux, Unix, and Windows - Privileges Tab
The Privileges Tab of the Views Editor lets you manage permissions for every view on the current datasource.
This tab displays if a privilege was inherited from a role or group, or if it was granted explicitly by a user. Rapid SQL
also shows if the privilege is grantable (granted with the GRANT OPTION.)
There is a table on every Privileges tab. Rapid SQL populates each row of the table with every user, group, and role in
the database. The legend, on every Privileges Tab, explains the marks in the table.
The table below describes the icons in the legend:
Column Name Description
Name the name of the column in the target table.
Datatype The datatype for the column in the target table. If applicable, Rapid SQL
displays the precision in parentheses.
Nulls The table definition permits nulls in the target table column. Null has no
explicitly assigned value. Null is not equivalent to zero or blank. A value of
null is not considered to be greater than, less than, or equivalent to any other
value, including another value of null.
Default The name of the column included in the table.
Icon Label Description
Black check mark User The privilege(s) was granted explicitly by a user.
Blue check mark Group The privilege(s) was inherited from a group.
Green check mark Role The privilege(s) was inherited from a role.
White check mark Revoked The privilege(s) was inherited from another
source, but has been revoked by a user. In
Rapid SQL, a user cannot revoke a privilege that
has been granted by a role.
USING > OBJECT EDITORS
EMBARCADERO TECHNOLOGIES > BOOKNAMEVARIABLE 169
After making changes on the tab, on the editor tool bar, click .
Rapid SQL opens the Preview:Alter dialog box
.
For more information, see:
Granting Permissions
Revoking Permissions
Views Editor
IBM DB2 UDB for OS/390 and z/OS Object Editors
Rapid SQL includes an Object Editor for all supported IBM DB2 UDB for OS/390 and z/OS objects. To see an Editor
for a specific object, click the corresponding link in the table below:
NOTE: If an objects has dependent objects, such as tables, triggers, procedures and views, you can view
and access their dependent objects in the editor.
Aliases Editor for IBM DB2 UDB for OS/390 and z/OS
The Aliases Editor lets you:
• Enter a comment.
• View alias DDL.
TIP: The r
efresh button lets you refresh or clear the editor’s contents, and log SQL.
The following tabs are available in the Aliases Editor:
• Comment
•
DDL
After making changes on the tab, on the editor tool bar, click .
Rapid SQL opens the Preview:Alter dialog box
.
Two black check marks With Grant The privilege(s) was granted with the
GRANTABLE option.
Aliases Editor
Check Constraints
Editor
Foreign Keys Editor Functions Editor
Indexes Editor Packages Editor Primary Keys Editor Procedures Editor
Tables Editor Tablespaces Editor Triggers Editor Unique Keys Editor
User Datatypes
Editor
Users Editor Views Editor
Icon Label Description
USING > OBJECT EDITORS
EMBARCADERO TECHNOLOGIES > BOOKNAMEVARIABLE 170
Aliases Editor for IBM DB2 UDB for OS/390 and z/OS - Comment Tab
The Comment Tab of the Aliases Editor lets you enter a comment which can be up to 254 characters long. The
comments are stored in the REMARKS column of the objects' system catalog table.
TIP: To filter the Owner and Object lists, click the Filter button next to each list. the application opens
the Filter
dialog box.
After making changes on the tab, on the editor tool bar, click .
Rapid SQL opens the Preview:Alter dialog box
.
For more information, see Aliases Editor
.
Aliases Editor for IBM DB2 UDB for OS/390 and z/OS - DDL Tab
The DDL Tab of the Aliases Editor lets you view the SQL code for every alias on the current datasource. To view DDL
for another alias, click the lists, click the target owner, and then click the target alias.
TIP: To filter the Owner and Object lists, click the Filter button next to each list. the application opens
the Filter
dialog box.
After making changes on the tab, on the editor tool bar, click .
Rapid SQL opens the Preview:Alter dialog box.
For more information, see Aliases Editor
.
Check Constraints Editor for IBM DB2 UDB for OS/390 and z/OS
The Check Constraints Editor lets you:
• View and modify check constraints.
• View check constraint DDL.
The following tabs are available in the Check Constraints Editor:
•
Definition
• DDL
Check Constraints Editor for IBM DB2 UDB for OS/390 and z/OS - Definition Tab
The table below describes the options and functionality on the Definition Tab on the Check Constraints Editor:
USING > OBJECT EDITORS
EMBARCADERO TECHNOLOGIES > BOOKNAMEVARIABLE 171
TIP: To filter the Owner and Object lists, click the Filter button next to each list. the application opens
the Filter dialog box.
After making changes on the tab, on the editor tool bar, click .
Rapid SQL opens the Preview:Alter dialog box.
For more information, see Check Constraints Editor
.
Check Constraints Editor for IBM DB2 UDB for OS/390 and z/OS - DDL Tab
The DDL Tab of the Check Constraints Editor lets you view the SQL code for every check constraint on the current
datasource. To view DDL for another check constraint, click the lists, click the target owner, and then click the target
check constraint.
TIP: To filter the Owner and Object lists, click the Filter button next to each list. the application opens
the Filter dialog box.
After making changes on the tab, on the editor tool bar, click .
Rapid SQL opens the Preview:Alter dialog box.
For more information, see Check Constraints Editor
.
Databases Editor for IBM DB2 UDB for OS/390 and z/OS
The Databases Editor lets you:
• Alter the database CCSI.
• Manage database privileges.
• Manage database dependencies.
• View database DDL.
TIP: The r
efresh button lets you refresh or clear the editor’s contents, and log SQL.
The following tabs are available in the Databases Editor:
•
Definition
• System Privileges
Option Description
Owner To change the check constraint owner, click the
Owner list, and then click the new owner.
Table To change the table on which the check constraint is
placed, click the Table list, and then click the new
table.
Check Condition To modify the check constraint condition, in the text
box, type the new check condition.
Table Columns button Click to open the Paste Columns for Check
Constraint dialog box.
USING > OBJECT EDITORS
EMBARCADERO TECHNOLOGIES > BOOKNAMEVARIABLE 172
• Dependencies
•
DDL
Databases Editor for IBM DB2 UDB for OS/390 and z/OS - Definition Tab
The Definition Tab of the Databases Editor lets you manage the parameters for the database.
TIP: To filter the Owner and Object lists, click the Filter button next to each list. the application opens
the Filter
dialog box.
After making changes on the tab, on the editor tool bar, click .
Rapid SQL opens the Preview:Alter dialog box.
For more information, see Databases Editor
.
Databases Editor for IBM DB2 UDB for OS/390 and z/OS - System Privileges
The Privileges Tab of the Databases Editor lets you manage privileges for every database on the current datasource.
This tab displays if a privilege was inherited from a role or group, or if it was granted explicitly by a user. Rapid SQL
also shows if the privilege is grantable (granted with the GRANT OPTION.)
There is a table on every Privileges Tab. Rapid SQL populates each row of the table with every user, group, and role
in the database. The legend, on every Privileges Tab, explains the marks in the table.
The table below describes the icons in the legend:
TIP: To filter the Owner and Object lists, click the Filter button next to each list. the application opens
the Filter
dialog box.
After making changes on the tab, on the editor tool bar, click .
Rapid SQL opens the Preview:Alter dialog box.
For more information, see:
Granting Permissions
Revoking Permissions
Databases Editor.
Icon Label Description
Black check mark User The privilege(s) was granted explicitly by a user.
Blue check mark Group The privilege(s) was inherited from a group.
Green check mark Role The privilege(s) was inherited from a role.
White check mark Revoked The privilege(s) was inherited from another
source, but has been revoked by a user. In
Rapid SQL, a user cannot revoke a privilege that
has been granted by a role.
Two black check marks With Grant The privilege(s) was granted with the
GRANTABLE option.
USING > OBJECT EDITORS
EMBARCADERO TECHNOLOGIES > BOOKNAMEVARIABLE 173
Databases Editor for IBM DB2 UDB for OS/390 and z/OS - Dependencies
The Dependencies Tab of the Databases Editor lets you manage database objects dependent on each database on
the current datasource. Rapid SQL arranges the objects in a tree structure. The objects are organized in folders based
on the dependency relationship. These folders contain all of the associated objects. The table below describes the
dependency relationship types:
TIP: Click one of the referenced objects to open that object’s editor.
TIP: To filter the Owner and Object lists, click the Filter button next to each list. the application opens
the Filter
dialog box.
After making changes on the tab, on the editor tool bar, click .
Rapid SQL opens the Preview:Alter dialog box.
For more information, see Databases Editor
.
Databases Editor for IBM DB2 UDB for OS/390 and z/OS - DDL Tab
The DDL Tab of the Databases Editor lets you view the SQL code for every database on the current datasource. To
view DDL for another database, click the list, and then click the target database.
TIP: To filter the Owner and Object lists, click the Filter button next to each list. the application opens
the Filter
dialog box.
After making changes on the tab, on the editor tool bar, click .
Rapid SQL opens the Preview:Alter dialog box.
For more information, see Databases Editor
.
Foreign Keys Editor for IBM DB2 UDB for OS/390 and z/OS
The Foreign Keys Editor lets you:
• Manage foreign key columns.
• View foreign key DDL.
TIP: The r
efresh button lets you refresh or clear the editor’s contents, and log SQL.
The following tabs are available in the Foreign Keys Editor:
• Columns
• DDL
Relationship Description
Referencing Objects The target view is dependent on these objects.
Referenced Objects These objects are dependent on the target view.
USING > OBJECT EDITORS
EMBARCADERO TECHNOLOGIES > BOOKNAMEVARIABLE 174
Foreign Keys Editor for IBM DB2 UDB for OS/390 and z/OS - Columns Tab
The Columns Tab of the Foreign Keys Editor lets you manage columns for every foreign key on the current
datasource. The table below describes the options and functionality on the columns Tab of the Foreign Keys Editor:
TIP: To filter the Owner and Object lists, click the Filter button next to each list. the application opens
the Filter
dialog box.
After making changes on the tab, on the editor tool bar, click .
Rapid SQL opens the Preview:Alter dialog box.
For more information, see Foreign Keys Editor
.
Foreign Keys Editor for IBM DB2 UDB for OS/390 and z/OS - DDL Tab
The DDL Tab of the Foreign Keys Editor lets you view the SQL code for every foreign key on the current datasource.
To view DDL for another foreign key, click the lists, click the target owner, and then click the target foreign key.
TIP: To filter the Owner and Object lists, click the Filter button next to each list. the application opens
the Filter
dialog box.
After making changes on the tab, on the editor tool bar, click .
Rapid SQL opens the Preview:Alter dialog box.
For more information, see Foreign Keys Editor
.
Functions Editor for IBM DB2 UDB for OS/390 and z/OS
The Functions Editor lets you:
• View and modify function definitions.
• Manage function dependencies.
• Manage function privileges.
TIP: The r
efresh button lets you refresh or clear the editor’s contents, and log SQL.
The following tabs are available in the Functions Editor:
•
Parameters
• Definition
Option Description
Table Owner To change the table owner, click the list, and then click the new table owner.
Table Name To change the table name, click the list, and then click the new table name.
Primary/Unique
Key
To change the primary/unique key, click the list, and then click the new
primary/unique key.
On Delete To change the constraint state action on delete, click the list, and then click
the new action.
On Update To change the constraint state action on update, click the list, and then click
the new action.
USING > OBJECT EDITORS
EMBARCADERO TECHNOLOGIES > BOOKNAMEVARIABLE 175
• Comment
•
Dependencies
• Privileges
• DDL
Functions Editor for IBM DB2 UDB for OS/390 and z/OS - Parameters Tab
The Parameters Tab of the Functions Editor lets you:
• Add parameters
• Insert parameters
• Modify parameters
The table below describes the options and functionality on the Parameters Tab of the Functions Editor:
TIP: To filter the Owner and Object lists, click the Filter button next to each list. the application opens
the Filter dialog box.
After making changes on the tab, on the editor tool bar, click .
Rapid SQL opens the Preview:Alter dialog box.
For more information, see Functions Editor
.
Functions Editor for IBM DB2 UDB for OS/390 and z/OS - Definition Tab
The Definition Tab of the Functions Editor lets you modify a function to change its definition by constructing a DROP
and CREATE FUNCTION script. The table below describes the options and functionality on the Definition Tab of the
Functions Editor:
Option Description
Add Button Click to open the Add Parameter dialog box.
Insert Button Click to open the Rapid SQL opens the Insert
Parameter dialog box.
Edit Button Click to open the Modify Parameter dialog box
.
USING > OBJECT EDITORS
EMBARCADERO TECHNOLOGIES > BOOKNAMEVARIABLE 176
TIP: To filter the Owner and Object lists, click the Filter button next to each list. the application opens
the Filter dialog box.
After making changes on the tab, on the editor tool bar, click .
Rapid SQL opens the Preview:Alter dialog box.
For more information, see Functions Editor
.
Functions Editor for IBM DB2 UDB for OS/390 and z/OS - Comment Tab
The Comment Tab of the Functions Editor lets you enter a comment which can be up to 254 characters long. The
comments are stored in the REMARKS column of the objects' system catalog table.
TIP: To filter the Owner and Object lists, click the Filter button next to each list. the application opens
the Filter
dialog box.
After making changes on the tab, on the editor tool bar, click .
Rapid SQL opens the Preview:Alter dialog box
.
For more information, see Functions Editor
.
Option Description
External Name To change the external name of the function, type the
new external name.
Language To change the language in which the function body is
written, select the new language.
If the function body is written in C or OLE, select
DB2SQL.
If the function body is written in JAVA, select
DB2GENERAL.
Parameter Style To change the parameter style of the function, select
the new parameter style.
Deterministic Select to make the function return different results
from calls with the same parameters.
Fenced Select to make the function run in a memory space
separate from the database.
Null Call Select to make the function executed if a null value is
passed as an argument.

USING > OBJECT EDITORS
EMBARCADERO TECHNOLOGIES > BOOKNAMEVARIABLE 177
Functions Editor for IBM DB2 UDB for OS/390 and z/OS - Dependencies Tab
The Dependencies Tab of the Functions Editor lets you manage database objects dependent on each function on the
current datasource. Rapid SQL arranges the objects in a tree structure. The objects are organized in folders based on
the dependency relationship. These folders contain all of the associated objects. The table below describes the
dependency relationship types:
TIP: Click one of the referenced objects to open that object’s editor.
TIP: To filter the Owner and Object lists, click the Filter button next to each list. the application opens
the Filter
dialog box.
After making changes on the tab, on the editor tool bar, click .
Rapid SQL opens the Preview:Alter dialog box.
For more information, see Functions Editor
.
Functions Editor for IBM DB2 UDB for OS/390 and z/OS - Privileges Tab
The Privileges Tab of the Functions Editor lets you manage permissions for every function on the current datasource.
This tab displays if a privilege was inherited from a role or group, or if it was granted explicitly by a user. Rapid SQL
also shows if the privilege is grantable (granted with the GRANT OPTION.)
There is a table on every Privileges Tab. Rapid SQL populates each row of the table with every user, group, and role
in the database. The legend, on every Privileges Tab, explains the marks in the table.
The table below describes the icons in the legend:
TIP: To filter the Owner and Object lists, click the Filter button next to each list. the application opens
the Filter
dialog box.
After making changes on the tab, on the editor tool bar, click .
Rapid SQL opens the Preview:Alter dialog box
.
For more information, see:
Granting Permissions
Relationship Description
Referencing Objects The target view is dependent on these objects.
Referenced Objects These objects are dependent on the target view.
Icon Label Description
Black check mark User The privilege(s) was granted explicitly by a user.
Blue check mark Group The privilege(s) was inherited from a group.
Green check mark Role The privilege(s) was inherited from a role.
White check mark Revoked The privilege(s) was inherited from another
source, but has been revoked by a user. In
Rapid SQL, a user cannot revoke a privilege that
has been granted by a role.
Two black check marks With Grant The privilege(s) was granted with the
GRANTABLE option.

USING > OBJECT EDITORS
EMBARCADERO TECHNOLOGIES > BOOKNAMEVARIABLE 178
Revoking Permissions
Functions Editor
Functions Editor for IBM DB2 UDB for OS/390 and z/OS - DDL Tab
The DDL Tab of the Functions Editor lets you view the SQL code for every function on the current datasource. To view
DDL for another table, click the lists, click the target owner, and then click the target table.
TIP: To filter the Owner and Object lists, click the Filter button next to each list. the application opens
the Filter
dialog box.
After making changes on the tab, on the editor tool bar, click .
Rapid SQL opens the Preview:Alter dialog box.
For more information, see Functions Editor
.
Groups Editor for IBM DB2 UDB for OS/390 and z/OS
The Groups Editor lets you:
• Manage group privileges.
• View group DDL.
TIP: The refresh button lets you refresh or clear the editor’s contents, and log SQL. The following tabs
are available in the Groups Editor:
The following tabs are available in the Groups Editor:
•
Object Privileges
• System Privileges
• DDL
Groups Editor for IBM DB2 UDB for OS/390 and z/OS - Privileges and System Privileges Tabs
The Privileges and System Privileges tabs of the Groups Editor let you manage permissions for every user on the
current datasource.
These tabs display if a privilege was inherited from a role or group, or if it was granted explicitly by a user. Rapid SQL
also shows if the privilege is grantable (granted with the GRANT OPTION.)
There is a table on every Privileges Tab. On the Groups Privileges Tab, Rapid SQL populates each row of the table
with every available database object. On the System Privileges Tab, Rapid SQL populates each row of the table with
the system privileges. The legend, on every Privileges Tab, explains the marks in the table.

USING > OBJECT EDITORS
EMBARCADERO TECHNOLOGIES > BOOKNAMEVARIABLE 179
The table below describes the icons in the legend:
TIP: To filter the Owner and Object lists, click the Filter button next to each list. the application opens
the Filter
dialog box.
After making changes on the tab, on the editor tool bar, click .
Rapid SQL opens the Preview:Alter dialog box.
For more information, see:
Granting Permissions
Revoking Permissions
Groups Editor
Groups Editor for IBM DB2 UDB for OS/390 and z/OS - DDL Tab
The DDL Tab of the Groups Editor lets you view the SQL code for every table on the current datasource. To view DDL
for another table, click the lists, click the target owner, and then click the target table.
TIP: To filter the Owner and Object lists, click the Filter button next to each list. the application opens
the Filter
dialog box.
After making changes on the tab, on the editor tool bar, click .
Rapid SQL opens the Preview:Alter dialog box.
For more information, see Groups Editor
.
Indexes Editor for IBM DB2 UDB for OS/390 and z/OS
The Indexes Editor lets you:
• Manage index columns.
• View and modify index attributes.
• Manage index storage.
• Add a comment.
• Manage index privileges.
TIP: The r
efresh button lets you refresh or clear the editor’s contents, and log SQL.
Icon Label Description
Black check mark User The privilege(s) was granted explicitly by a user.
Blue check mark Group The privilege(s) was inherited from a group.
Green check mark Role The privilege(s) was inherited from a role.
White check mark Revoked The privilege(s) was inherited from another
source, but has been revoked by a user. In
Rapid SQL, a user cannot revoke a privilege that
has been granted by a role.
Two black check marks With Grant The privilege(s) was granted with the
GRANTABLE option.
USING > OBJECT EDITORS
EMBARCADERO TECHNOLOGIES > BOOKNAMEVARIABLE 180
The following tabs are available in the Indexes Editor:
•
Columns
• Properties
• Storage
• Comment
•
Privileges
Indexes Editor for IBM DB2 UDB for OS/390 and z/OS - Columns Tab
The Columns Tab of the Indexes Editor lets you manage columns for every index on the current datasource. The
Columns Tab lets you:
• Add columns
• Insert columns
•Edit columns
• Drop columns
• Order columns
TIP: To filter the Owner and Object lists, click the Filter button next to each list. the application opens
the Filter
dialog box.
After making changes on the tab, on the editor tool bar, click .
Rapid SQL opens the Preview:Alter dialog box.
For more information, see Indexes Editor
.
Indexes Editor for IBM DB2 UDB for OS/390 and z/OS - Properties Tab
The Properties Tab of the Indexes Editor lets you set properties. The table below describes the options and
functionality on the Properties Tab of the Indexes Editor:
TIP: To filter the Owner and Object lists, click the Filter button next to each list. Rapid SQL opens the
Filter
dialog box.
After making changes on the tab, on the editor tool bar, click .
Rapid SQL opens the Preview:Alter dialog box.
For more information, see Indexes Editor
.
Option Description
Index Properties Lets you switch between unique and non-unique
indexes.
USING > OBJECT EDITORS
EMBARCADERO TECHNOLOGIES > BOOKNAMEVARIABLE 181
Indexes Editor for IBM DB2 UDB for OS/390 and z/OS - Storage Tab
The Storage Tab of the Indexes Editor lets you manage storage for every index on the current datasource. The table
below describes storage options:
TIP: To filter the Owner and Object lists, click the Filter button next to each list. Rapid SQL opens the
Filter dialog box.
After making changes on the tab, on the editor tool bar, click .
Rapid SQL opens the Preview:Alter dialog box.
For more information, see Indexes Editor
.
Indexes Editor for IBM DB2 UDB for OS/390 and z/OS - Comment Tab
The Comment Tab of the Indexes Editor lets you enter a comment which can be up to 254 characters long.The
comments are stored in the REMARKS column of the objects' system catalog table.
TIP: To filter the Owner and Object lists, click the Filter button next to each list. Rapid SQL opens the
Filter
dialog box.
After making changes on the tab, on the editor tool bar, click .
Rapid SQL opens the Preview:Alter dialog box
.
For more information, see Indexes Editor
.
Indexes Editor for IBM DB2 UDB for OS/390 and z/OS - Privileges Tab
The Privileges Tab of the Indexes Editor lets you manage permissions for every index on the current datasource.
This tab displays if a privilege was inherited from a role or group, or if it was granted explicitly by a user. Rapid SQL
also shows if the privilege is grantable (granted with the GRANT OPTION.)
There is a table on every Privileges Tab. Rapid SQL populates each row of the table with every user, group, and role
in the database. The legend, on every Privileges Tab, explains the marks in the table.
Option Description
Data Block Storage Lets you select parameters.
Extents The unit of space allocated to an object whenever the object needs more
space.
Initial Extent - The initial space extent (in bytes) allocated to the object.
Next Extent - The next extent (in bytes) that the object will attempt to
allocate when more space for the object is required.
Minimum Extents - The appropriate minimum extents value for the
object.
Maximum Extents - The appropriate maximum extents value for the
object.
Percent Increase - Magnifies how an object grows and, can materially
affect available free space in a tablespace. Select a value in the
corresponding box.
Free Lists Lets you select parameters.
USING > OBJECT EDITORS
EMBARCADERO TECHNOLOGIES > BOOKNAMEVARIABLE 182
The table below describes the icons in the legend:
TIP: To filter the Owner and Object lists, click the Filter button next to each list. Rapid SQL opens the
Filter
dialog box.
After making changes on the tab, on the editor tool bar, click .
Rapid SQL opens the Preview:Alter dialog box.
For more information, see:
Granting Permissions
Revoking Permissions
Indexes Editor
Nodegroups Editor for IBM DB2 UDB for OS/390 and z/OS
The Nodegroups Editor lets you:
• Manage nodegroup partitions.
• Add a comment.
• View nodegroup DDL.
The following tabs are available in the Nodegroups Editor:
• Partitions
• Comment
•
DDL
Nodegroups Editor for IBM DB2 UDB for OS/390 and z/OS - Partitions Tab
The Partitions Tab of the Nodegroups Editor lets you partition objects on the current datasource. The table below
describes the option of this tab:
Icon Label Description
Black check mark User The privilege(s) was granted explicitly by a user.
Blue check mark Group The privilege(s) was inherited from a group.
Green check mark Role The privilege(s) was inherited from a role.
White check mark Revoked The privilege(s) was inherited from another
source, but has been revoked by a user. In
Rapid SQL, a user cannot revoke a privilege that
has been granted by a role.
Two black check marks With Grant The privilege(s) was granted with the
GRANTABLE option.
USING > OBJECT EDITORS
EMBARCADERO TECHNOLOGIES > BOOKNAMEVARIABLE 183
TIP: To filter the Owner and Object lists, click the Filter button next to each list. Rapid SQL opens the
Filter dialog box.
After making changes on the tab, on the editor tool bar, click .
Rapid SQL opens the Preview:Alter dialog box.
For more information, see Nodegroups Editor
.
Nodegroups Editor for IBM DB2 UDB for OS/390 and z/OS - Comment Tab
The Comment Tab of the Nodegroups Editor lets you add explanatory comments to a nodegroup. The comments can
be up to 254 characters long. The comments are stored in the REMARKS column of the objects' system catalog table.
TIP: To filter the Owner and Object lists, click the Filter button next to each list. Rapid SQL opens the
Filter
dialog box.
After making changes on the tab, on the editor tool bar, click .
Rapid SQL the Preview:Alter dialog box.
For more information, see Nodegroups Editor
.
Nodegroups Editor for IBM DB2 UDB for OS/390 and z/OS - DDL Tab
The DDL Tab of the Nodegroups Editor lets you view the SQL code for every nodegroup on the current datasource. To
view DDL for another nodegroup, click the lists, click the target owner, and then click the target nodegroup.
TIP: To filter the Owner and Object lists, click the Filter button next to each list. Rapid SQL opens the
Filter
dialog box.
After making changes on the tab, on the editor tool bar, click .
Rapid SQL opens the Preview:Alter dialog box.
For more information, see Nodegroups Editor
.
Packages Editor for IBM DB2 UDB for OS/390 and z/OS
The Packages Editor lets you:
• View package properties.
• View bind parameters.
• View plans.
Option Description
Partitions NOT in nodegroup
grid
To add a partition to a nodegroup, click the
nodegroup you want to add to the group or click the
Select All button.
Partitions in nodegroup grid To remove a partition from a nodegroup, click the
nodegroup you want to remove from the group or
click the Select All button.
USING > OBJECT EDITORS
EMBARCADERO TECHNOLOGIES > BOOKNAMEVARIABLE 184
• View package contents.
• View and modify package dependencies.
• View run-time environments information.
• Add a comment.
• View and manage package privileges.
TIP: The Object Editor tool bar refresh button lets you refresh Object Editor contents, clear the Object
Editors, and log SQL if SQL Logging is turned on.
The following tabs are available in the Packages Editor:
• Properties
• Bind Parameters
• Plan/Packets
•Statements
•
Dependencies
• Comment
•
Privileges
• Environments
• Commands
Packages Editor for IBM DB2 UDB for OS/390 and z/OS - Properties Tab
The Properties Tab of the Packages Editor displays properties of any package on the datasource.
TIP: To filter the Owner and Object lists, click the Filter button next to each list. Rapid SQL opens the
Filter
dialog box.
After making changes on the tab, on the editor tool bar, click .
Rapid SQL opens the Preview:Alter dialog box.
For more information, see Packages Editor
.
Packages Editor for IBM DB2 UDB for OS/390 and z/OS - Bind Parameters Tab
The Bind Tab of the Packages Editor displays bind parameters of any package on the datasource.
TIP: To filter the Owner and Object lists, click the Filter button next to each list. Rapid SQL opens the
Filter
dialog box.
After making changes on the tab, on the editor tool bar, click .
Rapid SQL opens the Preview:Alter dialog box
.
For more information, see Packages Editor
.
USING > OBJECT EDITORS
EMBARCADERO TECHNOLOGIES > BOOKNAMEVARIABLE 185
Packages Editor for IBM DB2 UDB for OS/390 and z/OS - Plan/Packets Tab
The Plan/Packets Tab of the Packages Editor displays the plans that contain the package if the package was bound
individually, or as part of a complete collection id.
The table below describes the options and functionality on the Plan/Packets Tab of the Packages Editor:
TIP: To filter the Owner and Object lists, click the Filter button next to each list. Rapid SQL opens the
Filter
dialog box.
After making changes on the tab, on the editor tool bar, click .
Rapid SQL opens the Preview:Alter dialog box.
For more information, see Packages Editor
.
Packages Editor for IBM DB2 UDB for OS/390 and z/OS - Statements Tab
The Statements Tab of the Packages Editor shows the contents of any package statement on the datasource.
The table below describes the options and functionality on the Statements Tab of the Packages Editor:
TIP: To filter the Owner and Object lists, click the Filter button next to each list. Rapid SQL opens the
Filter
dialog box.
After making changes on the tab, on the editor tool bar, click .
Rapid SQL opens the Preview:Alter dialog box
.
For more information, see Packages Editor
.
Packages Editor for IBM DB2 UDB for OS/390 and z/OS - Dependencies Tab
The Dependencies Tab of the Packages Editor lets you manage database objects dependent on each package on the
current datasource. Rapid SQL arranges the objects in a tree structure. The objects are organized in folders based on
the dependency relationship. These folders contain all of the associated objects. The table below describes the
dependency relationship types:
Option Description
Edit Click to open the Editor for any selected plan(s).
Rebind Click to open the Rebind Plan dialog box
.
Free Click to open the Free Plan dialog box
.
Option Description
Explain Click to copy the selected statement(s) to an ISQL
window. Press CTL+A to select all statements.
Relationship Description
Referencing Objects The target procedure is dependent on these objects.
Referenced Objects These objects are dependent on the target procedure.
USING > OBJECT EDITORS
EMBARCADERO TECHNOLOGIES > BOOKNAMEVARIABLE 186
The table below describes the options and functionalities on the Dependencies Tab of the Packages Editor:
TIP: To filter the Owner and Object lists, click the Filter button next to each list. Rapid SQL opens the
Filter dialog box.
After making changes on the tab, on the editor tool bar, click .
Rapid SQL opens the Preview:Alter dialog box.
For more information, see Packages Editor
.
Packages Editor for IBM DB2 UDB for OS/390 and z/OS - Comment Tab
The Comment Tab of the Packages Editor lets you add explanatory comments to a package. The comment can be up
to 254 characters long. The comments are stored in the REMARKS column of the objects' system catalog table.
TIP: To filter the Owner and Object lists, click the Filter button next to each list. Rapid SQL opens the
Filter
dialog box.
After making changes on the tab, on the editor tool bar, click .
Rapid SQL opens the Preview:Alter dialog box.
For more information, see Packages Editor
.
Packages Editor for IBM DB2 UDB for OS/390 and z/OS - Privileges Tab
The Privileges Tab of the Packages Editor lets you manage permissions for every package on the current datasource.
This tab displays if a privilege was inherited from a role or group, or if it was granted explicitly by a user. Rapid SQL
also shows if the privilege is grantable (granted with the GRANT OPTION.)
There is a table on every Privileges Tab. Rapid SQL populates each row of the table with every user, group, and role
in the database. The legend, on every Privileges Tab, explains the marks in the table.
Option Description
Open Click to open the editor for the selected object.
Drop Click to generate drop statements for the selected
object(s) and open a dialog window asking for
confirmation of destructive action.
Select All Click to select all objects.
Unselect All Click to unselect all objects.
USING > OBJECT EDITORS
EMBARCADERO TECHNOLOGIES > BOOKNAMEVARIABLE 187
The table below describes the icons in the legend:
TIP: To filter the Owner and Object lists, click the Filter button next to each list. Rapid SQL opens the
Filter
dialog box.
After making changes on the tab, on the editor tool bar, click .
Rapid SQL opens the Preview:Alter dialog box.
For more information, see:
Granting Permissions
Revoking Permissions
Packages Editor
Packages Editor for IBM DB2 UDB for OS/390 and z/OS - Environments Tab
The Environments Tab of the Packages Editor displays run-time environments information for every package on the
datasource.
The table below describes the options and functionality on the Environments Tab of the Packages Editor:
TIP: To filter the Owner and Object lists, click the Filter button next to each list. Rapid SQL opens the
Filter
dialog box.
After making changes on the tab, on the editor tool bar, click .
Rapid SQL opens the Preview:Alter dialog box.
For more information, see Packages Editor
.
Icon Label Description
Black check mark User The privilege(s) was granted explicitly by a user.
Blue check mark Group The privilege(s) was inherited from a group.
Green check mark Role The privilege(s) was inherited from a role.
White check mark Revoked The privilege(s) was inherited from another
source, but has been revoked by a user. In
Rapid SQL, a user cannot revoke a privilege that
has been granted by a role.
Two black check marks With Grant The privilege(s) was granted with the
GRANTABLE option.
Option Functionality
Edit Click to open the Connection Editor.
USING > OBJECT EDITORS
EMBARCADERO TECHNOLOGIES > BOOKNAMEVARIABLE 188
Packages Editor for IBM DB2 UDB for OS/390 and z/OS - Commands Tab
The Commands Tab of the Packages Editor displays the command that originally built the package, for every package
on the datasource.
TIP: To filter the Owner and Object lists, click the Filter button next to each list. Rapid SQL opens the
Filter
dialog box.
After making changes on the tab, on the editor tool bar, click .
Rapid SQL opens the Preview:Alter dialog box
.
For more information, see Packages Editor
.
Plans Editor for IBM DB2 UDB for OS/390 and z/OS
The Plans Editor lets you:
• View plan properties.
• View DBRM information.
• Manage packages.
• View entire contents.
• Manage dependencies.
• Manage privileges.
• View run-time environments information.
• View the command that originally built the plan.
The following tabs are available in the Plans Editor:
•
Definition
• DBRMs
• Packages
• DBRM/Packages
• Dependencies
• Privileges
• Environments
• Commands
Plans Editor for IBM DB2 UDB for OS/390 and z/OS - Definition Tab
The Definition Tab of the Plans Editor displays properties of any plan on the datasource.
TIP: To filter the Owner and Object lists, click the Filter button next to each list. Rapid SQL opens the
Filter
dialog box.
After making changes on the tab, on the editor tool bar, click .
Rapid SQL opens the Preview:Alter dialog box.
USING > OBJECT EDITORS
EMBARCADERO TECHNOLOGIES > BOOKNAMEVARIABLE 189
For more information, see Plans Editor.
Plans Editor for IBM DB2 UDB for OS/390 and z/OS - DBRMs Tab
The DBRMs Tab of the Plans Editor displays DBRM information for any DBRM on the datasource.
The table below describes the options and functionality on the DBRMs Tab of the Plans Editor:
TIP: To filter the Owner and Object lists, click the Filter button next to each list. Rapid SQL opens the
Filter
dialog box.
After making changes on the tab, on the editor tool bar, click .
Rapid SQL opens the Preview:Alter dialog box.
For more information, see Plans Editor
.
Plans Editor for IBM DB2 UDB for OS/390 and z/OS - Packages Tab
The Packages Tab of the Plans Editor displays the packages that are included in the plan.
The table below describes the options and functionality on the Packages Tab of the Plans Editor:
TIP: To filter the Owner and Object lists, click the Filter button next to each list. Rapid SQL opens the
Filter
dialog box.
After making changes on the tab, on the editor tool bar, click .
Rapid SQL opens the Preview:Alter dialog box.
For more information, see Plans Editor
.
Plans Editor for IBM DB2 UDB for OS/390 and z/OS - DBRM/Packages Tab
The DBRM/Packages Tab of the Plans Editor displays the entire contents of the plan, DBRMs and packages, in a
single display. The first column contains either a 'D' for DBRM or 'P' for packages.
The table below describes the options and functionality on the DBRM/Packages Tab of the Plans Editor:
Option Description
Open Click to open the selected DBRM.
Explain Click to copy the contents of the DBRM to an ISQL
window. The Explain output displays in the report
pane.
Option Description
Edit Click to open the Editor for any selected package(s).
Rebind Click to open the Rebind Package dialog box
.
Free Click to open the Free Package dialog box
.
USING > OBJECT EDITORS
EMBARCADERO TECHNOLOGIES > BOOKNAMEVARIABLE 190
TIP: To filter the Owner and Object lists, click the Filter button next to each list. Rapid SQL opens the
Filter dialog box.
After making changes on the tab, on the editor tool bar, click .
Rapid SQL opens the Preview:Alter dialog box.
For more information, see Plans Editor
.
Plans Editor for IBM DB2 UDB for OS/390 and z/OS - Dependencies Tab
The Dependencies Tab of the Plans Editor lets you manage database objects dependent on each plan on the current
datasource. Rapid SQL arranges the objects in a tree structure. The objects are organized in folders based on the
dependency relationship. These folders contain all of the associated objects. The table below describes the
dependency relationship types:
The table below describes the options and functionalities on the Dependencies Tab of the Plans Editor:
TIP: To filter the Owner and Object lists, click the Filter button next to each list. Rapid SQL opens the
Filter
dialog box.
After making changes on the tab, on the editor tool bar, click .
Rapid SQL opens the Preview:Alter dialog box
.
For more information, see Plans Editor
.
Option Description
Edit Click to open the Editor for any selected package(s)
or DBRM.
Rebind Click to open the Rebind Package dialog box
. Has no
effect on the selected DBRM(s).
Free Click to open the Free Package dialog box
. Has no
effect on the selected DBRM(s).
Relationship Description
Referencing Objects The target procedure is dependent on these objects.
Referenced Objects These objects are dependent on the target procedure.
Option Description
Open Click to open the editor for the selected object.
Drop Click to generate drop statements for the selected
object(s) and open a dialog window asking for
confirmation of destructive action.
Select All Click to select all objects.
Unselect All Click to unselect all objects.
USING > OBJECT EDITORS
EMBARCADERO TECHNOLOGIES > BOOKNAMEVARIABLE 191
Plans Editor for IBM DB2 UDB for OS/390 and z/OS - Privileges Tab
The Privileges Tab of the Plans Editor lets you manage permissions for every plan on the current datasource.
This tab displays if a privilege was inherited from a role or group, or if it was granted explicitly by a user. Rapid SQL
also shows if the privilege is grantable (granted with the GRANT OPTION.)
TIP: To filter the Owner and Object lists, click the Filter button next to each list. Rapid SQL opens the
Filter
dialog box.
After making changes on the tab, on the editor tool bar, click .
Rapid SQL opens the Preview:Alter dialog box.
For more information, see:
Granting Permissions
Revoking Permissions
Plans Editor
Plans Editor for IBM DB2 UDB for OS/390 and z/OS - Environments Tab
The Environments Tab of the Plans Editor displays run-time environments information for every plan on the
datasource.
TIP: To filter the Owner and Object lists, click the Filter button next to each list. Rapid SQL opens the
Filter
dialog box.
After making changes on the tab, on the editor tool bar, click .
Rapid SQL opens the Preview:Alter dialog box.
For more information, see Plans Editor
.
Plans Editor for IBM DB2 UDB for OS/390 and z/OS - Commands Tab
The Commands Tab of the Plans Editor displays the command that originally built the plan, for every plan on the
datasource.
TIP: To filter the Owner and Object lists, click the Filter button next to each list. Rapid SQL opens the
Filter
dialog box.
After making changes on the tab, on the editor tool bar, click .
Rapid SQL opens the Preview:Alter dialog box
.
For more information, see Plans Editor
.
Primary Keys Editor for IBM DB2 UDB for OS/390 and z/OS
The Primary Keys Editor lets you:
• Manage primary key columns.
• View primary key DDL.
TIP: The r
efresh button lets you refresh or clear the editor’s contents, and log SQL.
USING > OBJECT EDITORS
EMBARCADERO TECHNOLOGIES > BOOKNAMEVARIABLE 192
The following tabs are available in the Primary Keys Editor:
•
Columns
• DDL
Primary Keys Editor for IBM DB2 UDB for OS/390 and z/OS - Columns Tab
Rapid SQL lets you modify a primary key to change any of its specifications. To modify a primary key constraint, Rapid
SQL drops then recreates the primary key constraint.
The table below describes the options and functionality of the Columns Tab of the Primary Keys Editor:
TIP: To filter the Owner and Object lists, click the Filter button next to each list. Rapid SQL opens the
Filter
dialog box.
After making changes on the tab, on the editor tool bar, click .
Rapid SQL opens the Preview:Alter dialog box.
For more information, see Primary Keys Editor
.
Primary Keys Editor for IBM DB2 UDB for OS/390 and z/OS - DDL Tab
The DDL Tab of the Primary Keys Editor lets you view the SQL code for every primary key on the current datasource.
To view DDL for another primary key, click the lists, click the target owner, and then click the target primary.
TIP: To filter the Owner and Object lists, click the Filter button next to each list. Rapid SQL opens the
Filter
dialog box.
After making changes on the tab, on the editor tool bar, click .
Rapid SQL opens the Preview:Alter dialog box.
For more information, see Primary Keys Editor
.
Procedures Editor for IBM DB2 UDB for OS/390 and z/OS
The Procedures Editor lets you:
Option Description
Owner To change the primary key owner, click the list, and
then click the new owner.
Table To change the table, click the list, and then click the
new table.
Primary Key Constraint To change the primary key constraint, click the list,
and then click the primary key constraint.
Specify the Columns in this
Index
To add and to remove primary key columns, select
the columns, and then click the Right and Left
arrows.
Index Columns To reorder the primary key columns, select the
columns, and then click the Up and Down arrows.

USING > OBJECT EDITORS
EMBARCADERO TECHNOLOGIES > BOOKNAMEVARIABLE 193
• View and modify procedure definitions.
• Manage procedure dependencies.
• Manage procedure parameters.
• Manage procedure partitions.
• Manage procedure privileges.
• Add a comment.
• View procedure DDL.
The following tabs are available in the Procedures Editor:
•
Definition
• Dependencies
• Parameters
• Partitions
• Privileges
• Comment
• DDL
Procedures Editor for IBM DB2 UDB for OS/390 and z/OS - Definition Tab
The Definition Tab of the Procedures Editor lets you modify a procedure to change its definition. To modify a
procedure, Rapid SQL must drop then re-create the procedure.
The table below describes the options and functionality of the Definition Tab of the Procedure Editor:
USING > OBJECT EDITORS
EMBARCADERO TECHNOLOGIES > BOOKNAMEVARIABLE 194
TIP: To filter the Owner and Object lists, click the Filter button next to each list. Rapid SQL opens the
Filter dialog box.
After making changes on the tab, on the editor tool bar, click .
Rapid SQL opens the Preview:Alter dialog box.
For more information, see Procedures Editor
.
Procedures Editor for IBM DB2 UDB for OS/390 and z/OS - Dependencies Tab
The Dependencies Tab of the Procedures Editor lets you manage database objects dependent on each procedure on
the current datasource. Rapid SQL arranges the objects in a tree structure. The objects are organized in folders based
on the dependency relationship. These folders contain all of the associated objects. The table below describes the
dependency relationship types:
TIP: Click one of the referenced objects to open that object’s editor.
TIP: To filter the Owner and Object lists, click the Filter button next to each list. Rapid SQL opens the
Filter
dialog box.
After making changes on the tab, on the editor tool bar, click .
Rapid SQL opens the Preview:Alter dialog box.
External Name To change the external name of the function, in the
box, type the new external name.
Result Sets To change the estimated upper bound for result sets
returned by the procedure, in the box, type the new
upper bound number.
Language To change the language in which the function body is
written, click the list, and then click the new
language.
If the function body is written in C or OLE, select
DB2SQL
If the function body is written in JAVA, select
DB2GENERAL.
Parameter Style To change the parameter style of the function, click
the list, and then click the new parameter style.
Deterministic To make the function return different results from
calls with the same parameters, select the check
box.
Fenced To make the function run in a memory space
separate from the database, select the check box.
Relationship Description
Referencing Objects The target procedure is dependent on these objects.
Referenced Objects These objects are dependent on the target procedure.
USING > OBJECT EDITORS
EMBARCADERO TECHNOLOGIES > BOOKNAMEVARIABLE 195
For more information, see Procedures Editor.
Procedures Editor for IBM DB2 UDB for OS/390 and z/OS - Parameters Tab
The table below describes the options and functionality on the Parameters Tab of the Procedures Editor:
NOTE: You cannot use host variables in the CALL statement for the name of the procedure.
TIP: To filter the Owner and Object lists, click the Filter button next to each list. Rapid SQL opens the
Filter
dialog box.
After making changes on the tab, on the editor tool bar, click .
Rapid SQL opens the Preview:Alter dialog box.
For more information, see Procedures Editor
.
Procedures Editor for IBM DB2 UDB for OS/390 and z/OS - Partitions Tab
The Partitions Tab of the Procedures Editor lets you partition procedures on the current datasource. The table below
describes the option of this tab:
TIP: To filter the Owner and Object lists, click the Filter button next to each list. Rapid SQL opens the
Filter
dialog box.
After making changes on the tab, on the editor tool bar, click .
Rapid SQL opens the Preview:Alter dialog box
.
For more information, see Procedures Editor
.
Procedures Editor for IBM DB2 UDB for OS/390 and z/OS - Privileges Tab
The Privileges and System Privileges tabs of the Object Editor let you manage permissions for every user on the
current datasource.
These tabs display if a privilege was inherited from a role or group, or if it was granted explicitly by a user. Rapid SQL
also shows if the privilege is grantable (granted with the GRANT OPTION.)
Option Description
Add Button Click to open the Add Parameter dialog box.
Insert Button Click to open the Insert Parameter dialog box
.
Edit Button Click to open the Modify Parameter dialog box
.
Option Description
Partition Button Click to open the Convert to Partitioned Index
Wizard.
USING > OBJECT EDITORS
EMBARCADERO TECHNOLOGIES > BOOKNAMEVARIABLE 196
There is a table on every Privileges Tab. On the Object Privileges Tab, Rapid SQL populates each row of the table
with every available database object. On the System Privileges Tab, Rapid SQL populates each row of the table with
the system privileges. The legend, on every Privileges Tab, explains the marks in the table.
The table below describes the icons in the legend:
TIP: To filter the Owner and Object lists, click the Filter button next to each list. Rapid SQL opens the
Filter
dialog box.
After making changes on the tab, on the editor tool bar, click .
Rapid SQL opens the Preview:Alter dialog box.
For more information, see:
Granting Permissions
Revoking Permissions
Procedures Editor
Procedures Editor for IBM DB2 UDB for OS/390 and z/OS - Comment Tab
The Comment Tab of the Procedures Editor lets you enter a comment. Comments can be up to 254 characters long.
The comments are stored in the REMARKS column of the objects' system catalog table.
TIP: To filter the Owner and Object lists, click the Filter button next to each list. Rapid SQL opens the
Filter
dialog box.
After making changes on the tab, on the editor tool bar, click .
Rapid SQL opens the Preview:Alter dialog box
.
For more information, see Procedures Editor
.
Procedures Editor for IBM DB2 UDB for OS/390 and z/OS - DDL Tab
The DDL Tab of the Procedures Editor lets you view the SQL code for every table on the current datasource. To view
DDL for another table, click the lists, click the target owner, and then click the target table.
TIP: To filter the Owner and Object lists, click the Filter button next to each list. Rapid SQL opens the
Filter
dialog box.
Icon Label Description
Black check mark User The privilege(s) was granted explicitly by a user.
Blue check mark Group The privilege(s) was inherited from a group.
Green check mark Role The privilege(s) was inherited from a role.
White check mark Revoked The privilege(s) was inherited from another
source, but has been revoked by a user. In
Rapid SQL, a user cannot revoke a privilege that
has been granted by a role.
Two black check marks With Grant The privilege(s) was granted with the
GRANTABLE option.
USING > OBJECT EDITORS
EMBARCADERO TECHNOLOGIES > BOOKNAMEVARIABLE 197
After making changes on the tab, on the editor tool bar, click .
Rapid SQL opens the Preview:Alter dialog box
.
For more information, see Procedures Editor
.
Synonyms Editor for IBM DB2 UDB for OS/390 and z/OS
The Synonyms Editor lets you:
• View base object information.
• Manage database objects dependent on each synonym.
• View synonym DDL.
TIP: The Object Editor tool bar refresh button lets you refresh Object Editor contents, clear the Object
Editors, and log SQL if SQL Logging is turned on.
TIP: To filter the Owner and Object lists, click the Filter button next to each list. Rapid SQL opens the
Filter
dialog box.
The following tabs are available in the Synonyms Editor:
• Definition
• Dependencies
• DDL
Synonyms Editor for IBM DB2 UDB for OS/390 and z/OS - Definition Tab
The Definition Tab of the Synonyms Editor lets you view base object information for every synonym on the current
datasource.
TIP: To filter the Owner and Object lists, click the Filter button next to each list. Rapid SQL opens the
Filter
dialog box.
After making changes on the tab, on the editor tool bar, click .
Rapid SQL opens the Preview:Alter dialog box.
For more information, see Synonyms Editor
.
USING > OBJECT EDITORS
EMBARCADERO TECHNOLOGIES > BOOKNAMEVARIABLE 198
Synonyms Editor for IBM DB2 UDB for OS/390 and z/OS - Dependencies Tab
The Dependencies Tab of the Synonyms Editor lets you manage database objects dependent on each synonym on
the current datasource. Rapid SQL arranges the objects in a tree structure. The objects are organized in folders based
on the dependency relationship. These folders contain all of the associated objects. The table below describes the
dependency relationship types:
TIP: Click one of the referenced objects to open that object’s editor.
TIP: To filter the Owner and Object lists, click the Filter button next to each list. Rapid SQL opens the
Filter
dialog box.
After making changes on the tab, on the editor tool bar, click .
Rapid SQL opens the Preview:Alter dialog box.
For more information, see Synonyms Editor
.
Synonyms Editor for IBM DB2 UDB for OS/390 and z/OS - DDL Tab
The DDL Tab of the Synonyms Editor lets you view the SQL code for every synonym on the current datasource. To
view DDL for another synonym, click the lists, click the target owner, and then click the target synonym.
TIP: To filter the Owner and Object lists, click the Filter button next to each list. Rapid SQL opens the
Filter
dialog box.
After making changes on the tab, on the editor tool bar, click .
Rapid SQL opens the Preview:Alter dialog box.
For more information, see Synonyms Editor
.
Stogroups Editor for IBM DB2 UDB for OS/390 and z/OS
The Stogroups Editor lets you:
• View and modify volumes.
• Manage function privileges.
• View stogroup DDL.
TIP: The r
efresh button lets you refresh or clear the editor’s contents, and log SQL.
The following tab is available in the Stogroups Editor:
• DDL
Relationship Description
Referencing Objects The target synonym is dependent on these objects.
Referenced Objects These objects are dependent on the target synonym.

USING > OBJECT EDITORS
EMBARCADERO TECHNOLOGIES > BOOKNAMEVARIABLE 199
Stogroups Editor for IBM DB2 UDB for OS/390 and z/OS - DDL Tab
The DDL Tab of the Stogroups Editor lets you view the SQL code for every storage group on the current datasource.
To view DDL for another storage group, click the lists, click the target owner, and then click the target storage group.
TIP: To filter the Owner and Object lists, click the Filter button next to each list. Rapid SQL opens the
Filter
dialog box.
After making changes on the tab, on the editor tool bar, click .
Rapid SQL opens the Preview:Alter dialog box
.
For more information, see Stogroups Editor
.
Tables Editor for IBM DB2 UDB for OS/390 and z/OS
The Tables Editor lets you:
• Manage table columns.
• Manage table constraints.
• Manage performance constraints.
• Manage table storage.
• Add a comment.
• Manage table dependencies.
• Manage table privileges.
• View table DDL.
TIP: The r
efresh button lets you refresh or clear the editor’s contents, and log SQL.
The following tabs are available in the Tables Editor:
• Columns
• Constraints
• Performance
• Storage
• Comment
• Dependencies
• Privileges
• DDL
Altering Tables for IBM DB2 UDB for OS/390 and z/OS
The ALTER TABLE command of Transact-SQL is limited to adding NULL columns to the end of a table and to adding
or dropping constraints. Unfortunately, this scenario does not address many requirements of administrators and
developers who need to add, delete or modify columns more broadly:
• Add columns anywhere in a table, not just the end
• Add columns that do not permit a NULL value.

USING > OBJECT EDITORS
EMBARCADERO TECHNOLOGIES > BOOKNAMEVARIABLE 200
• Change the NULL/NOT NULL status of table columns
• Change column datatypes to other compatible types
• Change the length of datatypes
• Delete a column
Due to the limitations of the ALTER TABLE command, the only way to make broader modifications is to write SQL
scripts that step through all desired changes. To perform an enhanced table alter, Rapid SQL constructs an SQL script
that completes the following steps:
1 Renames the existing table so that the original and its data remain intact
2 Builds a CREATE TABLE statement with the new table definition, including declared defaults, primary key and
check constraints
3 Builds an INSERT statement to copy data from the original, renamed table to the new one
4 Builds foreign keys on the new table
5 Reapplies any privileges granted on the table
6 Rebuilds all dependencies on the new table, including indexes, triggers, procedures, packages, functions and
views. When rebuilding procedures, functions, packages and views, Rapid SQL also rebuilds any permissions on
them
For more information, see Columns Tab of the Tables Editor
.
Tables Editor for IBM DB2 UDB for OS/390 and z/OS - Columns Tab
The Columns Tab of the Tables Editor lets you manage columns for every table on the current datasource. The
Columns Tab lets you:
• Add columns
• Insert columns
•Edit columns
• Drop columns
• Order columns
The table below describes the options and functionality on the Columns Tab of the Tables Editor:
TIP: To filter the Owner and Object lists, click the Filter button next to each list. Rapid SQL opens the
Filter
dialog box.
After making changes on the tab, on the editor tool bar, click .
Rapid SQL opens the Preview:Alter dialog box
.
For more information, see Tables Editor
.
Option Description
Add Button Select the column and click to open the Add Column dialog box.
Edit Button Select the column and click to open the Modify Column dialog box
.
USING > OBJECT EDITORS
EMBARCADERO TECHNOLOGIES > BOOKNAMEVARIABLE 201
Tables Editor for IBM DB2 UDB for OS/390 and z/OS - Constraints Tab
The Constraints Tab of the Tables Editor lets you manage constraints for every table on the current datasource. Rapid
SQL arranges the constraints in a tree structure. The tree contains folders which contain all constraints associated
with the target table. The objects are organized in folders based on the type of constraint:
• Primary Key
• Unique Key
• Check Constraint
• Foreign Key
TIP: Double-click a constraint to open a dialog box with detailed information on the target constraint.
The table below describes the options and functionality on the Constraints Tab of the Table Editor:
TIP: To filter the Owner and Object lists, click the Filter button next to each list. Rapid SQL opens the
Filter dialog box.
After making changes on the tab, on the editor tool bar, click .
Rapid SQL opens the Preview:Alter dialog box.
For more information, see Tables Editor
.
Tables Editor for IBM DB2 UDB for OS/390 and z/OS - Performance Tab
The Performance Tab of the Tables Editor lets you manage performance for every table on the current datasource.
The table below describes performance options:
TIP: To filter the Owner and Object lists, click the Filter button next to each list. Rapid SQL opens the
Filter
dialog box.
After making changes on the tab, on the editor tool bar, click .
Rapid SQL opens the Preview:Alter dialog box
.
For more information, see Tables Editor
.
Option Description
Add Button Click the constraint folder and then click the button to
open the Index Constraint dialog box
.
Edit Button Click the constraint folder and then click the button to
open the Index Constraint dialog box
.
Option Description
Parallel Query Option Lets you select parameters.
Logging Lets you select parameters.
Cache Lets you select parameters.
Add Button Click to open the Select Columns for Partition Dialog Box
.
USING > OBJECT EDITORS
EMBARCADERO TECHNOLOGIES > BOOKNAMEVARIABLE 202
Select Columns for Partition Dialog Box for IBM DB2 UDB for OS/390 and z/OS
The Select Columns for Partition Dialog Box lets you select any or all target columns for partitioning.
Completing the Select Columns for Partition Dialog Box
1 In the Columns window, do one of the following:
• To select a single column, click the target column.
• To select multiple columns, click the first target column, then press CTRL, and then click all remaining target
columns.
• To select all available columns, click Select All.
2 Click OK.
Rapid SQL selects the target columns for partitioning and closes the Select Columns for Partitioning Dialog Box.
For more information, see Tables Editor.
Tables Editor for IBM DB2 UDB for OS/390 and z/OS - Storage Tab
The Storage Tab of the Tables Editor lets you manage storage for every table on the current datasource. The table
below describes storage options:
TIP: To filter the Owner and Object lists, click the Filter button next to each list. Rapid SQL opens the
Filter
dialog box.
After making changes on the tab, on the editor tool bar, click .
Rapid SQL opens the Preview:Alter dialog box.
For more information, see Tables Editor
.
Option Description
Data Block Storage Lets you select parameters.
Extents The unit of space allocated to an object whenever the object needs more
space.
Initial Extent - The initial space extent (in bytes) allocated to the object.
Next Extent - The next extent (in bytes) that the object will attempt to
allocate when more space for the object is required.
Minimum Extents - The appropriate minimum extents value for the
object.
Maximum Extents - The appropriate maximum extents value for the
object.
Percent Increase - Magnifies how an object grows and, can materially
affect available free space in a tablespace. Select a value in the
corresponding box.
Free Lists Lets you select parameters.
USING > OBJECT EDITORS
EMBARCADERO TECHNOLOGIES > BOOKNAMEVARIABLE 203
Tables Editor for IBM DB2 UDB for OS/390 and z/OS - Comment Tab
The Comment Tab of the Tables Editor lets you enter explanatory comments to a table. The comment can be up to
254 characters long. The comments are stored in the REMARKS column of the objects' system catalog table.
TIP: To filter the Owner and Object lists, click the Filter button next to each list. Rapid SQL opens the
Filter
dialog box.
After making changes on the tab, on the editor tool bar, click .
Rapid SQL opens the Preview:Alter dialog box
.
For more information, see Tables Editor
.
Tables Editor for IBM DB2 UDB for OS/390 and z/OS - Dependencies Tab
The Dependencies Tab of the Tables Editor lets you manage database objects dependent on each table on the current
datasource. Rapid SQL arranges the objects in a tree structure. The objects are organized in folders based on the
dependency relationship. These folders contain all of the associated objects. The table below describes the
dependency relationship types:
TIP: Click one of the referenced objects to open that object’s editor.
TIP: To filter the Owner and Object lists, click the Filter button next to each list. Rapid SQL opens the
Filter
dialog box.
After making changes on the tab, on the editor tool bar, click .
Rapid SQL opens the Preview:Alter dialog box.
For more information, see Tables Editor
.
Tables Editor for IBM DB2 UDB for OS/390 and z/OS - Privileges Tab
The Privileges Tab of the Tables Editor lets you manage permissions for every table on the current datasource.
This tab displays if a privilege was inherited from a role or group, or if it was granted explicitly by a user. Rapid SQL
also shows if the privilege is grantable (granted with the GRANT OPTION.)
There is a table on every Privileges Tab. Rapid SQL populates each row of the table with every user, group, and role
in the database. The legend, on every Privileges Tab, explains the marks in the table.
Relationship Description
Referencing Objects The target procedure is dependent on these objects.
Referenced Objects These objects are dependent on the target procedure.
USING > OBJECT EDITORS
EMBARCADERO TECHNOLOGIES > BOOKNAMEVARIABLE 204
The table below describes the icons in the legend:
TIP: To filter the Owner and Object lists, click the Filter button next to each list. Rapid SQL opens the
Filter
dialog box.
After making changes on the tab, on the editor tool bar, click .
Rapid SQL opens the Preview:Alter dialog box.
For more information, see:
Granting Permissions
Revoking Permissions
Tables Editor
Tables Editor for IBM DB2 UDB for OS/390 and z/OS - DDL Tab
The DDL Tab of the Tables Editor lets you view the SQL code for every table on the current datasource. To view DDL
for another table, click the lists, click the target owner, and then click the target table.
TIP: To filter the Owner and Object lists, click the Filter button next to each list. Rapid SQL opens the
Filter
dialog box.
After making changes on the tab, on the editor tool bar, click .
Rapid SQL opens the Preview:Alter dialog box.
For more information, see Tables Editor
.
Tablespaces Editor for IBM DB2 UDB for OS/390 and z/OS
The Tablespaces Editor lets you:
• Add containers.
• Manage performance.
• Add a comment.
• View tablespace DDL.
TIP: The Object Editor tool bar refresh button lets you refresh Object Editor contents, clear the Object
Editors, and log SQL if SQL Logging is turned on.
Icon Label Description
Black check mark User The privilege(s) was granted explicitly by a user.
Blue check mark Group The privilege(s) was inherited from a group.
Green check mark Role The privilege(s) was inherited from a role.
White check mark Revoked The privilege(s) was inherited from another
source, but has been revoked by a user. In
Rapid SQL, a user cannot revoke a privilege that
has been granted by a role.
Two black check marks With Grant The privilege(s) was granted with the
GRANTABLE option.
USING > OBJECT EDITORS
EMBARCADERO TECHNOLOGIES > BOOKNAMEVARIABLE 205
The following tabs are available in the Tablespaces Editor:
•
Container
• Partition
• Definition
• Space
• Objects
• Privileges
• Performance
• Comment
• DDL
Tablespaces Editor for IBM DB2 UDB for OS/390 and z/OS - Container Tab
The Container Tab of the Tablespace Editor lets you add containers to a tablespace.
NOTE: This option is only available for database managed tablespaces.
The table below describes the options and functionality on the Container Tab of the Tablespaces Editor:
TIP: When you partition tablespaces across multiple nodes, the Tablespace Editor shows all relevant
tablespace information, including node placement, all in one tab. In addition, you can add and edit
file or device containers across the primary and sub nodes of the EEE environment. For Database
Managed Space tablespaces, you can assign and update container size parameters in KB, MB,
GB and Page increments.
TIP: To filter the Owner and Object lists, click the Filter button next to each list. Rapid SQL opens the
Filter
dialog box.
After making changes on the tab, on the editor tool bar, click .
Rapid SQL opens the Preview:Alter dialog box
.
For more information, see Tablespaces Editor
.
Add Container/Modify Dialog Box for IBM DB2 UDB for OS/390 and z/OS
The table below describes the options and functionality on the Add Container dialog box:
Option Description
Add Button Click to open the Add Container dialog box.
Edit Button Click to open the Change Container Size dialog box
.
USING > OBJECT EDITORS
EMBARCADERO TECHNOLOGIES > BOOKNAMEVARIABLE 206
After making changes on the tab, on the editor tool bar, click .
Rapid SQL opens the Preview:Alter dialog box
.
For more information, see Tablespaces Editor
.
Tablespaces Editor for IBM DB2 UDB for OS/390 and z/OS - Partition Tab
The Partition Tab of the Tablespace Editor lets you partition tablespace on the current datasource. The table below
describes the options and functionality on the Partitions Tab of the Tablespaces Editor:
TIP: To filter the Owner and Object lists, click the Filter button next to each list. Rapid SQL opens the
Filter dialog box.
After making changes on the tab, on the editor tool bar, click .
Rapid SQL opens the Preview:Alter dialog box.
For more information, see Tablespaces Editor
.
Tablespaces Editor for IBM DB2 UDB for OS/390 and z/OS - Definition Tab
The Definition Tab of the Tablespaces Editor lets you manage the parameters for the tablespace.
For more information, see Tablespaces Editor
.
Tablespace Editor - Space Tab
The Space Tab of the Tablespace Editor lets you view the table usage and the distribution of space for every
tablespace on the current datasource.
After making changes on the tab, on the editor tool bar, click .
Rapid SQL opens the Preview:Alter dialog box
.
For more information, see Tablespaces Editor
.
Option Description
File or Device Select the media to be used by clicking an option
button.
File In the box, type the name and location of the device
directory or click the Browse button.
Pages In the box, type the number of pages in the container.
Option Description
Clone Click to open the Clone Partition dialog box.
Edit Click to open the Partition Editor.

USING > OBJECT EDITORS
EMBARCADERO TECHNOLOGIES > BOOKNAMEVARIABLE 207
Tablespace Editor - Objects Tab
The Objects Tab of the Tablespace Editor lets you view information for every object on the current datasource.
After making changes on the tab, on the editor tool bar, click .
Rapid SQL opens the Preview:Alter dialog box.
For more information, see Tablespaces Editor
.
Tablespace Editor - Privileges Tab
The Privileges Tab of the Tablespace Editor lets you manage permissions for every tablespace on the current
datasource.
This tab displays if a privilege was inherited from a role or group, or if it was granted explicitly by a user. Rapid SQL
also shows if the privilege is grantable (granted with the GRANT OPTION.)
There is a table on every Privileges Tab. Rapid SQL populates each row of the table with every user, group, and role
in the database. The legend, on every Privileges Tab, explains the marks in the table.
The table below describes the icons in the legend:
TIP: To filter the Owner and Object lists, click the Filter button next to each list. Rapid SQL opens the
Filter
dialog box.
After making changes on the tab, on the editor tool bar, click .
Rapid SQL opens the Preview:Alter dialog box
.
For more information, see:
Granting Permissions
Revoking Permissions
Tablespaces Editor
Tablespaces Editor for IBM DB2 UDB for OS/390 and z/OS - Performance Tab
The Performance Tab of the Tablespaces Editor lets you manage performance for every tablespace on the current
datasource. The table below describes performance options
Icon Label Description
Black check mark User The privilege(s) was granted explicitly by a user.
Blue check mark Group The privilege(s) was inherited from a group.
Green check mark Role The privilege(s) was inherited from a role.
White check mark Revoked The privilege(s) was inherited from another
source, but has been revoked by a user. In
Rapid SQL, a user cannot revoke a privilege that
has been granted by a role.
Two black check marks With Grant The privilege(s) was granted with the
GRANTABLE option.
Option Description
Prefetch To change the prefetch size, in the box, type the new prefetch size.
USING > OBJECT EDITORS
EMBARCADERO TECHNOLOGIES > BOOKNAMEVARIABLE 208
TIP: To filter the Owner and Object lists, click the Filter button next to each list. Rapid SQL opens the
Filter dialog box.
After making changes on the tab, on the editor tool bar, click .
Rapid SQL opens the Preview:Alter dialog box.
For more information, see Tablespaces Editor
.
Tablespaces Editor for IBM DB2 UDB for OS/390 and z/OS - Comment Tab
The Comment Tab of the Tablespaces Editor lets you enter a comment which can be up to 254 characters long. The
comments are stored in the REMARKS column of the objects' system catalog table.
TIP: To filter the Owner and Object lists, click the Filter button next to each list. Rapid SQL opens the
Filter
dialog box.
After making changes on the tab, on the editor tool bar, click .
Rapid SQL opens the Preview:Alter dialog box
.
For more information, see Tablespaces Editor
.
Tablespaces Editor for IBM DB2 UDB for OS/390 and z/OS - DDL Tab
The DDL Tab of the Tablespaces Editor lets you view the SQL code for every tablespace on the current datasource. To
view DDL for another table, click the lists, click the target owner, and then click the target table.
TIP: To filter the Owner and Object lists, click the Filter button next to each list. Rapid SQL opens the
Filter
dialog box.
After making changes on the tab, on the editor tool bar, click .
Rapid SQL opens the Preview:Alter dialog box
.
For more information, see Tablespaces Editor
.
Overhead To change the overhead rate, in the box, type the new overhead rate in
milliseconds.
Transfer Rate To change the transfer rate, in the box, type the new transfer rate in
milliseconds.
Bufferpool To change the bufferpool, click the list, and then click the new bufferpool.
Option Description
Prefetch To change the prefetch size, in the box, type the new prefetch size.
Overhead To change the overhead rate, in the box, type the new overhead rate in
milliseconds.
Transfer Rate To change the transfer rate, in the box, type the new transfer rate in
milliseconds.
Option Description
USING > OBJECT EDITORS
EMBARCADERO TECHNOLOGIES > BOOKNAMEVARIABLE 209
Triggers Editor for IBM DB2 UDB for OS/390 and z/OS
The Triggers Editor lets you:
• View and modify trigger definitions.
• Manage trigger dependencies.
• Add a comment.
• View trigger DDL.
TIP: The refresh button lets you refresh or clear the editor’s contents, and log SQL.
The following tabs are available in the Triggers Editor:
•
Definition
• Dependencies
• Comment
•
DDL
Triggers Editor for IBM DB2 UDB for OS/390 and z/OS - Definition Tab
The Definition Tab of the Triggers Editor lets you modify a trigger. To modify a trigger, Rapid SQL must drop then
create the trigger. The table below describes the options and functionality on the Definition Tab of the Triggers Editor:
TIP: To filter the Owner and Object lists, click the Filter button next to each list. Rapid SQL opens the
Filter
dialog box.
After making changes on the tab, on the editor tool bar, click .
Rapid SQL opens the Preview:Alter dialog box.
For more information, see Triggers Editor
.
Option Description
Trigger Definition In the text box, type the changes to the trigger body.
USING > OBJECT EDITORS
EMBARCADERO TECHNOLOGIES > BOOKNAMEVARIABLE 210
Triggers Editor for IBM DB2 UDB for OS/390 and z/OS - Dependencies Tab
The Dependencies Tab of the Triggers Editor lets you manage database objects dependent on each trigger on the
current datasource. Rapid SQL arranges the objects in a tree structure. The objects are organized in folders based on
the dependency relationship. These folders contain all of the associated objects. The table below describes the
dependency relationship types:
TIP: Click one of the referenced objects to open that object’s editor.
TIP: To filter the Owner and Object lists, click the Filter button next to each list. Rapid SQL opens the
Filter
dialog box.
After making changes on the tab, on the editor tool bar, click .
Rapid SQL opens the Preview:Alter dialog box.
For more information, see Triggers Editor
.
Triggers Editor for IBM DB2 UDB for OS/390 and z/OS - Comment Tab
The Comment Tab of the Triggers Editor lets you enter a comment which can be up to 254 characters long. The
comments are stored in the REMARKS column of the objects' system catalog table.
TIP: To filter the Owner and Object lists, click the Filter button next to each list. Rapid SQL opens the
Filter
dialog box.
After making changes on the tab, on the editor tool bar, click .
Rapid SQL opens the Preview:Alter dialog box.
For more information, see Triggers Editor
.
Triggers Editor for IBM DB2 UDB for OS/390 and z/OS - DDL Tab
The DDL Tab of the Triggers Editor lets you view the SQL code for every trigger on the current datasource. To view
DDL for another trigger, click the lists, click the target owner, and then click the target trigger.
TIP: To filter the Owner and Object lists, click the Filter button next to each list. Rapid SQL opens the
Filter
dialog box.
After making changes on the tab, on the editor tool bar, click .
Rapid SQL opens the Preview:Alter dialog box.
For more information, see Triggers Editor
.
Unique Keys Editor for IBM DB2 UDB for OS/390 and z/OS
The Unique Keys Editor lets you:
• Manage unique key columns.
Relationship Description
Referencing Objects The target procedure is dependent on these objects.
Referenced Objects These objects are dependent on the target procedure.
USING > OBJECT EDITORS
EMBARCADERO TECHNOLOGIES > BOOKNAMEVARIABLE 211
• View unique key DDL.
TIP: The r
efresh button lets you refresh or clear the editor’s contents, and log SQL.
The following tabs are available in the Unique Keys Editor:
• Columns
• DDL
Unique Keys Editor for IBM DB2 UDB for OS/390 and z/OS - Columns Tab
The Columns Tab of the Unique Keys Editor lets you manage columns for every unique key on the current datasource.
The Columns Tab lets you:
• Add columns
• Insert columns
•Edit columns
• Drop columns
• Order columns
TIP: To filter the Owner and Object lists, click the Filter button next to each list. Rapid SQL opens the
Filter
dialog box.
After making changes on the tab, on the editor tool bar, click .
Rapid SQL opens the Preview:Alter dialog box.
For more information, see Unique Keys Editor
.
Unique Keys Editor for IBM DB2 UDB for OS/390 and z/OS - DDL Tab
The DDL Tab of the Unique Keys Editor lets you view the SQL code for every unique key on the current datasource.
To view DDL for another unique key, click the lists, click the target owner, and then click the target unique key.
TIP: To filter the Owner and Object lists, click the Filter button next to each list. Rapid SQL opens the
Filter
dialog box.
After making changes on the tab, on the editor tool bar, click .
Rapid SQL opens the Preview:Alter dialog box.
For more information, see Unique Keys Editor
.
User Datatypes Editor for IBM DB2 UDB for OS/390 and z/OS
The User Datatypes Editor lets you:
• View user datatype definitions.
• Add a comment.
• View user datatype DDL.
TIP: The Refresh button lets you refresh or clear the editor’s contents, and log SQL.
USING > OBJECT EDITORS
EMBARCADERO TECHNOLOGIES > BOOKNAMEVARIABLE 212
The following tabs are available in the User Datatypes Editor:
•
Definition
• Comment
•
DDL
User Datatypes Editor for IBM DB2 UDB for OS/390 and z/OS - Definition Tab
The Definition Tab of the User Datatypes Editor lets you modify a user datatype to change its base datatype
properties.
The table below describes the options and functionality on the Definition Tab of the User Datatypes Editor:
TIP: To filter the Owner and Object lists, click the Filter button next to each list. Rapid SQL opens the
Filter dialog box.
After making changes on the tab, on the editor tool bar, click .
Rapid SQL opens the Preview:Alter dialog box.
For more information, see User Datatypes Editor
.
User Datatypes Editor for IBM DB2 UDB for OS/390 and z/OS - Comment Tab
The Comment Tab of the User Datatypes Editor lets you enter a comment which can be up to 254 characters long.
The comments are stored in the REMARKS column of the objects' system catalog table.
TIP: To filter the Owner and Object lists, click the Filter button next to each list. Rapid SQL opens the
Filter
dialog box.
After making changes on the tab, on the editor tool bar, click .
Rapid SQL opens the Preview:Alter dialog box.
For more information, see User Datatypes Editor
.
Option Description
Base Datatype To modify the base datatype properties, click the list,
and then click the new base datatype.
Size To change the base datatype size, in the new box,
type the new base datatype size.
Width To change the base datatype size, in the new box,
type the new base datatype width.
Unit To change the base datatype unit, click the list, and
then click the new base datatype unit.
USING > OBJECT EDITORS
EMBARCADERO TECHNOLOGIES > BOOKNAMEVARIABLE 213
User Datatypes Editor for IBM DB2 UDB for OS/390 and z/OS - DDL Tab
The DDL Tab of the User Datatypes Editor lets you view the SQL code for every user datatype on the current
datasource. To view DDL for another user datatype, click the lists, click the target owner, and then click the target user
datatype.
TIP: To filter the Owner and Object lists, click the Filter button next to each list. Rapid SQL opens the
Filter
dialog box.
After making changes on the tab, on the editor tool bar, click .
Rapid SQL opens the Preview:Alter dialog box
.
For more information, see User Datatypes Editor
.
Users Editor for IBM DB2 UDB for OS/390 and z/OS
The Users Editor lets you:
• Manage user privileges.
• Manage user dependencies.
• View user DDL.
TIP: The refresh button lets you refresh or clear the editor’s contents, and log SQL.
The following tabs are available in the Users Editor:
•
Objects
• System Privileges
• Dependencies
• DDL
Users Editor for IBM DB2 UDB for OS/390 and z/OS - Objects Tab
The Objects Tab of the Users Editor lets you manage database objects associated with every user on the current
datasource. Rapid SQL organizes the objects in a tree structure with folders containing the objects.
TIP: To filter the Owner and Object lists, click the Filter button next to each list. Rapid SQL opens the
Filter
dialog box.
After making changes on the tab, on the editor tool bar, click .
Rapid SQL opens the Preview:Alter dialog box.
For more information, see Users Editor
.
Users Editor for IBM DB2 UDB for OS/390 and z/OS - System Privileges Tab
The System Privileges tabs of the Users Editor lets you manage permissions for every user on the current datasource.
These tabs display if a privilege was inherited from a role or group, or if it was granted explicitly by a user. Rapid SQL
also shows if the privilege is grantable (granted with the GRANT OPTION.)
There is a table on every Privileges Tab. On the System Privileges Tab, Rapid SQL populates each row of the table
with the system privileges. The legend, on every Privileges Tab, explains the marks in the table.
USING > OBJECT EDITORS
EMBARCADERO TECHNOLOGIES > BOOKNAMEVARIABLE 214
The table below describes the icons in the legend:
TIP: To filter the Owner and Object lists, click the Filter button next to each list. Rapid SQL opens the
Filter
dialog box.
After making changes on the tab, on the editor tool bar, click .
Rapid SQL opens the Preview:Alter dialog box.
For more information, see:
Granting Permissions
Revoking Permissions
Users Editor
Users Editor for IBM DB2 UDB for OS/390 and z/OS - Dependencies Tab
The Dependencies Tab of the Users Editor lets you manage database objects dependent on each user on the current
datasource. Rapid SQL arranges the objects in a tree structure. The objects are organized in folders based on the
dependency relationship. These folders contain all of the associated objects. The table below describes the
dependency relationship types:
TIP: Click one of the referenced objects to open that object’s editor.
TIP: To filter the Owner and Object lists, click the Filter button next to each list. Rapid SQL opens the
Filter
dialog box.
After making changes on the tab, on the editor tool bar, click .
Rapid SQL opens the Preview:Alter dialog box
.
For more information, see Users Editor
.
Icon Label Description
Black check mark User The privilege(s) was granted explicitly by a user.
Blue check mark Group The privilege(s) was inherited from a group.
Green check mark Role The privilege(s) was inherited from a role.
White check mark Revoked The privilege(s) was inherited from another
source, but has been revoked by a user. In
Rapid SQL, a user cannot revoke a privilege that
has been granted by a role.
Two black check marks With Grant The privilege(s) was granted with the
GRANTABLE option.
Relationship Description
Referencing Objects The target procedure is dependent on these objects.
Referenced Objects These objects are dependent on the target procedure.
USING > OBJECT EDITORS
EMBARCADERO TECHNOLOGIES > BOOKNAMEVARIABLE 215
Users Editor for IBM DB2 UDB for OS/390 and z/OS - DDL Tab
The DDL Tab of the Users Editor lets you view the SQL code for every user on the current datasource. To view DDL
for another user, click the lists, click the target owner, and then click the target user.
TIP: To filter the Owner and Object lists, click the Filter button next to each list. Rapid SQL opens the
Filter
dialog box.
After making changes on the tab, on the editor tool bar, click .
Rapid SQL opens the Preview:Alter dialog box
.
For more information, see Users Editor
.
Views Editor for IBM DB2 UDB for OS/390 and z/OS
The Views Editor lets you:
• Manage view columns.
• View and modify view definitions.
• Add a comment.
• Manage view privileges.
• Manage objects dependent on views.
TIP: The r
efresh button lets you refresh or clear the editor’s contents, and log SQL.
The following tabs are available in the Views Editor:
• Definition
• Columns
• Comment
•
Dependencies
• Privileges
Views Editor for IBM DB2 UDB for OS/390 and z/OS - Definition Tab
The Definition Tab of the Views Editor lets you modify a view. To modify a view, Rapid SQL must drop then create the
view.
The table below describes the options and functionality on the Definition Tab of the Views Editor:
TIP: To filter the Owner and Object lists, click the Filter button next to each list. Rapid SQL opens the
Filter dialog box.
After making changes on the tab, on the editor tool bar, click .
Rapid SQL opens the Preview:Alter dialog box.
Option Description
View Text In the box, type the changes.
USING > OBJECT EDITORS
EMBARCADERO TECHNOLOGIES > BOOKNAMEVARIABLE 216
For more information, see Views Editor.
Views Editor for IBM DB2 UDB for OS/390 and z/OS - Dependencies Tab
The Dependencies Tab of the Views Editor lets you manage database objects dependent on each view on the current
datasource. Rapid SQL arranges the objects in a tree structure. The objects are organized in folders based on the
dependency relationship. These folders contain all of the associated objects. The table below describes the
dependency relationship types:
TIP: Click one of the referenced objects to open that object’s editor.
TIP: To filter the Owner and Object lists, click the Filter button next to each list. Rapid SQL opens the
Filter
dialog box.
After making changes on the tab, on the editor tool bar, click .
Rapid SQL opens the Preview:Alter dialog box.
For more information, see Views Editor
.
Views Editor for IBM DB2 UDB for OS/390 and z/OS - Columns Tab
The Columns Tab of the Views Editor lets you manage columns for every table on the current datasource. The
Columns Tab lets you:
• Add columns
• Insert columns
•Edit columns
• Drop columns
• Order columns
The table below describes the information that Rapid SQL displays on the Columns Tab of the Views Editor:
TIP: To filter the Owner and Object lists, click the Filter button next to each list. Rapid SQL opens the
Filter
dialog box.
Relationship Description
Referencing Objects The target procedure is dependent on these objects.
Referenced Objects These objects are dependent on the target procedure.
Column Name Description
Name the name of the column in the target table.
Datatype The datatype for the column in the target table. If applicable, Rapid SQL
displays the precision in parentheses.
Nulls The table definition permits nulls in the target table column. Null has no
explicitly assigned value. Null is not equivalent to zero or blank. A value of
null is not considered to be greater than, less than, or equivalent to any other
value, including another value of null.
Default The name of the column included in the table.
USING > OBJECT EDITORS
EMBARCADERO TECHNOLOGIES > BOOKNAMEVARIABLE 217
After making changes on the tab, on the editor tool bar, click .
Rapid SQL opens the Preview:Alter dialog box
.
For more information, see Views Editor
.
Views Editor for IBM DB2 UDB for OS/390 and z/OS - Comment Tab
The Comment Tab of the Views Editor lets you enter a comment which can be up to 254 characters long. The
comments are stored in the REMARKS column of the objects' system catalog table.
TIP: To filter the Owner and Object lists, click the Filter button next to each list. Rapid SQL opens the
Filter
dialog box.
After making changes on the tab, on the editor tool bar, click .
Rapid SQL opens the Preview:Alter dialog box.
For more information, see Views Editor
.
Views Editor for IBM DB2 UDB for OS/390 and z/OS - Privileges Tab
The Privileges Tab of the Views Editor lets you manage permissions for every view on the current datasource.
This tab displays if a privilege was inherited from a role or group, or if it was granted explicitly by a user. Rapid SQL
also shows if the privilege is grantable (granted with the GRANT OPTION.)
There is a table on every Privileges Tab. Rapid SQL populates each row of the table with every user, group, and role
in the database. The legend, on every Privileges Tab, explains the marks in the table.
The table below describes the icons in the legend:
TIP: To filter the Owner and Object lists, click the Filter button next to each list. Rapid SQL opens the
Filter
dialog box.
After making changes on the tab, on the editor tool bar, click .
Rapid SQL opens the Preview:Alter dialog box.
For more information, see:
Granting Permissions
Revoking Permissions
Views Editor
Icon Label Description
Black check mark User The privilege(s) was granted explicitly by a user.
Blue check mark Group The privilege(s) was inherited from a group.
Green check mark Role The privilege(s) was inherited from a role.
White check mark Revoked The privilege(s) was inherited from another
source, but has been revoked by a user. In
Rapid SQL, a user cannot revoke a privilege that
has been granted by a role.
Two black check marks With Grant The privilege(s) was granted with the
GRANTABLE option.

USING > OBJECT EDITORS
EMBARCADERO TECHNOLOGIES > BOOKNAMEVARIABLE 218
Microsoft SQL Server Object Editors
Rapid SQL includes an Object Editor for all supported Microsoft SQL Server objects. To see an Editor for a specific
object, click the corresponding link in the table below:
NOTE: If an objects has dependent objects, such as tables, triggers, procedures and views, you can view
and access their dependent objects in the editor.
Aliases Editor for Microsoft SQL Server
The Aliases Editor lets you:
• View and modify definition of the alias.
• View alias DDL.
TIP: The r
efresh button lets you refresh or clear the editor’s contents, and log SQL.
Check Constraints Editor for Microsoft SQL Server
The Check Constraints Editor lets you:
• View and modify check constraints.
• View check constraint DDL.
TIP: The r
efresh button lets you refresh or clear the editor’s contents, and log SQL.
The table below describes the tabs available in the Check Constraints Editor:
The following functionality is available on the Check Constraints Editor Command menu:
•
Rename
• Status
Aliases Editor Check Constraints Editor Databases Editor Defaults Editor
Extended
Procedures Editor
Foreign Keys Editor Indexes Editor Primary Keys Editor
Procedures Editor Rules Editor Tables Editor Triggers Editor
Unique Keys
Editor
Users Editor User Datatypes Editor User Messages
Editor
Views Editor
Tab Description
Definition Lets you view and modify the check condition, enable/disable the check
constraint (Microsoft SQL Server 7.0 or later) and manage columns for the check
constraint.
DDL Lets you view the SQL code for every check constraint on the current datasource.
To view DDL for another check constraint, click the lists, click the target owners
and/or tables, and then click the target check constraint.
USING > OBJECT EDITORS
EMBARCADERO TECHNOLOGIES > BOOKNAMEVARIABLE 219
Databases Editor for Microsoft SQL Server
The Databases Editor lets you:
• Manage database placement.
• Manage database options.
• Manage database space.
• View database DDL.
TIP: The r
efresh button lets you refresh or clear the editor’s contents, and log SQL.
The following tabs are available in the Databases Editor:
•
Placement
• Transaction Log (Microsoft SQL Server 7.0 or later)
Box Description
Device Number The unique number for the database device.
Default Device Whether the database device is the default device. CREATE and ALTER
DATABASE commands that do not specify a location use the default
database device.
Physical Name The name of the Windows file for the target database device.
Description OPTIONAL: Any user-defined comments for the target database device.
First Virtual Page The first page number for the target database device.
Last Virtual Page The last page number for the target database device.
Option Description
Device Name Displays the database device name.
Mirror Name Lets you specify the mirror name.
Serial Writes Forces serial writes to the mirror device.
Contiguous Specifies a contiguous mirror device used when the initial medium
becomes full, allowing continuation of the backup operation.
Option Description
Device Name Displays the database device name.
Mirror Name Displays the mirror name.
Mirror Side Lets you specify the primary or secondary device.
Primary - Selects the database device mirror side.
Secondary - Selects the mirror device mirror side.
Unmirroring Mode Lets you specify the unmirror as temporary or permanent.
Retain - Sets the unmirror as temporary.
Remove - Sets the unmirror as permanent.
USING > OBJECT EDITORS
EMBARCADERO TECHNOLOGIES > BOOKNAMEVARIABLE 220
• Options
• Space
• DDL
The following functionality is available on the Databases Editor Command menu:
•
Rename
• Update Statistics
• DBCC
• Checkpoint
• Shrink
• Set Online/Offline
Databases Editor for Microsoft SQL Server - Placement Tab
The Placement Tab of the Databases Editor lets you manage following for database on the current datasource:
• Database Owner
• Database File
When changing the database owner (dbo) select the check box to transfer the existing aliases of users who could act
as the old dbo (including their permissions) to the new dbo.
After making changes on the tab, on the editor tool bar, click .
Rapid SQL opens the Preview:Alter dialog box
.
For more information, see Databases Editor
.
Databases Editor for Microsoft SQL Server - Transaction Log Tab
The Transaction Log Tab of the Databases Editor lets you manage transaction logs for every database on the current
datasource. Transaction Logs are available in Microsoft SQL Server 7.0 or later.
The table below describes the options and functionality on the Transaction Log Tab of the Databases Editor:
After making changes on the tab, on the editor tool bar, click .
Rapid SQL opens the Preview:Alter dialog box
.
For more information, see Databases Editor
.
Column Description
Name The name of the target database.
Physical Name The name and path of the target transaction log files. For example,
d:\MSSQL7\data\Picadilly_log.LDF.
Size The current size of the target transaction log file, in MB.
Max Size Indicates the maximum size that the transaction log files can become, in
MB.
File Growth Indicates the growth of the transaction log files, in percentage.

USING > OBJECT EDITORS
EMBARCADERO TECHNOLOGIES > BOOKNAMEVARIABLE 221
Databases Editor for Microsoft SQL Server - Options Tab
The Options Tab of the Databases Editor lets you view and modify the database options for every database on the
current datasource. The table below describes the available database options:
Option Description
ANSI null default Specifies whether database columns are designed as NULL or
NOT NULL by default.
ANSI nulls Controls database default nullability. For ANSI compatibility,
selecting the ANSI null default database option, changes the
database default to NULL.
When this option is selected, all user-defined data types or
columns that are not explicitly defined as NOT NULL during a
CREATE TABLE or ALTER TABLE statement default to allow null
values. Columns that are defined with constraints follow constraint
rules regardless of this setting.
This option is for Microsoft SQL Server 7.0 or later.
ANSI padding Controls the way the column stores values shorter than the defined
size of the column, and the way the column stores values that have
trailing blanks in char, varchar, binary, and varbinary data.
ANSI warnings Controls ANSI warnings. When selected, errors or warnings are
issued when conditions such as "divide by zero" occur or null
values appear in aggregate functions. When not selected, no
warnings are raised when null values appear in aggregate
functions, and null values are returned when conditions such as
"divide by zero" occur.
This option must be selected when you create or manipulate
indexes on computed columns or indexed views.
This option is for Microsoft SQL Server 7.0 or later.
arithabort Terminates a query when an overflow or divide-by-zero error
occurs during query execution.
auto create statistics Specifies that any missing statistics needed by a query for
optimization are built automatically during optimization. This option
is for Microsoft SQL Server 7.0 or later.
auto update statistics Specifies that any out of date statistics needed by a query for
optimization are built automatically during optimization. This option
is for Microsoft SQL Server 7.0 or later.
auto close Specifies that the database is shut down after its resources are
freed and all users exit. This option is for Microsoft SQL Server 7.0
or later.
auto shrink Specifies that the database files are candidates for automatic,
periodic shrinking. This option is for Microsoft SQL Server 7.0 or
later.

USING > OBJECT EDITORS
EMBARCADERO TECHNOLOGIES > BOOKNAMEVARIABLE 222
concat null yields null Specifies behavior when concatenating a null value. When
selected, if one of the operands in a concatenation operation is
NULL, the result of the operation is NULL. For example,
concatenating the character string "This is" and NULL results in the
value NULL, rather than the value "This is".
When not selected, concatenating a null value with a character
string yields the character string as the result; the null value is
treated as an empty character string.
This option must be selected when you create or manipulate
indexes on computed columns or indexed views.
This option is for Microsoft SQL Server 7.0 or later.
cursor close on commit Specifies the cursor behavior and scope. When selected, any open
cursors are closed automatically (in compliance with SQL-92)
when a transaction is committed. By default, this setting is OFF
and cursors remain open across transaction boundaries, closing
only when the connection is closed or when they are explicitly
closed. This option is for Microsoft SQL Server 7.0 or later.
db chaining Configures cross-database ownership chaining for the instance of
SQL Server. This security enhancement was added in SQL Server
2000 SP3 to allow you to manage cross-database security.
This server option allows you to control cross-database ownership
chaining at the database level or to allow cross-database
ownership chaining for all databases.
dbo use only Allows only the database owner access to the database.
default to local cursor Specifies the cursor behavior and scope. When this option is
selected, and a cursor is not defined as GLOBAL when it is
created, the scope of the cursor is local to the batch, stored
procedure, or trigger in which the cursor was created. The cursor
name is valid only within this scope. The cursor can be referenced
by local cursor variables in the batch, stored procedure, or trigger,
or a stored procedure OUTPUT parameter. The cursor is implicitly
deallocated when the batch, stored procedure, or trigger
terminates, unless it was passed back in an OUTPUT parameter. If
it is passed back in an OUTPUT parameter, the cursor is
deallocated when the last variable referencing it is deallocated or
goes out of scope.
This option is for Microsoft SQL Server 7.0 or later.
merge publish Specifies the database merge replication behavior. When selected,
the database can be used for merge replication publications. When
not selected, the database cannot be published for merge
replication. By default, merge publish is false. This option is for
Microsoft SQL Server 7.0 or later.
numeric roundabout Specifies the level of error reporting generated when rounding in
an expression causes a loss of precision.
offline Specifies the status of the database. When selected, the database
is closed and shutdown cleanly and marked offline. You should use
this option when a database is to be distributed on removable
media. The database cannot be modified while the database is
offline. When not selected, the database is open and available for
use.
Option Description
USING > OBJECT EDITORS
EMBARCADERO TECHNOLOGIES > BOOKNAMEVARIABLE 223
TIP: The Compatible level option sets certain database behaviors to be compatible with the specified
earlier version of Microsoft® SQL Server. The compatibility level affects the behaviors in the
specified database, not the entire server.To set database options for all future databases, set the
database options on the model database.
After making changes on the tab, on the editor tool bar, click .
Rapid SQL opens the Preview:Alter dialog box
.
For more information, see Databases Editor
.
Databases Editor for Microsoft SQL Server - Space Tab
The Space Tab of the Databases Editor lets you view pie charts showing the data space usage and the transaction log
(if available) space usage for every database on the current datasource.
TIP: Double-click a slice in the pie chart for detailed statistics.
After making changes on the tab, on the editor tool bar, click .
Rapid SQL opens the Preview:Alter dialog box.
For more information, see Databases Editor
.
published Specifies database publishing. When replication is installed, this
option permits the tables of a database to be published for
replication.
When selected, this option enables publication. When not
selected, this option disables publishing, drops all publications,
and unmarks all transactions that were marked for replication in
the transaction log.
quoted identifier Specifies that Microsoft SQL Server enforces ANSI rules regarding
quotation marks. This option specifies that double quotation marks
can be used for identifiers, such as column and table names.
Character strings must be enclosed in single quotation marks. This
option is for Microsoft SQL Server 7.0 or later.
read only Prevents users from modifying, but not retrieving data from the
database.
recursive triggers Enables recursive firing of triggers. This option is for Microsoft SQL
Server 7.0 or later.
select into/bulkcopy/pllsort Permits operations (such as fast bulk copy) that do not keep a
complete record of the transaction in the transaction log.
single user Restricts database access to one user at a time.
subscribed Specifies database subscriptions. When selected, the database
can be subscribed for publication. When not selected, the
database cannot be subscribed for publication.
torn page detection Specifies that incomplete pages can be detected. This option is for
Microsoft SQL Server 7.0 or later.
trunc log on chkpt Causes Microsoft SQL Server to truncate the transaction log every
time the automatic checkpoint process occurs. Truncate does not
occur on manual checkpoints.
Option Description
USING > OBJECT EDITORS
EMBARCADERO TECHNOLOGIES > BOOKNAMEVARIABLE 224
Databases Editor for Microsoft SQL Server - DDL Tab
The DDL Tab of the Databases Editor lets you view the SQL code for every database on the current datasource. To
view DDL for another database, click the list, and then click the target database.
After making changes on the tab, on the editor tool bar, click .
Rapid SQL opens the Preview:Alter dialog box
.
For more information, see Databases Editor
.
Defaults Editor for Microsoft SQL Server
The Defaults Editor lets you:
• View and modify default expressions.
• View default DDL.
• Manage default bindings.
TIP: The r
efresh button lets you refresh or clear the editor’s contents, and log SQL.
The following tabs are available in the Defaults Editor:
• Definition
• Bindings
TIP: The Defaults Editor Command menu offers the Rename functionality.
Defaults Editor for Microsoft SQL Server - Definition Tab
The Definition Tab of the Defaults Editor lets you do the following for every default on the current datasource:
• View and modify the default value
• View the DDL
To view DDL for another default, click the lists, click the target owner, and then click the target default.
After making changes on the tab, on the editor tool bar, click .
Rapid SQL opens the Preview:Alter dialog box
.
For more information, see Defaults Editor
.
Defaults Editor for Microsoft SQL Server- Bindings Tab
The Bindings Tab of the Defaults Editor lets you manage object bindings for every default on the current datasource.
Microsoft SQL Server lets you bind a default to user-defined datatypes and to columns in any table in a database (if
the default value is appropriate to the datatype of the column.)
After making changes on the tab, on the editor tool bar, click .
Rapid SQL opens the Preview:Alter dialog box
.
For more information, see
Defaults Editor
Bind and Unbind Objects to Default Dialog Boxes
USING > OBJECT EDITORS
EMBARCADERO TECHNOLOGIES > BOOKNAMEVARIABLE 225
Bind and Unbind Objects to Default Dialog Boxes for Microsoft SQL Server
The table below describes the options and functionality on the Bind Objects to Default dialog box:
The table below describes the options and functionality on the Unbind Objects to Default dialog box:
Extended Procedures Editor for Microsoft SQL Server
The Procedures Editor lets you:
• View and modify extended procedure definitions.
• Manage extended procedure dependencies.
• Manage extended procedure privileges.
TIP: The r
efresh button lets you refresh or clear the editor’s contents, and log SQL.
NOTE: Procedures are on the master database.
The following tabs are available in the Procedures Editor:
•
Definition
• Dependencies
• Privileges
The following functionality is available on the Procedures Editor Command menu:
•
Rename
• Execute
Procedures Editor for Microsoft SQL Server - Definition Tab
The Definition Tab of the Procedures Editor lets you do the following for every extended procedure on the current
datasource:
Option Description
Default Displays the default name.
Bind Type Lets you choose the type of bind. Select a column or a datatype
bind.
Do not modify existing columns - If you select Datatypes, you can
specify not to modify existing columns.
Table If you select columns as the bind type, you can select the table
from where the columns are bound.
Objects to be bound box Displays the objects available to bind.
Select/Unselect All button Lets you select or deselect all the objects in the Objects to be
bound box. To select multiple objects, shift-click and select the
target objects.
Option Description
Bound Objects Select the table column(s) or user datatype(s) that you want to
unbind.
USING > OBJECT EDITORS
EMBARCADERO TECHNOLOGIES > BOOKNAMEVARIABLE 226
• View and modify the dynamic-link library (DLL) name
• View the data definition language (DDL)
To view DDL for another extended procedure, click the lists, click the target owner, and then click the target extended
procedure.
After making changes on the tab, on the editor tool bar, click .
Rapid SQL opens the Preview:Alter dialog box
.
For more information, see Procedures Editor
.
Procedures Editor for Microsoft SQL Server - Dependencies Tab
The Dependencies Tab of the Procedures Editor lets you manage database objects dependent on each extended
procedure on the current datasource. Rapid SQL arranges the objects in a tree structure. The objects are organized in
folders based on the dependency relationship. These folders contain all of the associated objects. The table below
describes the dependency relationship types:
TIP: Click one of the referenced objects to open that object’s editor.
After making changes on the tab, on the editor tool bar, click .
Rapid SQL opens the Preview:Alter dialog box
.
For more information, see Procedures Editor
.
Procedures Editor for Microsoft SQL Server - Privileges Tab
The Privileges Tab of the Extended Stored Procedures Editor lets you manage permissions for every extended
procedure on the current datasource.
The table below describes the options and functionality on the Privileges Tab.
This tab displays if a privilege was inherited from a role or group, or if it was granted explicitly by a user. Rapid SQL
also shows if the privilege is grantable (granted with the GRANT OPTION.)
Relationship Description
Referencing Objects The target extended procedure is dependent on these objects.
Referenced Objects These objects are dependent on the target extended procedure.
Option Description
User Lets you select the object user.
Object Type Lets you select the object type.
Owner Lets you select the object owner.
Privilege Level Lets you select the privilege level.
Grant Opens the Grant Privilege(s) To
dialog box.
Revoke Opens the Revoke Privilege(s) From
dialog box.
Deny MICROSOFT SQL SERVER ONLY: Opens the Deny Privileges
From dialog box.
USING > OBJECT EDITORS
EMBARCADERO TECHNOLOGIES > BOOKNAMEVARIABLE 227
There is a table on every Privileges Tab. Rapid SQL populates each row of the table with every user, group, and role
in the database. The legend, on every Privileges Tab, explains the marks in the table.
The table below describes the icons in the legend:
After making changes on the tab, on the editor tool bar, click .
Rapid SQL opens the Preview:Alter dialog box
.
For more information, see:
Granting Permissions
Revoking Permissions
Procedures Editor
Foreign Keys Editor for Microsoft SQL Server
The Foreign Keys Editor lets you:
• Manage foreign key columns.
• View foreign key DDL.
TIP: The r
efresh button lets you refresh or clear the editor’s contents, and log SQL.
The following tabs are available in the Foreign Keys Editor:
• Columns
• DDL
TIP: The Foreign Keys Editor Command menu offers the Rename functionality.
Foreign Keys Editor for Microsoft SQL Server - Columns Tab
The Columns Tab of the Foreign Keys Editor lets you:
• View and modify the column mapping foreign keys.
• Enable/Disable foreign keys.
• Select the Not for Replication option foreign keys.
To view column information for another foreign key, click the lists, click the target database, owner, table, and/or
primary/unique key, and then click the target foreign key.
After making changes on the tab, on the editor tool bar, click .
Rapid SQL opens the Preview:Alter dialog box
.
For more information, see Foreign Keys Editor
.
Foreign Keys Editor for Microsoft SQL Server - DDL Tab
The DDL Tab of the Foreign Keys Editor lets you view the SQL code for every foreign key on the current datasource.
To view DDL for another foreign key, click the lists, click the target owners and/or tables, and then click the target
foreign key.

USING > OBJECT EDITORS
EMBARCADERO TECHNOLOGIES > BOOKNAMEVARIABLE 228
After making changes on the tab, on the editor tool bar, click .
Rapid SQL opens the Preview:Alter dialog box
.
For more information, see Foreign Keys Editor
.
Functions Editor for Microsoft SQL Server
The Functions Editor lets you:
• View and modify function definitions.
• Manage function dependencies.
• Manage function privileges.
TIP: The refresh button lets you refresh or clear the editor’s contents, and log SQL.
NOTE: Functions are available in Microsoft SQL Server 8.0 or later.
The following tabs are available in the Functions Editor:
•
Definition
• Dependencies
• Privileges
TIP: The Functions Editor Command menu offers the Rename functionality.
Functions Editor for Microsoft SQL Server - Definition Tab
The Definition Tab of the Functions Editor lets you do the following for every function on the current datasource:
• View and modify the dynamic-link library (DLL)
• View the data definition language (DDL)
To view DDL for another function, click the lists, click the target owner, and then click the target function.
After making changes on the tab, on the editor tool bar, click .
Rapid SQL opens the Preview:Alter dialog box
.
For more information, see Functions Editor
.
Functions Editor for Microsoft SQL Server - Dependencies Tab
The Dependencies Tab of the Functions Editor lets you manage database objects dependent on each function on the
current datasource. Rapid SQL arranges the objects in a tree structure. The objects are organized in folders based on
the dependency relationship. These folders contain all of the associated objects. The table below describes the
dependency relationship types:
TIP: Click one of the referenced objects to open that object’s editor.
Relationship Description
Referencing Objects The target function is dependent on these objects.
Referenced Objects These objects are dependent on the target function.
USING > OBJECT EDITORS
EMBARCADERO TECHNOLOGIES > BOOKNAMEVARIABLE 229
After making changes on the tab, on the editor tool bar, click .
Rapid SQL opens the Preview:Alter dialog box
.
For more information, see Functions Editor
.
Functions Editor for Microsoft SQL Server - Privileges Tab
The Privileges Tab of the Functions Editor lets you manage permissions for every function on the current datasource.
The table below describes the options and functionality on the Privileges Tab.
This tab displays if a privilege was inherited from a role or group, or if it was granted explicitly by a user. Rapid SQL
also shows if the privilege is grantable (granted with the GRANT OPTION.)
There is a table on every Privileges Tab. Rapid SQL populates each row of the table with every user, group, and role
in the database. The legend, on every Privileges Tab, explains the marks in the table.
The table below describes the icons in the legend:
After making changes on the tab, on the editor tool bar, click .
Rapid SQL opens the Preview:Alter dialog box
.
For more information, see:
Granting Permissions
Revoking Permissions
Functions Editor
Indexes Editor for Microsoft SQL Server
The Indexes Editor lets you:
• Manage index columns.
• View and modify index attributes.
• Manage index storage.
• Manage index statistics.
Option Description
User Lets you select the object user.
Object Type Lets you select the object type.
Owner Lets you select the object owner.
Privilege Level Lets you select the privilege level.
Grant Opens the Grant Privilege(s) To
dialog box.
Revoke Opens the Revoke Privilege(s) From
dialog box.
Deny MICROSOFT SQL SERVER ONLY: Opens the Deny Privileges
From dialog box.
USING > OBJECT EDITORS
EMBARCADERO TECHNOLOGIES > BOOKNAMEVARIABLE 230
• View index DDL.
TIP: The r
efresh button lets you refresh or clear the editor’s contents, and log SQL.
The following tabs are available in the Indexes Editor:
• Columns
• Attributes
• Storage
• Statistics
• DDL
The following functionality is available on the Indexes Editor Command menu:
•
Rename
• Update Statistics
• DBCC
Indexes Editor for Microsoft SQL Server - Columns Tab
The Columns Tab of the Indexes Editor lets you manage columns for every index on the current datasource. Rapid
SQL sorts all column information into two boxes. The box on the left lists all columns in the selected table. The box on
the right lists target table columns in the index. The table below describes the options and functionality on the
Columns Tab of the Indexes Editor:
After making changes on the tab, on the editor tool bar, click .
Rapid SQL opens the Preview:Alter dialog box.
For more information, see Indexes Editor
.
Column Name Description
Column Name of the column in the target table.
Datatype Datatype for the column in the target table. If applicable, Rapid SQL
displays the precision in parentheses.
Nulls The table definition permits nulls in the target table column. Null has no
explicitly assigned value. Null is not equivalent to zero or blank. A value of
null is not considered to be greater than, less than, or equivalent to any
other value, including another value of null.
Index columns The name of the column included in the index.
Asc. Sort Whether the index definition requires that Microsoft SQL Server sort the
table in ascending order. This option is for Microsoft SQL Server 7.0 or
later.
USING > OBJECT EDITORS
EMBARCADERO TECHNOLOGIES > BOOKNAMEVARIABLE 231
Indexes Editor for Microsoft SQL Server - Attributes Tab
The Attributes Tab of the Indexes Editor lets you manage attributes for every index on the current datasource. The
table below describes the options and functionality on the Attributes Tab of the Indexes Editor:
After making changes on the tab, on the editor tool bar, click .
Rapid SQL opens the Preview:Alter dialog box.
For more information, see Indexes Editor
.
Indexes Editor for Microsoft SQL Server - Storage Tab
The Storage Tab of the Indexes Editor lets you manage storage for every index on the current datasource. The table
below describes the options and functionality on the Storage Tab of the Indexes Editor:
After making changes on the tab, on the editor tool bar, click .
Rapid SQL opens the Preview:Alter dialog box
.
For more information, see Indexes Editor
.
Attribute Index Type Description
Unique General Indicates whether the target index is a unique
constraint.
Clustered General Indicates whether the target index is a
clustered, the physical order and the logical
order are the same.
Ignore Duplicate Keys General Indicates whether the target index ignores
duplicate key values. If you select his option,
the transaction that generated the duplicate
key values can continue.
Statistics Recompute General Indicates that index statistics are
automatically recomputed as the index is
updated. Microsoft does not recommend this.
Option Description
Filegroup Lets you specify the filegroup on which to place the index.
Fill Factor Lets you specify a percentage that indicates how full Microsoft SQL
Server should make the leaf level of each index page during index
creation. When an index page fills up, Microsoft SQL Server must take
time to split the index page to make room for new rows, which is quite
expensive. For update-intensive tables, a properly chosen Fill factor
value yields better update performance than an improper Fill factor
value.
Pad Index Lets you specify the space to leave open on each page (node) in the
intermediate levels of the index. This option is useful only when a Fill
factor is specified, because the Pad Index option uses the percentage
specified by Fill factor.
Sort in Tempdb Lets you specify that the intermediate sort results used to build the index
stores in the tempdb database. This option can reduce the time needed
to create an index if tempdb is on a different set of disks than the user
database, but it increases the amount of disk space used during the
index build. This option is for Microsoft SQL Server 8.0 or later.

USING > OBJECT EDITORS
EMBARCADERO TECHNOLOGIES > BOOKNAMEVARIABLE 232
Indexes Editor for Microsoft SQL Server - Statistics Tab
The Statistics Tab of the Indexes Editor lets you view the page and row statistics for every index on the current
datasource.
After making changes on the tab, on the editor tool bar, click .
Rapid SQL opens the Preview:Alter dialog box
.
For more information, see Indexes Editor
.
Indexes Editor for Microsoft SQL Server - DDL Tab
The DDL Tab of the Indexes Editor lets you view the SQL code for every index on the current datasource. To view the
DDL for another index, click the lists, click the target owners and/or tables, and then click the target owner and/or
index.
After making changes on the tab, on the editor tool bar, click .
Rapid SQL opens the Preview:Alter dialog box
.
For more information, see Indexes Editor
.
Logins Editor for Microsoft SQL Server
The Logins Editor lets you:
• View and modify login definitions.
• Manage users for logins.
• Manage roles for logins.
• Manage login accounts.
• View login DDL.
TIP: The r
efresh button lets you refresh or clear the editor’s contents, and log SQL.
The following tabs are available in the Logins Editor:
•
Definition
• Users
• Roles
• DDL
The following functionality is available on the Logins Editor Command menu:
•
Change Password
• Create Like
USING > OBJECT EDITORS
EMBARCADERO TECHNOLOGIES > BOOKNAMEVARIABLE 233
Logins Editor for Microsoft SQL Server - Definition Tab
The Definition Tab of the Logins Editor lets you view and modify information for every login on the current server. The
table below describes the options and functionality on the Definition tab of the Logins Editor:
After making changes on the tab, on the editor tool bar, click .
Rapid SQL opens the Preview:Alter dialog box
.
For more information, see Logins Editor
.
Logins Editor for Microsoft SQL Server - Users Tab
The Users Tab of the Logins Editor lets you manage each login’s user account(s) for every database on the current
server. Before a login name can access a user database, it must be added as a user or alias to that database by the
system administrator or database owner.
For more information, see Logins Editor.
Logins Editor for Microsoft SQL Server - Roles Tab
The Roles Tab of the Logins Editor lets you manage every login’s role(s). The tab includes a table listing every role of
which the target login is a member. This tab lets you:
• Grant roles.
• Revoke roles.
NOTE: The Roles Tab of the Logins Editor is available for Microsoft SQL Server 7.0 or later.
For more information, see Logins Editor
.
Logins Editor for Microsoft SQL Server - DDL Tab
The DDL Tab of the Logins Editor lets you view the SQL code for every login on the current datasource. To view DDL
for another login, click the list and then click the target login.
For more information, see Logins Editor
.
Primary Keys Editor for Microsoft SQL Server
The Primary Keys Editor lets you:
• Manage primary key columns.
• Manage primary key attributes.
• Manage primary key storage.
Box Description
Default Database The database that Microsoft SQL Server places the target user into
when they log in to the target server.
Default Language The language that Microsoft SQL Server uses to displays the target
login’s system messages.
Currently Logged In The login status of the target login.
USING > OBJECT EDITORS
EMBARCADERO TECHNOLOGIES > BOOKNAMEVARIABLE 234
• Manage primary key statistics.
• View primary key DDL.
TIP: The refresh button lets you refresh or clear the editor’s contents, and log SQL.
The following tabs are available in the Primary Keys Editor:
• Columns
• Attributes
• Storage
• Statistics
• DDL
TIP: The Primary Keys Editor Command menu offers the Rename functionality.
Primary Keys Editor for Microsoft SQL Server - Columns Tab
The Columns Tab of the Primary Keys Editor lets you manage columns for every primary key on the current
datasource. Rapid SQL sorts all column information into two boxes. The box on the left lists all columns in the selected
table. The box on the right lists target table columns in the primary key. The table below describes the options and
functionality on the Columns Tab of the Primary Keys Editor:
After making changes on the tab, on the editor tool bar, click .
Rapid SQL opens the Preview:Alter dialog box
.
For more information, see Primary Keys Editor
.
Primary Keys Editor for Microsoft SQL Server - Attributes Tab
The Attributes Tab of the Primary Keys Editor lets you manage attributes for every primary key on the current
datasource. The table below describes the options and functionality on the Attributes Tab of the Primary Keys Editor:
Column Name Description
Column The name of the column in the target table.
Datatype The datatype for the column in the target table. If applicable, Rapid SQL
displays the precision in parentheses.
Nulls The table definition permits nulls in the target table column. Null has no
explicitly assigned value. Null is not equivalent to zero or blank. A value of
null is not considered to be greater than, less than, or equivalent to any
other value, including another value of null.
Index columns The name of the column included in the primary key.
Asc. Sort Whether the index definition requires that Microsoft SQL Server sort the
table in ascending order. This option is for Microsoft SQL Server 7.0 or
later.
Attribute Index Type Description
Unique General Indicates whether the target primary key is a
unique constraint.

USING > OBJECT EDITORS
EMBARCADERO TECHNOLOGIES > BOOKNAMEVARIABLE 235
After making changes on the tab, on the editor tool bar, click .
Rapid SQL opens the Preview:Alter dialog box
.
For more information, see Primary Keys Editor
.
Primary Keys Editor for Microsoft SQL Server - Storage Tab
The Storage Tab of the Primary Keys Editor lets you manage storage for every primary key on the current datasource.
The table below describes the options and functionality on the Storage Tab of the Primary Keys Editor:
After making changes on the tab, on the editor tool bar, click .
Rapid SQL opens the Preview:Alter dialog box
.
For more information, see Primary Keys Editor
.
Clustered General Indicates whether the target primary key is a
clustered, the physical order and the logical
order are the same.
Ignore Duplicate Keys General Indicates whether the target primary key
ignores duplicate key values. If you select his
option, the transaction that generated the
duplicate key values can continue.
Statistics Recompute General Indicates that index statistics are
automatically recomputed as the index is
updated. Microsoft does not recommend this.
None Non-Unique Clustered Indicates that no special options should apply
when processing duplicate rows. For
non-unique clustered primary keys only.
Ignore Duplicate Rows Non-Unique Clustered Indicates that Microsoft SQL Server should
ignore duplicate rows when process
transactions with duplicate rows. For
non-unique clustered primary keys only.
Allow Duplicate Rows Non-Unique Clustered Indicates that Microsoft SQL Server should
process transaction with duplicate rows. For
non-unique clustered primary keys only.
Option Description
Segment Lets you specify the segment on which to place the target primary key.
Fill Factor Lets you specify the fill factor that specifies how full each index page can
be. If no fill factor is specified, Microsoft SQL Server uses the database's
default fill factor.
Pad Index If you specified a Fill factor of more than 0 percent, and you selected the
option to create a unique index, you can specify to use the same
percentage you specified in Fill Factor as the space to leave open on
each interior node. By default, Microsoft SQL Server sets a 2 row index
size.
Attribute Index Type Description
USING > OBJECT EDITORS
EMBARCADERO TECHNOLOGIES > BOOKNAMEVARIABLE 236
Primary Keys Editor for Microsoft SQL Server - Statistics Tab
The Statistics Tab of the Primary Keys Editor lets you view the page and row statistics for every primary key on the
current datasource.
After making changes on the tab, on the editor tool bar, click .
Rapid SQL opens the Preview:Alter dialog box
.
For more information, see Primary Keys Editor
.
Primary Keys Editor for Microsoft SQL Server - DDL Tab
The DDL Tab of the Primary Keys Editor lets you view the SQL code for every primary key on the current datasource.
To view DDL for another primary key, click the lists, click the target owner and/or table, and then click the target
primary key.
After making changes on the tab, on the editor tool bar, click .
Rapid SQL opens the Preview:Alter dialog box
.
For more information, see Primary Keys Editor
.
Procedures Editor for Microsoft SQL Server
The Procedures Editor lets you:
• View and modify procedure definitions.
• Manage procedure privileges.
• Manage procedure dependencies.
The following tabs are available in the Procedures Editor:
•
Definition
• Privileges
• Dependencies
TIP: The refresh button lets you refresh or clear the editor’s contents, and log SQL.
The following functionality is available on the Procedures Editor Command menu:
•
Rename
• Execute
Procedures Editor - Definition Tab
The Definition Tab of the Procedures Editor lets you view the SQL code for every procedure on the current
datasource. To view DDL for another procedure, click the lists, click the target owner, and then click the target
procedure.
After making changes on the tab, on the editor tool bar, click .
Rapid SQL opens the Preview:Alter dialog box
.
For more information, see Procedures Editor
.
USING > OBJECT EDITORS
EMBARCADERO TECHNOLOGIES > BOOKNAMEVARIABLE 237
Procedures Editor - Privileges Tab
The Privileges Tab of the Procedures Editor lets you manage permissions for every procedure on the current
datasource.
The table below describes the options and functionality on the Privileges Tab.
This tab displays if a privilege was inherited from a role or group, or if it was granted explicitly by a user. Rapid SQL
also shows if the privilege is grantable (granted with the GRANT OPTION.)
There is a table on every Privileges Tab. Rapid SQL populates each row of the table with every user, group, and role
in the database. The legend, on every Privileges Tab, explains the marks in the table.
The table below describes the icons in the legend:
After making changes on the tab, on the editor tool bar, click .
Rapid SQL opens the Preview:Alter dialog box
.
For more information, see:
Granting Permissions
Revoking Permissions
Procedures Editor
Procedures Editor - Dependencies Tab
The Dependencies Tab of the Procedures Editor lets you manage database objects dependent on each procedure on
the current datasource. Rapid SQL arranges the objects in a tree structure. The objects are organized in folders based
on the dependency relationship. These folders contain all of the associated objects. The table below describes the
dependency relationship types:
TIP: Click one of the referenced objects to open that object’s editor.
After making changes on the tab, on the editor tool bar, click .
Rapid SQL opens the Preview:Alter dialog box
.
Option Description
User Lets you select the object user.
Object Type Lets you select the object type.
Owner Lets you select the object owner.
Privilege Level Lets you select the privilege level.
Grant Opens the Grant Privilege(s) To
dialog box.
Revoke Opens the Revoke Privilege(s) From
dialog box.
Deny MICROSOFT SQL SERVER ONLY: Opens the Deny Privileges
From dialog box.
Relationship Description
Referencing Objects The target procedure is dependent on these objects.
Referenced Objects These objects are dependent on the target procedure.
USING > OBJECT EDITORS
EMBARCADERO TECHNOLOGIES > BOOKNAMEVARIABLE 238
For more information, see Procedures Editor.
The table below describes the options
and functionality on the Privileges Tab.
Option Description
Local Server The unique server name that users must supply when executing remote
procedure calls.
Publication Server Specifies database publishing. When replication is installed, this option
permits the tables of a database to be published for replication.
When selected, this option enables publication. When not selected, this
option disables publishing, drops all publications, and unmarks all
transactions that were marked for replication in the transaction log.
Distribution Server Enables the remote server to be a distribution server.
Subscription Server Specifies database subscriptions. When selected, the database can be
subscribed for publication. When not selected, the database cannot be
subscribed for publication.
Publisher/Subscriber Enables the remote server to be a publisher/subscriber server.
Collation Compatible
Server
Indicates Change DIstributed Query execution against remote servers. If
you select this option, Microsoft SQL Server assumes that all characters
in the remote server are compatible with the local server, with regard to
character set and collation sequence (or sort order). This option is for
Microsoft SQL Server 7.0 or later.
Data Access Server Indicates whether the target remote server is enabled for distributed
query access. This option is for Microsoft SQL Server 7.0 or later.
RPC Out Server Enables the remote server to execute stored procedures on the local
server using a remote procedure call (RPC). This option is for Microsoft
SQL Server 7.0 or later.
Option Description
Remote Server Name Displays the remote server name.
Remote Login Name Lets you specify a remote login name. Select the All box if you
want to use this name for all remote logins.
Local Login Name Lets you select a local user name.
Trusted Remote Login Lets you specify this remote login as a trusted login.
Option Description
User Lets you select the object user.
Object Type Lets you select the object type.
Owner Lets you select the object owner.
Privilege Level Lets you select the privilege level.
Grant Opens the Grant Privilege(s) To
dialog box.
Revoke Opens the Revoke Privilege(s) From
dialog box.
USING > OBJECT EDITORS
EMBARCADERO TECHNOLOGIES > BOOKNAMEVARIABLE 239
This tab displays if a privilege was inherited from a role or group, or if it was granted explicitly by a user. Rapid SQL
also shows if the privilege is grantable (granted with the GRANT OPTION.)
There is a table on every Privileges Tab. Rapid SQL populates each row of the table with every user, group, and role
in the database. The legend, on every Privileges Tab, explains the marks in the table.
The table below describes the icons in the legend:
After making changes on the tab, on the editor tool bar, click .
Rules Editor for Microsoft SQL Server
The Rules Editor lets you:
• View and modify rule definitions.
• Manage rule bindings.
TIP: The r
efresh button lets you refresh or clear the editor’s contents, and log SQL.
The following tabs are available in the Rules Editor:
• Definition
• Bindings
TIP: The Rules Editor Command menu offers the Rename functionality.
Rules Editor for Microsoft SQL Server - Definition Tab
The Definition Tab of the Rules Editor lets you view the SQL code for every rule on the current datasource. To view
DDL for another rule, click the lists, click the target owner, and then click the target rule.
After making changes on the tab, on the editor tool bar, click .
Rapid SQL opens the Preview:Alter dialog box
.
For more information, see Rules Editor
.
Rules Editor for Microsoft SQL Server - Bindings Tab
The Bindings Tab of the Rules Editor lets you manage object bindings for every rule on the current datasource.
Microsoft SQL Server lets you bind a rules to user-defined datatypes and to columns in any table in a database (if the
default value is appropriate to the datatype of the column.)
After making changes on the tab, on the editor tool bar, click .
Rapid SQL opens the Preview:Alter dialog box
.
For more information, see Rules Editor
.
Tables Editor for Microsoft SQL Server
The Tables Editor lets you:
Deny MICROSOFT SQL SERVER ONLY: Opens the Deny Privileges
From dialog box.
Option Description

USING > OBJECT EDITORS
EMBARCADERO TECHNOLOGIES > BOOKNAMEVARIABLE 240
• Manage table columns.
• Manage table constraints.
• Manage table storage.
• Manage table space.
• Manage table partitions.
• Manage table dependencies.
• Manage table privileges.
• View table DDL.
TIP: The r
efresh button lets you refresh or clear the editor’s contents, and log SQL.
The following tabs are available in the Tables Editor:
• Columns
• Constraints
• Storage
• Space
• Dependencies
• Privileges
• Full-Text Indexing Tab (Microsoft SQL Server 8.0 or later)
• DDL
The following functionality is available on the Tables Editor Command menu:
•
Rename
• Edit Data
• Build Query
• Update Statistics
•
Create Like
• DBCC
• Indexes
• Triggers
• Truncate
• Disable Triggers (Microsoft SQL Server 7.0 or later)
• Enable Triggers (Microsoft SQL Server 7.0 or later)
Tables Editor for Microsoft SQL Server - Columns Tab
The Columns Tab of the Tables Editor lets you manage columns for every table on the current datasource. The
Columns Tab lets you:

USING > OBJECT EDITORS
EMBARCADERO TECHNOLOGIES > BOOKNAMEVARIABLE 241
• Add columns
• Insert columns
•Edit columns
• Drop columns
• Order columns
The table below describes the options and functionality on the Columns Tab of the Tables Editor:
After making changes on the tab, on the editor tool bar, click .
Rapid SQL opens the Preview:Alter dialog box
.
For more information, see:
Add Column dialog box
Modify Column dialog box
Tables Editor
Tables Editor for Microsoft SQL Server - Constraints Tab
The Constraints Tab of the Tables Editor lets you manage constraints for every table on the current datasource. Rapid
SQL arranges the constraints in a tree structure. The tree contains folders which contain all constraints associated
with the target table. The objects are organized in folders based on the type of constraint:
•
Check Constraint
• Foreign Key
• Primary Key
• Unique Key
In the tree, double-click a constraint to open a dialog box with detailed information on the target constraint.
After making changes on the tab, on the editor tool bar, click .
Rapid SQL opens the Preview:Alter dialog box
.
For more information, see:
Index Constraint dialog box
Column Name Description
Name the name of the column in the target table.
Datatype The datatype for the column in the target table. If applicable, Rapid SQL
displays the precision in parentheses.
Nulls The table definition permits nulls in the target table column. Null has no
explicitly assigned value. Null is not equivalent to zero or blank. A value of
null is not considered to be greater than, less than, or equivalent to any other
value, including another value of null.
Default The name of the column included in the table.
Default Binding Lets you bind a default to the column, instead of declaring it.
Rule Binding Lets you bind a rule to the column.
USING > OBJECT EDITORS
EMBARCADERO TECHNOLOGIES > BOOKNAMEVARIABLE 242
Tables Editor
Tables Editor for Microsoft SQL Server- Storage Tab
The Storage Tab of the Tables Editor lets you manage storage for every table on the current datasource. The table
below describes the options and functionality on the Storage Tab of the Tables Editor:
After making changes on the tab, on the editor tool bar, click .
Rapid SQL opens the Preview:Alter dialog box
.
For more information, see Tables Editor
.
Tables Editor for Microsoft SQL Server - Space Tab
The Space Tab of the Tables Editor lets you view the table usage and the distribution of table space for every table on
the current datasource.
TIP: Double-click a slice in the pie chart for detailed statistics.
After making changes on the tab, on the editor tool bar, click .
Rapid SQL opens the Preview:Alter dialog box
.
For more information, see Tables Editor
.
Tables Editor for Microsoft SQL Server - Dependencies Tab
The Dependencies Tab of the Tables Editor lets you manage database objects dependent on each table on the current
datasource. Rapid SQL arranges the objects in a tree structure. The objects are organized in folders based on the
dependency relationship. These folders contain all of the associated objects. The table below describes the
dependency relationship types:
TIP: Click one of the referenced objects to open that object’s editor.
After making changes on the tab, on the editor tool bar, click .
Rapid SQL opens the Preview:Alter dialog box
.
For more information, see Tables Editor
.
Tables Editor for Microsoft SQL Server - Privileges Tab
The Privileges Tab of the Tables Editor lets you manage permissions for every table on the current datasource.
Option Description
Filegroup View on which filegroup within the database the table is stored. This is for
Microsoft SQL Server 7.0 or later.
Text Image Filegroup View on which filegroup within the database on which to place any text,
image, and/or next columns. This is for Microsoft SQL Server 7.0 or later.
Relationship Description
Referencing Objects The target view is dependent on these objects.
Referenced Objects These objects are dependent on the target view.
USING > OBJECT EDITORS
EMBARCADERO TECHNOLOGIES > BOOKNAMEVARIABLE 243
The table below describes the options and functionality on the Privileges Tab.
This tab displays if a privilege was inherited from a role or group, or if it was granted explicitly by a user. Rapid SQL
also shows if the privilege is grantable (granted with the GRANT OPTION.)
There is a table on every Privileges Tab. Rapid SQL populates each row of the table with every user, group, and role
in the database. The legend, on every Privileges Tab, explains the marks in the table.
The table below describes the icons in the legend:
After making changes on the tab, on the editor tool bar, click .
Rapid SQL opens the Preview:Alter dialog box
.
For more information, see:
Granting Permissions
Revoking Permissions
Tables Editor
Tables Editor for Microsoft SQL Server - Full-Text Indexing Tab
The Full-Text Indexing Tab of the Tables Editor lets you use the Microsoft SQL Server full-text service for every table
on the current datasource that permits the Microsoft full-text service.
The full-text index feature provides support for sophisticated word searches in character string data. A full-text index
stores information about significant words and their location within a given column. This information is used to quickly
complete full-text queries that search for rows with particular words or combinations of words.
NOTE: This tab is available for Microsoft SQL Server 8.0 or later.
After making changes on the tab, on the editor tool bar, click .
Rapid SQL opens the Preview:Alter dialog box
.
For more information, see Tables Editor
.
Tables Editor for Microsoft SQL Server - DDL Tab
The DDL Tab of the Tables Editor lets you view the SQL code for every table on the current datasource. To view DDL
for another table, click the lists, click the target owner, and then click the target table.
Option Description
User Lets you select the object user.
Object Type Lets you select the object type.
Owner Lets you select the object owner.
Privilege Level Lets you select the privilege level.
Grant Opens the Grant Privilege(s) To
dialog box.
Revoke Opens the Revoke Privilege(s) From
dialog box.
Deny MICROSOFT SQL SERVER ONLY: Opens the Deny Privileges
From dialog box.
USING > OBJECT EDITORS
EMBARCADERO TECHNOLOGIES > BOOKNAMEVARIABLE 244
After making changes on the tab, on the editor tool bar, click .
Rapid SQL opens the Preview:Alter dialog box
.
For more information, see Tables Editor
.
Triggers Editor for Microsoft SQL Server
The Triggers Editor lets you:
• View and modify trigger definitions.
• Manage trigger dependencies.
TIP: The r
efresh button lets you refresh or clear the editor’s contents, and log SQL.
The following tabs are available in the Triggers Editor:
• Definition
• Dependencies
The following functionality is available on the Triggers Editor Command menu:
•
Disable Trigger (Microsoft SQL Server 7.0 or later)
• Enable Trigger (Microsoft SQL Server 7.0 or later)
Triggers Editor for Microsoft SQL Server - Definition Tab
The Definition Tab of the Triggers Editor lets you do the following for every default on the current datasource:
• View and modify the trigger status (Microsoft SQL Server 7.0 or later)
• View the DDL
To view DDL for another trigger, click the lists, click the target owner and/or table, and then click the target trigger.
After making changes on the tab, on the editor tool bar, click .
Rapid SQL opens the Preview:Alter dialog box
.
For more information, see Triggers Editor
.
Triggers Editor for Microsoft SQL Server - Dependencies Tab
The Dependencies Tab of the Triggers Editor lets you manage database objects dependent on each trigger on the
current datasource. Rapid SQL arranges the objects in a tree structure. The objects are organized in folders based on
the dependency relationship. These folders contain all of the associated objects. The table below describes the
dependency relationship types:
TIP: Click one of the referenced objects to open that object’s editor.
Relationship Description
Referencing Objects The target view is dependent on these objects.
Referenced Objects These objects are dependent on the target view.
USING > OBJECT EDITORS
EMBARCADERO TECHNOLOGIES > BOOKNAMEVARIABLE 245
After making changes on the tab, on the editor tool bar, click .
Rapid SQL opens the Preview:Alter dialog box
.
For more information, see Triggers Editor
.
Unique Keys Editor for Microsoft SQL Server
The Unique Keys Editor lets you:
• Manage unique key columns.
• Manage unique key attributes.
• Manage unique key storage.
• Manage unique key statistics.
• View unique key DDL.
TIP: The r
efresh button lets you refresh or clear the editor’s contents, and log SQL.
The following tabs are available in the Unique Keys Editor:
• Columns
• Attributes
• Storage
• Statistics
• DDL
TIP: The Unique Keys Editor Command menu lets you Rename a unique key:
Unique Keys Editor for Microsoft SQL Server - Columns Tab
The Columns Tab of the Unique Keys Editor lets you manage columns for every unique key on the current datasource.
Rapid SQL sorts all column information into two boxes. The box on the left lists all columns in the selected table. The
box on the right lists target table columns in the table. The table below describes the options and functionality on the
Columns Tab of the Unique Keys Editor:
Column Name Description
Column The name of the column in the target table.
Datatype the datatype for the column in the target table. If applicable, Rapid SQL
displays the precision in parentheses.
Nulls The table definition permits nulls in the target table column. Null has no
explicitly assigned value. Null is not equivalent to zero or blank. A value of
null is not considered to be greater than, less than, or equivalent to any other
value, including another value of null.
Index Columns The name of the column included in the unique key.
Asc. Sort Whether the unique key definition requires that Microsoft SQL Server sort the
table in ascending order. This is for Microsoft SQL Server 7.0 or later.
USING > OBJECT EDITORS
EMBARCADERO TECHNOLOGIES > BOOKNAMEVARIABLE 246
After making changes on the tab, on the editor tool bar, click .
Rapid SQL opens the Preview:Alter dialog box
.
For more information, see Unique Keys Editor
.
Unique Keys Editor for Microsoft SQL Server - Attributes Tab
The Attributes Tab of the Unique Keys Editor lets you manage attributes for every unique key on the current
datasource. The table below describes the available attributes:
After making changes on the tab, on the editor tool bar, click .
Rapid SQL opens the Preview:Alter dialog box
.
For more information, see Unique Keys Editor
.
Unique Keys Editor for Microsoft SQL Server - Storage Tab
The Storage Tab of the Unique Keys Editor lets you manage storage for every unique key on the current datasource.
The table below describes the options and functionality on the Storage tab of the Unique Keys Editor:
Attribute Index Type Description
Unique General Indicates whether the target index is a unique
constraint.
Clustered General Indicates whether the target index is a
clustered, the physical order and the logical
order are the same.
Ignore Duplicate Keys General Indicates whether the target index ignores
duplicate key values. If you select his option,
the transaction that generated the duplicate
key values can continue.
Statistics Recompute General Indicates that index statistics are
automatically recomputed as the index is
updated. Microsoft does not recommend this.
Option Description
Filegroup Lets you specify the filegroup on which to place the index. This is for
Microsoft SQL Server 7.0 or later.
Fill Factor Lets you specify a percentage that indicates how full Microsoft SQL
Server should make the leaf level of each index page during index
creation. When an index page fills up, Microsoft SQL Server must take
time to split the index page to make room for new rows, which is quite
expensive. For update-intensive tables, a properly chosen Fill factor
value yields better update performance than an improper Fill factor
value.
Pad Index Lets you specify the space to leave open on each page (node) in the
intermediate levels of the index. This option is useful only when a Fill
factor is specified, because the Pad Index option uses the percentage
specified by Fill factor.
USING > OBJECT EDITORS
EMBARCADERO TECHNOLOGIES > BOOKNAMEVARIABLE 247
After making changes on the tab, on the editor tool bar, click .
Rapid SQL opens the Preview:Alter dialog box
.
For more information, see Unique Keys Editor
.
Unique Keys Editor for Microsoft SQL Server - Statistics Tab
The Statistics Tab of the Unique Keys Editor lets you view the page and row statistics for every unique key on the
current datasource.
After making changes on the tab, on the editor tool bar, click .
Rapid SQL opens the Preview:Alter dialog box
.
For more information, see Unique Keys Editor
.
Unique Keys Editor for Microsoft SQL Server - DDL Tab
The DDL Tab of the Unique Keys Editor lets you view the SQL code for every unique key on the current datasource.
To view DDL for another unique key, click the list, target owner and/or table, and then click target unique key.
After making changes on the tab, on the editor tool bar, click .
Rapid SQL opens the Preview:Alter dialog box
.
For more information, see Unique Keys Editor
.
Users Editor for Microsoft SQL Server
The Users Editor lets you:
• View and modify user definitions.
• Manage user privileges.
• Manage dependent objects for users.
• View user DDL.
TIP: The r
efresh button lets you refresh or clear the editor’s contents, and log SQL.
The following tabs are available in the Users Editor:
•
Definition
• Object Privileges
• System Privileges
• Objects
• DDL
The following functionality is available on the Unique Keys Editor Command menu:
•
Create Like
USING > OBJECT EDITORS
EMBARCADERO TECHNOLOGIES > BOOKNAMEVARIABLE 248
Users Editor for Microsoft SQL Server - Definition Tab
The Definition Tab of the Users Editor lets you manage roles for every user on the current datasource. To manage
roles for another user, click the list, and then click the target user.
After making changes on the tab, on the editor tool bar, click .
Rapid SQL opens the Preview:Alter dialog box
.
For more information, see Users Editor
.
Users Editor for Microsoft SQL Server - Object Privileges and System Privileges Tab
The Object Privileges and System Privileges tabs of the Users Editor let you manage permissions for every user on
the current datasource.
The table below describes the options and functionality on the Privileges Tab.
This tab displays if a privilege was inherited from a role or group, or if it was granted explicitly by a user. Rapid SQL
also shows if the privilege is grantable (granted with the GRANT OPTION.)
There is a table on every Privileges Tab. Rapid SQL populates each row of the table with every user, group, and role
in the database. The legend, on every Privileges Tab, explains the marks in the table.
The table below describes the icons in the legend:
After making changes on the tab, on the editor tool bar, click .
Rapid SQL opens the Preview:Alter dialog box
.
For more information, see:
Granting Permissions
Revoking Permissions
Users Editor
Users Editor for Microsoft SQL Server - Objects Tab
The Objects Tab of the Users Editor lets you manage database objects associated with every segment on the current
datasource. Rapid SQL organizes the objects in a tree structure with three folders containing all of the following
associated objects:
• Defaults
Option Description
User Lets you select the object user.
Object Type Lets you select the object type.
Owner Lets you select the object owner.
Privilege Level Lets you select the privilege level.
Grant Opens the Grant Privilege(s) To
dialog box.
Revoke Opens the Revoke Privilege(s) From
dialog box.
Deny MICROSOFT SQL SERVER ONLY: Opens the Deny Privileges
From dialog box.

USING > OBJECT EDITORS
EMBARCADERO TECHNOLOGIES > BOOKNAMEVARIABLE 249
• Indexes
• Procedures
• Rules
• Tables
• Triggers
• User Defined Datatypes
• Views
TIP: Click one of the objects to open that object’s editor.
After making changes on the tab, on the editor tool bar, click .
Rapid SQL opens the Preview:Alter dialog box
.
For more information, see Users Editor
.
Users Editor for Microsoft SQL Server - DDL Tab
The DDL Tab of the Users Editor lets you view the SQL code for every user on the current datasource. To view DDL
for another user, click the list, and then click the target user.
After making changes on the tab, on the editor tool bar, click .
Rapid SQL opens the Preview:Alter dialog box
.
For more information, see Users Editor
.
User Datatypes Editor for Microsoft SQL Server
The User Datatypes Editor lets you:
• View user datatype definitions.
• View objects associated with user datatypes.
• View user datatype DDL.
TIP: The r
efresh button lets you refresh or clear the editor’s contents, and log SQL.
User Datatypes Editor for Microsoft SQL Server - Definition Tab
The Definition Tab of the User Datatypes Editor lets you view and modify information for every user datatype on the
current datasource. The Definition Tab displays detailed information on the base datatype and any defaults and/or
rules.
For more information, see User Datatypes Editor for Microsoft SQL Server
.
User Datatypes Editor for Microsoft SQL Server - Usage Tab
The Usage Tab of the User Datatypes Editor displays hierarchy information for every user datatype on the current
datasource. To view hierarchy information for another user datatype, check the lists, click the target owner, and then
click the target user datatype.
For more information, see User Datatypes Editor for Microsoft SQL Server.
USING > OBJECT EDITORS
EMBARCADERO TECHNOLOGIES > BOOKNAMEVARIABLE 250
User Datatypes Editor for Microsoft SQL Server - DDL Tab
The DDL Tab lets you view the SQL code for every user datatype on the current datasource. To view DDL for another
user datatype, click the lists, click the target owner, and then click the target user datatype.
For more information, see User Datatypes Editor for Microsoft SQL Server
.
User Messages Editor for Microsoft SQL Server
NOTE: User Messages are only on the master database.
The User Messages Editor lets you:
• View and modify user message information.
• Manage user message bindings.
• View user message DDL.
TIP: The r
efresh button lets you refresh or clear the editor’s contents, and log SQL.
The following tabs are available in the User Messages Editor:
• Information
• DDL
User Messages Editor for Microsoft SQL Server - Information Tab
The Information Tab of the User Messages Editor lets you view, add, and edit every user message on the current
datasource. The Information Tab displays the language and contents of user messages.
After making changes on the tab, on the editor tool bar, click .
Rapid SQL opens the Preview:Alter dialog box
.
For more information, see User Messages Editor
.
User Messages Editor for Microsoft SQL Server - DDL Tab
The DDL Tab of the User Messages Editor lets you view the SQL code for every user message on the current
datasource. To view DDL for another user message, click the list, and then click the target user message.
After making changes on the tab, on the editor tool bar, click .
Rapid SQL opens the Preview:Alter dialog box
.
For more information, see User Messages Editor
.
Views Editor for Microsoft SQL Server
The Views Editor lets you:
• Manage view columns.
• View and modify view definitions.
• Manage view privileges.
USING > OBJECT EDITORS
EMBARCADERO TECHNOLOGIES > BOOKNAMEVARIABLE 251
• Manage objects dependent on views.
• View DDL for views.
TIP: The refresh button lets you refresh or clear the editor’s contents, and log SQL.
The following tabs are available in the Views Editor:
• Columns
• Definition
• Privileges
• Dependencies
The following functionality is available on the Views Editor Command menu:
• Triggers
(Microsoft SQL Server 8.0 or later)
• Indexes
(Microsoft SQL Server 8.0 or later)
•
Build Query
• Rename
Views Editor for Microsoft SQL Server - Columns Tab
The Columns Tab of the Views Editor lets you view column information for every view on the current datasource. The
table below describes the options and functionality on the Columns Tab of the Tables Editor:
After making changes on the tab, on the editor tool bar, click .
Rapid SQL opens the Preview:Alter dialog box
.
For more information, see Views Editor
.
Views Editor for Microsoft SQL Server - Definition Tab
The Definition Tab of the Views Editor lets you view the SQL code for every view on the current datasource. To view
DDL for another view, click the lists, click the target owner, and then click the target view.
After making changes on the tab, on the editor tool bar, click .
Rapid SQL opens the Preview:Alter dialog box
.
For more information, see Views Editor
.
Column Name Description
Column Name the name of the column in the target view.
Datatype Datatype for the column in the target view. If applicable, Rapid SQL
displays the precision in parentheses.
Nulls The table definition permits nulls in the target table column. Null
has no explicitly assigned value. Null is not equivalent to zero or
blank. A value of null is not considered to be greater than, less
than, or equivalent to any other value, including another value of
null.
USING > OBJECT EDITORS
EMBARCADERO TECHNOLOGIES > BOOKNAMEVARIABLE 252
Views Editor for Microsoft SQL Server - Privileges Tab
The Privileges Tab of the Views Editor lets you manage permissions for every view on the current datasource.
The table below describes the options and functionality on the Privileges Tab.
This tab displays if a privilege was inherited from a role or group, or if it was granted explicitly by a user. Rapid SQL
also shows if the privilege is grantable (granted with the GRANT OPTION.)
There is a table on every Privileges Tab. Rapid SQL populates each row of the table with every user, group, and role
in the database. The legend, on every Privileges Tab, explains the marks in the table.
The table below describes the icons in the legend:
After making changes on the tab, on the editor tool bar, click .
For more information, see:
Granting Permissions
Revoking Permissions
Views Editor
Views Editor for Microsoft SQL Server - Dependencies Tab
The Dependencies Tab of the Views Editor lets you manage database objects dependent on each view on the current
datasource. Rapid SQL arranges the objects in a tree structure. The objects are organized in folders based on the
dependency relationship. These folders contain all of the associated objects. The table below describes the
dependency relationship types:
TIP: Click one of the referenced objects to open that object’s editor.
After making changes on the tab, on the editor tool bar, click .
Rapid SQL opens the Preview:Alter dialog box
.
For more information, see Views Editor
.
Option Description
User Lets you select the object user.
Object Type Lets you select the object type.
Owner Lets you select the object owner.
Privilege Level Lets you select the privilege level.
Grant Opens the Grant Privilege(s) To
dialog box.
Revoke Opens the Revoke Privilege(s) From
dialog box.
Deny MICROSOFT SQL SERVER ONLY: Opens the Deny Privileges
From dialog box.
Relationship Description
Referencing Objects The target view is dependent on these objects.
Referenced Objects These objects are dependent on the target view.

USING > OBJECT EDITORS
EMBARCADERO TECHNOLOGIES > BOOKNAMEVARIABLE 253
Oracle Object Editors
Rapid SQL includes an Object Editor for all supported Oracle objects. To see an Editor for a specific object, click the
corresponding link in the table below.
NOTE: If an objects has dependent objects, such as tables, triggers, procedures and views, you can view
and access their dependent objects in the editor.
Check Constraints Editor for Oracle
The Check Constraints Editor lets you:
• View and modify check constraint definitions.
• View check constraint DDL.
TIP: The r
efresh button lets you refresh or clear the editor’s contents, and log SQL.
The table below describes the tabs available in the Check Constraints Editor:
The following functionality is available on the Check Constraints Editor Command menu:
•
Rename
• Status
Clusters Editor for Oracle
The Clusters Editor lets you:
Check Constraints
Editor
Clusters Editor Database Links Editor Foreign Keys Editor
Functions Editor Indexes Editor Libraries Editor Materialized Views
Editor
Materialized View
Logs Editor
Outlines Editor Package Bodies Editor Packages Editor
Primary Keys
Editor
Procedures Editor Profiles Editor Rollback Segments
Editor
Roles Editor Sequences Editor Snapshots Editor Snapshot Logs Editor
Synonyms Editor Tables Editor
Tablespaces Editor Triggers Editor Type Bodies Editor Types Editor
Unique Keys Editor Users Editor Views Editor
Tab Description
Definition Lets you view and modify the check condition, and manage columns for the
check constraint.
DDL Lets you view the SQL code for every check constraint on the current datasource.
To view DDL for another check constraint, click the lists, click the target owners
and/or tables, and then click the target check constraint.

USING > OBJECT EDITORS
EMBARCADERO TECHNOLOGIES > BOOKNAMEVARIABLE 254
• View and modify clusters.
• View and modify storage parameters.
• View and modify cluster performance.
• View and modify cluster space.
• View table dependencies.
• View cluster DDL.
TIP: The Clusters Editor tool bar refresh button lets you refresh Clusters Editor contents, clear the
Clusters Editors, and log SQL if SQL Logging is turned on.
The following tabs are available in the Clusters Editor:
•
Columns
• Storage
• Performance
• Space
• Tables
• DDL
The following functionality is available on the Clusters Editor Command menu:
•
Analyze
• Allocate Extent
• Truncate
• Deallocate Unused Space
Clusters Editor for Oracle - Columns Tab
The Columns Tab of the Clusters Editor lets you view and manage general properties and hash specifications for
every cluster on the current datasource.
After making changes on the tab, on the editor tool bar, click .
Rapid SQL opens the Preview:Alter dialog box
.
For more information, see Clusters Editor
.
Clusters Editor for Oracle - Storage Tab
The Storage Tab of the Clusters Editor lets you manage storage for every cluster on the current datasource. The table
below describes the options and functionality on the Storage Tab of the Clusters Editor:
Option Description
Data Block Storage Each transaction that updates a data block requires a transaction entry.
Initial - The initial parameter ensures that a minimum number of
concurrent transactions can update a data block, avoiding the overhead
of allocating a transaction entry dynamically.
Maximum - The maximum parameter limits concurrency on a data block.
USING > OBJECT EDITORS
EMBARCADERO TECHNOLOGIES > BOOKNAMEVARIABLE 255
After making changes on the tab, on the editor tool bar, click .
Rapid SQL opens the Preview:Alter dialog box
.
For more information, see Clusters Editor
.
Clusters Editor for Oracle - Performance Tab
The Performance Tab of the Clusters Editor lets you manage performance for every cluster on the current datasource.
The table below describes the options and functionality on the Performance Tab of the Clusters Editor:
After making changes on the tab, on the editor tool bar, click .
Rapid SQL opens the Preview:Alter dialog box
.
For more information, see Clusters Editor
.
Clusters Editor for Oracle - Space Tab
The Space Tab of the Clusters Editor lets you view the usage and the distribution of space for every cluster on the
current datasource. The table below describes the options and functionality on the Space Tab of the Clusters Editor:
Extents The unit of space allocated to an object whenever the object needs more
space.
Initial Extent - The initial space extent (in bytes) allocated to the object.
Next Extent - The next extent (in bytes) that the object will attempt to
allocate when more space for the object is required.
Minimum Extents - The appropriate minimum extents value for the
object.
Maximum Extents - The appropriate maximum extents value for the
object.
Percent Increase - Magnifies how an object grows and, can materially
affect available free space in a tablespace. Select a value in the
corresponding box.
Option Description
Parallel Query Option Lets you process queries using many query server processes running
against multiple CPUs, which provides substantial performance gains
such as reduction of the query completion time.
Cache Keeps the blocks in memory by placing it at the most recently used end.
This option is useful for small lookup tables.
Option Description
Space Utilization Lets you specify the percent of space reserved for future updates.
Free Lists Lets you manage the allocation of data blocks when concurrent
processes are issued against the cluster. Identifying multiple free lists
can reduce contention for free lists when concurrent inserts take place
and potentially improve the performance of the cluster.
Option Description

USING > OBJECT EDITORS
EMBARCADERO TECHNOLOGIES > BOOKNAMEVARIABLE 256
After making changes on the tab, on the editor tool bar, click .
Rapid SQL opens the Preview:Alter dialog box
.
For more information, see Clusters Editor
.
Clusters Editor for Oracle - Tables Tab of the
The LOB Space Tab of the Clusters Editor lets you view the table for every cluster on the current datasource.
After making changes on the tab, on the editor tool bar, click .
Rapid SQL opens the Preview:Alter dialog box.
For more information, see Clusters Editor
.
Clusters Editor for Oracle - DDL Tab
The DDL Tab of the Clusters Editor lets you view the SQL code for every cluster on the current datasource. To view
DDL for another cluster, click the lists, click the target owner, and then click the cluster.
After making changes on the tab, on the editor tool bar, click .
Rapid SQL opens the Preview:Alter dialog box
.
For more information, see Clusters Editor
.
Database Links Editor for Oracle
The Database Links Editor lets you:
• View and modify database link definitions.
• View database link DDL.
The following tabs are available in the Database Links Editor:
•
Definition
• DDL
TIP: The Database Links Editor tool bar refresh button lets you refresh Database Links Editor contents,
clear the Database Links Editors, and log SQL if SQL Logging is turned on.
Extents The unit of space allocated to an object whenever the object needs more
space.
Initial Extent - The initial space extent (in bytes) allocated to the object.
Next Extent - The next extent (in bytes) that the object will attempt to
allocate when more space for the object is required.
Minimum Extents - The appropriate minimum extents value for the
object.
Maximum Extents - The appropriate maximum extents value for the
object.
Percent Increase - Magnifies how an object grows and, can materially
affect available free space in a tablespace. Select a value in the
corresponding box.
Option Description
USING > OBJECT EDITORS
EMBARCADERO TECHNOLOGIES > BOOKNAMEVARIABLE 257
The following functionality is available on the Database Links Editor Command menu:
•
Rename
Database Links Editor for Oracle - Definition Tab
The Definition Tab of the Database Links Editor displays connection string information for every database link on the
current datasource.
After making changes on the tab, on the editor tool bar, click .
Rapid SQL opens the Preview:Alter dialog box
.
For more information, see Database Links Editor
.
Database Links Editor for Oracle - DDL Tab
The DDL Tab of the Database Links Editor lets you view the SQL code for every database link on the current
datasource. To view DDL for another database link, click the lists, click the target owner, and then click the target
database link.
After making changes on the tab, on the editor tool bar, click .
Rapid SQL opens the Preview:Alter dialog box
.
For more information, see Database Links Editor
.
Foreign Keys Editor for Oracle
The Foreign Keys Editor lets you:
• Manage foreign key columns.
• View foreign key DDL.
TIP: The r
efresh button lets you refresh or clear the editor’s contents, and log SQL.
The following tabs are available in the Foreign Keys Editor:
• Columns
• DDL
TIP: The Foreign Keys Editor Command menu offers the Rename functionality.
Icon Label Description
Black check mark User The privilege(s) was granted explicitly by a user.
Blue check mark Group The privilege(s) was inherited from a group.
Green check mark Role The privilege(s) was inherited from a role.
White check mark Revoked The privilege(s) was inherited from another
source, but has been revoked by a user. In
DBArtisan, a user cannot revoke a privilege that
has been granted by a role.
USING > OBJECT EDITORS
EMBARCADERO TECHNOLOGIES > BOOKNAMEVARIABLE 258
Foreign Keys Editor - Columns Tab
The Columns Tab of the Foreign Keys Editor lets you:
• View and modify the column mapping foreign keys.
• Enable/Disable foreign keys.
The table below describes the options and functionality on the Columns Tab of the Foreign Keys Editor:
After making changes on the tab, on the editor tool bar, click .
Rapid SQL opens the Preview:Alter dialog box
.
For more information, see Foreign Keys Editor
.
Foreign Keys Editor for Oracle - DDL Tab
The DDL Tab of the Foreign Keys Editor lets you view the SQL code for every foreign key on the current datasource.
To view DDL for another foreign key, click the lists, click the target owners and/or tables, and then click the target
foreign key.
After making changes on the tab, on the editor tool bar, click .
Rapid SQL opens the Preview:Alter dialog box
.
For more information, see Foreign Keys Editor
.
Functions Editor for Oracle
The Functions Editor lets you:
• View and modify function definition.
• View and modify function information.
• View and manage function dependencies.
• View and manage function privileges.
TIP: The Functions Editor tool bar refresh button lets you refresh Functions Editor contents, clear the
Functions Editors, and log SQL if SQL Logging is turned on.
Option Description
Referenced Table To view column information for another foreign key, click the lists,
click the target database, owner, table, and/or primary/unique key,
and then click the target foreign key.
Constraint Status Enabled - Select to make the foreign key cascade the deletion of
any primary key values in the parent table to corresponding foreign
key values in child tables.
Delete Cascade - Select if you do not want the foreign key to
cascade the deletion of any primary key values in the parent table
to corresponding foreign key values in child tables.
Columns Mapping Displays the map between the foreign key columns and the child
and parent tables.

USING > OBJECT EDITORS
EMBARCADERO TECHNOLOGIES > BOOKNAMEVARIABLE 259
The following tabs are available in the Functions Editor:
•
Definition
• Information
• Dependencies
• Privileges
The following functionality is available on the Functions Editor Command menu:
•
Create Synonym
Functions Editor for Oracle - Definition Tab
The Definition Tab of the Functions Editor lets you view the SQL code for every function on the current datasource. To
view DDL for another function, click the lists, click the target owner, and then click the target function.
After making changes on the tab, on the editor tool bar, click .
Rapid SQL opens the Preview:Alter dialog box.
For more information, see Functions Editor
.
Functions Editor for Oracle - Information Tab
The Information Tab of the Functions Editor displays the status and size information for every function on the current
datasource.
After making changes on the tab, on the editor tool bar, click .
Rapid SQL opens the Preview:Alter dialog box.
For more information, see Functions Editor
.
Functions Editor for Oracle - Dependencies Tab
The Dependencies Tab of the Functions Editor lets you manage database objects dependent on each function on the
current datasource. Rapid SQL arranges the objects in a tree structure. The objects are organized in folders based on
the dependency relationship. These folders contain all of the associated objects. The table below describes the
dependency relationship types:
TIP: Click one of the referenced objects to open that object’s editor.
After making changes on the tab, on the editor tool bar, click .
Rapid SQL opens the Preview:Alter dialog box
.
For more information, see Functions Editor
.
Relationship Description
Referencing Objects The target function is dependent on these objects.
Referenced Objects These objects are dependent on the target function.
USING > OBJECT EDITORS
EMBARCADERO TECHNOLOGIES > BOOKNAMEVARIABLE 260
Functions Editor for Oracle - Privileges Tab
The Privileges Tab of the Functions Editor lets you manage permissions for every function on the current datasource.
This tab displays if a privilege was inherited from a role or group, or if it was granted explicitly by a user. Rapid SQL
also shows if the privilege is grantable (granted with the GRANT OPTION.)
There is a table on every Privileges Tab. Rapid SQL populates each row of the table with every user, group, and role
in the database. The legend, on every Privileges Tab, explains the marks in the table.
The table below describes the icons in the legend:
After making changes on the tab, on the editor tool bar, click .
Rapid SQL opens the Preview:Alter dialog box
.
For more information, see:
Granting Permissions
Revoking Permissions
Functions Editor
Indexes Editor for Oracle
The Indexes Editor lets you:
• Manage index columns.
• View and modify index properties.
• Manage index storage.
• Manage index statistics.
• Manage index partitions.
• View index DDL.
TIP: The r
efresh button lets you refresh or clear the editor’s contents, and log SQL.
The following tabs are available in the Indexes Editor:
•
Columns
• Properties
Icon Label Description
Black check mark User The privilege(s) was granted explicitly by a user.
Blue check mark Group The privilege(s) was inherited from a group.
Green check mark Role The privilege(s) was inherited from a role.
White check mark Revoked The privilege(s) was inherited from another
source, but has been revoked by a user. In
Rapid SQL, a user cannot revoke a privilege that
has been granted by a role.
Two black check marks With Grant The privilege(s) was granted with the
GRANTABLE option.
USING > OBJECT EDITORS
EMBARCADERO TECHNOLOGIES > BOOKNAMEVARIABLE 261
• Storage
• Space
• Partitions
• DDL
The following functionality is available on the Indexes Editor Command menu:
•
Analyze
• Allocate Extent
• Deallocate Unused Space
• Rebuild
• Rename
• Convert to Partitioned
• Estimate Size
Indexes Editor for Oracle - Columns Tab
The Columns Tab of the Indexes Editor lets you manage columns for every index on the current datasource. Rapid
SQL sorts all column information into two boxes. The box on the left lists all columns in the selected table. The box on
the right lists target table columns in the index. The table below describes the options and functionality on the
Columns Tab of the Indexes Editor:
After making changes on the tab, on the editor tool bar, click .
Rapid SQL opens the Preview:Alter dialog box
.
For more information, see Indexes Editor
.
Indexes Editor for Oracle - Properties Tab
The Properties Tab of the Indexes Editor lets you set properties.
TIP: The Parallel server query option lets you process queries, using many query server processes,
running against multiple CPU's. This option provides substantial performance gains such as
reduction of the query completion time.
Column Name Description
Column Name of the column in the target index.
Datatype Datatype for the column in the target index. If applicable, Rapid SQL
displays the precision in parentheses.
Nulls The table definition permits nulls in the target table column. Null has no
explicitly assigned value. Null is not equivalent to zero or blank. A value of
null is not considered to be greater than, less than, or equivalent to any
other value, including another value of null.
Index columns The name of the column included in the index.
Asc. Sort Displays if the index definition sorts the index in ascending order.
USING > OBJECT EDITORS
EMBARCADERO TECHNOLOGIES > BOOKNAMEVARIABLE 262
After making changes on the tab, on the editor tool bar, click .
Rapid SQL opens the Preview:Alter dialog box
.
For more information, see Indexes Editor
.
Indexes Editor for Oracle - Storage Tab
The Storage Tab of the Indexes Editor lets you manage storage for every index on the current datasource. The table
below describes the options and functionality on the Storage Tab of the Indexes Editor:
After making changes on the tab, on the editor tool bar, click .
Rapid SQL opens the Preview:Alter dialog box
.
For more information, see Indexes Editor
.
Indexes Editor for Oracle - Space Tab
The Space Tab of the Indexes Editor lets you manage space allocations for every index on the current datasource.
The table below describes the options and functionality on the Space Tab of the Indexes Editor:
Option Description
Data Block Storage Each transaction that updates an index block requires a transaction
entry.
Initial - Ensures that a minimum number of concurrent transactions can
update an index block, avoiding the overhead of allocating a transaction
entry dynamically.
Maximum - The maximum parameter limits concurrency on an index
block.
Extents The unit of space allocated to an object whenever the object needs more
space.
Initial Extent - The initial space extent (in bytes) allocated to the object.
Next Extent - The next extent (in bytes) that the object will attempt to
allocate when more space for the object is required.
Minimum Extents - The appropriate minimum extents value for the
object.
Maximum Extents - The appropriate maximum extents value for the
object.
Percent Increase - Magnifies how an object grows and, can materially
affect available free space in a tablespace. Select a value in the
corresponding box.
Free Lists Lets you select or type the value. The default and minimum value is 1.
You should increase this number if multiple processes access the same
data block.
Option Description
Space Utilization Lets you specify the percent of space reserved for future updates.
Statistics Lets you select parameters.
USING > OBJECT EDITORS
EMBARCADERO TECHNOLOGIES > BOOKNAMEVARIABLE 263
After making changes on the tab, on the editor tool bar, click .
Rapid SQL opens the Preview:Alter dialog box
.
For more information, see Indexes Editor
.
Indexes Editor for Oracle - Partitions Tab
The Partitions Tab of the Indexes Editor lets you partition tables on the current datasource.
The table below describes the options and functionality on the Partitions Tab of the Indexes Editor:
NOTE: Options vary for partitioned and non-partitioned tables.
After making changes on the tab, on the editor tool bar, click .
Rapid SQL opens the Preview:Alter dialog box.
Extents The unit of space allocated to an object whenever the object needs more
space.
Initial Extent - The initial space extent (in bytes) allocated to the object.
Next Extent - The next extent (in bytes) that the object will attempt to
allocate when more space for the object is required.
Minimum Extents - The appropriate minimum extents value for the
object.
Maximum Extents - The appropriate maximum extents value for the
object.
Percent Increase - Magnifies how an object grows and, can materially
affect available free space in a tablespace. Select a value in the
corresponding box.
Option Description
Locality Displays the locality, whether the partitioned index is local or
global.
Alignment Displays whether this partitioned index is prefixed or non-prefixed.
Partitioning Method Displays the partitioning method, including Range-Hash Composite
or Range-List Composite.
Hash partitions partition the table according to a hash function.
Composite partitions use both range and hash types, first
partitioning the data by a range of values, and then further dividing
the partitions into subpartitions by way of a hash function.
List partitioning lets you control how rows map to partitions. You
can specify a list of discrete values for the partitioning column in
the description for each partition.
Partitioning Columns Displays partitioning columns.
Subpartitioning Columns Displays subpartitioning columns.
Partitions Click Edit to open the Partition
dialog box.
Click Drop to drop a partition.
Option Description
USING > OBJECT EDITORS
EMBARCADERO TECHNOLOGIES > BOOKNAMEVARIABLE 264
For more information, see Indexes Editor.
Coalesce Partition for Oracle
The Coalesce Partitions dialog box lets you coalesce an index or table partition. Coalescing an index partition lets you
decrease fragmentation.
NOTE: You can only coalesce a hash table partition. Coalescing is not available for range, range-list, or
composite partitions.
The table below describes the options and functionality on the Coalesce Partition dialog box:
After making changes on the tab, on the editor tool bar, click .
Rapid SQL opens the Preview:Alter dialog box
.
For more information, see Completing a Dialog Box
.
Mark Index Partition Unusable for Oracle
The Mark Index Partition Unusable dialog box lets you mark index partitions as unusable.
Important Notes
If you are preparing to drop or rebuild an index, mark local indexes as unusable. If you want to make unusable indexes
valid or to recover space and improve performance, rebuild the unusable indexes.
The table below describes the options and functionality on the Mark Index Unusable dialog box:
For more information, see Completing a Dialog Box
.
Rebuild Unusable Index Partition/Mark Local Indexes Unusable for Oracle
This dialog box lets you rebuild your indexes and subpartitions for composite-partitioned tables without having to drop
and recreate them, or specify the indexes for partitions to mark unusable. The table below describes the options and
functionality on the dialog box:
For more information, see Completing a Dialog Box
.
Option Description
Name Lists the indexes selected for coalescing.
Option Description
Partition Box Select the partitions that have the indexes that you want to mark
unusable.
Option Description
Local indexes for partitions to
be rebuilt
Lets you specify the indexes to rebuild the partitions
Local indexes for partitions to
be marked unusable
Lets you specify the indexes for partitions to mark unusable
USING > OBJECT EDITORS
EMBARCADERO TECHNOLOGIES > BOOKNAMEVARIABLE 265
Split Partition for Oracle
The Split Partition dialog box lets you divide a single partition into two partitions. You can split partitions if a single
partition is causing maintenance problems because it is too large.
Important Notes
• You cannot split a local index partition defined on a hash or composite table.
• Make sure that you specify an upper bound for the column that is lower than the upper bound for that column in
the original partition. The note at the bottom of the First New Partition Upper Bound dialog box
shows the upper
bound for the original partition in parentheses.
The table below describes the options and functionality on the Split Partition dialog box:
For more information, see Completing a Dialog Box
.
Indexes Editor for Oracle - DDL Tab
The DDL Tab of the Indexes Editor lets you view the SQL code for every index on the current datasource. To view the
DDL for another index, click the lists, click the target owners and/or tables, and then click the target owner and/or
index.
After making changes on the tab, on the editor tool bar, click .
Rapid SQL opens the Preview:Alter dialog box
.
For more information, see Indexes Editor
.
Job Queue Editor for Oracle
The Job Queue lets you:
• Alter the job's definition (code).
• Change the job's schedule and status.
• View display the DDL/command used to create the job.
TIP: The Object Editor tool bar refresh button lets you refresh Object Editor contents, clear the Object
Editors, and log SQL if SQL Logging is turned on.
The following tabs are available in the Libraries Editor:
Option Description
Specify the noninclusive
upper bound for the first new
partition
Lets you specify the non-inclusive upper bound for the partitioning
columns. Not available for the local index.
Define the attributes for the
two new partitions
Lets you add, edit, or drop the partition. The Add and Edit buttons
open the Add/Modify Partition dialog box
.
Parallelize the split operation
group box
Degree - Click the number of query server processes that should
be used in the operation.
Instances - Click the number indicating how you want the parallel
query split among servers.
USING > OBJECT EDITORS
EMBARCADERO TECHNOLOGIES > BOOKNAMEVARIABLE 266
Job Queue Editor for Oracle - Definition Tab
The Definition Tab of the Job Queue Editor lets you alter the job's definition (code).
After making changes on the tab, on the editor tool bar, click .
Rapid SQL opens the Preview:Alter dialog box.
For more information, see Job Queue Editor
.
Job Queue Editor for Oracle - Properties Tab
The Properties Tab of the Job Queue Editor lets you change the job's schedule and status.
After making changes on the tab, on the editor tool bar, click .
Rapid SQL opens the Preview:Alter dialog box.
For more information, see Job Queue Editor
.
Job Queue Editor for Oracle - DDL Tab
The DDL Tab of the Job Queue Editor displays the DDL/command used to create the job.
After making changes on the tab, on the editor tool bar, click .
Rapid SQL opens the Preview:Alter dialog box.
For more information, see Job Queue Editor
.
Libraries Editor for Oracle
The Libraries Editor lets you:
• View and modify library definition.
• Manage library dependencies.
• Manage library privileges.
• View library DDL.
TIP: The Object Editor tool bar refresh button lets you refresh Object Editor contents, clear the Object
Editors, and log SQL if SQL Logging is turned on.
The following tabs are available in the Libraries Editor:
•
Definition
• Dependencies
• Privileges
• DDL
The following functionality is available on the Libraries Editor Command menu:
•
Rename

USING > OBJECT EDITORS
EMBARCADERO TECHNOLOGIES > BOOKNAMEVARIABLE 267
Libraries Editor for Oracle - Definition Tab
The Definition Tab of the Libraries Editor displays information for every library on the current datasource.
After making changes on the tab, on the editor tool bar, click .
Rapid SQL opens the Preview:Alter dialog box.
For more information, see Libraries Editor
.
Libraries Editor for Oracle - Dependencies Tab
The Dependencies Tab of the Libraries Editor lets you manage database objects dependent on each library on the
current datasource. Rapid SQL arranges the objects in a tree structure. The objects are organized in folders based on
the dependency relationship. These folders contain all of the associated objects. The table below describes the
dependency relationship types:
TIP: Click one of the referenced objects to open that object’s editor.
After making changes on the tab, on the editor tool bar, click .
Rapid SQL opens the Preview:Alter dialog box
.
For more information, see Libraries Editor
.
Libraries Editor for Oracle - Privileges Tab
The Privileges Tab of the Libraries Editor lets you manage permissions for every library on the current datasource.
This tab displays if a privilege was inherited from a role or group, or if it was granted explicitly by a user. Rapid SQL
also shows if the privilege is grantable (granted with the GRANT OPTION.)
There is a table on every Privileges Tab. Rapid SQL populates each row of the table with every user, group, and role
in the database. The legend, on every Privileges Tab, explains the marks in the table.
The table below describes the icons in the legend:
After making changes on the tab, on the editor tool bar, click .
Rapid SQL opens the Preview:Alter dialog box
.
Relationship Description
Referencing Objects The target library is dependent on these objects.
Referenced Objects These objects are dependent on the target library.
Icon Label Description
Black check mark User The privilege(s) was granted explicitly by a user.
Blue check mark Group The privilege(s) was inherited from a group.
Green check mark Role The privilege(s) was inherited from a role.
White check mark Revoked The privilege(s) was inherited from another
source, but has been revoked by a user. In
Rapid SQL, a user cannot revoke a privilege that
has been granted by a role.
Two black check marks With Grant The privilege(s) was granted with the
GRANTABLE option.
USING > OBJECT EDITORS
EMBARCADERO TECHNOLOGIES > BOOKNAMEVARIABLE 268
For more information, see:
Granting Permissions
Revoking Permissions
Libraries Editor
Libraries Editor for Oracle - DDL Tab
The DDL Tab of the Libraries Editor lets you view the SQL code for every library on the current datasource. To view
DDL for another table, click the lists, click the target owner, and then click the target table.
After making changes on the tab, on the editor tool bar, click .
Rapid SQL opens the Preview:Alter dialog box.
For more information, see Libraries Editor
.
Materialized Views Editor for Oracle
The Materialized Views Editor lets you:
• View and modify materialized view information.
• Modify materialized view partitions.
TIP: The Object Editor tool bar refresh button lets you refresh Object Editor contents, clear the Object
Editors, and log SQL if SQL Logging is turned on.
The following tabs are available in the Materialized Views Editor:
• Information
• Partitions
• Dependencies
• Privileges
• DDL
Materialized Views Editor for Oracle - Information Tab
The Information Tab of the Materialized Views Editor displays the status and size information for every materialized
view on the current datasource.
After making changes on the tab, on the editor tool bar, click .
Rapid SQL opens the Preview:Alter dialog box
.
For more information, see Materialized Views Editor
.
Materialized Views Editor for Oracle - Partitions Tab
The Partitions Tab of the Materialized Views Editor lets you partition tables on the current datasource. The table below
describes the options and functionality on the Partitions Tab of the Materialized Views Editor:
NOTE: Options vary for partitioned and non-partitioned tables.
USING > OBJECT EDITORS
EMBARCADERO TECHNOLOGIES > BOOKNAMEVARIABLE 269
The following functionality is available on the Command menu:
•
Allocate Extent
• Deallocate Unused Space
• Mark Local Indexes Unusable
• Rebuild Unusable Local Indexes
• Split Partition
After making changes on the tab, on the editor tool bar, click .
Rapid SQL opens the Preview:Alter dialog box
.
For more information, see Materialized Views Editor
.
Materialized Views Editor for Oracle - Dependencies Tab
The Information Tab of the Materialized Views Editor displays the dependencies for every materialized view on the
current datasource.
After making changes on the tab, on the editor tool bar, click .
Rapid SQL opens the Preview:Alter dialog box
.
For more information, see Materialized Views Editor
.
Option Description
Partitioning Method Displays the partitioning method, including Range-Hash
Composite or Range-List Composite.
Hash partitions partition the table according to a hash
function. Composite partitions use both range and hash
types, first partitioning the data by a range of values, and then
further dividing the partitions into subpartitions by way of a
hash function.
List partitioning lets you control how rows map to partitions.
You can specify a list of discrete values for the partitioning
column in the description for each partition.
Row Movement If its key is updated, migrates the row to a new partition.
Partitioning Columns Displays partitioning columns.
Subpartitioning Columns Displays subpartitioning columns.
Partitions Click Add or Edit to open the Partition
dialog box.
Click Drop to drop a partition.
Subpartition Template If the partitioning type is Range-Hash Composite, displays a
list of subpartitions in the subpartition template.
Click Add, Insert, or Edit to open the Subpartition
dialog box.
Click Drop to drop a subpartition.
USING > OBJECT EDITORS
EMBARCADERO TECHNOLOGIES > BOOKNAMEVARIABLE 270
Materialized Views Editor for Oracle - Privileges Tab
The Information Tab of the Materialized Views Editor displays the privileges for every materialized view on the current
datasource.
For more information, see:
Granting Permissions
Revoking Permissions
Materialized Views Editor
Materialized Views Editor for Oracle - DDL Tab
The Information Tab of the Materialized Views Editor displays DDL for every materialized view on the current
datasource.
After making changes on the tab, on the editor tool bar, click .
Rapid SQL opens the Preview:Alter dialog box
.
For more information, see Materialized Views Editor
.
Materialized Views Editor for Oracle - Storage Tab
The Storage Tab of the Materialized Views Editor lets you manage storage for every Materialized View on the current
datasource. The table below describes the options and functionality on the Storage Tab of the Materialized Views
Editor:
After making changes on the tab, on the editor tool bar, click .
Rapid SQL opens the Preview:Alter dialog box
.
For more information, see Materialized Views Editor
.
Option Description
Data Block Storage Each transaction that updates a data block requires a transaction entry.
Initial Extent - Ensures that a minimum number of concurrent
transactions can update a data block, avoiding the overhead of
allocating a transaction entry dynamically.
Maximum - Limits concurrency on a data block.
Extents The unit of space allocated to an object whenever the object needs more
space.
Initial Extent - The initial space extent (in bytes) allocated to the object.
Next Extent - The next extent (in bytes) that the object will attempt to
allocate when more space for the object is required.
Minimum Extents - The appropriate minimum extents value for the
object.
Maximum Extents - The appropriate maximum extents value for the
object.
Percent Increase - Magnifies how an object grows and, can materially
affect available free space in a tablespace. Select a value in the
corresponding box.
USING > OBJECT EDITORS
EMBARCADERO TECHNOLOGIES > BOOKNAMEVARIABLE 271
Materialized Views Editor for Oracle - Query Tab
The Query Tab of the Materialized Views Editor displays SQL for every materialized view on the current datasource.
After making changes on the tab, on the editor tool bar, click .
Rapid SQL opens the Preview:Alter dialog box.
For more information, see Materialized Views Editor
.
Materialized View Logs Editor for Oracle
The Materialized View Logs Editor lets you:
• View materialized view log information.
• Manage materialized view log storage.
• Manage materialized view log performance.
• Manage materialized view log dependencies.
• View materialized view log DDL.
TIP: The Object Editor tool bar refresh button lets you refresh Object Editor contents, clear the Object
Editors, and log SQL if SQL Logging is turned on.
The following tabs are available in the Materialized View Logs Editor:
•
Information
• Storage
• Performance
• Dependencies
• DDL
Materialized View Logs Editor for Oracle - Information Tab
The Information Tab of the Materialized View Logs Editor displays logfile information for every materialized view log on
the current datasource.
After making changes on the tab, on the editor tool bar, click .
Rapid SQL opens the Preview:Alter dialog box
.
For more information, see Materialized View Logs Editor
.
USING > OBJECT EDITORS
EMBARCADERO TECHNOLOGIES > BOOKNAMEVARIABLE 272
Materialized View Logs Editor for Oracle - Storage Tab
The Storage Tab of the Materialized View Logs Editor lets you manage storage for every materialized view log on the
current datasource. The table below describes the options and functionality on the Storage Tab of the Materialized
View Logs Editor:
After making changes on the tab, on the editor tool bar, click .
Rapid SQL opens the Preview:Alter dialog box
.
For more information, see Materialized View Logs Editor
.
Materialized View Logs Editor for Oracle - Performance Tab
The Performance Tab of the Materialized View Logs Editor lets you manage performance for every materialized view
log on the current datasource. The table below describes the options and functionality on the Performance Tab of the
Materialized View Logs Editor:
Option Description
Data Block Storage Each transaction that updates a data block requires a transaction entry.
Initial Extent - Ensures that a minimum number of concurrent
transactions can update a data block, avoiding the overhead of
allocating a transaction entry dynamically.
Maximum - Limits concurrency on a data block.
Extents The unit of space allocated to an object whenever the object needs more
space.
Initial Extent - The initial space extent (in bytes) allocated to the object.
Next Extent - The next extent (in bytes) that the object will attempt to
allocate when more space for the object is required.
Minimum Extents - The appropriate minimum extents value for the
object.
Maximum Extents - The appropriate maximum extents value for the
object.
Percent Increase - Magnifies how an object grows and, can materially
affect available free space in a tablespace. Select a value in the
corresponding box.
Column Filtering Lets you select the filter columns to be recorded in the materialized view
log. You can specify only one primary key, one ROWID and one filter
column list per materialized view log.
The ROWID is a globally unique identifier for a row in a database. It is
created at the time the row is inserted into a table, and destroyed when it
is removed from a table.
Option Description
Parallel Query Option The Parallel server query option lets you process queries using many
query server processes running against multiple CPUs. This option
provides substantial performance gains such as reduction of the query
completion time.
Degree - Lets you type a value indicating the number of query server
processes that should be used in the operation.
Instances - Lets you type a value indicating how you want the parallel
query partitioned between the Parallel Servers.
Logging Select to create a log for all Materialized View updates.
USING > OBJECT EDITORS
EMBARCADERO TECHNOLOGIES > BOOKNAMEVARIABLE 273
After making changes on the tab, on the editor tool bar, click .
Rapid SQL opens the Preview:Alter dialog box
.
For more information, see Materialized View Logs Editor
.
Materialized View Logs Editor for Oracle - Dependencies Tab
The Dependencies Tab of the Materialized View Logs Editor lets you manage database objects dependent on each
materialized view log on the current datasource. Rapid SQL arranges the objects in a tree structure. The objects are
organized in folders based on the dependency relationship. These folders contain all of the associated objects. The
table below describes the options and functionality on the Dependencies Tab of the Materialized View Logs Editor:
TIP: Click one of the referenced objects to open that object’s editor.
After making changes on the tab, on the editor tool bar, click .
Rapid SQL opens the Preview:Alter dialog box
.
For more information, see Materialized View Logs Editor
.
Materialized View Logs Editor for Oracle - DDL Tab
The DDL Tab of the Materialized View Logs Editor lets you view the SQL code for every materialized view log on the
current datasource. To view DDL for another materialized view log, click the lists, click the target owner, and then click
the target materialized view log.
After making changes on the tab, on the editor tool bar, click .
Rapid SQL opens the Preview:Alter dialog box
.
For more information, see Materialized View Logs Editor
.
Outlines Editor for Oracle
The Outlines Editor lets you:
• View and modify outline definition.
• View outline information.
• View outline DDL.
Cache Select if you want Oracle to put data you access frequently at the most
recently used end of the list in the buffer cache when a full table scan is
performed. This option is useful for small lookup tables.
Relationship Description
Referencing Objects The target view is dependent on these objects.
Referenced Objects These objects are dependent on the target view.
Option Description
USING > OBJECT EDITORS
EMBARCADERO TECHNOLOGIES > BOOKNAMEVARIABLE 274
If an objects has dependent objects, such as tables, triggers, procedures and views, you can view and access their
dependent objects in the editor.
TIP: The Object Editor tool bar refresh button lets you refresh Object Editor contents, clear the Object
Editors, and log SQL if SQL Logging is turned on.
NOTE: The only SQL statements possible with stored outlines are SELECT, DELETE, UPDATE,
INSERT…SELECT, and CREATE TABLE…AS SELECT.
After making changes on the tab, on the editor tool bar, click .
Rapid SQL opens the Preview:Alter dialog box
.
Package Bodies Editor for Oracle
The Package Bodies Editor lets you:
• View package body DDL.
TIP: The Object Editor tool bar refresh button lets you refresh Object Editor contents, clear the Object
Editors, and log SQL if SQL Logging is turned on.
The following tab is available in the Package Bodies Editor:
•
DDL
Package Bodies Editor for Oracle - DDL Tab
The DDL Tab of the Package Bodies Editor lets you view the SQL code for every package bodies on the current
datasource. To view DDL for another package body, click the lists, click the target owner, and then click the target
package body.
After making changes on the tab, on the editor tool bar, click .
Rapid SQL opens the Preview:Alter dialog box
.
For more information, see Package Bodies Editor
.
Packages Editor for Oracle
The Packages Editor lets you:
• View and modify header specifications.
• View and modify body specifications.
• View and modify package size.
• View and modify package dependencies.
• View and manage package privileges.
TIP: The Object Editor tool bar refresh button lets you refresh Object Editor contents, clear the Object
Editors, and log SQL if SQL Logging is turned on.
The following tabs are available in the Packages Editor:
•
Header
USING > OBJECT EDITORS
EMBARCADERO TECHNOLOGIES > BOOKNAMEVARIABLE 275
• Body
• Information
• Dependencies
• Privileges
Packages Editor for Oracle - Header Tab
The Header Tab of the Packages Editor lets you modify the package header specifications.
After making changes on the tab, on the editor tool bar, click .
Rapid SQL opens the Preview:Alter dialog box.
For more information, see Packages Editor
.
Packages Editor for Oracle - Body Tab
The Body Tab of the Packages Editor lets you modify the package body specifications.
After making changes on the tab, on the editor tool bar, click .
Rapid SQL opens the Preview:Alter dialog box
.
For more information, see Packages Editor
.
Packages Editor for Oracle - Information Tab
The Information Tab of the Packages Editor displays the status and size information for every package on the current
datasource.
After making changes on the tab, on the editor tool bar, click .
Rapid SQL opens the Preview:Alter dialog box
.
For more information, see Packages Editor
.
Packages Editor for Oracle - Dependencies Tab
The Dependencies Tab of the Packages Editor lets you manage database objects dependent on each package on the
current datasource. Rapid SQL arranges the objects in a tree structure. The objects are organized in folders based on
the dependency relationship. These folders contain all of the associated objects. The table below describes the
dependency relationship types:
TIP: Click one of the referenced objects to open that object’s editor.
After making changes on the tab, on the editor tool bar, click .
Rapid SQL opens the Preview:Alter dialog box
.
For more information, see Packages Editor
.
Relationship Description
Referencing Objects The target package is dependent on these objects.
Referenced Objects These objects are dependent on the target package.

USING > OBJECT EDITORS
EMBARCADERO TECHNOLOGIES > BOOKNAMEVARIABLE 276
Packages Editor for Oracle - Privileges Tab
The Privileges Tab of the Packages Editor lets you manage permissions for every package on the current datasource.
This tab displays if a privilege was inherited from a role or group, or if it was granted explicitly by a user. Rapid SQL
also shows if the privilege is grantable (granted with the GRANT OPTION.)
There is a table on every Privileges Tab. Rapid SQL populates each row of the table with every user, group, and role
in the database. The legend, on every Privileges Tab, explains the marks in the table.
The table below describes the icons in the legend:
After making changes on the tab, on the editor tool bar, click .
Rapid SQL opens the Preview:Alter dialog box
.
For more information, see:
Granting Permissions
Revoking Permissions
Packages Editor
Primary Keys Editor for Oracle
The Primary Keys Editor lets you:
• Manage primary key columns.
• Manage primary key properties.
• Manage primary key storage.
• Manage primary key partitions.
• View primary key DDL.
TIP: The refresh button lets you refresh or clear the editor’s contents, and log SQL.
The following tabs are available in the Primary Keys Editor:
•
Columns
• Properties
• Storage
Icon Label Description
Black check mark User The privilege(s) was granted explicitly by a user.
Blue check mark Group The privilege(s) was inherited from a group.
Green check mark Role The privilege(s) was inherited from a role.
White check mark Revoked The privilege(s) was inherited from another
source, but has been revoked by a user. In
Rapid SQL, a user cannot revoke a privilege that
has been granted by a role.
Two black check marks With Grant The privilege(s) was granted with the
GRANTABLE option.

USING > OBJECT EDITORS
EMBARCADERO TECHNOLOGIES > BOOKNAMEVARIABLE 277
• Space
• Partitions
• DDL
TIP: The Primary Keys Editor Command menu offers the Rename functionality.
Primary Keys Editor for Oracle - Columns Tab
The Columns Tab of the Primary Keys Editor lets you manage columns for every primary key on the current
datasource. Rapid SQL sorts all column information into two boxes. The box on the left lists all columns in the selected
table. The box on the right lists target table columns in the primary key. The table below describes the options and
functionality on the Columns Tab of the Primary Keys Editor:
After making changes on the tab, on the editor tool bar, click .
Rapid SQL opens the Preview:Alter dialog box
.
For more information, see Primary Keys Editor
.
Primary Keys Editor for Oracle - Properties Tab
The Properties Tab of the Primary Keys Editor lets you set properties. The table below describes the options and
functionality on the Properties Tab of the Primary Keys Editor:
After making changes on the tab, on the editor tool bar, click .
Rapid SQL opens the Preview:Alter dialog box
.
For more information, see Primary Keys Editor
.
Column Name Description
Column The name of the column in the target primary key.
Datatype The datatype for the column in the target primary key. If applicable, Rapid
SQL displays the precision in parentheses.
Nulls The table definition permits nulls in the target table column. Null has no
explicitly assigned value. Null is not equivalent to zero or blank. A value of
null is not considered to be greater than, less than, or equivalent to any
other value, including another value of null.
Index columns The name of the column included in the primary key.
Option Description
Index Constraints Properties Lets you select properties.
Index Constraint Status Enable - Enables the constraint immediately after building it.
Disable - Disables the constraint immediately after building it.
USING > OBJECT EDITORS
EMBARCADERO TECHNOLOGIES > BOOKNAMEVARIABLE 278
Primary Keys Editor for Oracle - Storage Tab
The Storage Tab of the Primary Keys Editor lets you manage storage for every primary key on the current datasource.
The table below describes the options and functionality on the Storage Tab of the Primary Keys Editor:
After making changes on the tab, on the editor tool bar, click .
Rapid SQL opens the Preview:Alter dialog box
.
For more information, see Primary Keys Editor
.
Primary Keys Editor for Oracle - Space Tab
The Space Tab of the Primary Keys Editor lets you manage space allocations for every primary key on the current
datasource. The table below describes the options and functionality on the Space Tab of the Primary Keys Editor:
Option Description
Data Block Storage Tablespace - Lets you select the tablespace for the primary key.
NOTE: You should never place primary keys on the SYSTEM
tablespace.
Percent Free - Lets you type the appropriate percent free value for the
primary key.
Initial Transactions - Lets you type the appropriate initial transactions
value for the primary key.
Max Transactions - Lets you type the appropriate maximum transactions
value for the primary key.
Extents The unit of space allocated to an object whenever the object needs more
space.
Initial Extent - The initial space extent (in bytes) allocated to the object.
Next Extent - The next extent (in bytes) that the object will attempt to
allocate when more space for the object is required.
Minimum Extents - The appropriate minimum extents value for the
object.
Maximum Extents - The appropriate maximum extents value for the
object.
Percent Increase - Magnifies how an object grows and, can materially
affect available free space in a tablespace. Select a value in the
corresponding box.
Freelists Free list groups separate the data structures associated with the free
space management of a table into disjoint sets that are available for
individual instances. With free list groups, the performance issues
among processes working on different instances is reduced because
data blocks with sufficient free space for inserts are managed separately
for each instance.
Option Description
Space Utilization Lets you specify the percent of space reserved for future updates.
Statistics Lets you select parameters.
USING > OBJECT EDITORS
EMBARCADERO TECHNOLOGIES > BOOKNAMEVARIABLE 279
After making changes on the tab, on the editor tool bar, click .
Rapid SQL opens the Preview:Alter dialog box
.
For more information, see Primary Keys Editor
.
Primary Keys Editor for Oracle - Partitions Tab
The Partitions Tab of the Primary Keys Editor lets you partition primary keys on the current datasource. The table
below describes the options and functionality on the Partitions Tab of the Primary Keys Editor:
After making changes on the tab, on the editor tool bar, click .
Rapid SQL opens the Preview:Alter dialog box
.
For more information, see Primary Keys Editor
.
Primary Keys Editor for Oracle - DDL Tab
The DDL Tab of the Primary Keys Editor lets you view the SQL code for every primary key on the current datasource.
To view DDL for another primary key, click the lists, click the target owner and/or table, and then click the target
primary key.
After making changes on the tab, on the editor tool bar, click .
Rapid SQL opens the Preview:Alter dialog box
.
For more information, see Primary Keys Editor
.
Procedures Editor for Oracle
The Procedures Editor lets you:
• View and modify procedure definitions.
• Manage procedure dependencies.
Extents The unit of space allocated to an object whenever the object needs more
space.
Initial Extent - The initial space extent (in bytes) allocated to the object.
Next Extent - The next extent (in bytes) that the object will attempt to
allocate when more space for the object is required.
Minimum Extents - The appropriate minimum extents value for the
object.
Maximum Extents - The appropriate maximum extents value for the
object.
Percent Increase - Magnifies how an object grows and, can materially
affect available free space in a tablespace. Select a value in the
corresponding box.
Option Description
Partition Button Click to open the Convert to Partitioned Index Wizard.
Option Description
USING > OBJECT EDITORS
EMBARCADERO TECHNOLOGIES > BOOKNAMEVARIABLE 280
• Manage procedure privileges.
TIP: The r
efresh button lets you refresh or clear the editor’s contents, and log SQL.
The following tabs are available in the Procedures Editor:
• Definition
• Information
•
Dependencies
• Privileges
The following functionality is available on the Procedures Editor Command menu:
•
Rename
• Execute
Procedures Editor for Oracle - Definition Tab
The Definition Tab of the Procedures Editor lets you view the SQL code for every procedure on the current
datasource. To view DDL for another procedure, click the lists, click the target owner, and then click the target
procedure.
After making changes on the tab, on the editor tool bar, click .
Rapid SQL opens the Preview:Alter dialog box
.
For more information, see Procedures Editor
.
Procedures Editor for Oracle - Information Tab
The Information Tab of the Procedures Editor displays the status and size information for every procedure on the
current datasource.
After making changes on the tab, on the editor tool bar, click .
Rapid SQL opens the Preview:Alter dialog box.
For more information, see Procedures Editor
.
Procedures Editor for Oracle - Dependencies Tab
The Dependencies Tab of the Procedures Editor lets you manage database objects dependent on each procedure on
the current datasource. Rapid SQL arranges the objects in a tree structure. The objects are organized in folders based
on the dependency relationship. These folders contain all of the associated objects. The table below describes the
dependency relationship types:
TIP: Click one of the referenced objects to open that object’s editor.
Relationship Description
Referencing Objects The target procedure is dependent on these objects.
Referenced Objects These objects are dependent on the target procedure.

USING > OBJECT EDITORS
EMBARCADERO TECHNOLOGIES > BOOKNAMEVARIABLE 281
After making changes on the tab, on the editor tool bar, click .
Rapid SQL opens the Preview:Alter dialog box
.
For more information, see Procedures Editor
.
Procedures Editor for Oracle - Privileges Tab
The Privileges Tab of the Procedures Editor lets you manage permissions for every procedure on the current
datasource.
This tab displays if a privilege was inherited from a role or group, or if it was granted explicitly by a user. Rapid SQL
also shows if the privilege is grantable (granted with the GRANT OPTION.)
There is a table on every Privileges Tab. Rapid SQL populates each row of the table with every user, group, and role
in the database. The legend, on every Privileges Tab, explains the marks in the table.
The table below describes the icons in the legend:
After making changes on the tab, on the editor tool bar, click .
Rapid SQL opens the Preview:Alter dialog box
.
For more information, see:
Granting Permissions
Revoking Permissions
Procedures Editor
Profiles Editor for Oracle
The Profiles Editor lets you:
• Manage profile limits.
• Manage users.
• View profile DDL.
TIP: The Object Editor tool bar refresh button lets you refresh Object Editor contents, clear the Object
Editors, and log SQL if SQL Logging is turned on.
The following tabs are available in the Profiles Editor:
Icon Label Description
Black check mark User The privilege(s) was granted explicitly by a user.
Blue check mark Group The privilege(s) was inherited from a group.
Green check mark Role The privilege(s) was inherited from a role.
White check mark Revoked The privilege(s) was inherited from another
source, but has been revoked by a user. In
Rapid SQL, a user cannot revoke a privilege that
has been granted by a role.
Two black check marks With Grant The privilege(s) was granted with the
GRANTABLE option.
USING > OBJECT EDITORS
EMBARCADERO TECHNOLOGIES > BOOKNAMEVARIABLE 282
• Resources
• Users
• DDL
Profiles Editor for Oracle - Resources Tab
The Resources Tab of the Profiles Editor lets you manage profile limits. The table below describes the options and
functionality on the Resources Tab of the Profiles Editor:
After making changes on the tab, on the editor tool bar, click .
Rapid SQL opens the Preview:Alter dialog box
.
For more information, see Profiles Editor
.
Profiles Editor for Oracle - Users Tab
The Users Tab of the Profiles Editor lets you manage users for every profile on the current datasource.
After making changes on the tab, on the editor tool bar, click .
Rapid SQL opens the Preview:Alter dialog box
.
For more information, see Profiles Editor
.
Profiles Editor for Oracle - DDL Tab
The DDL Tab of the Profiles Editor lets you view the SQL code for every profile on the current datasource. To view
DDL for another profile, click the lists, click the target owner, and then click the target profile.
After making changes on the tab, on the editor tool bar, click .
Rapid SQL opens the Preview:Alter dialog box
.
For more information, see Profiles Editor.
Option Description
General Limits Lets you specify general limits.
Session Limits Lets you specify the limit on the amount of private space a session
can allocate in the shared pool of the SGA.
Time Limits Lets you specify the limit on total connection time per session.
Call Limits Lets you specify the CPU time limit for a call (a parse, execute, or
fetch), expressed in hundredths of seconds.
Login Limits Lets you specify the number of failed attempts to log in to the user
account before the account is locked.
Password Limits Lets you specify the number of days the same password can be
used for authentication. The password expires if it is not changed
within this period, and further connections are rejected.
USING > OBJECT EDITORS
EMBARCADERO TECHNOLOGIES > BOOKNAMEVARIABLE 283
Redo Log Groups Editor for Oracle
The Redo Log Groups Editor lets you:
• View, Add, and modify Redo Log Members.
• View check constraint DDL.
TIP: The r
efresh button lets you refresh or clear the editor’s contents, and log SQL.
The table below describes the tabs available in the Redo Log Groups Editor:
After making changes on the tab, on the editor tool bar, click .
Rapid SQL opens the Preview:Alter dialog box
.
Add/Edit Redo Log Member for Oracle
The Add/Modify Redo Log Group Member dialog box lets you add Redo Log Members, and edit existing ones. The
table below describes the options and functionality on the Add/Modify Redo Log Group Member dialog box:
Roles Editor for Oracle
The Roles Editor lets you:
• Manage users for roles.
• Manage role privileges.
• View role DDL.
TIP: The r
efresh button lets you refresh or clear the editor’s contents, and log SQL.
The following tabs are available in the Roles Editor:
•
Authentication
• Users
• Object Privileges
• System Privileges
• DDL
Tab Description
Redo Log
Members
Lets you View, Add, Edit, and Delete Redo Log Members.
DDL Lets you view the SQL code for every check constraint on the current datasource.
To view DDL for another check constraint, click the lists, click the target owners
and/or tables, and then click the target check constraint.
Option Description
Redo Log Group Name Type the Redo Log Group Name in the box, or edit the existing
one.
Redo Log Group Member
Name
Type the full path of the Redo Log Group Member name, or edit
the existing one.
USING > OBJECT EDITORS
EMBARCADERO TECHNOLOGIES > BOOKNAMEVARIABLE 284
Roles Editor for Oracle - Authentication Tab
The Authentication Tab of the Roles Editor lets you manage role identity. When creating a role, you must establish
certain rules governing its use. You can specify whether or not a role must be identified when used.
If you require role identification, you can authenticate the user externally through the operating system, or with a
specific password.
After making changes on the tab, on the editor tool bar, click .
Rapid SQL opens the Preview:Alter dialog box
.
For more information, see Roles Editor
.
Roles Editor for Oracle - Users Tab
The Users Tab of the Roles Editor lets you manage users for every role on the current datasource. A user becomes
associated with an application role after running the target application.
After making changes on the tab, on the editor tool bar, click .
Rapid SQL opens the Preview:Alter dialog box
.
For more information, see Roles Editor
.
Roles Editor for Oracle - Object Privileges and System Privileges Tab
The Object Privileges and System Privileges tabs of the Roles Editor let you manage permissions for every role on the
current datasource.
These tabs display if a privilege was inherited from a role or group, or if it was granted explicitly by a user. Rapid SQL
also shows if the privilege is grantable (granted with the GRANT OPTION.)
There is a table on every Privileges Tab. On the Object Privileges Tab, Rapid SQL populates each row of the table
with every available database object. On the System Privileges Tab, Rapid SQL populates each row of the table with
the system privileges. The legend, on every Privileges Tab, explains the marks in the table.
The table below describes the icons in the legend:
After making changes on the tab, on the editor tool bar, click .
Rapid SQL opens the Preview:Alter dialog box
.
For more information, see:
Granting Permissions
Revoking Permissions
Icon Label Description
Black check mark User The privilege(s) was granted explicitly by a user.
Blue check mark Group The privilege(s) was inherited from a group.
Green check mark Role The privilege(s) was inherited from a role.
White check mark Revoked The privilege(s) was inherited from another
source, but has been revoked by a user. In
Microsoft SQL Server, a user cannot revoke a
privilege that has been granted by a role.
Two black check marks With Grant The privilege(s) was granted with the
GRANTABLE option.
USING > OBJECT EDITORS
EMBARCADERO TECHNOLOGIES > BOOKNAMEVARIABLE 285
Roles Editor
Roles Editor for Oracle - DDL Tab
The DDL Tab of the Roles Editor lets you view the SQL code for every role on the current datasource. To view the DDL
for another role, click the lists, and then click the target role.
After making changes on the tab, on the editor tool bar, click .
Rapid SQL opens the Preview:Alter dialog box
.
For more information, see Roles Editor
.
Rollback Segments Editor for Oracle
The Rollback Segments Editor lets you:
• View rollback segment status.
• Manage rollback segment storage.
• View activity levels.
• View rollback segment DDL.
TIP: The Object Editor tool bar refresh button lets you refresh Object Editor contents, clear the Object
Editors, and log SQL if SQL Logging is turned on.
The following tabs are available in the Rollback Segments Editor:
•
Status
• Storage
• Activity
•
DDL
Rollback Segments Editor for Oracle - Status Tab
The Status Tab of the Rollback Segments Editor displays status information for every rollback segment on the current
datasource, and lets you place rollback segments online or offline.
After making changes on the tab, on the editor tool bar, click .
Rapid SQL opens the Preview:Alter dialog box
.
For more information, see Rollback Segments Editor
.
Rollback Segments Editor for Oracle - Storage Tab
The Storage Tab of the Object Editor lets you manage storage for every rollback segment on the current datasource.
TIP: Due to their heavy I/O nature, rollback segment placement is best on server drives that
experience little activity. Disks configured with RAID5 are typically poor choices for rollback
segments. If you use RAID on the server, a RAID0 or 0+1 configuration is best for rollback
segments.
USING > OBJECT EDITORS
EMBARCADERO TECHNOLOGIES > BOOKNAMEVARIABLE 286
The table below describes the options and functionality on the Storage Tab of the Rollback Segments Editor:
After making changes on the tab, on the editor tool bar, click .
Rapid SQL opens the Preview:Alter dialog box
.
For more information, see Rollback Segments Editor
.
Rollback Segments Editor for Oracle - Activity Tab
The Activity Tab of the Rollback Segments Editor displays activity levels, and dynamic sizing.
After making changes on the tab, on the editor tool bar, click .
Rapid SQL opens the Preview:Alter dialog box.
For more information, see Rollback Segments Editor
.
Rollback Segments Editor for Oracle - DDL Tab
The DDL Tab of the Rollback Segments Editor lets you view the SQL code for every rollback segment on the current
datasource. To view DDL for another rollback segment, click the lists, click the target owner, and then click the target
rollback segment.
After making changes on the tab, on the editor tool bar, click .
Rapid SQL opens the Preview:Alter dialog box
.
For more information, see Rollback Segments Editor
.
Sequences Editor for Oracle
The Sequences Editor lets you:
• Manage parameters for every sequence on the current datasource.
• Manage database objects dependent on each sequence on the current datasource.
• Manage permissions for every sequence on the current datasource.
Option Description
Extents The unit of space allocated to an object whenever the object needs more
space.
Initial Extent - The initial space extent (in bytes) allocated to the object.
Next Extent - The next extent (in bytes) that the object will attempt to
allocate when more space for the object is required.
Minimum Extents - The appropriate minimum extents value for the
object.
Maximum Extents - The appropriate maximum extents value for the
object.
Percent Increase - Magnifies how an object grows and, can materially
affect available free space in a tablespace. Select a value in the
corresponding box.
Extent Detail Displays extent details.
USING > OBJECT EDITORS
EMBARCADERO TECHNOLOGIES > BOOKNAMEVARIABLE 287
• View sequence DDL.
TIP: The Object Editor tool bar refresh button lets you refresh Object Editor contents, clear the Object
Editors, and log SQL if SQL Logging is turned on.
The following tabs are available in the Sequences Editor:
•
Definition
• Dependencies
• Privileges
• DDL
The following functionality is available on the Sequences Editor Command menu:
•
Rename
• Create Synonym
Sequences Editor for Oracle - Definition Tab
The Definition Tab of the Sequences Editor lets you manage parameters for every sequence on the current
datasource. The table below describes the options and functionality on the Definition Tab of the Sequences Editor:
After making changes on the tab, on the editor tool bar, click .
Rapid SQL opens the Preview:Alter dialog box
.
For more information, see Sequences Editor
.
Option Description
Parameters Increment By - Lets you specify the interval between sequence
numbers. This integer value can be any positive or negative
integer, but it cannot be 0. This value can have 28 or fewer digits.
The absolute of this value must be less than the difference of
MAXVALUE and MINVALUE. If this value is negative, then the
sequence descends. If the increment is positive, then the
sequence ascends. If you omit this clause, the interval defaults to
1.
Minimum Value - Lets you specify the minimum value of the
sequence. This integer value can have 28 or fewer digits.
Maximum Value - Lets you specify the maximum value the
sequence can generate. This integer value can have 28 or fewer
digits.
Current/Next Sequence
Numbers
Lets you make the sequence cycle and continue to generate
numbers.
Options Generate Numbers in Order - Useful when you are using the
sequence number as a timestamp.
USING > OBJECT EDITORS
EMBARCADERO TECHNOLOGIES > BOOKNAMEVARIABLE 288
Sequences Editor for Oracle - Dependencies Tab
The Dependencies Tab of the Sequences Editor lets you manage database objects dependent on each sequence on
the current datasource. Rapid SQL arranges the objects in a tree structure. The objects are organized in folders based
on the dependency relationship. These folders contain all of the associated objects. The table below describes the
dependency relationship types:
TIP: Click one of the referenced objects to open that object’s editor.
After making changes on the tab, on the editor tool bar, click .
Rapid SQL opens the Preview:Alter dialog box
.
For more information, see Sequences Editor
.
Sequences Editor for Oracle - Privileges Tab
The Privileges Tab of the Sequences Editor lets you manage permissions for every sequence on the current
datasource.
This tab displays if a privilege was inherited from a role or group, or if it was granted explicitly by a user. Rapid SQL
also shows if the privilege is grantable (granted with the GRANT OPTION.)
There is a table on every Privileges Tab. Rapid SQL populates each row of the table with every user, group, and role
in the database. The legend, on every Privileges Tab, explains the marks in the table.
The table below describes the icons in the legend:
After making changes on the tab, on the editor tool bar, click .
Rapid SQL opens the Preview:Alter dialog box
.
For more information, see:
Granting Permissions
Revoking Permissions
Sequences Editor
Relationship Description
Referencing Objects The target sequence is dependent on these objects.
Referenced Objects These objects are dependent on the target sequence.
Icon Label Description
Black check mark User The privilege(s) was granted explicitly by a user.
Blue check mark Group The privilege(s) was inherited from a group.
Green check mark Role The privilege(s) was inherited from a role.
White check mark Revoked The privilege(s) was inherited from another
source, but has been revoked by a user. In
Rapid SQL, a user cannot revoke a privilege that
has been granted by a role.

USING > OBJECT EDITORS
EMBARCADERO TECHNOLOGIES > BOOKNAMEVARIABLE 289
Sequences Editor for Oracle - DDL Tab
The DDL Tab of the Sequences Editor lets you view the SQL code for every sequence on the current datasource. To
view DDL for another sequence, click the lists, click the target owner, and then click the target sequence.
After making changes on the tab, on the editor tool bar, click .
Rapid SQL opens the Preview:Alter dialog box
.
For more information, see Sequences Editor
.
Snapshots Editor for Oracle
The Snapshots Editor lets you:
• View status and size information.
• Manage storage.
• Manage privileges.
• View snapshot DDL.
TIP: The Object Editor tool bar refresh button lets you refresh Object Editor contents, clear the Object
Editors, and log SQL if SQL Logging is turned on.
The following tabs are available in the Snapshots Editor:
• Information
• Storage
• Privileges
• DDL
Snapshots Editor for Oracle - Information Tab
The Information Tab of the Snapshots Editor displays the status and size information for every snapshot on the current
datasource.
After making changes on the tab, on the editor tool bar, click .
Rapid SQL opens the Preview:Alter dialog box
.
For more information, see Snapshots Editor
.
Snapshots Editor for Oracle - Storage Tab
The Storage Tab of the Snapshots Editor lets you manage storage for every snapshot on the current datasource. The
table below describes the options and functionality on the Storage Tab of the Snapshots Editor:
Option Description
Data Block Storage Each transaction that updates a data block requires a transaction entry.
Initial Extent - Ensures that a minimum number of concurrent
transactions can update a data block, avoiding the overhead of
allocating a transaction entry dynamically.
Maximum - Limits concurrency on a data block.
USING > OBJECT EDITORS
EMBARCADERO TECHNOLOGIES > BOOKNAMEVARIABLE 290
After making changes on the tab, on the editor tool bar, click .
Rapid SQL opens the Preview:Alter dialog box
.
For more information, see Snapshots Editor
.
Snapshots Editor for Oracle - Privileges Tab
The Privileges Tab of the Snapshots Editor lets you manage permissions for every snapshot on the current
datasource.
This tab displays if a privilege was inherited from a role or group, or if it was granted explicitly by a user. Rapid SQL
also shows if the privilege is grantable (granted with the GRANT OPTION.)
There is a table on every Privileges Tab. Rapid SQL populates each row of the table with every user, group, and role
in the database. The legend, on every Privileges Tab, explains the marks in the table.
The table below describes the icons in the legend:
After making changes on the tab, on the editor tool bar, click .
Rapid SQL opens the Preview:Alter dialog box
.
For more information, see:
Granting Permissions
Revoking Permissions
Snapshots Editor
Extents The unit of space allocated to an object whenever the object needs more
space.
Initial Extent - The initial space extent (in bytes) allocated to the object.
Next Extent - The next extent (in bytes) that the object will attempt to
allocate when more space for the object is required.
Minimum Extents - The appropriate minimum extents value for the
object.
Maximum Extents - The appropriate maximum extents value for the
object.
Percent Increase - Magnifies how an object grows and, can materially
affect available free space in a tablespace. Select a value in the
corresponding box.
Icon Label Description
Black check mark User The privilege(s) was granted explicitly by a user.
Blue check mark Group The privilege(s) was inherited from a group.
Green check mark Role The privilege(s) was inherited from a role.
White check mark Revoked The privilege(s) was inherited from another
source, but has been revoked by a user. In
Rapid SQL, a user cannot revoke a privilege that
has been granted by a role.
Two black check marks With Grant The privilege(s) was granted with the
GRANTABLE option.
Option Description
USING > OBJECT EDITORS
EMBARCADERO TECHNOLOGIES > BOOKNAMEVARIABLE 291
Snapshots Editor for Oracle - DDL Tab
The DDL Tab of the Snapshots Editor lets you view the SQL code for every snapshot on the current datasource. To
view DDL for another snapshot, click the lists, click the target owner, and then click the target snapshot.
After making changes on the tab, on the editor tool bar, click .
Rapid SQL opens the Preview:Alter dialog box
.
For more information, see Snapshots Editor
.
Snapshot Logs Editor for Oracle
The Snapshot Logs Editor lets you:
• View status and size information.
• Manage storage.
• View snapshot log DDL.
TIP: The Object Editor tool bar refresh button lets you refresh Object Editor contents, clear the Object
Editors, and log SQL if SQL Logging is turned on.
The following tabs are available in the Snapshot Logs Editor:
•
Information
• Storage
• DDL
Snapshot Logs Editor for Oracle - Information Tab
The Information Tab of the Snapshot Logs Editor displays the status and size information for every snapshot log on
the current datasource.
After making changes on the tab, on the editor tool bar, click .
Rapid SQL opens the Preview:Alter dialog box
.
For more information, see Snapshot Logs Editor
.
Snapshot Logs Editor for Oracle - Storage Tab
The Storage Tab of the Snapshot Logs Editor lets you manage storage for every snapshot log on the current
datasource. The table below describes the options and functionality on the Storage Tab of the Snapshot Logs Editor:
Option Description
Data Block Storage Each transaction that updates a data block requires a transaction entry.
Initial Extent - Ensures that a minimum number of concurrent
transactions can update a data block, avoiding the overhead of
allocating a transaction entry dynamically.
Maximum - Limits concurrency on a data block.
USING > OBJECT EDITORS
EMBARCADERO TECHNOLOGIES > BOOKNAMEVARIABLE 292
After making changes on the tab, on the editor tool bar, click .
Rapid SQL opens the Preview:Alter dialog box
.
For more information, see Snapshot Logs Editor
.
Snapshot Logs Editor for Oracle - DDL Tab
The DDL Tab of the Snapshot Logs Editor lets you view the SQL code for every snapshot log on the current
datasource. To view DDL for another snapshot log, click the lists, click the target owner, and then click the target
snapshot log.
After making changes on the tab, on the editor tool bar, click .
Rapid SQL opens the Preview:Alter dialog box
.
For more information, see Snapshot Logs Editor
.
Synonyms Editor for Oracle
The Synonyms Editor lets you:
• View base object information.
• Manage database objects dependent on each synonym.
• View synonym DDL.
TIP: The Object Editor tool bar refresh button lets you refresh Object Editor contents, clear the Object
Editors, and log SQL if SQL Logging is turned on.
The following tabs are available in the Synonyms Editor:
•
Definition
• Dependencies
• DDL
The following functionality is available on the Synonyms Editor Command menu:
•
Rename
Extents The unit of space allocated to an object whenever the object needs more
space.
Initial Extent - The initial space extent (in bytes) allocated to the object.
Next Extent - The next extent (in bytes) that the object will attempt to
allocate when more space for the object is required.
Minimum Extents - The appropriate minimum extents value for the
object.
Maximum Extents - The appropriate maximum extents value for the
object.
Percent Increase - Magnifies how an object grows and, can materially
affect available free space in a tablespace. Select a value in the
corresponding box.
Option Description
USING > OBJECT EDITORS
EMBARCADERO TECHNOLOGIES > BOOKNAMEVARIABLE 293
Synonyms Editor for Oracle - Definition Tab
The Definition Tab of the Synonyms Editor lets you view base object information for every synonym on the current
datasource.
After making changes on the tab, on the editor tool bar, click .
Rapid SQL opens the Preview:Alter dialog box
.
For more information, see Synonyms Editor
.
Synonyms Editor for Oracle - Dependencies Tab
The Dependencies Tab of the Synonyms Editor lets you manage database objects dependent on each synonym on
the current datasource. Rapid SQL arranges the objects in a tree structure. The objects are organized in folders based
on the dependency relationship. These folders contain all of the associated objects. The table below describes the
dependency relationship types:
TIP: Click one of the referenced objects to open that object’s editor.
After making changes on the tab, on the editor tool bar, click .
Rapid SQL opens the Preview:Alter dialog box
.
For more information, see Synonyms Editor
.
Synonyms Editor for Oracle - DDL Tab
The DDL Tab of the Synonyms Editor lets you view the SQL code for every synonym on the current datasource. To
view DDL for another synonym, click the lists, click the target owner, and then click the target synonym.
After making changes on the tab, on the editor tool bar, click .
Rapid SQL opens the Preview:Alter dialog box
.
For more information, see Synonyms Editor
.
Tables Editor for Oracle
The Tables Editor lets you:
• Manage table columns.
• Manage table constraints.
• Manage table storage.
• Manage table space.
• Manage table partitions.
• Manage table dependencies.
• Manage table privileges.
Relationship Description
Referencing Objects The target synonym is dependent on these objects.
Referenced Objects These objects are dependent on the target synonym.

USING > OBJECT EDITORS
EMBARCADERO TECHNOLOGIES > BOOKNAMEVARIABLE 294
• View table DDL.
TIP: The r
efresh button lets you refresh or clear the editor’s contents, and log SQL.
The following tabs are available in the Tables Editor:
• Columns
• Constraints
• Storage
• Performance
• Space
• LOB Space
• Partitions
• Comment
• Dependencies
• Privileges
• DDL
The following functionality is available on the Tables Editor Command menu:
•
Rename
• Edit Data
• Build Query
• Create Like
• Analyze
• Allocate Extent
• Deallocate Unused Space
• Indexes
• Triggers
• Create Synonym
• Truncate
• Move/Reorganize
• Convert to Partitioned
• Estimate Size
• Create Insert Statements
• Select*From
USING > OBJECT EDITORS
EMBARCADERO TECHNOLOGIES > BOOKNAMEVARIABLE 295
Tables Editor for Oracle - Columns Tab
The Columns Tab of the Tables Editor lets you manage columns for every table on the current datasource. The
Columns Tab lets you:
• Add columns
• Insert columns
•Edit columns
• Drop columns
• Order columns
• Rename columns
The table below describes the options and functionality on the Columns Tab of the Tables Editor:
After making changes on the tab, on the editor tool bar, click .
Rapid SQL opens the Preview:Alter dialog box
.
For more information, see:
Add Column Dialog Box
Modify Column Dialog Box
Tables Editor
Tables Editor for Oracle - Constraints Tab
The Constraints Tab of the Tables Editor lets you manage constraints for every table on the current datasource. Rapid
SQL arranges the constraints in a tree structure. The tree contains folders which contain all constraints associated
with the target table. The objects are organized in folders based on the type of constraint:
•
Check Constraint
• Foreign Key
• Primary Key
• Unique Key
In the tree, double-click a constraint to open a dialog box with detailed information on the target constraint.
The table below describes the options and functionality on the Constraints Tab:
Column Name Description
Name The name of the column in the target table.
Datatype The datatype for the column in the target table. If applicable, Rapid SQL
displays the precision in parentheses.
NOTE: For Oracle 9i, Rapid SQL supports the XMLType datatype. Rapid SQL
also supports the new Timestamp datatypes, including Timestamp,
Timestamp with Time Zone, and Timestamp with Local Time Zone.
Nulls The table definition permits nulls in the target table column. Null has no
explicitly assigned value. Null is not equivalent to zero or blank. A value of
null is not considered to be greater than, less than, or equivalent to any other
value, including another value of null.
Default The name of the column included in the table.
USING > OBJECT EDITORS
EMBARCADERO TECHNOLOGIES > BOOKNAMEVARIABLE 296
After making changes on the tab, on the editor tool bar, click .
Rapid SQL opens the Preview:Alter dialog box
.
For more information, see:
Index Constraint Dialog Box
Tables Editor
Tables Editor for Oracle - Storage Tab
The Storage Tab of the Tables Editor lets you manage storage for every table on the current datasource.
TIP: You should never place user tables on the SYSTEM tablespace.
The table below describes the options and functionality on the Storage Tab of the Tables Editor:
After making changes on the tab, on the editor tool bar, click .
Rapid SQL opens the Preview:Alter dialog box
.
For more information, see Tables Editor
.
Option Description
Add Click to open the Index Constraint dialog box.
Edit Click to open the Index Constraint dialog box
.
Drop Drops the selected constraint.
Option Description
Data Block Storage The storage parameter lets you tune performance by minimizing the
occurrence of row migration and chaining caused by update operations
that extend the length of rows stored on the data block.
Percent Used - Lets you type a value in the corresponding box.
Maximum - The maximum parameter limits concurrency on a data block.
Extents The unit of space allocated to an object whenever the object needs more
space.
Initial Extent - The initial space extent (in bytes) allocated to the object.
Next Extent - The next extent (in bytes) that the object will attempt to
allocate when more space for the object is required.
Minimum Extents - The appropriate minimum extents value for the
object.
Maximum Extents - The appropriate maximum extents value for the
object.
Percent Increase - Magnifies how an object grows and, can materially
affect available free space in a tablespace. Select a value in the
corresponding box.
USING > OBJECT EDITORS
EMBARCADERO TECHNOLOGIES > BOOKNAMEVARIABLE 297
Tables Editor for Oracle - Performance Tab
The Performance Tab of the Tables Editor lets you manage performance for every table on the current datasource.
The table below describes the options and functionality on the Performance Tab of the Tables Editor:
:
After making changes on the tab, on the editor tool bar, click .
Rapid SQL opens the Preview:Alter dialog box
.
For more information, see Tables Editor
.
Tables Editor for Oracle - Space Tab
The Space Tab of the Tables Editor lets you view the table usage and the distribution of table space for every table on
the current datasource.
After making changes on the tab, on the editor tool bar, click .
Rapid SQL opens the Preview:Alter dialog box
.
For more information, see Tables Editor
.
Option Description
Parallel Query Option The Parallel server query option lets you process queries using many
query server processes running against multiple CPUs, which provides
substantial performance gains such as reduction of the query completion
time.
Cache Keeps the blocks in memory by placing it at the most recently used end.
This option is useful for small lookup tables.
Option Description
Space Utilization Lets you specify the percent of space reserved for future updates.
Row Information Lets you view row information.
Extents The unit of space allocated to an object whenever the object needs more
space.
Initial Extent - The initial space extent (in bytes) allocated to the object.
Next Extent - The next extent (in bytes) that the object will attempt to
allocate when more space for the object is required.
Minimum Extents - The appropriate minimum extents value for the
object.
Maximum Extents - The appropriate maximum extents value for the
object.
Percent Increase - Magnifies how an object grows and, can materially
affect available free space in a tablespace. Select a value in the
corresponding box.
USING > OBJECT EDITORS
EMBARCADERO TECHNOLOGIES > BOOKNAMEVARIABLE 298
Tables Editor for Oracle - LOB Space Tab
The LOB Space Tab of the Tables Editor lets you view the table usage and the distribution of LOB table space for
every LOB on the current datasource. The table below describes the options and functionality on the LOB Space Tab
of the Tables Editor:
After making changes on the tab, on the editor tool bar, click .
Rapid SQL opens the Preview:Alter dialog box
.
For more information, see Tables Editor
.
Tables Editor for Oracle - Partitions Tab
The Partitions Tab of the Tables Editor lets you partition tables on the current datasource. The table below describes
the options and functionality on the Partitions Tab of the Tables Editor:
The following functionality is available on the Command menu:
•
Allocate Extent
• Analyze
• Coalesce (Not available for range-list partitions)
Option Description
Segment Definition Lets you edit the column name.
Configuration Lets you edit the column configuration.
Storage Lets you edit the storage parameters.
Option Description
Partitioning Method Displays the partitioning method, including Range-Hash
Composite or Range-List Composite.
Hash partitions partition the table according to a hash function.
Composite partitions use both range and hash types, first
partitioning the data by a range of values, and then further dividing
the partitions into subpartitions by way of a hash function.
List partitioning lets you control how rows map to partitions. You
can specify a list of discrete values for the partitioning column in
the description for each partition.
Row Movement If its key is updated, migrates the row to a new partition.
Partitioning Columns Displays partitioning columns.
Subpartitioning Columns Displays subpartitioning columns.
Partitions Click Add or Edit to open the Partition
dialog box.
Click Drop to drop a partition.
Subpartition Template If the partitioning type is Range-Hash Composite, displays a list of
subpartitions in the subpartition template.
Click Add, Insert, or Edit to open the Subpartition
dialog box.
Click Drop to drop a subpartition.
USING > OBJECT EDITORS
EMBARCADERO TECHNOLOGIES > BOOKNAMEVARIABLE 299
• Deallocate Unused Space
• Exchange
• Mark Local Indexes Unusable
• Rebuild Unusable Local Indexes
• Split Partition
• Truncate
After making changes on the tab, on the editor tool bar, click .
Rapid SQL opens the Preview:Alter dialog box
.
For more information, see Tables Editor
.
Exchange Data and Index Segments Dialog Box
You can use the Tables Editor to convert a partition into a nonpartitioned table by exchanging the data and index
segments. You can also convert a nonpartitioned table into partitions in an existing table. Exchanging the data and
index segments is most useful when you have nonpartitioned tables that you want to convert to partitions in a
partitioned table.
CAUTION: The table and partition being exchanged must have the same number of columns and the column
types must match.
The table below describes the options and functionality on the Exchange Data and Index Segments dialog box:
Merge Partitions Dialog Box
You can use the Tables Editor to merge the contents of two adjacent partitions from a range or composite partitioned
table into one. If you want to roll up similar partitions into larger partitions, which act as archives, you can merge them.
For example, you can make partitions for the data from each week which you can then merge into a partition for the
month.
NOTE: You cannot merge hash partitions.
NOTE: The partition that results from the merge inherits the higher upper bound of the two partitions.
Option Description
Partition with which to
Exchange Table
Select a partition.
Table with which to Exchange
Partition
Select a table owner and a non-partitioned, non-clustered table.
Include Indexes Includes indexes in the exchange.
Validate Proper Collation of
Rows
A column's collation sequence is used in any operation that
compares values of the column to each other or to constant values.
USING > OBJECT EDITORS
EMBARCADERO TECHNOLOGIES > BOOKNAMEVARIABLE 300
The table below describes the options and functionality on the Merge Partitions dialog box:
Tables Editor for Oracle - Comment Tab
The Comment Tab of the Tables Editor lets you enter a comment which can be up to 2000 characters long. The
comments are stored in the REMARKS column of the objects' system catalog table.
After making changes on the tab, on the editor tool bar, click .
Rapid SQL opens the Preview:Alter dialog box
.
For more information, see Tables Editor
.
Tables Editor for Oracle - Dependencies Tab
The Dependencies Tab of the Tables Editor lets you manage database objects dependent on each table on the current
datasource. Rapid SQL arranges the objects in a tree structure. The objects are organized in folders based on the
dependency relationship. These folders contain all of the associated objects. The table below describes the
dependency relationship types:
TIP: Click one of the referenced objects to open that object’s editor.
After making changes on the tab, on the editor tool bar, click .
Rapid SQL opens the Preview:Alter dialog box
.
For more information, see Tables Editor
.
Tables Editor for Oracle - Privileges Tab
The Privileges Tab of the Tables Editor lets you manage permissions for every table on the current datasource.
This tab displays if a privilege was inherited from a role or group, or if it was granted explicitly by a user. Rapid SQL
also shows if the privilege is grantable (granted with the GRANT OPTION.)
There is a table on every Privileges Tab. Rapid SQL populates each row of the table with every user, group, and role
in the database. The legend, on every Privileges Tab, explains the marks in the table.
Option Description
Partition Definition Lets you enter a new name to contain the merged partitions. Select
two partitions to merge. To select multiple partitions, click
SHIFT+click or CTRL+click.
Segment Displays tablespace parameters.
Physical Displays physical parameters.
Storage Displays storage parameters.
Relationship Description
Referencing Objects The target view is dependent on these objects.
Referenced Objects These objects are dependent on the target view.
USING > OBJECT EDITORS
EMBARCADERO TECHNOLOGIES > BOOKNAMEVARIABLE 301
The table below describes the icons in the legend:
After making changes on the tab, on the editor tool bar, click .
Rapid SQL opens the Preview:Alter dialog box.
For more information, see:
Granting Permissions
Revoking Permissions
Tables Editor
Tables Editor for Oracle - DDL Tab
The DDL Tab of the Tables Editor lets you view the SQL code for every table on the current datasource. To view DDL
for another table, click the lists, click the target owner, and then click the target table.
After making changes on the tab, on the editor tool bar, click .
Rapid SQL opens the Preview:Alter dialog box.
For more information, see Tables Editor
.
Tablespaces Editor for Oracle
The Tablespaces Editor lets you:
• Manage datafiles.
• Manage tablespace storage.
• Manage tablespace space.
• View tablespace contents and objects.
• Manage tablespace quotas.
• View tablespace DDL.
TIP: The Object Editor tool bar refresh button lets you refresh Object Editor contents, clear the Object
Editors, and log SQL if SQL Logging is turned on.
The following tabs are available in the Tablespaces Editor:
Icon Label Description
Black check mark User The privilege(s) was granted explicitly by a user.
Blue check mark Group The privilege(s) was inherited from a group.
Green check mark Role The privilege(s) was inherited from a role.
White check mark Revoked The privilege(s) was inherited from another
source, but has been revoked by a user. In
Rapid SQL, a user cannot revoke a privilege that
has been granted by a role.
Two black check marks With Grant The privilege(s) was granted with the
GRANTABLE option.

USING > OBJECT EDITORS
EMBARCADERO TECHNOLOGIES > BOOKNAMEVARIABLE 302
• Datafile
• Storage
• Space
• Map
• Objects
• Quotas
• DDL
The following functionality is available on the Tablespace Editor Command menu:
•
Change Status
• Coalesce
Tablespace Editor for Oracle - Datafile Tab
The Datafile Tab of the Tablespace Editor lets you manage every tablespace on the current datasource.
TIP: You can view and manage the Auto-Undo option on the Datafile Tab.
After making changes on the tab, on the editor tool bar, click .
Rapid SQL opens the Preview:Alter dialog box
.
For more information, see Tablespace Editor
.
Tablespace Editor for Oracle - Storage Tab
The Storage Tab of the Tablespace Editor lets you manage storage for every tablespace on the current datasource.
TIP: Always create tablespaces for user data and never place user tables and indexes in the SYSTEM
tablespace. Placing user objects in the SYSTEM tablespace can degrade performance and
introduce space-related headaches to the database.
Oracle8i or later supports locally managed tablespaces, which can all but eliminate the problem of tablespace
fragmentation. It totally does away with the storage parameters of MINEXTENTS, MAXEXENTS, PCTINCREASE,
and NEXT. With locally managed tablespaces you either specify the initial extent size and let Oracle automatically size
all other extents, or specify a uniform extent size for everything.
For users using a version earlier than Oracle 8i and locally managed tablespaces, there are manual methods can
employ to assist in the fight against tablespace fragmentation. They include:
• Setting PCTINCREASE to zero for all tablespaces and objects to promote same-sized extents.
• Specifying equal-sized allotments for your INITIAL and NEXT object storage parameters.
• Grouping objects with like growth and storage needs together in their own tablespaces.
TIP: One of the best ways to avoid fragmentation in a tablespace is to pre-allocate the space that your
objects will use. If possible, plan for one to two years' growth for each object and allocate your
space accordingly. Having initial empty objects will not affect table scan times as Oracle only
scans up to the high-water mark (the last used block) in a table.
USING > OBJECT EDITORS
EMBARCADERO TECHNOLOGIES > BOOKNAMEVARIABLE 303
Of all your tablespaces, you want to avoid fragmentation problems in your SYSTEM tablespace the most as this is the
major hotbed tablespace for Oracle activities. The easiest way to avoid this is to not allow any user (even the default
DBA ID's SYS and SYSTEM) to have access to it. There are three ways to do this:
• Ensure no user has a DEFAULT or TEMPORARY tablespace assignment of SYSTEM.
• Ensure no user has a quota set for SYSTEM.
Ensure no user has been granted the UNLIMITED TABLESPACE privilege.
After making changes on the tab, on the editor tool bar, click .
Rapid SQL opens the Preview:Alter dialog box
.
For more information, see:
Tablespace Editor
Tablespace Editor for Oracle - Space Tab
The Space Tab of the Tablespace Editor lets you view the table usage and the distribution of space for every
tablespace on the current datasource.
After making changes on the tab, on the editor tool bar, click .
Rapid SQL opens the Preview:Alter dialog box
.
For more information, see Tablespace Editor
.
Tablespace Editor for Oracle - Map Tab
The Map Tab of the tablespace editor lets you:
• View of the contents of a tablespace.
• Hover over or select a block of the map to view information on the object that occupies the block and its relevant
statistics.
• Scan for honeycomb or bubble space fragmentation.
After making changes on the tab, on the editor tool bar, click .
Rapid SQL opens the Preview:Alter dialog box.
For more information, see Tablespace Editor
.
Tablespace Editor for Oracle - Objects Tab
The Objects Tab of the Tablespace Editor lets you view information for every object on the current datasource.
After making changes on the tab, on the editor tool bar, click .
Rapid SQL opens the Preview:Alter dialog box
.
For more information, see Tablespace Editor
.
Tablespace Editor for Oracle - Quotas Tab
The Quotas Tab of the Tablespace editor lets you add and manage quotas for every tablespace on the current
datasource:
USING > OBJECT EDITORS
EMBARCADERO TECHNOLOGIES > BOOKNAMEVARIABLE 304
After making changes on the tab, on the editor tool bar, click .
Rapid SQL opens the Preview:Alter dialog box
.
For more information, see:
Tablespace Editor
Add User Quotas on Tablespace Dialog Box
Add/Edit User Quotas on Tablespace Dialog Box
The table below describes the options and functionality on the Add or Edit User Quotas on Tablespace dialog box:
Tablespace Editor for Oracle - DDL Tab
The DDL Tab of the Tablespace Editor lets you view the SQL code for every tablespace on the current datasource. To
view DDL for another tablespace, click the lists, click the target owner, and then click the target tablespace.
After making changes on the tab, on the editor tool bar, click .
Rapid SQL opens the Preview:Alter dialog box.
For more information, see Tablespace Editor
.
Triggers Editor for Oracle
The Triggers Editor lets you:
• View and modify trigger definitions.
• Manage trigger dependencies.
TIP: The r
efresh button lets you refresh or clear the editor’s contents, and log SQL.
The following tabs are available in the Triggers Editor:
• Action
• Type
• Information
•
Dependencies
• DDL
Option Description
User list Displays all users. Select a user on which you want to place a
quota.
Quota Lets you set a quota on the selected user. When you assign a
quota:
Users with privileges to create certain types of objects can create
those objects in the specified tablespace.
Oracle limits the amount of space that can be allocated for storage
of a user's objects within the specified tablespace to the amount of
the quota.

USING > OBJECT EDITORS
EMBARCADERO TECHNOLOGIES > BOOKNAMEVARIABLE 305
Triggers Editor for Oracle - Action Tab
The Action Tab of the Triggers Editor lets you modify the trigger action PL/SQL blook for any trigger on the datasource.
After making changes on the tab, on the editor tool bar, click .
Rapid SQL opens the Preview:Alter dialog box.
For more information, see Triggers Editor
.
Triggers Editor for Oracle - Type Tab
The Type Tab of the Triggers Editor lets you modify trigger options for any trigger on the datasource.
After making changes on the tab, on the editor tool bar, click .
Rapid SQL opens the Preview:Alter dialog box.
For more information, see Triggers Editor
.
Triggers Editor for Oracle - Information Tab
The Information Tab of the Triggers Editor displays status and size data for any trigger on the datasource.
After making changes on the tab, on the editor tool bar, click .
Rapid SQL opens the Preview:Alter dialog box.
For more information, see Triggers Editor
.
Triggers Editor for Oracle - Dependencies Tab
The Dependencies Tab of the Triggers Editor lets you manage database objects dependent on each trigger on the
current datasource. Rapid SQL arranges the objects in a tree structure. The objects are organized in folders based on
the dependency relationship. These folders contain all of the associated objects. The table below describes the
dependency relationship types:
TIP: Click one of the referenced objects to open that object’s editor.
After making changes on the tab, on the editor tool bar, click .
Rapid SQL opens the Preview:Alter dialog box
.
For more information, see Triggers Editor
.
Triggers Editor for Oracle - DDL Tab
The DDL Tab of the Triggers Editor lets you view the DDL for every default on the current datasource:
To view DDL for another trigger, click the lists, click the target owner and/or table, and then click the target trigger.
After making changes on the tab, on the editor tool bar, click .
Rapid SQL opens the Preview:Alter dialog box
.
Relationship Description
Referencing Objects The target view is dependent on these objects.
Referenced Objects These objects are dependent on the target view.
USING > OBJECT EDITORS
EMBARCADERO TECHNOLOGIES > BOOKNAMEVARIABLE 306
For more information, see Triggers Editor.
Type Bodies Editor for Oracle
The Type Bodies Editor lets you:
• View type body status and size.
• Manage dependencies.
• Manage type body permissions.
If an objects has dependent objects, such as tables, triggers, procedures and views, you can view and access their
dependent objects in the editor.
TIP: The Object Editor tool bar refresh button lets you refresh Object Editor contents, clear the Object
Editors, and log SQL if SQL Logging is turned on.
The following tabs are available in the Type Bodies Editor:
•
Information
• Dependencies
• Privileges
Type Bodies Editor for Oracle - Information Tab
The Information Tab of the Type Bodies Editor displays the status and size information for every type body on the
current datasource.
After making changes on the tab, on the editor tool bar, click .
Rapid SQL opens the Preview:Alter dialog box
.
For more information, see Type Bodies Editor
.
Type Bodies Editor for Oracle - Dependencies Tab
The Dependencies Tab of the Type Bodies Editor lets you manage database objects dependent on each type body on
the current datasource. Rapid SQL arranges the objects in a tree structure. The objects are organized in folders based
on the dependency relationship. These folders contain all of the associated objects. The table below describes the
dependency relationship types:
TIP: Click one of the referenced objects to open that object’s editor.
After making changes on the tab, on the editor tool bar, click .
Rapid SQL opens the Preview:Alter dialog box
.
For more information, see Type Bodies Editor
.
Relationship Description
Referencing Objects The target type body is dependent on these objects.
Referenced Objects These objects are dependent on the target type body.
USING > OBJECT EDITORS
EMBARCADERO TECHNOLOGIES > BOOKNAMEVARIABLE 307
Type Bodies Editor for Oracle - Privileges Tab
The Privileges Tab of the Type Bodies Editor lets you manage permissions for every type body on the current
datasource.
This tab displays if a privilege was inherited from a role or group, or if it was granted explicitly by a user. Rapid SQL
also shows if the privilege is grantable (granted with the GRANT OPTION.)
There is a table on every Privileges Tab. Rapid SQL populates each row of the table with every user, group, and role
in the database. The legend, on every Privileges Tab, explains the marks in the table.
The table below describes the icons in the legend:
After making changes on the tab, on the editor tool bar, click .
Rapid SQL opens the Preview:Alter dialog box
.
For more information, see:
Granting Permissions
Revoking Permissions
Type Bodies Editor
Types Editor for Oracle
The Types Editor lets you:
• Manage the type header text.
• Manage type body text.
• Manage header and body information.
• Manage type dependencies.
• Manage type permissions.
TIP: The Object Editor tool bar refresh button lets you refresh Object Editor contents, clear the Object
Editors, and log SQL if SQL Logging is turned on.
The following tabs are available in the Types Editor:
•
Header
• Body
Icon Label Description
Black check mark User The privilege(s) was granted explicitly by a user.
Blue check mark Group The privilege(s) was inherited from a group.
Green check mark Role The privilege(s) was inherited from a role.
White check mark Revoked The privilege(s) was inherited from another
source, but has been revoked by a user. In
Rapid SQL, a user cannot revoke a privilege that
has been granted by a role.
Two black check marks With Grant The privilege(s) was granted with the
GRANTABLE option.
USING > OBJECT EDITORS
EMBARCADERO TECHNOLOGIES > BOOKNAMEVARIABLE 308
• Information
• Dependencies
• Privileges
Types Editor for Oracle - Header Tab
The Header Tab of the Types Editor lets you manage the type header text for every type on the current datasource.
After making changes on the tab, on the editor tool bar, click .
Rapid SQL opens the Preview:Alter dialog box.
For more information, see Types Editor
.
Types Editor for Oracle - Body Tab
The Body Tab of the Types Editor lets you create type bodies text for every type on the current datasource.
After making changes on the tab, on the editor tool bar, click .
Rapid SQL opens the Preview:Alter dialog box.
For more information, see Types Editor
.
Types Editor for Oracle - Information Tab
The Information Tab of the Types Editor displays the header and body information for every type on the current
datasource.
After making changes on the tab, on the editor tool bar, click .
Rapid SQL opens the Preview:Alter dialog box
.
For more information, see Types Editor
.
Types Editor for Oracle - Dependencies Tab
The Dependencies Tab of the Types Editor lets you manage database objects dependent on each types on the current
datasource. Rapid SQL arranges the objects in a tree structure. The objects are organized in folders based on the
dependency relationship. These folders contain all of the associated objects. The table below describes the
dependency relationship types:
TIP: Click one of the referenced objects to open that object’s editor.
After making changes on the tab, on the editor tool bar, click .
Rapid SQL opens the Preview:Alter dialog box
.
For more information, see Types Editor
.
Relationship Description
Referencing Objects The target types is dependent on these objects.
Referenced Objects These objects are dependent on the target type.

USING > OBJECT EDITORS
EMBARCADERO TECHNOLOGIES > BOOKNAMEVARIABLE 309
Types Editor for Oracle - Privileges Tab
The Privileges Tab of the Types Editor lets you manage permissions for every type on the current datasource.
This tab displays if a privilege was inherited from a role or group, or if it was granted explicitly by a user. Rapid SQL
also shows if the privilege is grantable (granted with the GRANT OPTION.)
There is a table on every Privileges Tab. Rapid SQL populates each row of the table with every user, group, and role
in the database. The legend, on every Privileges Tab, explains the marks in the table.
The table below describes the icons in the legend:
After making changes on the tab, on the editor tool bar, click .
Rapid SQL opens the Preview:Alter dialog box
.
For more information, see:
Granting Permissions
Revoking Permissions
Types Editor
Unique Keys Editor for Oracle
The Unique Keys Editor lets you:
• Manage unique key columns.
• Manage unique key attributes.
• Manage unique key storage.
• Manage unique key statistics.
• View unique key DDL.
TIP: The r
efresh button lets you refresh or clear the editor’s contents, and log SQL.
The following tabs are available in the Unique Keys Editor:
•
Columns
• Properties
• Storage
Icon Label Description
Black check mark User The privilege(s) was granted explicitly by a user.
Blue check mark Group The privilege(s) was inherited from a group.
Green check mark Role The privilege(s) was inherited from a role.
White check mark Revoked The privilege(s) was inherited from another
source, but has been revoked by a user. In
Rapid SQL, a user cannot revoke a privilege that
has been granted by a role.
Two black check marks With Grant The privilege(s) was granted with the
GRANTABLE option.
USING > OBJECT EDITORS
EMBARCADERO TECHNOLOGIES > BOOKNAMEVARIABLE 310
• Space
• Partitions
• DDL
TIP: The Unique Keys Editor Command menu lets you Rename a unique key:
Unique Keys Editor for Oracle - Columns Tab
The Columns Tab of the Unique Keys Editor lets you manage columns for every unique key on the current datasource.
Rapid SQL sorts all column information into two boxes. The box on the left lists all columns in the selected unique key.
The box on the right lists target unique key columns in the unique key. The table below describes the options and
functionality on the Columns Tab of the Unique Keys Editor:
After making changes on the tab, on the editor tool bar, click .
Rapid SQL opens the Preview:Alter dialog box
.
For more information, see Unique Keys Editor
.
Unique Keys Editor for Oracle - Properties Tab
The Properties Tab of the Unique Keys Editor lets you set properties.The table below describes the options and
functionality on the Properties Tab of the Unique Keys Editor:
After making changes on the tab, on the editor tool bar, click .
Rapid SQL opens the Preview:Alter dialog box
.
For more information, see Unique Keys Editor
.
Column Name Description
Column The name of the column in the target unique key.
Datatype the datatype for the column in the target unique key. If applicable, Rapid SQL
displays the precision in parentheses.
Nulls The table definition permits nulls in the target table column. Null has no
explicitly assigned value. Null is not equivalent to zero or blank. A value of
null is not considered to be greater than, less than, or equivalent to any other
value, including another value of null.
Index Columns The name of the column included in the unique key.
Option Description
Index Constraints Properties Lets you select properties.
Index Constraint Status Enable - Enables the constraint immediately after building it.
Disable - Disables the constraint immediately after building it.
USING > OBJECT EDITORS
EMBARCADERO TECHNOLOGIES > BOOKNAMEVARIABLE 311
Unique Keys Editor for Oracle - Storage Tab
The Storage Tab of the Unique Keys Editor lets you manage storage for every unique key on the current datasource.
The table below describes the options and functionality on the Storage Tab of the Unique Keys Editor:
After making changes on the tab, on the editor tool bar, click .
Rapid SQL opens the Preview:Alter dialog box
.
For more information, see Unique Keys Editor
.
Unique Keys Editor for Oracle - Space Tab
The Space Tab of the Unique Keys Editor lets you manage space allocations for every unique key on the current
datasource. The table below describes the options and functionality on the Space Tab of the Unique Keys Editor:
Option Description
Data Block Storage The storage parameter lets you tune performance by minimizing the
occurrence of row migration and chaining caused by update operations
that extend the length of rows stored on the data block.
Percent Used - Lets you type a value in the corresponding box.
Maximum - The maximum parameter limits concurrency on a data block.
Extents The unit of space allocated to an object whenever the object needs more
space.
Initial Extent - The initial space extent (in bytes) allocated to the object.
Next Extent - The next extent (in bytes) that the object will attempt to
allocate when more space for the object is required.
Minimum Extents - The appropriate minimum extents value for the
object.
Maximum Extents - The appropriate maximum extents value for the
object.
Percent Increase - Magnifies how an object grows and, can materially
affect available free space in a tablespace. Select a value in the
corresponding box.
Option Description
Space Utilization Lets you specify the percent of space reserved for future updates.
Free Lists Free lists let you manage the allocation of data blocks when concurrent
processes are issued against the cluster. Identifying multiple free lists
can reduce contention for free lists when concurrent inserts take place
and potentially improve the performance of the cluster.
USING > OBJECT EDITORS
EMBARCADERO TECHNOLOGIES > BOOKNAMEVARIABLE 312
After making changes on the tab, on the editor tool bar, click .
Rapid SQL opens the Preview:Alter dialog box
.
For more information, see Unique Keys Editor
.
Unique Keys Editor for Oracle - Partitions Tab
The Partitions Tab of the Unique Keys Editor lets you partition unique keys on the current datasource. The table below
describes the options and functionality on the Partitions Tab of the Unique Keys Editor:
After making changes on the tab, on the editor tool bar, click .
Rapid SQL opens the Preview:Alter dialog box
.
For more information, see Unique Keys Editor
.
Unique Keys Editor for Oracle - DDL Tab
The DDL Tab of the Unique Keys Editor lets you view the SQL code for every unique key on the current datasource.
To view DDL for another unique key, click the list, target owner and/or table, and then click target unique key.
After making changes on the tab, on the editor tool bar, click .
Rapid SQL opens the Preview:Alter dialog box
.
For more information, see Unique Keys Editor
.
Users Editor for Oracle
The Users Editor lets you:
• View and modify user definitions.
• Manage user privileges.
Extents The unit of space allocated to an object whenever the object needs more
space.
Initial Extent - The initial space extent (in bytes) allocated to the object.
Next Extent - The next extent (in bytes) that the object will attempt to
allocate when more space for the object is required.
Minimum Extents - The appropriate minimum extents value for the
object.
Maximum Extents - The appropriate maximum extents value for the
object.
Percent Increase - Magnifies how an object grows and, can materially
affect available free space in a tablespace. Select a value in the
corresponding box.
Option Description
Partition Button Click to open the Convert to Partitioned Index Wizard.
Option Description
USING > OBJECT EDITORS
EMBARCADERO TECHNOLOGIES > BOOKNAMEVARIABLE 313
• Manage dependent objects for users.
• View user DDL.
TIP: The refresh button lets you refresh or clear the editor’s contents, and log SQL.
The following tabs are available in the Users Editor:
• Definition
• Roles
• Object Privileges
• System Privileges
• Objects
• DDL
The following functionality is available on the Users Editor Command menu:
•
Analyze Schema
• Change Password
• Create Like
Users Editor for Oracle - Definition Tab
The Definition Tab of the Users Editor lets you manage properties for every user on the current datasource.The table
below describes the options and functionality on the Definition Tab of the Users Editor:
After making changes on the tab, on the editor tool bar, click .
Rapid SQL opens the Preview:Alter dialog box
.
For more information, see Users Editor
.
Option Description
Defaults OPTIONAL: Lets you select a default tablespace, temporary
tablespace, and profile.
Account Password - Indicates that Oracle should identify the user with the
password you provide. In the Password box and in the Confirm
box, type the password for the user.
Externally - Indicates that Oracle should verify the database user
name against an existing operating system user name.
Globally - Indicates that Oracle permits access to the user by
obtaining username and password information from the security
domain central authority.
ORACLE 8 ONLY:. External Name - Type the external name of the
database user.
Tablespace Quotas Click to open the Set Tablespaces Quota dialog box
.
USING > OBJECT EDITORS
EMBARCADERO TECHNOLOGIES > BOOKNAMEVARIABLE 314
Users Editor for Oracle - Roles Tab
The Roles Tab of the Users Editor lets you grant, revoke, and define roles.
After making changes on the tab, on the editor tool bar, click .
Rapid SQL opens the Preview:Alter dialog box.
For more information, see Users Editor
.
Users Editor for Oracle - Object Privileges and System Privileges Tabs
The Object Privileges and System Privileges tabs of the Users Editor let you manage permissions for every user on
the current datasource.
These tabs display if a privilege was inherited from a role or group, or if it was granted explicitly by a user. Rapid SQL
also shows if the privilege is grantable (granted with the GRANT OPTION.)
There is a table on every Privileges Tab. On the Object Privileges Tab, Rapid SQL populates each row of the table
with every available database object. On the System Privileges Tab, Rapid SQL populates each row of the table with
the system privileges. The legend, on every Privileges Tab, explains the marks in the table.
The table below describes the icons in the legend:
After making changes on the tab, on the editor tool bar, click .
Rapid SQL opens the Preview:Alter dialog box
.
For more information, see:
Granting Permissions
Revoking Permissions
Users Editor
Users Editor for Oracle - Objects Tab
The Objects Tab of the Users Editor lets you manage database objects associated with every segment on the current
datasource. Rapid SQL organizes the objects in a tree structure with three folders containing all of the associated
objects.
TIP: Click one of the objects to open that object’s editor.
After making changes on the tab, on the editor tool bar, click .
Rapid SQL opens the Preview:Alter dialog box
.
Icon Label Description
Black check mark User The privilege(s) was granted explicitly by a user.
Blue check mark Group The privilege(s) was inherited from a group.
Green check mark Role The privilege(s) was inherited from a role.
White check mark Revoked The privilege(s) was inherited from another
source, but has been revoked by a user. In
Rapid SQL, a user cannot revoke a privilege that
has been granted by a role.
Two black check marks With Grant The privilege(s) was granted with the
GRANTABLE option.
USING > OBJECT EDITORS
EMBARCADERO TECHNOLOGIES > BOOKNAMEVARIABLE 315
For more information, see Users Editor.
Users Editor for Oracle - DDL Tab
The DDL Tab of the Users Editor lets you view the SQL code for every user on the current datasource. To view DDL
for another user, click the list, and then click the target user.
After making changes on the tab, on the editor tool bar, click .
Rapid SQL opens the Preview:Alter dialog box
.
For more information, see Users Editor
.
Views Editor for Oracle
The Views Editor lets you:
• Manage view columns.
• View and modify view definitions.
• Manage view privileges.
• Manage objects dependent on views.
• View DDL for views.
TIP: The r
efresh button lets you refresh or clear the editor’s contents, and log SQL.
The following tabs are available in the Views Editor:
• Columns
• Definition
• Comment
•
Dependencies
• Privileges
The following functionality is available on the Views Editor Command menu:
•
Build Query
• Rename
Views Editor for Oracle - Columns Tab
The Columns Tab of the Views Editor lets you view column information for every view on the current datasource. The
table below describes the options and functionality on the Columns Tab of the Views Editor:
Column Name Description
Column Name Name of the column in the target view.
Datatype Datatype for the column in the target view. If applicable, Rapid SQL
displays the precision in parentheses.

USING > OBJECT EDITORS
EMBARCADERO TECHNOLOGIES > BOOKNAMEVARIABLE 316
After making changes on the tab, on the editor tool bar, click .
Rapid SQL opens the Preview:Alter dialog box
.
For more information, see Views Editor
.
Views Editor for Oracle - Definition Tab
The Definition Tab of the Views Editor lets you view the SQL code for every view on the current datasource. To view
DDL for another view, click the lists, click the target owner, and then click the target view.
After making changes on the tab, on the editor tool bar, click .
Rapid SQL opens the Preview:Alter dialog box
.
For more information, see Views Editor
.
Views Editor for Oracle - Privileges Tab
The Privileges Tab of the Views Editor lets you manage permissions for every view on the current datasource.
This tab displays if a privilege was inherited from a role or group, or if it was granted explicitly by a user. Rapid SQL
also shows if the privilege is grantable (granted with the GRANT OPTION.)
There is a table on every Privileges Tab. Rapid SQL populates each row of the table with every user, group, and role
in the database. The legend, on every Privileges Tab, explains the marks in the table.
The table below describes the icons in the legend:
After making changes on the tab, on the editor tool bar, click .
Rapid SQL opens the Preview:Alter dialog box
.
For more information, see:
Granting Permissions
Revoking Permissions
Nulls The table definition permits nulls in the target table column. Null
has no explicitly assigned value. Null is not equivalent to zero or
blank. A value of null is not considered to be greater than, less
than, or equivalent to any other value, including another value of
null.
Icon Label Description
Black check mark User The privilege(s) was granted explicitly by a user.
Blue check mark Group The privilege(s) was inherited from a group.
Green check mark Role The privilege(s) was inherited from a role.
White check mark Revoked The privilege(s) was inherited from another
source, but has been revoked by a user. In
Rapid SQL, a user cannot revoke a privilege that
has been granted by a role.
Two black check marks With Grant The privilege(s) was granted with the
GRANTABLE option.
Column Name Description
USING > OBJECT EDITORS
EMBARCADERO TECHNOLOGIES > BOOKNAMEVARIABLE 317
Views Editor
Views Editor for Oracle - Comment Tab
The Comment Tab of the Views Editor lets you enter a comment which can be up to 254 characters long. The
comments are stored in the REMARKS column of the objects' system catalog table.
After making changes on the tab, on the editor tool bar, click .
Rapid SQL opens the Preview:Alter dialog box
.
For more information, see Views Editor
.
Views Editor for Oracle - Dependencies Tab
The Dependencies Tab of the Views Editor lets you manage database objects dependent on each view on the current
datasource. Rapid SQL arranges the objects in a tree structure. The objects are organized in folders based on the
dependency relationship. These folders contain all of the associated objects. The table below describes the
dependency relationship types:
TIP: Click one of the referenced objects to open that object’s editor.
After making changes on the tab, on the editor tool bar, click .
Rapid SQL opens the Preview:Alter dialog box
.
For more information, see Views Editor
.
Sybase ASE Object Editors
Rapid SQL includes an Object Editor for all supported Sybase ASE objects. To see an Editor for a specific object, click
the corresponding link in the table below:
NOTE: If an objects has dependent objects, such as tables, triggers, procedures and views, you can view
and access their dependent objects in the editor.
Relationship Description
Referencing Objects The target view is dependent on these objects.
Referenced Objects These objects are dependent on the target view.
Aliases Editor
Check Constraints Editor Databases Editor Defaults Editor
Extended
Procedures Editor
Foreign Keys Editor Groups Editor Indexes Editor
Logins Editor Primary Keys Editor Procedures Editor Roles Editor
Rules Editor Segments Editor Tables Editor Triggers Editor
Unique Keys Editor User Datatypes Editor Users Editor Views Editor
USING > OBJECT EDITORS
EMBARCADERO TECHNOLOGIES > BOOKNAMEVARIABLE 318
Aliases Editor for Sybase ASE
The Aliases Editor lets you view and modify the alias definition. The Definition Tab of the Aliases Editor lets you view
the SQL code every default on the current datasource. To view DDL for another alias, click the Alias list, click the
target alias, and then click the target user name.
TIP: The refresh button lets you refresh or clear the editor’s contents, and log SQL.
After making changes on the tab, on the editor tool bar, click .
Rapid SQL opens the Preview:Alter dialog box.
Check Constraints Editor for Sybase ASE
The Check Constraints Editor lets you:
• View and modify check constraint definitions.
• View check constraint DDL.
TIP: The r
efresh button lets you refresh or clear the editor’s contents, and log SQL.
The table below describes the tabs available in the Check Constraints Editor:
The following functionality is available on the Check Constraints Editor Command menu:
•
Rename
After making changes on the tab, on the editor tool bar, click .
Rapid SQL opens the Preview:Alter dialog box
.
Databases Editor for Sybase
Tab Description
Definition Lets you view and modify the check condition and manage columns for the check
constraint.
DDL Lets you view the SQL code for every check constraint on the current datasource.
To view DDL for another check constraint, click the lists, click the target owners
and/or tables, and then click the target check constraint.
Box Description
Device Number The unique number for the database device.
Default Device Whether the database device is the default device. CREATE and ALTER
DATABASE commands that do not specify a location use the default
database device.
Physical Name The name of the Windows file for the target database device.
Description OPTIONAL: Any user-defined comments for the target database device.
First Virtual Page The first page number for the target database device.
Last Virtual Page The last page number for the target database device.

USING > OBJECT EDITORS
EMBARCADERO TECHNOLOGIES > BOOKNAMEVARIABLE 319
ASE
The Databases Editor lets you:
• Manage database placement.
• Manage database options.
• Manage database space.
• View database DDL.
TIP: The r
efresh button lets you refresh or clear the editor’s contents, and log SQL.
The following tabs are available in the Databases Editor:
• Placement
• Options
• Space
• DDL
The following functionality is available on the Databases Editor Command menu:
• Rename
• DBCC
• Move Log
• Checkpoint
•
Set Online
Databases Editor for Sybase ASE - Placement Tab
The Placement Tab of the Databases Editor lets you manage following for database on the current datasource:
• Database Owner
• Database Device
• Transaction Log
When changing the database owner (dbo) select the check box to transfer the existing aliases of users who could act
as the old dbo (including their permissions) to the new dbo.
After making changes on the tab, on the editor tool bar, click .
Rapid SQL opens the Preview:Alter dialog box
.
For more information, see:
Databases Editor
Add Database Fragment dialog box
USING > OBJECT EDITORS
EMBARCADERO TECHNOLOGIES > BOOKNAMEVARIABLE 320
Databases Editor for Sybase ASE - Options Tab
The Options Tab of the Databases Editor lets you view and modify the database options for every database on the
current datasource. The table below describes the options and functionality on the Options tab of the Databases
Editor:
TIP: To set database options for all future databases, set the database options on the model database.
After making changes on the tab, on the editor tool bar, click .
Rapid SQL opens the Preview:Alter dialog box
.
For more information, see Databases Editor
.
Databases Editor for Sybase ASE - Space Tab
The Space Tab of the Databases Editor lets you view pie charts showing the data space usage and the transaction log
space usage for every database on the current datasource.
TIP: Double-click a slice in the pie chart for detailed statistics.
After making changes on the tab, on the editor tool bar, click .
Rapid SQL opens the Preview:Alter dialog box
.
For more information, see Databases Editor
.
Option Description
abort tran on log full Kills all user queries that need to write to the transaction log until
space in the transaction log is freed.
allow nulls by default Changes the default settings for table columns from NOT NULL to
NULL to comply with ANSI standards.
auto identity Adds a ten digit identity column to every new table created.
dbo use only Allows only the database owner access to the database.
ddl in tran Allows certain commands to create, alter, and drop objects to
occur inside a user-defined transactions.
identity in nonunique index Allows identity columns to be included in indexes that are defined
as being nonunique.
no chkpt on recovery Prevents an automatic checkpoint from occurring after a database
is loaded. It is used when a database is copied to a secondary
database through the continual dumping and loading of the
transaction log.
no free space acctg Suppresses free space accounting and execution of threshold
actions on non-log segments.
read only Prevents users from modifying, but not retrieving data from the
database.
select into/bulkcopy/pllsort Permits operations (such as fast bulk copy) that do not keep a
complete record of the transaction in the transaction log.
single user Restricts database access to one user at a time.
trunc log on chkpt Causes Sybase ASE to truncate the transaction log every time the
automatic checkpoint process occurs. Truncate does not occur on
manual checkpoints.
USING > OBJECT EDITORS
EMBARCADERO TECHNOLOGIES > BOOKNAMEVARIABLE 321
Databases Editor for Sybase ASE - DDL Tab
The DDL Tab of the Databases Editor lets you view the SQL code for every database on the current datasource. To
view DDL for another database, click the list, and then click the target database.
After making changes on the tab, on the editor tool bar, click .
Rapid SQL opens the Preview:Alter dialog box
.
For more information, see Databases Editor
.
Defaults Editor for Sybase ASE
The Defaults Editor lets you:
• View and modify default expressions
• View default DDL
• Manage default bindings
TIP: The r
efresh button lets you refresh or clear the editor’s contents, and log SQL.
The following tabs are available in the Defaults Editor:
• Definition
• Bindings
The following functionality is available on the Defaults Editor Command menu:
• Rename
Defaults Editor for Sybase ASE - Definition Tab
The Definition Tab of the Defaults Editor lets you do the following for every default on the current datasource:
• View and modify the default expression
• View the DDL
To view DDL for another default, click the lists, click the target owner, and then click the target default.
After making changes on the tab, on the editor tool bar, click .
Rapid SQL opens the Preview:Alter dialog box
.
For more information, see Defaults Editor
.
Defaults Editor for Sybase ASE - Bindings Tab
The Bindings Tab of the Defaults Editor lets you manage object bindings for every default on the current datasource.
Sybase ASE lets you bind a default to user-defined datatypes and to columns in any table in a database (if the default
value is appropriate to the datatype of the column.)
After making changes on the tab, on the editor tool bar, click .
Rapid SQL opens the Preview:Alter dialog box
.
For more information, see Defaults Editor
.
USING > OBJECT EDITORS
EMBARCADERO TECHNOLOGIES > BOOKNAMEVARIABLE 322
Extended Procedures Editor for Sybase ASE
The Procedures Editor lets you:
• View and modify extended procedure definitions.
• Manage extended procedure dependencies.
• Manage extended procedure privileges.
TIP: The r
efresh button lets you refresh or clear the editor’s contents, and log SQL.
The following tabs are available in the Procedures Editor:
• Definition
• Dependencies
• Privileges
The following functionality is available on the Procedures Editor Command menu:
• Rename
•
Execute
Extended Procedures Editor for Sybase ASE - Definition Tab
The Definition Tab of the Procedures Editor lets you do the following for every extended procedure on the current
datasource:
• View and modify the procedure name
• View the DDL
To view DDL for another extended procedure, click the lists, click the target owner, and then click the target extended
procedure.
After making changes on the tab, on the editor tool bar, click .
Rapid SQL opens the Preview:Alter dialog box.
For more information, see Procedures Editor
.
Tab Description
Definition The Definition Tab of the Dump Devices Editor lets you view and modify general
information for every dump device on the current datasource. The Definition Tab
displays the dump device type, physical name, and size.
DDL Lets you view the SQL code for every dump device on the current datasource. To
view DDL for another dump device, click the list, and then click the target dump
device. DBArtisan uses a color scheme to identify SQL syntax. To customize the
color scheme to suit your needs, see Setting ISQL Editor Options
.
USING > OBJECT EDITORS
EMBARCADERO TECHNOLOGIES > BOOKNAMEVARIABLE 323
Extended Procedures Editor for Sybase ASE - Dependencies Tab
The Dependencies Tab of the Procedures Editor lets you manage database objects dependent on each extended
procedure on the current datasource. Rapid SQL arranges the objects in a tree structure. The objects are organized in
folders based on the dependency relationship. These folders contain all of the associated objects. The table below
describes the dependency relationship types:
TIP: Click one of the referenced objects to open that object’s editor.
After making changes on the tab, on the editor tool bar, click .
Rapid SQL opens the Preview:Alter dialog box
.
For more information, see Procedures Editor
.
Extended Procedures Editor for Sybase ASE - Privileges Tab
The Privileges Tab of the Extended Stored Procedures Editor lets you manage permissions for every extended
procedure on the current datasource.
This tab displays if a privilege was inherited from a role or group, or if it was granted explicitly by a user. Rapid SQL
also shows if the privilege is grantable (granted with the GRANT OPTION.)
There is a table on every Privileges Tab. Rapid SQL populates each row of the table with every user, group, and role
in the database. The legend, on every Privileges Tab, explains the marks in the table.
The table below describes the icons in the legend:
After making changes on the tab, on the editor tool bar, click .
Rapid SQL opens the Preview:Alter dialog box
.
For more information, see:
Granting Permissions
Revoking Permissions
Procedures Editor.
Relationship Description
Referencing Objects The target extended procedure is dependent on these objects.
Referenced Objects These objects are dependent on the target extended procedure.
Icon Label Description
Black check mark User The privilege(s) was granted explicitly by a user.
Blue check mark Group The privilege(s) was inherited from a group.
Green check mark Role The privilege(s) was inherited from a role.
White check mark Revoked The privilege(s) was inherited from another
source, but has been revoked by a user. In
Sybase ASE, a user cannot revoke a privilege
that has been granted by a role.
Two black check marks With Grant The privilege(s) was granted with the
GRANTABLE option.
USING > OBJECT EDITORS
EMBARCADERO TECHNOLOGIES > BOOKNAMEVARIABLE 324
Foreign Keys Editor for Sybase ASE
The Foreign Keys Editor lets you:
• Manage foreign key columns.
• View foreign key DDL.
TIP: The r
efresh button lets you refresh or clear the editor’s contents, and log SQL.
The following tabs are available in the Foreign Keys Editor:
• Columns
• DDL
The following functionality is available on the Foreign Keys Editor Command menu:
• Rename
Foreign Keys Editor for Sybase ASE - Columns Tab
The Columns Tab of the Foreign Keys Editor lets you manage columns for every foreign key on the current
datasource. The table below describes the options and functionality on the Columns Tab of the Foreign Keys Editor:
To view column information for another foreign key, click the lists, click the target database, owner, table, and/or
primary/unique key, and then click the target foreign key.
After making changes on the tab, on the editor tool bar, click .
Rapid SQL opens the Preview:Alter dialog box
.
For more information, see Foreign Keys Editor
.
Foreign Keys Editor for Sybase ASE - DDL Tab
The DDL Tab of the Foreign Keys Editor lets you view the SQL code for every foreign key on the current datasource.
To view DDL for another foreign key, click the lists, click the target owners and/or tables, and then click the target
foreign key.
After making changes on the tab, on the editor tool bar, click .
Rapid SQL opens the Preview:Alter dialog box
.
For more information, see Foreign Keys Editor
.
Groups Editor for Sybase ASE
The Groups Editor lets you:
• Manage users for groups.
• Manage group privileges.
Column Name Description
Foreign Key Columns Name of the foreign key in the target table.
Referenced Columns Name of the table columns in the foreign key.
USING > OBJECT EDITORS
EMBARCADERO TECHNOLOGIES > BOOKNAMEVARIABLE 325
• View group DDL.
TIP: The r
efresh button lets you refresh or clear the editor’s contents, and log SQL.
The following tabs are available in the Groups Editor:
• Users
• Object Privileges
• System Privileges
• DDL
Groups Editor for Sybase ASE - Users Tab
The Users Tab of the Groups Editor lets you manage members for every group on the current datasource. Use the
buttons on this tab to move users in and out of groups.
After making changes on the tab, on the editor tool bar, click .
Rapid SQL opens the Preview:Alter dialog box
.
For more information, see Groups Editor
.
Groups Editor for Sybase ASE - Object Privileges and System Privileges Tabs
The Object Privileges and System Privileges tabs of the Groups Editor let you manage permissions for every group on
the current datasource.
These tabs display if a privilege was inherited from a role or group, or if it was granted explicitly by a user. Rapid SQL
also shows if the privilege is grantable (granted with the GRANT OPTION.)
There is a table on every Privileges Tab. On the Object Privileges Tab, Rapid SQL populates each row of the table
with every available database object. On the System Privileges Tab, Rapid SQL populates each row of the table with
the system privileges. The legend, on every Privileges tab, explains the marks in the table.
The table below describes the icons in the legend:
After making changes on the tab, on the editor tool bar, click .
Rapid SQL opens the Preview:Alter dialog box
.
For more information, see:
Granting Permissions
Icon Label Description
Black check mark User The privilege(s) was granted explicitly by a user.
Blue check mark Group The privilege(s) was inherited from a group.
Green check mark Role The privilege(s) was inherited from a role.
White check mark Revoked The privilege(s) was inherited from another
source, but has been revoked by a user. In
Sybase ASE, a user cannot revoke a privilege
that has been granted by a role.
Two black check marks With Grant The privilege(s) was granted with the
GRANTABLE option.

USING > OBJECT EDITORS
EMBARCADERO TECHNOLOGIES > BOOKNAMEVARIABLE 326
Revoking Permissions
Groups Editor
Groups Editor for Sybase ASE - DDL Tab
The DDL Tab of the Groups Editor lets you view the SQL code for every group on the current datasource. To switch
owners or groups, click the lists, and then click the target owner and/or group.
After making changes on the Tab, on the editor tool bar, click .
Rapid SQL opens the Preview:Alter dialog box
.
For more information, see Groups Editor
.
Indexes Editor for Sybase ASE
The Indexes Editor lets you:
• Manage index columns.
• View and modify index attributes.
• Manage index storage.
• Manage index statistics.
• View index DDL.
TIP: The r
efresh button lets you refresh or clear the editor’s contents, and log SQL.
The following tabs are available in the Indexes Editor:
• Columns
• Attributes
• Storage
• Statistics
• DDL
The following functionality is available on the Indexes Editor Command menu:
• Rename
•
Update Statistics
• DBCC
• Place
• Reorganize
USING > OBJECT EDITORS
EMBARCADERO TECHNOLOGIES > BOOKNAMEVARIABLE 327
Indexes Editor for Sybase ASE - Columns Tab
The Columns Tab of the Indexes Editor lets you manage columns for every index on the current datasource. Rapid
SQL sorts all column information into two boxes. The box on the left lists all columns in the selected table. The box on
the right lists target table columns in the index. The table below describes the options and functionality on the
Columns Tab of the Indexes Editor:
After making changes on the tab, on the editor tool bar, click .
Rapid SQL opens the Preview:Alter dialog box.
For more information, see Indexes Editor
.
Indexes Editor for Sybase ASE - Attributes Tab
The Attributes Tab of the Indexes Editor lets you manage attributes for every index on the current datasource. The
table below describes the options and functionality on the Attributes Tab of the Indexes Editor:
Column Name Description
Column Name of the column in the target table.
Datatype Datatype for the column in the target table. If applicable, Rapid SQL
displays the precision in parentheses.
Nulls The table definition permits nulls in the target table column. Null has no
explicitly assigned value. Null is not equivalent to zero or blank. A value of
null is not considered to be greater than, less than, or equivalent to any
other value, including another value of null.
Index columns The name of the column included in the index.
Asc. Sort Whether the index definition requires that Sybase ASE sort the table in
ascending order.
Attribute Index Type Description
Unique General Indicates whether the target index is a unique
constraint.
Clustered General Indicates whether the target index is a
clustered, the physical order and the logical
order are the same.
Ignore Duplicate Keys General Indicates whether the target index ignores
duplicate key values. If you select his option,
the transaction that generated the duplicate
key values can continue.
None Non-Unique Clustered Indicates that no special options should apply
when processing duplicate rows. For
non-unique clustered indexes only.
Ignore Duplicate Rows Non-Unique Clustered Indicates that Sybase ASE should ignore
duplicate rows when process transactions
with duplicate rows. For non-unique
clustered indexes only.
Allow Duplicate Rows Non-Unique Clustered Indicates that Sybase ASE should process
transaction with duplicate rows. For
non-unique clustered indexes only.
USING > OBJECT EDITORS
EMBARCADERO TECHNOLOGIES > BOOKNAMEVARIABLE 328
After making changes on the tab, on the editor tool bar, click .
Rapid SQL opens the Preview:Alter dialog box
.
For more information, see Indexes Editor
.
Indexes Editor for Sybase ASE - Storage Tab
The Storage Tab of the Indexes Editor lets you manage storage for every index on the current datasource. The table
below describes the options and functionality on the Storage Tab of the Indexes Editor:
After making changes on the tab, on the editor tool bar, click .
Rapid SQL opens the Preview:Alter dialog box.
For more information, see Indexes Editor
.
Indexes Editor for Sybase ASE - Statistics Tab
The Statistics Tab of the Indexes Editor lets you view the page and row statistics for every index on the current
datasource.
After making changes on the tab, on the editor tool bar, click .
Rapid SQL opens the Preview:Alter dialog box
.
For more information, see Indexes Editor
.
Indexes Editor for Sybase ASE - DDL Tab
The DDL Tab of the Indexes Editor lets you view the SQL code for every index on the current datasource. To view the
DDL for another index, click the lists, click the target owners and/or tables, and then click the target owner and/or
index.
After making changes on the tab, on the editor tool bar, click .
Rapid SQL opens the Preview:Alter dialog box
.
For more information, see Indexes Editor
.
Option Description
Segment Lets you specify the segment on which to place the target index.
Reserve Page Gap Lets you specify the number of pages for a reserve page gap. This
reserves empty pages for expansion when additional pages need to be
allocated. You should set a reserve page gap to reduce storage
fragmentation and reduce the frequency with which you need to recreate
indexes or run reorg rebuild on the table.
Replacement Strategy Lets you specify the Most Recently Used (MRU) replacement strategy.
The MRU, or fetch-and-discard replacement strategy, is for pages that a
query needs to read only once.
Prefetch Lets you specify the Prefetch replacement strategy. This replacement
strategy is for pages that a query needs to read more than once or for
pages that need updating.
USING > OBJECT EDITORS
EMBARCADERO TECHNOLOGIES > BOOKNAMEVARIABLE 329
Logins Editor for Sybase ASE
The Logins Editor lets you:
• View and modify login definitions.
• Manage users for logins.
• Manage roles for logins.
• Manage login accounts.
• View login DDL.
TIP: The r
efresh button lets you refresh or clear the editor’s contents, and log SQL.
The following tabs are available in the Logins Editor:
• Definition
• Users
• Roles
• Accounting
• DDL
The following functionality is available on the Logins Editor Command menu:
•
Change Password
Logins Editor for Sybase ASE - Definition Tab
The Definition Tab of the Logins Editor lets you view and modify information for every login on the current server. The
table below describes the options and functionality on the Definition Tab of the Logins Editor:
TIP: To identify the login, in the Full Name box, type the actual name of the user who uses the target
login.
After making changes on the tab, on the editor tool bar, click .
Rapid SQL opens the Preview:Alter dialog box
.
For more information, see Logins Editor
.
Option Description
Full Name OPTIONAL: A user-defined descriptive name for the target login.
Default Database The database that Sybase ASE places the target user into when they
log in to the target server.
Default Language The language that Sybase ASE uses to displays the target login’s
system messages.
Password Status The status, current, expired, of the password.
Last Password Change The data and time of the last time that the target login’s password
changed.
Currently Logged In The login status of the target login.
Account Status Whether the login is locked or unlocked.
USING > OBJECT EDITORS
EMBARCADERO TECHNOLOGIES > BOOKNAMEVARIABLE 330
Logins Editor for Sybase ASE - Users Tab
The Users Tab of the Logins Editor lets you manage each login’s user account(s) for every database on the current
server. Before a login name can access a user database, it must be added as a user or alias to that database by the
system administrator or database owner.
After making changes on the tab, on the editor tool bar, click .
Rapid SQL opens the Preview:Alter dialog box
.
For more information, see Logins Editor
.
Logins Editor for Sybase ASE - Roles Tab
The Roles Tab of the Logins Editor lets you manage every login’s role(s). The tab includes a table listing every role of
which the target login is a member.
The Roles Tab lets you:
• Grant Roles
• Assign Default Roles
• Revoke Roles
After making changes on the tab, on the editor tool bar, click .
Rapid SQL opens the Preview:Alter dialog box
.
For more information, see Logins Editor
.
Logins Editor for Sybase ASE - Accounting Tab
The Accounting Tab of the Logins Editor lets you manage chargeback accounting statistics for every login on the
current server. Chargeback accounting statistics are CPU and I/O usage statistics that Sybase ASE accumulates for
every login. To start a new accounting period, the system administrator must clear all previous login statistics.
After making changes on the tab, on the editor tool bar, click .
Rapid SQL opens the Preview:Alter dialog box
.
For more information, see Logins Editor
.
Logins Editor for Sybase ASE - DDL Tab
The DDL Tab of the Logins Editor lets you view the SQL code for every login on the current datasource. To view DDL
for another login, click the list, and then click the target login.
After making changes on the tab, on the editor tool bar, click .
Rapid SQL opens the Preview:Alter dialog box.
For more information, see Logins Editor
.
Primary Keys Editor for Sybase ASE
The Primary Keys Editor lets you:
• Manage primary key columns.
• Manage primary key attributes.

USING > OBJECT EDITORS
EMBARCADERO TECHNOLOGIES > BOOKNAMEVARIABLE 331
• Manage primary key storage.
• Manage primary key statistics.
• View primary key DDL.
TIP: The r
efresh button lets you refresh or clear the editor’s contents, and log SQL.
The following tabs are available in the Primary Keys Editor:
• Columns
• Attributes
• Storage
• Statistics
• DDL
The following functionality is available on the Primary Keys Editor Command menu:
• Rename
Primary Keys Editor for Sybase ASE - Columns Tab
The Columns Tab of the Primary Keys Editor lets you manage columns for every primary key on the current
datasource. Rapid SQL sorts all column information into two boxes. The box on the left lists all columns in the selected
table. The box on the right lists target table columns in the primary key. The table below describes the options and
functionality on the Columns Tab of the Primary Keys Editor:
After making changes on the tab, on the editor tool bar, click .
Rapid SQL opens the Preview:Alter dialog box
.
For more information, see Primary Keys Editor
.
Column Name Description
Column The name of the column in the target table.
Datatype The datatype for the column in the target table. If applicable, Rapid SQL
displays the precision in parentheses.
Nulls The table definition permits nulls in the target table column. Null has no
explicitly assigned value. Null is not equivalent to zero or blank. A value of
null is not considered to be greater than, less than, or equivalent to any
other value, including another value of null.
Index columns The name of the column included in the primary key.
Asc. Sort Whether the primary key definition requires that Sybase ASE sort the table
in ascending order.

USING > OBJECT EDITORS
EMBARCADERO TECHNOLOGIES > BOOKNAMEVARIABLE 332
Primary Keys Editor for Sybase ASE - Attributes Tab
The Attributes Tab of the Primary Keys Editor lets you manage attributes for every primary key on the current
datasource. The table below describes the available attributes:
After making changes on the tab, on the editor tool bar, click .
Rapid SQL opens the Preview:Alter dialog box.
For more information, see Primary Keys Editor
.
Primary Keys Editor for Sybase ASE - Storage Tab
The Storage Tab of the Primary Keys Editor lets you manage storage for every primary key on the current datasource.
The table below describes the options and functionality on the Storage Tab of the Primary Keys Editor:
After making changes on the tab, on the editor tool bar, click .
Rapid SQL opens the Preview:Alter dialog box
.
For more information, see Primary Keys Editor
.
Attribute Index Type Description
Unique General Indicates whether the target primary key is a
unique constraint.
Clustered General Indicates whether the target primary key is a
clustered, the physical order and the logical
order are the same.
Ignore Duplicate Keys General Indicates whether the target primary key
ignores duplicate key values. If you select his
option, the transaction that generated the
duplicate key values can continue.
None Non-Unique Clustered Indicates that no special options should apply
when processing duplicate rows. For
non-unique clustered primary keys only.
Ignore Duplicate Rows Non-Unique Clustered Indicates that Sybase ASE should ignore
duplicate rows when process transactions
with duplicate rows. For non-unique
clustered primary keys only.
Allow Duplicate Rows Non-Unique Clustered Indicates that Sybase ASE should process
transaction with duplicate rows. For
non-unique clustered primary keys only.
Option Description
Segment Lets you specify the segment on which to place the target primary key.
Reserve Page Gap Lets you specify the number of pages for a reserve page gap. This
reserves empty pages for expansion when additional pages need to be
allocated. You should set a reserve page gap to reduce storage
fragmentation and reduce the frequency with which you need to recreate
indexes or run reorg rebuild on the table.

USING > OBJECT EDITORS
EMBARCADERO TECHNOLOGIES > BOOKNAMEVARIABLE 333
Primary Keys Editor for Sybase ASE - Statistics Tab
The Statistics Tab of the Primary Keys Editor lets you view the page and row statistics for every primary key on the
current datasource.
After making changes on the tab, on the editor tool bar, click .
Rapid SQL opens the Preview:Alter dialog box
.
For more information, see Primary Keys Editor
.
Primary Keys Editor for Sybase ASE - DDL Tab
The DDL Tab of the Primary Keys Editor lets you view the SQL code for every primary key on the current datasource.
To view DDL for another primary key, click the lists, click the target owner and/or table, and then click the target
primary key.
After making changes on the tab, on the editor tool bar, click .
Rapid SQL opens the Preview:Alter dialog box
.
For more information, see Primary Keys Editor
.
Procedures Editor for Sybase ASE
The Procedures Editor lets you:
• View and modify procedure definitions.
• Manage procedure privileges.
• Manage procedure dependencies.
TIP: The r
efresh button lets you refresh or clear the editor’s contents, and log SQL.
The following tabs are available in the Procedures Editor:
• Definition
• Privileges
• Dependencies
The following functionality is available on the Procedures Editor Command menu:
• Rename
•
Execute
Procedures Editor for Sybase ASE - Definition Tab
The Definition Tab of the Procedures Editor lets you view the SQL code for every procedure on the current
datasource. To view DDL for another procedure, click the lists, click the target owner, and then click the target
procedure.
After making changes on the tab, on the editor tool bar, click .
Rapid SQL opens the Preview:Alter dialog box
.
For more information, see Procedures Editor
.
USING > OBJECT EDITORS
EMBARCADERO TECHNOLOGIES > BOOKNAMEVARIABLE 334
Procedures Editor for Sybase ASE - Privileges Tab
The Privileges Tab of the Procedures Editor lets you manage permissions for every procedure on the current
datasource.
This tab displays if a privilege was inherited from a role or group, or if it was granted explicitly by a user. Rapid SQL
also shows if the privilege is grantable (granted with the GRANT OPTION.)
There is a table on every Privileges Tab. Rapid SQL populates each row of the table with every user, group, and role
in the database. The legend, on every Privileges Tab, explains the marks in the table.
The table below describes the icons in the legend:
After making changes on the tab, on the editor tool bar, click .
Rapid SQL opens the Preview:Alter dialog box
.
For more information, see:
Granting Permissions
Revoking Permissions
Procedures Editor
Procedures Editor for Sybase ASE - Dependencies Tab
The Dependencies Tab of the Procedures Editor lets you manage database objects dependent on each procedure on
the current datasource. Rapid SQL arranges the objects in a tree structure. The objects are organized in folders based
on the dependency relationship. These folders contain all of the associated objects. The table below describes the
dependency relationship types:
TIP: Click one of the referenced objects to open that object’s editor.
After making changes on the tab, on the editor tool bar, click .
Rapid SQL opens the Preview:Alter dialog box
.
For more information, see Procedures Editor
.
Icon Label Description
Black check mark User The privilege(s) was granted explicitly by a user.
Blue check mark Group The privilege(s) was inherited from a group.
Green check mark Role The privilege(s) was inherited from a role.
White check mark Revoked The privilege(s) was inherited from another
source, but has been revoked by a user. In
Sybase ASE, a user cannot revoke a privilege
that has been granted by a role.
Two black check marks With Grant The privilege(s) was granted with the
GRANTABLE option.
Relationship Description
Referencing Objects The target procedure is dependent on these objects.
Referenced Objects These objects are dependent on the target procedure.
USING > OBJECT EDITORS
EMBARCADERO TECHNOLOGIES > BOOKNAMEVARIABLE 335
Roles Editor for Sybase ASE
The Roles Editor lets you:
• Manage role identification information.
• Manage logins for roles.
• Manage role privileges.
• View role DDL.
NOTE: User-defined roles are available in Sybase ASE 11.5 or later.
TIP: The r
efresh button lets you refresh or clear the editor’s contents, and log SQL.
The following tabs are available in the Roles Editor:
•
Authentication
• Logins/Roles
Option Description
Network Name The target remote server’s network name.
Local Server The unique server name that users must supply when executing remote
procedure calls.
Time out inactive
connections
Indicates if the target server has uses the timeouts option to disable and
enable the normal timeout code used by the local server.
Network Password
Encryptions
Indicates whether connections with a remote server are to be initiated
with a client-side password encryption handshake or with the usual
unencrypted password handshake sequence.
Security Model A Indicates if the target remote server uses the Remote Procedure Call
(RPC) Security Model A. With this model, Sybase ASE does not support
security services such as message confidentiality via encryption
between the local and remote servers. For more information on server
security, see the Sybase System Administration Guide.
Security Model B Indicates if the target remote server uses the RPC Security Model B.
With this model, Sybase ASE gets a credential from the security
mechanism and uses the credential to establish a secure physical
connection with the remote server. With this model, you can choose one
or more of the following security services: mutual authentication,
message confidentiality, and message integrity. For more information on
server security, see the Sybase System Administration Guide.
Security Mechanism The name for the security mechanism.
Mutual Authentication This option makes the local server authenticate the remote server by
retrieving the credential of the remote server and verifying it with the
security mechanism. With this option, the credentials of both servers are
authenticated and verified. You must select Security Model B to use this
option.
Message Confidentiality This option means that messages are encrypted when sent to the
remote server, and results from the remote server are encrypted. You
must select Security Model B to use this option.
Message Integrity This option means that messages between the servers are checked for
tampering. You must select Security Model B to use this option.
USING > OBJECT EDITORS
EMBARCADERO TECHNOLOGIES > BOOKNAMEVARIABLE 336
• Object Privileges
• System Privileges
• DDL
Roles Editor for Sybase ASE - Authentication Tab
The Authentication Tab of the Roles Editor lets you manage role identification for every role on the current server. To
identify the role, supply a password.
After making changes on the tab, on the editor tool bar, click .
Rapid SQL opens the Preview:Alter dialog box
.
For more information, see Roles Editor
.
Roles Editor for Sybase ASE - Logins/Roles Tab
The Logins/Roles Tab of the Roles Editor lets you manage the logins and default roles for every role on the current
server.
After making changes on the tab, on the editor tool bar, click .
Rapid SQL opens the Preview:Alter dialog box
.
For more information, see Roles Editor
.
Roles Editor for Sybase ASE - Object Privileges and System Privileges Tabs
The Object Privileges and System Privileges tabs of the Roles Editor let you manage permissions for every role on the
current datasource.
These tabs display if a privilege was inherited from a role or group, or if it was granted explicitly by a user. Rapid SQL
also shows if the privilege is grantable (granted with the GRANT OPTION.)
There is a table on every Privileges Tab. On the Privileges Tab, Rapid SQL populates each row of the table with every
available database object. On the System Privileges Tab, Rapid SQL populates each row of the table with the system
privileges. The legend, on every Privileges Tab, explains the marks in the table.
The table below describes the icons in the legend:
After making changes on the tab, on the editor tool bar, click .
Rapid SQL opens the Preview:Alter dialog box
.
Icon Label Description
Black check mark User The privilege(s) was granted explicitly by a user.
Blue check mark Group The privilege(s) was inherited from a group.
Green check mark Role The privilege(s) was inherited from a role.
White check mark Revoked The privilege(s) was inherited from another
source, but has been revoked by a user. In
Sybase ASE, a user cannot revoke a privilege
that has been granted by a role.
Two black check marks With Grant The privilege(s) was granted with the
GRANTABLE option.

USING > OBJECT EDITORS
EMBARCADERO TECHNOLOGIES > BOOKNAMEVARIABLE 337
For more information, see:
Granting Permissions
Revoking Permissions
Roles Editor
Roles Editor for Sybase ASE - DDL Tab
The DDL Tab of the Roles Editor lets you view the SQL code for every role on the current datasource. To view the DDL
for another role, click the lists, and then click the target role.
After making changes on the tab, on the editor tool bar, click .
Rapid SQL opens the Preview:Alter dialog box.
For more information, see Roles Editor
.
Rules Editor for Sybase ASE
The Rules Editor lets you:
• View and modify rule definitions.
• Manage rule bindings.
TIP: The r
efresh button lets you refresh or clear the editor’s contents, and log SQL.
The following tabs are available in the Rules Editor:
• Definition
• Bindings
The following functionality is available on the Rules Editor Command menu:
•
Rename
Rules Editor for Sybase ASE - Definition Tab
The Definition Tab of the Rules Editor lets you view the SQL code for every rule on the current datasource. To view
DDL for another rule, click the lists, click the target owner, and then click the target rule.
After making changes on the tab, on the editor tool bar, click .
Rapid SQL opens the Preview:Alter dialog box
.
For more information, see Rules Editor
.
Rules Editor for Sybase ASE - Bindings Tab
The Bindings Tab of the Rules Editor lets you manage object bindings for every rule on the current datasource.
Sybase ASE lets you bind a rules to user-defined datatypes and to columns in any table in a database (if the default
value is appropriate to the datatype of the column.)
After making changes on the tab, on the editor tool bar, click .
Rapid SQL opens the Preview:Alter dialog box
.
USING > OBJECT EDITORS
EMBARCADERO TECHNOLOGIES > BOOKNAMEVARIABLE 338
For more information, see Rules Editor.
Segments Editor for Sybase ASE
The Segments Editor lets you:
• Manage segment location.
• Manage associated objects.
• Manage segment space.
• Manage segment thresholds.
• View segment DDL.
TIP: The r
efresh button lets you refresh or clear the editor’s contents, and log SQL.
The following tabs are available in the Segments Editor:
• Location
• Objects
• Space
• Threshold
• DDL
Segments Editor for Sybase ASE - Location Tab
The Location Tab of the Segments Editor lets you extend and drop every segment on the current datasource.
After making changes on the tab, on the editor tool bar, click .
Rapid SQL opens the Preview:Alter dialog box.
For more information, see Segments Editor
.
Segments Editor for Sybase ASE - Objects Tab
The Objects Tab of the Segments Editor lets you manage database objects associated with every segment on the
current datasource. Rapid SQL organizes the objects in a tree structure with three folders containing all of the
following associated objects:
• Tables
• Indexes
•Constraints
After making changes on the tab, on the editor tool bar, click .
Rapid SQL opens the Preview:Alter dialog box
.
For more information, see Segments Editor
.
USING > OBJECT EDITORS
EMBARCADERO TECHNOLOGIES > BOOKNAMEVARIABLE 339
Segments Editor for Sybase ASE - Space Tab
The Space Tab of the Segments Editor lets you view the following information for every segment on the current
datasource:
• Segment Usage
• Distribution of Segment Space
• Object Space Usage
TIP: Double-click a slice in the pie chart for detailed statistics.
After making changes on the tab, on the editor tool bar, click .
Rapid SQL opens the Preview:Alter dialog box
.
For more information, see Segments Editor
.
Segments Editor for Sybase ASE - Threshold Tab
The Threshold Tab of the Segments Editor lets you manage thresholds for every segment on the current datasource.
The table on this tab displays information for the target segment.
After making changes on the tab, on the editor tool bar, click .
Rapid SQL opens the Preview:Alter dialog box.
For more information, see Segments Editor
.
Add Threshold
The table below describes the options and functionality on the Add Threshold dialog box:
For more information, see Segments Editor.
Segments Editor for Sybase ASE - DDL Tab
The DDL Tab of the Segments Editor lets you view the SQL code for every segment on the current datasource. To
view DDL for another segment, click the list, and then click the target segment.
After making changes on the tab, on the editor tool bar, click .
Rapid SQL opens the Preview:Alter dialog box
.
For more information, see Segments Editor
.
Option Description
Database Name Displays the database name.
Segment Name Displays the segement name.
Free pages Lets you specify the number of free pages.
Procedure Lets you type or select a procedure.

USING > OBJECT EDITORS
EMBARCADERO TECHNOLOGIES > BOOKNAMEVARIABLE 340
Tables Editor for Sybase ASE
The Tables Editor lets you:
• Manage table columns.
• Manage table constraints.
• Manage table storage.
• Manage table space.
• Manage table partitions.
• Manage table dependencies.
• Manage table privileges.
• View table DDL.
TIP: The r
efresh button lets you refresh or clear the editor’s contents, and log SQL.
The following tabs are available in the Tables Editor:
• Columns
• Constraints
• Storage
• Space
• Partitions
• Dependencies
• Privileges
• DDL
The following functionality is available on the Tables Editor Command menu:
• Rename
•
Edit Data
• Build Query
• Update Statistics
• DBCC
• Place
• Truncate
• Reorganize
• Indexes
• Triggers
Tables Editor for Sybase ASE - Columns Tab
The Columns Tab of the Tables Editor lets you manage columns for every table on the current datasource.
USING > OBJECT EDITORS
EMBARCADERO TECHNOLOGIES > BOOKNAMEVARIABLE 341
The Columns Tab lets you:
• Add Columns
• Insert Columns
• Edit Columns
• Drop Columns
• Order Columns
The table below describes the options and functionality on the Columns Tab of the Tables Editor:
After making changes on the tab, on the editor tool bar, click .
Rapid SQL opens the Preview:Alter dialog box.
For more information, see:
Add Column Dialog Box
Modify Column Dialog Box
Tables Editor
Tables Editor for Sybase ASE - Constraints Tab
The Constraints Tab of the Tables Editor lets you manage constraints for every table on the current datasource. Rapid
SQL arranges the constraints in a tree structure. The tree contains folders which contain all constraints associated
with the target table. The objects are organized in folders based on the type of constraint:
•
Check Constraint
• Foreign Key
• Primary Key
• Unique Key
In the tree, double-click a constraint to open a dialog box with detailed information on the target constraint.
After making changes on the tab, on the editor tool bar, click .
Rapid SQL opens the Preview:Alter dialog box
.
For more information, see:
Column Name Description
Name the name of the column in the target table.
Datatype The datatype for the column in the target table. If applicable, Rapid SQL
displays the precision in parentheses.
Nulls The table definition permits nulls in the target table column. Null has no
explicitly assigned value. Null is not equivalent to zero or blank. A value of
null is not considered to be greater than, less than, or equivalent to any other
value, including another value of null.
Default The name of the column included in the table.
Default Binding The name of any default bound to the table.
Rule Binding The name of any rule bound to the table.

USING > OBJECT EDITORS
EMBARCADERO TECHNOLOGIES > BOOKNAMEVARIABLE 342
Index Constraint Dialog Box
Tables Editor
Tables Editor for Sybase ASE - Storage Tab
The Storage Tab of the Tables Editor lets you manage storage for every table on the current datasource. The table
below describes the options and functionality on the Storage Tab of the Tables Editor:
After making changes on the tab, on the editor tool bar, click .
Rapid SQL opens the Preview:Alter dialog box
.
For more information, see Tables Editor
.
Tables Editor for Sybase ASE - Space Tab
The Space Tab of the Tables Editor lets you view the table usage and the distribution of table space for every table on
the current datasource.
TIP: Double-click a slice in the pie chart for detailed statistics.
After making changes on the tab, on the editor tool bar, click .
Rapid SQL opens the Preview:Alter dialog box.
Option Description
Segment Lets you specify the segment on which to place the target table.
Max Rows Per Page Lets you specify the maximum number of rows for the target table.
Reserve Page Gap Lets you specify the number of pages for a reserve page gap. This
reserves empty pages for expansion when additional pages need to be
allocated. You should set a reserve page gap to reduce storage
fragmentation and reduce the frequency with which you need to recreate
indexes or run reorg rebuild on the table.
Identity Gap Lets you specify the number of pages for an identity gap. The pages in
an identity gap give you control over ID numbers, and potential gaps in
them, for the target table.
Replacement Strategy Lets you specify the Most Recently Used (MRU) replacement strategy.
The MRU, or fetch-and-discard replacement strategy, is for pages that a
query needs to read only once.
Prefetch Lets you specify the Prefetch replacement strategy. This replacement
strategy is for pages that a query needs to read more than once or for
pages that need updating.
Locking Schema Lets you specify the type of locking strategy. Sybase ASE lets you
protect tables, data pages, or data rows currently used by active
transactions by locking them. The following locking strategies are
available:
All Pages - Locks all table pages.
Data Pages - Only locks table data pages.
Data Rows - Only locks table data rows.
Expected Row Size Lets you specify the number of expected row size, if you select Data
Pages or Data Rows locking strategy.
USING > OBJECT EDITORS
EMBARCADERO TECHNOLOGIES > BOOKNAMEVARIABLE 343
For more information, see Tables Editor.
Tables Editor for Sybase ASE - Partitions Tab
The Partitions Tab of the Tables Editor lets you manage partitions for every table on the current datasource. On this
tab you can:
• View table partition information (partition ID, first page, control page, and data pages)
•
Add table partitions
• Remove table partitions
After making changes on the tab, on the editor tool bar, click .
Rapid SQL opens the Preview:Alter dialog box.
For more information, see Tables Editor
.
Tables Editor for Sybase ASE - Dependencies Tab
The Dependencies Tab of the Tables Editor lets you manage database objects dependent on each table on the current
datasource. Rapid SQL arranges the objects in a tree structure. The objects are organized in folders based on the
dependency relationship. These folders contain all of the associated objects. The table below describes the
dependency relationship types:
TIP: Click one of the referenced objects to open that object’s editor.
After making changes on the tab, on the editor tool bar, click .
Rapid SQL opens the Preview:Alter dialog box
.
For more information, see Tables Editor
.
Tables Editor for Sybase ASE - Privileges Tab
The Privileges Tab of the Tables Editor lets you manage permissions for every table on the current datasource.
On this tab, you can see whether a privilege was inherited from a role or group, or if it was granted explicitly by a user.
Rapid SQL also shows if the privilege is grantable (granted with the GRANT OPTION.)
There is a table on every Privileges Tab. Rapid SQL populates each row of the table with every user, group, and role
in the database. The legend, on every Privileges Tab, explains the marks in the table.
The table below describes the icons in the legend:
Relationship Description
Referencing Objects The target view is dependent on these objects.
Referenced Objects These objects are dependent on the target view.
Icon Label Description
Black check mark User The privilege(s) was granted explicitly by a user.
Blue check mark Group The privilege(s) was inherited from a group.
Green check mark Role The privilege(s) was inherited from a role.
USING > OBJECT EDITORS
EMBARCADERO TECHNOLOGIES > BOOKNAMEVARIABLE 344
After making changes on the tab, on the editor tool bar, click .
Rapid SQL opens the Preview:Alter dialog box
.
For more information, see:
Granting Permissions
Revoking Permissions
Tables Editor
Tables Editor for Sybase ASE - DDL Tab
The DDL Tab of the Tables Editor lets you view the SQL code for every table on the current datasource. To view DDL
for another table, click the lists, click the target owner, and then click the target table.
After making changes on the tab, on the editor tool bar, click .
Rapid SQL opens the Preview:Alter dialog box
.
For more information, see Tables Editor
.
Triggers Editor for Sybase ASE
The Triggers Editor lets you:
• View and modify trigger definitions.
• Manage trigger dependencies.
TIP: The r
efresh button lets you refresh or clear the editor’s contents, and log SQL.
The following tabs are available in the Triggers Editor:
•
Definition
• Dependencies
The following functionality is available on the Triggers Editor Command menu:
• Rename
Triggers Editor for Sybase ASE - Definition Tab
The Definition Tab of the Triggers Editor lets you do the following for every default on the current datasource:
• View and modify the trigger status
• View the DDL
White check mark Revoked The privilege(s) was inherited from another
source, but has been revoked by a user. In
Sybase ASE, a user cannot revoke a privilege
that has been granted by a role.
Two black check marks With Grant The privilege(s) was granted with the
GRANTABLE option.
Icon Label Description
USING > OBJECT EDITORS
EMBARCADERO TECHNOLOGIES > BOOKNAMEVARIABLE 345
To view DDL for another trigger, click the lists, click the target owner and/or table, and then click the target trigger.
After making changes on the tab, on the editor tool bar, click .
Rapid SQL opens the Preview:Alter dialog box.
For more information, see Triggers Editor
.
Triggers Editor for Sybase ASE - Dependencies Tab
The Dependencies Tab of the Triggers Editor lets you manage database objects dependent on each trigger on the
current datasource. Rapid SQL arranges the objects in a tree structure. The objects are organized in folders based on
the dependency relationship. These folders contain all of the associated objects. The table below describes the
dependency relationship types:
TIP: Click one of the referenced objects to open that object’s editor.
After making changes on the tab, on the editor tool bar, click .
Rapid SQL opens the Preview:Alter dialog box
.
For more information, see Triggers Editor
.
Unique Keys Editor for Sybase ASE
The Unique Keys Editor lets you:
• Manage unique key columns.
• Manage unique key attributes.
• Manage unique key storage.
• Manage unique key statistics.
• View unique key DDL.
TIP: The r
efresh button lets you refresh or clear the editor’s contents, and log SQL.
The following tabs are available in the Unique Keys Editor:
• Columns
• Attributes
• Storage
• Statistics
• DDL
The following functionality is available on the Unique Keys Editor Command menu:
• Rename
Relationship Description
Referencing Objects The target view is dependent on these objects.
Referenced Objects These objects are dependent on the target view.

USING > OBJECT EDITORS
EMBARCADERO TECHNOLOGIES > BOOKNAMEVARIABLE 346
Unique Keys Editor for Sybase ASE - Columns Tab
The Columns Tab of the Unique Keys Editor lets you manage columns for every unique key on the current datasource.
Rapid SQL sorts all column information into two boxes. The box on the left lists all columns in the selected table. The
box on the right lists target table columns in the table. The table below describes the options and functionality on the
Columns Tab of the Unique Keys Editor:
After making changes on the tab, on the editor tool bar, click .
Rapid SQL opens the Preview:Alter dialog box.
For more information, see Unique Keys Editor
.
Unique Keys Editor for Sybase ASE - Attributes Tab
The Attributes Tab of the Unique Keys Editor lets you manage attributes for every unique key on the current
datasource. The table below describes the options and functionality on the Attributes Tab of the Unique Keys Editor:
Column Name Description
Column The name of the column in the target table.
Datatype the datatype for the column in the target table. If applicable, Rapid SQL
displays the precision in parentheses.
Nulls The table definition permits nulls in the target table column. Null has no
explicitly assigned value. Null is not equivalent to zero or blank. A value of
null is not considered to be greater than, less than, or equivalent to any other
value, including another value of null.
Index columns The name of the column included in the unique key.
Asc. Sort Whether the unique key definition requires that Sybase ASE sort the table in
ascending order.
Attribute Index Type Description
Unique General Indicates whether the target unique key is a
unique constraint.
Clustered General Indicates whether the target unique key is a
clustered, the physical order and the logical
order are the same.
Ignore Duplicate Keys General Indicates whether the target unique key
ignores duplicate key values. If you select his
option, the transaction that generated the
duplicate key values can continue.
None Non-Unique Clustered Indicates that no special options should apply
when processing duplicate rows. For
non-unique clustered unique keys only.
Ignore Duplicate Rows Non-Unique Clustered Indicates that Sybase ASE should ignore
duplicate rows when process transactions
with duplicate rows. For non-unique
clustered unique keys only.
Allow Duplicate Rows Non-Unique Clustered Indicates that Sybase ASE should process
transaction with duplicate rows. For
non-unique clustered unique keys only.
USING > OBJECT EDITORS
EMBARCADERO TECHNOLOGIES > BOOKNAMEVARIABLE 347
After making changes on the tab, on the editor tool bar, click .
Rapid SQL opens the Preview:Alter dialog box
.
For more information, see Unique Keys Editor
.
Unique Keys Editor for Sybase ASE - Storage Tab
The Storage Tab of the Unique Keys Editor lets you manage storage for every unique key on the current datasource.
The table below describes the options and functionality on the Storage Tab of the Unique Keys Editor:
After making changes on the tab, on the editor tool bar, click .
Rapid SQL opens the Preview:Alter dialog box
.
For more information, see Unique Keys Editor
.
Unique Keys Editor for Sybase ASE - Statistics Tab
The Statistics Tab of the Unique Keys Editor lets you view the page and row statistics for every unique key on the
current datasource.
After making changes on the tab, on the editor tool bar, click .
Rapid SQL opens the Preview:Alter dialog box
.
For more information, see Unique Keys Editor
.
Unique Keys Editor for Sybase ASE - DDL Tab
The DDL Tab of the Unique Keys Editor lets you view the SQL code for every unique key on the current datasource.
To view DDL for another unique key, click the list, target owner and/or table, and then click target unique key.
After making changes on the tab, on the editor tool bar, click .
Rapid SQL opens the Preview:Alter dialog box
.
For more information, see Unique Keys Editor
.
User Datatypes Editor for Sybase ASE
The User Datatypes Editor lets you:
• View user datatype definitions.
• View objects associated with user datatypes.
Option Description
Segment Lets you specify the segment on which to place the target unique key.
Reserve Page Gap Lets you specify the number of pages for a reserve page gap. This
reserves empty pages for expansion when additional pages need to be
allocated. You should set a reserve page gap to reduce storage
fragmentation and reduce the frequency with which you need to recreate
indexes or run reorg rebuild on the table.

USING > OBJECT EDITORS
EMBARCADERO TECHNOLOGIES > BOOKNAMEVARIABLE 348
• View user datatype DDL.
TIP: The r
efresh button lets you refresh or clear the editor’s contents, and log SQL.
The table below describes the tabs available in the User Datatypes Editor:
The following functionality is available on the User Datatypes Editor Command menu:
• Rename
After making changes on the tab, on the editor tool bar, click .
Rapid SQL opens the Preview:Alter dialog box
.
Users Editor for Sybase ASE
The Users Editor lets you:
• View and modify user definitions.
• Manage user privileges.
• Manage dependent objects for users.
• View user DDL.
TIP: The r
efresh button lets you refresh or clear the editor’s contents, and log SQL.
The following tabs are available in the Users Editor:
•
Definition
• Object Privileges
• System Privileges
• Objects
• DDL
Users Editor for Sybase ASE - Definition Tab
The Definition Tab of the Users Editor lets you manage groups for every user on the current datasource. To manage
groups for another user, click the list, and then click the target user.
After making changes on the tab, on the editor tool bar, click .
Rapid SQL opens the Preview:Alter dialog box
.
Tab Description
Definition The Definition Tab of the User Datatypes Editor lets you view and modify
information for every user datatype on the current datasource. The Definition Tab
displays detailed information on the base datatype and any defaults and/or rules.
Usage Lets you view all database objects that use the target user datatype.
DDL Lets you view the SQL code for every user datatype on the current datasource.
To view DDL for another user datatype, click the lists, click the target owner, and
then click the target user datatype.
USING > OBJECT EDITORS
EMBARCADERO TECHNOLOGIES > BOOKNAMEVARIABLE 349
For more information, see Users Editor.
Users Editor for Sybase ASE - Object Privileges and System Privileges Tabs
The Object Privileges and System Privileges tabs of the Users Editor let you manage permissions for every user on
the current datasource.
On these tabs, you can see whether a privilege was inherited from a role or group, or if it was granted explicitly by a
user. Rapid SQL also shows if the privilege is grantable (granted with the GRANT OPTION.)
There is a table on every Privileges Tab. On the Object Privileges Tab, Rapid SQL populates each row of the table
with every available database object. On the System Privileges Tab, Rapid SQL populates each row of the table with
the system privileges. The legend, on every Privileges Tab, explains the marks in the table.
The table below describes the icons in the legend:
After making changes on the tab, on the editor tool bar, click .
Rapid SQL opens the Preview:Alter dialog box
.
For more information, see:
Granting Permissions
Revoking Permissions
Users Editor
Users Editor for Sybase ASE - Objects Tab
The Objects Tab of the Users Editor lets you manage database objects associated with every segment on the current
datasource. Rapid SQL organizes the objects in a tree structure with three folders containing all of the following
associated objects:
• Tables
• Indexes
•Constraints
TIP: Click one of the objects to open that object’s editor.
After making changes on the tab, on the editor tool bar, click .
Rapid SQL opens the Preview:Alter dialog box
.
For more information, see Users Editor
.
Icon Label Description
Black check mark User The privilege(s) was granted explicitly by a user.
Blue check mark Group The privilege(s) was inherited from a group.
Green check mark Role The privilege(s) was inherited from a role.
White check mark Revoked The privilege(s) was inherited from another
source, but has been revoked by a user. In
Sybase ASE, a user cannot revoke a privilege
that has been granted by a role.
Two black check marks With Grant The privilege(s) was granted with the
GRANTABLE option.
USING > OBJECT EDITORS
EMBARCADERO TECHNOLOGIES > BOOKNAMEVARIABLE 350
Users Editor for Sybase ASE - DDL Tab
The DDL Tab of the Users Editor lets you view the SQL code for every user on the current datasource. To view DDL
for another user, click the list, and then click the target user.
After making changes on the tab, on the editor tool bar, click .
Rapid SQL opens the Preview:Alter dialog box
.
For more information, see Users Editor
.
Views Editor for Sybase ASE
The Views Editor lets you:
• Manage view columns.
• View and modify view definitions.
• Manage view privileges.
• Manage objects dependent on views.
TIP: The r
efresh button lets you refresh or clear the editor’s contents, and log SQL.
The following tabs are available in the Views Editor:
• Columns
• Definition
• Privileges
• Dependencies
The following functionality is available on the Views Editor Command menu:
• Build Query
• Rename
Views Editor for Sybase ASE - Columns Tab
The Columns Tab of the Views Editor lets you view column information for every view on the current datasource. The
table below describes the options and functionality on the Columns Tab of the Views Editor:
After making changes on the tab, on the editor tool bar, click .
Rapid SQL opens the Preview:Alter dialog box
.
Column Name Description
Column Name the name of the column in the target view.
Datatype Datatype for the column in the target view. If applicable, Rapid SQL
displays the precision in parentheses.
Nulls The table definition permits nulls in the target table column. Null
has no explicitly assigned value. Null is not equivalent to zero or
blank. A value of null is not considered to be greater than, less
than, or equivalent to any other value, including another value of
null.
USING > OBJECT EDITORS
EMBARCADERO TECHNOLOGIES > BOOKNAMEVARIABLE 351
For more information, see Views Editor.
Views Editor for Sybase ASE - Definition Tab
The Definition Tab of the Views Editor lets you view the SQL code for every view on the current datasource. To view
DDL for another view, click the lists, click the target owner, and then click the target view.
After making changes on the tab, on the editor tool bar, click .
Rapid SQL opens the Preview:Alter dialog box
.
For more information, see Views Editor
.
Views Editor for Sybase ASE - Privileges Tab
The Privileges Tab of the Views Editor lets you manage permissions for every view on the current datasource.
This tab displays if a privilege was inherited from a role or group, or if it was granted explicitly by a user. Rapid SQL
also shows if the privilege is grantable (granted with the GRANT OPTION.)
There is a table on every Privileges Tab. Rapid SQL populates each row of the table with every user, group, and role
in the database. The legend, on every Privileges Tab, explains the marks in the table.
The table below describes the icons in the legend:
After making changes on the tab, on the editor tool bar, click .
Rapid SQL opens the Preview:Alter dialog box
.
For more information, see:
Granting Permissions
Revoking Permissions
Views Editor
Icon Label Description
Black check mark User The privilege(s) was granted explicitly by a user.
Blue check mark Group The privilege(s) was inherited from a group.
Green check mark Role The privilege(s) was inherited from a role.
White check mark Revoked The privilege(s) was inherited from another
source, but has been revoked by a user. In
Sybase ASE, a user cannot revoke a privilege
that has been granted by a role.
Two black check marks With Grant The privilege(s) was granted with the
GRANTABLE option.
USING > FUNCTIONALITY
EMBARCADERO TECHNOLOGIES > BOOKNAMEVARIABLE 352
Views Editor for Sybase ASE - Dependencies Tab
The Dependencies Tab of the Views Editor lets you manage database objects dependent on each view on the current
datasource. Rapid SQL arranges the objects in a tree structure. The objects are organized in folders based on the
dependency relationship. These folders contain all of the associated objects. The table below describes the
dependency relationship types:
TIP: Click one of the referenced objects to open that object’s editor.
After making changes on the tab, on the editor tool bar, click .
Rapid SQL opens the Preview:Alter dialog box
.
For more information, see Views Editor
.
Functionality
The table below lists functionality available in Rapid SQL.
Relationship Description
Referencing Objects The target view is dependent on these objects.
Referenced Objects These objects are dependent on the target view.
Functionality IBM DB2 UDB
for Open
Systems
IBM DB2 UDB for z/OS
and OS/390
Microsoft SQL Server Oracle Sybase ASE
Activate
Logging
X
Add Database
Fragment
XX X XX
Add, Insert, or
Modify Column
XX X XX
Add, Insert, or
Modify
Parameter
XX X XX
Add, Insert, or
Modify Partition
XX X XX
Add or Modify
Cluster Column
X
Add or Modify
Datafile
XX X XX
Allocate Extent
XX
Analyze
XX X X
Bind Data
Cache
X
Bind Package X
Bind Plan X
USING > FUNCTIONALITY
EMBARCADERO TECHNOLOGIES > BOOKNAMEVARIABLE 353
Build Query XX X XX
Change
Category
X
Change
Container Size
XX X XX
Change
Database
Comment
X
Change
Password
XX
Change Status
X
Checkpoint
XX
Clone Partition X
Clone Table X
Coalesce
X
Compile
X
Connection
Editor
XX X XX
Convert to
Partitioned
X
Copy Object
Names
XX X XX
Create Alias
XX
Create Insert
Statements
XX X XX
Create or Edit
Java Source
Create Like
XX X XX
Create or Edit
User Accounts
XX X XX
Create or
Modify Check
Constraint
XX X XX
Create or
Modify User
Message Text
XX X XX
Create
Synonym
XX X
Creating an
Object
XX X XX
DataLink
Options
X
DBCC
XX
Functionality IBM DB2 UDB
for Open
Systems
IBM DB2 UDB for z/OS
and OS/390
Microsoft SQL Server Oracle Sybase ASE
USING > FUNCTIONALITY
EMBARCADERO TECHNOLOGIES > BOOKNAMEVARIABLE 354
Deallocate
Unused Space
X
Dependencies
XX X XX
Detach/Attach
X
Disable/Enable
Job Queues
X
Disable/Enable
Triggers
XXX
Disk Resize
X
Drop
XX X XX
Edit Data
XX X XX
Error X X X X X
Estimate Size
X
Execute
XX
Extract
XX X XX
Filter X
Flush Cache X
Free Packages X
Free Plans X
Generate
Anonymous
Block
X
Generating
Packages,
Procedures,
and
Statements
from Tables
and Views
X
Grant Roles X X X X X
Impact
Analysis
XX X XX
Index
Constraint
XX X XX
Load Java X
Lob Storage
Definition
XXXX
Lock
XX
Move Log
XX
Open
XX X XX
Partitioned
Columns
X
Functionality IBM DB2 UDB
for Open
Systems
IBM DB2 UDB for z/OS
and OS/390
Microsoft SQL Server Oracle Sybase ASE
USING > FUNCTIONALITY
EMBARCADERO TECHNOLOGIES > BOOKNAMEVARIABLE 355
Partition Upper
Bound
X
Paste Columns
for Check
Constraints
XX X XX
Place
XX
Preview:
Create
XX X XX
Preview X X X X X
Quiesce
Tablespaces
XX
Reassign by
Category
X
Rebind
Packages
XX
Rebind Plans X
Rebuild
Indexes
X
Rebuild
Outlines
X
Redistribute X
Refresh
Summary
Table
X
Rename
XX X XX
Reorganize
XX X
Report
XX X XX
Restart X
Revoke Role X X X X X
Schema X X X X X
Select * From
XX X XX
Set
Online/Offline
X
Set
Tablespaces
Quota
X
Set UNDO
Tablespace
X
Shrink
XX
Status
XXX
Summary
Definition
X
Functionality IBM DB2 UDB
for Open
Systems
IBM DB2 UDB for z/OS
and OS/390
Microsoft SQL Server Oracle Sybase ASE
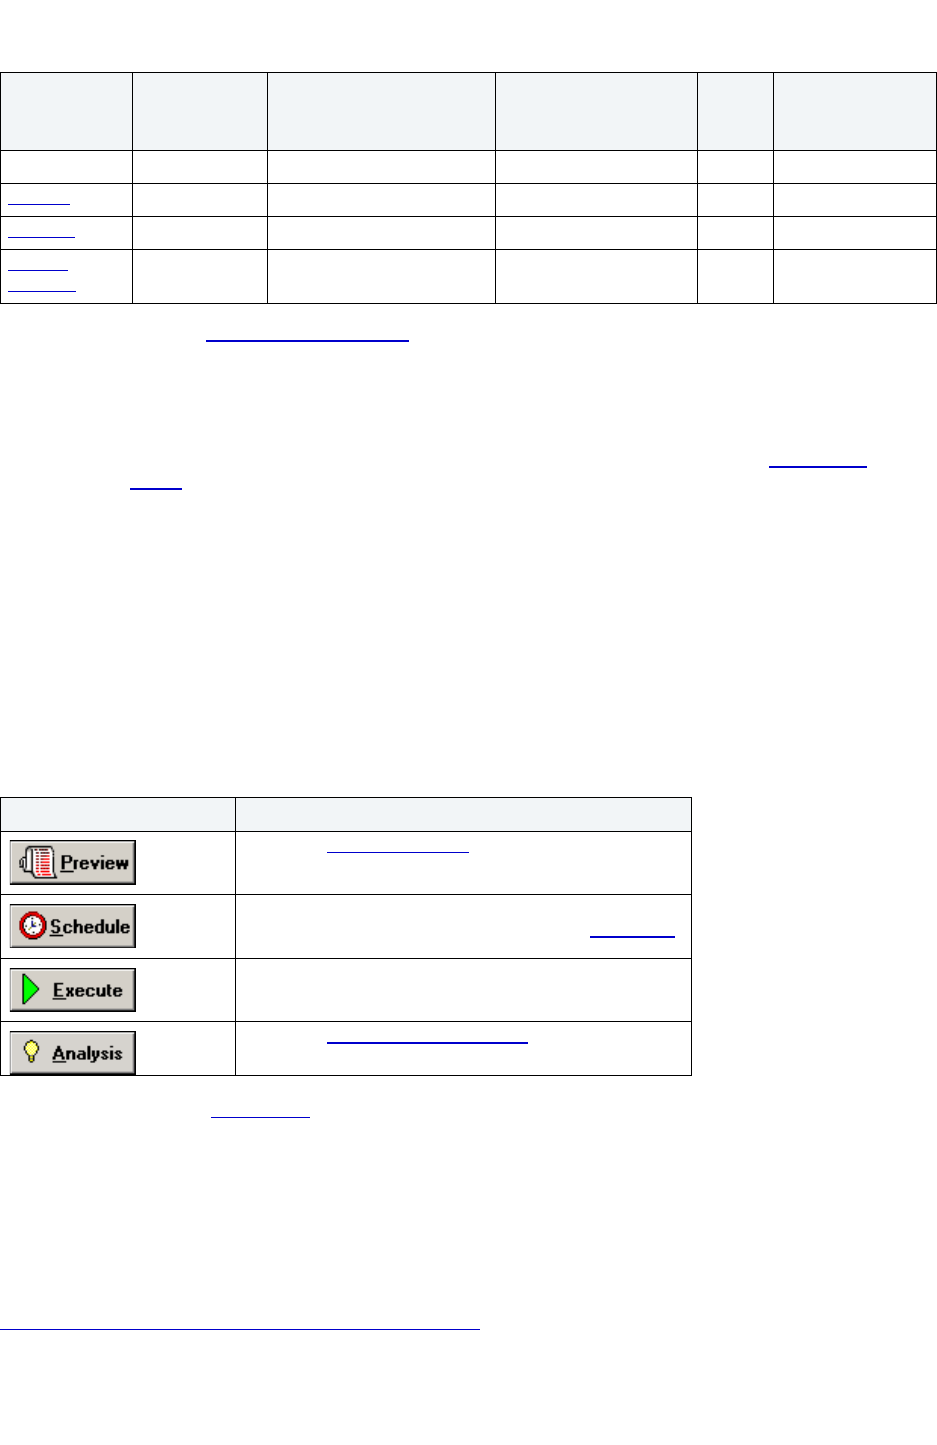
USING > FUNCTIONALITY
EMBARCADERO TECHNOLOGIES > BOOKNAMEVARIABLE 356
For more information, see Completing a Dialog Box.
Completing a Dialog Box
NOTE: Rapid SQL includes Wizards for creating new objects. For more information see Creating an
Object.
1 On the Database Explorer, select the target object node.
Rapid SQL displays the target objects in the Database Explorer.
2 On the Database Explorer, right-click the target object, and then select the target functionality.
Rapid SQL opens the functionality dialog box.
3 Complete the dialog box.
4 Do one of the following:
For more information, see Functionality
.
Creating an Object
Rapid SQL offers easy-to-use wizards and dialog boxes for creating objects.
Related Topics
IBM DB2 UDB for Linux, Unix, and Windows Object Wizards
Switch Online X
Triggers
XX X XX
Truncate
XX X XX
Update
Statistics
XX X X
Button Description
Opens the Preview dialog box.
Opens Embarcadero Job Scheduler, or (if unavailable)
another scheduling application. For more, see Scheduling.
Executes the task.
Opens the Impact Analysis dialog box. This option is not
available for every dialog box.
Functionality IBM DB2 UDB
for Open
Systems
IBM DB2 UDB for z/OS
and OS/390
Microsoft SQL Server Oracle Sybase ASE

USING > FUNCTIONALITY
EMBARCADERO TECHNOLOGIES > BOOKNAMEVARIABLE 357
IBM DB2 UDB for OS/390 and z/OS Object Wizards
Microsoft SQL Server Object Wizards
Oracle Object Wizards
Sybase ASE Object Wizards
Completing an Object Wizard
Completing an Object Dialog Box
Completing an Object Wizard
1 On the Datasource Explorer, select the target object node.
2 In the right pane of the application, right-click the target object, and then click New.
Rapid SQL opens the wizard.
3 Complete the wizard panels, and then click Finish.
Rapid SQL opens the Preview: Create dialog box.
For more information, see Creating an Object.
Completing an Object Creation Dialog Box
1 On the Datasource Explorer, select the target object node.
2 In the right pane of the application, right-click the target object, and then click New.
Rapid SQL opens the dialog box.
3 Complete the dialog box, and then click Finish.
Rapid SQL opens the Preview: Create dialog box.
For more information, see Creating an Object.
IBM DB2 UDB for Linux, Unix, and Windows Object Wizards
Alias Wizard Create Check
Constraint Dialog Box
Database Wizard Foreign Key Wizard
Function Wizard Index Wizard Materialized Query Table
Wizard
Node Group Wizard
Create Primary
Key Constraint
Dialog Box
Procedure Wizard Table Wizard Tablespace Wizard
Trigger Wizard Type Wizard Create Unique Key
Constraint Dialog Box
User Datatype Wizard
View Wizard

USING > FUNCTIONALITY
EMBARCADERO TECHNOLOGIES > BOOKNAMEVARIABLE 358
Alias Wizard for IBM DB2 UDB for Linux, Unix, and Windows
The Alias Wizard lets you create an alias without knowing the underlying commands. As you complete the Alias
Wizard process, Rapid SQL constructs the necessary CREATE ALIAS statement based on the information that you
supply.
The Alias Wizard:
• Lets you specify the alias and the owner.
• Lets you specify the target object owner, type, and name.
Important Notes
•None
For more information, see:
Completing an Object Wizard
Alias Wizard - Panel 1
Alias Wizard for IBM DB2 UDB for Linux, Unix, and Windows - Panel 1
The table below describes the options and functionality on the first panel of the Alias Wizard.
For more information, see:
Completing an Object Wizard
Alias Wizard
Alias Wizard for IBM DB2 UDB for Linux, Unix, and Windows - Panel 2
The table below describes the options and functionality on the second panel of the Alias Wizard.
For more information, see:
Completing an Object Wizard
Alias Wizard
Option Description
Who owns the alias to be
created?
Lets you select the owner of the alias.
What is the name of the
alias?
NOTE: Lets you type the name of the alias.
Option Description
Target Owner Lets you select an owner.
Target Alias Lets you select an existing table, view or alias or you
can specify another name.
Comment OPTIONAL: Lets you enter a comment.

USING > FUNCTIONALITY
EMBARCADERO TECHNOLOGIES > BOOKNAMEVARIABLE 359
Database Wizard for IBM DB2 UDB for Linux, Unix, and Windows
The Database Wizard lets you create a database without requiring you to know any of the underlying commands.
The IBM DB2 UDB for Linux, Unix, and Windows Database Wizard lets you:
• Name the database
• Add catalog containers
Important Notes
• Rapid SQL does not support creating databases for a version 8 server from a version 7 client.
Opening the IBM DB2 UDB for Linux, Unix, and Windows Database Wizard
1 On the Registration tool bar, click New UDB Database.
OR
On the Datasource Explorer, right-click an instance node or the Datasources node, and then click New UDB
Database.
Rapid SQL opens the first panel of the Database Wizard.
Database Wizard for IBM DB2 UDB for Linux, Unix, and Windows - Panel 1
The table below describes the options and functionality on the first panel of the Database Wizard.
For more information, see IBM DB2 UDB for Linux, Unix, and Windows Database Wizard.
Database Wizard for IBM DB2 UDB for Linux, Unix, and Windows - Panel 2
The table below describes the options and functionality on the second panel of the Database Wizard.
Option Description
What is the name of the
database?
Lets you specify a unique name. The database name
should be between 1 - 8 characters and must begin
with a letter A-Z or #, @, $.
What is the datasource name
for the new database?
Lets you type a unique datasource name to appear in
the datasource explorer.
What is the alias name of the
database.
OPTIONAL: Lets you type an alias. The database
name should be between 1 - 8 characters and must
begin with a letter A-Z or #, @, $.
What is the comment used for
the database?
OPTIONAL: Lets you type a comment up to 30
characters.
Option Description
On what drive/path will the
database reside?
OPTIONAL: Leave blank if you want Rapid SQL to
create the database using the DFTBPATH
parameter.
USING > FUNCTIONALITY
EMBARCADERO TECHNOLOGIES > BOOKNAMEVARIABLE 360
For more information, see IBM DB2 UDB for Linux, Unix, and Windows Database Wizard.
Database Wizard for IBM DB2 UDB for Linux, Unix, and Windows - Last Panel
The table below describes the options and functionality on the last panel of the Database Wizard.
For more information, see IBM DB2 UDB for Linux, Unix, and Windows Database Wizard
.
Add/Edit Container forTablespace
The table below describes the options and functionality on the Add and Edit Container for Tablespace dialog box:
What default tablespace
parameters should be used?
OPTIONAL: Lets you specify the Default Extent Size
and Number of Segments.
What global default
parameters should the
database use?
OPTIONAL: Lets you specify Territory, Codeset, and
Collating Sequence.
Option Description
Add the containers for the
tablespace below
Lets you select user containers:
Use System Managed Space
Use Database Managed Space
Add - Click to open the Add Container for
Tablespace dialog box.
Edit - Click to open the Edit Container for Tablespace
dialog box.
What optional default storage
parameters should be used.
OPTIONAL: Lets you specify the parameters.
Finish Opens the Preview SQL dialog box
.
Option Description
Directory Lets you type the container directory.
File name Displays the container file name.
Option Description
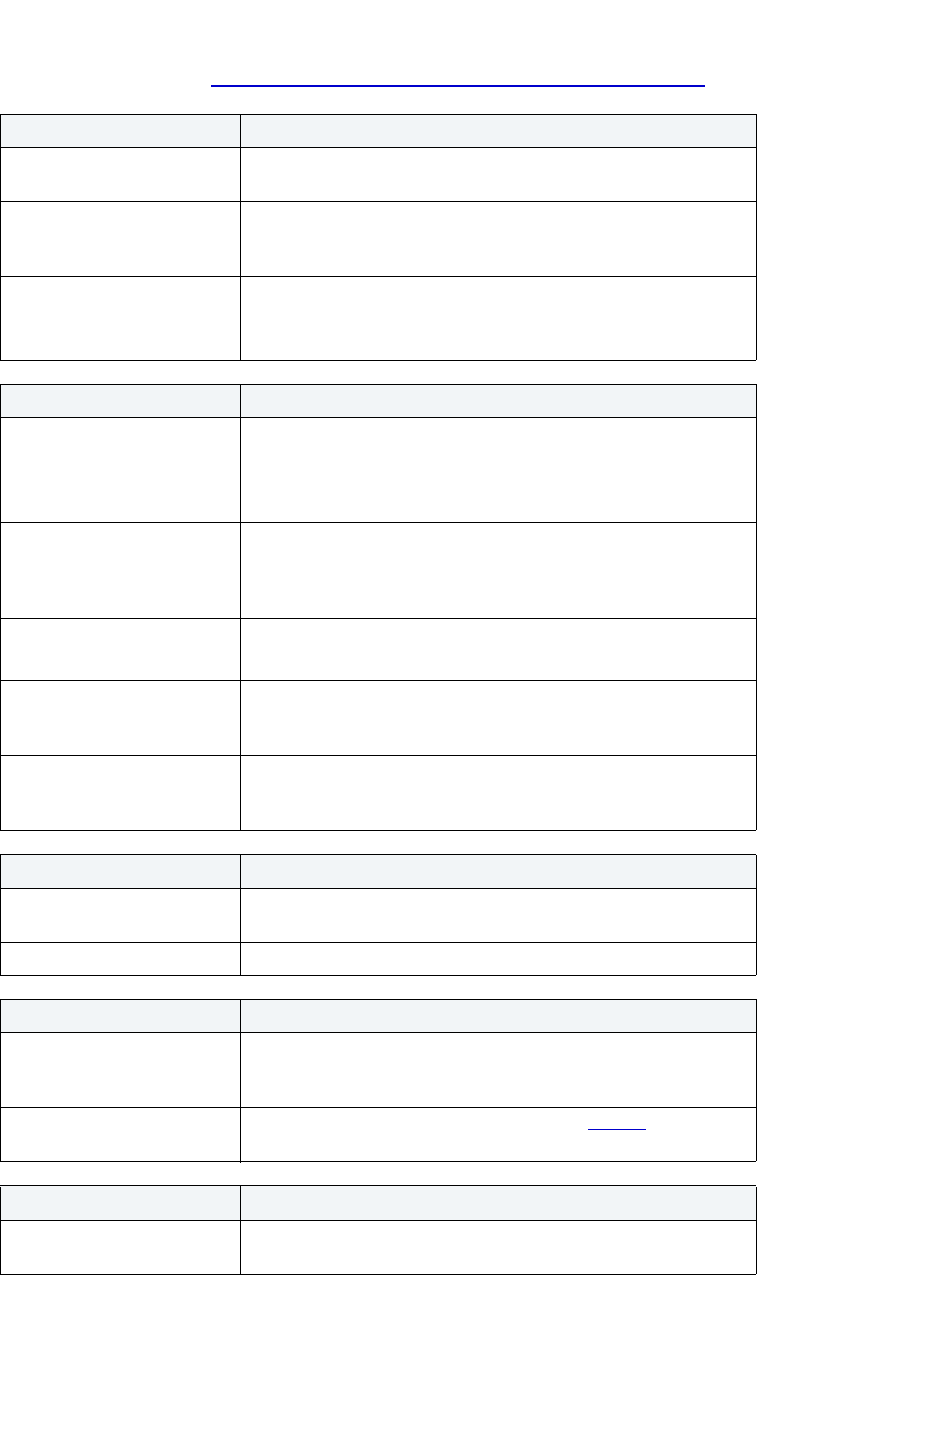
USING > FUNCTIONALITY
EMBARCADERO TECHNOLOGIES > BOOKNAMEVARIABLE 361
For more information, see IBM DB2 UDB for Linux, Unix, and Windows Database Wizard.Foreign Key Wizard for IBM
DB2 UDB for Linux, Unix, and Windows
The Foreign Key Wizard lets you create a foreign key without knowing the underlying commands.
Option Description
What is the name of the event
monitor?
Lets you type a name.
Do you want to autostart the
event monitor when the
database starts?
Lets you select an option.
Select the types of events
you would like to monitor
Lets you select an event type(s).
NOTE: Deadlocks with details is only available for IBM DB2 UDB
for Windows/Unix 8.
Option Description
What is the target for the
Event Monitor?
Lets you specify the target of the event monitor data. There are
three types of target: to file, to pipe, and to table.
NOTE: To Table option is only available for IBM DB2 UDB for
Windows/Unix 8.
When the event monitor if full
do you want the database
agents to block until the event
data is written to the disk?
Lets you specify a blocking option.
This option is available only for File and Table output types.
Specify the buffer size for the
Event Monitor
OPTIONAL: Lets you specify buffer size in pages.
This option is available only for File and Table output types.
Specify the maximum number
of files and the maximum file
size for the Event Monitor.
OPTIONAL: Lets you specify maxfiles and maxfilesize in pages.
This option is available only for File output type.
How do you want the Event
Monitor output written to the
file?
Lets you specify an output option.This option is available only for
File and Table output types.
Option Description
Event type Lets you specify an event type, if any were selected. Event types
include Connections, Statements, and Transactions.
Where clause Lets you type a WHERE clause specific to the event type.
Option Description
Select the database partition
where the event monitor runs
and writes the events
Lets you specify a partition.
Where do you want this Event
Monitor to collect data?
Available if you selected Deadlock events on Panel 1
.
Option Description
Select the partition(s) for the
event monitor to run against.
Lets you select which partition(s) the event monitor runs against.

USING > FUNCTIONALITY
EMBARCADERO TECHNOLOGIES > BOOKNAMEVARIABLE 362
The Foreign Key Wizard lets you:
• Name the foreign key constraint
• Identify the parent table and the referenced constraint.
• Map the column pairs between the parent and child tables.
Important Notes
•None
For more information, see:
Completing an Object Wizard
Foreign Key Wizard - Panel 1
Foreign Key Wizard for IBM DB2 UDB for Linux, Unix, and Windows - Panel 1
The table below describes the options and functionality on the first panel of the Foreign Key Wizard.
For more information, see:
Completing an Object Wizard
Foreign Key Wizard
Foreign Key Wizard for IBM DB2 UDB for Linux, Unix, and Windows - Panel 2
The table below describes the options and functionality on the second panel of the Foreign Key Wizard.
Option Description
Which table will host the
constraint?
Lets you select the owner and table.
What will be the name of this
new constraint?
Lets you select a constraint name.
System Generated Name - DB2 automatically generates a name.
User Specified Constraint Name - You type the name.
What action should
dependent table take when a
row of parent table is
deleted?
Lets you select an action.
No Action
Restrict
Cascade
Set Null
What action what action
should dependent table take
when a row of parent table is
updated?
Lets you select and action.
No Action
Restrict
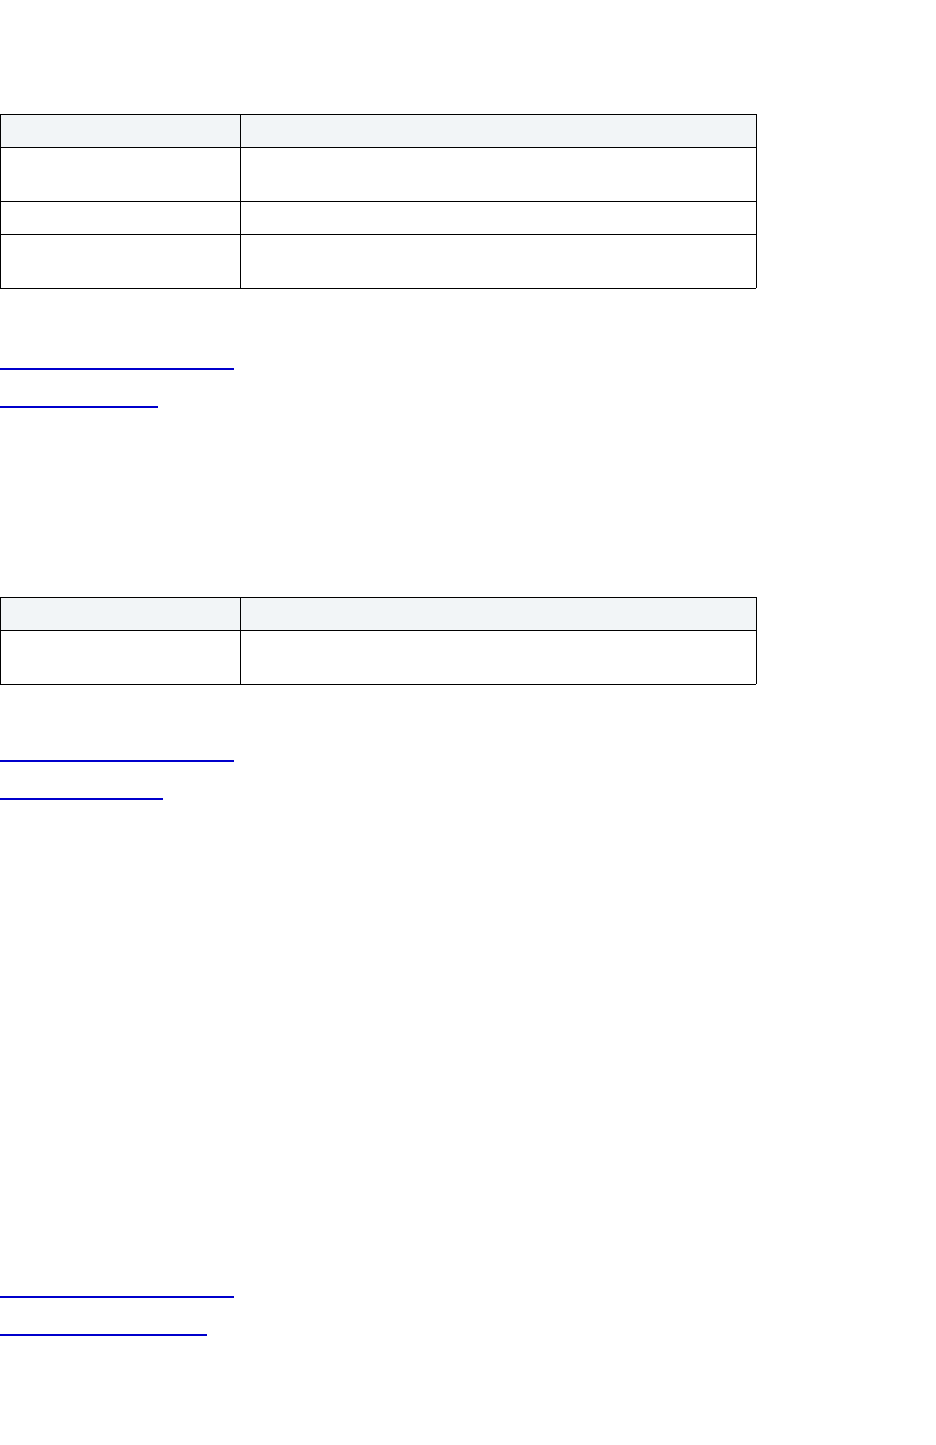
USING > FUNCTIONALITY
EMBARCADERO TECHNOLOGIES > BOOKNAMEVARIABLE 363
For more information, see:
Completing an Object Wizard
Foreign Key Wizard
Foreign Key Wizard for IBM DB2 UDB for Linux, Unix, and Windows - Panel 3
The table below describes the options and functionality on the third panel of the Foreign Key Wizard.
Completing Panel 3
For more information, see:
Completing an Object Wizard
Foreign Key Wizard
Function Wizard for IBM DB2 UDB for Linux, Unix, and Windows
The Function Wizard lets you create a function without knowing the underlying commands. As you complete the
Function Wizard process, Rapid SQL constructs the necessary CREATE FUNCTION statement based on the
information that you supply.
The Function Wizard lets you:
• Specify the function name, owner, and type.
• Specify the datatypes for the parameters of the new function.
• Specify special options of how and when the function should act.
Important Note
• To create a user-defined function, need CREATE ANY privileges or IMPLICIT_SCHEMA authority on the
database if the schema does not already exist.
For more information, see:
Completing an Object Wizard
Function Wizard - Panel 1
Option Description
Select the parent table to
reference?
Lets you select the table owner and the parent table owner.
Table Name Lets you select the parent table name.
Select the parent table
constraint
Lets you select the primary and unique key constraints you want to
reference.
Option Description
Select column associations Lets you map the foreign key columns between the child and
parent tables.
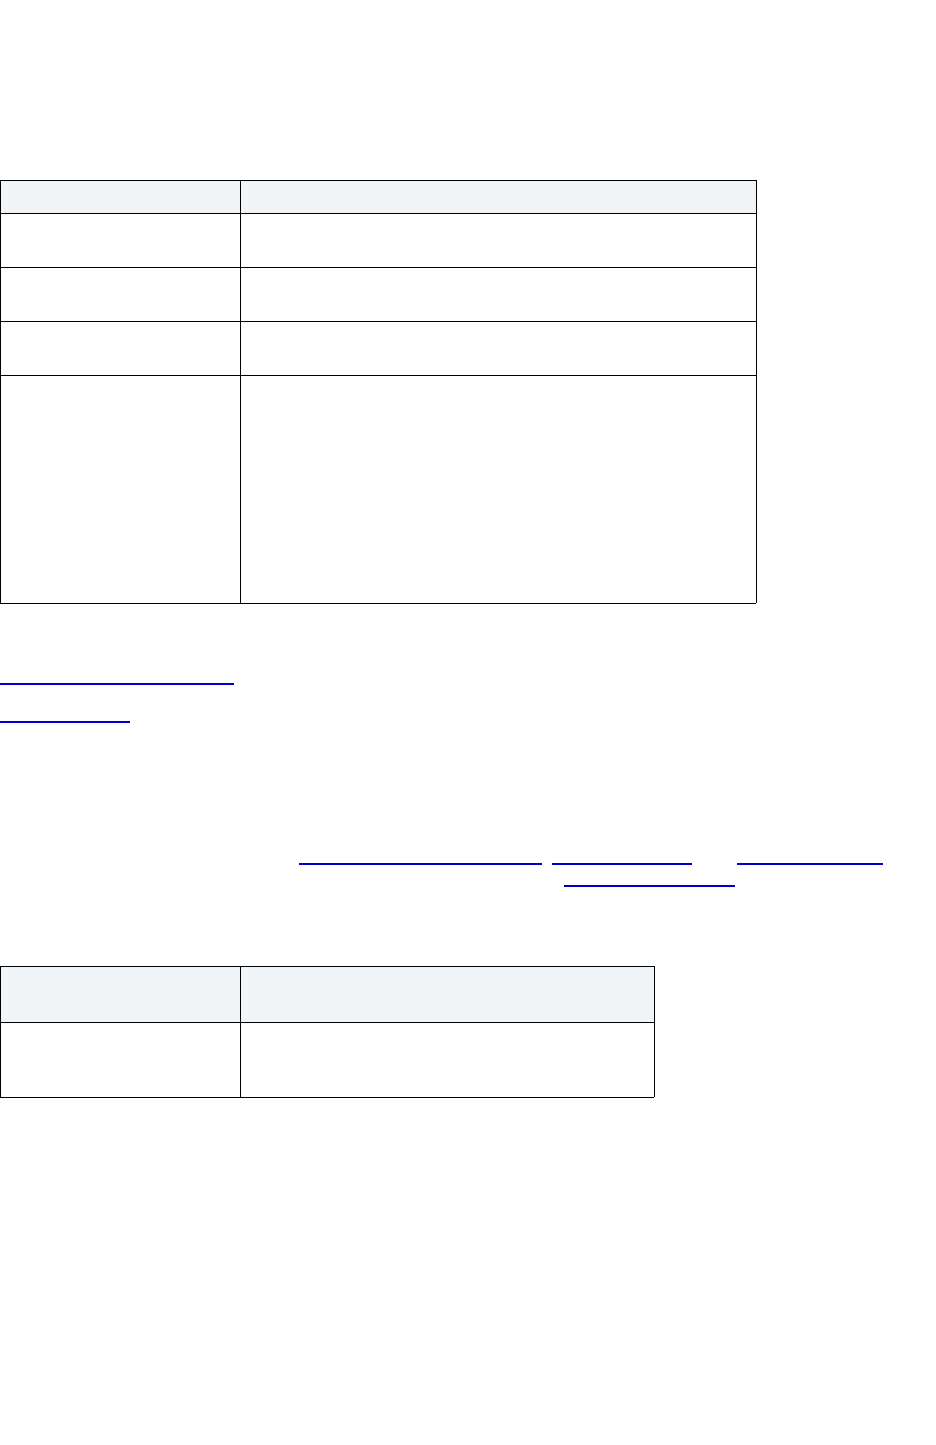
USING > FUNCTIONALITY
EMBARCADERO TECHNOLOGIES > BOOKNAMEVARIABLE 364
Function Wizard for IBM DB2 UDB for Linux, Unix, and Windows - Panel 1
The table below describes the options and functionality on the first panel of the Function Wizard.
For more information, see:
Completing an Object Wizard
Function Wizard
Function Wizard for IBM DB2 UDB for Linux, Unix, and Windows - Panel 2
The tables below describe the options and functionality on the second panel of the Function Wizard.
NOTE: The options differ for external scalar/ table functions
, sourced functions, and template functions.
Options for OLEDB functions are the same options for external scalar/ table
functions.
Option Description
Who will own the function to
be registered?
Lets you select the function owner.
What is the name of the
function?
Lets you enter the function name.
What is the unique name of
the function?
OPTIONAL: Lets you enter the unique name.
What type of function would
you like to register?
Lets you select the type of function:
External Scaler
External Table
OLEDB - Accesses OLE DB data in user-defined OLE DB external
tables.
Sourced
SQL Language
Tem pla te
External Scaler/Table
Function
Description
Specify language in which the
body of the user-defined
function is written:
Lets you select the language.
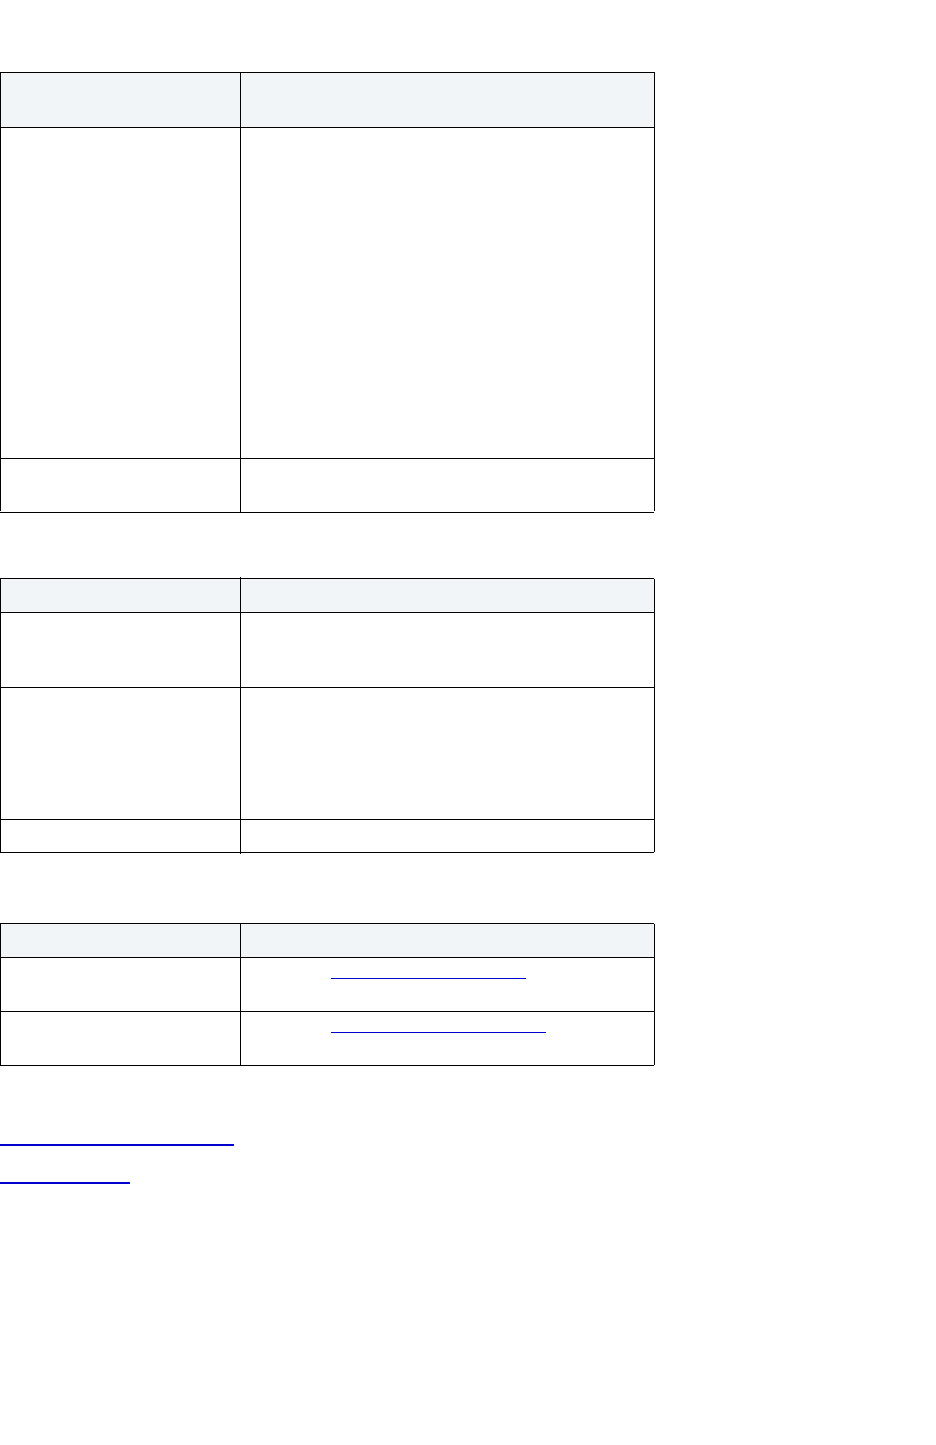
USING > FUNCTIONALITY
EMBARCADERO TECHNOLOGIES > BOOKNAMEVARIABLE 365
For more information, see:
Completing an Object Wizard
Function Wizard
Specify the either the name of
the library containing the
function or the full name of
the function:
Lets you type the full path of the library or click the
Browse button.
NOTE: If you are using C language, specify the full
library path and the function name, otherwise IBM
DB2 UDB Database Manager assumes the function
is under the IBM DB2 UDB library.
NOTE: If you are using Java script, specify the Class
ID and the function name, otherwise IBM DB2 UDB
Database Manager assumes the function is under
the IBM DB2 UDB library.
NOTE: If you are using OLE language, specify the
full library path and the function name, otherwise IBM
DB2 UDB Database Manager assumes the function
is under the IBM DB2 UDB library.
What is the name of the entry
point function to be invoked?
OPTIONAL: Lets you enter the name of the entry
point function.
Sourced Function Description
Select the source function
which will implement the
function being created:
Lets you select the source function.
Name and Parameters Lets you select the name and parameters for the
function.
Name - Select the name from the list.
Parameters - If the function has multiple parameters,
select the parameters from the list.
Specific Name Lets you select the function by a specific name.
Template Function Description
Add Button Opens the Add Parameter dialog box, which lets you
specify the datatypes for the function's parameters.
Edit button Opens the Modify Parameter dialog box
that lets you
cast the datatype to a different datatype.
External Scaler/Table
Function
Description
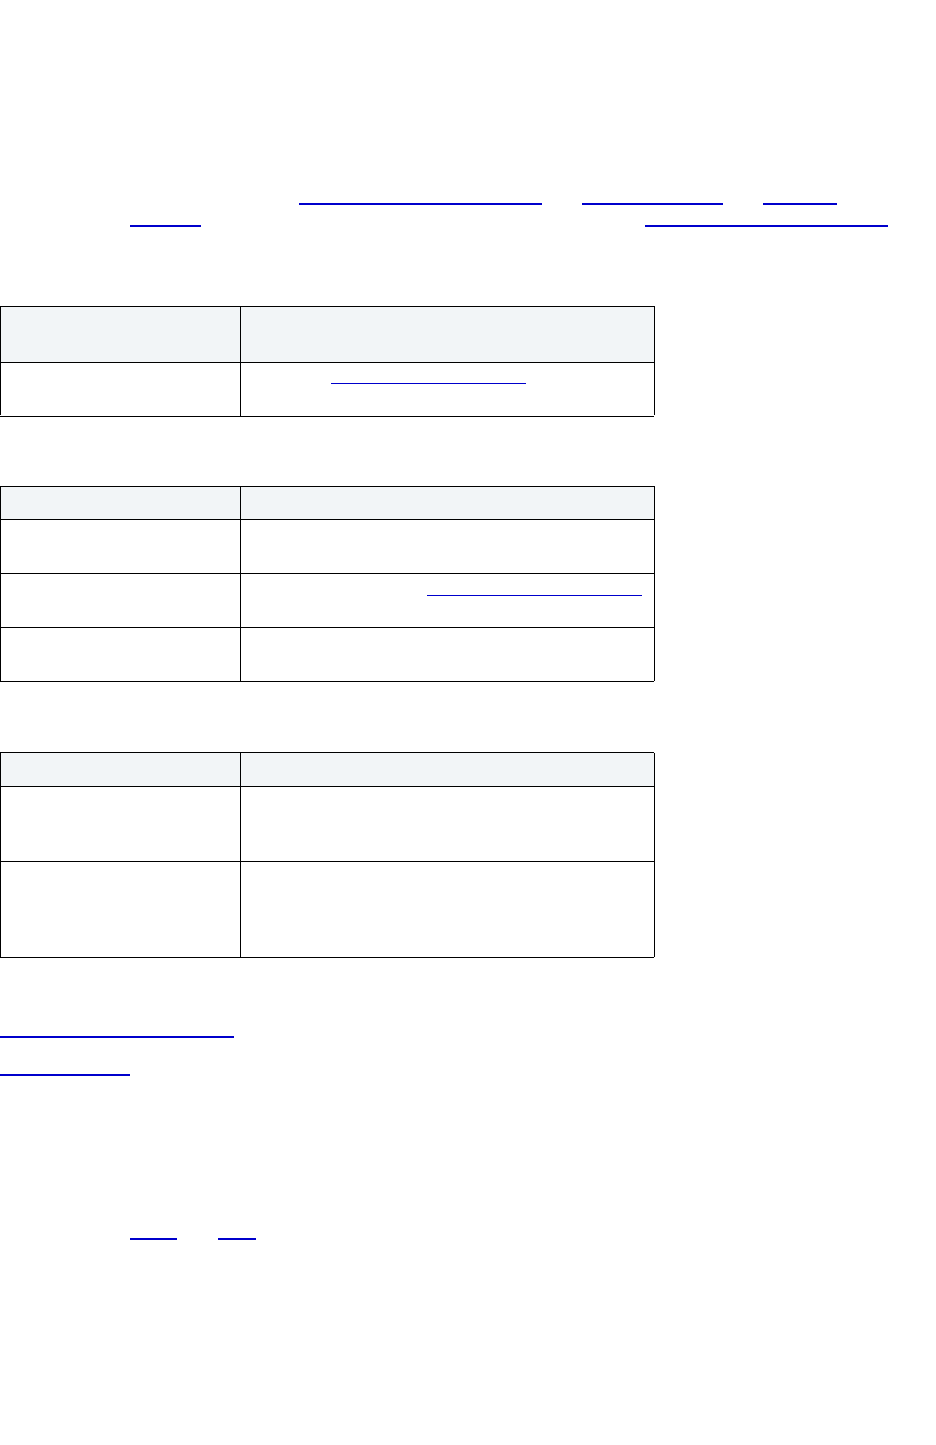
USING > FUNCTIONALITY
EMBARCADERO TECHNOLOGIES > BOOKNAMEVARIABLE 366
Function Wizard for IBM DB2 UDB for Linux, Unix, and Windows - Panel 3
The tables below describe the options and functionality on the third panel of the Function Wizard.
NOTE: If you do not need to modify or specify any parameters for the function, this panel is optional.
NOTE: The options differ for external scalar/ table functions and sourced functions and template
functions. Options for OLEDB functions are the same options for external scalar/ table functions.
For more information, see:
Completing an Object Wizard
Function Wizard
Function Wizard for IBM DB2 UDB for Linux, Unix, and Windows - Panel 4
The tables below describe the options and functionality on the fourth panel of the Function Wizard.
NOTE: This panel is only available for external scalar and table functions. The panel options differ for
scaler and table functions.
External Scaler/Table
Function
Description
Add Button Opens the Add Parameter dialog box, which lets you
specify the datatypes for the function's parameters.
Sourced Function Description
Specify the datatypes for the
new function's parameters:
Lets you select the target function parameter
datatype.
Edit button OPTIONAL: Opens the Modify Parameter dialog box
that lets you cast the datatype to a different datatype.
Specify the datatype for the
new function's return value:
Lets you accept the default or enter a datatype.
Template Function Description
Specify the datatype to be
returned to the invoking
statement
Lets you select the return datatype.
Specify the datatype returned
by the function code if it
differs from the return type
above
Lets you select the cast datatype.
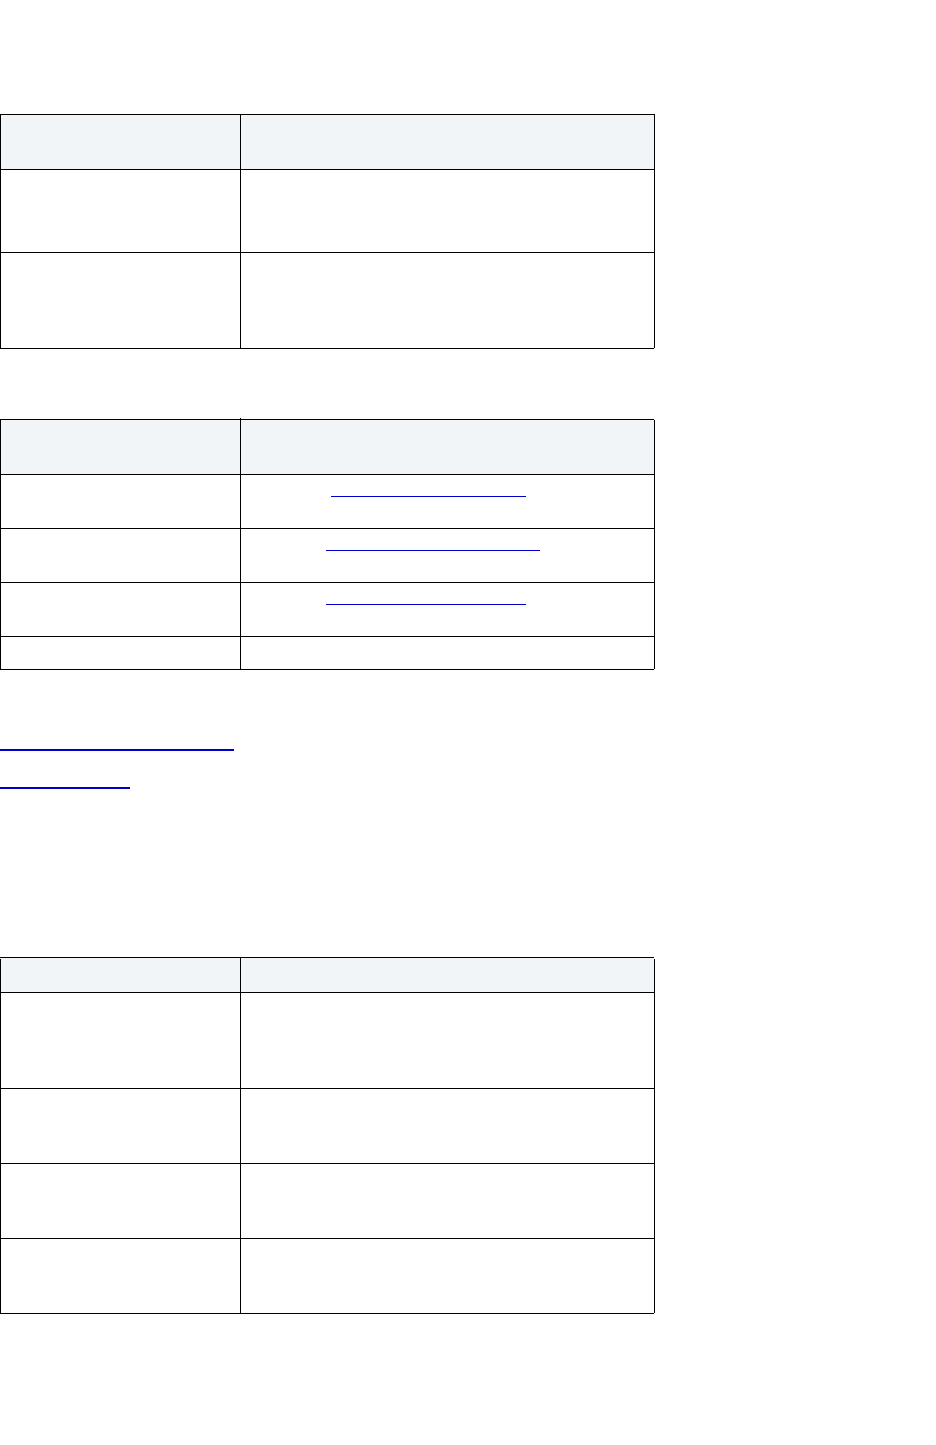
USING > FUNCTIONALITY
EMBARCADERO TECHNOLOGIES > BOOKNAMEVARIABLE 367
For more information, see:
Completing an Object Wizard
Function Wizard
Function Wizard for IBM DB2 UDB for Linux, Unix, and Windows - Panel 5
The table below describes the options and functionality on the fifth panel of the Function Wizard.
For more information, see:
External Scaler Function
Option
Description
Specify the datatype to be
returned to the invoking
statement:
Lets you select the return datatype and set the width
and scale.
As Locator - Lets you set the parameter as a locator.
Specify the datatype returned
by the function code if it
differs from the return type
above:
OPTIONAL: Only necessary if the return type of the
new function is to be different than the program that
implements the function.
External Table Function
Option
Description
Add Button Opens the Add Parameter dialog box, which lets you
specify the columns to be returned.
Insert Button Opens the Insert Parameter dialog box
, which lets
you specify the columns to be returned.
Edit Button Opens the Edit Parameter dialog box
, which lets you
specify the columns to be returned.
Drop Button Lets you drop a column.
Option Description
Does the function take any
action that changes the state
of an object not managed by
the database manager?
Click the Yes or No Option button.
Does the function depend on
some state values that do not
effect the results?
Click the Yes or No option button.
Would you like the function to
be called in the event that
there is a null argument?
If you click the No option button, a NULL argument is
not passed to the function and the result of the
function is considered NULL automatically.
Would you like a scratchpad
to be provided for this
function?
NOTE: Only available for EXTERNAL TABLE or
EXTERNAL SCALAR functions.

USING > FUNCTIONALITY
EMBARCADERO TECHNOLOGIES > BOOKNAMEVARIABLE 368
Completing an Object Wizard
Function Wizard
Function Wizard for IBM DB2 UDB for Linux, Unix, and Windows -Panel 6
The tables below describe the options and functionality on the sixth panel of the Function Wizard.
NOTE: The options differ for external scalar
and external table functions. Options for OLEDB functions
are the same options for external table functions.
For more information, see:
Completing an Object Wizard
Function Wizard
Index Wizard for IBM DB2 UDB for Linux, Unix, and Windows
The Index Wizard lets you create an index without knowing the underlying commands.
The Index Wizard lets you:
External Scaler Function
Option
Description
Would you like a final call to
be made to the external
function?
Click Yes or No.
Do you want the invocation of
the function to be
parallelizable for a single
reference to the function?
Click Yes or No.
Do not want certain specific
information known by IBM
DB2 UDB to be passed on to
the function as an additional
invocation-time argument?
Click Yes or No.
External Table Function
Option
Description
You can help the DB2
optimizer by providing an
estimate of the number of
rows to returned by the
function.
Default for optimizer is 0.
To make enabled check box
should be checked.
Click Yes or No for static dispatch option. Default is
yes.
NOTE: Static dispatch is for the External Table
function and is for IBM DB2 UDB for Linux, Unix, and
Windows version 8 only.
USING > FUNCTIONALITY
EMBARCADERO TECHNOLOGIES > BOOKNAMEVARIABLE 369
• Specify the table owner and name.
• Specify the index owner and name.
• Lets you create a unique index and provide a comment for the index.
• Lets you identify the index location and order.
Important Notes
•None
For more information, see:
Completing an Object Wizard
Index Wizard - Panel 1
Index Wizard for IBM DB2 UDB for Linux, Unix, and Windows - Panel 1
The table below describes the options and functionality on the first panel of the Index Wizard:
For more information, see:
Completing an Object Wizard
Index Wizard
Index Wizard for IBM DB2 UDB for Linux, Unix, and Windows - Panel 2
The table below describes the options and functionality on the second panel of the Index Wizard.
Option Description
Who owns the table to be
indexed?
Lets you select a table owner.
What is the name of the table
to be indexed?
Lets you enter a table name.
Who owns the index to be
created?
Lets you select the index owner.
What is the name of the
index?
Lets you enter an index name.
Option Description
Unique Index enforces uniqueness on the values of the
table's index key.
Cluster Specifies that the index is the clustering index of the
table. The cluster factor of a clustering index is
maintained or improved dynamically as data is
inserted into the associated table, by attempting to
insert new rows physically close to the rows for which
the key values of this index are in the same range.
USING > FUNCTIONALITY
EMBARCADERO TECHNOLOGIES > BOOKNAMEVARIABLE 370
For more information, see:
Completing an Object Wizard
Index Wizard
Index Wizard for IBM DB2 UDB for Linux, Unix, and Windows - Panel 3
The table below describes the options and functionality on the third panel of the Index Wizard.
For more information, see:
Completing an Object Wizard
Index Wizard
Index Wizard for IBM DB2 UDB for Linux, Unix, and Windows - Panel 4
The table below describes the options and functionality on the last panel of the Index Wizard.
Allow reverse scans Specifies that an index can support both forward and
reverse scans; that is, in the order defined by the
wizard and in the opposite (or reverse) order.
Percentage of free space left
on index
Lets you type or select the percentage of each index
page to leave as free space when building the index,
from 0 to 99.
Minimum percentage of used
space left on index pages
Lets you type or select the minimum percentage of
space used on an index leaf page. If, after a key is
removed from an index leaf page, the percentage of
space used on the page is at or below integer
percent, an attempt is made to merge the remaining
keys on this page with those of a neighboring page. If
there is sufficient space on one of these pages, the
merge is performed and one of the pages is deleted.
The value of integer can be from 0 to 99.
Comment OPTIONAL: Lets you enter a comment.
Option Description
Select the Index Columns: Lets you select the table columns to include in the
index and reorder the index columns.
Option Description
Please select index extension
name
Lets you select the index extension name.
Option Description
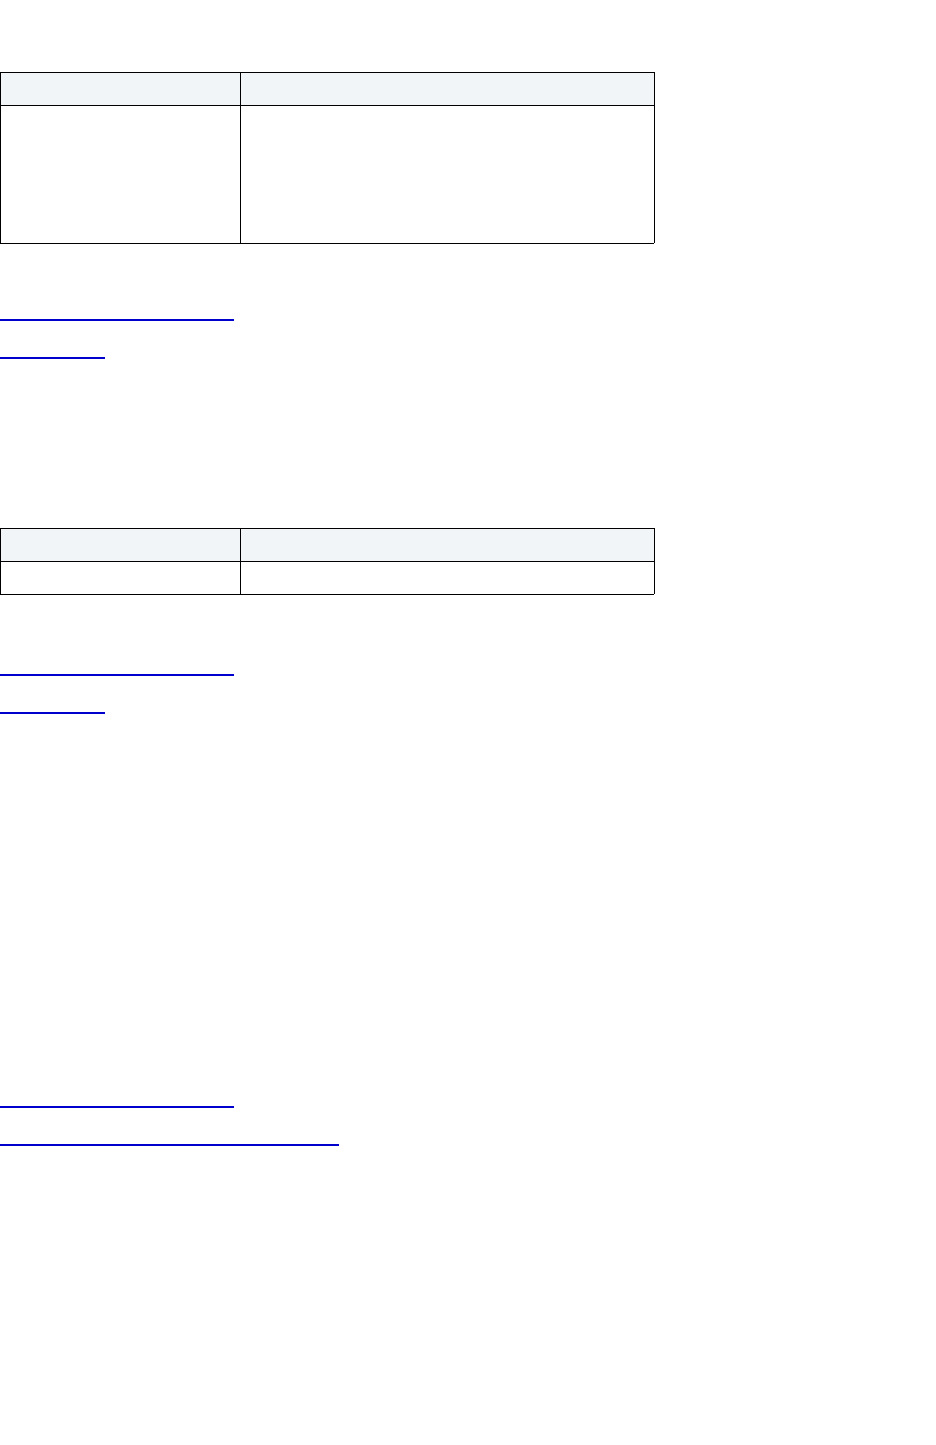
USING > FUNCTIONALITY
EMBARCADERO TECHNOLOGIES > BOOKNAMEVARIABLE 371
For more information, see:
Completing an Object Wizard
Index Wizard
Index Wizard for IBM DB2 UDB for Linux, Unix, and Windows - Panel 4
The table below describes the options and functionality on the last panel of the Index Wizard.
For more information, see:
Completing an Object Wizard
Index Wizard
Materialized Query Table Wizard for IBM DB2 UDB for Linux, Unix, and Windows
The Materialized Query Table Wizard lets you create a table without knowing the underlying commands.
The Materialized Query Table Wizard lets you:
• Name the table and owner
• Lets you set logging options for the table and to provide table comments.
Important Notes
•None
For more information, see:
Completing an Object Wizard
Materialized Query Table Wizard - Panel 1
Materialized Query Table Wizard for IBM DB2 UDB for Linux, Unix, and Windows - Panel 1
The table below describes the options and functionality on the first panel of the Materialized Query Table Wizard.
NOTE: These options are only available if the tablespace you selected is a database managed
tablespace.
The CREATE INDEX
EXTENSION statement
creates an extension object
for use with indexes on tables
that have structured type or
distinct type columns.
Lets you type the CREATE INDEX EXTENSION
statement.
Option Description
Enter a comment. OPTIONAL: Lets you enter a comment for the table.
Option Description
USING > FUNCTIONALITY
EMBARCADERO TECHNOLOGIES > BOOKNAMEVARIABLE 372
For more information, see:
Completing an Object Wizard
Materialized Query Table Wizard
Materialized Query Table Wizard for IBM DB2 UDB for Linux, Unix, and Windows - Panel 2
In the second panel of the Materialized Query Table Wizard, the Add Column dialog box opens immediately to let you
add and define table columns.
The table below describes the options and functionality on the second panel of the Materialized Query Table Wizard.
For more information, see:
Completing an Object Wizard
Materialized Query Table Wizard
Materialized Query Table Wizard for IBM DB2 UDB for Linux, Unix, and Windows - Panel 3
The table below describes the options and functionality on the third panel of the Materialized Query Table Wizard.
For more information, see:
Completing an Object Wizard
Option Description
Who owns the table? Lets you select the table owner.
What is the name of the
table?
Lets you enter the table name.
Select a tablespace on which
to place the table:
OPTIONAL: Click the list and then click the double space.
Specify separate tablespaces
for index and long data
below:
OPTIONAL: Lets you separate indexes or long data from the table.
Indexes
Long data
Option Description
Add the columns belonging to
this table
Add - Click to open the Add Column dialog box.
Insert - Click to open the Insert Column dialog box
.
Edit - Click to open the Modify Column dialog box
.
Drop - Click to delete the column.
Option Description
Specify the query on which
this table is based.
Lets you type the SQL query on which the materialized table is
based.

USING > FUNCTIONALITY
EMBARCADERO TECHNOLOGIES > BOOKNAMEVARIABLE 373
Materialized Query Table Wizard
Materialized Query Table Wizard for IBM DB2 UDB for Linux, Unix, and Windows - Panel 4
The table below describes the options and functionality on the fourth panel of the Materialized Query Table Wizard.
For more information, see:
Completing an Object Wizard
Materialized Query Table Wizard
Materialized Query Table Wizard for IBM DB2 UDB for Linux, Unix, and Windows - Panel 5
The table below describes the options and functionality on the fifth panel of the Materialized Query Table Wizard.
For more information, see:
Completing an Object Wizard
Materialized Query Table Wizard
Materialized Query Table Wizard for IBM DB2 UDB for Linux, Unix, and Windows - Panel 6
The table below describes the options and functionality on the sixth panel of the Materialized Query Table Wizard.
Option Description
Definition Only Lets you select definition options, Include Column Defaults and
Include Identity Column Attributes.After you complete the wizard,
Rapid SQL opens the Tables Editor.
Refreshable Lets you select refresh options. After you complete the wizard,
Rapid SQL opens the Material Query Tables Editor.
Option Description
Would you like extra
information regarding SQL
changes to this table to be
written to the log?
Lets you specify if you want the wizard to save changes to a log.
Would you like to skip logging
changes made to this table by
Insert... and Alter Table
operations in the same unit of
work in which this table is
created?
Lets you specify if you want the wizard to skip logging changes.
What type of table lock would
you like when it is being
accessed?
Lets you select a table lock.
USING > FUNCTIONALITY
EMBARCADERO TECHNOLOGIES > BOOKNAMEVARIABLE 374
For more information, see:
Completing an Object Wizard
Materialized Query Table Wizard
Node Group Wizard for IBM DB2 UDB for Linux, Unix, and Windows
The Node Group Wizard lets you create a node group without knowing the underlying commands. When you create a
nodegroup, name the nodegroup and select the partitions to include in the nodegroup.
Important Notes
•None
The table below describes the options and functionality on the Node Group Wizard.
For more information, see Completing an Object Wizard
.
Create Primary Key Constraint Dialog Box for IBM DB2 UDB for Linux, Unix, and
Windows
The Create Primary Key Constraint dialog box lets you create a primary key without knowing the underlying
commands. When you create a primary key, specify the owner and table on which you want to place the primary key
constraint.
Important Notes
•None
The table below describes the options and functionality on the Create Primary Key Constraint Dialog Box.
Option Description
What percent of free space to
leave for load and
reorganization?
Lets you specify the number of pages of free space.
Do you want data to append
to the end of the table?
Lets you specify if you want data to append at the end of the table.
Do you want the access plan
to this table to be based on
existing statistics and
optimization level?
Lets you specify optimization options.
Enter a comment OPTIONAL: Lets you type a comment.
Option Description
What is the name of the
nodegroup?
Lets you enter the nodegroup name.
Select partitions in the
nodegroup:
Lets you select the check boxes that correspond with
the target partitions or click the Check All button.
USING > FUNCTIONALITY
EMBARCADERO TECHNOLOGIES > BOOKNAMEVARIABLE 375
For more information, see Completing an Object Wizard.
Procedure Wizard for IBM DB2 UDB for Linux, Unix, and Windows
The Procedure Wizard lets you create a procedure without knowing the underlying commands.
The Procedure Wizard lets you:
• Name the procedure and specify its body.
• Set the language of the procedure and the location of the library or class containing the procedure.
• Specify the datatypes for the parameters of the stored procedure.
• Apply special options to the procedure, such as whether the procedure should always run in separate address
space than the database.
Important Notes
•None
For more information, see:
Completing an Object Wizard
Procedure Wizard - Panel 1
Procedure Wizard for IBM DB2 UDB for Linux, Unix, and Windows - Panel 1
The table below describes the options and functionality on the first panel of the Procedure Wizard.
For more information, see:
Option Description
Owner Lets you select the primary key constraint owner.
Table Lets you select the table you want to place the
primary key constraint.
Constraint Name Lets you enter the name of the constraint, which can
be up to 30 characters long and must be unique
across the entire database.
Specify Columns in
Constraint:
Lets you select, reorder, and remove the primary key
columns.
Option Description
Who will own the procedure
to be registered?
Lets you select the procedure owner.
What is the name of the
procedure?
Lets you enter the procedure name.
What is the unique name of
the procedure?
OPTIONAL: Lets you enter the unique name.
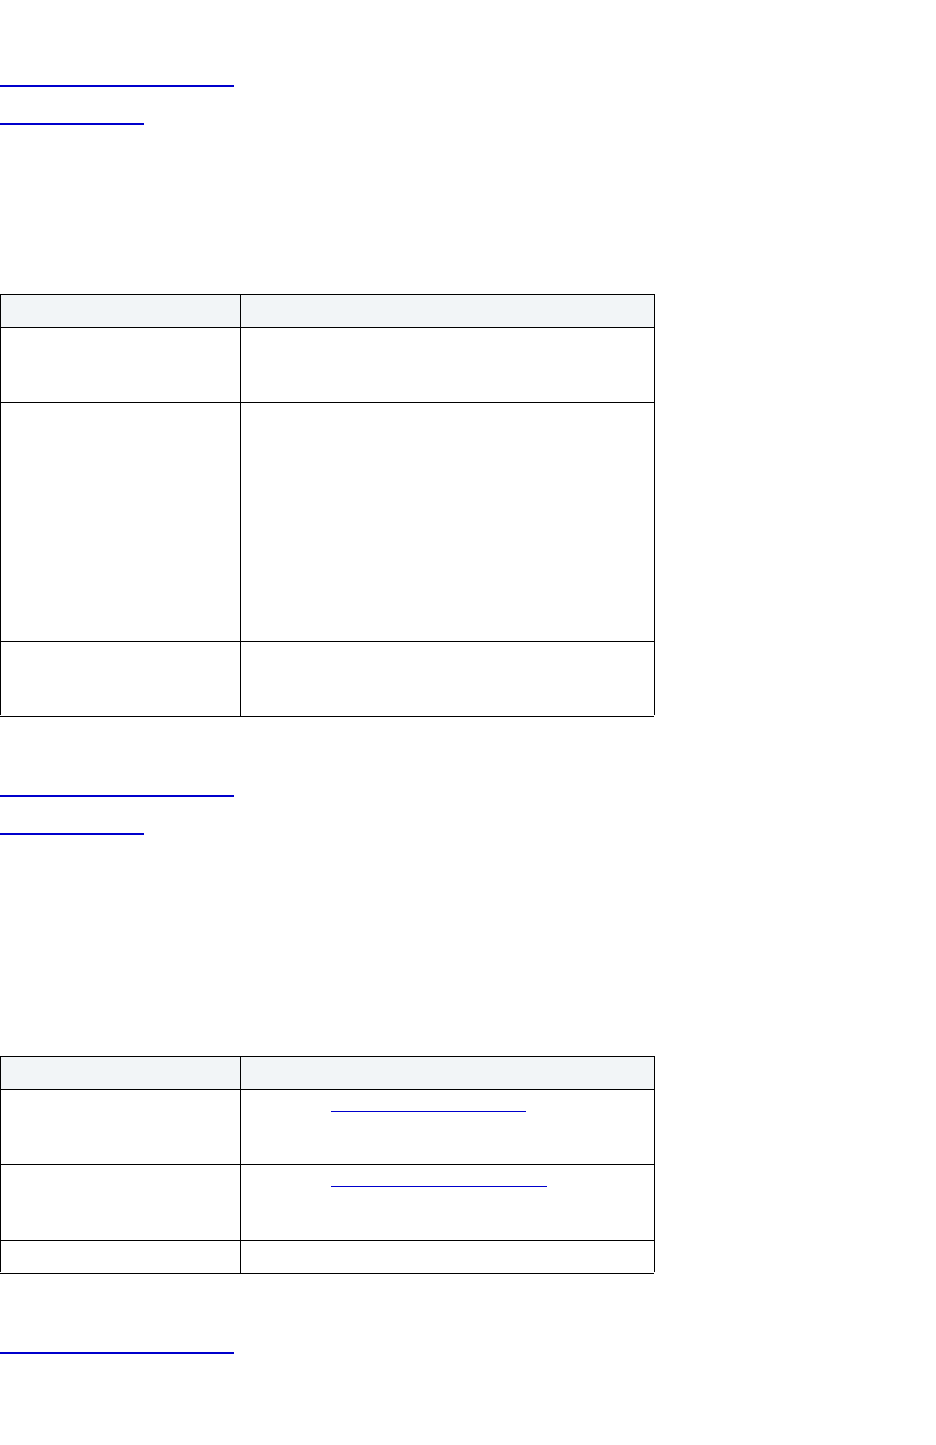
USING > FUNCTIONALITY
EMBARCADERO TECHNOLOGIES > BOOKNAMEVARIABLE 376
Completing an Object Wizard
Procedure Wizard
Procedure Wizard for IBM DB2 UDB for Linux, Unix, and Windows - Panel 2
The table below describes the options and functionality on the second panel of the Procedure Wizard.
For more information, see:
Completing an Object Wizard
Procedure Wizard
Procedure Wizard for IBM DB2 UDB for Linux, Unix, and Windows - Panel 3
The table below describes the options and functionality on the third panel of the Procedure Wizard.
NOTE: If you do not need to modify or specify any parameters for the procedure, this panel is optional.
For more information, see:
Completing an Object Wizard
Option Description
Specify the language in which
the procedure routine is
written
Lets you select the language: C, JAVA, COBOL,
OLE, or SQL.
Specify the either the name of
the library containing the
procedure or the full name of
the procedure:
Lets you enter the full path of the library of click the
browse button.
NOTE: If you are using C language, specify the full
library path and the procedure name, otherwise IBM
DB2 UDB Database Manager assumes the
procedure is under the IBM DB2 UDB library.
NOTE: If you are using Java script, specify the Class
ID and the procedure name, otherwise IBM DB2
UDB Database Manager assumes the procedure is
under the IBM DB2 UDB library.
What is the name of the entry
point procedure to be
invoked?
OPTIONAL: Lets you enter the name of the entry
point function.
Option Description
Add Button Opens the Add Parameter dialog box, which lets you
specify the datatypes for the new procedure's
parameters.
Edit Button Opens the Modify Parameter dialog box
, which lets
you specify the datatypes for the new procedure's
parameters.
Delete Button Lets you delete the parameter.
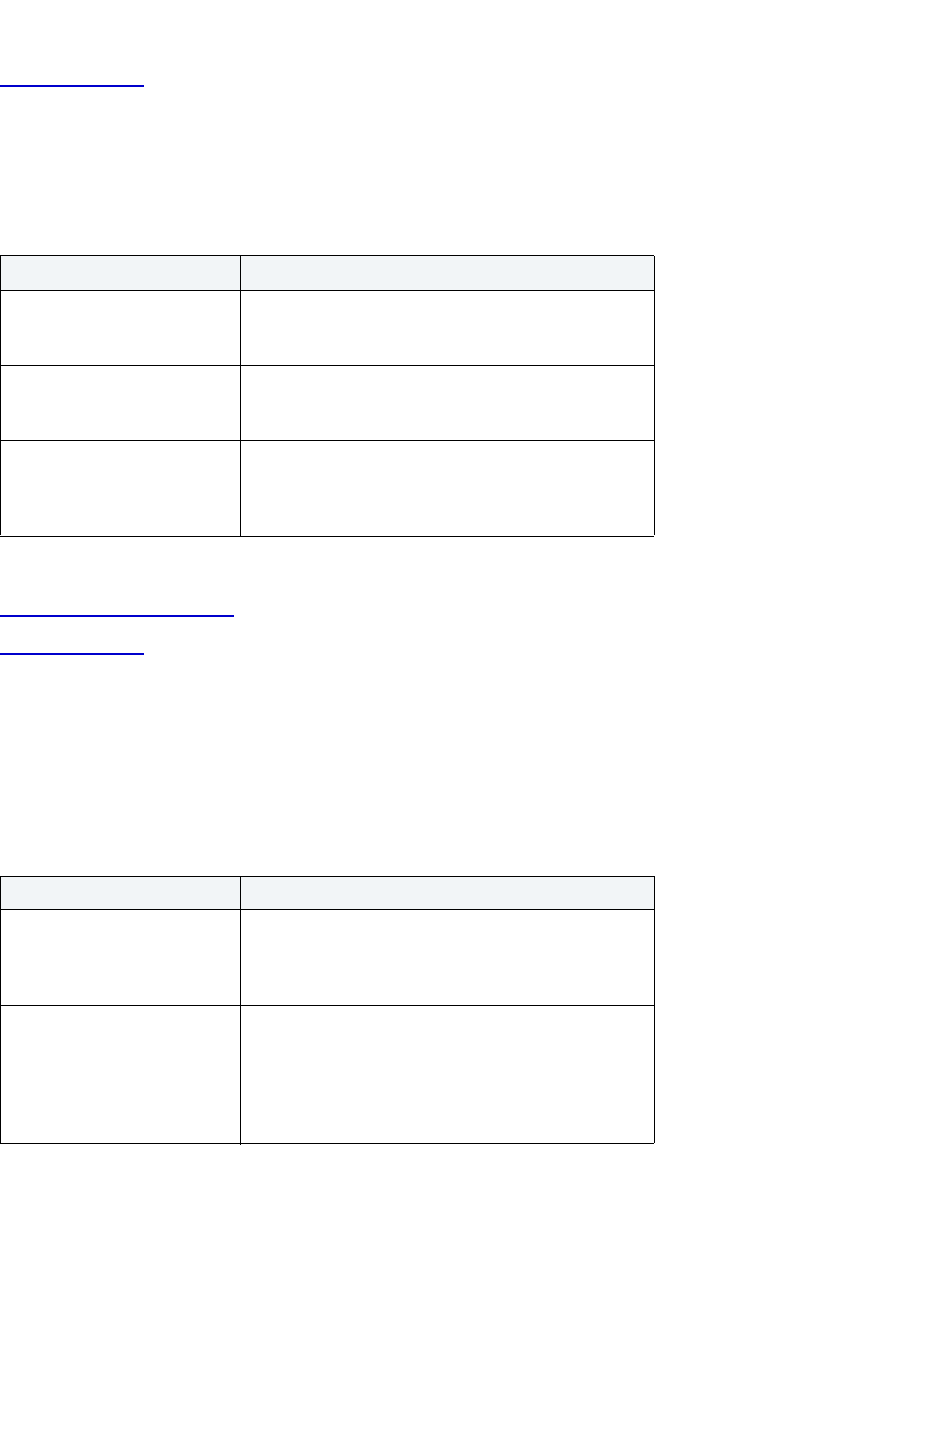
USING > FUNCTIONALITY
EMBARCADERO TECHNOLOGIES > BOOKNAMEVARIABLE 377
Procedure Wizard
Procedure Wizard for IBM DB2 UDB for Linux, Unix, and Windows - Panel 4
The table below describes the options and functionality on the fourth panel of the Procedure Wizard.
For more information, see:
Completing an Object Wizard
Procedure Wizard
Procedure Wizard for IBM DB2 UDB for Linux, Unix, and Windows - Panel 5
NOTE: The panel is only available for IBM DB2 UDB for Linux, Unix, and Windows 8.
The table below describes the options and functionality on the fifth panel of the Procedure Wizard.
Option Description
Indicate the estimated upper
bound of returned result sets:
OPTIONAL: To indicate the estimated upper bound
of returned result sets, type the upper bound value in
the corresponding box
What level of data access for
the SQL statements in the
procedure?
Lets you select an option: Modifies SQL Data
(default), Contains SQL Data, No SQL, and Reads
SQL Data.
Does this procedure depend
on some state values that
effect the results
(deterministic)?
Click Yes or No.
Option Description
Do you want the initial values
to be from the runtime
environment (inherited
registers)?
Lets you user specify the Inherit Special Registers
parameter for SQL procedure.
Would you like this procedure
to be fenced?
Lets you select yes or no. If you select yes,
Threadsafe is not an option for OLE Language.For
Fenced procedures, Threadsafe is the default for
Java Language. All other languages, Not Threadsafe
is the default. For Not Fenced procedures,
Threadsafe is the default.

USING > FUNCTIONALITY
EMBARCADERO TECHNOLOGIES > BOOKNAMEVARIABLE 378
For more information, see:
Completing an Object Wizard
Procedure Wizard
Procedure Wizard for IBM DB2 UDB for Linux, Unix, and Windows - Panel 6
NOTE: The panel is only available for IBM DB2 UDB for Linux, Unix, and Windows 8.
The table below describes the options and functionality on the sixth panel of the Procedure Wizard.
For more information, see:
Completing an Object Wizard
Procedure Wizard
Specify how the parameters
are handled in the stored
procedure
Lets you select an option: DB2DARI, DB2GENERAL,
DB2SQL, GENERAL, GENERAL WITH NULLS,
JAVA, and SQL.
DB2GENERAL is for Java Language only.
DB2SQL is for C, COBOL, or OLE Language only.
GENERAL is for C Language only.
GENERAL WITH NULLS is for C or COBOL
Language only.
JAVA is for Java Language only.
SQL is for C, COBOL, or OLE Language only.
How do you want the stored
procedure to expect the
parameters?
Default for routine is Subroutine.
Main Routine is valid for C or COBOL Language and
Parameter Style GENERAL, GENERAL WITH
NULLS, SQL, or DB2SQL only.
Option Description
Would you like certain
specific information known by
DB2 to be passed to the
function as an additional
invocation-time argument?
Lets you select yes or no.
Do you want the initial values
to be from the runtime
environment (inherited
registers)?
Lets you select yes or no.
Option Description
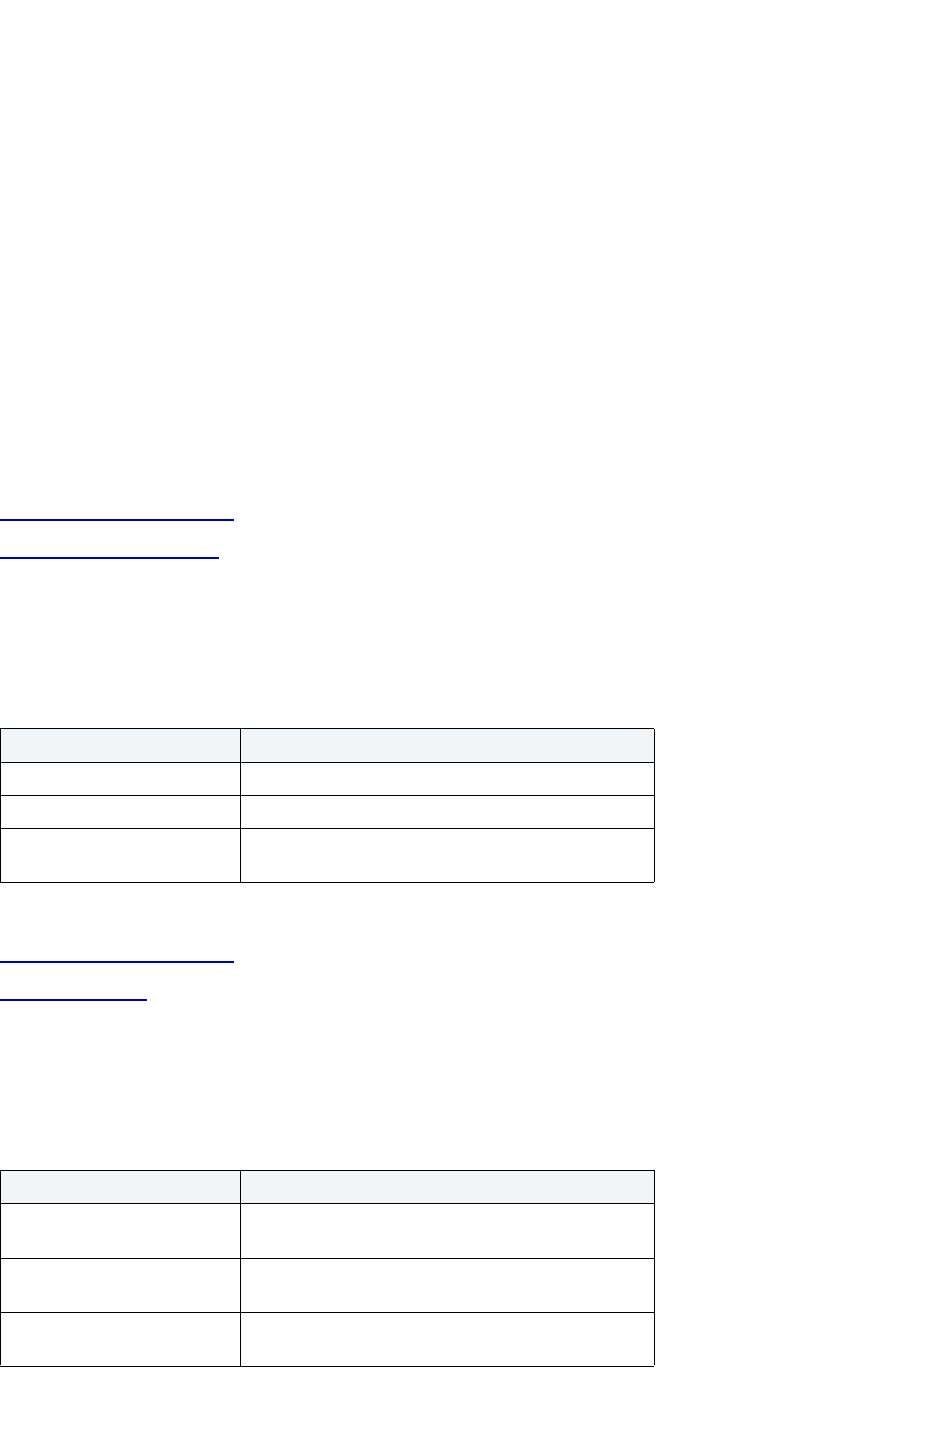
USING > FUNCTIONALITY
EMBARCADERO TECHNOLOGIES > BOOKNAMEVARIABLE 379
Sequence Wizard for IBM DB2 UDB for Linux, Unix, and Windows
The Sequence Wizard lets you create a sequence without knowing the underlying commands. As you complete the
Sequence Wizard, Rapid SQL constructs the necessary CREATE SEQUENCE statement from the information that
you have supplied. When finished, you can instruct Rapid SQL to compile the sequence on the target Rapid SQL
database or to write a script file containing the CREATE SEQUENCE statement.
The Sequence Wizard lets you:
• Specify the name and owner of the sequence.
• Set both the value of the sequence, and an interval and ranges for incrementing it.
• Cache the sequence, cycle the sequence when it reaches its minimum or maximum values, and guarantee that
Rapid SQL generates sequence numbers in the order of request.
Important Notes
• To create a sequence, it must belong to your schema or you need CREATE SEQUENCE privilege.
For more information, see:
Completing an Object Wizard
Sequence Wizard - Panel 1
Sequence Wizard for IBM DB2 UDB for Linux, Unix, and Windows - Panel 1
The table below describes the options and functionality on the first panel of the Sequence Wizard.
For more information, see:
Completing an Object Wizard
Sequence Wizard
Sequence Wizard for IBM DB2 UDB for Linux, Unix, and Windows - Panel 2
The table below describes the options and functionality on the second panel of the Sequence Wizard.
Option Description
Who owns the sequence? Lets you select the owner.
What is the sequence name? Lets you type the name.
What numeric datatype
should the Sequence use?
Lets you select a numeric datatype.
Option Description
What is the first sequence
number to be generated?
Start With - Lets you type the value.
What is the interval between
sequence numbers?
Increment By - Lets you type the value.
What is the sequences
minimum value?
Minimum Value - Lets you type the value.

USING > FUNCTIONALITY
EMBARCADERO TECHNOLOGIES > BOOKNAMEVARIABLE 380
For more information, see:
Completing an Object Wizard
Sequence Wizard
Sequence Wizard for IBM DB2 UDB for Linux, Unix, and Windows - Optional Panel 3
The table below describes the options and functionality on the third panel of the Sequence Wizard.
For more information, see:
Completing an Object Wizard
Sequence Wizard
Schema Wizard for IBM DB2 UDB for Linux, Unix, and Windows
The Schema Wizard lets you create the structure of a database system including database objects.
Important Notes
•None
For more information, see Completing the Schema Wizard for IBM DB2 UDB for Linux, Unix, and Windows
.
Completing the Schema Wizard for IBM DB2 UDB for Linux, Unix, and Windows
Schema Wizard for IBM DB2 UDB for Linux, Unix, and Windows - Panel 1
The table below describes the options and functionality on the first panel of the Schema Wizard.
What is the sequences
maximum value?
Maximum Value - Lets you type the value.
Option Description
Preallocate sequence
numbers and cache them for
faster access?
Lets you cache the sequence.
Number of Values - Lets you type the value.
Should the sequence
continue to generate values
after reaching either its
maximum or minimum value?
Lets you make the sequence cycle and continue to
generate numbers.
Should the sequence
numbers be generated in the
order of request?
Select to generate sequence numbers in the order of
request. The ORDER option is useful when you are
using the sequence number as a timestamp.
Option Description
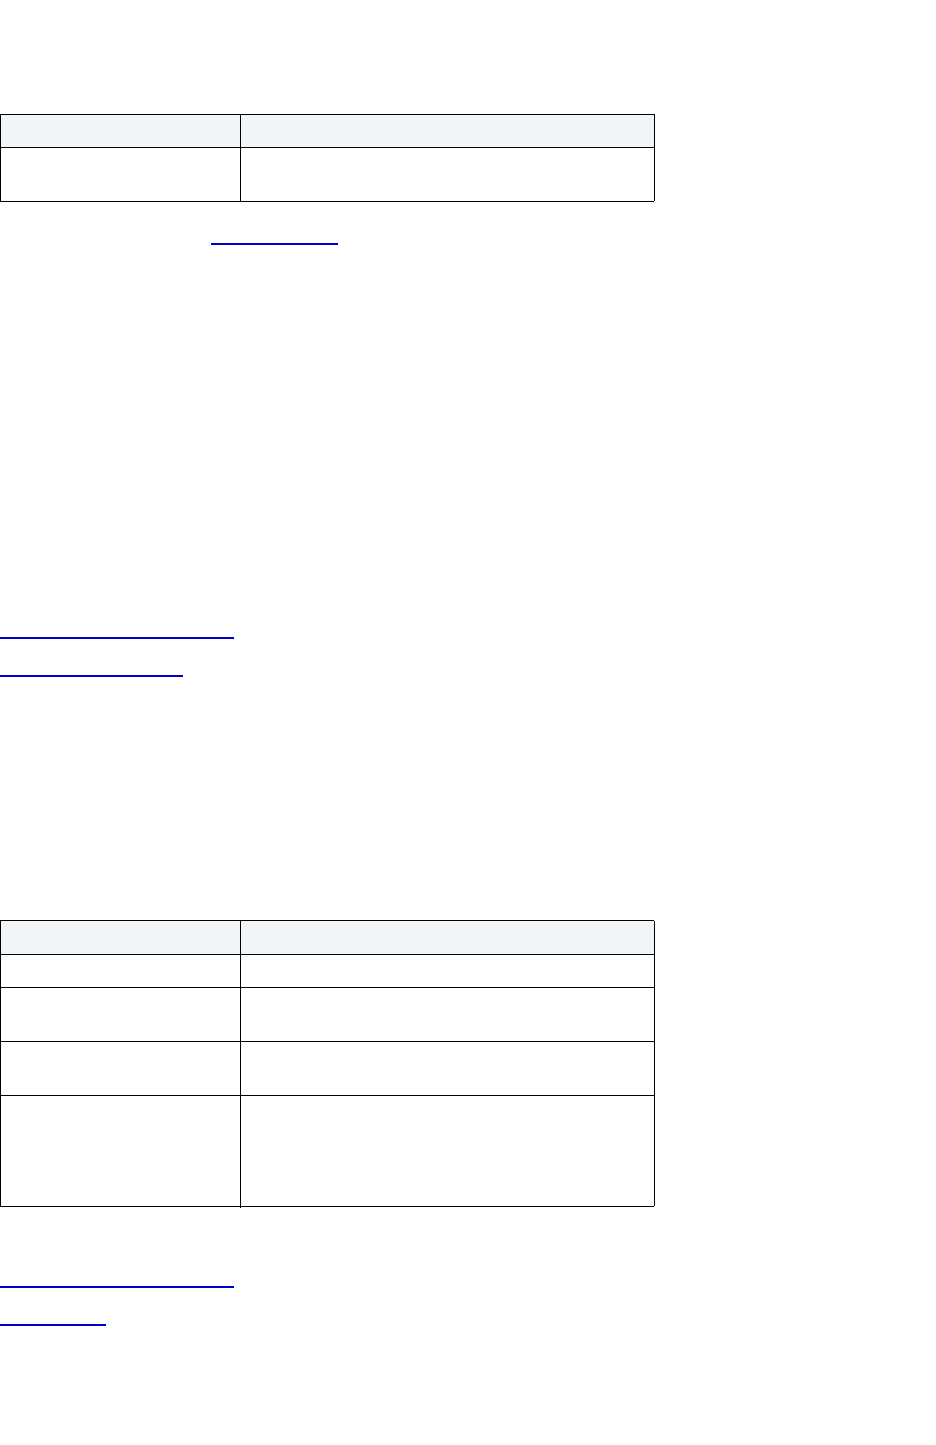
USING > FUNCTIONALITY
EMBARCADERO TECHNOLOGIES > BOOKNAMEVARIABLE 381
For more information, see Schema Wizard.
Table Wizard for IBM DB2 UDB for Linux, Unix, and Windows
The Table Wizard lets you create a table without knowing the underlying commands.
The Table Wizard lets you:
• Name the table and owner
• Lets you set logging options for the table and to provide table comments.
Important Notes
•None
For more information, see:
Completing an Object Wizard
Table Wizard - Panel 1
Table Wizard for IBM DB2 UDB for Linux, Unix, and Windows - Panel 1
The table below describes the options and functionality on the first panel of the Table Wizard.
NOTE: These options are only available if the tablespace you selected is a database managed
tablespace.
For more information, see:
Completing an Object Wizard
Table Wizard
Option Description
What is the name of the
schema?
Lets you type the name of the structure of a database
system.
Option Description
Who owns the table? Lets you select the table owner.
What is the name of the
table?
Lets you enter the table name.
Select a tablespace on which
to place the table:
OPTIONAL: Click the list and then click the double
space.
Specify separate tablespaces
for index and long data
below:
OPTIONAL: Lets you separate indexes or long data
from the table.
Indexes
Long data
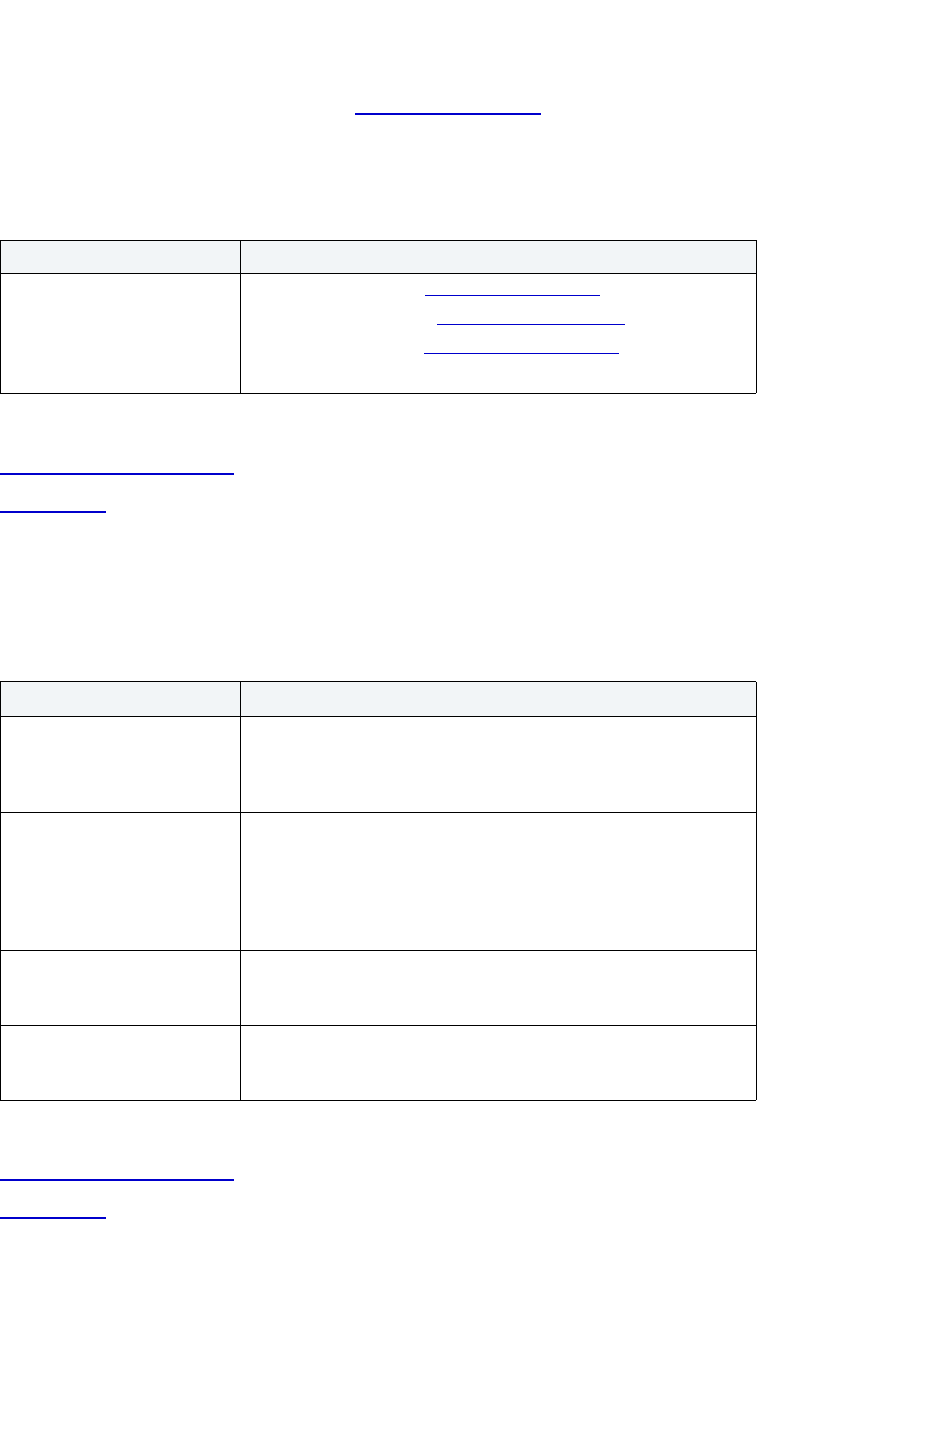
USING > FUNCTIONALITY
EMBARCADERO TECHNOLOGIES > BOOKNAMEVARIABLE 382
Table Wizard for IBM DB2 UDB for Linux, Unix, and Windows - Panel 2
In the second panel of the Table Wizard, the Add Column dialog box opens immediately to let you add and define
table columns.
The table below describes the options and functionality on the second panel of the Table Wizard.
For more information, see:
Completing an Object Wizard
Table Wizard
Table Wizard for IBM DB2 UDB for Linux, Unix, and Windows - Panel 3
The table below describes the options and functionality on the fifth panel of the Table Wizard.
For more information, see:
Completing an Object Wizard
Table Wizard
Table Wizard for IBM DB2 UDB for Linux, Unix, and Windows - Panel 4
The table below describes the options and functionality on the fourth panel of the Table Wizard.
Option Description
Add the columns belonging to
this table
Add - Click to open the Add Column dialog box.
Insert - Click to open the Insert Column dialog box
.
Edit - Click to open the Modify Column dialog box
.
Drop - Click to delete the column.
Option Description
Would you like extra
information regarding SQL
changes to this table to be
written to the log?
Lets you specify if you want the wizard to save changes to a log.
Would you like to skip logging
changes made to this table by
Insert... and Alter Table
operations in the same unit of
work in which this table is
created?
Lets you specify if you want the wizard to skip logging changes.
What type of table lock would
you like when it is being
accessed?
Lets you select a table lock.
What percent of free space to
leave for load an
reorganization?
Lets you specify the number of pages.
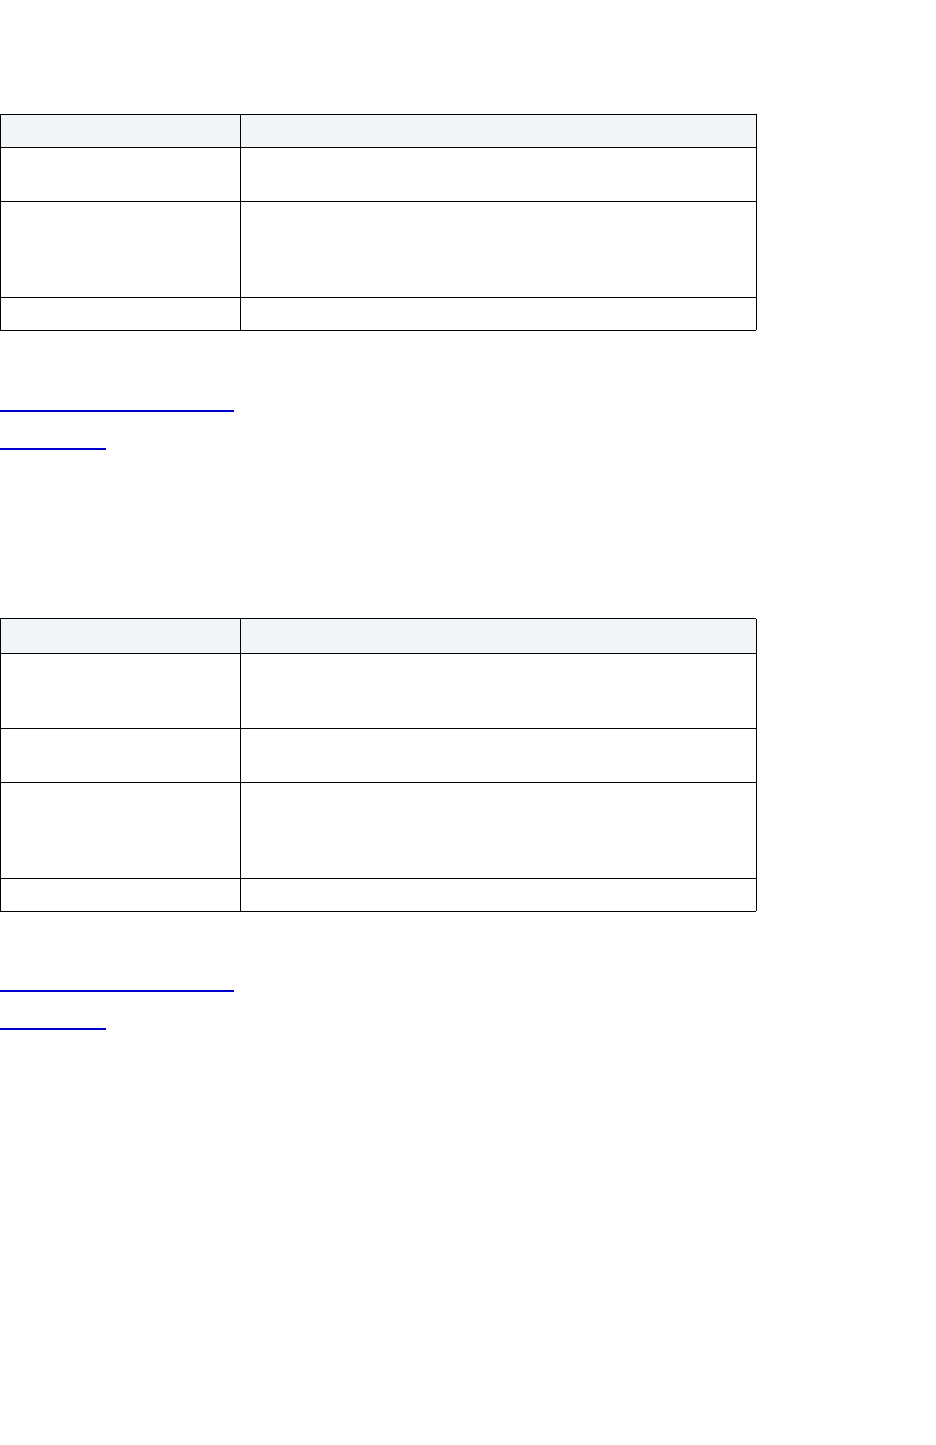
USING > FUNCTIONALITY
EMBARCADERO TECHNOLOGIES > BOOKNAMEVARIABLE 383
For more information, see:
Completing an Object Wizard
Table Wizard
Table Wizard for IBM DB2 UDB for Linux, Unix, and Windows - Panel 6
The table below describes the options and functionality on the sixth panel of the Table Wizard.
For more information, see:
Completing an Object Wizard
Table Wizard
Tablespace Wizard for IBM DB2 UDB for Linux, Unix, and Windows
The Tablespace Wizard lets you create a tablespace without knowing the underlying commands. As you complete the
Tablespace Wizard process, Rapid SQL constructs the CREATE TABLESPACE statement based on the information
that you supply.
The Tablespace Wizard lets you:
• Name the tablespace.
• Specify data type to be stored on the tablespace.
• Specify what type of tablespace to create.
Option Description
Do you want data to append
to the end of the table?
Lets you select No or Yes.
Do you want the access plan
of this table to be based on
existing statistics and
optimization level?
Lets you select Not Volatile or Volatile.
Enter a comment. OPTIONAL: Lets you enter a comment for the table.
Option Description
What percent of free space to
leave for load and
reorganization?
Lets you specify the number of pages of free space.
Do you want data to append
to the end of the table?
Lets you specify if you want data to append at the end of the table.
Do you want the access plan
to this table to be based on
existing statistics and
optimization level?
Lets you specify optimization options.
Enter a comment OPTIONAL: Lets you type a comment.
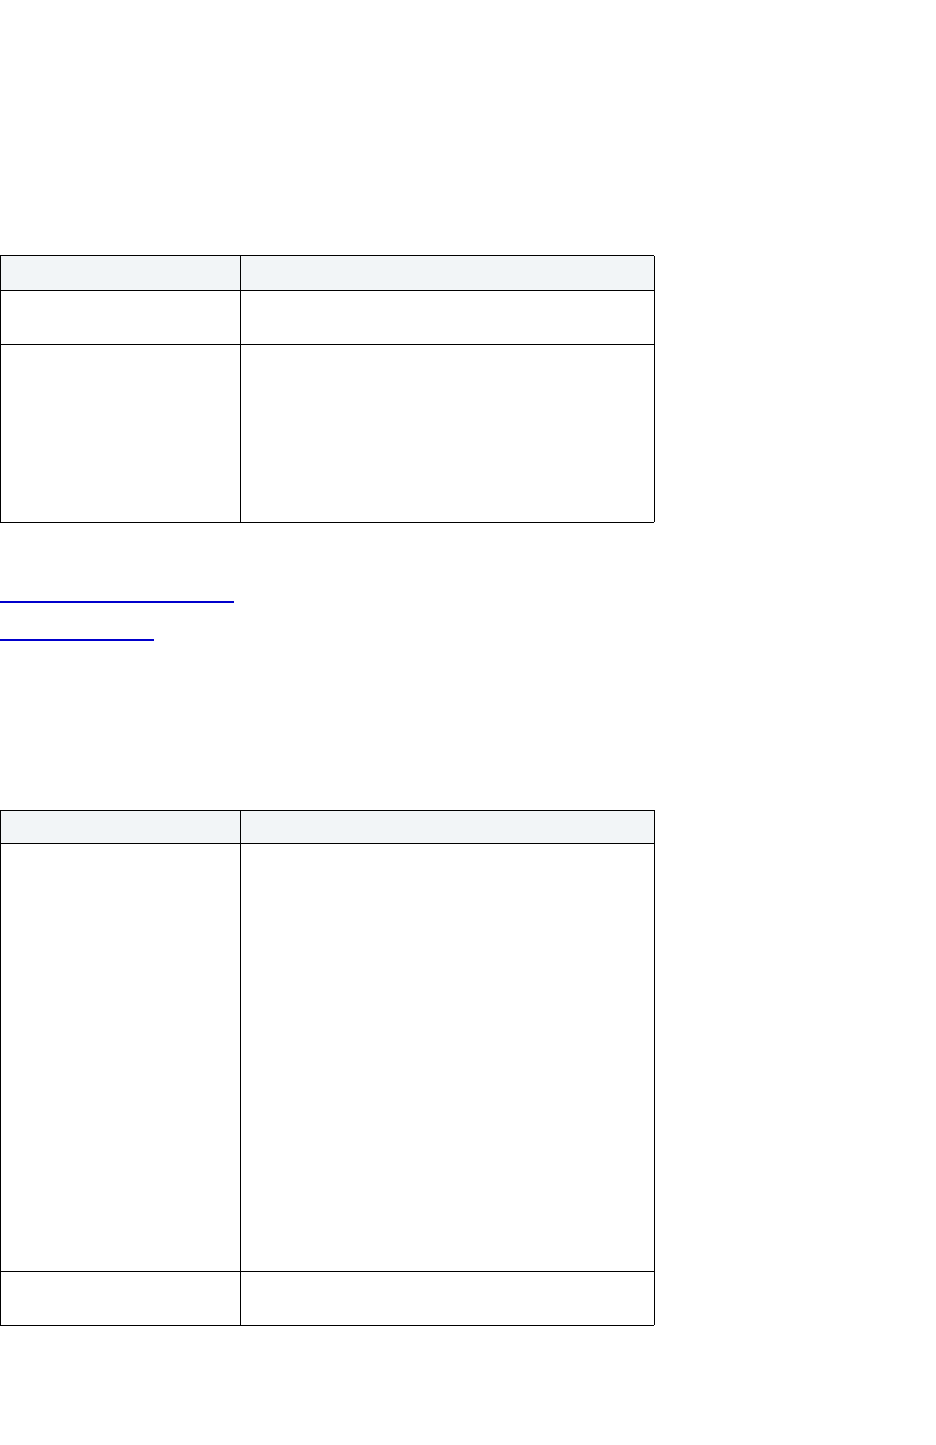
USING > FUNCTIONALITY
EMBARCADERO TECHNOLOGIES > BOOKNAMEVARIABLE 384
• Add containers to the tablespace.
Tablespace Wizard for IBM DB2 UDB for Linux, Unix, and Windows - Panel 1
The table below describes the options and functionality on the first panel of the Tablespace Wizard.
For more information, see:
Completing an Object Wizard
Tablespace Wizard
Tablespace Wizard for IBM DB2 UDB for Linux, Unix, and Windows - Panel 2
The table below describes the options and functionality on the second panel of the Tablespace Wizard.
Option Description
What is the Name of the
Tablespace?
Lets you enter the name of the tablespace.
Choose the type of data to
store in the tablespace:
Lets you select an option:
Regular
Indexes Only
Long
Temporary
User Temporary
Option Description
Specify whether this
tablespace will be managed
by the operating system or
the database:
Lets you select if the tablespace is managed by the
OS or a database.
Operating system-managed - Uses your operating
system to manage physical storage and growth of
the database. This type of tablespace can be used
for small databases that do not experience heavy
access. You can not add containers to a system
managed tablespace after it has been created.
Database-managed - Relies on IBM DB2 UDB to
manage physical storage and the growth of the
database. This type of tablespace lets you have more
control over storage options such as physical
location, size, type of storage, fetch rate and
placement of indexes and tables. This type of
tablespace should be used for large databases
wherein performance is an issue. Additionally, a
database managed tablespace can be backed up,
restored or tuned separately as you have control
over individual space.
Select a nodegroup to assign
to the tablespace:
NOTE: This option is only applicable to parallel
databases.
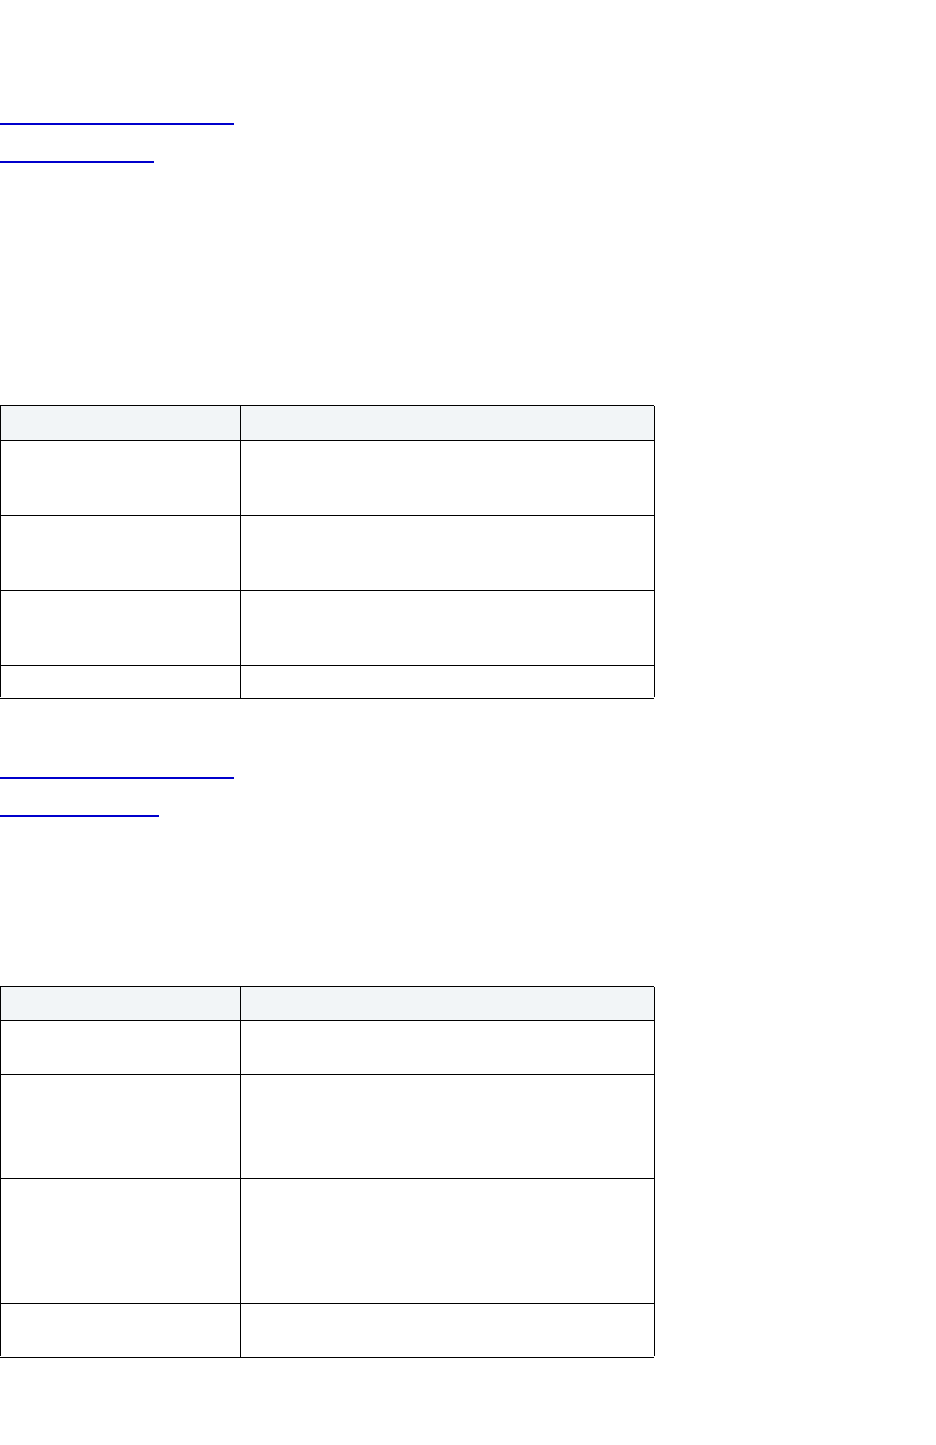
USING > FUNCTIONALITY
EMBARCADERO TECHNOLOGIES > BOOKNAMEVARIABLE 385
For more information, see:
Completing an Object Wizard
Tablespace Wizard
Tablespace Wizard for IBM DB2 UDB for Linux, Unix, and Windows - Panel 3
The table below describes the options and functionality on the third panel of the Tablespace Wizard.
NOTE: A container can either be a directory located on in your operating file system, a physical file or a
physical storage device, such as a disk.
For more information, see:
Completing an Object Wizard
Tablespace Wizard
Tablespace Wizard for IBM DB2 UDB for Linux, Unix, and Windows - Panel 4
The table below describes the options and functionality on the fourth panel of the Tablespace Wizard.
Option Description
Directory For an operating system-managed tablespace, type
the name and location of the directory or click the
Browse button.
File For a database-managed tablespace, type the name
and location of the directory or click the Browse
button.
Media If you are creating a database-managed tablespace,
indicate the media to be used by clicking the File or
Device option button.
Pages Lets you type the name of pages in the container.
Option Description
Specify Page Size: Specify page size used by the tablespace. Click the
list and then click the page size.
Specify the extents and
prefetch sizes:
Extent size - Size of the group of consecutive pages
defined to the database.
Prefetch size - Number of pages the prefetcher gets
from the disk at a time.
Specify the overhead and
transfer fields:
Overhead - An estimate in milliseconds of the time
required by the container before any data is read into
memory.
Transfer - The average time that it would take to read
one page into memory.
Specify the buffer pool for this
tablespace
Lets you specify the name of the buffer pool to be
used for tables in this table space.
USING > FUNCTIONALITY
EMBARCADERO TECHNOLOGIES > BOOKNAMEVARIABLE 386
For more information, see:
Completing an Object Wizard
Tablespace Wizard
Trigger Wizard for IBM DB2 UDB for Linux, Unix, and Windows
The Trigger Wizard lets you create a trigger without requiring you to know any of the underlying commands.
The Trigger Wizard lets you:
• Specify the trigger name and the table on which it fires.
• Specify trigger timing, event action, and applicable table columns for an Update trigger.
• Specify the granularity of the trigger and correlation names for the new rows.
Important Notes
•None
For more information, see:
Completing an Object Wizard
Trigger Wizard - Panel 1
Trigger Wizard for IBM DB2 UDB for Linux, Unix, and Windows - Panel 1
The table below describes the options and functionality on the first panel of the Trigger Wizard.
For more information, see:
Completing an Object Wizard
Trigger Wizard
Drop Table Lets you indicate if you want to drop the table, and if
so, how do you want to recover it.
Option Description
Who owns the trigger to be
created?
Lets you select the owner.
What is the name of the
trigger?
Lets you enter than trigger name.
Who owns the base table? Lets you select the owner.
What is the name of the base
table?
Lets you select the base table.
Option Description
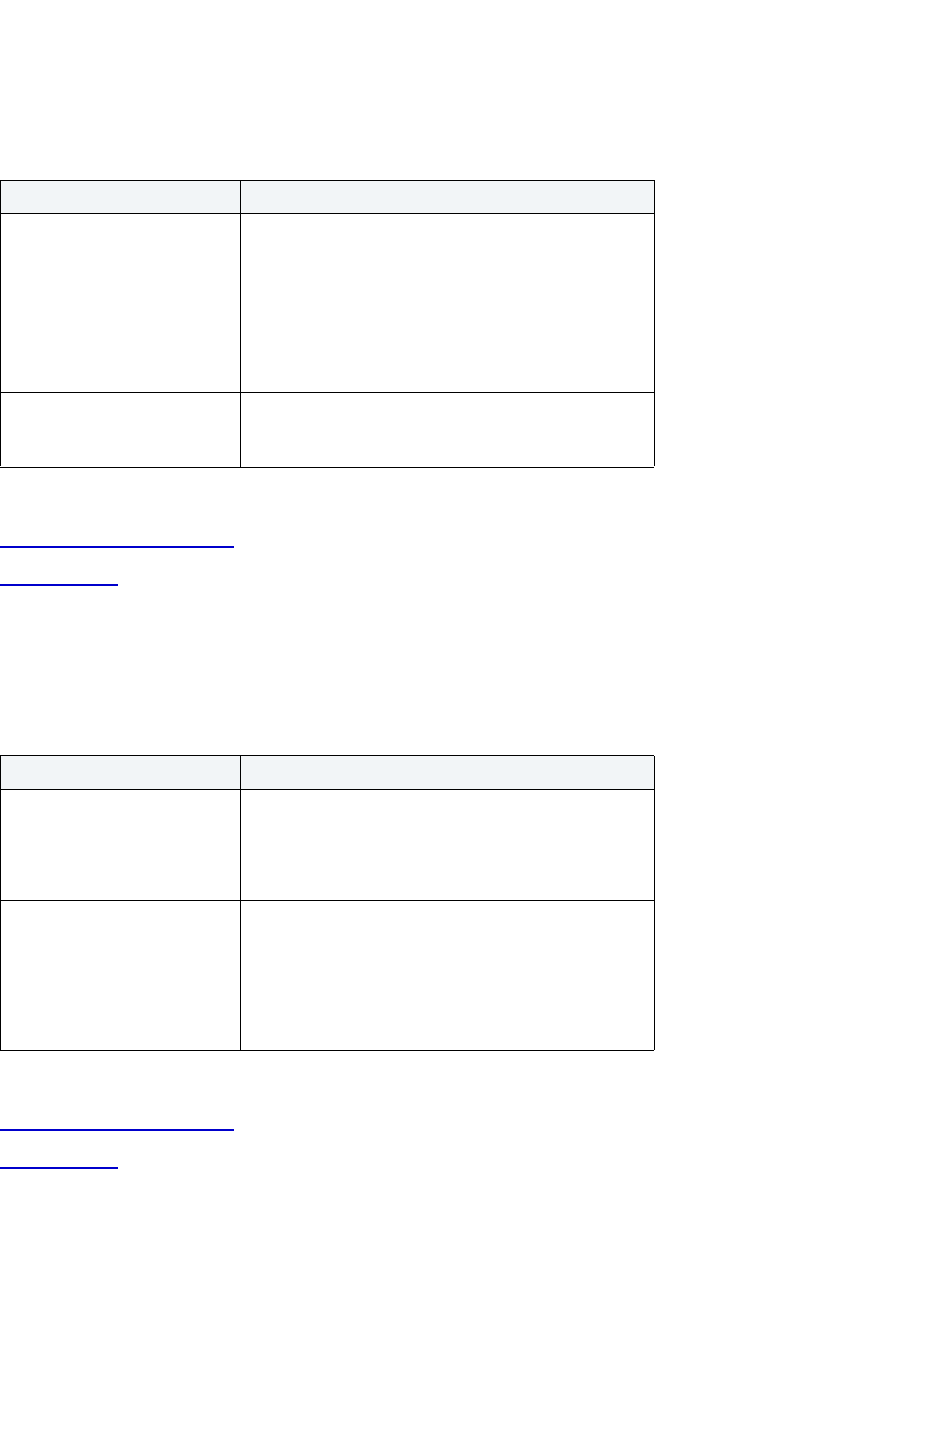
USING > FUNCTIONALITY
EMBARCADERO TECHNOLOGIES > BOOKNAMEVARIABLE 387
Trigger Wizard for IBM DB2 UDB for Linux, Unix, and Windows - Panel 2
The table below describes the options and functionality on the second panel of the Trigger Wizard.
For more information, see:
Completing an Object Wizard
Trigger Wizard
Trigger Wizard for IBM DB2 UDB for Linux, Unix, and Windows - Panel 3
The table below describes the options and functionality on the third panel of the Trigger Wizard.
For more information, see:
Completing an Object Wizard
Trigger Wizard
Trigger Wizard for IBM DB2 UDB for Linux, Unix, and Windows - Panel 4
The table below describes the options and functionality on the fourth panel of the Trigger Wizard.
Option Description
When should the trigger fire? Lets you select Timing and Event.
Before - To make the trigger fire before an event.
After - To make the trigger fire after an event.
Insert - To make the Event cause an insert.
Update - To make the Event cause an update.
Delete - To make the Event cause an delete.
If the trigger fires an update
event, which column updates
should fire a trigger?
If the trigger fires and update event, lets you select
the check box that corresponds to the column
updates that should fire, or click the Check All button.
Option Description
What type of trigger should
be created?
This step is only available if you set the trigger timing
to occur After the event.
Statement
Row
Specify the correlation
names:
OPTIONAL:
Lets you specify the table for the old rows.
Lets you specify the table for the new rows.
Lets you specify the name for the old rows.
Lets you specify the name for the new rows.
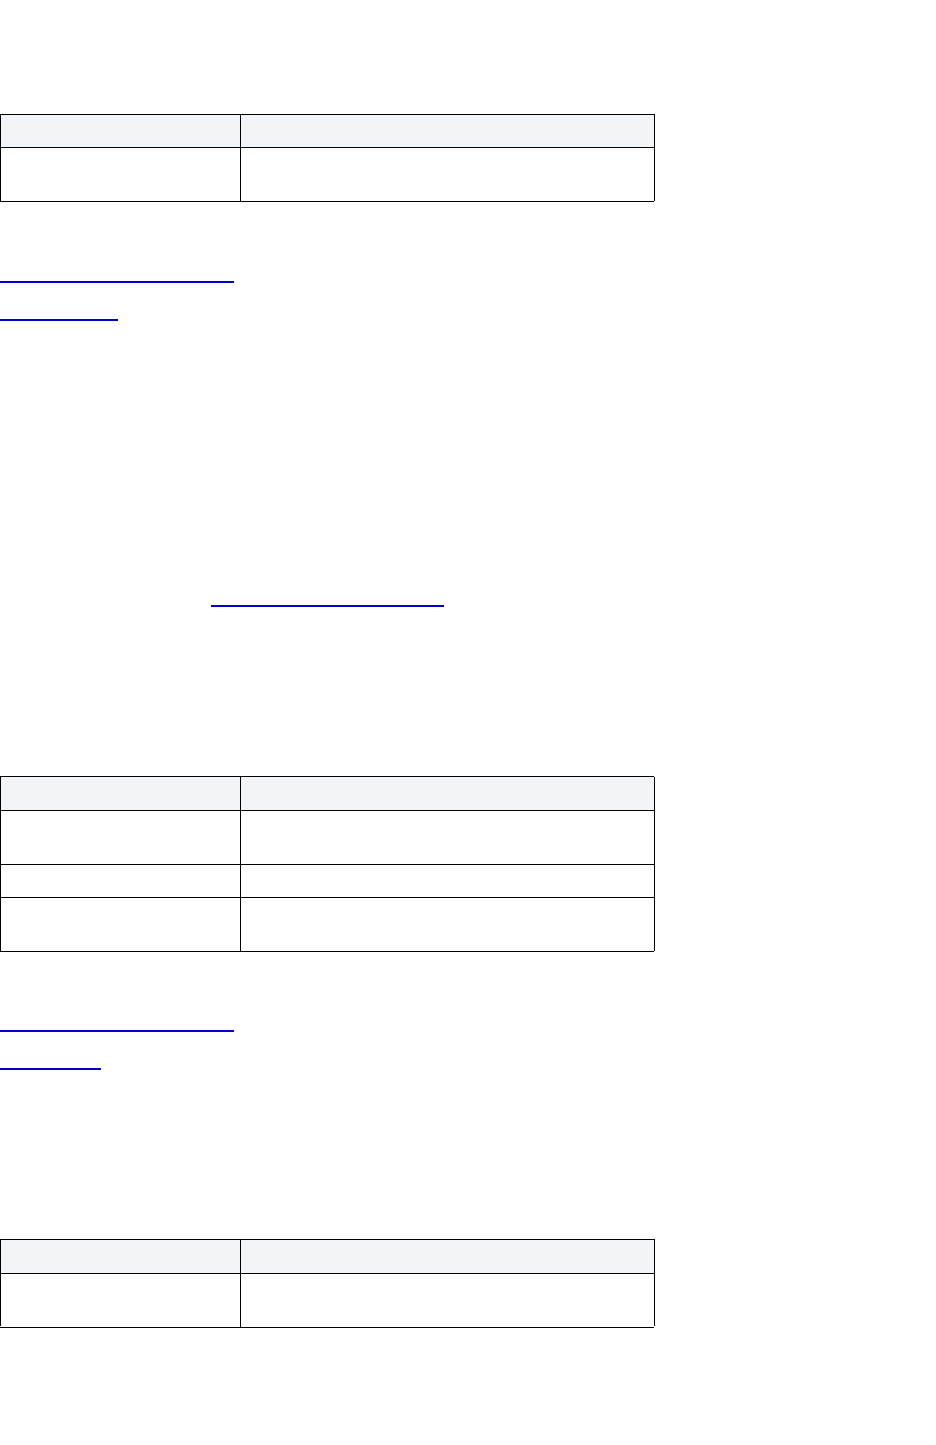
USING > FUNCTIONALITY
EMBARCADERO TECHNOLOGIES > BOOKNAMEVARIABLE 388
For more information, see:
Completing an Object Wizard
Trigger Wizard
Type Wizard for IBM DB2 UDB for Linux, Unix, and Windows
Creating an object type is a two-step process. You create the object type specification, and then create the type body.
The Structured Type Wizard lets you create an object type specification and body. A template is created using the
CREATE OR REPLACE TYPE or TYPE BODY statements.
Important Notes
•None
For more information, see Completing an Object Wizard
.
Type Wizard for IBM DB2 UDB for Linux, Unix, and Windows - Panel 1
The table below describes the options and functionality on the first panel of the Type Wizard.
For more information, see:
Completing an Object Wizard
Type Wizard
Type Wizard for IBM DB2 UDB for Linux, Unix, and Windows - Panel 2
The table below describes the options and functionality on the second panel of the Type Wizard.
Option Description
Please type the body of the
trigger below:
Lets you enter the trigger body syntax.
Option Description
Who owns the type to be
created?
Lets you select the owner.
What is the name of the type? Lets you type the name.
Is this structured type a
subtype?
Lets you select schema and name.
Option Description
Add the attributes belonging
to this type.
Lets you add, edit or drop an attribute.

USING > FUNCTIONALITY
EMBARCADERO TECHNOLOGIES > BOOKNAMEVARIABLE 389
For more information, see:
Completing an Object Wizard
Type Wizard
Type Wizard for IBM DB2 UDB for Linux, Unix, and Windows - Panel 3
The third panel of the Type Wizard lets you select type options.
The table below describes the options and functionality on the third panel of the Type Wizard.
For more information, see:
Completing an Object Wizard
Type Wizard
User Datatype Wizard for IBM DB2 UDB for Linux, Unix, and Windows
The User Datatype Wizard lets you create a user datatype without knowing the underlying commands.
The User Data Type Wizard lets you:
• Name the user datatype.
• Define the base datatype properties.
Important Notes
•None
Option Description
Instantiable Lets you specify if an instance of the structured type can be
created.
With Function Access All methods of this type and its subtypes, including methods
created in the future, can be accessed using functional notation.
With Comparisons Comparison functions are supported for instances of the structured
type.
Not Final Structured type may be used as a supertype.
Inline Length The maximum size (in bytes) of a structured type column instance
to store inline with the rest of the values in the row of a table.
Instances of a structured type or its subtypes, that are larger than
the specified inline length, are stored separately from the base
table row, similar to the way that LOB values are handled.
Cast Function (Source as
Ref)
Lets you specify the name of the system-generated function that
casts a value with the data type rep-type to the reference type of
this structured type.
Cast Function (Ref as
Source)
Lets you specify the name of the system-generated function that
casts a reference type value for this structured type to the data
type rep-type.
Representation Type Lets you specify the representation type, width and size.
USING > FUNCTIONALITY
EMBARCADERO TECHNOLOGIES > BOOKNAMEVARIABLE 390
For more information, see:
Completing an Object Wizard
User Datatype Wizard - Panel 1
User Datatype Wizard for IBM DB2 UDB for Linux, Unix, and Windows - Panel 1
The table below describes the options and functionality on the first panel of the User Datatype Wizard.
For more information, see:
Completing an Object Wizard
User Datatype Wizard
User Datatype Wizard for IBM DB2 UDB for Linux, Unix, and Windows - Panel 2
The table below describes the options and functionality on the second panel of the User Datatype Wizard.
For more information, see:
Completing an Object Wizard
User Datatype Wizard
View Wizard for IBM DB2 UDB for Linux, Unix, and Windows
The View Wizard lets you create a view without knowing any of the underlying commands.
Option Description
Who owns the datatype? Lets you select the datatype owner.
What is the name of the
datatype?
Lets you enter the datatype name.
Option Description
What is the source datatype? Lets you select the source datatype.
Specify the datatype
characteristics:
NOTE: The availability of options depends on the
source datatype you specified.
Length
LOB Unit
Precision Scale
Bit Data Bit data check box is only available for certain data
types. Select this check box if you want to store this
data in a bit format.
Comment Lets you associate a comment with the user
datatype, and type the comment, which can be up to
254 characters long.
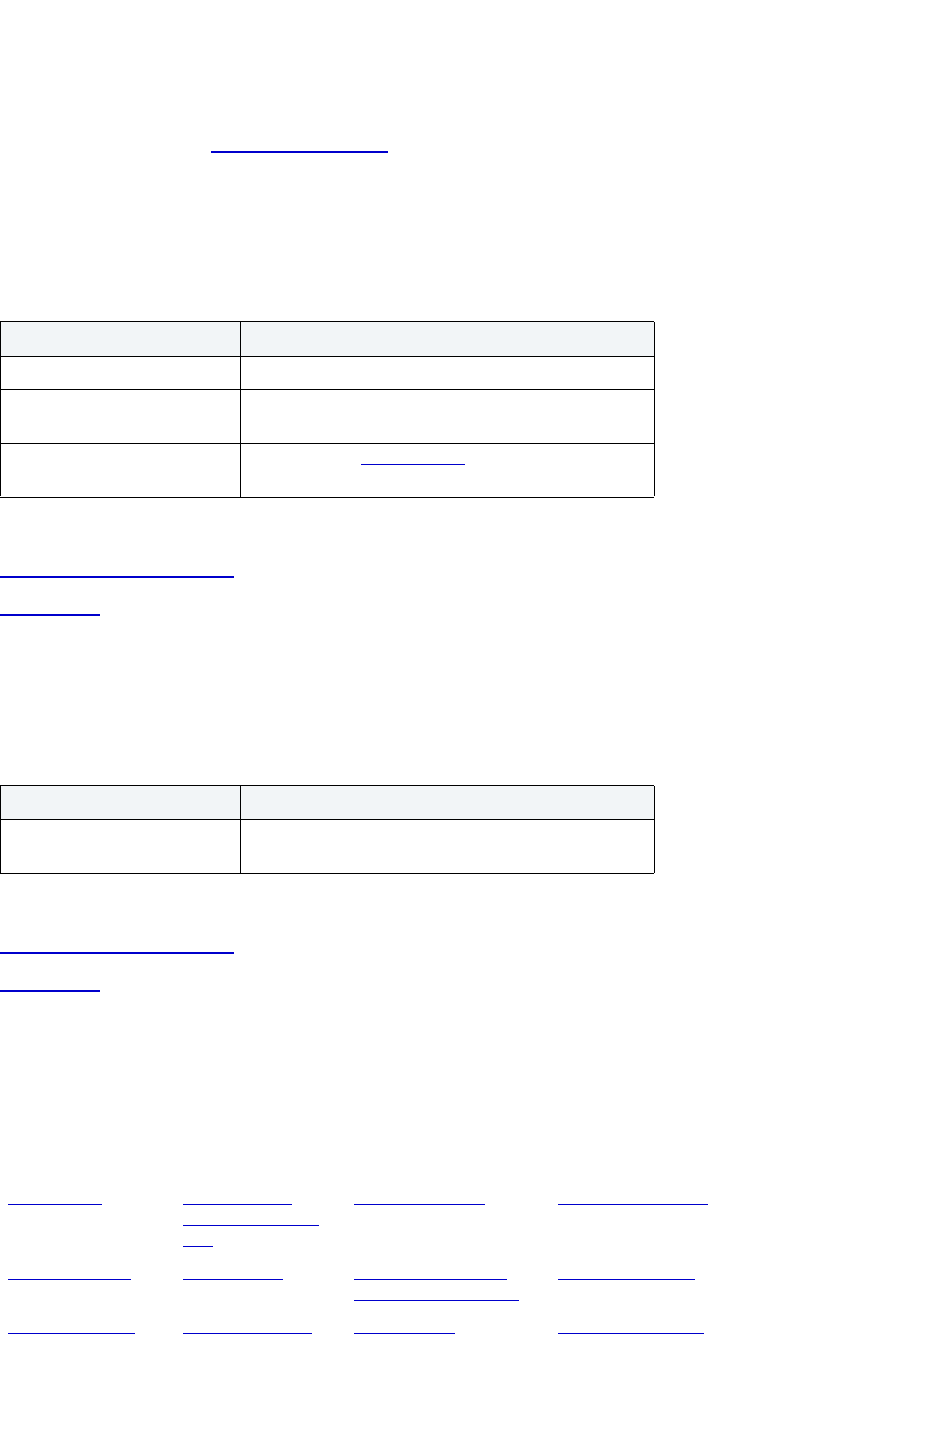
USING > FUNCTIONALITY
EMBARCADERO TECHNOLOGIES > BOOKNAMEVARIABLE 391
Important Notes
•None
For more information, see View Wizard - Panel 1
.
View Wizard for IBM DB2 UDB for Linux, Unix, and Windows - Panel 1
The table below describes the options and functionality on the first panel of the View Wizard.
For more information, see:
Completing an Object Wizard
View Wizard
View Wizard for IBM DB2 UDB for Linux, Unix, and Windows - Panel 2
The table below describes the options and functionality on the second panel of the View Wizard.
For more information, see:
Completing an Object Wizard
View Wizard
IBM DB2 UDB for OS/390 and z/OS Object Wizards
Option Description
Who owns the view? Lets you select the view owner.
What is the name of the
view?
Lets you enter the view name.
Use Query Builder to define
view
Select to open Query Builder
to help you build the
view SQL.
Option Description
Please select the view
options to include
Lets you select view options.
Alias Wizard
Create Check
Constraint Dialog
Box
Database Wizard Foreign Key Wizard
Function Wizard Index Wizard Create Primary Key
Constraint Dialog Box
Procedure Wizard
Stogroup Wizard Synonym Wizard Table Wizard Tablespace Wizard

USING > FUNCTIONALITY
EMBARCADERO TECHNOLOGIES > BOOKNAMEVARIABLE 392
Alias Wizard for IBM DB2 UDB for OS/390 and z/OS
The Alias Wizard lets you create an alias without knowing the underlying commands. As you complete the Alias
Wizard process, Rapid SQL constructs the necessary CREATE ALIAS statement based on the information that you
supply.
The Alias Wizard:
• Lets you specify the alias and the owner.
• Lets you specify the target object owner, type, and name.
Important Notes
•None
For more information, see:
Completing an Object Wizard
Alias Wizard - Panel 1
Alias Wizard for IBM DB2 UDB for OS/390 and z/OS - Panel 1
The table below describes the options and functionality on the first panel of the Alias Wizard.
TIP: To filter the Owner and Object lists, click the Filter button next to each list. Rapid SQL opens the
Filter
dialog box.
For more information, see:
Completing an Object Wizard
Alias Wizard
Alias Wizard for IBM DB2 UDB for OS/390 and z/OS - Panel 2
The table below describes the options and functionality on the second panel of the Alias Wizard.
Trigger Wizard Create Unique Key
Constraint Dialog
Box
User Datatype Wizard View Wizard
Option Description
Who owns the alias to be
created?
Lets you select the alias owner.
What is the name of the
alias?
Lets you enter the name.
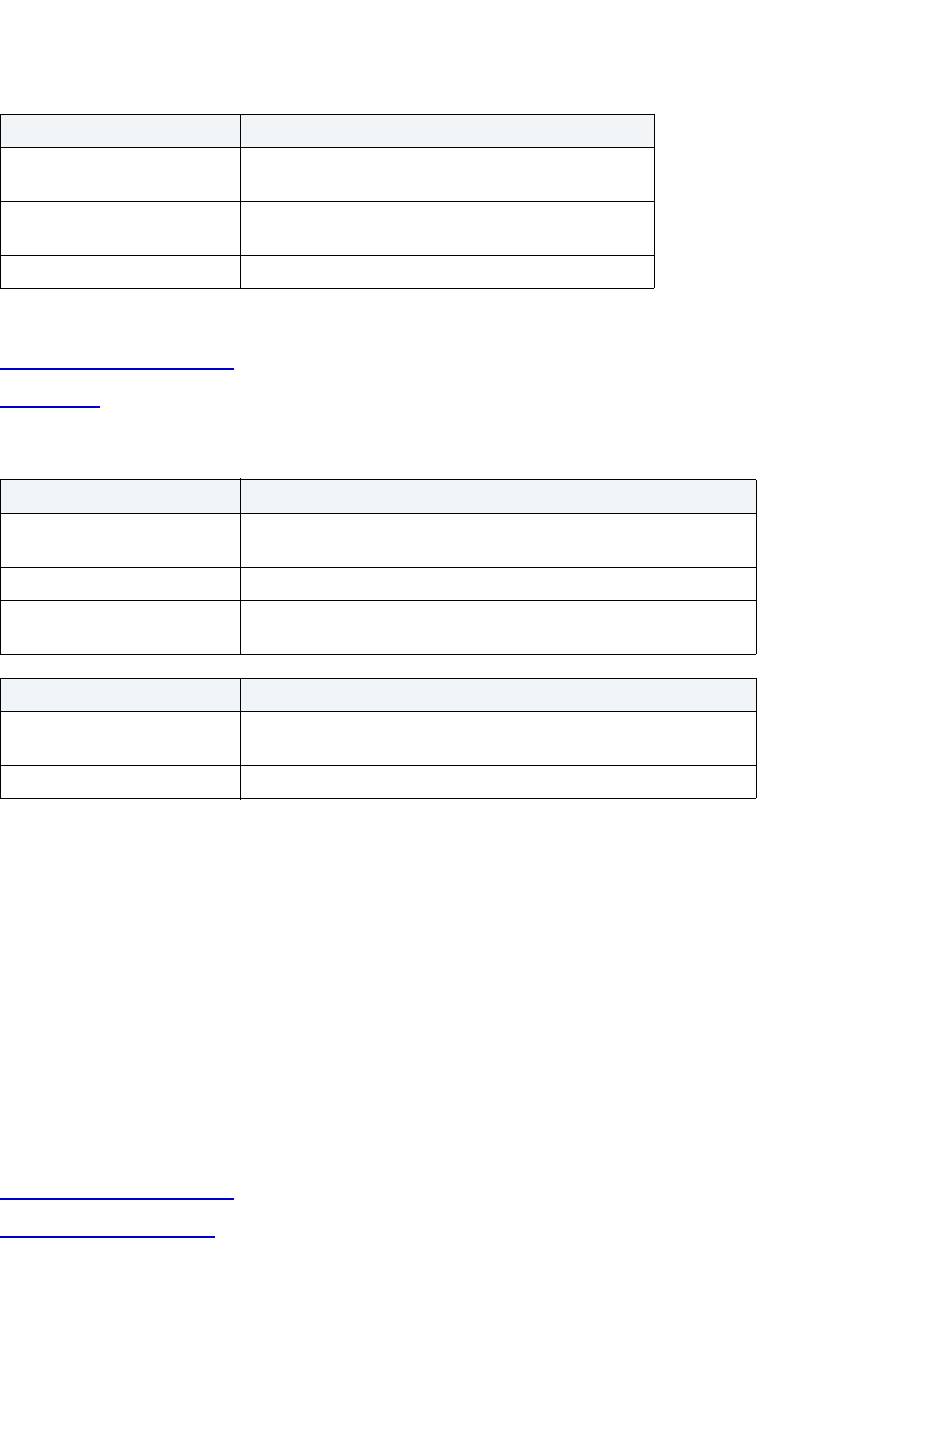
USING > FUNCTIONALITY
EMBARCADERO TECHNOLOGIES > BOOKNAMEVARIABLE 393
For more information, see:
Completing an Object Wizard
Alias Wizard
TIP: Rapid SQLDatabase Wizard for IBM DB2 UDB for OS/390 and z/OS
The Database Wizard lets you create a database without knowing any of the underlying commands.
The Database Wizard lets you:
• Name the database.
• Choose the type of database.
• Select the Storage Group.
• Select the Encoding Scheme.
Important Notes
•None
For more information, see:
Completing an Object Wizard
Database Wizard - Panel 1
Database Wizard for IBM DB2 UDB for OS/390 and z/OS - Panel 1
The table below describes the options and functionality on the first panel of the Database Wizard.
Option Description
Who owns the target of the
alias.
Lets you select the target owner.
What is the name of the
target to be aliased?
Lets you select an existing table, view or alias or you
can specify another name.
Comment Lets you associate a comment with the alias.
Option Description
Use Extended Storage If you are using a UNIX system and want to store migrated pages
from the bufferpool in extended storage.
All Nodes Disperses the bufferpool across all nodes.
Nodes in checked
nodegroups
Specifies nodegroups where the bufferpool should reside.
Option Description
Specify size for any partitions Lets you override the default bufferpool size and specify an exact
page size.
Set Size Opens the Size Editor for Selected Nodes dialog box.
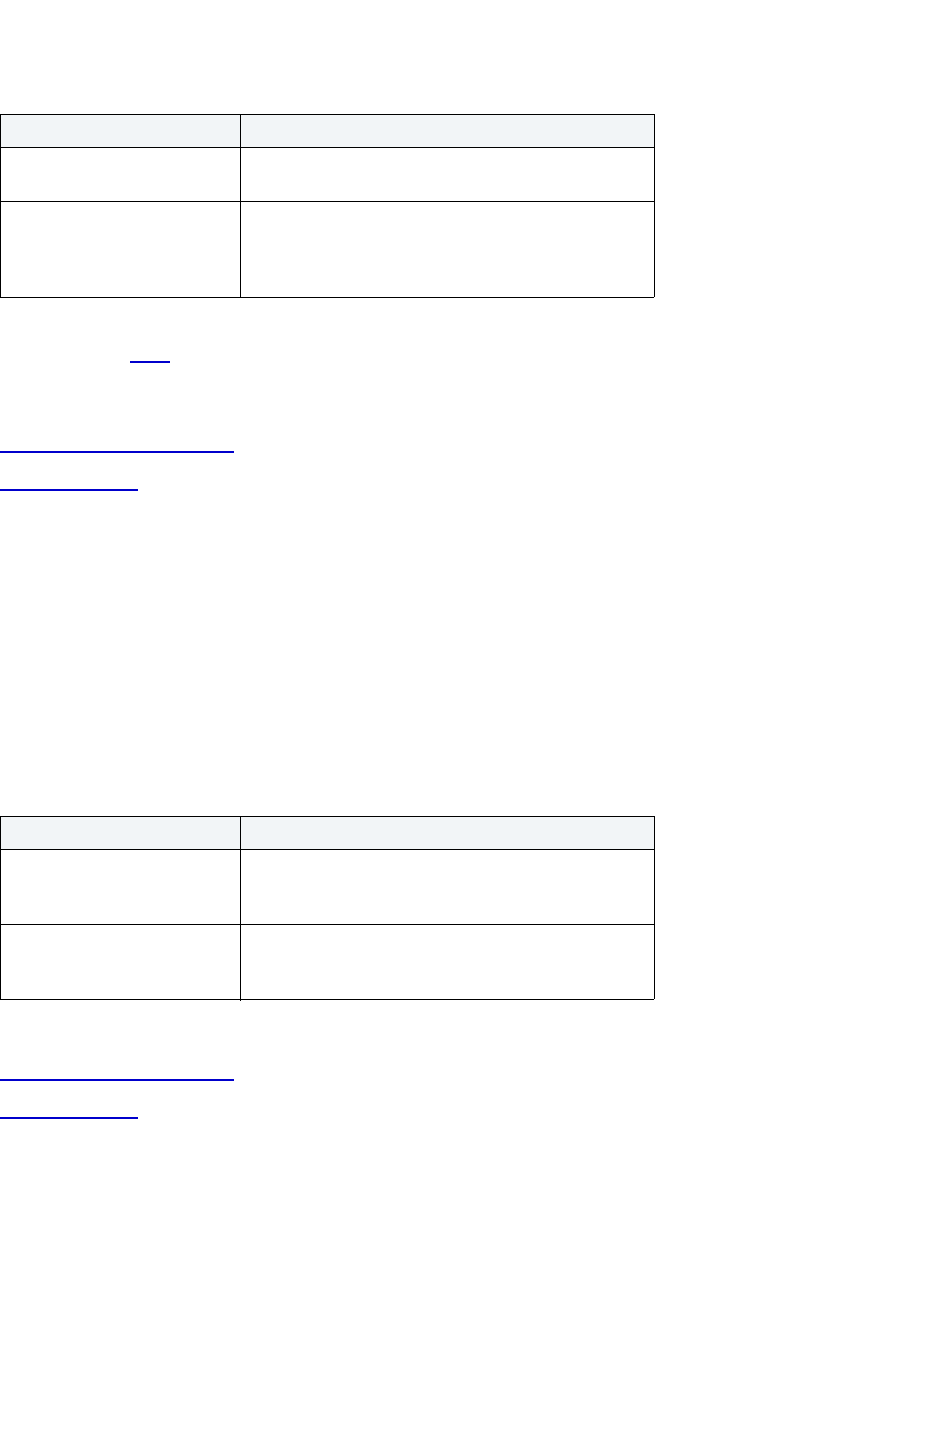
USING > FUNCTIONALITY
EMBARCADERO TECHNOLOGIES > BOOKNAMEVARIABLE 394
TIP: To filter the Owner and Object lists, click the Filter button next to each list. Rapid SQL opens the
Filter dialog box.
For more information, see:
Completing an Object Wizard
Database Wizard
Database Wizard for IBM DB2 UDB for OS/390 and z/OS - Panel 2
The table below describes the options and functionality on the second panel of the Database Wizard.
NOTE: To change the encoding scheme for a database after it has been created to utilize a different
coded character set identifier (CCSID) that supports the Euro symbol, all data must be unloaded
and reloaded. For more information regarding the encoding scheme, contact your System
administrator.
For more information, see:
Completing an Object Wizard
Database Wizard
Foreign Key Wizard for IBM DB2 UDB for OS/390 and z/OS
The Foreign Key Wizard lets you create a foreign key without knowing the underlying commands.
The Foreign Key Wizard lets you:
• Name the foreign key constraint
• Identify the parent table and the referenced constraint.
Option Description
What is the name of the
database
Lets you type a name for the database.
Choose the type of database NOTE: This option in only available if the server is
configured in IBM DB2 UDB for OS/390 and z/OS to
allow sharing. For more information, contact your
System administrator.
Option Description
Storage Group Name Lets you click the list and select the storage group
name. If you do not select a name, the Database
Wizard selects the default name.
Encoding Scheme Lets you click the list and select the encoding
scheme. If you do not select a scheme, the Database
Wizard selects the default scheme.
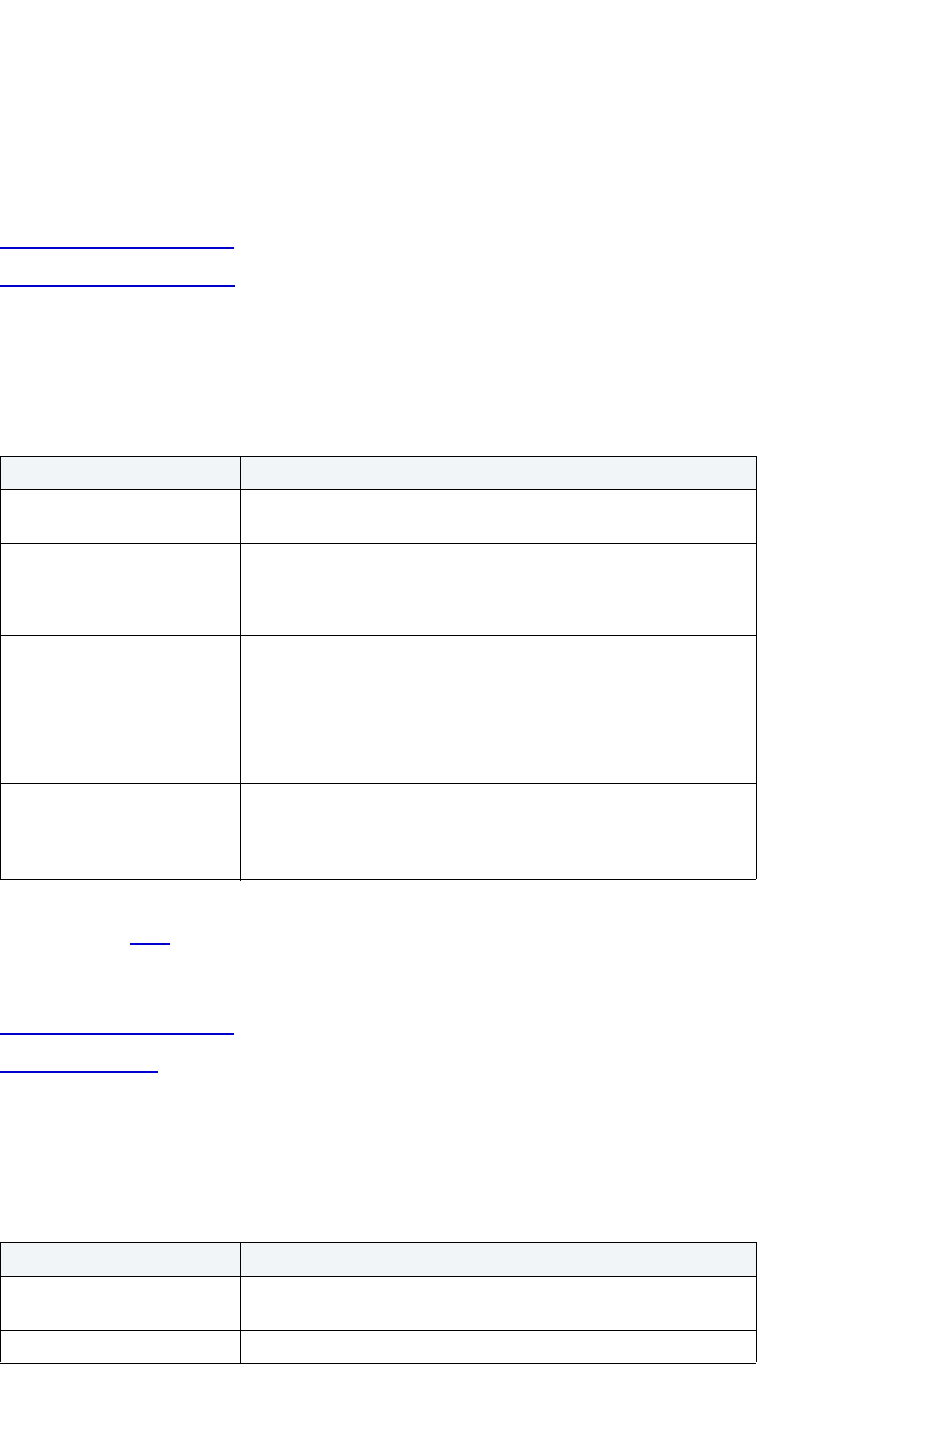
USING > FUNCTIONALITY
EMBARCADERO TECHNOLOGIES > BOOKNAMEVARIABLE 395
• Map the column pairs between the parent and child tables.
Important Notes
•None
For more information, see:
Completing an Object Wizard
Foreign Key Wizard - Panel 1
Foreign Key Wizard for IBM DB2 UDB for OS/390 and z/OS - Panel 1
The table below describes the options and functionality on the first panel of the Foreign Key Wizard.
TIP: To filter the Owner and Object lists, click the Filter button next to each list. Rapid SQL opens the
Filter
dialog box.
For more information, see:
Completing an Object Wizard
Foreign Key Wizard
Foreign Key Wizard for IBM DB2 UDB for OS/390 and z/OS - Panel 2
The table below describes the options and functionality on the second panel of the Foreign Key Wizard.
Option Description
Which table will host the
constraint?
Lets you select the owner and table.
What will be the name of this
new constraint?
Lets you select a constraint name.
System Generated Name - DB2 automatically generates a name.
User Specified Constraint Name - You type the name.
What action should
dependent table take when a
row of parent table is
deleted?
Lets you select an action.
No Action
Restrict
Cascade
Set Null
What action what action
should dependent table take
when a row of parent table is
updated?
Lets you select an action.
No Action
Restrict
Option Description
Select the parent table to
reference?
Lets you select the table owner and the parent table owner.
Table Name Lets you select the parent table name.
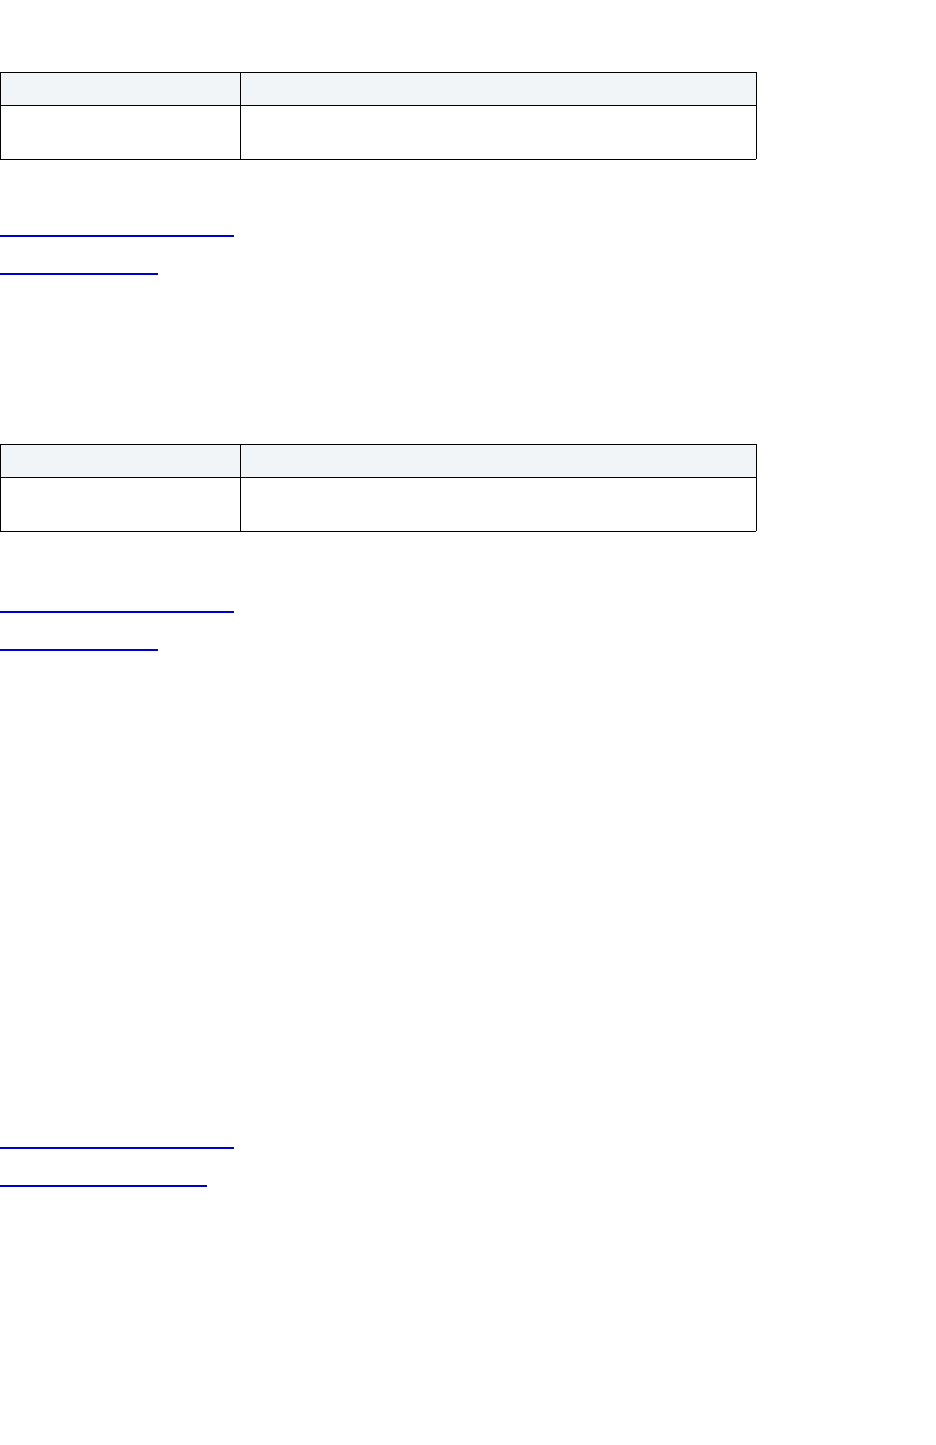
USING > FUNCTIONALITY
EMBARCADERO TECHNOLOGIES > BOOKNAMEVARIABLE 396
For more information, see:
Completing an Object Wizard
Foreign Key Wizard
Foreign Key Wizard for IBM DB2 UDB for OS/390 and z/OS - Panel 3
The table below describes the options and functionality on the third panel of the Foreign Key Wizard.
For more information, see:
Completing an Object Wizard
Foreign Key Wizard
Function Wizard for IBM DB2 UDB for OS/390 and z/OS
The Function Wizard lets you create a function without knowing the underlying commands. As you complete the
Function Wizard process, Rapid SQL constructs the necessary CREATE FUNCTION statement based on the
information that you supply.
The Function Wizard lets you:
• Specify the function name, owner, and type.
• Specify the datatypes for the parameters of the new function.
• Specify special options of how and when the function should act.
Important Note
• To create a user-defined function, you need CREATE ANY privileges or IMPLICIT_SCHEMA authority on the
database if the schema does not already exist.
For more information, see:
Completing an Object Wizard
Function Wizard - Panel 1
Function Wizard for IBM DB2 UDB for OS/390 and z/OS - Panel 1
The table below describes the options and functionality on the first panel of the Function Wizard.
NOTE: To create an external (user-defined) function, you need a defined procedure or routine that is
compiled and linked into a library.
Select the parent table
constraint
Lets you select the primary and unique key constraints you want to
reference.
Option Description
Select column associations Lets you map the foreign key columns between the child and
parent tables.
Option Description
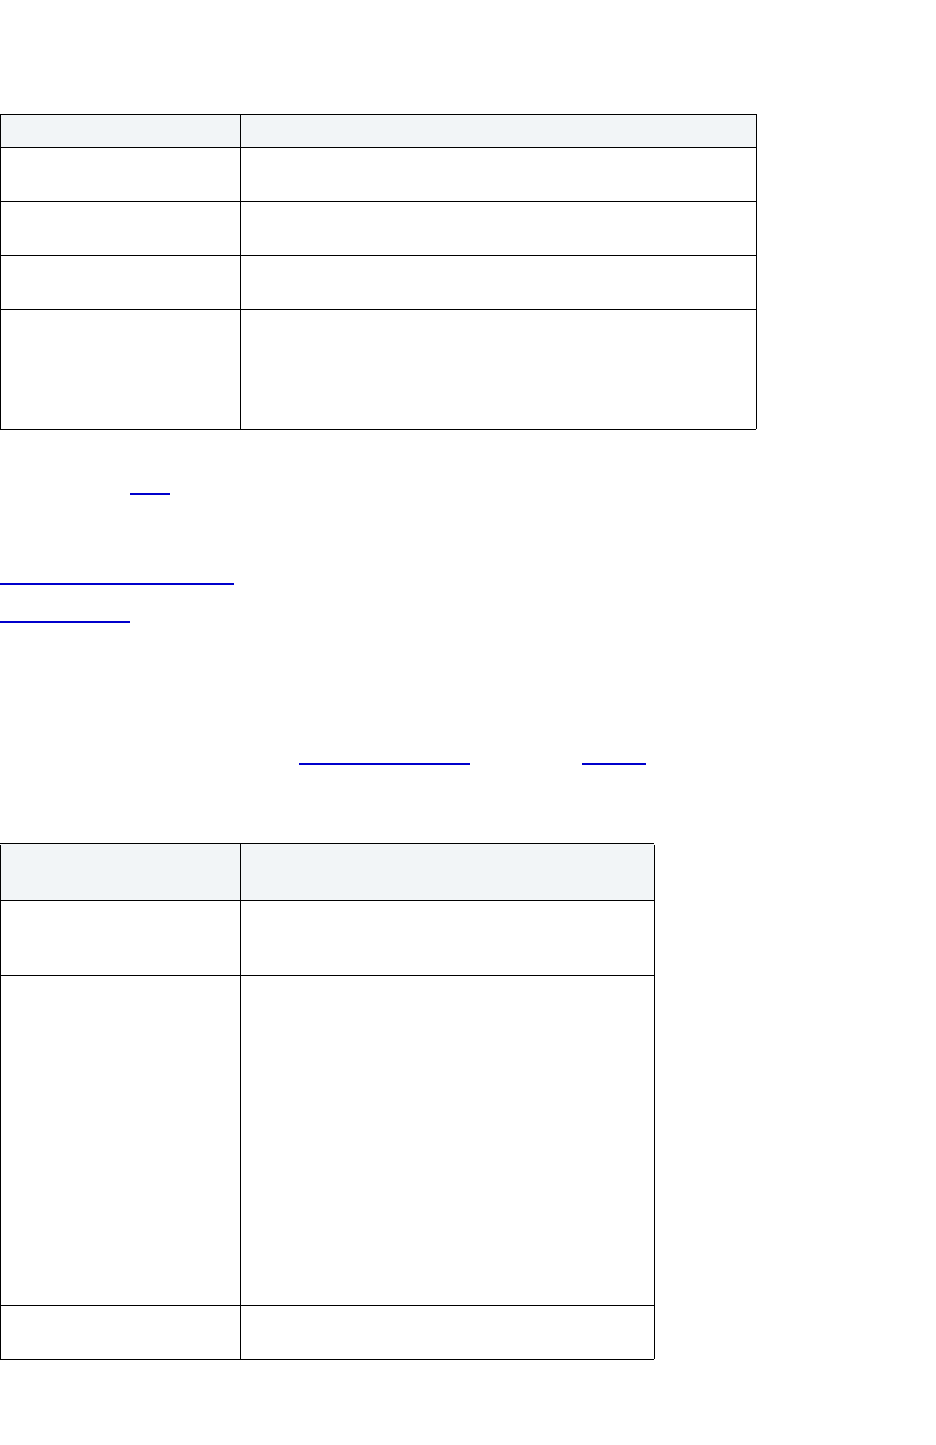
USING > FUNCTIONALITY
EMBARCADERO TECHNOLOGIES > BOOKNAMEVARIABLE 397
TIP: To filter the Owner and Object lists, click the Filter button next to each list. Rapid SQL opens the
Filter
dialog box.
For more information, see:
Completing an Object Wizard
Function Wizard
Function Wizard for IBM DB2 UDB for OS/390 and z/OS - Panel 2
The tables below describe the options and functionality on the second panel of the Function Wizard.
NOTE: The options differ for external scalar/ table
functions and sourced functions.
Option Description
Who will own the function to
be registered?
Lets you select the function owner.
What is the name of the
function?
Lets you enter the function name.
What is the unique name of
the function?
Lets you enter the unique name.
What type of function would
you like to register?
Lets you select the type of function.
External Scaler
External Table
Sourced
External Scaler/Table
Function Option
Description
Specify language in which the
body of the user-defined
function is written:
Lets you select the language.
Specify the either the name of
the library containing the
function or the full name of
the function:
Lets you type the full path of the library or click the
Browse button.
NOTE: If you are using C language, specify the full
library path and the function name, otherwise IBM
DB2 UDB Database Manager assumes the function
is under the IBM DB2 UDB library.
NOTE: If you are using Java script, specify the Class
ID and the function name, otherwise IBM DB2 UDB
Database Manager assumes the function is under
the IBM DB2 UDB library.
NOTE: If you are using OLE language, specify the
full library path and the function name, otherwise IBM
DB2 UDB Database Manager assumes the function
is under the IBM DB2 UDB library.
What is the name of the entry
point function to be invoked?
OPTIONAL: Lets you enter the name of the entry
point function.
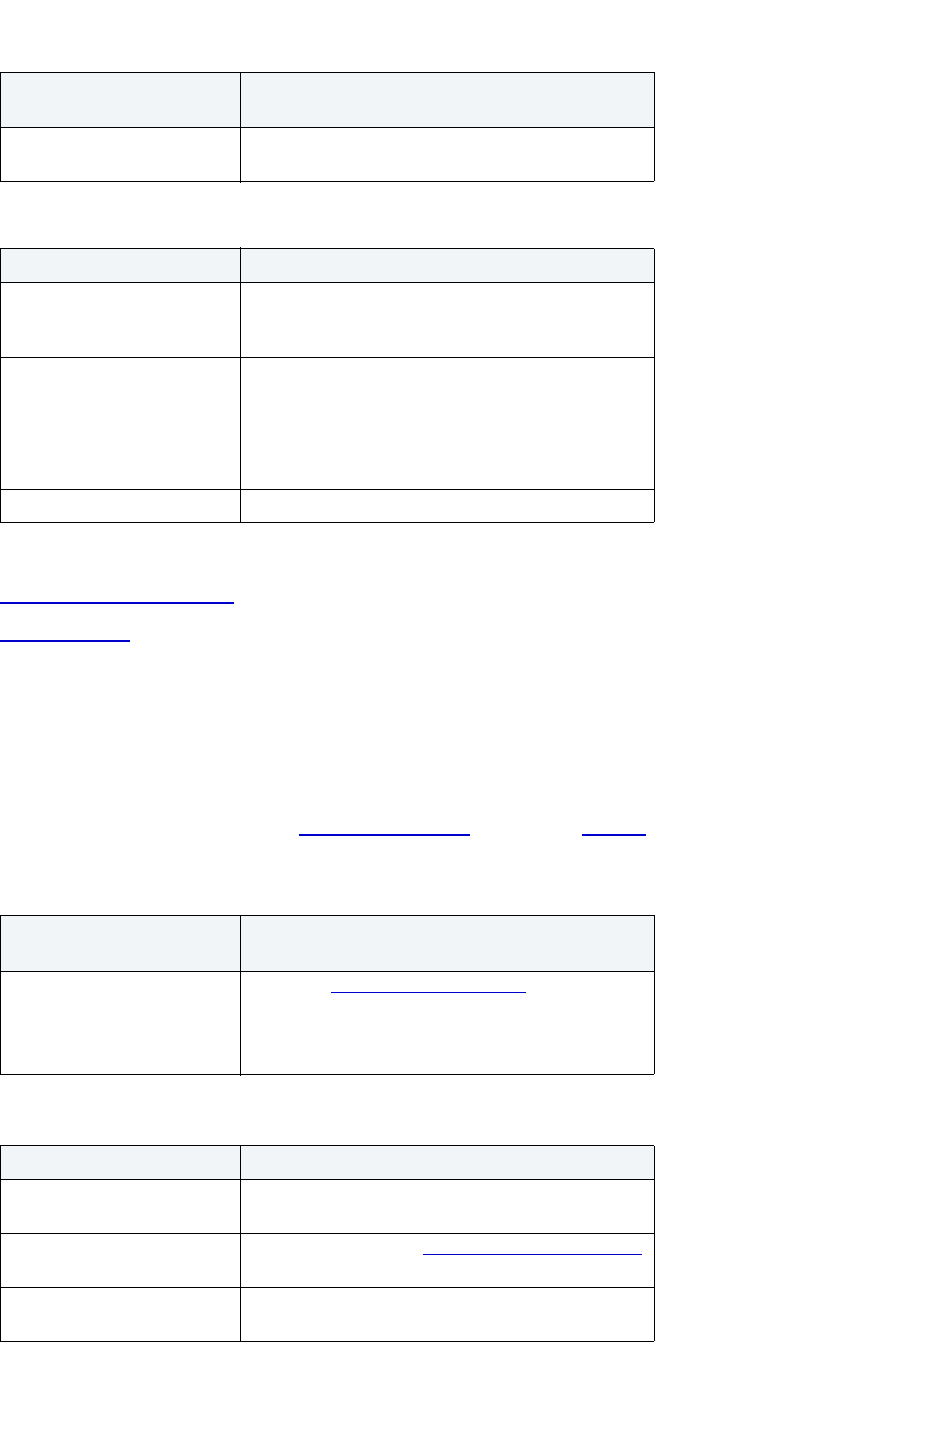
USING > FUNCTIONALITY
EMBARCADERO TECHNOLOGIES > BOOKNAMEVARIABLE 398
For more information, see:
Completing an Object Wizard
Function Wizard
Function Wizard for IBM DB2 UDB for OS/390 and z/OS - Panel 3
The tables below describe the options and functionality on the third panel of the Function Wizard.
NOTE: If you do not need to modify or specify any parameters for the function, this panel is optional.
NOTE: The options differ for external scalar/ table functions and sourced functions.
Would you like this function to
be fenced?
Click Yes or No.
Sourced Function Option Description
Select the source function
which will implement the
function being created:
Lets you select the source function.
Name and Parameters Lets you select the name and parameters for the
function.
Name - Select the name from the list.
Parameters - If the function has multiple parameters,
select the parameters from the list.
Specific Name Lets you select the function by a specific name.
External Scaler/Table
Function Option
Description
Add Button Opens the Add Parameter dialog box, which lets you
specify the datatypes for the function's parameters.
NOTE: Make sure that the external name
specification is correct and valid.
Sourced Function Option Description
Specify the datatypes for the
new function's parameters:
Lets you select the target function parameter
datatype.
Edit button OPTIONAL: Opens the Modify Parameter dialog box
that lets you cast the datatype to a different datatype.
Specify the datatype for the
new function's return value:
Lets you accept the default or enter a datatype.
External Scaler/Table
Function Option
Description
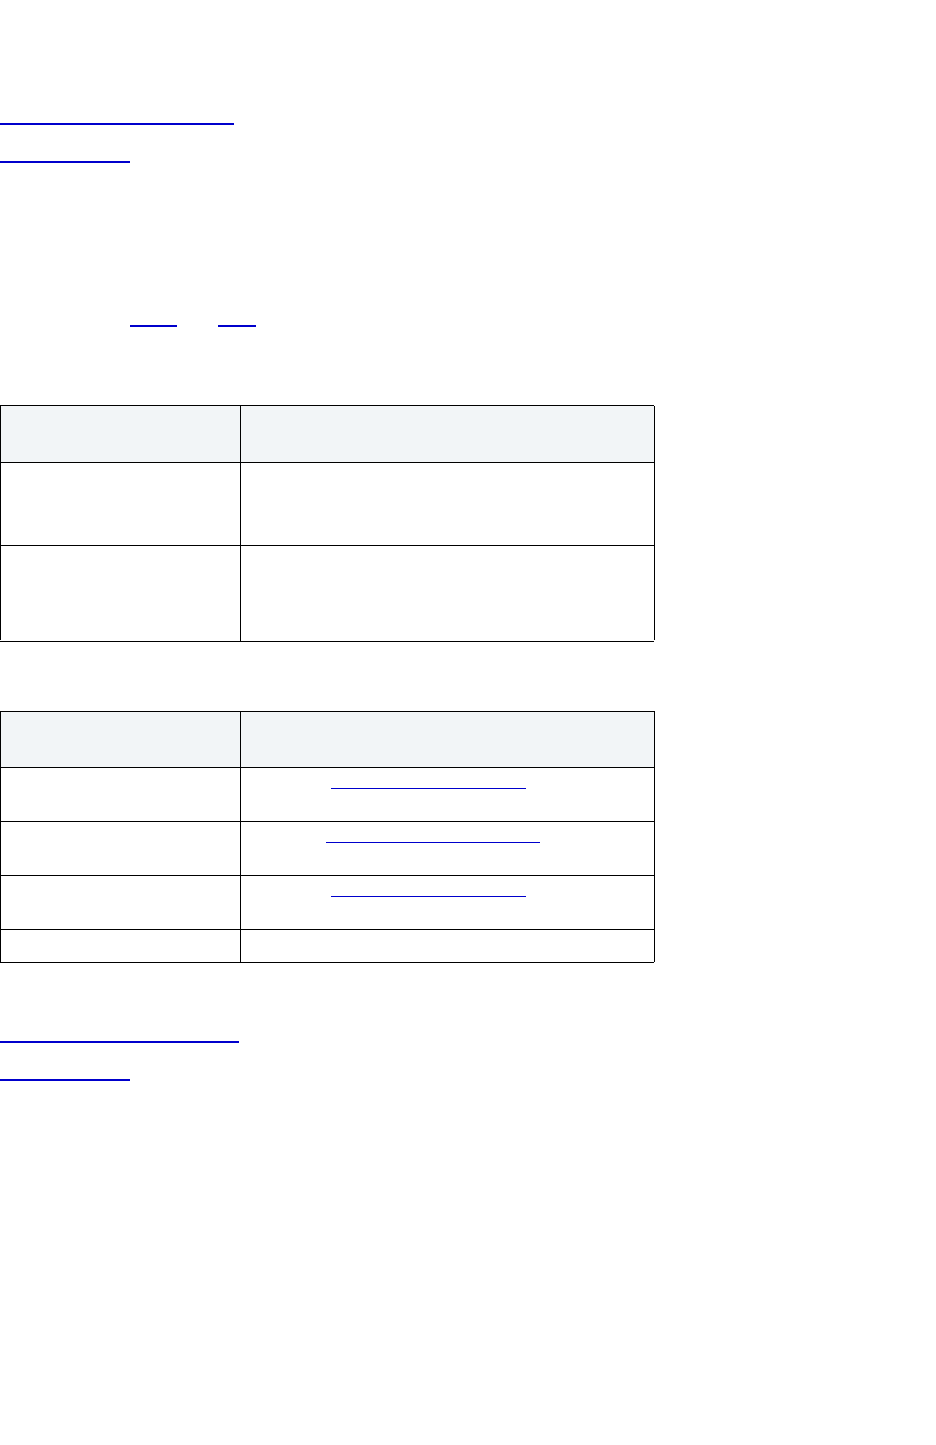
USING > FUNCTIONALITY
EMBARCADERO TECHNOLOGIES > BOOKNAMEVARIABLE 399
For more information, see:
Completing an Object Wizard
Function Wizard
Function Wizard for IBM DB2 UDB for OS/390 and z/OS - Panel 4
The tables below describe the options and functionality on the fourth panel of the Function Wizard.
NOTE: This panel is only available for external scalar and table functions. The panel options differ for
scaler
and table functions.
For more information, see:
Completing an Object Wizard
Function Wizard
Function Wizard for IBM DB2 UDB for OS/390 and z/OS - Panel 5
The tables below describe the options and functionality on the fifth panel of the Function Wizard.
External Scaler Function
Option
Description
Specify the datatype to be
returned to the invoking
statement:
Lets you select the return datatype and set the width
and scale.
As Locator - Lets you set the parameter as a locator.
Specify the datatype returned
by the function code if it
differs from the return type
above:
OPTIONAL: Only necessary if the return type of the
new function is to be different than the program that
implements the function.
External Table Function
Option
Description
Add Button Opens the Add Parameter dialog box, which lets you
specify the columns to be returned.
Insert Button Opens the Insert Parameter dialog box
, which lets
you specify the columns to be returned.
Edit Button Opens the Edit Parameter dialog box
, which lets you
specify the columns to be returned.
Drop Button Lets you drop a column.
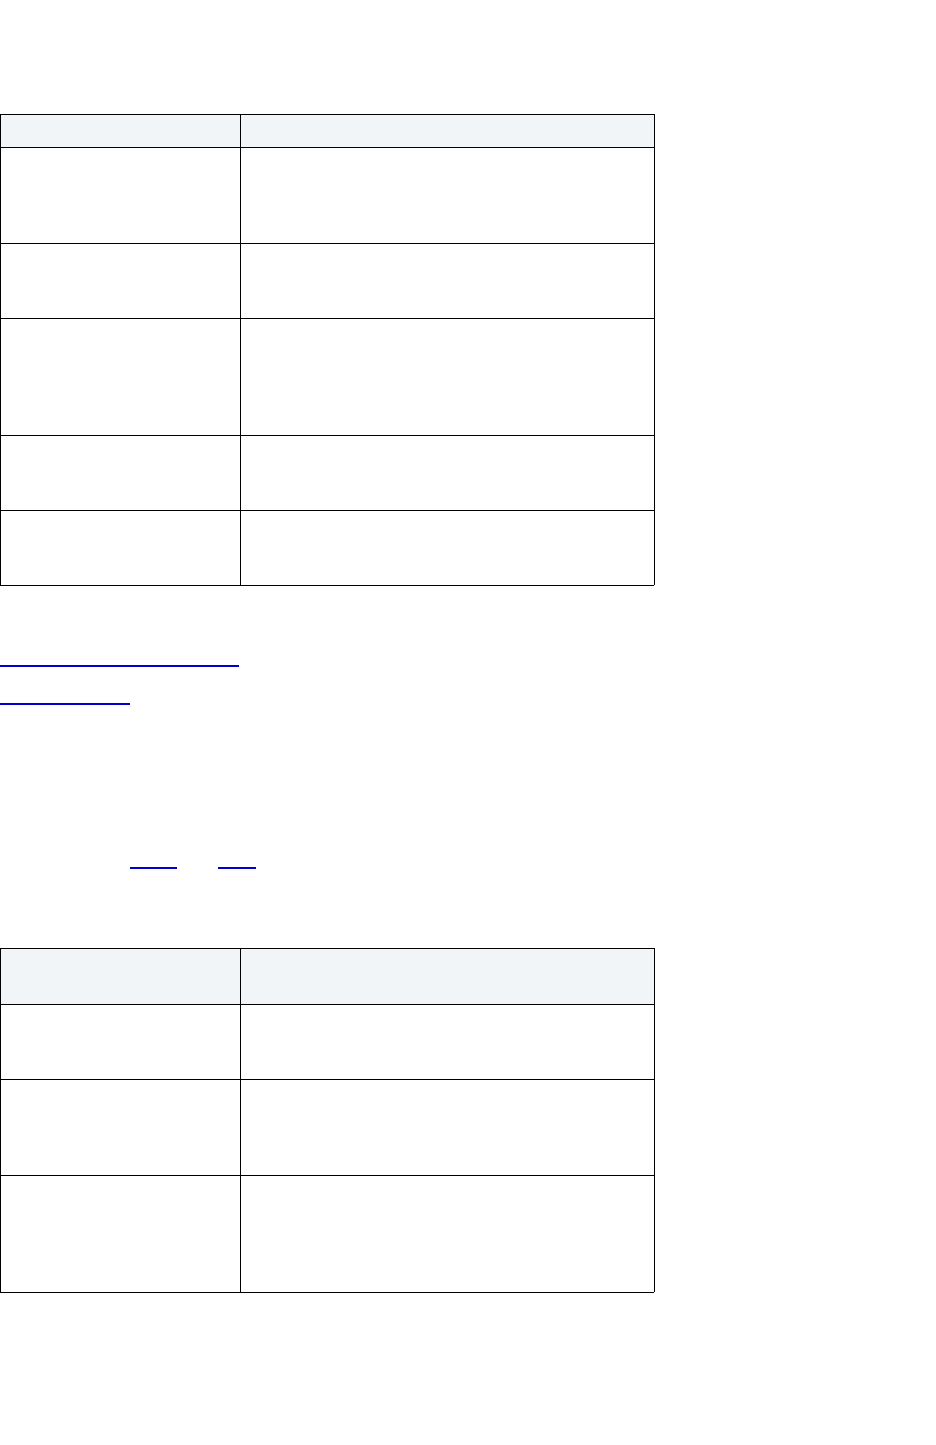
USING > FUNCTIONALITY
EMBARCADERO TECHNOLOGIES > BOOKNAMEVARIABLE 400
For more information, see:
Completing an Object Wizard
Function Wizard
Function Wizard for IBM DB2 UDB for OS/390 and z/OS - Panel 6
The tables below describe the options and functionality on the sixth panel of the Function Wizard.
NOTE: This panel is only available for external scalar and table functions. The panel options differ for
scaler
and table functions.
Option Description
Does the function take any
action that changes the state
of an object not managed by
the database manager?
Click Yes or No.
Does the function depend on
some state values that do not
effect the results?
Click Yes or No.
Does the function depend on
some state values that do not
effect the results?
This sets the DETERMINISTIC clause of the
CREATE FUNCTION statement. If you click the No
option button, the database optimizer takes special
precautions when processing queries to not issue
additional calls to this type of function.
Would you like the function to
be called in the event that
there is a null argument?
If you click the No option button, a NULL argument is
not passed to the function and the result of the
function is considered NULL automatically.
Would you like a scratchpad
to be provided for this
function?
If you click the Yes option button, an area of memory
is created to preserve information between the
invocation of one function to another.
External Scaler Function
Option
Description
Would you like a final call to
be made to the external
function?
Click Yes or No.
Do you want the invocation of
the function to be
parallelizable for a single
reference to the function?
Click Yes or No.
Do not want certain specific
information known by IBM
DB2 UDB to be passed on to
the function as an additional
invocation-time argument?
Click Yes or No.

USING > FUNCTIONALITY
EMBARCADERO TECHNOLOGIES > BOOKNAMEVARIABLE 401
For more information, see:
Completing an Object Wizard
Function Wizard
Index Wizard for IBM DB2 UDB for OS/390 and z/OS
The Index Wizard lets you create an index without knowing the underlying commands.
The Index Wizard lets you:
• Specify the table owner and name.
• Specify the index owner and name.
• Create a unique index and provide a comment for the index.
• Identify the index location and order.
• Specify free-block and gbpcache-block index parameters.
• Specify other index parameters.
Important Notes
•None
For more information, see:
Completing an Object Wizard
Index Wizard - Panel 1
Index Wizard for IBM DB2 UDB for OS/390 and z/OS - Panel 1
The table below describes the options and functionality on the first panel of the Index Wizard.
External Table Function
Option
Description
Do not want certain specific
information known by IBM
DB2 UDB to be passed on to
the function as an additional
invocation-time argument?
Click Yes or No.
Rows To help the optimizer, type an estimate number of
rows to be returned by the function.
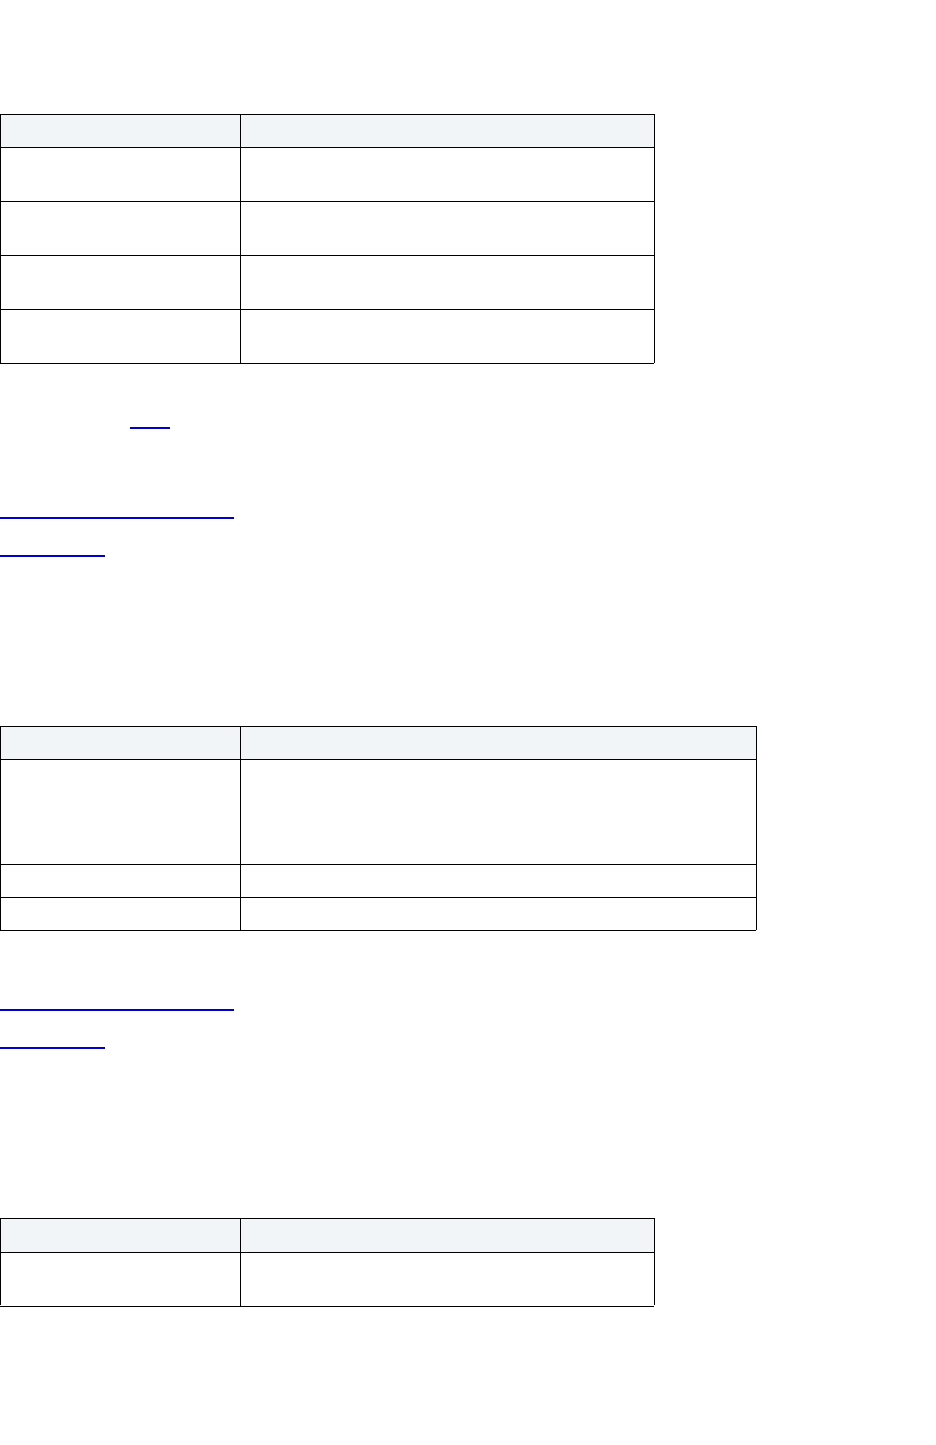
USING > FUNCTIONALITY
EMBARCADERO TECHNOLOGIES > BOOKNAMEVARIABLE 402
TIP: To filter the Owner and Object lists, click the Filter button next to each list. Rapid SQL opens the
Filter dialog box.
For more information, see:
Completing an Object Wizard
Index Wizard
Index Wizard for IBM DB2 UDB for OS/390 and z/OS - Panel 2
The table below describes the options and functionality on the second panel of the Index Wizard.
For more information, see:
Completing an Object Wizard
Index Wizard
Index Wizard for IBM DB2 UDB for OS/390 and z/OS - Panel 3
The table below describes the options and functionality on the third panel of the Index Wizard.
For more information, see:
Option Description
Who owns the table to be
indexed?
Lets you select a table owner.
What is the name of the table
to be indexed?
Lets you enter a table name.
Who owns the index to be
created?
Lets you select the index owner.
What is the name of the
index?
Lets you enter an index name.
Options Description
Unique If selected, index enforces uniqueness on the values of the table's
index key.
If not selected, index does not enforce uniqueness on the values of
the table's index key.
Cluster If selected, clusters the index.
Comment OPTIONAL: Lets you associate a comment with the index.
Option Description
Select the Index Columns: Lets you select the table columns to include in the
index and reorder the index columns.
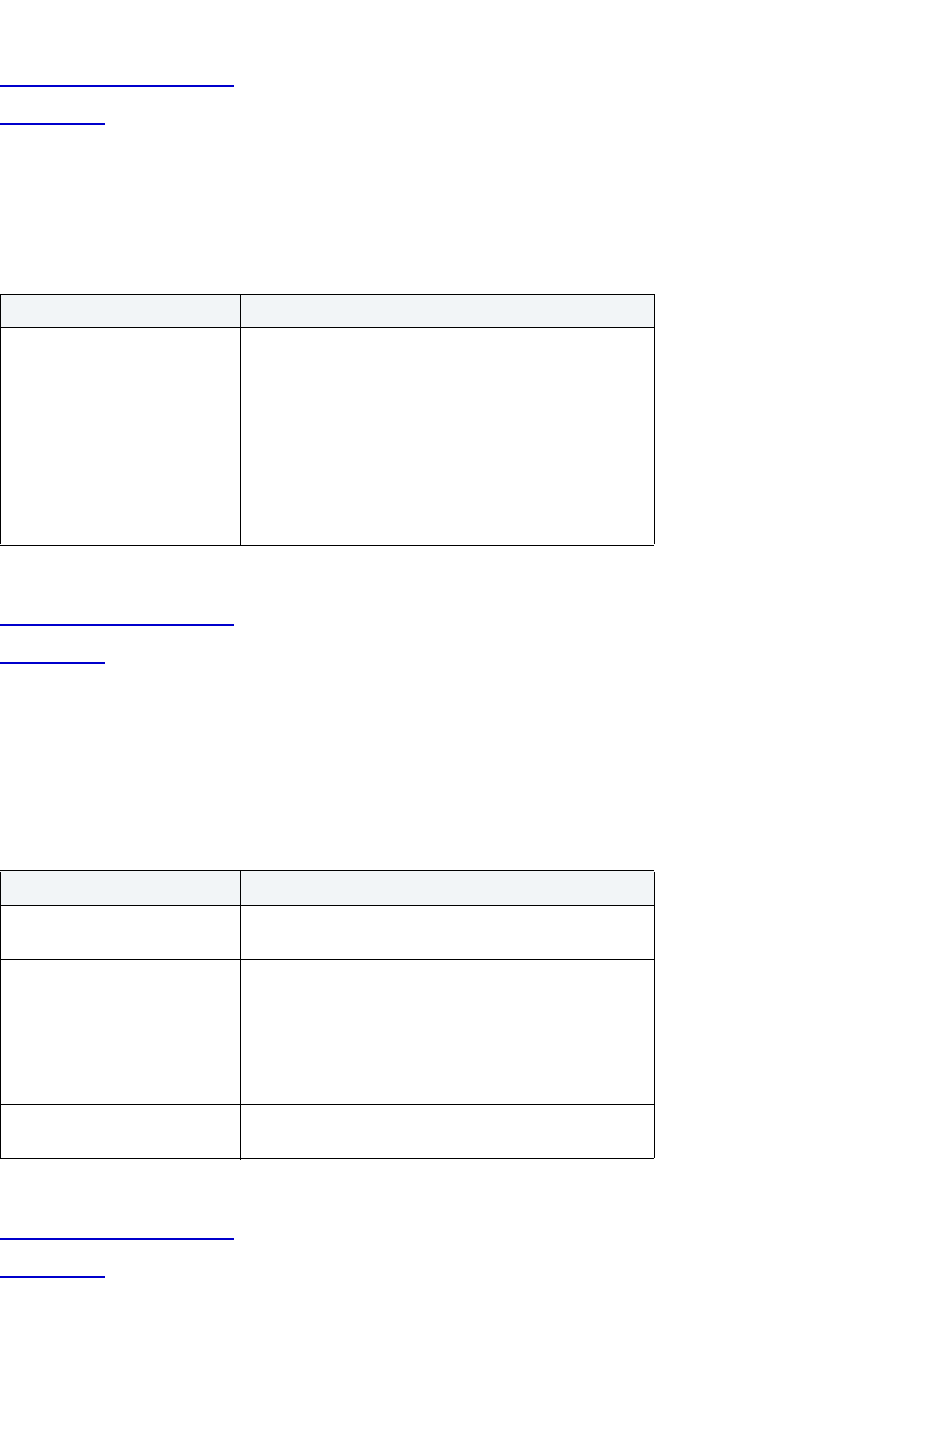
USING > FUNCTIONALITY
EMBARCADERO TECHNOLOGIES > BOOKNAMEVARIABLE 403
Completing an Object Wizard
Index Wizard
Index Wizard for IBM DB2 UDB for OS/390 and z/OS - Panel 4
The table below describes the options and functionality on the fourth panel of the Index Wizard.
For more information, see:
Completing an Object Wizard
Index Wizard
Index Wizard for IBM DB2 UDB for OS/390 and z/OS - Panel 5
The table below describes the options and functionality on the fifth panel of the Index Wizard.
For more information, see:
Completing an Object Wizard
Index Wizard
Option Description
Specify how this index will be
managed
Select an option.
If DB2 defines and manages the data sets on a
volume of the specified storage group, specify a
storgate group, minimum primary space allocation
(PRIQTY), minimum secondary space allocation
(SECQTY), and whether or not you want to erase
data sets when index is dropped.
If a user manages the data sets on a specified VCAT
catalog-name, enter or select the VCAT.
Option Description
Data sharing environment
option
Lets you specify which index pages are written.
Specify options relating to
space management
Free space portion of each page lets you enter the
percentage of each index page to leave as free
space (PCTFREE).
Free page frequency lets you enter how often to
leave a page of free space when index entries are
created (FREEPAGE).
To create a partitioned index,
enter a value greater than 0
Lets you enter the number of partitions.
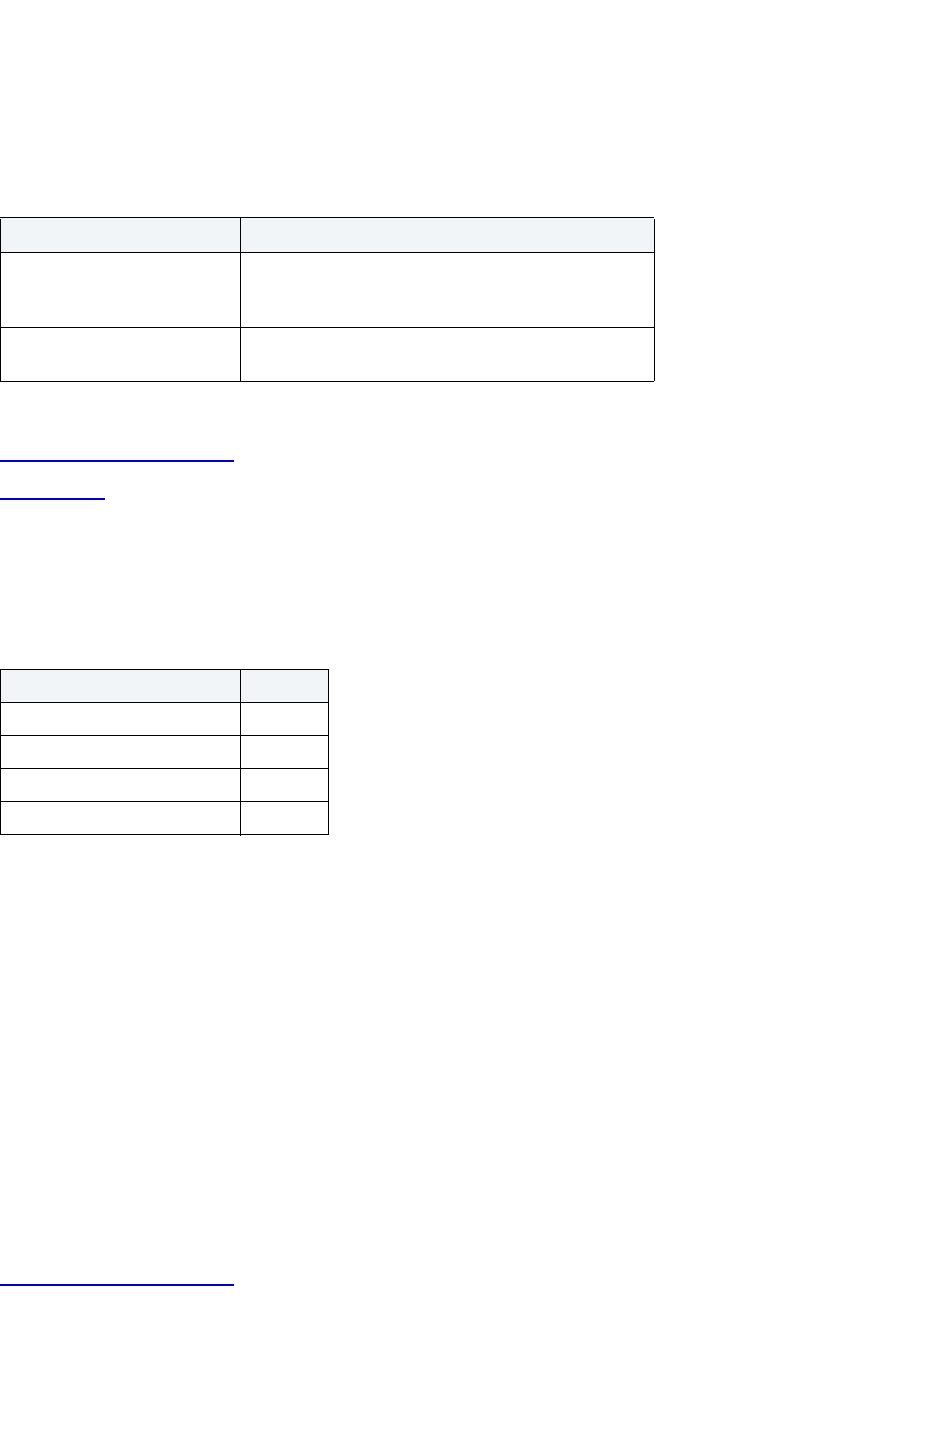
USING > FUNCTIONALITY
EMBARCADERO TECHNOLOGIES > BOOKNAMEVARIABLE 404
Index Wizard for IBM DB2 UDB for OS/390 and z/OS - Panel 6
The table below describes the options and functionality on the sixth panel of the Index Wizard.
For more information, see:
Completing an Object Wizard
Index Wizard
Index Wizard for IBM DB2 UDB for OS/390 and z/OS - Panel 7
The table below describes the options and functionality on the seventh panel of the Index Wizard.
Plan Wizard for IBM DB2 UDB for OS/390 and z/OS
The Plan Wizard lets you create IBM DB2 UDB for OS/390 and z/OS plans without knowing the underlying
commands.
The Plan Wizard lets you:
• Modify the DBRM
• Select plan options
• Modify the connection
Important Notes
•None
For more information, see:
Completing an Object Wizard
Plan Wizard - Panel 1
Option Description
Resource Management
option
If yes, creates the data sets for the index immediately
instead of postponing creation until data is inserted in
the index.
Specific options for the index
partitions
Lets you edit specific index partition options. Select
the index, and then click Edit.
Index Parameter Default
Close Option Yes
Defer Option No
Copy Option No
Piecesize Option 2G
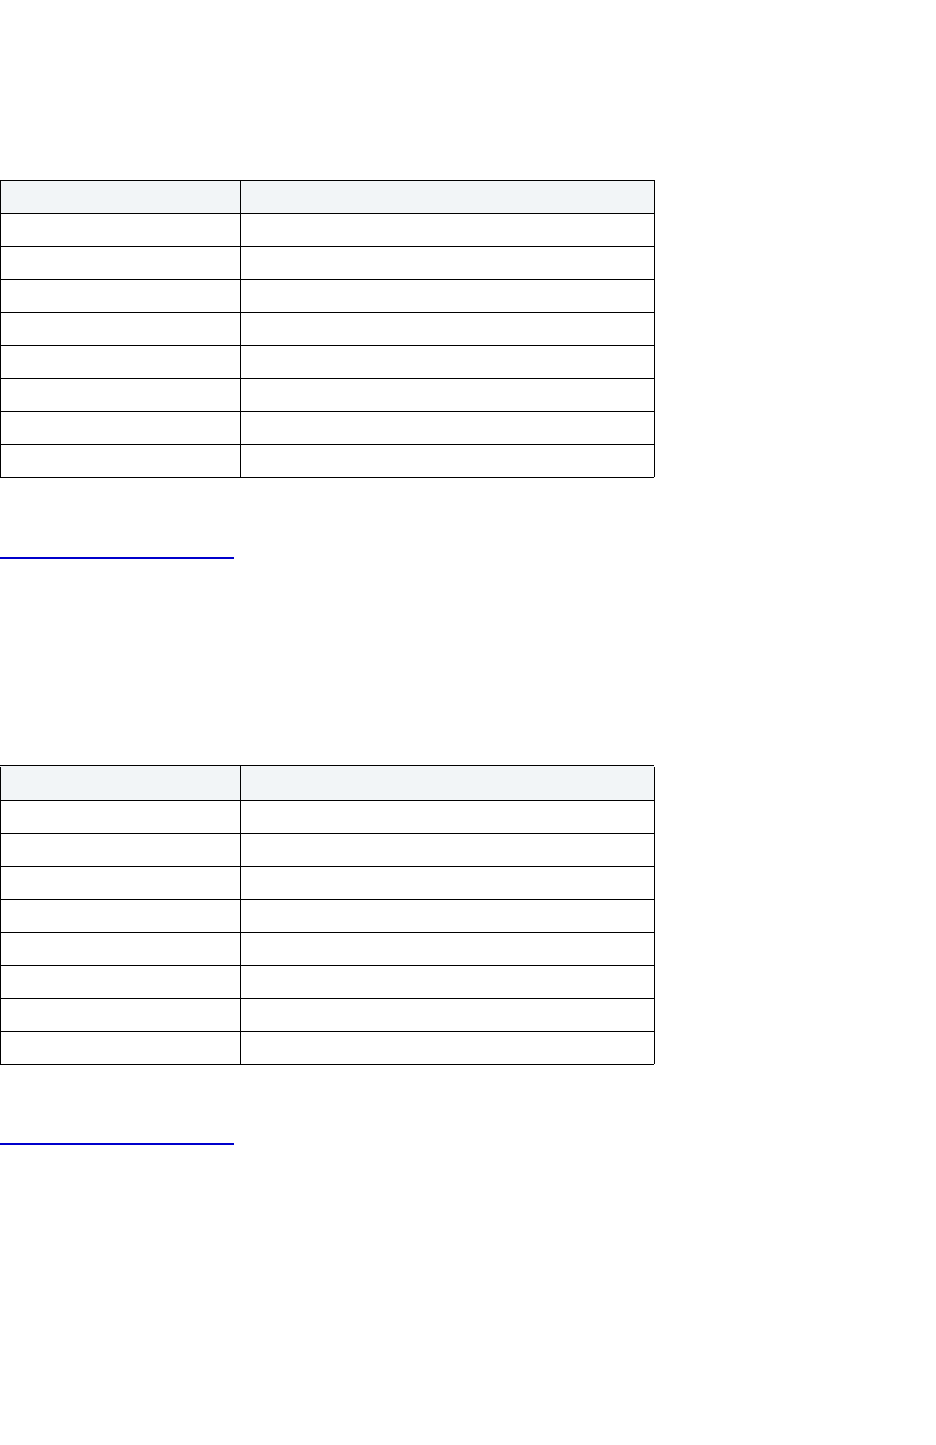
USING > FUNCTIONALITY
EMBARCADERO TECHNOLOGIES > BOOKNAMEVARIABLE 405
Plan Wizard for IBM DB2 UDB for OS/390 and z/OS - Optional Panel 1
The table below describes the options and functionality on the first panel of the Plan Wizard:
For more information, see:
Completing an Object Wizard
Plan Wizard
Plan Wizard for IBM DB2 UDB for OS/390 and z/OS - Optional Panel 2
The table below describes the options and functionality on the second panel of the Plan Wizard:
For more information, see:
Completing an Object Wizard
Plan Wizard
Plan Wizard for IBM DB2 UDB for OS/390 and z/OS - Panel 3
The table below describes the options and functionality on the third panel of the Plan Wizard:
Option Functionality
Lock Isolation Lets you select an option.
Keep Dynamic Lets you select an option.
Current Data Lets you select an option.
Schema Path Lets you select an option.
Dynamic Rules Lets you select an option.
Resource Release Lets you select an option.
Validate Lets you select an option.
DB Protocol Lets you select an option.
Option Functionality
Explain Lets you select an option.
Reoptvars Lets you select an option.
Defer Prepare Lets you select an option.
Page Writes Lets you select an option.
Optimization Hint Lets you select an option.
Encoding Lets you select an option.
Degree Lets you select an option.
Flag Lets you select an option.
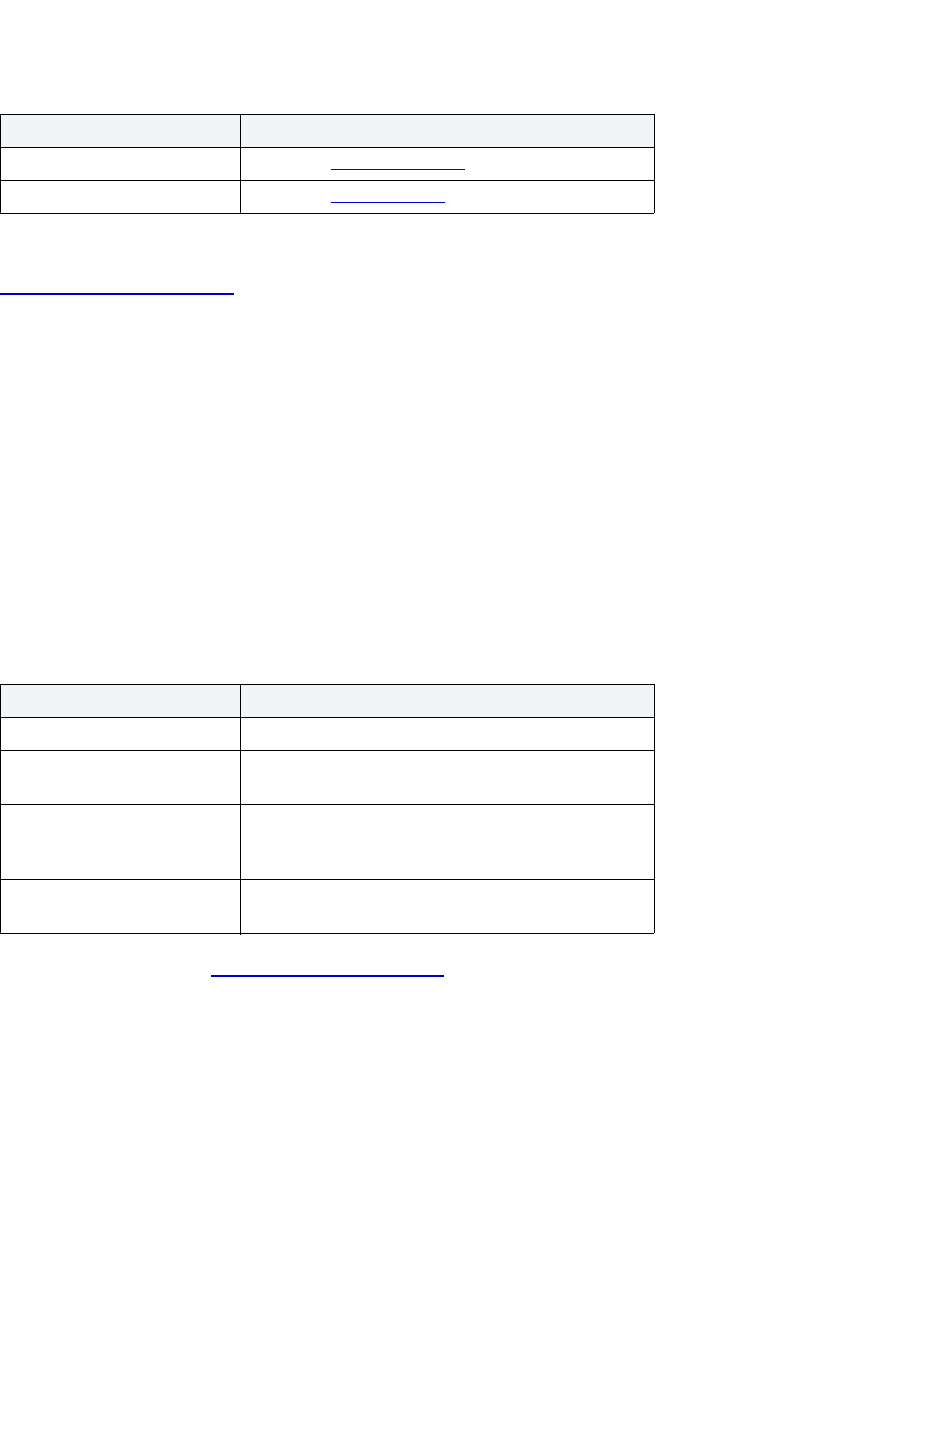
USING > FUNCTIONALITY
EMBARCADERO TECHNOLOGIES > BOOKNAMEVARIABLE 406
For more information, see:
Completing an Object Wizard
Plan Wizard
Create Primary Key Constraint Dialog Box for IBM DB2 UDB for OS/390 and z/OS
The Create Primary Key Constraint dialog box lets you create a primary key without knowing the underlying
commands. When you create a primary key, specify the owner and table on which you want to place the primary key
constraint.
Important Notes
•None
The table below describes the options and functionality on the Create Primary Key Constraint dialog box.
For more information, see Completing an Object Wizard
.
Procedure Wizard for IBM DB2 UDB for OS/390 and z/OS
The Procedure Wizard lets you create a procedure without knowing the underlying commands.
The Procedure Wizard lets you:
• Name the procedure and specify its body.
• Set the language of the procedure and the location of the library or class containing the procedure.
• Specify the datatypes for the parameters of the stored procedure.
• Apply special options to the procedure, such as whether the procedure should always run in separate address
space than the database.
Option Functionality
Edit Opens the Connection Editor.
Edit Opens the Package Editor
.
Option Description
Owner Lets you select the primary key constraint owner.
Table Lets you select the table you want to place the
primary key constraint.
Constraint Name Lets you enter the name of the constraint, which can
be up to 30 characters long and must be unique
across the entire database.
Specify Columns in
Constraint:
Lets you select, reorder, and remove the primary key
columns.
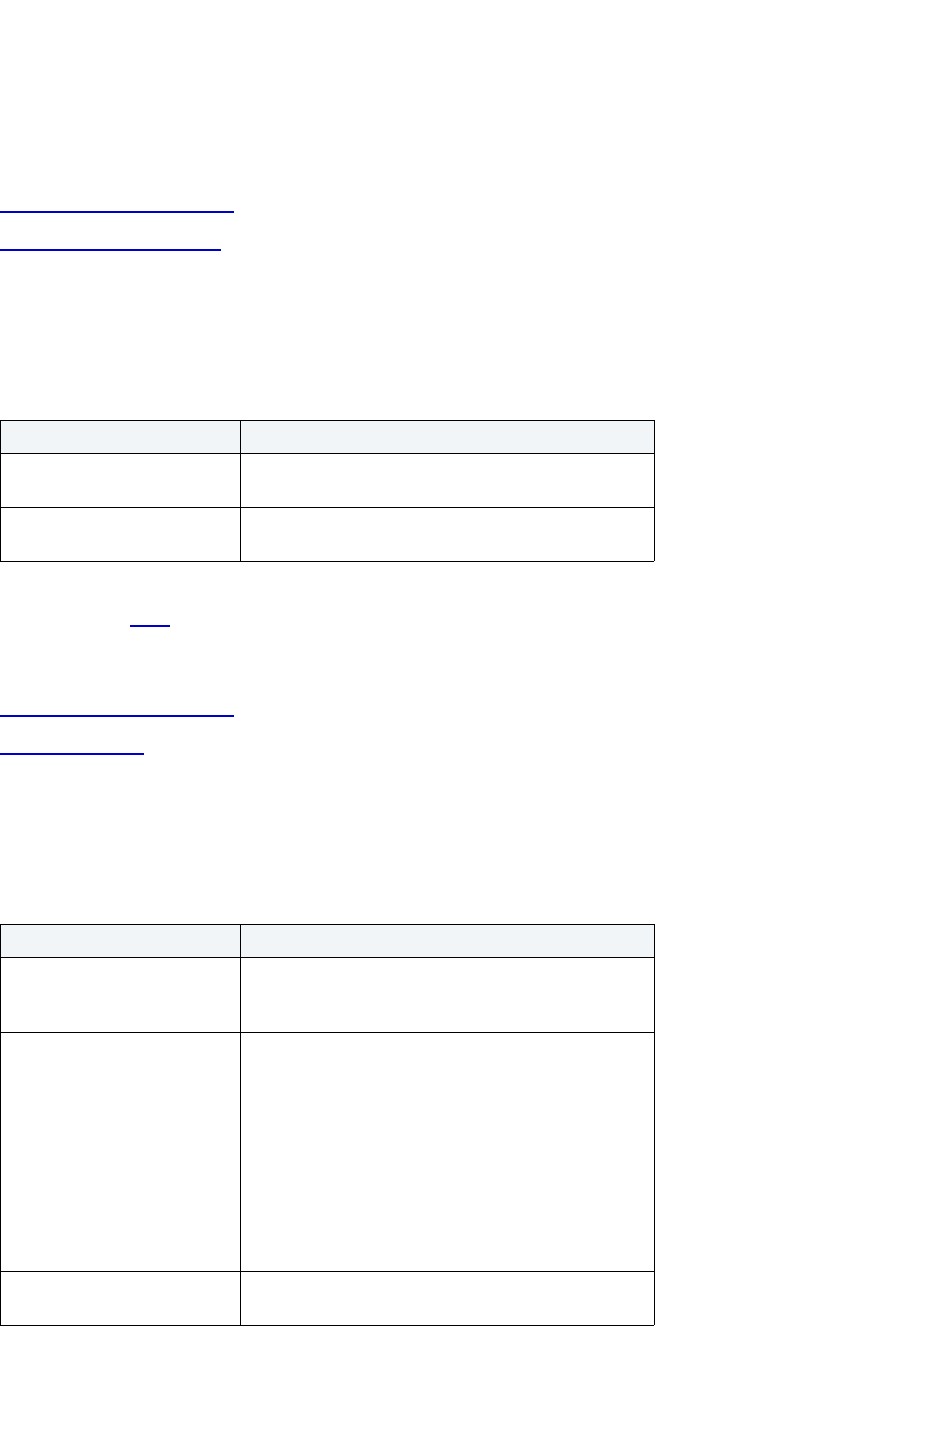
USING > FUNCTIONALITY
EMBARCADERO TECHNOLOGIES > BOOKNAMEVARIABLE 407
Important Notes
• If you are creating a SQL routine procedure, you must have the latest UDB fixpack installed on your OS/390
Client. If you do not have the latest fixpack installed, the SQL routine procedure creation will fail.
For more information, see:
Completing an Object Wizard
Procedure Wizard - Panel 1
Procedure Wizard for IBM DB2 UDB for OS/390 and z/OS - Panel 1
The table below describes the options and functionality on the first panel of the Procedure Wizard.
TIP: To filter the Owner and Object lists, click the Filter button next to each list. Rapid SQL opens the
Filter
dialog box.
For more information, see:
Completing an Object Wizard
Procedure Wizard
Procedure Wizard for IBM DB2 UDB for OS/390 and z/OS - Panel 2
The table below describes the options and functionality on the second panel of the Procedure Wizard.
Option Description
Who will own the procedure
to be registered?
Lets you select the procedure owner.
What is the name of the
procedure?
Lets you enter the procedure name.
Option Description
Specify language in which the
body of the user-defined
function is written:
Lets you select the language.
Specify the either the name of
the library containing the
function or the full name of
the function:
Lets you enter the full path of the library of click the
browse button.
NOTE: If you are using C language, specify the full
library path and the procedure name, otherwise IBM
DB2 UDB Database Manager assumes the
procedure is under the IBM DB2 UDB library.
NOTE: If you are using Java script, specify the Class
ID and the procedure name, otherwise IBM DB2
UDB Database Manager assumes the procedure is
under the IBM DB2 UDB library.
What is the name of the entry
point function to be invoked?
OPTIONAL: Lets you enter the name of the entry
point function.
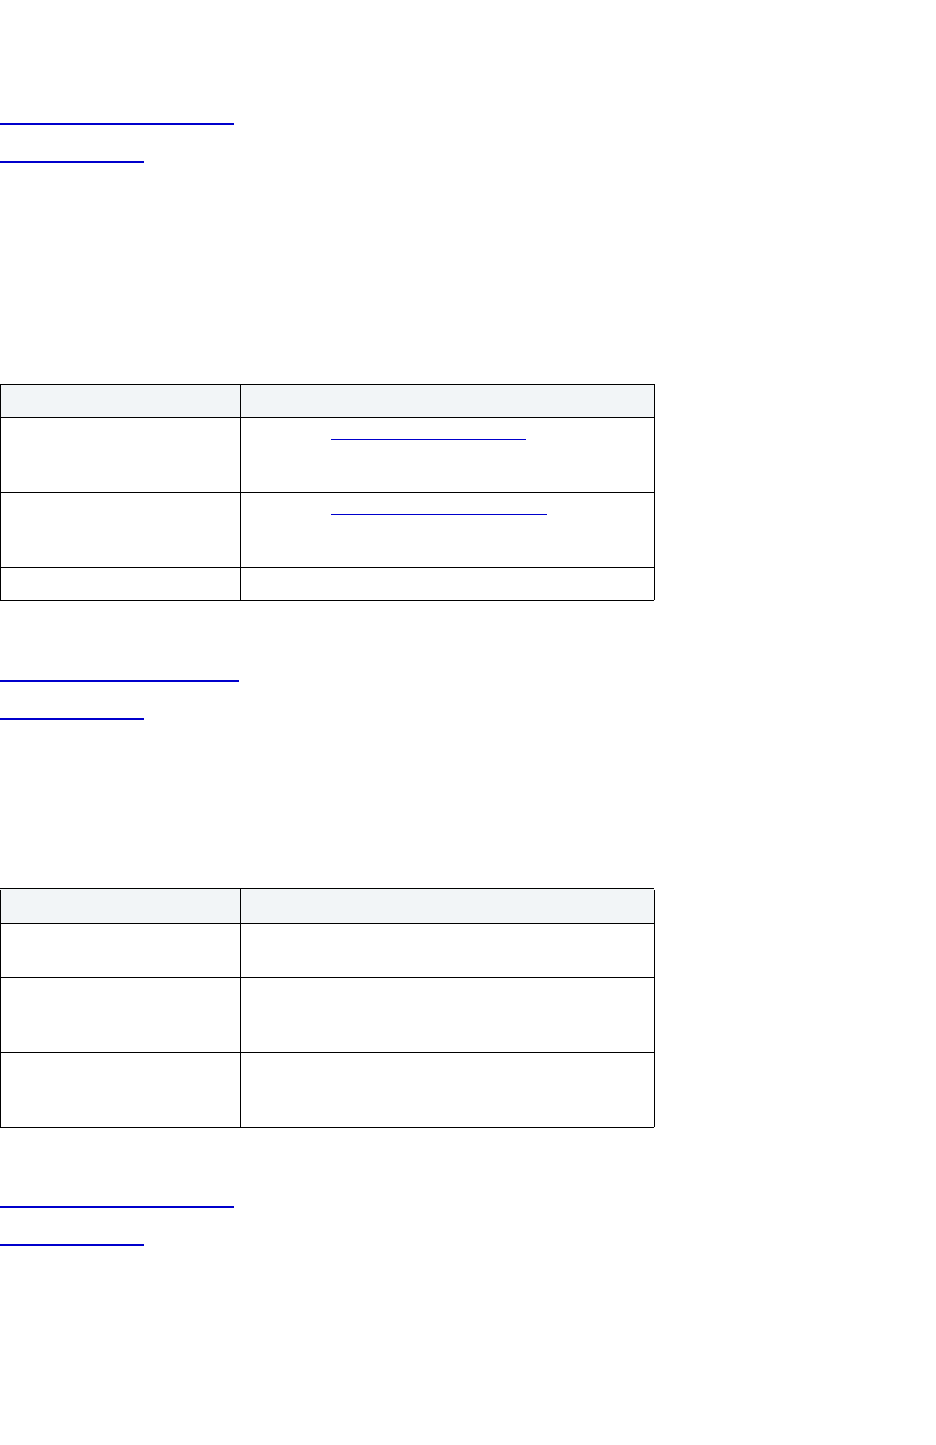
USING > FUNCTIONALITY
EMBARCADERO TECHNOLOGIES > BOOKNAMEVARIABLE 408
For more information, see:
Completing an Object Wizard
Procedure Wizard
Procedure Wizard for IBM DB2 UDB for OS/390 and z/OS - Panel 3
The table below describes the options and functionality on the third panel of the Procedure Wizard.
NOTE: If you do not need to modify or specify any parameters for the procedure, this panel is optional.
For more information, see:
Completing an Object Wizard
Procedure Wizard
Procedure Wizard for IBM DB2 UDB for OS/390 and z/OS - Panel 4
The table below describes the options and functionality on the fourth panel of the Procedure Wizard.
For more information, see:
Completing an Object Wizard
Procedure Wizard
Stogroup Wizard for IBM DB2 UDB for OS/390 and z/OS
The Stogroup Wizard lets you create a stogroup without knowing any of the underlying commands.
Option Description
Add Button Opens the Add Parameter dialog box, which lets you
specify the datatypes for the new procedure's
parameters.
Edit Button Opens the Modify Parameter dialog box
, which lets
you specify the datatypes for the new procedure's
parameters.
Delete Button Lets you delete the parameter.
Option Description
Would you like this procedure
to be fenced?
Click Yes or No.
Indicate the estimated upper
bound of returned result sets:
OPTIONAL: To indicate the estimated upper bound
of returned result sets, type the upper bound value in
the corresponding box.
Does this procedure depend
on some state values that
effect the results?
Click Yes or No.
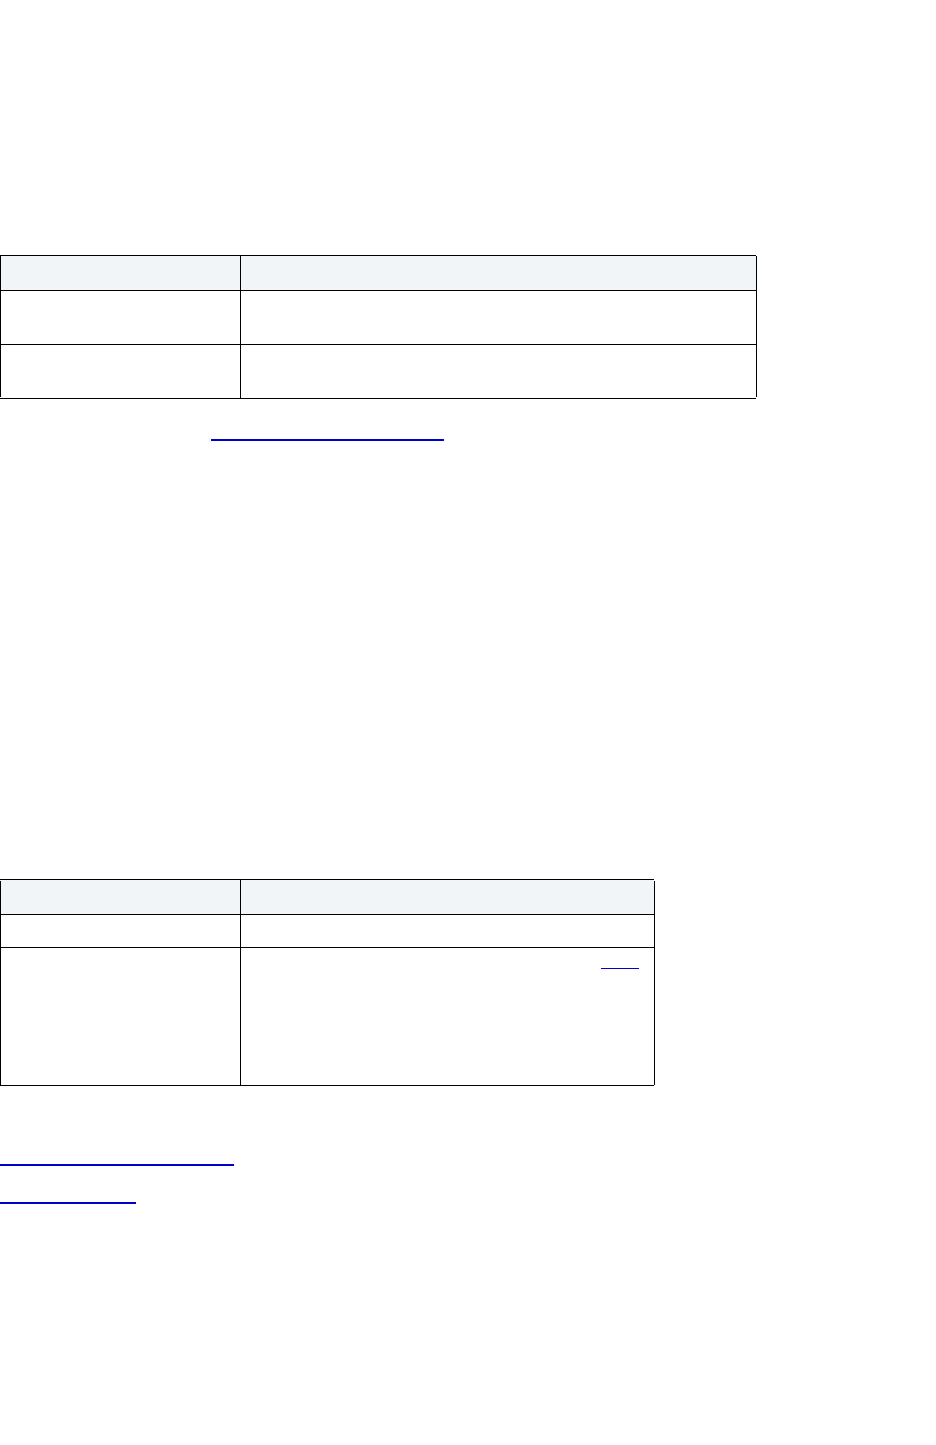
USING > FUNCTIONALITY
EMBARCADERO TECHNOLOGIES > BOOKNAMEVARIABLE 409
Important Notes
•None
The table below describes the options and functionality on the Stogroup Wizard.
For more information, see Completing an Object Wizard
.
Synonym Wizard for IBM DB2 UDB for OS/390 and z/OS
The Synonym Wizard lets you create a synonym without knowing the underlying commands.
The Synonym Wizard lets you:
• Specify the synonym name and owner.
• Create a synonym for a table, view or alias.
Synonym Wizard for IBM DB2 UDB for OS/390 and z/OS - Panel 1
The table below describes the options and functionality on the first panel of the Synonym Wizard.
NOTE: An alias does not display in the Table Editor if you create a synonym for that alias name.
For more information, see:
Completing an Object Wizard
Synonym Wizard
Synonym Wizard for IBM DB2 UDB for OS/390 and z/OS - Panel 2
The table below describes the options and functionality on the second panel of the Synonym Wizard.
Option Description
What is the name of the
Stogroup?
Lets you type the Stogroup name.
VCAT Lets you select the VCAT name. Specifies that the data set is
managed by the user.
Option Description
Owner of Synonym Object Lets you select the synonym owner.
Name of Synonym Object Lets you type the synonym name and click the Filter
button. The Filter dialog box lets you filter the results
of an object node to names with one or more
patterns. This lets you display and work with a target
object without waiting for all the objects in a large list
to display.

USING > FUNCTIONALITY
EMBARCADERO TECHNOLOGIES > BOOKNAMEVARIABLE 410
For more information, see:
Completing an Object Wizard
Synonym Wizard
Table Wizard for IBM DB2 UDB for OS/390 and z/OS
The Table Wizard lets you create a table without knowing the underlying commands.
The Table Wizard lets you:
• Name the table and owner
• Lets you set logging options for the table and to provide table comments.
Important Notes
•None
For more information, see:
Completing an Object Wizard
Table Wizard - Panel 1
Table Wizard for IBM DB2 UDB for OS/390 and z/OS - Panel 1
The table below describes the options and functionality on the first panel of the Table Wizard.
NOTE: These options are only available if the tablespace you selected is a database managed
tablespace.
Option Description
Owner of Base Table or View Lets you select the target owner.
Name of the Base Table or
View
Select an existing table - Select to create the
synonym from an existing table.
Select an existing view - Select to create the
synonym from an existing view.
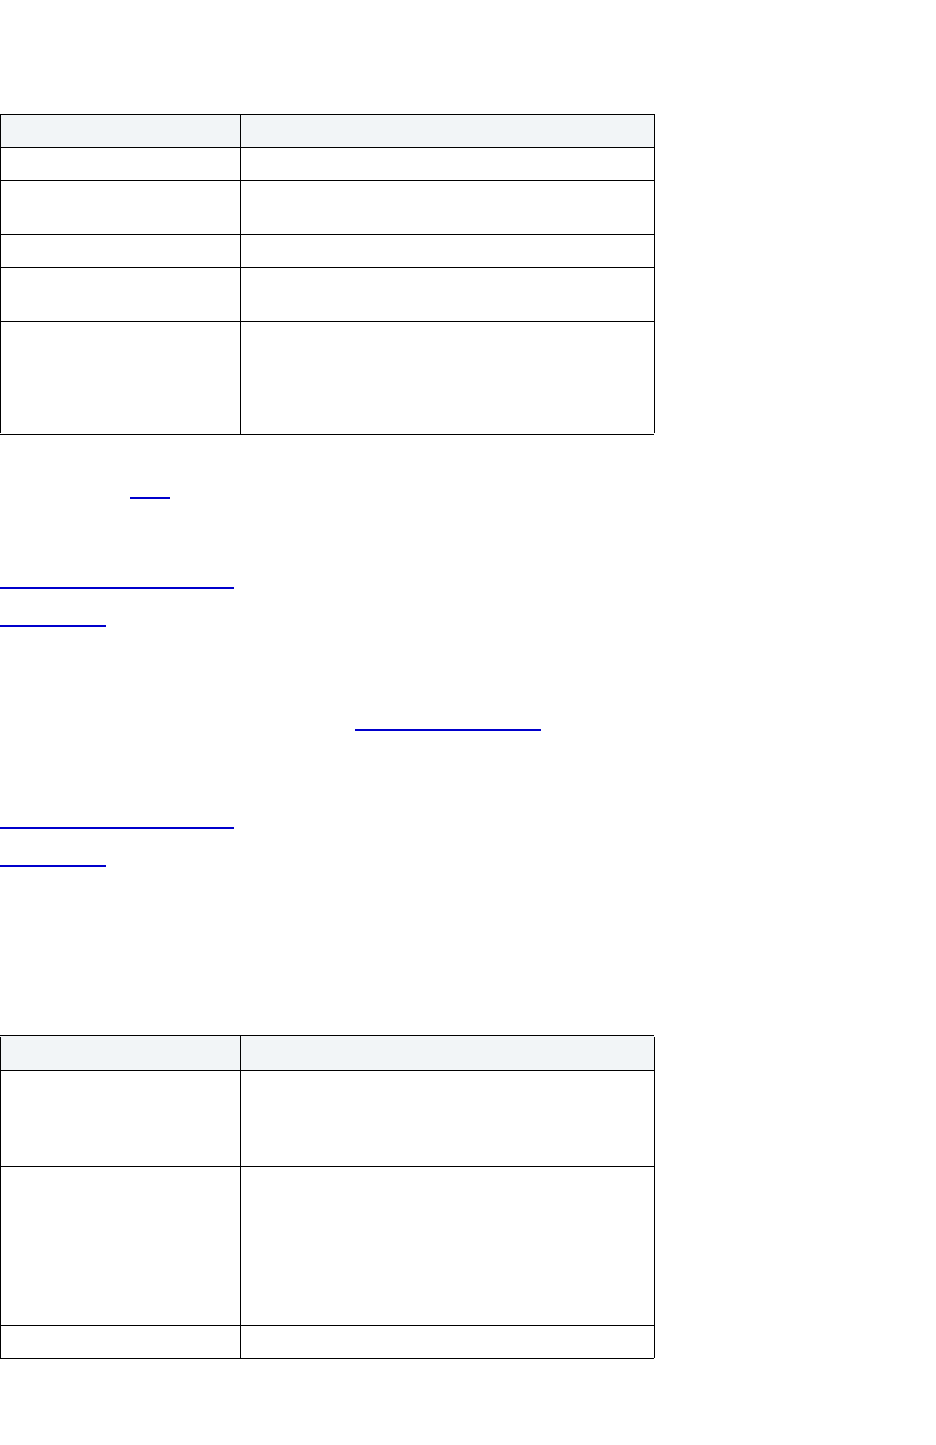
USING > FUNCTIONALITY
EMBARCADERO TECHNOLOGIES > BOOKNAMEVARIABLE 411
TIP: To filter the Owner and Object lists, click the Filter button next to each list. Rapid SQL opens the
Filter dialog box.
For more information, see:
Completing an Object Wizard
Table Wizard
Table Wizard for IBM DB2 UDB for OS/390 and z/OS - Panel 2
In the second panel of the Table Wizard, the Add Column dialog box opens immediately to let you add and define
table columns.
For more information, see:
Completing an Object Wizard
Table Wizard
Table Wizard for IBM DB2 UDB for OS/390 and z/OS - Panel 3
The table below describes the options and functionality on the third panel of the Table Wizard.
Option Description
Who owns the table? Lets you select the table owner.
What is the name of the
table?
Lets you enter the table name.
Summary Table Lets you select a summary table.
Select a tablespace on which
to place the table:
OPTIONAL: Lets you select a tablespace where you
want to place your table.
Specify separate tablespaces
for index and long data
below:
OPTIONAL: Lets you separate indexes or long data
from the table.
Indexes
Long data
Option Description
Would you like extra
information regarding SQL
changes to this table to be
written to the log?
Lets you have any additional information written to
the log.
Would you like to skip logging
changes made to this table by
Insert, Delete, Update,
Create Index, Drop Index,
and Alter Table operations in
the same unit of work in
which this table is created?
Lets you skip any changes made to the table if you
are still in the same unit of work in which the table
was created.
Enter a comment. OPTIONAL: Lets you enter a comment for the table.

USING > FUNCTIONALITY
EMBARCADERO TECHNOLOGIES > BOOKNAMEVARIABLE 412
For more information, see:
Completing an Object Wizard
Table Wizard
Tablespace Wizard for IBM DB2 UDB for OS/390 and z/OS
The Tablespace Wizard lets you create a tablespace without knowing the underlying commands. As you complete the
Tablespace Wizard process, Rapid SQL constructs the CREATE TABLESPACE statement based on the information
that you supply.
The Tablespace Wizard lets you:
• Name the tablespace.
• Specify data type to be stored on the tablespace.
• Specify what type of tablespace to create.
• Add containers to the tablespace.
• Specify how IBM DB2 UDB should manage the growth of the tablespace.
• Specify the type of tablespace to create.
• Specify how IBM DB2 UDB for OS/390 and z/OS should manage additional parameters in your tablespace.
Important Notes
•None
For more information, see:
Completing an Object Wizard
Tablespace Wizard - Panel 1
Tablespace Wizard for IBM DB2 UDB for OS/390 and z/OS - Panel 1
The table below describes the options and functionality on the first panel of the Tablespace Wizard.
You are creating a LOB table.
Do you want DB2 to create
the LOB tablespaces,
auxiliary tables, and indexes?
The option is available if you add a LOB column to
the table. Lets you specify to create the supporting
tables.
NOTE: If you create a base table with a LOB
columns (CLOB, DBCLOB, or BLOB), you must also
define a ROWID column for the table. The definition
of the table is marked incomplete until an auxiliary
table is created in a LOB table space for each LOB
column in the base table and index is created on
each auxiliary table. The auxiliary table stores the
actual values of a LOB column. If you create a table
with a LOB column in a partitioned table space, there
must be one auxiliary table defined for each partition
of the base table space.
Option Description

USING > FUNCTIONALITY
EMBARCADERO TECHNOLOGIES > BOOKNAMEVARIABLE 413
For more information, see:
Completing an Object Wizard
Tablespace Wizard
Tablespace Wizard for IBM DB2 UDB for OS/390 and z/OS - Panel 2
The table below describes the options and functionality on the second panel of the Tablespace Wizard.
NOTE: Stogroup tablespaces require SYSADM or SYSCTRL authority, or the USE privilege.
For more information, see:
Option Description
What is the Name of the
Tablespace?
Lets you enter the name of the tablespace.
Choose the type of data to
store in the tablespace:
Lets you select an option:
Non-partitioned
Partitioned
Segmented
LOB
Select the database that
includes the tablespace
Lets you select the target database. Every database
must contain at least one temporary tablespace.
Option Description
DB2 will define and manage
the data sets on a volume of
the default storage group of
the database
Select to accept the default storage group. The application
allocates and manages the space where the table is to be stored.
The storage model typically consists of many files, representing
table objects, stored in the file system space. In a Database
Managed Space (DMS) table space, the database manager
controls the storage space. The storage model consists of a limited
number of devices or files, whose space is managed by DB2.
DB2 will define and manage
the data sets on the volume
of the specified storage group
The application allocates and manages the space where the table
is to be stored. The storage model typically consists of many files,
representing table objects, stored in the file system space. In a
Database Managed Space (DMS) table space, the database
manager controls the storage space. The storage model consists
of a limited number of devices or files, whose space is managed by
DB2.
Lets you select options:
Select a storage group
Minimum primary space allocation
Minimum secondary space allocation
Erase data sets when tablespace dropped?
User will manage the data
sets on a specified VCAT
catalog name
Lets you type or select VCAT. VCAT tablespace specifies that the
data set is managed by the user.
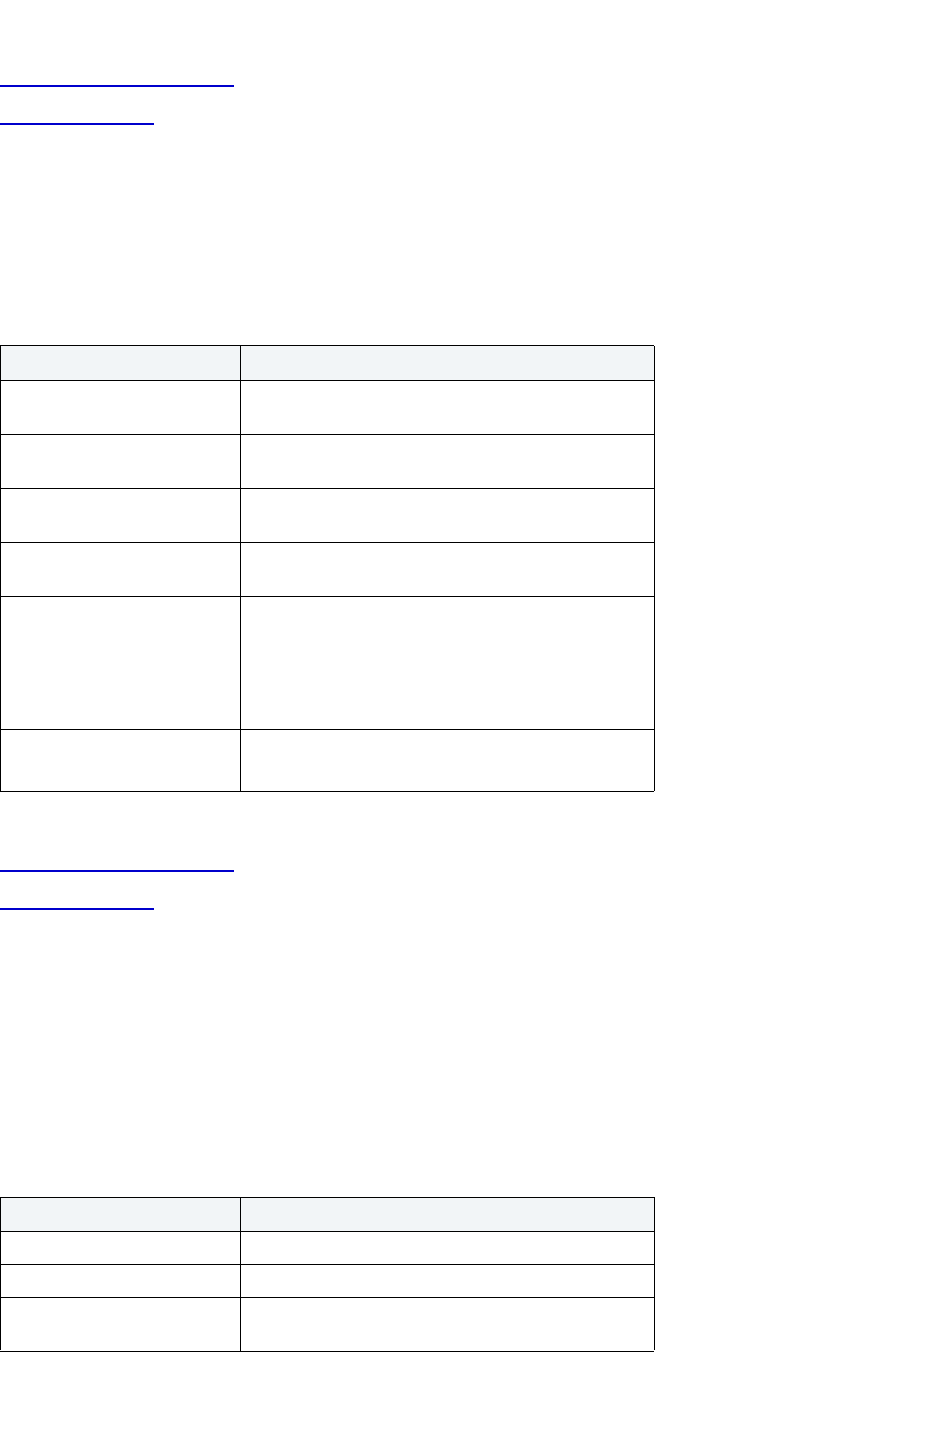
USING > FUNCTIONALITY
EMBARCADERO TECHNOLOGIES > BOOKNAMEVARIABLE 414
Completing an Object Wizard
Tablespace Wizard
Tablespace Wizard for IBM DB2 UDB for OS/390 and z/OS - Panel 3
The table below describes the options and functionality on the third panel of the Tablespace Wizard.
NOTE:
For more information, see:
Completing an Object Wizard
Tablespace Wizard
Tablespace Wizard for IBM DB2 UDB for OS/390 and z/OS - Panel 4
The table below describes the options and functionality on the fourth panel of the Tablespace Wizard.
NOTE: To change the encoding scheme for a database after it is created to utilize a different coded
character set identifier (CCSID) that supports the Euro symbol, all data must be unloaded and
reloaded. For more information regarding the encoding scheme, contact your System
administrator.
Option Description
Number partitions If your tablespace is partitioned, lets you type the
number of partitions.
Partition size If your tablespace is partitioned or LOB, select the
size of partitions.
Segment size If your tablespace is segmented, in the list, click the
target segment size.
Max rows per page If your tablespace is partitioned, non-partitioned or
segmented, type the number of rows.
Using Block Select to set minimum primary and secondary space
allocation values.
PRIQTY - The minimum primary space allocation.
SECQTY - The minimum secondary space
allocation.
Free Block PCTFREE - Lets you type a value.
FREEPAGE - Lets you type a value.
Option Description
Logging Lets you set logging options for the tablespace.
Encoding Scheme Lets you type of language for the tablespace.
Member Cluster Select to let DB2 manage the data storage in the
tablespace for an Insert command.
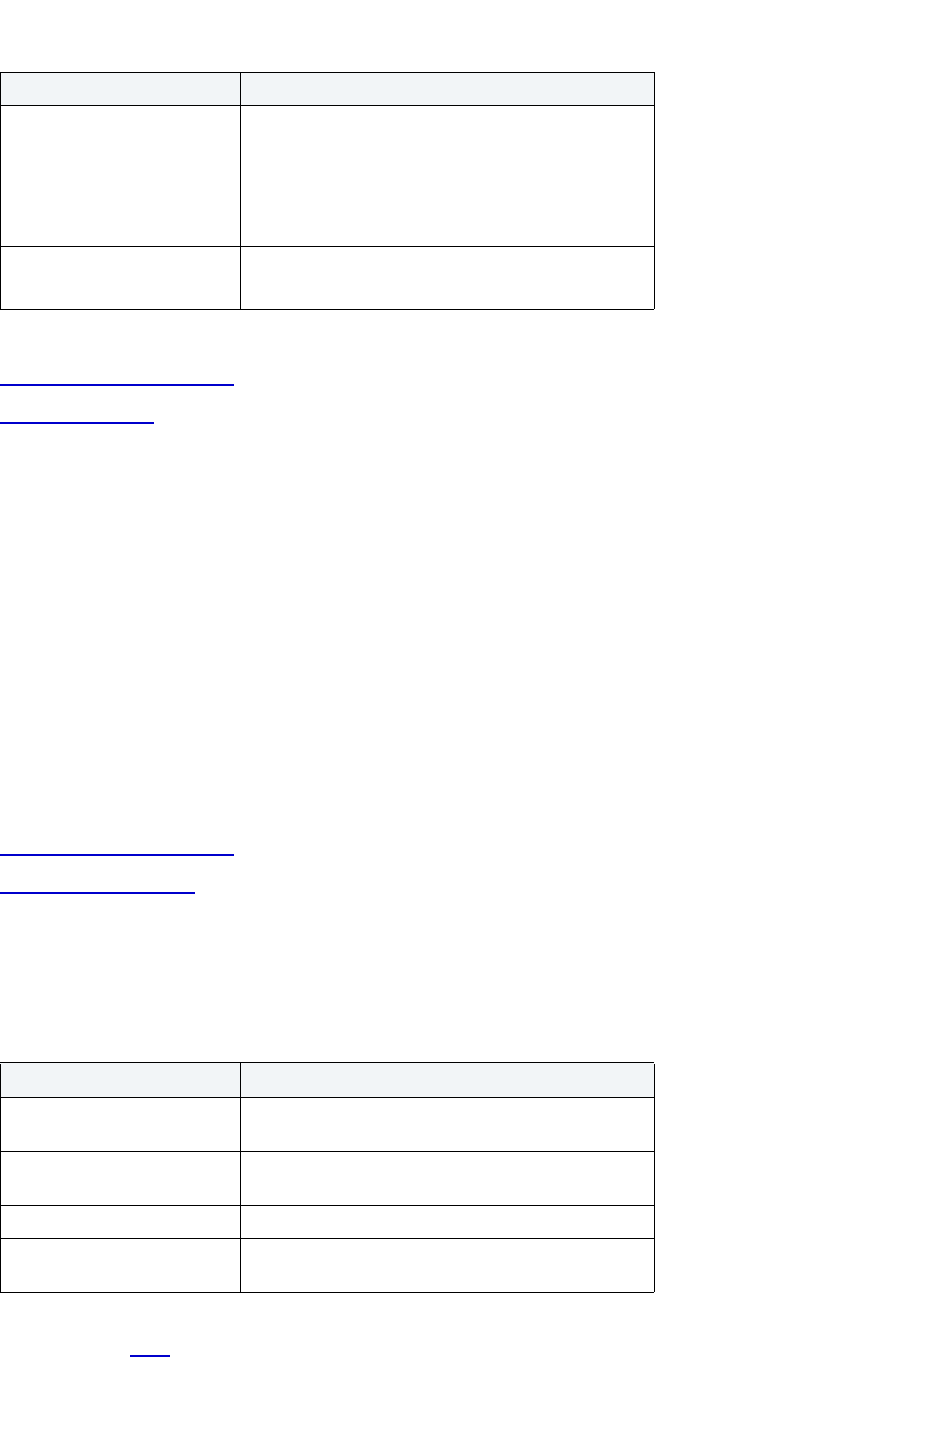
USING > FUNCTIONALITY
EMBARCADERO TECHNOLOGIES > BOOKNAMEVARIABLE 415
For more information, see:
Completing an Object Wizard
Tablespace Wizard
Trigger Wizard for IBM DB2 UDB for OS/390 and z/OS
The Trigger Wizard lets you create a trigger without requiring you to know any of the underlying commands.
The Trigger Wizard lets you:
• Specify the trigger name and the table on which it fires.
• Specify trigger timing, event action, and applicable table columns for an Update trigger.
• Specify the granularity of the trigger and correlation names for the new rows.
Important Notes
•None
For more information, see:
Completing an Object Wizard
Trigger Wizard - Panel 1
Trigger Wizard for IBM DB2 UDB for OS/390 and z/OS - Panel 1
The table below describes the options and functionality on the first panel of the Trigger Wizard.
TIP: To filter the Owner and Object lists, click the Filter button next to each list. Rapid SQL opens the
Filter
dialog box.
Locking Lets you select the locking parameters.
Lock Size
Maximum Locks
Selective Partition Locking - Select if you want to lock
all partitions.
Dataset Handling Lets you select the rule parameters.
Close Rule
Option Description
Who owns the trigger to be
created?
Lets you select the owner.
What is the name of the
trigger?
Lets you enter than trigger name.
Who owns the base table? Lets you select the owner.
What is the name of the base
table?
Lets you select the base table.
Option Description

USING > FUNCTIONALITY
EMBARCADERO TECHNOLOGIES > BOOKNAMEVARIABLE 416
For more information, see:
Completing an Object Wizard
Trigger Wizard
Trigger Wizard for IBM DB2 UDB for OS/390 and z/OS - Panel 2
The table below describes the options and functionality on the second panel of the Trigger Wizard.
For more information, see:
Completing an Object Wizard
Trigger Wizard
Trigger Wizard for IBM DB2 UDB for OS/390 and z/OS - Panel 3
The table below describes the options and functionality on the third panel of the Trigger Wizard.
For more information, see:
Completing an Object Wizard
Trigger Wizard
Option Description
When should the trigger fire? Lets you select Timing and Event.
Before - To make the trigger fire before an event.
After - To make the trigger fire after an event.
Insert - To make the Event cause an insert.
Update - To make the Event cause an update.
Delete - To make the Event cause an delete.
If the trigger fires an update
event, which column updates
should fire a trigger?
If the trigger fires and update event, lets you select
the check box that corresponds to the column
updates that should fire, or click the Check All button.
Option Description
What type of trigger should
be created?
This step is only available if you set the trigger timing
to occur After the event.
Statement
Row
Specify the correlation
names:
OPTIONAL:
Table for the old rows:
Table for the new rows:
Name for the old rows:
Name for the new rows:
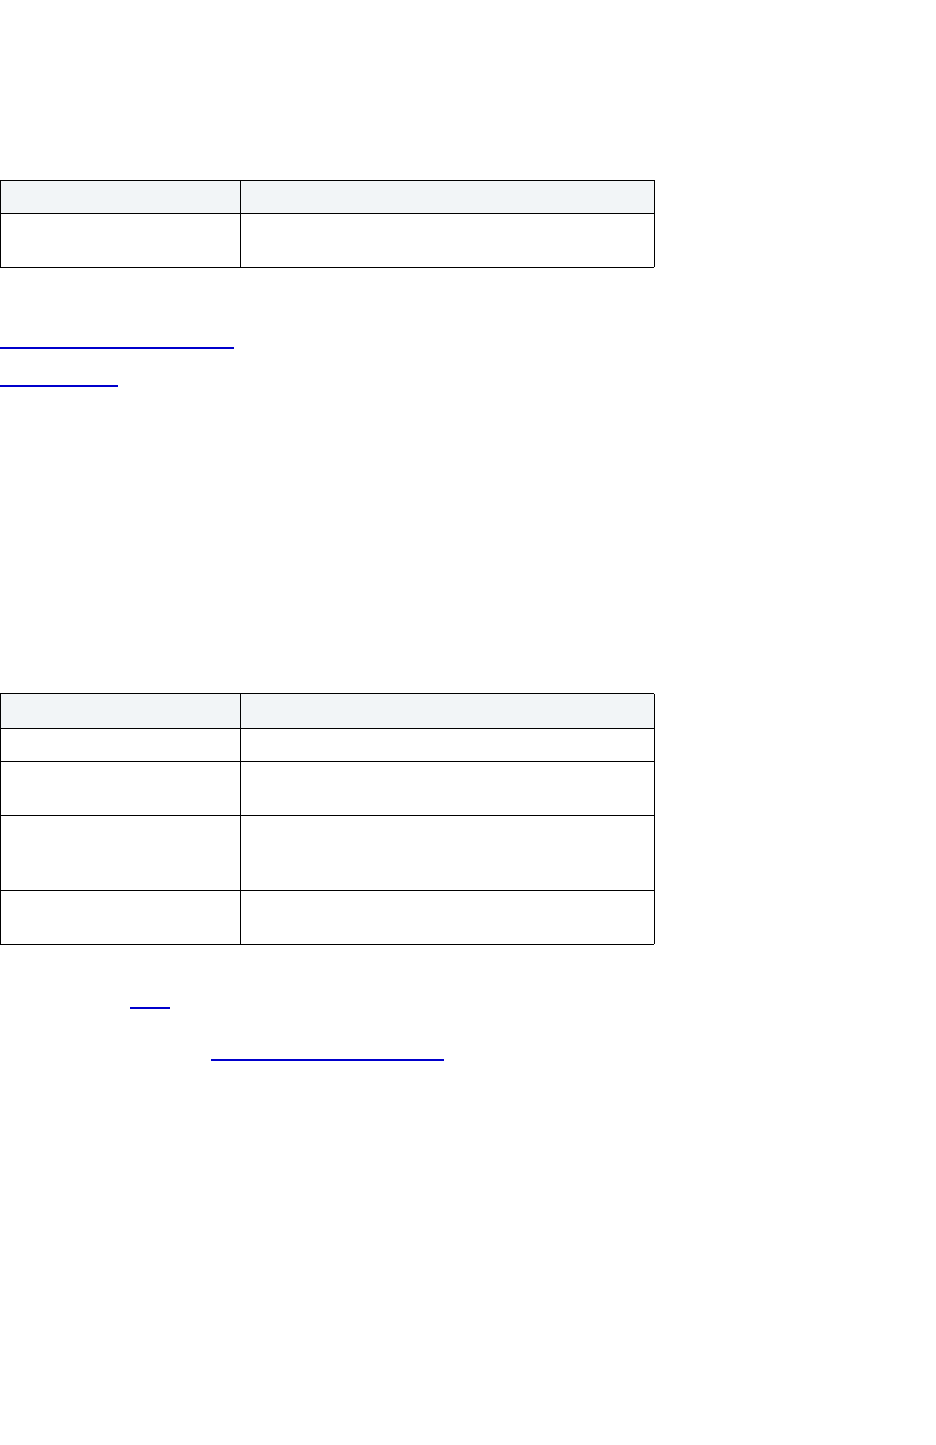
USING > FUNCTIONALITY
EMBARCADERO TECHNOLOGIES > BOOKNAMEVARIABLE 417
Trigger Wizard for IBM DB2 UDB for OS/390 and z/OS - Panel 4
The table below describes the options and functionality on the fourth panel of the Trigger Wizard.
For more information, see:
Completing an Object Wizard
Trigger Wizard
Create Unique Key Constraint Dialog Box for IBM DB2 UDB for OS/390 and z/OS
The Create Unique Key dialog box lets you create a unique key without knowing the underlying commands.
Important Notes
•None
The table below describes the options and functionality on the Create Unique Key Constraint dialog box.
TIP: To filter the Owner and Object lists, click the Filter button next to each list. Rapid SQL opens the
Filter
dialog box.
For more information, see Completing an Object Wizard
.
User Datatype Wizard for IBM DB2 UDB for OS/390 and z/OS
The User Datatype Wizard lets you create a user datatype without knowing the underlying commands.
The User Data Type Wizard lets you:
• Name the user datatype.
• Define the base datatype properties.
Option Description
Please type the body of the
trigger below:
Lets you enter the trigger body syntax.
Option Description
Owner Lets you select the unique key constraint owner.
Table Lets you select the table you want to place the
unique key constraint.
Constraint Name Lets you enter the name of the constraint, which can
be up to 30 characters long and must be unique
across the entire database.
Specify Columns in
Constraint
Lets you select, reorder, and remove the constraint
columns.
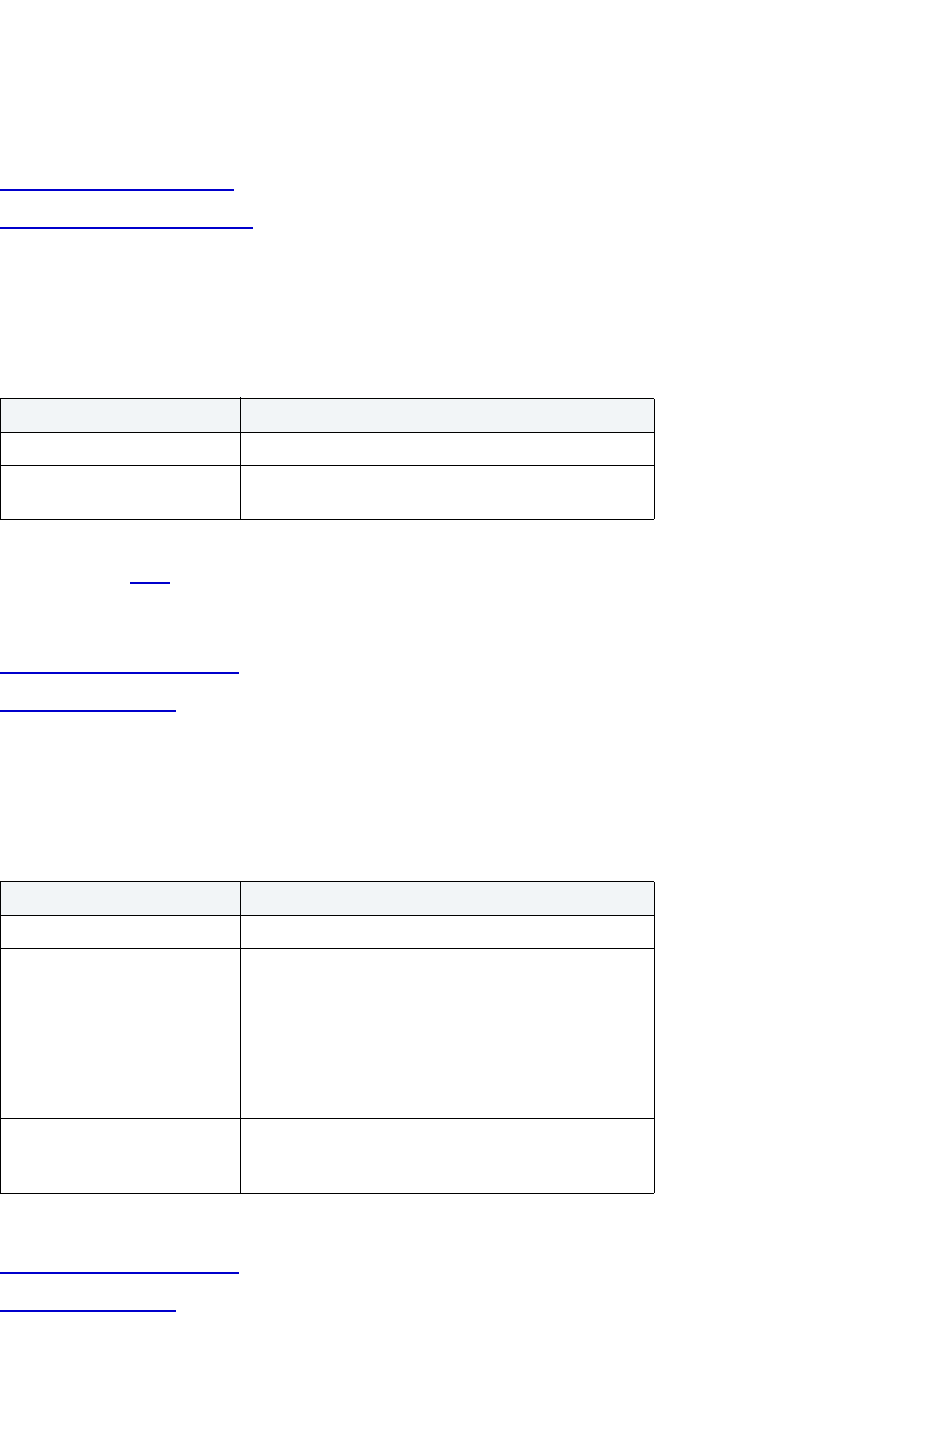
USING > FUNCTIONALITY
EMBARCADERO TECHNOLOGIES > BOOKNAMEVARIABLE 418
Important Notes
•None
For more information, see:
Completing an Object Wizard
User Datatype Wizard - Panel 1
User Datatype Wizard for IBM DB2 UDB for OS/390 and z/OS - Panel 1
The table below describes the options and functionality on the first panel of the User Datatype Wizard.
TIP: To filter the Owner and Object lists, click the Filter button next to each list. Rapid SQL opens the
Filter
dialog box.
For more information, see:
Completing an Object Wizard
User Datatype Wizard
User Datatype Wizard for IBM DB2 UDB for OS/390 and z/OS - Panel 2
The table below describes the options and functionality on the second panel of the User Datatype Wizard.
For more information, see:
Completing an Object Wizard
User Datatype Wizard
Option Description
Who owns the datatype? Lets you select the datatype owner.
What is the name of the
datatype?
Lets you enter the datatype name.
Option Description
What is the source datatype? Lets you select the source datatype.
Specify the datatype
characteristics:
NOTE: The availability of options depends on the
source datatype you specified.
Length
LOB Unit
Precision
Scale
Comment Lets you associate a comment with the user
datatype, and type the comment, which can be up to
254 characters long.

USING > FUNCTIONALITY
EMBARCADERO TECHNOLOGIES > BOOKNAMEVARIABLE 419
View Wizard for IBM DB2 UDB for OS/390 and z/OS
The View Wizard lets you create a view without knowing any of the underlying commands.
Important Notes
•None
For more information, see View Wizard - Panel 1
.
View Wizard for IBM DB2 UDB for OS/390 and z/OS - Panel 1
The table below describes the options and functionality on the first panel of the View Wizard.
TIP: To filter the Owner and Object lists, click the Filter button next to each list. Rapid SQL opens the
Filter
dialog box.
For more information, see:
Completing an Object Wizard
View Wizard
View Wizard for IBM DB2 UDB for OS/390 and z/OS - Panel 2
The table below describes the options and functionality on the second panel of the View Wizard.
Option Description
Who owns the view to be
created?
Lets you select the view owner.
What is the name of the
view?
Lets you enter the view name.
Select the constraint (if any)
to apply to the view
Lets you specify that the constraint that every row
that is inserted or updated through the view must
conform to the definition of the view.
Local Check Option - Update and insert operations
on view must satisfy the search conditions of view
and underlying views that are defined with a check
option. Furthermore, every updatable view that is
directly or indirectly defined on view inherits those
search conditions (the search conditions of view and
all underlying views of that are defined with a check
option) as a constraint on insert or update
operations.
Cascade Check Option - Update and insert
operations on view must satisfy the search
conditions of view and all underlying views,
regardless of whether the underlying views were
defined with a check option. Furthermore, every
updatable view that is directly or indirectly defined on
view inherits those search conditions (the search
conditions of view and all underlying views) as a
constraint on insert or update operations.

USING > FUNCTIONALITY
EMBARCADERO TECHNOLOGIES > BOOKNAMEVARIABLE 420
For more information, see:
Completing an Object Wizard
View Wizard
With DB2 version 8, SYSPROC.DSNWZP runs in a WLM-established stored procedure address space and so
EMB.SUBSYSTEM_INFO must also.
For a successful Receive job, use the IND$FILE program with the PUT command and no options to transfer the files.
Temporary Database Panel
The Temporary Database page informs you of an additional DBArtisan requirement related to the use of declared
global temporary tables.
As described on the page, the DBArtisan stored procedures use DB2 declared global temporary tables (DGTTs). You
must ensure that a temporary database has been created in each subsystem (or each member of a data sharing
group) accessed by DBArtisan. After completing the Install Wizard, you can use DBArtisan itself to create the
temporary database, if it does not already exist. Alternatively, you can use the following SQL statements to create the
temporary database.
In a non-data sharing environment, use these statements, replacing xxxx with the subsystem ID:
CREATE DATABASE xxxxTEMP AS TEMP;
CREATE TABLESPACE xxxxTMP1 IN xxxxTEMP SEGSIZE 32
PRIQTY 12000 SECQTY 12000 BUFFERPOOL BP0;
CREATE TABLESPACE xxxxTMP2 IN xxxxTEMP SEGSIZE 32
PRIQTY 12000 SECQTY 12000 BUFFERPOOL BP0;
In a data sharing environment, use these statements one time for each member of the data sharing group, replacing
xxxx with the member name: CREATE DATABASE xxxxTEMP AS TEMP FOR xxxx;
CREATE TABLESPACE xxxxTMP1 IN xxxxTEMP SEGSIZE 32
PRIQTY 12000 SECQTY 12000 BUFFERPOOL BP0;
CREATE TABLESPACE xxxxTMP2 IN xxxxTEMP SEGSIZE 32
PRIQTY 12000 SECQTY 12000 BUFFERPOOL BP0;
After reviewing the information about temporary databases, click Next to continue. The Per-Subsystem Configuration
Complete page displays.
Microsoft SQL Server Object Wizards
Option Description
Please select the view
options to include
Lets you select view options.
Alias Wizard
Create Check
Constraints Dialog Box
Database Device Wizard Database Wizard
USING > FUNCTIONALITY
EMBARCADERO TECHNOLOGIES > BOOKNAMEVARIABLE 421
Alias Wizard for Microsoft SQL Server
The Alias Wizard lets you create an alias. Aliases let you assume the permissions of another database user without
creating a separate user identity. You can use an alias when a users requires only temporary access to a database.
You can also use an alias to mask a user’s identity.
Important Notes
•None
The table below describes the options and functionality on the first panel of the Alias Wizard.
For more information, see Completing an Object Wizard
.
Database Device Wizard for Microsoft SQL Server
The Database Device Wizard lets you create a database device. Database Devices are the fundamental storage
mechanism for Microsoft SQL Server. They bridge the physical world of your hard disks and the logical internal
structure of Microsoft SQL Server. When you create a device, Microsoft SQL Server writes a file on your hard disk and
pre-initializes the panels for quick allocation to databases. Microsoft SQL Server stores the resulting panel range in
the system catalog and refers to it when determining how to allocate space on a device to a particular database.
The Database Device Wizard lets you:
• Name the device and indicate if it should become the default device.
• Specify the virtual device number for and size of the new device.
• Override many obscure, rarely-used parameters of the DISK INIT statement.
Default Wizard Dump or Backup
Device Wizard
Foreign Key Wizard Function Wizard
Group Wizard Index Wizard Linked Server Wizard Login Wizard
Create Primary Key
Constraint Dialog Box
Procedure Wizard Remote Server Wizard Role Wizard
Rule Wizard Segment Wizard Table Wizard Trigger Wizard
Create Unique Key
Constraint Dialog Box
User Message Wizard User Wizard User Datatype Wizard
View Wizard
Option Description
What is the Login ID of the
user who wants an alternate
identity in the current
database?
Lets you select the user.
Which user will serve as the
logins alias?
Lets you select the user to which you want to map the login.
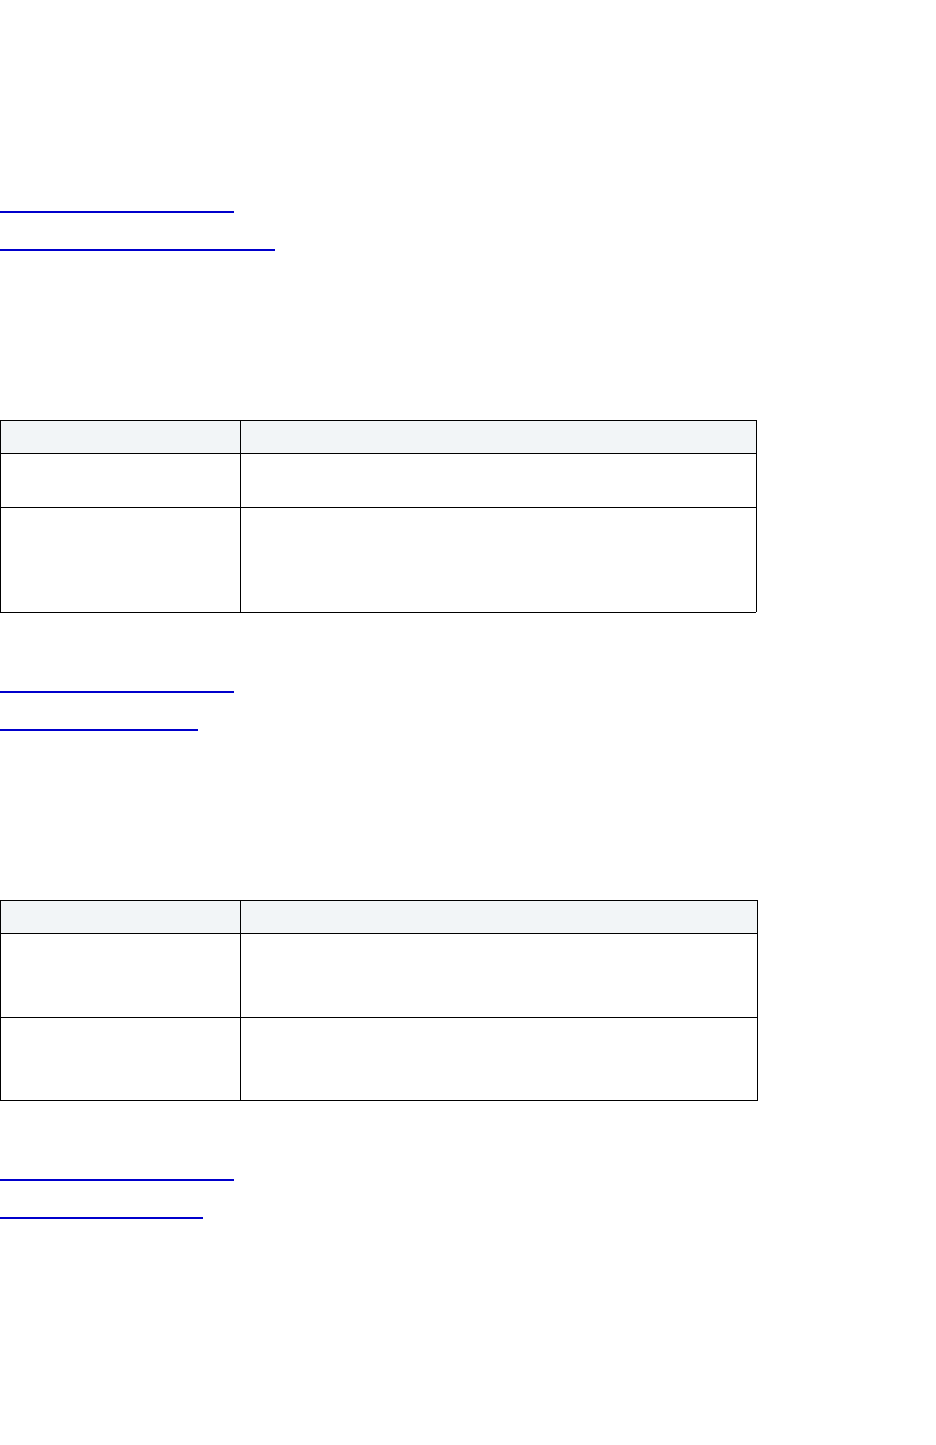
USING > FUNCTIONALITY
EMBARCADERO TECHNOLOGIES > BOOKNAMEVARIABLE 422
Important Notes
• Make sure your Microsoft SQL Server is configured for enough devices that it can accommodate the creation of
another device.
For more information, see:
Completing an Object Wizard
Database Device Wizard - Panel 1
Database Device Wizard for Microsoft SQL Server - Panel 1
The table below describes the options and functionality on the first panel of the Database Device Wizard.
For more information, see:
Completing an Object Wizard
Database Device Wizard
Database Device Wizard for Microsoft SQL Server - Panel 2
The table below describes the options and functionality on the second panel of the Database Device Wizard.
For more information, see:
Completing an Object Wizard
Database Device Wizard
Database Device Wizard for Microsoft SQL Server - Panel 3
The table below describes the options and functionality on the third panel of the Database Device Wizard.
Option Description
What is the logical name of
the device?
Lets you enter the device name.
What is the physical name of
the device?
Lets you enter the physical name of the device.
NOTE: You need to specify the full path for the file, including the
hard drive letter or machine name, directory and full file name with
the *.DAT extension (i.e. D:\MSSQL\DATA\TEST.DAT).
Option Description
What is the virtual device
number?
Lets you enter the virtual device number for the new device.
Rapid SQL automatically calculates the next open device number
and defaults its value in the box.
What is the size of the device
in megabytes?
Lets you type the value of the size of the device, in megabytes.
NOTE: Make sure that you have enough free space on the hard
disk to accommodate the device file.

USING > FUNCTIONALITY
EMBARCADERO TECHNOLOGIES > BOOKNAMEVARIABLE 423
For more information, see:
Completing an Object Wizard
Database Device Wizard
Database Wizard for Microsoft SQL Server
The Database Wizard lets you create a database without requiring you to know any of the underlying commands. The
Database Wizard presents you with a different set of options based on your server version to create the database
accurately on each platform
The Database Wizard lets you:
• Name the database.
• Specify how and where you want to place the physical storage of the database.
TIP: Microsoft SQL Server recommends that you do not create any user objects, such as tables, views,
stored procedures, or triggers, in the master database. The master database includes the system
tables that store the system information used by SQL Server, such as configuration option
settings.
• Attach an existing set of operating system files.
• Name the filegroup and the database on file name.
• Lets you add the transaction logfile.
• Lets you specify database options.
Important Notes
•None
For more information, see:
Completing an Object Wizard
Database Wizard - Panel 1
Database Wizard for Microsoft SQL Server - Panel 1
The table below describes the options and functionality on the first panel of the Database Wizard.
Option Description
Do you want to specify a
specific starting panel
number?
Lets you specify the starting panel. Microsoft SQL Server defaults
this value to zero.
What is the controller
number?
Lets you specify the controller number. Microsoft SQL Server
defaults to zero.

USING > FUNCTIONALITY
EMBARCADERO TECHNOLOGIES > BOOKNAMEVARIABLE 424
For more information, see:
Completing an Object Wizard
Database Wizard
Add/Modify Transaction Log File
The second panel of the Database Wizard opens the Add Transaction Log File dialog box that lets you name the
filegroup and the database on file name. A Microsoft SQL Server 7.0 maps databases over a set of operating system
files. Microsoft SQL Server does not mix data and log information on the same file, and only one database uses
individual files. This set of operating system files includes primary data files, secondary data files, and logfiles. Each
database includes one primary data file that acts as the main database storage unit for the database and can refer to
other database files. The main function of secondary data file is to store data that can not fit in the primary data file.
You can have multiple secondary data files.
The table below describes the options and functionality on the Add/Modify Transaction Log File dialog box.
Database Wizard for Microsoft SQL Server - Panel 3
The third panel of the Database Wizard lets you add the transaction logfile. The logfile includes the information used to
recover the database. Each database must have at least one logfile.
Option Description
What is the name of the
database?
Lets you enter the name of the database.
Microsoft SQL Server 7 or
later Do you want to create
database by attaching an
existing set of operating
system files?
Lets you use existing files to create your database.
Option Description
Database Displays the database name.
Filegroup Lets you select a filegroup to which the database belongs.
Default - Sets filegroup as the default.
Read Only - Sets the filegroup as read-only.
Database File Name - Lets you name the database file.
File Path - Lets you specify the file location. Type or browse and
locate the file. The application automatically gives the database file
a *.mdf extension.
Size - Lets you specify a database size in KB or MB.
Allow Growth Lets the database file grow.
Growth Rate - Lets you specify the growth rate in percents, KB, or
MB.
Max Size - Specifies the maximum database file size. Select
Unlimited to let the database file grow without restrictions. To
specify a specific size, select Size and enter a size in KB or MB.
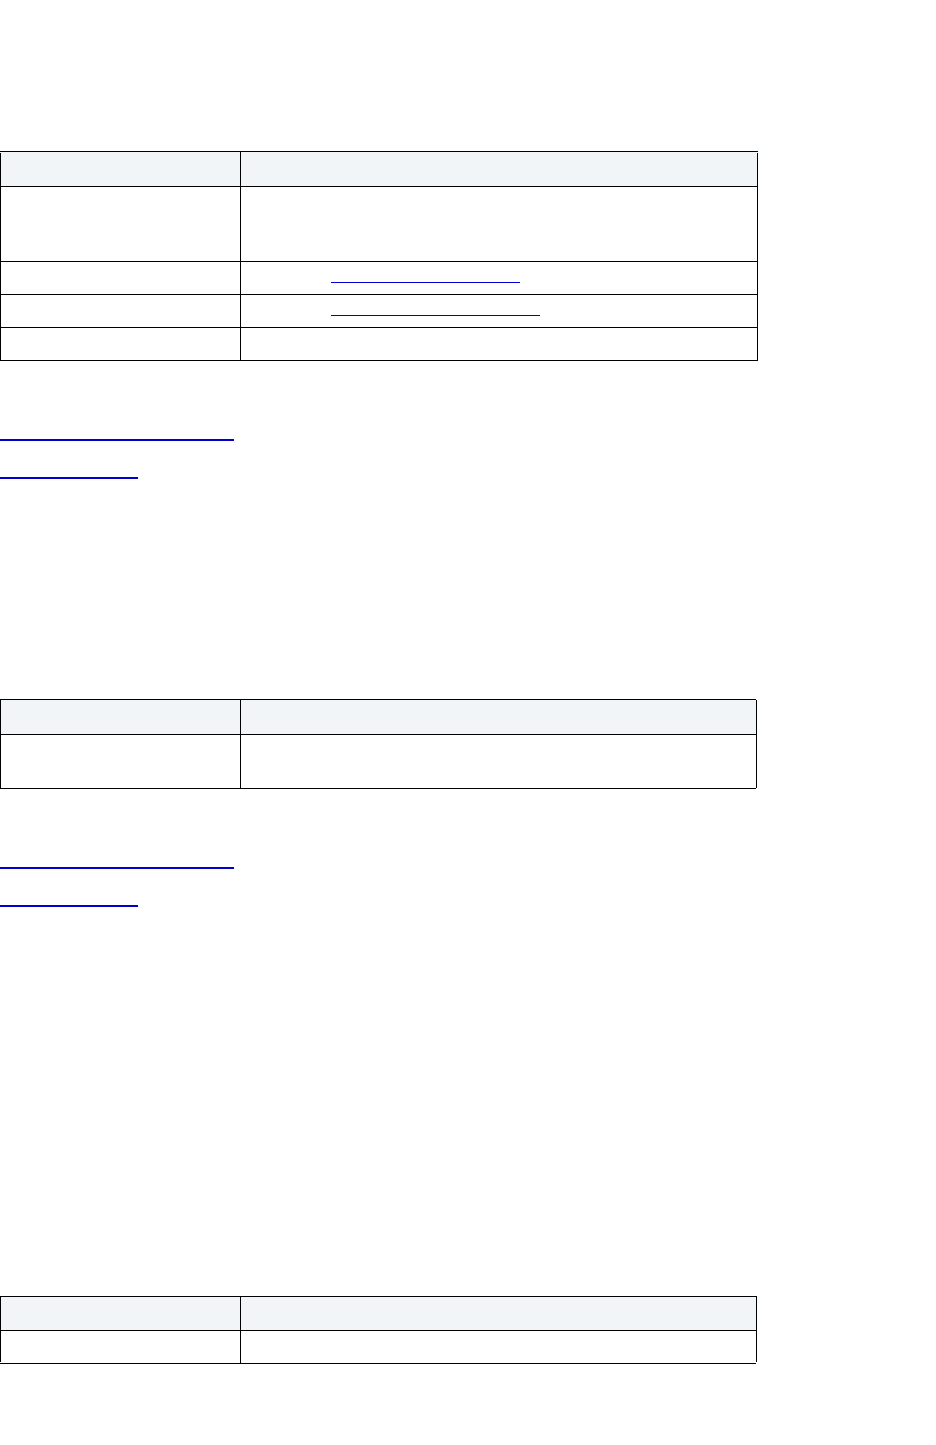
USING > FUNCTIONALITY
EMBARCADERO TECHNOLOGIES > BOOKNAMEVARIABLE 425
The table below describes the options and functionality on the third panel of the Database Wizard.
For more information, see:
Completing an Object Wizard
Database Wizard
Database Wizard for Microsoft SQL Server - Panel 4
The table below describes the options and functionality on the fourth panel of the Database Wizard.
NOTE: This panel is optional.
For more information, see:
Completing an Object Wizard
Database Wizard
Default Wizard for Microsoft SQL Server
The Default Wizard lets you create a default. Defaults promote data integrity by supplying a default value to a table
column if the user does not explicitly provide one. They are reusable objects that you can bind to table columns or
user datatypes.
The Default Wizard lets you name the default and specify its value.
Important Notes
•None
The table below describes the options and functionality on the first panel of the Default Wizard.
Option Description
In which files do you wish to
place the database
transaction log
Displays the files.
Add Opens the Add Transaction Log File
dialog box.
Edit Opens the Modify Transaction Log File
dialog box.
Delete Deletes the target file.
Option Description
Which database options do
you wish to activate?
Lets you select the appropriate check boxes or click the Check All
button.
Option Description
Who owns the default? Lets you select the owner.
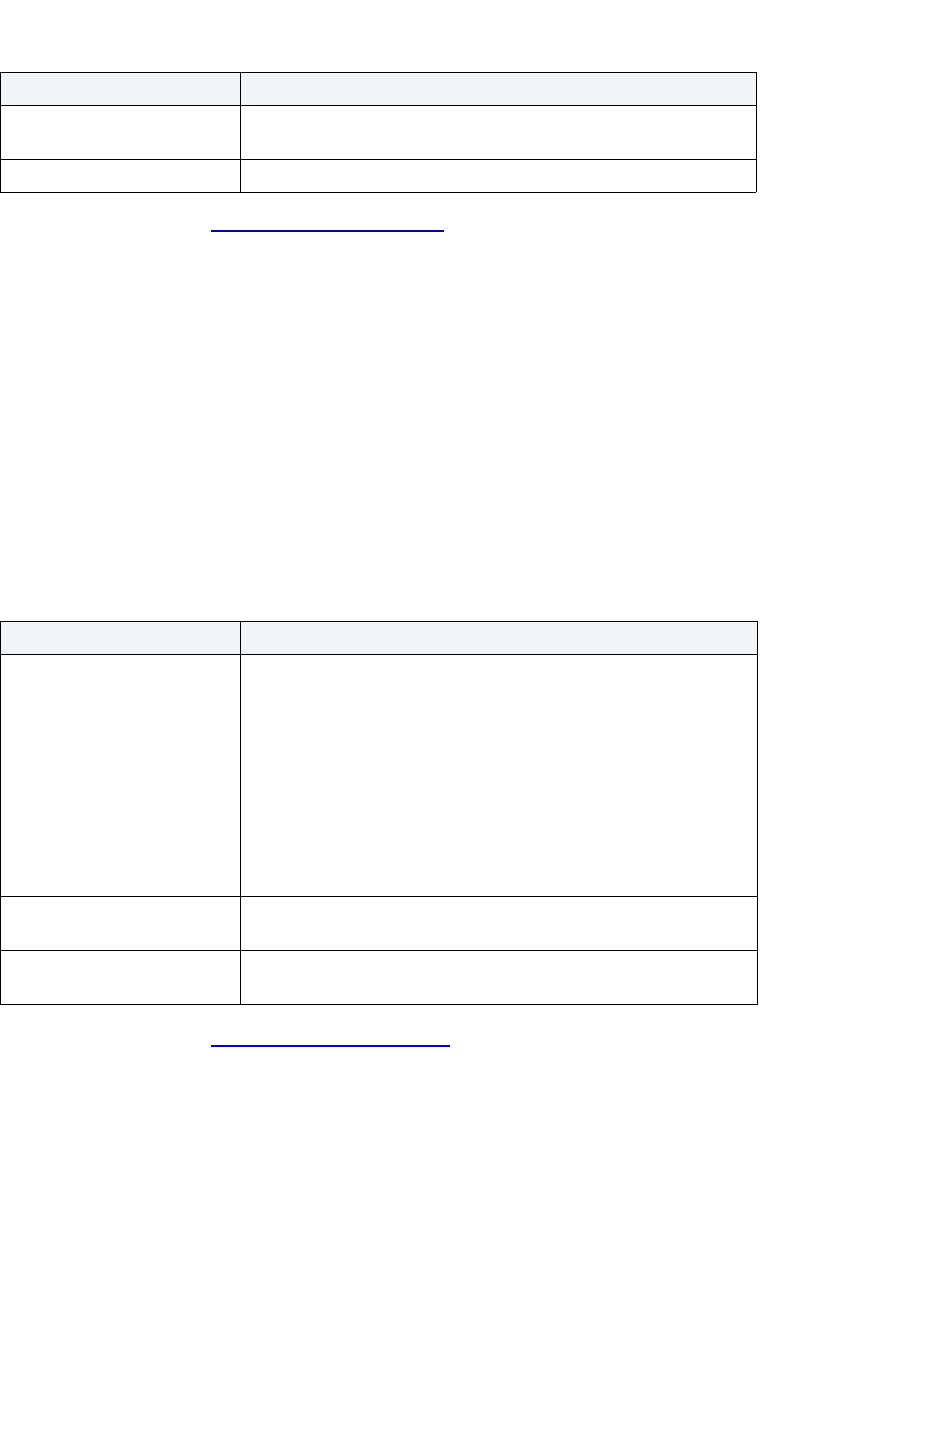
USING > FUNCTIONALITY
EMBARCADERO TECHNOLOGIES > BOOKNAMEVARIABLE 426
For more information, see Completing an Object Wizard.
Dump or Backup Device Wizard for Microsoft SQL Server
The Dump Device Wizard lets you create a dump or backup device. Dump devices store backups of databases and
transaction logs. In Microsoft SQL Server 7, dump devices have been renamed to backup devices.
Before you can dump a database or its transaction log, first create a dump device that stores the resulting backup file.
Microsoft SQL Server lets you create tape, disk and diskette dump devices.
Important Notes
•None
The table below describes the options and functionality on the Default Wizard.
For more information, see Completing an Object Wizard.
Extended Procedure Wizard for Microsoft SQL Server
The Extended Procedure Wizard lets you create an extended procedure. Extended Procedures are dynamic link
libraries that can be used to load and execute application routines written in other programming languages, such as C
or Visual Basic. Extended Procedures function and appear in the same manner as normal stored procedures in that
you can pass parameters to them and obtain results.
The Extended Procedure Wizard lets you:
• Specify the extended procedure owner.
• Specify the name of the function to call within the library.
What is the name of the
default?
Lets you enter the default name.
What is the default value? Lets you enter the default value or expression.
Option Description
What is the device type? Lets you select the device type you are using.
Disk- Fast and convenient mechanism for backups.
Diskette - Facilitates off site storage, but only for very small
databases.
Pipe - A temporary connection between Microsoft SQL Server and
another application.
Tape- Facilitate off site storage for enhanced disaster recovery.
Skip ANSI Labels - Select for tape if you want to skip American
National Standards Institute (ANSI) labels.
What is the dump/backup
device Name?
Lets you type the device name.
What is the physical name? Lets you type the device or file name that is recognized by the
operating system. (e.g. a:sqltable.dat).
Option Description
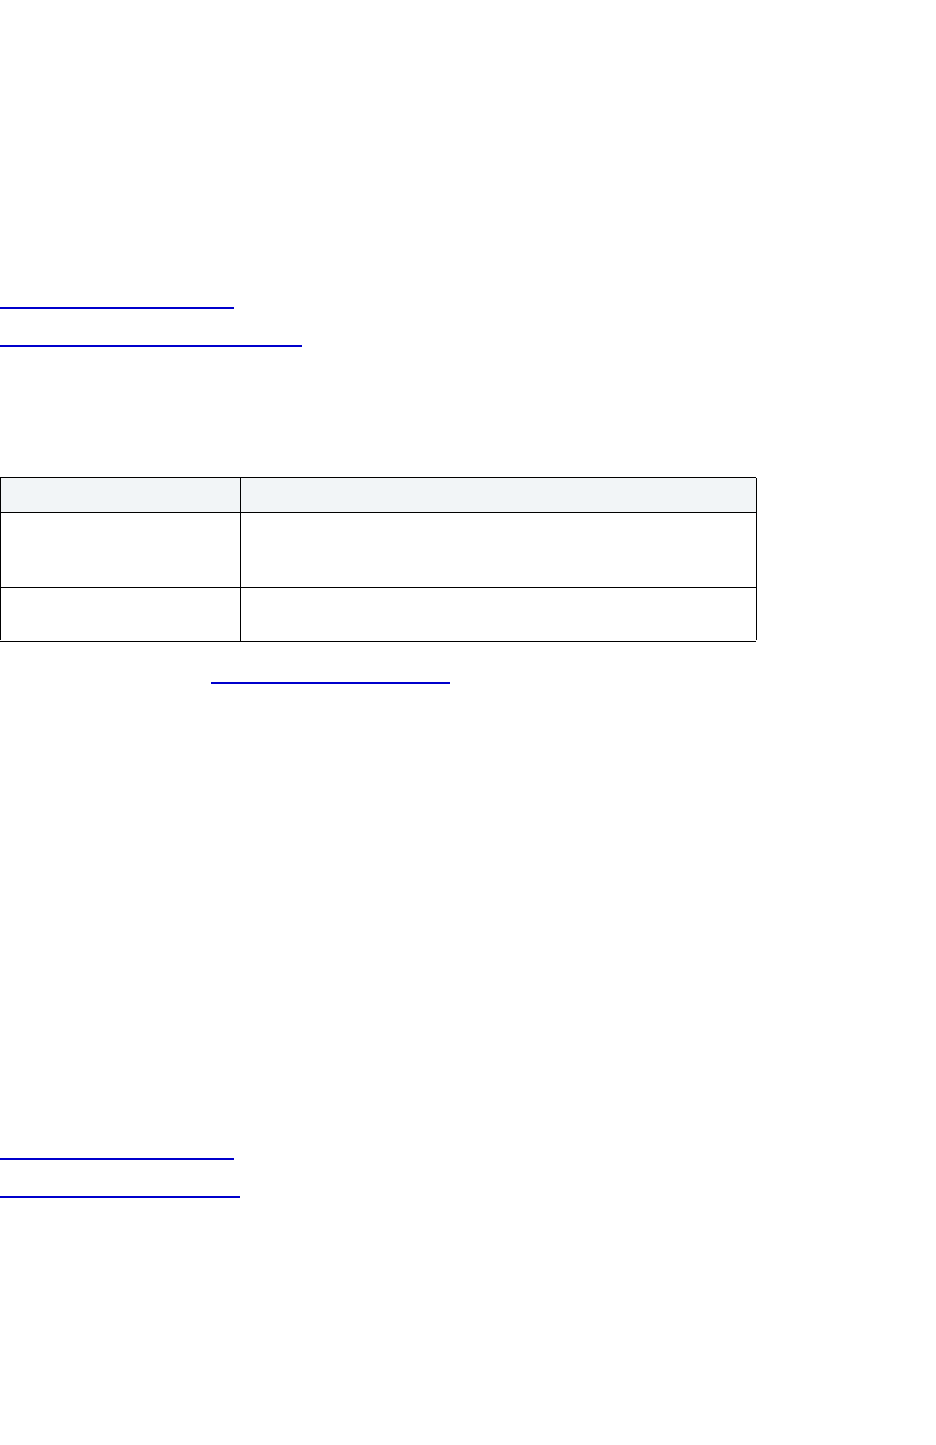
USING > FUNCTIONALITY
EMBARCADERO TECHNOLOGIES > BOOKNAMEVARIABLE 427
• Specify the name of the library containing the function.
Extended stored procedures provide a method for calling procedural language functions from within the Adaptive
Server.
Important Notes
•None
For more information, see:
Completing an Object Wizard
Extended Procedure Wizard - Panel 1
Extended Procedure Wizard for Microsoft SQL Server - Panel 1
The table below describes the options and functionality on the first panel of the Extended Procedure Wizard:
For more information, see Completing an Object Wizard.
Foreign Key Wizard for Microsoft SQL Server
The Foreign Key Wizard lets you create a foreign key. Foreign keys enforce referential integrity between tables by
verifying the existence of foreign key values in the parent table before letting you insert or update foreign key values in
the child table.
The Foreign Key Wizard lets you:
• Name the foreign key constraint
• Identify the parent table and the referenced constraint.
• Map the column pairs between the parent and child tables.
Important Notes
•None
For more information, see:
Completing an Object Wizard
Foreign Key Wizard - Panel 1
Foreign Key Wizard for Microsoft SQL Server - Panel 1
The table below describes the options and functionality on the first panel of the Foreign Key Wizard.
Option Description
What is the name of the
function to call within the
DDL?
Lets you type the function name.
What is the name of the DDL
containing the function?
Lets you type the DDL name.
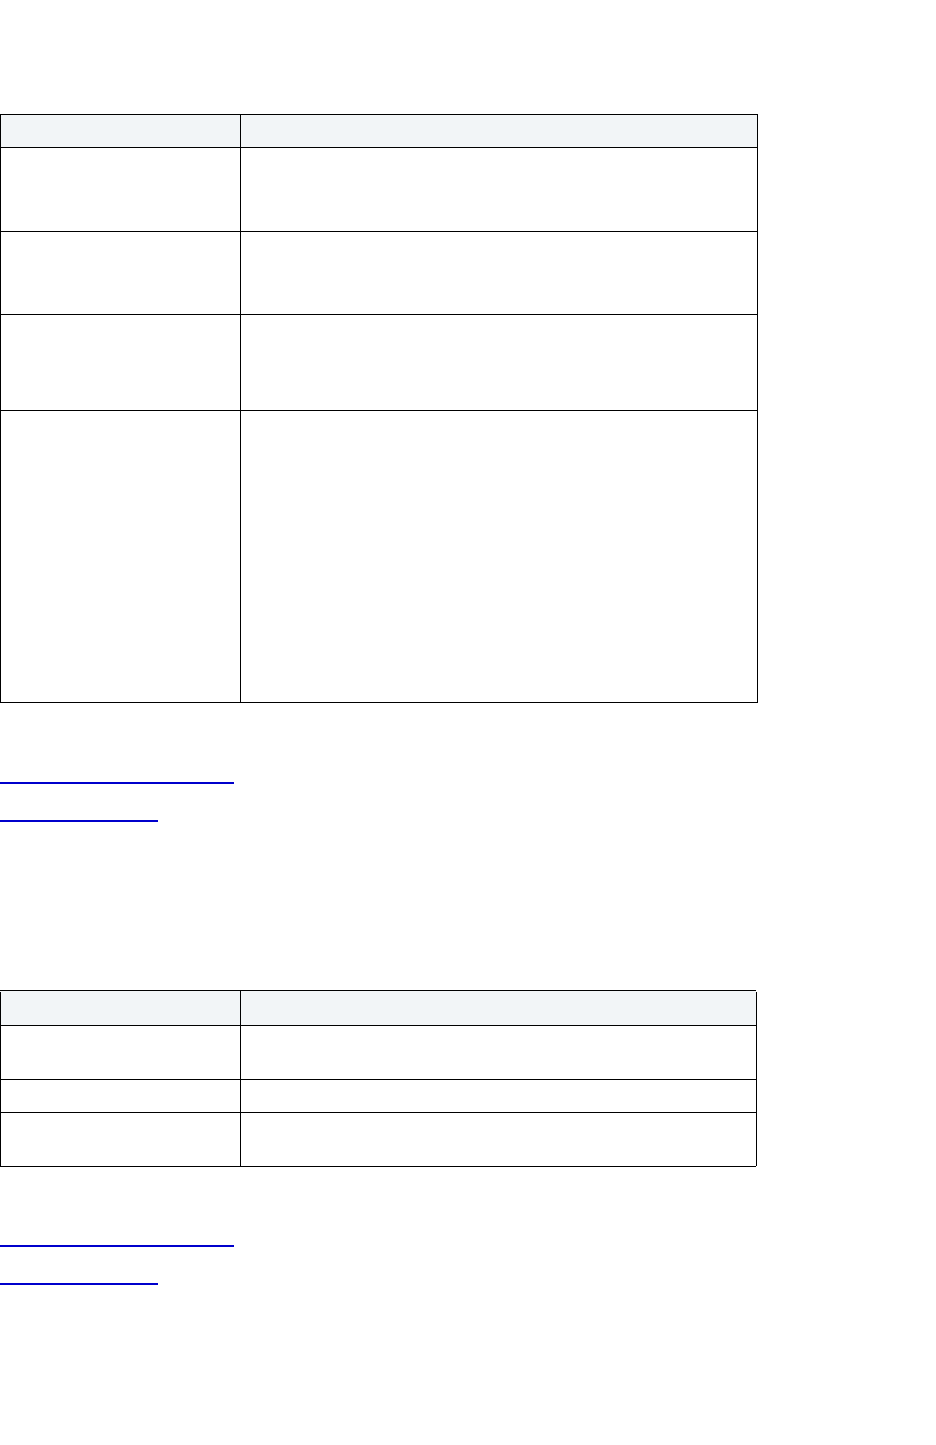
USING > FUNCTIONALITY
EMBARCADERO TECHNOLOGIES > BOOKNAMEVARIABLE 428
For more information, see:
Completing an Object Wizard
Foreign Key Wizard
Foreign Key Wizard for Microsoft SQL Server - Panel 2
The table below describes the options and functionality on the second panel of the Foreign Key Wizard.
For more information, see:
Completing an Object Wizard
Foreign Key Wizard
Option Description
Which table will host the
constraint?
Lets you select the owner and table.
NOTE: This option is not available when you open the wizard from
the Foreign Keys Editor.
What will be the name of this
new constraint?
System Generated Name - Lets Microsoft SQL Server
automatically generate a name.
User Specified Constraint Name - Lets you enter a name.
Should or should not the
foreign key constraint be
enforced when replicating the
table?
To enforce the foreign key when replicating the table, select the Not
for Replication check box. Replication copies and distributes data
and database objects from one database to another and then
synchronizes information between databases for consistency.
Microsoft SQL Server 8
only Do you want the foreign
key to cascade the deletion
and/or update of primary key
values?
Cascade on Delete - Specifies that if an attempt is made to delete a
row with a key referenced by foreign keys in existing rows in other
tables, all rows containing those foreign keys are also deleted. If
cascading referential actions have also been defined on the target
tables, the specified cascading actions are also taken for the rows
deleted from those tables.
Cascade on Update - Specifies that if an attempt is made to update
a key value in a row, where the key value is referenced by foreign
keys in existing rows in other tables, all of the foreign key values
are also updated to the new value specified for the key. If
cascading referential actions have also been defined on the target
tables, the specified cascading actions are also taken for the key
values updated in those tables.
Option Description
Select the parent table to
reference?
Lets you select the table owner and the parent table owner.
Table Name Lets you select the parent table name.
Select the parent table
constraint
Lets you select the primary and unique key constraints you want to
reference.
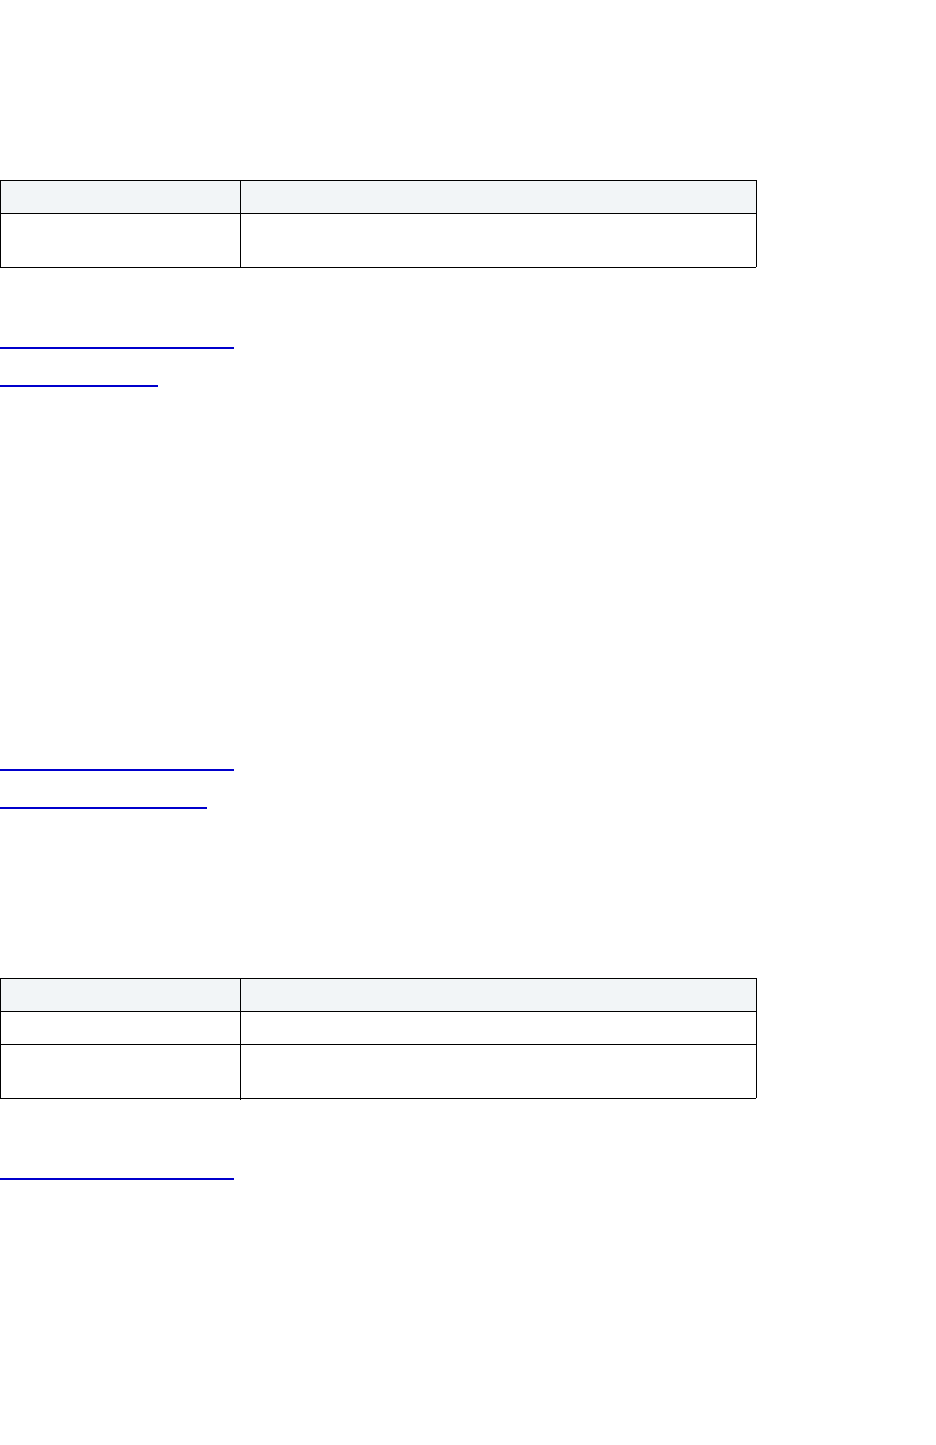
USING > FUNCTIONALITY
EMBARCADERO TECHNOLOGIES > BOOKNAMEVARIABLE 429
Foreign Key Wizard for Microsoft SQL Server - Panel 3
The table below describes the options and functionality on the third panel of the Foreign Key Wizard.
For more information see:
Completing an Object Wizard
Foreign Key Wizard
Function Wizard for Microsoft SQL Server
The Function Wizard lets you create a function. Functions are subroutines that you define. Functions are useful for
reusable application logic. You can use functions to determine the best methods for controlling access and
manipulation of the underlying data contained in an object.
The Function Wizard lets you specify the function name, owner, and type.
Important Note
• To create a user-defined function, you need CREATE ANY privileges or IMPLICIT_SCHEMA authority on the
database if the schema does not already exist.
For more information, see:
Completing an Object Wizard
Function Wizard - Panel 1
Function Wizard for Microsoft SQL Server - Panel 1
The table below describes the options and functionality on the first panel of the Function Wizard.
For more information, see:
Completing an Object Wizard
Function Wizard
Function Wizard for Microsoft SQL Server - Panel 2
The table below describes the options and functionality on the second panel of the Function Wizard.
Option Description
Select column associations Lets you map the foreign key columns between the child and
parent tables.
Option Description
Who will own the function? Lets you select the function owner.
What is the name of the
function?
Lets you enter the function name.
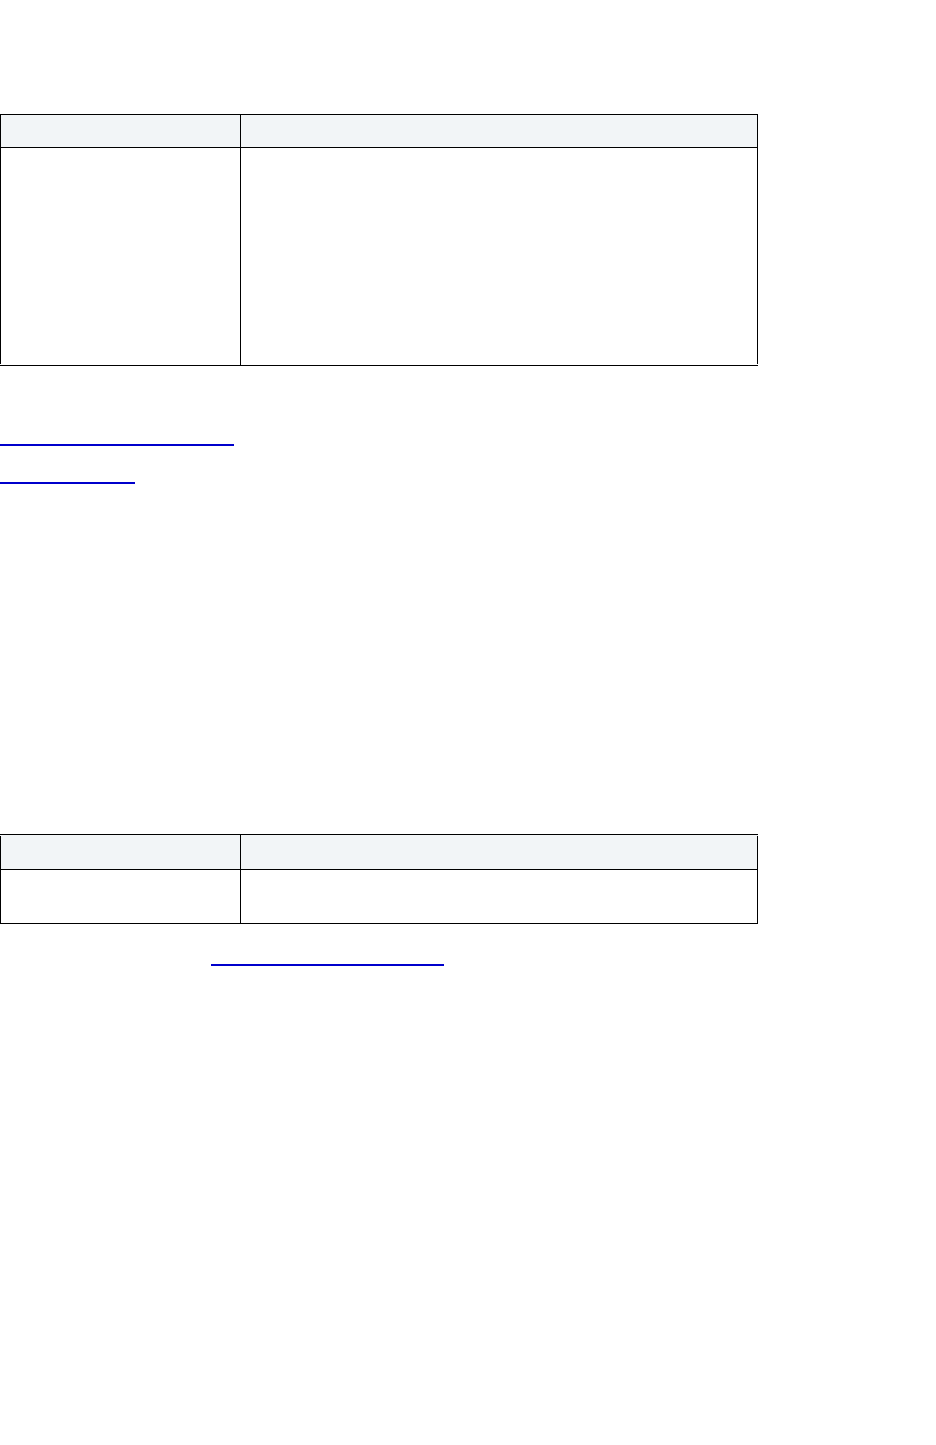
USING > FUNCTIONALITY
EMBARCADERO TECHNOLOGIES > BOOKNAMEVARIABLE 430
For more information, see:
Completing an Object Wizard
Function Wizard
Group Wizard for Microsoft SQL Server
The Group Wizard lets you create a group. Groups are a defined collection of database users. The primary use of
groups is to consolidate the management of permissions. By batching together similar users into groups, you can
greatly reduce the number of commands required to set permissions.
Important Notes
•None
The table below describes the options and functionality on the first panel of the Group Wizard.
For more information, see Completing an Object Wizard
.
Index Wizard for Microsoft SQL Server
The Index Wizard lets you create an index without knowing the underlying commands.
The Index Wizard lets you:
• Specify the table owner and name.
• Specify the index owner and name.
• Create a unique index and provide a comment for the index.
• Identify the index location and order.
• Specify basic index properties.
• Select the table columns that participate in the index.
Option Description
What type of function would
you like to create?
Scalar - Operates on a single value and then returns a single
value. Scalar functions can be used wherever an expression is
valid.
Inline Table-valued- Returns a table. There is no function body; the
table is the result set of a single SELECT statement.
Multi-statement Table-valued - Returns a table. The function body,
defined in a BEGIN...END block, contains the TRANSACT-SQL
statements that build and insert rows into the table that will be
returned.
Option Description
What is the name of the
group?
Lets you enter the name of the group.
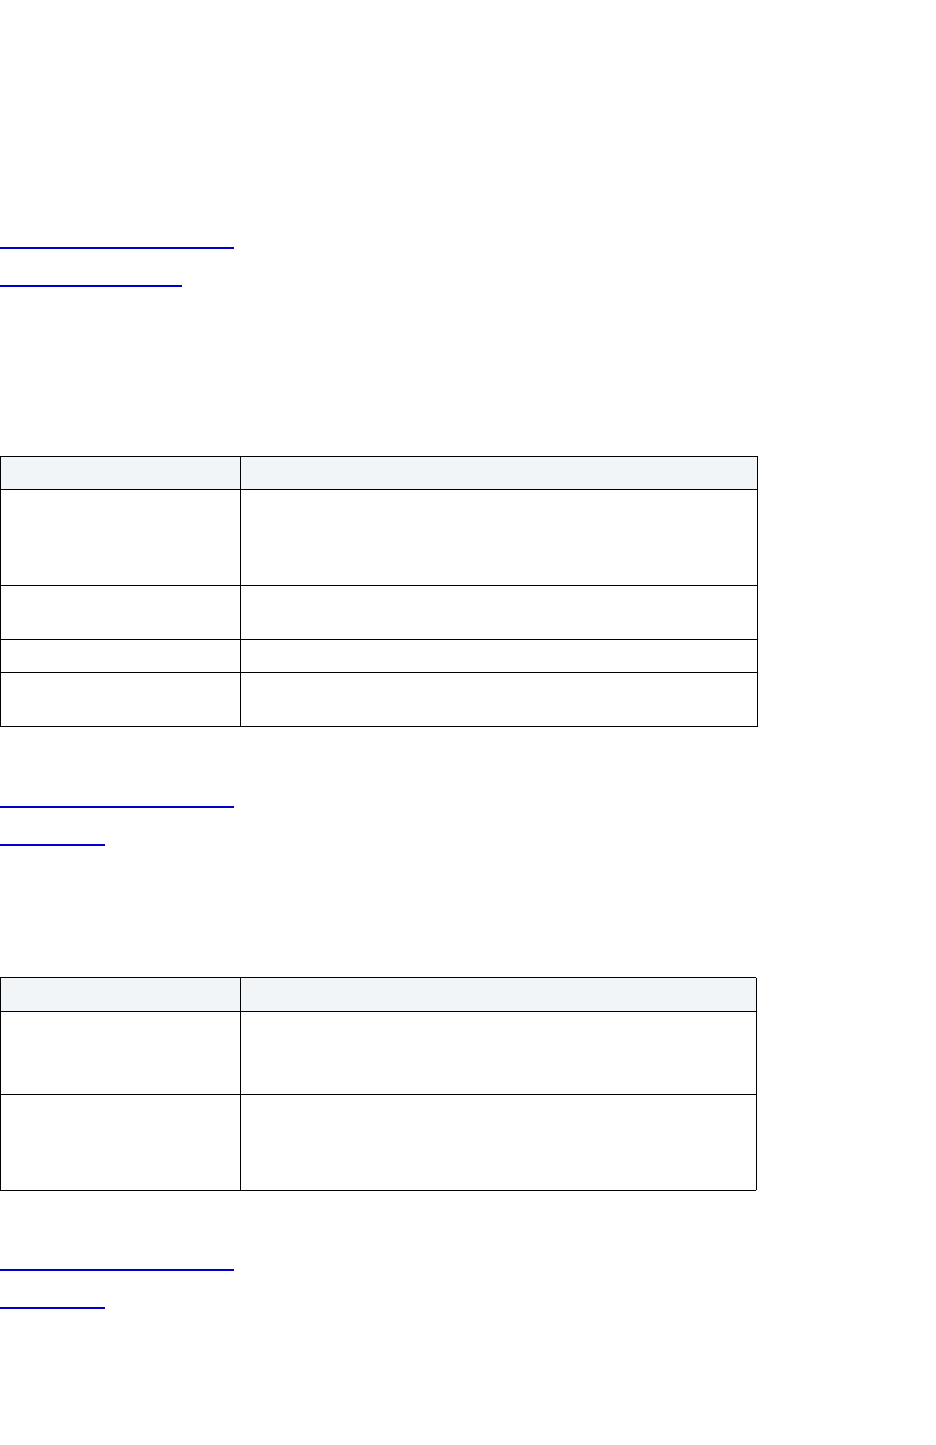
USING > FUNCTIONALITY
EMBARCADERO TECHNOLOGIES > BOOKNAMEVARIABLE 431
• Specify where you want to place the index and specify available options, such as the fill factor.
Important Notes
•None
For more information, see:
Completing an Object Wizard
Index Wizard - Panel 1
Index Wizard for Microsoft SQL Server - Panel 1
The table below describes the options and functionality on the first panel of the Index Wizard.
For more information, see:
Completing an Object Wizard
Index Wizard
Index Wizard for Microsoft SQL Server - Panel 2
The table below describes the options and functionality on the second panel of the Index Wizard.
For more information, see:
Completing an Object Wizard
Index Wizard
Option Description
Select the object on which the
the index is to be created.
Lets you select the target object for the index. For Microsoft SQL
Server 2000, you can create an index of a schema-bound view.
Schema-binding binds the view to the schema of the underlying
base tables.
Who owns the table to be
indexed?
Lets you select a table owner.
Which table is to be indexed? Lets you select the table.
What is the name of the
index?
Lets you type an index name.
Option Description
Do you wish to create a
unique index?
Select to create a unique index (one in which no two rows are
permitted to have the same index value) on a table or view.
NOTE: A clustered index on a view must be unique.
Do you want the index to be
clustered?
Select to create an index where the physical order of rows is the
same as the indexed order of the rows, and the bottom (leaf) level
of the clustered index contains the actual data rows. A table or
view is allowed one clustered index at a time.
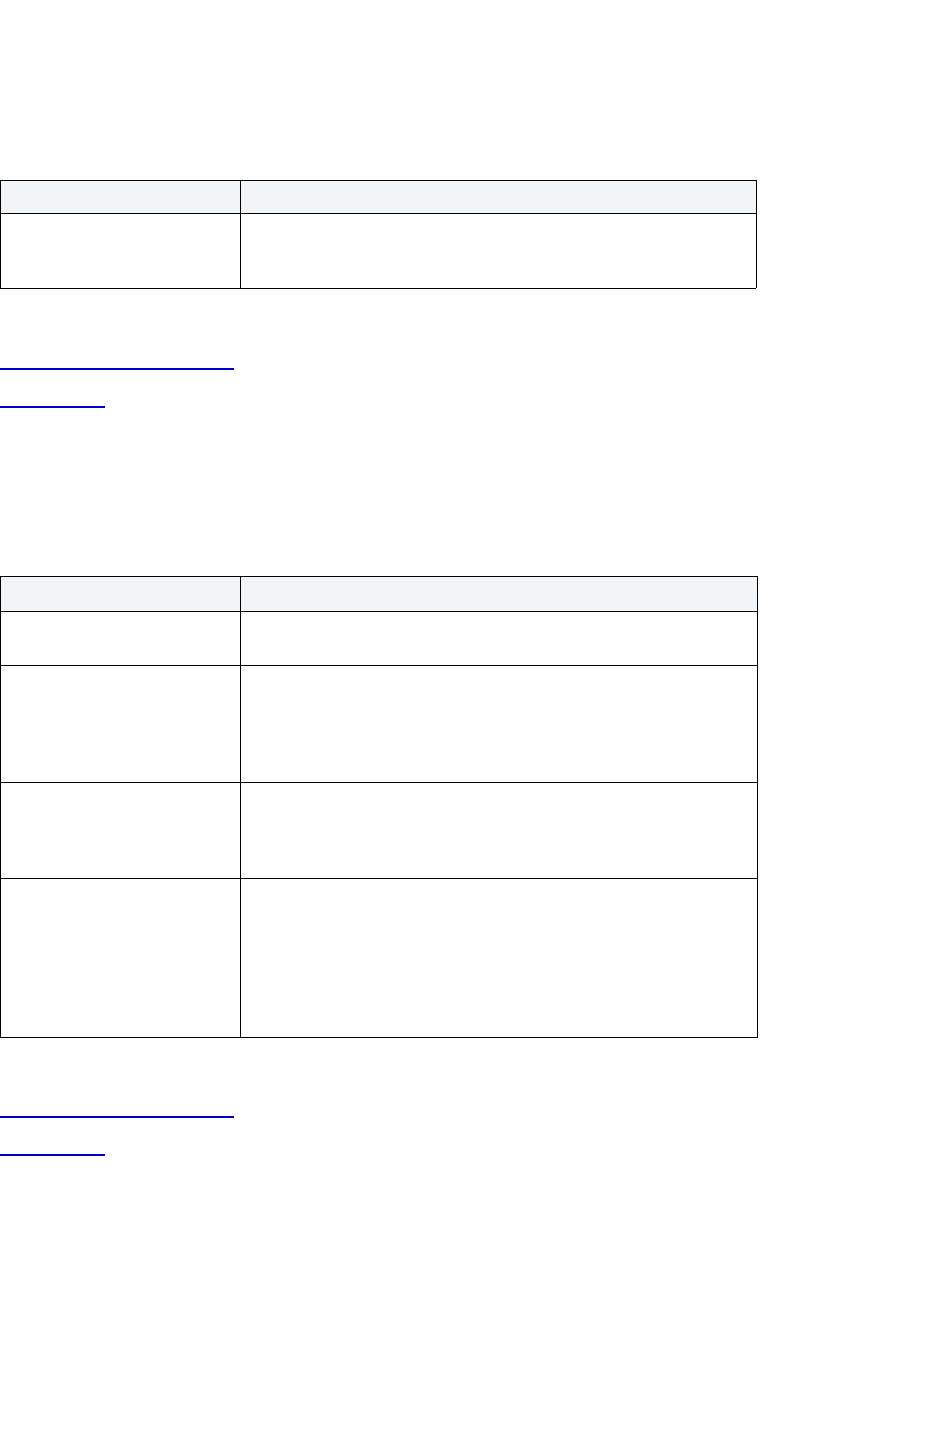
USING > FUNCTIONALITY
EMBARCADERO TECHNOLOGIES > BOOKNAMEVARIABLE 432
Index Wizard for Microsoft SQL Server - Panel 3
The table below describes the options and functionality on the third panel of the Index Wizard.
For more information, see:
Completing an Object Wizard
Index Wizard
Index Wizard for Microsoft SQL Server - Panel 4
The tables below describe the options and functionality on the fourth panel of the Index Wizard.
For more information, see:
Completing an Object Wizard
Index Wizard
Index Wizard for Microsoft SQL Server - Panel 5
The tables below describe the options and functionality on the fifth panel of the Index Wizard.
Option Description
Select the Index Columns Lets you click the table columns to include in the index, and then
click the Right Arrow button. You can also reorder the index
columns.
Option Description
On which filegroup do you
wish to place the index?
Lets you select the filegroup. If you do not specify a filegroup,
Microsoft SQL Server creates the index in the default filegroup.
Specify the fill factor, if any, by
which you wish to pad index
pages.
Lets you type the fill factor percentage value (0-100) that indicates
how full SQL Server should make the leaf level of each index page
during index creation. When an index page fills up, SQL Server
must take time to split the index page to make room for new rows,
which can be costly.
Do you wish to leave enough
space for a minimum of two
rows of the index maximum
size in each index node?
Select to leave enough space for a minimum of two rows of the
index maximum size in each index node.
Do you wish to allow
intermediate sort results used
to build the index to be stored
in tempdb?
Select to store the intermediate index sort results in tempdb. This
option may reduce the time needed to create an index if tempdb is
on a different set of disks than the user database, but it increases
the amount of disk space used to create an index. In addition to the
space required in the user database to create the index, tempdb
must have about the same amount of additional space to hold the
intermediate sort results.

USING > FUNCTIONALITY
EMBARCADERO TECHNOLOGIES > BOOKNAMEVARIABLE 433
For more information, see:
Completing an Object Wizard
Index Wizard
Linked Server Wizard for Microsoft SQL Server
The Linked Server Wizard lets you create linked servers. Linked servers let you create links to OLE DB data sources.
OLE DB is a COM-based application programming interface (API) for accessing data. OLE DB supports accessing
data stored in any format (databases, spreadsheets, text files, and so on) for which an OLE DB provider is available.
With a linked server you can execute commands against OLE DB data sources on different servers.
The Linked Server Wizard lets you:
• Name the server and specify the type of server.
• Specify the OLE DB provider information.
• Specify linked server options.
Important Notes
•None
For more information, see:
Completing an Object Wizard
Linked Server Wizard - Panel 1
Linked Server Wizard for Microsoft SQL Server - Panel 1
The table below describes the options and functionality on the first panel of the Linked Server Wizard.
Option Description
Do you want to enable
automatic recomputation of
distribution statistics?
Lets queries involving the table run at the optimal level as
distribution statistics are updated automatically when the index is
created. If you disable this option, you can compromise query
performance.
Do you wish to ignore
duplicate keys when insert or
update operations cause
them to occur?
Controls what happens when an attempt is made to insert a
duplicate key value into a column that is part of a unique clustered
index.
If select and an INSERT statement that creates a duplicate key is
executed, SQL Server issues a warning and ignores the duplicate
row.
If not selected, SQL Server issues an error message and rolls back
the entire INSERT statement.
NOTE: This option is available for unique indexes only.
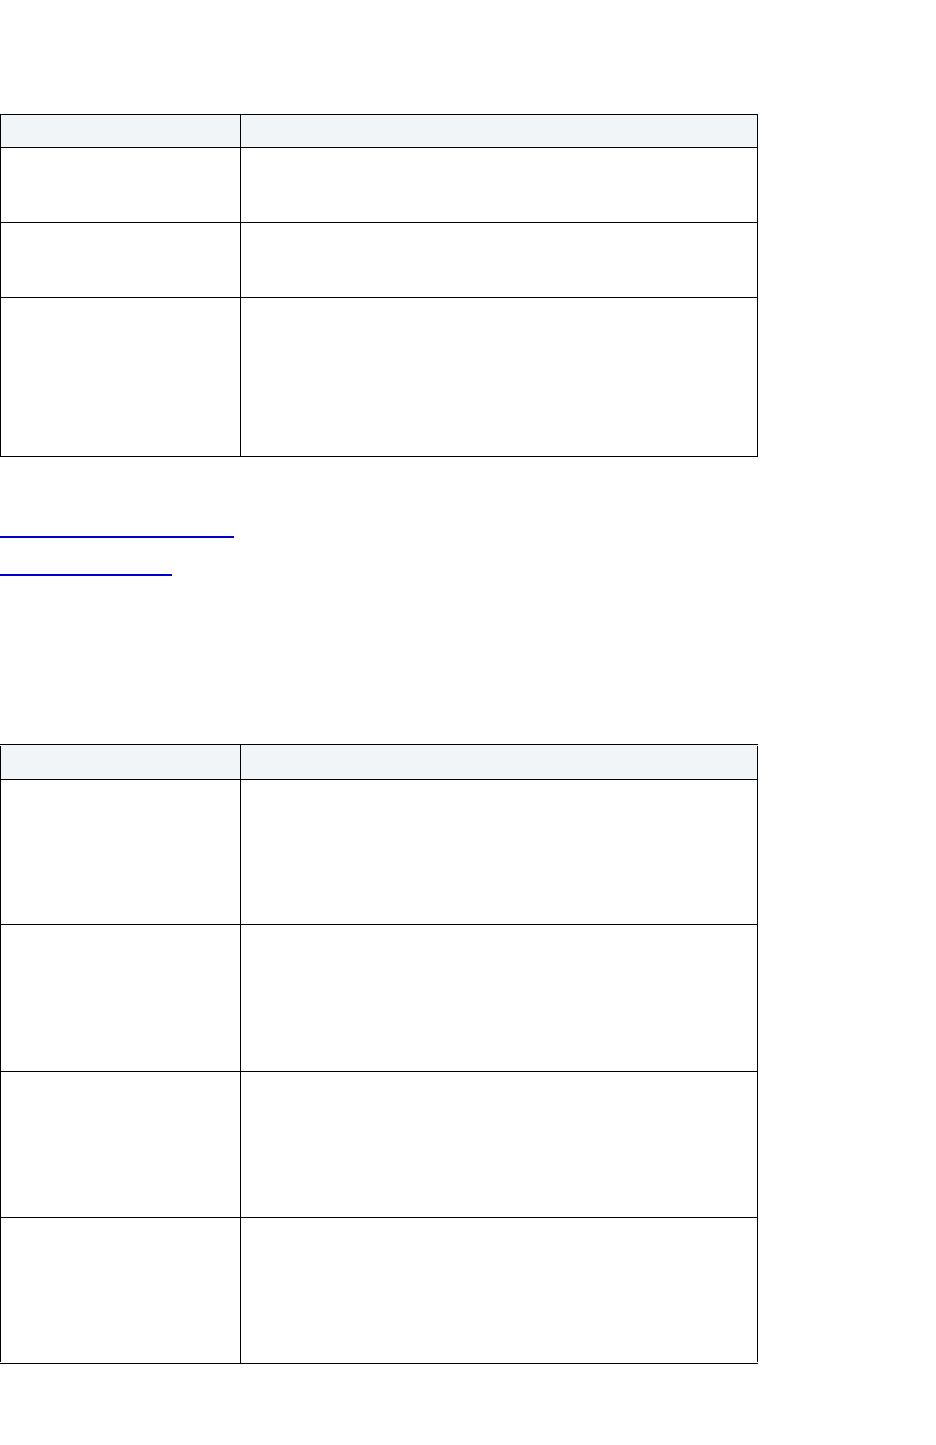
USING > FUNCTIONALITY
EMBARCADERO TECHNOLOGIES > BOOKNAMEVARIABLE 434
For more information, see:
Completing an Object Wizard
Linked Server Wizard
Linked Server Wizard for Microsoft SQL Server - Panel 2
The table below describes the options and functionality on the Linked Server Wizard.
Option Description
What is the name of the
linked server?
Lets you type the name of the new linked server. If the linked
server is a Microsoft SQL Server, the name must be the network
name of the server.
If this is a SQL Server you
can use the default values for
a linked SQL Server.
Any tables retrieved from the server are from the default database
defined for the login on the linked server.
What is the provider name? If the server is not an instance Microsoft SQL Server, click the
provider list, and then click the name of the OLE DB provider
managing access to the specified linked server. An OLE DB
provider is a software component that exposes OLE DB interfaces.
Each OLE DB provider exposes data from a particular type of data
source (for example SQL Server databases, Access databases, or
Excel spreadsheets).
Option Description
What is the datasource as
interpreted by the OLE DB
provider?
Lets you type the name of the OLE DB provider managing the
access to the linked server.
An OLE DB provider is a software component that exposes OLE
DB interfaces. Each OLE DB provider exposes data from a
particular type of data source (for example SQL Server databases,
Access databases, or Excel spreadsheets).
What is the location as
interpreted by the OLE DB
provider?
Lets you type the OLE DB location property corresponding to the
linked server.
An OLE DB provider is a software component that exposes OLE
DB interfaces. Each OLE DB provider exposes data from a
particular type of data source (for example SQL Server databases,
Access databases, or Excel spreadsheets).
What is the OLE DB
provider-specific connection
string that identifies a unique
datasource?
Lets you type the OLE DB provider string property corresponding
to the linked server.
An OLE DB provider is a software component that exposes OLE
DB interfaces. Each OLE DB provider exposes data from a
particular type of data source (for example SQL Server databases,
Access databases, or Excel spreadsheets).
What is the catalog to be
used when making a
connection to the OLE DB
provider?
Lets you type the OLE DB catalog property corresponding to the
linked server.
An OLE DB provider is a software component that exposes OLE
DB interfaces. Each OLE DB provider exposes data from a
particular type of data source (for example SQL Server databases,
Access databases, or Excel spreadsheets).

USING > FUNCTIONALITY
EMBARCADERO TECHNOLOGIES > BOOKNAMEVARIABLE 435
For more information, see:
Completing an Object Wizard
Linked Server Wizard
Linked Server Wizard for Microsoft SQL Server - Optional Panel 3
NOTE: Options vary by SQL Sever version.
The table below describes the options and functionality on the Linked Server Wizard.
For more information, see:
Completing an Object Wizard
Linked Server Wizard
Login Wizard for Microsoft SQL Server
The Login Wizard lets you create logins. Logins let you access your account. Your login account controls access to the
server and all of the databases within it. Only the System Administrator or System Security Officer can create logins.
Once you can log into a server, you need additional privileges to access user databases. Specifically, each database
owner adds the login as a user or alias to the database.
The Login Wizard lets you:
• Name the login.
• Specify the type of login to create.
• Define a login password.
• Select the databases on which to create users.
• Select the user type.
Option Description
Server Options RPC Out Server - Lets you select the server with RPC encryption.
Collation Compatible - Select if the character set and sort order in
the datasource corresponding to the linked server is the same as
the local server.
Use Remote Collation - Select to use the collation information of
character columns from the linked server.
RPC - Enables RPC encryption from the server.
Lazy Schema Validation - Select if the checking of the schema of
remote tables is delayed until execution.
Collation Name - Lets you select the collation to be used for
character data from the linked server.
Query Timeout - Lets you type the seconds to wait when Microsoft
SQL Server attempts to query the linked server.
Connection Timeout - Lets you type the seconds to wait when
Microsoft SQL Server attempts to make a connection to the linked
server.
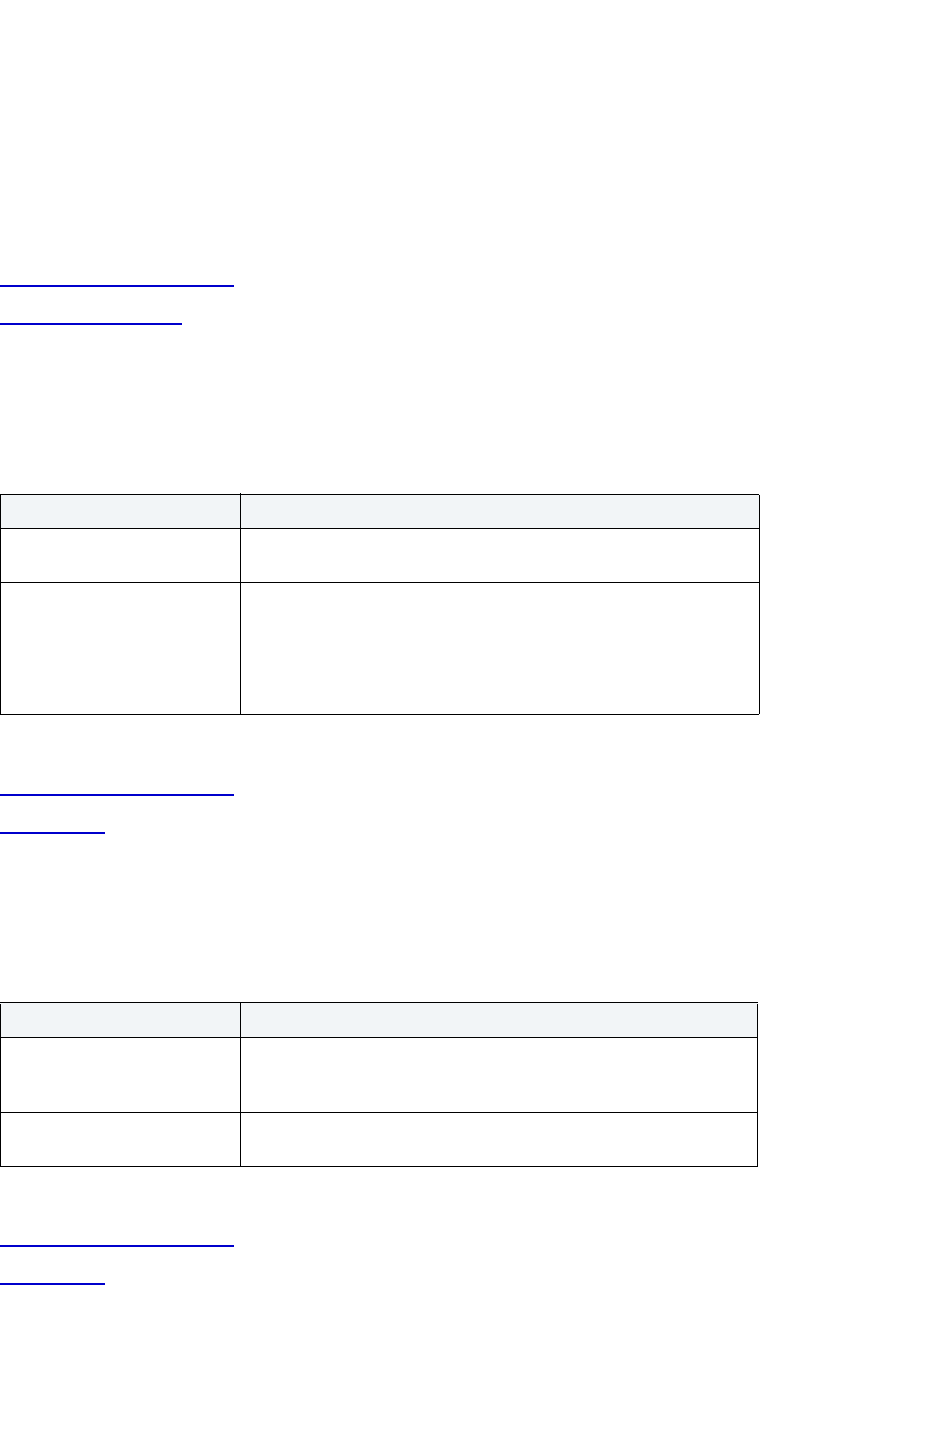
USING > FUNCTIONALITY
EMBARCADERO TECHNOLOGIES > BOOKNAMEVARIABLE 436
• Specify a group or role (as applicable).
• Assign aliases for the login.
Important Notes
•None
For more information, see:
Completing an Object Wizard
Login Wizard - Panel 1
Login Wizard for Microsoft SQL Server - Panel 1
The table below describes the options and functionality on the first panel of the Login Wizard.
For more information, see:
Completing an Object Wizard
Login Wizard
Login Wizard for Microsoft SQL Server - Panel 2
The table below describes the options and functionality on the second panel of the Login Wizard.
For more information, see:
Completing an Object Wizard
Login Wizard
Option Description
What is the name of the
login?
Lets you type the login name.
Specify whether this login
account will be for a SQL
Server or a Windows NT User
or Group.
If the this is a Microsoft SQL Server Login, click the SQL Server
option button and complete the password and confirm boxes.
Microsoft SQL Server 7 or later If the this is a NT User or Group
Login, click the NT User or Group option button.
Click the Domain list, and then click a domain.
Option Description
What should be the login's
default database?
Lets you select the default database. Avoid specifying the master
database to prevent users from creating objects there
inadvertently.
What is the login's default
language?
Lets you select the default language. Rapid SQL automatically
defaults to the server's default language.
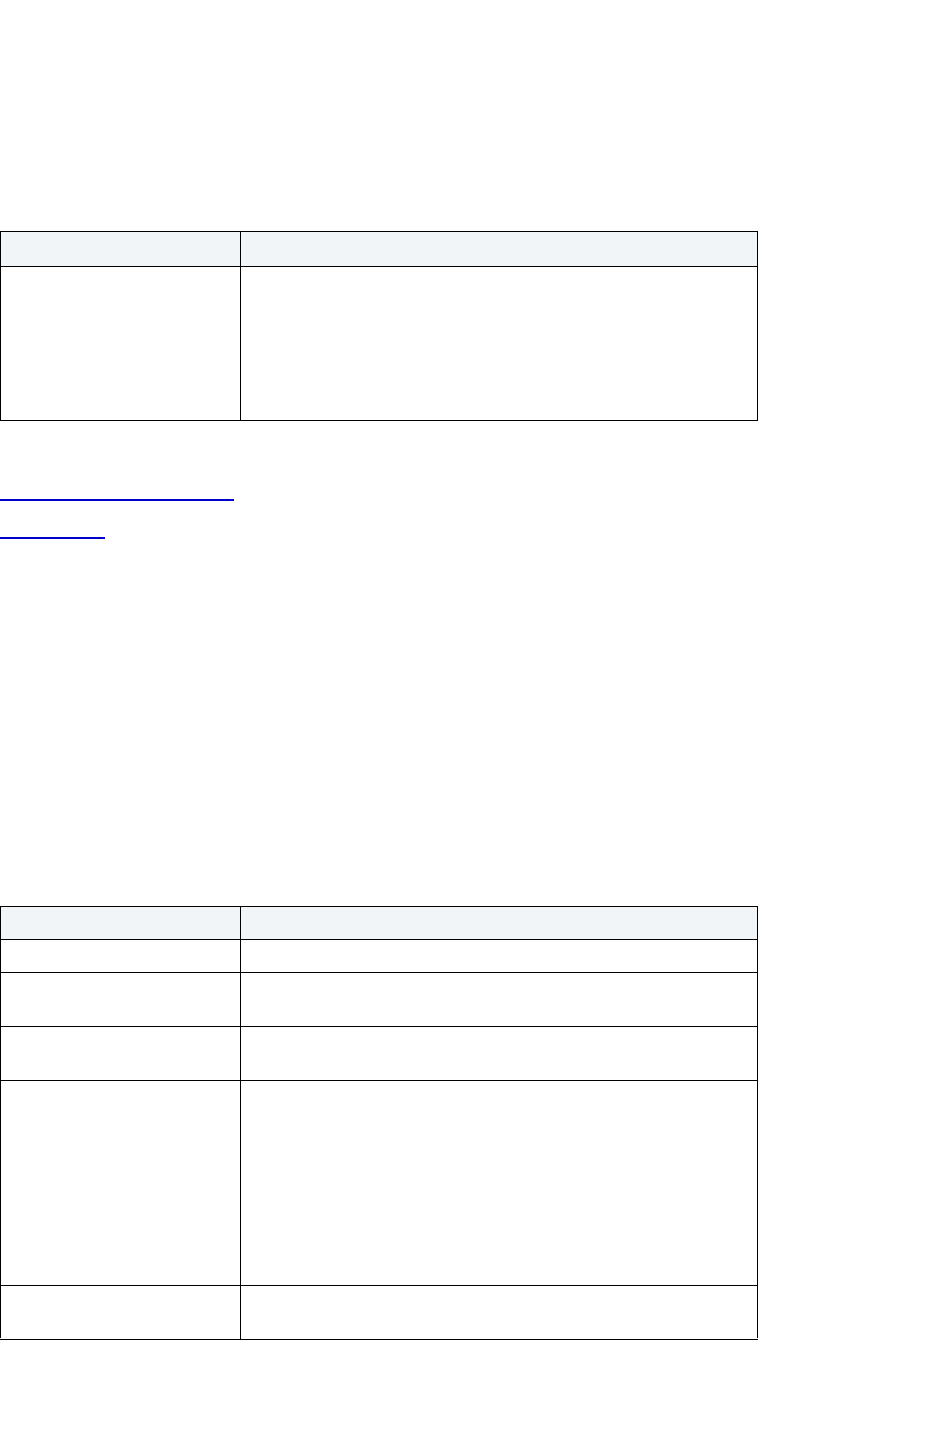
USING > FUNCTIONALITY
EMBARCADERO TECHNOLOGIES > BOOKNAMEVARIABLE 437
Login Wizard for Microsoft SQL Server - Panel 3
The table below describes the options and functionality on the second panel of the Login Wizard.
NOTE: The options on this panel differ by version of Microsoft SQL Server.
For more information, see:
Completing an Object Wizard
Login Wizard
Create Primary Key Constraint Dialog Box for Microsoft SQL Server
The Create Primary Key Constraint dialog box lets you create a primary key. Primary Keys are a set of table columns
that can uniquely identify every row of a table.
The dialog box lets you specify the owner and table on which you want to place the primary key constraint.
Important Notes
•None
The table below describes the options and functionality on the Create Primary Key Constraint dialog box.
Option Description
Select database to create
users
Lets you select the appropriate target user check boxes or click
check all.
User Name - If you are adding a user name that is different from
the Login ID, type the new name in the User Name box.
Database Roles - Lets you select the check boxes that correspond
to the target databases or click Select All.
Option Description
Owner Lets you select the primary key constraint owner.
Table Lets you select the table you want to place the primary key
constraint.
Constraint Name Lets you enter the name of the constraint, which can be up to 30
characters long and must be unique across the entire database.
Properties Clustered - Select for a a unique index (one in which no two rows
are permitted to have the same index value) on a table or view.
NOTE: If this option is not available for your index, you must first
clear this setting on the existing clustered index.
Filegroup - Lets you select the filegroup. If you do not specify a
filegroup, Microsoft SQL Server creates the index in the default
filegroup.
Fill Factor - Lets you type the fill factor percentage value (0-100).
Specify Columns in
Constraint:
Lets you select, reorder, and remove the primary key columns.
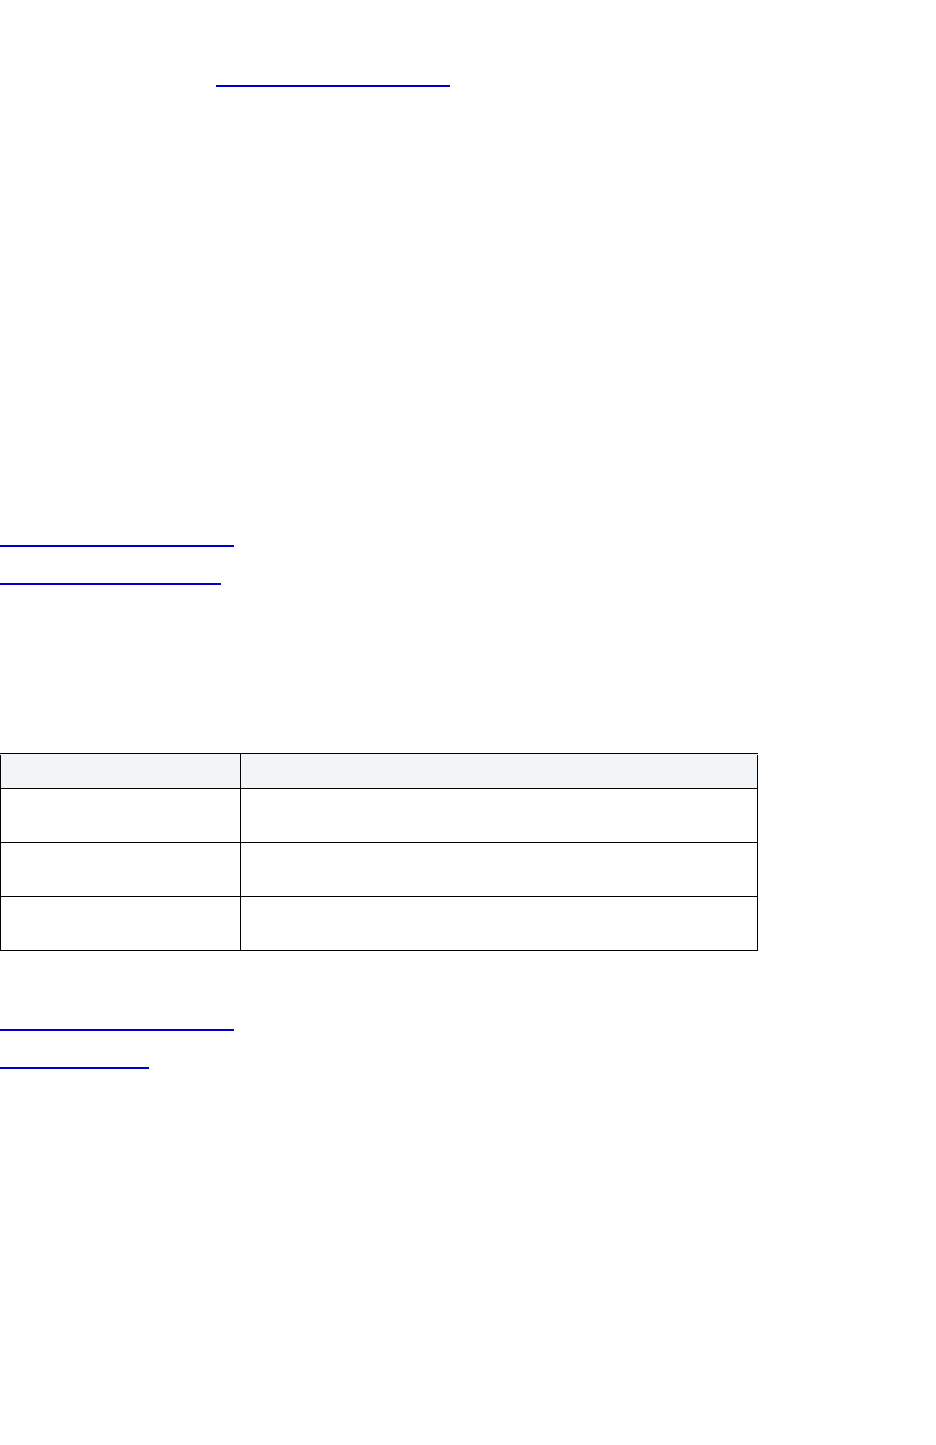
USING > FUNCTIONALITY
EMBARCADERO TECHNOLOGIES > BOOKNAMEVARIABLE 438
For more information, see Completing an Object Wizard.
Procedure Wizard for Microsoft SQL Server
The Procedure Wizard lets you create a procedure. Procedures are a reusable block of PL/SQL, stored in the
database, that applications can call. Procedures streamline code development, debugging and maintenance by being
reusable. Procedures enhance database security by letting you write procedures granting users execution privileges
to tables rather than letting them access tables directly.
The Procedure Wizard lets you:
• Name the procedure and specify its body.
• Specify any execution options and you can encrypt the stored procedure text in syscomments.
Important Notes
•None
For more information, see:
Completing an Object Wizard
Procedure Wizard - Panel 1
Procedure Wizard for Microsoft SQL Server - Panel 1
The table below describes the options and functionality on the first panel of the Procedure Wizard.
For more information, see:
Completing an Object Wizard
Procedure Wizard
Procedure Wizard for Microsoft SQL Server - Panel 2
The table below describes the options and functionality on the second panel of the Procedure Wizard.
Option Description
Who will own the procedure
to be registered?
Lets you select the procedure owner.
What is the name of the
procedure?
Lets you enter the procedure name.
What is the number of the
procedure?
OPTIONAL: Lets you enter the number used to group procedures
of the same name so they can be dropped together.
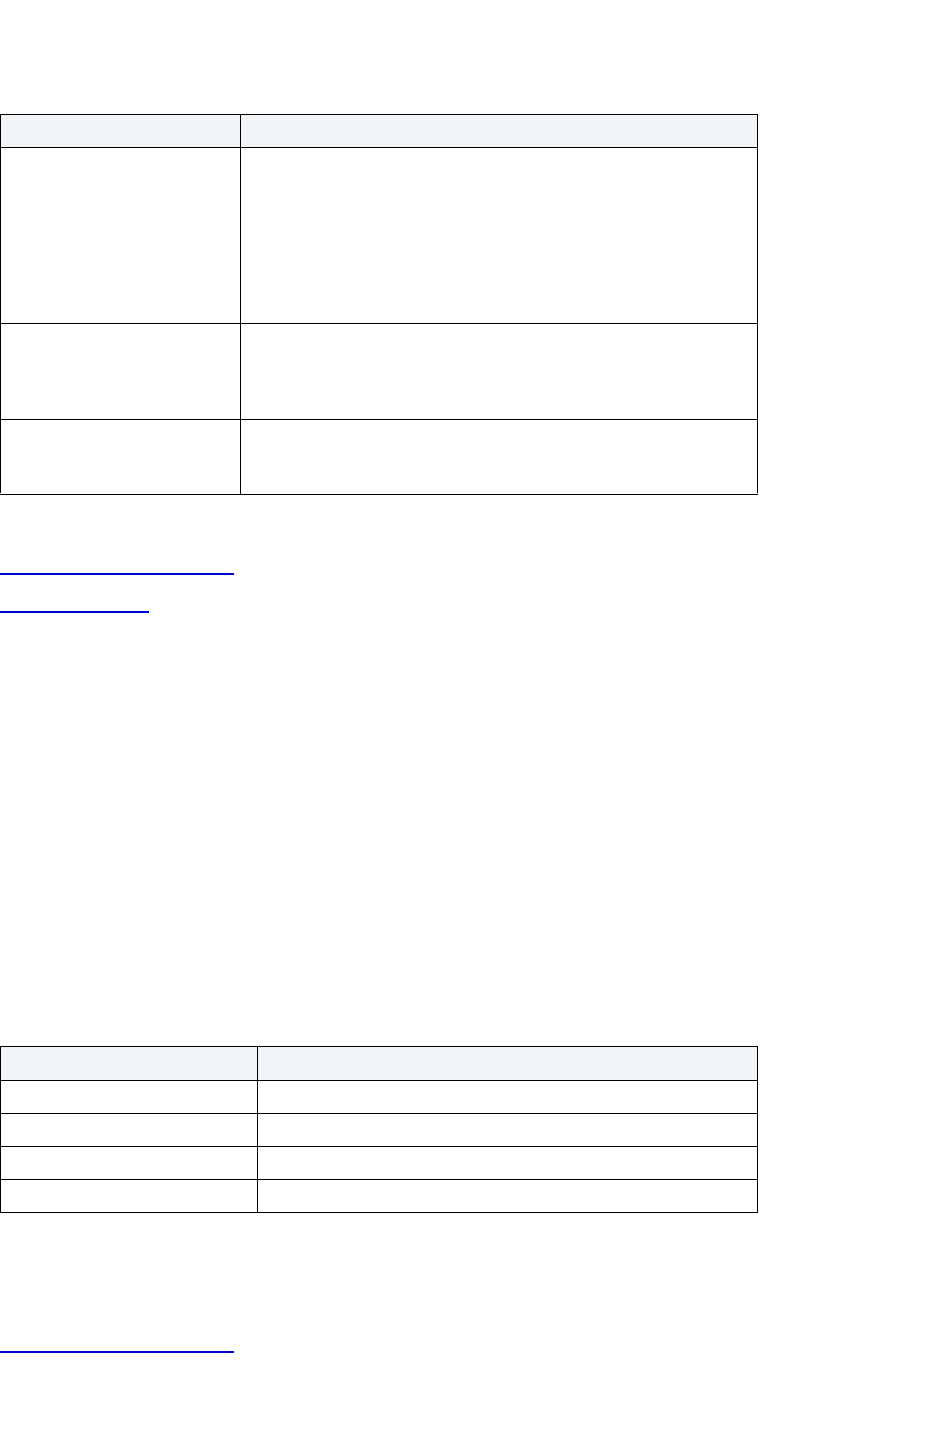
USING > FUNCTIONALITY
EMBARCADERO TECHNOLOGIES > BOOKNAMEVARIABLE 439
For more information, see:
Completing an Object Wizard
Procedure Wizard
Remote Server Wizard for Microsoft SQL Server
The Remote Server Wizard lets you create a remote server. Remote Servers are servers on a network that you can
access through your local server. Instead of logging directly into a remote server, you can log into your local server
and execute a remote procedure call to it.
The Remote Server Wizard lets you:
• Name the remote server and to designate if it is remote or local.
• Specify remote server options.
Important Notes
Before you can set up a remote server, you first configure both the local and remote servers to accept remote access.
To configure the Microsoft SQL Servers for remote access, you need to log into each server. The table below
describes the parameters you need to configure on each server:
After setting these server configuration parameters, shutdown and restart the server so the new values can take
effect.
For more information, see:
Completing an Object Wizard
Option Description
Execution Options None - Select if you do not want to specify any execution options.
Recompile - This option tells Microsoft SQL Server to not cache a
plan for the procedure and to recompile each time it is executed.
This option slows down the execution time of a procedure as it
must be recompiled each time. If the procedure parameters vary
widely between executions, consider this option.
Replication - Lets you create the stored procedure for replication.
With Encryption Option Lets you encrypt the stored procedure definition in the system
catalog. This option prevents proprietary procedures from being
viewed by other users or third parties by encrypting the data of
packages.
Finish Button Rapid SQL opens the Stored Procedures Editor with the outline for
the CREATE PROCEDURE statement in the Procedure text box.In
the Procedure text box, type the body of the stored procedure.
Parameter Description
Remote Access 1(enabled)
Remote Connections Number of remote connections required
Remote Logins Number of remote logins required
Remote Sites Number of remote sites required
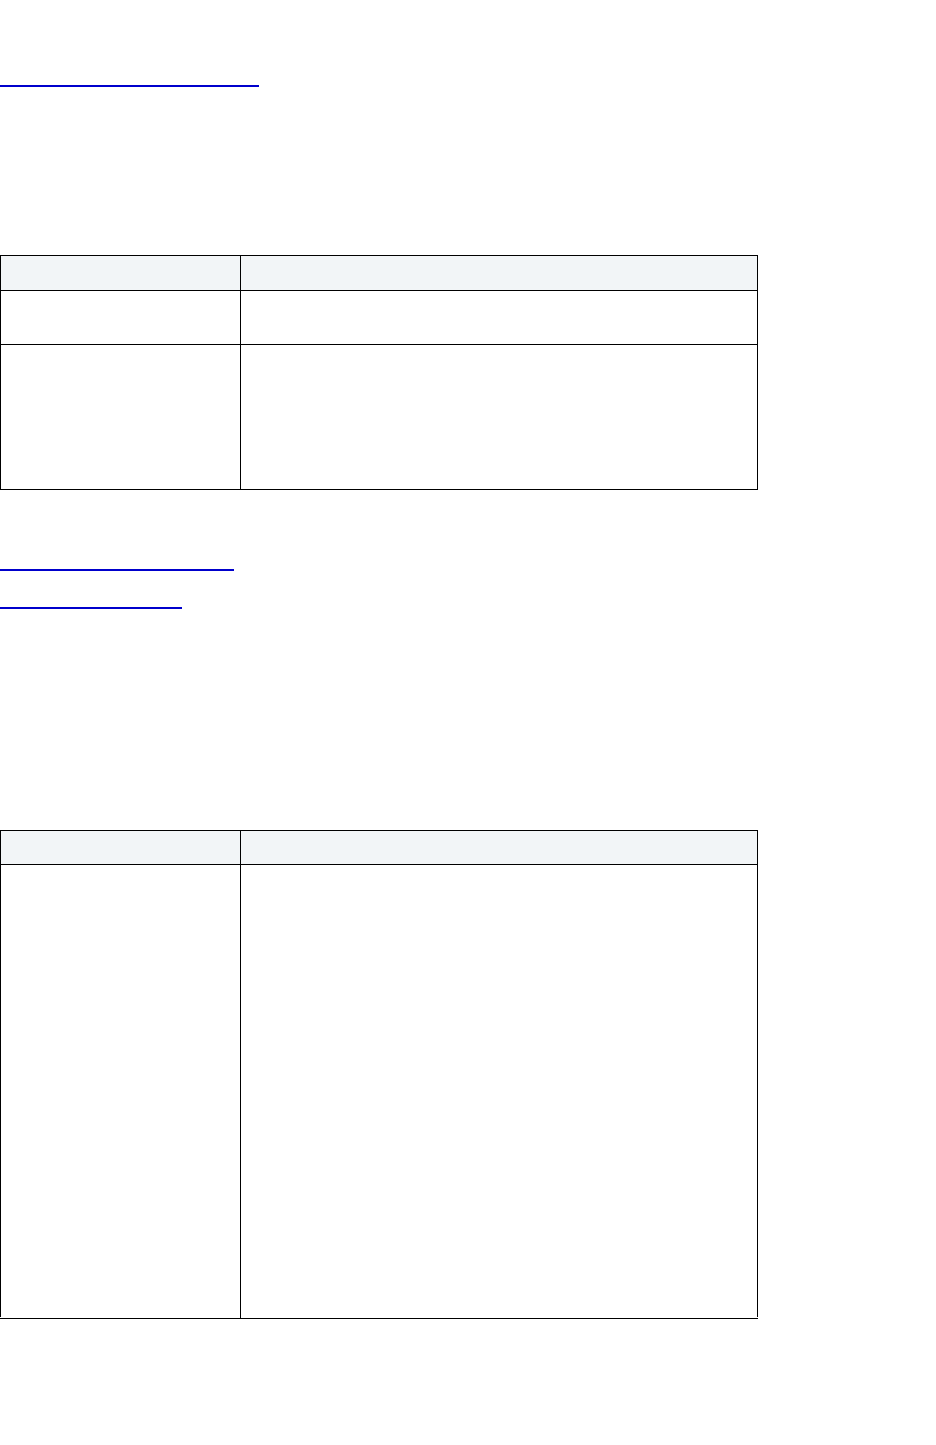
USING > FUNCTIONALITY
EMBARCADERO TECHNOLOGIES > BOOKNAMEVARIABLE 440
Remote Server Wizard - Panel 1
Remote Server Wizard for Microsoft SQL Server - Panel 1
The table below describes the options and functionality on the first panel of the Remote Server Wizard.
For more information, see:
Completing an Object Wizard
Remote Server Wizard
Remote Server Wizard for Microsoft SQL Server - Optional Panel 2
The table below describes the options and functionality on the second panel of the Remote Server Wizard.
NOTE: Options vary by SQL Sever version.
For more information, see:
Option Description
What is the name of the
remote server?
Lets you type the name of the remote server.
Is the remote server the local
or remote server?
The local server routes all commands to the remote server. To
communicate with a remote server, you log into a local server and
submit your remote procedure calls for remote servers. The remote
server receives remote procedure calls from the local server and
processes them accordingly.
Lets you select the Remote or Local option button.
Option Description
Server Options Publication Server - Select if the server is to publish data for
replication.
Subscription Server - Select If the server is to manage
subscriptions to replicated data.
Distribution Server - Select If the server is to manage the
distribution database.
Publisher/Subscriber - Select if the server is both a subscriber and
publisher of replicated data.
DSN Server - Select if the server is to receive replicated data via
ODBC.
Fallback Server - Select if the server is to serve as a fallback
server.
Collation Compatible - Select if the server is to be collation
compatible.
Data Access Server - Select if the server is to serve as a data
access server.
RPC Out Server - Select if the server is to serve as a RPC Out
server.
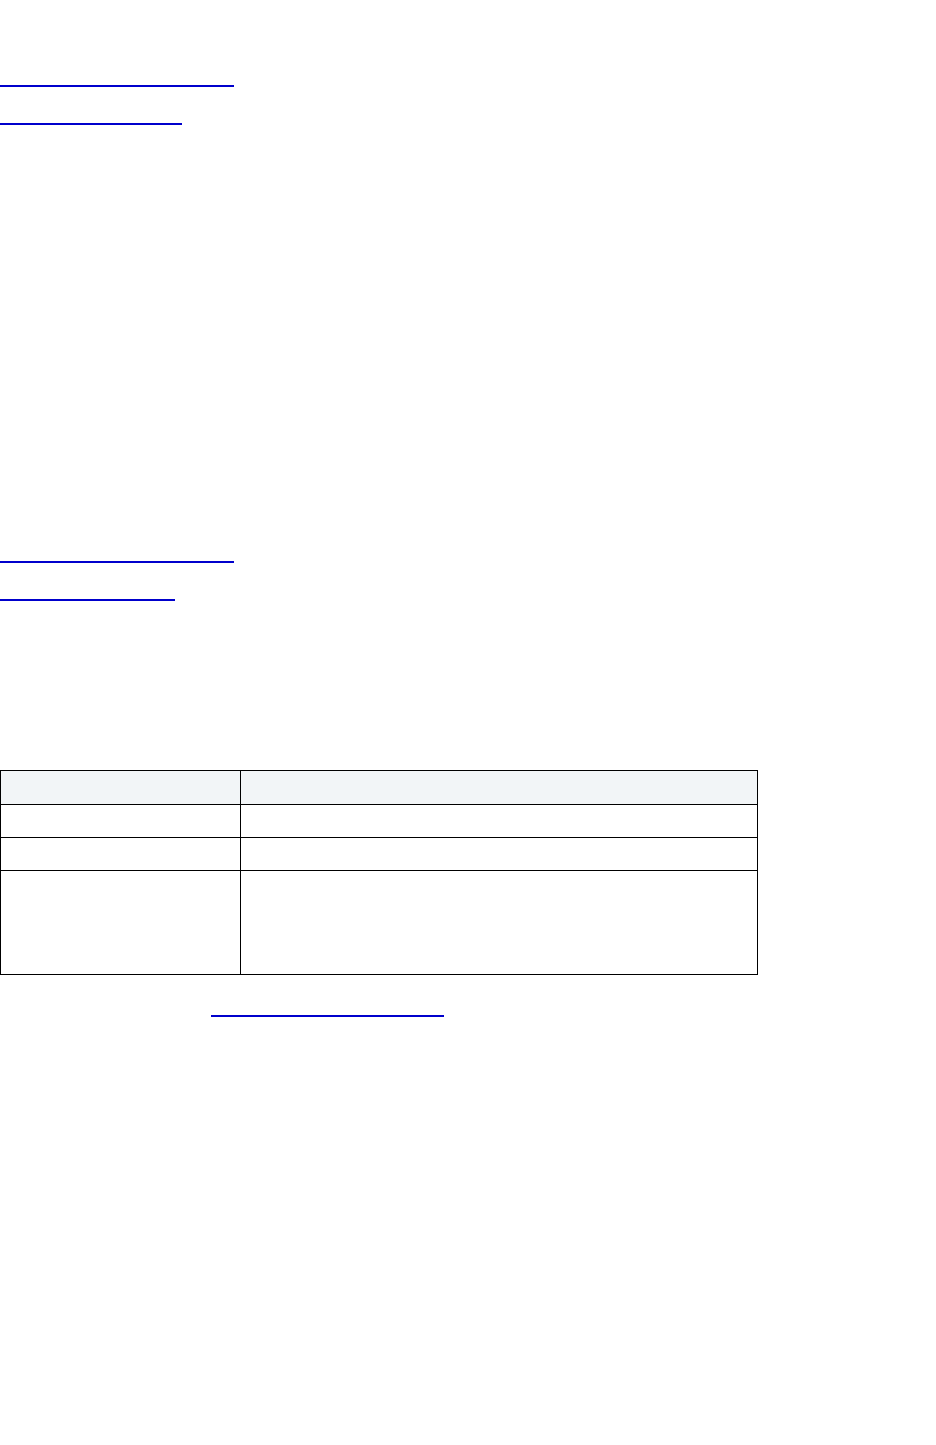
USING > FUNCTIONALITY
EMBARCADERO TECHNOLOGIES > BOOKNAMEVARIABLE 441
Completing an Object Wizard
Remote Server Wizard
Role Wizard for Microsoft SQL Server
The Role Wizard lets you create a role. Roles are sets of user privileges you associate with access to objects within a
database. Roles streamline the process of granting permissions. You can use roles to grant sets of permissions and
privileges to users and groups.
The Role Wizard lets you:
• Specify role name.
• Specify role identification.
Important Notes
•None
For more information, see:
Completing an Object Wizard
Role Wizard - Panel 1
Role Wizard for Microsoft SQL Server - Panel 1
The table below describes the options and functionality on the first panel of the Role Wizard.
For more information, see Completing an Object Wizard
.
Rule Wizard for Microsoft SQL Server
The Rule Wizard lets you create a rule. Rules promote data integrity by allowing you to validate the values supplied to
a table column. They are reusable objects that you can bind to table columns or user datatypes. For example, you can
create a rule, bind it to a column in a table and have it specify acceptable values that can be inserted into that column.
Important Notes
•None
The table below describes the options and functionality on the first panel of the Rule Wizard.
Option Description
What is the name of the role? Lets you type the name of the role.
Who owns the role? Lets you select the owner.
Select the type of the role to
create
Lets you select the type of role, either a Standard SQL Server Role
or an Application Role.
If you select Application Role, in the Password box, type the role
password, and in the Confirm box, retype the password.
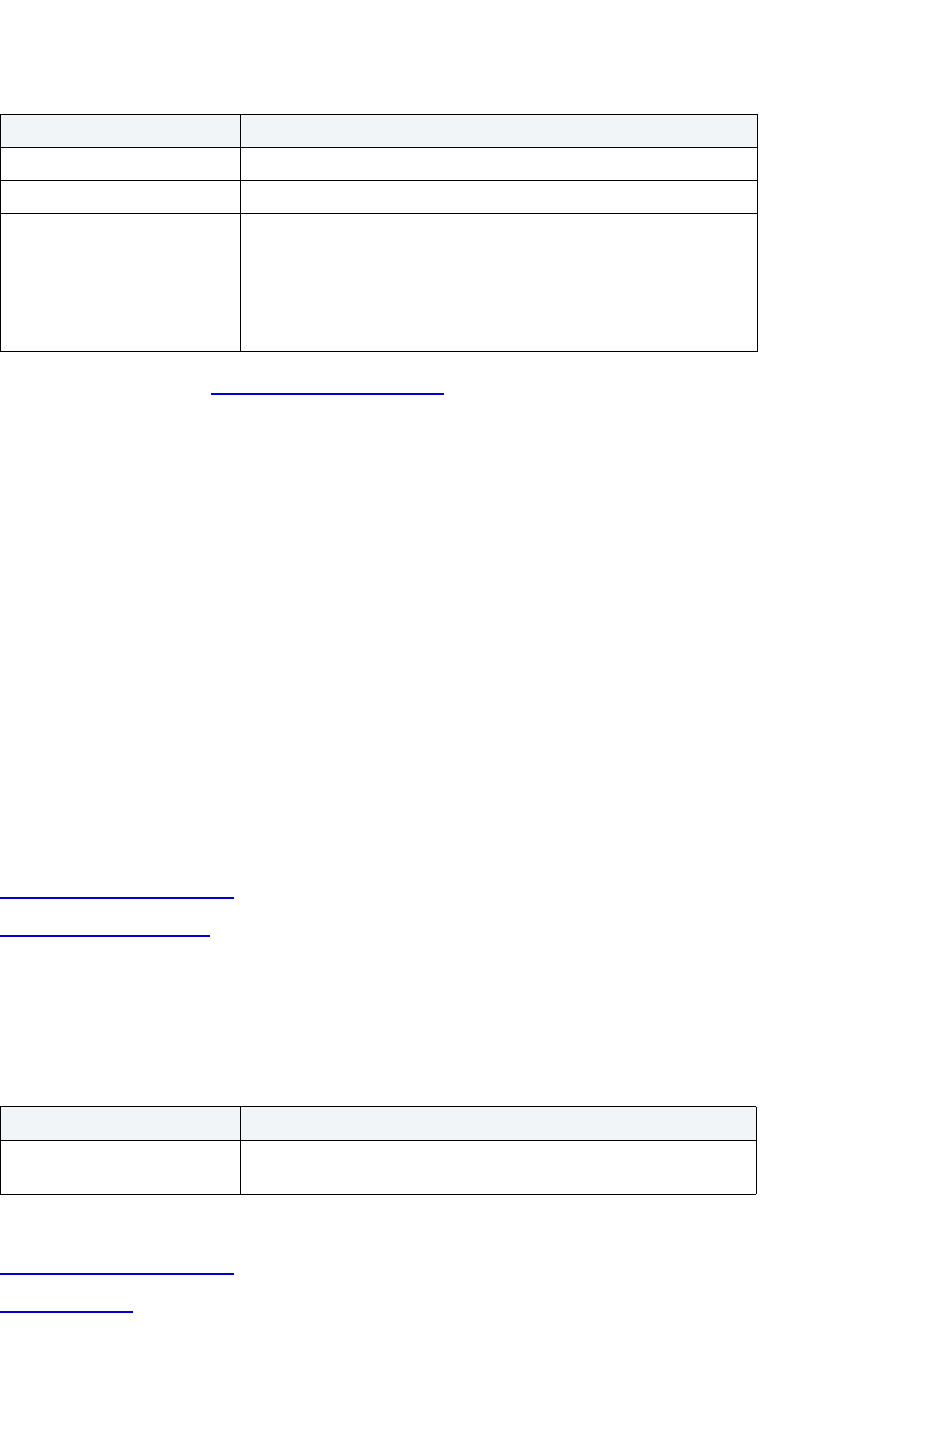
USING > FUNCTIONALITY
EMBARCADERO TECHNOLOGIES > BOOKNAMEVARIABLE 442
For more information, see Completing an Object Wizard.
Segment Wizard for Microsoft SQL Server
The Segment Wizard lets you create a segment. Segments are a mechanism for placing tables and indexes on
specific logical partitions. You create segments on one or more fragments of a database. You can map segments to
specific database fragments, which in turn reside on specific hard disks; and, mapping segments lets you increase i/o
throughput by placing intensively used tables and indexes on different physical devices. You can allocate tables and
indexes to segments by including placement statements at the end of CREATE TABLE or CREATE INDEX
statements.
The Segment Wizard lets you:
• Name the segment.
• Place the segment on one or more database fragments.
Important Notes
• None.
For more information, see:
Completing an Object Wizard
Segment Wizard - Panel 1
Segment Wizard for Microsoft SQL Server - Panel 1
The table below describes the options and functionality on the first panel of the Segment Wizard.
For more information, see:
Completing an Object Wizard
Segment Wizard
Option Description
What is the name of the rule? Lets you type the name of the rule.
Who owns the rule? Lets you select the owner.
What is the rule restriction
box?
Lets you type the condition(s) defining the rule. A rule can be any
expression valid in a WHERE clause and can include such
elements as arithmetic operators, relational operators, and
predicates (for example, IN, LIKE, BETWEEN). A rule cannot
reference columns or other database objects. Built-in functions that
do not reference database objects can be included.
Option Description
What is the name of the
segment?
Lets you type the name of the segment.
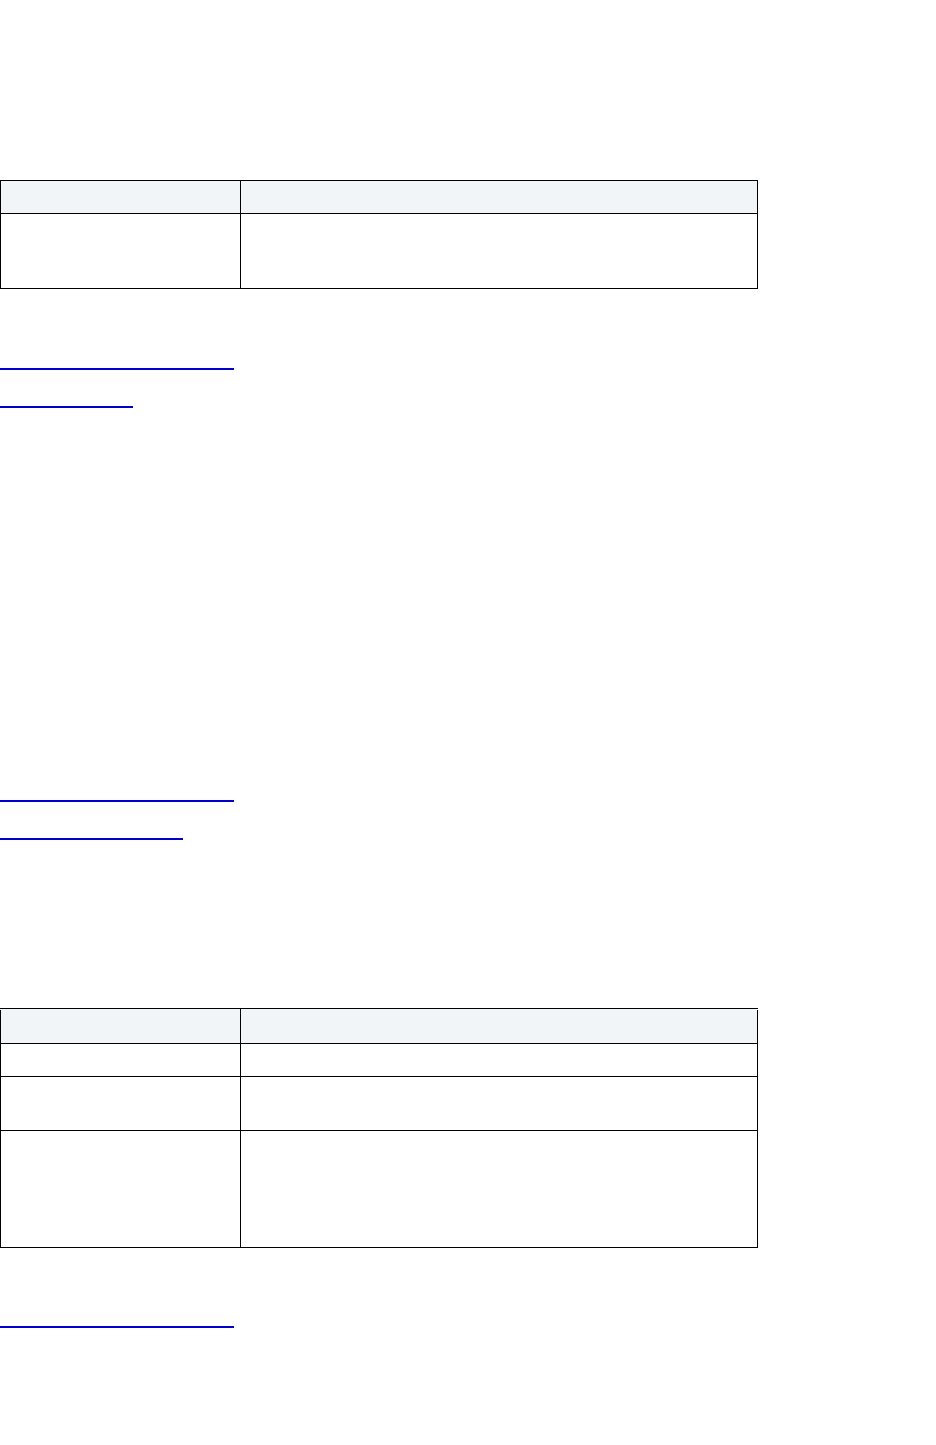
USING > FUNCTIONALITY
EMBARCADERO TECHNOLOGIES > BOOKNAMEVARIABLE 443
Segment Wizard for Microsoft SQL Server - Panel 2
The table below describes the options and functionality on the second panel of the Segment Wizard.
For more information, see:
Completing an Object Wizard
Segment Wizard
Table Wizard for Microsoft SQL Server
The Table Wizard lets you create a table without knowing the underlying commands.
The Table Wizard lets you:
• Name the table and owner.
• Specify table columns, including the name, row bindings, and type of datatype.
Important Notes
•None
For more information, see:
Completing an Object Wizard
Table Wizard - Panel 1
Table Wizard for Microsoft SQL Server - Panel 1
The table below describes the options and functionality on the first panel of the Table Wizard.
For more information, see:
Completing an Object Wizard
Option Description
On which database device(s)
do you wish to place the
segment?
Lets you select the database (device) fragments on which you want
to place the segment, or Select All.
Option Description
Who owns the table? Lets you select the table owner.
What is the name of the
table?
Lets you enter the table name.
Microsoft SQL Server 8.0 or
later Select the option below
if this table is to be used as
base table of an Indexed
View.
ANSI_NULLS - Specifies behavior of the Equals (=) and Not Equal
to (<>) comparison operators when used with null values.
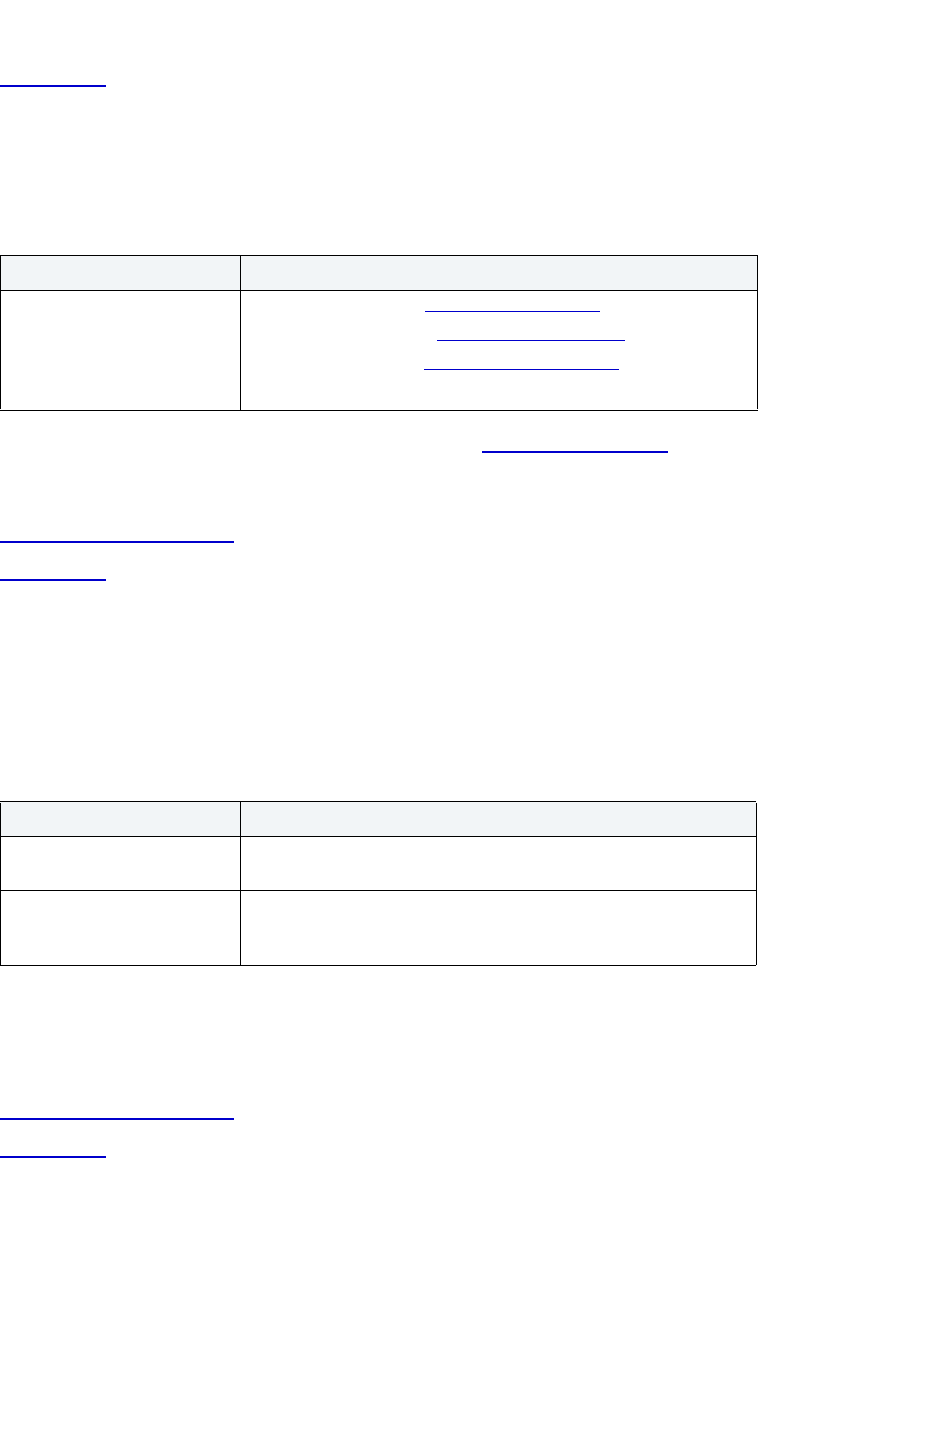
USING > FUNCTIONALITY
EMBARCADERO TECHNOLOGIES > BOOKNAMEVARIABLE 444
Table Wizard
Table Wizard for Microsoft SQL Server - Panel 2
The table below describes the options and functionality on the second panel of the Table Wizard:
NOTE: In the second panel of the Table Wizard the Add Column dialog box opens immediately.
For more information, see:
Completing an Object Wizard
Table Wizard
Table Wizard for Microsoft SQL Server - Panel 3
The table below describes the options and functionality on the third panel of the Table Wizard.
NOTE: This panel is only available for Microsoft SQL Server 7 or later.
TIP: As these datatypes are used to store large amounts of data, you can benefit from placing them
on a separate file group than the table.
For more information, see:
Completing an Object Wizard
Table Wizard
Trigger Wizard for Microsoft SQL Server
The Trigger Wizard lets you create a trigger. Triggers are a special type of procedure that automatically fire when
defined data modification operations (insert, update or delete) occur on a target table. Triggers fire after an insert,
update or delete, but belong to the same transaction as the data modification operation.
The Trigger Wizard lets you:
Option Description
Add the columns belonging to
this table
Add - Click to open the Add Column dialog box.
Insert - Click to open the Insert Column dialog box
.
Edit - Click to open the Modify Column dialog box
.
Drop - Click to delete the column.
Option Description
On which filegroup do you
want to place the table?
Lets you select the target filegroup.
On which filegroup do you
want to place text and image
columns?
If the table includes text or image columns, click the list, and then
click the target filegroup. This option is disabled if the table has no
text or image datatypes.
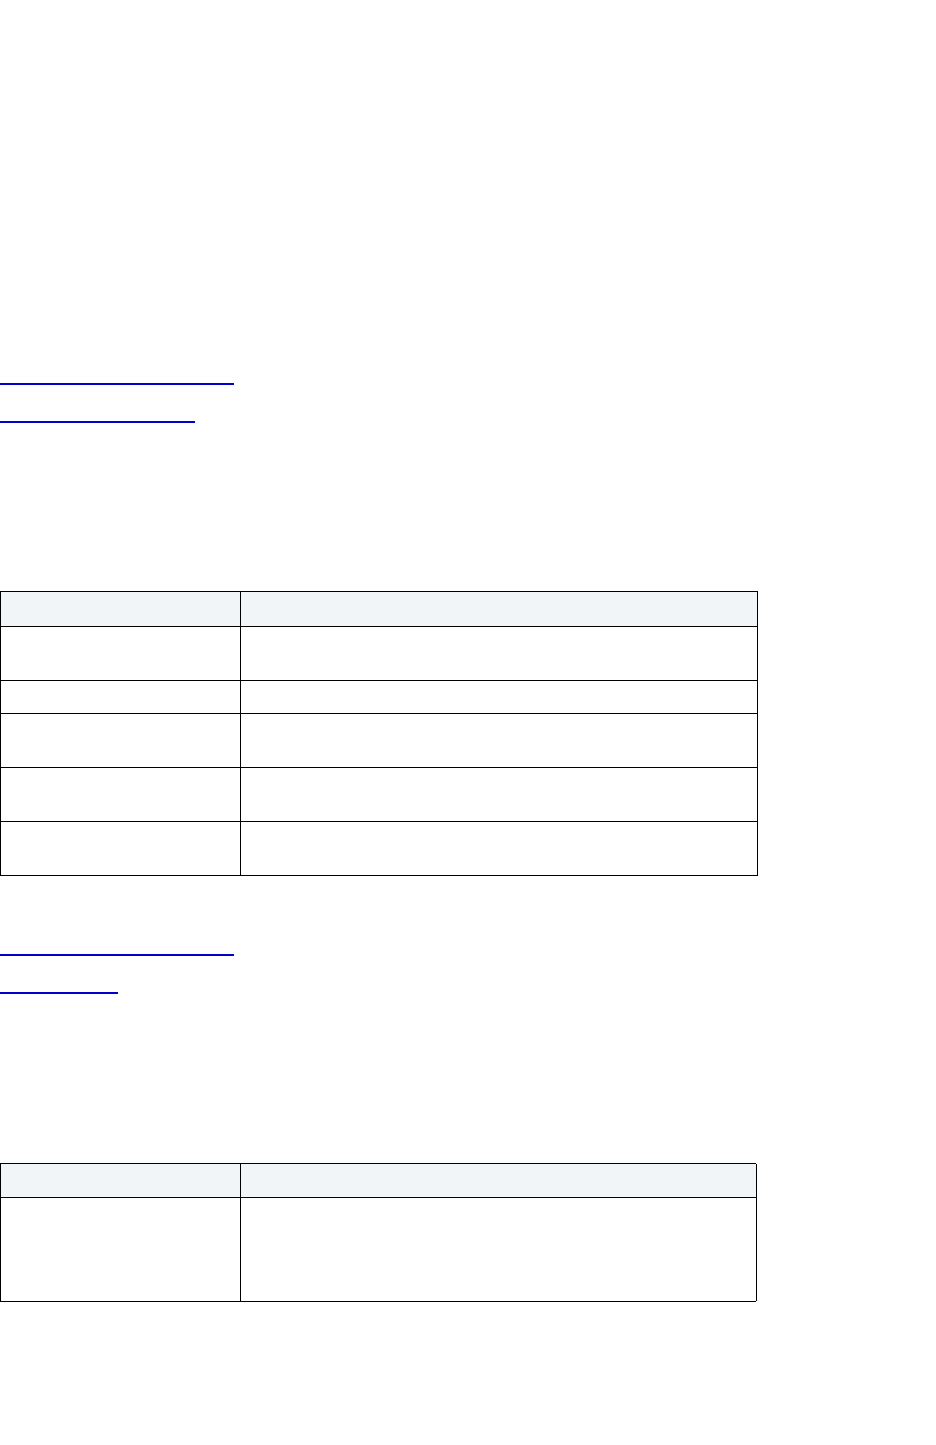
USING > FUNCTIONALITY
EMBARCADERO TECHNOLOGIES > BOOKNAMEVARIABLE 445
• Specify the trigger name and the table on which it fires.
• Specify when Rapid SQL fires the trigger.
• Specify the data modification operations that cause the trigger to fire.
• Enter the body syntax.
Important Notes
• For more information on the syntax for Trigger bodies, consult the Microsoft SQL Server Transact-SQL
Documentation.
For more information, see:
Completing an Object Wizard
Trigger Wizard - Panel 1
Trigger Wizard for Microsoft SQL Server - Panel 1
The table below describes the options and functionality on the first panel of the Trigger Wizard.
For more information, see:
Completing an Object Wizard
Trigger Wizard
Trigger Wizard for Microsoft SQL Server - Panel 2
The table below describes the options and functionality on the second panel of the Trigger Wizard.
For more information, see:
Option Description
Select the object on which the
trigger is to be created.
Lets you select table or view.
Who owns the base table? Lets you select the base table.
What is the name of the base
table?
Lets you select the base table.
What is the name of the
trigger?
Lets you enter the trigger name.
Use Encryption Encrypts the syscomments entries that contain the text of the
create trigger statement.
Option Description
When should the trigger fire? Instead Of - Select if you want Rapid SQL to execute the trigger
instead of the triggering SQL statement.
After - Select if you want Rapid SQL to execute the trigger after
executing the triggering SQL statement.
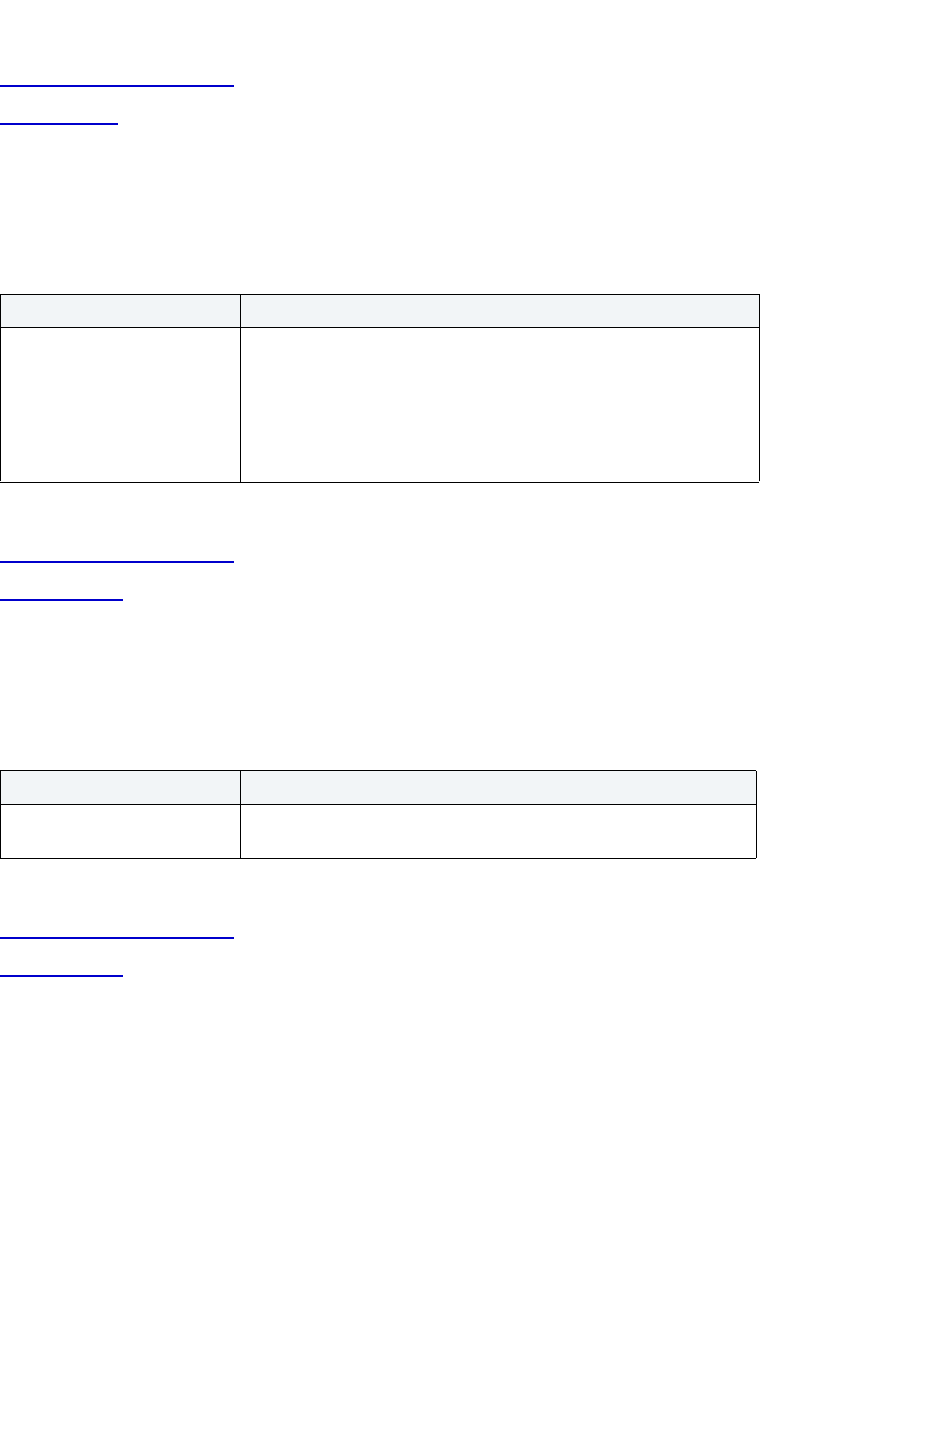
USING > FUNCTIONALITY
EMBARCADERO TECHNOLOGIES > BOOKNAMEVARIABLE 446
Completing an Object Wizard
Trigger Wizard
Trigger Wizard for Microsoft SQL Server - Panel 3
The table below describes the options and functionality on the third panel of the Trigger Wizard.
For more information, see:
Completing an Object Wizard
Trigger Wizard
Trigger Wizard for Microsoft SQL Server - Panel 4
The table below describes the options and functionality on the fourth panel of the Trigger Wizard.
For more information, see:
Completing an Object Wizard
Trigger Wizard
Create Unique Key Constraint Dialog Box for Microsoft SQL Server
The Create Unique Key dialog box lets you create a unique key. Unique keys can enforce logical keys that are not
chosen as the primary key. They enforce uniqueness for specified columns in a table.
Important Notes
•None
The table below describes the options and functionality on the Create Primary Key Constraint dialog box.
Option Description
Which table modification
operation(s) should cause the
trigger to fire?
Insert - Provides SQL to execute automatically after items are
inserted into the table.
Update - Provides SQL to execute automatically after items in the
table are updated.
Delete - Provides SQL to execute automatically after items in the
table are deleted.
Option Description
Please type the body of the
trigger below?
Lets you enter the trigger body syntax.
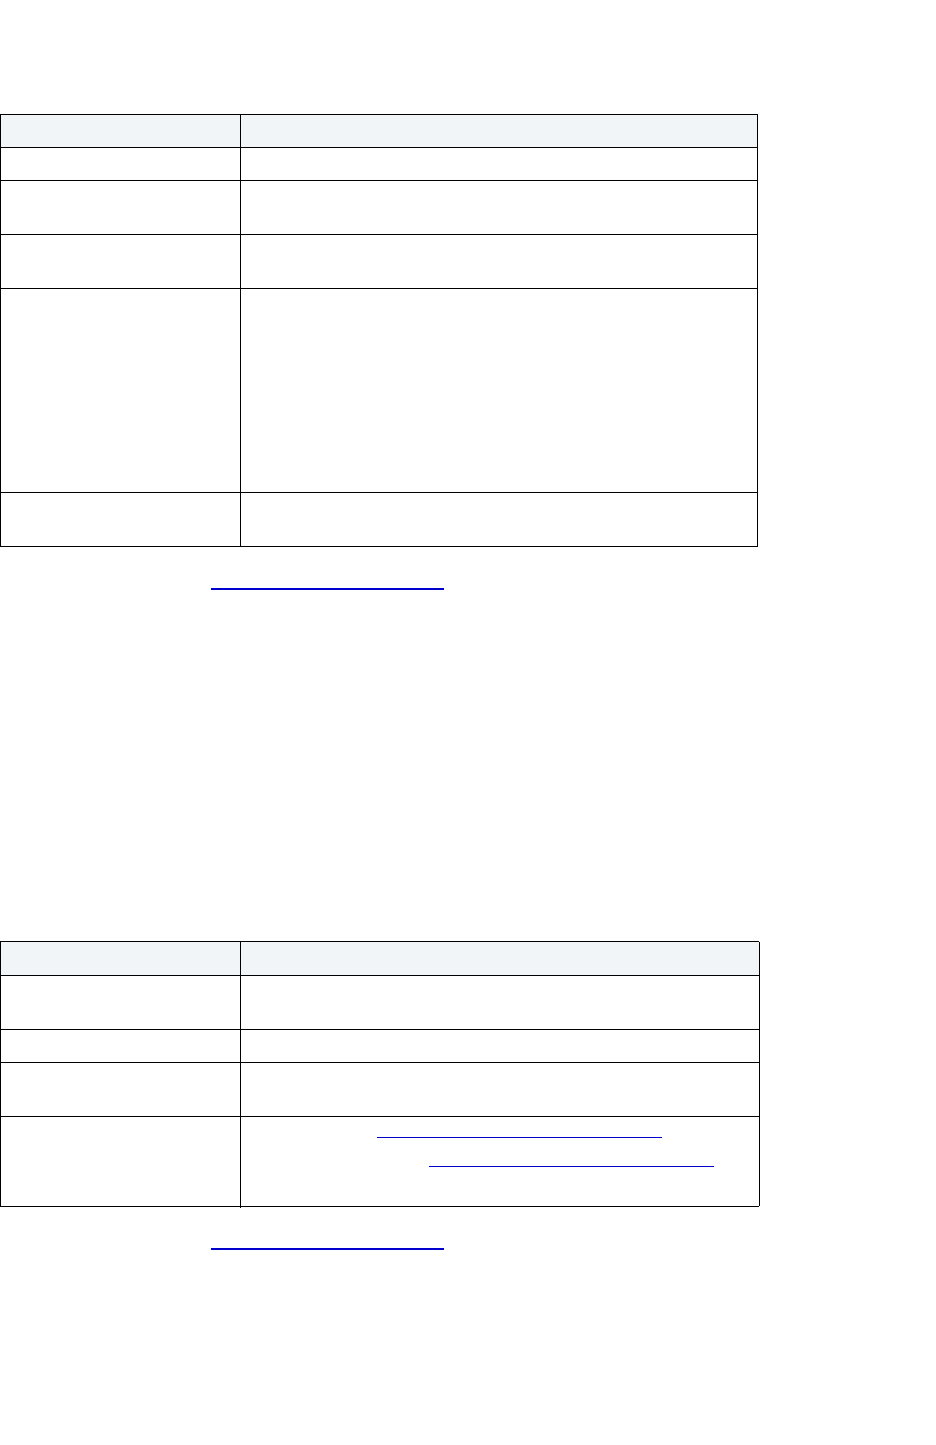
USING > FUNCTIONALITY
EMBARCADERO TECHNOLOGIES > BOOKNAMEVARIABLE 447
For more information, see Completing an Object Wizard.
User Message Wizard for Microsoft SQL Server
The User Message Wizard lets you create a user message without knowing the underlying commands. The User
Message Wizard lets you specify the message number, severity level of the error message, language and text of the
message.
Important Notes
• The user messages node only displays under the master database.
The table below describes the options and functionality on the User Message Wizard.
For more information, see Completing an Object Wizard
.
Option Description
Owner Lets you select the unique key constraint owner.
Table Lets you select the table you want to place the unique key
constraint.
Constraint Name Lets you enter the name of the constraint, which can be up to 30
characters long and must be unique across the entire database.
Properties Lets you select options:
Clustered - A cluster comprises of a group of tables that share the
same data blocks, and which are grouped together because they
share common columns and are often used together.
Filegroup - Lets you select the filegroup within the database the
constraint is stored.
Fill Factor - Lets you specify a percentage of how large each
constraint can become.
Specify Columns in
Constraint
Lets you select, reorder, and remove the constraint columns.
Option Description
What is the message
number?
Lets you type the value of the message number.
What is the severity? Lets you select the severity level.
Always write the message to
the Windows NT
Lets you write user messages to the Microsoft Windows NT
application log.
Add the text for this message Add - Opens the Create User Message Text dialog box
.
Edit Button - Opens the Modify User Message Text dialog box
.
Delete - Lets you delete the message.
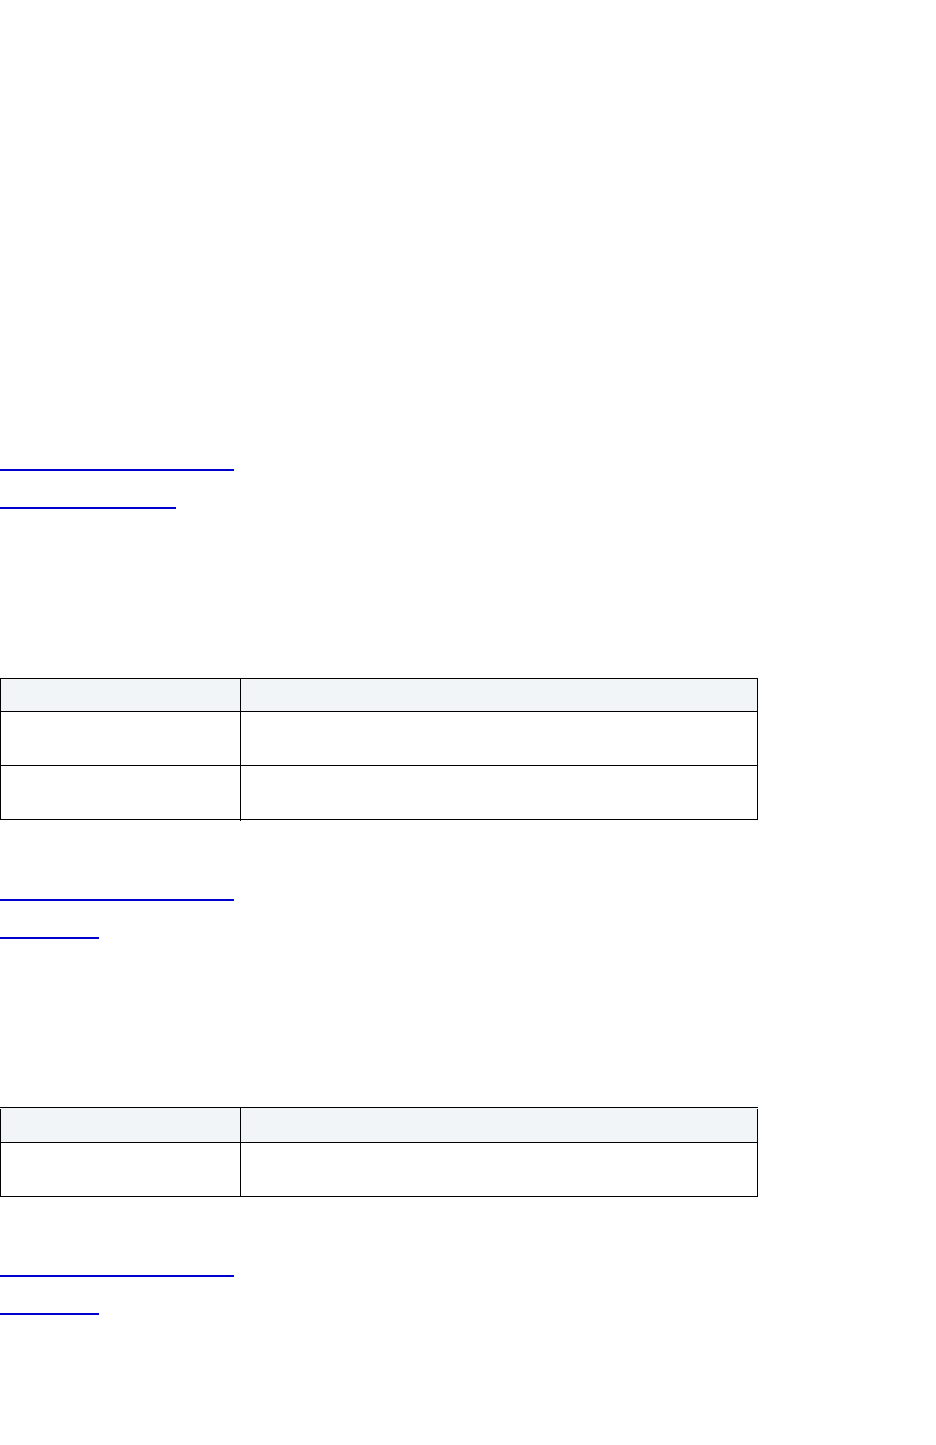
USING > FUNCTIONALITY
EMBARCADERO TECHNOLOGIES > BOOKNAMEVARIABLE 448
User Wizard for Microsoft SQL Server
The User Wizard lets you create a user. A user is an individual with access to the DBMS.
The User Wizard lets you:
• Map the login to the user.
• Name the user.
• Specify the group to which the user should belong.
• Grant any applicable system privileges to the user.
Important Notes
•None
For more information, see:
Completing an Object Wizard
User Wizard - Panel 1
User Wizard for Microsoft SQL Server - Panel 1
The table below describes the options and functionality on the first panel of the User Wizard.
For more information, see:
Completing an Object Wizard
User Wizard
User Wizard for Microsoft SQL Server - Optional Panel 2
The table below describes the options and functionality on the second panel of the User Wizard.
For more information, see:
Completing an Object Wizard
User Wizard
Option Description
What is the Login ID of the
new user?
Lets you select the login ID of the new user.
What is the name of the user? Lets you type the name if is different from the Login ID. The name
can be up to 30 characters.
Options Description
Which roles do you want the
new user to join?
Lets you select roles you want to assign to the new user or click the
Select All button.
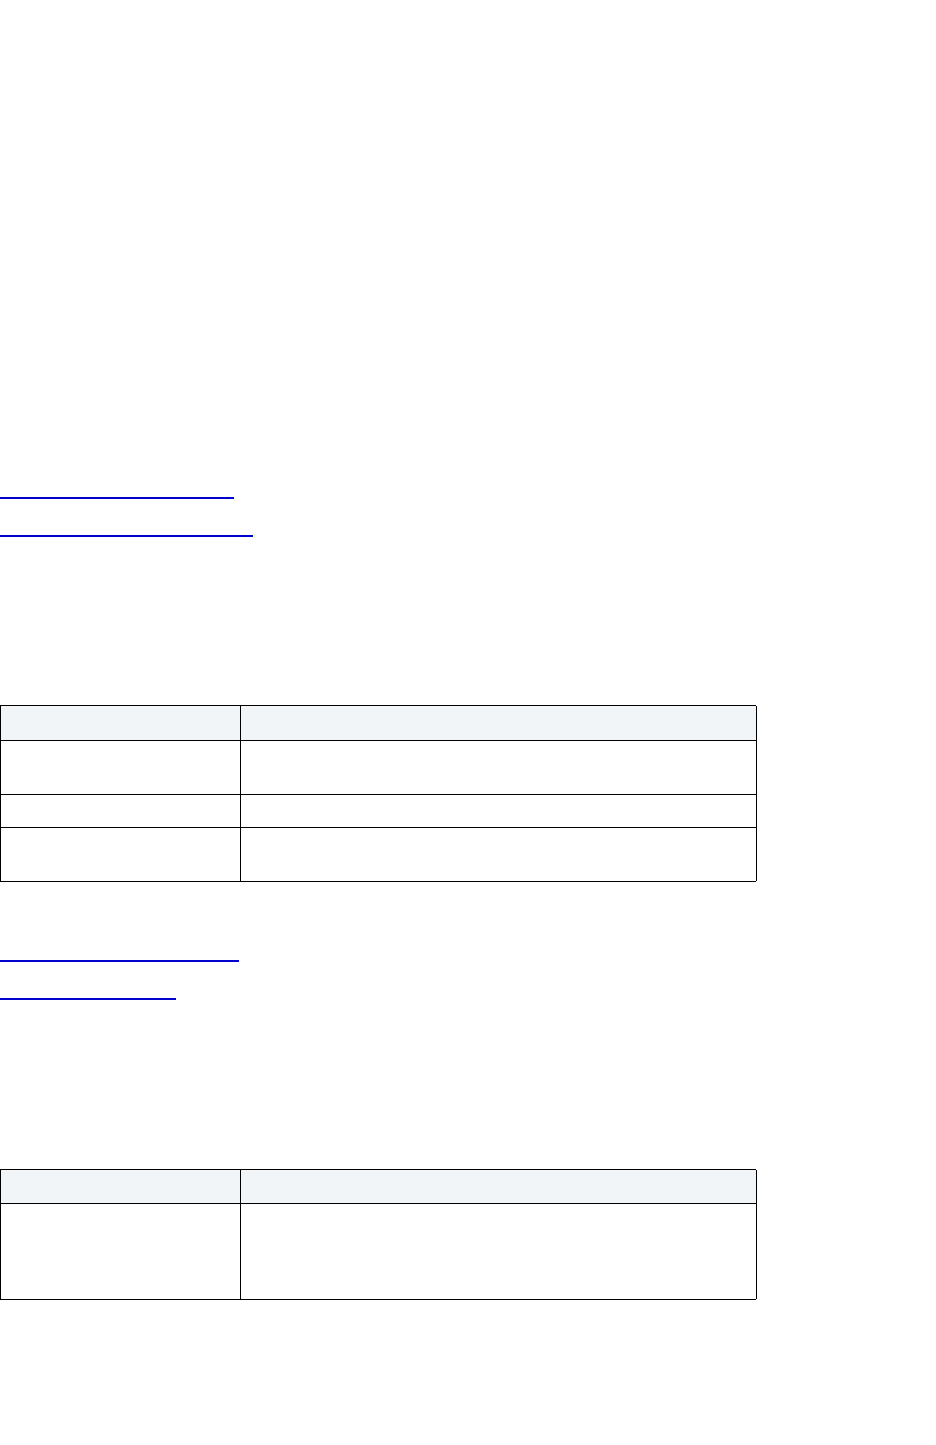
USING > FUNCTIONALITY
EMBARCADERO TECHNOLOGIES > BOOKNAMEVARIABLE 449
User Datatype Wizard for Microsoft SQL Server
The User Datatype Wizard lets you create a user datatype. User datatypes promote domain consistency by
streamlining the definition of commonly used table columns in a database. You can build a customized datatype from
system datatypes and bind defaults and rules to it to enhance integrity. When you reference the user datatype in a
column, the column assumes all of the properties of the user datatype.
The User Datatype Wizard lets you:
• Name the user datatype.
• Select the base datatype.
• Define the base datatype parameters.
Important Notes
•None
For more information, see:
Completing an Object Wizard
User Datatype Wizard - Panel 1
User Datatype Wizard for Microsoft SQL Server - Panel 1
The table below describes the options and functionality on the first panel of the User Datatype Wizard.
For more information, see:
Completing an Object Wizard.
User Datatype Wizard
User Datatype Wizard for Microsoft SQL Server - Panel 2
The table below describes the options and functionality on the second panel of the User Datatype Wizard.
Option Description
What is the name of the
datatype?
Lets you enter the datatype name.
What is the base datatype? Lets you select the base datatype.
What are the datatype
parameters?
Lets you enter the parameter values.
Option Description
Does the datatype allow null
values?
Indicate if you want to allow null values in the datatype. Null has no
explicitly assigned value. Null is not equivalent to zero or blank. A
value of null is not considered to be greater than, less than, or
equivalent to any other value, including another value of null.

USING > FUNCTIONALITY
EMBARCADERO TECHNOLOGIES > BOOKNAMEVARIABLE 450
For more information, see:
Completing an Object Wizard
User Datatype Wizard
View Wizard for Microsoft SQL Server
The View Wizard for Microsoft SQL Server lets you create a view. Views are SQL queries stored in the system catalog
that customize the display of data contained in one or more tables. Views behave like tables because you can query
views and perform data manipulation operations on them. However, views do not actually store any data. Instead, they
depend on data contained in their base tables.
Important Notes
•None
For more information, see View Wizard - Panel 1
.
View Wizard for Microsoft SQL Server - Panel 1
The table below describes the options and functionality on the first panel of the View Wizard.
For more information, see:
Completing an Object Wizard
View Wizard
View Wizard for Microsoft SQL Server - Panel 2
The table below describes the options and functionality on the second panel of the View Wizard.
Which default is bound to the
new datatype?
Lets you select the default. Defaults promote data integrity by
supplying a default value to a column if the user does not explicitly
provide one. They are reusable objects that you can bind to user
datatypes.
Which rule is bound to the
new datatype?
Lets you select the rule. Rules promote data integrity by allowing
you to validate the values supplied to a column. They are reusable
objects that you can bind to user datatypes.
Option Description
Who owns the view? Lets you select the view owner.
What is the name of the
view?
Lets you enter the view name.
Use Query Builder to define
view
Select to open Query Builder
to help you build the view SQL.
Option Description

USING > FUNCTIONALITY
EMBARCADERO TECHNOLOGIES > BOOKNAMEVARIABLE 451
For more information, see:
Completing an Object Wizard
View Wizard
Oracle Object Wizards
Cluster Wizard for Oracle
The Cluster Wizard lets you create a cluster. Clusters provide an optional method of storing table data. A cluster
comprises of a group of tables that share the same data blocks, and which are grouped together because they share
common columns and are often used together. The related columns of tables stored in a cluster are known as the
cluster key.
The Cluster Wizard lets you:
• Name the cluster owner.
• Name the cluster.
• Specify the tablespace where you want to create the cluster.
• Add columns to the cluster.
• Indicate the cluster type: index or hash.
• Specify how Oracle should allocate data blocks to store the cluster.
• Specify how Oracle should manage the growth of the cluster.
Option Description
Please select the view
options to include
Lets you select view options.
Create Check
Constraint Dialog Box
Cluster Wizard Database Link Wizard Directory Wizard
Foreign Key Wizard Function Wizard Index Wizard Job Queue Wizard
Library Wizard Materialized View
Wizard
Materialized View Log
Wizard
Package Wizard
Create Primary Key
Constraint Dialog Box
Procedure Wizard Profile Wizard Redo Log Group
Wizard
Role Wizard Rollback Segment
Wizard
Sequence Wizard Snapshot Wizard
Snapshot Log Wizard Stored Outline Wizard Synonym Wizard Table Wizard
Tablespace Wizard Trigger Wizard Object Type Wizard Create Unique Key
Constraint Dialog Box
User Wizard View Wizard
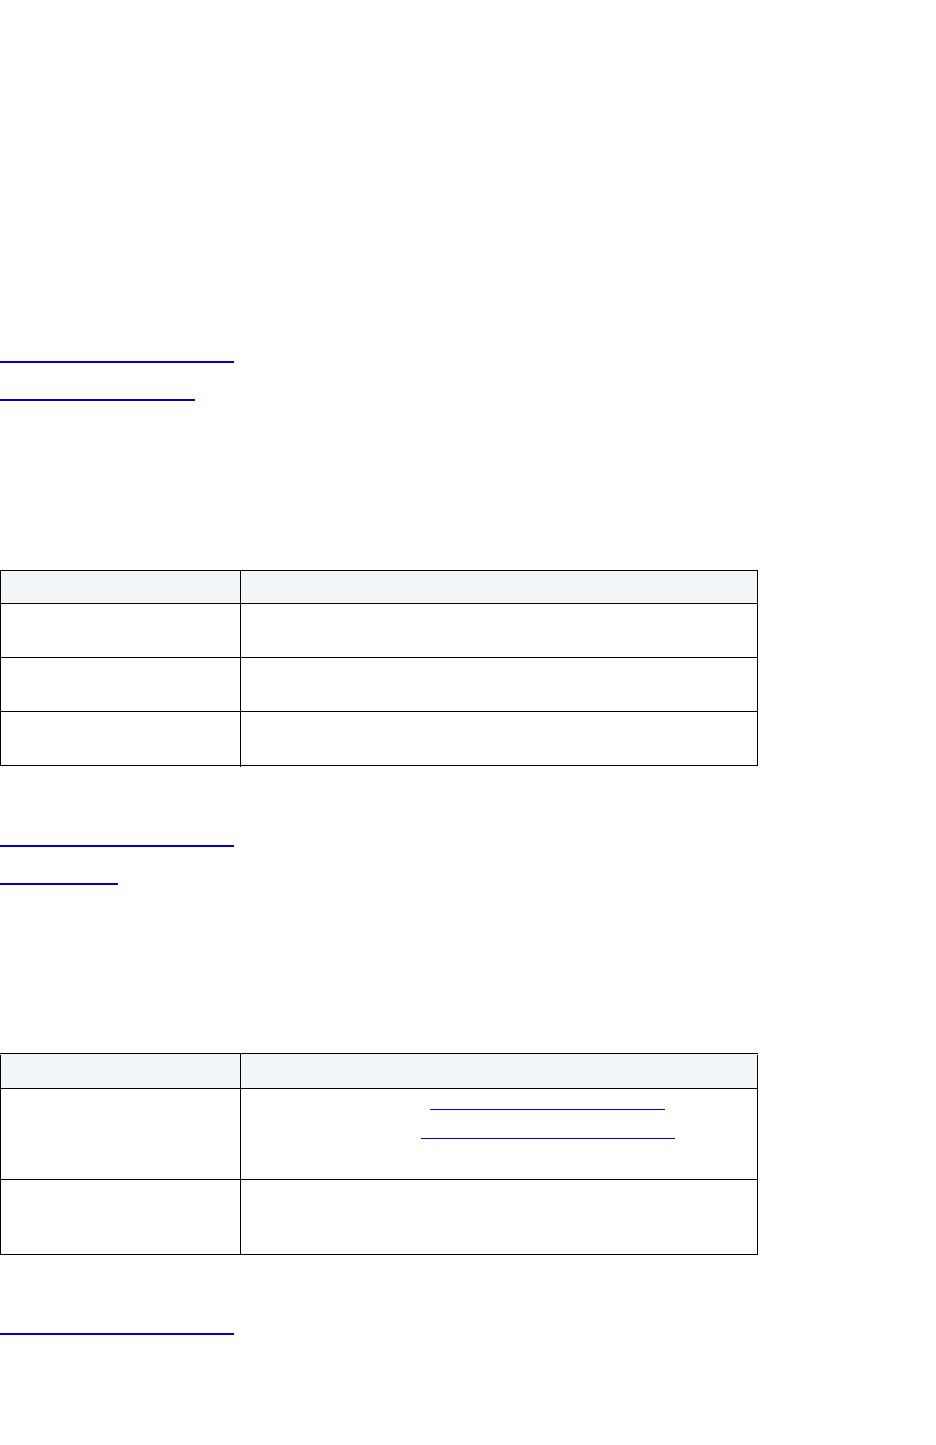
USING > FUNCTIONALITY
EMBARCADERO TECHNOLOGIES > BOOKNAMEVARIABLE 452
• Identify free lists.
• Identify free list groups.
• Specify a default bufferpool.
• Specify Oracle's Parallel Server options.
Important Notes
• To create a cluster, you need the CREATE CLUSTER or CREATE ANY CLUSTER system privilege.
For more information, see:
Completing an Object Wizard
Cluster Wizard - Panel 1
Cluster Wizard for Oracle - Panel 1
The table below describes the options and functionality on the first panel of the Cluster Wizard.
For more information, see:
Completing an Object Wizard
Cluster Wizard
Cluster Wizard for Oracle - Panel 2
The table below describes the options and functionality on the second panel of the Cluster Wizard.
For more information, see:
Completing an Object Wizard
Option Description
Who owns the cluster? Lets you type the name of the owner. It can be up to 30 characters
long.
What is the name of the
cluster?
Lets you type the name of the cluster. It can be up to 30 characters
long.
On which tablespace do you
want to create the cluster?
Lets you select the tablespace.
Option Description
Add columns that are in this
cluster
Add Button - Opens the Add Cluster Column dialog box.
Edit Button - Open the Modify Cluster Column dialog box
.
Drop Button - Drops the column.
What is the size of this
cluster?
Lets you type the value of the size of the cluster, and then click the
list to indicate the unit of measure: Bytes, KB, or MB. The cluster
size can not exceed the size of a single data block.
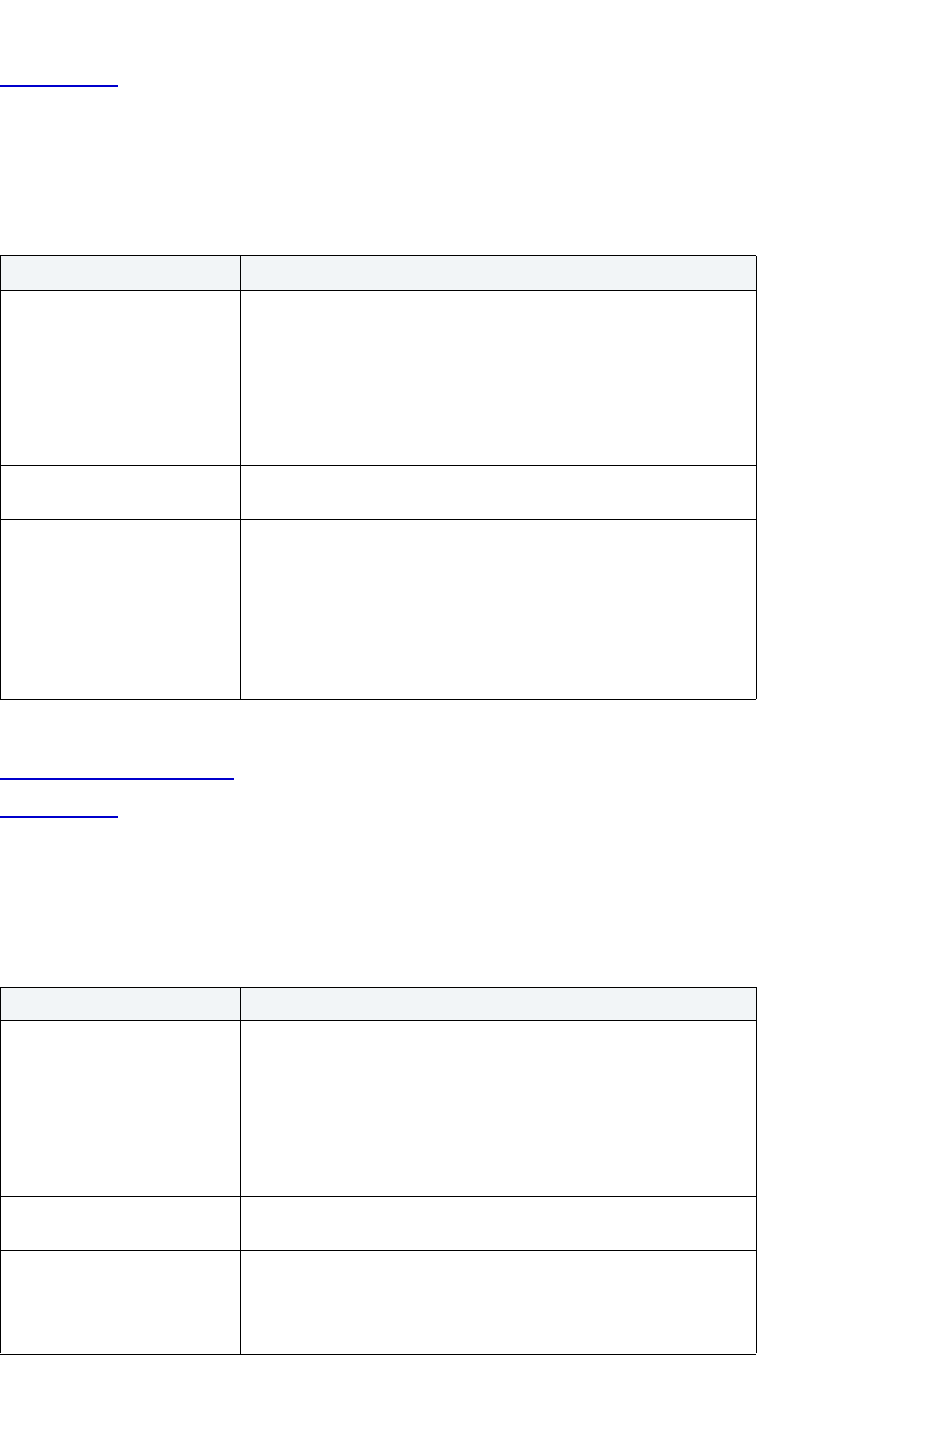
USING > FUNCTIONALITY
EMBARCADERO TECHNOLOGIES > BOOKNAMEVARIABLE 453
Cluster Wizard
Cluster Wizard for Oracle - Panel 3
The table below describes the options and functionality on the third panel of the Cluster Wizard.
For more information, see:
Completing an Object Wizard
Cluster Wizard
Cluster Wizard for Oracle - Panel 4
The table below describes the options and functionality on the fourth panel of the Cluster Wizard.
Option Description
What is the cluster type? Lets you select a cluster type:
Index Cluster - Store the cluster data together and index the cluster
key, which should make them faster at retrieving a range of data
rows.
Hash Cluster - Apply hashing functions to the cluster key to
determine the physical location of a data row, which should make
them faster at retrieving specific data rows.
If this is a hash cluster, what
is the number of hash keys?
Lets you type the number of hash keys.
What is the hash function? Oracle uses a hash function to generate a distribution of numeric
values, called hash values, which are based on specific cluster key
values. The key of a hash cluster, like the key of an index cluster,
can be a single column or composite key (multiple column key). To
find or store a row in a hash cluster, Oracle applies the hash
function to the row's cluster key value. The resulting hash value
corresponds to a data block in the cluster, which Oracle then reads
or writes on behalf of the issued statement.
Option Description
How many transactions are
allowed for each datablock in
the cluster?
Each transaction that updates a data block requires a transaction
entry.
Initial - The initial parameter ensures that a minimum number of
concurrent transactions can update a data block, avoiding the
overhead of allocating a transaction entry dynamically.
Maximum - The maximum parameter limits concurrency on a data
block.
What is the percent of space
reserved for future updates?
Percent Free - Lets you type a value in the corresponding box.
What is the minimum
percentage of used space
that ORACLE maintains for
each datablock?
The storage parameter lets you tune performance by minimizing
the occurrence of row migration and chaining caused by update
operations that extend the length of rows stored on the data block.
Percent Used - Lets you type a value in the corresponding box.
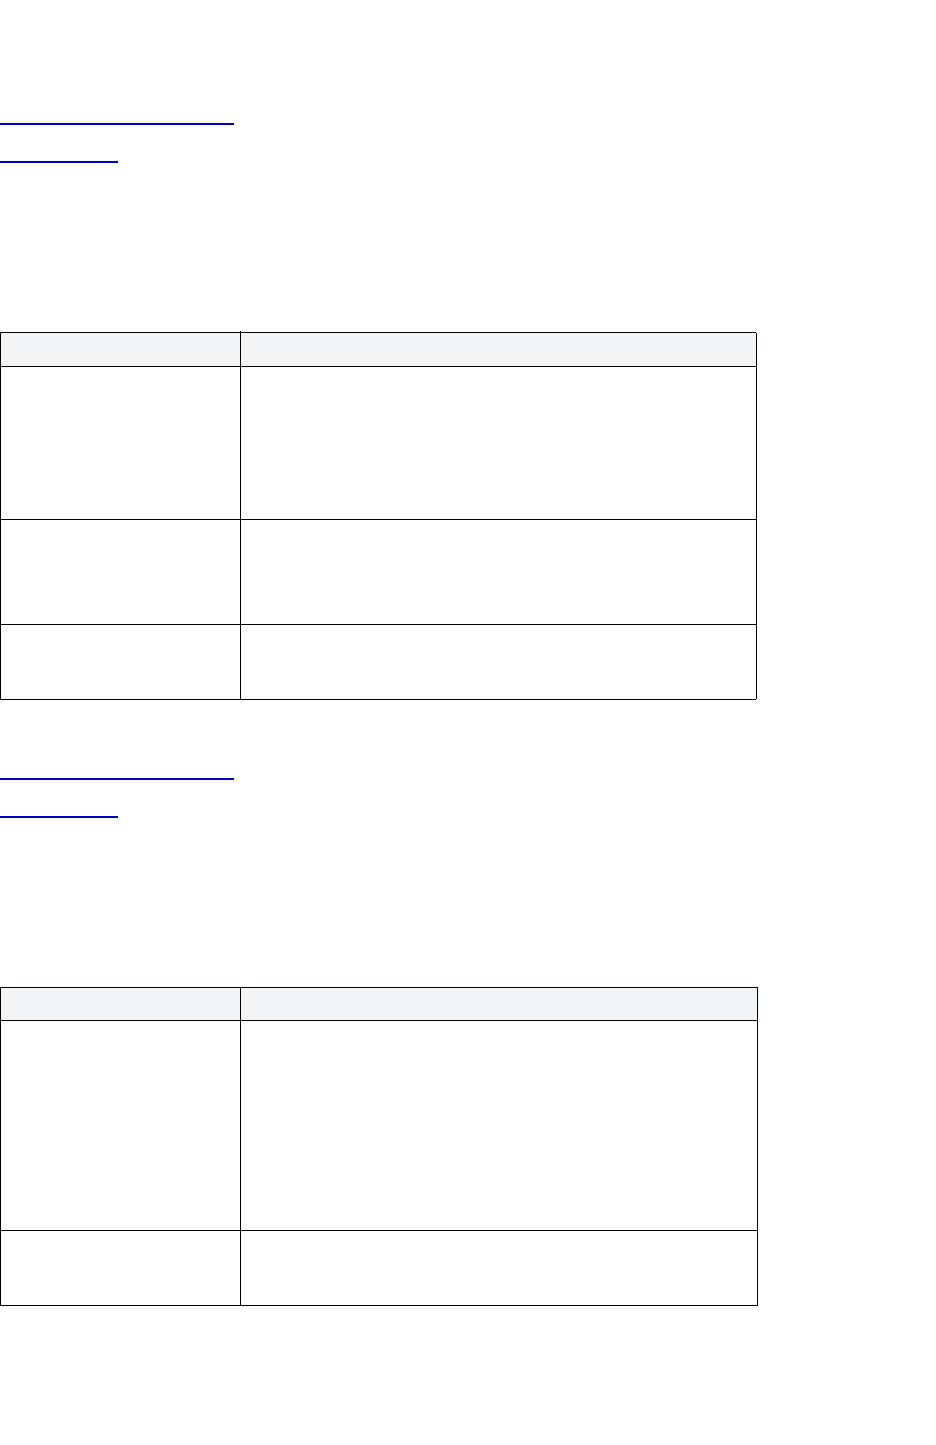
USING > FUNCTIONALITY
EMBARCADERO TECHNOLOGIES > BOOKNAMEVARIABLE 454
For more information, see:
Completing an Object Wizard
Cluster Wizard
Cluster Wizard for Oracle - Panel 5
The table below describes the options and functionality on the fifth panel of the Cluster Wizard.
For more information, see:
Completing an Object Wizard
Cluster Wizard
Cluster Wizard for Oracle - Panel 6
The table below describes the options and functionality on the sixth panel of the Cluster Wizard.
Option Description
How large are the cluster's
extents?
The unit of space allocated to an object whenever the object needs
more space.
Initial Extent - The initial space extent (in bytes) allocated to the
object.
Next Extent - The next extent (in bytes) that the object will attempt
to allocate when more space for the object is required.
How extents should be
allocated to the cluster?
Minimum Extents - The appropriate minimum extents value for the
object.
Maximum Extents - The appropriate maximum extents value for
the object.
What is the growth rate for
sizing additional extents?
Percent Increase - Magnifies how an object grows and, can
materially affect available free space in a tablespace. Select a
value in the corresponding box.
Option Description
Specify the number of free
lists
Free lists let you manage the allocation of data blocks when
concurrent processes are issued against the cluster. Identifying
multiple free lists can reduce contention for free lists when
concurrent inserts take place and potentially improve the
performance of the cluster.
Free Lists - Lets you select the list or type a value in the
corresponding box. The default and minimum value is 1; this option
should be set higher if multiple processes access the same data
block.
Specify the number of free list
groups
Free Lists Groups - Lets you select the list or type a value in the
corresponding box. The default and minimum value is 1; this option
is only applicable for the parallel server option.
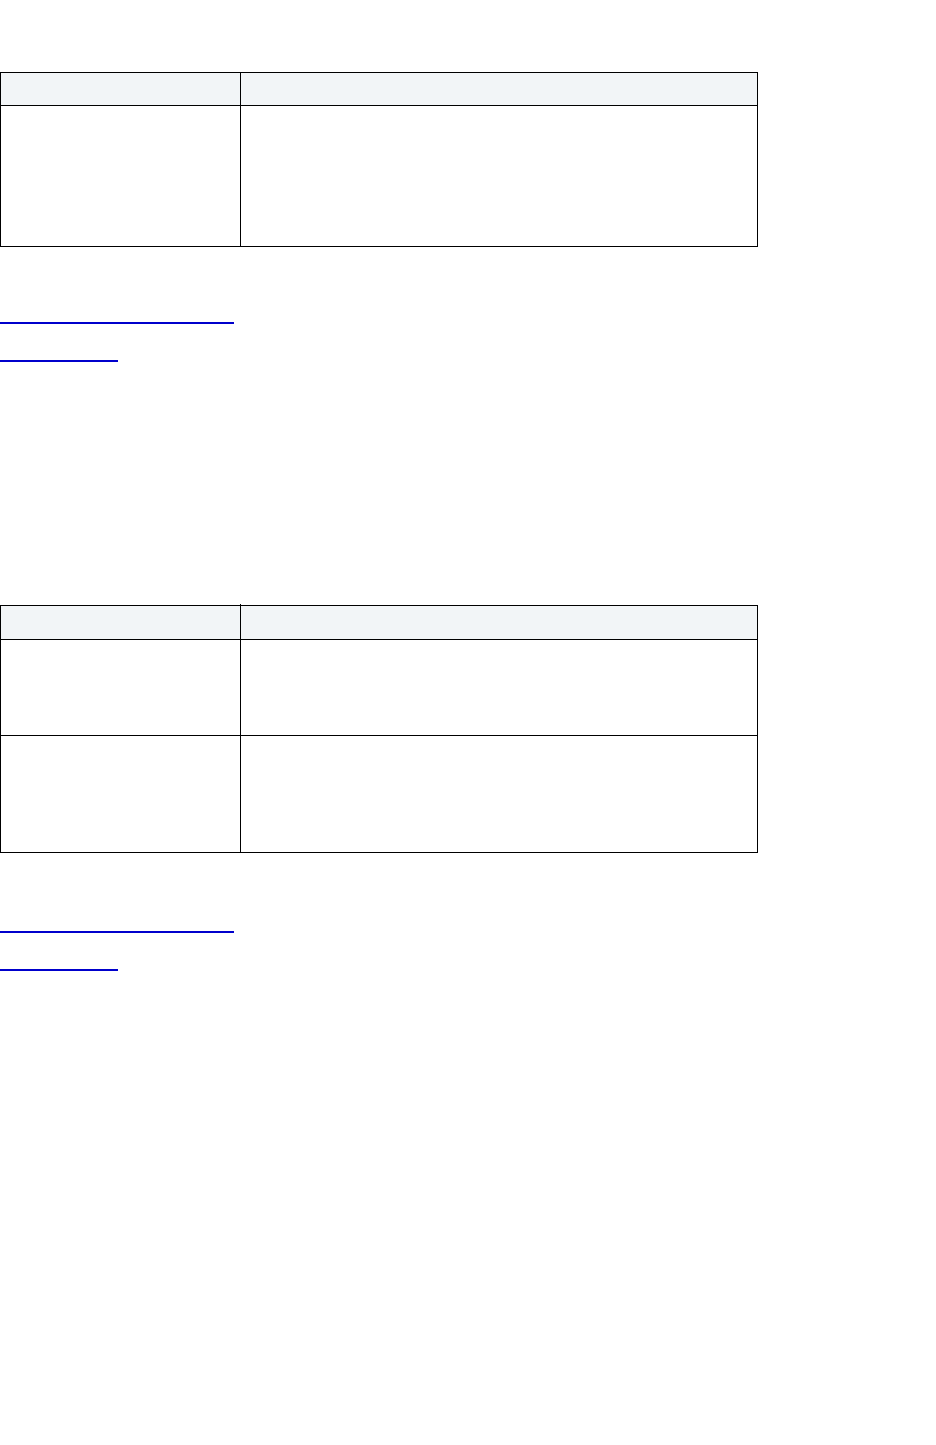
USING > FUNCTIONALITY
EMBARCADERO TECHNOLOGIES > BOOKNAMEVARIABLE 455
For more information, see:
Completing an Object Wizard
Cluster Wizard
Cluster Wizard for Oracle - Panel 7
The table below describes the options and functionality on the seventh panel of the Cluster Wizard.
NOTE: This panel is only applicable when you are using Oracle with the Parallel Server in parallel query
mode.
For more information, see:
Completing an Object Wizard
Cluster Wizard
Database Link Wizard for Oracle
The Database Link Wizard lets you create a database link. Database links are named schema objects that describe a
path from one database to another. Database links are implicitly used when a reference is made to a global object
name in a distributed database. To use a database link, either it is public or you own it.
The Database Link Wizard lets you:
• Name the database link and to specify if it should be public.
• Specify how to connect to a remote database.
Important Notes
•None
Define a default bufferpool for
this cluster
Bufferpool - Lets you select an option:
Default - Select to retain the default.
Keep - Select to retain the object in memory to avoid I/O conflicts.
ORACLE 8i ONLY: Recycle - Select to rid data blocks from
memory as soon as they are no longer in use.
Option Description
You can achieve substantial
performance gains by using
Oracle's parallel query option
type
The Parallel server query option lets you process queries using
many query server processes running against multiple CPUs,
which provides substantial performance gains such as reduction of
the query completion time.
Choosing Cache keeps the
blocks in memory by placing
it at the most recently used
end. This option is useful for
small lookup tables.
Lets you select an option button.
Option Description
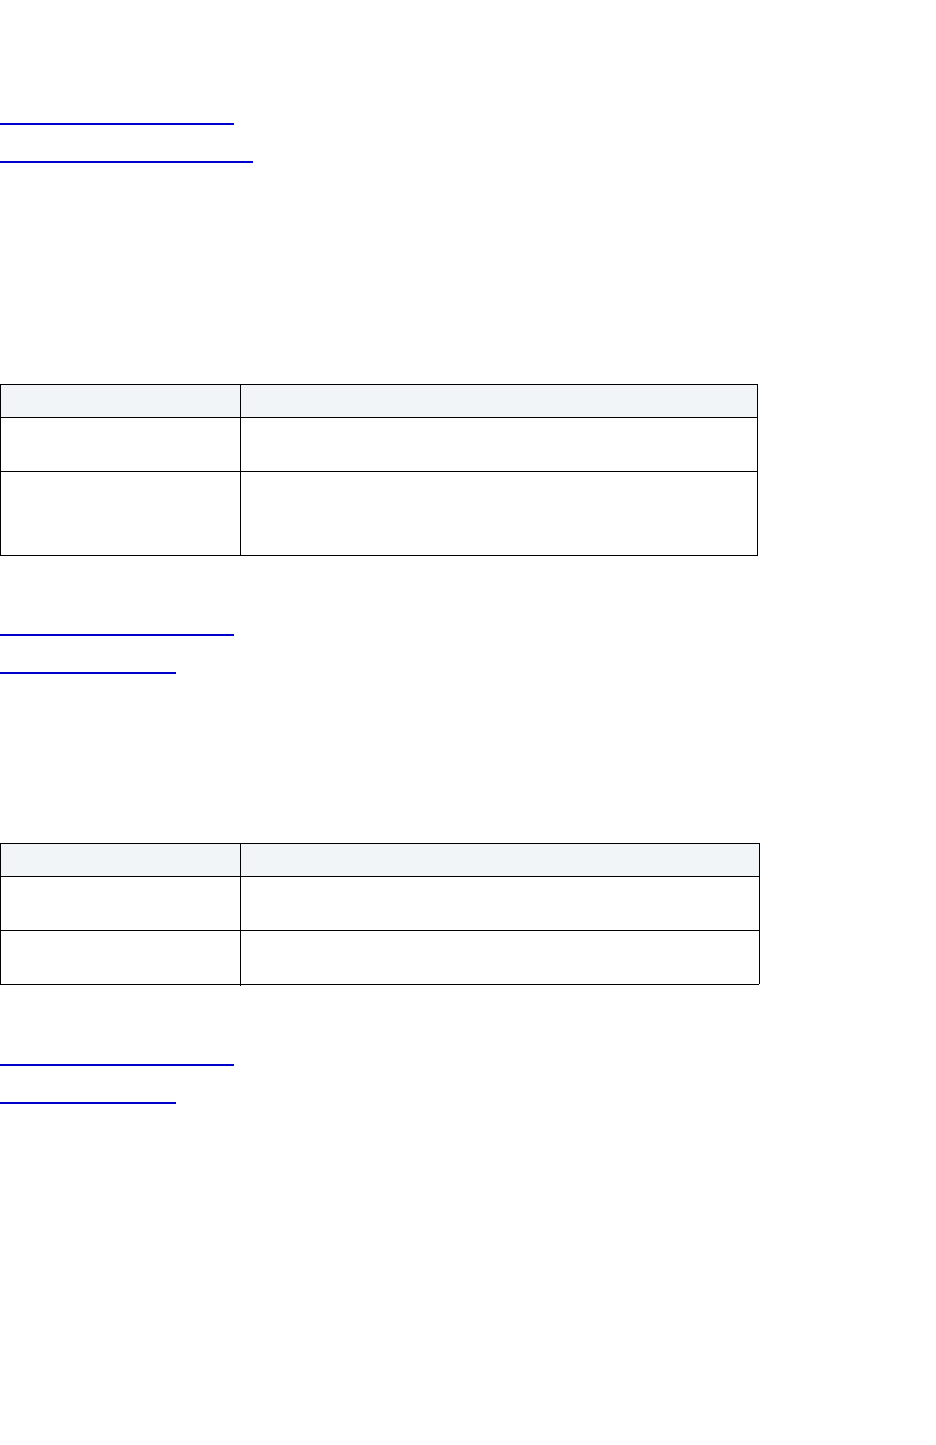
USING > FUNCTIONALITY
EMBARCADERO TECHNOLOGIES > BOOKNAMEVARIABLE 456
For more information, see:
Completing an Object Wizard
Database Link Wizard - Panel 1
Database Link Wizard for Oracle - Panel 1
The table below describes the options and functionality on the first panel of the Database Link Wizard.
NOTE: To create a public database link, you need CREATE PUBLIC DATABASE LINK privileges.
For more information, see:
Completing an Object Wizard
Database Link Wizard
Database Link Wizard for Oracle - Panel 2
The table below describes the options and functionality on the second panel of the Database Link Wizard.
For more information, see:
Completing an Object Wizard
Database Link Wizard
Directory Wizard for Oracle
The Directory Wizard lets you create a directory without knowing the underlying commands. As you complete the
Directory Wizard, Rapid SQL constructs the necessary CREATE DIRECTORY statement from the information that you
have supplied. The Directory Wizard prompts you to name the directory and provide the full-qualified directory path.
Important Notes
•None
Option Description
What is the name of the
database link box?
Lets you type the database link name.
Should the database link be
public?
Click Yes or No.
NOTE: To create a public database link, you must have CREATE
PUBLIC DATABASE LINK privileges.
Option Description
What is the name of the
remote user?
Lets you type the remote user's name.
What is the remote user's
password?
Lets you type the remote user's password.
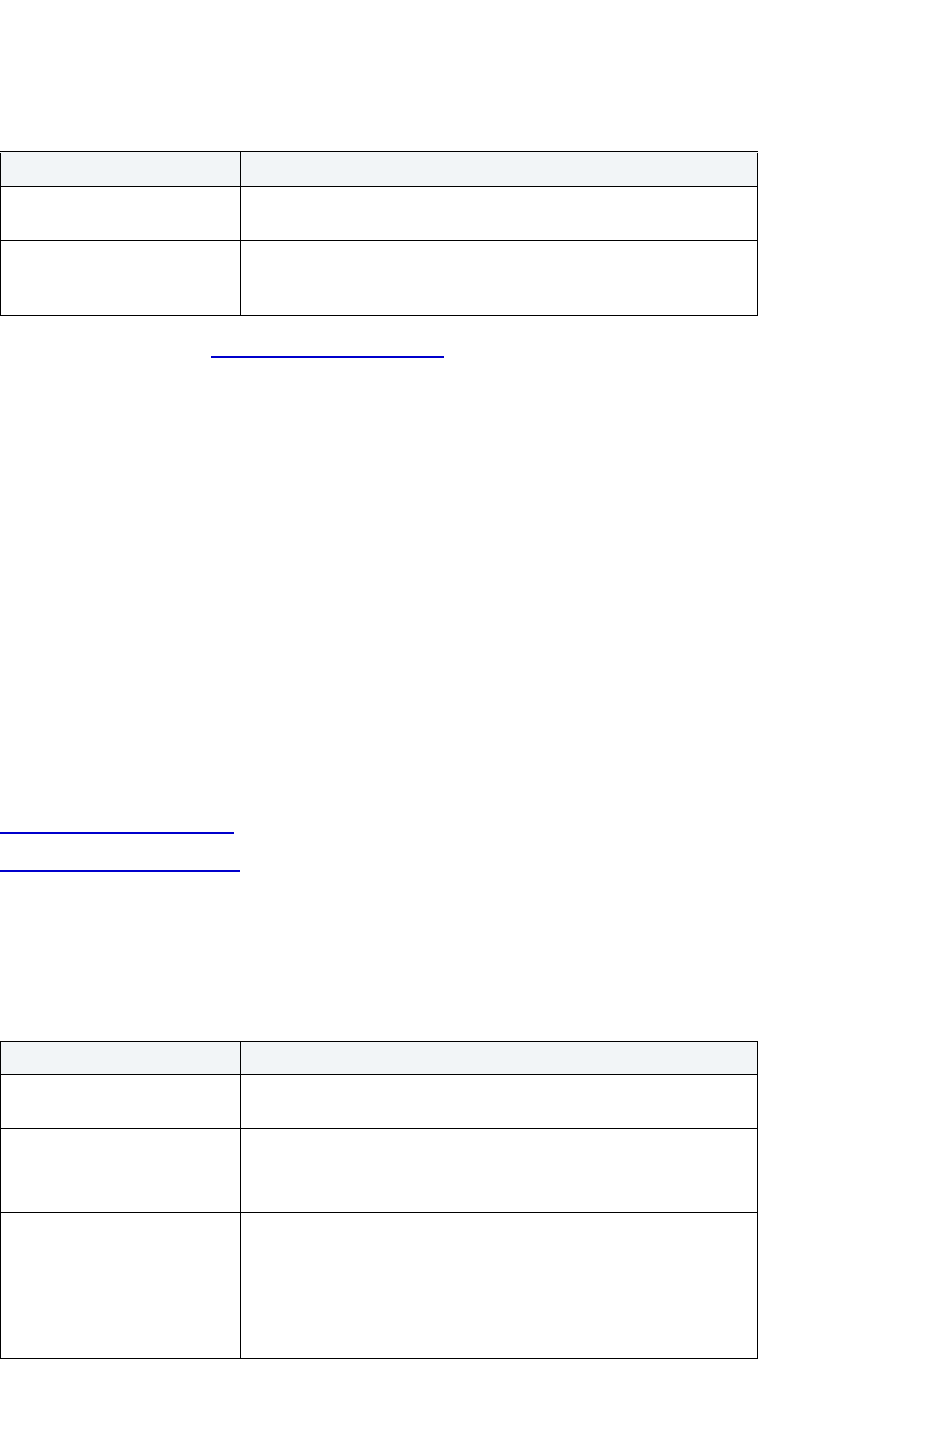
USING > FUNCTIONALITY
EMBARCADERO TECHNOLOGIES > BOOKNAMEVARIABLE 457
The table below describes the options and functionality on the first panel of the Directory Wizard.
For more information, see Completing an Object Wizard
.
Foreign Key Wizard for Oracle
The Foreign Key Wizard lets you create a foreign key. Foreign keys enforce referential integrity between tables by
verifying the existence of foreign key values in the parent table before letting you insert or update foreign key values in
the child table.
The Foreign Key Wizard lets you:
• Name the foreign key constraint
• Identify the parent table and the referenced constraint.
• Map the column pairs between the parent and child tables.
Important Notes
•None
For more information, see:
Completing an Object Wizard
Foreign Key Wizard - Panel 1
Foreign Key Wizard for Oracle - Panel 1
The table below describes the options and functionality on the first panel of the Foreign Key Wizard.
Option Description
What is the name of the
directory?
Lets you type the directory name.
What is the directory path? Lets you type the full path name of the outside operating system
directory which you want to alias in the directory (for example,
/Video/Library/G_Rated.)
Option Description
Which table will host the
constraint?
Lets you select the owner and table.
What will be the name of this
new constraint?
System Generated Name - Lets Oracle automatically generate a
name.
User Specified Constraint Name - Lets you enter a name.
Do you want the foreign key
to cascade the deletion of
primary key values?
To make the foreign key cascade the deletion of any primary key
values in the parent table to corresponding foreign key values in
child tables, click the Yes option button.
If you do not want the foreign key to cascade the deletion of any
primary key values in the parent table to corresponding foreign key
values in child tables, click the No option button.

USING > FUNCTIONALITY
EMBARCADERO TECHNOLOGIES > BOOKNAMEVARIABLE 458
For more information, see:
Completing an Object Wizard
Foreign Key Wizard
Foreign Key Wizard for Oracle - Panel 2
The table below describes the options and functionality on the second panel of the Foreign Key Wizard.
For more information, see:
Completing an Object Wizard
Foreign Key Wizard
Foreign Key Wizard for Oracle - Panel 3
The table below describes the options and functionality on the third panel of the Foreign Key Wizard.
For more information, see:
Completing an Object Wizard
Foreign Key Wizard
Function Wizard for Oracle
The Function Wizard lets you create a function. Functions are subroutines that you define. Functions are useful for
reusable application logic. You can use functions to determine the best methods for controlling access and
manipulation of the underlying data contained in an object.
The Function Wizard lets you specify the function name, owner, and type.
What will be the status of this
constraint?
Enabled -Ensures that all data modifications upon a given table (or
tables) satisfy the conditions of the constraints.
Disabled - Constraint is temporarily not operational.
Option Description
Select the parent table to
reference?
Lets you select the table owner and the parent table owner.
Table Name Lets you select the parent table name.
Select the parent table
constraint
Lets you select the primary and unique key constraints you want to
reference.
Option Description
Select column associations Lets you map the foreign key columns between the child and
parent tables.
Option Description

USING > FUNCTIONALITY
EMBARCADERO TECHNOLOGIES > BOOKNAMEVARIABLE 459
Important Note
• To create a function in your own schema, you need CREATE PROCEDURE privileges. To create a function in
someone else's schema, you need CREATE ANY PROCEDURE privileges.
The table below describes the options and functionality on the Function Wizard.
For more information, see Completing an Object Wizard
.
Index Wizard for Oracle
The Index Wizard lets you create an index. Indexes are optional structures associated with tables. You can create
indexes specifically to speed SQL statement execution on a table. When properly used, Indexes are the primary
means of reducing disk I/O. Indexes are logically and physically independent of the data in the associated table.
Unique Indexes guarantee that no two rows of a table have duplicate values in the columns that define the index.
The Index Wizard lets you specify:
• Index owner.
• Table indexed.
• Index name.
• Index properties.
• The table columns that participate in the index.
• The tablespace on which to place the index.
• How Oracle should store the index on blocks.
• Oracle's Parallel Server options.
• How Oracle should allocate additional extents as the index grows.
• Storage parameters for the index.
• The partitioning columns.
• An ordered list of partitions by adding, inserting, editing, or dropping.
Important Notes
• The Index Wizard varies slightly in content based on the version of Oracle to which you are connected.
• To create indexes in your own schema, you need INDEX privileges on the target table. To create indexes in other
schema, you need CREATE ANY INDEX privileges.
For more information, see:
Completing an Object Wizard
Index Wizard - Panel 1
Option Description
Who will own the function? Lets you select the function owner.
What is the name of the
function?
Lets you enter the function name.

USING > FUNCTIONALITY
EMBARCADERO TECHNOLOGIES > BOOKNAMEVARIABLE 460
Index Wizard for Oracle - Panel 1
The table below describes the options and functionality on the first panel of the Index Wizard.
NOTE: For Oracle 8i or later, you can place a unique key constraint on an Index-Organized table.
TIP: Index-organized tables take up less storage space and quickly access table rows.
Index-organized tables stores rows in primary key order reducing the amount of storage space
needed.
TIP: An advantage of using index-organized tables is that the tables use less memory because key
columns are not duplicated in the table and index. Rapid SQL stores the remaining non-key
columns in the index structure.
For more information, see:
Completing an Object Wizard
Option Description
Who owns the table to be
indexed?
Lets you select a table owner.
What is the table to be
indexed?
Lets you select a table.
Who owns the index to be
created?
Lets you select the index owner.
What is the name of the index
index?
Lets you enter an index name.
For Convert to Partitioned
Index Wizard:
Partitioning Method
Lets you select your partitioning method:
Global index partitioning -A global partitioned index can refer to
rows in more than one table partition or subpartition. Global
partitioned indexes are more difficult to manage than local
partitioned indexes because any change in the underlying table
partition affects all partitions in a global index. As a result, there is
increased partition maintenance.
NOTE: A global index can only be range partitioned but it can be
defined on any kind of partitioned table.
Local index partitioning - A local partitioned index has keys that
refer to rows in a single table partition. A local partitioned index is
automatically partitioned to mirror the underlying table. The
number of partitions or subpartitions and the partition bounds for
the partitioned index correspond with the partitions on the table.
Oracle maintains this correspondence. If the table partitions are
altered, the index partitions are altered accordingly.
A local partitioned index is prefixed if it is partitioned on the same
column as the underlying table. The local partitioned index is non
prefixed if it is partitioned on a different column.
For local index partitioning, select the type of table:
Range - Range partitions partition the data in the table according to
a range of values.
Composite - Composite partitions use both range and hash types,
first partitioning the data by a range of values, and then further
dividing the partitions into subpartitions by way of a hash function.
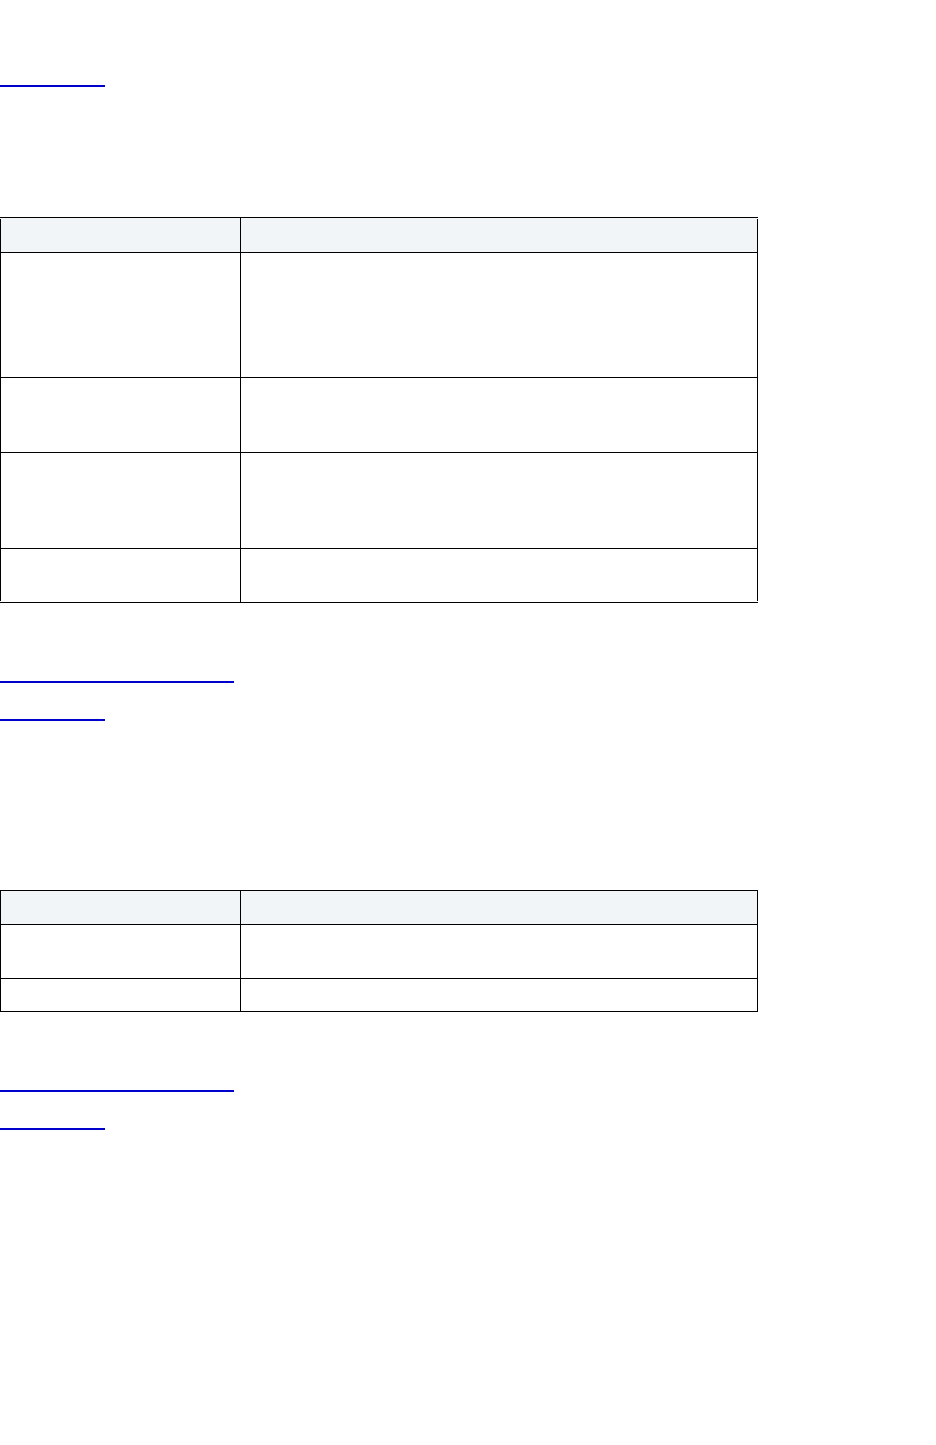
USING > FUNCTIONALITY
EMBARCADERO TECHNOLOGIES > BOOKNAMEVARIABLE 461
Index Wizard
Index Wizard for Oracle - Panel 2
The table below describes the options and functionality on the second panel of the Index Wizard:
For more information, see:
Completing an Object Wizard
Index Wizard
Index Wizard for Oracle - Panel 3
The table below describes the options and functionality on the third panel of the Index Wizard.
For more information, see:
Completing an Object Wizard
Index Wizard
Index Wizard for Oracle - Panel 4
The table below describes the options and functionality on the fourth panel of the Index Wizard.
Option Description
What type of index do you
wish to create?
Unique - Select if the index is a unique constraint.The values in the
indexed columns must be distinct
Bitmap - Widely used in data warehousing environments. The
environments typically have large amounts of data and ad hoc
queries, but a low level of concurrent DML transactions.
Are the rows in the table
already stored in ascending
order?
Increases the speed of the index creation process. Oracle does not
sort the rows.
Do you want to store the
bytes of the index block in
reverse order?
Stores the bytes of the index block in reverse order and to exclude
the ROWID. The ROWID is a globally unique identifier for a row in
a database. It is created at the time the row is inserted into a table,
and destroyed when it is removed from a table.
Is the index function-based? Permits the results of known queries to be returned much more
quickly.
Option Description
Select the Index Columns In the grid, click the table columns to include in the index, and then
click the right arrow button.
Currently Selected Columns Click the up and down arrows to change column location.
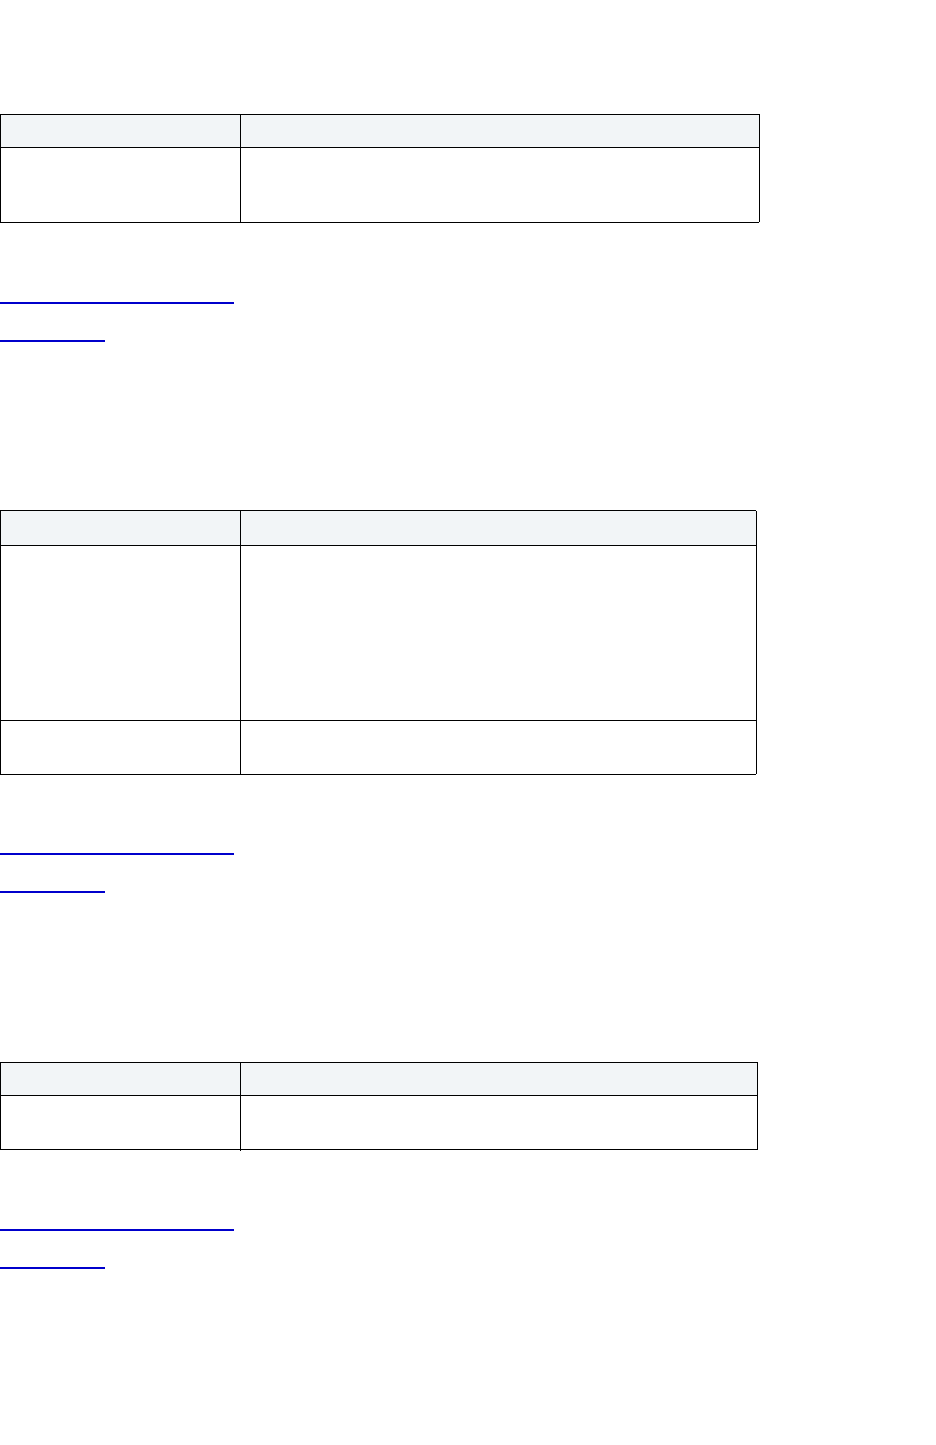
USING > FUNCTIONALITY
EMBARCADERO TECHNOLOGIES > BOOKNAMEVARIABLE 462
For more information, see:
Completing an Object Wizard
Index Wizard
Index Wizard for Oracle - Panel 5
The table below describes the options and functionality on the fifth panel of the Index Wizard.
For more information, see:
Completing an Object Wizard
Index Wizard
Index Wizard for Oracle - Panel 6
The table below describes the options and functionality on the sixth panel of the Index Wizard.
For more information, see:
Completing an Object Wizard
Index Wizard
Option Description
On which tablespace do you
wish to place the index?
Select DEFAULT instead of a tablespace only if you are creating a
local partitioned index and want the partitions in the same
tablespace as the partitions in the underlying table.
Option Description
In how many transaction
entries are allowed for each
datablock of the index?
Each transaction that updates an index block requires a
transaction entry.
Initial - Ensures that a minimum number of concurrent transactions
can update an index block, avoiding the overhead of allocating a
transaction entry dynamically.
Maximum - The maximum parameter limits concurrency on an
index block.
What is the percent of space
reserved for future updates?
Percent Free - Lets you type the percentage.
Option Description
Would you like to estimate
the size of the table?
Select to estimate how large the table will become given a row
growth projection.

USING > FUNCTIONALITY
EMBARCADERO TECHNOLOGIES > BOOKNAMEVARIABLE 463
Index Wizard for Oracle - Panel 7
The table below describes the options and functionality on the seventh panel of the Index Wizard.
NOTE: This panel is only applicable when you are using Oracle with the Parallel Server in parallel query
mode.
For more information, see:
Completing an Object Wizard
Index Wizard
Index Wizard for Oracle - Panel 8
The table below describes the options and functionality on the eighth panel of the Index Wizard.
For more information, see:
Completing an Object Wizard
Index Wizard
Option Description
You can achieve substantial
performance gains by using
Oracle's parallel query option.
The Parallel server query option lets you process queries, using
many query server processes, running against multiple CPU's.
This option provides substantial performance gains such as
reduction of the query completion time.
Degree - Lets you type a value indicating the number of query
server processes that should be used in the operation.
Instances - Lets you type a value indicating how you want the
parallel query partitioned between the Parallel Servers.
Do you want this operation
logged in the redo file?
NOTE: This option is only available if your database is running in
ARCHIVELOG mode.
Option Description
How large are the indexes
extents?
The unit of space allocated to an object whenever the object needs
more space.
Initial Extent - The initial space extent (in bytes) allocated to the
object.
Next Extent - The next extent (in bytes) that the object will attempt
to allocate when more space for the object is required.
How many extents should be
allocated to the index?
Minimum Extents - The appropriate minimum extents value for the
object.
Maximum Extents - The appropriate maximum extents value for
the object.
What is the growth rate for
sizing additional extents?
NOTE: You should be careful when setting Percent Increase
because it magnifies how an object grows and, therefore, can
materially affect available free space in a tablespace.
Percentage Increase - Lets you type the percentage.

USING > FUNCTIONALITY
EMBARCADERO TECHNOLOGIES > BOOKNAMEVARIABLE 464
Index Wizard for Oracle - Panel 9
Free lists let you manage the allocation of data blocks when concurrent processes are issued against the index. You
can potentially improve the performance of the index by identifying multiple free lists, which can reduce contention for
free lists when concurrent inserts take place. If you are working with Oracle8, you have the option of creating a
partitioned index.
For more information, see:
Oracle Partitioning
Completing an Object Wizard
Index Wizard
Index Wizard for Oracle - Panel 10
NOTE: This panel only displays if you selected the partitioning in panel 9.
The table below describes the options and functionality on the ninth panel of the Index Wizard.
Option Description
Specify the number of free
lists?
Lets you select or type the value. The default and minimum value is
1. You should increase this number if multiple processes access
the same data block.
Specify the number of free list
groups?
NOTE: This option is only applicable for the parallel server option.
Lets you select or type the value. The default and minimum value is
1.
Define a bufferpool for this
index
Default - To use the default bufferpool.
Keep - To retain the object in memory to avoid I/O conflicts.
NOTE: The Recycle option is only available for Oracle8.
Recycle - To save cache space by ridding data blocks from
memory as soon as they are no longer in use.
Do you want to partition this
index?
Lets you partition the index.
Select whether partitioning of
the index will be user-defined
(global) or automatically
equi-partitioned with the with
the underlying table (local):
NOTE: This option is only applicable for the partitioning option.
Global index partitioning - A global partitioned index is an index on
a partitioned or non-partitioned table which is partitioned using a
different partitioning-key from the table. Global-partitioned indexes
can only be partitioned using range partitioning. For example, a
table could be range-partitioned by month and have twelve
partitions, while an index on that table could be range-partitioned
using a different partitioning key and have a different number of
partitions.
Local index partitioning - Select if you want Rapid SQL to partition
the index on the same columns, with the same amount of
partitions, and the same partition bounds as the table.
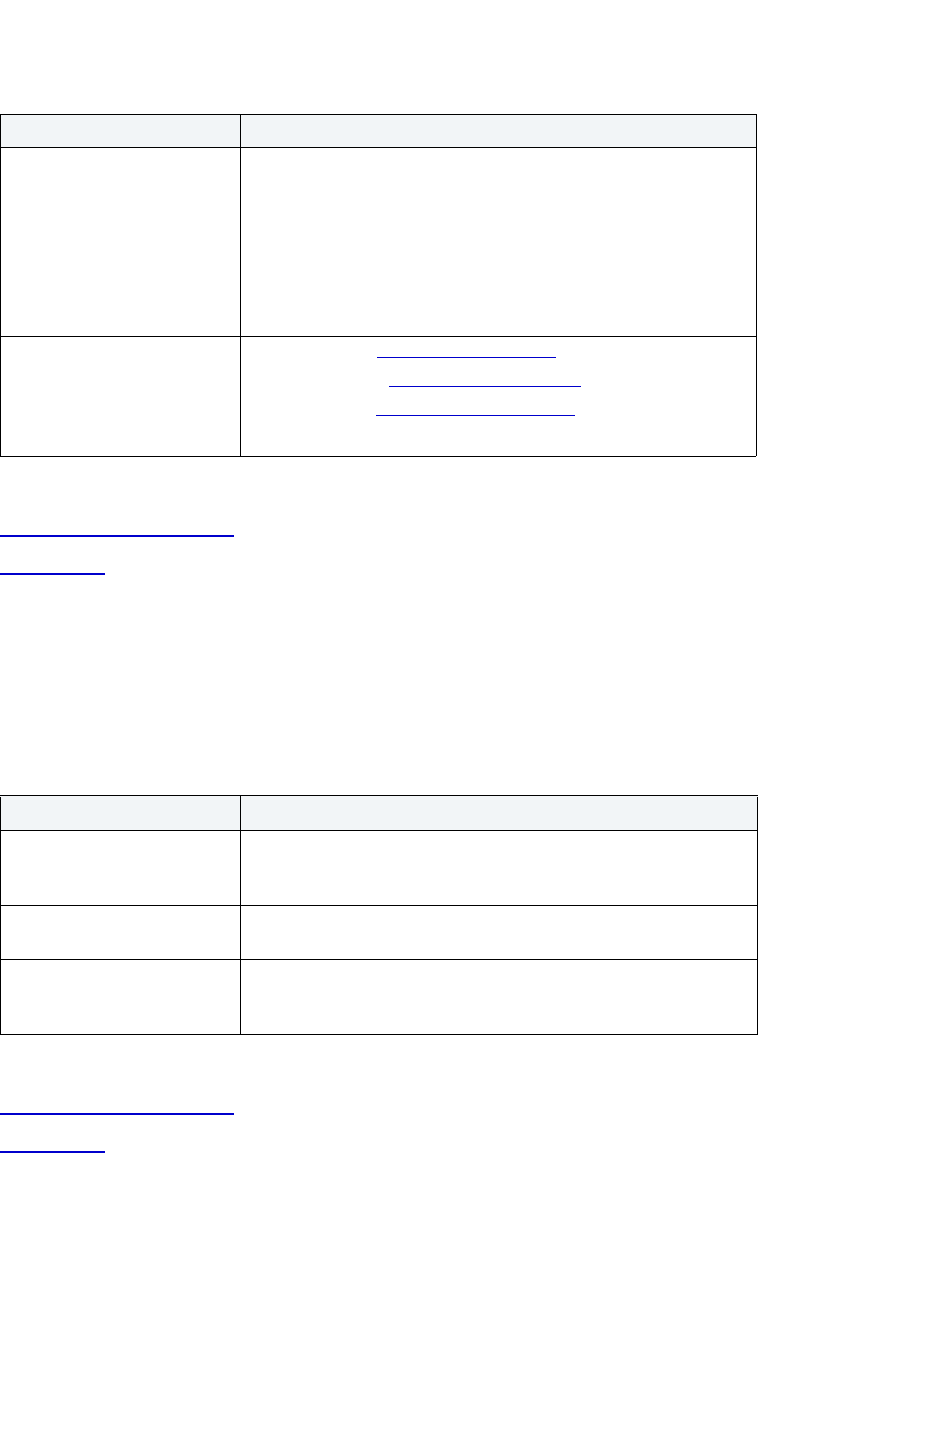
USING > FUNCTIONALITY
EMBARCADERO TECHNOLOGIES > BOOKNAMEVARIABLE 465
For more information, see:
Completing an Object Wizard
Index Wizard
Index Wizard for Oracle - Panel 10
NOTE: This option is only available in Oracle 9.2 or later.
The table below describes the options and functionality on this panel of the Table Wizard.
For more information, see:
Completing an Object Wizard
Index Wizard
Convert to Partitioned Index Wizard for Oracle
NOTE: This panel only displays if you selected the partitioning in panel 9.
The table below describes the options and functionality on the ninth panel of the Index Wizard.
Option Description
Select the partitioning
columns
Available Columns - Lets you select the target partitioning
columns, click the right button to move the columns to the selected
columns grid.
Selected Columns - To reorder the columns, click the up and down
buttons. You can create an ordered list with up to 16 partitioning
columns on the table. A partitioning column can not contain the
LEVEL, ROWID, or MLSLABEL pseudocode or a col of type
ROWID.
Create a list of ordered
partitions
Add - Opens the Add Partition dialog box
.
Insert - Opens the Insert Partition dialog box
.
Edit - Opens the Modify Partition dialog box
.
Drop - Lets you drop a partition.
Option Description
The partitioning columns for
the table and index are listed
below
Available Columns - Lets you select at least one partitioning
column, and then click the right arrow button to move it to the
Selected Columns box.
The partitioning method is
selected below
Lets you specify which partitioning method to use, hash or list.
The subpartitioning columns
for the table and index are
listed below
Available Columns - Lets you select at least one subpartitioning
column, and then click the right arrow button to move it to the
Selected Columns box.
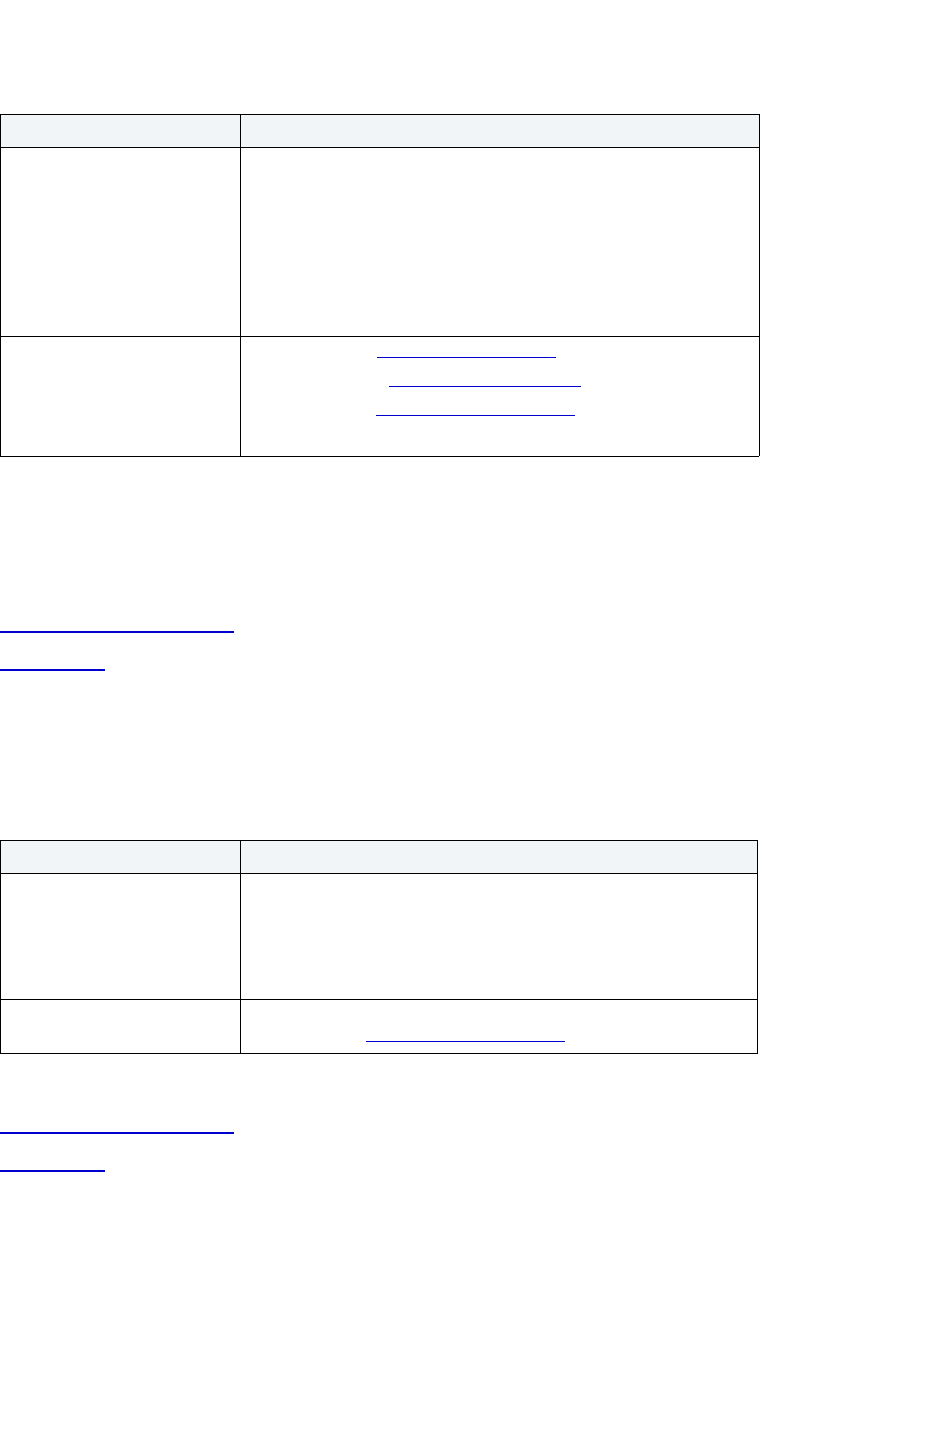
USING > FUNCTIONALITY
EMBARCADERO TECHNOLOGIES > BOOKNAMEVARIABLE 466
Index Partition Space Dialog Box
The Index Partition Space is a read-only dialog box that lets the parameters set for the target index.
For more information, see:
Completing an Object Wizard
Index Wizard
Index Wizard for Oracle - Panel 10
The table below describes the options and functionality on the tenth panel of the Index Wizard.
For more information, see:
Completing an Object Wizard
Index Wizard
Job Queue Wizard for Oracle
The Job Queue Wizard lets you create a new job for the Oracle job queues. Job Queues are built-in mechanisms that
let you schedule a variety of SQL-based or command-line driven tasks.
The Job Queue Wizard lets you:
Option Description
Select the partitioning
columns
Available Columns - Lets you select the target partitioning columns,
click the right button to move the columns to the selected columns
grid.
Selected Columns - To reorder the columns, click the up and down
buttons. You can create an ordered list with up to 16 partitioning
columns on the table. A partitioning column can not contain the
LEVEL, ROWID, or MLSLABEL pseudocode or a col of type
ROWID.
Create a list of ordered
partitions
Add - Opens the Add Partition dialog box
.
Insert - Opens the Insert Partition dialog box
.
Edit - Opens the Modify Partition dialog box
.
Drop - Lets you drop a partition.
Option Description
Where do you want the
subpartitions to be stored?
The tablespace specified at the index level - Select if you want
Rapid SQL to specify tablespace at the index level.
The same tablespaces as those used for the corresponding table
subpartitions - Select to use the same tablespaces as those used
for the corresponding table subpartitions.
Create an ordered list of
partitions
Lets you edit existing partitions. Click the Edit button and Rapid
SQL opens the Modify Partition dialog box
.
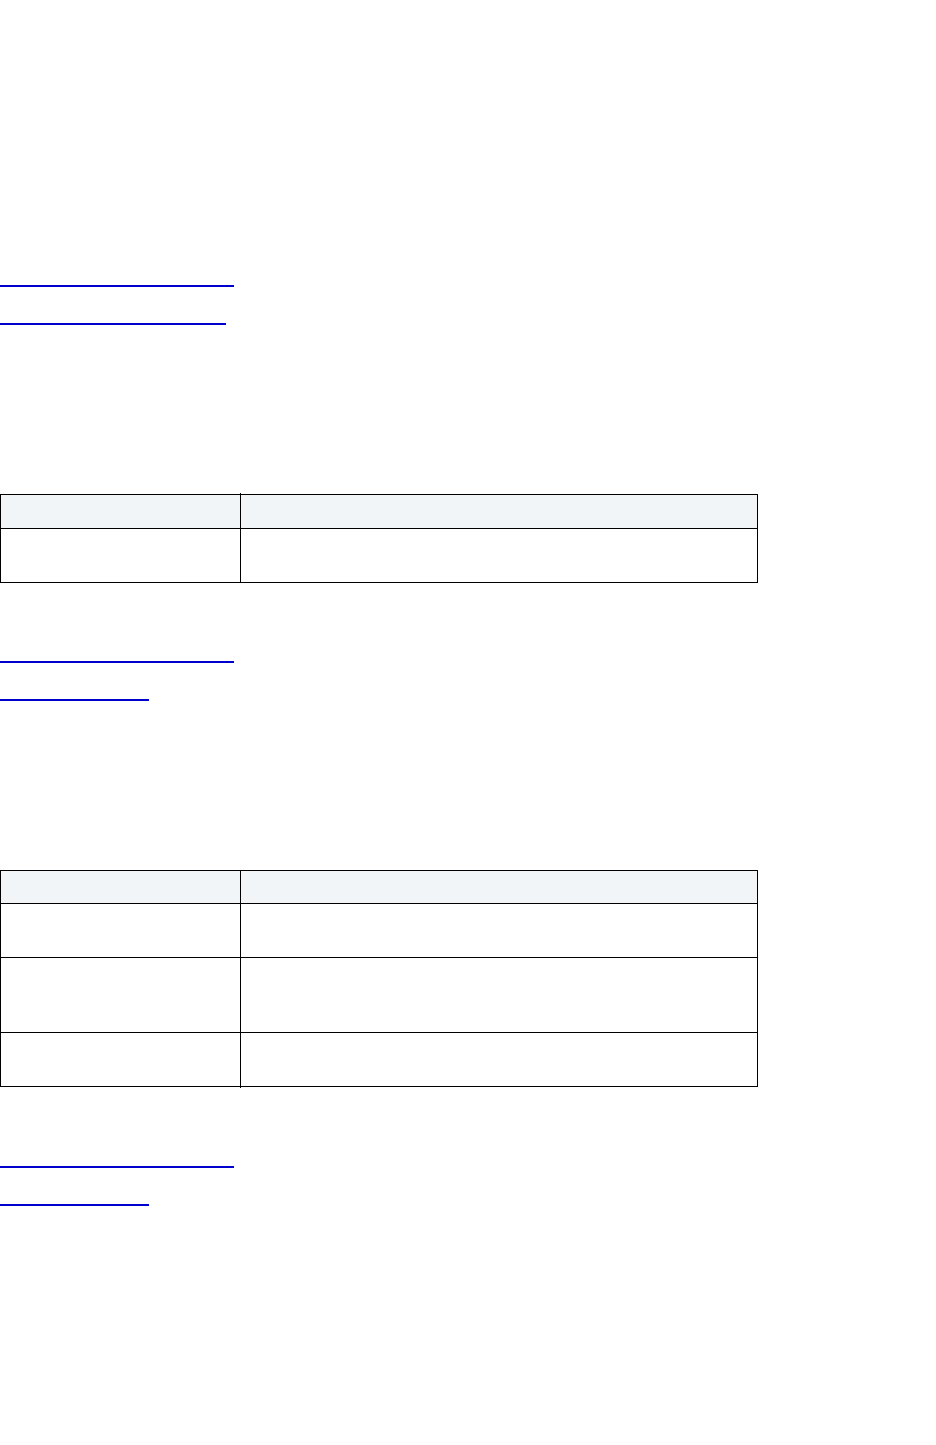
USING > FUNCTIONALITY
EMBARCADERO TECHNOLOGIES > BOOKNAMEVARIABLE 467
• Specify the PL/SQL code that will run in the job.
• Specify when the job will run, if it will run again, and if it should be enabled to run.
Important Notes
None
For more information, see:
Completing an Object Wizard
Job Queue Wizard - Panel 1
Job Queue Wizard for Oracle - Panel 1
The table below describes the options and functionality on the first panel of the Job Queue Wizard.
For more information, see:
Completing an Object Wizard
Job Queue Wizard
Job Queue Wizard for Oracle - Panel 2
The table below describes the options and functionality on the second panel of the Job Queue Wizard.
For more information, see:
Completing an Object Wizard
Job Queue Wizard
Option Description
Enter the PL/SQL code you
would like submitted
Lets you type PL/SQL code, or retrieve a previously saved PL/SQL
script.
Option Description
When would you like for the
job to begin execution?
Lets you select the job's start date/time.
Would you like to have the job
run on an ongoing basis?
Lets you determine if the job should be periodically re-executed.
You can choose how often by entering in a numeric value in the
Every box and then making a selection from the list
Would you like to have the job
submitted as disabled?
Lets you specify if the job should originally be submitted as
disabled or enabled.
USING > FUNCTIONALITY
EMBARCADERO TECHNOLOGIES > BOOKNAMEVARIABLE 468
Library Wizard for Oracle
The Library Wizard lets you create a library without knowing the underlying commands. Libraries are an object type
introduced in Oracle8 that represent a call to an operating system shared library. After the call is made, libraries can
be used by SQL or PL/SQL to link to external procedures or functions. Libraries are only to be used on operating
systems that support shared libraries and dynamic linking. Libraries serve as pointers or aliases to physical operating
system shared library files and do not have existence as a physical object on their own, rather they rely on the
physical existence of the files in the external operating system library to which they refer. To access the function or
procedures stored in the library, you need execute privileges at the operating system level where the shared library
resides.
Important Notes
• To create a library in your own schema, you need CREATE ANY LIBRARY privileges. To use the functions or
procedures stored in the library, you need object EXECUTE privileges on the library.
The table below describes the options and functionality on the Library Wizard.
For more information, see Completing an Object Wizard
.
Materialized View Wizard for Oracle
The Materialized View Wizard lets you create a materialized view. Materialized views are used to dynamically copy
data between distributed databases.
The Materialized View Wizard lets you:
• Specify the materialized view owner and to name the materialized view.
• Specify the materialized view's refresh configuration.
• Place the materialized view on a tablespace and specify the query that should be used to populate the
materialized view.
• Specify how Oracle should allocate data blocks to store the materialized view.
• Specify how Oracle should manage the growth of the materialized view.
• Specify if Oracle updates the materialized view, register an existing table, and specify how to populate a
materialized view.
• Specify if the data for the materialized view is cached, if you want the updates logged, and to specify a number of
threads for a parallel operation.
• Specify rollback segments, and enable query rewrites.
Important Notes
•None
Option Description
Who owns the library? Lets you select the owner.
What is the name of the
library?
Lets you type the name.
What is the file specification? Lets you type the file name and location. You must type the
complete location (for example, D:\Embarcadero\ETLIB21D.DLL).
USING > FUNCTIONALITY
EMBARCADERO TECHNOLOGIES > BOOKNAMEVARIABLE 469
For more information, see:
Completing an Object Wizard
Materialized View Wizard - Panel 1
Materialized View Wizard for Oracle - Panel 1
The table below describes the options and functionality on the first panel of the Materialized View Wizard.
For more information, see:
Completing an Object Wizard
Materialized View Wizard
Materialized View Wizard for Oracle - Panel 2
The table below describes the options and functionality on the second panel of the Materialized View Wizard.
The table below describes the requirements for the fast refresh method:
Option Description
Who owns the materialized
view?
Lets you select the owner.
What is the name of the
materialized view?
Lets you type the name.
Option Description
How should the materialized
view be refreshed?
Fast - Select to refresh the materialized view using a materialized
view log.
Complete - Select to rebuild the materialized view when it
refreshes.
Force - Select to determine the fastest available refresh method
between Fast and Complete for the database.
Choose a refresh
mechanism:
On Demand - Select to refresh the materialized view on demand.
On Commit - Select to refresh the materialized view whenever
Oracle processes a transaction. Only select this option for
materialized views on single table aggregates and materialized
views containing joins.
Automatically - Select to refresh the materialized view
automatically. In the On this date: boxes select a time and date,
and then select a refresh amount and a unit of time.
When the
Materialized View
has:
Only Joins Joins and Aggregates Aggregate on a Single
Table

USING > FUNCTIONALITY
EMBARCADERO TECHNOLOGIES > BOOKNAMEVARIABLE 470
Detail tables only X X X
Single table only X
Table Appears
only once in the
FROM list
XX X
No non-repeating
expressions like
SYSDATE and
ROWNUM
XX X
No references to
RAW or LONG
RAW
X X X
No GROUP BY X
Rowids of all the
detail tables must
appear in the
SELECT list of
the query
X
Expressions are
allowed in the
GROUP BY and
SELECT clauses
provided they are
the same
XX
Aggregates
allowed but
cannot be nested
XX
AVG with COUNT X X
SUM with COUNT X
Only Joins Joins and Aggregates Aggregate on a Single
Table
VARIANCE with
COUNT and SUM
XX
STDDEV with
COUNT and SUM
XX
WHERE clause
includes join
predicates which
can be ANDed bit
not ORed.
XX
No WHERE
clause
X
No HAVING or
CONNECT BY
XX X
When the
Materialized View
has:

USING > FUNCTIONALITY
EMBARCADERO TECHNOLOGIES > BOOKNAMEVARIABLE 471
For more information, see:
Completing an Object Wizard
Materialized View Wizard
Materialized View Wizard for Oracle - Panel 3
The table below describes the options and functionality on the third panel of the Materialized View Wizard.
No subqueries,
inline views, or
set functions like
UNION or MINUS
X X X
COUNT(*) must
be present
X
No MIN and MAX
allowed
X
If outer joins, then
unique
constraints must
exist on the join
columns of the
inner join table
X
Materialized View
logs must exist
and contain all
columns
referenced in the
materialized view
and have been
created with the
LOG NEW
VALUES clause
X
Materialized View
Logs must exist
with rowids of all
the detail tables
X
Non-aggregate
expression in
SELECT and
GROUP BY must
be straight
columns
X
DML to detail
table
XX
Direct path data
load
XX X
ON COMMIT X X
ON DEMAND X X X
When the
Materialized View
has:
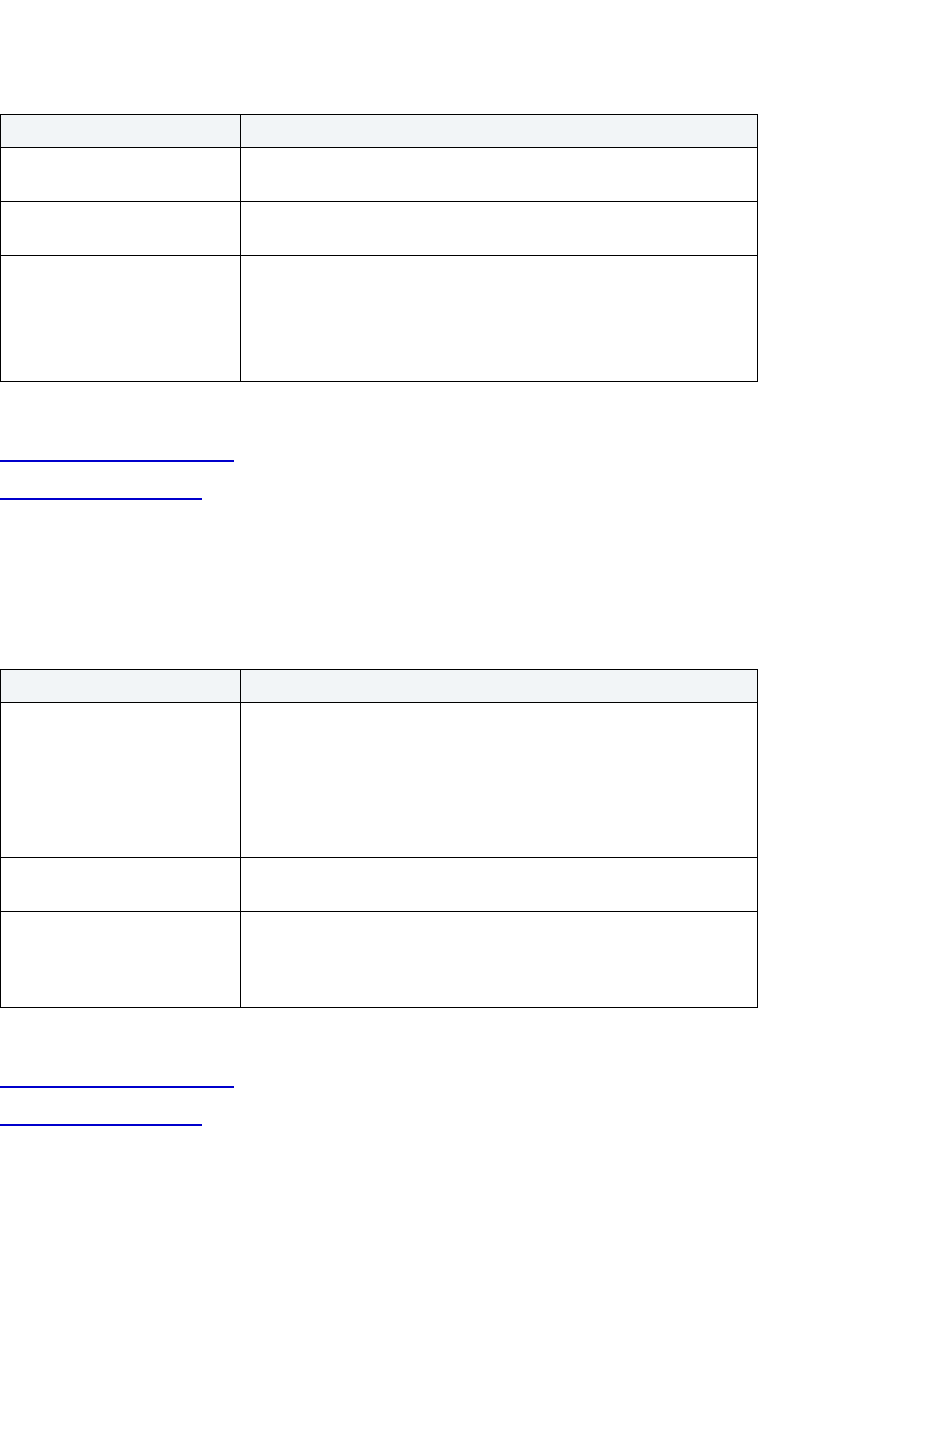
USING > FUNCTIONALITY
EMBARCADERO TECHNOLOGIES > BOOKNAMEVARIABLE 472
For more information, see:
Completing an Object Wizard
Materialized View Wizard
Materialized View Wizard for Oracle - Panel 4
The table below describes the options and functionality on the fourth panel of the Materialized View Wizard.
For more information, see:
Completing an Object Wizard
Materialized View Wizard
Materialized View Wizard for Oracle - Panel 5
The table below describes the options and functionality on the fifth panel of the Materialized View Wizard.
Option Description
Where do you want to place
the materialized view?
Lets you select the tablespace where you want the materialized
view placed.
What is the materialized view
query?
Lets you type the SQL query to be used to populate and to refresh
the materialized view.
Select a refresh method Primary Key - A primary key's values uniquely identify the rows in a
table. Only one primary key can be defined for each table.
ROWID - A globally unique identifier for a row in a database. It is
created at the time the row is inserted into a table, and destroyed
when it is removed from a table.
Option Description
How many transaction
entries are allowed for each
datablock in the materialized
view?
Each transaction that updates a data block requires a transaction
entry.
Initial Extent - Ensures that a minimum number of concurrent
transactions can update a data block, avoiding the overhead of
allocating a transaction entry dynamically.
Maximum - Limits concurrency on a data block.
What is the percent of space
reserved for future updates?
Percent Free - Lets you type the percentage.
What is the minimum
percentage of used space
that Oracle maintains for
each datablock?
Percent Used - Lets you type the percentage.
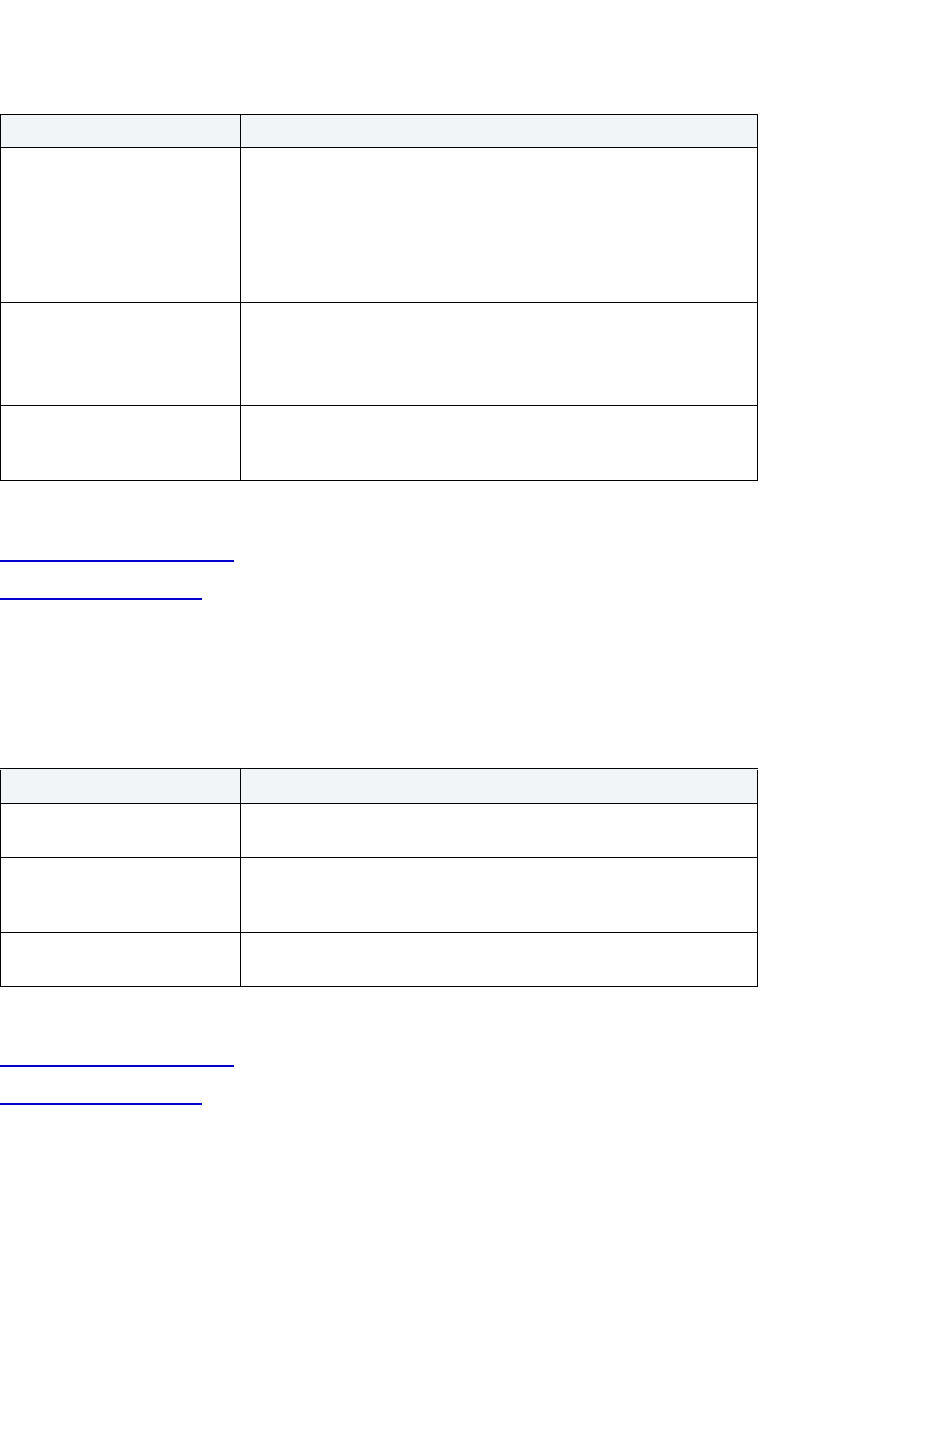
USING > FUNCTIONALITY
EMBARCADERO TECHNOLOGIES > BOOKNAMEVARIABLE 473
For more information, see:
Completing an Object Wizard
Materialized View Wizard
Materialized View Wizard for Oracle - Panel 6
The table below describes the options and functionality on the sixth panel of the Materialized View Wizard.
For more information, see:
Completing an Object Wizard
Materialized View Wizard
Materialized View Wizard for Oracle - Panel 7
The table below describes the options and functionality on the seventh panel of the Materialized View Wizard.
Option Description
How large are the
materialized views extents?
The unit of space allocated to an object whenever the object needs
more space.
Initial Extent - The initial space extent (in bytes) allocated to the
object.
Next Extent - The next extent (in bytes) that the object will attempt
to allocate when more space for the object is required.
How many extents should be
allocated to the materialized
view?
Minimum Extents - The appropriate minimum extents value for the
object.
Maximum Extents - The appropriate maximum extents value for
the object.
What is the growth rate for
sizing additional materialized
views?
Percent Increase - Magnifies how an object grows and, can
materially affect available free space in a tablespace. Select a
value in the corresponding box.
Option Description
Can the materialized view be
updated?
Lets you select to materialized view to be updated.
Do you want to register a
prebuilt table to the view?
Lets you select to register and existing table as a preinitialized
materialized view. This option is particularly useful for registering
large materialized views in a data warehousing environment.
Should the materialized view
be immediately filled?
Lets you select if you want the materialized view populated
immediately or during the next refresh operation.
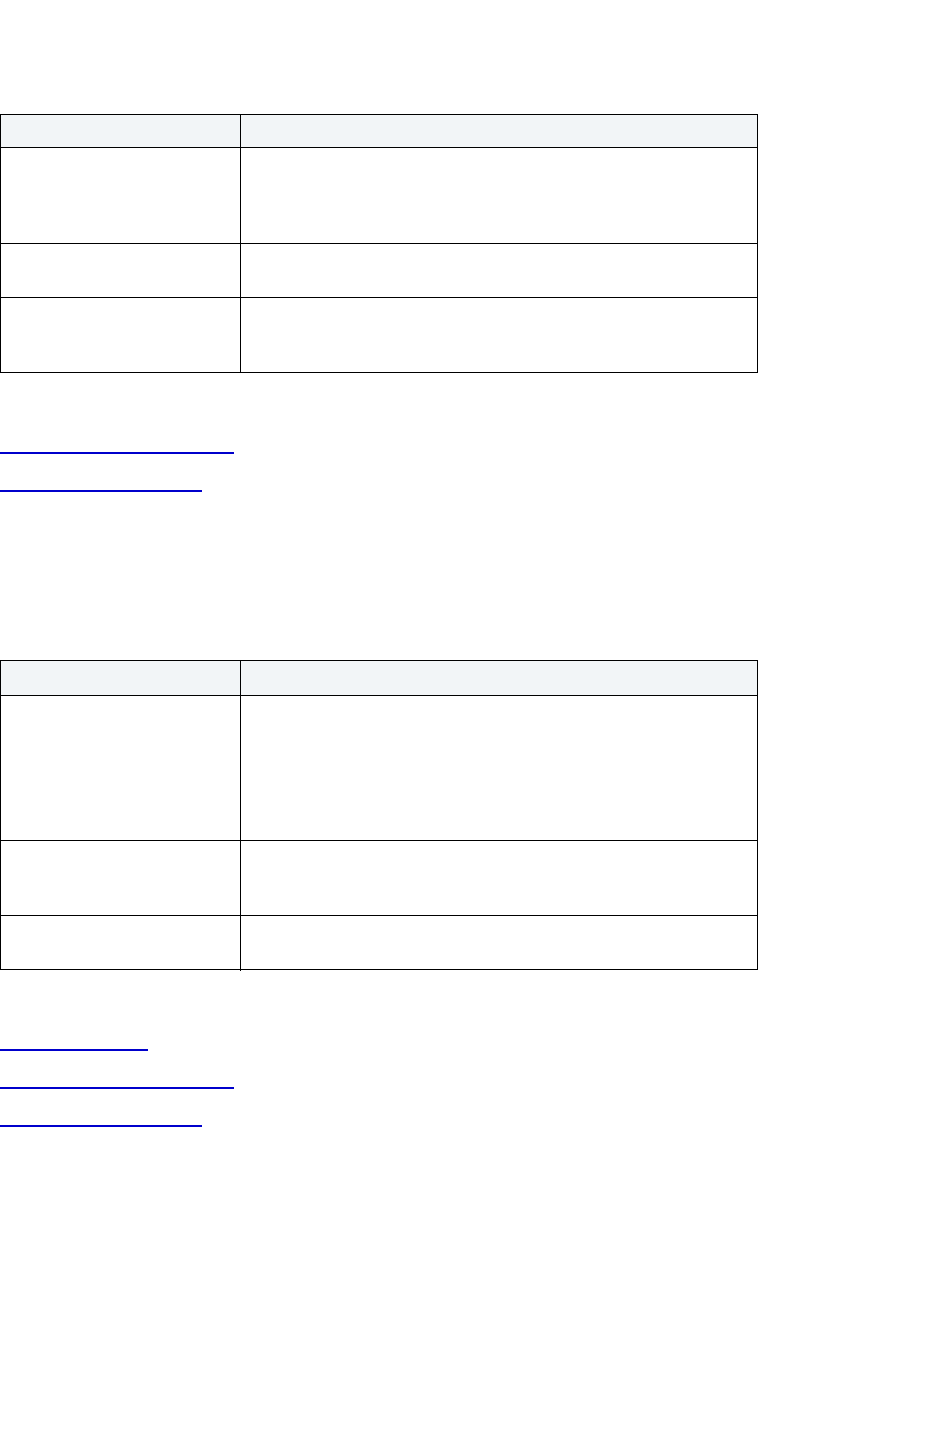
USING > FUNCTIONALITY
EMBARCADERO TECHNOLOGIES > BOOKNAMEVARIABLE 474
For more information, see:
Completing an Object Wizard
Materialized View Wizard
Materialized View Wizard for Oracle - Panel 8
The table below describes the options and functionality on the eighth panel of the Materialized View Wizard.
For more information, see:
Oracle Partitioning
Completing an Object Wizard
Materialized View Wizard
Materialized View Wizard for Oracle - Panel 9 (Composite Partitioning)
The table below describes the options and functionality on the ninth panel of the Materialized View Wizard.
NOTE: You must compete both the partitioning and sub partitioning column boxes to enable the Next
button.
Option Description
Should data for the
materialized view be cached?
Select if you want Oracle to put data you access frequently at the
most recently used end of the list in the buffer cache when a full
table scan is performed. This option is useful for small lookup
tables.
Do you want updates to be
logged?
Lets you create a log for all Materialized view updates.
Do you want to specify the
number threads used in a
parallel operation?
Lets you type a degree amount.
Option Description
Would you like to specify
rollback segments to be used
for the materialized view
refresh?
Local Rollback Segment - Select Default if you want Oracle to
select the rollback segment to use. Default is most useful when
modifying a materialized view.
Master Rollback Segment - Lets you type the remote rollback
segment used at the remote master site for the individual
materialized view.
Is the materialized view
eligible for query rewrite?
Select to enable the materialized view for query rewrite. Only
enable query rewrite only if expressions in the statement are
repeatable.
Do you want to partition this
materialized view?
Lets you select a partitioning method.
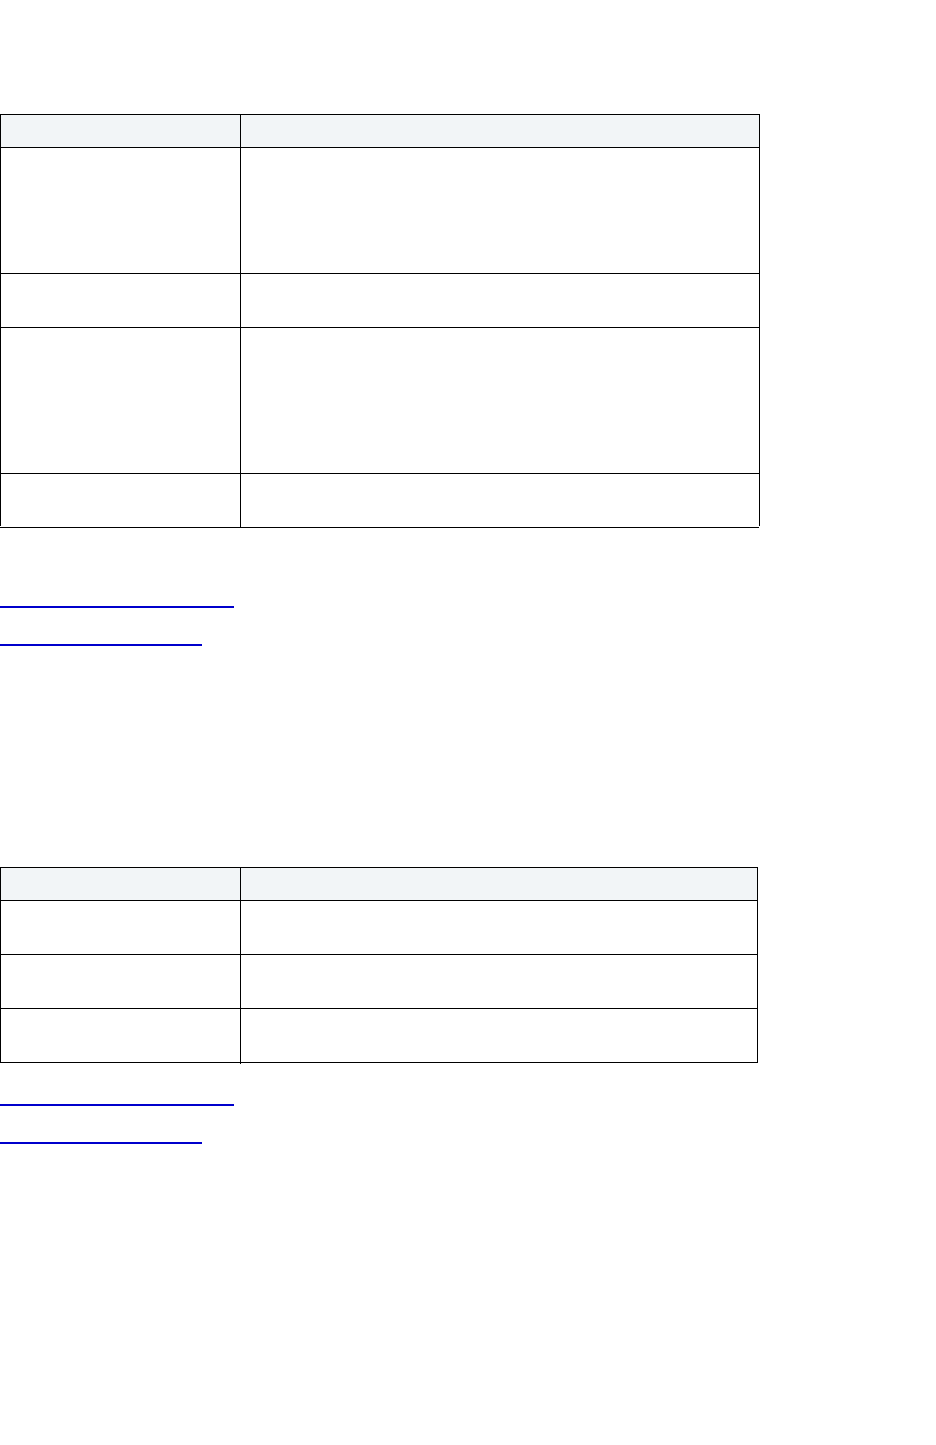
USING > FUNCTIONALITY
EMBARCADERO TECHNOLOGIES > BOOKNAMEVARIABLE 475
For more information, see:
Completing an Object Wizard
Materialized View Wizard
Materialized View Wizard for Oracle - Panel 9 (Composite Partitioning)
NOTE: This option is only available in Oracle 9.2 or later.
The table below describes the options and functionality on the ninth panel of the Materialized View Wizard.
Completing an Object Wizard
Materialized View Wizard
Materialized View Wizard for Oracle - Panel 10 (Range-Hash Composite Partitioning)
The table below describes the options and functionality on the tenth panel of the Materialized View Wizard.
Option Description
Select the Partitioning
Columns
Type the Column name in the box and then click the right arrow to
move it to the selected columns box. You can type as many column
names as you want. Use the left arrow to remove the column.
NOTE: If you remove the column, you need to type the name
again, and then move it if you want to add it back.
Selected Columns Displays a list of the columns you moved from Available Columns.
You can use the up and down arrows to reorder the columns.
Select the subpartitioning
columns
Type the subpartition column name in the box and then click the
right arrow to move it to the selected columns box. You can type as
many column names as you want. Use the left arrow to remove the
column.
NOTE: If you remove the column, you need to type the name
again, and then move it if you want to add it back.
Selected Columns Displays a list of the columns you moved from Available Columns.
You can use the up and down arrows to reorder the columns.
Option Description
Enter Column Lets you select at least one partitioning column, and then click the
right arrow button to move it to the Selected Columns box.
Select the subpartitioning
Method
Lets you specify which subpartitioning method to use, hash or list.
Enter Column Lets you select at least one subpartitioning column, and then click
the right arrow button to move it to the Selected Columns box.
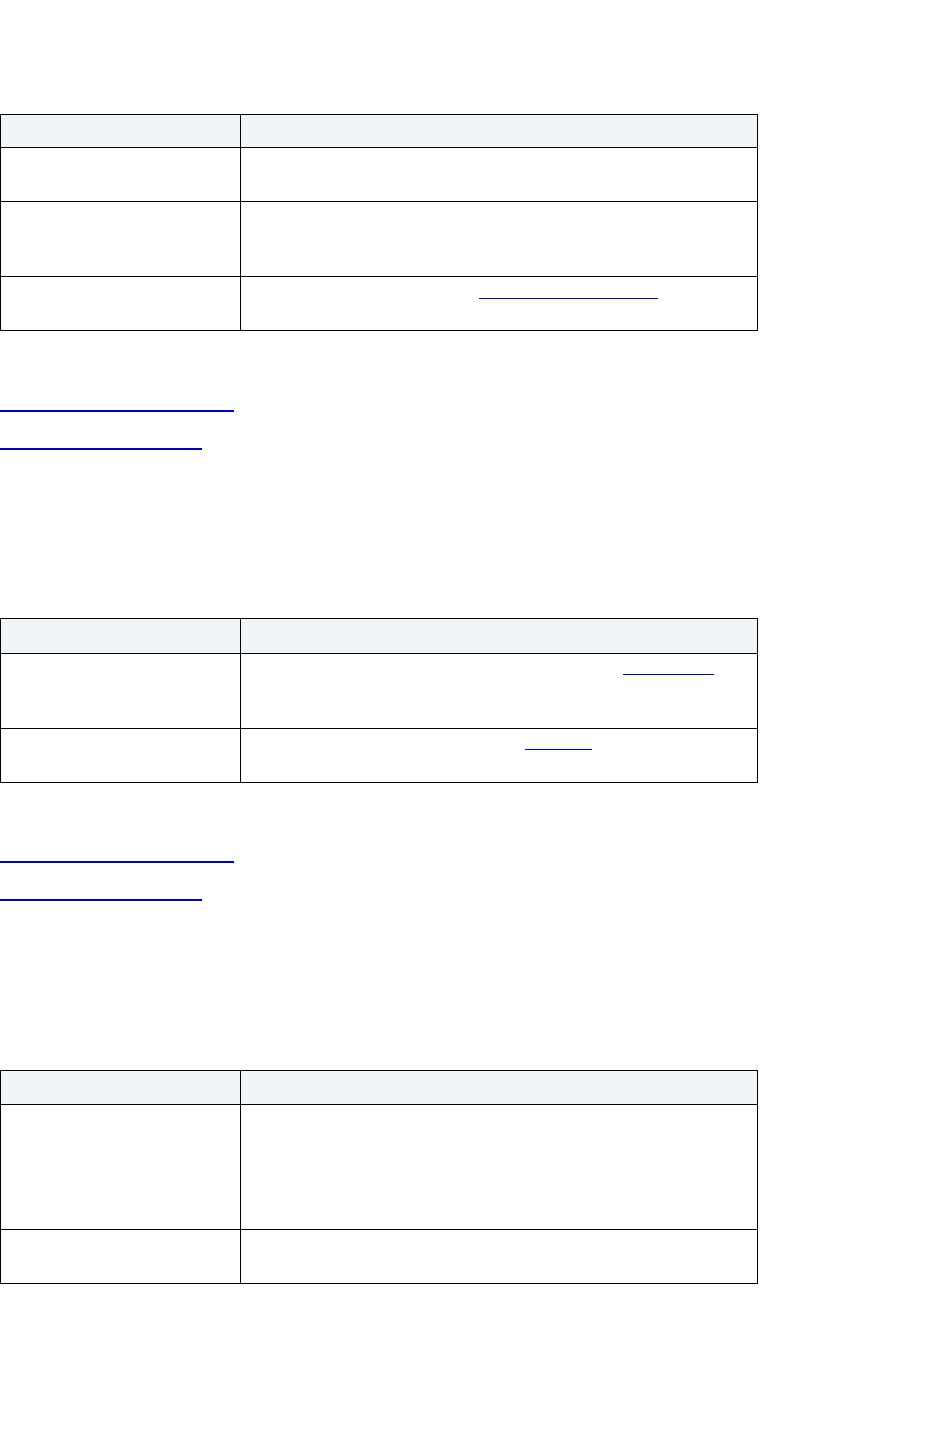
USING > FUNCTIONALITY
EMBARCADERO TECHNOLOGIES > BOOKNAMEVARIABLE 476
For more information, see:
Completing an Object Wizard
Materialized View Wizard
Materialized View Wizard for Oracle - Panel 10 (Range-List Composite Partitioning)
The table below describes the options and functionality on the tenth panel of the Materialized View Wizard.
For more information, see:
Completing an Object Wizard
Materialized View Wizard
Materialized View Wizard for Oracle - Panel 9 (Hash Partitioning)
The table below describes the options and functionality on the ninth panel of the Materialized View Wizard.
Option Description
Specify default number of
subpartitions
OPTIONAL: Lets you type a value.
Select the default
tablespaces to contain the
subpartitions
OPTIONAL: Lets you select a tablespace from the list, and then
click the right arrow button.
Create an ordered list of
partitions
Add Button - Click to open the Add Partition dialog box
.
Option Description
Create a list of subpartitions
to be included in the
subpartition template
OPTIONAL: Click Add, Insert, or Edit to open the Subpartition
dialog box.
Create an ordered list of
partitions
Click Add, Insert, or Edit to open the Partition
dialog box.
Option Description
Select the Partitioning
Columns
Type the Column name in the box and then click the right arrow to
move it to the selected columns box. You can type as many column
names as you want. Use the left arrow to remove the column.
NOTE: If you remove the column, you need to type the name
again, and then move it if you want to add it back.
Selected Columns Displays a list of the columns you moved from Available Columns.
You can use the up and down arrows to reorder the columns.
USING > FUNCTIONALITY
EMBARCADERO TECHNOLOGIES > BOOKNAMEVARIABLE 477
For more information, see:
Completing an Object Wizard
Materialized View Wizard
Materialized View Wizard for Oracle - Panel 9 (Range Partitioning)
The table below describes the options and functionality on the ninth panel of the Materialized View Wizard.
For more information, see:
Completing an Object Wizard
Materialized View Wizard
Materialized View Wizard for Oracle - Panel 9 (List Partitioning)
The table below describes the options and functionality on the ninth panel of the Materialized View Wizard.
Hash Partitioning Methods Click the option button that corresponds to the partition method you
want:
None - No partitioning method.
Specify number of partitions and (optionally) tablespaces - This
option enables the Number of Partitions box. Type the value in the
box. If you want to specify a tablespace, click the Tablespace list,
and then click the target tablespace. Use the right arrow to move
the tablespace to the box.
Specify individual partitions by name and (optionally) tablespaces -
This option enables the Partition Name box. Type a name in the
box. If you want to specify a tablespace, click the Tablespace list,
and then click the target tablespace. Use the right arrow to move
the partition name to the box.
Option Description
Select the Partitioning
Columns
Type the Column name in the box and then click the right arrow to
move it to the selected columns box. You can type as many column
names as you want. Use the left arrow to remove the column.
NOTE: If you remove the column, you need to type the name
again, and then move it if you want to add it back.
Selected Columns Displays a list of the columns you moved from Available Columns.
You can use the up and down arrows to reorder the columns.
Create an ordered list of
partitions
Add Button - Click to open the Add Partition dialog box
.
Option Description

USING > FUNCTIONALITY
EMBARCADERO TECHNOLOGIES > BOOKNAMEVARIABLE 478
For more information, see:
Completing an Object Wizard
Materialized View Wizard
Materialized View Log Wizard for Oracle
The Materialized View Log Wizard lets you create a materialized view log. Materialized View logs are tables that
maintain a history of modifications to the master table, and they are used to refresh simple materialized views. When
you create a materialized view log, Oracle automatically creates a log table to track data changes in the master table
and a log trigger to maintain the data in the log table.
The Materialized View Log Wizard lets you:
• Specify the materialized view log owner and master table.
• Select refresh types and select column filters.
• Specify how Oracle should allocate data blocks to store the materialized view log.
• Specify how Oracle should manage the growth of the materialized view.
• Specify if you want the data for the materialized view log cached, if you want updates logged, and to enable
parallel query.
• Specify if you want the log to hold new values.
Important Notes
•None
For more information, see:
Completing an Object Wizard
Materialized View Log Wizard - Panel 1
Materialized View Log Wizard for Oracle - Panel 1
The table below describes the options and functionality on the first panel of the Materialized View Log Wizard.
Option Description
Select the Partitioning
Columns
Type the Column name in the box and then click the right arrow to
move it to the selected columns box. You can type as many column
names as you want. Use the left arrow to remove the column.
NOTE: if you remove the column, you need to type the name
again, and then move it if you want to add it back.
Selected Columns Displays a list of the columns you moved from Available Columns.
You can use the up and down arrows to reorder the columns.
USING > FUNCTIONALITY
EMBARCADERO TECHNOLOGIES > BOOKNAMEVARIABLE 479
For more information, see:
Completing an Object Wizard
Materialized View Log Wizard
Materialized View Log Wizard for Oracle - Panel 2
The table below describes the options and functionality on the second panel of the Materialized View Log Wizard.
For more information, see:
Completing an Object Wizard
Materialized View Log Wizard
Materialized View Log Wizard for Oracle - Panel 3
The table below describes the options and functionality on the third panel of the Materialized View Log Wizard.
Option Description
Who owns the materialized
view logs table?
Lets you select the owner.
Which table will serve as the
materialized view log's
master table?
Lets you select the table.
On which tablespace do you
want to place the table?
Lets you select the tablespace.
Option Description
Which refresh types would
you like to use?
NOTE: For tables with no primary keys, ROWID is the only option.
ROWID - A globally unique identifier for a row in a database. It is
created at the time the row is inserted into a table, and destroyed
when it is removed from a table.
Primary Key - Select if you want the Materialized View Log to
record the primary key
Select any filter column(s) to
be recorded in the
materialized view log
OPTIONAL: Lets you select the filter columns to be recorded in the
materialized view log. You can specify only one primary key, one
ROWID and one filter column list per materialized view log.
Option Description
How many transaction
entries are allowed for each
datablock in the materialized
view log?
Each transaction that updates a data block requires a transaction
entry.
Initial Extent - Ensures that a minimum number of concurrent
transactions can update a data block, avoiding the overhead of
allocating a transaction entry dynamically.
Maximum - Limits concurrency on a data block.
USING > FUNCTIONALITY
EMBARCADERO TECHNOLOGIES > BOOKNAMEVARIABLE 480
For more information, see:
Completing an Object Wizard
Materialized View Log Wizard
Materialized View Log Wizard for Oracle - Panel 4
The table below describes the options and functionality on the fourth panel of the Materialized View Log Wizard.
For more information, see:
Completing an Object Wizard
Materialized View Log Wizard
Materialized View Log Wizard for Oracle - Panel 5
The table below describes the options and functionality on the fifth panel of the Materialized View Log Wizard.
What is the percent of space
reserved for future updates?
Percent Free - Lets you type the percentage.
What is the minimum
percentage of used space
that Oracle maintains for
each datablock?
Percent Used - Lets you type the percentage.
Option Description
How large are the
materialized views log’s
extents?
The unit of space allocated to an object whenever the object needs
more space.
Initial Extent - The initial space extent (in bytes) allocated to the
object.
Next Extent - The next extent (in bytes) that the object will attempt
to allocate when more space for the object is required.
How many extents should be
allocated to the materialized
view log?
Minimum Extents - The appropriate minimum extents value for the
object.
Maximum Extents - The appropriate maximum extents value for
the object.
What is the growth rate for
sizing additional extents?
Percent Increase - Magnifies how an object grows and, can
materially affect available free space in a tablespace. Select a
value in the corresponding box.
Option Description
Should data for the
materialized view log be
cached?
Select if you want Oracle to put data you access frequently at the
most recently used end of the list in the buffer cache when a full
table scan is performed. This option is useful for small lookup
tables.
Option Description
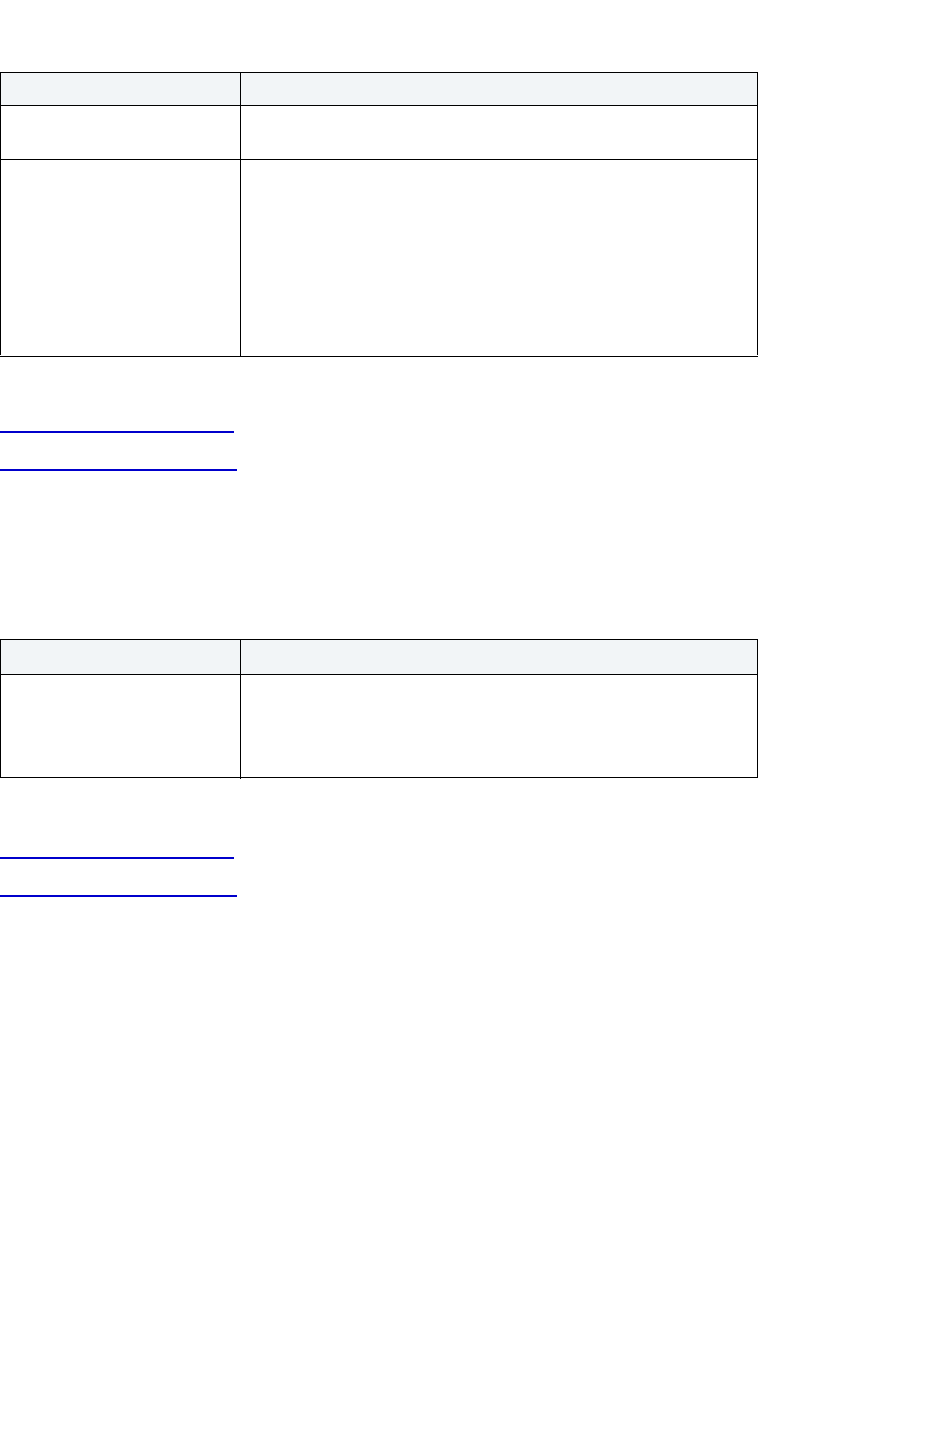
USING > FUNCTIONALITY
EMBARCADERO TECHNOLOGIES > BOOKNAMEVARIABLE 481
For more information, see:
Completing an Object Wizard
Materialized View Log Wizard
Materialized View Log Wizard for Oracle - Panel 6
The table below describes the options and functionality on the sixth panel of the Materialized View Log Wizard.
For more information, see:
Completing an Object Wizard
Materialized View Log Wizard
Outline Wizard for Oracle
The Outline Wizard guides you through the process of creating an outline. Outlines are a set of results for the
execution plan generation of a particular SQL statement. When you create an outline, plan stability examines the
optimization results using the same data used to generate the execution plan. That is, Oracle uses the input to the
execution plan to generate an outline, and not the execution plan itself.
The Outline Wizard lets you:
• Specify the name for the outline.
• Specify the category for the outline.
• Enter the SQL statement to be used by the stored outline.
Important Notes
•None
For more information, see:
Do you want updates to be
logged?
Lets you create a log for all Materialized View updates.
Do you want to enable
parallel query for the log?
The Parallel server query option lets you process queries using
many query server processes running against multiple CPUs. This
option provides substantial performance gains such as reduction of
the query completion time.
Degree - Lets you type a value indicating the number of query
server processes that should be used in the operation.
Instances - Lets you type a value indicating how you want the
parallel query partitioned between the Parallel Servers.
Option Description
Should the log hold new
values
Yes, hold new values - Select if the log is for a table with a
single-table materialized aggregate view.
No, exclude new values - Select to disable the recording of new
values in the log.
Option Description
USING > FUNCTIONALITY
EMBARCADERO TECHNOLOGIES > BOOKNAMEVARIABLE 482
Completing an Object Wizard
Outline Wizard - Panel 1
Outline Wizard for Oracle - Panel 1
The table below describes the options and functionality on the first panel of the Outline Wizard.
For more information, see:
Completing an Object Wizard
Outline Wizard
Outline Wizard for Oracle - Panel 2
The table below describes the options and functionality on the second panel of the Outline Wizard.
NOTE: The only SQL statements possible with stored outlines are SELECT, DELETE, UPDATE,
INSERT…SELECT, and CREATE TABLE…AS SELECT.
For more information, see:
Completing an Object Wizard
Outline Wizard
Package Wizard for Oracle
The Package Wizard lets you create a package. Packages contain all the information needed to process SQL
statements from a single source file. You can use packages to process and call batches of SQL.
Important Notes
•None
The table below describes the options and functionality on the Package Wizard.
Option Description
What is the name of the
stored outline?
Lets you type the name of the outline.
NOTE: The name can be up to 30 characters long.
In what category should the
stored outline be placed?
OPTIONAL: Lets you type the name of the category for the outline.
Option Description
What is the SQL statement to
be used by the stored
outline?
Type the target SQL statement to be used by the outline.
USING > FUNCTIONALITY
EMBARCADERO TECHNOLOGIES > BOOKNAMEVARIABLE 483
For more information, see Completing an Object Wizard.
Create Primary Key Constraint Dialog Box for Oracle
The Create Primary Key Constraint dialog box lets you create a primary key. Primary Keys are a set of table columns
that can uniquely identify every row of a table.
Important Notes
•None
The table below describes the options and functionality on the Create Primary Key Constraint dialog box.
Option Description
Who owns the package? Lets you select the owner.
What is the name of the
package?
Lets you type the name.
Finish Button Opens the Packages Editor to the Header Tab. In the Package
Header Text box, type the package header specifications. Click the
Body Tab, and in the Package Body Text box, type the package
body specifications.
Option Description
Owner Lets you select the primary key constraint owner.
Table Lets you select the table you want to place the primary key
constraint.
Constraint Name Lets you enter the name of the constraint, which can be up to 30
characters long and must be unique across the entire database.
Specify Columns in
Constraint
Lets you select the primary key columns, and then click the Right
arrow to move them to the Constraint Columns grid. To remove a
primary key column, in the Constraint Columns grid, click the
primary key column, and then click the left arrow button.
Constraint Columns - To reorder the primary key columns, click the
up and down arrow buttons.
Status Enable - Select to enable the constraint immediately after building
it.
Disable - Select to disable the constraint immediately after building
it.

USING > FUNCTIONALITY
EMBARCADERO TECHNOLOGIES > BOOKNAMEVARIABLE 484
For more information, see Completing an Object Dialog Box.
Procedure Wizard for Oracle
The Procedure Wizard lets you create a procedure. Procedures are a reusable block of PL/SQL, stored in the
database, that applications can call. Procedures streamline code development, debugging and maintenance by being
reusable. Procedures enhance database security by letting you write procedures granting users execution privileges
to tables rather than letting them access tables directly.
Important Notes
To create a procedure in your own schema, you need CREATE PROCEDURE privileges. To create a procedure in
someone else's schema, you need CREATE ANY PROCEDURE privileges.
The table below describes the options and functionality on the Procedure Wizard.
For more information, see Completing an Object Wizard
.
Data Block Storage Lets you indicate the data block storage parameters.
Tablespace - Lets you select the tablespace for the primary key.
NOTE: You should never place primary keys on the SYSTEM
tablespace.
Percent Free - Lets you type the appropriate percent free value for
the primary key.
Initial Transactions - Lets you type the appropriate initial
transactions value for the primary key.
Max Transactions - Lets you type the appropriate maximum
transactions value for the primary key.
Extents The unit of space allocated to an object whenever the object needs
more space.
Initial Extent - The initial space extent (in bytes) allocated to the
object.
Next Extent - The next extent (in bytes) that the object will attempt
to allocate when more space for the object is required.
Minimum Extents - The appropriate minimum extents value for the
object.
Maximum Extents - The appropriate maximum extents value for
the object.
Percent Increase - Magnifies how an object grows and, can
materially affect available free space in a tablespace. Select a
value in the corresponding box.
Option Description
Who owns the procedure? Lets you select the owner.
What is the name of the
procedure?
Lets you type the name of the procedure.
Finish Button Opens the Procedures Editor to the Definition Tab. Type the
procedure definition.
Option Description
USING > FUNCTIONALITY
EMBARCADERO TECHNOLOGIES > BOOKNAMEVARIABLE 485
Profile Wizard for Oracle
The Profile Wizard lets you create a profile. Profiles are a mechanism for allocating system and database resources to
users.
The Profile Wizard lets you:
• Name the profile.
• Set composite limit.
• Set session limits for SGA shared pool.
• Set limits on total connection time per session and Idle time per session.
• Set limits on concurrent sessions per user, CPU time per session, and data blocks read per session.
• Set limits on CPU time per call, and number of data blocks read for a call to process an SQL statement.
• Set the number of failed login attempts, and the days an account locks.
Important Notes
• To create a profile, you need the CREATE PROFILE system privilege.
For more information, see:
Completing an Object Wizard
Profile Wizard - Panel 1
Profile Wizard for Oracle - Panel 1
The table below describes the options and functionality on the first panel of the Profile Wizard.
For more information, see:
Completing an Object Wizard
Profile Wizard
Profile Wizard for Oracle - Panel 2
The table below describes the options and functionality on the second panel of the Profile Wizard.
Options Description
What is the name of the
profile?
Lets you type the name of the user. It can be up to 30 characters
long.
What is the composite limit on
resources per session?
Lets you select an option. If you click the Other option button, in the
corresponding Service Units box, type the value of the service
units.
What is the limit on the
amount of private space a
session can allocate in the
shared pool of the SGA?
Lets you select an option. If you click Other, type the value of the
limit, and then click list to indicate KB or MB.
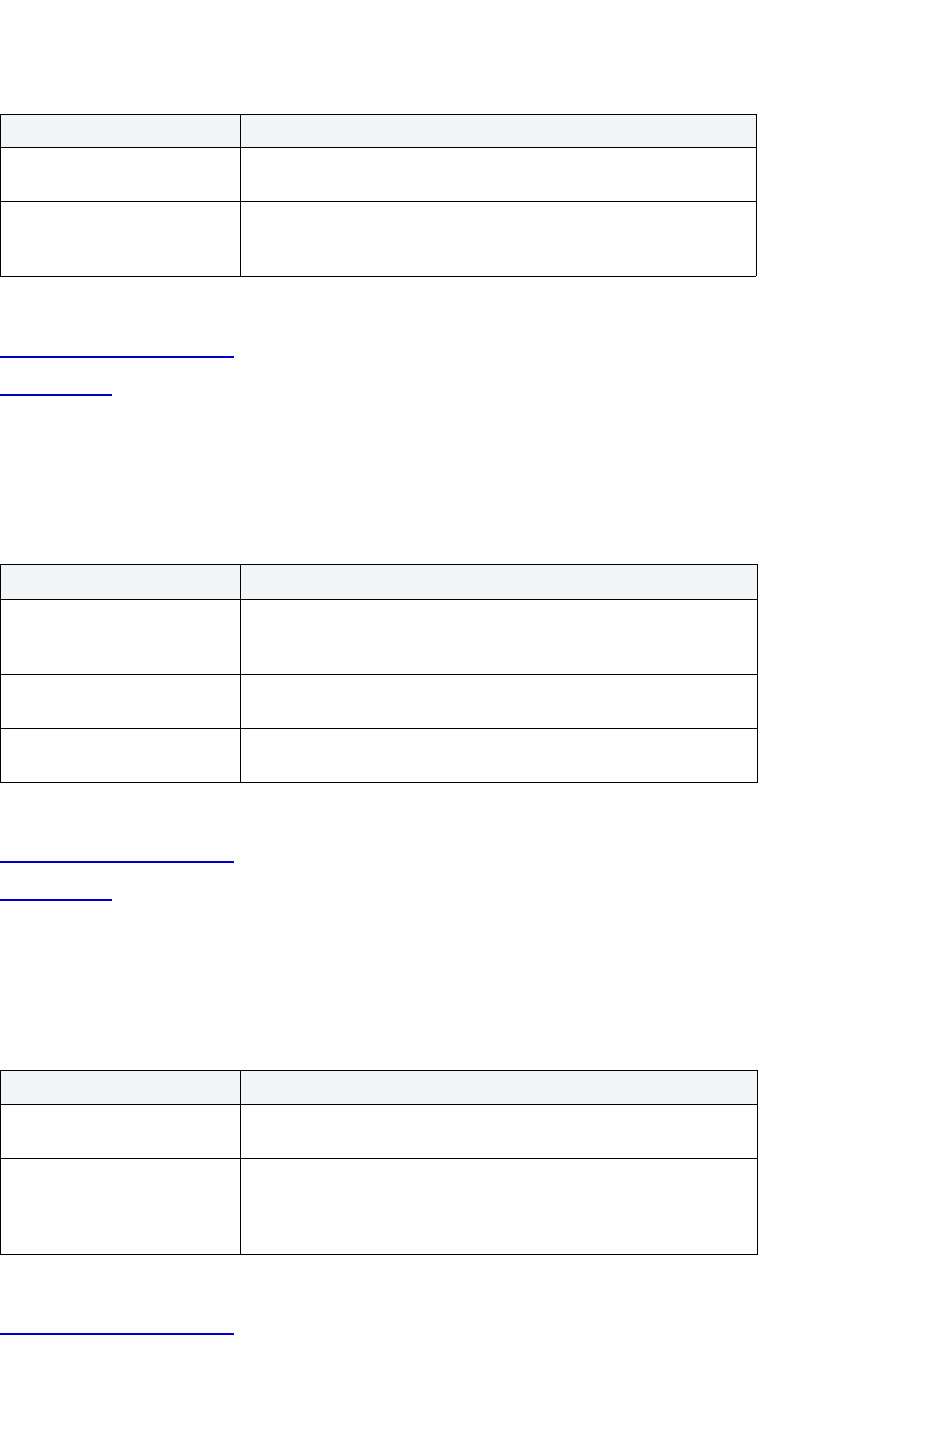
USING > FUNCTIONALITY
EMBARCADERO TECHNOLOGIES > BOOKNAMEVARIABLE 486
For more information, see:
Completing an Object Wizard
Profile Wizard
Profile Wizard for Oracle - Panel 3
The table below describes the options and functionality on the third panel of the Profile Wizard.
For more information, see:
Completing an Object Wizard
Profile Wizard
Profile Wizard for Oracle - Panel 4
The table below describes the options and functionality on the fourth panel of the Profile Wizard.
For more information, see:
Completing an Object Wizard
Option Description
What is the limit on total
connection time per session?
Lets you specify the total elapsed time limit for a session,
expressed in minutes.
What is the limit on idle time
per session?
Lets you specify permitted periods of continuous inactive time
during a session, expressed in minutes. Long-running queries and
other operations are not subject to this limit.
Option Description
What is the limit on
concurrent sessions per
user?
Lets you specify the number of concurrent sessions to which you
want to limit the user.
What is the limit on CPU time
per session?
Lets you specify the CPU time limit for a session, expressed in
hundredth of seconds.
What is the limit on data
blocks read per session?
Lets you specify the permitted number of data blocks read in a
session, including blocks read from memory and disk.
Option Description
What is the limit on CPU time
per call?
Lets you specify the CPU time limit for a call (a parse, execute, or
fetch), expressed in hundredths of seconds.
What is the limit on the
number of data blocks read
for a call to process a SQL
statement?
Lets you specify the permitted the number of data blocks read for a
call to process a SQL statement (a parse, execute, or fetch).
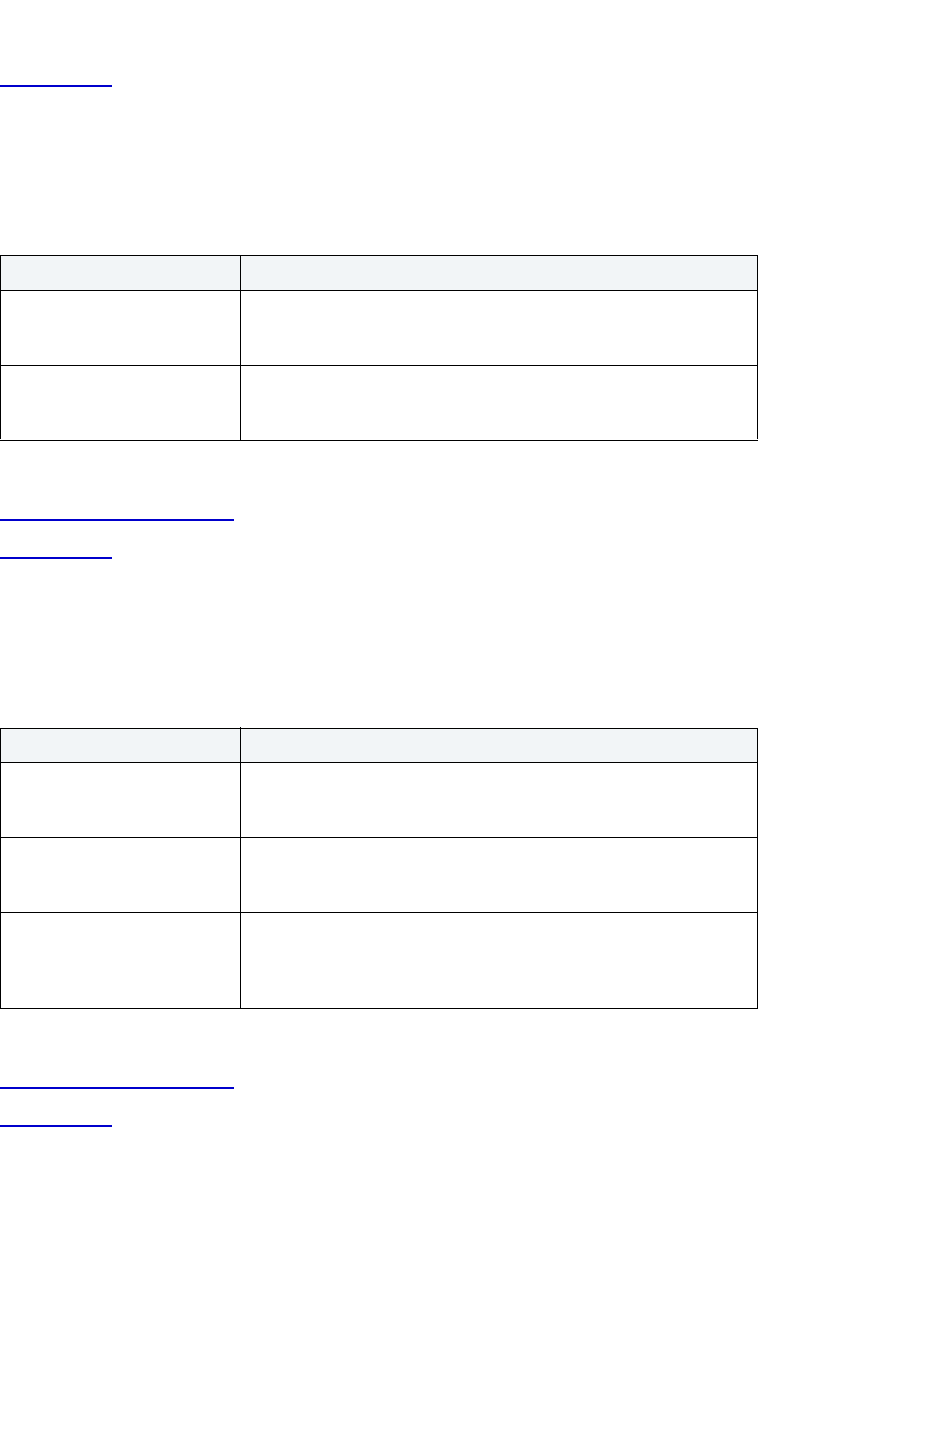
USING > FUNCTIONALITY
EMBARCADERO TECHNOLOGIES > BOOKNAMEVARIABLE 487
Profile Wizard
Profile Wizard for Oracle - Panel 5
The table below describes the options and functionality on the fifth panel of the Profile Wizard.
For more information, see:
Completing an Object Wizard
Profile Wizard
Profile Wizard for Oracle - Panel 6
The table below describes the options and functionality on the sixth panel of the Profile Wizard.
For more information, see:
Completing an Object Wizard
Profile Wizard
Profile Wizard for Oracle - Panel 7
The table below describes the options and functionality on the seventh panel of the Profile Wizard.
NOTE: The seventh panel of the Profile Wizard is available for Oracle 8 or later.
Option Description
How many failed login
attempts will be allowed
before an account is locked?
Lets you specify the number of failed attempts to log in to the user
account before the account is locked.
How long will the account be
locked after the specified
number of login attempts?
Lets you specify the number of days an account will be locked after
the specified number of consecutive failed login attempts.
Option Description
What is the lifetime of the
password?
Lets you specify the number of days the same password can be
used for authentication. The password expires if it is not changed
within this period, and further connections are rejected.
How many days must pass
before a password can be
reused?
Lets you specify the number of days before which a password can
be reused.
How many password
changes are required before
the current password can be
reused?
Lets you specify the number of password changes required before
the current password can be reused.

USING > FUNCTIONALITY
EMBARCADERO TECHNOLOGIES > BOOKNAMEVARIABLE 488
For more information, see:
Completing an Object Wizard
Profile Wizard
Redo Log Group Wizard for Oracle
The Redo Log Group Wizard lets you create a Redo Log Group. A redo log is a set of files that protect altered
database data in memory that has not been written to the datafiles. The redo log can consist of two parts: the online
redo log and the archived redo log.
If you find that you have problems with redo log group availability and Oracle consistently has to wait for redo log
groups to become free, create additional redo log groups. Rapid SQL lets you create additional redo log groups to
ensure that there is always a recycled redo log group available.
The Redo Log Group Wizard lets you:
• Assign a number to the new redo log group and determine the file size for the group members.
• Choose a thread for the redo log group for Oracle Parallel Server.
• Add redo log members with the Add Redo Log Member dialog box.
Important Notes
•None
For more information, see:
Completing an Object Wizard
Redo Log Group Wizard - Panel 1
Redo Log Group Wizard for Oracle - Panel 1
The table below describes the options and functionality on the first panel of the Redo Log Group Wizard.
Option Description
What is the grace period
allowed for a password to be
changed without expiring?
Lets you specify the number of days after the grace period begins
during which a warning is issued and login is allowed. If the
password is not changed during the grace period, the password
expires.
What is the name of the
password complexity
verification routine?
Lets a PL/SQL password complexity verification script be passed
as an argument to the CREATE PROFILE statement.
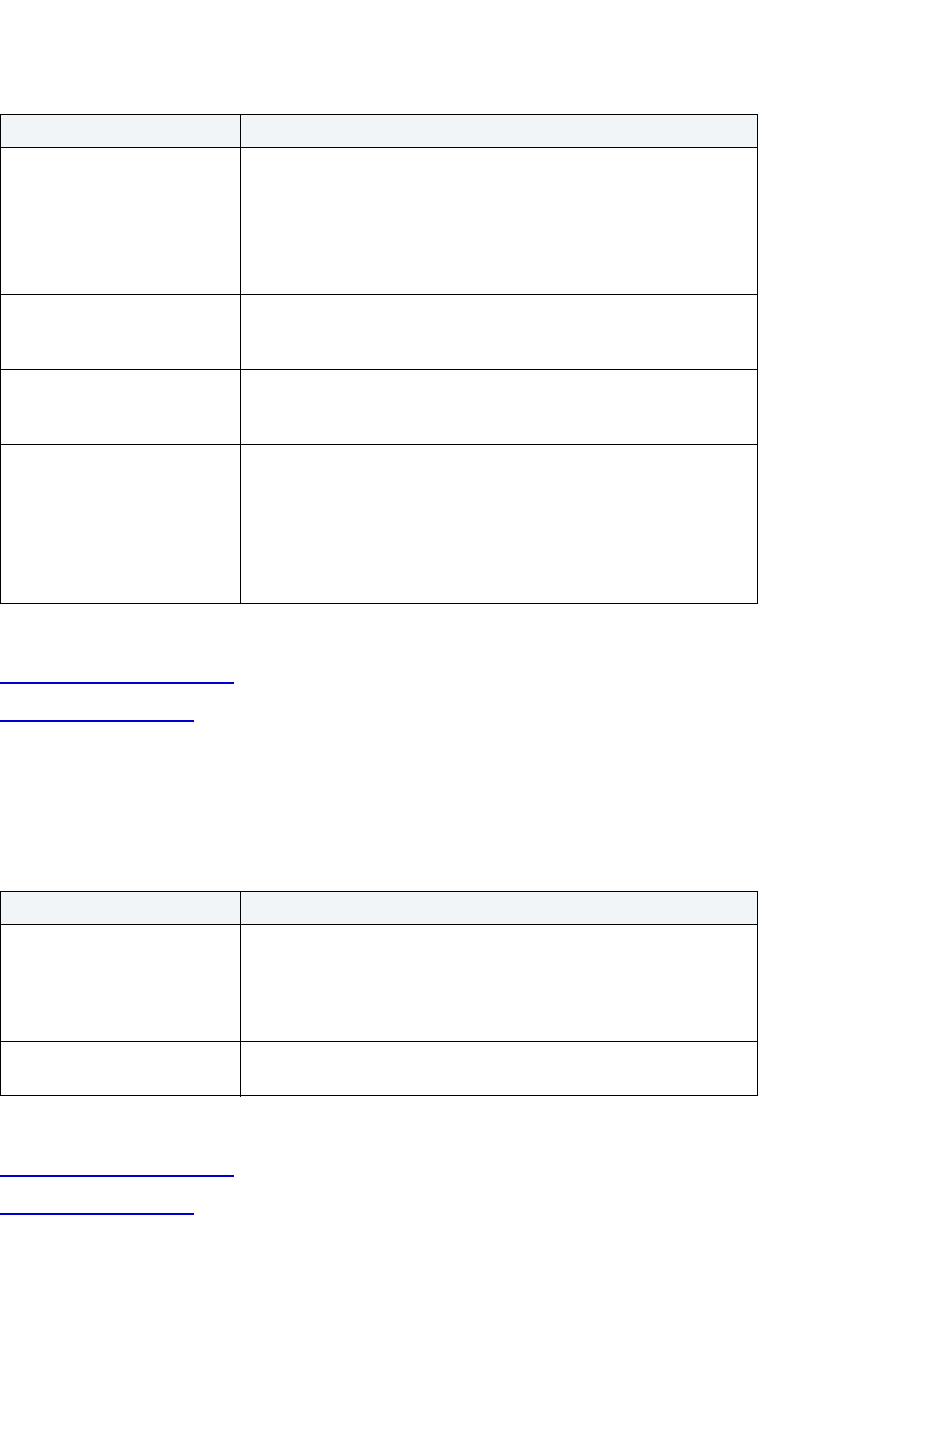
USING > FUNCTIONALITY
EMBARCADERO TECHNOLOGIES > BOOKNAMEVARIABLE 489
For more information, see:
Completing an Object Wizard
Redo Log Group Wizard
Redo Log Group Wizard for Oracle - Panel 2
The table below describes the options and functionality on the second panel of the Redo Log Group Wizard.
For more information, see:
Completing an Object Wizard
Redo Log Group Wizard
Option Description
ORACLE 9i ONLY:
OMF
Lets you specify to use Oracle Managed Files to automatically
create the redo log group. Oracle automatically creates and
removes operating system files as you create and drop storage
objects.
NOTE: If you select OMF, you do not have to enter a redo log
group number or file size.
What is the group number for
the redo log group?
When numbering your redo log groups, it is better not to skip
numbers (e.g., 5, 10, 15). Skipping numbers causes Oracle to
consume extra space in the control files of the database.
What file size should the
group’s redo log members
be?
Lets you type a size and specify KB or MB.
To which thread should the
redo log group be added?
OPTIONAL: If you are using Oracle Parallel Server, type the
thread. A thread is an operating system component that allows the
logic of multiuser applications to be performed as several separate,
asynchronous execution paths. Threads help ensure that work is
being performed for some user connections even when other
connections are blocked (for example, when waiting for a disk read
or write operation to complete).
Option Description
Redo Log Group Member
Name
The name of each group member should be a file name. For
example, D:\ORACLE\ORADATA\FINANCEDB\REDO02.LOG is a
valid group member name. If you do not specify a full path, Rapid
SQL creates files in either the default or current directory of the
database server.
Add Button Rapid SQL adds the member name to the list of redo log group
members in Panel 2.

USING > FUNCTIONALITY
EMBARCADERO TECHNOLOGIES > BOOKNAMEVARIABLE 490
Role Wizard for Oracle
The Role Wizard lets you create a role without knowing the underlying commands. As you complete the Role Wizard,
Rapid SQL constructs the necessary CREATE ROLE statement from the information that you have supplied. The Role
Wizard lets you specify a name for the role and whether or not the role should be identified.
Important Notes
• To create a role, you need the CREATE ROLE system privilege.
The table below describes the options and functionality on the first panel of the Role Wizard.
For more information, see Completing an Object Wizard
.
Rollback Segment Wizard for Oracle
The Rollback Segment Wizard lets you create a rollback segment. Rollback segments manage all transactions in your
Oracle databases. They maintain read consistency among concurrent users in a database and can rollback
transactions. They are transaction logs that maintain discrete records of changes to data. By maintaining a history of
data changes, rollback segments can rollback uncommitted transactions so that data is rolled back to their prior state.
The Rollback Segment Wizard lets you:
• Name the rollback segment and to place it online or off-line.
• Place the rollback segment on a tablespace.
• Specify the initial next and optimal extent size as well a the minimum and maximum number of extents that
should be allocated to the rollback segment.
Important Notes
• This wizard is not available if auto-UNDO management is enabled.
For more information, see:
Completing an Object Wizard
Rollback Segment Wizard - Panel 1
Option Description
What is the name of the role? Lets you type the name of the role.
How should the role be
identified?
Identified -
If you select, select an option below.
Globally - Select to indicate that Oracle permits access to the user
by obtaining user name and password information from the
security domain central authority.
Externally - Select to indicate that Oracle should verify the
database user name against an existing operating system user
name.
Password - Select to indicate that Oracle should identify the role
with the password you provide. In the Password box, type the
password for the user.
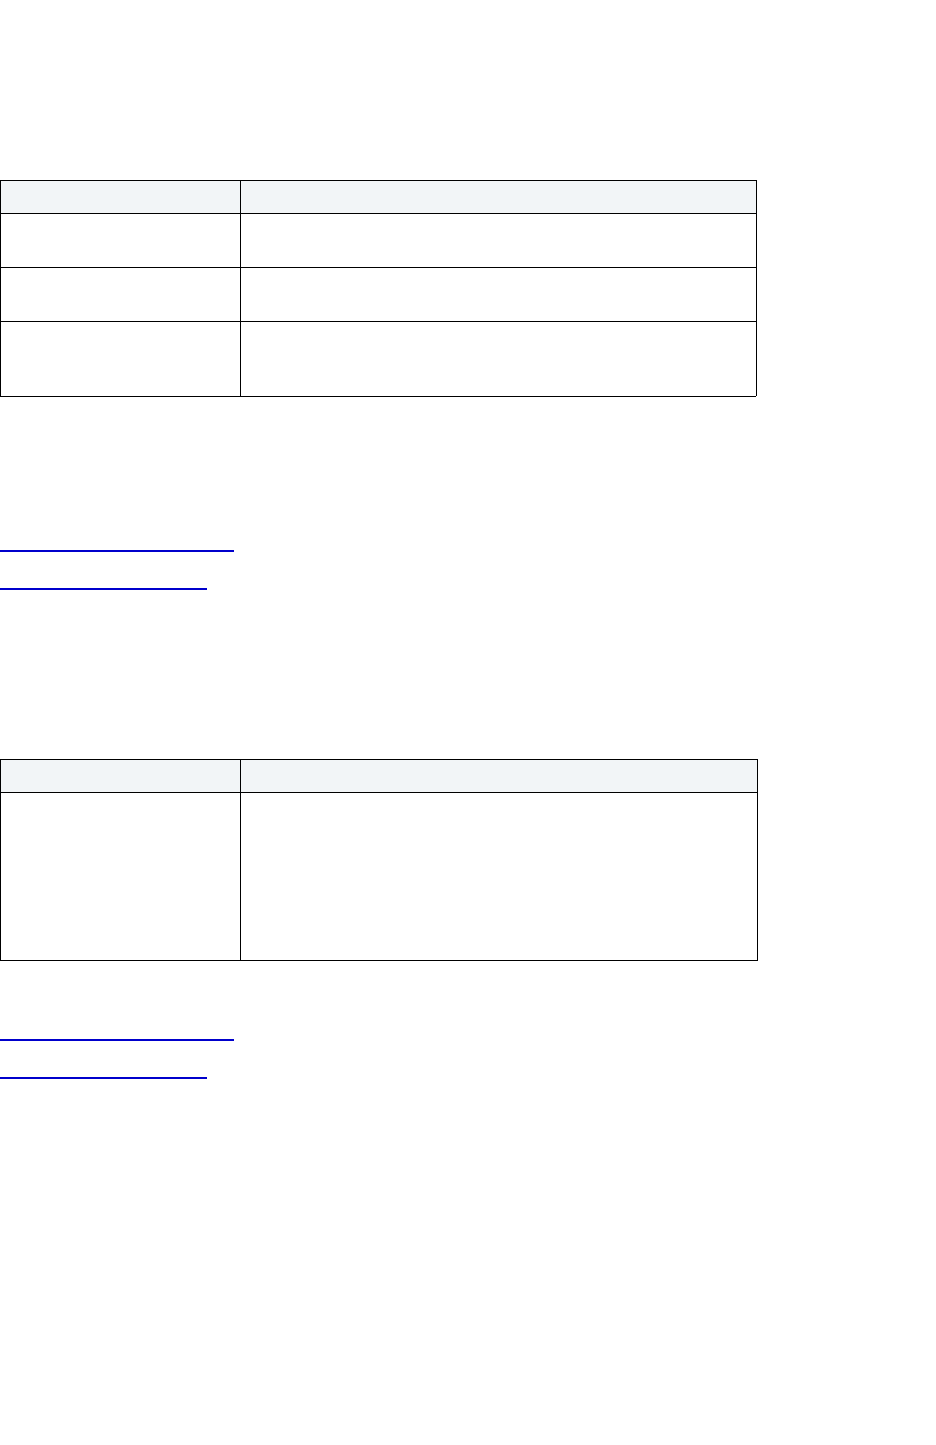
USING > FUNCTIONALITY
EMBARCADERO TECHNOLOGIES > BOOKNAMEVARIABLE 491
Rollback Segment Wizard for Oracle - Panel 1
The table below describes the options and functionality on the first panel of the Rollback Segment Wizard.
TIP: Make sure enough rollback segments exist on a database to handle the imposed workload. One
rule of thumb is to create one rollback segment per four concurrent users.
For more information, see:
Completing an Object Wizard
Rollback Segment Wizard
Rollback Segment Wizard for Oracle - Panel 2
The table below describes the options and functionality on the second panel of the Rollback Segment Wizard.
For more information, see:
Completing an Object Wizard
Rollback Segment Wizard
Rollback Segment Wizard for Oracle - Panel 3
The table below describes the options and functionality on the third panel of the Rollback Segment Wizard.
Option Description
What is the name of the
rollback segment?
Lets you type the rollback segment name.
Should this rollback segment
be made public?
Lets you Indicate if the rollback segment should be made public.
Do you want to place this
rollback segment online
following its creation?
Lets you Indicate if the rollback segment is to be placed online or
off-line upon creation.
Option Description
On which tablespace do you
want to place this rollback
segment?
Lets you select the tablespace where you want to place the
rollback segment.
Due to their heavy I/O nature, rollback segment placement is best
on server drives that experience little activity. Disks configured with
RAID5 are typically poor choices for rollback segments. If you use
RAID on the server, a RAID0 or 0+1 configuration is best for
rollback segments.
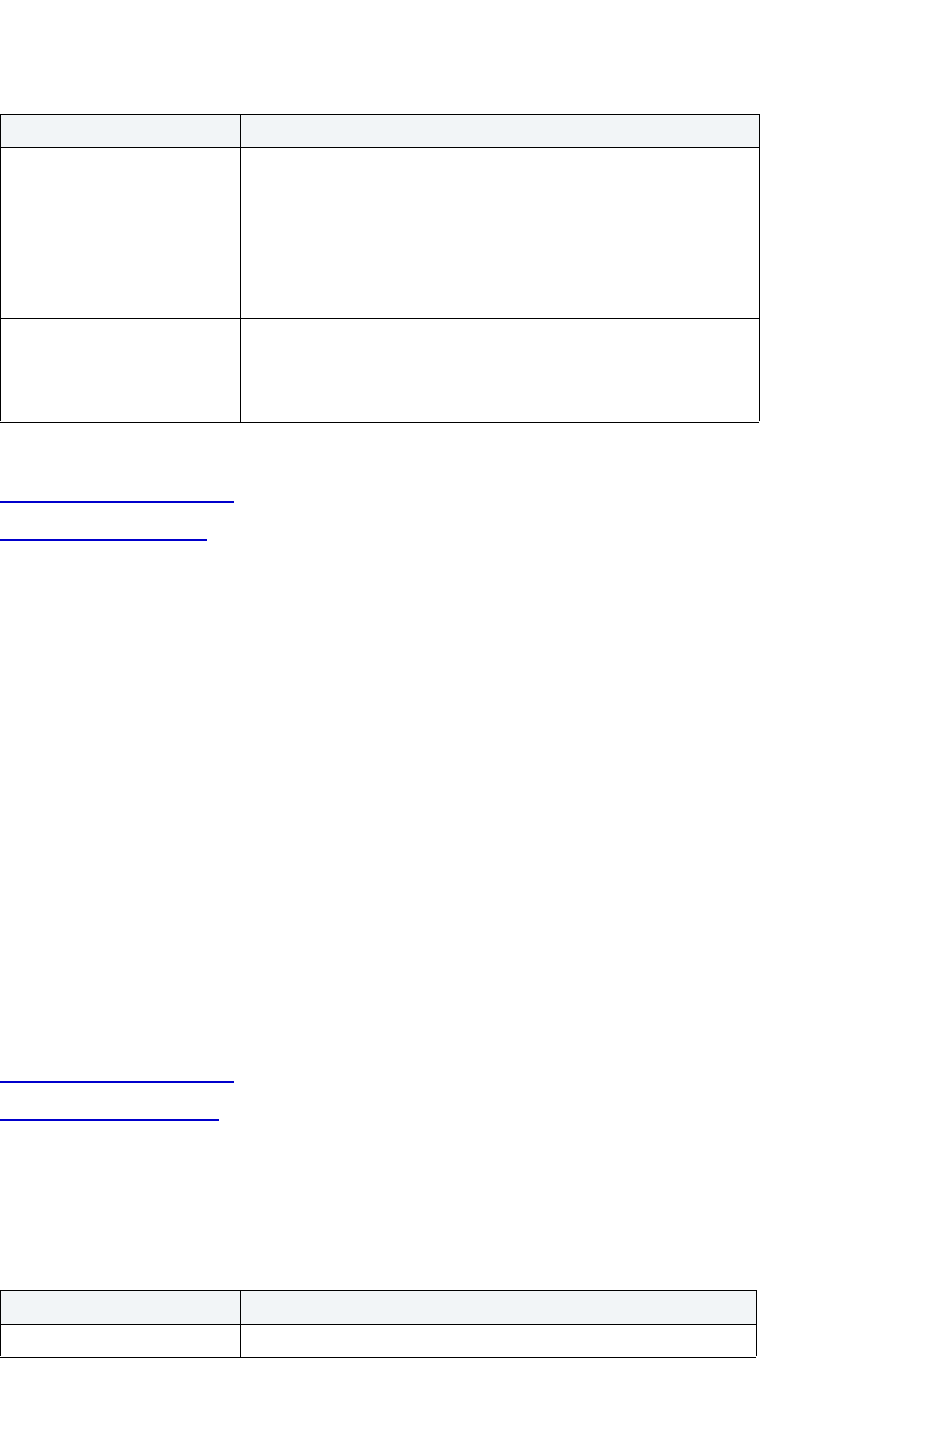
USING > FUNCTIONALITY
EMBARCADERO TECHNOLOGIES > BOOKNAMEVARIABLE 492
For more information, see:
Completing an Object Wizard
Rollback Segment Wizard
Sequence Wizard for Oracle
The Sequence Wizard lets you create a sequence. Sequences are programmable database objects that generate a
definable sequence of values. Once defined, a sequence can be made available to many users. A sequence can be
accessed and incremented by multiple users with no waiting. A sequence can be used to automatically generate
primary key values for tables. When you create a sequence, you can define its initial value, increment interval and
maximum value.
The Sequence Wizard lets you:
• Specify the name and owner of the sequence.
• Set both the value of the sequence, and an interval and ranges for incrementing it.
• Cache the sequence, cycle the sequence when it reaches its minimum or maximum values, and guarantee that
Oracle generates sequence numbers in the order of request.
Important Notes
• To create a sequence, it must belong to your schema or you need CREATE SEQUENCE privilege.
For more information, see:
Completing an Object Wizard
Sequence Wizard - Panel 1
Sequence Wizard for Oracle - Panel 1
The table below describes the options and functionality on the first panel of the Sequence Wizard.
Option Description
What extent sizes do you
want to assign to this rollback
segment?
Lets you select an option.
Large transactions benefit from using larger sized rollback
segments.
Initial Size - Size (in bytes) of the initial extent.
Next Size - Size (in bytes) of the second extent.
Optimal Size - Optimal size of the rollback segment.
What are the minimum and
maximum number of extents
to allocate to this rollback
segment?
Minimum Extents - The appropriate minimum extents value for the
object.
Maximum Extents - The appropriate maximum extents value for the
object.
Option Description
Who owns the sequence? Lets you select the owner.
USING > FUNCTIONALITY
EMBARCADERO TECHNOLOGIES > BOOKNAMEVARIABLE 493
For more information, see:
Completing an Object Wizard
Sequence Wizard
Sequence Wizard for Oracle - Panel 2
The table below describes the options and functionality on the second panel of the Sequence Wizard.
For more information, see:
Completing an Object Wizard
Sequence Wizard
Sequence Wizard for Oracle - Optional Panel 3
The table below describes the options and functionality on the third panel of the Sequence Wizard.
What is the sequence name? Lets you type the name.
Option Description
What is the first sequence
number to be generated?
Lets you specify the first sequence number to be generated. Use to
start an ascending sequence at a value greater than its minimum
or to start a descending sequence at a value less than its
maximum. For ascending sequences, the default value is the
minimum value of the sequence. For descending sequences, the
default value is the maximum value of the sequence. This integer
value can have 28 or fewer digits.
What is the interval between
sequence numbers?
Lets you specify the interval between sequence numbers. This
integer value can be any positive or negative integer, but it cannot
be 0. This value can have 28 or fewer digits. The absolute of this
value must be less than the difference of MAXVALUE and
MINVALUE. If this value is negative, then the sequence descends.
If the increment is positive, then the sequence ascends. If you omit
this clause, the interval defaults to 1.
What is the sequences
minimum value?
Lets you specify the minimum value of the sequence. This integer
value can have 28 or fewer digits.
What is the sequences
maximum value?
Lets you specify the maximum value the sequence can generate.
This integer value can have 28 or fewer digits.
Option Description
Should Oracle preallocate
sequence numbers and
cache them for faster
access?
Lets you specify how many values of the sequence Oracle
preallocates and keeps in memory for faster access. This integer
value can have 28 or fewer digits. The minimum value for this
parameter is 2. For sequences that cycle, this value must be less
than the number of values in the cycle. You cannot cache more
values than will fit in a given cycle of sequence numbers.
Option Description
USING > FUNCTIONALITY
EMBARCADERO TECHNOLOGIES > BOOKNAMEVARIABLE 494
For more information, see:
Completing an Object Wizard
Sequence Wizard
Snapshot Wizard for Oracle
The Snapshot Wizard lets you create a snapshot. Snapshots are used to dynamically copy data between distributed
databases.
The Snapshot Wizard lets you:
• Specify the snapshot owner and to name the snapshot.
• Specify the snapshot's refresh configuration.
• Place the snapshot on a tablespace and specify the query that should be used to populate the snapshot.
• Specify how Oracle should allocate data blocks to store the snapshot.
• Specify how Oracle should manage the growth of the snapshot.
Important Notes
•None
For more information, see:
Completing an Object Wizard
Snapshot Wizard - Panel 1
Snapshot Wizard for Oracle - Panel 1
The table below describes the options and functionality on the first panel of the Snapshot Wizard
For more information, see:
Should the sequence
continue to generate values
after reaching either its
maximum or minimum value?
Lets you specify the sequence cycle to indicate that the sequence
continues to generate values after reaching either its maximum or
minimum value. After an ascending sequence reaches its
maximum value, it generates its minimum value. After a
descending sequence reaches its minimum, it generates its
maximum.
Should the sequence
numbers be generated in the
order of request?
Lets you guarantee that Oracle generates sequence numbers in
the order of request. The ORDER option is useful when you are
using the sequence number as a timestamp.
Option Description
Who owns the snapshot? Lets you select the owner.
What is the name of the
snapshot?
Lets you type the name.
Option Description
USING > FUNCTIONALITY
EMBARCADERO TECHNOLOGIES > BOOKNAMEVARIABLE 495
Completing an Object Wizard
Snapshot Wizard
Snapshot Wizard for Oracle - Panel 2
The table below describes the options and functionality on the second panel of the Snapshot Wizard.
For more information, see:
Completing an Object Wizard
Snapshot Wizard
Snapshot Wizard for Oracle - Panel 3
The table below describes the options and functionality on the third panel of the Snapshot Wizard.
For more information, see:
Completing an Object Wizard
Snapshot Wizard
Snapshot Wizard for Oracle - Panel 4
The table below describes the options and functionality on the fourth panel of the Snapshot Wizard
Option Description
How should the snapshot be
refreshed?
Fast - Select to refresh the snapshot using a snapshot log.
Complete - Select to rebuild the snapshot when refreshed.
Fast - Select to make the database determine the fastest available
refresh method between Fast and Complete.
When should the snapshot
start being refreshed?
Lets you type the date expression that determines when the
snapshots first becomes populated in the appropriate box. If you do
not specify a start date, then Oracle determines the start date
based on the refresh interval. The START parameter must be a
date expression and not a specific date. In addition, the start date
must be in the future
How often should the
snapshot be refreshed?
Lets you type a date expression that determines the interval at
which the snapshot is refreshed in the appropriate box. The NEXT
parameter must be a date expression and not a specific date. In
addition, it must be in the future.
Option Description
Where do you want to place
the snapshot?
Lets you select the tablespace where you want to place the
snapshot.
What is the SQL query to
populate the snapshot?
Lets you type the SQL query to be used to populate and to refresh
the snapshot.
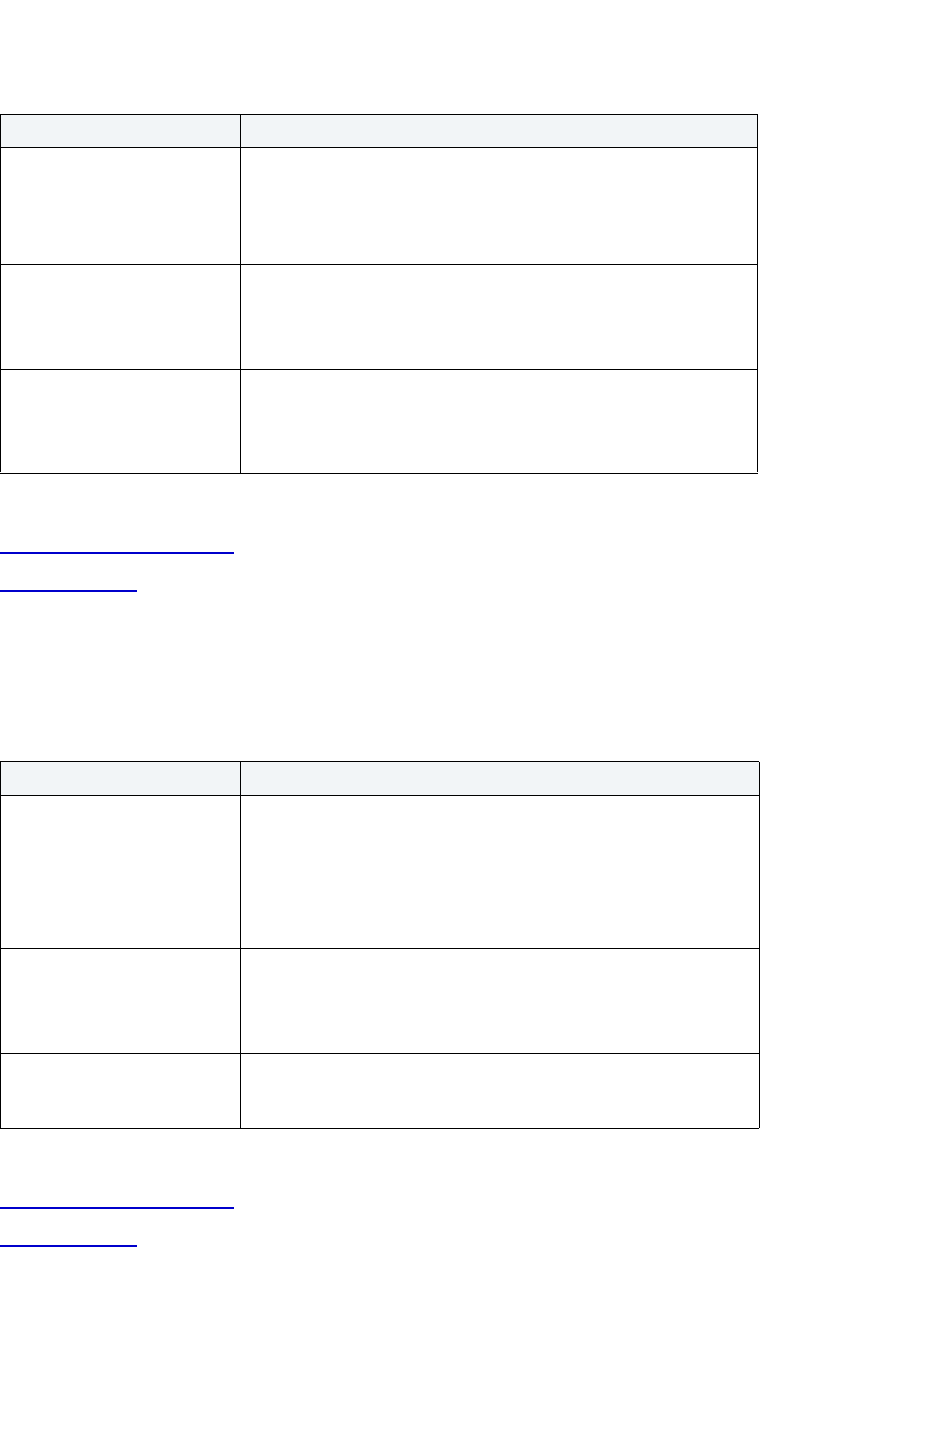
USING > FUNCTIONALITY
EMBARCADERO TECHNOLOGIES > BOOKNAMEVARIABLE 496
For more information, see:
Completing an Object Wizard
Snapshot Wizard
Snapshot Wizard for Oracle - Panel 5
The table below describes the options and functionality on the fifth panel of the Snapshot Wizard.
For more information, see:
Completing an Object Wizard
Snapshot Wizard
Option Description
How many transaction entries
are allowed for each data
block in the snapshot?
Each transaction that updates a data block requires a transaction
entry. The initial parameter ensures that a minimum number of
concurrent transactions can update a data block, avoiding the
overhead of allocating a transaction entry dynamically. The
maximum parameter limits concurrency on a data block.
What is the percent of space
reserved for future updates?
The storage parameter lets you tune performance by minimizing
the occurrence of row migration and chaining caused by update
operations that extend the length of rows stored on the data block.
Percent Free - Lets you click the list or type the percentage.
What is the minimum
percentage of used space
that Oracle maintains for
each datablock?
The storage parameter lets you tune performance by minimizing
the occurrence of row migration and chaining caused by update
operations that extend the length of rows stored on the data block.
Percent Used - Lets you click the list or type the percentage.
Option Description
How large are the snapshots
extents?
The unit of space allocated to an object whenever the object needs
more space.
Initial Extent - The initial space extent (in bytes) allocated to the
object.
Next Extent - The next extent (in bytes) that the object will attempt
to allocate when more space for the object is required.
How many extents should be
allocated to the snapshot?
Minimum Extents - The appropriate minimum extents value for the
object.
Maximum Extents - The appropriate maximum extents value for the
object.
What is the growth rate for
sizing additional extents?
Percent Increase - Magnifies how an object grows and, can
materially affect available free space in a tablespace. Select a
value in the corresponding box.
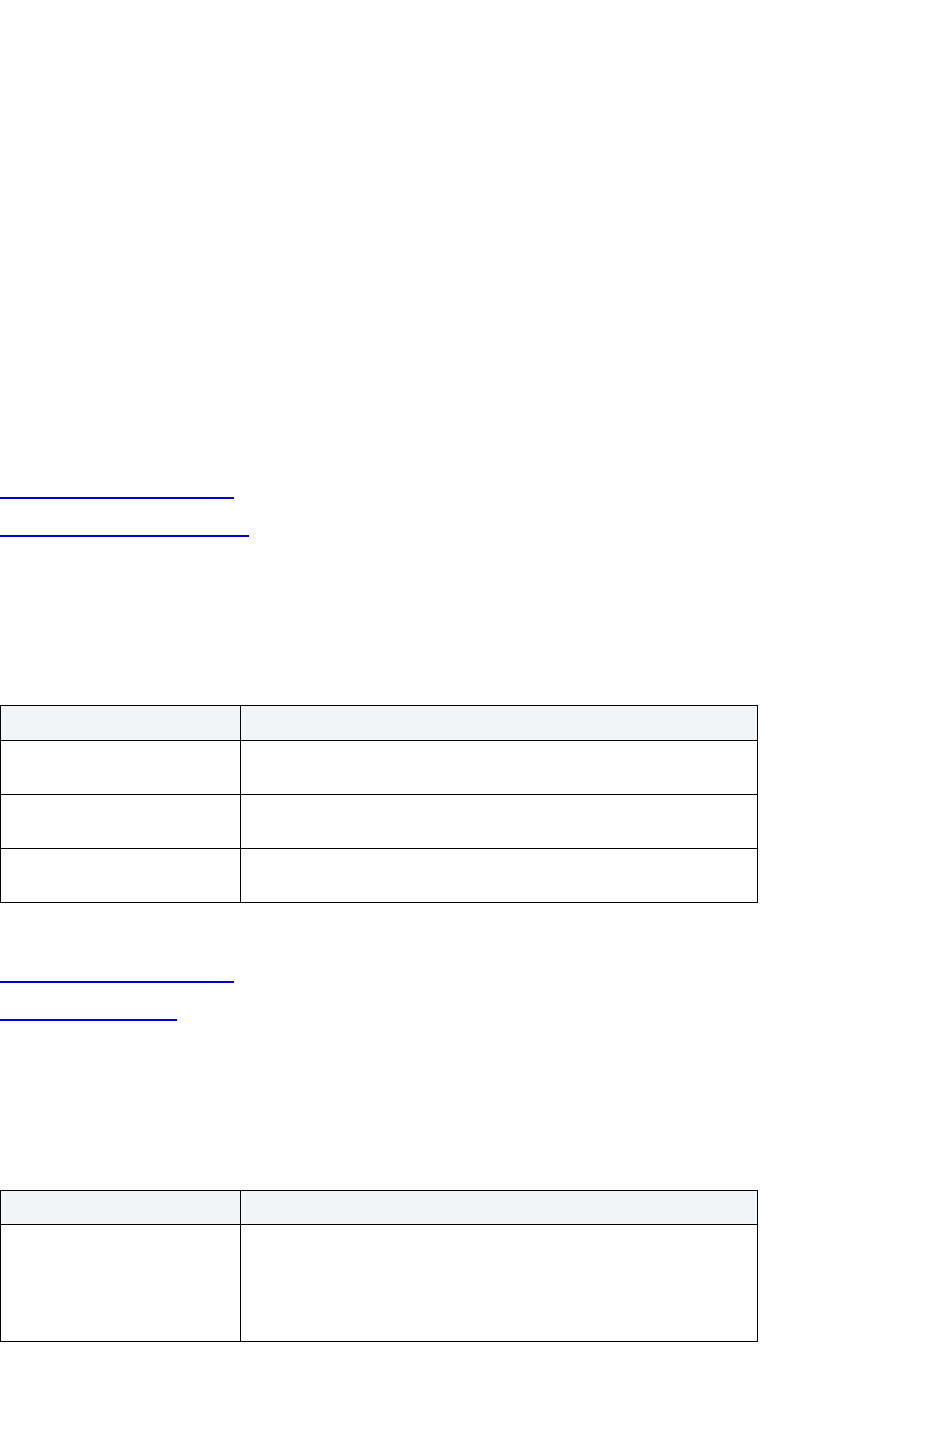
USING > FUNCTIONALITY
EMBARCADERO TECHNOLOGIES > BOOKNAMEVARIABLE 497
Snapshot Log Wizard for Oracle
The Snapshot Log Wizard lets you create a snapshot log. Snapshot logs are tables that maintain a history of
modifications to the master and they are used to refresh simple snapshots. When you create a snapshot log, Oracle
automatically creates a log table to track data changes in the master table and a log trigger to maintain the data in the
log table.
The Snapshot Log Wizard lets you:
• Specify the snapshot log owner, master table and the tablespace.
• Specify how Oracle should allocate data blocks to store the snapshot log.
• Specify how Oracle should manage the growth of the snapshot.
Important Notes
•None
For more information, see:
Completing an Object Wizard
Snapshot Log Wizard - Panel 1
Snapshot Log Wizard for Oracle - Panel 1
The table below describes the options and functionality on the first panel of the Snapshot Log Wizard.
For more information, see:
Completing an Object Wizard
Snapshot Log Wizard
Snapshot Log Wizard for Oracle - Panel 2
The table below describes the options and functionality on the second panel of the Snapshot Log Wizard.
Option Description
Who owns the snapshot log’s
master table?
Lets you click the list, and then click the owner.
Which table will serve as the
snapshot log's master table?
Lets you click the list, and then click the table.
On which tablespace do you
want to place the table?
Lets you click the list, and then click the tablespace.
Option Description
How many transaction entries
are allowed for each
datablock in the snapshot
log?
Each transaction that updates a data block requires a transaction
entry. The initial parameter ensures that a minimum number of
concurrent transactions can update a data block, avoiding the
overhead of allocating a transaction entry dynamically. The
maximum parameter limits concurrency on a data block.
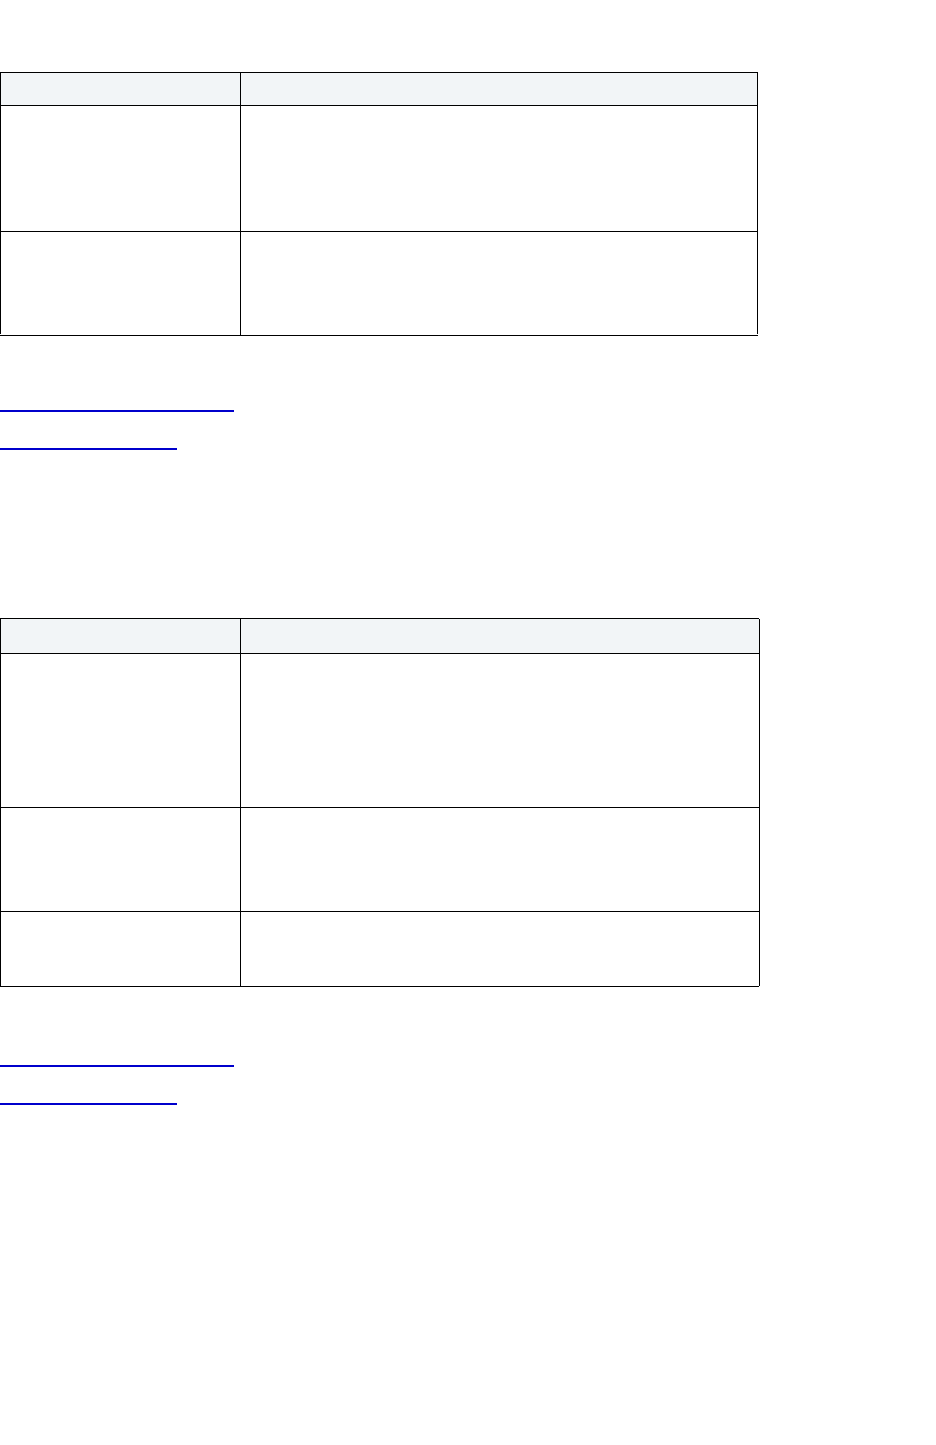
USING > FUNCTIONALITY
EMBARCADERO TECHNOLOGIES > BOOKNAMEVARIABLE 498
For more information, see:
Completing an Object Wizard
Snapshot Log Wizard
Snapshot Log Wizard for Oracle - Panel 3
The table below describes the options and functionality on the third panel of the Snapshot Log Wizard.
For more information, see:
Completing an Object Wizard
Snapshot Log Wizard
Synonym Wizard for Oracle
The Synonym Wizard lets you create a synonym. Synonyms are an alternate name for an object in the database.
Depending on the platform, you can define synonyms on tables, views, sequences, procedures, functions, packages
and materialized views.
The Synonym Wizard lets you:
• Specify the object type to be referenced by the synonym.
What is the percent of space
reserved for future updates?
The storage parameter lets you tune performance by minimizing
the occurrence of row migration and chaining caused by update
operations that extend the length of rows stored on the data block.
Percent Free - Lets you click the list or type the percent in the
Percent Free box.
What is the minimum
percentage of used space
that Oracle maintains for
each data block?
The storage parameter lets you tune performance by minimizing
the occurrence of row migration and chaining caused by update
operations that extend the length of rows stored on the data block.
Percent Used - Lets you click the list or type the percent.
Option Description
How large are the snapshot
log's extents?
The unit of space allocated to an object whenever the object needs
more space.
Initial Extent - The initial space extent (in bytes) allocated to the
object.
Next Extent - The next extent (in bytes) that the object will attempt
to allocate when more space for the object is required.
How many extents should be
allocated to the snapshot log?
Minimum Extents - The appropriate minimum extents value for the
object.
Maximum Extents - The appropriate maximum extents value for the
object.
What is the growth rate for
sizing additional extents?
Percent Increase - Magnifies how an object grows and, can
materially affect available free space in a tablespace. Select a
value in the corresponding box.
Option Description

USING > FUNCTIONALITY
EMBARCADERO TECHNOLOGIES > BOOKNAMEVARIABLE 499
• Identify the base database object for which you are creating the synonym.
Important Notes
• To create a private synonym, you need CREATE SYNONYM privileges. To create a public synonym, you need
CREATE PUBLIC SYNONYM privileges.
For more information, see:
Completing an Object Wizard
Synonym Wizard - Panel 1
Synonym Wizard for Oracle - Panel 1
The table below describes the options and functionality on the first panel of the Synonym Wizard.
For more information, see:
Completing an Object Wizard
Synonym Wizard
Synonym Wizard for Oracle - Panel 2
The table below describes the options and functionality on the second panel of the Synonym Wizard.
For more information, see:
Completing an Object Wizard
Synonym Wizard
Synonym Wizard for Oracle - Panel 3
The table below describes the options and functionality on the third panel of the Synonym Wizard.
Option Description
What is the name of the
synonym?
Lets you type the database link name.
Do you want to make this
synonym accessible to all
users?
Lets you make the synonym public.
Who owns the synonym? Lets you select the owner.
Option Description
What is the object type of the
referenced object?
Lets you select the object type to be referenced by the synonym.

USING > FUNCTIONALITY
EMBARCADERO TECHNOLOGIES > BOOKNAMEVARIABLE 500
For more information, see:
Completing an Object Wizard
Synonym Wizard
Table Wizard for Oracle
The Table Wizard lets you create a table without knowing the underlying commands. As you complete the Table
Wizard, Rapid SQL constructs the necessary CREATE TABLE statement from the information that you supply. The
Table Wizard varies slightly in content based on the version of Oracle on the target datasource.
The Table Wizard lets you:
• Specify the table owner, name the table and place it on a tablespace.
• Specify partitioning.
• Specify how Oracle should allocate data blocks to store the table.
• Specify Oracle's Parallel Server options.
• Provide a table comment and/or description.
Important Notes
• The table wizard panels differ depending on what options you select.
• To simplify the process of creating a table, the Table Wizard focuses on creating the basic table definition without
any constraints. After you create the basic table definition, you can add primary, unique, and foreign keys to the
table on the Constraints Tab of the Tables Editor.
For more information, see:
Completing an Object Wizard
Table Wizard - Panel 1 for Heap-Organized Tables
Table Wizard - Panel 1 for Index-Organized Tables
Option Description
Who owns the referenced
object?
Lets you select the owner.
What is the name of
referenced object?
NOTE: The object cannot be contained in a package.
Lets you select the name. This list is populated by the object type
you selected in step 2 of the wizard.
If the object resides in a
remote database, please
choose a database link
Lets you select the database link so that you can connect to the
object.

USING > FUNCTIONALITY
EMBARCADERO TECHNOLOGIES > BOOKNAMEVARIABLE 501
Table Wizard for Oracle - Panel 1
TIP: Index-organized tables take up less storage space and quickly access table rows.
Index-organized tables stores rows in primary key order reducing the amount of storage space
needed.
TIP: An advantage of using index-organized tables is that the tables use less memory because key
columns are not duplicated in the table and index. Rapid SQL stores the remaining non-key
columns in the index structure.
The table below describes the options and functionality on the first panel of the Table Wizard.
For more information, see:
Partitioning
Completing an Object Wizard
Table Wizard
Table Wizard for Oracle - Panel 2 for Heap-Organized Tables
Rapid SQL opens the Add Column dialog box.
Option Description
Who owns the table? Lets you select the owner.
What is the name of the
table?
Lets you type the name.
On which tablespace do you
want to place the table?
Lets you select the tablespace.
NOTE: You should never place user tables on the SYSTEM
tablespace.
How do you want the table
organized?
ORACLE 8 OR LATER ONLY:
Index-organized - Tables are tables with data rows grouped by the
primary key. Index-organized tables provide fast key-based access
to table data for queries involving exact match and range searches.
Because there is not separate table storage area, if you make
changes to the table data such as adding new rows, updating rows,
or deleting rows Rapid SQL updates the index structure.
An advantage of using Index-Organized tables is that the tables
use less memory because key columns are not duplicated in the
table and index. Rapid SQL stores the remaining non-key columns
in the index structure.
Heap-Organized - The data rows of the table are stored in no
particular order.
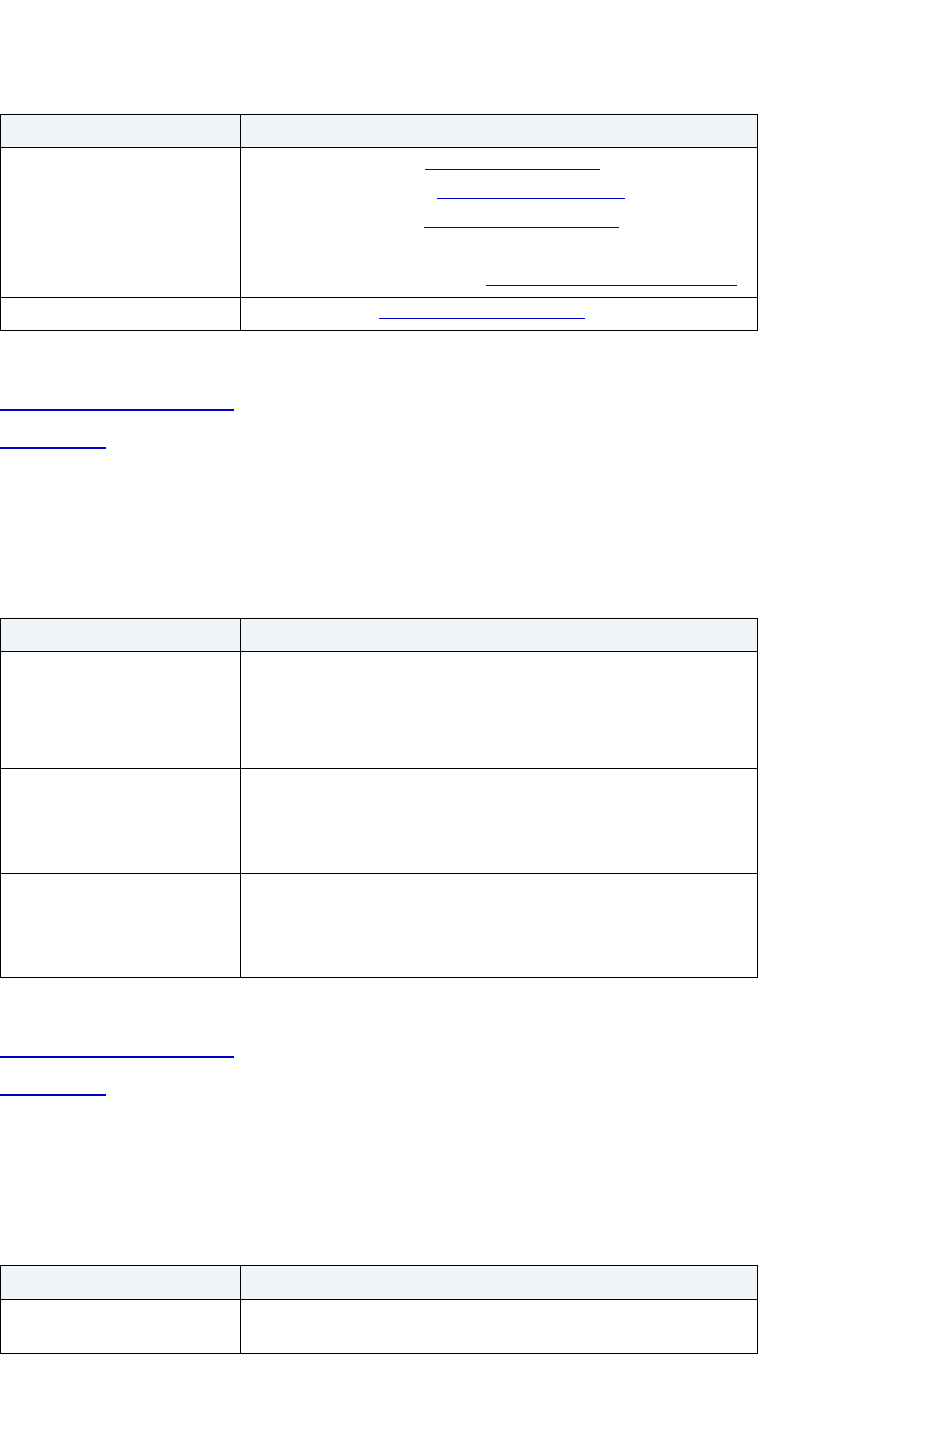
USING > FUNCTIONALITY
EMBARCADERO TECHNOLOGIES > BOOKNAMEVARIABLE 502
The table below describes the options and functionality on the second panel of the Table Wizard:
For more information, see:
Completing an Object Wizard
Table Wizard
Table Wizard for Oracle - Panel 3 for Heap-Organized Tables
The table below describes the options and functionality on the third panel of the Table Wizard.
For more information, see:
Completing an Object Wizard
Table Wizard
Table Wizard for Oracle - Panel 4 for Heap-Organized Tables
The table below describes the options and functionality on the fourth panel of the Table Wizard.
Option Description
Add the columns belonging to
this table
Add - Click to open the Add Column dialog box.
Insert - Click to open the Insert Column dialog box
.
Edit - Click to open the Modify Column dialog box.
Drop - Click to delete the column.
Lob Storage - Click to open the Lob Storage Definition dialog box
.
Add Constraint Click to open the Index Constraint dialog box
.
Option Description
How many transaction entries
are allowed for each
datablock in the table?
Each transaction that updates a data block requires a transaction
entry. The initial parameter ensures that a minimum number of
concurrent transactions can update a data block, avoiding the
overhead of allocating a transaction entry dynamically. The
maximum parameter limits concurrency on a data block.
What is the percent of space
reserved for future updates?
Lets you tune performance by minimizing the occurrence of row
migration and chaining caused by update operations that extend
the length of rows stored on the data block.
Percentage Free - Lets you select or type the percentage.
What is the minimum
percentage of used space
that Oracle maintains for
each datablock?
Lets you to tune the efficiency of data storage and to avoid
fragmentation within data blocks. The sum of Percent Free and
Percent Used cannot exceed 100 percent.
Percentage Used - Lets you select or type the percentage.
Option Description
Would you like to estimate
the size of the table?
Select to estimate how large the table will become given a row
growth projection.

USING > FUNCTIONALITY
EMBARCADERO TECHNOLOGIES > BOOKNAMEVARIABLE 503
For more information, see:
Completing an Object Wizard
Table Wizard
Table Wizard for Oracle - Panel 5 for Heap-Organized Tables
The table below describes the options and functionality on the fifth panel of the Table Wizard.
For more information, see:
Completing an Object Wizard
Table Wizard
Table Wizard for Oracle - Panel 6 for Heap-Organized Tables
The table below describes the options and functionality on the sixth panel of the Table Wizard.
Option Description
You can achieve substantial
performance gains by using
Oracle's parallel query option
The Parallel server query option lets you process queries using
many query server processes running against multiple CPUs. This
option provides substantial performance gains such as reduction of
the query completion time.
Degree - Lets you type a value indicating the number of query
server processes that should be used in the operation.
Instances - Lets you type a value indicating how you want the
parallel query partitioned between the Parallel Servers.
Do you want this operation
logged in the redo file?
Lets you create a transaction log.
Choosing Cache keeps the
blocks in memory by placing
it at the most recently used
end. This option is useful for
small lookup tables.
Lets you select to place the operation in cache so that the blocks
are stored in most recently used memory.
Option Description
How large are the table's
extents?
The unit of space allocated to an object whenever the object needs
more space.
Initial Extent - The initial space extent (in bytes) allocated to the
object.
Next Extent - The next extent (in bytes) that the object will attempt
to allocate when more space for the object is required.
How extents should be
allocated to the table?
Minimum Extents - The appropriate minimum extents value for the
object.
Maximum Extents - The appropriate maximum extents value for
the object.
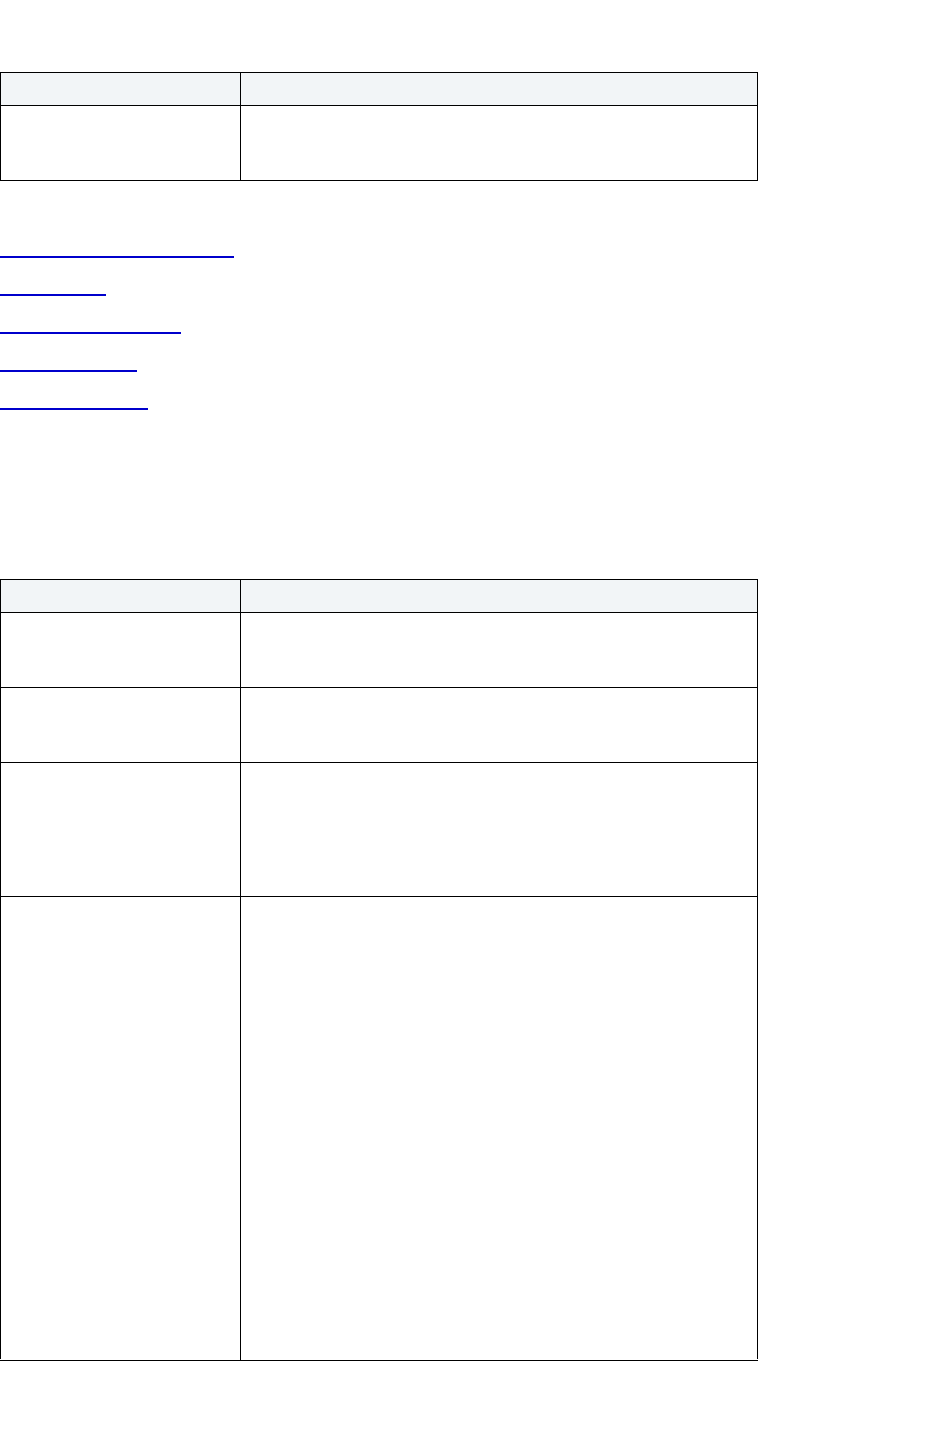
USING > FUNCTIONALITY
EMBARCADERO TECHNOLOGIES > BOOKNAMEVARIABLE 504
For more information, see:
Completing an Object Wizard
Table Wizard
Composite Partitioning
Hash Partitioning
Range Partitioning
Table Wizard for Oracle - Panel 7 for Heap-Organized Tables
The table below describes the options and functionality on the last panel of the Table Wizard.
What is the growth rate for
sizing additional extents?
Percent Increase - Magnifies how an object grows and, can
materially affect available free space in a tablespace. Select a
value in the corresponding box.
Option Description
Specify the number of free
lists
Free Lists - Lets you type the value. The default and minimum
value is 1. Set higher if multiple processes access the same data
block.
Specify the number of free list
groups
Free List Groups - Lets you type the value. The default and
minimum value is 1. This option is only applicable for the parallel
server option.
Define a bufferpool for this
table
DEFAULT - Select to use the default bufferpool.
KEEP - Select to retain the object in memory to avoid I/O conflicts.
RECYCLE - Select to save cache space by ridding data blocks
from memory as soon as they are no longer in use. This option is
only available for Oracle8.
Do you want to partition this
table?
NOTE: You cannot partition a table if it is part of a cluster, includes
LOBs (BLOB, CLOB, NCLOB, or BFILE), LONG or LONG RAW
datatypes, or object types, or is index-organized.
Composite - Lets you first divide the table into partitions based on a
range. Then you subdivide each partition into subpartitions. For
Oracle versions earlier than 9.2, the subpartitions are based on a
hash value. For Oracle 9.2 and later, the next panel lets you
subpartition by hash or by list. This combines the ease and
manageability of range partitioning with the data distribution of
hash or list partitioning.
Hash - Uses a hash value and distributes the data evenly across
multiple devices or machines.
Range - Relies on a data value to partition a table. Select range
partitioning when you do not known how the data maps on a given
range, range partition sizes would differ too greatly, or partition
pruning and key joins aren't important.
List - In Oracle 9i, Oracle introduced list partitioning. List
partitioning lets control how rows map to partitions. You can specify
a list of discrete values for the partitioning column in the description
for each partition.
Option Description
USING > FUNCTIONALITY
EMBARCADERO TECHNOLOGIES > BOOKNAMEVARIABLE 505
For more information, see:
Completing an Object Wizard
Table Wizard
Partitioning
Composite Partitioning
Hash Partitioning
Range Partitioning
Table Wizard for Oracle - Optional Last Panel for Heap-Organized Tables
For more information, see:
Completing an Object Wizard
Table Wizard
Table Wizard for Oracle - Panel 1 for Index-Organized Tables
TIP: Index-organized tables take up less storage space and quickly access table rows.
Index-organized tables stores rows in primary key order reducing the amount of storage space
needed.
TIP: An advantage of using index-organized tables is that the tables use less memory because key
columns are not duplicated in the table and index. Rapid SQL stores the remaining non-key
columns in the index structure.
The table below describes the options and functionality on the first panel of the Table Wizard.
Do you want to enable Row
Movement?
This clause allows for data row movement along various partitions
of the table being defined.
Option Description
Enter a table description Lets you type any table comments and/or descriptions; this can be
up to 2000 characters long.
Option Description
Who owns the table? Lets you select the owner.
What is the name of the
table?
Lets you type the name.
On which tablespace do you
want to place the table?
Lets you select the tablespace.
NOTE: You should never place user tables on the SYSTEM
tablespace.
Option Description
USING > FUNCTIONALITY
EMBARCADERO TECHNOLOGIES > BOOKNAMEVARIABLE 506
For more information, see:
Partitioning
Completing an Object Wizard
Table Wizard
Table Wizard for Oracle - Panel 2 for Index-Organized Tables
Rapid SQL opens the Add Column dialog box.
The table below describes the options and functionality on the second panel of the Table Wizard:
For more information, see:
Completing an Object Wizard
Table Wizard
Table Wizard for Oracle - Panel 3 for Index-Organized Tables
The table below describes the options and functionality on the third panel of the Table Wizard.
ORACLE 8 OR LATER
How do you want the table
organized?
Index-organized tables are tables with data rows grouped by the
primary key. Index-organized tables provide fast key-based access
to table data for queries involving exact match and range
searches. Because there is not separate table storage area, if you
make changes to the table data such as adding new rows,
updating rows, or deleting rows Rapid SQL updates the index
structure.
An advantage of using Index-Organized tables is that the tables
use less memory because key columns are not duplicated in the
table and index. Rapid SQL stores the remaining non-key columns
in the index structure.
Option Description
Add the columns belonging to
this table
Add - Click to open the Add Column dialog box.
Insert - Click to open the Insert Column dialog box
.
Edit - Click to open the Modify Column dialog box
.
Drop - Click to delete the column.
Lob Storage - Click to open the Lob Storage Definition dialog box
.
Add Constraint Click to open the Index Constraint dialog box
.
Option Description
USING > FUNCTIONALITY
EMBARCADERO TECHNOLOGIES > BOOKNAMEVARIABLE 507
For more information, see:
Completing an Object Wizard
Table Wizard
Table Wizard for Oracle - Panel 4 for Index-Organized Tables
The table below describes the options and functionality on the fourth panel of the Table Wizard.
For more information, see:
Completing an Object Wizard
Table Wizard
Table Wizard for Oracle - Panel 5 for Index-Organized Tables
The table below describes the options and functionality on the fifth panel of the Table Wizard.
Option Description
How many transaction entries
are allowed for each
datablock in the table?
Each transaction that updates a data block requires a transaction
entry. The initial parameter ensures that a minimum number of
concurrent transactions can update a data block, avoiding the
overhead of allocating a transaction entry dynamically. The
maximum parameter limits concurrency on a data block.
What is the percent of space
reserved for future updates?
Lets you tune performance by minimizing the occurrence of row
migration and chaining caused by update operations that extend
the length of rows stored on the data block.
Percentage Free - Lets you select or type the percentage.
Option Description
Would you like to estimate
the size of the table?
Select to estimate how large the table will become given a row
growth projection.
Option Description
What is the percentage of
space you want to reserve in
the index block?
Lets you select a percent threshold from the list or type a value.
The default value is 50.
Do you want to specify an
overflow segment?
The overflow segment preserves dense clustering of the B*tree
index by storing row column values that exceed a specified
threshold in a separate overflow data segment.
NOTE: You cannot drop an overflow segment.
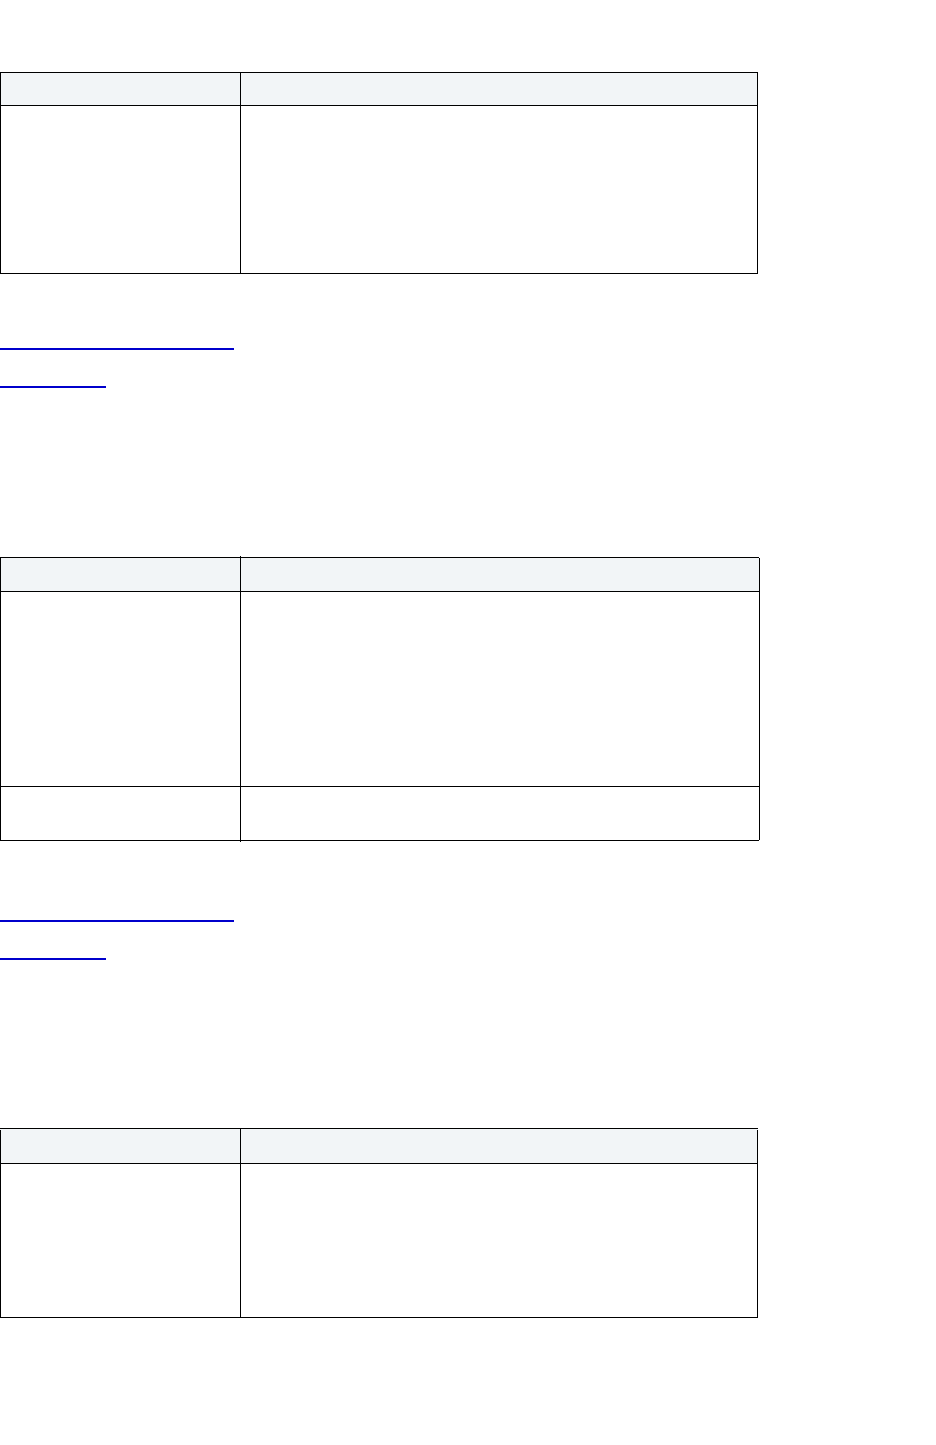
USING > FUNCTIONALITY
EMBARCADERO TECHNOLOGIES > BOOKNAMEVARIABLE 508
For more information, see:
Completing an Object Wizard
Table Wizard
Table Wizard for Oracle - Panel 6 for Index-Organized Tables
The table below describes the options and functionality on the sixth panel of the Table Wizard.
For more information, see:
Completing an Object Wizard
Table Wizard
Table Wizard for Oracle - Panel 7 for Index-Organized Tables
The table below describes the options and functionality on the seventh panel of the Table Wizard.
Do you want to use key
compression to eliminate
repeated occurrences of
primary key column values?
Key compression lets you save space by breaking index keys into
prefix and suffix entries. All prefix entries are then shared among
the suffix entries in the index block, letting you store more keys per
index block.
Compression Value - The Compression Value must be between 1
and the total number of primary key columns minus 1. To use key
compression, you need at least two primary key columns.
Option Description
You can achieve substantial
performance gains by using
Oracle's parallel query option
The Parallel server query option lets you process queries using
many query server processes running against multiple CPU's. This
option provides substantial performance gains such as reduction of
the query completion time.
Degree - Lets you type a value indicating the number of query
server processes that should be used in the operation.
Instances - Lets you type a value indicating how you want the
parallel query partitioned between the Parallel Servers.
Do you want this operation
logged in the redo file?
Lets you log the operation in the redo file.
Option Description
How large are the table's
extents?
The unit of space allocated to an object whenever the object needs
more space.
Initial Extent - The initial space extent (in bytes) allocated to the
object.
Next Extent - The next extent (in bytes) that the object will attempt
to allocate when more space for the object is required.
Option Description
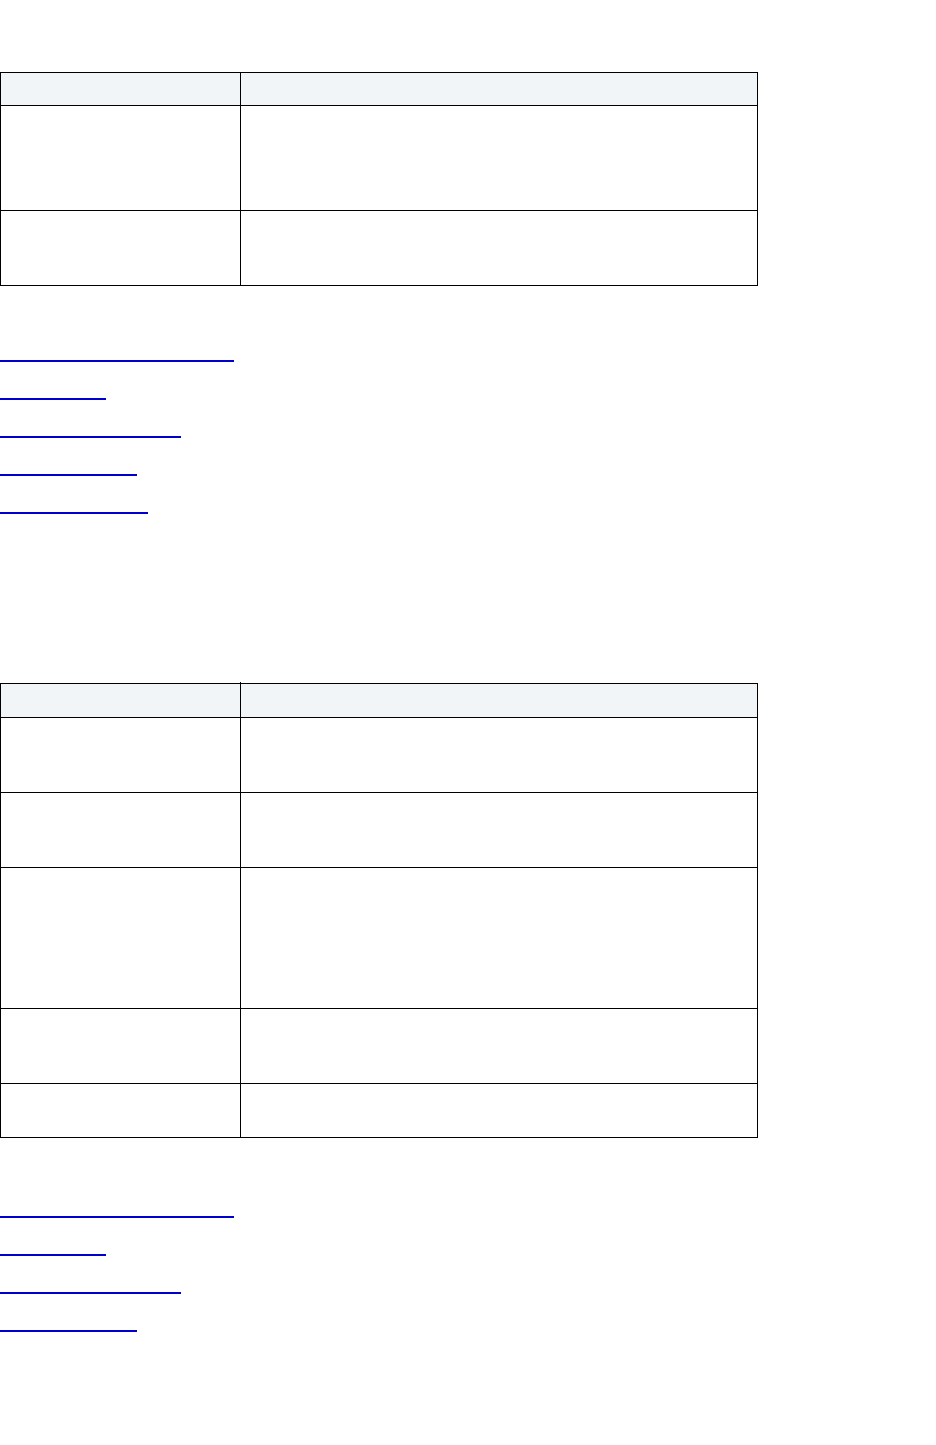
USING > FUNCTIONALITY
EMBARCADERO TECHNOLOGIES > BOOKNAMEVARIABLE 509
For more information, see:
Completing an Object Wizard
Table Wizard
Composite Partitioning
Hash Partitioning
Range Partitioning
Table Wizard for Oracle - Panel 8 for Index-Organized Tables
The table below describes the options and functionality on the eighth panel of the Table Wizard.
For more information, see:
Completing an Object Wizard
Table Wizard
Composite Partitioning
Hash Partitioning
How extents should be
allocated to the table?
Minimum Extents - The appropriate minimum extents value for the
object.
Maximum Extents - The appropriate maximum extents value for
the object.
What is the growth rate for
sizing additional extents?
Percent Increase - Magnifies how an object grows and, can
materially affect available free space in a tablespace. Select a
value in the corresponding box.
Option Description
Specify the number of free
lists
Free Lists - Lets you type the value. The default and minimum
value is 1. Set higher if multiple processes access the same data
block.
Specify the number of free list
groups
Free List Groups - Lets you type the value. The default and
minimum value is 1. This option is only applicable for the parallel
server option.
Define a bufferpool for this
table
DEFAULT - Select to use the default bufferpool.
KEEP - Select to retain the object in memory to avoid I/O conflicts.
ORACLE 8 ONLY:
RECYCLE - Select to save cache space by ridding data blocks
from memory as soon as they are no longer in use.
Do you want to partition this
table?
NOTE: You cannot partition a table if it is part of a cluster, includes
LOBs (BLOB, CLOB, NCLOB, or BFILE), LONG or LONG RAW
datatypes, or object types, or is index-organized.
Do you want to enable Row
Movement?
This clause allows for data row movement along various partitions
of the table being defined.
Option Description

USING > FUNCTIONALITY
EMBARCADERO TECHNOLOGIES > BOOKNAMEVARIABLE 510
Range Partitioning
Table Wizard for Oracle - Optional Last Panel for Index-Organized Tables
For more information, see:
Completing an Object Wizard
Table Wizard
Oracle Partitioning
Partitioning your tables lets you get around the problem of supporting large tables. Partitioning lets you break large
tables into smaller pieces, which are called partitions. Partitions make the data in your table easier to manage and
analyze. Your SQL statements can access the partitions rather than the entire table. Partitions are most useful in data
warehouse applications, which store large amounts of data.
The table below describes the types of partitions in Oracle:
Option Description
Enter a table description Lets you type any table comments and/or descriptions; this can be
up to 2000 characters long.
Partition Type Description
Range Use range partitioning to map rows to partitions based on ranges
of column values. This type of partitioning is useful when dealing
with data that has logical ranges into which it can be distributed; for
example, months of the year. Performance is best when the data
evenly distributes across the range. If partitioning by range causes
partitions to vary dramatically in size because of unequal
distribution, you may want to consider one of the other methods of
partitioning.
Hash Use hash partitioning if your data does not easily lend itself to
range partitioning, but you would like to partition for performance
and manageability reasons. Hash partitioning provides a method of
evenly distributing data across a specified number of partitions.
Rows are mapped into partitions based on a hash value of the
partitioning key. Creating and using hash partitions gives you a
highly tunable method of data placement, because you can
influence availability and performance by spreading these evenly
sized partitions across I/O devices (striping).
Composite In Oracle 8i, Oracle introduced both hash and composite
partitioning. Hash partitions partition the table according to a hash
function. Composite partitions use both range and hash types, first
partitioning the data by a range of values, and then further dividing
the partitions into subpartitions by way of a hash function.
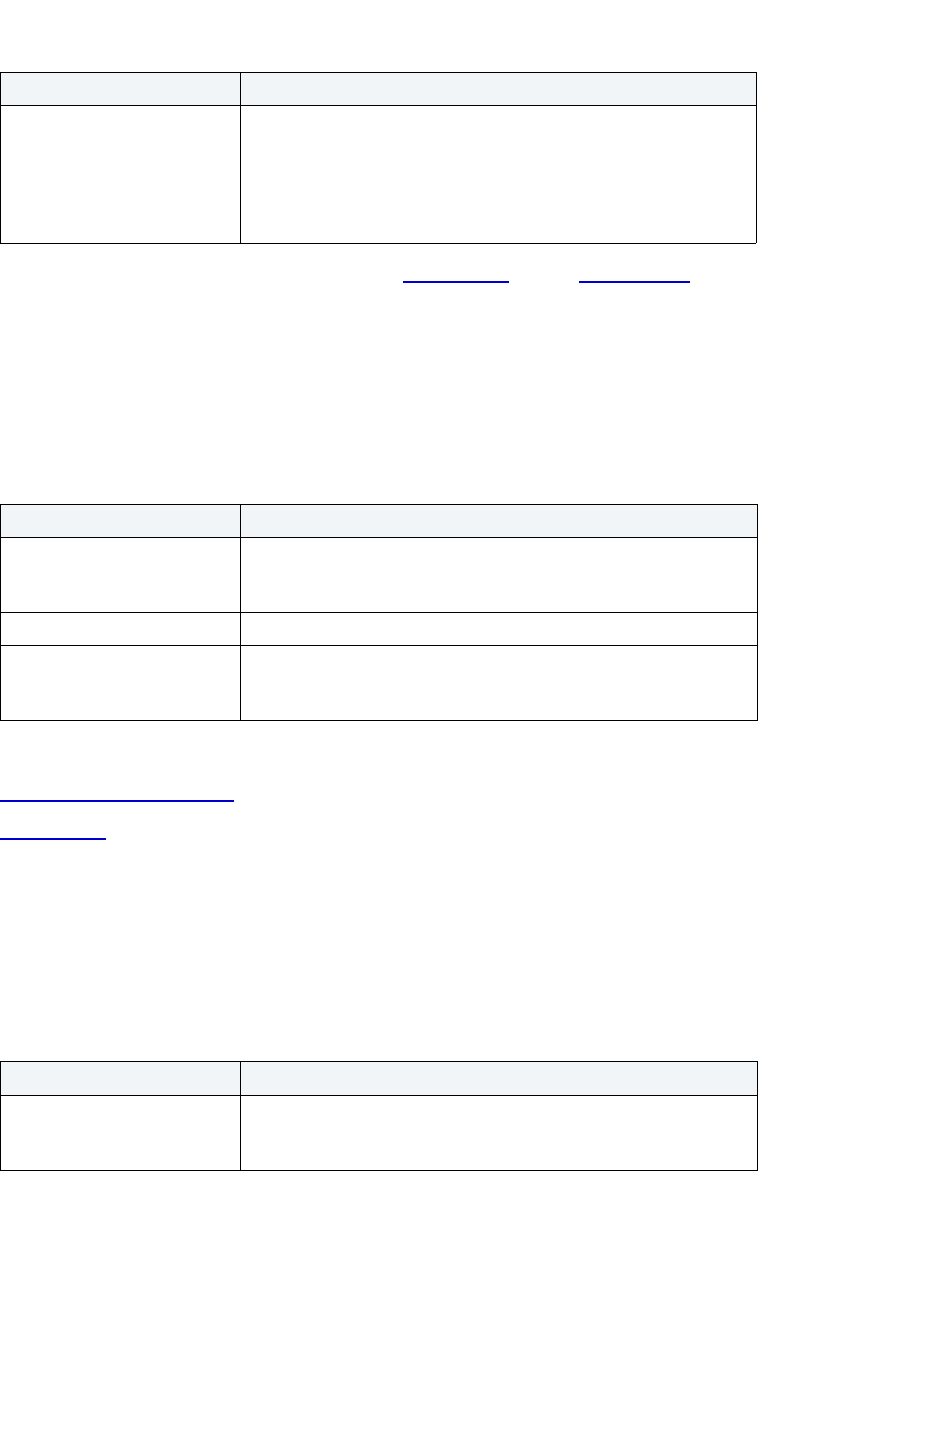
USING > FUNCTIONALITY
EMBARCADERO TECHNOLOGIES > BOOKNAMEVARIABLE 511
Rapid SQL lets you create table partitions with the Table Wizard and the Tables Editor.
Table Wizard for Oracle - Composite Partitioning
NOTE: This option is only available in Oracle 8.0 or later and is not available for index-organized tables.
The table below describes the options and functionality on this panel of the Table Wizard.
For more information, see:
Completing an Object Wizard
Table Wizard
Table Wizard for Oracle - Composite Partitioning
NOTE: This option is only available in Oracle 9.2 or later.
The table below describes the options and functionality on this panel of the Table Wizard.
List Use list partitioning when you require explicit control over how
rows map to partitions. You can specify a list of discrete values for
the partitioning column in the description for each partition. This is
different from range partitioning, where a range of values is
associated with a partition, and from hash partitioning, where the
user has no control of the row to partition mapping.
Option Description
Select the partitioning
columns
Available Columns - Lets you select at least one partitioning
column, and then click the right arrow button to move it to the
Selected Columns box.
Subpartitioning Method Lets you specify which subpartitioning method to use, hash or list.
Select the subpartitioning
columns
Available Columns - Lets you select at least one subpartitioning
column, and then click the right arrow button to move it to the
Selected Columns box.
Option Description
Select the partitioning
columns
Available Columns - Lets you select at least one partitioning
column, and then click the right arrow button to move it to the
Selected Columns box.
Partition Type Description

USING > FUNCTIONALITY
EMBARCADERO TECHNOLOGIES > BOOKNAMEVARIABLE 512
For more information, see:
Completing an Object Wizard
Table Wizard
Table Wizard for Oracle - Range-Hash Composite Partitioning
NOTE: This option is only available in Oracle 9.2 or later.
The table below describes the options and functionality on this panel of the Table Wizard.
For more information, see:
Completing an Object Wizard
Table Wizard
Table Wizard for Oracle - Range-List Composite Partitioning
NOTE: This option is only available in Oracle 9.2 or later.
The table below describes the options and functionality on this panel of the Table Wizard.
Select the subpartitioning
Method
Hash - Select if your data does not easily lend itself to range
partitioning, but you would like to partition for performance and
manageability reasons. Hash partitioning provides a method of
evenly distributing data across a specified number of partitions.
Rows are mapped into partitions based on a hash value of the
partitioning key. Creating and using hash partitions gives you a
highly tunable method of data placement, because you can
influence availability and performance by spreading these evenly
sized partitions across I/O devices (striping).
List- Select when you require explicit control over how rows map to
partitions. You can specify a list of discrete values for the
partitioning column in the description for each partition. This is
different from range partitioning, where a range of values is
associated with a partition, and from hash partitioning, where the
user has no control of the row to partition mapping.
Select the subpartitioning
columns
Available Columns - Lets you select at least one subpartitioning
column, and then click the right arrow button to move it to the
Selected Columns box.
Option Description
Specify default number of
subpartitions
OPTIONAL: Lets you type a value.
Select the default
tablespaces to contain the
subpartitions
OPTIONAL: Lets you select a tablespace from the list, and then
click the right arrow button.
Create an ordered list of
partitions
Add Button - Click to open the Add Partition dialog box
.
Option Description
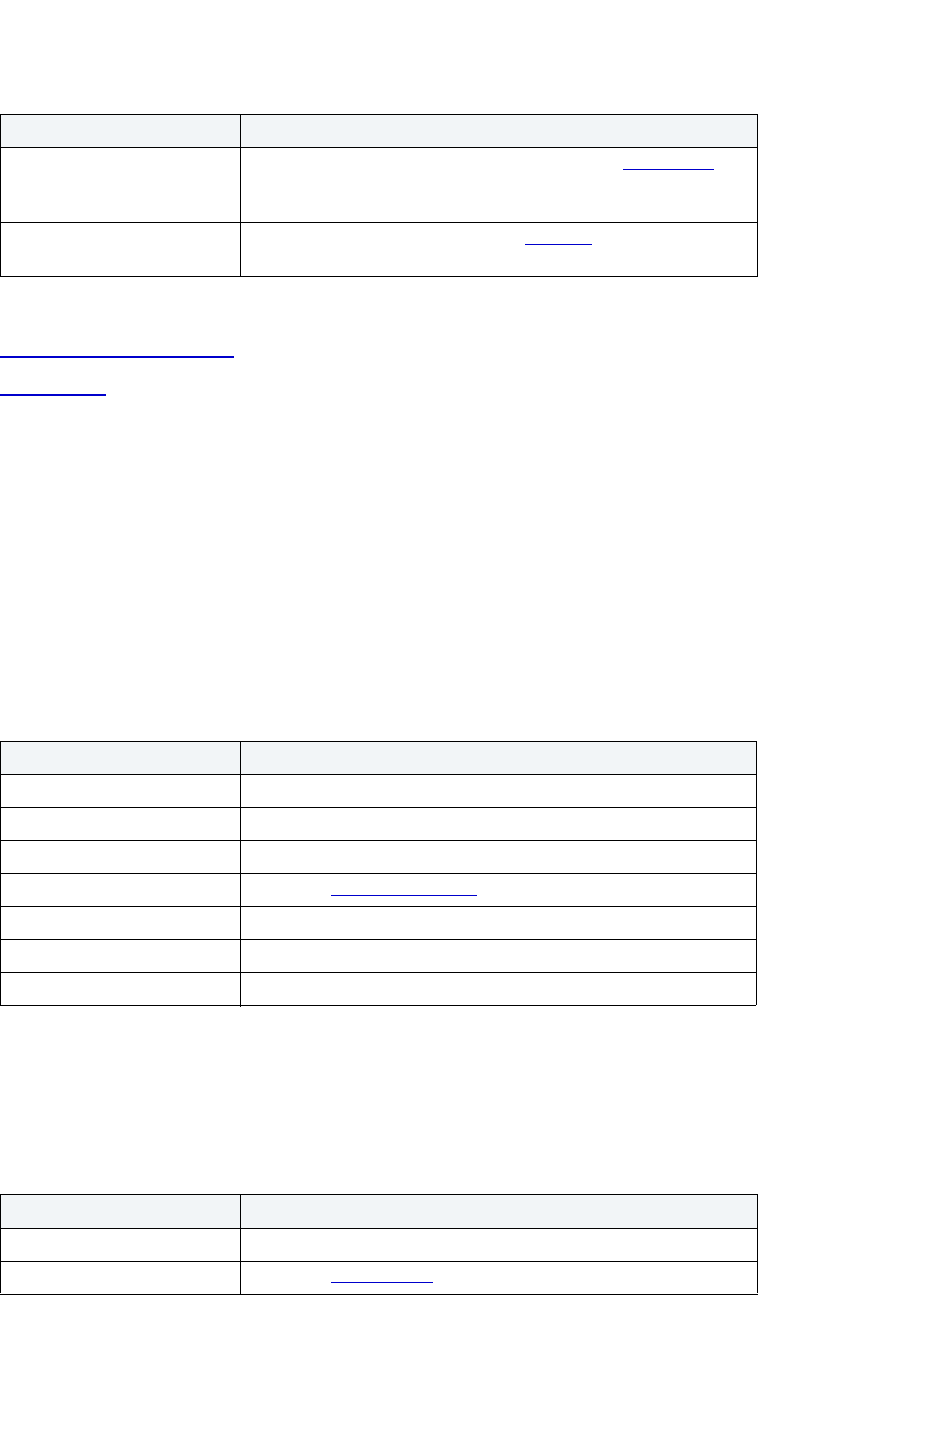
USING > FUNCTIONALITY
EMBARCADERO TECHNOLOGIES > BOOKNAMEVARIABLE 513
For more information, see:
Completing an Object Wizard
Table Wizard
Subpartition
The Subpartition dialog box lets you add, insert or edit a subpartition in a partition.
Important Notes
• When you split a range-list partition, you cannot specify the new partitions’ subpartition information.
The table below describes the options and functionality on the Subpartition dialog box.
NOTE: Options vary by wizard and editor.
Add Partition Value
The Add Partition Value dialog box lets you add a value to a partition. The table below describes the options and
functionality on the dialog box.
Option Description
Create a list of subpartitions
to be included in the
subpartition template
OPTIONAL: Click Add, Insert, or Edit to open the Subpartition
dialog box.
Create an ordered list of
partitions
Click Add, Insert, or Edit to open the Partition
dialog box.
Option Description
Name Displays the subpartition name.
Value(s) Displays the subpartition value(s).
Default Subpartition Select to use default subpartition.
Add Value Opens the Add Partition Value
dialog box.
Drop Value Click to drop selected value.
Tablespace Lets you select a tablespace.
Add Click to add subpartition to the template.
Option Description
Please add a value Lets you specific a value for the partition.
Add Opens the Add Partition
dialog box.
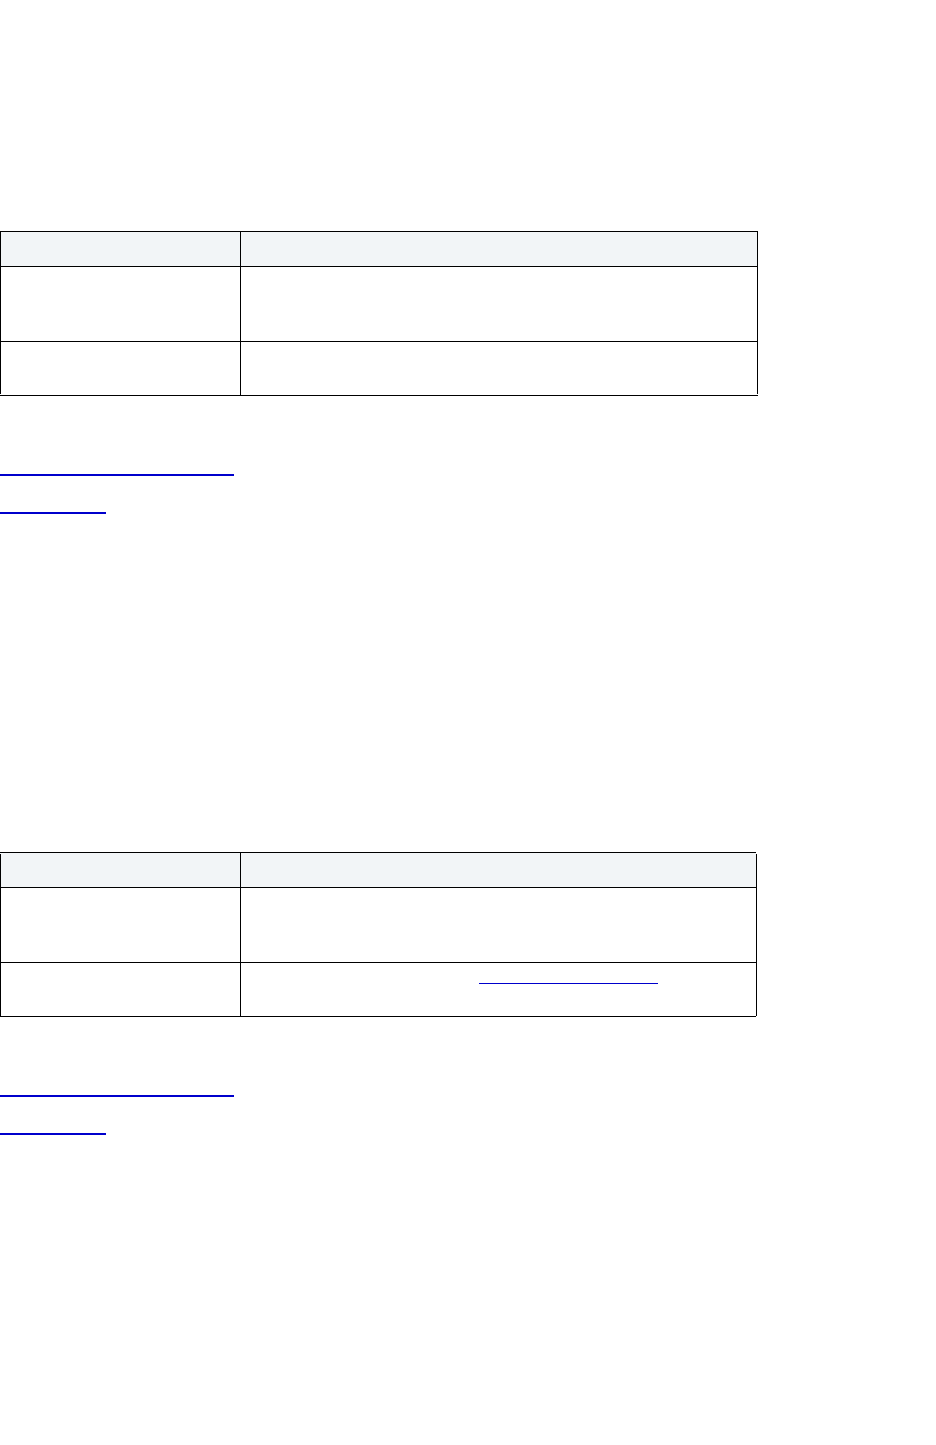
USING > FUNCTIONALITY
EMBARCADERO TECHNOLOGIES > BOOKNAMEVARIABLE 514
Table Wizard for Oracle - Hash Partitioning
NOTE: This panel is only available in Oracle 8i or later and is not available for index-organized tables.
The table below describes the options and functionality on this panel of the Table Wizard.
For more information, see:
Completing an Object Wizard
Table Wizard
Table Wizard for Oracle - Range Partitioning
The table below describes the options and functionality on this panel of the Table Wizard.
NOTE: This option is only available in Oracle 8.0.
NOTE: If a table is partitioned on a nullable column, and the column includes NULL values, then the
highest partition should have a partition bound of MAXVALUE for that column. If MAXVALUE is
not set, then the rows that contain nulls map above the highest partition in the table and the insert
fail.
For more information, see:
Completing an Object Wizard
Table Wizard
Table Wizard for Oracle - Optional Last Panel
The table below describes the options and functionality on the last panel of the Table Wizard.
Option Description
Select the partitioning
columns
Available Columns - Lets you select at least one available column,
and then click the right arrow to move the column to the Selected
Columns.
Hash partitioning methods OPTIONAL: Click the option button that corresponds to the Hash
partitioning method.
Option Description
Select the partitioning
columns
Available Columns - Lets you select at least one available column,
and then click the right arrow to move the column to the Selected
Columns.
Create an ordered list of
partitions
Add Button - Click to open the Add Partition dialog box
.

USING > FUNCTIONALITY
EMBARCADERO TECHNOLOGIES > BOOKNAMEVARIABLE 515
For more information, see:
Completing an Object Wizard
Table Wizard
Tablespace Wizard for Oracle
The Tablespace Wizard lets you create a tablespace. Tablespaces are storage structures that act as partitions for the
database. You can create a tablespace to store table data and other objects related to table performance such as
indexes or large object data. Tablespaces are used to manage large complex databases. Once you have created a
tablespace, you can place objects on it.
The Tablespace Wizard lets you:
• Name the tablespace, and specify space management.
• Specify what types of objects are stored on the tablespace, and place the tablespace online or offline.
• Add the datafiles that comprise the tablespace and specify the parameters for the datafiles.
• Specify how Oracle should manage the growth of the tablespace.
Important Notes
• For auto-UNDO management to be in effect, set init.ora parameter to undo_management. When set to MANUAL
(the default), it disables auto-UNDO management. When to set AUTO, auto-UNDO management is enabled.
• To determine if the undo_management parameter is set to AUTO, use the following query:
SELECT VALUE
FROM SYS.V_$PARAMETER
WHERE NAME = 'undo_management'
NOTE: This parameter cannot be set dynamically via the ALTER SYSTEM or ALTER SESSION.
For more information, see:
Completing an Object Wizard
Tablespace Wizard - Panel 1
Tablespace Wizard for Oracle - Panel 1
The table below describes the options and functionality on the first panel of the Tablespace Wizard.
Option Description
Enter a table description Lets you type any table comments and/or descriptions; this can be
up to 2000 characters long.
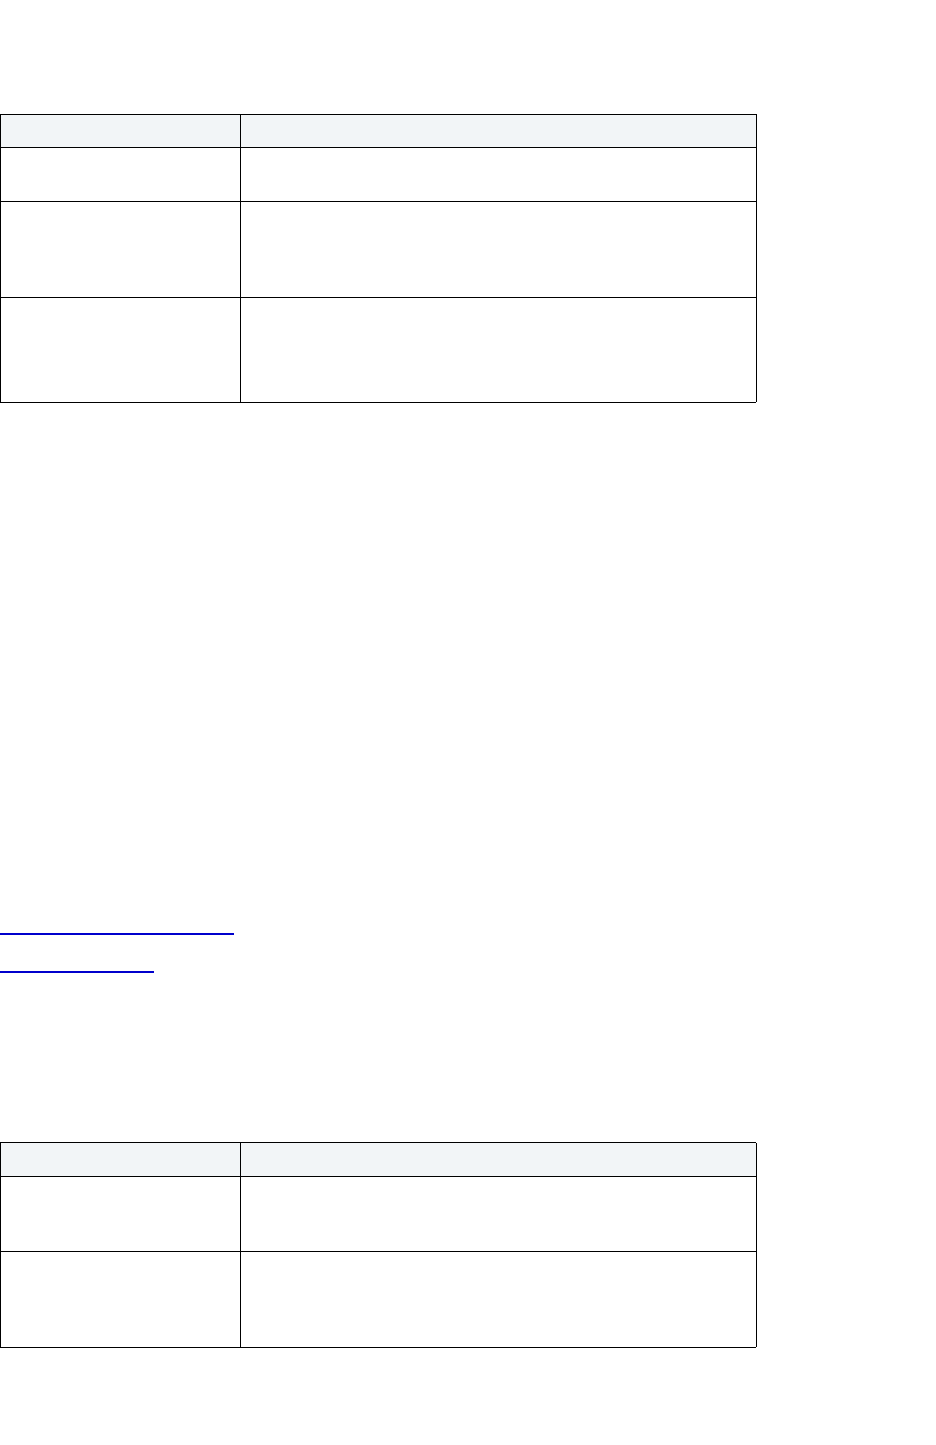
USING > FUNCTIONALITY
EMBARCADERO TECHNOLOGIES > BOOKNAMEVARIABLE 516
For users using a version earlier than Oracle 8i and locally managed tablespaces, there are manual methods can
employ to assist in the fight against tablespace fragmentation. They include:
• Setting PCTINCREASE to zero for all tablespaces and objects to promote same-sized extents.
• Specifying equal-sized allotments for your INITIAL and NEXT object storage parameters.
• Grouping objects with like growth and storage needs together in their own tablespaces.
One of the best ways to avoid fragmentation in a tablespace is to pre-allocate the space that your objects will use. If
possible, plan for one to two years' growth for each object and allocate your space accordingly. Having initial empty
objects will not affect table scan times as Oracle only scans up to the high-water mark (the last used block) in a table.
Of all your tablespaces, you want to avoid fragmentation problems in your SYSTEM tablespace the most as this is the
major hotbed tablespace for Oracle activities. The easiest way to avoid this is to not allow any user (even the default
DBA ID's SYS and SYSTEM) to have access to it. There are three ways to do this:
• Ensure no user has a DEFAULT or TEMPORARY tablespace assignment of SYSTEM.
• Ensure no user has a quota set for SYSTEM.
• Ensure no user has been granted the UNLIMITED TABLESPACE privilege.
For more information, see:
Completing an Object Wizard
Tablespace Wizard
Tablespace Wizard for Oracle - Panel 2
The table below describes the options and functionality on the second panel of the Tablespace Wizard.
Option Description
What is the name of the
tablespace?
Lets you type the name of the tablespace.
What type of tablespace
would you like to create?
Lets you select a tablespace type. A permanent tablespace only
holds objects for the duration of the session. An UNDO tablespace
allows for automatic rollback segment management in Oracle 9i or
later.
Do you want space
management to be performed
through the data dictionary or
locally in the tablespace?
Dictionary Managed
Locally Managed - Select for an UNDO tablespace. Eliminates the
storage parameters of MINEXTENTS, MAXEXENTS,
PCTINCREASE, and NEXT.
Option Description
Do you want redo logging
when Schema/Data is
modified?
Lets you indicate that you want redo logging when Schema/Data is
modified.
Should the tablespace be
placed online following its
creation?
Always create tablespaces for user data and never place user
tables and indexes in the SYSTEM tablespace. Placing user
objects in the SYSTEM tablespace can degrade performance and
introduce space-related headaches to the database.
USING > FUNCTIONALITY
EMBARCADERO TECHNOLOGIES > BOOKNAMEVARIABLE 517
For more information, see:
Completing an Object Wizard
Tablespace Wizard
Tablespace Wizard for Oracle - Panel 3
NOTE: This panel is available for tablespaces that are permanent and locally-managed.
The table below describes the options and functionality on the third panel of the Tablespace Wizard.
For more information, see:
Completing an Object Wizard
Tablespace Wizard
Tablespace Wizard for Oracle - Panel 4
The table below describes the options and functionality on the fourth panel of the Tablespace Wizard.
Option Description
What type of segment
management should be
used?
Lets you select segment management type:
Automatic - Oracle manages the free space for all objects using
bitmaps. Available for permanent locally-managed tablespaces.
NOTE: LOBs cannot be stored in auto segment tablespaces.
Manual - Oracle manages the free space for all objects using free
lists.
What block size should the
tablespaces use?
Lets you specify the tablespace block size. You can create
tablespaces with block sizes that differ from the block size that the
database was created with.
Option Description
OMF ORACLE 9i ONLY: Lets you specify to use Oracle Managed Files
to automatically create the datafile.
Datafile Name Lets you type the datafile name.
Datafile Size Lets you type the datafile size, and then click the list to indicate MB
or KB.
Reuse Existing File? Lets you use an existing file instead of creating a new one.
Autoextend Select this check box if you want to autoextend the datafile when
more space is required. This enables the options below.
Disk Space to Allocate to the
Datafile When More Extents
are Required
Type the disk space to allocate to the datafile when more extents
are required by typing it and then click the list to indicate MB or KB.

USING > FUNCTIONALITY
EMBARCADERO TECHNOLOGIES > BOOKNAMEVARIABLE 518
For more information, see:
Completing an Object Wizard
Tablespace Wizard
Tablespace Wizard for Oracle - Panel 5
The table below describes the options and functionality on the fifth panel of the Tablespace Wizard.
For more information, see:
Completing an Object Wizard
Tablespace Wizard
Trigger Wizard for Oracle
The Trigger Wizard lets you create a trigger. Triggers are a special type of procedure that automatically fire when
defined data modification operations (insert, update or delete) occur on a target table. Triggers fire after an insert,
update or delete, but belong to the same transaction as the data modification operation.
The Trigger Wizard lets you:
• Specify the trigger name and the table on which it fires.
• Specify the granularity of the trigger.
• Define the trigger body.
• Specify the trigger timing, event and applicable table columns for an update trigger.
• Define the PL/SQL block that should execute when the trigger fires.
Maximum Disk Space
Allowed for Allocation to the
Datafile
Specify the maximum disk space allowed for allocation to the
datafile, by clicking the Unlimited option button or the Other option
button. In the Other box, type the amount and then click the list to
indicate MB or KB.
Option Description
What should be the default
extent sizes boxes
The unit of space allocated to an object whenever the object needs
more space.
Initial Extent - The initial space extent (in bytes) allocated to the
object.
Next Extent - The next extent (in bytes) that the object will attempt
to allocate when more space for the object is required.
How many extents should be
allocated to the objects
placed on the tablespace?
Minimum Extents - The appropriate minimum extents value for the
object.
Maximum Extents - The appropriate maximum extents value for
the object.
What should be the growth
rate for sizing additional
extents?
Percent Increase - Magnifies how an object grows and, can
materially affect available free space in a tablespace. Select a
value in the corresponding box.
Option Description
USING > FUNCTIONALITY
EMBARCADERO TECHNOLOGIES > BOOKNAMEVARIABLE 519
Important Notes
• To create triggers in your own schema, you need CREATE TRIGGER privileges. To create triggers in other
schemas, you need CREATE ANY TRIGGER privileges.
For more information, see:
Completing an Object Wizard
Trigger Wizard - Panel 1
Trigger Wizard for Oracle - Panel 1
The table below describes the options and functionality on the first panel of the Trigger Wizard.
For more information, see:
Completing an Object Wizard
Trigger Wizard
Trigger Wizard for Oracle - Panel 2
The table below describes the options and functionality on the second panel of the Trigger Wizard.
For more information, see:
Completing an Object Wizard
Trigger Wizard
Trigger Wizard for Oracle - Panel 3
The table below describes the options and functionality on the third panel of the Trigger Wizard.
Option Description
Select the object on which the
trigger is to be created.
Lets you select Table or View.
Who owns the base table? Lets you click the list, and then select the owner.
What is the name of the base
table?
Lets you click the list, and then select the name.
Who owns the trigger to be
created?
Lets you click the list, and then select the name.
What is the name of the
trigger?
Lets you type the trigger name.
Option Description
What type of trigger should
be created?
Statement - Select to make the trigger fire only once.
Row - Select to make the trigger fire for each row affected.
What is the triggers state? Lets you click the Enable option button or the Disable option
button.
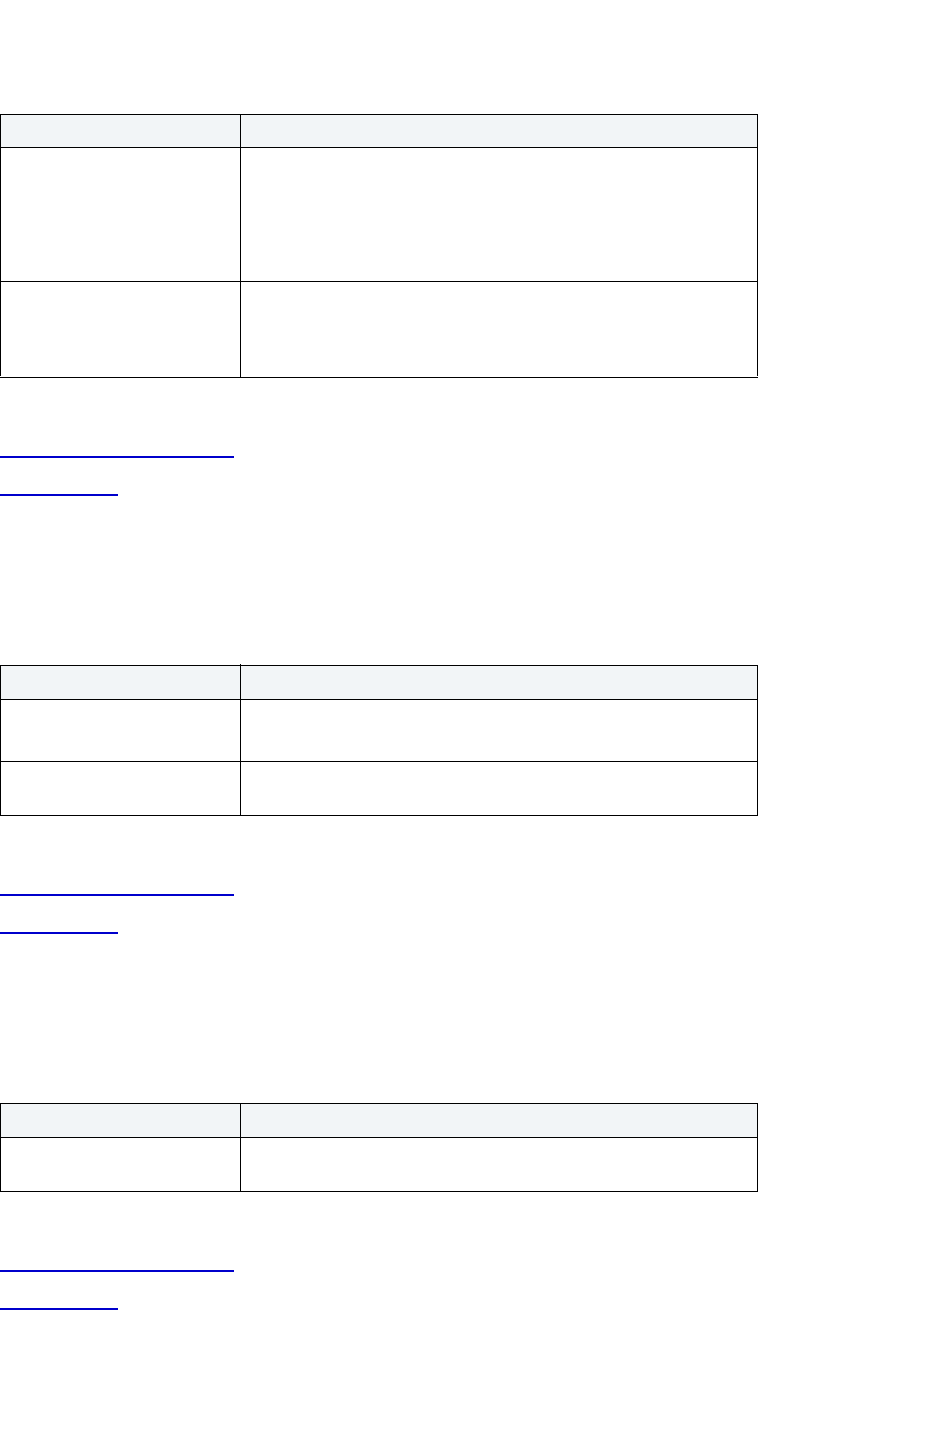
USING > FUNCTIONALITY
EMBARCADERO TECHNOLOGIES > BOOKNAMEVARIABLE 520
For more information, see:
Completing an Object Wizard
Trigger Wizard
Trigger Wizard for Oracle - Panel 4
The table below describes the options and functionality on the fourth panel of the Trigger Wizard.
For more information, see:
Completing an Object Wizard
Trigger Wizard
Trigger Wizard for Oracle - Panel 5
The table below describes the options and functionality on the fifth panel of the Trigger Wizard.
For more information, see:
Completing an Object Wizard
Trigger Wizard
Option Description
When should the trigger fire? Lets you specify when the trigger should fire before or after an
update changes a value in one of the columns.
Timing - Lets you specify when the trigger should fire.
Events - Lets you specify one or more types of statements that can
cause the trigger to fire.
If the trigger fires on an
update event, which column
updates should fire the
trigger?
OPTIONAL: Lets you indicate if all or none of the column updates
should fire the trigger.
NOTE: This is not available for Instead of Triggers.
Option Description
Specify the correlation table
names
Old Table -Lets you type the name of the old table.
New Table - Lets you type the name of the new table.
What is the trigger restriction? OPTIONAL: Lets you specify the trigger restriction, which is a SQL
condition that must be satisfied for Oracle to fire the trigger.
Option Description
Enter SQL for the trigger’s
action
Lets you type the PL/SQL block that should execute when the
trigger fires.
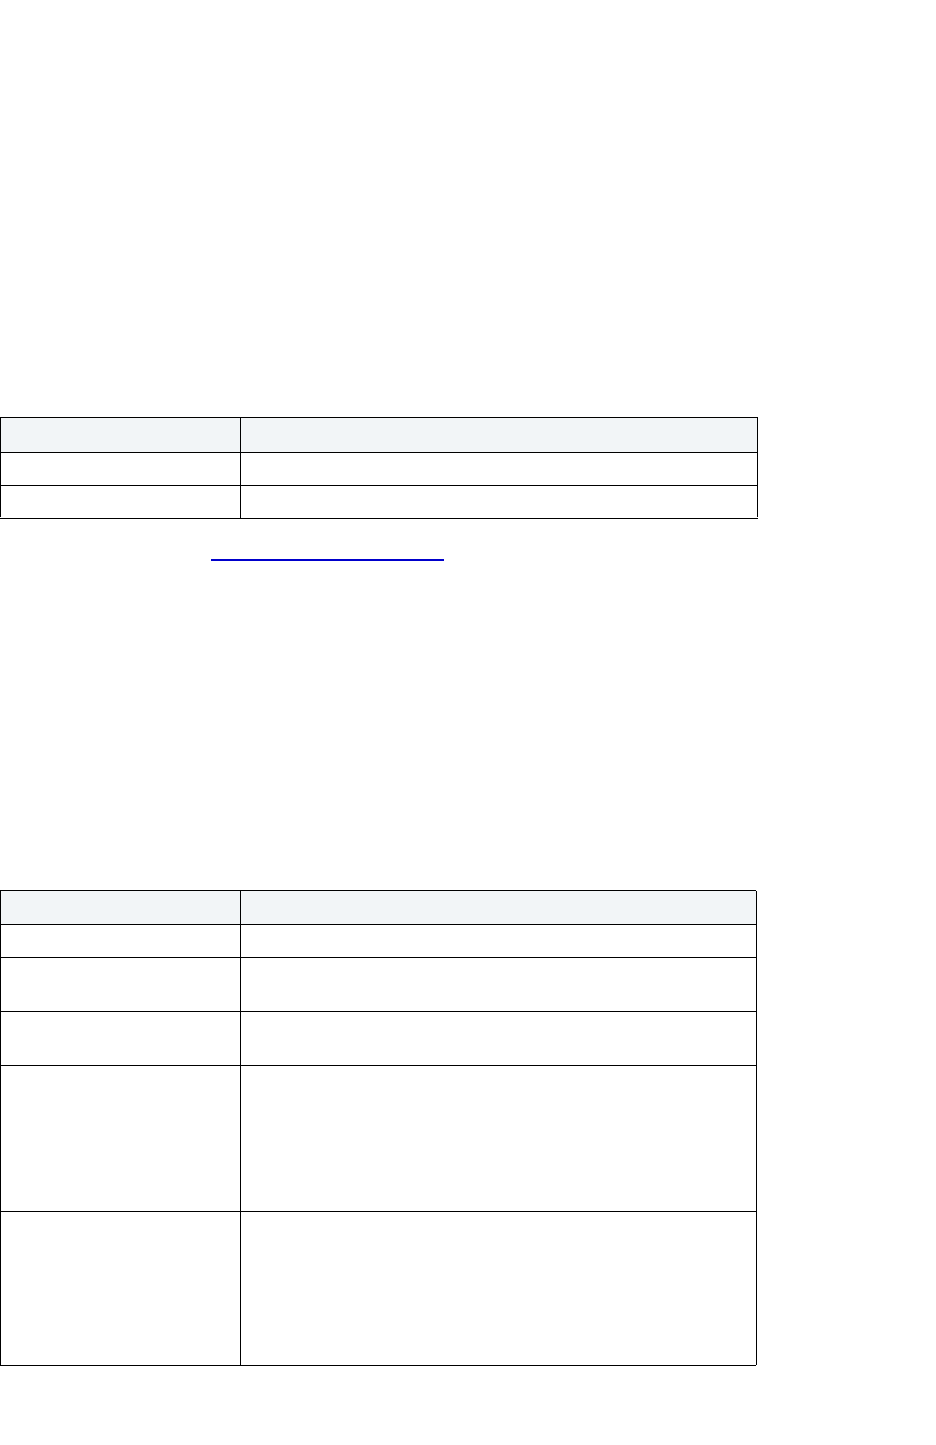
USING > FUNCTIONALITY
EMBARCADERO TECHNOLOGIES > BOOKNAMEVARIABLE 521
Object Type Wizard for Oracle
The Object Type Wizard lets you create an object type. Types define an abstract data type or object composed of a
collection of similar types of data. For example, create an object type that defines a full address rather than the pieces
of an address, such as city, state and postal code. An object type stores the pieces of an address in a single type,
storing them in the same location and allowing the full address to be accessed and manipulated as single unit rather
than multiple units.
Important Notes
• For information on the syntax used to create object types, see the Oracle8 Server SQL Reference or PL/SQL
User's Guide and Reference.
The table below describes the options and functionality on the Object Type Wizard.
For more information, see Completing an Object Wizard.
Create Unique Key Dialog Box for Oracle
The Create Unique Key Constraint dialog box lets you create a unique key. Unique keys can enforce logical keys that
are not chosen as the primary key. They enforce uniqueness for specified columns in a table.
Important Notes
•None
The table below describes the options and functionality on the Create Unique Key Constraint dialog box.
Option Description
Who owns the type? Lets you click the list, and then click the owner.
What is the name of the type? Lets you type the name.
Option Description
Owner Lets you select the unique key constraint owner.
Table Lets you select the table you want to place the unique key
constraint.
Constraint Name Lets you enter the name of the constraint, which can be up to 30
characters long and must be unique across the entire database.
Specify Columns in
Constraint
Lets you select the unique key columns, and then click the Right
arrow to move them to the Constraint Columns grid. To remove a
unique key column, in the Constraint Columns grid, click the
unique key column, and then click the left arrow button.
Constraint Columns - To reorder the unique key columns, click the
up and down arrow buttons.
Status Enable - Select to enable the constraint immediately after building
it.
Disable - Select to disable the constraint immediately after building
it.
Validate - Select to validate the constraint immediately after
building it.

USING > FUNCTIONALITY
EMBARCADERO TECHNOLOGIES > BOOKNAMEVARIABLE 522
For more information, see Completing an Object Dialog Box.
User Wizard for Oracle
The User Wizard lets you create a user. A user is an individual with access to the DBMS.
The User Wizard lets you:
• Set up the user name.
• Identify the user by password, externally, or globally.
• Grant locked or unlocked access to the user's account.
• Assign tablespaces and a profile to the user.
• Assign tablespace quotas to the user.
• Grant roles to the user.
Important Notes
• To create a user, you need the CREATE USER system privilege.
For more information, see:
Completing an Object Wizard
User Wizard - Panel 1
Data Block Storage Lets you indicate the data block storage parameters.
Tablespace - Lets you select the tablespace for the unique key.
Percent Free - Lets you type the appropriate percent free value for
the unique key.
Initial Transactions - Lets you type the appropriate initial
transactions value for the unique key.
Max Transactions - Lets you type the appropriate maximum
transactions value for the unique key.
Extents The unit of space allocated to an object whenever the object needs
more space.
Initial Extent - The initial space extent (in bytes) allocated to the
object.
Next Extent - The next extent (in bytes) that the object will attempt
to allocate when more space for the object is required.
Minimum Extents - The appropriate minimum extents value for the
object.
Maximum Extents - The appropriate maximum extents value for
the object.
Percent Increase - Magnifies how an object grows and, can
materially affect available free space in a tablespace. Select a
value in the corresponding box.
Option Description
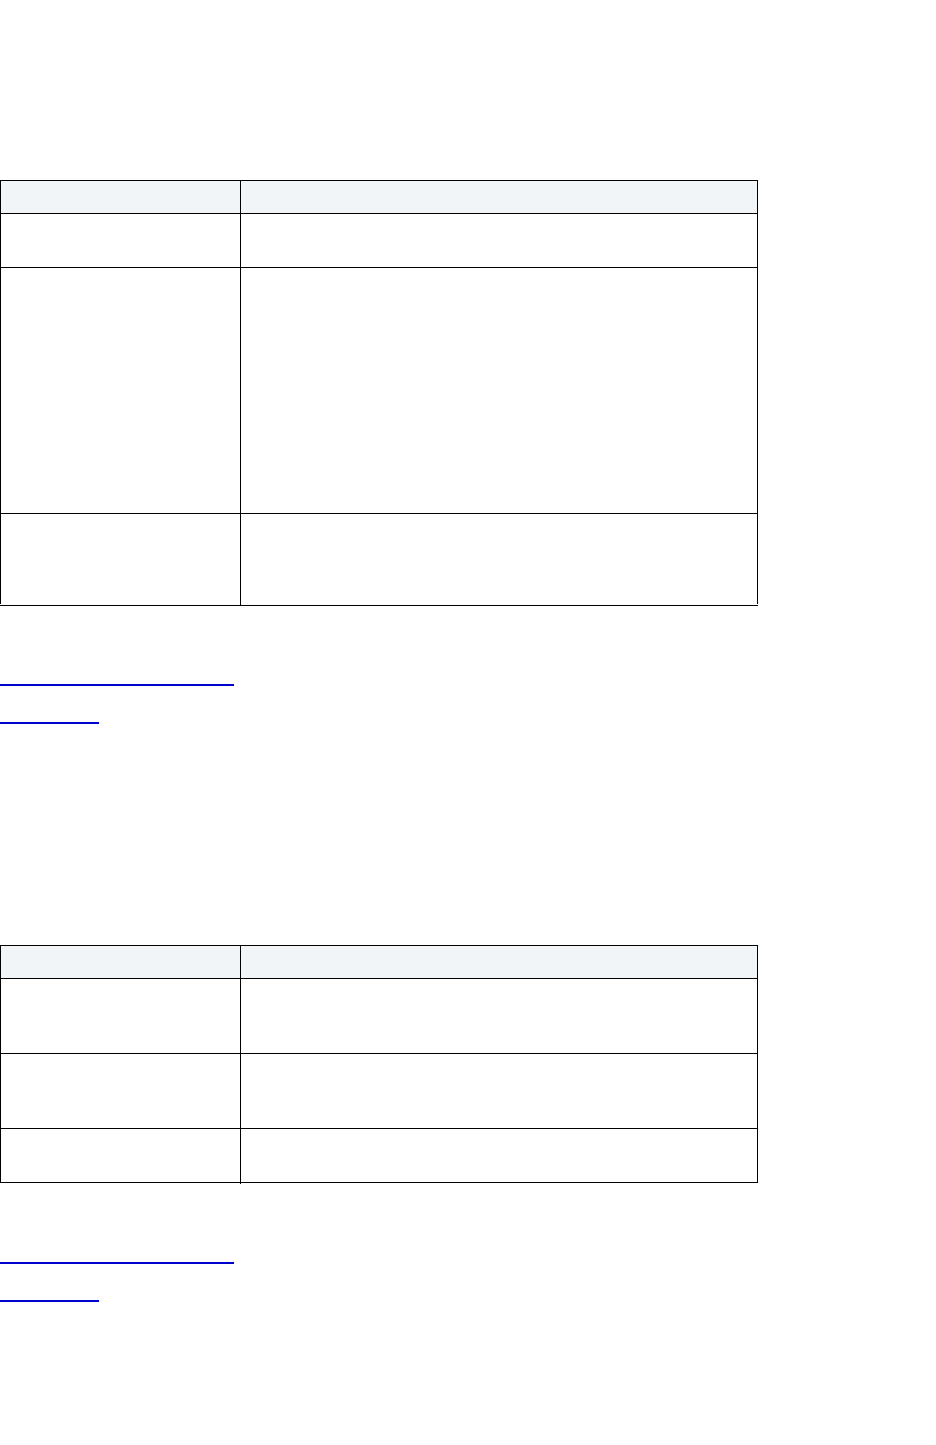
USING > FUNCTIONALITY
EMBARCADERO TECHNOLOGIES > BOOKNAMEVARIABLE 523
User Wizard for Oracle - Panel 1
The table below describes the options and functionality on the first panel of the User Wizard.
For more information, see:
Completing an Object Wizard
User Wizard
User Wizard for Oracle - Optional Panel 2
The table below describes the options and functionality on the second panel of the User Wizard.
NOTE: This panel is optional.
For more information, see:
Completing an Object Wizard
User Wizard
Option Description
What is the name of the user? Lets you type the name of the user. It can be up to 30 characters
long.
How should the user be
identified box?
Password - Indicates that Oracle should identify the user with the
password you provide. In the Password box and in the Confirm
box, type the password for the user.
Externally - Indicates that Oracle should verify the database user
name against an existing operating system user name.
Globally - Indicates that Oracle permits access to the user by
obtaining username and password information from the security
domain central authority.
ORACLE 8 ONLY: External Name - Type the external name of the
database user.
What access do you want to
grant to the user's account?
NOTE: Only available for Oracle 8.
Locked
Unlocked
Option Description
What is the default
tablespace for objects that
the user creates?
Lets you select the default tablespace.
What is the tablespace to be
used for the user's temporary
segments?
Lets you select the tablespace.
What is the profile for the
user?
Lets you select the profile.
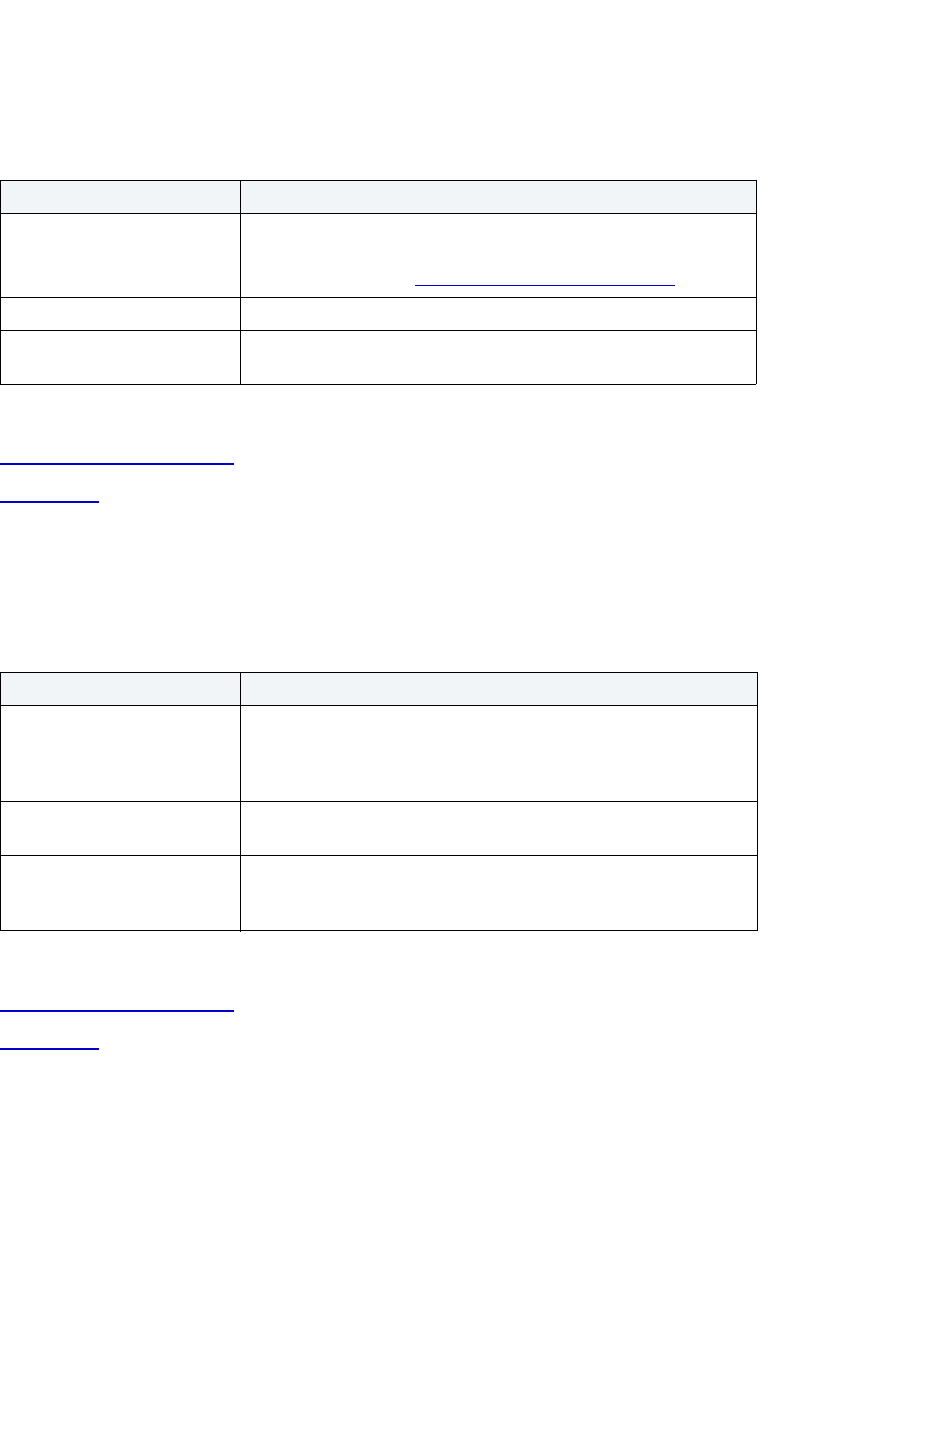
USING > FUNCTIONALITY
EMBARCADERO TECHNOLOGIES > BOOKNAMEVARIABLE 524
User Wizard for Oracle - Optional Panel 3
The table below describes the options and functionality on the third panel of the User Wizard.
For more information, see:
Completing an Object Wizard
User Wizard
User Wizard for Oracle - Optional Panel 4
The table below describes the options and functionality on the fourth panel of the User Wizard.
For more information, see:
Completing an Object Wizard
User Wizard
View Wizard for Oracle
The View Wizard lets you create a view. Views are SQL queries stored in the system catalog that customize the
display of data contained in one or more tables. Views behave like tables because you can query views and perform
data manipulation operations on them. However, views do not actually store any data. Instead, they depend on data
contained in their base tables.
Important Notes
• To create a view in your own schema, you need CREATE VIEW privileges. To create a view in someone else's
schema, you need CREATE ANY VIEW privileges.
Option Description
Set Quota Button In the Tablespace box, click the tablespace you want, and then
click the Set Quota option button.
Rapid SQL opens the Set Tablespaces Quota dialog box
.
Select All Button Lets you select all tablespaces.
Unselect All Button If you have selected any tablespaces you can in the Tablespace
box, click the Unselect All option button.
Option Description
Do you wish to grant any
roles to the user? Is so, then
select them from the list
below.
Lets you select the roles, if any, to grant to the user.
Do you wish to grant admin
options to all selected roles?
Lets you grant admin options to all roles.
Do you wish to enable all
selected roles as default
roles?
Lets you mark the selected roles as the defaults.
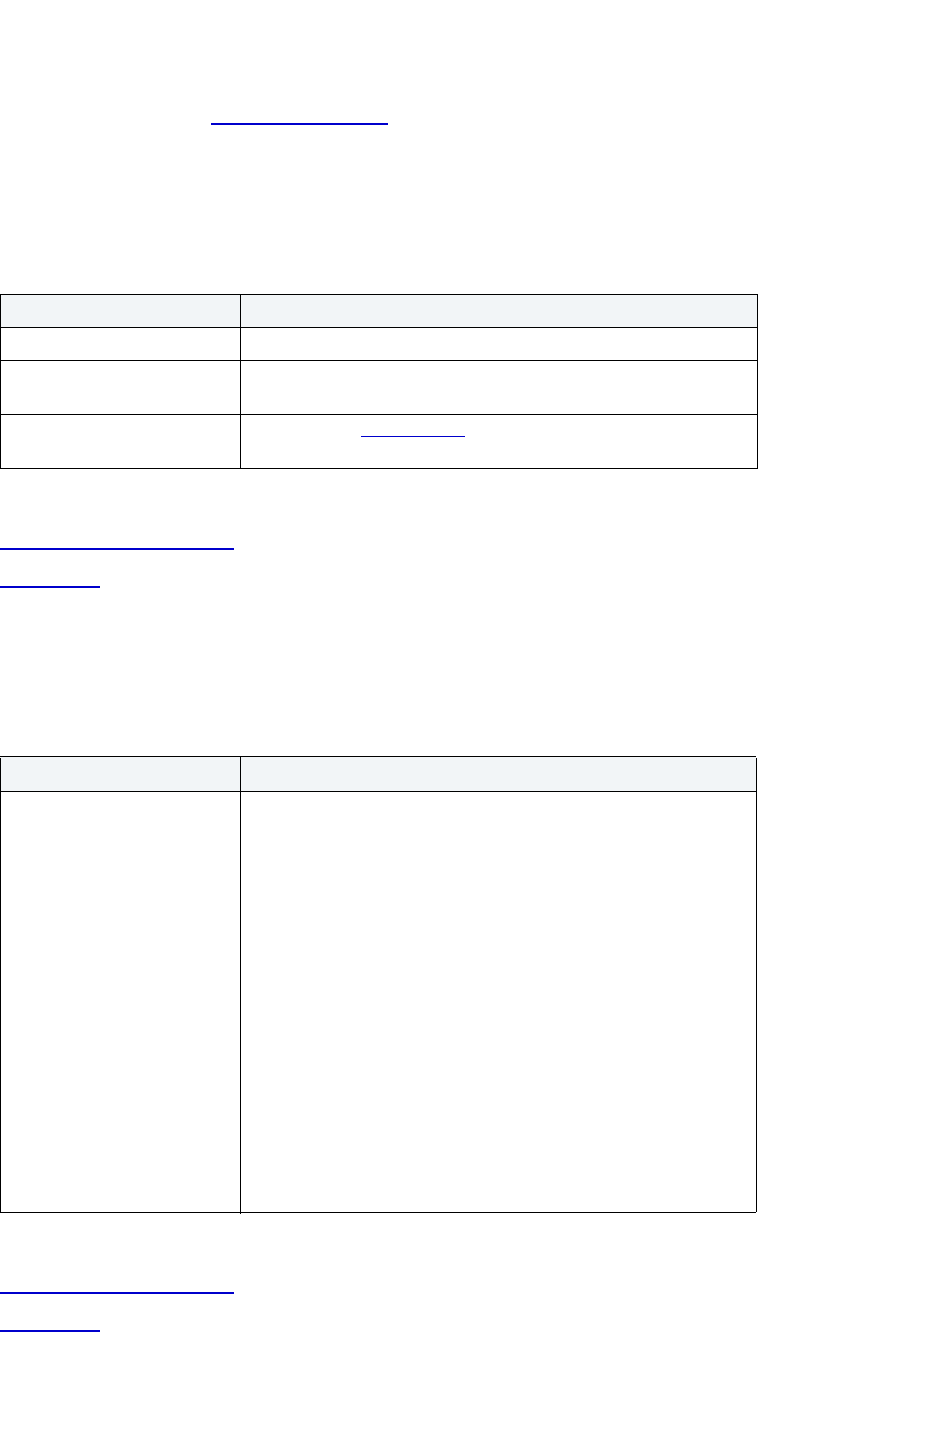
USING > FUNCTIONALITY
EMBARCADERO TECHNOLOGIES > BOOKNAMEVARIABLE 525
• For information on the syntax used to create object views, see the Oracle8 Server SQL
For more information, see View Wizard - Panel 1
.
View Wizard for Oracle - Panel 1
The table below describes the options and functionality on the first panel of the View Wizard.
For more information, see:
Completing an Object Wizard
View Wizard
View Wizard for Oracle - Panel 2
The table below describes the options and functionality on the second panel of the View Wizard.
For more information, see:
Completing an Object Wizard
View Wizard
Option Description
Who owns the view? Lets you select the view owner.
What is the name of the
view?
Lets you enter the view name.
Use Query Builder to define
view
Select to open Query Builder
to help you build the view SQL.
Option Description
Please select the view
options to include
Replace - Select to re-create the view if it already exists. You can
use this clause to change the definition of an existing view without
dropping, re-creating, and regranting object privileges previously
granted on it.
Force -Select to create the view regardless of whether the view's
base tables or the referenced object types exist or the owner of the
schema containing the view has privileges on them. These
conditions must be true before any SELECT, INSERT, UPDATE, or
DELETE statements can be issued against the view.
Read Only - Select to indicate that the table or view cannot be
updated.
With Check Option -Select to indicate that Oracle prohibits any
changes to the table or view that would produce rows that are not
included in the subquery.
Constraint - Lets you specify the name of the CHECK OPTION
constraint. If you omit this identifier, Oracle automatically assigns
the constraint a name of the form SYS_Cn, where n is an integer
that makes the constraint name unique within the database.

USING > FUNCTIONALITY
EMBARCADERO TECHNOLOGIES > BOOKNAMEVARIABLE 526
Sybase ASE Object Wizards
Alias Wizard for Sybase ASE
The Alias Wizard lets you create an alias without knowing the underlying commands. The Alias Wizard lets you map a
login to an existing user in the database.
Important Notes
•None
The table below describes the options and functionality on the Alias Wizard.
For more information, see Completing an Object Wizard
.
Database Device Wizard for Sybase ASE
The Database Device Wizard lets you create a database device without knowing the underlying commands.
The Database Device Wizard lets you:
• Name the device and indicate if it should become the default device.
• Specify the virtual device number for and size of the new device.
• Override many obscure, rarely-used parameters of the DISK INIT statement.
Alias Wizard Create Check
Constraint Dialog Box
Database Device Wizard Database Wizard
Data Cache Wizard Default Wizard Dump Device Wizard Extended Procedure
Wizard
Foreign Key Wizard Group Wizard Index Wizard Login Wizard
Create Primary Key
Constraint Dialog Box
Procedure Wizard Remote Server Wizard Role Wizard
Rule Wizard Segment Wizard Table Wizard Trigger Wizard
Create Unique Key
Dialog Box
User Datatype Wizard User Message Wizard User Wizard
View Wizard
Option Description
What is the Login ID of the
user who wants an alternate
identity in the current
database?
Lets you select the user.
Which user will serve as the
logins alias?
Lets you select the user to which you want to map
the login.
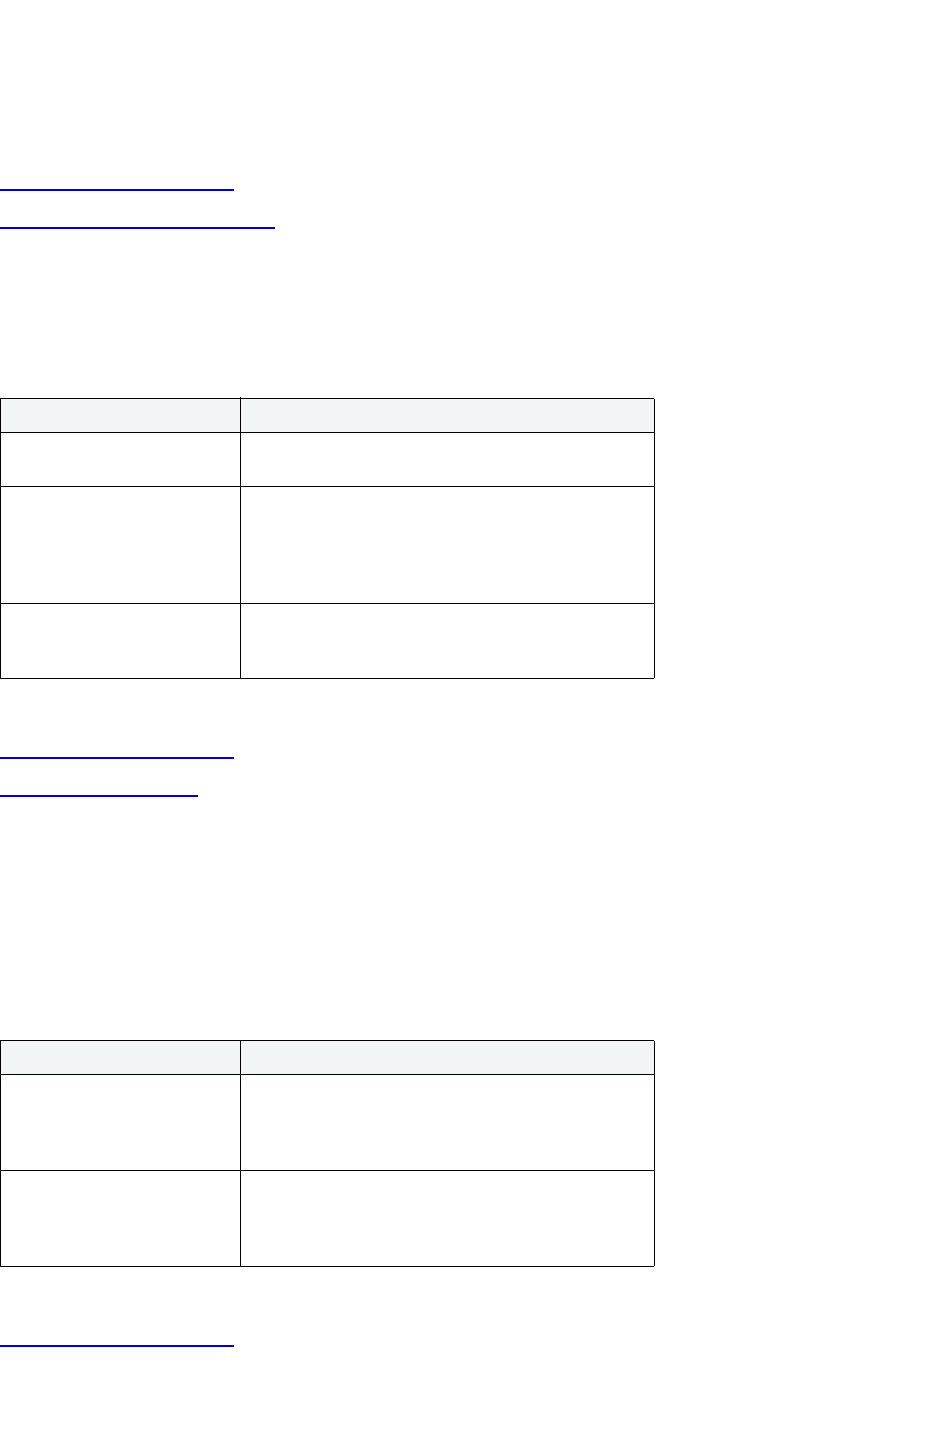
USING > FUNCTIONALITY
EMBARCADERO TECHNOLOGIES > BOOKNAMEVARIABLE 527
Important Notes
•None
For more information, see:
Completing an Object Wizard
Database Device Wizard - Panel 1
Database Device Wizard for Sybase ASE - Panel 1
The table below describes the options and functionality on the Database Device Wizard.
For more information, see:
Completing an Object Wizard
Database Device Wizard
Database Device Wizard for Sybase ASE - Panel 2
The table below describes the options and functionality on the second panel of the Database Device Wizard.
NOTE: Make sure that your Sybase ASE is configured for enough devices that it can accommodate the
creation of another device.
For more information, see:
Completing an Object Wizard
Option Description
What is the logical name of
the device?
Lets you type the device name.
What is the physical name of
the device?
Lets you type the physical name of the device. You
need to specify the full path for the file, including the
hard drive letter or machine name, directory and full
file name with the *.DAT extension (for example,
D:\SYB\DATA\TEST.DAT).
Do you want to specify this
device as a default for
database storage?
The default device is where all new databases Rapid
SQL is placed unless the user specifies an exact
device in the CREATE DATABASE statement.
Option Description
What is the virtual device
number?
Lets you type the value of the virtual device number
for the new device. Rapid SQL automatically
calculates the next open device number and defaults
its value in the box.
What is the size of the device
in megabytes?
Lets you type the value of the size of the device, in
megabytes. Make sure that you have enough free
space on the hard disk to accommodate the device
file.

USING > FUNCTIONALITY
EMBARCADERO TECHNOLOGIES > BOOKNAMEVARIABLE 528
Database Device Wizard
Database Device Wizard for Sybase ASE - Panel 3
The table below describes the options and functionality on the third panel of the Database Device Wizard.
For more information, see:
Completing an Object Wizard
Database Device Wizard
Database Wizard for Sybase ASE
The Database Wizard lets you create a database without knowing the underlying commands.
The Database Wizard lets you:
• Name the database.
• Set special database properties.
• Specify how and where you want to place the physical storage of the database.
• Set database options.
Important Notes
•None
For more information, see:
Completing an Object Wizard
Database Wizard - Panel 1
Database Wizard for Sybase ASE - Panel 1
The table below describes the options and functionality on the first panel of the Database Wizard.
Option Description
If you want to choose a
specific starting page number,
enter it here.
Lets you set the starting panel number, type a value
in the box. Normally, Sybase ASE defaults this value
to 0.
What is the controller
number?
Lets you type the value. Normally, Sybase ASE uses
0.
Do you want to force the
database file to be created
contiguously?
NOTE: This option is only available on Open VMS
systems.
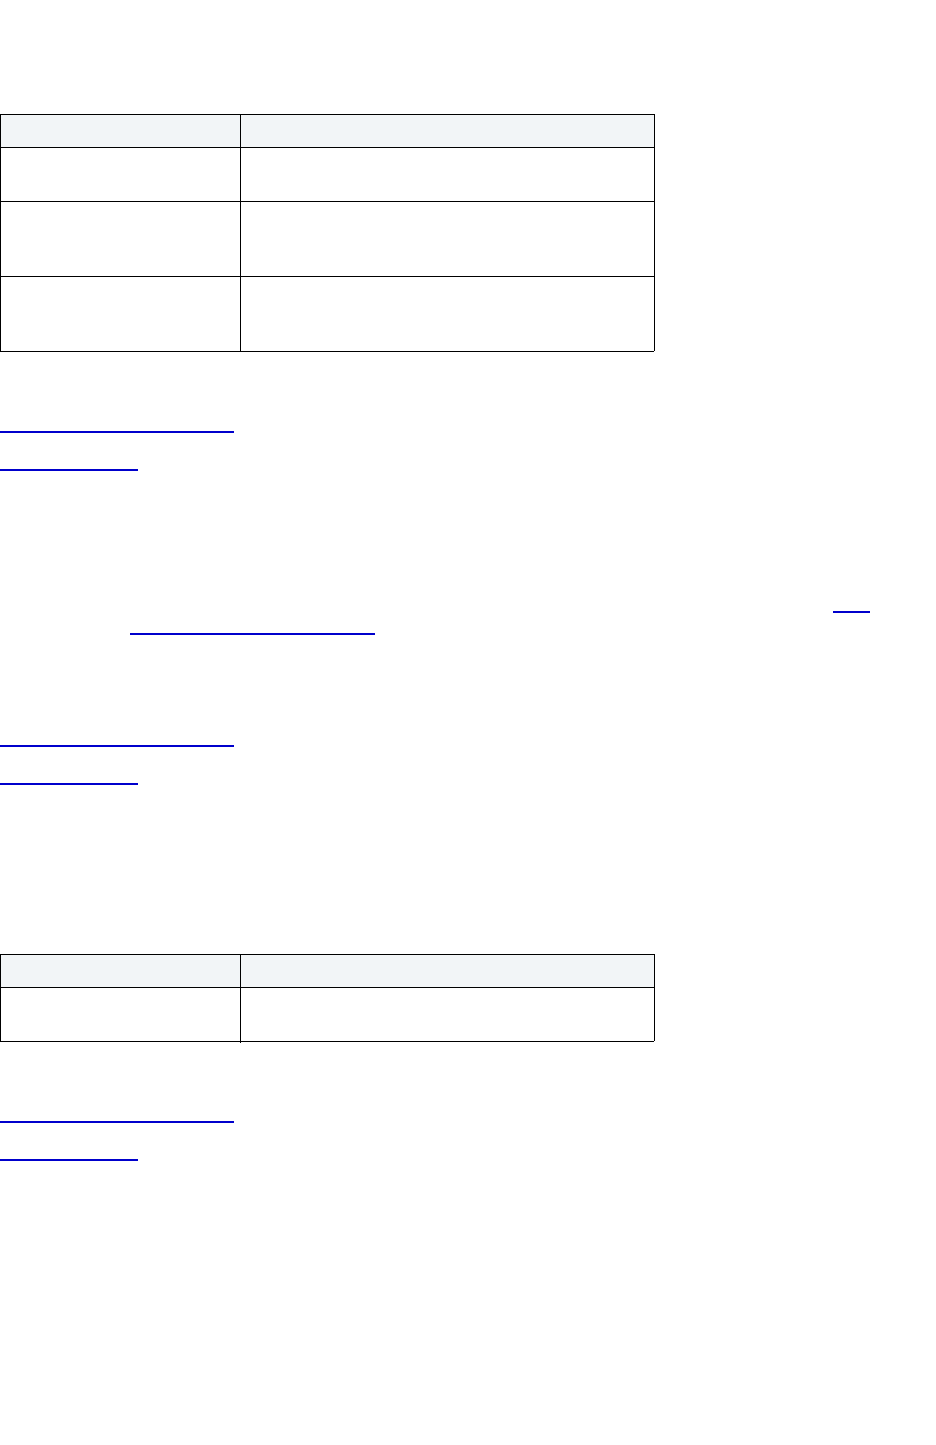
USING > FUNCTIONALITY
EMBARCADERO TECHNOLOGIES > BOOKNAMEVARIABLE 529
For more information, see:
Completing an Object Wizard
Database Wizard
Database Wizard for Sybase ASE - Panel 2
The table below describes the options and functionality on the second panel of the Database Wizard.
NOTE: Before you can complete the second panel of the wizard, add a database fragment. The Add
Database Fragment dialog box opens when you proceed from panel one to panel two of the
Create Database Wizard.
For more information, see:
Completing an Object Wizard
Database Wizard
Database Wizard for Sybase ASE - Panel 3
The table below describes the options and functionality on the third panel of the Database Wizard.
For more information, see:
Completing an Object Wizard
Database Wizard
Data Cache Wizard for Sybase ASE
The Data Cache Wizard lets you create a named data cache without knowing the underlying commands. When you
create a named data cache, Sybase ASE reallocates memory from the default data cache to the named data cache.
Option Description
What is the name of the
database?
Lets you type the name of the database.
Do you create the database
for loading a database dump
using the “for load” option?
The “for load” option speeds loading by eliminating
the step for pre-initializing panels
Do you wish to create the
database using the “with
override” option.
Lets you override any problems encountered.
Option Description
Which database options do
you wish to activate
Lets you select the appropriate check boxes or click
Check All.
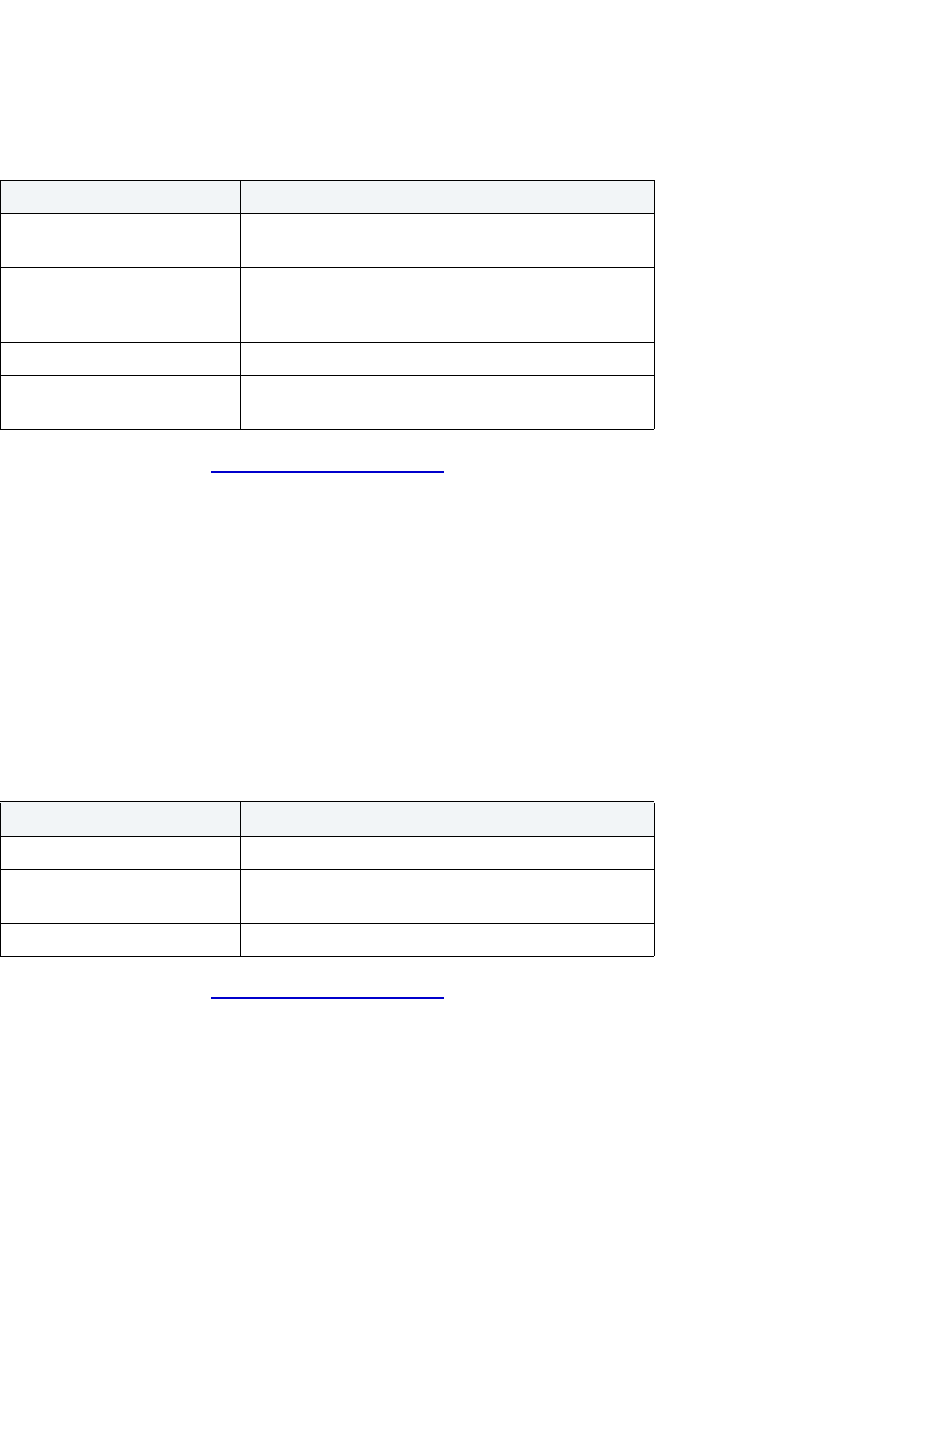
USING > FUNCTIONALITY
EMBARCADERO TECHNOLOGIES > BOOKNAMEVARIABLE 530
Important Notes
•None
The table below describes the options and functionality on the Data Cache Wizard.
For more information, see Completing an Object Wizard
.
Default Wizard for Sybase ASE
The Default Wizard lets you create a default without knowing any of the underlying commands. The Default Wizard
lets you name the default and specify its value.
Important Notes
•None
The table below describes the options and functionality on the Default Wizard.
For more information, see Completing an Object Wizard
.
Dump Device Wizard for Sybase ASE
The Dump Device Wizard lets you create a dump or backup device without knowing the underlying commands.
Important Notes
•None
The table below describes the options and functionality on the Dump Device Wizard.
What is the name of the data
cache?
Lets you type the name of the data cache.
What is the size of the data
cache box?
Lets you type the value of the data cache size, and
then select the unit: megabytes, kilobytes, gigabytes
or pages.
What is the cache type? Lets you select mixed or log only cache types.
What is the cache
replacement policy?
Lets you select a strict or relaxed cache replacement
policy.
Option Description
Who owns the default? Lets you select the owner.
What is the name of the
default?
Lets you type the default name.
What is the default value? Lets you type the default value or expression.
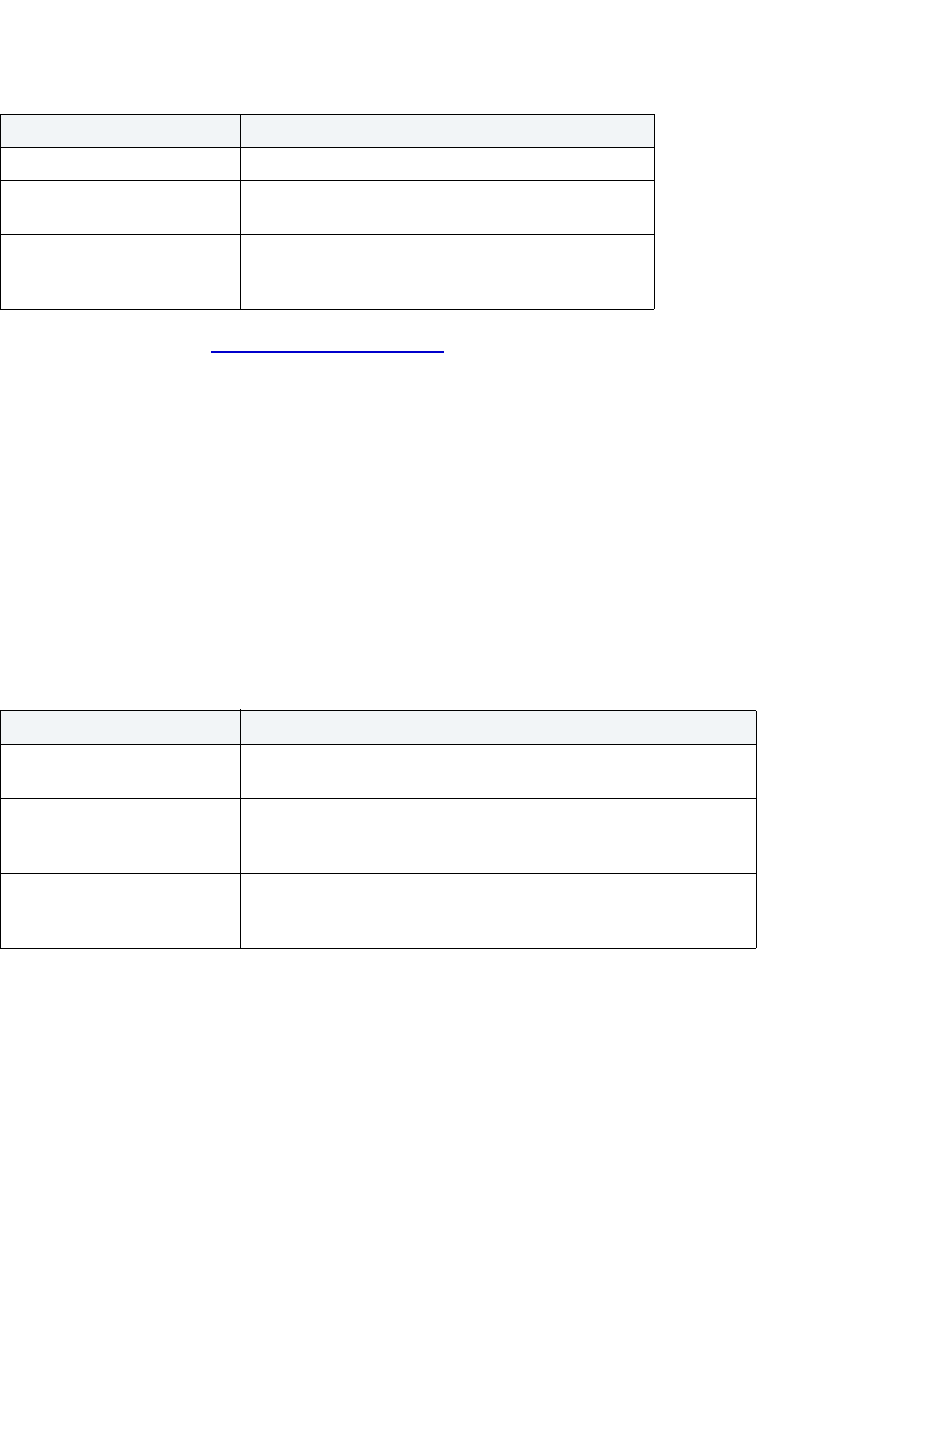
USING > FUNCTIONALITY
EMBARCADERO TECHNOLOGIES > BOOKNAMEVARIABLE 531
For more information, see Completing an Object Wizard.
Extended Procedure Wizard for Sybase ASE
The Extended Procedure Wizard lets you:
• Specify the extended procedure owner.
• Specify the name of the function to call within the library.
• Specify the name of the library containing the function.
Extended stored procedures provide a method for calling procedural language functions from within the Adaptive
Server.
The table below describes the options and functionality of the Extended Procedure Wizard:
Foreign Key Wizard for Sybase ASE
The Foreign Key Wizard lets you create a foreign key without knowing the underlying commands.
The Foreign Key Wizard lets you:
• Name the foreign key constraint.
• Identify the parent table and the referenced constraint.
• Map the column pairs between the parent and child tables.
Important Notes
•None
For more information, see:
Option Description
What is the device type? Lets you select the device type you are using.
What is the dump device
Name?
Lets you type the device name.
What is the physical name? Lets you type the device or file name that is
recognized by the operating system. (For example,
a:sqltable.dat).
Option Description
Who owns the extended
procedure?
Lets you select an extended procedure owner.
What is the name of the
function to call within the
library?
Lets you type in the function name.
What is the name of the
library containing the
function?
Lets you type in the library name.
USING > FUNCTIONALITY
EMBARCADERO TECHNOLOGIES > BOOKNAMEVARIABLE 532
Completing an Object Wizard
Foreign Key Wizard - Panel 1
Foreign Key Wizard for Sybase ASE - Panel 1
The table below describes the options and functionality on the first panel of the Foreign Key Wizard.
For more information, see:
Completing an Object Wizard
Foreign Key Wizard
Foreign Key Wizard for Sybase ASE - Panel 2
The table below describes the options and functionality on the second panel of the Foreign Key Wizard.
For more information, see:
Completing an Object Wizard
Foreign Key Wizard
Foreign Key Wizard for Sybase ASE - Panel 3
The table below describes the options and functionality on the third panel of the Foreign Key Wizard.
Option Description
Which table will host the
constraint?
Owner - Lets you select the owner.
Table - Lets you select the table.
What will be the name of this
new constraint?
System Generated Name - Select to let Sybase ASE
automatically generate a name.
User Specified Constraint Name - Lets you type the
name.
Option Description
Select the parent table to
reference
Database - Lets you select the database owner.
Table Owner - Lets you select the parent table owner.
Table Name - Lets you select the parent table name.
Select the parent table
constraint
Lets you select the primary and unique key
constraints you want to reference.
Option Description
Select column associations Begin with the first foreign key column, and then click
the lists to map the foreign key columns between the
child and parent tables.
USING > FUNCTIONALITY
EMBARCADERO TECHNOLOGIES > BOOKNAMEVARIABLE 533
For more information, see:
Completing an Object Wizard
Foreign Key Wizard
Group Wizard for Sybase ASE
The Group Wizard lets you create a group without knowing the underlying commands.
Important Notes
•None
For more information, see:
Completing an Object Wizard
Group Wizard - Panel 1
Group Wizard for Sybase ASE - Panel 1
The table below describes the options and functionality on the first panel of the Group Wizard.
For more information, see Completing an Object Wizard
.
Index Wizard for Sybase ASE
The Index Wizard lets you create an index without knowing the underlying commands.
The Index Wizard lets you:
• Specify the table owner and name.
• Specify the index owner and name.
• Create a unique index and provide a comment for the index.
• Identify the index location and order.
• Specify where you want to place the index and specify available options, such as the fill factor.
• Specify fill factor and maximum rows of data per page.
• Set the cache replacement strategy for the index.
Important Notes
•None
For more information, see:
Completing an Object Wizard
Option Description
What is the name of the
group?
Lets you type the name of the group.
USING > FUNCTIONALITY
EMBARCADERO TECHNOLOGIES > BOOKNAMEVARIABLE 534
Index Wizard - Panel 1
Index Wizard for Sybase ASE - Panel 1
The table below describes the options and functionality on the first panel of the Index Wizard.
For more information, see:
Completing an Object Wizard
Index Wizard
Index Wizard for Sybase ASE - Panel 2
The table below describes the options and functionality on the Index Wizard.
For more information, see:
Completing an Object Wizard
Index Wizard
Index Wizard for Sybase ASE - Panel 3
The table below describes the options and functionality on the third panel of the Index Wizard.
For more information, see:
Option Description
Who owns the table to be
indexed?
Lets you select a table owner.
What is the name of the table
to be indexed?
Lets you enter a table name.
Who owns the index to be
created?
Lets you select the index owner.
What is the name of the
index?
Lets you enter an index name.
Option Description
Do you wish to create a
unique key
Index enforces uniqueness on the values of the
table's index key.
Do you want the index to be
clustered?
A clustered index sorts data so that their physical
order always matches their logical order.
Option Description
Select the Index Columns Lets you select the table columns to include in the
index and reorder the index columns.
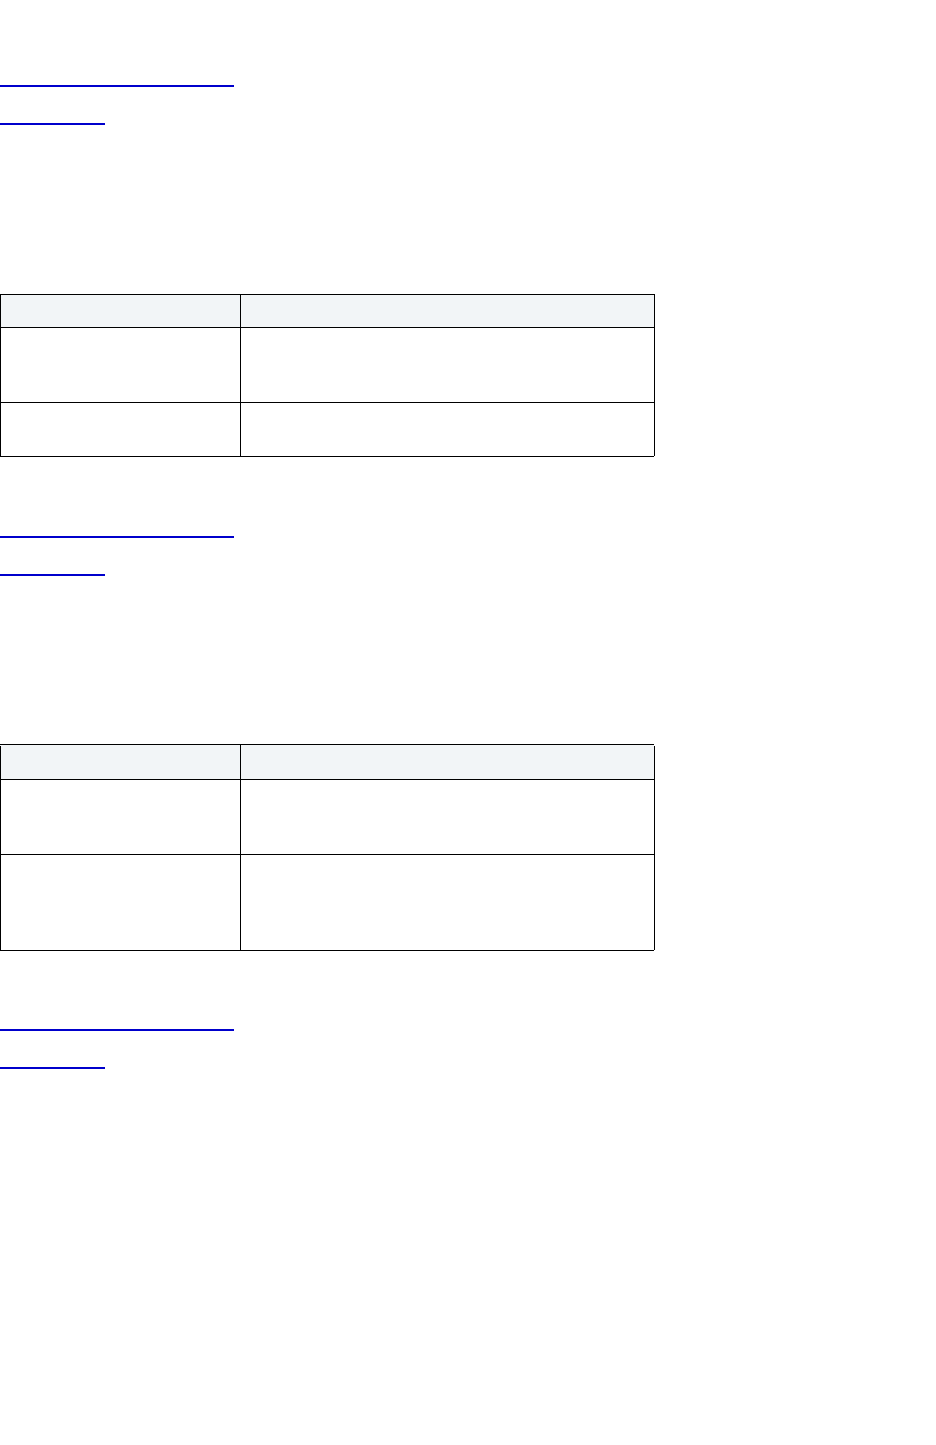
USING > FUNCTIONALITY
EMBARCADERO TECHNOLOGIES > BOOKNAMEVARIABLE 535
Completing an Object Wizard
Index Wizard
Index Wizard for Sybase ASE - Panel 4
The table below describes the options and functionality on the fourth panel of the Index Wizard.
For more information, see:
Completing an Object Wizard
Index Wizard
Index Wizard for Sybase ASE - Panel 5
The table below describes the options and functionality on the fifth panel of the Index Wizard.
For more information, see:
Completing an Object Wizard
Index Wizard
Index Wizard for Sybase ASE - Panel 6
The table below describes the options and functionality on the sixth panel of the Index Wizard.
NOTE: The following table describes the options to create a unique or clustered index.
Option Description
On which segment do you
wish to place the index?
Lets you select the target segment. If you do not
specify a segment, Microsoft SQL Server creates an
index in the default segment.
Are the rows in the table
already stored in order?
If the table data is already in order, you can expedite
index creation by skipping the sorting procedure.
Option Description
Specify the fill factor, if any, by
which you wish to pad index
pages.
Lets you type the fill factor percentage value (0-100).
Applying a fill factor lets you pad the index pages to
avoid page splits, which degrade performance.
Specify the maximum rows of
data to allow on each page.
Max Rows per Page - Lets you type the value of the
maximum rows allowable per page. Max rows per
page is a workaround for the lack of row-level locking
in Sybase ASE.
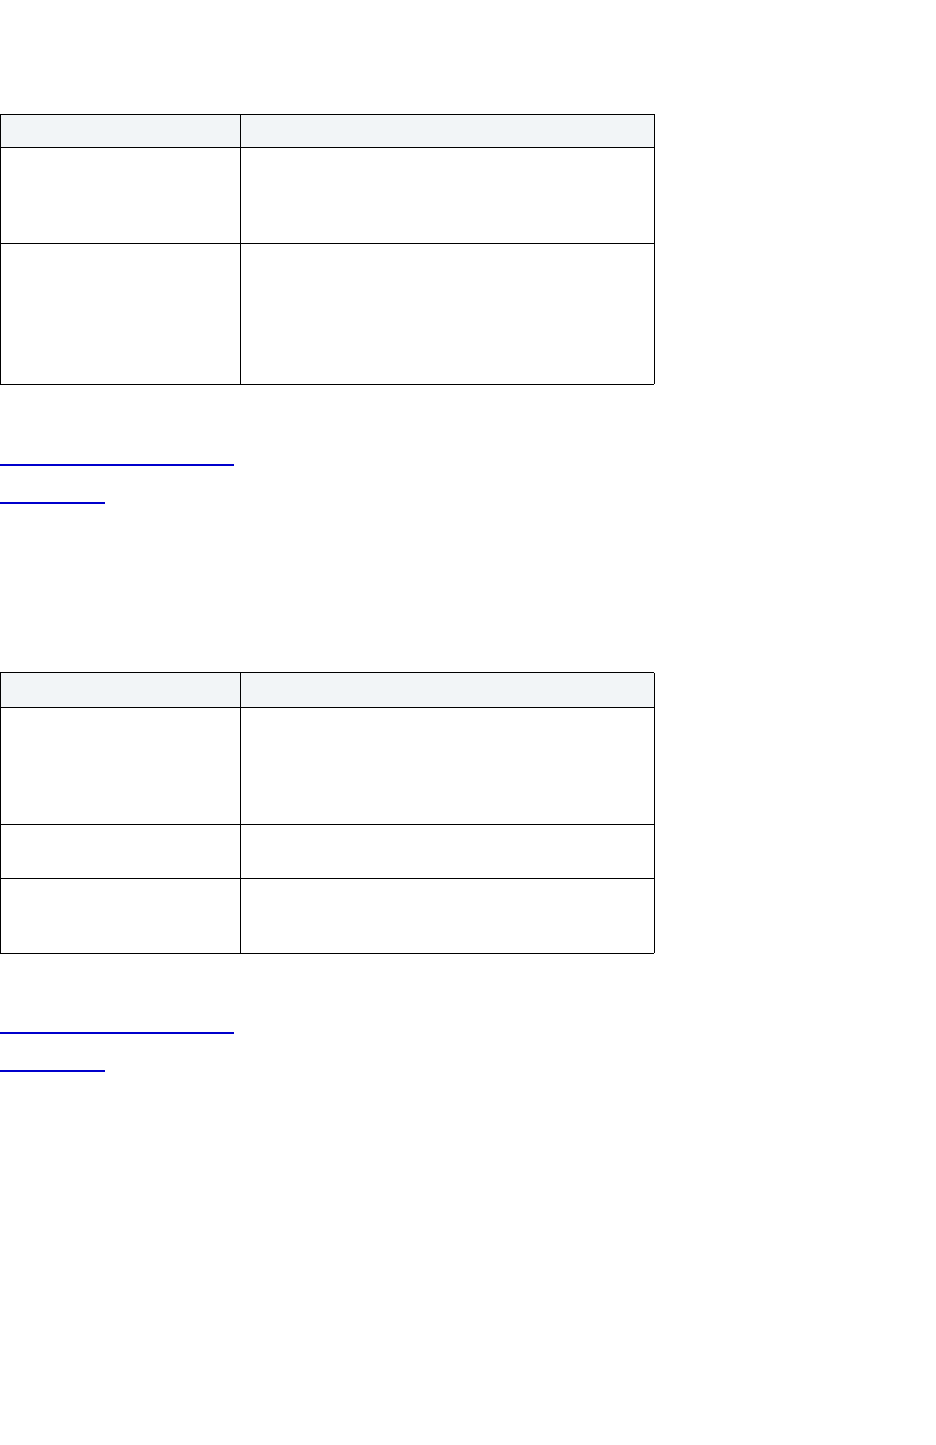
USING > FUNCTIONALITY
EMBARCADERO TECHNOLOGIES > BOOKNAMEVARIABLE 536
For more information, see:
Completing an Object Wizard
Index Wizard
Index Wizard for Sybase ASE - Panel 7
The table below describes the options and functionality on the seventh panel of the Index Wizard.
For more information, see:
Completing an Object Wizard
Index Wizard
Login Wizard for Sybase ASE
The Login Wizard lets you create a login and specifying security options without requiring you to know any of the
underlying commands.
The Login Wizard lets you:
• Name the login ID.
• Define a login password.
• Specify a default database and language for the login.
Option Description
Do you want to ignore
duplicate keys when insert or
update operations causes
them to occur?
Lets you decide to ignore duplicate keys if they are
created by insert or update operations.
Which option should apply
when processing duplicate
rows?
Lets you select an options when processing
duplicate rows.
None - Nothing is done to duplicate rows.
Ignore Duplicate Rows - Ignores duplicate rows.
Allow Duplicate Rows - Allows duplicate rows.
Option Description
Which cache replacement
strategy should be used? Do
you want to flush the most or
the least recently used pages
first?
Most Recent - Select to make Sybase ASE flush the
most recently used pages first.
Least Recent - Select to make Sybase ASE flush the
least recently used pages first.
Do you want to prefetch
pages from the index?
Prefetching lets you employ large I/O for processing
intensive queries.
Specify the empty pages to
be allocated to the index.
Reserve Page Gap - Lets you specify the number of
empty data pages that should be allocated to the
index.
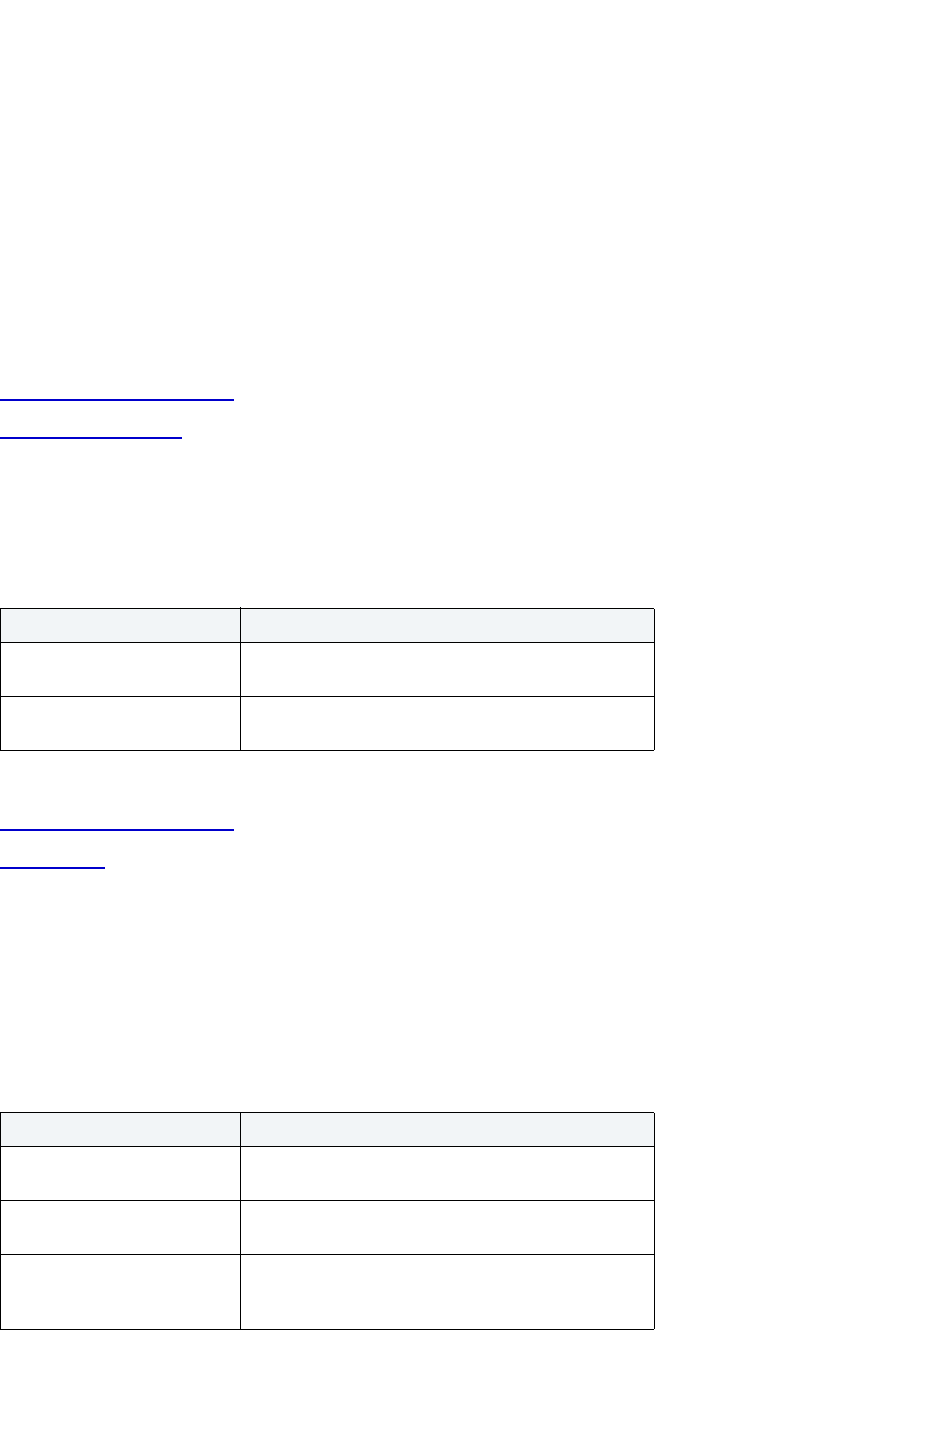
USING > FUNCTIONALITY
EMBARCADERO TECHNOLOGIES > BOOKNAMEVARIABLE 537
• Grant roles to the login.
• Lock the login upon creation.
• Select databases to create users.
• Select user types, user names, and user groups.
• Select aliases.
Important Notes
•None
For more information, see:
Completing an Object Wizard
Login Wizard - Panel 1
Login Wizard for Sybase ASE - Panel 1
The table below describes the options and functionality on the first panel of the Login Wizard.
For more information, see:
Completing an Object Wizard
Login Wizard
Login Wizard for Sybase ASE - Panel 2
The table below describes the options and functionality on the second panel of the Login Wizard.
NOTE: You should avoid specifying the master database to prevent users from creating objects there
inadvertently.
Option Description
What is the ID for the Login? Lets you type the login name. Can be up to 30
characters long.
What is the password for the
new login?
Can be up to 30 characters long, but must be at least
six characters.
Option Description
What is the full name of the
login box?
OPTIONAL: Lets you type the full name for the login
(for example, John Smith).
What should be the login's
default database?
Database - Lets you select the default database.
What is the login's default
language?
Language - Lets you select the default language. If
you do not select one, Rapid SQL uses the server’s
default language.
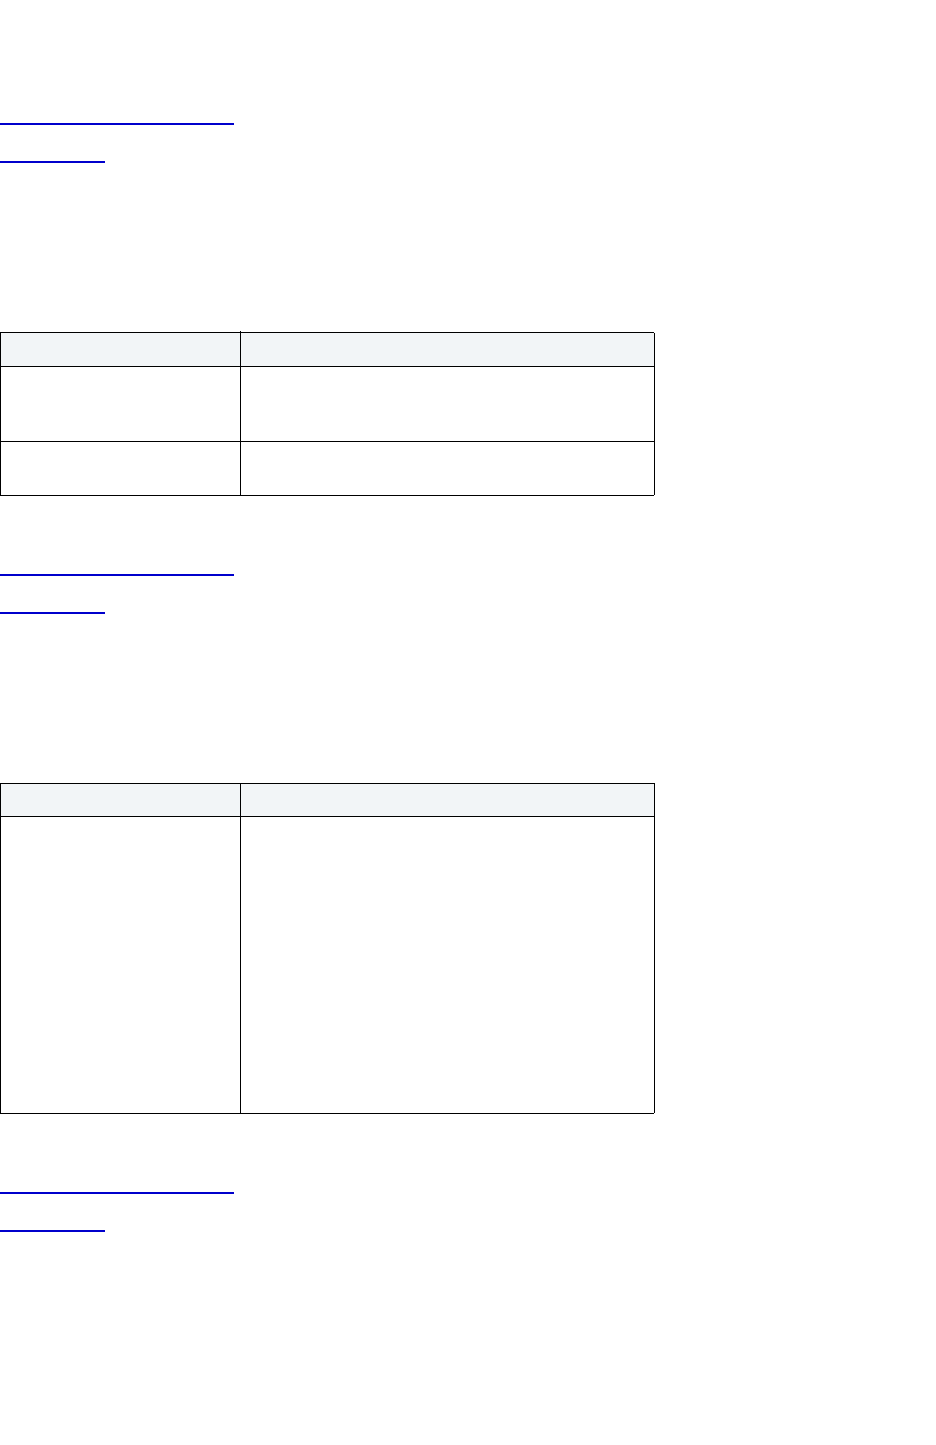
USING > FUNCTIONALITY
EMBARCADERO TECHNOLOGIES > BOOKNAMEVARIABLE 538
For more information, see:
Completing an Object Wizard
Login Wizard
Login Wizard for Sybase ASE - Panel 3
The table below describes the options and functionality on the third panel of the Login Wizard.
For more information, see:
Completing an Object Wizard
Login Wizard
Login Wizard for Sybase ASE - Panel 4
The table below describes the options and functionality on the fourth panel of the Login Wizard.
For more information, see:
Completing an Object Wizard
Login Wizard
Login Wizard for Sybase ASE - Optional Panel 5
The table below describes the options and functionality on the Login Wizard.
Option Description
Select any roles that you wish
to grant to the login from the
list below
OPTIONAL: Lets you select the check boxes that
correspond to the roles you want to grant, or click the
Select All button.
Do you want to lock the new
login after creating it?
Lets you lock the new login so that nobody else can
use it.
Option Description
Select databases to create
users
Lets you select the check boxes that correspond to
the databases or click the Check All button.
User Type - Lets you select the user type you want to
add.
If you select Alias in the Alias box, click the User
Name list, and then click the user name.
If you select dbo and you want to transfer aliases and
permissions, click the Transfer Aliases and
Permissions check box.
If you select User, in the User box, click the User
Name list, and then click the user name, then click
the Group list, and then click the user group.
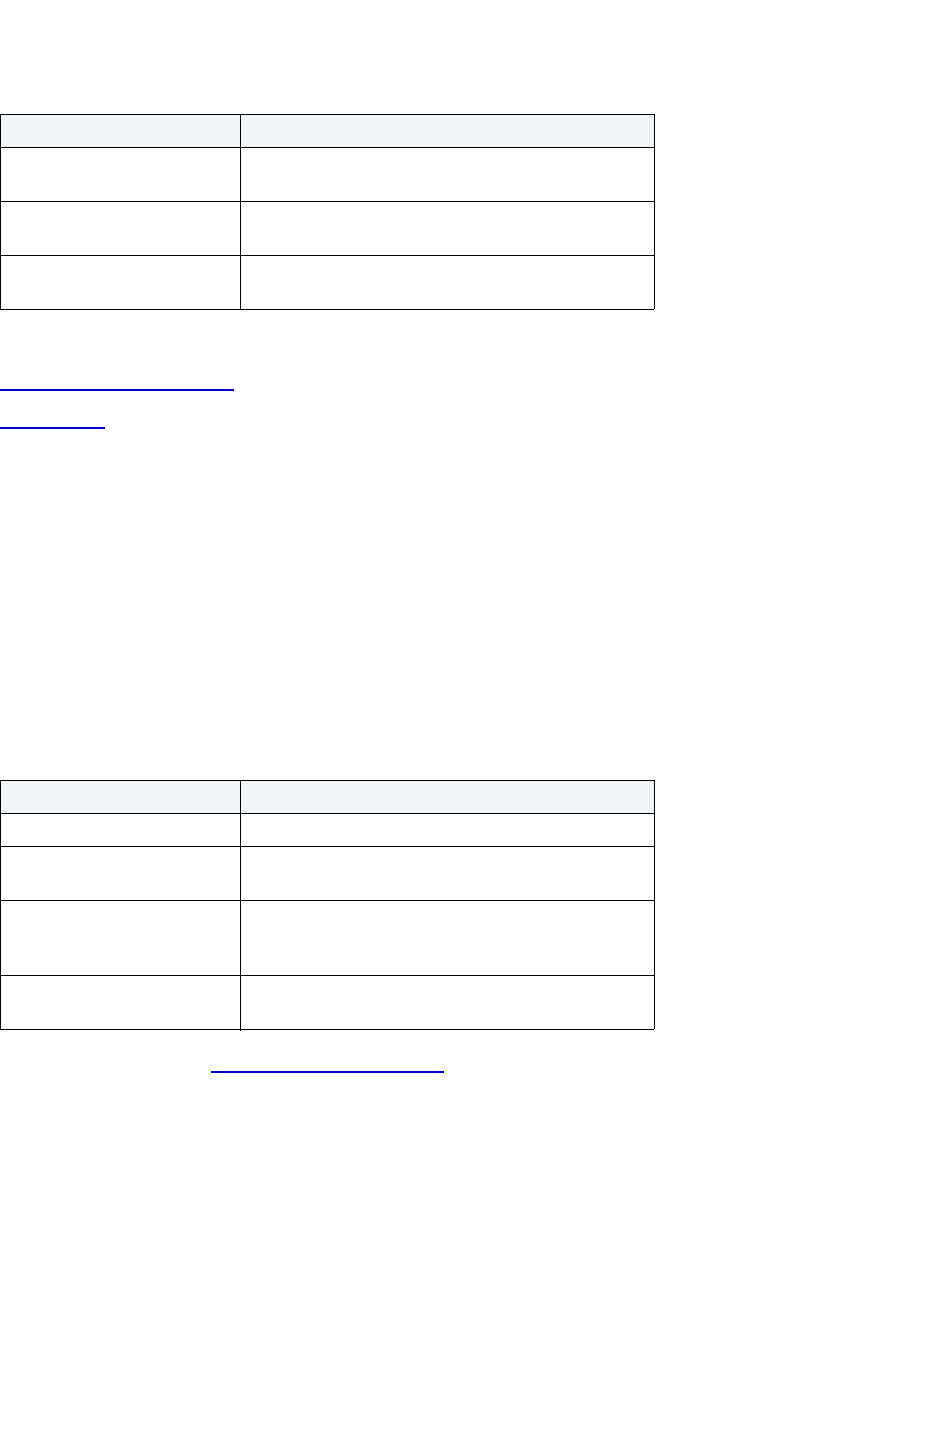
USING > FUNCTIONALITY
EMBARCADERO TECHNOLOGIES > BOOKNAMEVARIABLE 539
For more information, see:
Completing an Object Wizard
Login Wizard
Create Primary Key Constraint Dialog Box for Sybase ASE
The Create Primary Key Constraint dialog box lets you create a primary key without knowing the underlying
commands.
Important Notes
• If you are creating a non-clustered index constraint, you should place it on a separate segment from the target
table.
The table below describes the options and functionality on the Create Primary Key Constraint dialog box.
For more information, see Completing an Object Wizard
.
Procedure Wizard for Sybase ASE
The Extended Procedures Wizard lets you create an extended stored procedure without knowing the underlying
commands.
Important Notes
•None
The table below describes the options and functionality on the Procedure Wizard.
Option Description
Enter the password
expiration, if any
Enter a value between zero and 32767 days.
Enter the minimum password
length, if any
Enter a value between zero and 30.
Enter the maximum number
of login attempts, if any
Enter a value between zero and 32767.
Option Description
Owner Lets you select the primary key constraint owner.
Table Lets you select the table you want to place the
primary key constraint.
Constraint Name Lets you enter the name of the constraint, which can
be up to 30 characters long and must be unique
across the entire database.
Specify Columns in
Constraint:
Lets you select, reorder, and remove the primary key
columns.
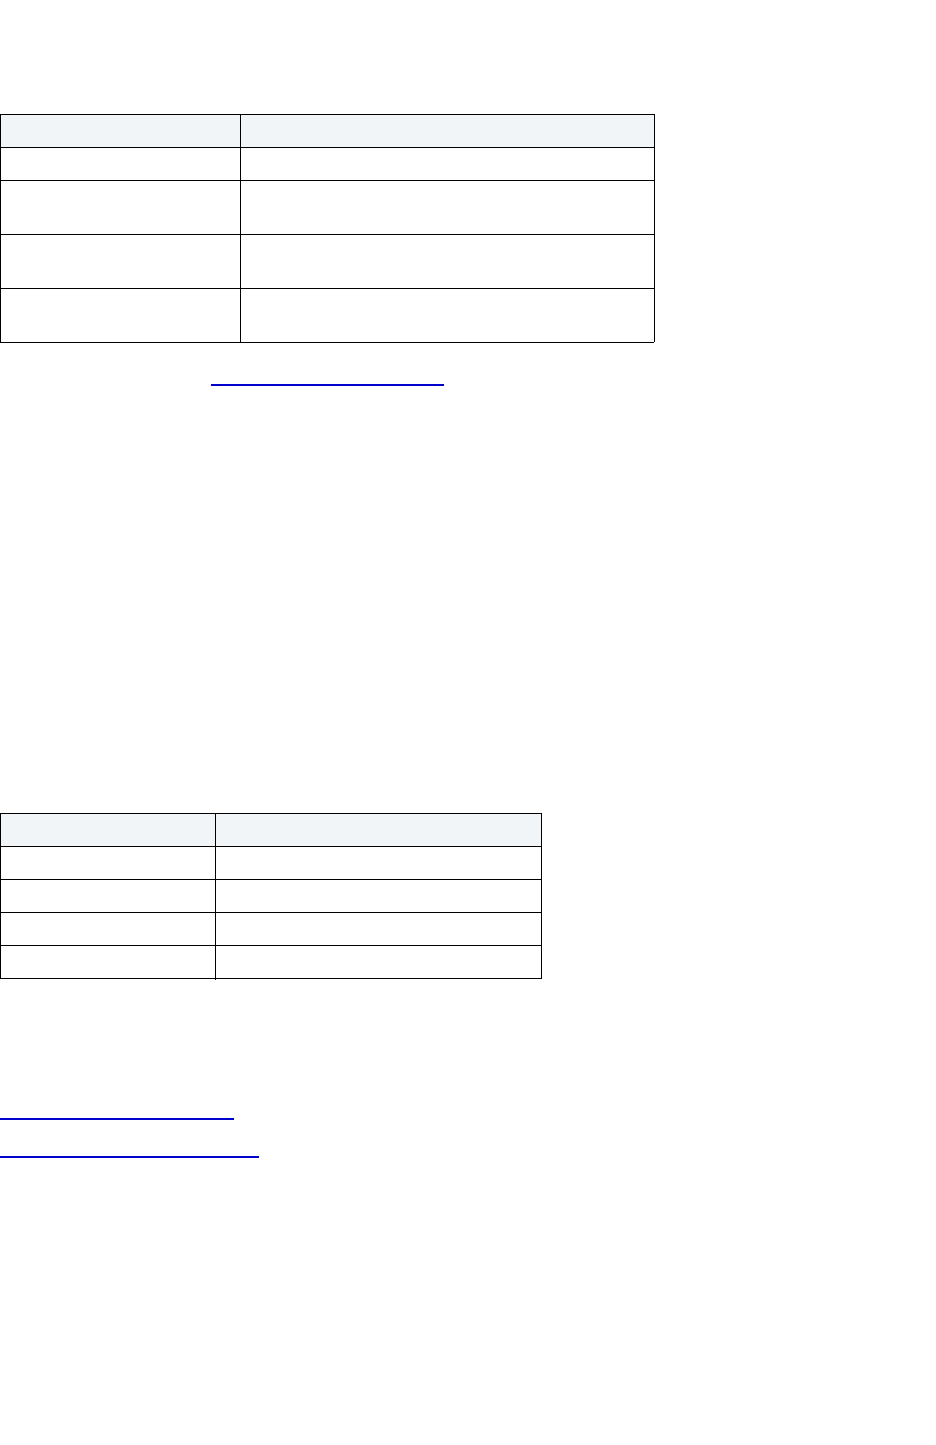
USING > FUNCTIONALITY
EMBARCADERO TECHNOLOGIES > BOOKNAMEVARIABLE 540
For more information, see Completing an Object Wizard.
Remote Server Wizard for Sybase ASE
The Remote Server Wizard lets you create a remote server without knowing any of the underlying commands.
The Remote Server Wizard lets you:
• Name the remote server and designate if it is remote or local.
• Specify connection, encryption, and security options.
• Specify a security mechanism.
Important Notes
• Before you can setup a remote server, first configure both the local and remote servers to accept remote access.
To configure Sybase ASE for remote access, you need to log into each server and configure server parameters.
The table below describes the parameters you need to configure:
• After setting these server configuration parameters, shut down and restart the server so the new values can take
effect. When you have configured both servers, proceed to the steps below.
For more information, see:
Completing an Object Wizard
Remote Server Wizard - Panel 1
Remote Server Wizard for Sybase ASE - Panel 1
The table below describes the options and functionality on the first panel of the Remote Server Wizard.
Option Description
Who owns the procedure? Lets you select the owner.
What is the name of the
procedure?
Lets you type the procedure name.
What is the number of the
procedure?
Lets you set the procedure number.
With Recompile Option Lets you indicate if the procedure should be
recompiled.
Parameter Description
Remote Access 1(enabled)
Remote Connections Number of remote connections required
Remote Logins Number of remote logins required
Remote Sites Number of remote sites required
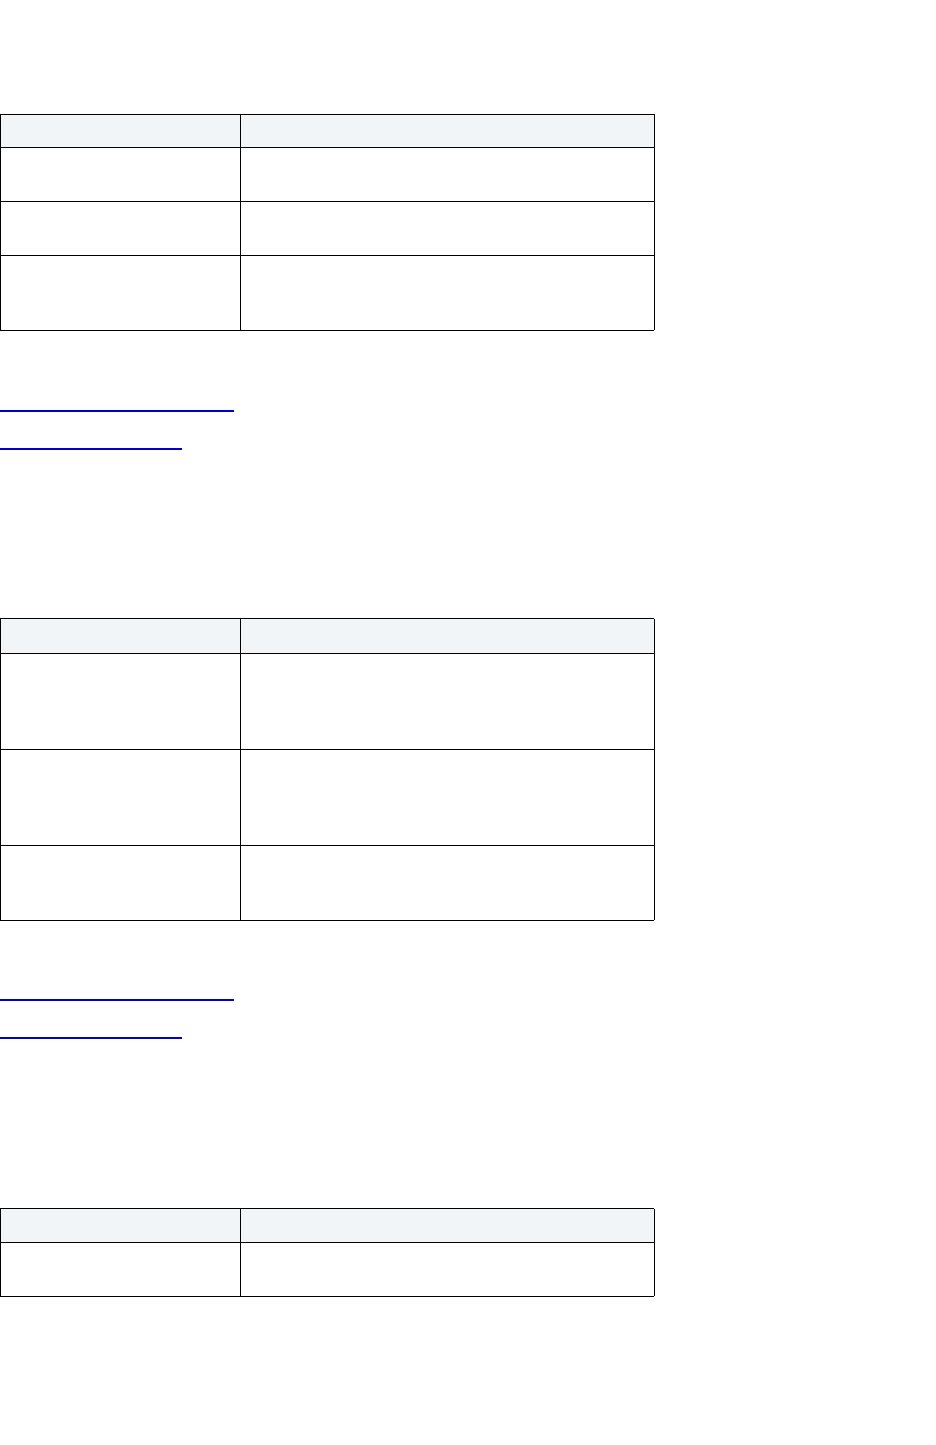
USING > FUNCTIONALITY
EMBARCADERO TECHNOLOGIES > BOOKNAMEVARIABLE 541
For more information, see:
Completing an Object Wizard
Remote Server Wizard
Remote Server Wizard for Sybase ASE - Panel 2
The table below describes the options and functionality on the second panel of the Remote Server Wizard.
For more information, see:
Completing an Object Wizard
Remote Server Wizard
Remote Server Wizard for Sybase ASE - Panel 3
The table below describes the options and functionality on the Remote Server Wizard.
Option Description
What is the name of the
remote server?
Lets you type the name of the remote server.
What is the server's physical
network name?
OPTIONAL: Lets you type the name of the server's
physical network name.
Do you want to add a remote
server or identify the local
server?
Lets you add a remote server or identification to the
local server.
Option Description
Indicate whether SQL Server
should time out inactive
physical connections with this
remote server
Yes, time out
No, run until shut down
Indicate whether encryption
should be used to protect
passwords sent to this remote
server
Yes, encrypt
No, use plain text
Which security mode would
you like to use for remote
procedure calls?
Security Model A
Security Model B
Option Description
Specify a security mechanism OPTIONAL: Lets you type the name of the security
mechanism.
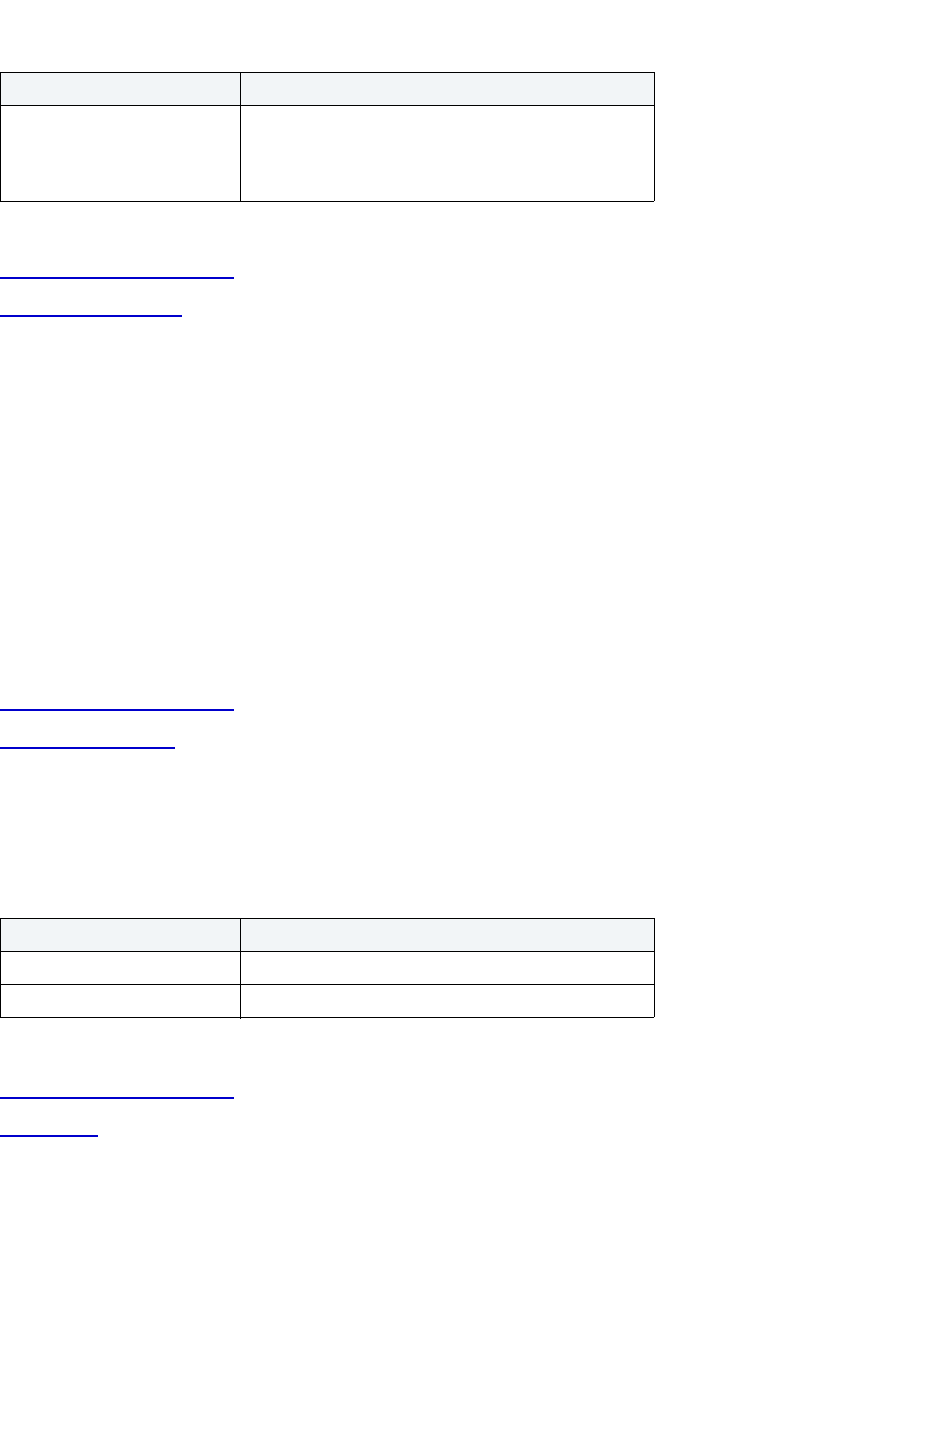
USING > FUNCTIONALITY
EMBARCADERO TECHNOLOGIES > BOOKNAMEVARIABLE 542
For more information, see:
Completing an Object Wizard
Remote Server Wizard
Role Wizard for Sybase ASE
The Role Wizard lets you create a role without knowing the underlying commands.
The Role Wizard lets you:
• Name the role and enter a password that can be used to activate the role.
• Specify login criteria.
Important Notes
•None
For more information, see:
Completing an Object Wizard
Role Wizard - Panel 1
Role Wizard for Sybase ASE - Panel 1
The table below describes the options and functionality on the first panel of the Role Wizard.
For more information, see:
Completing an Object Wizard
Role Wizard
Role Wizard for Sybase ASE - Optional Panel 2
The table below describes the options and functionality on the Role Wizard.
NOTE: This panel is optional.
If you selected Security
Model B on the previous
page, you may enable the
following options.
Mutual Authentication
Message Confidentiality
Message Integrity
Option Description
What is the name of the role? Lets you type the role name.
Password Lets you type the role password.
Option Description
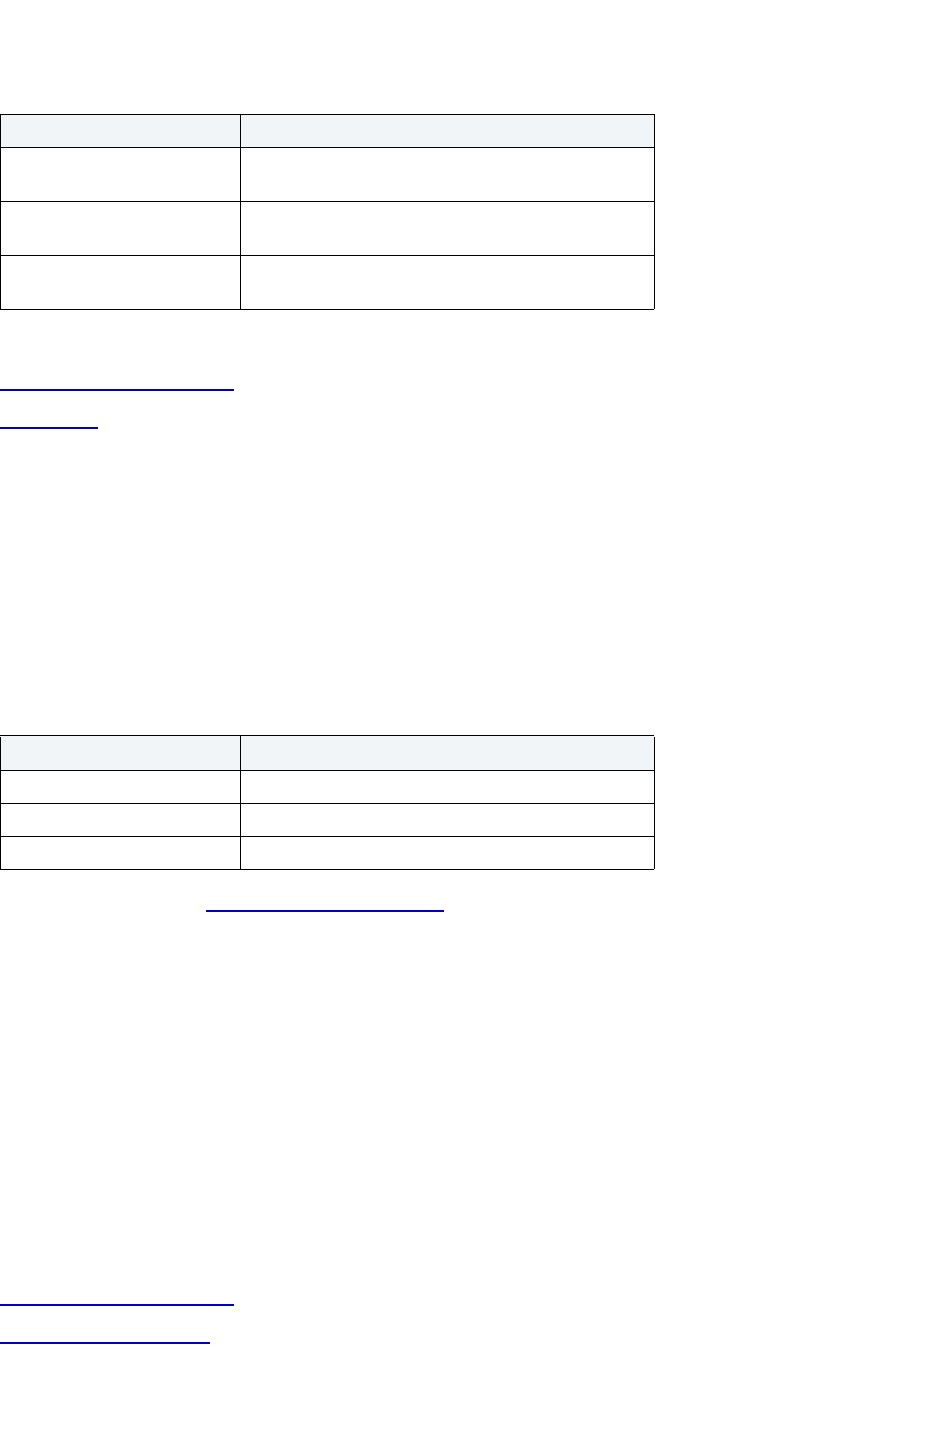
USING > FUNCTIONALITY
EMBARCADERO TECHNOLOGIES > BOOKNAMEVARIABLE 543
For more information, see:
Completing an Object Wizard
Role Wizard
Rule Wizard for Sybase ASE
The Rule Wizard lets you create a rule without knowing the underlying commands.
Important Notes
•None
The table below describes the options and functionality on the Rule Wizard.
For more information, see Completing an Object Wizard.
Segment Wizard for Sybase ASE
The Segment Wizard lets you create a segment without knowing any of the underlying commands.
The Segment Wizard lets you:
• Name the segment.
• Place the segment on one or more database fragments.
Important Notes
•None
For more information, see:
Completing an Object Wizard
Segment Wizard - Panel 1
Option Description
Enter the password
expiration, if any
Enter a value between zero and 32767 days.
Enter the minimum password
length, if any
Enter a value between zero and 30.
Enter the maximum number
of login attempts, if any
Enter a value between zero and 32767.
Option Description
Who owns the rule? Lets you select the owner.
What is the name of the rule? Lets you type the name of the role.
What is the rule restriction? Lets you type the rule condition.
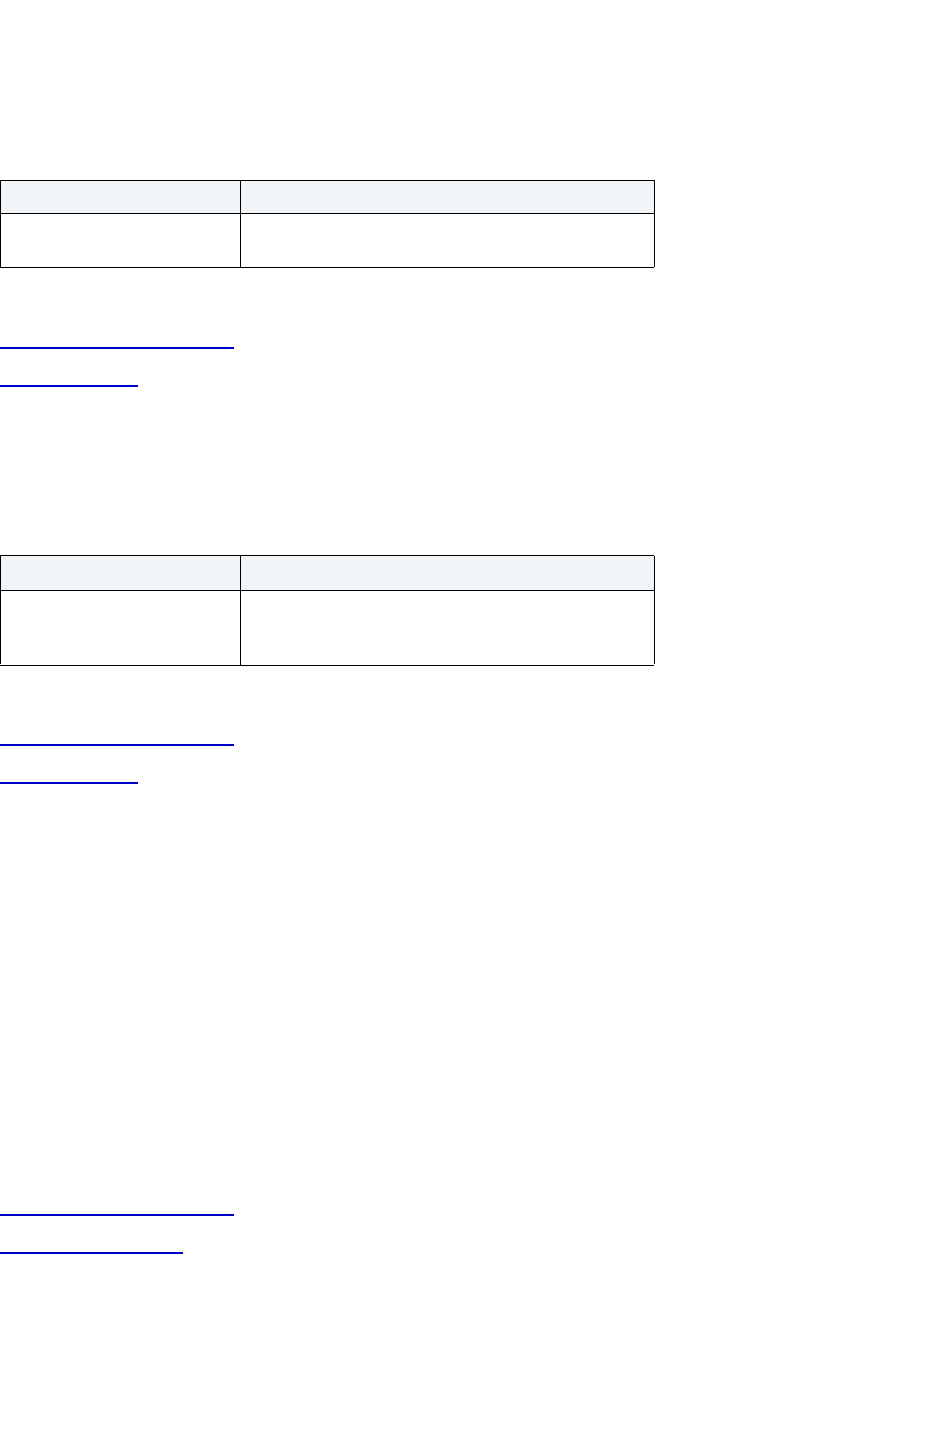
USING > FUNCTIONALITY
EMBARCADERO TECHNOLOGIES > BOOKNAMEVARIABLE 544
Segment Wizard for Sybase ASE - Panel 1
The table below describes the options and functionality on the Segment Wizard.
For more information, see:
Completing an Object Wizard
Segment Wizard
Segment Wizard for Sybase ASE - Panel 2
The table below describes the options and functionality on the second panel of the Segment Wizard.
For more information, see:
Completing an Object Wizard
Segment Wizard
Table Wizard for Sybase ASE
The Table Wizard lets you create a table without knowing the underlying commands.
The Table Wizard lets you:
• Name the table and owner.
• Specify the maximum rows allows per data page.
• Specify the cache replacement and prefetch strategies.
Important Notes
•None
For more information, see:
Completing an Object Wizard
Table Wizard - Panel 1
Table Wizard for Sybase ASE - Panel 1
The table below describes the options and functionality on the first panel of the Table Wizard:
Option Description
What is the name of the
segment?
Lets you type the name of the segment.
Option Description
On which database device do
you wish to place the
segment?
Lets you click the database (device) fragments on
which you want to place the segment.
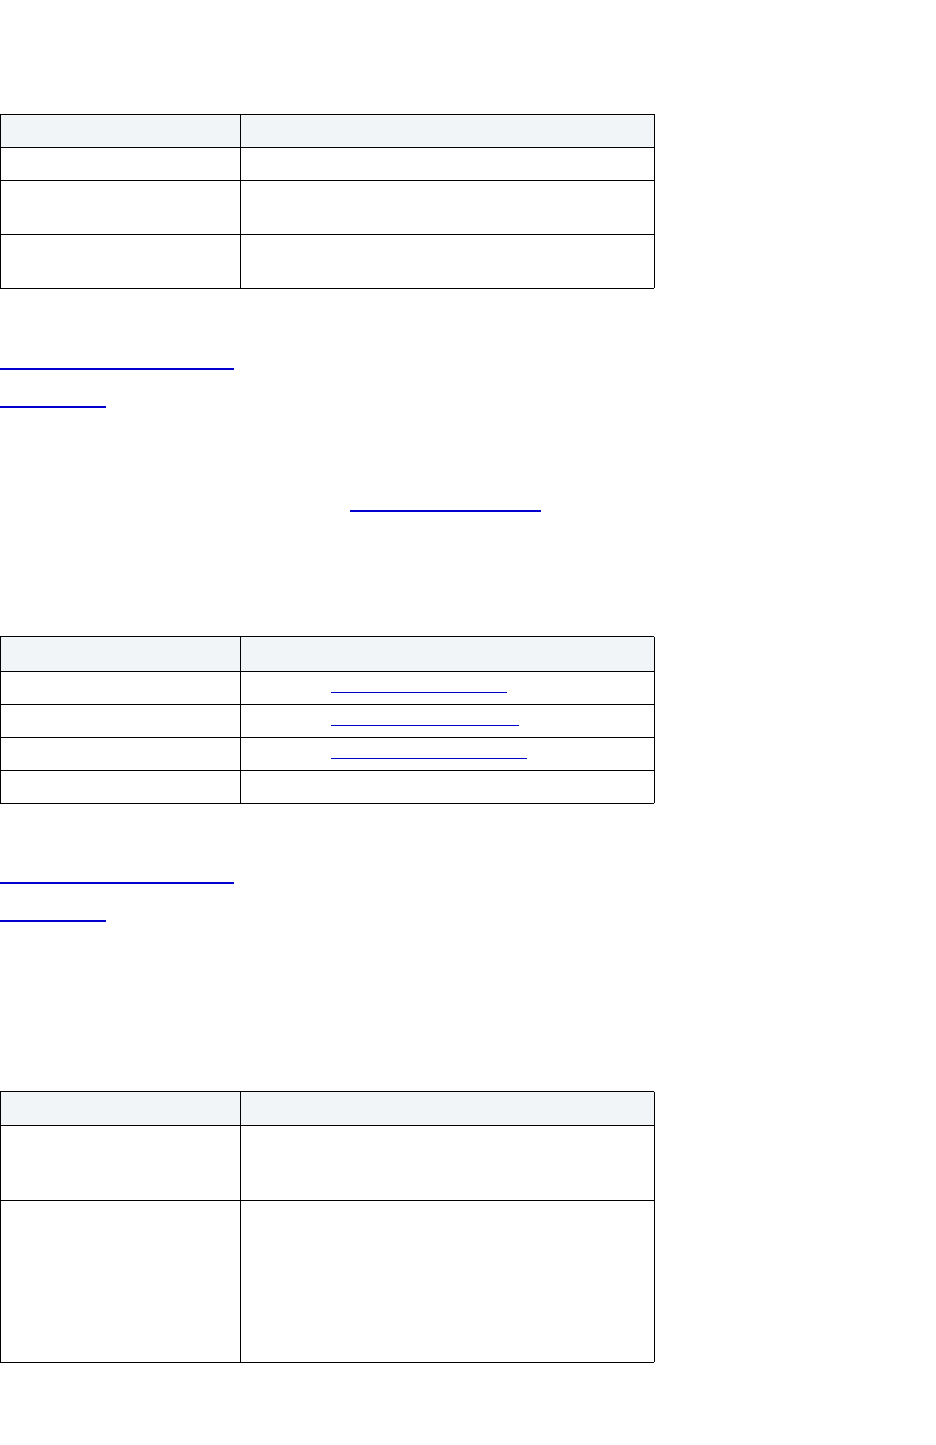
USING > FUNCTIONALITY
EMBARCADERO TECHNOLOGIES > BOOKNAMEVARIABLE 545
For more information, see:
Completing an Object Wizard
Table Wizard
Table Wizard for Sybase ASE - Panel 2
In the second panel of the Table Wizard, the Add Column dialog box opens immediately to let you add and define
table columns.
The table below describes the options and functionality on the second panel of the Table Wizard.
For more information, see:
Completing an Object Wizard
Table Wizard
Table Wizard for Sybase ASE - Panel 3
The table below describes the options and functionality on the third panel of the Table Wizard.
Option Description
Who owns the table? Lets you select the owner.
What is the name of the
table?
Lets you type the name.
On which segment do you
want to place the table?
Lets you select the segment.
Option Description
Add Button Opens the Add Column dialog box.
Insert Button Opens the Insert Column dialog box
.
Edit Button Opens the Modify Column dialog box
.
Drop Button Select to delete a columns.
Option Description
Specify the maximum rows of
data to allow on each data
page.
Lets you type the value of the maximum number of
rows. If you leave the value zero, Rapid SQL does
not apply the Max Rows option.
Specify the locking scheme
and expected row size to be
used for the table.
All Pages
SYBASE 11.9 ONLY:
Data Pages - Lets you specify which data pages you
want to lock and the expected row size.
Data Rows - Lets you specify which data rows you
want to lock and the expected row size.
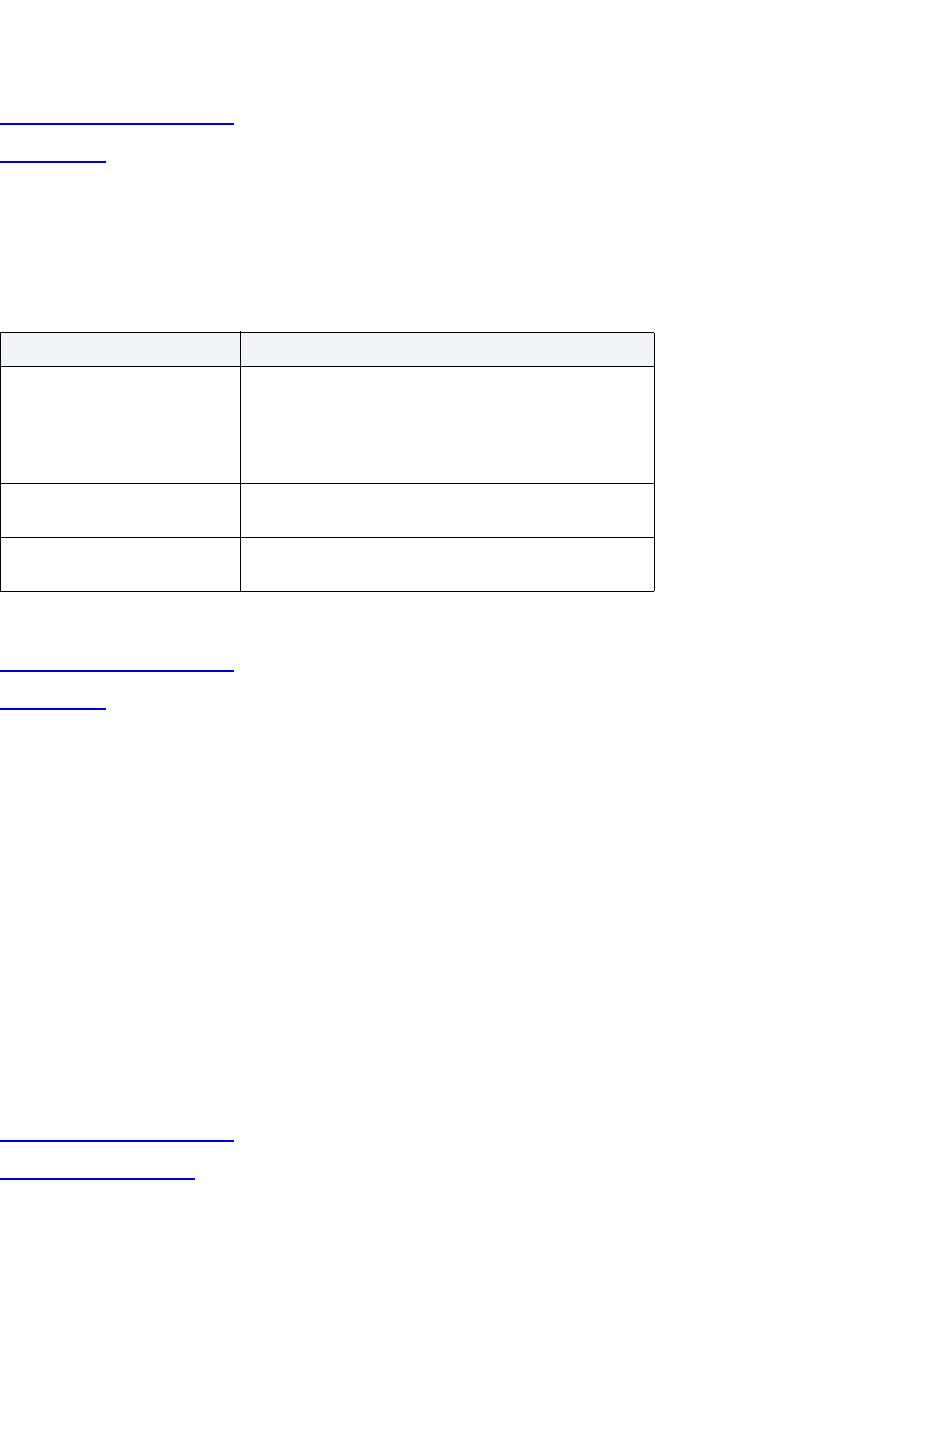
USING > FUNCTIONALITY
EMBARCADERO TECHNOLOGIES > BOOKNAMEVARIABLE 546
For more information, see:
Completing an Object Wizard
Table Wizard
Table Wizard for Sybase ASE - Panel 4
The table below describes the options and functionality on the fourth panel of the Table Wizard.
For more information, see:
Completing an Object Wizard
Table Wizard
Trigger Wizard for Sybase ASE
The Trigger Wizard lets you create a trigger without knowing the underlying commands.
The Trigger Wizard lets you:
• Specify the trigger name and the table on which it fires.
• Specify the data modification operations that causes the trigger to fire.
• Define the trigger body.
Important Notes
•None
For more information, see:
Completing an Object Wizard
Trigger Wizard - Panel 1
Trigger Wizard for Sybase ASE - Panel 1
The table below describes the options and functionality on the first panel of the Trigger Wizard.
Option Description
Which cache replacement
strategy should be used? Do
you want to flush the most or
least recently used pages
first?
Lets you set your cache strategy for optimal
efficiency.
Do you want to prefetch data
pages from the table?
Prefetching lets you employ large I/O for processing
intensive queries.
Specify the empty pages to
be allocated to the table.
Reserve Page Gap
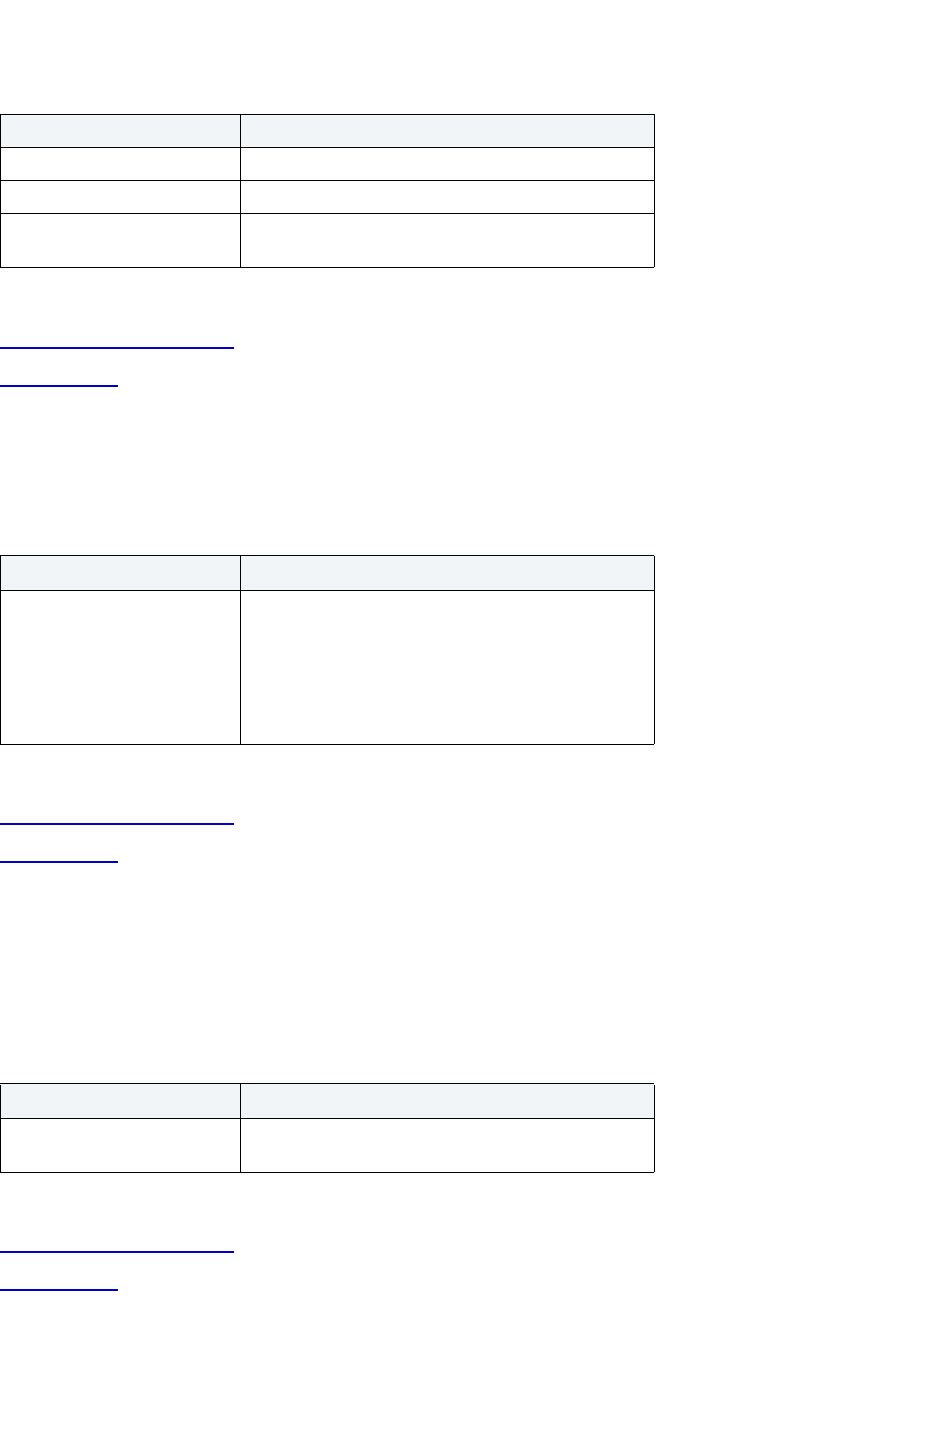
USING > FUNCTIONALITY
EMBARCADERO TECHNOLOGIES > BOOKNAMEVARIABLE 547
For more information, see:
Completing an Object Wizard
Trigger Wizard
Trigger Wizard for Sybase ASE - Panel 2
The table below describes the options and functionality on the second panel of the Trigger Wizard.
For more information, see:
Completing an Object Wizard
Trigger Wizard
Trigger Wizard for Sybase ASE - Panel 3
The table below describes the options and functionality on the third panel of the Trigger Wizard.
NOTE: For more information on the syntax for Trigger bodies, consult the Sybase ASE Documentation.
For more information, see:
Completing an Object Wizard
Trigger Wizard
Option Description
Who owns the table? Lets you select the owner.
Which is the base table? Lets you select the base table.
What is the name of the
trigger?
Lets you select the name of the trigger.
Option Description
Which table modification
operation(s) should cause the
trigger to fire?
Insert - Provides SQL to execute automatically after
items are inserted into the table.
Update - Provides SQL to execute automatically after
items in the table are updated.
Delete - Provides SQL to execute automatically after
items in the table are deleted.
Option Description
Please type the body of the
trigger below?
Lets you type the trigger body syntax.

USING > FUNCTIONALITY
EMBARCADERO TECHNOLOGIES > BOOKNAMEVARIABLE 548
Create Unique Key Dialog Box for Sybase ASE
The Create Unique Key dialog box lets you create a unique key without knowing the underlying commands.
Important Notes
• If you are creating a non-clustered index constraint, you should place it on a separate segment from the target
table.
The table below describes the options and functionality on the Create Unique Key Constraint dialog box.
For more information, see Completing an Object Wizard.
User Datatype Wizard for Sybase ASE
The User Datatype Wizard lets you create a user datatype without knowing the underlying commands.
The User Data Type Wizard lets you:
• Name the user datatype.
• Define the base datatype properties.
• Set null values in columns
• Set default binding
• Set rule binding
Important Notes
•None
For more information, see:
Completing an Object Wizard
User Datatype Wizard - Panel 1
User Datatype Wizard for Sybase ASE - Panel 1
The table below describes the options and functionality on the first panel of the User Datatype Wizard.
Option Description
Owner Lets you select the unique key constraint owner.
Table Lets you select the table you want to place the
unique key constraint.
Constraint Name Lets you enter the name of the constraint, which can
be up to 30 characters long and must be unique
across the entire database.
Properties Clustered
Fillfactor - Lets you type the fillfactor value.
Segment - Lets you select the segment.
Specify Columns in
Constraint
Lets you select, reorder, and remove the constraint
columns.

USING > FUNCTIONALITY
EMBARCADERO TECHNOLOGIES > BOOKNAMEVARIABLE 549
For more information, see:
Completing an Object Wizard
User Datatype Wizard
User Datatype Wizard for Sybase ASE - Panel 2
The table below describes the options and functionality on the second panel of the User Datatype Wizard.
For more information, see:
Completing an Object Wizard
User Datatype Wizard
User Datatype Wizard for Sybase ASE - Panel 3
The table below describes the options and functionality on the third panel of the User Datatype Wizard.
For more information, see:
Completing an Object Wizard
User Datatype Wizard
Option Description
What is the name of the
datatype?
Lets you type the datatype name.
Option Description
Does the new datatype use
identity properties?
Indicate if the datatype uses indemnity properties.
What is the base datatype? Lets you select the base datatype.
What are the datatype
parameters?
Lets you type the appropriate values.
Width
Scale
Option Description
Does the datatype allow null
values?
Indicate if you want to allow null values in the
datatype.
Which default is bound to the
new datatype?
Lets you select a default.
Which rule is bound to the
new datatype?
Lets you select the rule.
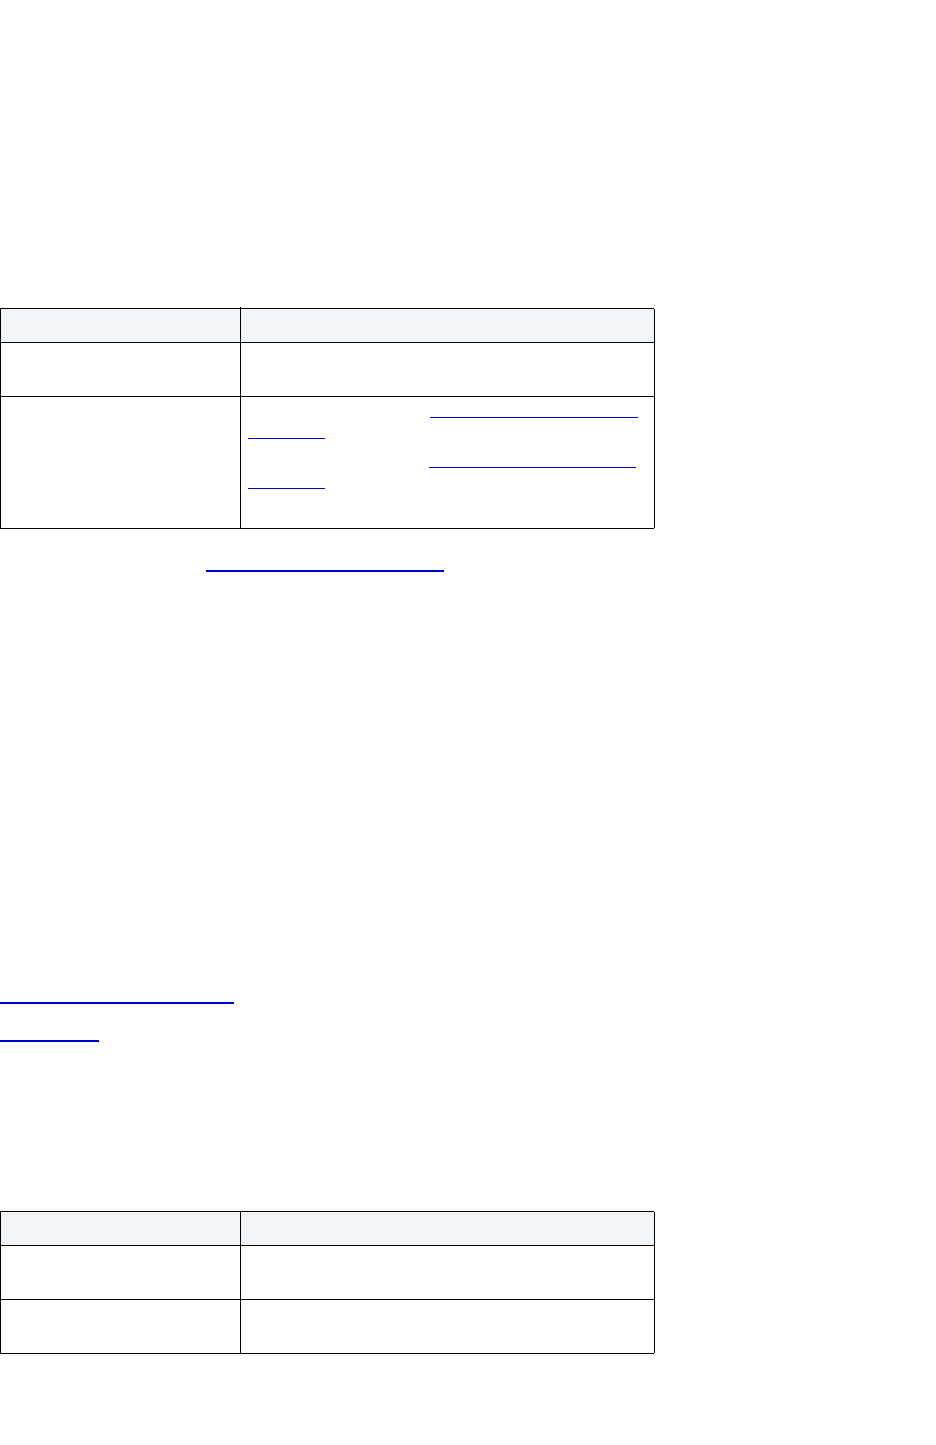
USING > FUNCTIONALITY
EMBARCADERO TECHNOLOGIES > BOOKNAMEVARIABLE 550
User Message Wizard for Sybase ASE
The User Message Wizard lets you create a user message without knowing the underlying commands.
Important Notes
•None
The table below describes the options and functionality on the User Message Wizard.
For more information, see Completing an Object Wizard
.
User Wizard for Sybase ASE
The User Wizard lets you create a user without requiring you to know any of the underlying commands.
The User Wizard lets you:
• Map the login to the user.
• Name the user.
• Specify the group to which the user should belong.
Important Notes
•None
For more information, see:
Completing an Object Wizard
User Wizard
User Wizard for Sybase ASE - Panel 1
The table below describes the options and functionality on the User Wizard.
Option Description
What is the message number
box?
Lets you type the value of the message number,
which by default must be greater than 20000.
Add the message text
belonging to this message.
Add Button - Opens the Create User Message Text
dialog box.
Edit Button - Opens the Modify User Message Text
dialog box.
Delete Button - Deletes the message.
Option Description
What is the login ID of the
new user?
Lets you type the Login ID of the new user. It can be
up to 30 characters long.
What is the name of the user? Lets you type the name if it is different from the Login
ID.
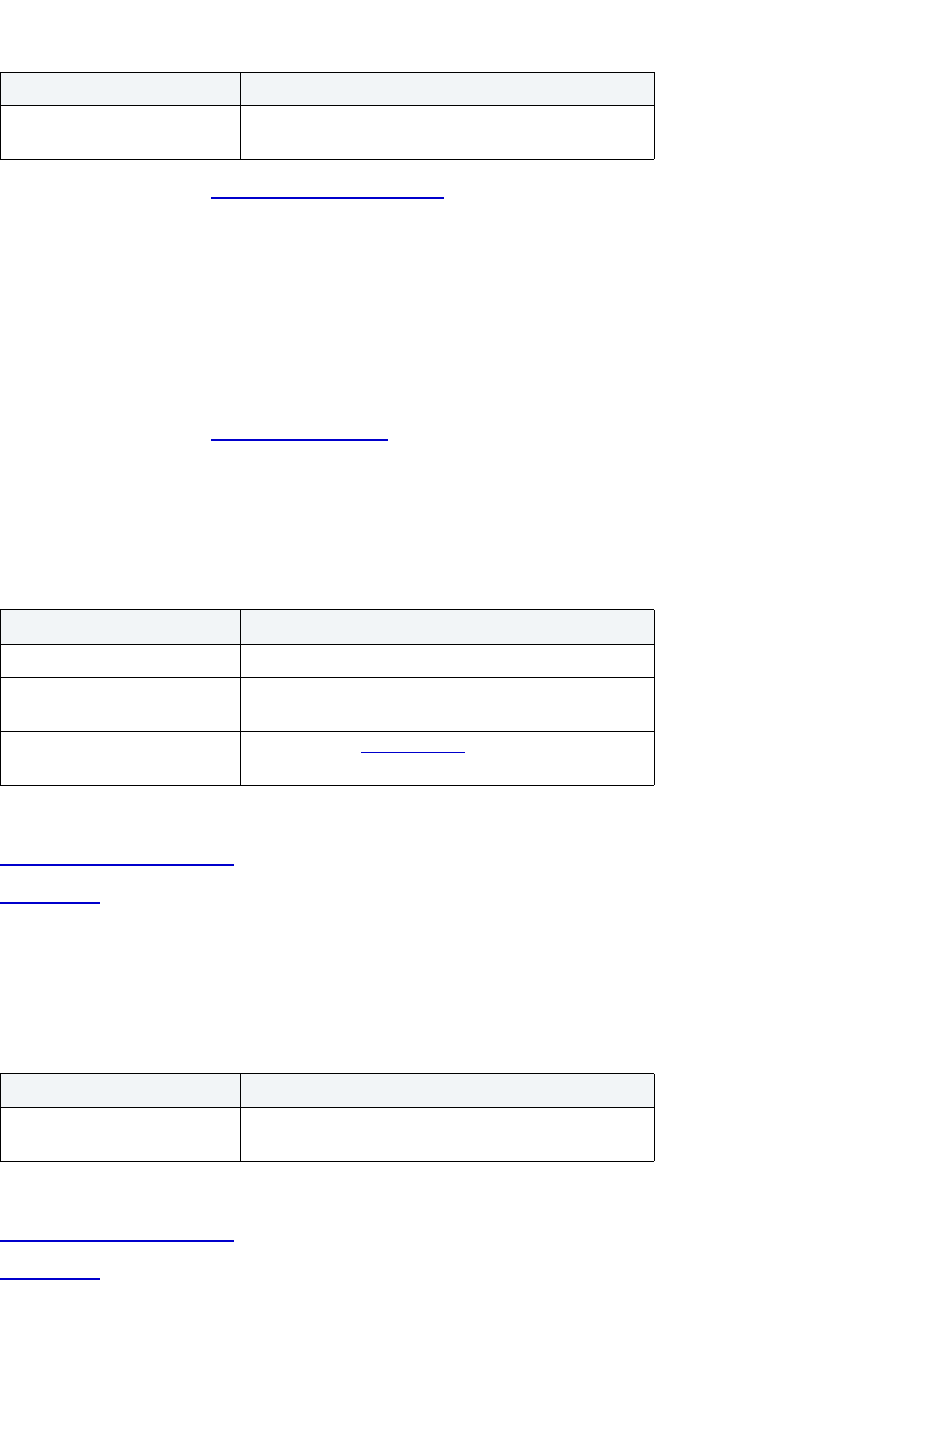
USING > FUNCTIONALITY
EMBARCADERO TECHNOLOGIES > BOOKNAMEVARIABLE 551
For more information, see Completing an Object Wizard.
View Wizard for Sybase ASE
The View Wizard lets you create a view without knowing the underlying commands.
Important Notes
•None
For more information, see View Wizard - Panel 1
.
View Wizard for Sybase ASE - Panel 1
The table below describes the options and functionality on the first panel of the View Wizard.
For more information, see:
Completing an Object Wizard
View Wizard
View Wizard for Sybase ASE - Panel 2
The table below describes the options and functionality on the second panel of the View Wizard.
For more information, see:
Completing an Object Wizard
View Wizard
To which group should the
user belong?
Lets you select the target group.
Option Description
Who owns the view? Lets you select the view owner.
What is the name of the
view?
Lets you enter the view name.
Use Query Builder to define
view
Select to open Query Builder
to help you build the
view SQL.
Option Description
Please select the view
options to include
Lets you select view options.
Option Description

USING > FUNCTIONALITY
EMBARCADERO TECHNOLOGIES > BOOKNAMEVARIABLE 552
Activate Logging
This functionality is available for IBM DB2 UDB for Linux, Unix, and Windows only.
The Activate Logging dialog box lets you store the most recent log records, when the table is not logging initially.
Important Notes
None
For more information, see Completing the Activate Logging Dialog Box.
Completing the Activate Logging Dialog Box
To complete this dialog box, do the following:
Add/Modify Database File
The table below describes the options and functionality on the Add/Modify Database File dialog box.
1 On the Database Explorer, select the target object node.
Rapid SQL displays the target objects in the Database Explorer.
2 On the Database Explorer, right-click the target object, and then select Activate Logging.
Rapid SQL opens the Activate Logging dialog box.
3 Do one of the following:
Option Description
Database Displays the database name.
Filegroup Lets you select a filegroup to which the database belongs.
Default - Sets filegroup as the default.
Read Only - Sets the filegroup as read-only.
Database File Name - Lets you name the database file.
File Path - Lets you specify the file location. Type or browse and
locate the file. The application automatically gives the database file
a *.mdf extension.
Size - Lets you specify a database size in KB or MB.
Allow Growth Lets the database file grow.
Growth Rate - Lets you specify the growth rate in percents, KB, or
MB.
Max Size - Specifies the maximum database file size. Select
Unlimited to let the database file grow without restrictions. To
specify a specific size, select Size and enter a size in KB or MB.
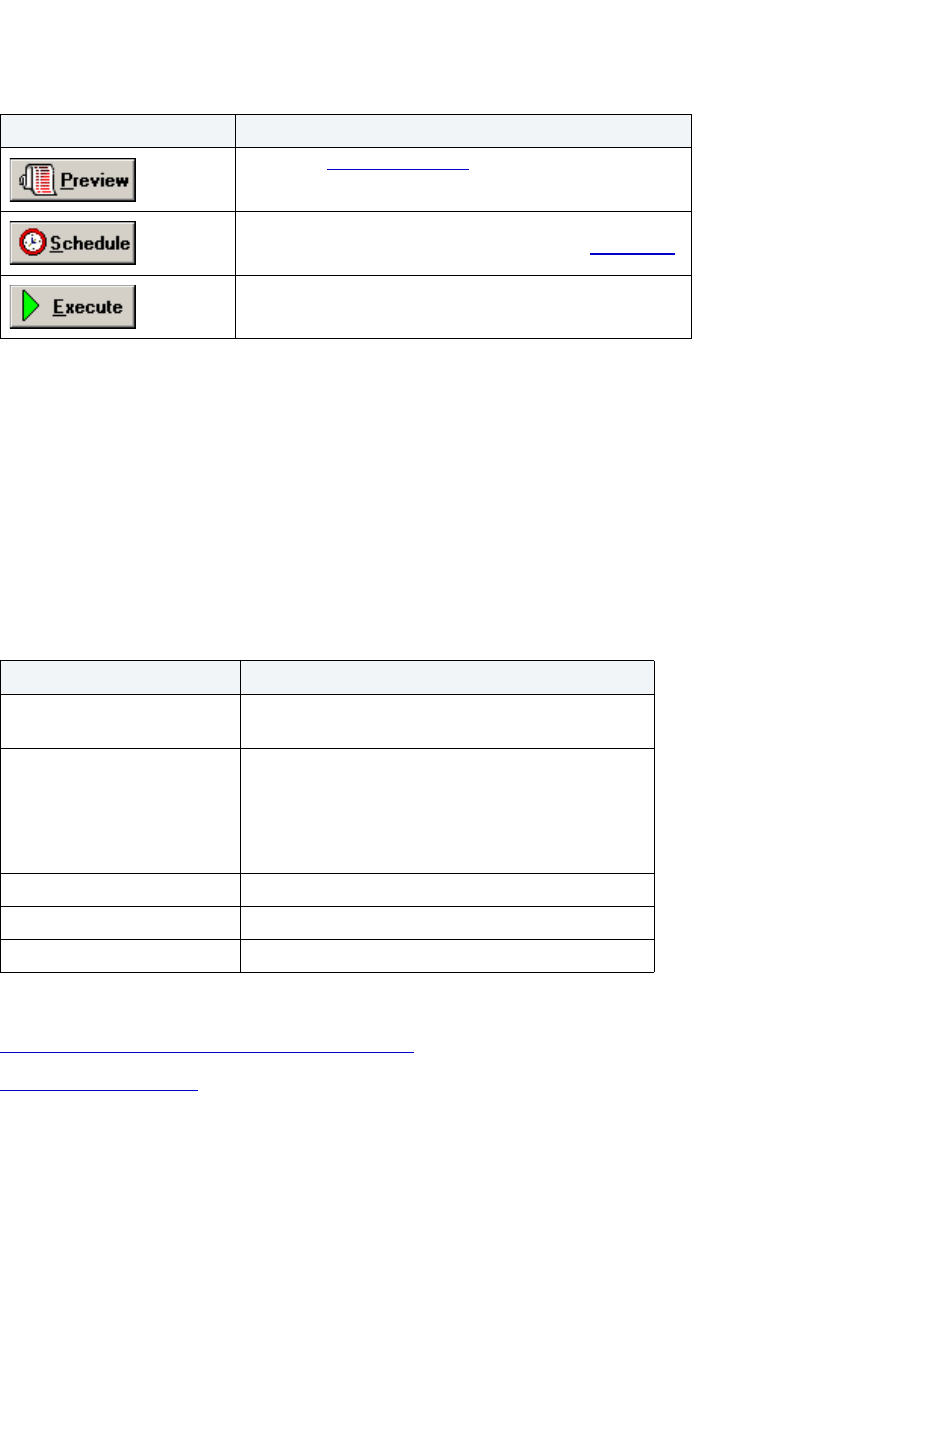
USING > FUNCTIONALITY
EMBARCADERO TECHNOLOGIES > BOOKNAMEVARIABLE 553
Add Database Fragment
This functionality is available for all platforms.
The Add Database Fragment dialog box lets you add database fragments to a device.
Important Notes
None
The table below describes the options and functionality on the Add Database Fragment dialog box.
For more information, see:
Completing the Add Database Fragment Dialog Box
Completing a Dialog Box
Completing the Add Database Fragment Dialog Box
To complete this dialog box, do the following:
1 In the Data Device box, click the Device list to specify the placement of the database.
2 In the Size box, type the MB value of the data device.
3 OPTIONAL: In the Log Device box, click the list to specify the placement of the transaction log.
4 If you specify a log device, in the Size box, type the MB value of the log device.
Button Description
Opens the Preview dialog box.
Opens Embarcadero Job Scheduler, or (if unavailable)
another scheduling application. For more, see Scheduling
.
Executes the task.
Option Description
Data Device Lets you specify a data device. Select a device and
set a device size in MBs.
Log Device OPTIONAL: Lets you specify the placement of the
transaction log.
NOTE: We strongly recommend that you place the
transaction log on a separate device from all other
database fragments.
Add Button Lets you add more database fragments.
Edit Button Lets you edit an existing database fragment.
Delete Button Lets you delete an existing database fragment.

USING > FUNCTIONALITY
EMBARCADERO TECHNOLOGIES > BOOKNAMEVARIABLE 554
5 Click Add.
Rapid SQL adds the database fragment and closes the Add Database File dialog box.
• To add more database fragments, click the Add button.
• To edit an existing database fragment, click the fragment and click the Edit button.
• To delete an existing database fragment, click the fragment and click the Delete button.
For more information, see:
Add Database Fragment
Completing a Dialog Box
Add, Insert, or Modify Column
This functionality is available for all platforms.
The Add, Insert, or Modify Columns dialog box lets you manage columns. You can open the dialog box in the following
wizards and editors:
• IBM DB2 UDB for Linux, Unix, and Windows Indexes Editor - Columns Tab
• IBM DB2 UDB for Linux, Unix, and Windows Tables Editor - Columns Tab
• IBM DB2 UDB for Linux, Unix, and Windows Unique Keys Editor - Columns Tab
• IBM DB2 UDB for Linux, Unix, and Windows Views Editor - Columns Tab
• IBM DB2 UDB for OS/390 and z/OS Indexes Editor - Columns Tab
• IBM DB2 UDB for OS/390 and z/OS Tables Editor - Columns Tab
• IBM DB2 UDB for OS/390 and z/OS Unique Keys Editor - Columns Tab
• IBM DB2 UDB for OS/390 and z/OS Views Editor - Columns Tab
• Microsoft SQL Server Tables Editor - Columns Tab
• Oracle Tables Editor - Columns Tab
• Sybase ASE Tables Editor - Columns Tab
• IBM DB2 UDB for Linux, Unix, and Windows Table Wizard - Panel 2
• IBM DB2 UDB for OS/390 and z/OS Table Wizard - Panel 2
• Microsoft SQL Server Table Wizard - Panel 2
• Oracle Table Wizard - Panel 2 for Heap-Organized Tables
• Oracle Table Wizard - Panel 2 for Index-Organized Tables
• Sybase Table Wizard - Panel 2
Important Notes
None
The table below describes the options and functionality on the Add, Insert or Modify Column dialog box.
NOTE: The options differ by platform.

USING > FUNCTIONALITY
EMBARCADERO TECHNOLOGIES > BOOKNAMEVARIABLE 555
NOTE: The options differ for IBM DB2 UDB for OS/390 and z/OS, Microsoft SQL Server 7 or later, Oracle,
and Sybase ASE.
For more information, see:
Completing the Add, Insert or Modify Column Dialog Box
Completing a Dialog Box
Option Description
Column Name Lets you enter the name of the column.
Datatype Lets you select a datatype and set the width and
scale.
NOTE: Oracle 9i supports Timestamp datatypes,
including Timestamp, Timestamp with Time Zone,
and Timestamp with Local Time Zone.
Allow Nulls? Lets you allow columns with no text.
Default Value Lets you accept the default value for the datatype.
Comment OPTIONAL: Lets you type comments, which can be
up to 254 characters long.
Lob Options Lets you specify options for a large datatype.
Character Options For a datatype that has character options.
For Bit Data
Identity Column Lets you specifies values for an identity column. The
identity column will start at the value specified in Min
Value, and will continue to progress until the Max
value is reached.
Min Value - Lets you specify the minimum value. If
you do not specify, Rapid SQL will use the max
values for the datatype.
Max Value - Lets you specify the maximum value. If
you do not specify, Rapid SQL will use the max
values for the datatype.
Cycle - If you do not select, when the Max Value is
reached the server will not allow anymore rows. If
you do select, when the Max value is reached the
server will start the identity column from the
beginning.

USING > FUNCTIONALITY
EMBARCADERO TECHNOLOGIES > BOOKNAMEVARIABLE 556
Completing the Add, Insert or Modify Column Dialog Box
To complete this dialog box, do the following:
NOTE: The options differ for IBM DB2 UDB for OS/390 and z/OS
, Microsoft SQL Server 7 or later, Oracle,
and Sybase ASE.
1 In the Column Name box, type the target column name.
2 Click the Datatype list, and then click the target datatype.
NOTE: For SQL Server 2000, if you create a table with a Column datatype = text., you can set the storage
and image values on the Storage Tab of the Tables Editor Storage Tab. When you have a text
datatype, the Storage Tab displays a Text In Row box where you can specify the maximum size
to be stored.
NOTE: Because the smalldatetime datatype stores dates and time with less precision than the datetime
datatype, before outputting you use the CAST or CONVERT functions to convert any boxes with
the smalldatetime datatype to either VARCHAR or datetime datatypes. For more information, see
SQL Server Books Online, Transact-SQL Reference.
3 To allow nulls, click the Yes option button.
4 If you do not want to allow nulls, click the No option button.
5 To define a computed expression column, click the Computed Expression option button and then type the
expression in the box.
NOTE: This option is only valid for Microsoft SQL Server 7.
6 To set row binding parameters, in the Row Binding grid.
• To set a default value, click the Default Value list or type a value in the box.
• To fill the rows with a default value, select the Fill Rows with Default Value check box.
• To bind a default to the column (instead of declaring it), in the Default Binding list, click the default binding.
• To bind a rule to the column, click the Default Rule list and click the default rule.
7 To set an identity column, select the Identity Column check box.
8 If you select the Identity Column check box, in the Identity Seed and Identity Increment boxes, type the
appropriate values.
9 If the columns are not for replication, select the Not for Replication check box.
10 Click the Add button.
Rapid SQL adds the column.
11 When you finish adding columns, click the Close button.
Rapid SQL closes the Add Column dialog box.
12 To insert a column, click the Insert button.
13 To add, insert, edit or drop and columns, click the corresponding button in Add columns that are belonging to
this table.
For more information see:
Add, Insert or Modify Column
Completing a Dialog Box

USING > FUNCTIONALITY
EMBARCADERO TECHNOLOGIES > BOOKNAMEVARIABLE 557
Add, Insert or Modify Column for IBM DB2 UDB for OS/390 and z/OS
The table below describes the options and functionality on the Add, Insert or Modify Column dialog box for IBM DB2
UDB for OS/390 and z/OS.
For more information, see:
Completing the Add, Insert or Modify Column Dialog Box
Completing a Dialog Box
Add, Insert or Modify Column for Microsoft SQL Server
Microsoft SQL Server 7 introduced the concept of the computed expression column which lets you define a virtual
column derived from an expression that computes a value based on other columns from the same table. For example,
create a computed expression column that calculates the sales tax for an item based on the values stored in the price
and tax rate columns of that table. Computed expression columns cannot be used as a key column.
Options Description
Column Name Lets you enter the name of the column.
Datatype Lets you select a datatype and set the width and
scale.
Allow Nulls? Lets you allow columns with no text.
Default Value Lets you accept the default value for the datatype
you selected.
Comment OPTIONAL: Lets you type comments, which can be
up to 254 characters long.
For Data Lets you specify the subtype If the datatype selected
is a character string column such as CHAR,
VARCHAR or LONG VARCHAR.
SBCS - The column holds single-byte data.
Mixed - The column holds mixed data. Do not set as
MIXED if the installation box, MIXED DATA on the
DSNTIPF panel is NO.
Bit - The column holds BIT data. For CLOB
datatypes, the default is SBCS when the installation
box, MIXED DATA on the DSNTIPF panel is NO. The
default for CLOB datatypes is Mixed when the
installation box, MIXED DATA on the DSNTIPF panel
is YES.
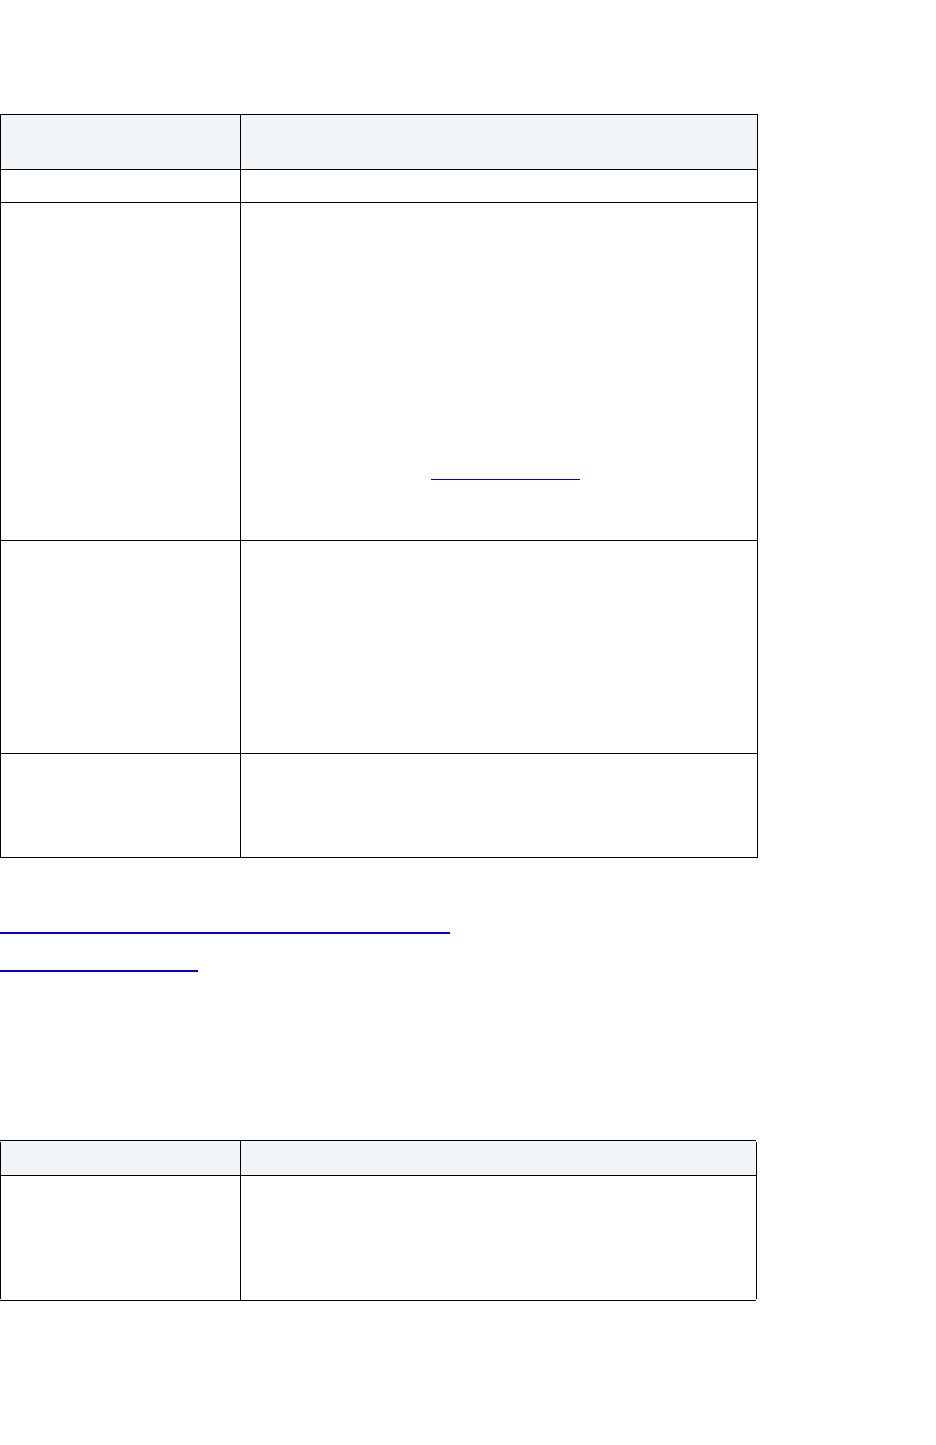
USING > FUNCTIONALITY
EMBARCADERO TECHNOLOGIES > BOOKNAMEVARIABLE 558
For more information, see:
Completing the Add, Insert or Modify Column Dialog Box
Completing a Dialog Box
Collation Properties
The table below describes the options and functionality on the Collation Properties dialog box:
Option for Microsoft SQL
Server 7 or later
Description
Column Name Lets you type the target column name.
Datatype Lets you select the target datatype, width and scale.
NOTE: Because the smalldatetime datatype stores dates and time
with less precision than the datetime datatype, before outputting
you use the CAST or CONVERT functions to convert any boxes
with the smalldatetime datatype to either VARCHAR or datetime
datatypes. For more information, see SQL Server Books Online,
Transact-SQL Reference.
Allow Nulls - Lets you allow columns with no text.
Collation - Lets you specify a collation sequence for the column. A
column's collation sequence is used in any operation that
compares values of the column to each other or to constant values.
Click button to open the Collation Properties
when datatype char,
varchar, text, nchar, nvarchar or ntext is selected.
Computed Expression
Row Binding Lets you bind a row to the column.
Default Value - Lets you select a default value or type a value in the
box.
Fill Rows with Default Value - Select to fill rows with the value
above.
Default BInding - Lets you bind a default to the column, instead of
declaring it.
Rule Binding - Lets you bind a rule to the column.
Identity Column Lets you set an identity column and set the identity seed and
identity increment values.
Not for Replication - Lets you indicate if the columns are not for
replication.
Option Description
SQL Collation SQL collations are a compatibility option to match the attributes of
common combinations of code page number and sort orders that
have been specified in earlier versions of SQL Server.
Select to choose among the collation sequences defined by SQL
Server. Then select a collation sequence from the list.

USING > FUNCTIONALITY
EMBARCADERO TECHNOLOGIES > BOOKNAMEVARIABLE 559
Add, Insert or Modify Column for Oracle
The table below describes the options and functionality on the Add, Insert or Modify Column dialog box for Oracle.
Windows Collation Windows collations are collations defined for SQL Server to
support Microsoft Windows® locales. By specifying a Windows
collation for SQL Server, the instance of SQL Server uses the
same code pages and sorting and comparison rules as an
application running on a computer for which you have specified the
associated Windows locale. For example, the French Windows
collation for SQL Server matches the collation attributes of the
French locale for Windows.
Select to choose among the collation sequences defined by
Windows. Then select a collation sequence from the list.
Binary Sort Sorts and compares data in tables based on the bit patterns
defined for each character. Binary sort order is case-sensitive, that
is lowercase precedes uppercase, and accent-sensitive. This is the
fastest sorting order.
If this option is not selected, SQL Server follows sorting and
comparison rules as defined in dictionaries for the associated
language or alphabet.
NOTE: Available only if you select Windows collation.
Dictionary Sort Available only if you select Windows collation. Select this if you
want comparison operations to use certain alphabetic comparison
options. The alphabetic comparisons options are:
Case Sensitive - Distinguishes between uppercase and lowercase
letters. If not selected, SQL Server considers the uppercase and
lowercase versions of letters to be equal. SQL Server does not
define whether lowercase letters sort lower or higher in relation to
uppercase letters when Case-sensitive is not selected.
Accent Sensitive - Distinguishes between accented and
unaccented characters. For example, 'a' is not equal to ''. If not
selected, SQL Server considers the accented and unaccented
versions of letters to be equal.
Kana Sensitive -Distinguishes between the two types of Japanese
kana characters: Hiragana and Katakana. If not selected, SQL
Server considers Hiragana and Katakana characters to be equal.
Width Sensitive - Distinguishes between a single-byte character
(half-width) and the same character when represented as a
double-byte character (full-width). If not selected, SQL Server
considers the single-byte and double-byte representation of the
same character to be equal.
Reset Defaults Applies to the column the default collation sequence for the
database.
Option Description
Column Name Lets you type the column name.
Option Description

USING > FUNCTIONALITY
EMBARCADERO TECHNOLOGIES > BOOKNAMEVARIABLE 560
For more information, see:
Completing the Add, Insert or Modify Column Dialog Box
Completing a Dialog Box
Add, Insert or Modify Column for Sybase ASE
The table below describes the options and functionality on the Add, Insert or Modify Column dialog box for Sybase
ASE.
For more information, see:
Datatype Lets you select the datatype for the table.
NOTE: For Oracle 9i, Rapid SQL supports the
XMLType datatype.
If you select CHAR, RAW or VARCHAR2, in the
Width box, type the width value.
If you select NUMBER, in the Width box, type the
width value and in the Scale box, type the scale
value.
Allow Nulls? Lets you allow columns with no text.
Default Value Lets you select or type a default on the column.
Comment OPTIONAL: Lets you type a comment. A column
comment can be up to 2000 characters long.
Add Button Click to add the column.
Close Button Click to return to Panel 2.
Option Description
Column Name Lets you type the column name.
Datatype Lets you select the target datatype. If the Datatype
requires width and/or scale, type the values in the
corresponding boxes.
NOTE: Because the smalldatetime datatype stores
dates and time with less precision than the datetime
datatype, before outputting you use the CAST or
CONVERT functions to convert any boxes with the
smalldatetime datatype to either VARCHAR or
datetime datatypes.
Allow Nulls? Lets you allow columns with no text.
Default Value OPTIONAL: Lets you select or type a value.
Identity Column Lets you set the identity column. The identity column
will start at the value specified in Min Value, and will
continue to progress until the Max value is reached.
Default Binding Lets you bind a default to the column (instead of
declaring it).
Rule Binding Lets you bind a rule to the column.
Option Description
USING > FUNCTIONALITY
EMBARCADERO TECHNOLOGIES > BOOKNAMEVARIABLE 561
Completing the Add, Insert or Modify Column Dialog Box
Completing a Dialog Box
Add, Insert, or Modify Parameter
This functionality is available for all platforms.
The Add, Insert, or Modify Parameters dialog box lets you manage parameters. You can open the dialog box in the
following wizards and editors:
• IBM DB2 UDB for Linux, Unix, and Windows Functions Editor - Parameters Tab
• IBM DB2 UDB for Linux, Unix, and Windows Procedures Editor - Parameters Tab
• IBM DB2 UDB for OS/390 and z/OS Functions Editor - Parameters Tab
• IBM DB2 UDB for OS/390 and z/OS Procedures Editor - Parameters Tab
• IBM DB2 UDB for Linux, Unix, and Windows Function Wizard - Panel 2
• IBM DB2 UDB for Linux, Unix, and Windows Function Wizard - Panel 3
• IBM DB2 UDB for Linux, Unix, and Windows Procedure Wizard - Panel 3
• IBM DB2 UDB for OS/390 and z/OS Function Wizard - Panel 3
• IBM DB2 UDB for OS/390 and z/OS Function Wizard - Panel 4
• IBM DB2 UDB for OS/390 and z/OS Procedure Wizard - Panel 3
Important Notes
None
The table below describes the options and functionality on the Add, Insert or Modify Parameter dialog box.
For more information, see Completing a Dialog Box
.
Add, Insert, or Modify Partition
This functionality is available for Oracle.
Option Description
Parameter Name Lets you enter the name of the parameter.
Datatype Lets you select a datatype.
Width Lets you set as appropriate to the datatype.
Scale Lets you set as appropriate to the datatype.
Parameter Mode Lets you select the parameter mode.
Add Button Click to add the parameter.
Close Button Click when you finish adding parameters.

USING > FUNCTIONALITY
EMBARCADERO TECHNOLOGIES > BOOKNAMEVARIABLE 562
You can open the dialog box in the following wizards:
•
Oracle Index Wizard - Panel 10
• Oracle Materialized View Wizard - Panel 10 (Composite Partitioning)
• Oracle Materialized View Wizard - Panel 9 (Range Partitioning)
• Oracle Table Wizard - Composite Partitioning
• Oracle Table Wizard - Range Partitioning
The table below describes the options and functionality on the Add, Insert or Modify Partition dialog box.
NOTE: Options differ by platform and wizard.
For more information, see:
Completing the Add, Insert or Modify Partition Dialog Box
Completing a Dialog Box
Option Description
Name Lets you type the name of the new partition. Do not use single
quotation marks (‘) in the name.
# of Partitions Lets you specify the number of partitions.
Set Upper Bound Button Lets you set the non-inclusive upper bound for the partitioning
columns. Not available for the local index.
Opens the Partition Upper Bound dialog box
.The partitioning
columns you chose in Step 1 appear in the column grid, with a
default upper bound of MAXVALUE.
Tablespace Lets you select the tablespace on which the partition should be
placed.
No Logging Select to make the partition log.
Physical Lets you set the percent free, initial transactions and maximum
transactions.
Space Attributes Click View to view space attributes.
Storage Lets you set any storage parameters by clicking the corresponding
lists or typing the values in the corresponding boxes.
Subpartition definition None - Oracle creates one subpartition.
Subpartition by name - Click Add, Insert, or Edit to open the
Subpartition
dialog box.
Click Drop or to delete the subpartition.
Use the tablespace(s) specified at the partition level - Select to use
the tablespace(s) specified at the partition level.
Create a list of two subpartitions - Displays a list of two
subpartitions.
Add - Click to open the Subpartition
dialog box.
Remove - Click to remove a selected subpartition.
USING > FUNCTIONALITY
EMBARCADERO TECHNOLOGIES > BOOKNAMEVARIABLE 563
Completing the Add, Insert or Modify Partition Dialog Box
To complete this dialog box, do the following:
1 In the Partition Definition box, type the name of the new partition.
NOTE: Do not use single quotation marks (‘) in the name.
• If you do not want to set the non-inclusive upper bound for the partitioning columns, proceed to step 13.
• To set the non-inclusive upper bound for the partitioning columns, proceed to step 8.
2 Click the column in the grid and then click the Set Upper Bound button.
Rapid SQL opens the Partition Upper Bound dialog box
.
NOTE: The partitioning columns you chose in Step 1 appear in the column grid, with a default upper
bound of MAXVALUE.
The following table describes when you should enable editing of the upper bound:
3 Click the Partitioning Column list and then click the partitioning column.
4In the Upper Bound list, click the default or type the value of the upper bound. All rows in the partition will have
partitioning keys that compare to less than the partition bound and greater than or equal to the partition bound for
the preceding partition.
5 Click Set.
Rapid SQL establishes the upper bound.
6 Click OK.
Rapid SQL closes the Rapid SQL message.
7 When you finish setting the upper bound for the partitioning columns, click Close.
Rapid SQL returns to the Add Partition dialog box.
8 In the Segment box, click the Tablespace list and then click the tablespace on which the partition should be
placed.
9 To make the partition log, click the No Logging check box to clear this option.
10 In the Physical box, set the percent free, initial transactions and maximum transactions by clicking the
corresponding lists or typing the values in the corresponding boxes.
Partition Type Index Table Notes
Hash N/A N/A Does not have upper
bound.
Range Local Disable Enable
Range Global Enable all but the last
partition
Enable The upper bound button
will be disabled if there is
only one partition.
Composite Global Enable all but the last
partition
Enable The upper bound button
will be disabled if there is
only one partition.
USING > FUNCTIONALITY
EMBARCADERO TECHNOLOGIES > BOOKNAMEVARIABLE 564
11 In the Storage Parameters box, set any storage parameters by clicking the corresponding lists or typing the
values in the corresponding boxes.
12 Click Add.
Rapid SQL adds the partition.
13 When you finish adding partitions, click the Close button.
• To insert another partition into the list, click the Insert button, and then click Insert to insert the column.
• To edit a partition, select the partition in the grid and then click the Edit button, and then click Modify to modify
the column.
• To drop a partition, click the Drop button and then click Yes.
Rapid SQL confirms the drop, closes the Rapid SQL message, and omits the partition from the list.
14 When you finish specifying the partitioning attributes, click Finish.
For more information, see:
Add, Insert or Modify Partition
Completing a Dialog Box
Add or Modify Cluster Column
The Add or Modify Cluster Column dialog box lets you manage cluster columns. You can open the dialog box in the
Oracle Cluster Wizard - Panel 2.
Important Notes
None
The table below describes the options and functionality on the Add or Modify Cluster Column dialog box:
For more information, see:
Completing the Add or Modify Cluster Column Dialog Box
Completing a Dialog Box
Option Description
Column Name Lets you type the column name.
Datatype Lets you select the datatype for the cluster.
If you select CHAR, RAW or VARCHAR2, in the
Width box, type the width value.
If you select NUMBER, in the Width box, type the
width value and in the Scale box, type the scale
value.

USING > FUNCTIONALITY
EMBARCADERO TECHNOLOGIES > BOOKNAMEVARIABLE 565
Completing the Add or Modify Cluster Column Dialog Box
To complete this dialog box, do the following:
1In the Add Cluster Column dialog box, in the Column Name box, type the column name.
2 Click the Datatype list, click the datatype for the cluster.
• If you clicked CHAR, RAW or VARCHAR2, in the Width box, type the width value.
• If you clicked NUMBER, in the Width box, type the width value and in the Scale box, type the scale value.
3 Click the Add button.
4 To continue adding columns to the cluster, repeat steps 1-3.
5 When you finish adding columns, click Close.
Rapid SQL closes the Add Cluster Column dialog box.
For more information, see:
Add or Modify Cluster Column
Completing a Dialog Box
Add or Modify Datafile
This functionality is available for all platforms.
The Add/Modify Datafile dialog box lets you add a datafile to a tablespace, or edit an existing one. You can open the
dialog box in the Oracle Tablespace Wizard
.
Important Notes
None
The table below describes the options and functionality on the Add/Modify Datafile dialog box:
For more information, see:
Completing the Add/Modify Datafile Dialog Box
Option Description
Datafile Name Type the name of the datafile in the box.
Datafile Size Type the datafile size and then click the list to indicate MB or KB.
Resuse Existing File? Lets you indicate whether you want to reuse and existing file or
not. The default is No. To reuse the existing file, click the Yes
option button.
Autoextend Select this check box if you want to autoextend the datafile when
more extents are required. This enables the options below.
Disk Space to Allocate to the
Datafile When More Extents
are Required
Type the disk space to allocate to the datafile when more extents
are required by typing it and then click the list to indicate MB or KB.
Maximum Disk Space
Allowed for Allocation to the
Datafile
Specify the maximum disk space allowed for allocation to the
datafile. Select Unlimited or Other. In the Other box, type the
amount and then click the list to indicate MB or KB.

USING > FUNCTIONALITY
EMBARCADERO TECHNOLOGIES > BOOKNAMEVARIABLE 566
Completing a Dialog Box
Completing the Add/Modify Datafile Dialog Box
To complete this dialog box, do the following:
1 In the Datafile Name box, type the datafile name.
2 In the Datafile Size box, type the datafile size and then click the list to indicate MB or KB.
3 Reuse Existing File?
• To reuse the existing file, click the Yes option button.
• If you do not want to reuse the existing file, click the No option button.
4 Select the Autoextend check box.
Rapid SQL auto extends the datafile.
• In the Disk Space to Allocate to the Datafile When More Extents are Required box, type the disk space to
allocate to the datafile when more extents are required by typing it and then click the list to indicate MB or KB.
• Specify the maximum disk space allowed for allocation to the datafile by clicking the Unlimited option button
or the Other option button.
NOTE: If you click Other, in the Other box, type the amount and then click the list to indicate MB or KB.
5 Click OK.
Rapid SQL adds the datafile to the tablespace definition.
6 Click Close.
Rapid SQL closes the Add Datafile dialog box.
For more information, see:
Add or Modify Datafile
Completing a Dialog Box
Allocate Extent
This functionality is available for Oracle only.
The Allocate Extent dialog box lets you explicitly allocate extents for clusters, tables, and indexes in Oracle. Though
Oracle dynamically allocates extents when additional space is required, explicit allocation of additional extents can be
useful if you know that an object grows.
Explicit allocation of additional extents can be particularly helpful when using Oracle Parallel Server. When using
Oracle Parallel Server and allocating additional extents, you can allocate an extent explicitly to a specific instance in
order to minimize contention for free space among multiple instances.
Important Notes
For composite-partitioned tables, you can allocate extents to subpartitions as well as partitions.
The table below describes the options and functionality on the Allocate Extent dialog box.

USING > FUNCTIONALITY
EMBARCADERO TECHNOLOGIES > BOOKNAMEVARIABLE 567
For more information, see:
Completing the Allocate Extent Dialog Box
Completing a Dialog Box
Completing the Allocate Extent Dialog Box
To complete this dialog box, do the following:
1 On the Database Explorer, select the target object node.
Rapid SQL displays the target objects in the Database Explorer.
2 On the Database Explorer, right-click the target object, and then select Allocate Extent.
Rapid SQL opens the Allocate Extent dialog box.
3 In the Extent Size box, type the new value of the extent, click the list to indicate the extent size: MB or KB.
4 Click the Datafile list, click the new datafile.
5 In the Instance box, specify the instance for Oracle to use when allocating the extent; this option only applies for
Oracle with the Parallel Server in parallel query mode.
6 Do one of the following:
Option Describe
Extent Size Refers to a datafile in the tablespace of the table,
index, or cluster. You can choose a specific datafile
from which to take space for the added extent. If you
choose (Default), Oracle takes the space from any
accessible datafile in the tablespace containing the
table, index, or cluster.
Datafile Lets you select the new datafile.
Instance Lets you specify a freelist from which to draw the
extent. If you are using Oracle Parallel Server, you
can assign the new extent to a free list group
associated with a specific instance. The number you
enter in the Instance text box should be the number
of the freelist group that you wish to use, rather than
the number of the specific instance. If you are using
Oracle Parallel Server and you omit this parameter,
Oracle allocates the extent, but the extent is drawn
from the master freelist by default. Only use this
parameter for Oracle Parallel Server.
NOTE: The number you enter in the Instance field
should be the number of the free list group that you
wish to use, rather than the number of the specific
instance.
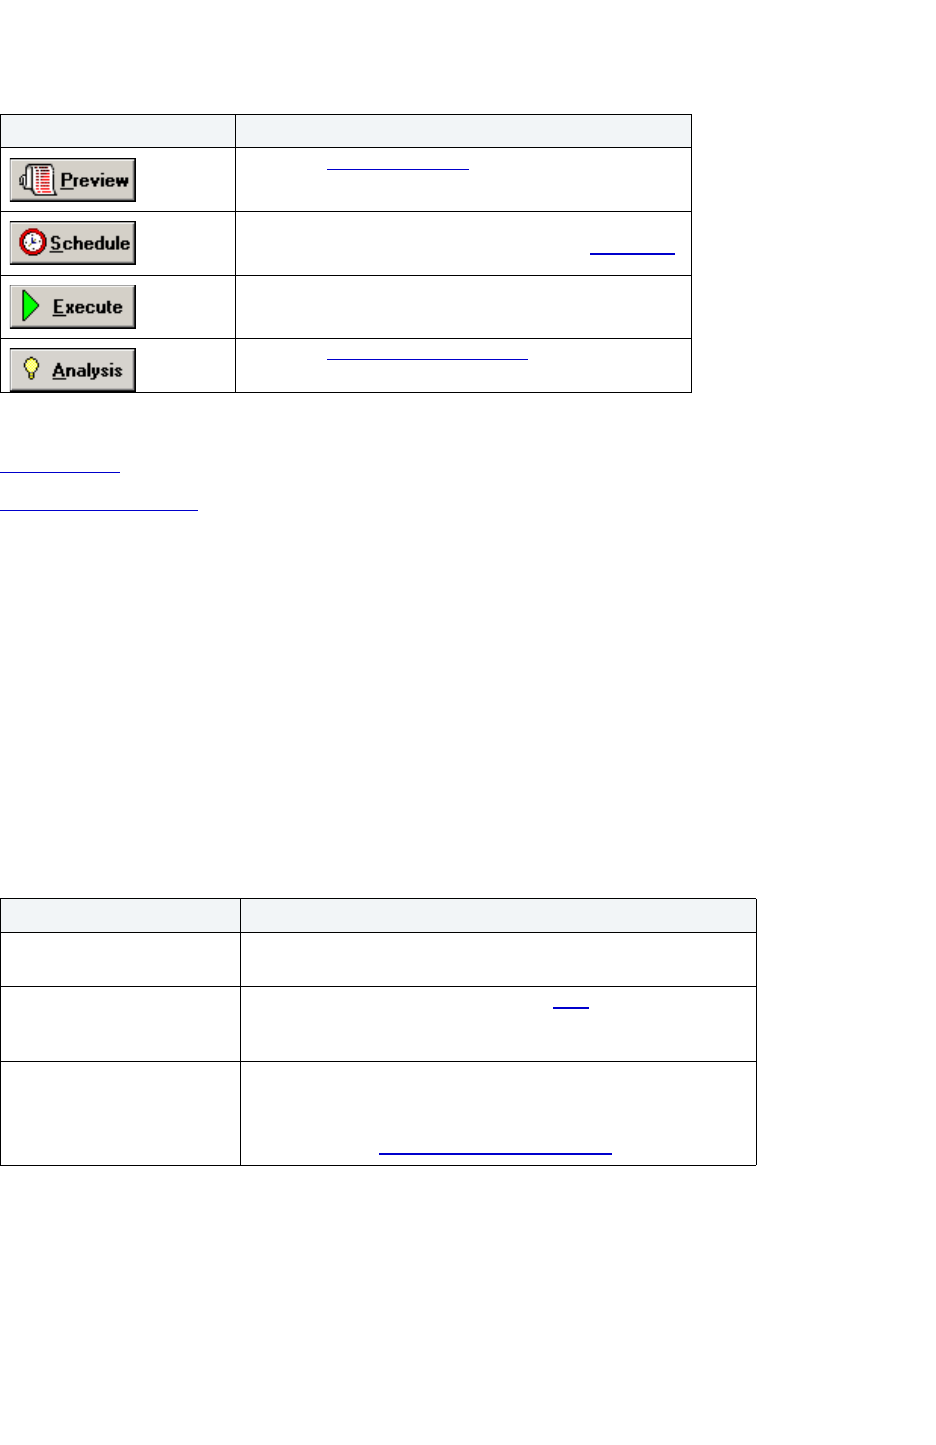
USING > FUNCTIONALITY
EMBARCADERO TECHNOLOGIES > BOOKNAMEVARIABLE 568
For more information, see:
Allocate Extent
Completing a Dialog Box
Analyze
The Analyze dialog box lets you analyze the selected partitions. Analyzing a partition is helpful when you are trying to
gather statistics about that partition, or if you are trying to validate the structure of that partition. If you are using
cost-based optimization techniques, you can use the statistics to determine the most efficient use of SQL statements
when accessing the partitions. In the case of hardware or system failure, analyze your partitions to make sure that
their structure is not corrupt. Gathering information on chained rows lets you see if you have enough room for updates
to rows in the partition.
Important Notes
For composite-partitioned tables, you can analyze subpartitions as well as partitions.
The table below describes the options and functionality on the Analyze dialog box:
Button Description
Opens the Preview dialog box.
Opens Embarcadero Job Scheduler, or (if unavailable)
another scheduling application. For more, see Scheduling
.
Executes the task.
Opens the Impact Analysis dialog box
. This option is not
available for every dialog box.
Option Description
Partition Box Lists all the partitions available for analysis. Click the target
partition. To select all the partitions, use the Select All button.
Analysis Option Lets you select the type of analysis. The table
below describes the
analysis types and any additional information that you need to
supply for each type.
Tables Only:
Histogram Option
Performs the core calculations for a width-balanced histogram. For
each row, Oracle returns the number of the histogram bucket
appropriate for the data.
Click to open the Histogram Statistics dialog box
.

USING > FUNCTIONALITY
EMBARCADERO TECHNOLOGIES > BOOKNAMEVARIABLE 569
Partition Analysis Type table
Analysis Option Description Additional Information
Compute Statistics Scans the partition in its entirety to
gather the information and computes
exact statistics. An analysis that
computes statistics takes longer than
an estimation of statistics.
None
Delete Statistics Deletes statistics for a partition from
the data dictionary. Deletes statistics
not used when cost-based optimization
is used for SQL statements accessing
the partition.
None
For Indexes:
Estimate Statistics
Scans the partition and gathers
representative information from
portions of the partition. Estimating
statistics is not as accurate as
computing statistics but the analysis is
less time consuming.
If you choose Estimate Statistics,
you must also type in a percentage
or a row count in Sample. Use the
drop-down menu to choose
Percent or Row Count.
The higher the percentage or the
row count, the better the
estimation.
For Tables:
Estimate Statistics
Scans the partition and gathers
representative information from
portions of the partition. Estimating
statistics is not as accurate as
computing statistics but the analysis is
less time consuming.
If you choose Estimate Statistics,
you must also type in a percentage
or a row count in Sample. Use the
drop-down menu to choose
Percent or Row Count.
The higher the percentage or the
row count, the better the
estimation.
If you choose Estimate Statistics,
you can also choose to generate a
histogram in Histogram Option.
If you choose to create a histogram
for Selected Columns, you must
also choose the columns in
Selected Histogram Columns. If
there are no available columns,
click the Add button.
For Indexes:
Validate Structure
Verifies the integrity of the partition. If
the partition is corrupt, Oracle returns
an error message. If the partition is
valid, no error is returned.
None
For Tables:
Validate Structure
Verifies the integrity of the partition. If
the partition is corrupt, Oracle returns
an error message. If the partition is
valid, no error is returned.
Oracle also verifies that the rows
belongs to the correct partition. If rows
do not collate correctly, they are
considered invalid and Oracle lists
them in a table.
You must specify a table in which
to put any invalid rows.
If you do not have a table prepared
to accept the invalid rows, you can
check the Create Target Table if it
does not exist box to have Rapid
SQL create a table for you.
Clicking Cascade validates the
structure of associated objects
such as indexes.
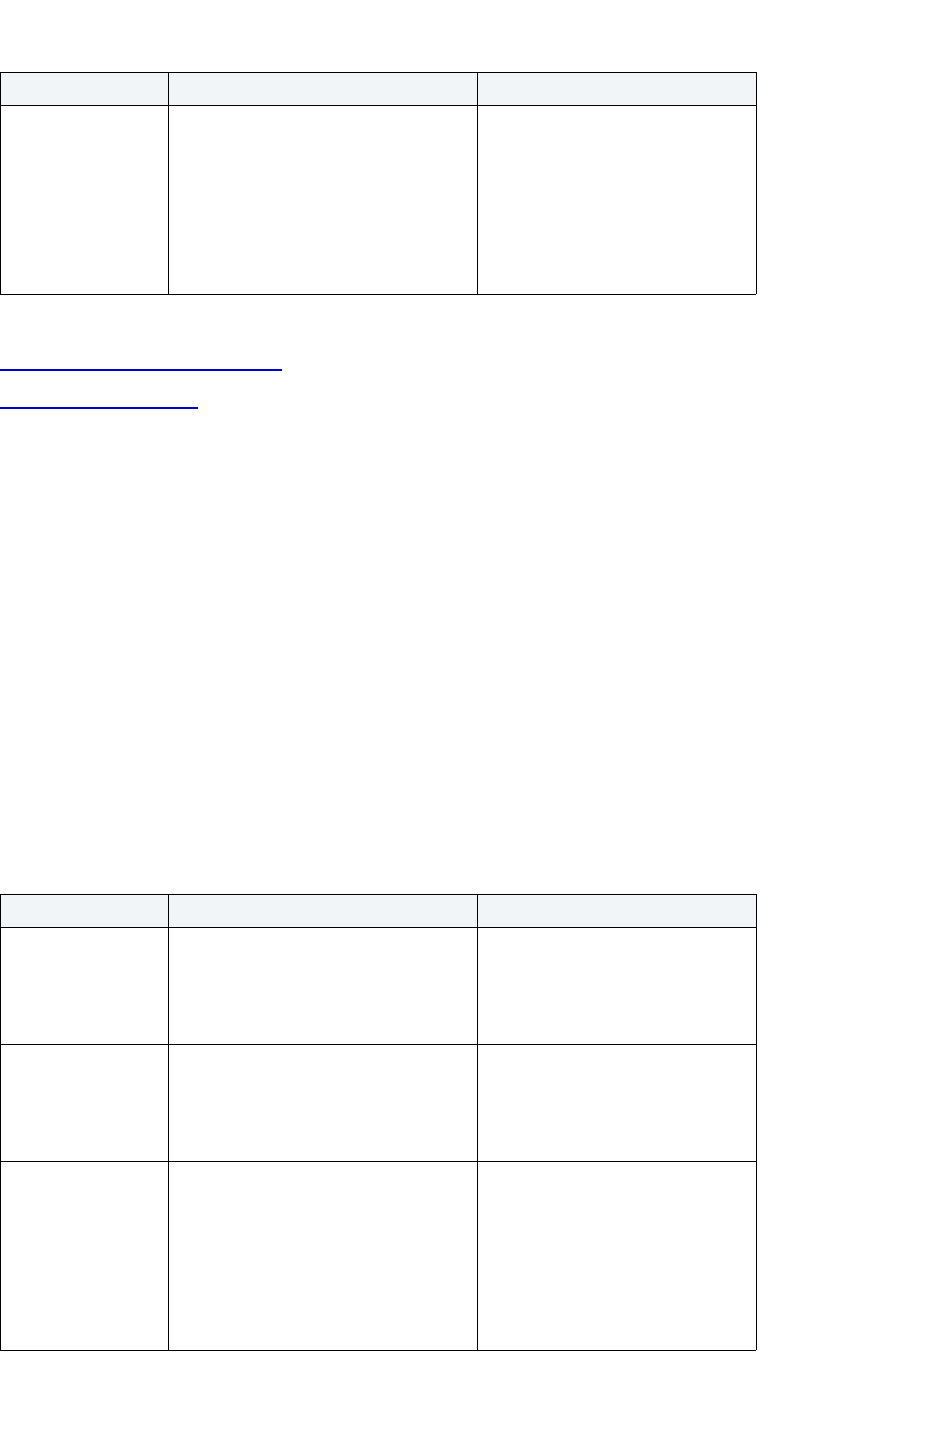
USING > FUNCTIONALITY
EMBARCADERO TECHNOLOGIES > BOOKNAMEVARIABLE 570
For more information, see:
Completing the Analyze Dialog Box
Completing a Dialog Box
Completing the Analyze Dialog Box
To complete this dialog box, do the following:
1 On the Database Explorer, select the target object node.
Rapid SQL displays the target objects in the Database Explorer.
2 On the Database Explorer, right-click the target object, and then select Analyze.
Rapid SQL opens the Analyze dialog box.
3 Select the target partition(s).
TIP: To select all partitions in the index, click Select All.
4In Analysis Option, select the type of analysis. The table below describes the analysis types and any additional
information that you need to supply for each type.
For Tables:
List Chained Rows
Lists the chained rows of the partition.
The results are stored in the named
table.
You must specify a table in which
to list the chained rows.
If you do not have a table prepared
to accept the results of the List
Chained Rows command, you can
check the Create Target Table if it
does not exist box to have Rapid
SQL create a table for you.
Analysis Option Description Additional Information
Compute Statistics Scans the partition in its entirety to
gather the information and computes
exact statistics. An analysis that
computes statistics takes longer than
an estimation of statistics.
None
Delete Statistics Deletes statistics for a partition from
the data dictionary. Deletes statistics
not used when cost-based optimization
is used for SQL statements accessing
the partition.
None
Estimate Statistics Scans the partition and gathers
representative information from
portions of the partition. Estimating
statistics is not as accurate as
computing statistics but the analysis is
less time consuming.
If you choose Estimate Statistics,
you must also type in a percentage
or a row count in Sample. Use the
drop-down menu to choose
Percent or Row Count.
The higher the percentage or the
row count, the better the
estimation.
Analysis Option Description Additional Information
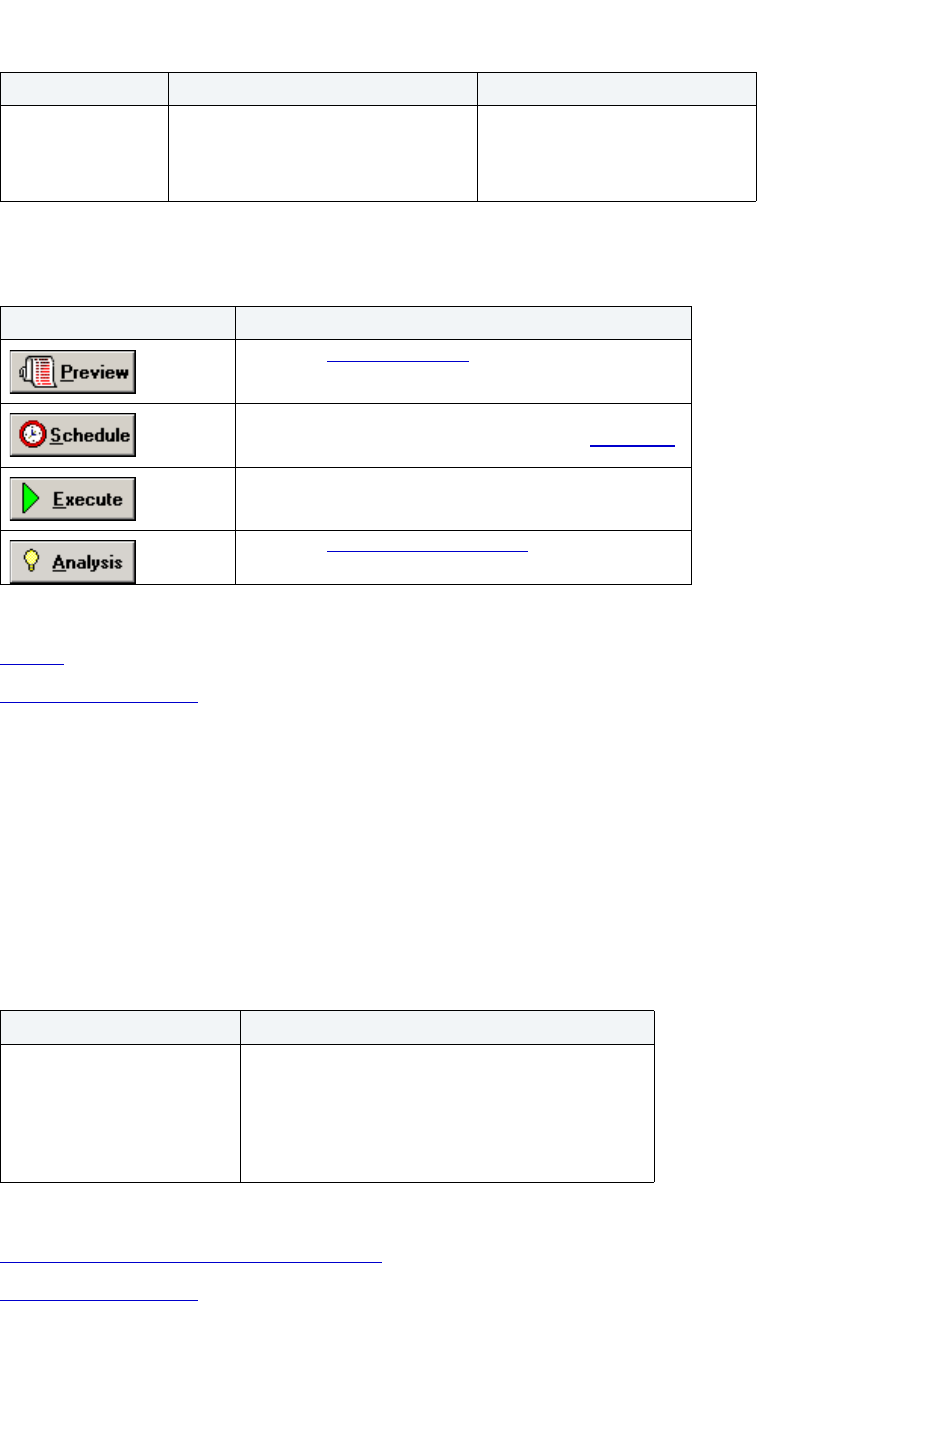
USING > FUNCTIONALITY
EMBARCADERO TECHNOLOGIES > BOOKNAMEVARIABLE 571
5 Do one of the following:
For more information, see:
Analyze
Completing a Dialog Box
Histogram Statistics Dialog Box
The Histograms Statistics dialog box lets you specify options for histograms.
Important Notes
You can only generate a histogram for tables.
The table below describes the options and functionality on the Histogram Statistics dialog box.
For more information, see:
Completing the Histogram Statistics Dialog Box
Completing a Dialog Box
Validate Structure Verifies the integrity of the partition. If
the partition is corrupt, Oracle returns
an error message. If the partition is
valid, no error is returned.
None
Button Description
Opens the Preview dialog box.
Opens Embarcadero Job Scheduler, or (if unavailable)
another scheduling application. For more, see Scheduling
.
Executes the task.
Opens the Impact Analysis dialog box
. This option is not
available for every dialog box.
Option Description
Size Number of bands, or sections, into which the column
data is sorted. Each section refers to a range of
values and Oracle fits each piece of data into one of
those sections. For example, in the image above, the
column data for the NUMBER_SEATS column is split
into 10 sections.
Analysis Option Description Additional Information

USING > FUNCTIONALITY
EMBARCADERO TECHNOLOGIES > BOOKNAMEVARIABLE 572
Completing the Histogram Statistics Dialog Box
To complete this dialog box, do the following:
1 Click the option button that corresponds to the level at which you want to capture histogram statistics.
2 Type any appropriate values in the corresponding boxes.
3 If you click Selected Columns, click the columns you want and then click the Select or Unselect button.
4 Click OK.
For more information, see:
Histogram Statistics Dialog Box
Completing a Dialog Box
Bind Data Cache
This functionality is available for Sybase ASE only.
The data cache holds the data, index, and log pages currently in use and pages used recently by Sybase ASE. The
Bind Data Cache dialog box lets you bind the following items to the data cache:
• Entire Database
• Index(es)
• Table(s)
• Text and Image Columns from Tables
Important Notes
• The data cache must be active before you can bind an object to it. To activate a new data cache, Sybase ASE
requires that you restart the server. The bindings take effect immediately after the server restart.
• You can bind the syslogs table to a logonly cache.
For more information, see Completing a Dialog Box.
Bind Package
This functionality is available for IBM DB2 UDB for OS/390 and z/OS only.
The Bind Package Wizard lets you set package parameters, add environments, and set package properties.
Important Notes
None
For more information, see Bind Package Wizard - Panel 1
.
Bind Package Wizard - Panel 1
The table below describes the options and functionality on the first panel of the Bind Package wizard:
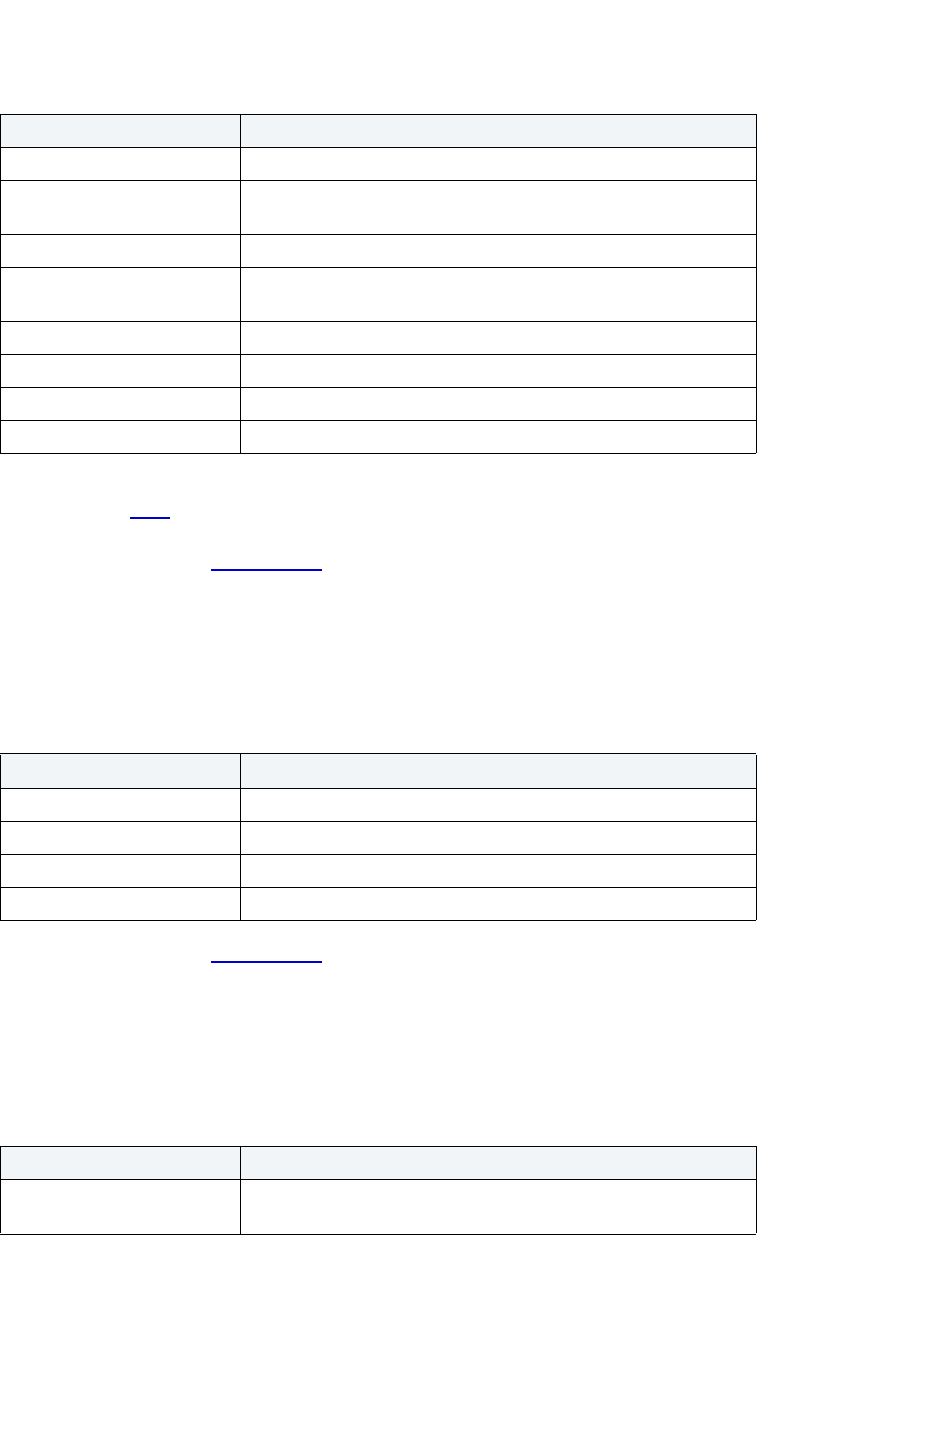
USING > FUNCTIONALITY
EMBARCADERO TECHNOLOGIES > BOOKNAMEVARIABLE 573
TIP: To filter the Owner and Object lists, click the Filter button next to each list. Rapid SQL opens the
Filter dialog box.
For more information, see Bind Package
.
Bind Package Wizard - Panel 2
The table below describes the options and functionality on the second panel of the Bind Package wizard:
For more information, see Bind Package
.
Bind Package Wizard - Panel 3
The table below describes the options and functionality on the third panel of the Bind Package wizard:
Option Functionality
Location Lets you select the name of the location to connect to.
Collection Lets you select the location of the DBMS where the package binds
and where the description of the package resides.
New package - PDS name Lets you select a name.
Member Lets you select what database request modules (DBRMs) to
include in the package.
Copy from collection. Lets you select a collection.
Package Lets you select a package.
Version Lets you select a version of the package.
Options Lets you select an option.
Option Functionality
Owner Lets you select a package owner.
Qualifier Lets you select a qualifier, the package creator.
Action Lets you select an action.
Version Lets you select a version of the package.
Option Functionality
Isolation Determines how far to isolate an application from the effects of
other running applications.

USING > FUNCTIONALITY
EMBARCADERO TECHNOLOGIES > BOOKNAMEVARIABLE 574
For more information, see Bind Package.
Bind Package Wizard - Panel 4
The table below describes the options and functionality on the fourth panel of the Bind Package wizard:
Keep Dynamic Specifies that DB2 keeps dynamic SQL statements after commit
points. The application does not need to prepare an SQL
statement after every commit point. DB2 keeps the dynamic SQL
statement until the application process ends, a rollback operation
occurs or the application executes an explicit PREPARE statement
with the same statement identifier.
If the prepared statement cache is active, DB2 keeps a copy of the
prepared statement in the cache. If the prepared statement cache
is not active, DB2 keeps only the SQL statement string past a
commit point. DB2 then implicitly prepares the SQL statement if
the application executes an OPEN, EXECUTE, or DESCRIBE
operation for that statement.
Current Data Determines whether to require data currency for read-only and
ambiguous cursors when the isolation level of cursor stability is in
effect. It also determines whether block fetching can be used for
distributed, ambiguous cursors.
Degree Determines whether to attempt to run a query using parallel
processing to maximize performance. Lets you select an option.
DB Protocol Specifies which protocol to use when connecting to a remote site
that is identified by a three-part name statement.
Dynamic Rules Determines what values apply at run time for the following dynamic
SQL attributes:
The authorization ID that is used to check authorization
The qualifier that is used for unqualified objects
The source for application programming options that DB2 uses to
parse and semantically verify dynamic SQL statements
Whether dynamic SQL statements can include GRANT, REVOKE,
ALTER, CREATE, DROP, and RENAME statements
Release Determines when to release resources that a program uses, either
at each commit point or when the program terminates.
Commit - Releases resources at each commit point.
Deallocate - Releases resources only when the program
terminates.
Validate Determines whether to recheck, at run time, errors found during
bind. The option has no effect if all objects and needed privileges
exist.
Bind - If not all objects or needed privileges exist at bind time, the
wizard displays an error messages, and does not bind the
package.
Run - If not all objects or privileges exist at bind time, the process
issues warning messages, but the bind succeeds. DB2 checks
existence and authorization again at run time for SQL statements
that failed those checks during bind. The checks use the
authorization ID of the package owner.
Option Functionality
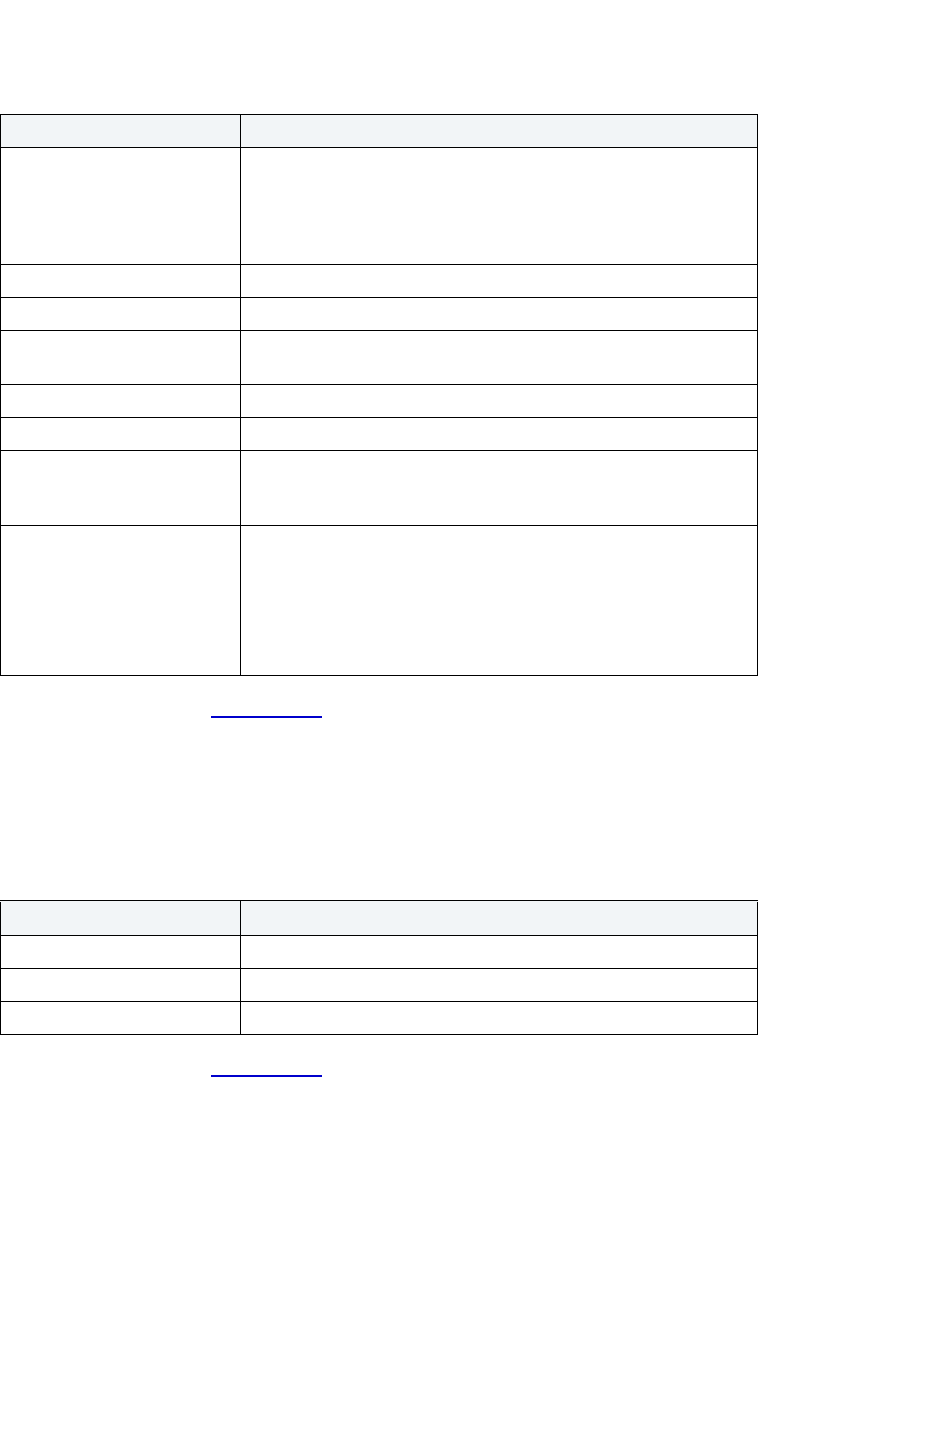
USING > FUNCTIONALITY
EMBARCADERO TECHNOLOGIES > BOOKNAMEVARIABLE 575
For more information, see Bind Package.
Bind Package Wizard - Panel 5
The table below describes the options and functionality on the fifth panel of the Bind Package wizard:
For more information, see Bind Package
.
Bind Plan
This functionality is available for IBM DB2 UDB for OS/390 and z/OS only.
The Bind Plan Wizard lets you set plan parameters, add packages, and set bind properties.
Important Notes
None
Option Functionality
Explain Obtains information about how SQL statements in the package are
to execute, and then inserts that information into the table
owner.PLAN_TABLE, where owner is the authorization ID of the
owner of the plan or package. This option does not obtain
information for statements that access remote objects.
Reopt(VARS) Re-determines the access path at run time.
Prepare Prepares dynamic SQL statements that refer to remote objects.
ImmedWrite Immediate writes will be done for updates made to group buffer
pool dependent pagesets or partitions.
Opthint Query optimization hints are used for static SQL.
Encoding Lets you select type of language for the package.
Path Lets you select a path that DB2 uses to resolve unqualified
user-defined distinct types, functions, and stored procedure names
(in CALL statements).
Flag Lets you select a flags, messages to display:
- All informational, warning, error, and completion messages
- Only warning, error, and completion messages
- Only error and completion messages
- Only completion messages.
Option Functionality
Enable or Disable Lets you select system connection types that can use the package.
System Lets you select a system.
Cname Lets you select an option.

USING > FUNCTIONALITY
EMBARCADERO TECHNOLOGIES > BOOKNAMEVARIABLE 576
For more information, see Bind Plan Wizard - Panel 1.
Bind Plan Wizard - Panel 1
The table below describes the options and functionality on the first panel of the Bind Plan wizard:
TIP: To filter the Owner and Object lists, click the Filter button next to each list. Rapid SQL opens the
Filter
dialog box.
For more information, see Bind Plan
.
Option Functionality
Plan Name Lets you select the plan name.
Qualifier OPTIONAL: Lets you select a qualifier, the plan creator.
Action OPTIONAL: Lets you select an action.
Sql Rules OPTIONAL: Determines whether you can execute a type 2
CONNECT statement to an existing SQL connection, according to
DB2 rules.
Lets you select DB2 or STD.
Cache Size OPTIONAL: Lets you select or type the cachesize in bytes, the
authorization cache acquired in the EDM pool for the plan. At run
time, the authorization cache stores user IDs authorized to run.
Consulting the cache can avoid a catalog lookup for checking
authorization to run the plan.
Plan Owner OPTIONAL: Determines the authorization ID of the owner of the
plan.
Current Server OPTIONAL: Determines the location to connect to before running
the plan.
Resource Acquire OPTIONAL: Determines whether to acquire resources for DBRMs
specified in the MEMBER list when the application first accesses
them or when the plan is allocated. Local or remote packages
associated with the plan acquire their resources when the
application first accesses them.
Use - Acquires table space locks only when the application
program bound to the plan first uses them.
Allocate - Acquires all table space locks when the plan is allocated.
The value has no effect on dynamic SQL statements, which always
use ACQUIRE(USE).
Disconnect OPTIONAL: Determines which remote connections to destroy
during commit operations. The option applies to any application
process that uses the plan and has remote connections of any
type. Regardless of the value of this option, a commit operation
destroys all connections in the release pending state.
Explicit - Destroy only connections in the release pending state.
This value allows you maximum flexibility for controlling remote
connections.
Automatic - Destroy all remote connections.
Conditional - Destroy all remote connections unless an open cursor
defined as WITH HOLD is associated with the connection.
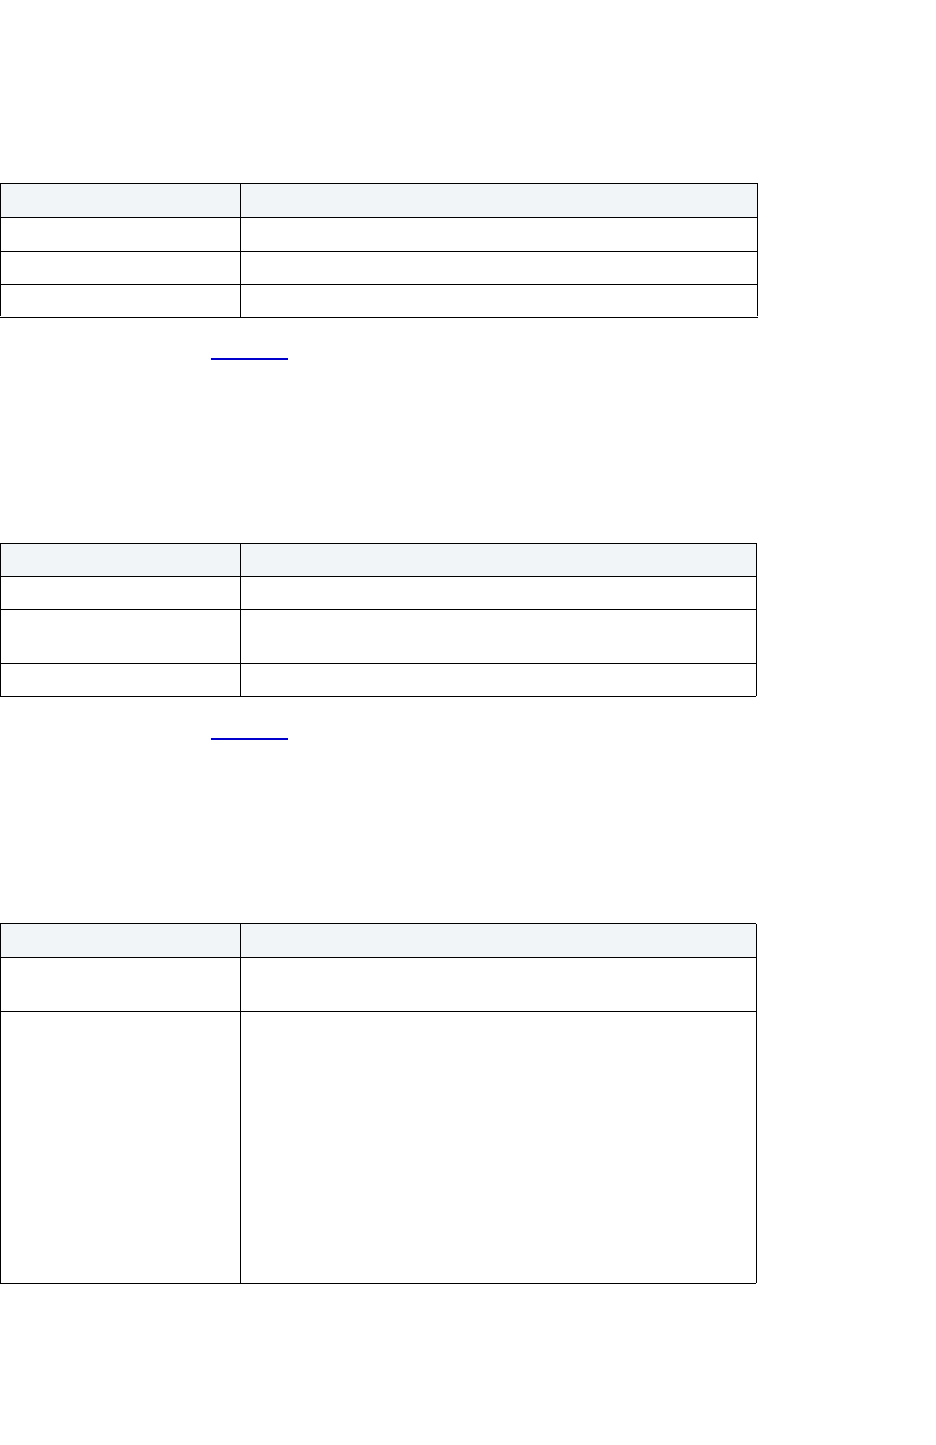
USING > FUNCTIONALITY
EMBARCADERO TECHNOLOGIES > BOOKNAMEVARIABLE 577
Bind Plan Wizard - Panel 2
The table below describes the options and functionality on the second panel of the Bind Plan wizard:
For more information, see Bind Plan
.
Bind Plan Wizard - Panel 3
The table below describes the options and functionality on the third panel of the Bind Plan wizard:
For more information, see Bind Plan.
Bind Plan Wizard - Panel 4
The table below describes the options and functionality on the fourth panel of the Bind Plan wizard:
Option Functionality
Member Name Lets you select the member name.
PDS Name Lets you select the partitioned data set.
Add Click to enter each member and PDS name.
Option Functionality
Location Lets you select the name of the location to connect to.
Collection Lets you select the location of the DBMS where the plan binds and
where the description of the plan resides.
Package Lets you select a package.
Option Functionality
Isolation Determines how far to isolate an application from the effects of
other running applications.
Keep Dynamic Specifies that DB2 keeps dynamic SQL statements after commit
points. The application does not need to prepare an SQL
statement after every commit point. DB2 keeps the dynamic SQL
statement until the application process ends, a rollback operation
occurs or the application executes an explicit PREPARE statement
with the same statement identifier.
If the prepared statement cache is active, DB2 keeps a copy of the
prepared statement in the cache. If the prepared statement cache
is not active, DB2 keeps only the SQL statement string past a
commit point. DB2 then implicitly prepares the SQL statement if
the application executes an OPEN, EXECUTE, or DESCRIBE
operation for that statement.

USING > FUNCTIONALITY
EMBARCADERO TECHNOLOGIES > BOOKNAMEVARIABLE 578
For more information, see Bind Plan.
Bind Plan Wizard - Panel 5
The table below describes the options and functionality on the fifth panel of the Bind Plan wizard:
Current Data Determines whether to require data currency for read-only and
ambiguous cursors when the isolation level of cursor stability is in
effect. It also determines whether block fetching can be used for
distributed, ambiguous cursors.
Degree Determines whether to attempt to run a query using parallel
processing to maximize performance. Lets you select an option.
Dynamic Rules Determines what values apply at run time for the following dynamic
SQL attributes:
The authorization ID that is used to check authorization
The qualifier that is used for unqualified objects
The source for application programming options that DB2 uses to
parse and semantically verify dynamic SQL statements
Whether dynamic SQL statements can include GRANT, REVOKE,
ALTER, CREATE, DROP, and RENAME statements
Release Determines when to release resources that a program uses, either
at each commit point or when the program terminates.
Commit - Releases resources at each commit point.
Deallocate - Releases resources only when the program
terminates.
Validate Determines whether to recheck, at run time, errors found during
bind. The option has no effect if all objects and needed privileges
exist.
Bind - If not all objects or needed privileges exist at bind time, the
wizard displays an error messages, and does not bind the
package.
Run - If not all objects or privileges exist at bind time, the process
issues warning messages, but the bind succeeds. DB2 checks
existence and authorization again at run time for SQL statements
that failed those checks during bind. The checks use the
authorization ID of the plan owner.
Option Functionality
Explain Obtains information about how SQL statements in the member list
of the plan, are to execute, and then inserts that information into
the table owner.PLAN_TABLE, where owner is the authorization ID
of the owner of the plan or package. This option does not obtain
information for statements that access remote objects.
Reopt(VARS) Re-determines the access path at run time.
Prepare Prepares dynamic SQL statements that refer to remote objects.
ImmedWrite Immediate writes will be done for updates made to group buffer
pool dependent pagesets or partitions.
Option Functionality
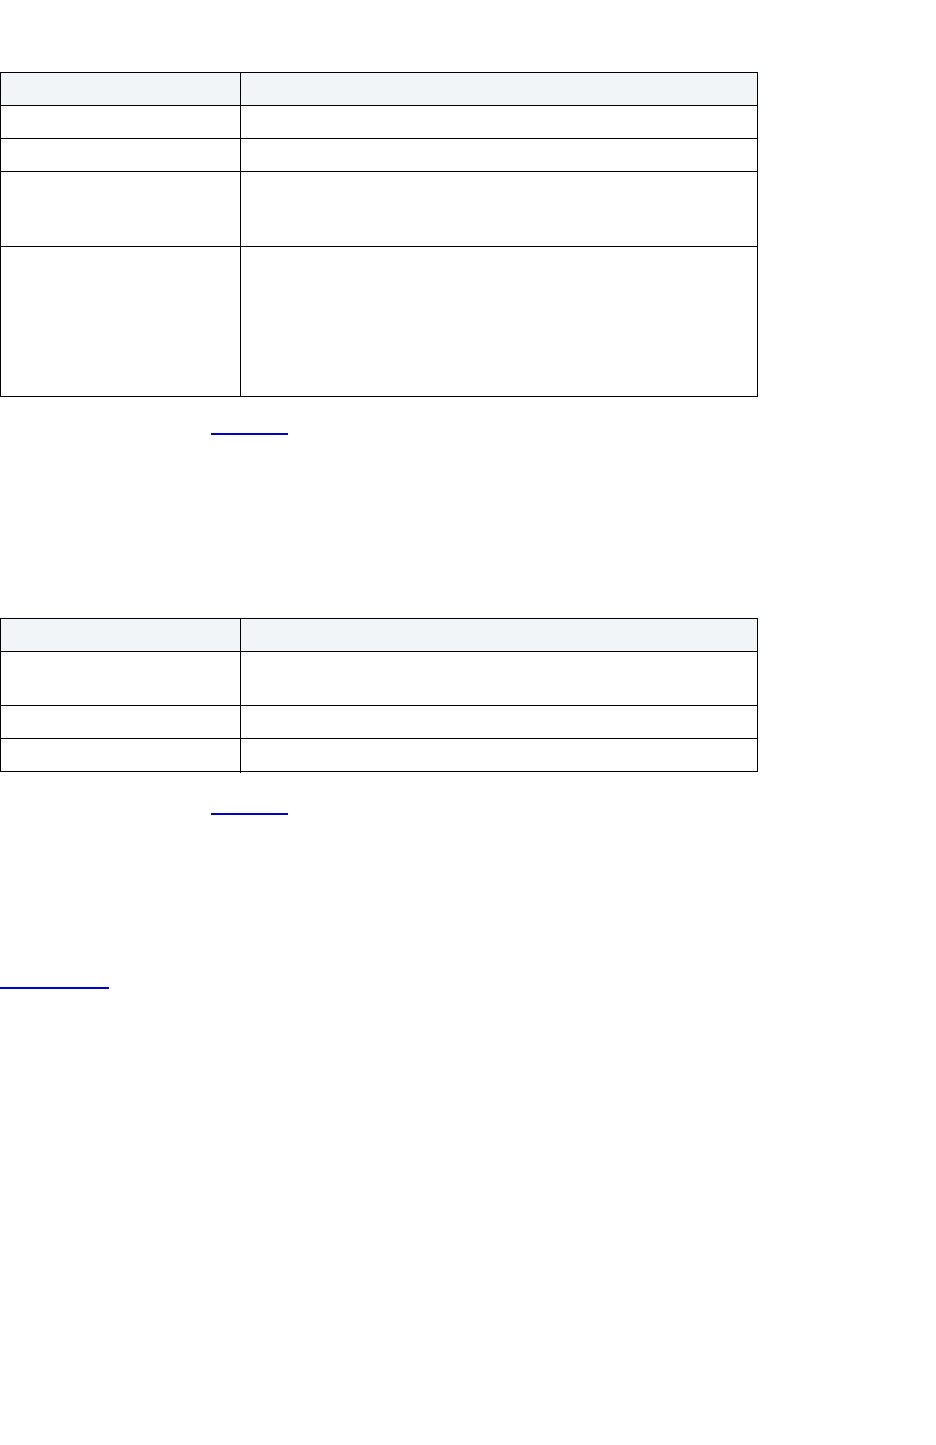
USING > FUNCTIONALITY
EMBARCADERO TECHNOLOGIES > BOOKNAMEVARIABLE 579
For more information, see Bind Plan.
Bind Plan Wizard - Panel 6
The table below describes the options and functionality on the sixth panel of the Bind Plan wizard:
For more information, see Bind Plan.
Build Query
This functionality is available for all platforms.
Query Builder
is a database productivity tool that lets you construct, structure, and manipulate up to five different types
of queries simultaneously. It includes a separate graphical interface that opens within your current workspace. You can
run Query Builder against all Embarcadero Technologies supported database platforms.
Change Category
This functionality is available for Oracle only.
The Change Category dialog box lets you change the category of a target Stored Outline and specify a new outline
category to move the outline.
Important Notes
None
Opthint Query optimization hints are used for static SQL.
Encoding Lets you select type of language for the package.
Path Lets you select a path that DB2 uses to resolve unqualified
user-defined distinct types, functions, and stored procedure names
(in CALL statements).
Flag Lets you select a flags, messages to display:
- All informational, warning, error, and completion messages
- Only warning, error, and completion messages
- Only error and completion messages
- Only completion messages.
Option Functionality
Enable or Disable Lets you select system connection types that can use the plan or
package.
System Lets you select a system.
Cname Lets you select an option.
Option Functionality

USING > FUNCTIONALITY
EMBARCADERO TECHNOLOGIES > BOOKNAMEVARIABLE 580
The table below describes the options and functionality on the Change Category dialog box:
For more information, see Completing the Change Category Dialog Box
.
Completing the Change Category Dialog Box
To complete this dialog box, do the following:
1 On the Database Explorer, select the Outlines node.
Rapid SQL displays the Outlines in the Database Explorer.
2 On the Database Explorer, right-click the Outline, and then select Change Category.
Rapid SQL opens the Change Category dialog box.
3 In the New Category box, enter the target category.
4 Do one of the following:
For more information, see:
Change Category
Completing a Dialog Box
Change Container Size
This functionality is available for all platforms.
The Change Container Size lets you increase and resize a container, the allocation of space to a tablespace.
Depending on the tablespace type, the container can be a directory, device, or file.
Option Description
Owner Displays the outline owner.
Outline Name Display the outline name.
Current Category Displays the current category of the outline.
New Category Lets you select a new outline category to move the outline.
Button Description
Opens the Preview dialog box.
Opens Embarcadero Job Scheduler, or (if unavailable)
another scheduling application. For more, see Scheduling
.
Executes the task.
Opens the Impact Analysis dialog box
. This option is not
available for every dialog box.
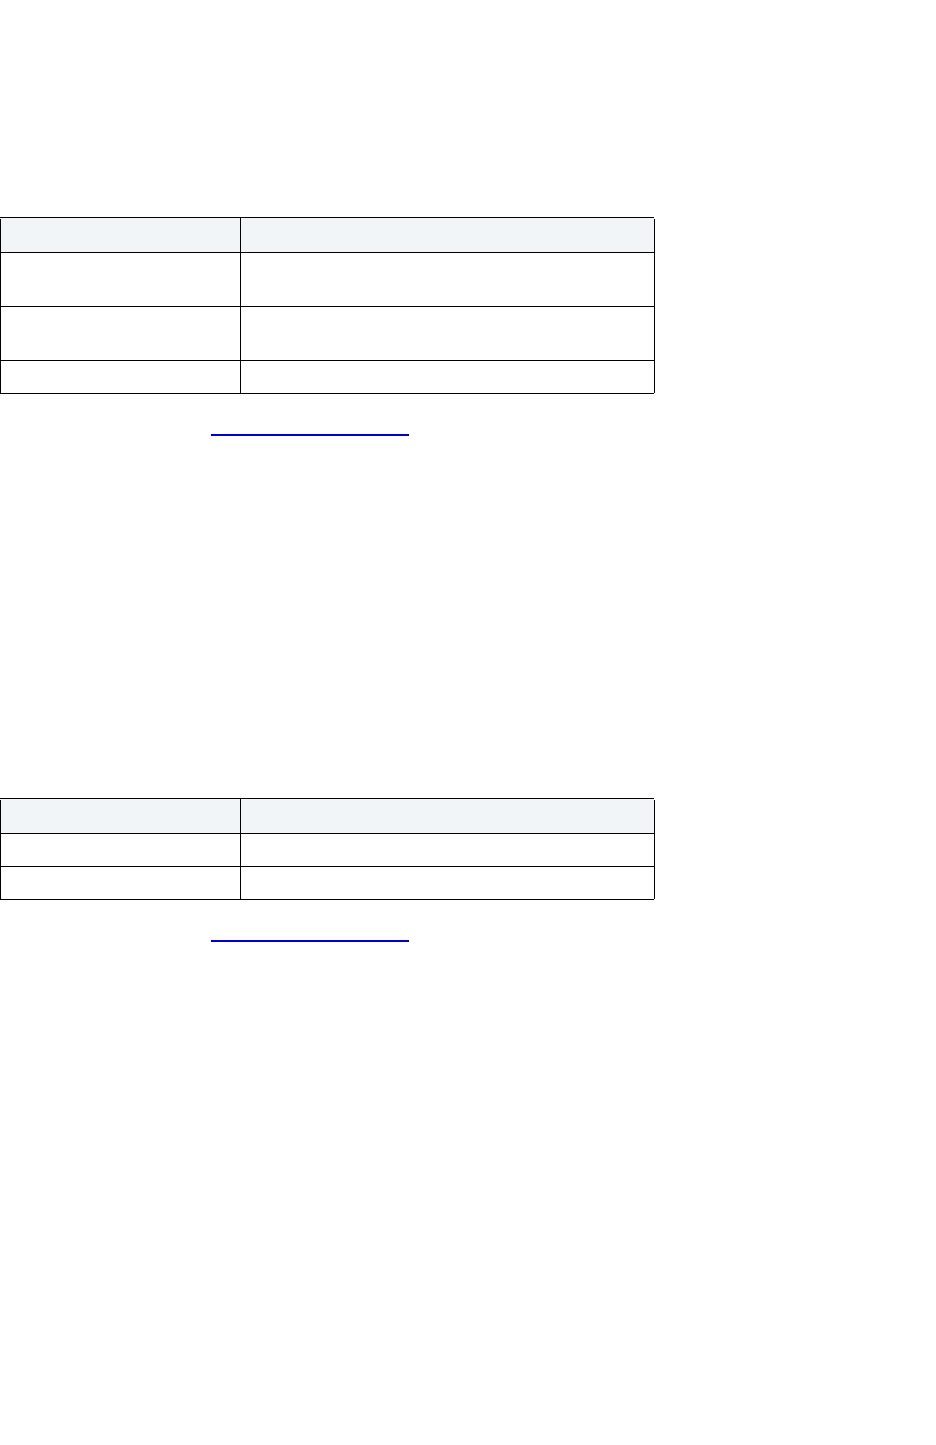
USING > FUNCTIONALITY
EMBARCADERO TECHNOLOGIES > BOOKNAMEVARIABLE 581
Important Notes
None
The table below describes the options and functionality on the Change Container Size dialog box:
For more information, see Completing a Dialog Box
.
Change Database Comment
This functionality is available for IBM DB2 UDB for Linux, Unix, and Windows.
The Change Database Comment dialog box lets you change the comment for a database.
Important Notes
None
The table below describes the options and functionality on the Change Database Comment dialog box:
For more information, see Completing a Dialog Box
.
Change Password
This functionality is available for Microsoft SQL Server, Oracle, and Sybase ASE only.
The Change Password dialog box lets you change user passwords, which you should do on a regular basis to guard
against security leaks.
Important Notes
None
The table below describes the options and functionality on the Change Password dialog box.
Option Description
Increase Container Size by
(Extent)
Select to increase the container size.
Change Container Size to
(Resize)
Select to resize the container.
Size Lets you select a container size.
Option Description
Current Comment Displays the current comment.
New Comment Lets you type a new comment.
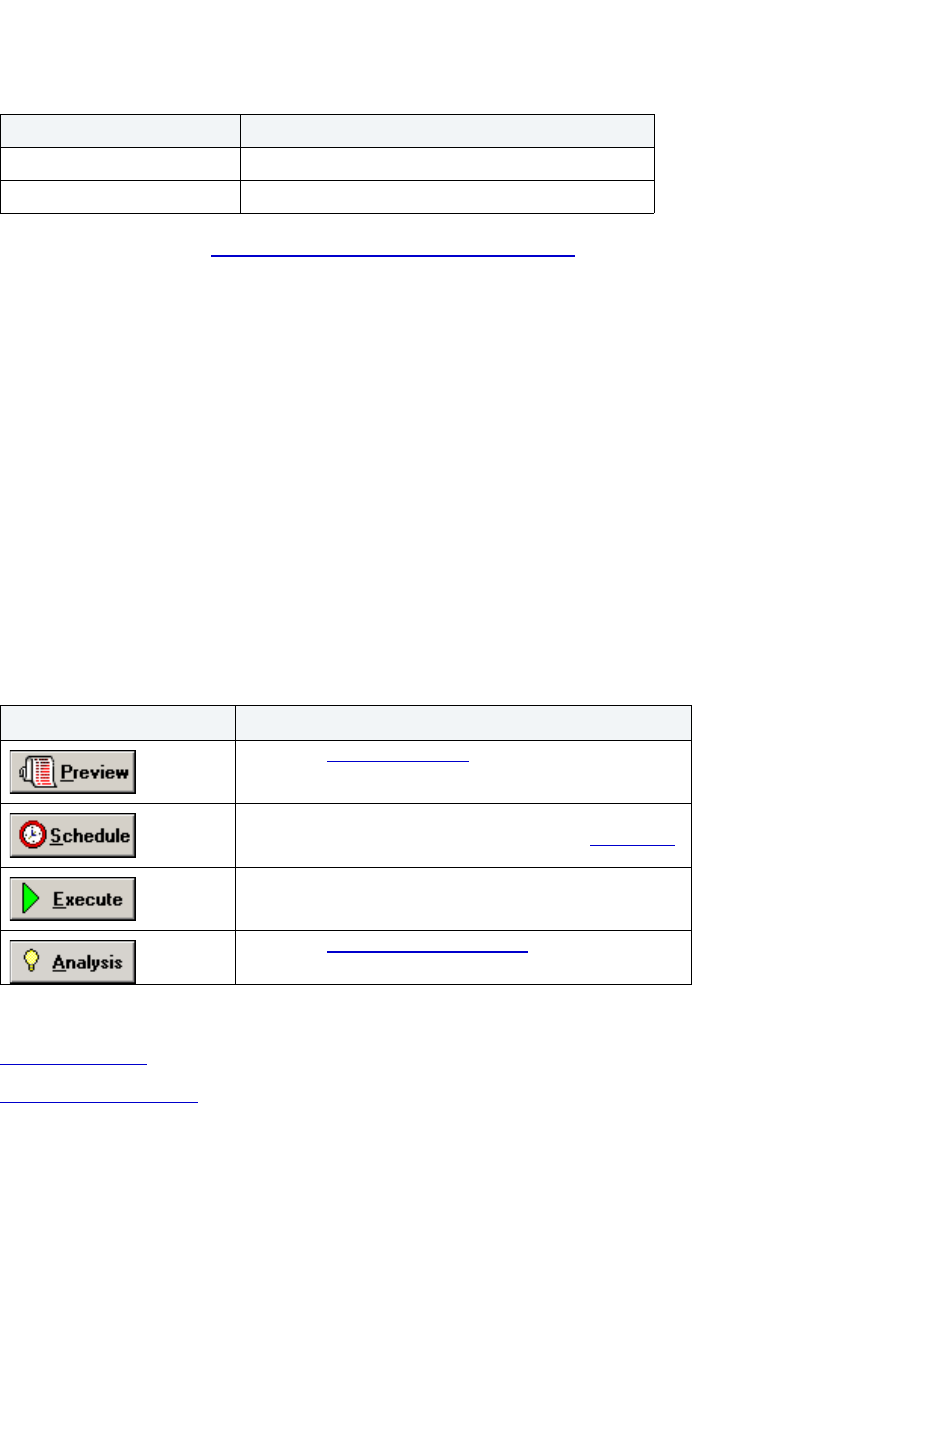
USING > FUNCTIONALITY
EMBARCADERO TECHNOLOGIES > BOOKNAMEVARIABLE 582
For more information, see Completing the Change Password Dialog Box.
Completing the Change Password Dialog Box
1 On the Database Explorer, select the Users node.
Rapid SQL displays the Users in the Database Explorer.
2 On the Database Explorer, right-click the User, and then select Change Password.
Rapid SQL opens the Change Password dialog box.
3 OPTIONAL: In the Old Password box, type the old password.
4 In the New Password box, type the new password.
5 In the Confirm Password box, type the new password.
6 Do one of the following:
For more information, see:
Change Password
Completing a Dialog Box
Change Status
This functionality is available for Oracle only.
The Change Status dialog box lets you change the status of a tablespace from online to offline and vice-versa. A
tablespace is a storage structure that acts as a partition for the database. You can also place the tablespace in read
only mode or read/write mode.
Option Description
New Password Lets you type the new password.
Confirm Password Lets you retype the new password.
Button Description
Opens the Preview dialog box.
Opens Embarcadero Job Scheduler, or (if unavailable)
another scheduling application. For more, see Scheduling
.
Executes the task.
Opens the Impact Analysis dialog box
. This option is not
available for every dialog box.

USING > FUNCTIONALITY
EMBARCADERO TECHNOLOGIES > BOOKNAMEVARIABLE 583
Important Notes
None
The table below describes the options and functionality on the Change Status dialog box.
For more information, see Completing the Change Status Dialog Box
.
Completing the Change Status Dialog Box
To complete this dialog box, do the following:
1 On the Database Explorer, select the Tablespaces node.
Rapid SQL displays the Tablespaces in the Database Explorer.
2 On the Database Explorer, right-click the Tablespace, and then select Change Status.
Rapid SQL opens the Change Status dialog box.
3 To bring the tablespace online, click the Online option button.
4 To make the tablespace read only and prevent further write operations on the tablespace, select the Read Only
check box.
5 To take the tablespace offline and prevent further access to its segments, click the Offline option button, click the
list and then click Normal, Temporary, or Immediate to indicate the method for taking the tablespace offline.
6 Do one of the following:
For more information, see:
Change Status
Completing a Dialog Box
New Status Option Description
Online Select to take tablespace online.
Read Only Select to make the tablespace read only and prevent
further write operations on the tablespace.
Offline Select to take the tablespace offline and prevent
further access to its segments.
Button Description
Opens the Preview dialog box.
Opens Embarcadero Job Scheduler, or (if unavailable)
another scheduling application. For more, see Scheduling
.
Executes the task.
Opens the Impact Analysis dialog box
. This option is not
available for every dialog box.
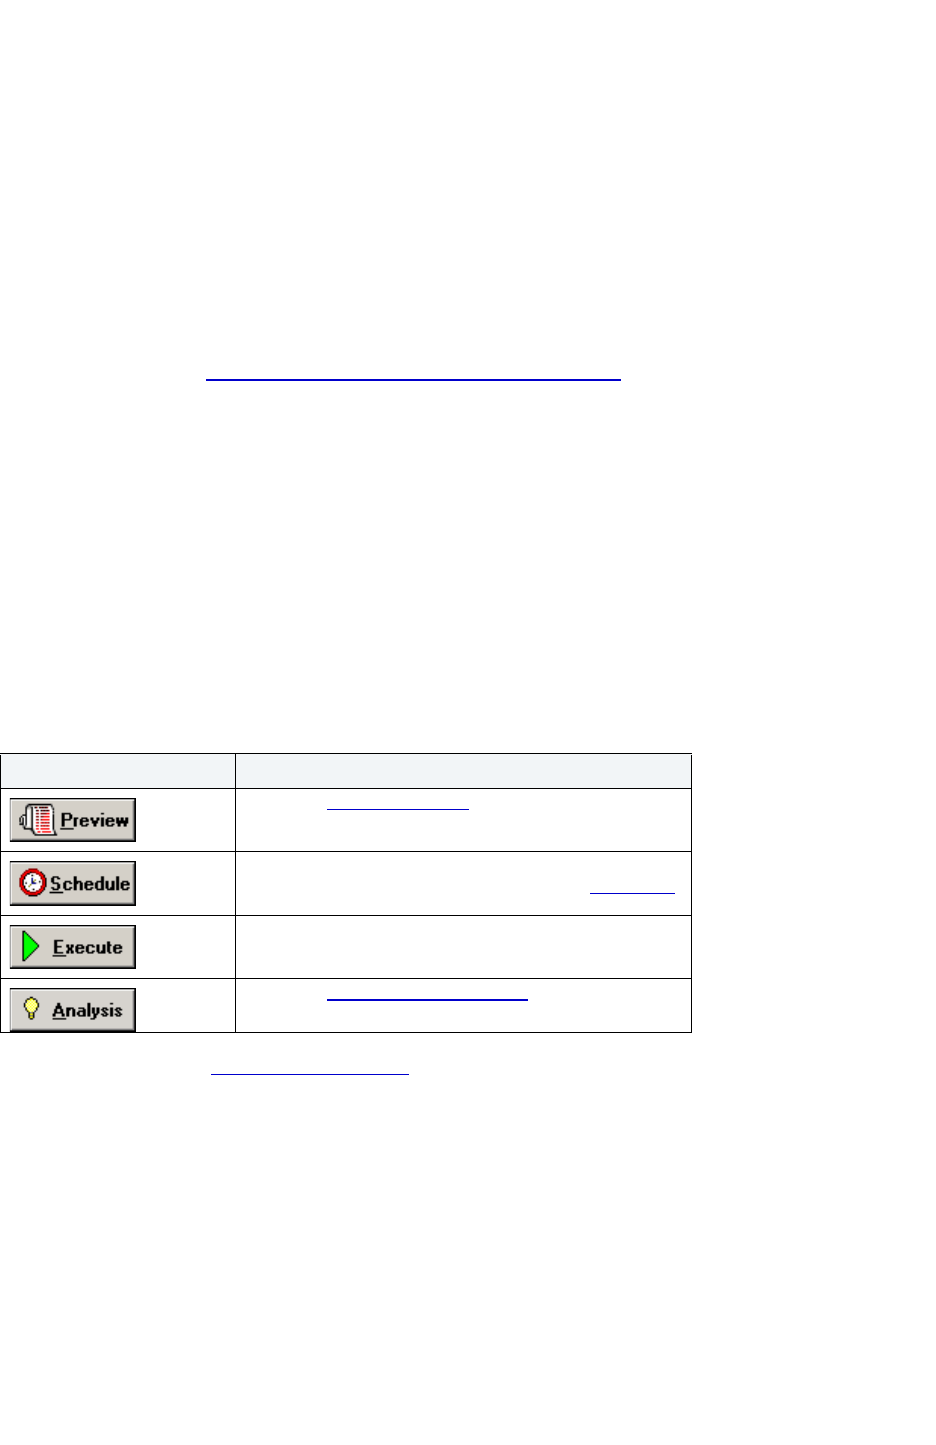
USING > FUNCTIONALITY
EMBARCADERO TECHNOLOGIES > BOOKNAMEVARIABLE 584
Checkpoint
This functionality is available for Microsoft SQL Server, and Sybase ASE only.
The Checkpoint Database(s) dialog box lets you force all dirty pages for the current database to be written to disk. A
dirty page is any data or log page which, after being read into the buffer cache, is modified but not yet written to disk.
The Checkpoint statement saves time in a subsequent recovery by creating a point at which all modifications to data
and log pages are guaranteed to have been written to disk. If the current database is in log-truncate mode,
CHECKPOINT also truncates the inactive portion of the log.
Important Notes
The default permission for executing a checkpoint is the db_owner fixed database role.
For more information, see Completing the Checkpoint Database(s) Dialog Box
.
Completing the Checkpoint Database(s) Dialog Box
To complete this dialog box, do the following:
1 On the Database Explorer, select the Databases node.
Rapid SQL displays the Databases in the Database Explorer.
2 On the Database Explorer, right-click the database, and then select Checkpoint.
Rapid SQL opens the Checkpoint Database(s) dialog box.
3 Do one of the following:
For more information, see Completing a Dialog Box
.
Clone Partition
This functionality is available for IBM DB2 UDB for OS/390 and z/OS only.
The Clone Partition dialog box lets you clone a definition of a partition.
Important Notes
None
Button Description
Opens the Preview dialog box.
Opens Embarcadero Job Scheduler, or (if unavailable)
another scheduling application. For more, see Scheduling
.
Executes the task.
Opens the Impact Analysis dialog box
. This option is not
available for every dialog box.
USING > FUNCTIONALITY
EMBARCADERO TECHNOLOGIES > BOOKNAMEVARIABLE 585
The table below describes the options and functionality on the dialog box:
For more information, see Completing a Dialog Box.
Clone Table
NOTE: This functionality is available for Oracle.
The Clone Table dialog box lets you clone a definition of a table.
Important Notes
None
The table below describes the options and functionality on the dialog box:
For more information, see Completing a Dialog Box.
Coalesce
NOTE: The Coalesce dialog box is available for Oracle 7 or later.
The Coalesce Fragments dialog box helps you maximize the size of free space chunks in tablespaces to avoid the
situation in which an object cannot acquire enough contiguous free space to accommodate its next extent size.
Towards this goal, look for opportunities to coalesce adjacent blocks of free space into a single, larger block.
Starting with Version 7, Oracle automatically coalesces adjacent free space chunks with a background process.
However, it still supports the commands for coalescing free space manually.
Depending on the size of the tablespace, coalescing its free space can take a long time. So determine when to
perform this operation. It you coalesce immediately, Rapid SQL locks the tablespace.
Important Notes
• You cannot coalesce on an UNDO tablespace.
For more information, see Completing a Dialog Box
.
Option Description
Select 1 or More Partitions Lets you select partitions to clone.
Select All Click select all partitions to clone.
Unselect All Click to unselect all partitions to clone.
Option Description
Select 1 or More Tables Lets you select tables to clone.
Select All Click select all tables to clone.
Unselect All Click to unselect all tables to clone.
USING > FUNCTIONALITY
EMBARCADERO TECHNOLOGIES > BOOKNAMEVARIABLE 586
Compile
This functionality is available for IBM DB2 UDB for Linux, Unix, and Windows Oracle only.
The Compile dialog box lets you recompile specific objects by issuing the proper ALTER statement. The explicit
recompilation of invalid objects eliminates the need for implicit run-time recompilation which, in turn, can cause
run-time compilation errors and performance overhead. Recompile objects after you make changes to that object or
dependent objects.
Important Notes
None
The table below describes the options and functionality on the Confirm Compile dialog box for Oracle java classes:
The table below describes the options and functionality on the Confirm Compile dialog box for Oracle:
The table below describes the options and functionality on the Confirm Compile dialog box for IBM DB2 UDB for
Linux, Unix, and Windows:
Option Description
Java class(es) to be compiled Displays the java classes.
Option Description
Do not compile dependent
objects
Compiles only the current object and to ignore the object’s
dependencies. This is the default setting.
Compile dependent objects Compiles statements for all objects referenced by the object being
compiled. For example, if you compile a function that references a
specific procedure and you select to compile the dependent
objects, an ALTER COMPILE statement is created for that
referenced procedure.
Compile only invalid dependent objects - Creates ALTER
COMPILE statements for only those objects that are currently
invalid.
Compile dependent system objects - Compiles all of the
referenced objects with the debug option.
Compile with debug option Selecting the Compile with debug option check box instructs the
Oracle PL/SQL compiler to generate and store the code for use in
debugging sessions.
Option Description
Compare with release option Compiles the stored procedure into a state that will run optimally in
a production environment.
Compile with debug option Compiles the stored procedure with the debugging information and
symbols required to service step, pause, and breakpoint requests.
Keep current specific name Notifies DB2 that the stored procedure will keep its current system
assigned name. With this option, DB2 is not required to reset
internal references to the target object.

USING > FUNCTIONALITY
EMBARCADERO TECHNOLOGIES > BOOKNAMEVARIABLE 587
To recompile an object it must belong to your schema or you need ALTER ANY privileges on that object. You must
also have appropriate privileges for any associated objects.
•
Functions
• Java Classes
• Java Sources
• Materialized Views
• Packages
• Package Bodies
• Procedures
• Type Bodies
• Types
• Users
• Views
Compiling Functions
Rapid SQL lets you recompile a function. Oracle first recompiles any invalid objects on which the function depends. In
addition, it marks any objects that depend on the function as invalid.
To recompile a function that is part of a package, compile the package itself. Rapid SQL uses the ALTER FUNCTION
statement to compile a stand-alone function. However, you should not use the ALTER FUNCTION statement to
individually recompile a function that is part of a package.
Compiling Java Classes
Rapid SQL lets you compile a Java class. Oracle resolves references to other Java classes.
Compiling Java Sources
Oracle lets you compile a Java source. Oracle resolves references to other Java sources.
Compiling Materialized Views
Rapid SQL lets you compile materialized views. If a materialized view fails to revalidate after you recompile, that
materialized view cannot be fast refreshed ON DEMAND or used for query rewrite.
For more information, see:
Compile
Completing a Dialog Box
Compiling Packages and Package Bodies
Rapid SQL lets you recompile a package, and recompiles all package objects together.
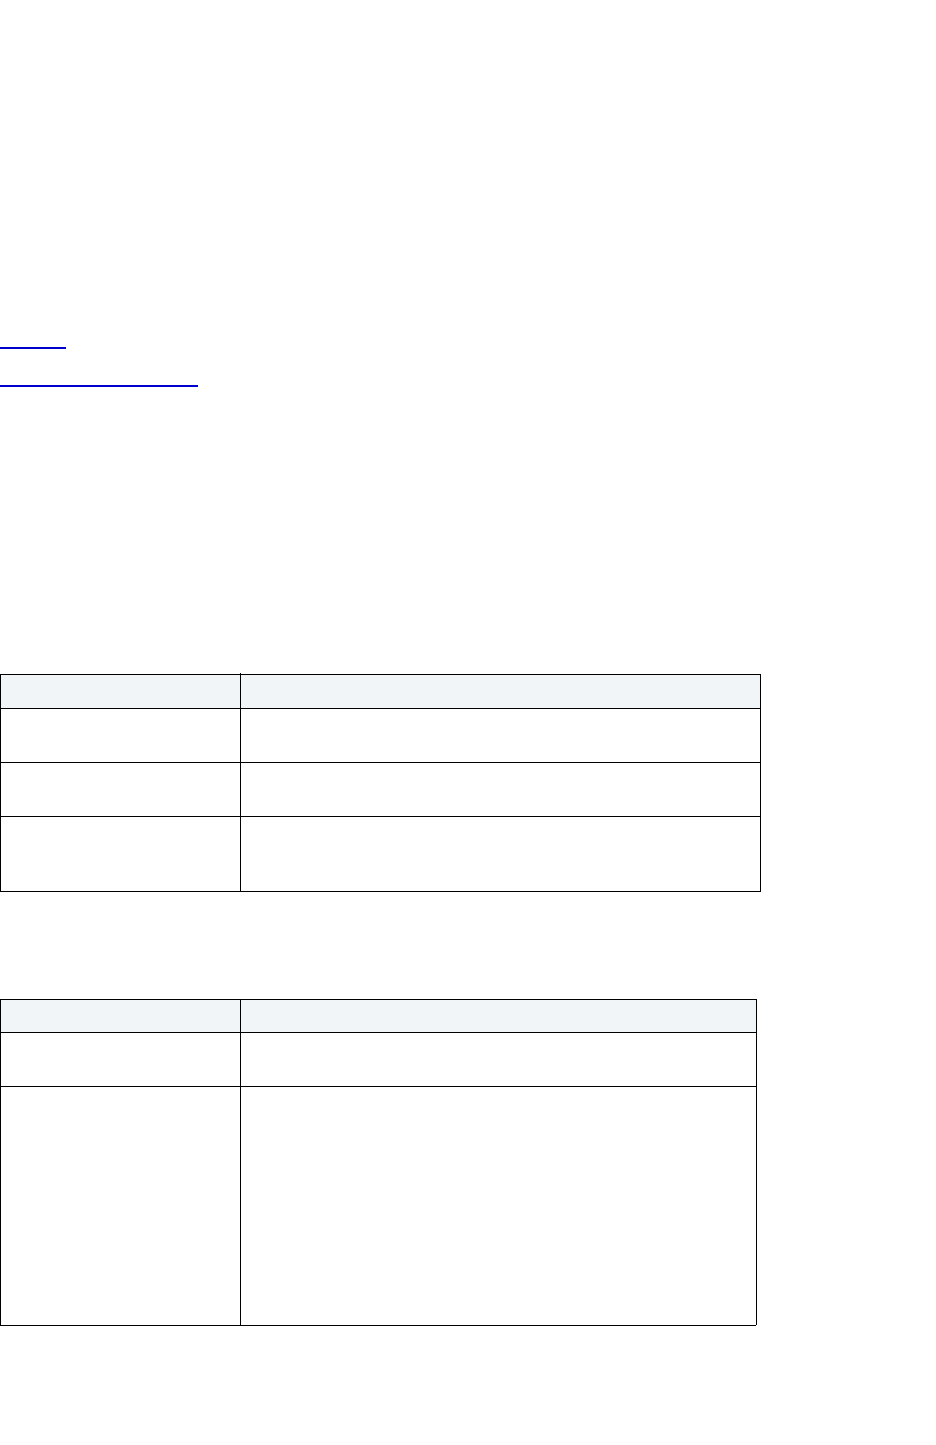
USING > FUNCTIONALITY
EMBARCADERO TECHNOLOGIES > BOOKNAMEVARIABLE 588
Recompiling a package in Rapid SQL compiles both the package specification and the package body by issuing two
consecutive ALTER statements. However, Rapid SQL shows only the ALTER statement for the specification in the
Preview: Confirm Compile dialog box. You can recompile only the package body by explicitly compiling the package
body itself.
When recompiling the entire package, Oracle recompiles the package even if it is invalid. However, if there are
compilation errors, the package remains invalid and Oracle invalidates all dependent objects.
Recompiling only a package body does not invalidate objects that depend upon the package specification regardless
of whether or not the package body has compilation errors.
For more information, see:
Compile
Completing a Dialog Box
Compiling Procedures
Rapid SQL lets you compile a procedure that is part of a package, by compiling the package itself. Rapid SQL uses
the ALTER PROCEDURE statement to compile a stand-alone procedure. However, you should not use the ALTER
PROCEDURE statement to individually recompile a procedure that is part of a package.
The table below describes the options and functionality on the Confirm Compile dialog box for IBM DB2 UDB for
Linux, Unix, and Windows:
The table below describes the options and functionality on the Confirm Compile dialog box for Oracle:
Option Description
Compare with release option Compiles the stored procedure into a state that will run optimally in
a production environment.
Compile with debug option Compiles the stored procedure with the debugging information and
symbols required to service step, pause, and breakpoint requests.
Keep current specific name Notifies DB2 that the stored procedure will keep its current system
assigned name. With this option, DB2 is not required to reset
internal references to the target object.
Option Description
Do not compile dependent
objects
Compiles only the current object and to ignore the object’s
dependencies. This is the default setting.
Compile dependent objects Compiles statements for all objects referenced by the object being
compiled. For example, if you compile a function that references a
specific procedure and you select to compile the dependent
objects, an ALTER COMPILE statement is created for that
referenced procedure.
Compile only invalid dependent objects - Creates ALTER
COMPILE statements for only those objects that are currently
invalid.
Compile dependent system objects - Compiles all of the
referenced objects with the debug option.
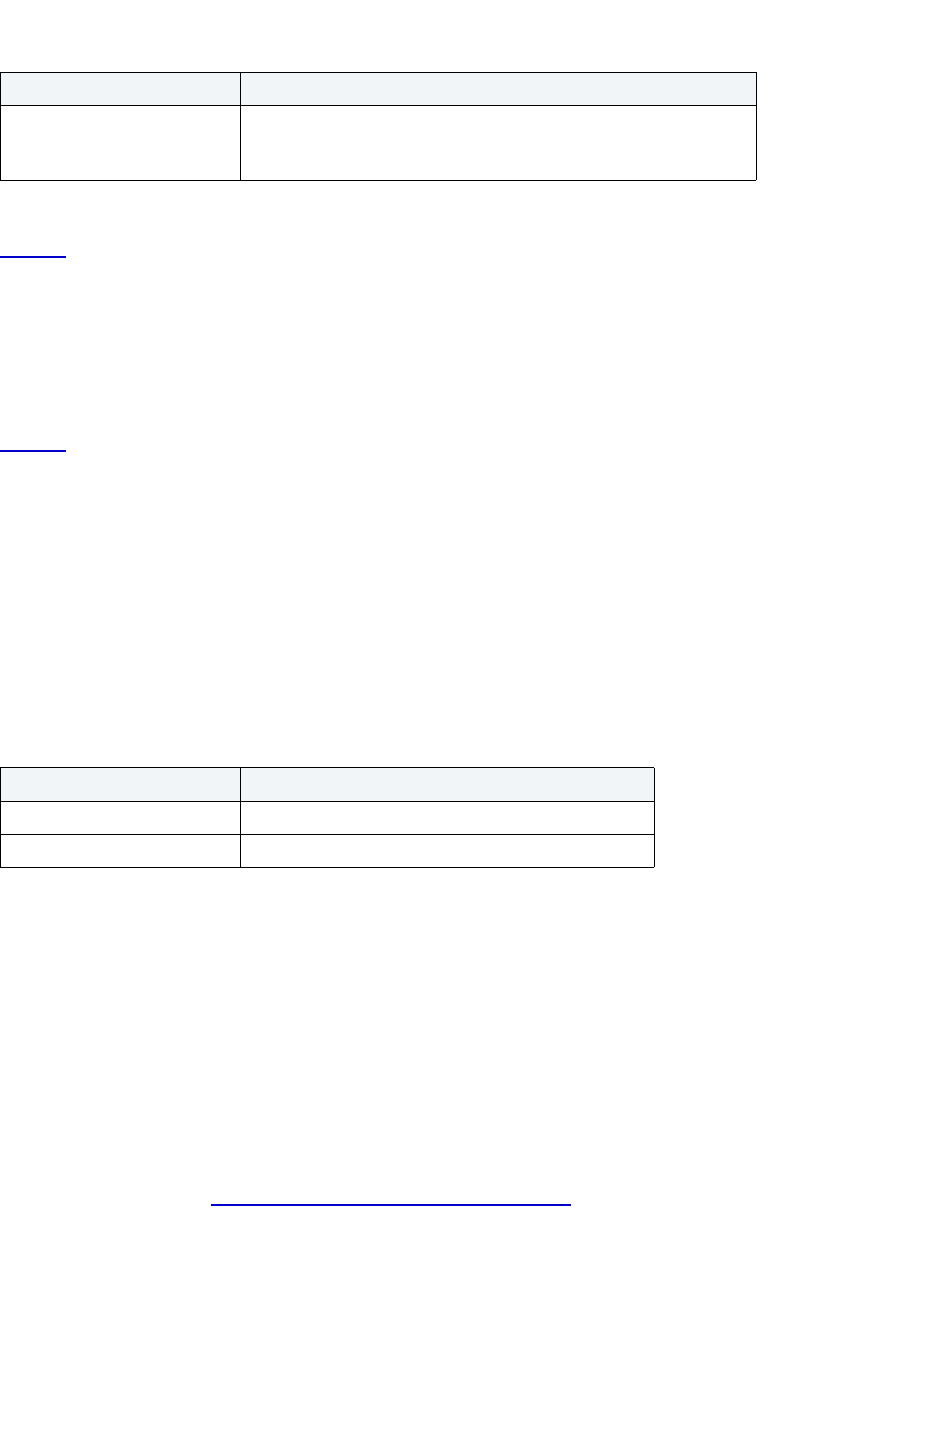
USING > FUNCTIONALITY
EMBARCADERO TECHNOLOGIES > BOOKNAMEVARIABLE 589
For more information, see:
Compile
Compiling Types and Type Bodies
Rapid SQL lets you recompile a type. Rapid SQL recompiles both the type specification and the type body.
For more information, see:
Compile
Connection Editor
This functionality is available for all platforms.
The Connection Editor lets you modify plan and package connections.
The table below describes the options and functionality of the Connection Editor:
Convert to Partitioned
This functionality is available for Oracle only.
The Convert to Partitioned Wizard lets you select partitioning methods, columns, and add partitions. Index-organized
tables take up less storage space and quickly access table rows. Index-organized tables stores rows in primary key
order reducing the amount of storage space needed.
Important Notes
None
For more information, see Completing the Convert to Partitioned Wizard
.
Compile with debug option Selecting the Compile with debug option check box instructs the
Oracle PL/SQL compiler to generate and store the code for use in
debugging sessions.
Option Description
Connections Displays the connections for the plan or package.
Add Click to add the connection.
Option Description
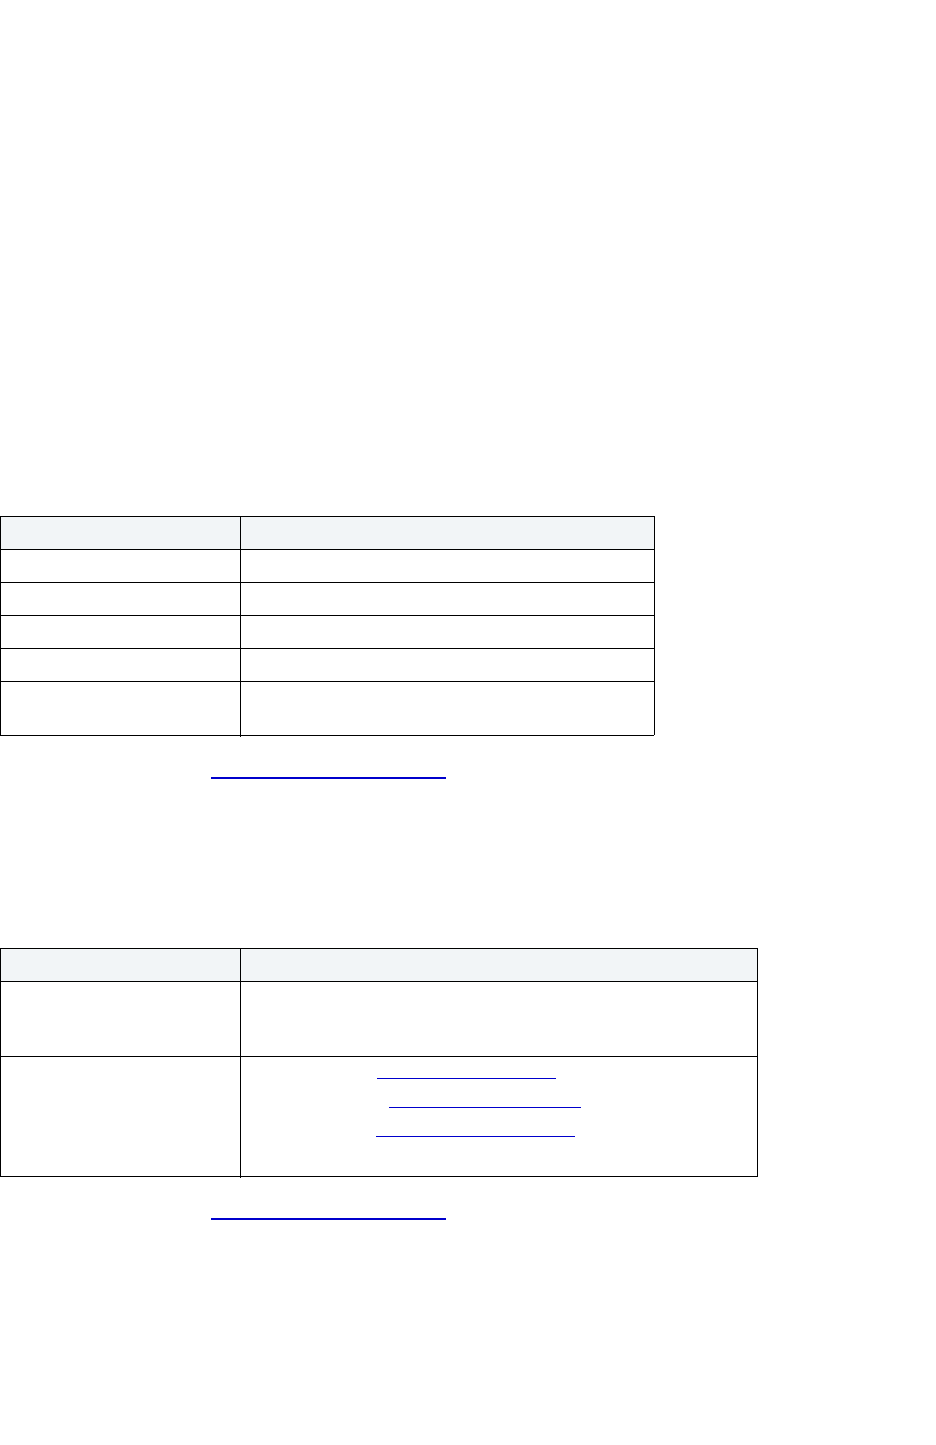
USING > FUNCTIONALITY
EMBARCADERO TECHNOLOGIES > BOOKNAMEVARIABLE 590
Completing the Convert to Partitioned Wizard
To complete this wizard, do the following:
1 On the Database Explorer, select the target object node.
Rapid SQL displays the target objects in the Database Explorer.
2 On the Database Explorer, right-click the target object, and then select Convert to Partitioned.
Rapid SQL opens the Convert to Partitioned wizard.
3 Complete the wizard panels and then click Finish.
Rapid SQL opens the Preview:Create dialog box.
Convert to Partitioned Wizard - Panel 1
The table below describes the options and functionality on this panel of the Convert to Partitioned Wizard:
For more information, see Convert to Partitioned Wizard
.
Convert to Partitioned Wizard - Panel 2
The table below describes the options and functionality on this panel of the Convert to Partitioned Wizard:
For more information, see Convert to Partitioned Wizard
.
Convert to Partitioned Wizard - Panel 3
The table below describes the options and functionality on this panel of the Convert to Partitioned Wizard:
Option Description
Owner Displays the table owner.
Table Displays the table name.
Tablespace Lets you select the tablespace.
Partitioning Method Lets you select a partitioning method.
Do you want to enable row
movement?
Lets you enable row movement.
Option Description
Select the partitioning
columns
Available Columns - Lets you select at least one available column,
and then click the right arrow to move the column to the Selected
Columns.
Create a list of ordered
partitions
Add - Opens the Add Partition dialog box
.
Insert - Opens the Insert Partition dialog box
.
Edit - Opens the Modify Partition dialog box
.
Drop - Lets you drop a partition.
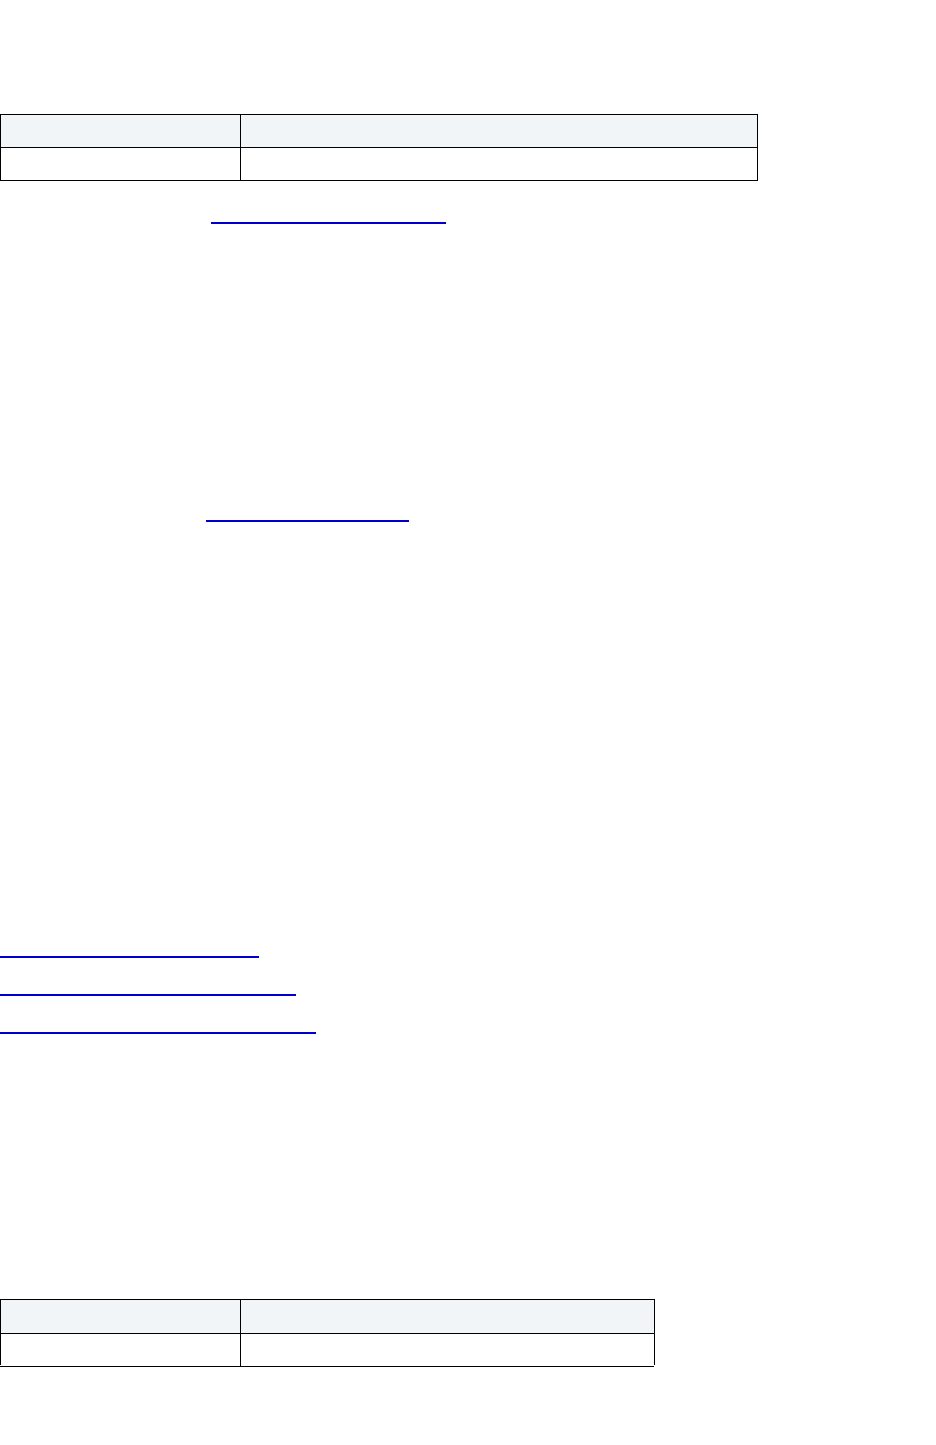
USING > FUNCTIONALITY
EMBARCADERO TECHNOLOGIES > BOOKNAMEVARIABLE 591
For more information, see Convert to Partitioned Wizard.
Copy Object Names
This functionality is available for Microsoft SQL Server and Oracle only.
The Copy Object Names functionality lets you copy and then paste object name(s) into other applications.
Important Notes
None
For more information, see Completing a Dialog Box
.
Create Alias
This functionality is available for IBM DB2 UDB for Linux, Unix, and Windows, IBM DB2 UDB for
OS/390 and z/OS, and Microsoft SQL Server only.
The Create Alias dialog box lets you create an alternate name for an object without requiring you to know any of the
underlying SQL commands. The dialog box constructs the necessary CREATE ALIAS statement based on the
information you supply.
TIP: If an object name is lengthy, create an alias, and then use the alias during a query.
Important Notes
None
For more information, see:
Creating an Alias for One Object
Creating an Alias for Multiple Objects
Completing the Create Alias Dialog Box
Creating an Alias for One Object
The Create Alias dialog box lets you create an alternate name for an object without requiring you to know any of the
underlying SQL commands. The dialog box constructs the necessary CREATE ALIAS statement based on the
information you supply.
The table below describes the options and functionality on the Create Alias dialog box:
Option Description
Enter a table description Lets you type an optional table description.
Option Description
Alias Lets you type the alias name.
USING > FUNCTIONALITY
EMBARCADERO TECHNOLOGIES > BOOKNAMEVARIABLE 592
For more information, see:
Create Alias
Completing the Create Alias Dialog Box
Creating an Alias for Multiple Objects
The Create Aliases dialog box lets you assign an Alias Owner to multiple objects. The Create Alias dialog box lets you
create an alternate name for an object without requiring you to know any of the underlying SQL commands. The
dialog box constructs the necessary CREATE ALIAS statement based on the information you supply.
The table below describes the options and functionality on the Create Alias dialog box:
For more information, see:
Create Alias
Completing the Create Alias Dialog Box
Completing the Create Alias Dialog Box
To complete this dialog box, do the following:
1 On the Database Explorer, select the target object node.
Rapid SQL displays the target objects in the Database Explorer.
2 On the Database Explorer, right-click the target object, and then select Create Alias.
Rapid SQL opens the Create Alias dialog box.
3In Alias, type the alias name.
4 For one object, in Owner, select the target alias owner.
5 Do one of the following:
Owner Lets you select the target alias owner.
Option Description
Alias Owner Lets you select the target alias owner.
Button Description
Opens the Preview dialog box.
Opens Embarcadero Job Scheduler, or (if unavailable)
another scheduling application. For more, see Scheduling.
Option Description
USING > FUNCTIONALITY
EMBARCADERO TECHNOLOGIES > BOOKNAMEVARIABLE 593
For more information, see Create Alias.
Create Insert Statements
This functionality is available for all platforms.
The Create Insert Statements dialog box lets you create Insert Statements for selected columns and data.
Important Notes
None
The table below describes the options and functionality on the Create Insert Statements dialog box:
For more information, see:
Completing the Create Insert Statements Dialog Box
Completing the Create Insert Statements Dialog Box
To complete this dialog box, do the following:
1 On the Database Explorer, select the Tables node.
Rapid SQL displays the tables in the Database Explorer.
2 On the Database Explorer, right-click the table, and then select Create Insert Statements.
Rapid SQL opens the Create Insert Statements dialog box.
3In Columns, select columns for a SELECT statement.
4 OPTIONAL: In Where, lets you enter a WHERE statement.
5 Click OK.
Executes the task.
Opens the Impact Analysis dialog box
. This option is not
available for every dialog box.
Option Description
Columns Lets you select columns for a Select statement.
Where OPTIONAL: Lets you enter a WHERE statement.
Include owner information in
insert statements
Select to include the owner information.
Set row count Lets you specify a row count, the number of rows in a table that
were affected by the Insert statement executed against the table,
or a view based on the table.
Button Description

USING > FUNCTIONALITY
EMBARCADERO TECHNOLOGIES > BOOKNAMEVARIABLE 594
Create or Edit Java Source
NOTE: This functionality is available for Oracle only.
The Java Editor lets you enter Java code. The table below describes the Java Editor toolbar options:
Important Notes
None
Create Like
This functionality is available for Oracle only.
The Create Like Editor lets you create a new object based on an existing object. The Create Like Editor is available for
logins
, tables, and users.
Important Notes
None
Create Like Editor for Logins
The Create Like Editor lets you create a new login based on an existing login.
The following tabs are available in the Create Like Editor for Logins:
•
Definition
• Users
• Roles
Create Like Editor for Logins - Definition Tab
The table below describes the options and functionality of the Definition Tab:
Option Description
Lock/Unlock Connection Click to lock or unlock connection.
Create Click to open the Create Options dialog box, which
lets you select the options for creating the java
source.
Errors Click to split the workspace in half, displaying the
error messages in the lower half of the workspace.
USING > FUNCTIONALITY
EMBARCADERO TECHNOLOGIES > BOOKNAMEVARIABLE 595
NOTE: Click Create to open the Preview:Create dialog box.
For more information, see Create Like Editor for Logins
.
Create Like Editor for Logins - Users Tab
The table below describes the options and functionality of the Users Tab:
NOTE: Click Create to open the Preview:Create dialog box.
For more information, see Create Like Editor for Logins
.
Create Like Editor for Logins - Roles Tab
The table below describes the options and functionality of the Roles Tab:
NOTE: Click Create to open the Preview:Create dialog box
.
For more information, see Create Like Editor for Logins
.
Option Description
New Login Name Lets you type the new login name.
SQL Server Login OPTIONAL: Lets you type the password.
NT User or Group Lets you select the domain.
Default Database Lets you select the default database.
Default Language Lets you select the default language.
Option Description
Databases where the login
does NOT have a user
account.
Lets you select the target database.
Databases where the login
HAS a user account.
Lets you select the target database.
Add User Click to open the Create User Account dialog box
.
Drop User Click to move the database to the Databases where
the login does NOT have a user account window.
Edit User Click to open the Edit User Accounts dialog box
.
Option Description
Grant Click to open the Grant Role dialog box.
Revoke Click to open the Revoke Roles dialog box
.

USING > FUNCTIONALITY
EMBARCADERO TECHNOLOGIES > BOOKNAMEVARIABLE 596
Create Like Editor for Tables
The Create Like Editor lets you create a new table based on an existing table. The Create Like Editor lets you
manage:
• Table columns
• Table constraints
• Table storage
• Table partitions
The following tabs are available in the Create Like Editor:
•
Columns
• Constraints
• Storage
• Performance
• Partitions
• Comment
Create Like Editor for Tables - Columns Tab
The Columns Tab of the Create Like Editor lets you manage columns for the new table. The table below describes the
options and functionality of the Columns Tab:
NOTE: Click Create to open the Preview:Create dialog box.
For more information, see Create Like Editor for Tables
.
Create Like Editor for Tables - Constraints Tab
The Constraints Tab of the Create Like Editor lets you manage constraints for the new table. Rapid SQL arranges the
constraints in a tree structure. The tree includes folders which contain all constraints associated with the target table.
The objects are organized in folders based on the type of constraint:
• Primary Key
• Unique Key
Option Description
New Table Name Lets you type the new table name.
Add Click to open the Add Column dialog box
.
Insert Click to open the Insert Column dialog box
.
Edit Click to open the Modify Column dialog box
.
Drop Lets you drop the selected column.
Up Lets you move the selected column up.
Down Lets you move the selected column down.
LOB Storage Click to open the Lob Storage Definition dialog box
.
Convert to LOB Click to open the Lob Storage Definition dialog box
.
USING > FUNCTIONALITY
EMBARCADERO TECHNOLOGIES > BOOKNAMEVARIABLE 597
• Check Constraint
• Foreign Key
TIP: Double-click a constraint to open a dialog box with detailed information on the target constraint.
The table below describes the options and functionality on the Constraints Tab:
NOTE: Click Create to open the Preview:Create dialog box.
For more information, see Create Like Editor for Tables
.
Create Like Editor for Tables - Storage Tab
The Storage Tab of the Create Like Editor lets you manage storage for the new table.
The table below describes the options and functionality on the Storage Tab:
NOTE: Click Create to open the Preview:Create dialog box
.
For more information, see Create Like Editor for Tables
.
Option Description
Add Click to open the Index Constraint dialog box.
Edit Click to open the Index Constraint dialog box
.
Drop Drops the selected constraint.
Option Description
Data Block Storage The storage parameter lets you tune performance by minimizing
the occurrence of row migration and chaining caused by update
operations that extend the length of rows stored on the data block.
Percent Used - Lets you type a value in the corresponding box.
Maximum - The maximum parameter limits concurrency on a data
block.
Extents Initial - The initial parameter ensures that a minimum number of
concurrent transactions can update a data block, avoiding the
overhead of allocating a transaction entry dynamically.
Percent Increase - Magnifies how an object grows and, can
materially affect available free space in a tablespace. Select a
value in the corresponding box.
Filegroup Lets you select the filegroup within the database the table is stored.
This is for Microsoft SQL Server 7.0 or later.
Text Image Filegroup Lets you select the text image filegroup within the database on
which to place any text, image, and/or next columns. This is for
Microsoft SQL Server 7.0 or later.
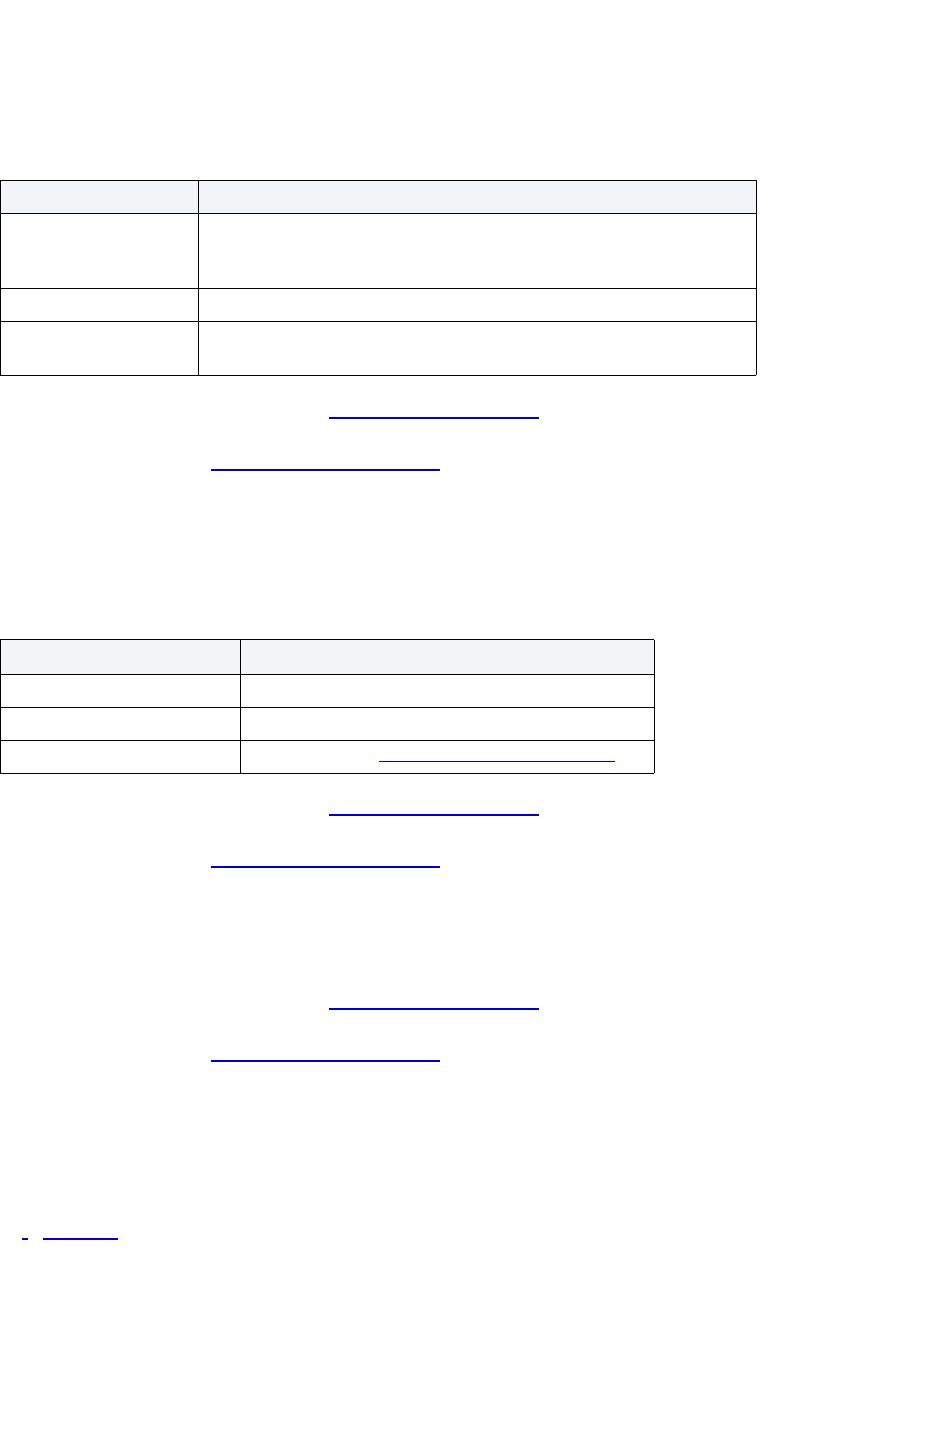
USING > FUNCTIONALITY
EMBARCADERO TECHNOLOGIES > BOOKNAMEVARIABLE 598
Create Like Editor for Tables - Performance Tab
The table below describes the options and functionality on the Performance Tab:
NOTE: Click Create to open the Preview:Create dialog box
.
For more information, see Create Like Editor for Tables
.
Create Like Editor for Tables - Partitions Tab
The table below describes the options and functionality on the Partitions Tab:
NOTE: Click Create to open the Preview:Create dialog box
.
For more information, see Create Like Editor for Tables
.
Create Like Editor for Tables - Comment Tab
The Comment Tab lets you lets you type a comment up to 2000 characters long.
NOTE: Click Create to open the Preview:Create dialog box
.
For more information, see Create Like Editor for Tables
.
Create Like Editor for Users
The Create Like Editor lets you create a new user based on an existing user. The following tabs are available in the
Create Like Editor:
• Definition
• Object Privileges
• System Privileges
Option Description
Parallel Query Option Lets you process queries using many query server processes running
against multiple CPUs, which provides substantial performance gains
such as reduction of the query completion time.
Logging Select to have all changes stored.
Cache Keeps the blocks in memory by placing it at the most recently used end.
This option is useful for small lookup tables.
Option Description
Is Table Partitioned Lets you select if the table is partitioned.
Partitioned Method Lets you select the partitioned method.
Add Click to open the Partitioned Columns dialog box
.
USING > FUNCTIONALITY
EMBARCADERO TECHNOLOGIES > BOOKNAMEVARIABLE 599
Create Like Editor for Users - Definition Tab
The table below describes the options and functionality of the Definition Tab:
For more information, see Create Like Editor for Users
.
Add Alias
The Add Alias dialog box lets you create an aliased login.
For more information, see Create Like Editor for Users
.
Drop Aliased Login
The Drop Aliased Login dialog box lets you drop an aliased login.
For more information, see Create Like Editor for Users
.
Create Like Editor for Users - Object Privileges
The table below describes the options and functionality of the Object Privileges Tab:
For more information, see Create Like Editor for Users
.
Create Like Editor for Users - System Privileges Tab
The table below describes the options and functionality of the System Privileges Tab:
Option Description
Login Name Lets you select login name.
Full Name Lets you type the full name.
Add Click to open the Add Alias
dialog box.
Drop Click to open the Drop Aliased Login
dialog box.
Add/Change Lets you add or change a group.
Drop Lets you drop a group.
Option Description
Object Type Lets you select an object type.
Owner Lets you select an owner.
Grant Opens the Grant Privilege(s) dialog box
.
Revoke Opens the Revoke Privileges dialog box
.
Option Description
Grant Opens the Grant Privilege(s) dialog box.
USING > FUNCTIONALITY
EMBARCADERO TECHNOLOGIES > BOOKNAMEVARIABLE 600
For more information, see Create Like Editor for Users.
Create or Edit User Accounts
This functionality is available for all platforms.
The Create or Edit User Accounts dialog box lets you manage user accounts.
Important Notes
None
The table below describes the options and functionality on the Create or Edit User Accounts dialog box:
For more information, see Completing a Dialog Box
.
Create or Modify Constraint
This functionality is available for all platforms.
The Create/Modify Constraint Dialog Box lets you create or edit a constraint without knowing the underlying
commands.
Important Notes
•None
TIP: To filter the Owner and Object lists, click the Filter button next to each list. Rapid SQL opens the
Filter dialog box.
For more information, see Completing an Object Dialog Box
.
Revoke Opens the Revoke Privileges dialog box.
Option Description
User Name Lets you type the user name.
Database roles Lets you select the roles for the user account.
Option Description
Owner Lets you select the check constraint owner.
Table Lets you select where you want to place the check constraint.
Constraint Name Lets you type the name of the constraint, which can be up to 30
characters long and must be unique across the entire database.
Comment Lets you type a comment.
Option Description
USING > FUNCTIONALITY
EMBARCADERO TECHNOLOGIES > BOOKNAMEVARIABLE 601
Create or Modify User Message Text
This functionality is available for all platforms.
The Create or Modify User Message Text dialog box lets you manage user messages. You can open this dialog box in
the following wizards:
• Microsoft SQL Server User Message Wizard
• Sybase ASE User Message Wizard
Important Notes
None
The table below describes the options and functionality on the Create or Modify User Message Text dialog box.
For more information, see Completing a Dialog Box
.
Create Synonym
NOTE: The Create Synonym functionality is available for IBM DB2 UDB for Linux, Unix, and Windows
and Oracle.
The Create Synonym dialog box lets you create synonyms for objects.
A synonym is an alternate name for an object in the database. You can define synonyms on tables, views, sequences,
procedures, functions, packages, package bodies, materialized views, and Java class objects.
There are two types of synonyms:
• Public
• Private
Public synonyms can be used by everyone in the database. Private synonyms belong to the synonym owner and the
owner can control the synonym’s availability to others.
Synonyms simplify object names and provide added security. Synonyms let you:
• Simplify SQL statements.
• Reference an object without needing to specify its owner.
• Reference a remote object without needing to specify its database.
• Alias an object so its purpose becomes more understandable.
• Mask the name, owner, and location of an object.
NOTE: The schema object for which you define a synonym cannot be contained in a package.
Option Description
Language Lets you specify the message language.
Message Text Lets you type a message.

USING > FUNCTIONALITY
EMBARCADERO TECHNOLOGIES > BOOKNAMEVARIABLE 602
Rapid SQL lets you specify options for creating synonyms with the Create Synonym and Create Synonyms dialog
boxes. The dialog box that Rapid SQL returns depends on whether you are creating a synonym for a single object or
are creating synonyms for multiple objects at the same time.
Important Notes
None
The table below describes the options and functionality on the Create Synonym dialog box.
For more information, see Completing the Create Synonym Dialog Box
.
Completing the Create Synonym Dialog Box
To complete this dialog box, do the following:
1 On the Database Explorer, select the target object node.
Rapid SQL displays the target objects in the Database Explorer.
2 On the Database Explorer, right-click the target object, and then select Create Synonym.
Rapid SQL opens the Create Synonym dialog box.
3 In the Synonym Scope box, click the Public or Private option button.
4 If you clicked the Private option button, click the list and then click the owner.
5 Do one of the following:
Option Description
Synonym A synonym can have the same name as the base
object if that object is contained in another schema.
For example, you can define the synonym
EMPLOYEE on the table COMPANY.EMPLOYEE as
long you are not working in the COMPANY schema.
If you choose to create synonyms for multiple objects
in a single operation, Rapid SQL uses the object
name as the synonym name. After creating
synonyms in such a manner, users no longer need to
specify the owner name.
Synonym Scope Lets you choose whether you want the synonym to
be private or public by clicking the Public or Private
option buttons. If you click the Private option button,
choose a schema in which to create the synonym.
Button Description
Opens the Preview dialog box.
Opens Embarcadero Job Scheduler, or (if unavailable)
another scheduling application. For more, see Scheduling.
USING > FUNCTIONALITY
EMBARCADERO TECHNOLOGIES > BOOKNAMEVARIABLE 603
For more information, see:
Create Synonym
Completing a Dialog Box
DataLink Options
NOTE: This functionality is available for IBM DB2 UBB for OS/390 and z/OS only.
The DataLink Options dialog box lets you manage datalinks, datatypes that enable logical references from the
database to a file that is stored outside the database.
Important Notes
None
The table below describes the options and functionality on the DataLink Options dialog box:
For more information, see Completing a Dialog Box
.
DBCC
This functionality is available for Microsoft SQL Server and Sybase ASE only.
The DBCC (Database Consistency Check) dialog box lets you:
• Specify single or multiple tables or indexes for validation.
• Perform database-wide validations.
• Perform object-level validations of databases.
Executes the task.
Opens the Impact Analysis dialog box
. This option is not
available for every dialog box.
Option Description
Datalink Options Lets you select datalink options:
No Link Control
File Link Control
File Link Options
File-Link Options Lets you select file-link options:
Read
On Unlink
Write Permission
Recovery
Button Description
USING > FUNCTIONALITY
EMBARCADERO TECHNOLOGIES > BOOKNAMEVARIABLE 604
Important Notes
None
For more information, see Completing the DBCC Dialog Box
.
Completing the DBCC Dialog Box
To complete this dialog box, do the following:
1 On the Database Explorer, select the target object node.
Rapid SQL displays the target objects in the Database Explorer.
2 On the Database Explorer, right-click the target object, and then select DBCC.
Rapid SQL opens the DBCC dialog box.
3 Click the DBCC list and click the DBCC operation you want to perform.
NOTE: DBCC options differ for Microsoft SQL Server
and Sybase ASE objects.
4 Do one of the following:
For more information, see:
DBCC
Completing a Dialog Box
DBCC for Microsoft SQL Server
The DBCC (Database Consistency Check) dialog box lets you specify single or multiple tables or indexes for
validation in Microsoft SQL Server. Use this dialog box to perform table-level or index-level validations of databases
which are too large to undergo database-level DBCC operations in a time-efficient manner.
The DBCC dialog box includes the following elements:
• A window displaying the target database objects
• A drop-down list of DBCC Operations
• Buttons for previewing the operation’s SQL code, scheduling the operation, and executing the operation
Button Description
Opens the Preview dialog box.
Opens Embarcadero Job Scheduler, or (if unavailable)
another scheduling application. For more, see Scheduling
.
Executes the task.
Opens the Impact Analysis dialog box
. This option is not
available for every dialog box.

USING > FUNCTIONALITY
EMBARCADERO TECHNOLOGIES > BOOKNAMEVARIABLE 605
Important Notes
None
For more information, see:
DBCC for Databases
DBCC for Tables
DBCC for Indexes
DBCC for Microsoft SQL Server Databases
The DBCC dialog box for databases lets you perform database-wide validations. You should validate your databases
as part of regular database maintenance to guard against corruption and failure. Microsoft SQL Server offers a set of
DBCC commands to validate the integrity of your databases. Generally, you should perform these DBCC commands
prior to dumping your databases to ensure that you are capturing clean backups of your databases.
The fundamental difference between the DBCC dialog box for databases, tables and indexes is the content of the
DBCC Operation drop-down list.
The table below describes the options and functionality on the DBCC dialog box.
DBCC Operation Description
Check Allocation Executes a DBCC CHECKALLOC command. Makes sure that
all data and index panels are correctly allocated and used. It
reports on the amount of space allocated and used in the
database. When checking allocation, you have the option to skip
non-clustered indexes by selecting the Skip non-clustered
indexes check box.
Check Catalog Executes a DBCC CHECKCATALOG command. Checks for
consistency in and between system tables.
Check Database Executes a DBCC CHECKDB command. Verifies that all tables
and indexes are properly linked, that indexes are in proper
sorted order, that all pointers are consistent, that the data on
each panel is reasonable, and that panel offsets are reasonable.
When checking a database, you have the option to skip
non-clustered indexes by selecting the Skip non-clustered
indexes check box.
Check FileGroup Executes a DBCC CHECKFILEGROUP command. Verifies that
all tables and indexes for the specified filegroup are properly
linked, that indexes are in proper sorted order, that all pointers
are consistent, that the data on each panel is reasonable, and
that panel offsets are reasonable. When checking filegroups, you
have the option to skip non-clustered indexes by selecting the
Skip non-clustered indexes check box.
Show Oldest Transaction Executes a DBCC OPENTRAN command. Displays information
on the oldest active transaction and the oldest distributed and
non distributed replicated transactions, if any, within the
specified database.
Update Usage Executes a DBCC UPDATEUSAGE command. Reports and
corrects the rows, used, reserved, and dpanels columns of the
sysindexes table for any clustered indexes on objects of the type
U (user-defined table) or S (system table).

USING > FUNCTIONALITY
EMBARCADERO TECHNOLOGIES > BOOKNAMEVARIABLE 606
For more information, see:
Completing the DBCC Dialog Box
DBCC
DBCC for Microsoft SQL Server Tables
The DBCC dialog box for tables lets you perform table-level validations of databases. The fundamental difference
between the DBCC dialog box for tables and indexes is the content of the DBCC Operation drop-down list.
The table below describes the options and functionality on the DBCC dialog box.
Option Description
Check Current Identity Value Checks the current identity value for the target objects, correcting
values if needed depending on parameter specifications. Identity
columns created with a NOT FOR REPLICATION clause in either
the CREATE TABLE or ALTER TABLE statement are not corrected
by this operation.
Check Fragmentation Displays the target table's data and index fragmentation
information, determining whether the table is heavily fragmented.
When a table is heavily fragmented, you can reduce fragmentation
and improve read performance by dropping and recreating a
clustered index (without using the SORTED_DATA option). Doing
so reorganizes the data, resulting in full data pages. To adjust the
level of fullness, use the Rebuild Index operation’s FILLFACTOR
option. When INSERT, UPDATE, and DELETE statements
fragment tables, they usually do so with unequal distribution
across the entire database so that each page varies in fullness
over time, forcing additional page reads for queries that scan part
or all of a table.
Check Table Checks the linkages and sizes of text, ntext and image pages for
selected tables. For the data, index, text, ntext, and image pages
of the target tables, this operation also checks that index and data
pages are correctly linked, indexes are in their proper sorted order,
pointers are consistent, the data on each page is reasonable, and
the page offsets are reasonable. DBCC CHECKTABLE requires a
shared lock on all tables and indexes in the database for the
duration of the operation. However, DBCC CHECKTABLE does
not check the allocations of pages in the specified table (for this,
use DBCC CHECKALLOC). To perform DBCC CHECKTABLE on
every table in the database, use DBCC CHECKDB.
Check Text/Image Allocation NOTE: This option is not available Microsoft SQL Server version 7
or later.
Checks the allocation of text, ntext, or image columns for a table.
In later versions of Microsoft SQL, use DBCC CHECKTABLE to
check the integrity of the data, index, text, ntext, and image pages
for the target table.

USING > FUNCTIONALITY
EMBARCADERO TECHNOLOGIES > BOOKNAMEVARIABLE 607
For more information, see:
Completing the DBCC Dialog Box
DBCC
DBCC for Microsoft SQL Server Indexes
The DBCC dialog box for indexes lets you perform index-level validations of databases. The fundamental difference
between the DBCC dialog box for tables and indexes is the content of the DBCC Operation drop-down list.
The table below describes the options and functionality on the DBCC dialog box.
Pin Table Pins target tables in memory so that they are not flushed when
Microsoft SQL Server needs space to read in new pages. DBCC
PINTABLE is best used for keeping small, frequently referenced
tables in memory.
Pinning a large table can consume a large portion of the buffer
cache, leaving inadequate memory to service other tables in the
system. A pinned table that is larger than the buffer cache itself can
fill the entire cache, necessitating a shut down of the system by a
sysadmin user, who must then restart Microsoft SQL Server and
unpin the table. Pinning too many small tables can result in a
similar problem.
Rebuild Index Dynamically rebuilds one, multiple, or all indexes for a table in the
target database, allowing indexes which enforce either primary key
or unique constraints to be rebuilt without need for dropping and
recreating. This operation is not supported for use on system
tables.
Unpin Table Marks target tables as unpinned, rendering their pages flushable
from the buffer cache if space is needed to read in a new page
from disk.
Update Usage Reports and corrects inaccuracies in the sysindexes table (which
can result in incorrect space usage reports by the sp_spaceused
system stored procedure) and corrects the rows, used, reserved,
and dpages columns of the sysindexes table for tables and
clustered indexes. If there are no inaccuracies in sysindexes,
DBCC UPDATEUSAGE returns no data. Use this operation to
synchronize space-usage counters. Executing this operation on
large tables or databases can require some time, so it should
typically be used only when you suspect incorrect values returned
by sp_spaceused.
Option Description

USING > FUNCTIONALITY
EMBARCADERO TECHNOLOGIES > BOOKNAMEVARIABLE 608
For more information, see:
Completing the DBCC Dialog Box
DBCC
DBCC for Sybase ASE
The DBCC (Database Consistency Check) dialog box lets you specify single or multiple databases, tables or indexes
for validation in Sybase ASE. Use this dialog box to perform table-level or index-level validations of databases which
are too large to undergo database-level DBCC operations in a time-efficient manner.
The DBCC dialog box includes the following elements:
• A window displaying the target database objects
Option Description
Check Fragmentation Displays the target index's table data and fragmentation
information, determining whether the table is heavily fragmented.
For more information, see tip below.
When a table is heavily fragmented, you can reduce fragmentation
and improve read performance by dropping and recreating a
clustered index (without using the SORTED_DATA option). Doing
so reorganizes the data, resulting in full data pages. To adjust the
level of fullness, use the Rebuild Index operation’s FILLFACTOR
option. When INSERT, UPDATE, and DELETE statements
fragment tables, they usually do so with unequal distribution
across the entire database so that each page varies in fullness
over time, forcing additional page reads for queries that scan part
or all of a table.
Check Index Checks the linkages and sizes of text and image pages for
selected indexes. DBCC CHECKTABLE requires a shared lock on
all tables and indexes in the database for the duration of the
operation.
Rebuild Index Dynamically rebuilds all target indexes, allowing those which
enforce either primary key or unique constraints to be rebuilt
without need for dropping and recreating. This operation is not
supported for use on system tables.
Show Statistics Displays the current distribution statistics for the target indexes.
The results returned indicate the selectivity of each target index (a
lower density equals a higher selectivity) and provide the basis for
determining the usefulness of target indexes to the optimizer.
Update Usage Reports and corrects inaccuracies in the sysindexes table (which
can result in incorrect space usage reports by the sp_spaceused
system stored procedure) and corrects the rows, used, reserved,
and dpages columns of the sysindexes table for tables and
clustered indexes. If there are no inaccuracies in sysindexes,
DBCC UPDATEUSAGE returns no data. Use this operation to
synchronize space-usage counters. Executing this operation on
large tables or databases can require some time, so it should
typically be used only when you suspect incorrect values returned
by sp_spaceused. Additional Options: Update Index Option, and
DBCC General Option.
USING > FUNCTIONALITY
EMBARCADERO TECHNOLOGIES > BOOKNAMEVARIABLE 609
• A drop-down list of DBCC Operations
• Buttons for previewing the operation’s SQL code, scheduling the operation, and executing the operation
For more information, see:
DBCC for Tables
DBCC for Indexes
DBCC for Databases
DBCC for Sybase ASE Databases
The DBCC dialog box for databases lets you perform database-wide validations. The fundamental difference between
the DBCC dialog box for databases, tables and indexes is the content of the DBCC Operation drop-down list.
The table below describes the options and functionality on the DBCC dialog box.
For more information, see:
Completing the DBCC Dialog Box
DBCC
DBCC for Sybase ASE Tables
The DBCC dialog box for tables lets you perform table-level validations of databases. The fundamental difference
between the DBCC dialog box for tables and indexes is the content of the DBCC Operation drop-down list.
The table below describes the options and functionality on the DBCC dialog box.
Option Description
Check Allocation Checks the allocation and use of all pages in the
target database.
Check Catalog Checks for consistency in and between system
tables in the target database.
Check Database Checks the allocation and structural integrity of all
the objects in the target database.
Check Storage Checks the target database for allocation, OAM page
entries, page consistency, text valued columns,
allocation of text valued columns, and text column
chains. The results of this operation are stored in the
dbccdb database.
Database Repair Drops a damaged database.

USING > FUNCTIONALITY
EMBARCADERO TECHNOLOGIES > BOOKNAMEVARIABLE 610
DBCC Operation Options
Rapid SQL offers additional options for selected operations which you can specify to further customize a database
consistency check. The table below describes each option:
For more information, see:
Completing the DBCC Dialog Box
Option Description
Check Allocation Checks the database to see that every page is
correctly allocated, and that no allocated page is
unused. Use TABLEALLOC frequently (daily) to
check page linkages in the Adaptive Server before
performing a database dump to ensure the integrity
of the dumped data.
Check Table Checks the linkages and sizes of text, ntext and
image pages for selected tables. For the data, index,
text, ntext, and image pages of the target tables, this
operation also checks that index and data pages are
correctly linked, indexes are in their proper sorted
order, pointers are consistent, the data on each page
is reasonable, and the page offsets are reasonable.
DBCC CHECKTABLE requires a shared lock on all
tables and indexes in the database for the duration of
the operation. However, DBCC CHECKTABLE does
not check the allocations of pages in the specified
table (for this, use DBCC CHECKALLOC). To
perform DBCC CHECKTABLE on every table in the
database, use DBCC CHECKDB.
Check Text Upgrades text values after you have changed an
Adaptive Server's character set to a multibyte
character set.
Rebuild Index Dynamically rebuilds one, multiple, or all indexes for
a table in the target database, allowing indexes
which enforce either primary key or unique
constraints to be rebuilt without need for dropping
and recreating. This operation is not supported for
use on system tables.
Option Description
Error Option Click Fix Error to instruct Rapid SQL to fix any allocation errors it finds. You
must put your database in single-user mode to fix errors, so specify this
option during times of low usage.
Job Scope Select Optimize to produce a report based on the allocation pages listed in
the object allocation map (OAM) pages for the table. It does not report and
cannot fix unreferenced extents on allocation pages that are not listed in
the OAM pages. The optimized option is the default. Select Full to perform
the equivalent of a table-level CHECKALLOC, reporting all types of
allocation errors. Select Fast to produce an exception report of pages that
are referenced but not allocated in the extent. Fast does not produce an
allocation report.
Update Index Option Click this check box to skip non-clustered indexes when updating index
options.

USING > FUNCTIONALITY
EMBARCADERO TECHNOLOGIES > BOOKNAMEVARIABLE 611
DBCC
DBCC for Sybase ASE Indexes
The DBCC dialog box for indexes lets you perform index-level validations of databases. Unlike the DBCC dialog box
for tables, this DBCC dialog box offers only one option on the DBCC Operation drop-down list: Check Allocation. This
option checks the specified database to see that all pages are correctly allocated and that no allocated page is
unused.
The table below describes the options and functionality on the DBCC dialog box.
For more information, see:
Completing the DBCC Dialog Box
DBCC
Deallocate Unused Space
This functionality is available for Oracle only.
The Deallocate Unused Space dialog box lets you deallocate space from clusters, indexes, and tables. You can also
deallocate unused space from table partitions and subpartitions. When you find that allocated space is not being used,
you can free that space for use by other objects by explicitly deallocating space. Oracle releases the freed space to
the user quota for the tablespace in which the deallocation occurs.
Oracle deallocates unused space from the end of the object toward the high water mark. In other words, Oracle frees
space starting with the space that would have been used last. If an extent is completely contained in the space to be
deallocated, then the whole extent is freed. If an extent is only partially contained in the space to be deallocated, then
Oracle shrinks that extent to the size of the used space up to the high water mark, and frees the unused space in the
extent.
If you are deallocating unused space from and index and the index is range-partitioned or hash-partitioned, Oracle
deallocates unused space from each partition in the index. If an index is a local index on a composite-partitioned table,
Oracle deallocates unused space from each of the subpartitions in the index.
Option Description
DBCC Option Checks the specified database to see that all pages
are correctly allocated and that no page that is
allocated is not used.
Error Option Rapid SQL to fixes any allocation errors it finds. You
must put your database in single-user mode to fix
errors, so specify this option during times of low
usage
Job Scope Produces a report based on the allocation pages
listed in the object allocation map (OAM) pages for
the table. It does not report and cannot fix
unreferenced extents on allocation pages that are not
listed in the OAM pages. The optimized option is the
default. A full job is the equivalent to a table-level
CHECKALLOC, reporting all types of allocation
errors. A fast job does not produce an allocation
report, but produces an exception report of pages
that are referenced but not allocated in the extent.
USING > FUNCTIONALITY
EMBARCADERO TECHNOLOGIES > BOOKNAMEVARIABLE 612
Important Notes
None
The table below describes the options and functionality on the Deallocate Unused Space dialog box:
TIP: You can verify that the deallocated space is freed by going to the Space Tab in the appropriate
Rapid SQL editor.
For more information, see Completing the Deallocate Unused Space Dialog Box
.
Completing the Deallocate Unused Space Dialog Box
To complete this dialog box, do the following:
1 On the Database Explorer, select the Tables node.
Rapid SQL displays the tables in the Database Explorer.
2 On the Database Explorer, right-click the table, and then select Deallocate Unused Space.
Rapid SQL opens the Deallocate Unused Space dialog box.
3 Specify the number of bytes above the high-water mark that the objects will have after deallocation. If no value is
specified, all unused space will be freed.
4 Do one of the following:
Option Description
Specify the number of bytes above the
high-water mark that the objects will have
after deallocation. If no value is specified, all
unused space will be freed.
If you do not specify an amount of unused space
and the high water mark is above the size of
INITIAL and MINEXTENTS, then all of the unused
space is freed. If the high water mark is less than
the size of INITIAL or MINEXTENTS, then all
unused space above MINEXTENTS is freed.
If you specify an amount of unused space and the
remaining number of extents is smaller than
MINEXTENTS, then the MINEXTENTS value
changes to reflect the new number. If the initial
extent becomes smaller as a result of the
deallocation, the INITIAL value changes to reflect
the new size of the initial extent.
Button Description
Opens the Preview dialog box.
Opens Embarcadero Job Scheduler, or (if unavailable)
another scheduling application. For more, see Scheduling
.
Executes the task.

USING > FUNCTIONALITY
EMBARCADERO TECHNOLOGIES > BOOKNAMEVARIABLE 613
For more information, see Completing a Dialog Box.
Dependencies
This functionality is available for all platforms.
The Dependencies window displays and lets you modify the referencing objects for an object.
Important Notes
None
For more information, see Viewing Dependencies.
Viewing Dependencies
To open the Dependencies Window, do the following:
1 On the Database Explorer, select the target object node.
Rapid SQL displays the target objects in the Database Explorer.
2 On the Database Explorer, right-click the target object, and then select Dependencies.
Rapid SQL opens the Dependencies Window.
For more information, see Dependencies
.
Detach/Attach
This functionality is available for Microsoft SQL Server 2000 or later only.
The Detach/Attach dialog box lets you detach and reattach data and transaction log files. Detaching a database
removes the database from the server but leaves the database intact within the data and transaction log files that
compose the database. These data and transaction log files can then be used to attach the database to any instance
of Microsoft SQL Server, including the server from which the database was detached. This makes the database
available in exactly the same state it was in when it was detached. The Rapid SQL commands are:
•
Detach
• Attach
Important Notes
None
For more information, see Completing the Detach Dialog Box
.
Opens the Impact Analysis dialog box. This option is not
available for every dialog box.
Button Description
USING > FUNCTIONALITY
EMBARCADERO TECHNOLOGIES > BOOKNAMEVARIABLE 614
Detaching a Database
The table below describes the options and functionality on the Detach dialog box.
For more information, see Completing the Detach Dialog Box.
Completing the Detach Dialog Box
To complete this dialog box, do the following:
1 On the Database Explorer, select the Databases node.
Rapid SQL displays the Databases in the Database Explorer.
2 On the Database Explorer, right-click the database, and then select Detach.
Rapid SQL opens the Detach dialog box.
3 To skip the UPDATE STATISTICS operation when detaching the database, select the Skip Checks check box for
the target database(s).
TIP: This option is useful for databases that are to be moved to read-only media.
4 Do one of the following:
For more information, see:
Detach
Completing a Dialog Box
Attaching a Database
The table below describes the options and functionality on the Attach dialog box.
Option Description
Skip Checks Select to skip the UPDATE STATISTICS operation when detaching
the database. This option is useful for databases that are to be
moved to read-only media.
Button Description
Opens the Preview dialog box.
Opens Embarcadero Job Scheduler, or (if unavailable)
another scheduling application. For more, see Scheduling
.
Executes the task.
Opens the Impact Analysis dialog box
. This option is not
available for every dialog box.
USING > FUNCTIONALITY
EMBARCADERO TECHNOLOGIES > BOOKNAMEVARIABLE 615
For more information, see:
Completing the Attach Dialog Box
Completing a Dialog Box
Completing the Attach Dialog Box
To complete this dialog box, do the following:
1 On the Database Explorer, select the Databases node.
Rapid SQL displays the Databases in the Database Explorer.
2 On the Database Explorer, right-click the Database, and then select Attach.
Rapid SQL opens the Attach dialog box.
3 In the Database Name to be Attached box, type the database name.
4 In the grid, do one of the following:
Microsoft SQL Server 7.0
• Select the target database file(s).
• To add the *.mdf file(s), click Add, enter the name of the MDF (master data file) of the database to attach, and
then click OK.
• To add the *.ldf file(s), click Add, enter the name of the LDF (log data file) of the database to attach, and then
click OK.
• To drop database file(s), click Drop and then select the target file(s).
Microsoft SQL Server 2000
• Select the target database file(s).
• To add database file(s), click Add and then enter the name of the MDF (master data file) of the database to
attach.
Rapid SQL automatically adds the appropriate *.ldf file.
5 To drop database file(s), click Drop and then select the target file(s).
6 Do one of the following:
Option Description
Database Name to be
Attached
Lets you type the name of the target database to
attach the file(s) to.
Add Button Click to add database file(s), and then type the name
of the MDF (master data file) of the database to
attach.
Button Description
Opens the Preview dialog box.
USING > FUNCTIONALITY
EMBARCADERO TECHNOLOGIES > BOOKNAMEVARIABLE 616
For more information, see:
Attach
Completing a Dialog Box
Disable/Enable Job Queues
This functionality is available for Oracle only.
The Disable/Enable dialog box lets you enable or disable any job queue. Job Queues are built-in mechanisms that let
you schedule a variety of SQL-based or command-line driven tasks.
Important Notes
None.
For more information, see Completing the Enable/Disable Dialog Box.
Completing the Enable/Disable Dialog Box for Job Queues
To complete this dialog box, do the following:
1 On the Database Explorer, select the Job Queues node.
Rapid SQL displays the job queues in the Database Explorer.
2 On the Database Explorer, right-click the target job queue, and then select Enable or Disable.
Rapid SQL opens the Enable or Disable dialog box.
3 Do one of the following:
Opens Embarcadero Job Scheduler, or (if unavailable)
another scheduling application. For more, see Scheduling
.
Executes the task.
Opens the Impact Analysis dialog box
. This option is not
available for every dialog box.
Button Description
Opens the Preview dialog box.
Opens Embarcadero Job Scheduler, or (if unavailable)
another scheduling application. For more, see Scheduling
.
Executes the task.
Button Description
USING > FUNCTIONALITY
EMBARCADERO TECHNOLOGIES > BOOKNAMEVARIABLE 617
For more information, see Completing a Dialog Box.
Disable/Enable Triggers
This functionality is available for Microsoft SQL Server, Oracle, and Sybase ASE only.
The Disable/Enable dialog box lets you enable or disable any triggers.
Triggers are a special type of procedure that automatically fire when defined data modification operations (insert,
update or delete) occur on a target table. Triggers fire after an insert, update or delete, but belong to the same
transaction as the data modification operation.
Loading a database from a previous dump causes any triggers defined in the database to fire. To speed the time
required to load a database you should disable triggers.
Important Notes
Disabling triggers can lead to problems with maintaining referential integrity and business rules.
For more information, see Completing the Enable/Disable Dialog Box.
Completing the Enable/Disable Dialog Box for Triggers
To complete this dialog box, do the following:
4 On the Datasource Explorer tool bar, click Command, and then select Enable or Disable.
OR
In the right pane of the application, right-click the target object, and then select Enable or Disable.On the
Database Explorer, select the Triggers node.
Rapid SQL displays the triggers in the Database Explorer.
5 On the Database Explorer, right-click the target trigger, and then select Enable or Disable.
Rapid SQL opens the Enable or Disable dialog box.
6 Do one of the following:
Opens the Impact Analysis dialog box. This option is not
available for every dialog box.
Button Description
Opens the Preview dialog box.
Opens Embarcadero Job Scheduler, or (if unavailable)
another scheduling application. For more, see Scheduling.
Executes the task.
Button Description
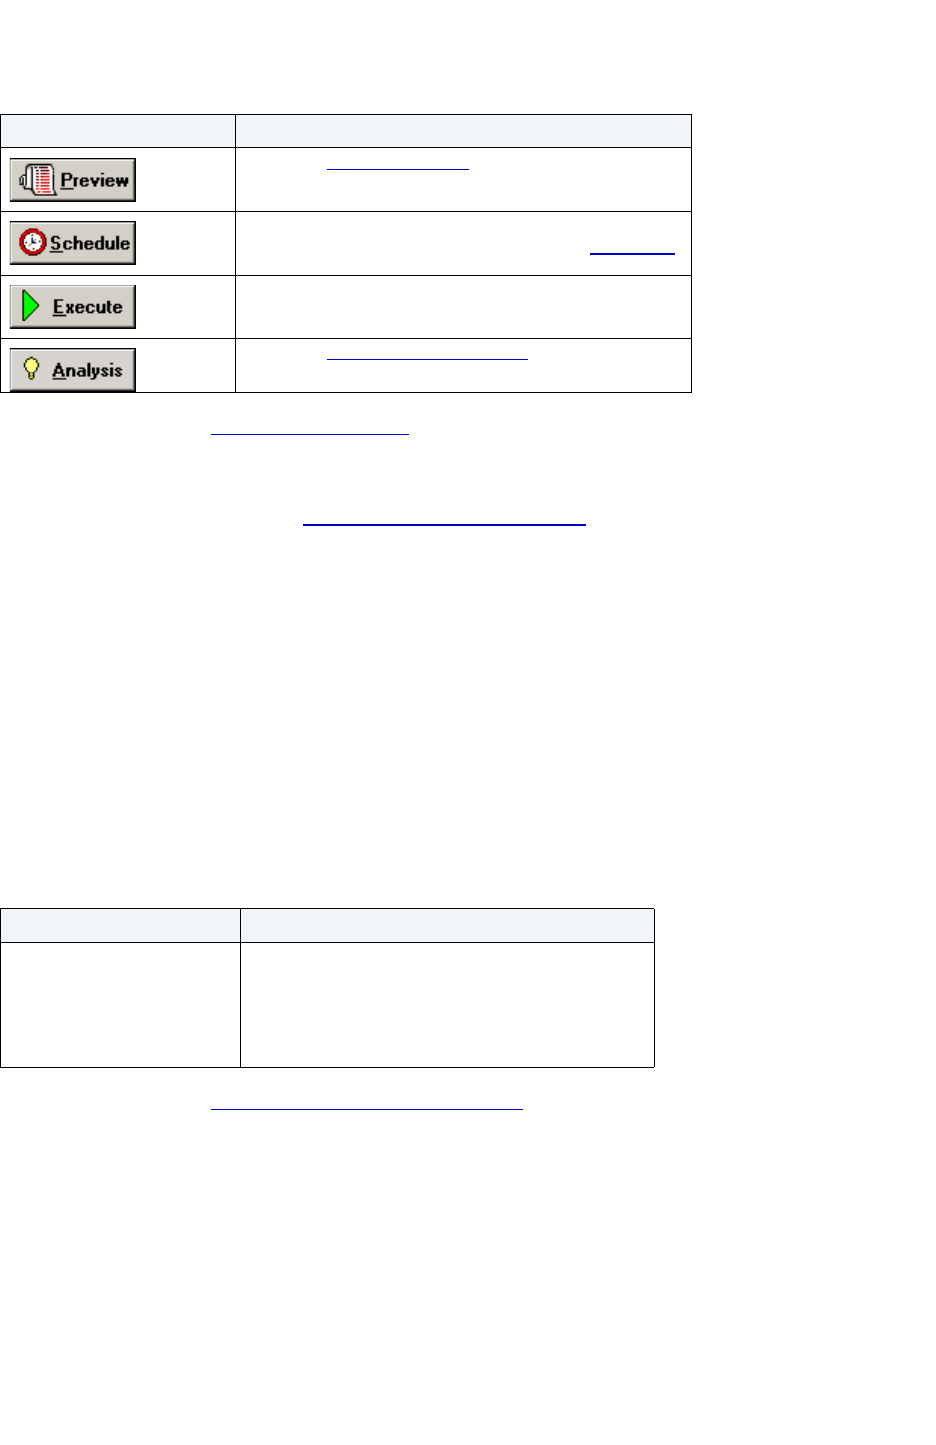
USING > FUNCTIONALITY
EMBARCADERO TECHNOLOGIES > BOOKNAMEVARIABLE 618
For more information, see Completing a Dialog Box.
For more information, see Completing a Dialog Box.
Disk Resize
This functionality is available for Sybase ASE 12.5.01 only.
The Disk Resize dialog box lets you dynamically increase the size of database devices without having to add and
configure additional database devices.
Important Notes
None
The table below describes the options and functionality on the Disk Resize dialog box.
For more information, see Completing the Disk Resize Dialog Box
.
Completing the Disk Resize Dialog Box
To complete this dialog box, do the following:
1 On the Database Explorer, select the Database Devices node.
Rapid SQL displays the Database Devices in the Database Explorer.
Button Description
Opens the Preview dialog box.
Opens Embarcadero Job Scheduler, or (if unavailable)
another scheduling application. For more, see Scheduling
.
Executes the task.
Opens the Impact Analysis dialog box
. This option is not
available for every dialog box.
Option Description
Increase current size by: Lets you type the amount in server pages to increase
the device(s). 512 pages equals 1MB.
NOTE: Whether the Sybase database is configured
for 2K, 4K, or 8K page sizes does not impact the
sizing.
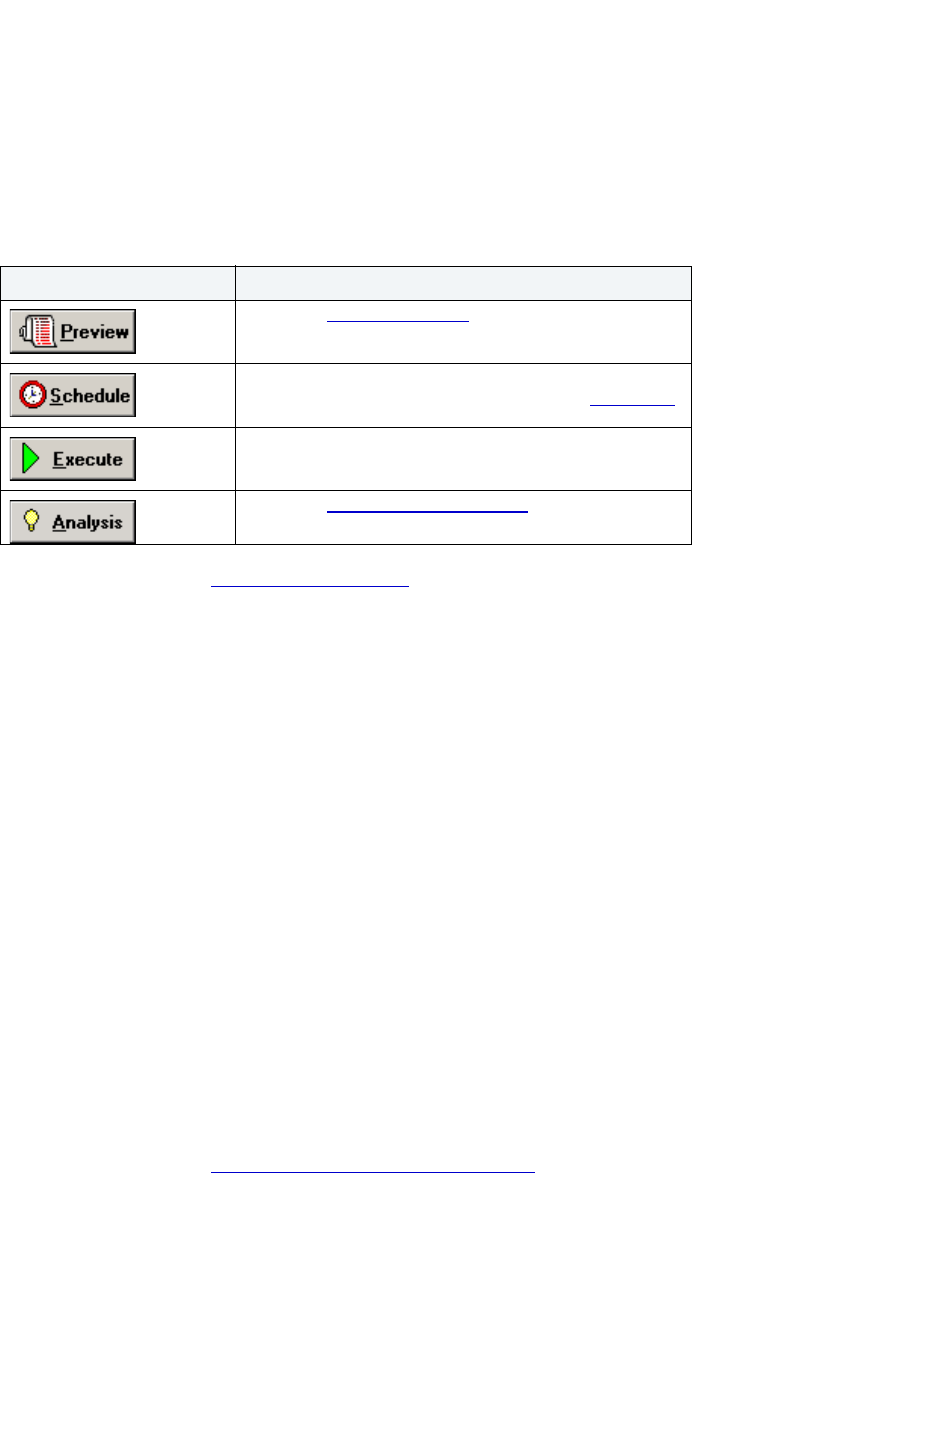
USING > FUNCTIONALITY
EMBARCADERO TECHNOLOGIES > BOOKNAMEVARIABLE 619
2 On the Database Explorer, right-click the database device, and then select Disk Resize.
Rapid SQL opens the Disk Resize dialog box.
3In Increase current size by: type the amount in server pages to increase the device(s). 512 pages equals 1MB.
4 Do one of the following:
For more information, see Completing a Dialog Box
.
Drop
This functionality is available for all platforms.
The Confirm Drop dialog box lets you drop one or more database objects and remove their definition from the system
catalog. The Confirm Drop dialog box lets you:
• Drop the object(s) immediately
• Schedule dropping the object(s)
• Analyze the impact of dropping the object(s)
• Preview the SQL to drop the object(s)
• Save the SQL to drop the object(s)
• Print the SQL to drop the object(s)
• Send an e-mail attachment with the SQL to drop the object(s)
Important Notes
None
For more information, see Completing the Confirm Drop Dialog Box.
Button Description
Opens the Preview dialog box.
Opens Embarcadero Job Scheduler, or (if unavailable)
another scheduling application. For more, see Scheduling
.
Executes the task.
Opens the Impact Analysis dialog box
. This option is not
available for every dialog box.
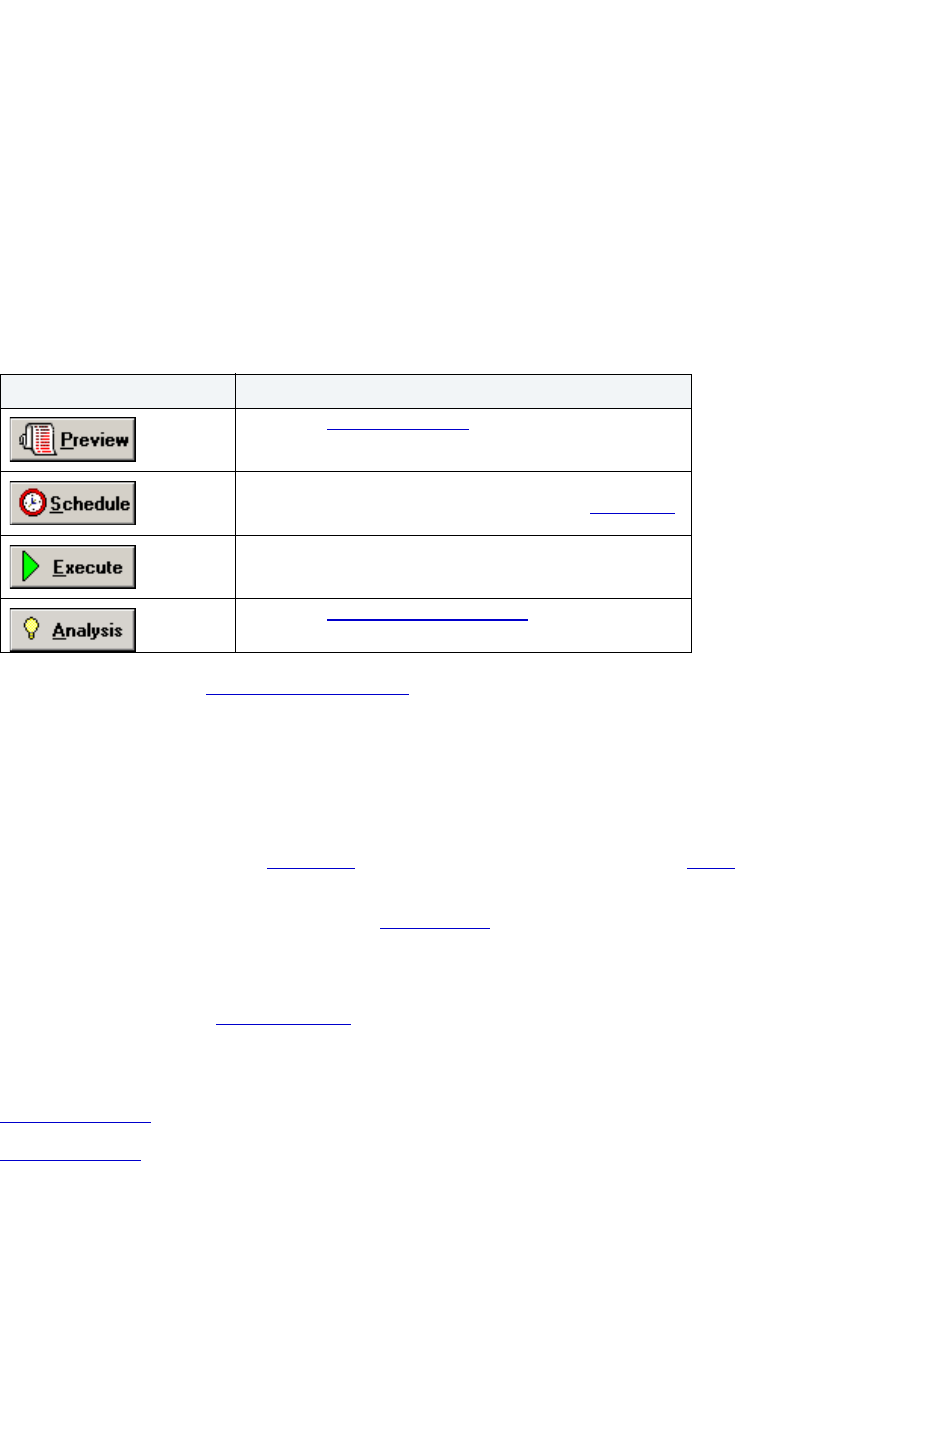
USING > FUNCTIONALITY
EMBARCADERO TECHNOLOGIES > BOOKNAMEVARIABLE 620
Completing the Confirm Drop Dialog Box
To complete this dialog box, do the following:
1 On the Database Explorer, select the target object node.
Rapid SQL displays the target objects in the Database Explorer.
2 On the Database Explorer, right-click the target object, and then select Drop.
Rapid SQL opens the Confirm Drop dialog box.
3 Do one of the following:
For more information, see Completing a Dialog Box
.
Edit Data
This functionality is available for all platforms.
The Edit Data function opens the Data Editor
. You can use the Data Editor to edit your tables in real-time. The Data
Editor supports all editable datatypes and is an alternative way to add, edit, or delete data from your tables.
NOTE: You can use Data Editor within Query Builder
to edit data in tables while you create SELECT
statements. You can open multiple Data Editor sessions so that you can continue to change your
data until you find the best match query.
The Data Editor includes a Data Editor Filter
that lets you select the columns in your table that you want to edit. You
must select at least one column to use the Data Editor. The Data Editor Filter is not available for the Query Builder.
For more information, see:
Data Editor Design
Using Data Editor
Error
The Error message displays a warning. After reading the warning, click Close to continue.
Button Description
Opens the Preview dialog box.
Opens Embarcadero Job Scheduler, or (if unavailable)
another scheduling application. For more, see Scheduling
.
Executes the task.
Opens the Impact Analysis dialog box
. This option is not
available for every dialog box.
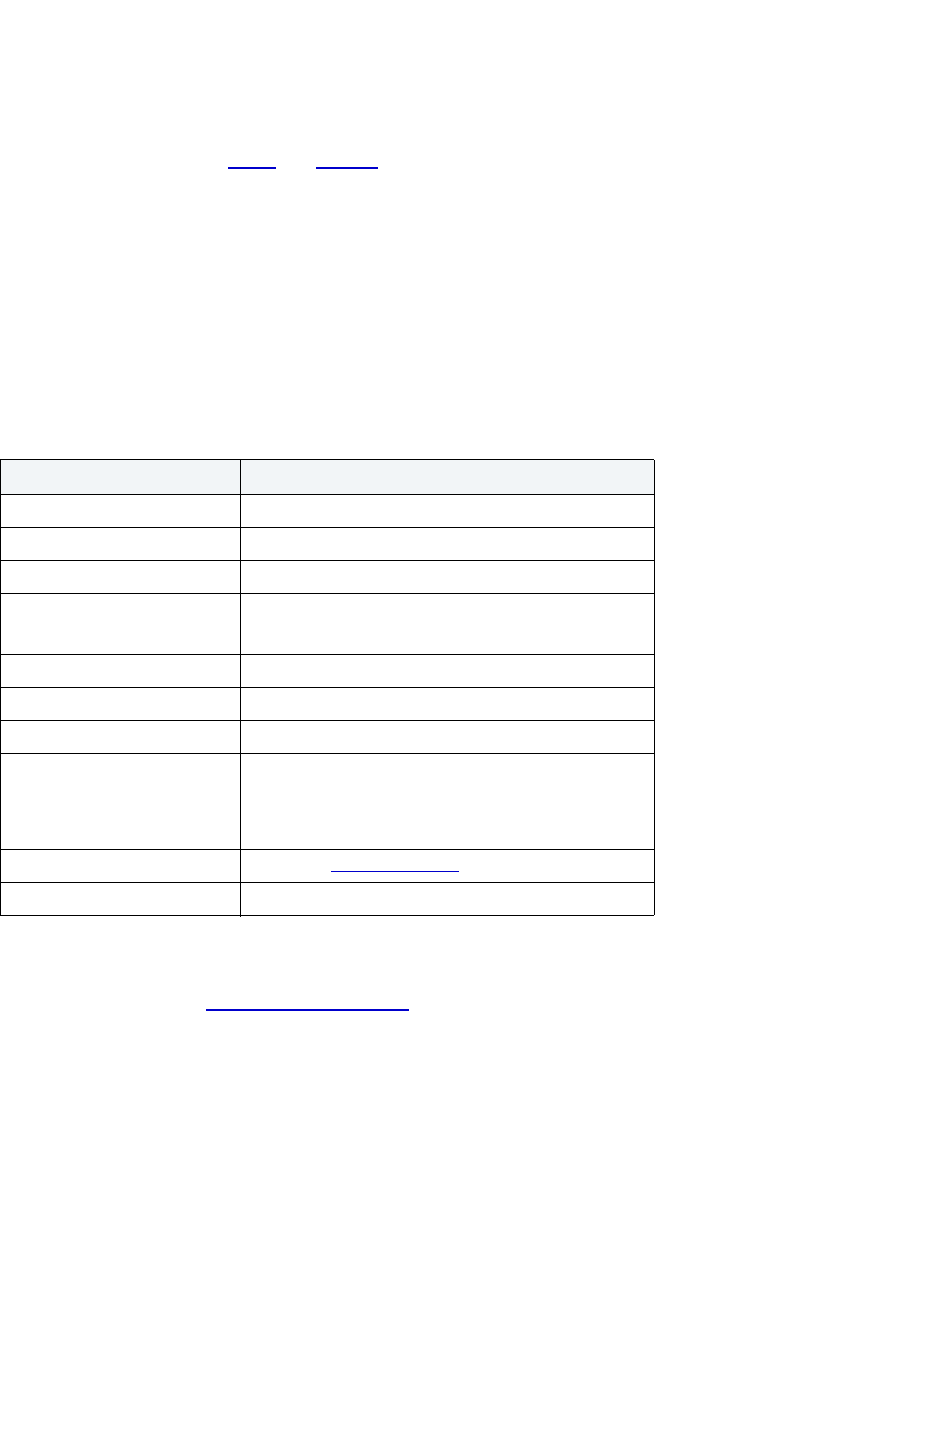
USING > FUNCTIONALITY
EMBARCADERO TECHNOLOGIES > BOOKNAMEVARIABLE 621
Estimate Size
This functionality is available for Oracle and Sybase ASE only.
Estimate Size dialog box for tables
and indexes lets you estimate how large a table or index will become given a row
growth projection. The results let you proactively plan your space-related object needs.
Important Notes
None
Estimate Table Sizes
The table below describes the options and functionality on the Estimate Size dialog box for tables:
TIP: To generate an HTML report, click the Report button.
For more information, see Completing a Dialog Box.
Estimate Index Sizes
The table below describes the options and functionality on the Estimate Size dialog box for indexes:
Option Description
Database Lets you select the table database.
Owner Lets you select the table owner.
Table Name Lets you select the table by name.
Number of Rows Lets you type number of rows to estimate size.
Click Calculator to open a calculator.
Estimate Table Size (KB) Lets you type table size to estimate size.
Add Table Click to add a table to the grid.
Remove Table Click to remove a table from the grid.
Estimate Size Click to start the estimate size functionality. Rapid
SQL then calculates the information, and displays it
in a browser-ready HTML report that you can print or
save.
Update Statistics Opens the Update Statistics
dialog box.
Save As Lets you save as a result grid (.rsl) file.

USING > FUNCTIONALITY
EMBARCADERO TECHNOLOGIES > BOOKNAMEVARIABLE 622
TIP: To generate an HTML report, click the Report button.
For more information, see Completing a Dialog Box
.
Execute
This functionality is available for Oracle and Sybase ASE only.
The Execution dialog box lets you execute functions
and procedures. The Execution dialog box displays the
necessary parameters. Depending on the parameter datatype, you can use the built-in calculator and calendar to
select the entered data.
Rapid SQL lets you enter arguments and set execution options in the Execution dialog box.
Important Notes
None
For more information, see:
Executing Functions
Executing Procedures
Completing the Execution Dialog Box
Option Description
Database Lets you select the table database.
Owner Lets you select the table owner.
Table Name Lets you select the table.
Index Name Lets you select the index.
Fill Factor Lets you specify a percentage of how full each index
page can become.
Click Calculator to open a calculator.
Number of Rows Lets you type number of rows to estimate size.
Click Calculator to open a calculator.
Estimate Index Size (KB) Lets you type index size to estimate size.
Add Index Click to add a index to the grid.
Remove Index Click to remove a index from the grid.
Estimate Size Click to start the estimate size functionality.
Rapid SQL then calculates the information, and
displays it in a browser-ready HTML report that you
can print or save.
Update Statistics Opens the Update Statistics
dialog box.
Save As Lets you save as a result grid (.rsl) file.

USING > FUNCTIONALITY
EMBARCADERO TECHNOLOGIES > BOOKNAMEVARIABLE 623
Completing the Execution Dialog Box
To complete this dialog box, do the following:
TIP: The Code Analyst
is a tool to identify time-consuming lines of code. Code Analyst lets you perform
detailed response time analysis on the execution of Procedures and Functions.
1 On the Database Explorer, select the target object node.
Rapid SQL displays the target objects in the Database Explorer.
2 On the Database Explorer, right-click the target object, and then select Execute.
Rapid SQL opens the Execute dialog box.
3 To use the calendar, click the Down arrow.
4 To use the calculator, click the Down arrow.
NOTE: These built-in functions are context-sensitive to the type. of parameter required
5 To execute the function with show plan, click Query Plan.
TIP: Code Analyst
is a tool to identify time-consuming lines of code. Code Analyst lets you perform
detailed response time analysis on the execution of Procedures and Functions.
6 To modify your results options, click Results.
7 Do one of the following:
For more information, see:
Executing Functions
Executing Procedures
Execute
Completing a Dialog Box
Executing Functions
The table below describes the options and functionality on the Execution dialog box:
Button Description
Opens the Preview dialog box.
Opens Embarcadero Job Scheduler, or (if unavailable)
another scheduling application. For more, see Scheduling.
Executes the task.
Opens the Impact Analysis dialog box
. This option is not
available for every dialog box.

USING > FUNCTIONALITY
EMBARCADERO TECHNOLOGIES > BOOKNAMEVARIABLE 624
For more information, see:
Completing the Execution Dialog Box
Completing a Dialog Box
Executing Procedures
The Procedure Execution dialog box lets you:
• Save input parameters as *.prm files to preserve specific input parameter configurations.
• Open *.prm files to save the effort of reentering specific input parameters.
• Reset parameters to their default setting.
The table below describes the options and functionality of the Procedure Execution dialog box:
Option Description
Query Plan Click the Query Plan button to activate the Oracle EXPLAIN
PLAN functionality. By default, Rapid SQL stores the EXPLAIN
PLAN output in a table named
EMBARCADERO_EXPLAIN_PLAN.
Rapid SQL's Query Plan window now displays data for the
estimated costs, number of rows, and bytes returned by each
plan step.
The Code Analyst
is a tool to identify time-consuming lines of
code. Code Analyst lets you perform detailed response time
analysis on the execution of Procedures and Functions.
Result Options Click the Result Options button lets you set options for the
current execution. For more information on Result Options, see
the Options Editor.
Arguments Enter arguments in the blank text box. The datatype to the left
of the blank field lets you know what type of argument is
expected. For numeric arguments, you can use the calculator
to enter information. For date arguments, you can use the
built-in calendar or you can override the calendar by selecting
the check box and entering your argument in field that follows.
NULL is the default argument in that field.
Default Select to gather default information from the data dictionary.
ORACLE ONLY: You can not specify non-default parameters
after specifying a default parameter.
Option Description
Owner Displays the current procedure’s owner.
Procedure Displays the name of the current procedure.
Parameter Specify the required input parameters in this window. If input
parameters are not required for the execution of the target
procedure, a message displays in this window, stating that the
procedure “has no input parameters. Press execute to run it.”

USING > FUNCTIONALITY
EMBARCADERO TECHNOLOGIES > BOOKNAMEVARIABLE 625
For more information, see:
Completing the Execution Dialog Box
Completing a Dialog Box
Extract
This functionality is available for all platforms.
Rapid SQL lets you extract data from one database to another database and extract the statements required to create
objects into an Interactive SQL window. You can extract an object from the Datasource Explorer or the Objects Editor.
Important Notes
None
For more information, see:
Extracting Data
Extracting Data
To extract data, do the following:
1 On the Database Explorer, click the target object node, and then click the target object.
2 In the Explorer window, right-click the target object, and then click Extract.
Rapid SQL opens the DDL Editor.
For more information, see:
Completing a Dialog Box
Open Click to open an Open dialog box, from which you can open an
existing *.prm file. The saved parameters immediately populate the
dialog box upon opening.
Save Click to save the values of your input parameters as a *.prm file.
You can reopen a saved *.prm file from this dialog box at any time.
Reset Click to reset the parameters in the Parameter window to their
default values.
Default Select to gather default information from the data dictionary.
ORACLE ONLY: You can not specify non-default parameters after
specifying a default parameter.
Continue Click to execute the procedure once you have entered values for
all required parameters in the Parameter window.
Option Description
USING > FUNCTIONALITY
EMBARCADERO TECHNOLOGIES > BOOKNAMEVARIABLE 626
Extract Data as XML
NOTE: This functionality is available for Oracle 9i and SQL Server 8.0.
1 On the Datasource Explorer, expand the target datasource.
2 Expand the Tables node.
3 In the right pane of the Explorer window, right-click any table listed, and then select Extract Data as XML.
4 Select the columns to include in the Insert statement.
5 You can also filter what rows are included by adding your own Select statement.
6 Click OK.
The resulting XML document is created and presented in an active XML Editor. At this point the document can
be saved in XML format.
Filter
This functionality is available for IBM DB2 UDB for OS/390 and z/OS only.
The Filter dialog box lets you filter the results of an object node to names with one or more patterns. This lets you
display and work with a target object without waiting for all the objects in a large list to display.
Important Notes
None
The table below describes the options and functionality on the Filter dialog box:
For more information, see Completing the Object Filter Dialog Box.
Completing the Object Filter Dialog Box
To complete this dialog box, do the following:
1 On the Database Explorer, right-click the target object node.
2Select Filter.
Rapid SQL opens the Filter dialog box.
3In Pattern, type either a complete object name or a partial object name with wild cards.
4Select Match Case if the filter is case sensitive.
Option Description
Pattern Lets you type either a complete object name or a partial object
name with wild cards. Optionally, you can type a comma / space
separated list of patterns that the filter should apply.
Match Case Lets you specify if the filter is case sensitive.
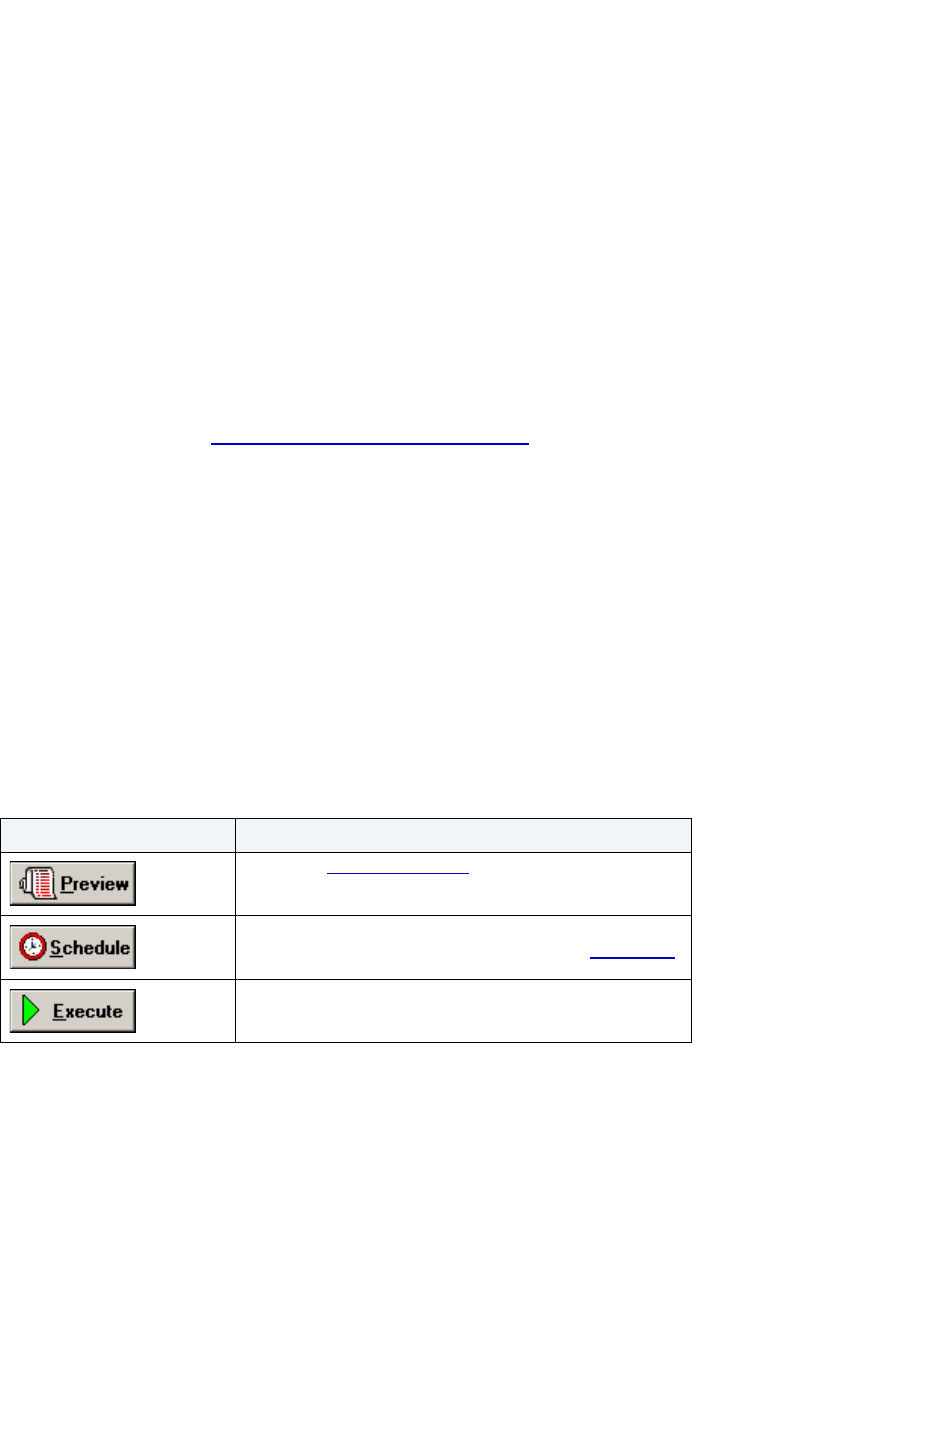
USING > FUNCTIONALITY
EMBARCADERO TECHNOLOGIES > BOOKNAMEVARIABLE 627
5 Click OK.
Rapid SQL displays the target objects in the Database Explorer.
Flush Cache
This functionality is available for IBM DB2 UDB for Linux, Unix, and Windows 8.1 only.
The Flush Cache dialog box lets you clear all dynamic SQL in the cache and forces IBM DB2 UDB for Linux, Unix, and
Windows to recompile the SQL the next time it is called.
Important Notes
None
For more information, see Completing the Flush Cache Dialog Box
.
Completing the Flush Cache Dialog Box
To complete this dialog box, do the following:
1 On the Database Explorer, select the target object node.
Rapid SQL displays the target objects in the Database Explorer.
2 On the Database Explorer, right-click the target object, and then select Flush Cache.
Rapid SQL opens the Flush Cache dialog box.
3 Do one of the following:
Free Packages
This functionality is available for IBM DB2 UDB for OS/390 and z/OS only.
The Free Packages dialog box lets you delete a specific version of a package, all versions of a package, or whole
collections of packages.
CAUTION: Confirmation is required because this is a destructive action.
To complete the Free Plans dialog box, do one of the following:
Button Description
Opens the Preview dialog box.
Opens Embarcadero Job Scheduler, or (if unavailable)
another scheduling application. For more, see Scheduling.
Executes the task.
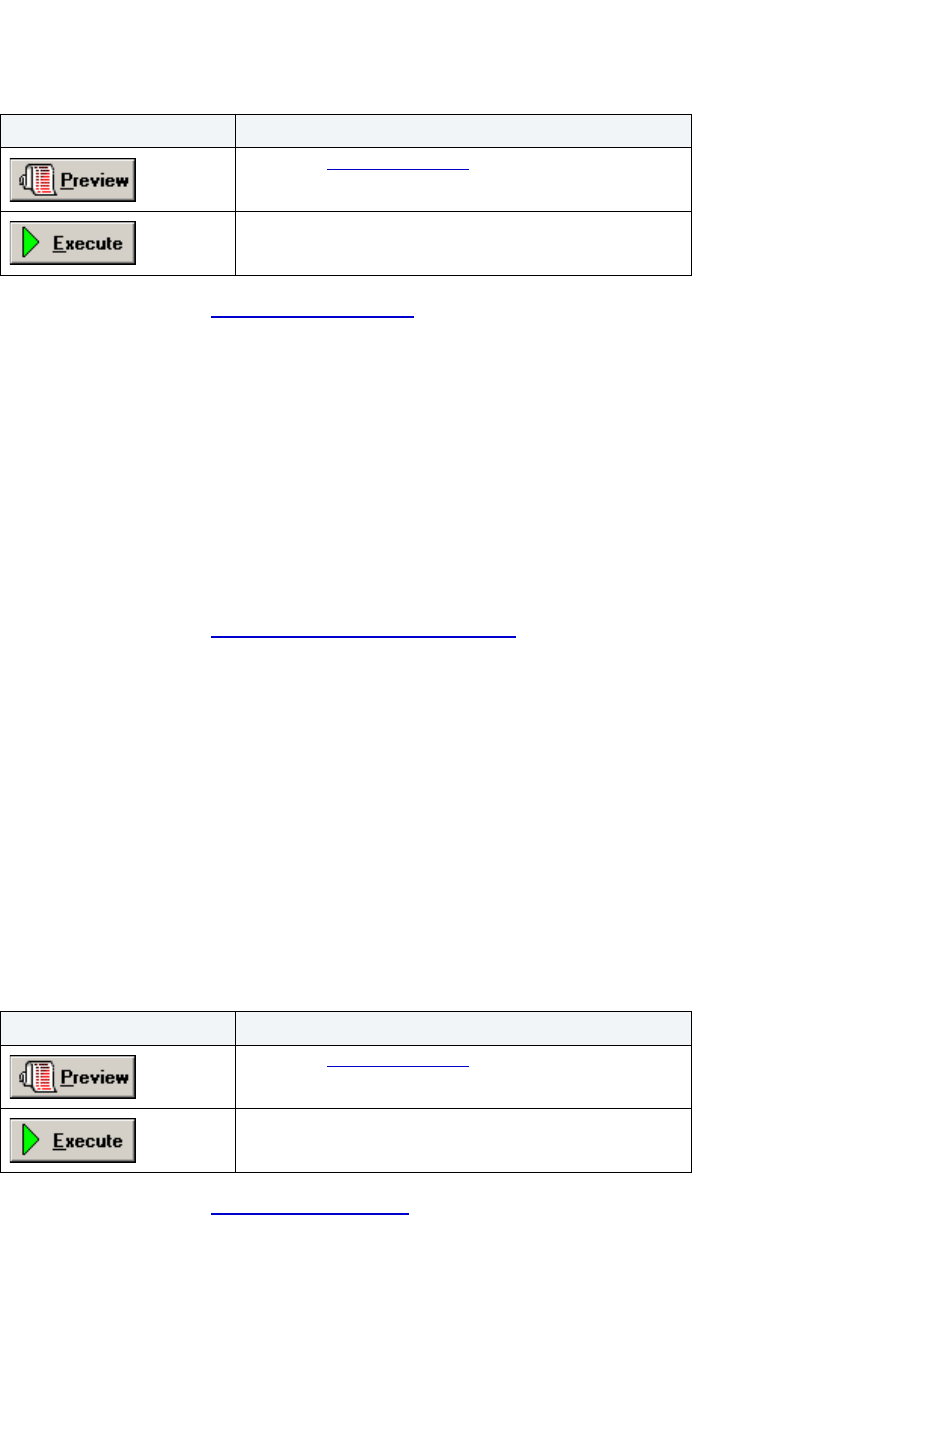
USING > FUNCTIONALITY
EMBARCADERO TECHNOLOGIES > BOOKNAMEVARIABLE 628
For more information, see Completing a Dialog Box.
Free Plans
This functionality is available for IBM DB2 UDB for OS/390 and z/OS only.
The Free Plans dialog box lets you delete application plans. A Plan is an executable application created in the bind
process. It can include one or more packages or debris.
Important Notes
Confirmation is required because this is a destructive action.
For more information, see Completing the Free Plans Dialog Box.
Completing the Free Plans Dialog Box
To complete the Free Plans dialog box, do one of the following:
1 On the Database Explorer, select the Plans node.
Rapid SQL displays the plans in the Database Explorer.
2 On the Database Explorer, right-click the target object, and then select Free.
Rapid SQL opens the Free Plans dialog box.
3 Do one of the following:
For more information, see Completing a Dialog Box
.
Generate Anonymous Block
This functionality is available for Oracle only.
Button Description
Opens the Preview dialog box.
Executes the task.
Button Description
Opens the Preview dialog box.
Executes the task.

USING > FUNCTIONALITY
EMBARCADERO TECHNOLOGIES > BOOKNAMEVARIABLE 629
An anonymous block is an alternative to a stored procedure or function. An anonymous block has no explicit name
and, unlike a procedure or function, is not stored by in the Oracle server database as a schema object. This means
that Oracle server compiles and executes only the current instance of the anonymous block. Anonymous blocks are
normally sent to the Oracle server from another application and require compilation before execution. Since functions
and procedures are stored by Oracle server, they exist in a precompiled state and require no explicit compilation
before execution.
Rapid SQL lets you generate anonymous blocks from existing functions and procedures. Rapid SQL produces the
code appropriate for an anonymous block in the ISQL Window and provides you with the normal ISQL Window
options to check, manipulate, and execute the SQL.
Important Note
Rapid SQL also lets you generate anonymous blocks for functions and procedures that are part of a package.
For more information, see Completing a Dialog Box
.
Generating Packages, Procedures, and Statements from Tables and
Views
This functionality is available for all platforms.
Rapid SQL lets you generate simple packages, procedures, and statements for selected tables and lets you generate
a simple select statement for views. Because the packages and procedures generated by Rapid SQL are rudimentary,
they are intended merely as a starting point and should be modified to reflect your specific needs. Rapid SQL opens
the generated statements in the ISQL Window.
When Rapid SQL creates a package from a table, it generates a series of procedures designed to emulate the typical
variety of procedures in a package. Rapid SQL lets you choose the IN and OUT columns and generates the
procedures based on your selections. Rapid SQL creates procedures and statements from tables in the same way.
Important Notes
None
For more information, see:
Generate Packages, Procedures, and Statements
Generate Select Statement
Generate Packages, Procedures, and Statements
Rapid SQL opens this dialog box when you want to generate code for an Insert, Update, or Delete statement. This
dialog box lets you specify the columns you want to include in the generation of an Insert, Update, or Delete statement
or procedure.
For more information, see Completing a Dialog Box.
Generate Select Statement
Rapid SQL opens this dialog box when you want to generate code for a Select statement. This dialog box includes two
panes: one for specifying Input Columns, one for specifying Output Columns.
NOTE: This dialog box mirrors the functionality of Rapid SQL’s Embarcadero Code Generator dialog box,
which is accessible from the application’s Tools menu and Tools toolbar.

USING > FUNCTIONALITY
EMBARCADERO TECHNOLOGIES > BOOKNAMEVARIABLE 630
The Select 1 or More Columns dialog box lets you specify the IN and OUT columns for a package or procedure, or the
columns to select for a Select statement and any associated WHERE clause. Rapid SQL uses the Input Columns to
generate the WHERE clause.
For more information, see Completing a Dialog Box
.
Grant Roles
This functionality is available for all platforms.
The Grant Role Dialog Box lets you select the roles to grant to a user. Roles are sets of user privileges you associate
with access to objects within a database. Roles streamline the process of granting permissions. You can use roles to
grant sets of permissions and privileges to users and groups.
Important Notes
None
For more information, see Completing the Grant Role Dialog Box
.
Completing the Grant Roles Dialog Box
To complete this dialog box, do the following:
1 In the Database Explorer, select the target user.
2 Right-click the target user, and select Open.
Rapid SQL opens the Users Editor.
3 On the Definition Tab of the Users Editor, select the Role, and then click Add.
Rapid SQL opens the Grant Roles dialog box.
4 Select the role(s) to grant.
5 Do one of the following:
For more information, see Completing a Dialog Box
.
This functionality is available for IBM DB2 UDB for OS/390 and z/OS only.
Select Partition(s) for Tablespace Dialog Box
Button Description
Opens the Preview dialog box.
Opens Embarcadero Job Scheduler, or (if unavailable)
another scheduling application. For more, see Scheduling
.
Executes the task.

USING > FUNCTIONALITY
EMBARCADERO TECHNOLOGIES > BOOKNAMEVARIABLE 631
Impact Analysis
This functionality is available for all platforms.
The Impact Analysis dialog box displays the objects dependent on the object you are changing. You can use the
Impact Analysis dialog box to review the objects that could be impacted should you proceed with the action in
question.
Important Notes
None
For more information, see Completing a Dialog Box.
Index Constraint
This functionality is available for all platforms.
The Index Constraint dialog box lets you create constraints.
Important Notes
None
The table below describes the options and functionality on the Index Constraint dialog box:
NOTE: Options differ by platform.
For more information, see Completing a Dialog Box
.
Load Java
NOTE: This functionality is available for Oracle 8i or later.
Before you can call Java stored procedures, you must load them into the Oracle database and publish them to SQL.
Option Description
Constraint Name Lets you type the name of the constraint, which can be up to 30
characters long and must be unique across the entire database.
Properties Lets you select options:
Clustered - A cluster comprises of a group of tables that share the
same data blocks, and which are grouped together because they
share common columns and are often used together.
Filegroup - Lets you select the filegroup within the database the
constraint is stored.
Fill Factor - Lets you specify a percentage of how large each
constraint can become.
Specify Columns in
Constraint
Lets you click the key columns, and then click the right arrow button
to move them to the Constraint Columns grid.
Columns Button Click to open the Paste Columns for Check Constraint dialog box
.
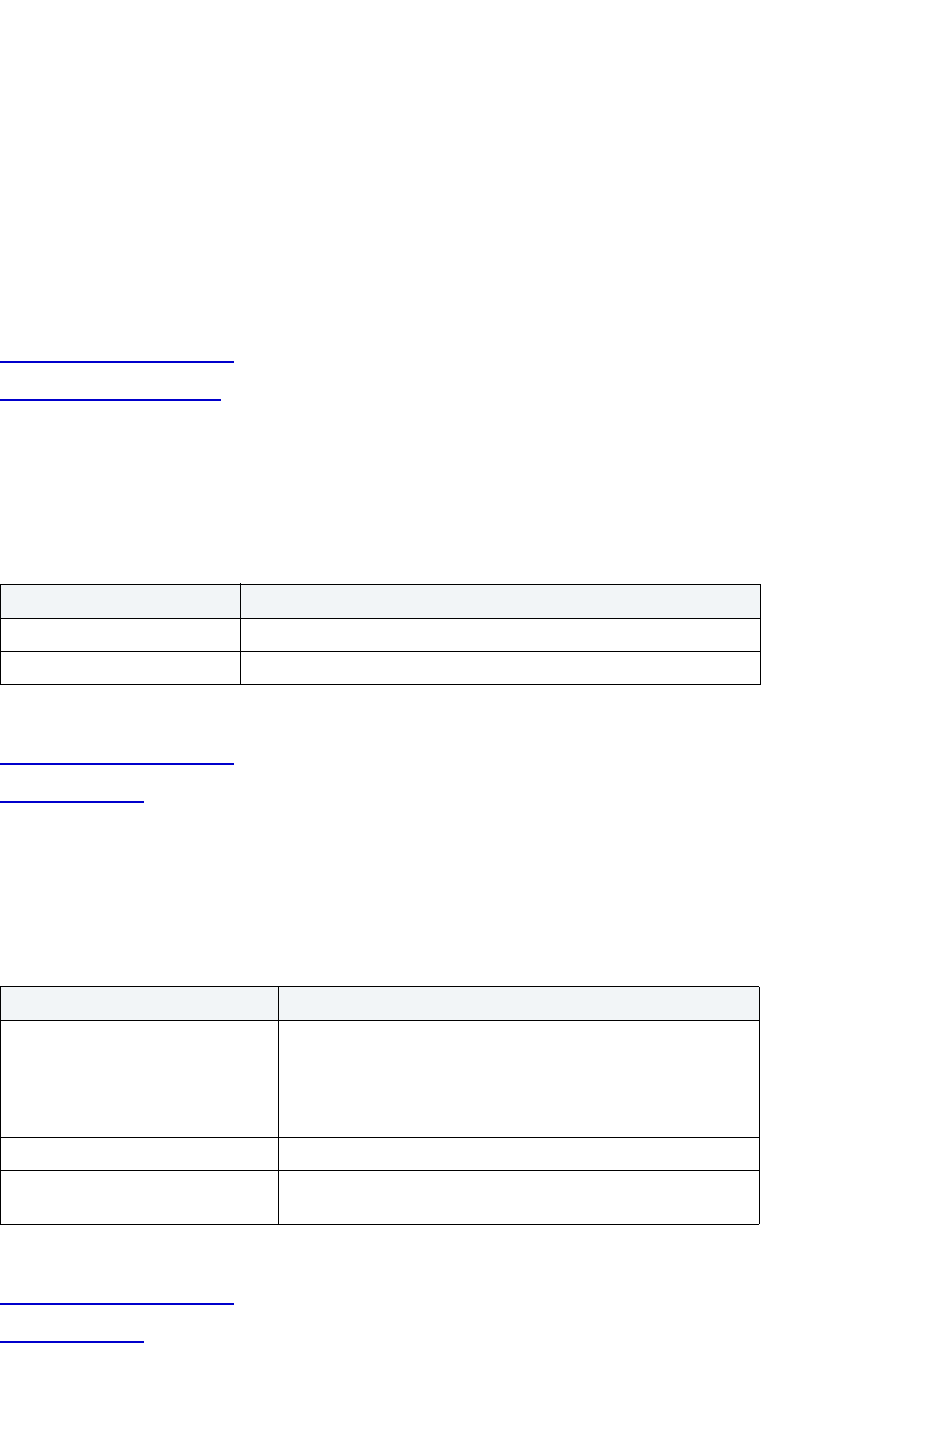
USING > FUNCTIONALITY
EMBARCADERO TECHNOLOGIES > BOOKNAMEVARIABLE 632
The Java Load Wizard lets you:
• Select the owner of the Java object and the files to load.
• Select options for the loading of the files.
• Select Resolver options.
Important Notes
None
For more information, see:
Completing an Object Wizard
Java Load Wizard - Panel 1
Java Load Wizard - Panel 1
The table below describes the options of the first panel of the Java Load Wizard.
For more information, see:
Completing an Object Wizard
Java Load Wizard
Java Load Wizard - Panel 2
The table below describes the options of the second panel of the Java Load Wizard.
For more information, see:
Completing an Object Wizard
Java Load Wizard
Option Description
Who owns the Java Object? Lets you select the owner of the Java object.
Select files to be loaded Select a file, and then click Add.
Option Description
When do you want the Java files to
be resolved?
Lets you specify when the source file is loaded as a source
schema object, the source file is compiled, class schema
objects are created for each class defined in the compiled
.java file, and the compiled code is stored in the class schema
objects.
Select the Encoding Options Lets you specify the encoding of the .java file.
Grant Access to the following
users
Lets you select one or more users.
USING > FUNCTIONALITY
EMBARCADERO TECHNOLOGIES > BOOKNAMEVARIABLE 633
Java Load Wizard - Panel 3
The table below describes the options of the third panel of the Java Load Wizard.
For more information, see:
Completing an Object Wizard
Java Load Wizard
Lob Storage Definition
This functionality is available for IBM DB2 UDB for Linux, Unix, and Windows, Microsoft SQL
Server, Oracle, and Sybase ASE only.
The Lob Storage Definition dialog box lets you edit LOB storage parameters.
Important Notes
None
The table below describes the options and functionality on the Lob Storage Definition dialog box.
For more information, see Completing a Dialog Box.
Lock
This functionality is available for IBM DB2 UDB for Linux, Unix, and Windows only.
The Lock Table dialog box lets you lock tables to prevent other users from reading or updating the table data. Locking
a table saves the time of locking each row of the table that needs to be updated. Rapid SQL releases locks at the end
of a transaction.
Option Description
Other Load Options OPTIONAL: Lets you select options.
Add Resolver Options Lets you specify the objects to search within the schemas defined.
Add - Click to open the Select a Resolver Option dialog box to add
a new resolver option in the list.
Edit - Click to open the Resolver Edit dialog box to modify a
resolver option.
Remove - Select one or more resolver option and click to delete.
Option Description
Segment Definition Lets you edit the column name.
Configuration Lets you edit the column configuration.
Storage Lets you edit the storage parameters.
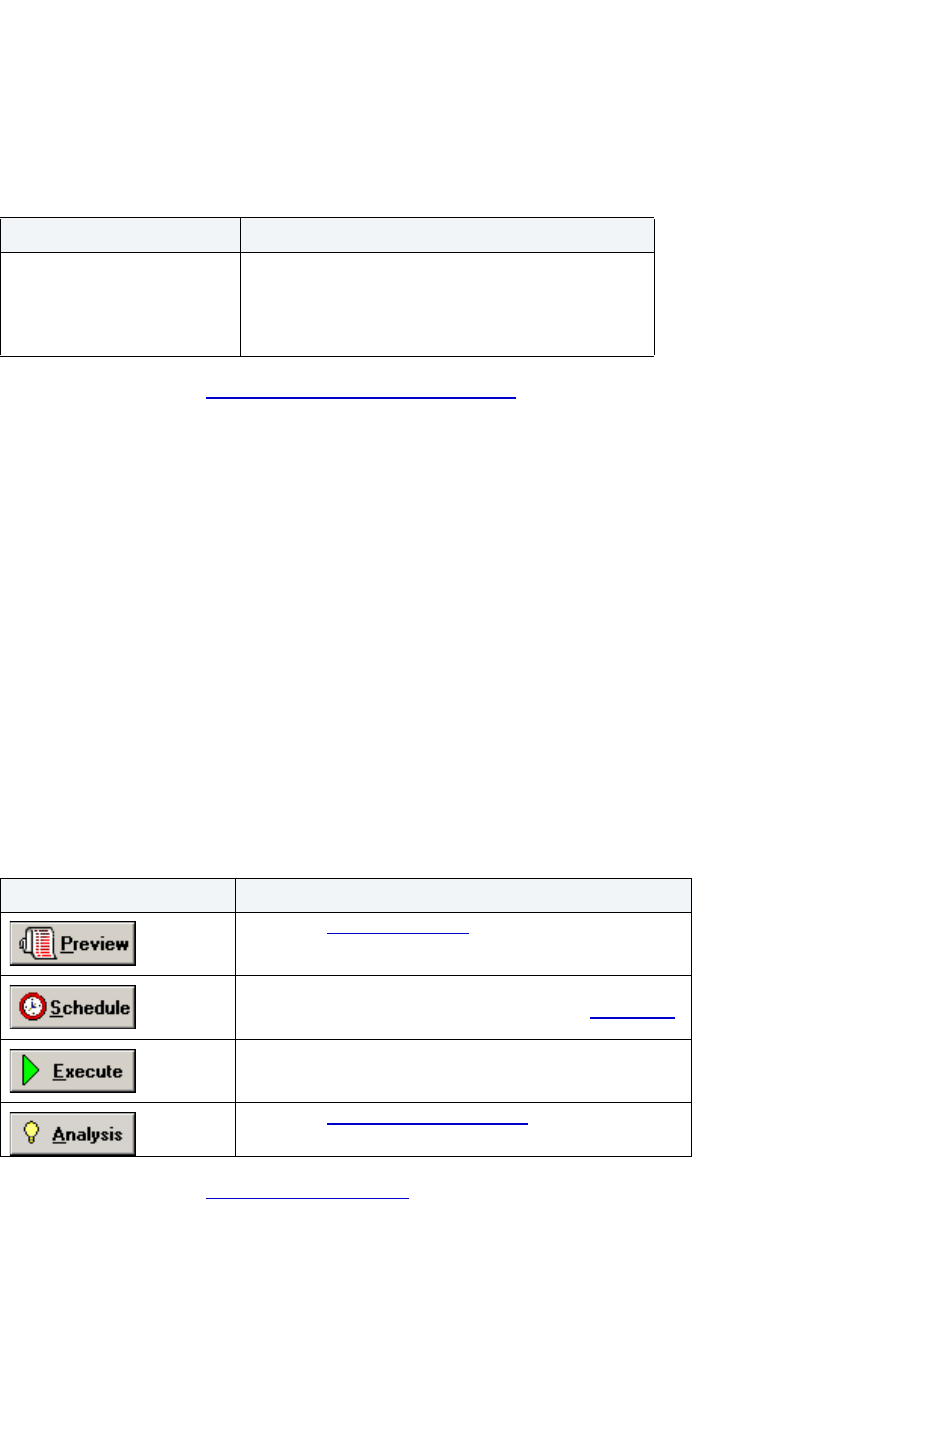
USING > FUNCTIONALITY
EMBARCADERO TECHNOLOGIES > BOOKNAMEVARIABLE 634
Important Notes
None
The table below describes the options and functionality on the Lock Table dialog box.
For more information, see Completing the Lock Table Dialog Box
.
Completing the Lock Table Dialog Box
To complete this dialog box, do the following:
1 On the Database Explorer, select the Tables node.
Rapid SQL displays the Tables in the Database Explorer.
2 On the Database Explorer, right-click the table, and then select Lock.
Rapid SQL opens the Lock dialog box.
3 Select a Lock Mode option:
• Share - Lets other users view but not modify the table data.
• Exclusive - Prevents other users from viewing or modifying the table data.
4 Do one of the following:
For more information, see Completing a Dialog Box
.
Modify Constraint
The table below describes the options and functionality on the Modify Constraint dialog box:
Option Description
Lock Mode Share - Lets other users view but not modify the table
data.
Exclusive - Prevents other users from viewing or
modifying the table data.
Button Description
Opens the Preview dialog box.
Opens Embarcadero Job Scheduler, or (if unavailable)
another scheduling application. For more, see Scheduling.
Executes the task.
Opens the Impact Analysis dialog box
. This option is not
available for every dialog box.
USING > FUNCTIONALITY
EMBARCADERO TECHNOLOGIES > BOOKNAMEVARIABLE 635
Move Log
This functionality is available for Microsoft SQL Server and Sybase ASE only.
The Move Transaction Log dialog box lets you move a transaction log from one device to another.
Important Notes
None
The table below describes the options and functionality on the Move Transaction Log dialog box.
For more information, see Completing the Move Log Dialog Box
.
Completing the Move Log Dialog Box
To complete this dialog box, do the following:
1 On the Database Explorer, select the Databases node.
Rapid SQL displays the Databases in the Database Explorer.
2 On the Database Explorer, right-click the database, and then select Move Log.
Rapid SQL opens the Move Log dialog box.
3In New Device, select the device to which you want to move the transaction log.
4 Do one of the following:
Option Description
Owner Displays owner.
Table Displays table.
Specify Columns in
Constraint
Lets you select the columns and click the right arrow
to include in constraint.
Option Description
New Device Let you select the device to which you want to move
the transaction log.
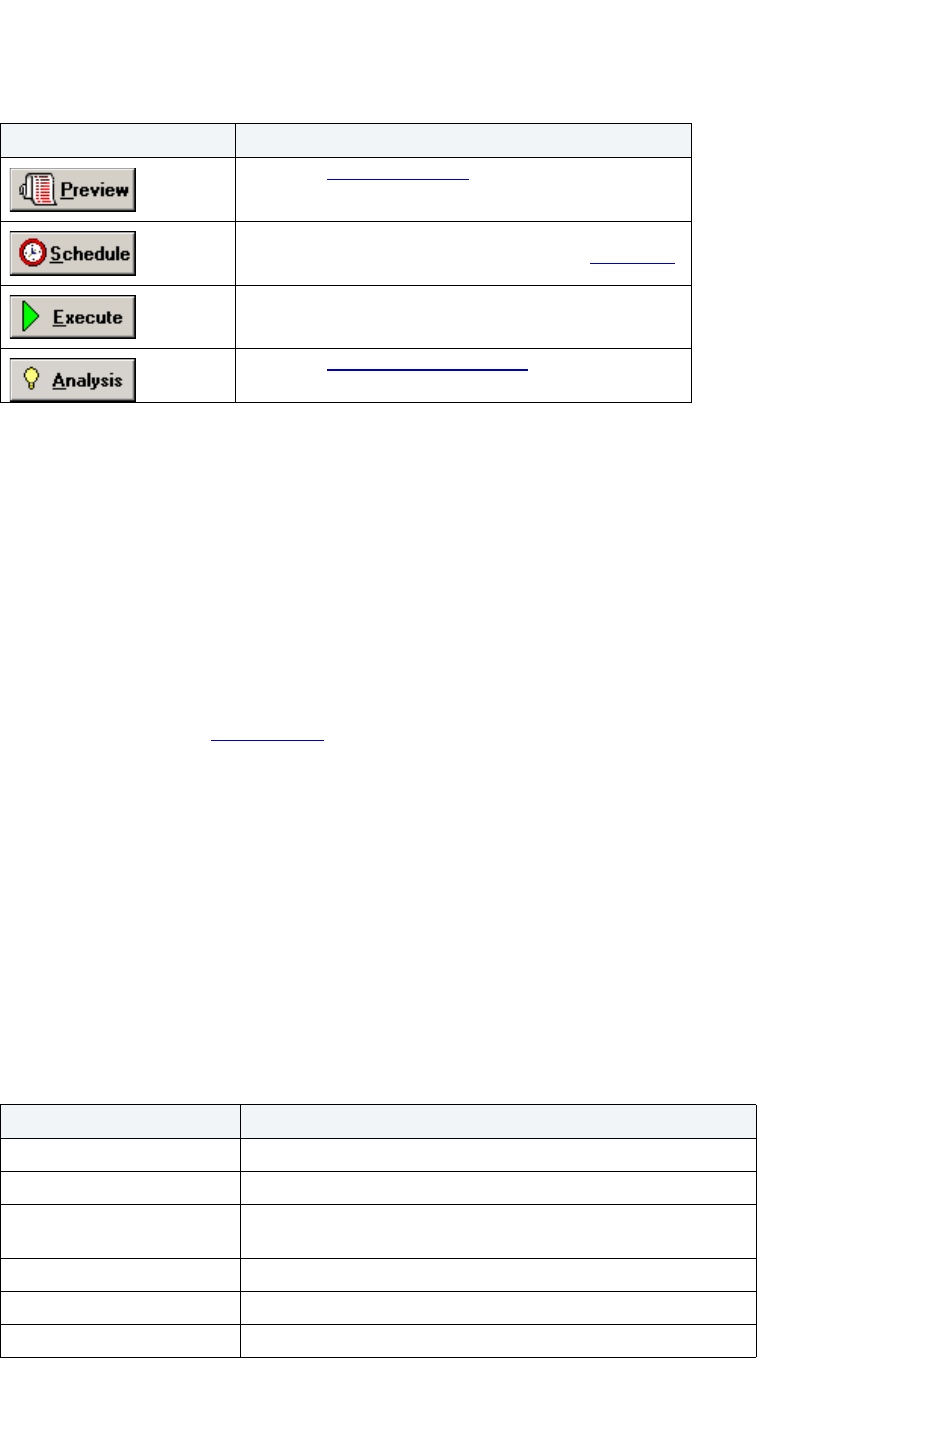
USING > FUNCTIONALITY
EMBARCADERO TECHNOLOGIES > BOOKNAMEVARIABLE 636
Open
This functionality is available for all platforms.
Rapid SQL stores information about server and object types in object editors. An editor is a tabbed dialog box that
groups related information together.
Each editor contains a context-sensitive Commands menu with pertinent functionality for the object. Many of the
object editors contain a DDL Tab. This tab displays the underlying target object's SQL.
TIP: The Object Editor tool bar has a refresh button, that lets you refresh Object Editor contents, clear
the Object Editors, and log SQL if SQL Logging is turned on.
If an objects has dependent objects, such as tables, triggers, procedures and views, you can view and access their
dependent objects in the editor.
For more information, see Object Editors
.
Package Editor
This functionality is available for IBM DB2 UDB for OS/390 and z/OS only.
The Package Editor lets you modify a package.
Important Notes
None
The table below describes the options and functionality on the Package Editor:
Button Description
Opens the Preview dialog box.
Opens Embarcadero Job Scheduler, or (if unavailable)
another scheduling application. For more, see Scheduling
.
Executes the task.
Opens the Impact Analysis dialog box
. This option is not
available for every dialog box.
Option Description
Plan Name Displays the plan name.
Location Lets you select the name of the location to connect to.
Collection Lets you select the location of the DBMS where the plan binds and
where the description of the plan resides.
Package Lets you select a package.
Add Click to add the plan.
Close Click to close the editor and return to the wizard.
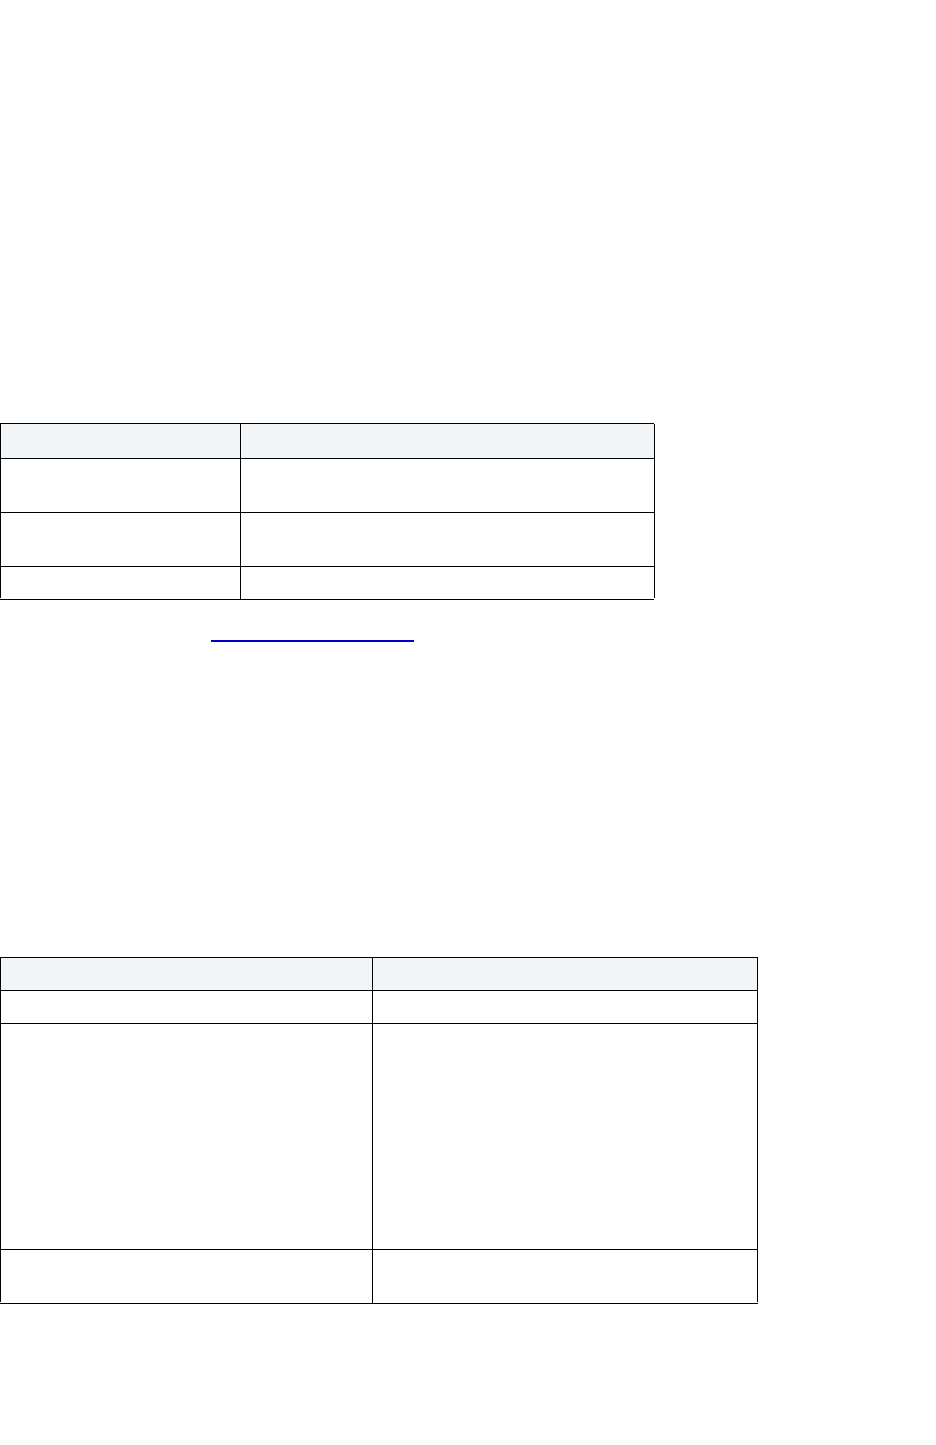
USING > FUNCTIONALITY
EMBARCADERO TECHNOLOGIES > BOOKNAMEVARIABLE 637
Partitioned Columns
This functionality is available for Oracle only.
The Partitioned Columns dialog box lets you partition columns. Partitioning lets you break large columns into smaller
pieces, which are called partitions. Partitions make the data in your table easier to manage and analyze. Your SQL
statements can access the partitions rather than the entire table. Partitions are most useful in data warehouse
applications, which store large amounts of data.
Important Notes
None
The table below describes the options and functionality on the Partitioned Columns dialog box.
For more information, see Completing a Dialog Box.
Partition Editor
The Partition Editor lets you specify partition management and partition options.
Important Notes
None
The table below describes the options and functionality on the Partition Editor.
Option Description
Available Columns Select column and click the right arrow button to
move to Partitioning Columns.
Partitioning Columns Select column and click the left arrow to move to
Available Columns.
Apply Click to apply changes.
Option Description
Partition number Identifies a partition of the object.
DB2 manages the data sets on a volume of the
specified storage group
A DB2-managed data set that resides on a
volume of the identified storage group.
Stogroup Name - Lets you specify the stogroup.
Primary Space Allocation - Lets you specify the
minimum primary space allocation for a
DB2-managed data set of the partition.
Secondary Space Allocation - Lets you specify
the minimum secondary space allocation for a
DB2-managed data set of the partition.
User manages the data sets on a specified
VCAT catalog-name
A user-managed data set with a name that starts
with catalog-name.
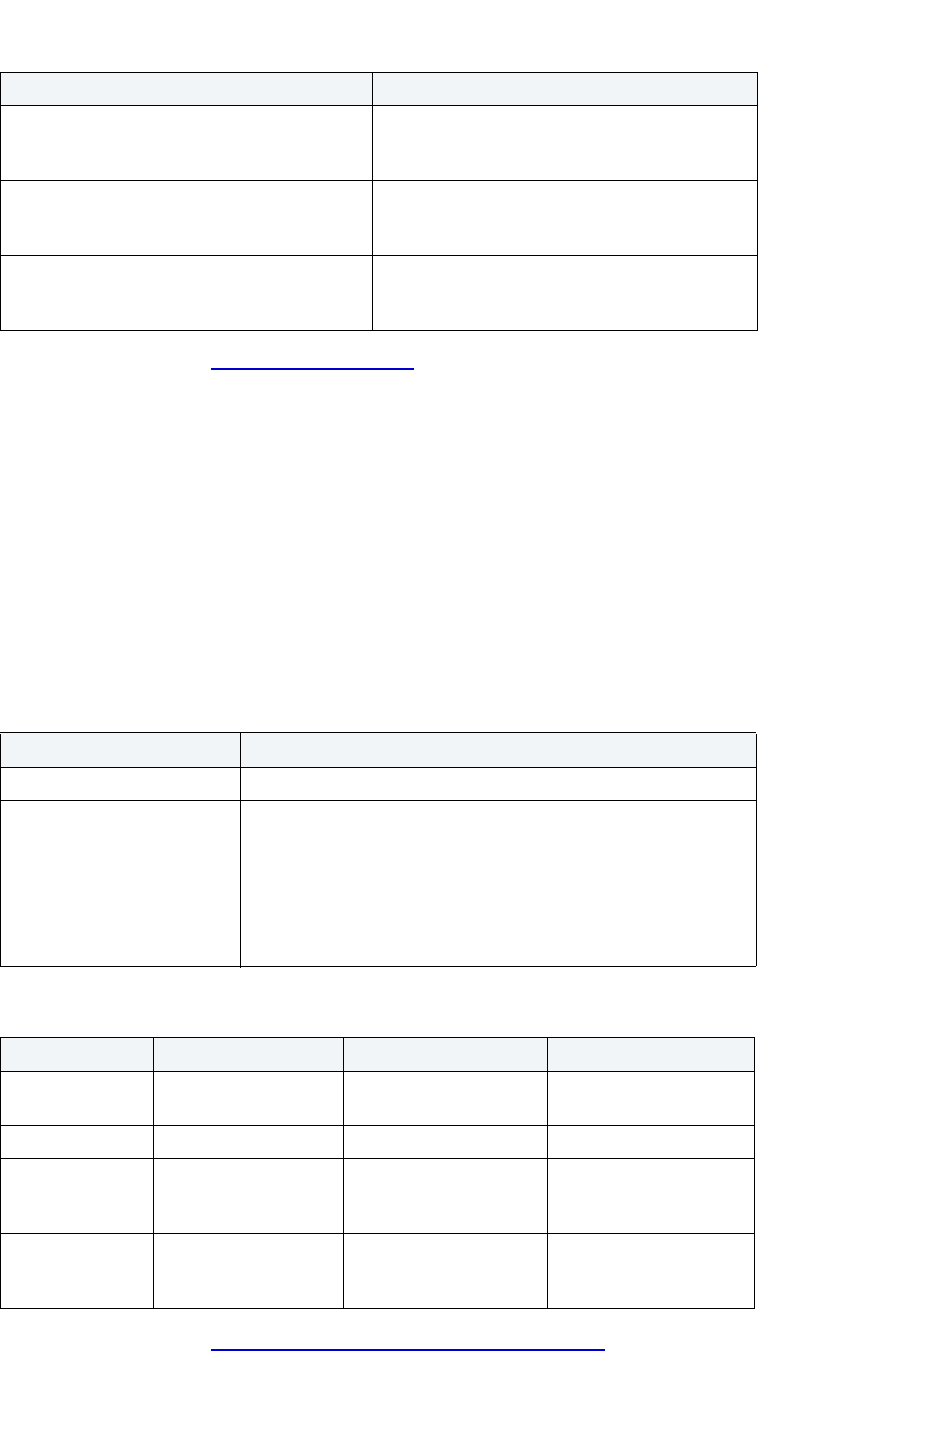
USING > FUNCTIONALITY
EMBARCADERO TECHNOLOGIES > BOOKNAMEVARIABLE 638
For more information, see Completing a Dialog Box.
Partition Upper Bound
This functionality is available for Oracle only.
The Partition Upper Bound dialog box lets you specify the non-inclusive upper bound for the partitioning columns.
Important Notes
None
The table below describes the options and functionality on the Partition Upper Bound dialog box.
The table below describes when you should enable editing of the upper bound:
For more information, see Completing the Partition Upper Bound Dialog Box
.
Free space portion of each page Lets you specify what percentage of each page
to leave as free space when the object is loaded
or reorganized.
Free page frequency Lets you specify how often to leave a page of free
space when the object is loaded or reorganized.
a number between 0 and 255.
Pages in group buffer pool In a data sharing environment, lets you specify
what pages of the partition are written to the
group buffer pool in a data sharing environment.
Option Description
Partitioning Column Lets you select the partitioning column.
Upper Bound Lets you select the default or type the value of the upper bound. All
rows in the partition have partitioning keys that compare to less
than the partition bound and greater than or equal to the partition
bound for the preceding partition.
NOTE: The set button is not available if your selection is higher
than the upper bound for the column in the original partition. If the
upper bound is MAXVALUE, you need to type a value in the list.
Partition Type Index Table Notes
Hash N/A N/A Does not have upper
bound.
Range Local Disable Enable
Range Global Enable all but the last
partition
Enable The upper bound button
is disabled if there is only
one partition.
Composite Global Enable all but the last
partition
Enable The upper bound button
is disabled if there is only
one partition.
Option Description
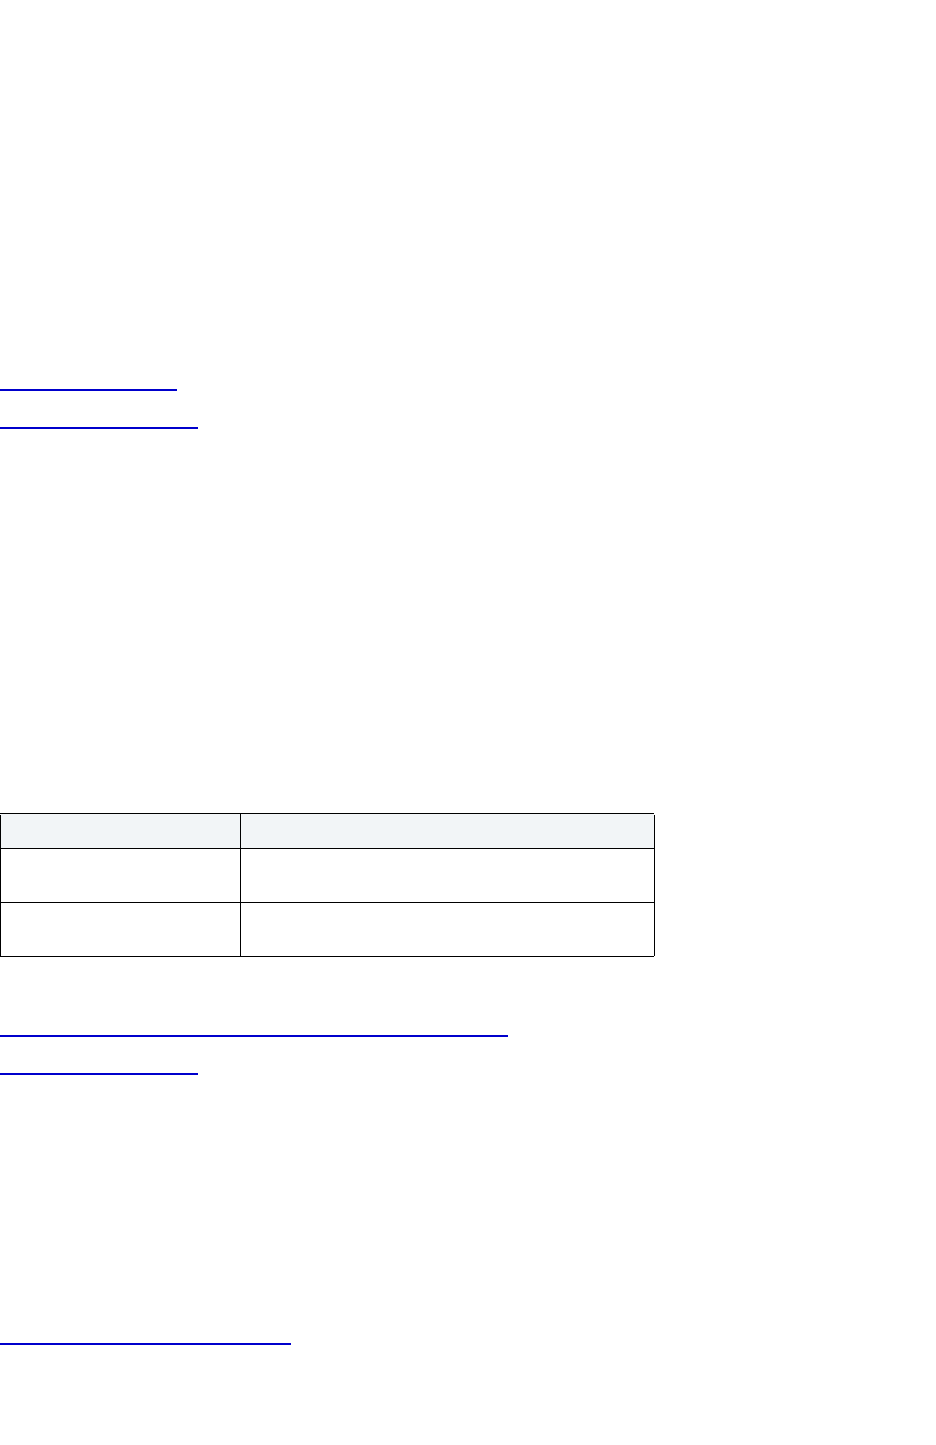
USING > FUNCTIONALITY
EMBARCADERO TECHNOLOGIES > BOOKNAMEVARIABLE 639
Completing the Partition Upper Bound Dialog Box
To complete this dialog box, do the following:
1 Click the Partitioning Column list and then click the partitioning column.
2In the Upper Bound list, click the default or type the value of the upper bound. All rows in the partition will have
partitioning keys that compare to less than the partition bound and greater than or equal to the partition bound for
the preceding partition.
3 Click Set.
4 Click OK.
For more information, see:
Partition Upper Bound
Completing a Dialog Box
Paste Columns for Check Constraint
This functionality is available for all platforms.
The Paste Columns for Check Constraint dialog box lets you paste selected column(s) in the check constraint
definition.
Important Notes
None
The table below describes the options and functionality on the Paste Columns for Check Constraint dialog box.
For more information, see:
Completing the Paste Columns for Check Constraint Dialog Box
Completing a Dialog Box
Completing the Paste Columns for Check Constraint Dialog Box
To complete this dialog box, do the following:
1 In the Columns grid, click the columns you want to paste or click the Select All button.
2 When you finish selecting columns, click Paste.
For more information, see:
Paste Columns for Check Constraint
Option Description
Columns Lets you select column(s) to include in the check
constraint definition.
Paste Button Click to paste selected column(s) in the check
constraint definition.
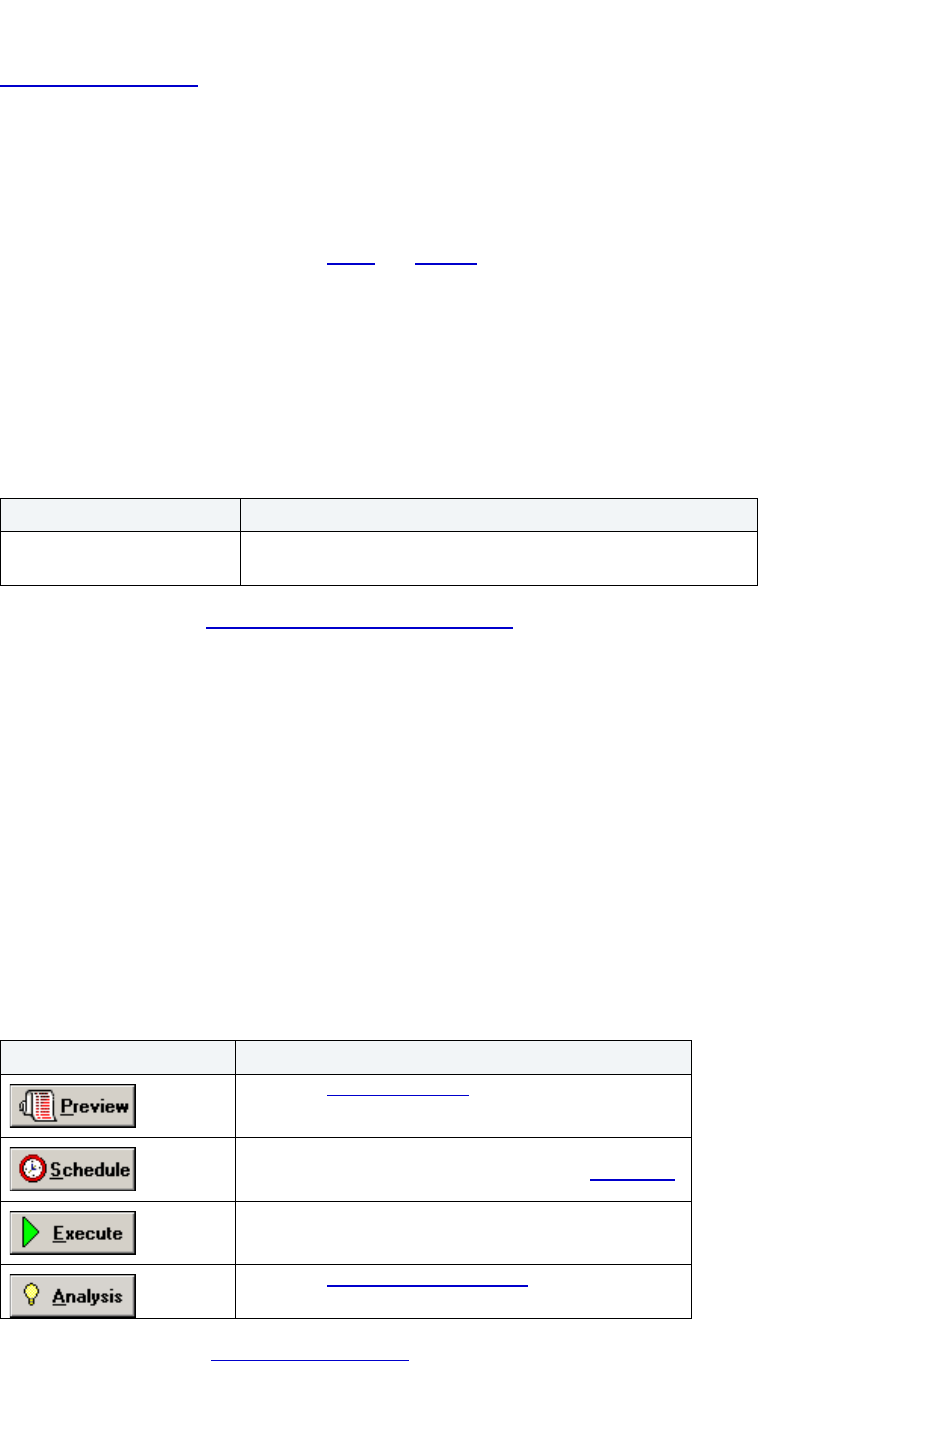
USING > FUNCTIONALITY
EMBARCADERO TECHNOLOGIES > BOOKNAMEVARIABLE 640
Completing a Dialog Box
Place
NOTE: Place functionality is available for Sybase ASE.
The Placement dialog box lets you place tables
and indexes on different segments. From a performance standpoint it
is not recommended to have a table and its supporting indexes on the same device or disk segment. It is also good to
have more frequently accessed indexes and tables grouped together on higher speed devices, if possible.
Important Notes
None
The table below describes the options and functionality on the Placement dialog box.
For more information, see Completing the Placement Dialog Box
.
Completing the Placement Dialog Box
To complete this dialog box, do the following:
1 On the Database Explorer, select the target object node.
Rapid SQL displays the target objects in the Database Explorer.
2 On the Database Explorer, right-click the target object, and then select Place.
Rapid SQL opens the Placement dialog box.
3In New Segment Location, select the segments to place the object.
4 Do one of the following:
For more information, see Completing a Dialog Box
.
Option Description
New Segment Location Lets you specify the segment on which you can place objects, the
default, logsegment or system.
Button Description
Opens the Preview dialog box.
Opens Embarcadero Job Scheduler, or (if unavailable)
another scheduling application. For more, see Scheduling.
Executes the task.
Opens the Impact Analysis dialog box
. This option is not
available for every dialog box.
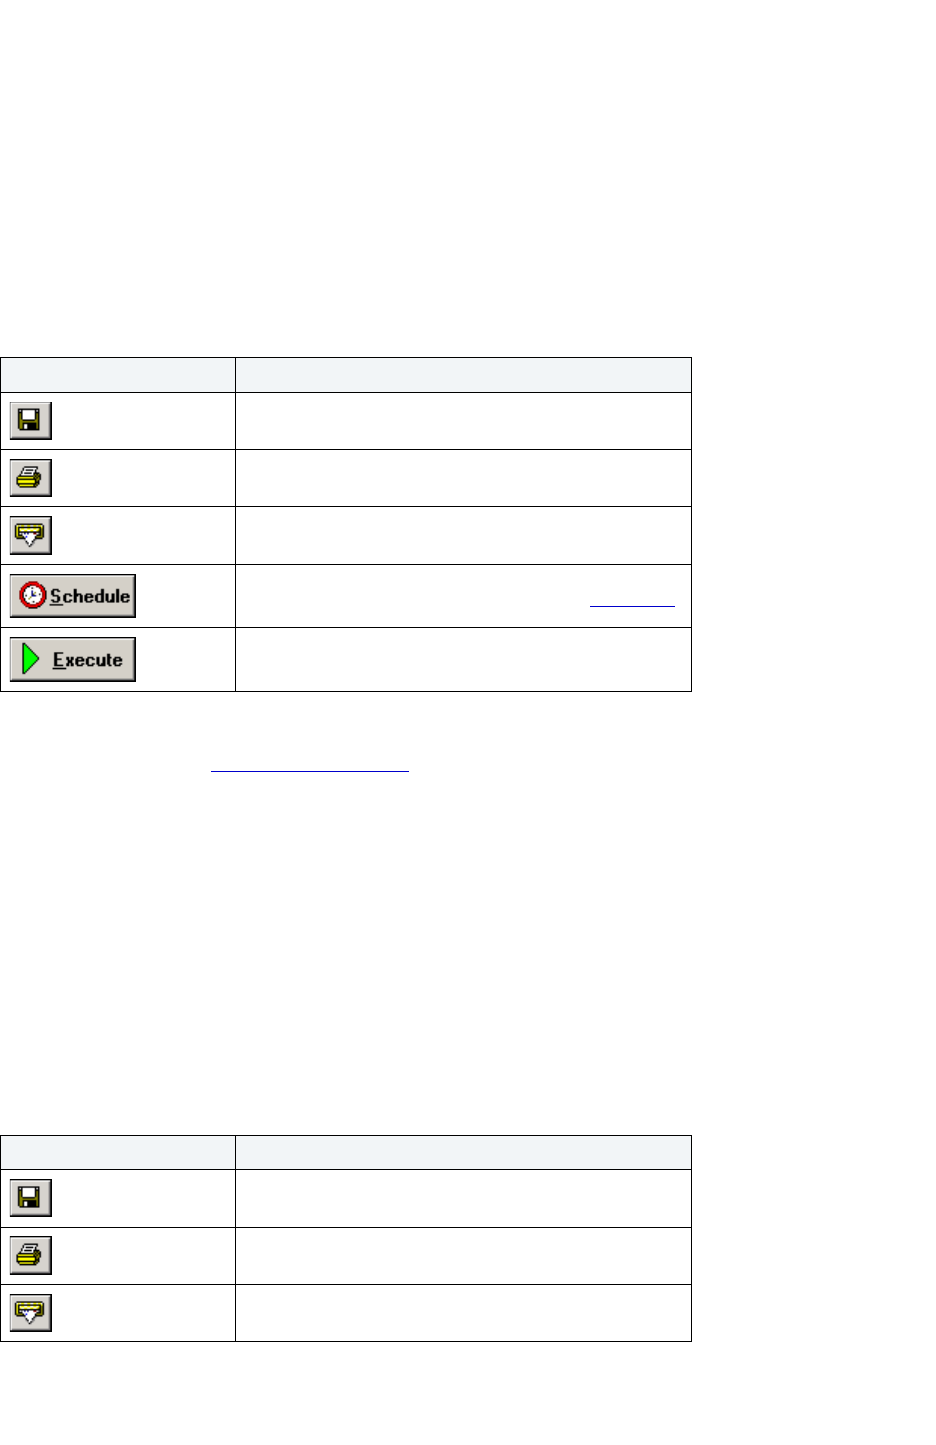
USING > FUNCTIONALITY
EMBARCADERO TECHNOLOGIES > BOOKNAMEVARIABLE 641
Preview: Create
This functionality is available for all platforms.
The Preview:Create dialog box lets you preview any SQL related command you want to perform on an object.
Important Notes
None
The table below describes the options and functionality of the Preview:Create dialog box:
For more information, see Completing a Dialog Box
.
Preview
This functionality is available for all platforms.
The Preview dialog box lets you preview any SQL related command you want to perform on an object.
Important Notes
None
The table below describes the options and functionality on the Preview dialog box:
Button Description
Saves SQL.
Prints SQL.
Sends SQL via e-mail.
Opens Embarcadero Job Scheduler, or (if unavailable)
another scheduling application. For more, see Scheduling
.
Executes the task.
Button Description
Saves SQL.
Prints SQL.
Sends SQL via e-mail.
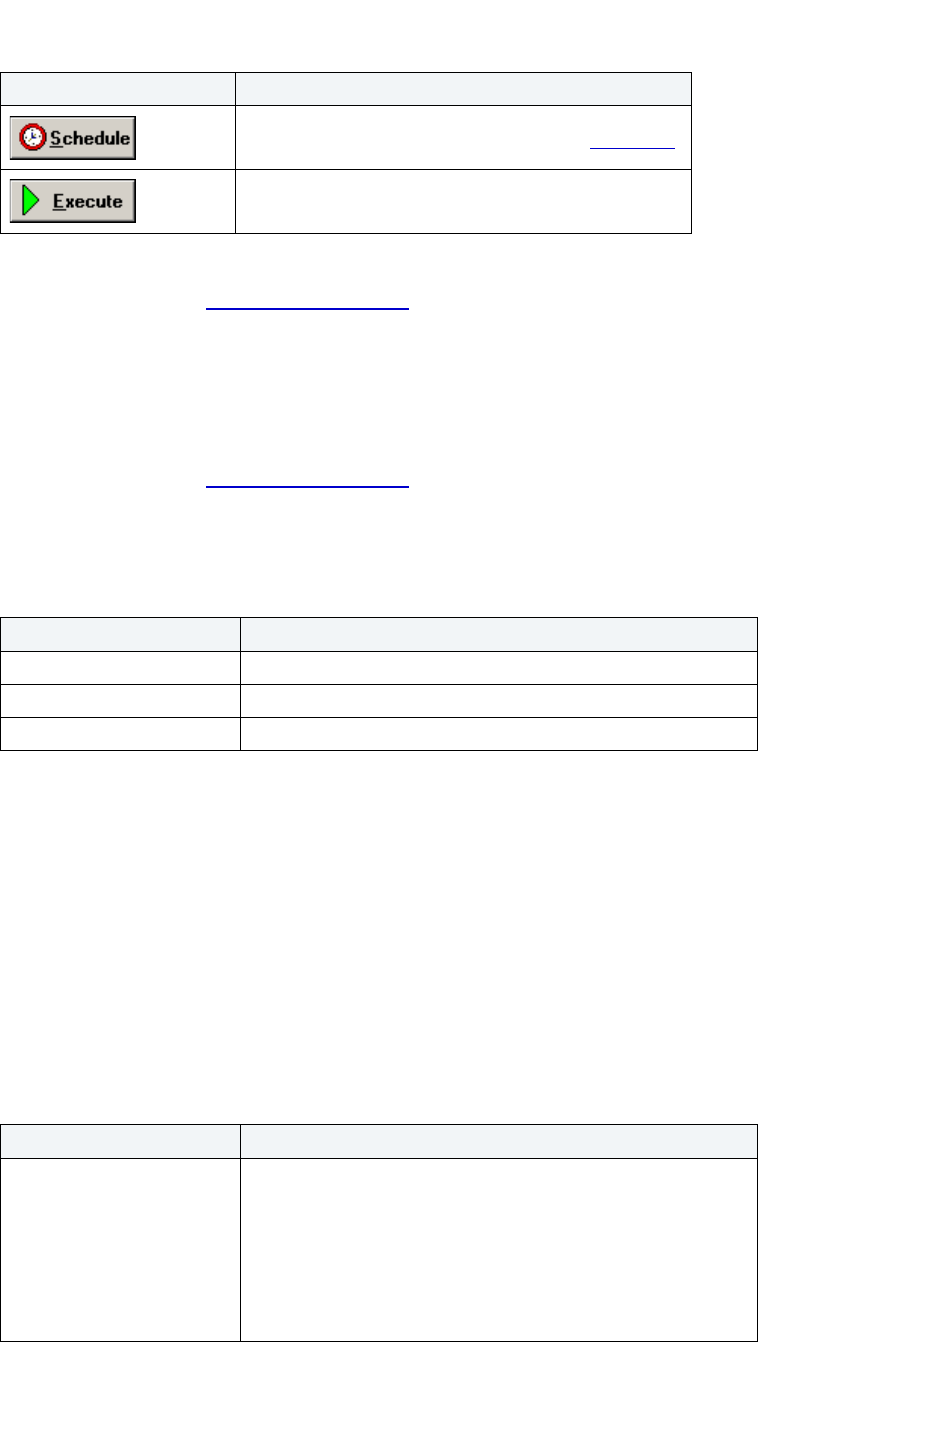
USING > FUNCTIONALITY
EMBARCADERO TECHNOLOGIES > BOOKNAMEVARIABLE 642
For more information, see Completing a Dialog Box.
Job Cards for Batch Execution
The Job Cards for Batch Execution dialog box lets you specify the job cards that should be used to execute the utility
in batch.
For more information, see Completing a Dialog Box
.
Quiesce Tablespaces
Quiesce Tablespaces
This functionality is available for IBM DB2 UDB for Linux, Unix, and Windows and IBM DB2 UDB
for OS/390 and z/OS only.
The Quiesce Tablespaces dialog box lets you temporarily prevent other users from updating or reading selected tables
on a tablespace. For example, you may not want the table to be updated during a backup procedure to capture a
complete backup of the table as it exists.
Important Notes
None
The table below describes the options and functionality on the Quiesce Tablespaces dialog box.
Opens Embarcadero Job Scheduler, or (if unavailable)
another scheduling application. For more, see Scheduling
.
Executes the task.
Option Description
For user Lets you select and type user name to restrict.
For group Lets you select and type group name to restrict.
Connections Lets you select a connection option to restrict.
Option Description
Quiesce Mode Exclusive - Prevents other users from viewing or modifying the
table data.
Intent to Update - Lets other users view but not update the table
data.
Reset - Lets you reset a table's quiesce mode.
Share - Lets all users view (including you) but not modify the table
data.
Button Description
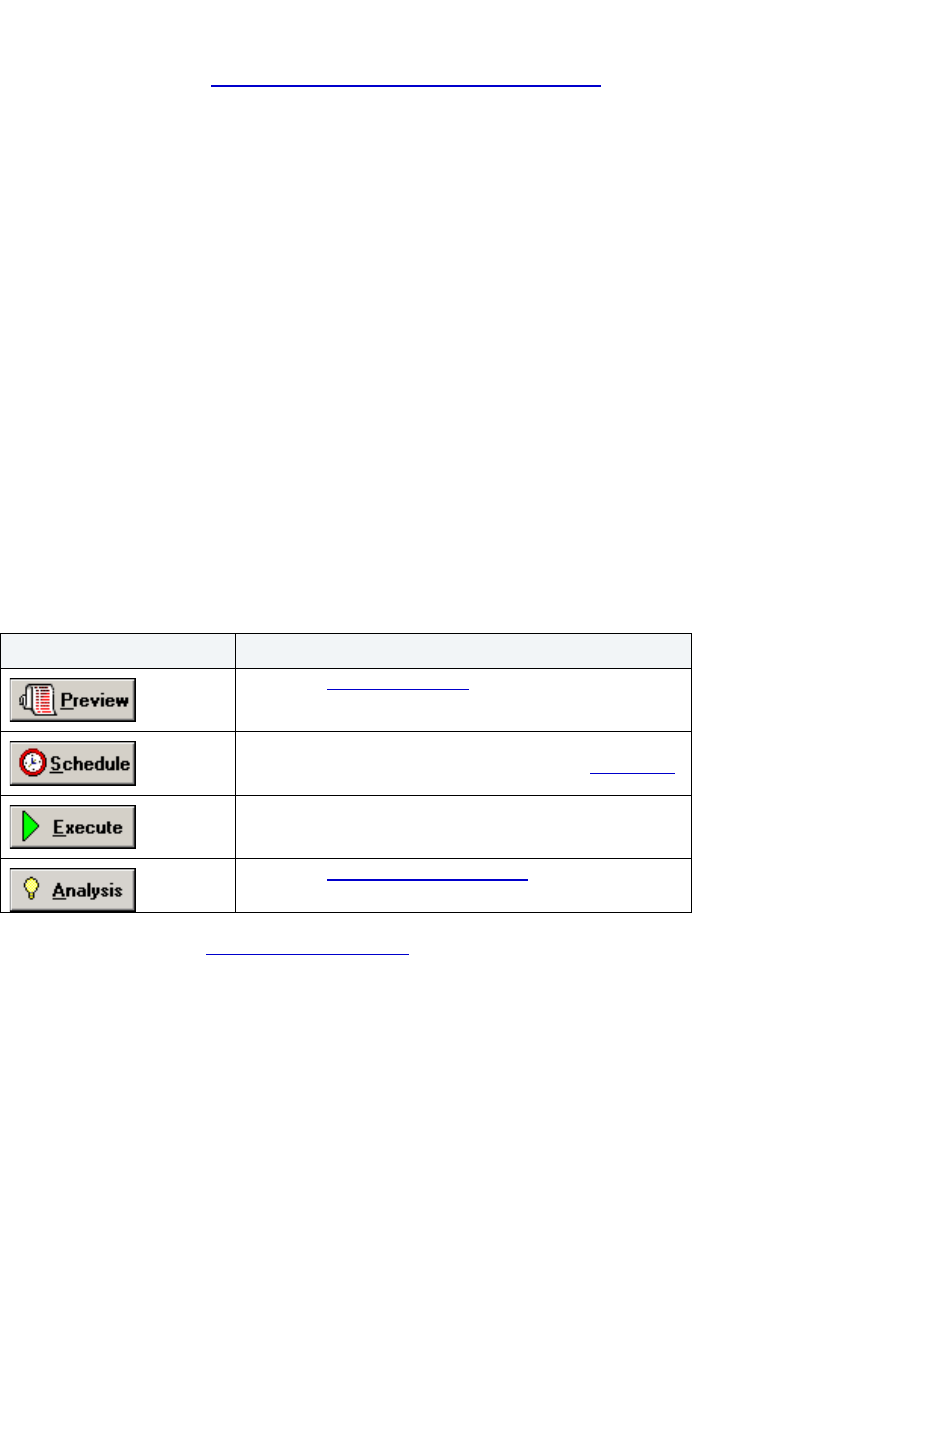
USING > FUNCTIONALITY
EMBARCADERO TECHNOLOGIES > BOOKNAMEVARIABLE 643
For more information, see Completing the Quiesce Tablespaces Dialog Box.
Completing the Quiesce Tablespaces Dialog Box
To complete this dialog box, do the following:
1 On the Database Explorer, select the Tables node.
Rapid SQL displays the Tables in the Database Explorer.
2 On the Database Explorer, right-click the table, and then select Quiesce Tablespaces.
Rapid SQL opens the Quiesce Tablespaces dialog box.
3 Select a Quiesce Mode:
• Exclusive - Prevents other users from viewing or modifying the table data.
• Intent to Update - Lets other users view but not update the table data.
• Reset - Lets you reset a table's quiesce mode.
• Share - Lets all users view (including you) but not modify the table data.
4 Do one of the following:
For more information, see Completing a Dialog Box
.
Reassign by Category
This functionality is available for Oracle only.
The Reassign by Category dialog box lets you reassign the category of stored outlines in Oracle.
Outlines are a set of results for the execution plan generation of a particular SQL statement. When you create an
outline, plan stability examines the optimization results using the same data used to generate the execution plan. That
is, Oracle uses the input to the execution plan to generate an outline, and not the execution plan itself.
Important Notes
None
Button Description
Opens the Preview dialog box.
Opens Embarcadero Job Scheduler, or (if unavailable)
another scheduling application. For more, see Scheduling
.
Executes the task.
Opens the Impact Analysis dialog box
. This option is not
available for every dialog box.
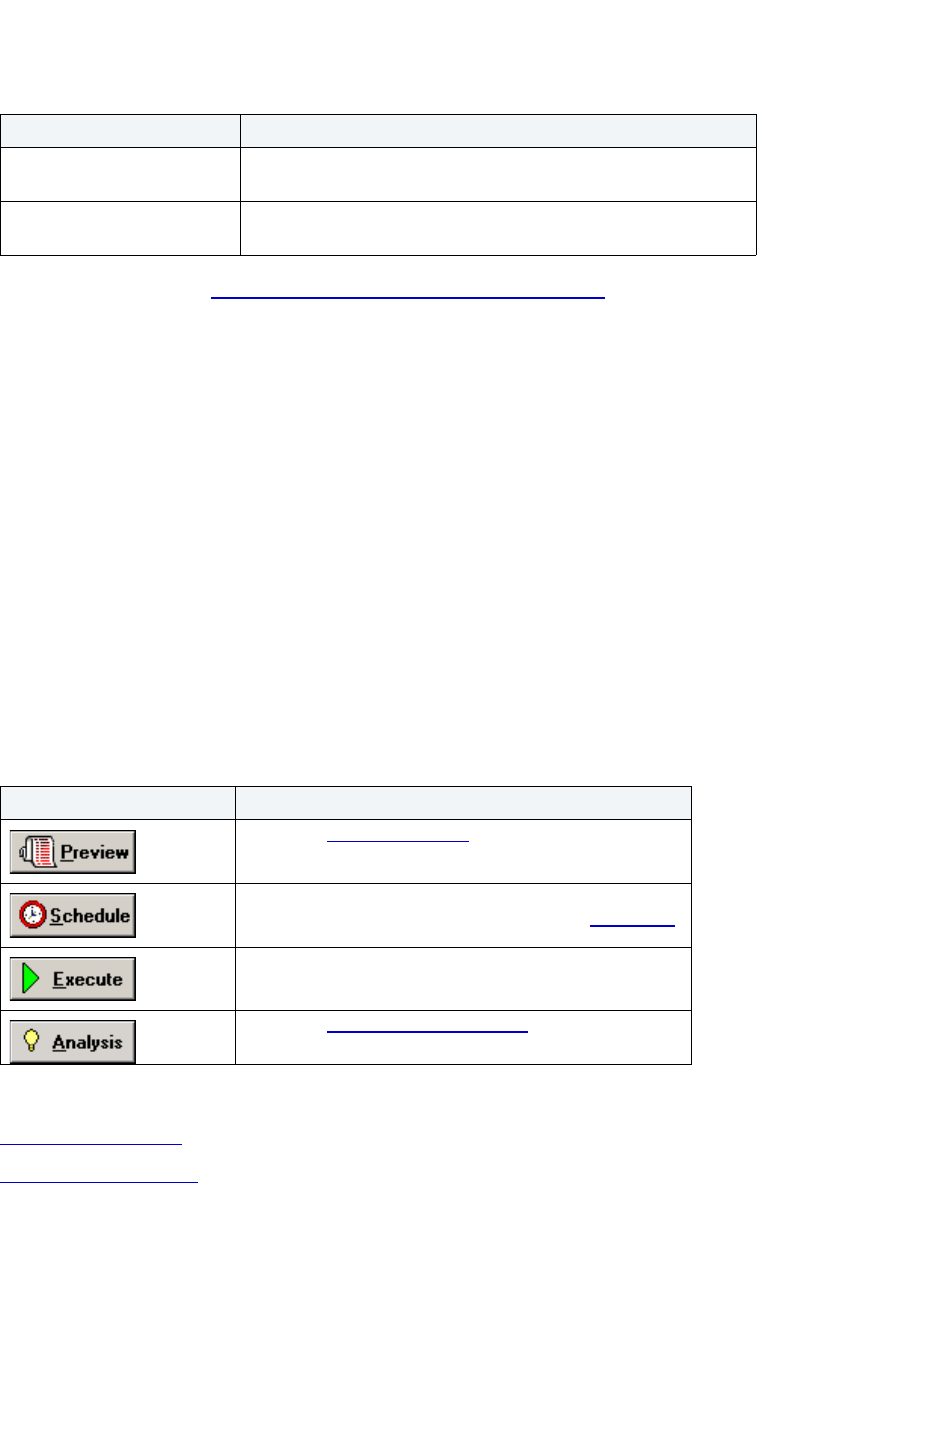
USING > FUNCTIONALITY
EMBARCADERO TECHNOLOGIES > BOOKNAMEVARIABLE 644
The table below describes the options and functionality on the Reassign by Category dialog box:
For more information, see Completing the Reassign by Category Dialog Box.
Completing the Reassign by Category Dialog Box
To complete this dialog box, do the following:
1 On the Database Explorer, select the Outlines node.
Rapid SQL displays the Outlines in the Database Explorer.
2 On the Database Explorer, right-click the outline, and then select Reassign by Category.
Rapid SQL opens the Reassign by Category dialog box.
3 In the Source Category box, enter the target source outline category.
4 In the Destination Category box, enter the new category for the target outlines.
5 You can click the list to display existing categories, or you can type a new category in the box.
6 Do one of the following:
For more information, see:
Reassign by Category
Completing a Dialog Box
Rebind Packages
This functionality is available for IBM DB2 UDB for Linux, Unix, and Windows only.
Option Description
Source Category Lets you move all outlines from one category to a new category.
Select the original category.
Destination Category Reassigns the original category to the new category. Select a new
destination category.
Button Description
Opens the Preview dialog box.
Opens Embarcadero Job Scheduler, or (if unavailable)
another scheduling application. For more, see Scheduling
.
Executes the task.
Opens the Impact Analysis dialog box
. This option is not
available for every dialog box.
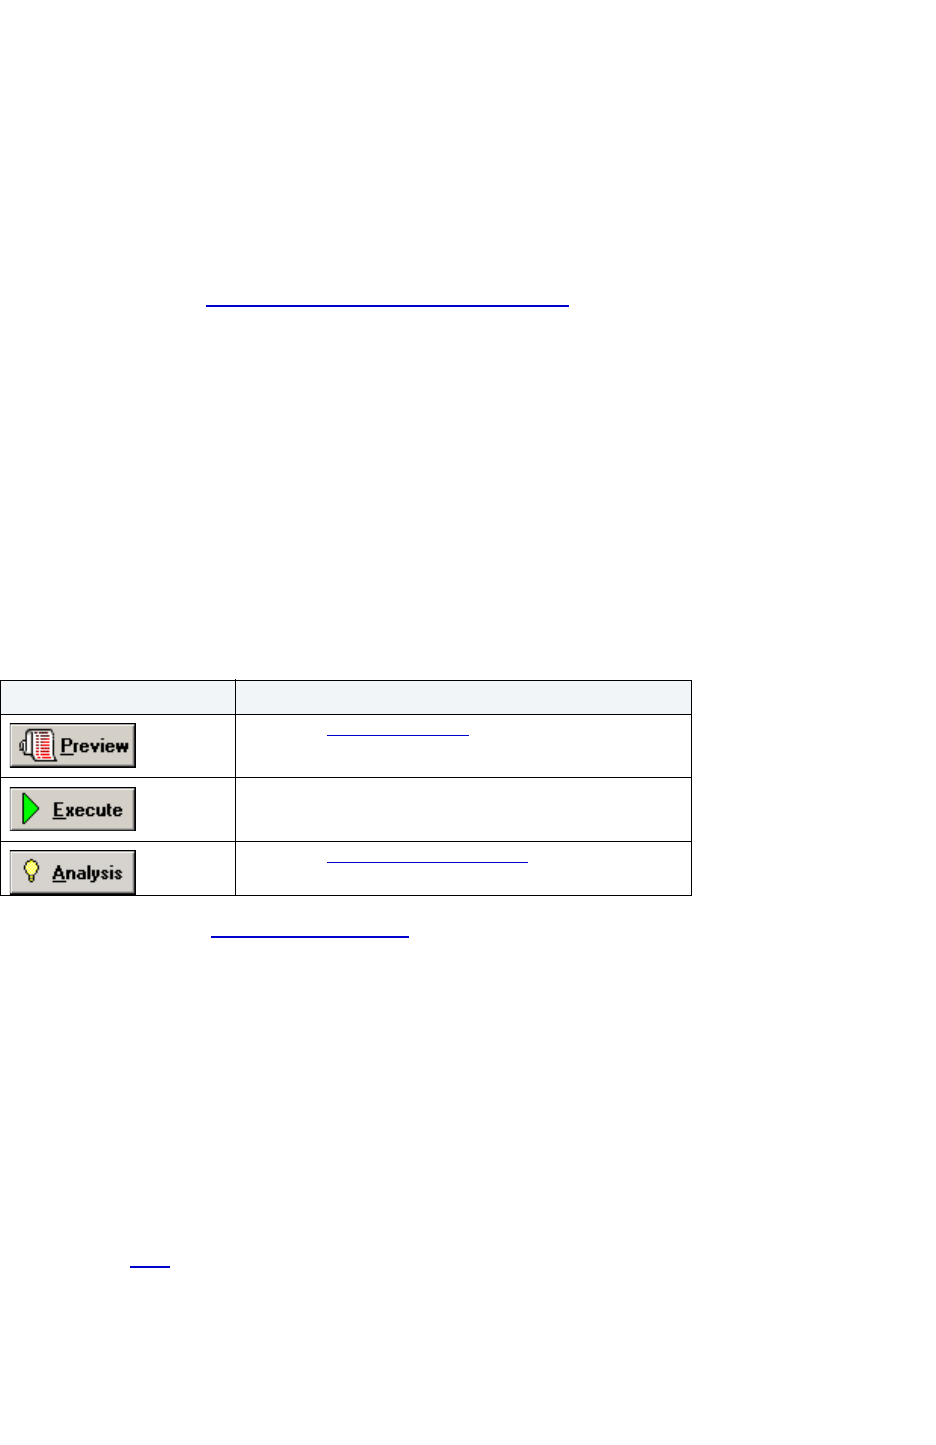
USING > FUNCTIONALITY
EMBARCADERO TECHNOLOGIES > BOOKNAMEVARIABLE 645
The Rebind Package dialog box lets you update the best access path for SQL statements when the contents of a
package changes.
Important Notes
None
TIP: If the physical storage of a package is changed or dropped, rebinding updates the path of the SQL
statements.
For more information, see Completing the Rebind Packages Dialog Box.
Completing the Rebind Packages Dialog Box
To complete this dialog box, do the following:
1 On the Database Explorer, select the Packages node.
Rapid SQL displays the Packages in the Database Explorer.
2 On the Database Explorer, right-click the package, and then select Rebind.
Rapid SQL opens the Rebind dialog box.
3 Do one of the following:
For more information, see Completing a Dialog Box.
Rebind Plans
This functionality is available for IBM DB2 UDB for Linux, Unix, and Windows only.
The Rebind Plans dialog box lets you update the best access path for SQL statements when the contents of a plan
change.
TIP: If the physical storage of a plan is changed or dropped, rebinding updates the path of the SQL
statements.
TIP: To filter the Owner and Object lists, click the Filter button next to each list. Rapid SQL opens the
Filter
dialog box.
Important Notes
None
Button Description
Opens the Preview dialog box.
Executes the task.
Opens the Impact Analysis dialog box
. This option is not
available for every dialog box.
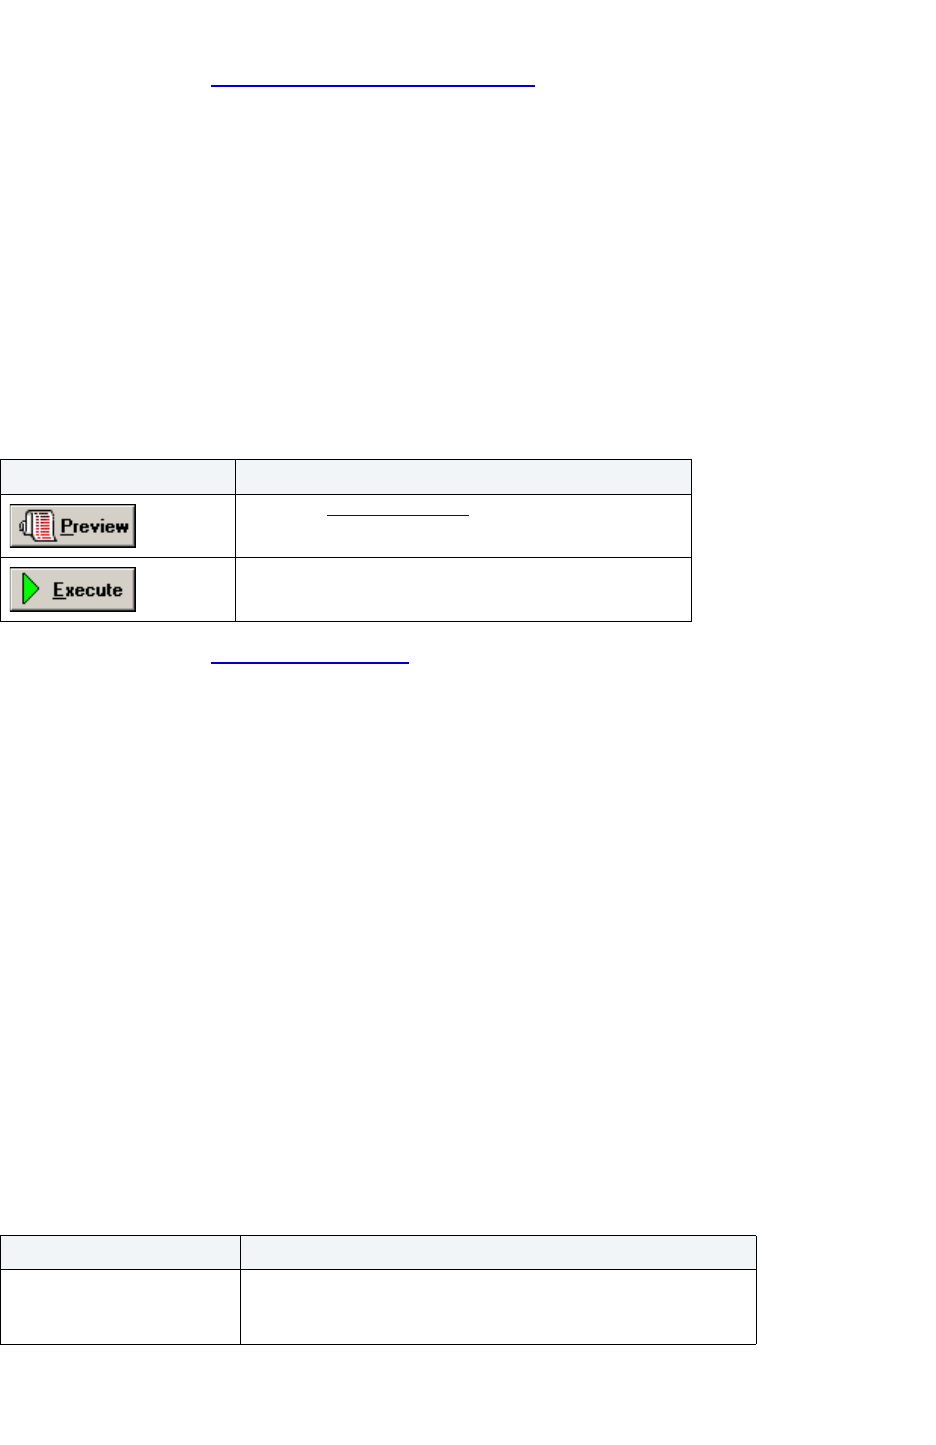
USING > FUNCTIONALITY
EMBARCADERO TECHNOLOGIES > BOOKNAMEVARIABLE 646
For more information, see Completing the Rebind Plans Dialog Box.
Completing the Rebind Plans Dialog Box
To complete the Rebind Plans dialog box, do one of the following:
1 On the Database Explorer, select the Plans node.
Rapid SQL displays the plans in the Database Explorer.
2 On the Database Explorer, right-click the target object, and then select Rebind.
Rapid SQL opens the Rebind Plans dialog box.
3 Do one of the following:
For more information, see Completing a Dialog Box
.
Rebuild Indexes
This functionality is available for Oracle only.
The Rebuild Indexes dialog box lets you rebuild an index that has become fragmented. Rebuilding an index is a good
alternative to coalescing an index because you can move the index to a different tablespace and change both
tablespace and storage parameters while eliminating fragmentation. However, rebuilding an index has a higher cost
than coalescing an index. These same qualities also make rebuilding an index a viable alternative to dropping an
index then re-creating it.
As a rule of thumb, check indexes for rebuilds when their level (or tree depth) reaches four or greater, or many deleted
leaf rows are found. The Rebuild Indexes dialog box can also be used to easily move an index from one tablespace to
another.
Important Notes
• If you are rebuilding a function-based index, the index is enabled when the rebuild is finished.
• You cannot rebuild a partitioned index. You must rebuild each partition or subpartition individually.
The table below describes the options and functionality on the Rebuild dialog box.
Button Description
Opens the Preview dialog box.
Executes the task.
Option Description
New Tablespace Defaults to the tablespace which currently includes the index. To
change the tablespace containing the index, choose a new
tablespace from the list.

USING > FUNCTIONALITY
EMBARCADERO TECHNOLOGIES > BOOKNAMEVARIABLE 647
For more information, see Completing the Rebuild Indexes Dialog Box.
Completing the Rebuild Indexes Dialog Box
To complete this dialog box, do the following:
1 On the Database Explorer, select the Indexes node.
Rapid SQL displays the Indexes in the Database Explorer.
2 On the Database Explorer, right-click the Index, and then select Rebuild.
Rapid SQL opens the Rebuild Indexes dialog box.
1 To move the index to a new tablespace, click the New Tablespace list and then click the new tablespace.
2 In the Logging box, click:
•The Recoverable option button to make the operation log in the redo file.
•The Non-Recoverable option button if you do not want the operation logged in the redo file.
3 If you are using Parallel Server, select the Parallel Server check box and:
• Type a value indicating the number of query server processes that should be used in the operation in the
Degree box.
• Type a value indicating how you want the parallel query partitioned between the Parallel Servers in the
Instances box.
4 In the Order box:
• Click the Reverse option button to rebuild the index to store the bytes of the index block in reverse order.
• Click the No Reverse option button to rebuild the index to store the bytes of the index block in order.
NOTE: This option is only available for Oracle8.
5 Do one of the following:
Logging Recoverable - The creation of the index logs in the redo log file.
Non-Recoverable - The creation of the index is not logged in the
redo log file.
Use Parallel Processes Performs processes for the sequential execution of a SQL
statement in parallel using multiple parallel processes. One
process, known as the parallel execution coordinator, dispatches
the execution of a statement to several parallel execution servers
and coordinates the results from all of the server processes to
send the results back to the user.
NOTE: Only available for Oracle with the Parallel Server option.
Order Reverse - Instructs Oracle to store the bytes of the index block in
reverse order and to exclude the ROWID when rebuilding the
index.
No Reverse - Instructs Oracle to store the bytes of the index block
in normal order when rebuilding the index.
Option Description
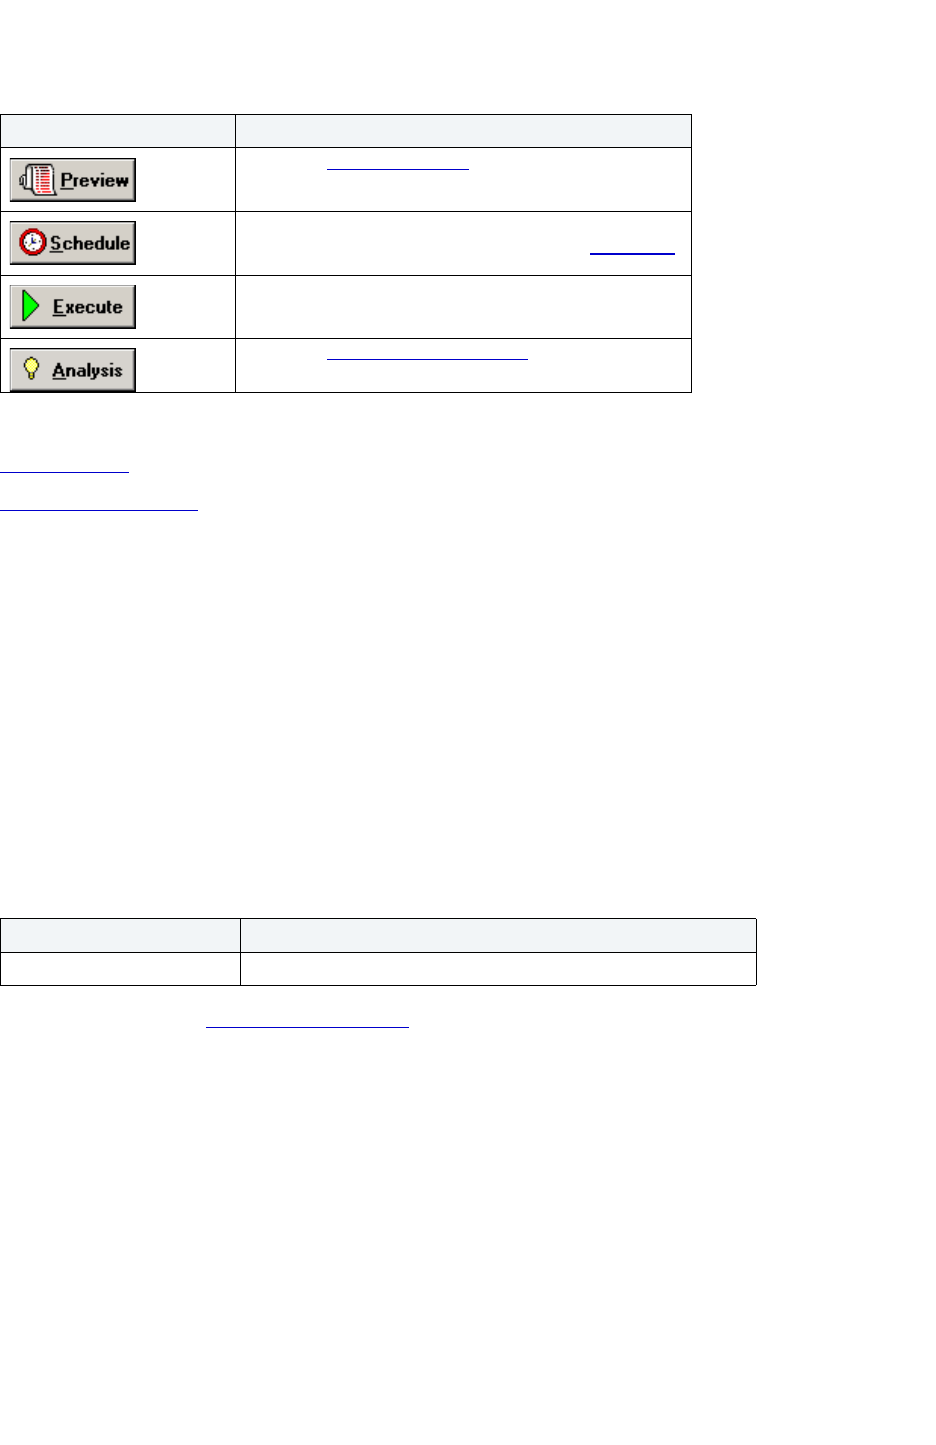
USING > FUNCTIONALITY
EMBARCADERO TECHNOLOGIES > BOOKNAMEVARIABLE 648
For more information, see:
Rebuild Indexes
Completing a Dialog Box
Rebuild Outlines
This functionality is available for Oracle only.
The Rebuild Outlines dialog box lets you rebuild an outline.
Outlines are a set of results for the execution plan generation of a particular SQL statement. When you create an
outline, plan stability examines the optimization results using the same data used to generate the execution plan. That
is, Oracle uses the input to the execution plan to generate an outline, and not the execution plan itself.
Important Notes
None
The table below describes the options and functionality on the Rebuild Outlines dialog box:
For more information, see Completing a Dialog Box
.
Recompile
This functionality is available for Microsoft SQL Server and Sybase ASE only.
The Recompile dialog box lets you specify single or multiple objects for recompilation. Recompilation causes each
procedure and trigger that uses the target table to be recompiled the next time it runs.
The queries used by procedures and triggers are optimized only once, when they are compiled. As you add indexes or
make other changes to your database that affect its statistics, your compiled procedures and triggers may lose
efficiency. By recompiling the procedures and triggers that act on a table, you can optimize the queries for maximum
efficiency.
Button Description
Opens the Preview dialog box.
Opens Embarcadero Job Scheduler, or (if unavailable)
another scheduling application. For more, see Scheduling
.
Executes the task.
Opens the Impact Analysis dialog box
. This option is not
available for every dialog box.
Option Description
Outline(s) to be rebuilt box Displays the outline(s) available to rebuild.
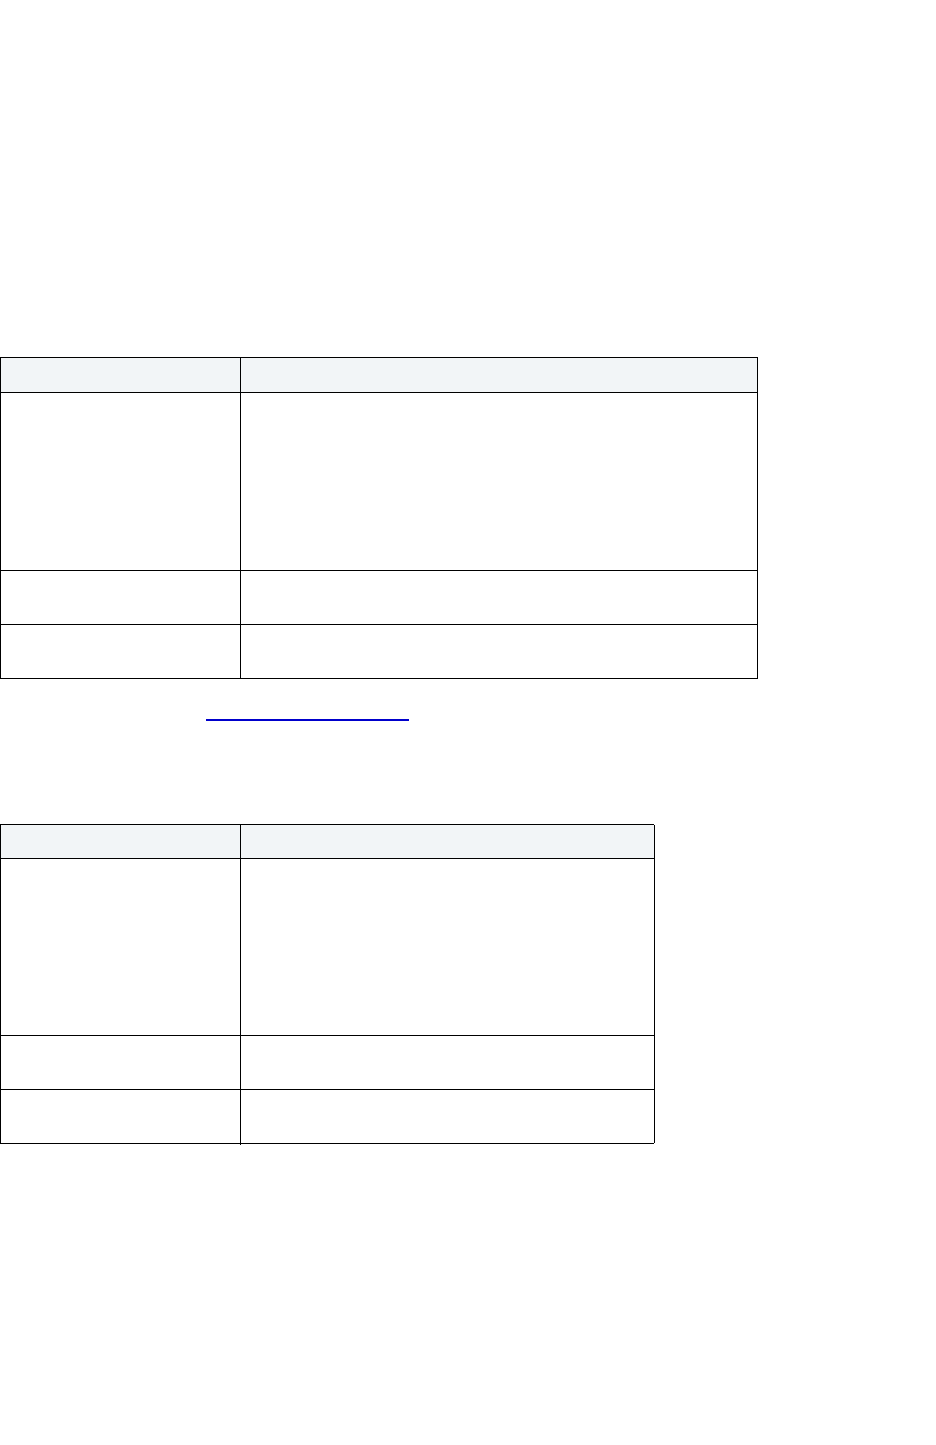
USING > FUNCTIONALITY
EMBARCADERO TECHNOLOGIES > BOOKNAMEVARIABLE 649
Redistribute
This functionality is available for IBM DB2 UDB for Linux, Unix, and Windows only.
The Redistribute dialog box lets you redistribute the data in a nodegroup.
Important Notes
None
The table below describes the options and functionality on the Redistribute dialog box:
For more information, see Completing a Dialog Box
.
The table below describes the options and functionality on the Refit dialog box:
Important Notes
None
Refresh Summary Table
This functionality is available for IBM DB2 UDB for Linux, Unix, and Windows 8.1 only.
Option Description
Redistribute Options Lets you click the appropriate option button:
Uniform
Using Dist. File
Using Target Map
Continue
Rollback
Using Dist. File Lets you select and type the distinct file name in the corresponding
box.
Using target File Lets you select and type the target file name in the corresponding
box
Option Description
Redistribute Options Lets you click the appropriate option button:
Uniform
Using Dist. File
Using Target Map
Continue
Rollback
Using Dist. File Lets you select and type the distinct file name in the
corresponding box.
Using target File Lets you select and type the target file name in the
corresponding box
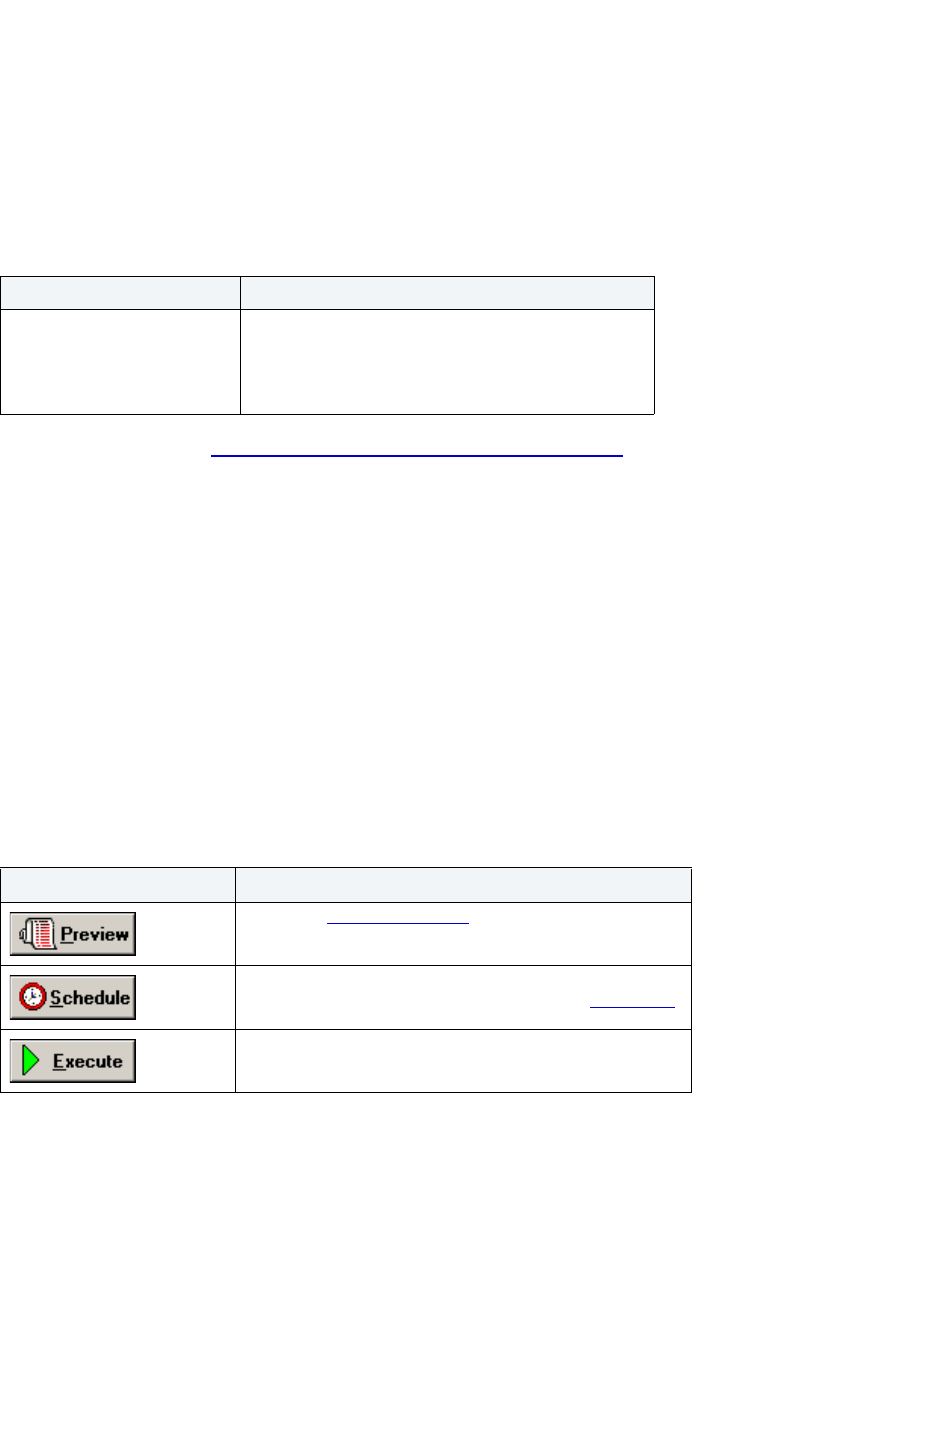
USING > FUNCTIONALITY
EMBARCADERO TECHNOLOGIES > BOOKNAMEVARIABLE 650
The Refresh Summary Table Dialog box lets you reload summary tables that have been defined with refresh options.
Important Notes
None
The table below describes the options and functionality on the Refresh Summary Table dialog box:
For more information, see Completing the Refresh Summary Table Dialog Box
.
Completing the Refresh Summary Table Dialog Box
To complete this dialog box, do the following:
1 On the Database Explorer, select the target object node.
Rapid SQL displays the target objects in the Database Explorer.
2 On the Database Explorer, right-click a summary table, and then select Refresh Summary Table.
Rapid SQL opens the Refresh Summary Table dialog box.
3 Select a refresh option.
4 Do one of the following:
Important Notes
Rename
This functionality is available for all platforms.
The Rename dialog box lets you rename an object.
Option Description
Refresh Lets you select a refresh option.
NOTE: For IBM DB2 UDB for Linux, Unix, and
Windows 7, summary tables refresh when the
system determines the refresh patterns.
Button Description
Opens the Preview dialog box.
Opens Embarcadero Job Scheduler, or (if unavailable)
another scheduling application. For more, see Scheduling
.
Executes the task.
USING > FUNCTIONALITY
EMBARCADERO TECHNOLOGIES > BOOKNAMEVARIABLE 651
Microsoft SQL Server
Microsoft SQL Server lets you rename a database if you own it. Before renaming a database, set it to single-user
mode.
Microsoft SQL Server does not rename the table if it is referenced within the body of other objects that call it, such as
tables, triggers or views. As a result, renaming a table can result in broken dependencies with other objects. Also,
Microsoft SQL Server does not let you rename System Tables.
IBM DB2 UDB for OS/390 and z/OS
Rapid SQL lets you rename a primary key if the underlying table has only one owner.
The rename operation does not rename the table if it is referenced within the body of other objects, such as tables,
triggers or views, that call it. As a result, renaming a table can result in broken dependencies with other objects.
Sybase ASE
Before renaming a database, set it to single-user mode.
System indexes can not be renamed.
The rename operation does not rename the stored procedure if it is referenced within the body of other objects, such
as another stored procedure, that call it. As a result, renaming a stored procedure can result in broken dependencies
with other objects.
The rename operation does not rename the table if it is referenced within the body of other objects, such as tables,
triggers or views, that call it. As a result, renaming a table can result in broken dependencies with other objects.
The rename operation does not rename the view if it is referenced within the body of other objects, such as stored
procedures, triggers or other views, that call it. As a result, renaming a view can result in broken dependencies with
other objects.
The table below describes the options and functionality on the Rename dialog box.
NOTE: Options differ by platform.
For more information, see Completing the Rename Dialog Box
.
Completing the Rename Dialog Box
To complete this dialog box, do the following:
1 On the Database Explorer, select the target object node.
Rapid SQL displays the target objects in the Database Explorer.
2 On the Database Explorer, right-click the target object, and then select Rename.
Rapid SQL opens the Rename dialog box.
3In New Name, type the new name.
4 Do one of the following:
Option Description
New Name Lets you type the new name of the object.

USING > FUNCTIONALITY
EMBARCADERO TECHNOLOGIES > BOOKNAMEVARIABLE 652
For more information, see Completing a Dialog Box.
Reorganize
Reorganize functionality is available for IBM DB2 UDB for Linux, Unix, and Windows, Oracle, and
Sybase ASE only.
The Reorganize dialog box lets you alter a table’s physical storage to ensure that it is stored efficiently and to eliminate
fragmentation.
Important Notes
None
For more information, see Completing the Reorganize Dialog Box
.
Completing the Reorganize Dialog Box
To complete this dialog box, do the following:
1 On the Database Explorer, select the target object node.
Rapid SQL displays the target objects in the Database Explorer.
2 On the Database Explorer, right-click the target object, and then select Reorganize.
Rapid SQL opens the Reorganize dialog box.
3 If you want to move the table(s) to a new tablespace, click the New Tablespace list and select the target
tablespace.
4 In the Data Block Storage box, indicate the data block storage parameters:
• In the Percent Free box, type the appropriate percent free value for the table.
• In the Percent Used box, type the appropriate percent used value for the table.
• In the Initial Transactions box, type the appropriate initial transactions value for the table.
• In the Max Transactions box, type the appropriate maximum transactions value for the table.
Button Description
Opens the Preview dialog box.
Opens Embarcadero Job Scheduler, or (if unavailable)
another scheduling application. For more, see Scheduling
.
Executes the task.
Opens the Impact Analysis dialog box
. This option is not
available for every dialog box.
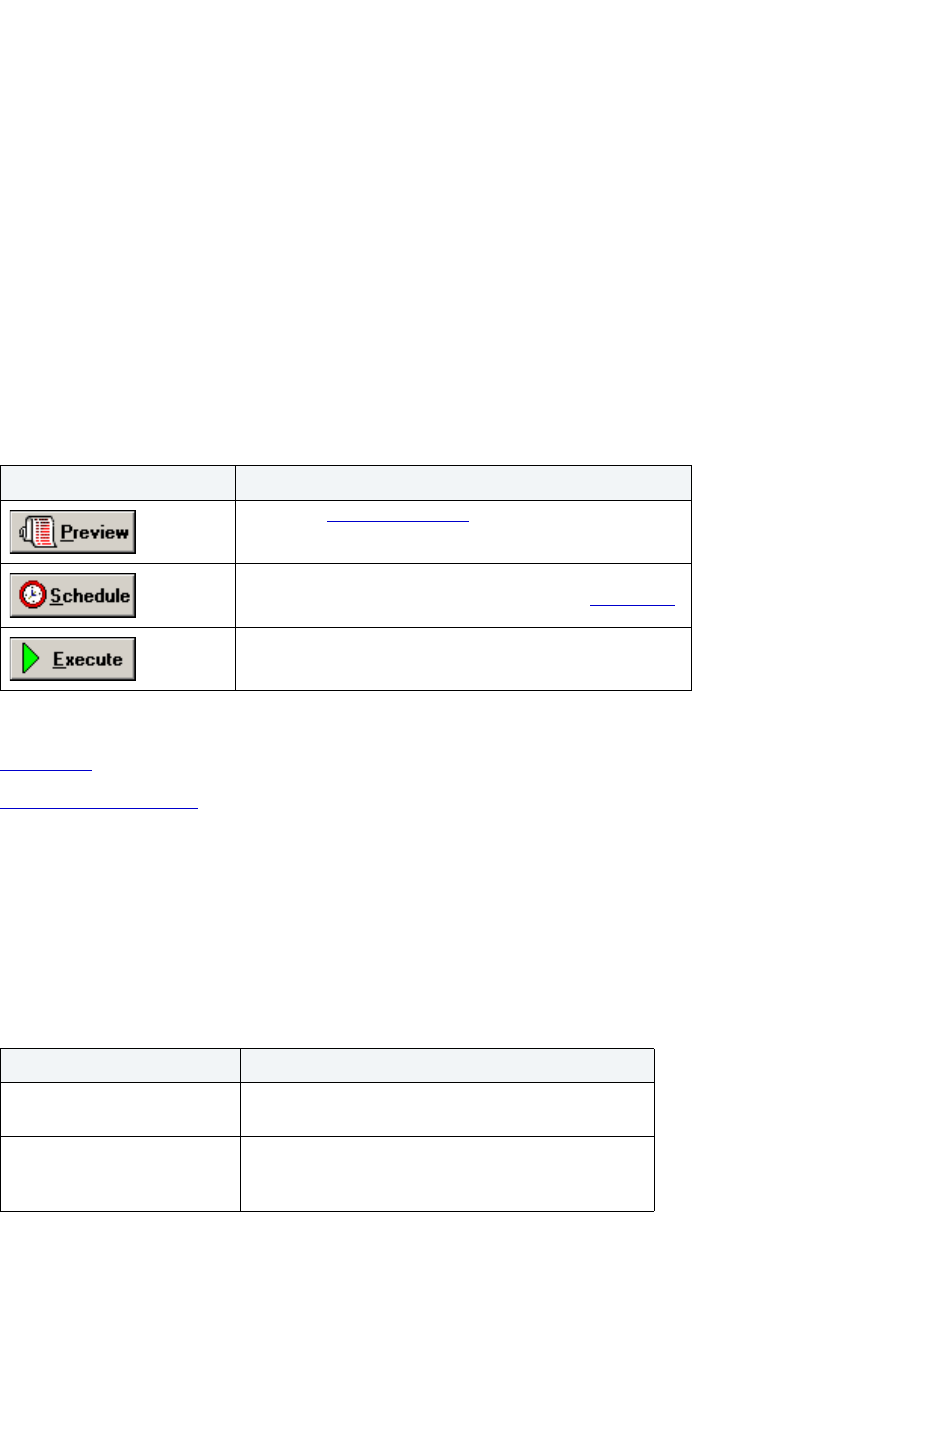
USING > FUNCTIONALITY
EMBARCADERO TECHNOLOGIES > BOOKNAMEVARIABLE 653
5 In the Extents box, indicate the extents parameters:
• In the Initial Extent box, type the appropriate initial extent KB value for the table.
• In the Next Extent box, type the appropriate next extent KB value for the table.
• In the Percent Increase box, type the appropriate percent increase value for the table.
• In the Minimum Extents box, type the appropriate minimum extents value for the table.
• In the Maximum Extents box, type the appropriate maximum extents value for the table.
6 To modify freelist parameters, in the Freelists box:
• In the Freelists box, type the new value.
• In the Freelist Group box, type the new value.
7 Do one of the following:
For more information, see:
Reorganize
Completing a Dialog Box
Reorganizing IBM DB2 UDB for Linux, Unix, and Windows Objects
Reorganize Dialog Box (One Table)
The table below describes the options and functionality on the Reorganize dialog box.
Reorganize Dialog Box (Multiple Tables)
The table below describes the options and functionality on the Reorganize dialog box.
Button Description
Opens the Preview dialog box.
Opens Embarcadero Job Scheduler, or (if unavailable)
another scheduling application. For more, see Scheduling
.
Executes the task.
Option Description
Index Associates a temporary index with the table's index.
You can select another index from the list.
Temporary Tablespace Associates a temporary tablespace with the table's
tablespace. You can select another tablespace from
the list.

USING > FUNCTIONALITY
EMBARCADERO TECHNOLOGIES > BOOKNAMEVARIABLE 654
For more information, see Completing the Reorganize Dialog Box.
Reorganizing Oracle Objects
The Reorganize dialog box lets you reduce query processing time against tables. This functionality is available for
both tables.
For more information, see Completing the Reorganize Dialog Box
.
Reorganizing Sybase ASE Objects
The Reorganize dialog box lets you reduce query processing time against tables. This functionality is available for
both tables
and indexes.
For more information, see Completing the Reorganize Dialog Box
.
Reorganizing Sybase ASE Tables
The Reorganize Table dialog box lets you reduce the query processing time against a table by reorganizing the table
to ensure that space is properly allocated to it. For lengthy reorganization processes, this dialog box also lets you
execute a process in increments
, lets you resume an incomplete process, and lets you specify the duration of each
increment.
TIP: Frequent update activity on a table can cause data rows to migrate and to chain over multiple data
pages. Chained or forwarded rows can degrade performance because more physical reads are
required to access a row of data. Consequently, you should monitor chained rows regularly to spot
performance bottlenecks before they become severe. In addition, altering physical storage
parameters can lead to fragmentation of space on your data pages, which also results in reduced
performance levels.
You should consider reorganizing a table if you are experiencing slow performance due to:
• A large number of chained or forwarded rows on your data pages
• A large amount of fragmentation in your data pages
NOTE: You can reorganize tables in Sybase ASE versions 11.9.2, 12, and 12.5.
The table below describes the options and functionality on the Reorganize Table dialog box:
Option Description
Temporary Tablespace Associates a temporary tablespace with the table's
tablespace. You can select another tablespace from
the list.

USING > FUNCTIONALITY
EMBARCADERO TECHNOLOGIES > BOOKNAMEVARIABLE 655
For more information, see Completing the Reorganize Dialog Box.
Incremental Reorganizations
If target tables are too long to reorganize in one session, Rapid SQL lets you reorganize them in increments over
multiple sessions by specifying a maximum duration for each session. After Rapid SQL reorganizes tables for the
specified duration, the operation stops until you resume it again from the Options box of the ReOrganize Table dialog
box. The Options box lets you specify to resume a previously initiated but incomplete partial reorganization. It also lets
you specify the duration for which you want a resumed reorganization to continue before stopping again. The Option
box is disabled for the rebuild command.
NOTE: The duration you specify refers to elapsed time, not CPU time
Option Description
Compact Lets you reclaim space and undo row forwarding.
Minimizes interference with other activities by using multiple small
transactions of brief duration. Each transaction is limited to eight
pages of reorg processing. These three commands also provide
resume
and time options that allow you to set a time limit on how
long a reorg runs and to resume a reorg from the point at which the
previous reorg stopped, making it possible to use a series of partial
reorganizations at off-peak times to reorg a large table.
Reclaim Space Lets you reclaim unused space resulting from deletions and
row-shortening updates on a page.
Minimizes interference with other activities by using multiple small
transactions of brief duration. Each transaction is limited to eight
pages of reorg processing. These three commands also provide
resume
and time options that allow you to set a time limit on how
long a reorg runs and to resume a reorg from the point at which the
previous reorg stopped, making it possible to use a series of partial
reorganizations at off-peak times to reorg a large table.
Rebuild Lets you undo row forwarding and reclaim unused page space. It
also rewrites all rows to comply with the target table's clustered
index, writes rows to data pages to comply with space
management setting changes (via sp_chgattribute), and drops and
re-creates all the target table's (or tables') indexes.
Reorg rebuild holds an exclusive table lock for its entire duration.
On a large table this can be a significant amount of time. However,
reorg rebuild accomplishes everything that dropping and
re-creating a clustered index does and takes less time. In addition,
reorg rebuild rebuilds the table using all of the table's current space
management settings. Dropping and re-creating an index does not
use the space management setting for reservepagegap. In most
cases, reorg rebuild requires additional disk space equal to the size
of the table it is rebuilding and its indexes.
Undo Row Forwarding Lets you undo row forwarding, a process that occurs when an
update increases a row's length in a data-only-locked table such
that the row is too large to fit on its original page.
Options Start at the point where a previous reorg left off - Select to resume
a previously initiated but incomplete partial reorganization. Then
specify the duration for which you want the resumed reorganization
to continue before stopping again. This box is disabled for the
rebuild command.

USING > FUNCTIONALITY
EMBARCADERO TECHNOLOGIES > BOOKNAMEVARIABLE 656
In the option box, if you select the check box without specifying a duration, Rapid SQL executes the reorg at the point
where the previous reorg stopped and continues to the end of the target tables. If you clear the check box and specify
a duration, the reorg starts at the beginning of the target tables and continues for the specified number of minutes. If
you select the check box and specify a duration, Rapid SQL runs the reorg from the point where it last left off, and
continues for the specified number of minutes.
NOTE: If you reorganize a table using one command (Compact, Reclaim Space, or Undo Forwarding) for
a specified duration, you cannot resume the process from its resume point using a different
command. For example, you cannot compact a table for an hour, and then reclaim space on the
remainder of the table. A resumed reorganization process must utilize the same command from
start to finish. Selecting a different command begins a new reorganization process.
CAUTION: While this option lets you reorganize a large table in multiple manageable pieces, any updates to
the table between reorganization runs can cause pages to be skipped or processed more than
once.
For more information, see Completing a Dialog Box
.
Reorganize Sybase ASE Indexes
The Reorganize Index dialog box lets you reduce the query processing time against a table by running a reorg rebuild
command on the target index.
This operation:
• Undoes row forwarding and reclaim unused page space
• Rewrites all rows in the table to comply with the table's clustered index
• Writes rows to data pages to comply with space management setting changes (via sp_chgattribute)
• Drops and re-creates the table's indexes
Reorg rebuild holds an exclusive table lock for its entire duration. On a large table this can be a significant amount of
time. However, reorg rebuild accomplishes everything that dropping and re-creating a clustered index does and takes
less time. In addition, reorg rebuild rebuilds the table using all of the table's current space management settings.
Dropping and re-creating an index does not use the space management setting for reservepagegap. In most cases,
reorg rebuild requires additional disk space equal to the size of the table it is rebuilding and its indexes.
For more information, see Completing the Reorganize Dialog Box
.
Report
This functionality is available for all platforms.
The Generate Report dialog box lets you generate detailed reports about all the objects in your database. The
reports give you the complete information about the properties of your objects. They derive their contents from the
information displayed in the object editors. To facilitate the online publication of these reports, Rapid SQL generates
these reports in HTML. You can view these reports directly in Rapid SQL’s built-in HTML browser.
Important Notes
None
For more information, see Completing the Generate Report Dialog Box
.

USING > FUNCTIONALITY
EMBARCADERO TECHNOLOGIES > BOOKNAMEVARIABLE 657
Completing the Generate Report Dialog Box
To complete the Generate Report dialog box, do the following:
1 On the Database Explorer, select the target object node.
Rapid SQL displays the target objects in the Database Explorer.
2 On the Database Explorer, right-click the target object, and then select Report.
Rapid SQL opens the Generate Report dialog box.
Generating a Summary Report
1 Select the Summary Report (Listing all items) option.
Rapid SQL displays the report. You can find data in the report, save, send, and print the report.
2 To exit the report, click Close.
Generating a Detail Report
1 Select the Detail Report (Report on each supported item) option.
Rapid SQL opens the Report dialog box.
2In Report Home Page File Name, type the report name or click Browse to locate the report.
3 In Report Title, type the report title.
Rapid SQL displays Object Name and Object Type.
4 Click Execute.
Rapid SQL displays the report. You can find data in the report, save, send, and print the report.
5 To exit the report, click Close.
For more information, see:
Report
Completing a Dialog Box
Restart
This functionality is available for IBM DB2 UDB for Linux, Unix, and Windows only.
The Restart Sequence dialog box lets you restart a sequence.
A sequence is a programmable database objects that generates a definable sequence of values. A sequence can be
made available to many users.
Important Notes
None
For more information, see Completing a Dialog Box
.
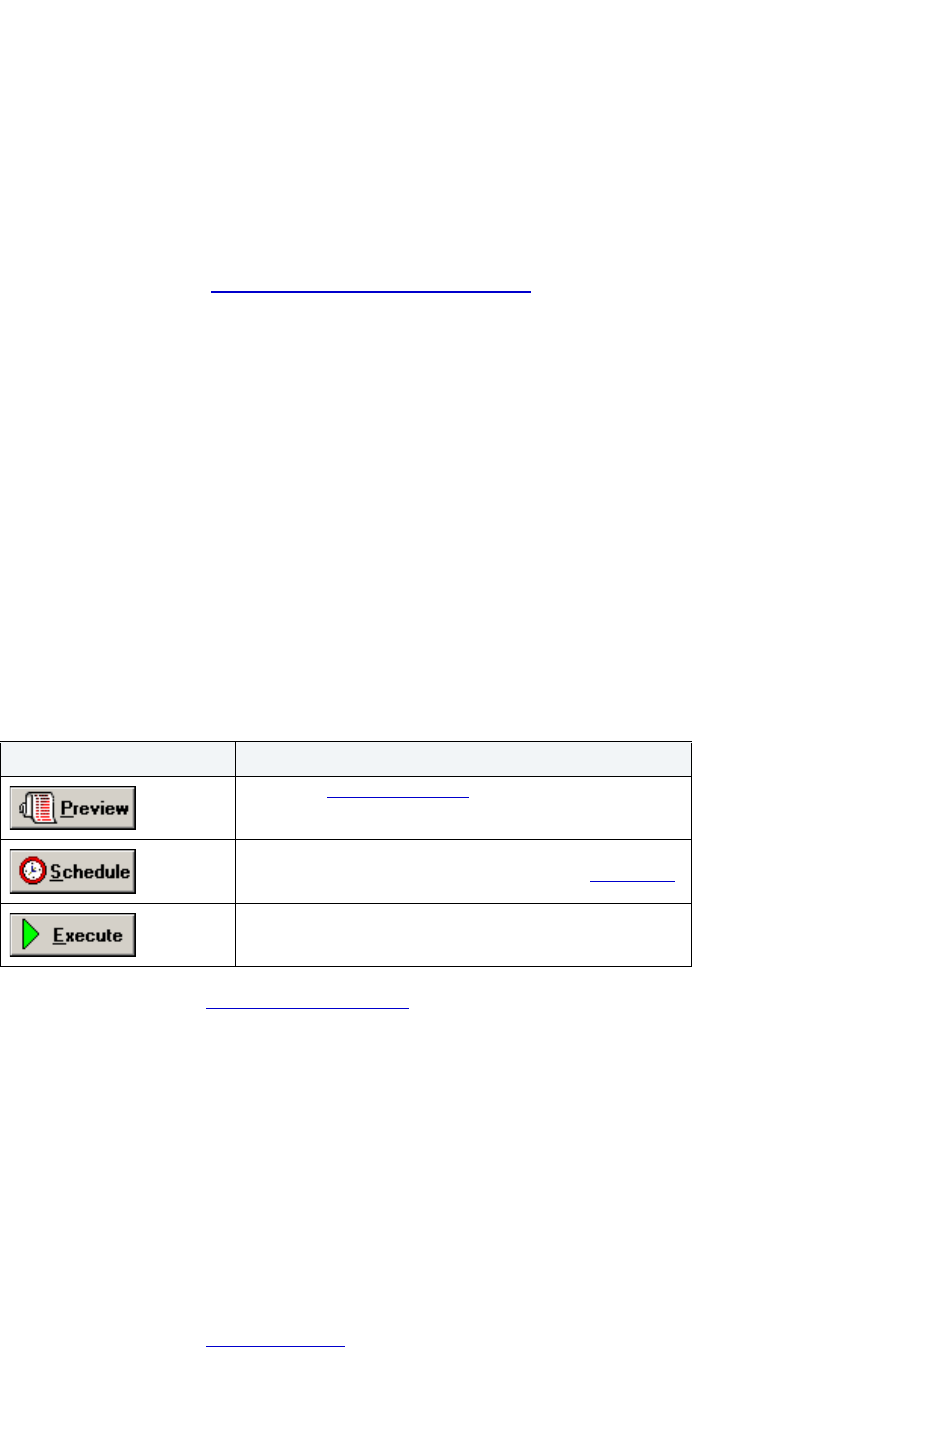
USING > FUNCTIONALITY
EMBARCADERO TECHNOLOGIES > BOOKNAMEVARIABLE 658
Revoke Role
This functionality is available for all platforms.
The Revoke Role dialog box lets you revoke a role to restrict user access to objects.
Important Notes
None
For more information, see Completing the Revoke Role Dialog Box.
Completing the Revoke Roles Dialog Box
To complete this dialog box, do the following:
1 In the Database Explorer, select the target user.
2 Right-click the target user, and select Open.
Rapid SQL opens the Users Editor.
3 On the Definition Tab of the Users Editor, select the Role, and then click Drop.
Rapid SQL opens the Revoke Roles dialog box.
4 Select the role(s) to revoke.
5 Do one of the following:
For more information, see Completing a Dialog Box
.
NOTE: This functionality is available for IBM DB2 UDB for OS/390 and z/OS.
Schema
This functionality is available for all platforms.
The Schema dialog box lets you view everything that makes up a selected table.
Important Notes
None
For more information, see Viewing Schema
.
Button Description
Opens the Preview dialog box.
Opens Embarcadero Job Scheduler, or (if unavailable)
another scheduling application. For more, see Scheduling
.
Executes the task.

USING > FUNCTIONALITY
EMBARCADERO TECHNOLOGIES > BOOKNAMEVARIABLE 659
Viewing Schema
To view schema, do the following:
1 On the Database Explorer, select the target object node.
Rapid SQL displays the target objects in the Database Explorer.
2 On the Database Explorer, right-click the target object, and then select Schema.
Rapid SQL opens the Schema window.
For more information, see Completing a Dialog Box
.
Select * From
This functionality is available for all platforms.
The Select * From dialog box lets you retrieve all data from a selected table or view.
Important Notes
None
For more information, see Completing the Select * From Dialog Box
.
Completing the Select * From Dialog Box
To complete this dialog box, do the following:
1 On the Database Explorer, select the target object node.
Rapid SQL displays the target objects in the Database Explorer.
2 On the Database Explorer, right-click the target object, and then select Select * From.
Rapid SQL opens the Select * From dialog box.
For more information, see Completing a Dialog Box
.
Set Online/Offline
This functionality is available for Microsoft SQL Server, Oracle, and Sybase ASE only.
The Set Database(s) Online/Offline dialog box lets you disable your databases to prevent access, and enable your
databases to grant access through the Datasource menu.
Important Notes
For Sybase, Rapid SQL only lets you set databases online.
For more information, see Completing the Set Database(s) Online/Offline Dialog Box.
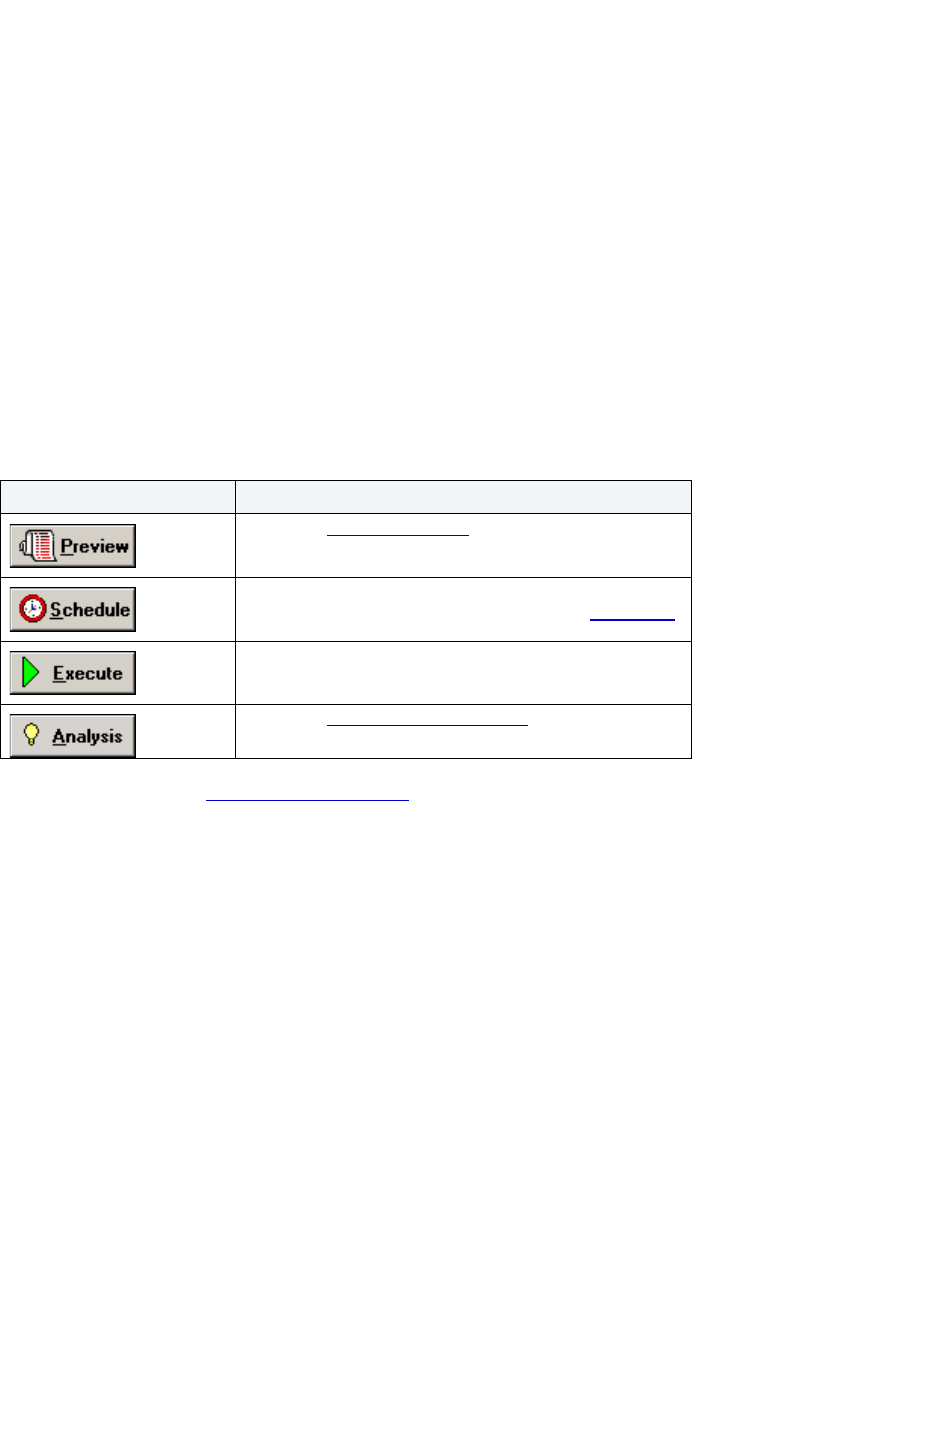
USING > FUNCTIONALITY
EMBARCADERO TECHNOLOGIES > BOOKNAMEVARIABLE 660
Completing the Set Database(s) Online/Offline Dialog Box
To complete this dialog box, do the following:
1 On the Database Explorer, select the Databases node.
Rapid SQL displays the Databases in the Database Explorer.
2 On the Database Explorer, right-click the database, and then select Set Online/Offline.
Rapid SQL opens the Set Database(s) Online/Offline dialog box.
3 Select an option:
• Set Online
• Set Offline
4 Do one of the following:
For more information, see Completing a Dialog Box
.
Set Tablespaces Quota
This functionality is available for Oracle only.
The Set Tablespaces Quota dialog box lets you set a quota for a tablespace. When you assign a quota:
• Users with privileges to create certain types of objects can create those objects in the specified tablespace.
• Oracle limits the amount of space that can be allocated for storage of a user's objects within the specified
tablespace to the amount of the quota.
Important Notes
None
The table below describes the options and functionality on the Set Tablespaces Quota dialog box.
Button Description
Opens the Preview dialog box.
Opens Embarcadero Job Scheduler, or (if unavailable)
another scheduling application. For more, see Scheduling.
Executes the task.
Opens the Impact Analysis dialog box
. This option is not
available for every dialog box.
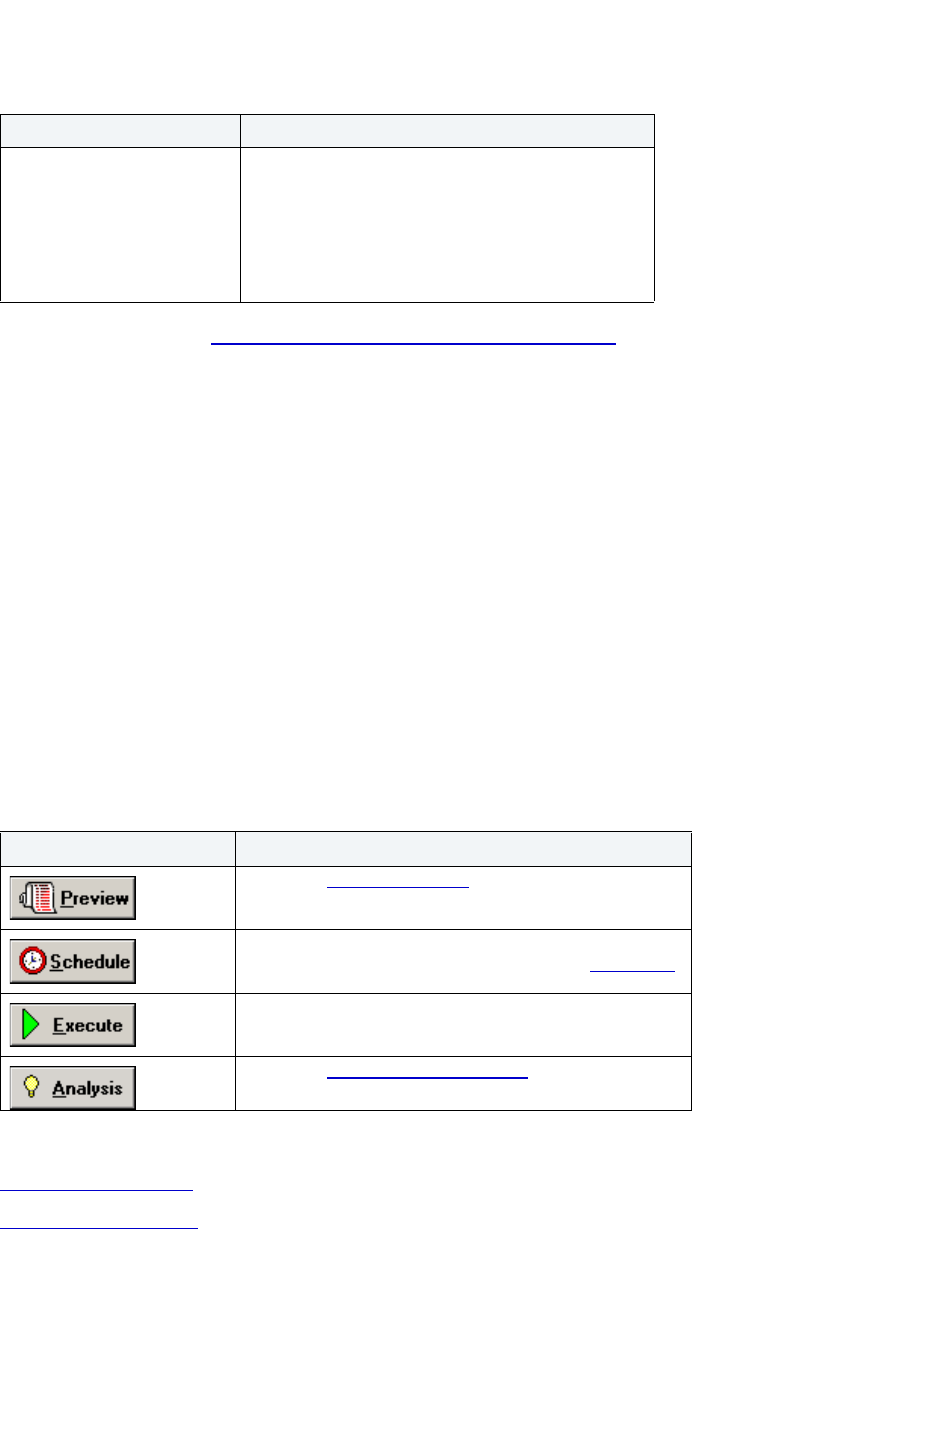
USING > FUNCTIONALITY
EMBARCADERO TECHNOLOGIES > BOOKNAMEVARIABLE 661
For more information, see Completing the Set Tablespaces Quota Dialog Box.
Completing the Set Tablespaces Quota Dialog Box
To complete this dialog box, do the following:
1 On the Database Explorer, select the Tablespaces node.
Rapid SQL displays the Tablespaces in the Database Explorer.
2 On the Database Explorer, right-click the tablespace, and then select Quota.
Rapid SQL opens the Set Tablespaces Quota dialog box.
3 Click the Unlimited or Other option button.
4 If you click Other, type the value of the quota and then click list to indicate KB or MB.
5 Click OK.
6 Do one of the following:
For more information, see:
Set Tablespaces Quota
Completing a Dialog Box
Set UNDO Tablespace
NOTE: This functionality is available for Oracle 9 or later.
Option Description
Quota Lets you set a quota on the selected tablespace. You
can select an unlimited, or specified size.
Unlimited - Lets you place an unlimited quota on the
tablespace.
Other - Lets you place a specified quota in KB or MB
on the tablespace.
Button Description
Opens the Preview dialog box.
Opens Embarcadero Job Scheduler, or (if unavailable)
another scheduling application. For more, see Scheduling
.
Executes the task.
Opens the Impact Analysis dialog box
. This option is not
available for every dialog box.
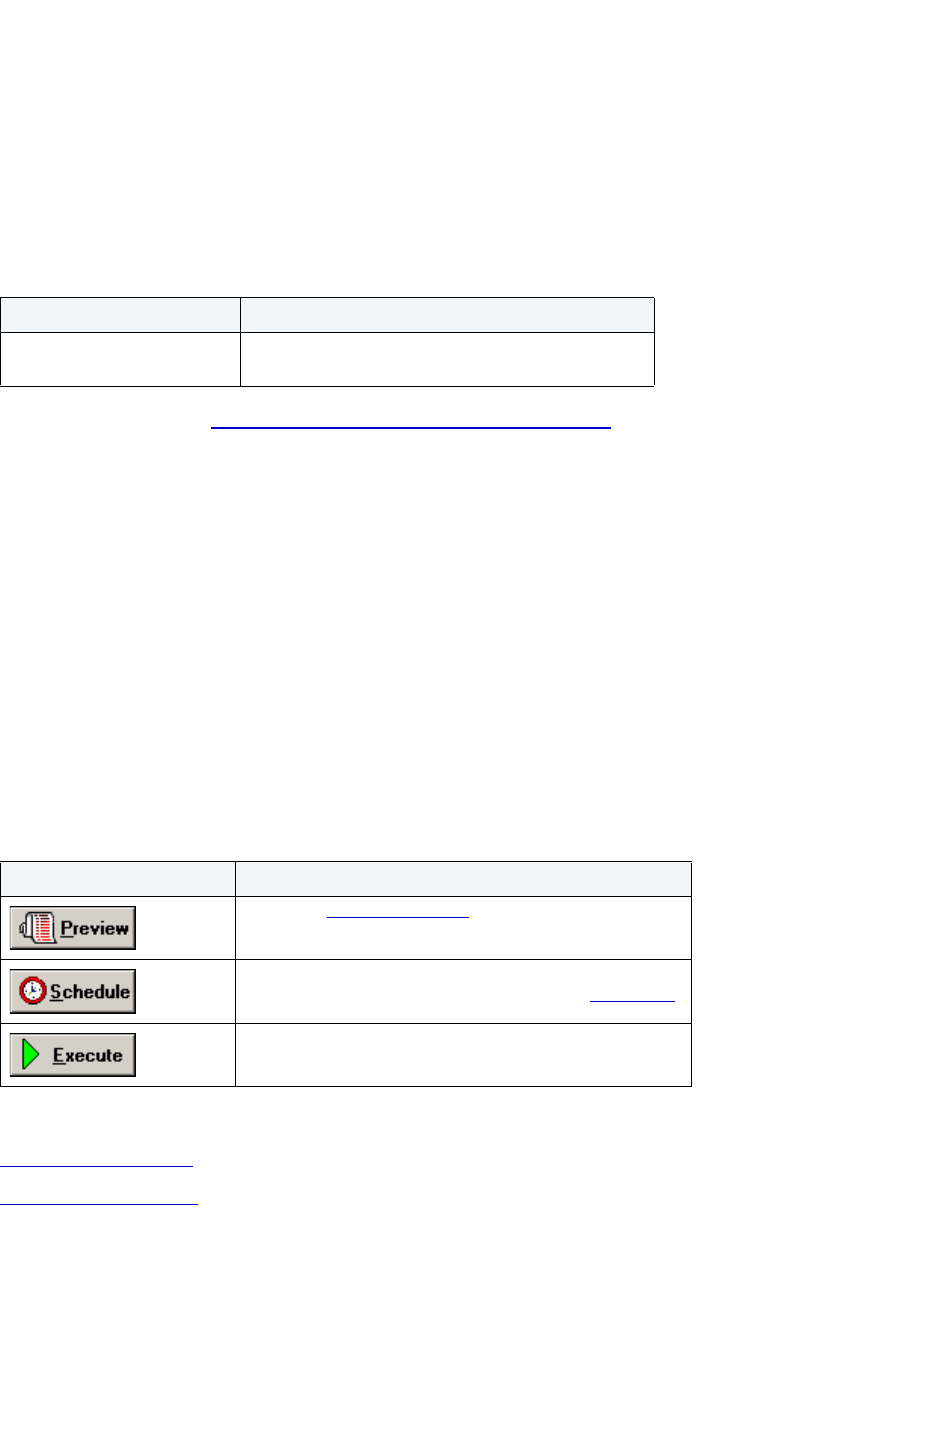
USING > FUNCTIONALITY
EMBARCADERO TECHNOLOGIES > BOOKNAMEVARIABLE 662
Set UNDO Tablespace dialog box lets you dynamically set an UNDO tablespace if the tablespace is running in AUTO
UNDO mode.
Important Notes
None
The table below describes the options and functionality on the Set UNDO Tablespace dialog box.
For more information, see Completing the Set UNDO Tablespace Dialog Box.
Completing the Set UNDO Tablespace Dialog Box
To complete this dialog box, do the following:
1 On the Database Explorer, select the Tablespaces node.
Rapid SQL displays the Tablespaces in the Database Explorer.
2 On the Database Explorer, right-click the tablespace, and then select Set Undo Tablespace.
Rapid SQL opens the Set Undo Tablespace dialog box.
3In New Undo Tablespace select from the possible UNDO tablespace choices. Select NULL to un-assign all
UNDO tablespaces
4 Do one of the following:
For more information, see:
Set Tablespaces Quota
Completing a Dialog Box
Shrink
NOTE: The Shrink functionality is available for Microsoft SQL Server and Oracle 7.3 or later.
Option Description
New Undo Tablespace Display the possible UNDO tablespace choices.
Select NULL to un-assign all UNDO tablespaces
Button Description
Opens the Preview dialog box.
Opens Embarcadero Job Scheduler, or (if unavailable)
another scheduling application. For more, see Scheduling
.
Executes the task.

USING > FUNCTIONALITY
EMBARCADERO TECHNOLOGIES > BOOKNAMEVARIABLE 663
Microsoft SQL Server
The Shrink Database dialog box lets you reclaim space from a database that is too large.
Important Notes
None
The table below describes the options and functionality on the Shrink Database dialog box.
Oracle
The Shrink Rollback Segments dialog box lets you shrink the size of rollback segments. The proper sizing of rollback
segments is critical to their overall performance. Performance degrades whenever a rollback segment must extend,
wrap or shrink in response to transaction loads. Ideally, you want to make the extents of rollback segments as small as
possible while still ensuring that each transaction can fit into a single extent.
After an abnormally large transaction load, you might consider shrinking a rollback segment to eliminate unnecessary
space. Oracle 7.3 or later lets you shrink a rollback segment manually by a specific amount or back to its Optimal
Size.
Important Notes
For Oracle 9 or later, Shrink is not available if auto-UNDO management is enabled.
The table below describes the options and functionality on the Shrink Rollback Segments dialog box:
For more information, see Completing a Dialog Box
.
Status
NOTE: The Status functionality is available for Microsoft SQL Server, Oracle, and Sybase ASE.
The Set Constraint(s) Status dialog box lets you change the status of check constraints, foreign key constraints,
primary key constraints, and unique key constraints.
Option Description
Move data pages to
beginning of file before shrink
Select to move data pages to the beginning of the file before the
shrink.
Release All Unused Space Deselect to set the target free space to retain, and then in the
Target Free Space to Retain (percent) box, type the new value of
free space to retain.
The new size for the database must be at least as large as the
Minimum Allowable Size displayed in the Current File Size box.
Target free space percent
after shrink
Lets you specify the target free space percent after the shrink.
Option Functionality
Specify the size... If you do not provide a specific number the Rollback Segment uses
the OPTIMAL value specified in the Storage clause. If an
OPTIMAL value is not specified, the size defaults to the
MINEXTENTS value of the Storage clause.

USING > FUNCTIONALITY
EMBARCADERO TECHNOLOGIES > BOOKNAMEVARIABLE 664
Important Notes
None
For more information, see Completing the Set Constraint(s) Status Dialog Box
.
Completing the Set Constraint(s) Status Dialog Box
To complete this dialog box, do the following:
1 On the Database Explorer, select the target object node.
Rapid SQL displays the target objects in the Database Explorer.
2 On the Database Explorer, right-click the target object, and then select Status.
Rapid SQL opens the Set Constraint(s) Status dialog box.
3 Select dialog box options.
4 Do one of the following:
For more information, see:
Setting Constraint Status for Microsoft SQL Server Objects
Setting Constraint Status for Oracle
Completing a Dialog Box.
Setting Constraint Status for Microsoft SQL Server Objects
The Set Constraint Status dialog box lets you specify the ability of a group of constraints to be replicated, and (for
Microsoft SQL Server version 7 or later) enable or disable check constraints, foreign key constraints, primary key
constraints, and unique key constraints.
The table below describes the options and functionality on the Set Constraint Status dialog box.
Button Description
Opens the Preview dialog box.
Opens Embarcadero Job Scheduler, or (if unavailable)
another scheduling application. For more, see Scheduling.
Executes the task.
Opens the Impact Analysis dialog box
. This option is not
available for every dialog box.
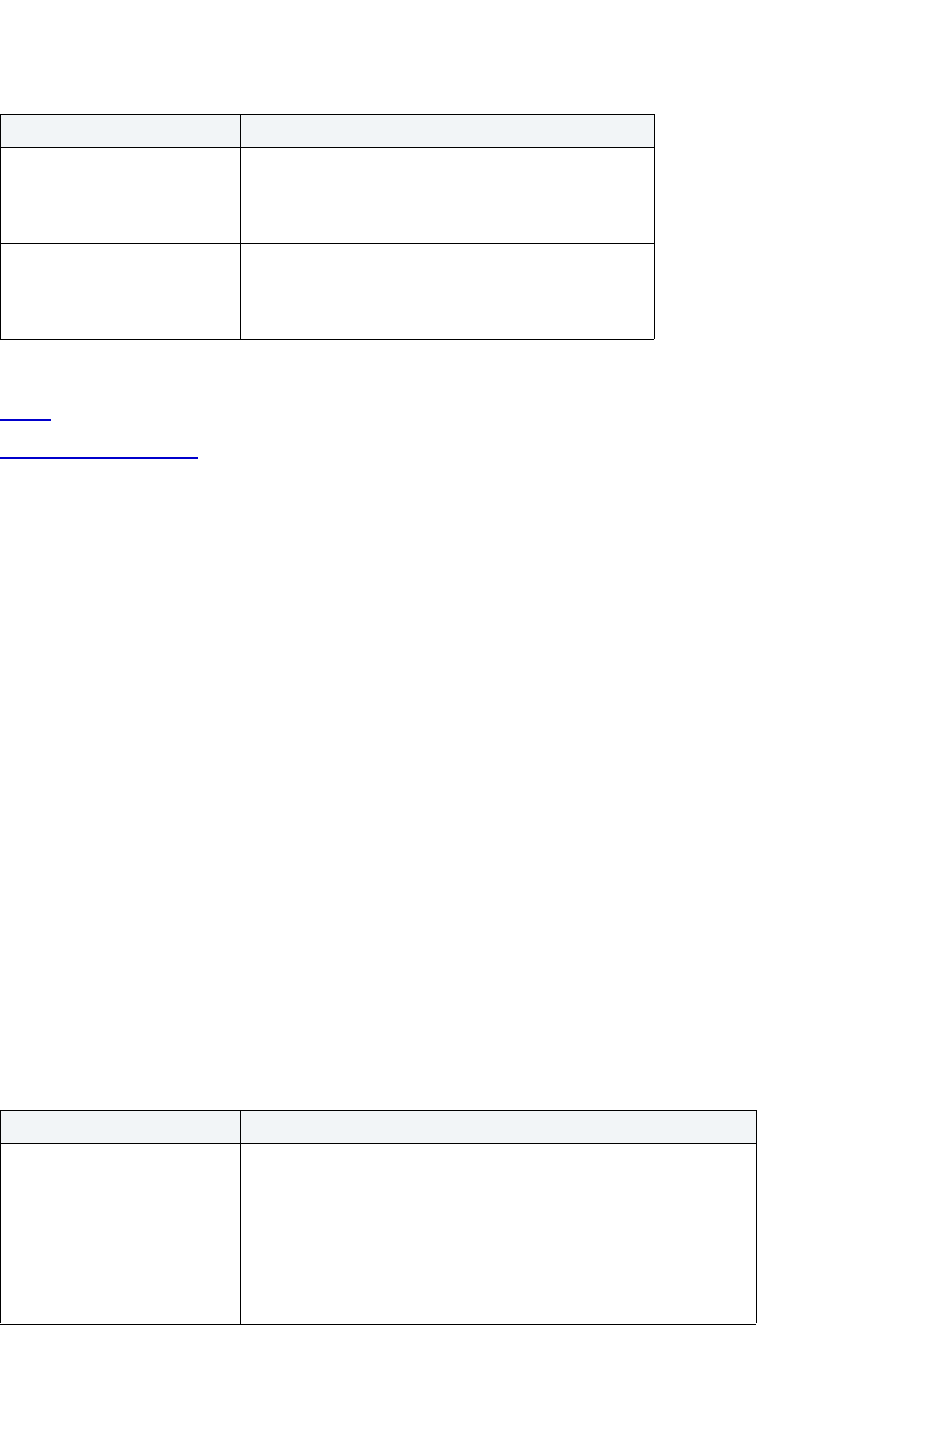
USING > FUNCTIONALITY
EMBARCADERO TECHNOLOGIES > BOOKNAMEVARIABLE 665
For more information, see:
Status
Completing a Dialog Box
Setting Constraint Status for Oracle
The Set Constraint(s) Status dialog box lets you change the status of check constraints, foreign key constraints,
primary key constraints, and unique key constraints. Rapid SQL lets you enable or disable selected constraints and, in
the case of primary key and unique key constraints, lets you enable with or without validation and disable with or
without the changes cascading.
When enabled, the rule defined by the constraint is enforced on the data values in the columns on which the constraint
is placed. When disabled, the constraint rule is not enforced but the constraint continues to be stored in the data
dictionary.
Temporarily disabling constraints can improve performance when you are loading large amounts of data or when you
are making massive changes to a table. Disabling constraints also can be useful if you are importing or exporting one
table at a time.
NOTE: Primary keys for index-organized tables cannot be disabled.
NOTE: You cannot drop a unique or primary key constraint that is part of a referential integrity constraint
without also dropping the foreign key. To drop the referenced key and the foreign key together,
select the Cascade check box in the Set Constraint(s) Status dialog box.
The table below describes the options and functionality on the Set Constraint(s) Status dialog box.
NOTE: The options differ by object.
Option Description
Enabled Deselect to temporarily override listed check
constraints. Useful when you need to execute special
processes that would ordinarily incur
constraint-related errors.
Not for Replication When you duplicate the table schema and data of a
source database containing constraints marked "Not
for Replication", these objects are not carried over to
the duplicate of the schema.
Option Description
Enable Enabling the constraint and not selecting the Validate check box
automatically uses Oracle ENABLE NOVALIDATE clause which
enables a constraint so that it does not validate the existing data. A
table using constraints in enable novalidate mode can contain
invalid data but you cannot add new invalid data to that table.The
enable novalidate mode is useful as an intermediate state or when
you do not want the constraint to check for possible exceptions
(e.g., after a data warehouse load).
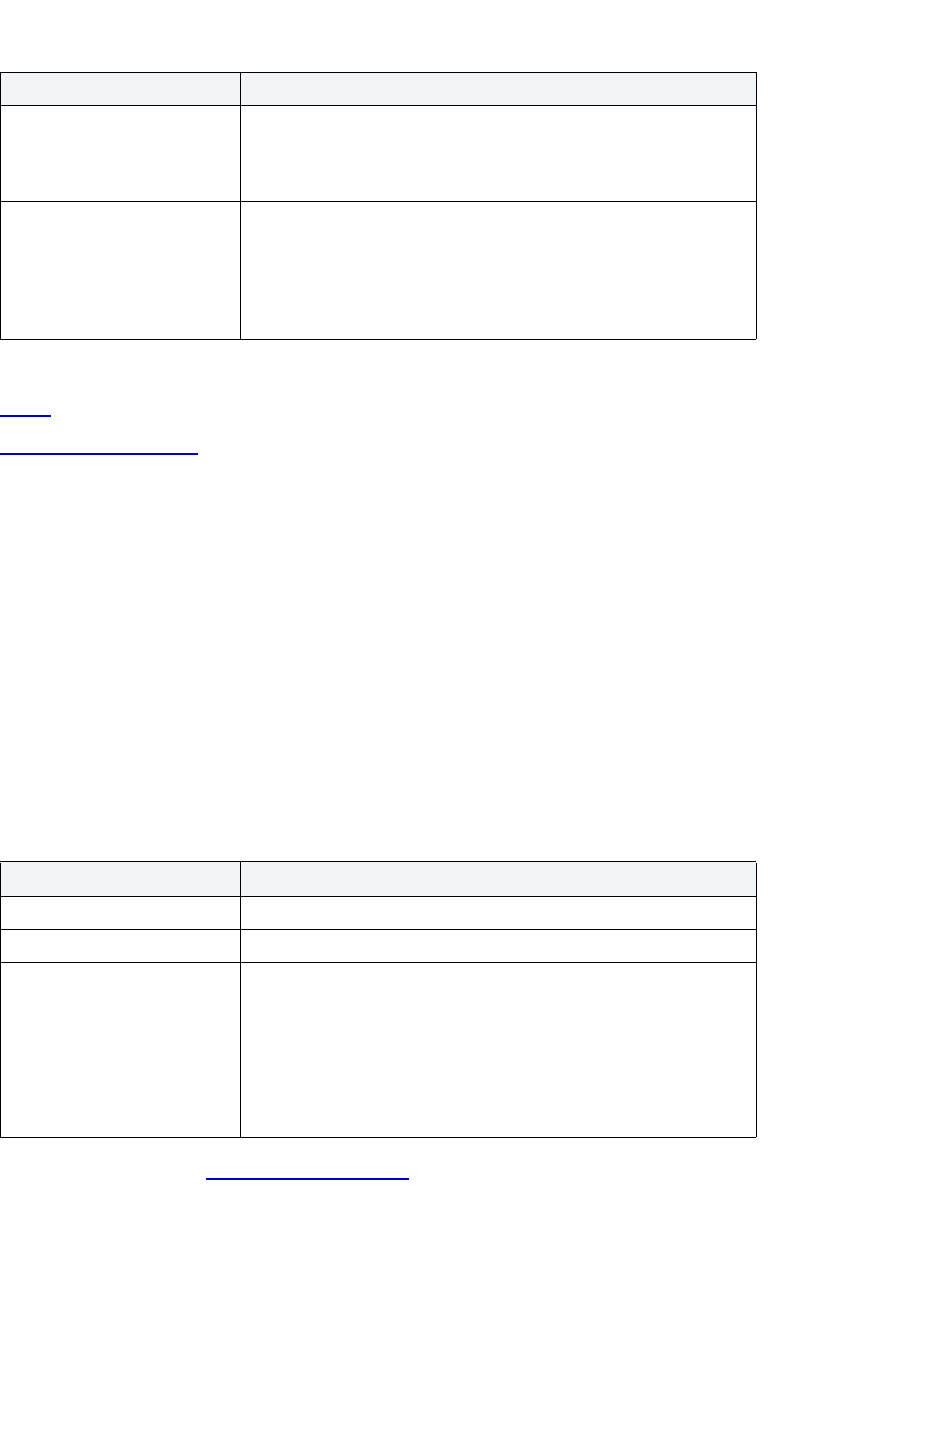
USING > FUNCTIONALITY
EMBARCADERO TECHNOLOGIES > BOOKNAMEVARIABLE 666
For more information, see:
Status
Completing a Dialog Box
Summary Definition
This functionality is available for IBM DB2 UDB for Linux, Unix, and Windows only.
The Summary Definition dialog box lets you enter the query for your table. If you are creating a table as a result of a
query, you need to include the query in the AS FullSelect box.
TIP: You can open the query in the ISQL Editor and use the copy/paste function to add the query to
the AS FullSelect box.
Important Notes
You must complete the Summary Definition dialog box to proceed with the Table Wizard.
The table below describes the options and functionality on the Summary Definition dialog box:
For more information, see Completing a Dialog Box
.
Switch Online
NOTE: The Switch Online functionality is available for IBM DB2 UDB for Linux, Unix, and Windows only.
Validate Enabling the constraint and selecting the Validate check box
causes Oracle to validate all existing data in the key columns of the
table with the constraint. If an exception exists, Oracle returns an
error and the constraint remains disabled.
Cascade Selecting the Cascade check box when disabling a primary key or
foreign key constraint instructs Oracle to simultaneously disable
any constraints that depend on the primary or unique key.
Selecting the Delete Cascade check box instructs Oracle to delete
data in the child table (on which the foreign key is defined) if the
referenced data is the parent table is deleted.
Option Description
Table Name Read-only field that displays the table name.
AS FullSelect Enter the query in box.
Summary table Options Lets you set able options for the table you are creating.
Definition Only - Lets you set copy options for the table definition. If
you select this check box, you can set the copy options to include
Column Defaults and Identity Column Attr. The default selection is
Column Defaults.
Refreshable Options - Lets you set table refresh options for data
and query.
Option Description
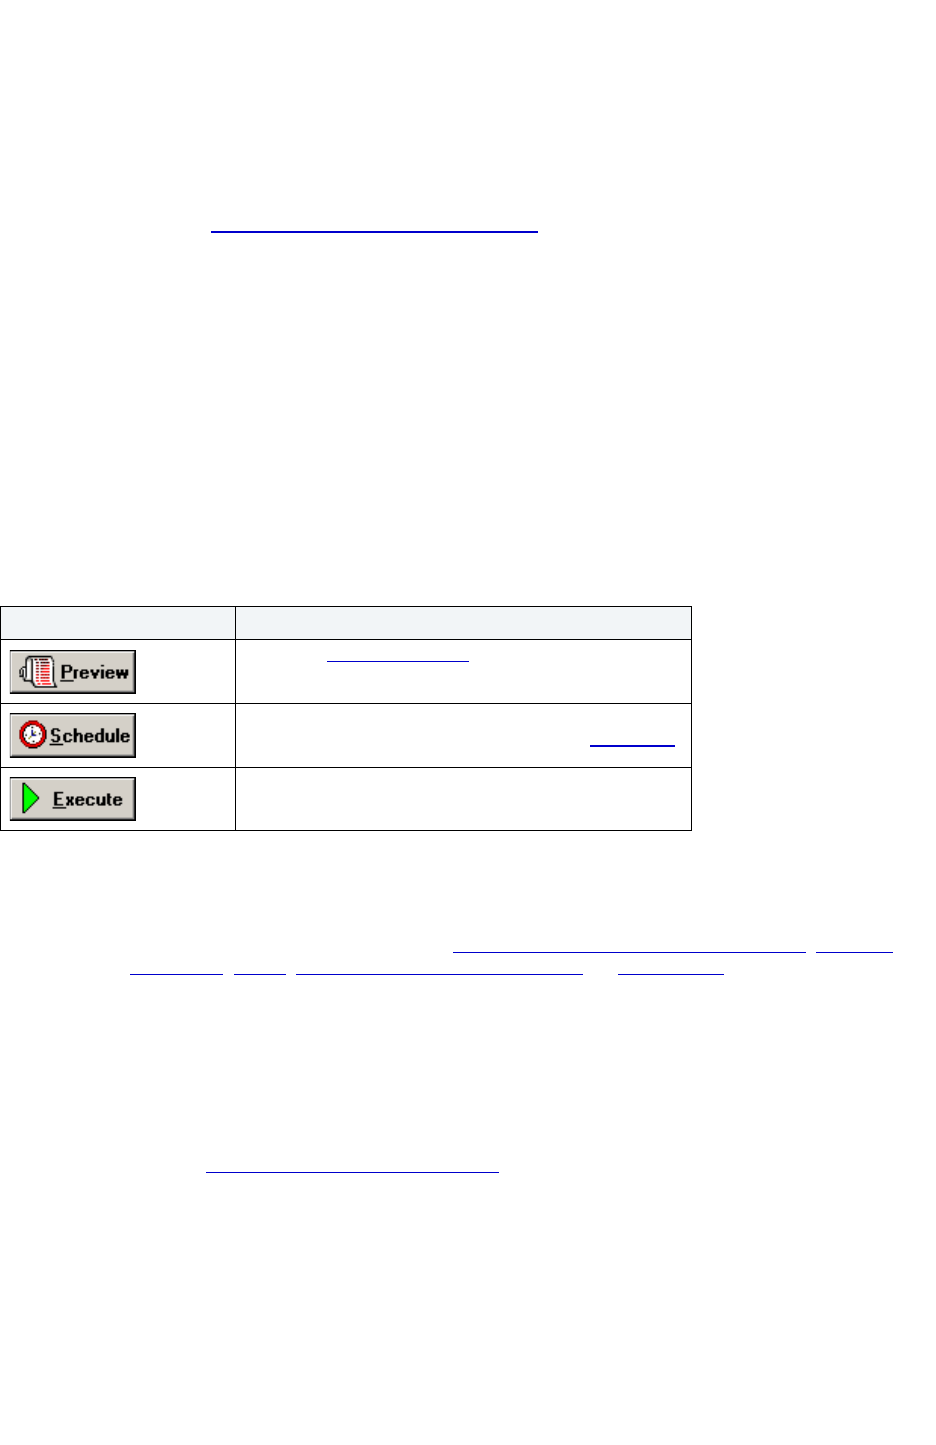
USING > FUNCTIONALITY
EMBARCADERO TECHNOLOGIES > BOOKNAMEVARIABLE 667
The Switch Online dialog box lets you access a tablespace by switching it online after the parent container(s) have
been recovered or restored.
Important Notes
None
For more information, see Completing the Switch Online Dialog Box
.
Completing the Switch Online Dialog Box
To complete this dialog box, do the following:
1 On the Database Explorer, select the target object node.
Rapid SQL displays the target objects in the Database Explorer.
2 On the Database Explorer, right-click the target object, and then select Switch Online.
Rapid SQL opens the Switch Online dialog box.
3 Do one of the following:
Truncate
NOTE: The Truncate functionality is available for IBM DB2 UDB for Linux, Unix, and Windows, Microsoft
SQL Server, Oracle, IBM DB2 UDB for OS/390 and z/OS and Sybase ASE.
The Truncate dialog box lets you quickly delete the rows of a table.
Important Notes
If you truncate a table, Rapid SQL deletes all the rows. These rows are not logged as individual drops and cannot be
recovered from a transaction log or other type of log.
For more information, see Completing the Truncate Dialog Box.
Button Description
Opens the Preview dialog box.
Opens Embarcadero Job Scheduler, or (if unavailable)
another scheduling application. For more, see Scheduling.
Executes the task.
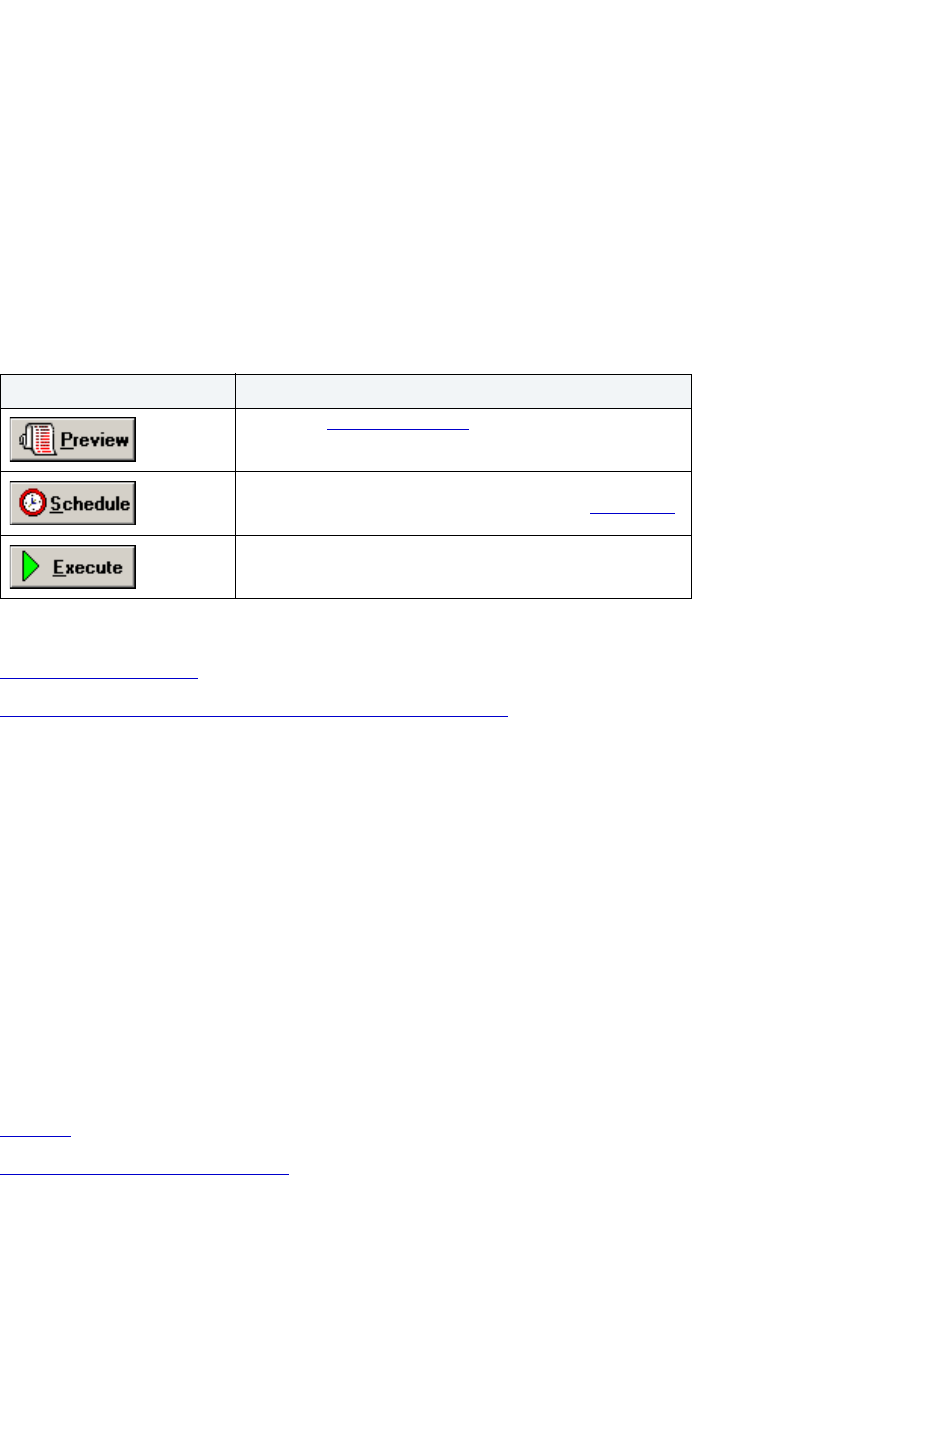
USING > FUNCTIONALITY
EMBARCADERO TECHNOLOGIES > BOOKNAMEVARIABLE 668
Completing the Truncate Dialog Box
To complete this dialog box, do the following:
1 On the Database Explorer, select the target object node.
Rapid SQL displays the target objects in the Database Explorer.
2 On the Database Explorer, right-click the target object, and then select Truncate.
Rapid SQL opens the Truncate dialog box.
3 Do one of the following:
For more information, see:
Completing a Dialog Box
Truncating IBM DB2 UDB for Linux, Unix, and Windows Objects
Truncating Microsoft SQL Server Objects
Truncating Oracle Objects
Truncating IBM DB2 UDB for OS/390 and z/OS Objects
Truncating Sybase ASE Objects
Truncating IBM DB2 UDB Objects
The Truncate dialog box lets you quickly delete the rows of a table.
NOTE: If you truncate a table, Rapid SQL deletes all the rows. These rows are not logged as individual
drops and cannot be recovered from a transaction log or other type of log.
For more information, see:
Truncate
Completing the Truncate Dialog Box
Truncating Microsoft SQL Server Objects
The Truncate dialog box lets you quickly delete the rows of a table.
NOTE: If you truncate a table, Rapid SQL deletes all the rows. These rows are not logged as individual
drops and cannot be recovered from a transaction log or other type of log.
Button Description
Opens the Preview dialog box.
Opens Embarcadero Job Scheduler, or (if unavailable)
another scheduling application. For more, see Scheduling
.
Executes the task.

USING > FUNCTIONALITY
EMBARCADERO TECHNOLOGIES > BOOKNAMEVARIABLE 669
For more information, see:
Truncate
Completing the Truncate Dialog Box
Truncating Oracle Objects
The Truncate dialog box lets you truncate tables and clusters. Truncating a table or cluster is a quick and efficient way
to delete all of a table’s or a cluster’s existing rows. You can truncate any table or cluster in their schema or, if you
have the DROP ANY TABLE system privilege, you can truncate any table in any schema.
When you truncate a table or cluster, you can specify whether space currently allocated for the table is returned to the
containing tablespace or if it is returned to the system. The table below includes notes on the objects you can truncate:
The table below describes the options and functionality on the Truncate dialog box.
Object Notes
Cluster Before truncating a cluster containing a parent key,
disable all referencing foreign keys existing in
different tables.
Truncating a cluster does not generate any rollback
information and commits immediately.
Oracle alters the storage parameter NEXT to the size
of the last extent deleted from the segment.
Table Before truncating a table containing a parent key,
disable all referencing foreign keys existing in
different tables.
Truncating a table does not generate any rollback
information and commits immediately.
Oracle alters the storage parameter NEXT to the size
of the last extent deleted from the segment.
Oracle automatically deletes all data in the table's
indexes and any materialized view direct-load
INSERT information associated with a truncated
table.
If the table is not empty, all associated
nonparititioned indexes and all partitions of
associated global partitioned indexes are marked
unusable.
You cannot truncate a hash cluster nor can you
truncate individual tables in a hash cluster or an
index cluster.

USING > FUNCTIONALITY
EMBARCADERO TECHNOLOGIES > BOOKNAMEVARIABLE 670
For more information, see:
Truncate
Completing the Truncate Dialog Box
Truncating IBM DB2 UDB for OS/390 and z/OS Objects
The Truncate dialog box lets you quickly delete the rows of a table.
CAUTION: If you truncate a table, Rapid SQL deletes all the rows. These rows are not logged as individual
drops and cannot be recovered from a transaction log or other type of log.
Truncating a table is a faster alternative to deleting all of its rows. You cannot recover a truncated table because
TRUNCATE TABLE is an unlogged command.
For more information, see:
Truncate
Completing the Truncate Dialog Box
Truncating Sybase ASE Objects
The Truncate dialog box lets you truncate single or multiple tables. Truncating a table is a faster alternative to deleting
all its rows. You cannot recover a truncated table because TRUNCATE TABLE is an unlogged command.
NOTE: You cannot truncate a table referenced by a foreign key constraint. Instead, use a DELETE
statement without a WHERE clause.
TIP: When you truncate a table, Sybase ASE removes all rows from the target table, but retains the
table structure (its indexes, columns, constraints, etc.). The counter used by an identity for new
rows is reset to the seed for the column. To retain the identity counter, use a DELETE statement
instead of TRUNCATE. To remove the target table definition and its data, use a DROP TABLE
statement.
For more information, see:
Truncate
Completing the Truncate Dialog Box
Option Description
Storage Handling Drop Storage - Select if you want the freed extents
returned to the system where they can be used by
other objects.
Reuse Storage - Select if you want the space to
remain allocated to the table or cluster you have just
truncated.
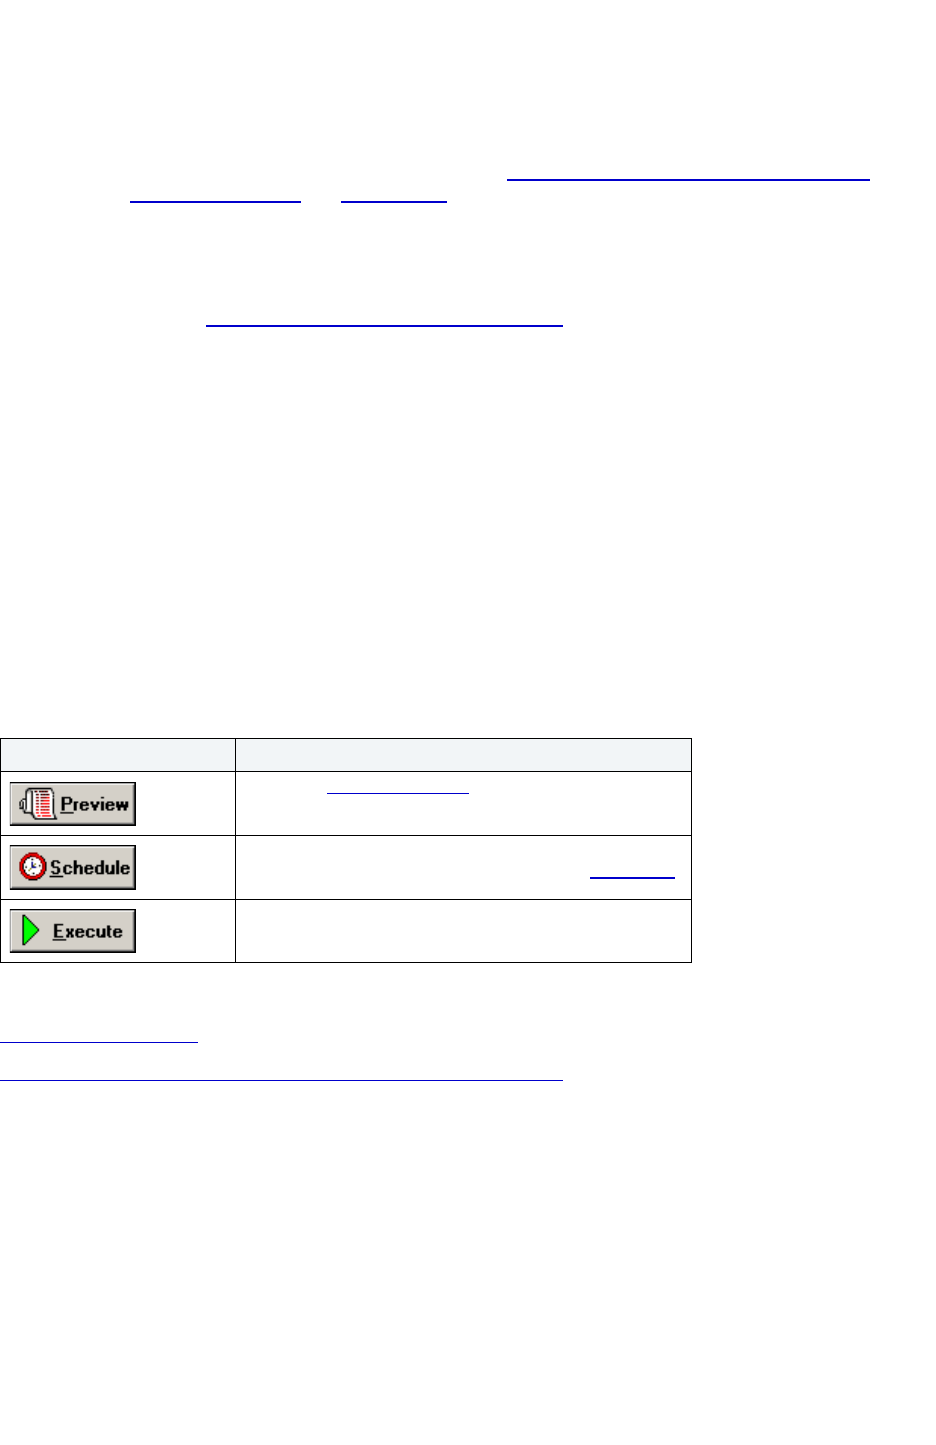
USING > FUNCTIONALITY
EMBARCADERO TECHNOLOGIES > BOOKNAMEVARIABLE 671
Update Statistics
The Update Statistics dialog box lets you update the statistics for an active table or index. As indexes grow and shrink
in response to data modification, the accuracy of their statistics can deteriorate.
NOTE: The Update Statistics dialog box is available for IBM DB2 UDB for Linux, Unix, and Windows,
Microsoft SQL Server, and Sybase ASE.
Important Notes
None
For more information, see Completing the Update Statistics Dialog Box
.
Completing the Update Statistics Dialog Box
To complete this dialog box, do the following:
1 On the Database Explorer, select the target object node.
Rapid SQL displays the target objects in the Database Explorer.
2 On the Database Explorer, right-click the target object, and then select Update Statistics.
Rapid SQL opens the Update Statistics dialog box.
3 Select dialog box options.
4 Do one of the following:
For more information, see:
Completing a Dialog Box
Updating IBM DB2 UDB for Linux, Unix, and Windows Object Statistics
Updating Microsoft SQL Server Object Statistics
Updating Sybase ASE Object Statistics
Updating IBM DB2 UDB for Linux, Unix, and Windows Object Statistics
The table below describes the options and functionality on the Update Statistics dialog box.
Button Description
Opens the Preview dialog box.
Opens Embarcadero Job Scheduler, or (if unavailable)
another scheduling application. For more, see Scheduling.
Executes the task.

USING > FUNCTIONALITY
EMBARCADERO TECHNOLOGIES > BOOKNAMEVARIABLE 672
Tab Option Description
Table Options Update table statistics Updates table statistics.
Do not collect column
statistics
Column statistics provide
information that the optimizer uses
to choose the best access plans for
queries.
Collect column statistics on
key columns only
Collects column statistics on
columns that make up all the
indexes defined on the table.
Column statistics provide
information that the optimizer uses
to choose the best access plans for
queries.
Collect column statistics on
all columns
Collects column statistics for all
columns.
Column statistics provide
information that the optimizer uses
to choose the best access plans for
queries.
Do not collect distribution
statistics
Does not collect basic statistics or
distribution statistics on the
columns.
For efficiency both of RUNSTATS
and subsequent query-plan
analysis, you might collect
distribution statistics on only the
table columns that queries use in
WHERE, GROUP BY, and similar
clauses. You might also collect
cardinality statistics on combined
groups of columns. The optimizer
uses such information to detect
column correlation when it
estimates selectivity for queries
that reference the columns in the
group.
Collect distribution statistics
on key columns only
Collects both basic statistics and
distribution statistics on key
columns only.
For efficiency both of RUNSTATS
and subsequent query-plan
analysis, you might collect
distribution statistics on only the
table columns that queries use in
WHERE, GROUP BY, and similar
clauses. You might also collect
cardinality statistics on combined
groups of columns. The optimizer
uses such information to detect
column correlation when it
estimates selectivity for queries
that reference the columns in the
group.

USING > FUNCTIONALITY
EMBARCADERO TECHNOLOGIES > BOOKNAMEVARIABLE 673
For more information, see:
Update Statistics
Completing the Update Statistics Dialog Box
Updating Table Statistics
Collecting Column Statistics
Collecting Distribution Statistics for Tables
Collect distribution statistics
on all columns
Collects both basic statistics and
distribution statistics on all
columns.
For efficiency both of RUNSTATS
and subsequent query-plan
analysis, you might collect
distribution statistics on only the
table columns that queries use in
WHERE, GROUP BY, and similar
clauses. You might also collect
cardinality statistics on combined
groups of columns. The optimizer
uses such information to detect
column correlation when it
estimates selectivity for queries
that reference the columns in the
group.
Frequency Lets you specify the maximum
number of frequency values to
collect, between 1 and 32767.
Quantiles Lets you specify the maximum
number of distribution quantile
values to collect, between 1 and
32767.
Index Options Update index statistics Updates index statistics.
Collect extended index
statistics
Collects extended index statistics,
the CLUSTERFACTOR and
PAGE_FETCH_PAIRS statistics
that are gathered for relatively
large indexes.
Collect sample statistics Rapid SQL uses a CPU sampling
technique when compiling the
extended index statistics. If the
option is not specified, every entry
in the index is examined to
compute the extended index
statistics.
Select Indexes Lets you select the indexes.
Access Options Allow read only access
during collection
Allows read only access while
Rapid SQL updates the statistics.
Allow read/write access
during collection
Allows read and write access while
Rapid SQL updates the statistics.
Tab Option Description

USING > FUNCTIONALITY
EMBARCADERO TECHNOLOGIES > BOOKNAMEVARIABLE 674
Setting Access Levels While Updating Statistics for Indexes
Collecting Extended Index Statistics
Collecting Sample Statistics for Indexes
Updating Table Statistics
To update table statistics, do the following:
Collecting Column Statistics
To collect column statistics, do the following:
Collecting Distribution Statistics for Tables
To collect distribution statistics for tables, do the following:
Setting Access Levels While Updating Statistics for Indexes
To set access levels while updating statistics for an index, do the following:
Collecting Extended Index Statistics
To collect extended index statistics, do the following:
Collecting Sample Statistics for Indexes
To collect sample statistics for indexes, do the following:
Updating Microsoft SQL Server Object Statistics
You can update statistics so that Microsoft SQL Server performs the most efficient query possible. This feature
updates statistical information on your database so that the query processor can determine the optimal strategy for
evaluating a query. These statistics record the key values used for distribution in an database.
You can use the Update Statistics dialog box if there is significant change in the key values in the database, if a large
amount of data in an indexed column has been added, changed, or removed, or if a table has been truncated causing
significant changes in the distribution of key values.
The Update Statistics dialog box lets you specify tables and indexes for validation. This dialog box offers different
update options depending on your version of Microsoft SQL Server.
TIP: Avoid updating statistics on your target tables during busy access periods. Microsoft SQL Server
locks remote tables and indexes while reading data for update statistics.
For Microsoft SQL Server version 7 or later, the Update Statistics dialog box lets you specify a full or a percentage of a
full scan to be used for updating table or index statistics. It also lets you enable or disable future automatic
recomputations of statistics. These recomputations are made at Microsoft SQL Server’s discretion. When updating
statistics for tables, this dialog box also lets you specify the type of statistics you require.
Updating Objects
The table below describes the options and functionality on the Update Statistics dialog box for objects.
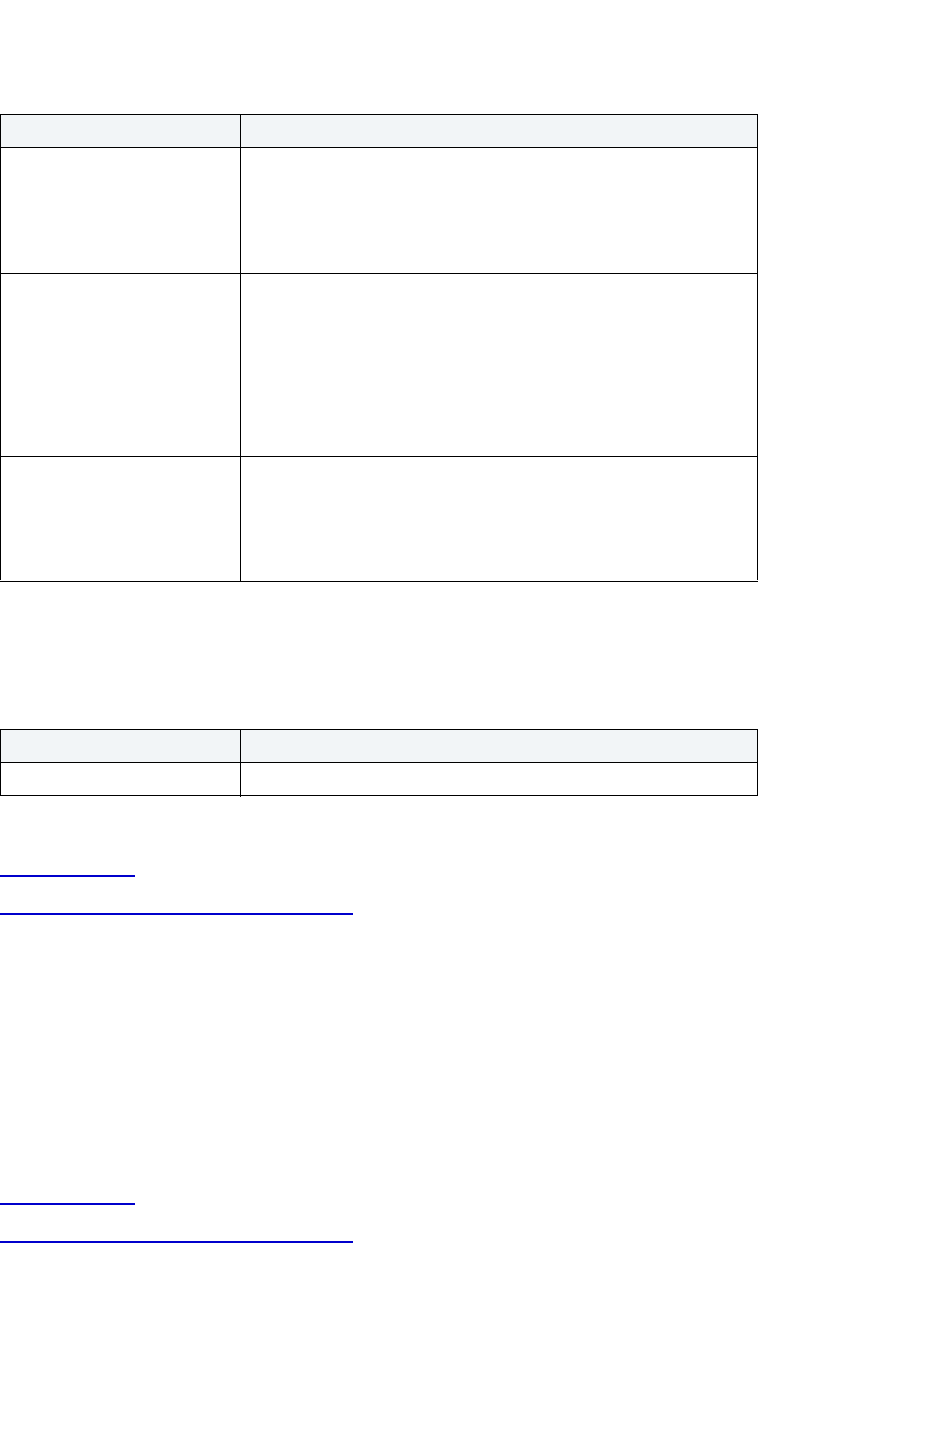
USING > FUNCTIONALITY
EMBARCADERO TECHNOLOGIES > BOOKNAMEVARIABLE 675
Updating Databases
The table below describes the options and functionality on the Update Statistics dialog box for databases.
For more information, see:
Update Statistics
Completing the Update Statistics Dialog Box
Updating Sybase ASE Object Statistics
The Update Statistics dialog box lets you specify tables and indexes for validation. This dialog box offers different
update options depending on your version of Sybase ASE.
TIP: Avoid updating statistics on your target tables during busy access periods. Sybase ASE locks
remote tables and indexes while reading data for update statistics.
For more information, see:
Update Statistics
Completing the Update Statistics Dialog Box
Important Notes
None
Option Description
Scan Range Full Scan - Select when you want index statistics on every
available row.
Sample Scan - Select when database size prohibits a full scan and
you can afford to rely on statistics extrapolated from a sample of all
available rows.
Statistics Type Index - Select if you only require statistics on the target tables’
indexed columns.
Columns - Select if you require statistics on the target tables in
their entirety.
All existing statistics - Select if you require statistics on the whole
database.
NOTE: Only available for updating statistics on tables.
Statistics Recompute Select if you want Microsoft SQL Server to recompute and update
the statistics for the index as part of its normal internal
maintenance.
Deselect if you want the scheduling of future recomputations to be
solely your responsibility.
Option Description
Database(s) to Update Lets you specify the database(s) to update.

USING > SQL SCRIPTING
EMBARCADERO TECHNOLOGIES > BOOKNAMEVARIABLE 676
SQL Scripting
Rapid SQL incorporates a powerful SQL scripting environment, the ISQL Editor. The ISQL Editor lets you write,
debug, test and deploy solid SQL code for your database applications. The scripting environment lets you:
• Open multiple interactive script windows.
• Execute multiple scripts on the same desktop.
• Capture multiple result sets on the same desktop.
Rapid SQL's scripting environment is comprised of different windows:
• ISQL Editor
• DDL Editor
• Results Editor
These windows are context sensitive to the type of script you are opening or extracting. For example, if you extract the
schema for a table, Rapid SQL opens a DDL Window containing the script. If you execute a script, a result window
displays containing the results of your execution statement.
TIP: Since you must drop a database object before you can recreate it, you can set the DDL Editor to
automatically include DROP statements for specified objects.
TIP: You can have multiple ISQL windows open at the same time, with each running separate queries.
ISQL Editor
The ISQL Editor includes the ISQL Window and DDL Editor.
The ISQL Window lets you:
• Insert files and open files.
• Rename and configure query tabs.
• Find and replace with regular expressions.
• Mail your script files.
TIP: To enlarge or reduce (zoom) the display font size, press Ctrl-= or Ctrl-- (plus or minus on the
numeric pad), or hold the Ctrl key while scrolling the mouse wheel. To return to the default size,
press Ctrl-/ (on the numeric pad).
TIP: To toggle to the next SQL window, press CTRL +T.
TIP: The row limit option lets you display only the first 'n' rows from any submitted query.
TIP: For Oracle, Rapid SQL displays REF CURSOR contents in the ISQL Window and Results Tab
.
TIP: For IBM DB2 UDB for Linux, Unix, and Windows and Oracle, you can access the Code
Completion functionality with the CTRL+K shortcut.
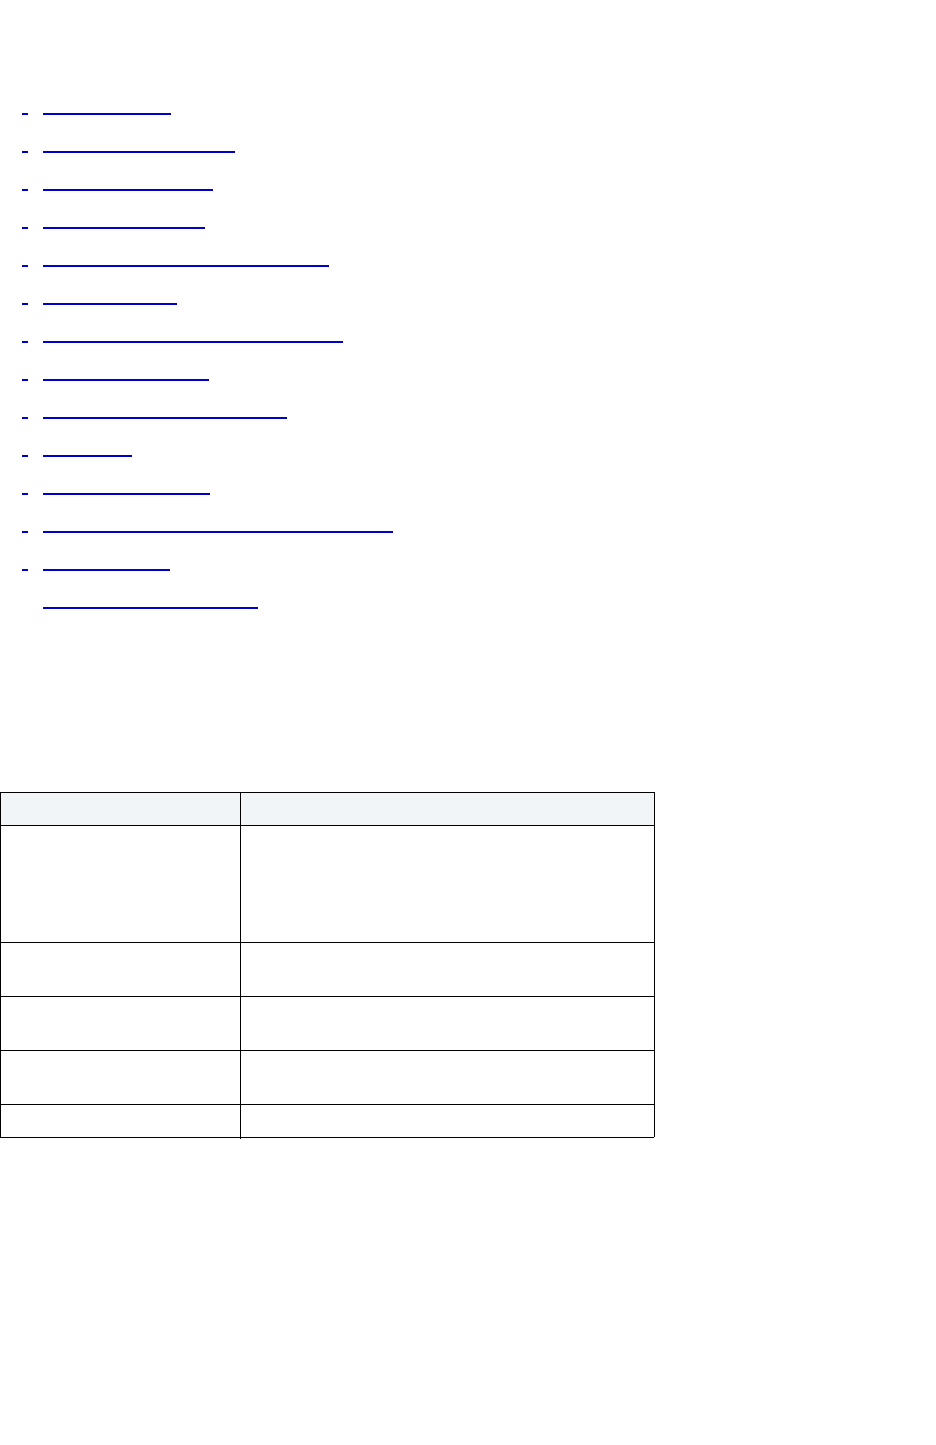
USING > SQL SCRIPTING
EMBARCADERO TECHNOLOGIES > BOOKNAMEVARIABLE 677
Related Topics
•
Toolbar Options
• Opening ISQL Windows
• Opening DDL Editors
• Opening Script Files
• Inserting Files into an ISQL Window
• Splitter Windows
• Find and Replace in an ISQL Window
• Regular Expressions
• Navigating in an ISQL Window
• Scheduling
• Sending SQL Scripts
• Renaming and Closing Query Window Tabs
• Printing a Script
• Saving and Closing Scripts
Toolbar Options
The table below describes the options of the ISQL Editor toolbar:
ISQL Windows
A script is a collection of SQL statements used to perform a task. Scripts, stored as files, form the foundation of most
application projects. Definitions of tables, indexes, stored procedures, as well as reports and batch jobs, are usually
stored in script files and shared by groups of developers using version control software. You can manage SQL scripts
in SQL windows. Rapid SQL lets you open multiple SQL windows in one or more workspaces.
Option Description
Lock Lets you lock an ISQL Window to a specific
datasource connection. When locked, the ISQL
Window does not respond to datasource change
events, and only uses the current connection for
execution.
Format Transforms spaghetti-style written SQL code into an
easier read format.
Syntax Check Checks any set of SQL to ensure it is valid before it is
submitted to the database.
Analyze Code Reports the number and type of statements
contained within the SQL code.
Debug Opens the Embarcadero SQL Debugger.

USING > SQL SCRIPTING
EMBARCADERO TECHNOLOGIES > BOOKNAMEVARIABLE 678
Opening ISQL Windows
To open the ISQL Window, do the following:
1 On the File menu, click New ISQL.
OR
On the Main tool bar, click New ISQL.
Rapid SQL opens an SQL window in your current workspace.
For more information, see
ISQL Window Status Bar
ISQL Editor.
ISQL Window Status Bar
The ISQL window Status bar lets you view:
• Auto commit status (Oracle) - Automatically commits SQL statements as soon as the statements are run.
• Begin Transaction ON/OFF (SQL Server and Sybase)
TIP: For Microsoft SQL Server and Sybase, to set Begin Transaction status to “Yes”, on the ISQL
Window toolbar, click the SQL Begin Tran button.
TIP: For Oracle, you can apply auto commit status changes to all open ISQL windows. You can modify
the Oracle Auto Commit status and ISQL Tab
of the Options Editor.
DDL Editors
NOTE: This functionality is available for all platforms.
Rapid SQL lets you open a new DDL Editor when you want to create a script that is tied to an object type in your
database. The DDL Editor opens containing a template script for the selected object type. Because the DDL Editor is
directly tied to a database, database warning messages can be issued. For example, if you have a create table script
which includes a DROP TABLE statement, the DDL Editor warns you about the existence of this statement and that
you could lose existing table data.
Important Notes
None
The table below describes the options and functionality on the Create New Database Object dialog box.
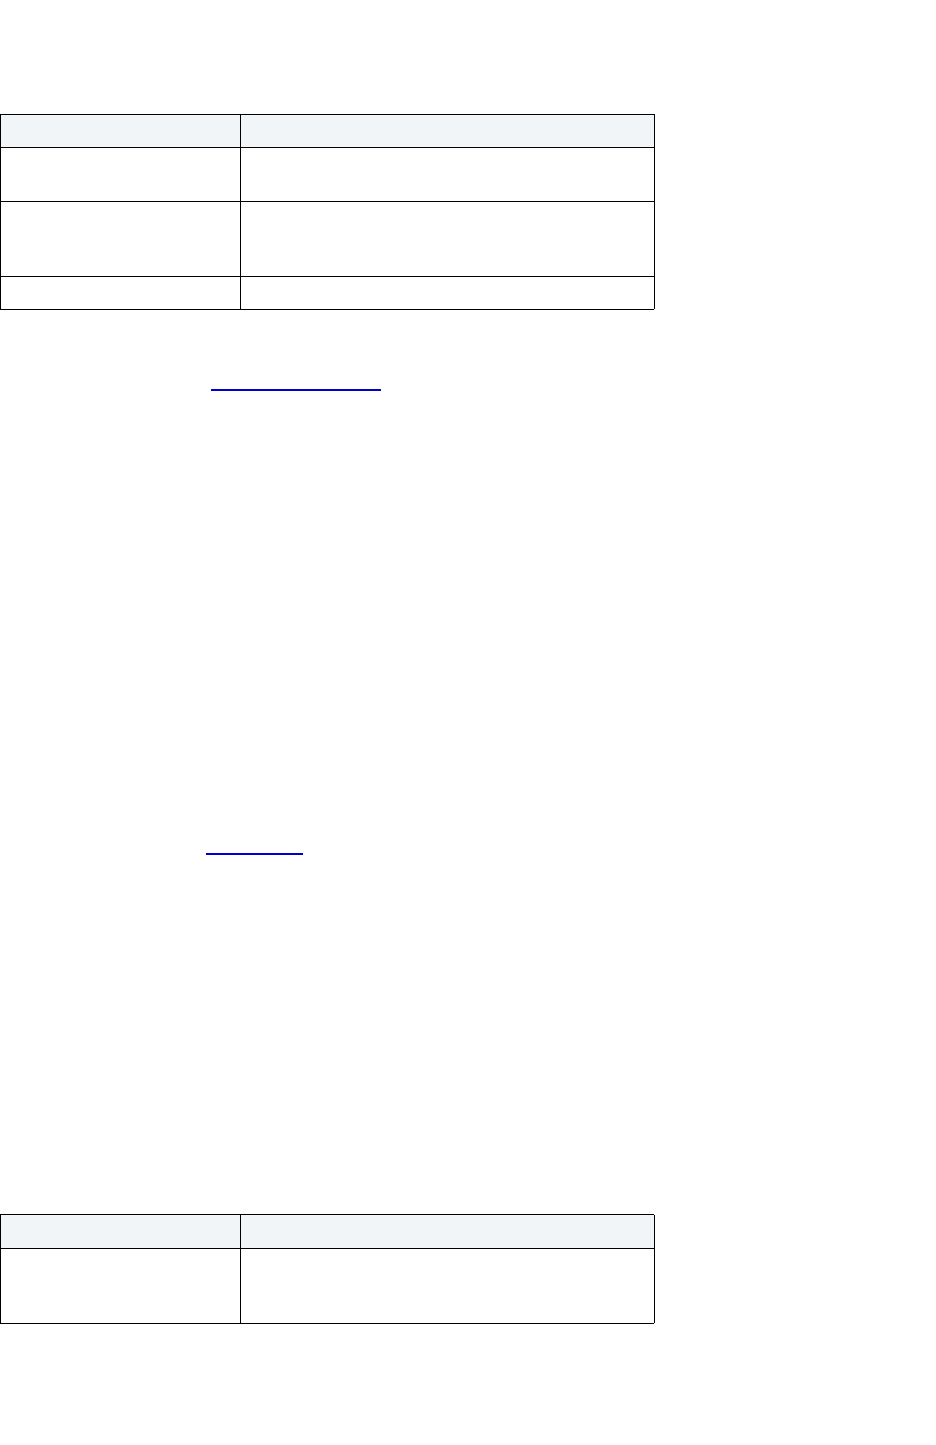
USING > SQL SCRIPTING
EMBARCADERO TECHNOLOGIES > BOOKNAMEVARIABLE 679
Rapid SQL opens a DDL Editor containing a template for the object type you selected.
For more information, see Opening DDL Editors
.
Opening DDL Editors
To open DDL Editors, do the following.
1 On the File menu, click New DDL Editor.
OR
On the Main tool bar, click the Down arrow on New, and then click DDL Editor.
2In Object Type select the object type to which you want to attach the script.
3In Owner type the name of the object owner for the object. The name of the owner connected to the current
datasource is used as the default.
4In Object Name type the name of the object type.
5 Click OK.
Rapid SQL pastes the DDL into the ISQL Editor.
For more information, see ISQL Editor
.
Open Files
NOTE: This functionality is available for all platforms.
The Open Files dialog box lets you open existing files.
Important Notes
None
The table below describes the options and functionality on the Open Files dialog box.
Option Description
Object Type Lets you select the object type to which you want to
attach the script.
Owner Lets you type the name of the object owner for the
object. The name of the owner connected to the
current datasource is used as the default.
Object Name Lets you type the name of the object type.
Option Description
File Name Lets you type a script file name. You can open
multiple script files simultaneously by selecting
multiple file names in the file list.
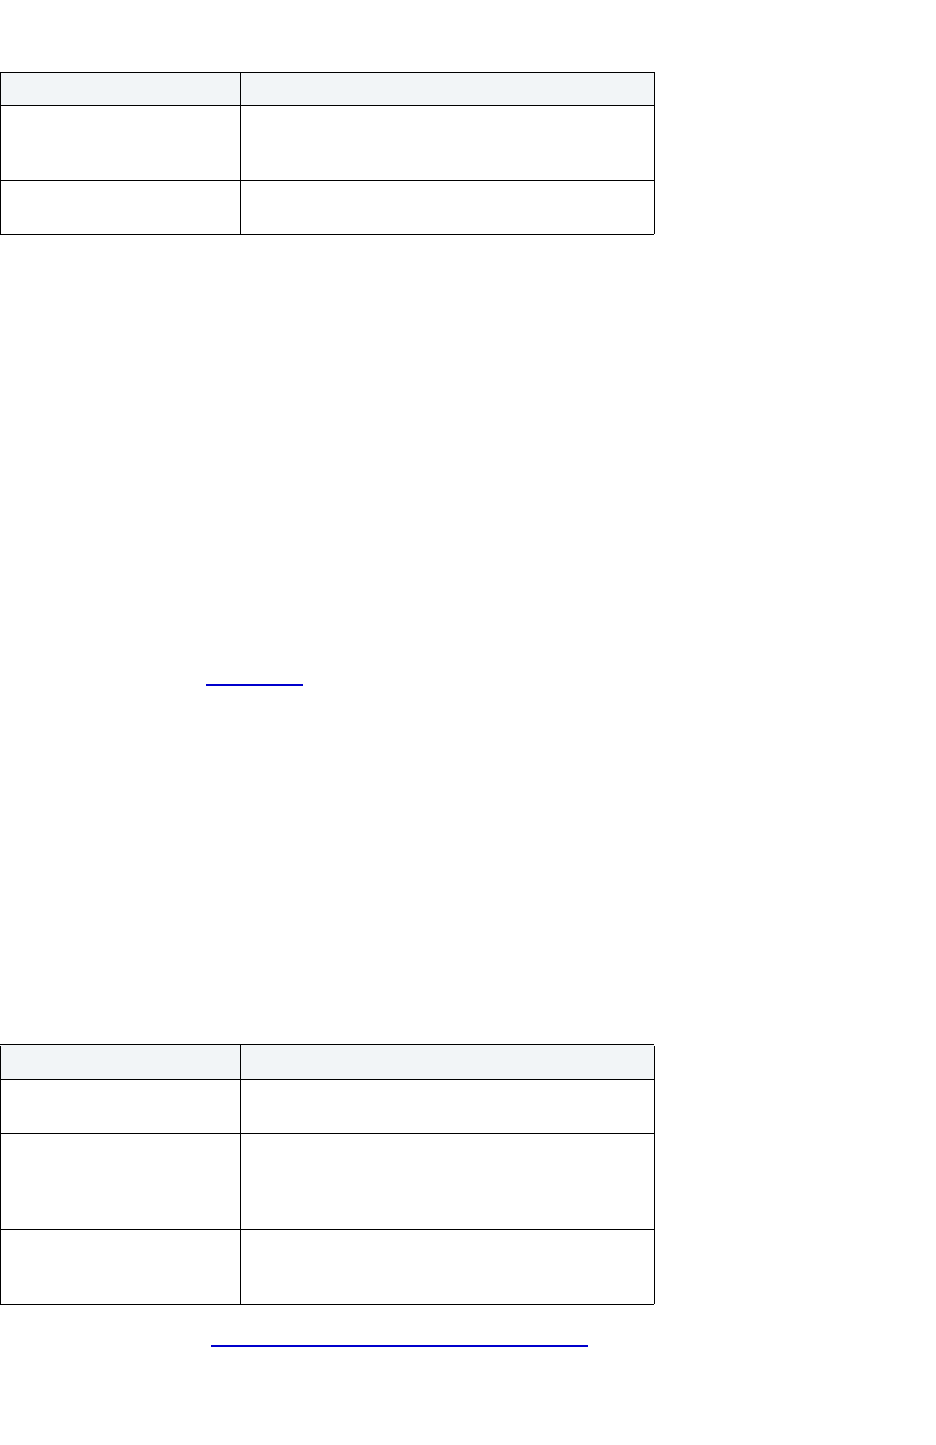
USING > SQL SCRIPTING
EMBARCADERO TECHNOLOGIES > BOOKNAMEVARIABLE 680
Completing the Open Files Dialog Box
To complete the Open Files dialog box, do the following:
1 On the File menu, click Open.
OR
On the Main tool bar, click Open.
2 Select a script file.
OR
3In File Name, type a script file name.
4In Files of type, select types of files to display.
5 Click Open to open one or more files into the current workspace.
Rapid SQL pastes the script into the ISQL Editor.
For more information, see ISQL Editor
.
What Type of File
NOTE: This functionality is available for all platforms.
The What Type of File Is dialog box lets you select options for unknown file types.
Important Notes
None
The table below describes the options and functionality on the What Type of File Is dialog box:
For more information, see Completing the What Type of File Is Dialog Box
.
Files of Type Lets you control the files displayed in the file list by
changing the selection. Rapid SQL displays multiple
default file extensions.
Open Button Click to open one or more files into the current
workspace.
Option Description
The file is a general purpose
SQL script
Select if the unknown file is a SQL script.
The file contains the DDL to
create a database object of
the file contains Oracle
Anonymous PL/SQL.
Lets you select object type, type the owner, and
object name.
Always open unknown files
into a SQL window without
prompting.
Select to hide What Type of File Is Dialog Box for
future unknown file types.
Option Description
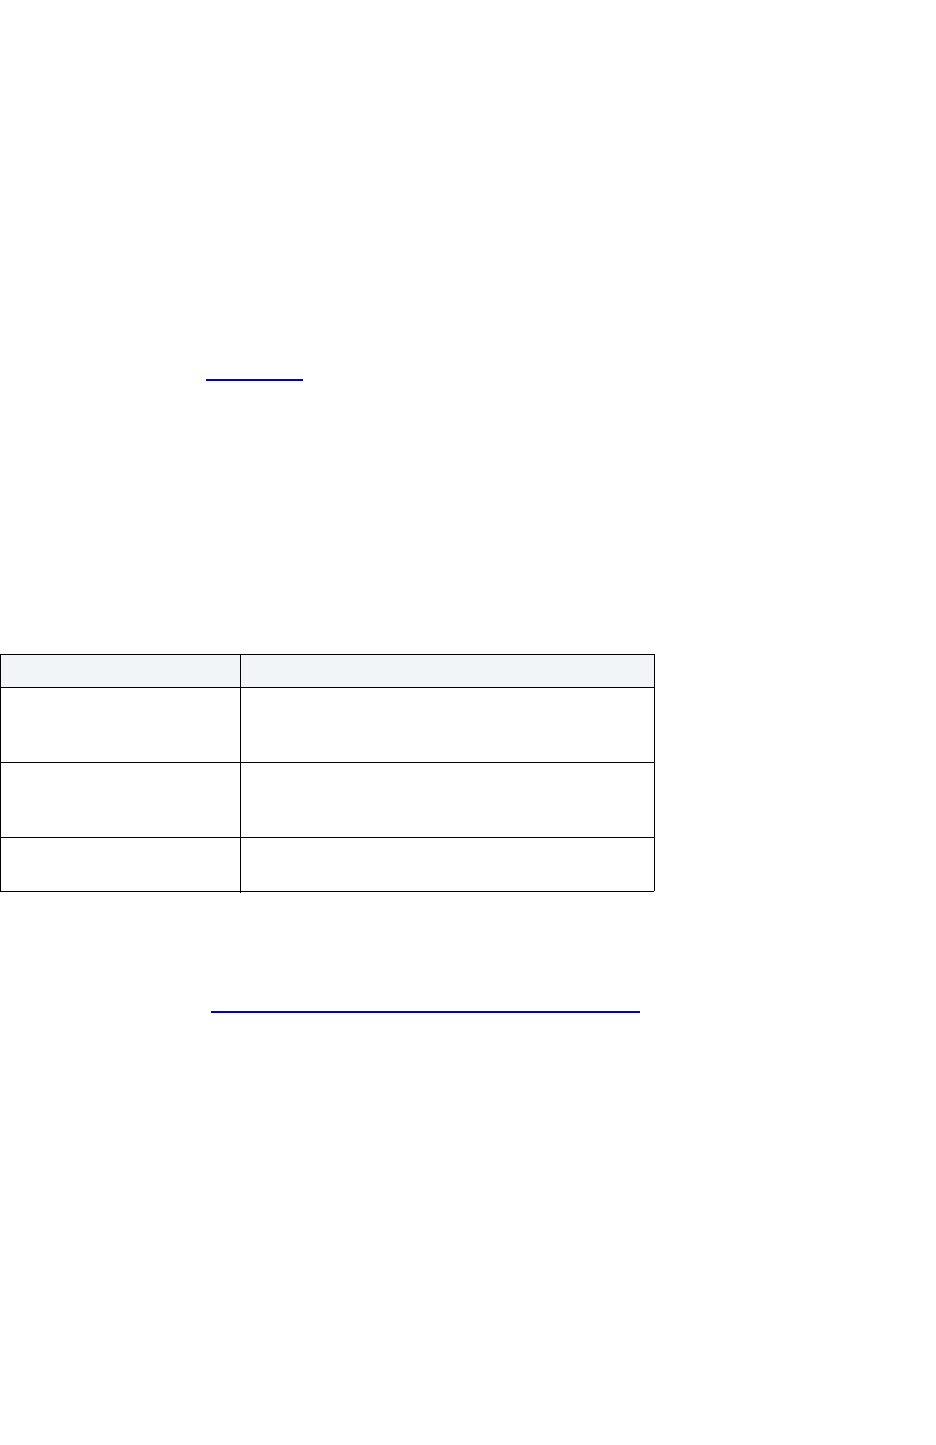
USING > SQL SCRIPTING
EMBARCADERO TECHNOLOGIES > BOOKNAMEVARIABLE 681
Completing the What Type of File Is Dialog Box
To complete the What Type of File Is dialog box, do the following:
1 On the File Menu, click Open.
Rapid SQL opens the Open File(s) dialog box.
2 In the Open File(s) dialog box, select the target script, and then click Open.
Rapid SQL opens the What type of file dialog box.
3 Select options, and then click OK.
Rapid SQL opens the target script in an SQL Editor.
For more information, see ISQL Editor
.
Insert File into Current File
NOTE: This functionality is available for all platforms.
The ISQL Editor facilitates the reuse of SQL scripts by letting you insert an existing file into another script.
The table below describes the options and functionality on the Insert File into Current File dialog box.
Important Notes
None
For more information, see Completing the Insert File into Current File Dialog Box
.
Completing the Insert File into Current File Dialog Box
To complete the Insert File into Current File dialog box, do the following:
1 On the Edit menu, click Edit Insert File.
OR
On the Edit tool bar, click Edit Insert File.
Rapid SQL opens the Insert File into Current File dialog box.
2 Select a script file.
OR
Option Description
File Name Lets you type a script file name. You can open
multiple script files simultaneously by selecting
multiple file names in the file list.
Files of Type Lets you control the files displayed in the file list by
changing the selection. Rapid SQL displays multiple
default file extensions.
Open Button Click to insert one or more files into the current
workspace.

USING > SQL SCRIPTING
EMBARCADERO TECHNOLOGIES > BOOKNAMEVARIABLE 682
3In File Name, type a script file name.
4In Files of type, select types of files to display.
5 Click Open to insert one or more files into the current workspace.
Rapid SQL inserts the file.
For more information, see ISQL Editor
.
Splitting Windows
You can split an SQL window into four different screens so that you can view different sections of a document
simultaneously. You have the option to split the ISQL Window horizontally, vertically or into quadrants.
Splitting the ISQL Window Horizontally
To split the ISQL Window horizontally, do the following:
1 Point to the split box at the top of the vertical scroll bar on the right side of the SQL window.
2 When the pointer changes, drag it to the desired position.
Splitting the ISQL Window Vertically
To split the ISQL Window vertically, do the following:
1 Point to the split box at the top of the horizontal scroll bar on the bottom left side of the SQL window.
2 When the pointer changes, drag it to the desired position.
Removing Splits from an ISQL Window
Double-click the appropriate split bar to return the SQL window to its normal state.
For more information, see ISQL Editor
.
Find
NOTE: This functionality is available for all platforms.
The Find dialog box lets you search text in your SQL scripts.
Important Notes
None
The table below describes the options and functionality on the Find dialog box.
Option Description
Find What Lets you type your search string.
Match whole word only Select to search for only the complete word.
Match Case Select to make the search case-sensitive.
Regular expression Select if you are looking for a regular text expression
.
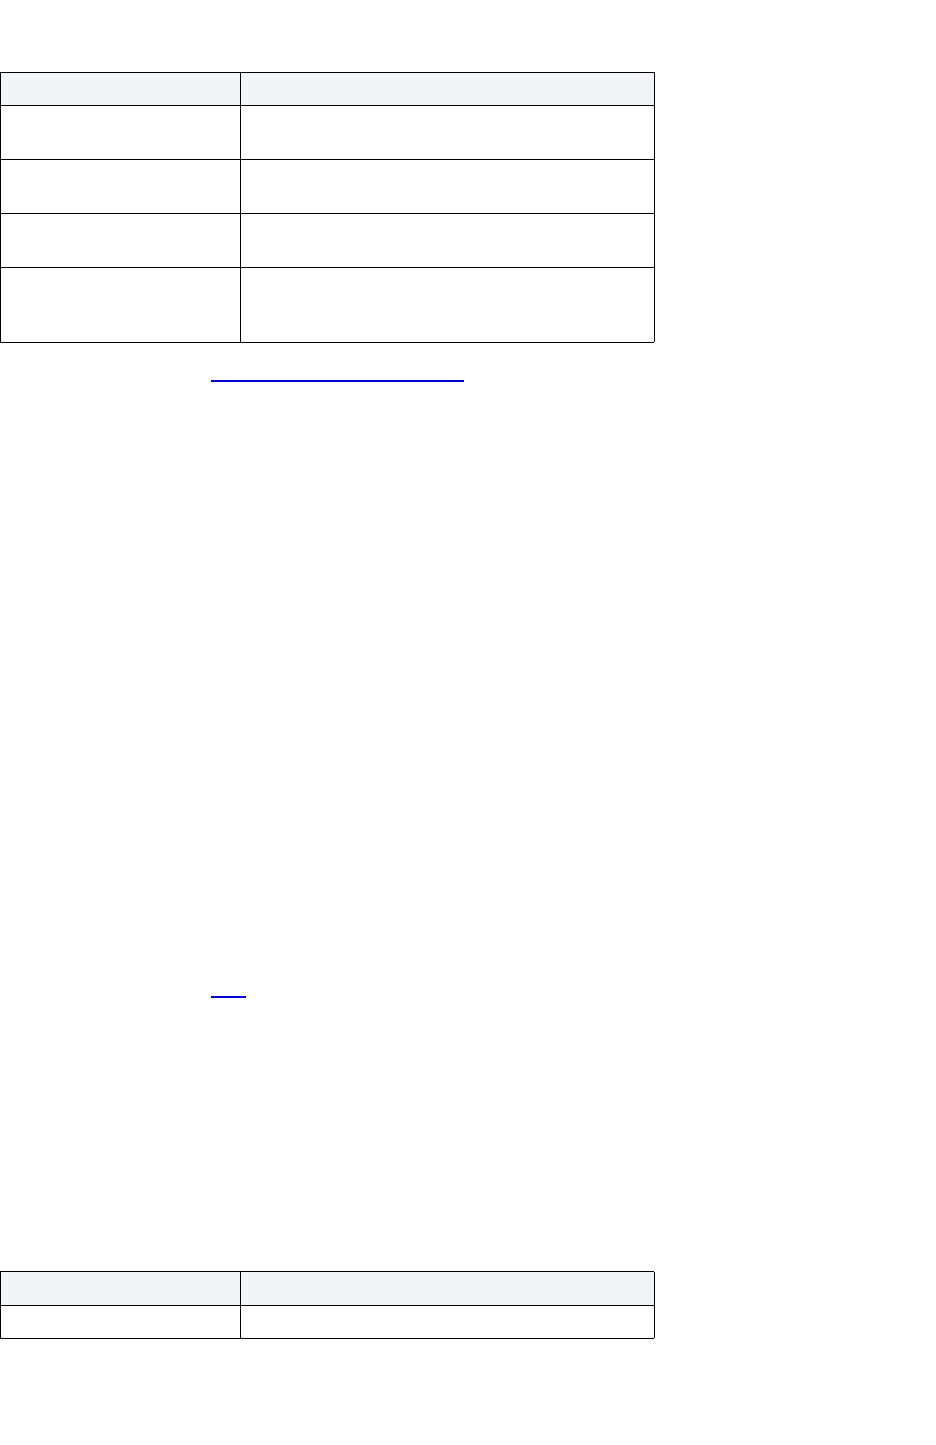
USING > SQL SCRIPTING
EMBARCADERO TECHNOLOGIES > BOOKNAMEVARIABLE 683
For more information, see Completing the Find Dialog Box.
Completing the Find Dialog Box
To complete the Find dialog box, do the following
1 On the Edit menu, click Find.
OR
On the Edit tool bar, click Find.
2In Find What, type your search string.
3Select Match whole word only to search for only the complete word.
4Select Match Case to make the search case-sensitive.
5Select Regular expression to search for a regular text expression.
6Select Wrap around search to search from the end of the script and back to the insertion point.
7In Direction, click Up or Down.
8 Click Find Next to find the next occurrence of your search string.
9 Click Mark All to place a small blue dot next to every line number in the script which meets the required search
string criteria.
The ISQL Editor highlights the object name if it matches the search criteria.
For more information, see Find
.
Replace
NOTE: This functionality is available for all platforms.
The Replace dialog box lets you search and replace text in your SQL scripts.
The table below describes the options and functionality on the Replace dialog box.
Wrap around search Lets you search from the end of the script and back
to the insertion point.
Direction Lets you specify the direction you want to search.
Click the Up or Down option button.
Find Next Button Click to find the next occurrence of your search
string.
Mark All Button Click to place a small blue dot next to every line
number in the script which meets the required search
string criteria.
Option Description
Find What Lets you type your search string.
Option Description

USING > SQL SCRIPTING
EMBARCADERO TECHNOLOGIES > BOOKNAMEVARIABLE 684
For more information, see Completing the Replace Dialog Box.
Completing the Replace Dialog Box
To complete the Replace dialog box, do the following:
1 On the Edit menu, click Replace.
OR
On the Edit tool bar, click Replace.
2In Find What, type your search string.
3In Replace With, type the replacement text.
4Select Match whole word only to search for only the complete word.
5Select Match Case to make the search case-sensitive.
6Select Regular expression to search for a regular text expression.
7Select Wrap around search to search from the end of the script and back to the insertion point.
8In Direction, click Up or Down.
9 Click Find Next to find the next occurrence of your search string.
10 Click Replace to replace the current selection.
11 Click Replace All to automatically find and replace all occurrences of your search string within the current
window.
For more information, see ISQL Editor
.
Replace With Lets you type the replacement text.
Match Case Select to make the search case-sensitive.
Regular expression Select if you are looking for a regular text expression
.
Wrap around search Lets you search from the end of the script and back
to the insertion point.
Direction Lets you specify the direction you want to search.
Click the Up or Down option button.
Find Next Button Click to find the next occurrence of your search
string.
Replace Button Click replace the current selection.
Replace All Button Click to automatically find and replace all
occurrences of your search string within the current
window.
Option Description

USING > SQL SCRIPTING
EMBARCADERO TECHNOLOGIES > BOOKNAMEVARIABLE 685
Regular Expressions
Regular Expressions are offered as an optional search criteria in the SQL windows search facility. Regular
Expressions serve as powerful notation for describing string matching patterns. Special characters are used to denote
certain match criteria on which the ISQL Editor should conduct its search. The table below describes the special
characters and their meanings:
For more information, see ISQL Editor
.
Character Meaning Example
^ Circumflex - Constrains the search to the
start of a line
^Rap -- Match lines beginning with
Rap
^Emb -- Match lines beginning with
Emb
$ Dollar - A dollar as the last character of the
string constrains matches to the end of lines.
if$--Match lines ending with if
^end$-- Match lines consisting of
the single word end
. Period - A period anywhere in the string
matches any single character.
T..l -- Matches Tool, Till, Tail etc.
H.w -- Matches Huw, How, Haw
etc.
^Sin.ers -- Matches lines beginning
with Sinders, Sinners etc.
* Asterisk - An expression followed by an
asterisk matches zero or more occurrences
of that expression.
to* -- Matches t, to, too etc.
00* -- matches 0, 00, 000, 0000
etc.
+ Plus - An expression followed by a plus sign
matches one or more occurrences of that
expression.
to+ -- Matches to, too etc.
10+ -- Matches 10, 100, 1000,
10000 etc.
/(:d+/) -- Matches (0), (12464), (12)
etc.
? Question mark - An expression followed by a
question mark optionally matches that
expression.
for? -- Matches f and for
10? -- Matches 1 and 10
() Brackets - Brackets can be used to group
characters together prior to using a * + or?.
Rap(id)? -- Matches Rap and Rapid
B(an)*a -- Matches Ba, Bana and
Banana
[ ] Square brackets - A string enclosed in
square brackets matches any character in
that string, but no others. If the first character
of the string is a circumflex, the expression
matches any character except the characters
in the string. A range of characters can be
specified by two characters separated by a -.
These should be given in ASCII order (A-Z,
a-z, 0-9 etc.).
{[0-9]} -- Matches {0}, {4}, {5} etc.
/([0-9]+/) -- Matches (100), (342),
(4), (23456) etc.
H[uo]w -- Matches Huw and How
Gre[^py] -- Matches Green, Great
etc. but not Grep, Grey etc.
[z-a] -- Matchesnothing
^[A-Z] -- Match lines beginning with
an upper-case letter
\ Backslash - A backslash quotes any
character. This allows a search for a
character that is usually a regular expression
specifier.
\$ -- Matches a dollar sign $
\+ -- Matches a +

USING > SQL SCRIPTING
EMBARCADERO TECHNOLOGIES > BOOKNAMEVARIABLE 686
Goto
NOTE: This functionality is available for all platforms.
The Goto dialog box lets you move to a specific line or column in your script.
Important Notes
None
The table below describes the options on the Goto dialog box:
Completing the Goto Dialog Box
To complete the Goto dialog box, do the following:
1 On the Edit menu, click Goto.
Rapid SQL opens the Go To dialog box.
2In Line Number, type or select the target line number.
3 Click OK.
Rapid SQL moves the cursor to the target line.
For more information, see ISQL Editor
.
Column Look-up
Column Look-up allows users to quickly reference and select table column names while coding or editing queries in
the ISQL window.
Important Notes
You can set the options for column look-up in the Code Workbench
.
Using Column Look-up
To use this feature, do the following:
1 In the ISQL Window, type the name of the table, view, or alias and then a period. You must construct a clause
containing the table, view, or alias name before the column look-up feature will work. For example:
SELECT employee.
Rapid SQL opens the list of available columns.
2 Select the target column name.
Rapid SQL adds the column name to the SQL statement.
Option Description
Line Number Lets you type or select the target line number.

USING > SQL SCRIPTING
EMBARCADERO TECHNOLOGIES > BOOKNAMEVARIABLE 687
Code Templates
Rapid SQL lets you paste code templates into any open editable window. Code templates are complete code blocks
that can be easily added to open windows or scripts with a few keystrokes. Templates let you define standard
comment blocks or add common exit and error handling routines to new or existing objects.
To paste a code template, do the following:
1 Open ISQL Window.
2 Type the code template shortcut.
3 Type the template hot key.
OR
4 In the Code Templates dialog box, select the target template.
For more information, see:
Code Workbench
Edit Code Template Dialog Box
Sending SQL Scripts
If you have MAPI-compliant E-mail software installed on your computer, then you can send SQL scripts to other users.
To send a SQL script, do the following:
1 On the File menu, click Send.
OR
On the Main tool bar, click Send.
Rapid SQL opens your E-mail application.
2In the Address box, type the name of the addressee(s) and any other options.
NOTE: The ISQL Editor automatically attaches a file containing your SQL script to the e-mail message.
3 Click Send.
Rapid SQL sends the result set to the specified addressee(s).
For more information, see ISQL Editor
.
Renaming and Closing Query Window Tabs
SQL windows are tabbed windows that can be closed or renamed.
To rename a Query Tab, you need an open SQL window that includes an executed script. For information on how to
execute scripts, see:
• Executing Scripts
• Script Execution Facility

USING > SQL SCRIPTING
EMBARCADERO TECHNOLOGIES > BOOKNAMEVARIABLE 688
Renaming a Query Window Tab
To rename a Query Window Tab, do the following:
1 Right-click the Query Tab on the SQL window, and then click Rename.
Rapid SQL opens the Rename Tab dialog box.
NOTE: The Query Tab can be located on the top or bottom of the SQL window. You can set the location
of the tab when configuring Datasource options.
2In the New Name box, type the name of the new Query window.
3 Click OK.
Rapid SQL changes the name and closes the Rename Tab dialog box. The new name of the tab displays directly
on the Query Window Tab at the top of the window.
Closing a Query Window Tab
To close a Query Window Tab, do the following:
1 At the top of the ISQL window, right-click the Query Tab, and then click Close or Close All.
Rapid SQL closes the Query.
For more information, see ISQL Editor
.
Print
NOTE: This functionality is available for all platforms.
The Print dialog box lets you can specify a range of panels to print, or print the contents of a script window to a file.
Important Notes
None
The table below describes the options and functionality on the Print dialog box.
Tab Option Description
Scope Printer Displays default printer.
Print Range Lets you select the appropriate print range.
Number of Copies Lets you click the Up or Down arrow or type the
number of copies you want.
Page Setup Header Lets you type header type to display at the top of the
page.
Footer Lets you type header type to display at the bottom of
the page.
Header/Footer not within
Margins
Select to position header and footer outside the
margins.
Margins Lets you specify margins in either inches or
centimeters.
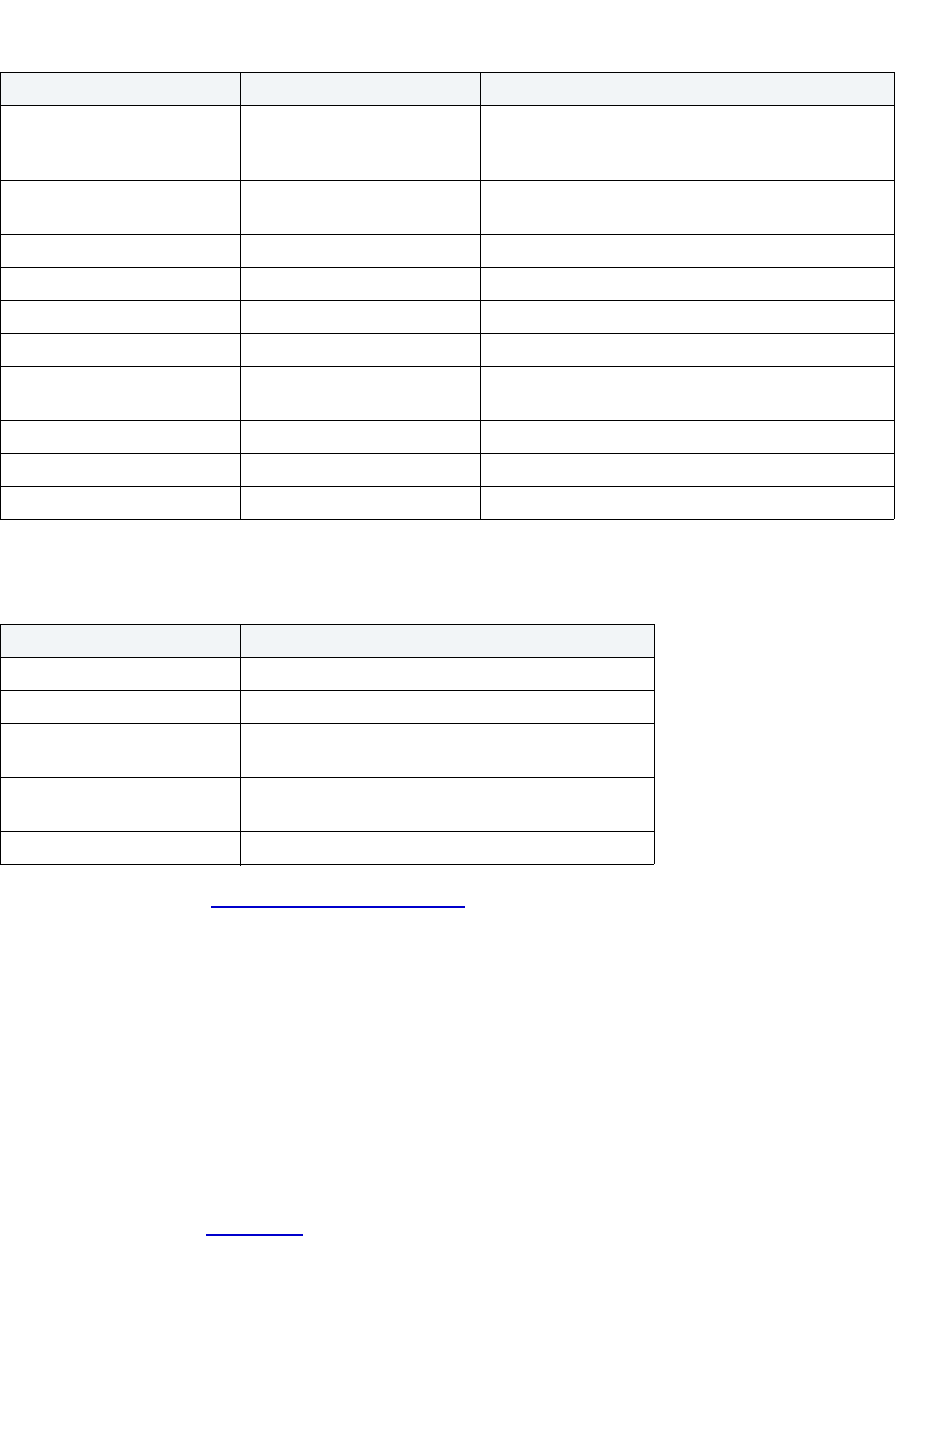
USING > SQL SCRIPTING
EMBARCADERO TECHNOLOGIES > BOOKNAMEVARIABLE 689
The table below describes the buttons on the Print dialog box:
For more information, see Completing the Print Dialog Box
.
Completing the Print Dialog Box
To complete the Print dialog box, do the following:
1 On the File menu, click Print.
OR
On the Main tool bar, click Print.
2 On the tabs, select options.
3 Click Print.
For more information, see ISQL Editor
.
Options Chromacoding Lets you select Use Color if you have a color printer.
Lets you select Use Font if script includes italics and
bold fonts.
Line Numbering Lets you specify the interval between numbered
lines.
Other Options Lets you select other options.
Documents Document Box Lets you select documents to print.
Clear Click to clear list.
Invert Click to switch printing order.
Configurations New Configuration Name Lets you type a new configuration which saves you
current settings, and then click Create.
Delete Lets you delete an existing configuration.
Load Lets you load an existing configuration.
Update Lets you update an existing configuration.
Button Description
Save Settings Lets you save settings.
Font Lets you open the Font dialog box and select fonts.
Setup Lets you open the Print Setup dialog box and select
printer options.
Preview Lets you open the Print Preview dialog box that lets
you preview the document before you print it.
Print Lets you print the document.
Tab Option Description

USING > SQL SCRIPTING
EMBARCADERO TECHNOLOGIES > BOOKNAMEVARIABLE 690
Saving and Closing Scripts
Untitled scripts are named SQL1...SQLn by default, and all scripts are saved with the SQL extension. You can save
your files with any valid name.
For more information, see:
Saving a Script
Closing a Script
Closing the Error List
ISQL Editor
Saving a Script
To complete the Save dialog box, do the following:
1 On the File menu, click Save.
OR
On the Main tool bar, click Save.
Rapid SQL opens the Save As dialog box.
2 If this is a new file, in the File Name box, type the name of the file.
3 If this is an existing file and you want to use save as, on the Main menu, click Save As, and in the File Name
box, type the name of the file.
4 Click Save.
Rapid SQL closes the Save As dialog box.
For more information, see Saving and Closing Scripts
.
Saving Modified Documents
The table below describes the options and functionality on the Save Modified Documents dialog box:
Important Notes
None
For more information, see Saving and Closing Scripts
.
Option Description
Save All Click to save documents in all open ISQL windows.
Save Selected Click to save selected documents.
Invert Click to clear selection.
Save None Click to not save documents and close the
application.

USING > SQL SCRIPTING
EMBARCADERO TECHNOLOGIES > BOOKNAMEVARIABLE 691
Closing a Script
To close a script, do the following:
1 On the on the Main menu, click Close.
OR
On the ISQL window tool bar, click Close.
OR
In the upper right corner of the window, double-click the System menu icon.
Rapid SQL starts closing the script.
2 If you have not saved your script, Rapid SQL prompts you to save the file. Click Yes to save and No to close
without saving.
For more information, see Saving and Closing Scripts
.
Closing the Error List
To close the error list, do the following:
1 On the Query menu, click Show Errors.
OR
On the ISQL window tool bar, click Show Errors.
Rapid SQL closes the error list.
For more information, see ISQL Editor
.
Editing Scripts
The ISQL Window incorporates a powerful editor that lets you edit your SQL scripts. The ISQL Window includes
editing features such as:
• Uppercase or lowercase character conversion.
• Commenting and uncommenting blocks of text.
• Selecting text.
• Inserting PL/SQL tags.
• Setting and navigating with bookmarks.
The ISQL Editor provides Paste SQL Syntax
and Paste SQL Statements utilities from which you can paste syntax for
SQL commands and functions directly into an ISQL Window.
Editing a Script
To edit a script, do the following:
1 In the SQL window, type your changes or additions.
2 When you are finished with your changes, on the ISQL window tool bar, click Execute to compile the script.
For more information, see ISQL Editor
.
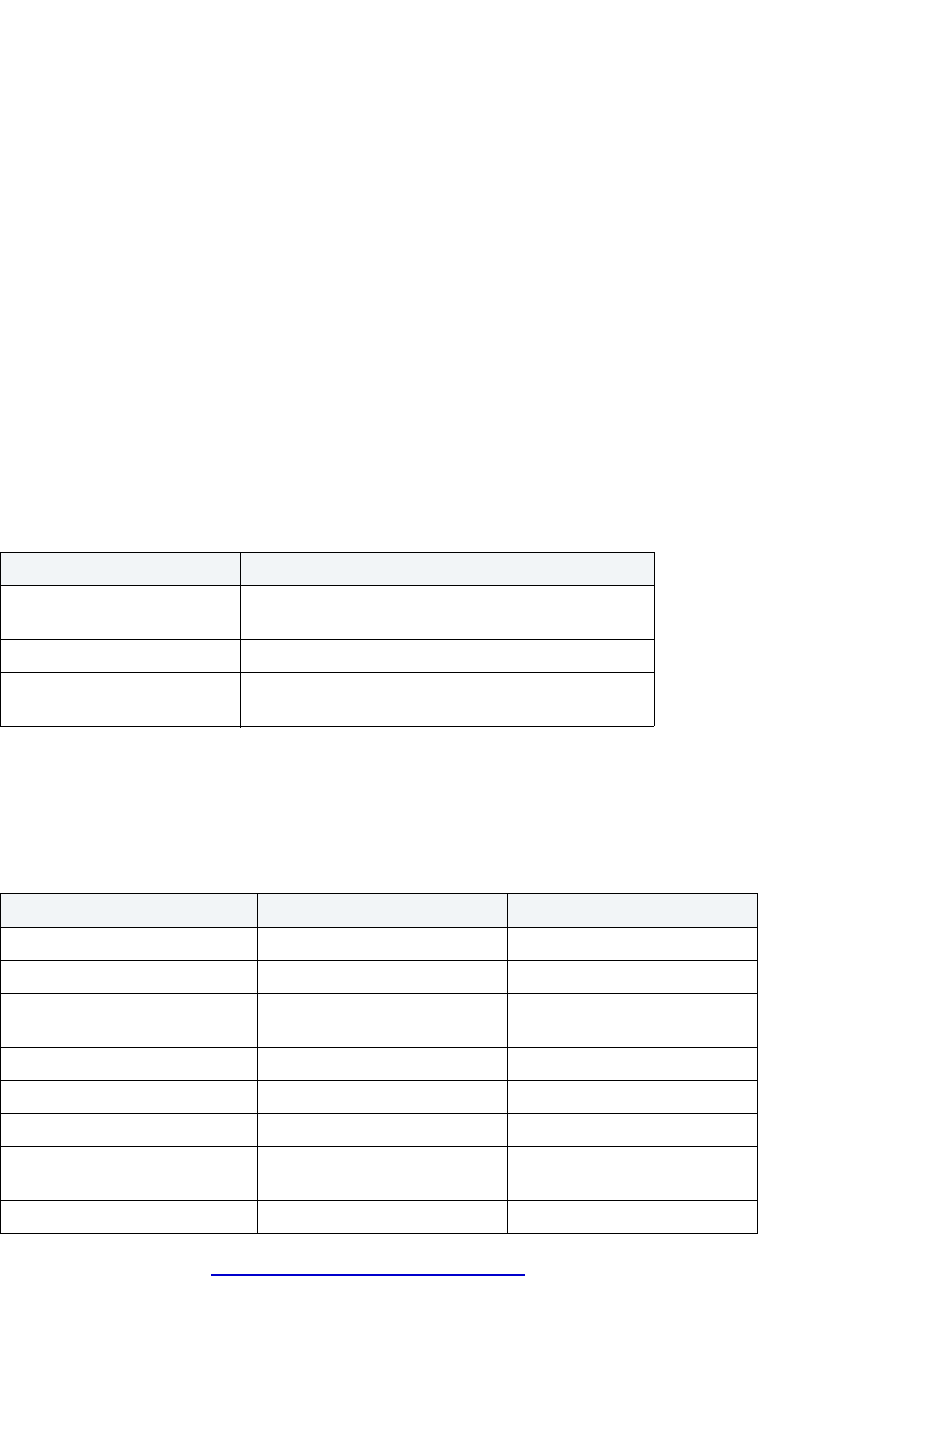
USING > SQL SCRIPTING
EMBARCADERO TECHNOLOGIES > BOOKNAMEVARIABLE 692
Paste SQL Syntax
NOTE: This functionality is available for all platforms.
The Paste SQL Syntax facility lets you paste SQL syntax without having to refer to documentation to find syntax for
SQL commands. You can also paste the SQL directly into an ISQL window.The Paste SQL Syntax facility that includes
SQL syntax for:
• Commands
• Functions
•XML
• Other object syntax
Important Notes
None
The table below describes the options and functionality on the SQL Syntax dialog box.
NOTE: You must change the placeholders (e.g., expression) in the statements to reflect the specific
objects in your database. For assistance with basic SQL statements, such as Select, Insert,
Update, or Delete, use the Paste SQL Statement facility instead.
The table below describes options for each RDBMS platform:
For more information, see Completing the SQL Syntax Dialog Box
.
Option Description
SQL Statements Lets you select the target command, functions, or
optimizer hint.
Syntax Displays the syntax.
Paste Button Click to paste the SQL statement into your ISQL
Window.
Oracle Sybase ASE Microsoft
SQL Commands SQL Commands SQL Commands
Number Functions Aggregate Functions Aggregate Functions
Character Functions Datatype Conversion
Functions
Datatype Conversion
Functions
Date Functions Date Functions Date Functions
Conversion Functions Mathematical Functions Mathematical Functions
Group Functions String Functions String Functions
Other Functions (User, NVL,
etc.)
System Functions System Functions
Optimizer Hints System Diagnostics Text/Image Functions
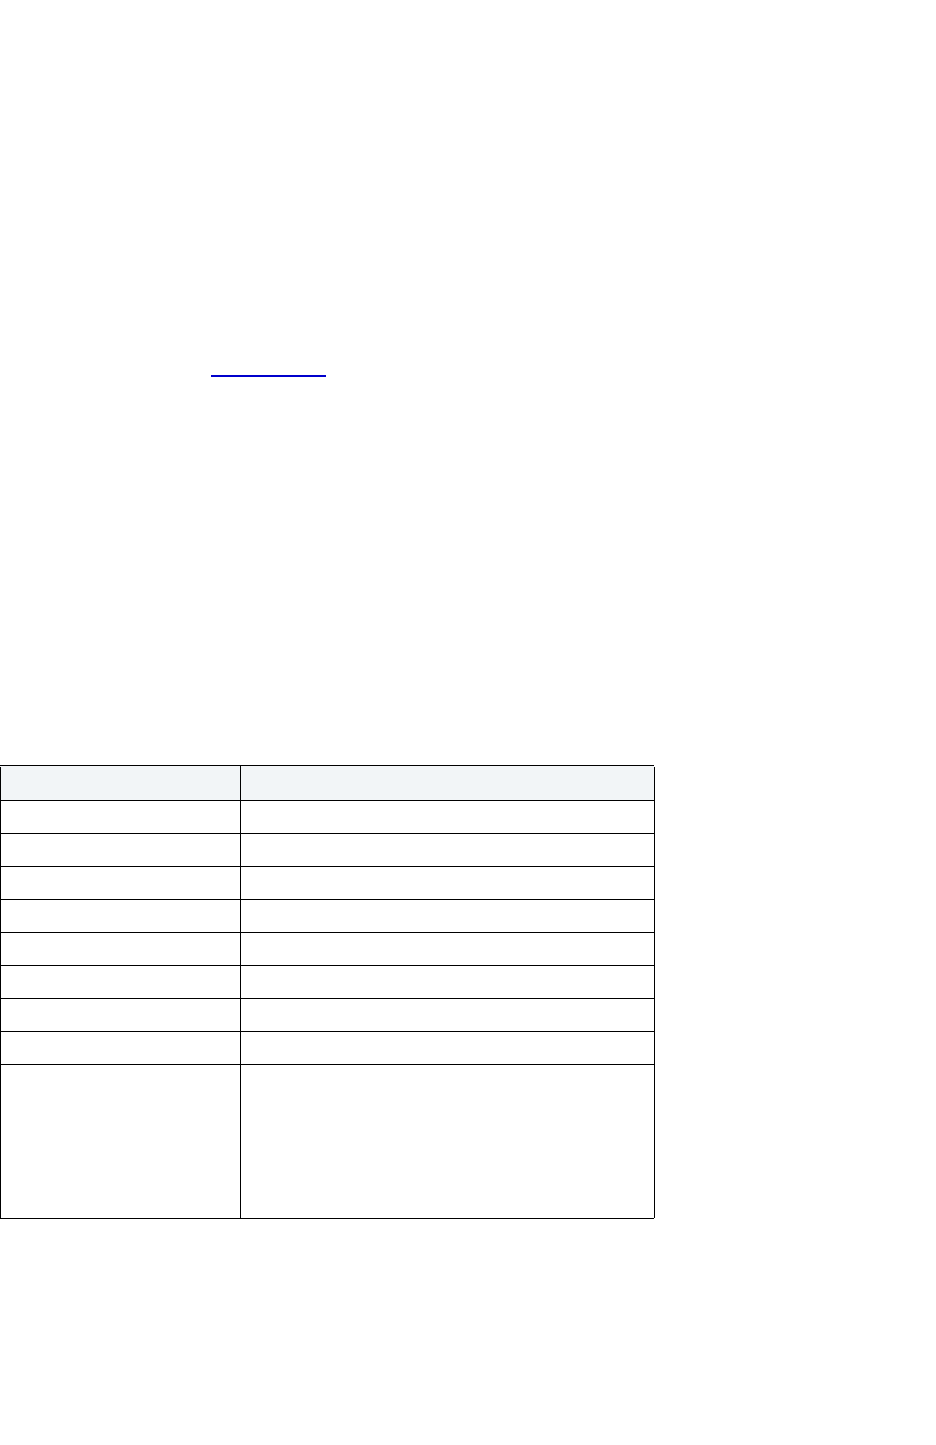
USING > SQL SCRIPTING
EMBARCADERO TECHNOLOGIES > BOOKNAMEVARIABLE 693
Completing the SQL Syntax Dialog Box
To complete the SQL Syntax dialog box, do the following:
1 Place your insertion point in an open SQL window.
2 On the Edit menu, click Paste SQL Syntax.
OR
On the ISQL Window tool bar, click Paste SQL Syntax.
3In SQL Statements, select the target command, functions, or optimizer hint.
4 To paste the SQL statement into your ISQL Window, click Paste.
For more information, see Editing Scripts
.
Paste SQL Statements
NOTE: The functionality is available for all platforms.
The Paste SQL Statement facility lets you create Select, Insert, Update, and Delete SQL statements. The Paste SQL
Statement window displays all available database object names from which you can choose to construct SQL
statements. These statements are dependent on the object type you choose.
Important Notes
None
The table below describes the options and functionality on the Paste SQL dialog box.
Option Description
Datasource Lets you select the target datasource.
Database Lets you select the target database.
Owner Lets you select the owner.
Object Type Lets you select the target object type.
Select Click if you want a SELECT SQL statement.
Update Click if you want an UPDATE SQL statement.
Insert Click if you want an INSERT SQL statement.
Delete Click if you want a DELETE SQL statement.
Object Type Box Rapid SQL displays a column of objects, given your
selections of datasource, owner, and object type.
Lets you select the check box next to the target
object type, or click All to select all.
Paste - Click to paste this object into your Editor
window.

USING > SQL SCRIPTING
EMBARCADERO TECHNOLOGIES > BOOKNAMEVARIABLE 694
For more information, see Completing the Paste SQL Dialog Box.
Completing the Paste SQL Dialog Box
To complete the Paste dialog box, do the following
1 Place your insertion point in an open Editor window.
2 On the Edit menu, click Paste SQL.
OR
On the Editor window tool bar, click Paste SQL.
3In Datasource, select the target datasource.
4In Database, select the target database.
5In Owner, select the owner.
6In Object Type, select the target object type.
7 Click Select if you want a SELECT SQL statement.
8 Click Update if you want an UPDATE SQL statement.
9 Click Insert if you want an INSERT SQL statement.
10 Click Delete if you want a DELETE SQL statement.
11 In the Object Type Box, select the check box next to the target object type, or click All to select all.
12 Click Paste to paste this object into your Editor window.
13 In the Middle Box, click the target object type properties or click All to select all.
14 Click Paste to paste the object properties into your Editor window, under the Object Type box.
Rapid SQL the SQL statement in the right box.
Middle Box Rapid SQL displays attributes appropriate to the type
of object you selected. For example, if you select
Tables, Rapid SQL fills the second column with the
columns of the table you select in the first column. If
you select Procedures, Rapid SQL fills the second
column with available parameters for the procedure
you select in the first column.
Lets you click the target object type properties or
click All to select all. For example, if you selected a
Table, then select one or more columns in the middle
box; or, if you selected a Procedure, then select
parameters in the middle box.
Paste - Click to paste the object properties into your
Editor window, under the Object Type box.
Right Box Displays the SQL statement.
Paste - Click when you are satisfied with the entire
SQL statement. Rapid SQL pastes the SQL
statement into your Editor window.
Option Description

USING > SQL SCRIPTING
EMBARCADERO TECHNOLOGIES > BOOKNAMEVARIABLE 695
15 In the Right Box, click Paste when you are satisfied with the entire SQL statement.
Rapid SQL pastes the SQL statement into your Editor window.
For more information, see Editing Scripts.
Selecting Text
The ISQL Editor lets you select a single word, a single line, or a block of text.
Selecting a Single Word
To select a single word, do the following:
1 In the ISQL Editor window, position the pointer in the word and double-click.
Selecting a Line of Text
Rapid SQL offers two ways to select a line of text:
1 In the ISQL Editor window, click the line number listed on the left side of the window.
OR
2 Position the pointer at the beginning of the line of text, hold down the SHIFT key, and then click the end of the line
of text.
Selecting a Block of Text
To select a block of text, do the following:
1 In the ISQL Editor window, drag until the block of text is selected.
For more information, see Editing Scripts.
Moving and Copying Text in an ISQL Window
You can move or copy information anywhere in an Editor window or into a different Editor window by dragging it.
Moving Text
To move text, do the following:
1 In the ISQL Editor window, select the text you want to move.
2 Drag to the target location.
Copying Text
To copy text, do the following:
1 In the ISQL Editor window, select the text you want to copy.
2 On the Edit menu, click Copy.
3 Drag to the target location.
NOTE: If you are dragging between different Editor windows, arrange the Editor windows so that the
source and destination windows are open and visible. You must be able to see both the original
and target locations.

USING > SQL SCRIPTING
EMBARCADERO TECHNOLOGIES > BOOKNAMEVARIABLE 696
For more information, see Editing Scripts.
Commenting and Uncommenting Scripts
For most developers and development teams, documenting code is a fundamental part of the coding process. Besides
contributing explanatory material for others who need to analyze or maintain your code later, the ability to comment
and uncomment code can be very useful for bypassing statements in a procedure during compilation.
Commenting Code
To commenting out code, do the following:
1 On the Edit menu, click Comment Out.
OR
Select a line of code, and on the Edit tool bar, click Comment Out.
Rapid SQL comments code.
Uncommenting Code
To uncomment code, do the following:
1 On the Edit menu, click Undo Comment Out.
OR
Select a line of code, and on the Edit tool bar, click Undo Comment Out.
Rapid SQL uncomments code.
For more information, see Editing Scripts.
Changing Case
When writing SQL scripts, you can change the letter casing of certain statements or lines of code. You can change
case from lowercase to uppercase, or from uppercase to lowercase, using the case functions.
Changing Case
To change case, do the following:
1 Select one or more letters in your script.
2 On the Edit menu, click Upper Case.
OR
On the Edit menu, click Lower Case.
OR
On the Edit tool bar, click Upper Case.
OR
On the Edit tool bar, click Lower Case.
Rapid SQL changes the case.
For more information, see Editing Scripts
.

USING > SQL SCRIPTING
EMBARCADERO TECHNOLOGIES > BOOKNAMEVARIABLE 697
Cutting, Copying and Pasting Text and Columns in an ISQL Window
The Editor window incorporates Cut, Copy and Paste text, and whole columns functions. You can move the selected
text or columns to and from the Windows clipboard.
For more information, see:
Copying and Pasting Text
Cutting and Pasting Text
Copying and Pasting a Column
Cutting and Pasting a Column
Copying and Pasting Text
To copy and paste text, do the following:
1 In the Editor window, select the target text.
2 On the Edit menu, click Copy.
OR
On the Editor tool bar, click Copy.
Rapid SQL copies the text.
3 On the Edit menu, click Paste.
OR
On the Editor tool bar, click Paste.
Rapid SQL pastes the text.
For more information, see Cutting, Copying and Pasting Text and Columns in an ISQL Window
.
Cutting and Pasting Text
To cut and paste text, do the following:
1 In the Editor window, select the target text.
2 On the Edit menu, click Cut.
OR
On the Editor tool bar, click Cut.
Rapid SQL cuts the text.
3 On the Edit menu, click Paste.
OR
On the Editor tool bar, click Paste.
Rapid SQL pastes the text.
For more information, see Cutting, Copying and Pasting Text and Columns in an ISQL Window
.

USING > SQL SCRIPTING
EMBARCADERO TECHNOLOGIES > BOOKNAMEVARIABLE 698
Copying and Pasting a Column
To copy and paste a column, do the following:
1 In the Editor window, position the pointer in front of the column of the target text.
2 Press ALT and simultaneously drag the pointer over the target column.
3On the Edit menu, click Copy.
OR
On the Editor tool bar, click Copy.
OR
Right-click the text, and then click Copy.
Rapid SQL copies the column.
4 In the Editor window, position the pointer where you want to paste the column.
5On the Edit menu, click Paste.
OR
On the Editor tool bar, click Paste.
OR
Right-click the text, and then click Paste.
Rapid SQL pastes the column.
For more information, see Cutting, Copying and Pasting Text and Columns in an ISQL Window
.
Cutting and Pasting a Column
To cut and paste a column, do the following:
1 In the Editor window, position the pointer in front of the column of the target text.
2 Press ALT and simultaneously drag the pointer over the target.
3On the Edit menu, click Cut.
OR
On the Editor tool bar, click Cut.
OR
Right-click the text, and then click Cut.
Rapid SQL cuts the column.
4 In the Editor window, position the pointer where you want to paste the column.
5On the Edit menu, click Paste.
OR
On the Editor tool bar, click Paste.
OR
Right-click the text, and then click Paste.
Rapid SQL pastes the column.

USING > SQL SCRIPTING
EMBARCADERO TECHNOLOGIES > BOOKNAMEVARIABLE 699
For more information, see Cutting, Copying and Pasting Text and Columns in an ISQL Window.
Setting Bookmarks
Bookmarks are useful tools for navigating throughout an Editor window. You can jump back and forth between
bookmarks easily, and there is no practical limit to the number of bookmarks you can set.
The table below describes the options for setting bookmarks:
Setting a Bookmark
To set a bookmark, do the following:
1 In the Editor window, position the pointer in front of the line you want to bookmark.
2 On the Editor window tool bar, click Bookmark.
Rapid SQL inserts a blue dot in the gutter next to the line you have book marked.
For more information, see:
Moving Between Bookmarks
Clearing Bookmarks
Moving Between Bookmarks
You use the Next Bookmark and the Previous Bookmark buttons to move back and forth between bookmarks.
Goto the Next Bookmark
To goto the next bookmark, do the following:
1 In the Editor window, position the pointer where you have set bookmarks, and then click Bookmark.
Rapid SQL jumps to the next bookmark.
Goto the Previous Bookmark
To goto the previous bookmark, do the following:
1 In the Editor window, position the pointer where you have set bookmarks, and then click Goto Bookmark.
Rapid SQL jumps to the previous bookmark.
For more information, see Setting Bookmarks
.
Feature Description
Bookmarks: Bookmarks are valuable navigation aids for jumping from one portion of a
script to another. You can add bookmarks in important areas of your
scripts, then jump back and forth between bookmarks.
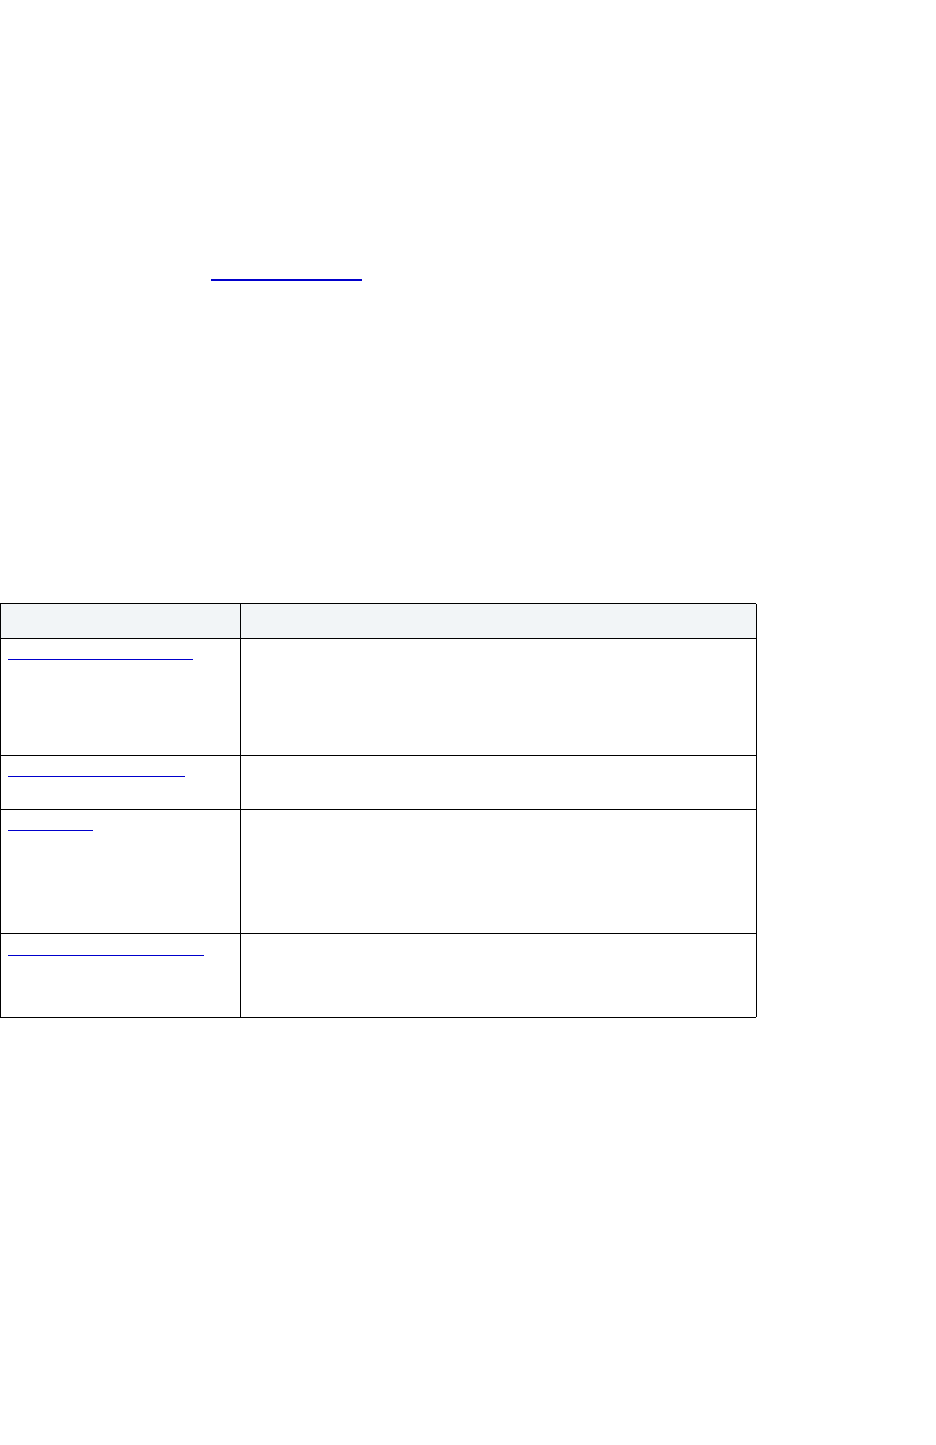
USING > SQL SCRIPTING
EMBARCADERO TECHNOLOGIES > BOOKNAMEVARIABLE 700
Clearing Bookmarks
To clear bookmarks, do the following:
1 On the Editor tool bar, click Clear Bookmark.
Rapid SQL clears all bookmarks.
NOTE: This does not clear any error indicators (red dots) that might be showing in the gutter.
For more information, see Setting Bookmarks
.
Executing Scripts
The ISQL Editor lets you execute all or part of your SQL scripts. Unless you are executing large scripts that have
multiple statements within them, or you need to view optimizer statistics, you execute most of your SQL scripts without
options.
NOTE: For Oracle Client 8.0.5, if you execute a multi-line SQL statement with an error in the syntax, the
cursor does not jump to the line of the error.
The ISQL Editor incorporates multiple features to refine and ease script execution. The table below describes these
features:
Executing a Script
To execute a script, do the following:
1 On the Editor window tool bar, click Execute.
OR
In the Editor window, right-click, and then click Execute.
Rapid SQL starts executing the script.
Executing Partial Scripts
To execute a partial script, select the portion of the script to be executed and follow the steps outlined above. This
feature is helpful while debugging large scripts and stored procedures.
Feature Description
Script Execution Facility The Script Execution Facility lets you execute scripts in parallel
against multiple datasources. The facility also lets you schedule a
job to perform the script execution at the appointed time, which
saves development time and ensures accuracy and integrity
across your databases.
Step Execution Facility
The Step Execution Facility processes batches from one delimiter
to the next.
Query Plan
The Query Plan Facility provides a graphical display that lets you
identify the execution path that your SQL follows.
Rapid SQL's Query Plan window now displays data for the
estimated costs, number of rows, and bytes returned by each plan
step.
Query Options Dialog Box
MICROSOFT SQL SERVER and SYBASE ASE ONLY:
The Query Options dialog box lets you customize what you see
when you execute your query.

USING > SQL SCRIPTING
EMBARCADERO TECHNOLOGIES > BOOKNAMEVARIABLE 701
Script Execution Facility
Rapid SQL has a Script Execution Facility that lets you run parallel queries against multiple datasources. This facility
is also a stand-alone utility that is available from the utilities tool bar. If used as a stand-alone utility, you can directly
type your script or copy and paste a script in an additional tab. Once you have selected the desired options, Rapid
SQL establishes multiple threads and database connections to run the script simultaneously against the selected
target datasources. Additionally, ANSI SQL scripts can run against multiple datasources from different DBMS vendors.
For example, you can simultaneously execute an ordinary SELECT statement against Oracle, Sybase ASE, Microsoft
SQL Server and IBM DB2 UDB for Linux, Unix, and Windows servers.
The Script Execution Facility runs with two output modes:
• Graphical
•File
Graphical output mode opens multiple result windows, one for each target datasource.
File output mode sends all output to a specified file or files. This feature allows for the execution of scripts against a
large number of target datasources in a single operation and enables scheduling capabilities.
Once the scripts have finished executing, you have the option to send a notification message indicating that the script
execution has completed via e-mail or Net Send. This message includes attachments of all the output files generated.
For more information, see Executing Scripts Against Multiple Datasources
.
Executing Scripts Against Multiple Datasources
To execute scripts against multiple datasources, do the following:
1 On the Utilities menu, click Script Execution Facility.
OR
On the Utilities tool bar, click Script Execution Facility.
OR
On the Editor window tool bar, click Script Execution Facility.
The table below describes the options and functionality on the Script Execution Facility dialog box.
NOTE: This option is not available for a DDL Editor or PL/ISQL Editor. To execute a script from a DDL or
a PL/ISQL Editor, use the stand-alone Script Execution Facility.
2 If you selected File output:
Option Description
Script Lets you type, copy and paste, or cut and paste a
script.
Target Only Connected Datasources - Select to see only
your currently connected datasources.
All DBMS Types - Select to see all DBMS types.
In the Datasource grid, select the check boxes next
to the datasources against which you want to run
your query, or click Select All to select all
datasources.
Database - Lets you type the name of the target
database.

USING > SQL SCRIPTING
EMBARCADERO TECHNOLOGIES > BOOKNAMEVARIABLE 702
For more information, see Script Execution Facility.
Compilation Error Tab
Rapid SQL displays any errors encountered when a package, function or procedure was last compiled by a user in a
separate tab of those object editors. The Errors Tab provides the line number, column position and error message for
each compilation error.
For more information, see Executing Scripts.
Command History
The ISQL Editor is equipped with a command history box, which lets you keep a history of previously used SQL
commands. The Command History is a list that is available in the Results
window. Command history lets you go back
and run previously used commands from the list rather than opening or inserting a script.
Executing from Command History
To execute from Command History, do the following:
1 In the Results window, click the Command History list, and then click the command you want to execute.
The Query window is automatically populated with the selected command.
2 To execute the command, click Execute.
For more information, see Executing Scripts
.
Output Specify how you want the output to be handled
Graphical Output - Select for graphical output.
File Output - Select for file output.
In the Directory box, type the full path and directory
name in which you want to place the output file, or
click Browse File icon to locate the directory.
Click the File Type list to specify the file type you
want to apply to the output file.
Include column titles when saving - Select to include
column titles in your saved file.
Open files with registered applications - Select to
open the files with registered application.
Notify Job Description - Lets you type a job description to
supply a subject in your e-mail message.
E-mail addresses - Lets you type the e-mail
address(es) separated by semi-colons.
Net Send User Names - Lets you type the Net Send
user name(s) separated by semi-colons.
Schedule Button This option is available when you select the File
Output Option button and have the Microsoft Task
Scheduler installed. For more information regarding
scheduling, see Scheduling
.
Option Description

USING > SQL SCRIPTING
EMBARCADERO TECHNOLOGIES > BOOKNAMEVARIABLE 703
Canceling a Query
The ISQL Editor lets you cancel a query while the rows are still being returned.
Canceling a Query
To cancel a query, do the following:
1 On the Editor window tool bar, click Cancel.
NOTE: This button is only enabled after a script has begun executing.
For more information, see Executing Scripts
.
Step Execution Facility
Step execution of scripts is an invaluable method to debug your scripts. The Step Execution facility lets you step
through each batch in your script. While some batches can include many lines of code, some batches can consist of
one line. Rapid SQL parses the statements and moves from batch to batch during the step execution process, each
step controlled by you clicking the step execution button.
The table below describes how Rapid SQL provides a number of useful tools for working with step execution of your
scripts:
For more information, see Using the Step Execution Facility.
Feature Description
ISQL Window
Gutter
The ISQL Window Gutter is a vertical gray display bar located to the left of the
ISQL window. It includes location indicators such as line numbers, error
indicators, and bookmarks. The gutter is a quick visual cue to your current
position in the script.
Script Line
Numbers
Line numbers are included to let you navigate large scripts. Error messages in
the output window indicate the line number where the error occurred.
Automatic Error
Flagging
When using the Step Execution mode, Rapid SQL flags errors with a red dot in
the ISQL window gutter. The errors are flagged sequentially as they are stepped
into.
Point and Click
Error Navigation
Rapid SQL displays errors in the output window at the bottom of the screen and
selects the errors as they occur. You can click each error and Rapid SQL takes
you directly to the line where that error occurred.
Step Click the Step button to step into the next batch of code.
Step Back Click the Step Back icon to step back to the most previous
batch of code.
Step Over Click the Step Over icon to jump over a batch to the next batch.
Run to Cursor Click the Run to Cursor icon to execute all of the code between
the beginning of the script to wherever you have inserted the
pointer.
Cancel Step
Execution
Click the Cancel Step Execution icon to change to regular
execution mode.

USING > SQL SCRIPTING
EMBARCADERO TECHNOLOGIES > BOOKNAMEVARIABLE 704
Using the Step Execution Facility
Rapid SQL offers three ways to use the step execution facility:
1 Open a script.
2 On the Query menu, click Step-Execute.
OR
On the Editor window tool bar, click Step-Execute.
OR
Right-click, and then click, Step-Execute.
Rapid SQL starts the procedure and displays errors at the bottom of the Editor window.
NOTE: Rapid SQL indicates each executing line with a yellow arrow in the gutter of the Editor window.
The gutter is that gray area between the line numbers on the left and the code window. As you
step through your batches, Rapid SQL moves the arrow to indicate your current location.
3 To continue stepping through the script, on the Editor window tool bar, click Step, which displays in the Editor
window after you have started the Step Execute procedure.
4 To step back, on the Editor window tool bar, click Step Back, which displays in the Editor window after you have
started the Step Execute procedure.
5 To step over a batch and execute the next batch, on the Editor window tool bar, click Step Over, which displays
in the Editor window after you have started the Step Execute procedure.
6 To stop Step Execution mode, on the Editor window tool bar, click Stop Step Execute, which displays in the
Editor window after you have started the Step Execute procedure.
7To Run to Cursor, on the Editor window tool bar, click Run to Cursor, which is available when the pointer is in
the Editor window.
For more information, see Executing Scripts
.
Using the Query Plan Facility
Each RDBMS platform provides a graphical display that lets you identify the execution path that your SQL follows. For
Microsoft SQL Server, Rapid SQL provides the Query Plan facility. The Query Plan button is a toggle. Set it to enable
the Show Plan mode.
Rapid SQL's Query Plan window displays data for the estimated costs, number of rows, and bytes returned by each
plan step.
NOTE: For IBM DB2 UDB for Linux, Unix, and Windows, Rapid SQL includes a tree view of statements
and associated costs.
Using the Query Plan Facility
To use the Query Plan Facility, do the following:
1 Open a script.
2On the Query menu, click Query Plan.
OR
On the Editor window tool bar, click Query Plan.
Rapid SQL starts the Show Plan mode.

USING > SQL SCRIPTING
EMBARCADERO TECHNOLOGIES > BOOKNAMEVARIABLE 705
3 To generate the Show Plan in a separate result window, click Execute.
TIP: For Rapid SQL, the Code Analyst
is a tool to identify time-consuming lines of code. Code Analyst
lets you perform detailed response time analysis on the execution of Procedures and Functions.
For more information, see Using the Query Options Dialog Box
.
Query Options
NOTE: The Query Options dialog box is available for Microsoft SQL Server and Sybase ASE only. Rapid
SQL lets you customize what you see when you execute your query using the Query Options
dialog box. The Query Options are available in the Query Options dialog box which is organized
by query analysis, transactions, arithmetic and miscellaneous.
TIP: For Rapid SQL, the Code Analyst
is a tool to identify time-consuming lines of code. Code Analyst
lets you perform detailed response time analysis on the execution of Procedures and Functions.
Important Notes
• The options you select only apply to the current window. To make options permanent, set the options in the
Options Editor .
Completing the Query Options Dialog Box
To complete the Query Options dialog box, do the following:
1 On the Query menu, click Query Options.
OR
In the ISQL Editor window, right-click, and then click Query Options.
Rapid SQL opens the Query Options dialog box.
2 Select the appropriate options.To reset the all of the options to the default settings, click Reset.
TIP: Rapid SQL lets you limit the number of rows returned to the result window of the ISQL window.
3 Click OK.
Rapid SQL accepts your selections and closes the Query Options dialog box.
For information on the sections of the Query Options dialog box, see:
•
Query Analysis
• Misc
• Transactions
• Arithmetic
• DBCC Traceflags
Query Analysis
NOTE: The options you select only apply to the current window. To make options permanent, set the
options in the Options Editor .

USING > SQL SCRIPTING
EMBARCADERO TECHNOLOGIES > BOOKNAMEVARIABLE 706
The table below describes the options and functionality in the Query Analysis section.
TIP: The Code Analyst
is a tool to identify time-consuming lines of code. Code Analyst lets you perform
detailed response time analysis on the execution of Procedures and Functions.
For more information, see Using the Query Options Dialog Box
.
Misc
NOTE: The options you select only apply to the current window. To make options permanent, set the
options in the Options Editor .
Option Description
Show Plan Reports data retrieval methods chosen by the Microsoft SQL
Server query optimizer.
No Count Terminates the message indicating the number of rows affected by
a Transact-SQL statement from being returned as part of the
results.
No Exec Compiles each query without executing it.
Statistics IO Displays information regarding the amount of disk activity
generated by Transact-SQL statements.
Statistics Time Displays the number of milliseconds required to parse, compile,
and execute each statement.
Statistics Subquery Cache SYBASE ASE ONLY:
Displays the number of cache hits, misses, and the number of rows
in the subquery cache for each subquery.
Parse Only Checks the syntax of each Transact-SQL statement and returns
any error messages without compiling or executing the statement.
Selecting this check box makes Microsoft SQL Server only parse
the statement.
Clearing this check box, makes Microsoft SQL Server compile and
execute the statement.
Do not use Parse Only in a stored procedure or a trigger.
Force Plan Processes a join in the same order as tables appear in the FROM
clause of a SELECT statement only.
Prefetch SYBASE ASE ONLY:
Selecting this check box enables large I/Os to the data cache.
Clearing this check box disables large I/Os to the data cache.
Table Count SYBASE ASE ONLY:
Sets the number of tables that Sybase ASE considers at one time
while optimizing a join.

USING > SQL SCRIPTING
EMBARCADERO TECHNOLOGIES > BOOKNAMEVARIABLE 707
The table below describes the options and functionality in the Misc section
TIP: For Rapid SQL, the Code Analyst
is a tool to identify time-consuming lines of code. Code Analyst
lets you perform detailed response time analysis on the execution of Procedures and Functions.
For more information, see Using the Query Options Dialog Box
.
Microsoft SQL Server Transactions
NOTE: The options you select only apply to the current window. To make options permanent, set the
options in the Options Editor .
Option Description
Row Count Terminates the query after returning the specified number of rows.
ANSI NULL Specifies SQL-92 compliant actions of the Equals (=) and Not
Equal to (<>) comparison operators when used with null values.
Select to makes ANSI_NULLS compare the Equal and Not Equal
operators and returns NULL when one of its arguments is NULL.
Clearing this check box makes the operators return TRUE or
FALSE depending on whether both arguments are NULL.
Quoted Identifier Determines how Microsoft SQL Server reads double quotation
marks.
Select to make double quotation marks delimit an identifier, such
as a column name.
Clearing this check box makes double quotation marks delimit a
character string, just as single quotes do.
Transact SQL Warning SYBASE ASE ONLY:

USING > SQL SCRIPTING
EMBARCADERO TECHNOLOGIES > BOOKNAMEVARIABLE 708
The table below describes the options and functionality in the Transaction section.
TIP: For Rapid SQL, the Code Analyst
is a tool to identify time-consuming lines of code. Code Analyst
lets you perform detailed response time analysis on the execution of Procedures and Functions.
For more information, see Using the Query Options Dialog Box
.
Sybase ASE Transactions
NOTE: The options you select only apply to the current window. To make options permanent, set the
options in the Options Editor .
Transaction or Isolation levels specify the kinds of actions which are not permitted while the current transaction
executes. The table below describes the options and functionality in the Transaction section.
Option Description
Read Uncommitted The lowest level of transaction isolation. Transactions are isolated
to ensure that physically corrupt data is not read.
Applies dirty read, or isolation level 0 locking, which ensures that
no shared locks are issued and no exclusive locks are honored.
If set, it is possible to read uncommitted or dirty data values in the
data can be changed and rows can appear or disappear in the data
set before the end of the transaction.
Read Committed Microsoft SQL Server default transaction isolation level.
Specifies that shared locks are held while data is read to avoid dirty
reads. You can change the data before the end of the transaction,
resulting in nonrepeatable reads or phantom data.
Repeatable Read Places locks on all data used in a query, preventing other users
from updating the data. Other users can insert new phantom rows
into the data and are included in later reads in the current
transaction.
Concurrency is lower than Read Committed. Use this option only
when necessary.
Serializable The highest level of transaction isolation. Transactions are
completely isolated from one another.
Places a range lock on the data set, preventing other users from
updating or inserting rows into the data set until the transaction is
complete.
Concurrency is lower than Repeatable Read. Use this option only
when necessary.
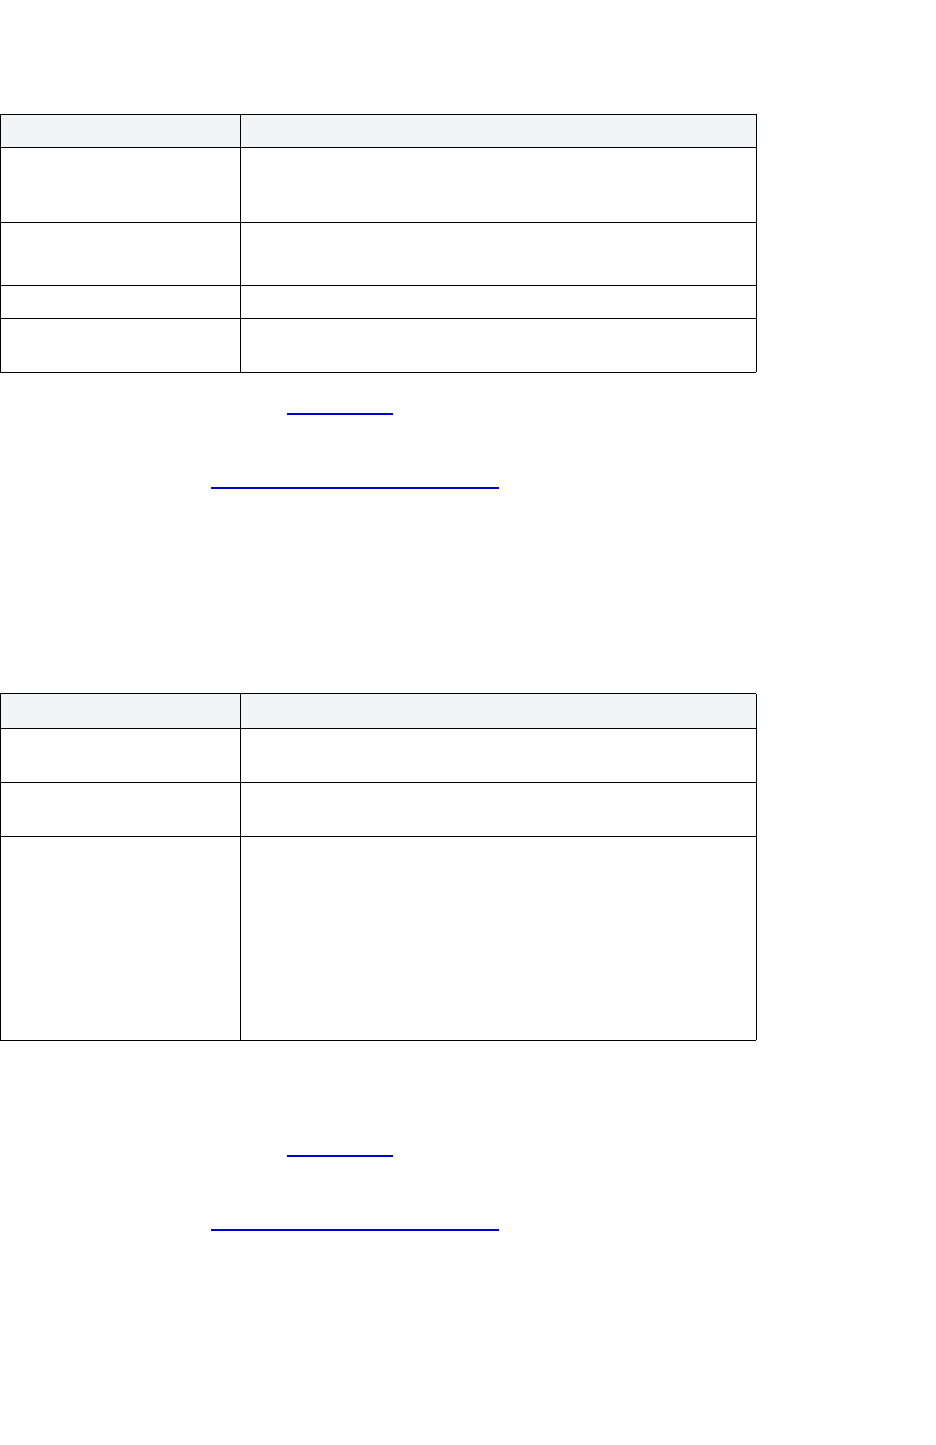
USING > SQL SCRIPTING
EMBARCADERO TECHNOLOGIES > BOOKNAMEVARIABLE 709
TIP: For Rapid SQL, the Code Analyst is a tool to identify time-consuming lines of code. Code Analyst
lets you perform detailed response time analysis on the execution of Procedures and Functions.
For more information, see Using the Query Options Dialog Box
.
Arithmetic
NOTE: The options you select only apply to the current window. To make options permanent, set the
options in the Options Editor .
The table below describes the options and functionality in the Arithmetic section.
NOTE: For more information, see Microsoft SQL Server 7 Books Online or Sybase ASE 12.0 Online
Reference Manual.
TIP: For Rapid SQL, the Code Analyst
is a tool to identify time-consuming lines of code. Code Analyst
lets you perform detailed response time analysis on the execution of Procedures and Functions.
For more information, see Using the Query Options Dialog Box
.
Option Description
Chained Invokes a begin transaction before the following statements:
delete, insert, open, fetch, select, and update. You must still
explicitly close the transaction with a commit.
Isolation Level 1 Sybase default isolation level.
Prevents dirty reads.
Isolation Level 2 Prevents dirty and non-repeatable reads.
Isolation Level 3 Prevents dirty and non-repeatable reads and phantoms. This level
is equivalent to performing all selects with holdlock.
Option Description
Ignore Arithmetic Overflow Controls whether error messages are returned from overflow or
divide-by-zero errors during a query.
Abort On Arithmetic Overflow Stops a query when an overflow or divide-by-zero error occurs
during query execution.
Abort on Arithmetic Trunc SYBASE ASE ONLY:
Specifies behavior following a loss of scale by an exact numeric
datatype during an implicit datatype conversion.
Selecting this check box aborts the statement that causes the error
but continues to process other statements in the transaction or
batch.
Clearing this check box truncates the query results and continues
processing.
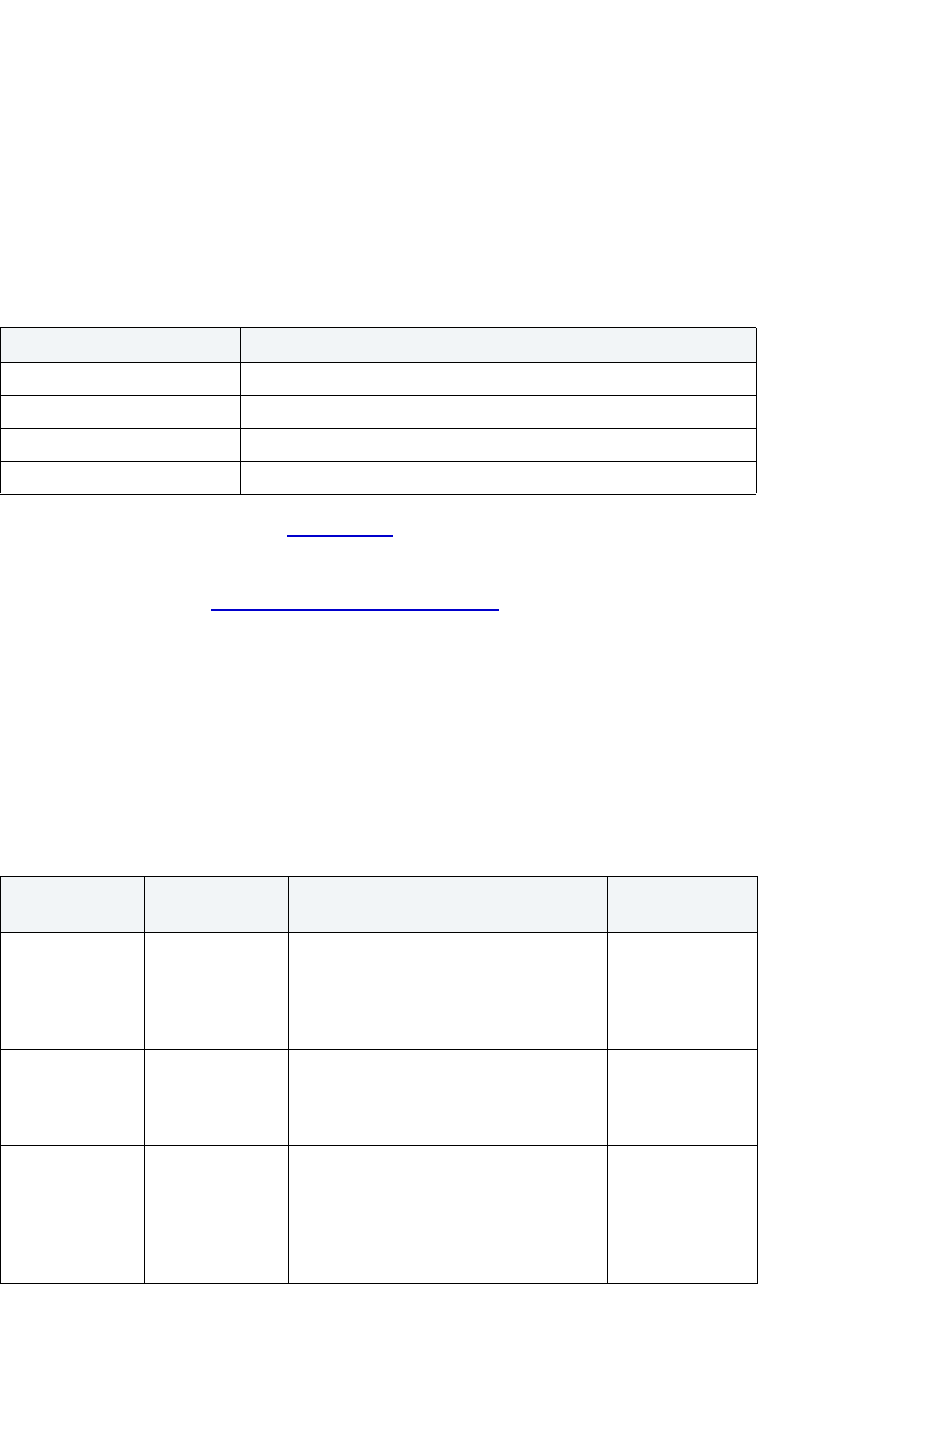
USING > SQL SCRIPTING
EMBARCADERO TECHNOLOGIES > BOOKNAMEVARIABLE 710
DBCC Traceflags
NOTE: The options you select only apply to the current window. To make options permanent, set the
options in the Options Editor .
NOTE: This section is available for Sybase ASE only.
Traceflags, specifically for Index Selection (302) and Join Selection (310), are valuable when tuning query
performance.
The table below describes the options and functionality in the DBCC Traceflags section.
TIP: For Rapid SQL, the Code Analyst
is a tool to identify time-consuming lines of code. Code Analyst
lets you perform detailed response time analysis on the execution of Procedures and Functions.
For more information, see Using the Query Options Dialog Box
.
Result Options
The Result Options dialog box lets you set the SQL Results Window options. The table below describes Results
options:
NOTE: The options you select only apply to the current window. To make options permanent, set the
options in the Options Editor .
Option Description
Index Selection (302) Valuable when tuning query performance.
Join Selection (310) Valuable when tuning query performance.
Output to Execution Window Lets you select an option.
Output to Server Error Log Lets you select an option.
Interface
Element
Option Description Default
Result Window Single Window Displays all results in one tabbed result
window. Multiple result sets are
appended together in the window.
Single Window and Multiple Windows
options are mutually exclusive.
Selected
Multiple
Windows
Displays multiple result sets one result
set per window. Single Window and
Multiple Windows options are mutually
exclusive.
Not selected
Placement Attached to
Editor
Used in conjunction with Single Window
option or Multiple Window option.
Indicates that results appear as tabbed
windows attached to the ISQL Window.
Attached to Editor and Unattached
options are mutually exclusively.
Selected

USING > SQL SCRIPTING
EMBARCADERO TECHNOLOGIES > BOOKNAMEVARIABLE 711
Using the Token Matching Capability
When you are working with a large script with multiple levels of embedded steps, compare left and right parentheses,
curly braces, square brackets and BEGIN/END pairs to make sure that you have delimited your code properly.
The Token Matching capability of Rapid SQL helps you achieve clean code.
Finding Matching Tokens
To find matching tokens, do the following:
1 Position the insertion pointer just to the left of the first token in a token pair you want to locate.
2 Click Match Token.
Rapid SQL jumps the pointer to the next available token.
For more information, see Query Plan Facility
.
Results Editor
The results of your SQL queries are displayed in the Results Tab of each Editor Window, which captures result sets in
a virtual data grid that accommodates large result sets. The data grid offers many of the features of a basic Windows
spreadsheet, giving you a great deal of flexibility in editing the worksheet and formatting its contents.
TIP: For Oracle, Rapid SQL displays REF CURSOR contents in the ISQL Window and Results Tab.
Unattached Used in conjunction with Single Window
option or Multiple Windows option.
Indicates that results appear in windows
separate from the ISQL Window.
Attached to Editor and Unattached
options are mutually exclusive.
Not Selected
Format Standard Grid Displays all result sets in a standard grid
format. Result sets are only displayed in
grid format in SQL Editors that are
opened after you have selected this
option. It does not apply to SQL Editors
that are already open.
Selected
HTML Displays all result sets as HTML tables.
Result sets are only displayed in HTML
format in SQL Editors that are opened
after you have selected this option. It
does not apply to SQL Editors that are
already open.
Not selected
ASCII Text Displays all result sets as ASCII Text.
Result sets are only displayed in ASCII
Text format in SQL Editors that are
opened after you have selected this
option. It does not apply to SQL Editors
that are already open.
Not selected
Interface
Element
Option Description Default

USING > SQL SCRIPTING
EMBARCADERO TECHNOLOGIES > BOOKNAMEVARIABLE 712
You have many choices for navigating and viewing your SQL query results. The Results window includes functionality
to set result window options, find and replace, export data to other products such as Microsoft Excel, and mail your
results files.
For more information, see Configuring Result Set Windows
.
Configuring Result Set Windows
Result set windows can be configured in a variety of ways. You can configure your result set windows to present result
sets in multiple or single panels, attached or detached from the corresponding ISQL window. These options can be set
globally to save you the hassle of setting options for each result window. Additionally, Result windows can be torn off
and dropped onto an open area of the workspace to create separate windows. These are known as Tear Off Tab
Windows.
You can set the Result Window to display result sets in any of the following modes:
•
Single result sets in one attached tab window.
• Multiple result sets in one attached tab window.
• Single result sets in one separate unattached tab windows.
• Multiple result sets in one separate unattached tab windows.
• Tear Off Tab windows.
Viewing Multiple Result Sets in Separate Unattached Windows
To set the option to have multiple result sets displayed in multiple unattached windows, do the following:
1On the File menu, click Options.
OR
On the Main tool bar, click Options.
Rapid SQL opens the Options Editor.
2 In the Options Editor, click the list, and then click Results or click the Results Tab.
3 In the Results Window grid, click the Multiple Windows option.
4 In the Results Window grid, click the Unattached option.
5 Click OK.
Rapid SQL saves the settings and closes the Options Editor.
For more information, see Configuring Result Set Windows
.
Viewing Multiple Result Sets in One Attached Tab Window
To set the option to have multiple result sets displayed in one attached tab window, do the following:
1On the File menu, click Options.
OR
On the Main tool bar, click Options.
Rapid SQL opens the Options Editor.

USING > SQL SCRIPTING
EMBARCADERO TECHNOLOGIES > BOOKNAMEVARIABLE 713
2 In the Options Editor, click the list, and then click Results or click the Results Tab.
3 In the Results Window grid, click the Multiple Windows option.
4 In the Results Window grid, click the Attached to Editor option.
5 Click OK.
Rapid SQL saves the settings and closes the Options Editor.
For more information, see Configuring Result Set Windows
.
Viewing Single Result Sets in One Separate Unattached Window
To set the option to have a single result set displayed in one unattached window, do the following:
1On the File menu, click Options.
OR
On the Main tool bar, click Options.
Rapid SQL opens the Options Editor.
2 In the Options Editor, click the list, and then click Results or click the Results Tab.
3 In the Results Window grid, click the Single Window option.
4 In the Results Window grid, click the Unattached option.
5 Click OK.
Rapid SQL saves the settings and closes the Options Editor.
For more information, see Configuring Result Set Windows
.
Viewing Single Result Sets in One Attached Tab Window
To set the option have all SQL query results displayed in a single attached tab window, do the following:
1On the File menu, click Options.
OR
On the Main tool bar, click Options.
Rapid SQL opens the Options Editor.
2 In the Options Editor, click the list, and then click Results or click the Results Tab.
3 In the Results Window grid, click the Multiple Windows option.
4 In the Results Window grid, click the Attached to Editor option.
5 To re-use the same result set window for subsequent result sets, select the Reuse window check box. This
option is only valid for single, attached result windows.
6 Click OK.
Rapid SQL saves the settings and closes the Options Editor.
For more information, see Configuring Result Set Windows
.

USING > SQL SCRIPTING
EMBARCADERO TECHNOLOGIES > BOOKNAMEVARIABLE 714
Exporting Data to Other Products
You can export data from a result set to traditional spreadsheet products, such as Microsoft Excel. You can copy part
or all of a result set and paste it into your traditional spreadsheet product by way of the Microsoft Windows Clipboard
function. You can also save your result sets as tab delimited files, comma separated files or as HTML tables. HTML
tables can be opened in your default Internet browser. Tab delimited files and CSV files can be opened in any
spreadsheet or word processing program.
NOTE: Rapid SQL supports pipe delimited ( '|" ) files when you save result sets.
For more information, see Results Editor
.
Setting Result Windows to Read Only Mode
To set your result windows to read only mode to keep anyone from accidentally editing or altering a result set, do the
following:
1 Select a Result window that you want to make read only.
2 On the Edit menu, click Read Only.
Rapid SQL places a check-mark next to read only and sets the command.
NOTE: The Read Only command is a toggle. When it is set, the formatting buttons on the Edit menu are
not available.
For more information, see Results Editor
.
Result Window Status Bar
The Result Window Status Bar displays information about each Result window at the bottom of each window. You can
display or hide the status bar by setting the Status Bar preference. This preference applies to all result windows.
For more information, see Results Editor
.
Mailing Result Sets
If you have MAPI-compliant electronic mail software installed on your computer, then you can mail result sets to other
users.
Mailing a Result Set
To mail a result set, do the following:
1 Open the Message dialog box:
2On the File menu, click Send.
OR
On the File tool bar, click Send.
Rapid SQL opens the open Message dialog box.
3 In the Address box, type the name of the addressee(s) and any other options.
The ISQL Editor automatically attaches a file containing your result set to the mail message.

USING > SQL SCRIPTING
EMBARCADERO TECHNOLOGIES > BOOKNAMEVARIABLE 715
4 Click Send.
Rapid SQL sends the result set to the specified addressee(s).
For more information, see Results Editor.
Closing and Renaming Result Window Tabs
Rapid SQL lets you close or rename tabbed Result set windows.
Renaming a Result Window Tab
To rename a Result Window Tab, do the following:
1 Place your pointer over the Results Tab.
2 Right-click the Results Tab, and then click Rename.
Rapid SQL opens the Rename Tab Editor.
3 In the New Name box, type the new name.
4 Click OK.
Rapid SQL changes the name and closes the Rename Tab Editor.
Closing a Result Window Tab
To close a Result Window Tab, do the following:
1On the Result Window Tab tool bar, click Close.
OR
Right-click the Results Tab, and then click Close.
Rapid SQL closes the Result Window Tab.
For more information, see Results Editor
.
Saving and Closing Result Sets
You can save your result sets using the standard Save and Save As functions. You can save multiple copies of the
same result set and modify each copy to specific formatting requirements.
Saving Results
To save results, do the following:
1On the File menu, click Save.
OR
On the Main tool bar, click Save.
Rapid SQL opens the Save Results dialog box.
2 In the File name box, type the name of the result set.
3In Save as type, select the file type.
TIP: You can now save data in Excel 2000 or later .xls, user-specified delimited .txt, and XML formats.

USING > SQL SCRIPTING
EMBARCADERO TECHNOLOGIES > BOOKNAMEVARIABLE 716
4 To include column titles, select Include column titles when saving.
5 For delimited results, in User Specified Delimiter type the delimiter.
6 Click Save.
Rapid SQL saves the file and closes the Save As dialog box.
Closing a Result Set
To close a result set, do the following:
1On the Main menu, click Close.
OR
On the Result tool bar, click Close.
OR
In the upper-right corner of the window, double-click the System menu icon.
Rapid SQL closes the Result Set.
2 If you have not saved your result set, Rapid SQL prompts you to save the file. Click Yes to save and No to close
without saving.
For more information, see Results Editor
.
Editing Result Sets
The Results Editor provides many ways to edit and customize your result windows. The Data Grid offers a host of
features for manipulating, sorting and formatting data.
Topics
• Cutting, Copying, and Pasting Cell Contents
• Cutting, Copying, and Pasting Rows
• Cutting, Copying, and Pasting Columns
• Adding and Inserting Rows
• Adding and Inserting Columns
• Deleting Rows and Column
• Resizing Rows and Columns
• Sorting Data
Cutting, Copying, and Pasting Cell Contents
The Result window supports standard cut, copy and paste functionality.

USING > SQL SCRIPTING
EMBARCADERO TECHNOLOGIES > BOOKNAMEVARIABLE 717
Cutting Cell Contents
To cut cell contents, do the following:
1In the Results window, double click or tab to the target cell. A double line bounds the selected cell. You can also
select text using standard text selection techniques.
2On the Edit menu, click Cut.
OR
On the Result tool bar, click Cut.
Rapid SQL cuts the cell.
Copying Cell Contents
To copy cell contents, do the following:
1In the Results window, double click or tab to the target cell. A double line bounds the selected cell. You can also
select text using standard text selection techniques.
2On the Edit menu, click Copy.
OR
On the Result tool bar, click Copy.
Rapid SQL copies the cell.
Pasting Cell Contents
To paste cell contents, do the following:
1 In the Results window, double click or tab to the target cell. A double line bounds the selected cell.
2On the Edit menu, click Paste.
OR
On the Result tool bar, click Paste.
Rapid SQL pastes the cell.
For more information, see Editing Result Sets
.
Cutting, Copying, and Pasting Rows
You can perform standard cut, copy, and paste functions on rows, just as you can on individual cells.
Cutting Rows
To cut a row, do the following:
1 In the Results window, click the numbered row heading on the left side of the row.
2On the Edit menu, click Cut.
OR
On the Result tool bar, click Cut.
Rapid SQL cuts the row.

USING > SQL SCRIPTING
EMBARCADERO TECHNOLOGIES > BOOKNAMEVARIABLE 718
Copying Rows
To copy rows, do the following:
1 In the Results window, double click or tab to the target row. A double line bounds the selected row. You can also
select text using standard text selection techniques.
2On the Edit menu, click Copy.
OR
On the Result tool bar, click Copy.
Rapid SQL copies the row.
Pasting Rows
To paste rows, do the following:
1 In the Results window, double click or tab to the target row. A double line bounds the selected row.
2On the Edit menu, click Paste.
OR
On the Result tool bar, click Paste.
Rapid SQL pastes the row.
For more information, see Editing Result Sets
.
Cutting, Copying, and Pasting Columns
You can perform standard cut, copy, and paste functions on columns, just as you can on rows.
Cutting Columns
To cut columns, do the following:
1 In the Results window, click the column heading above the first row.
2On the Edit menu, click Cut.
OR
On the Result tool bar, click Cut.
Rapid SQL cuts the column.
Copying Columns
To copy columns, do the following:
1 In the Results window, click the column heading.
2On the Edit menu, click Copy.
OR
On the Result tool bar, click Copy.
Rapid SQL copies the column.

USING > SQL SCRIPTING
EMBARCADERO TECHNOLOGIES > BOOKNAMEVARIABLE 719
Pasting Columns
To paste columns, do the following:
1 In the Results window, click the column heading above the first row to select the target column.
2On the Edit menu, click Paste.
OR
On the Result tool bar, click Paste.
Rapid SQL pastes the column.
For more information, see Editing Result Sets
.
Adding and Inserting Rows
You can add or insert rows to expand or rearrange your result sets.
Adding a Row
To add a row, do the following:
1 To add a row as the last row of the result set, position the pointer inside the result set.
2 On the Edit menu, click Add Row.
3 To add a row inside the result set, click the numbered row heading where you want to add a row.
4 On the Edit menu, click Add Row.
Inserting a Row
To insert a row, do the following:
1 To insert a row as the last row of the result set, position the pointer inside the result set.
2 On the Edit menu, click Insert Row.
3 To insert a row inside the result set, click the numbered row heading where you want to insert a row.
4 On the Edit menu, click Insert Row.
For more information, see Editing Result Sets
.
Adding and Inserting Columns
You can add or insert columns to expand or rearrange your result sets.
Adding a Column
To add a column, do the following:
1 Position the pointer inside the result set.
2Select Edit, Add Column from the main menu. The new column is added as the last column of the result set.

USING > SQL SCRIPTING
EMBARCADERO TECHNOLOGIES > BOOKNAMEVARIABLE 720
Inserting a Column
To insert a column, do the following:
1 Select the column where you want to insert a column.
2Select Edit, Insert Column from the main menu. The new column is inserted to the left of the column that you
selected.
For more information, see Editing Result Sets
.
Deleting Rows and Columns
You can delete entire rows and columns to edit your result sets.
Deleting a Row
To delete a row, do the following:
1 Select the target row of data to delete.
2On the Edit menu, click Delete Row.
OR
Right-click the row, and then click Delete Row.
Rapid SQL deletes the row.
Deleting a Column
To delete a column, do the following:
1 Select the target column of data to delete.
2On the Edit menu, click Delete Column.
OR
Right-click the column, and then click Delete Column.
Rapid SQL deletes the column.
For more information, see Editing Result Sets
.
Resizing Rows and Columns
Resizing rows and columns can aid readability of the spreadsheet contents or condense space for editing and
formatting purposes.
Resizing Rows to Their Default Height
To resize rows to their default height, do the following:
1 Select one or more rows by clicking on the numbered row headings to the left of the rows.
2 Right-click the selected rows, and then click Resize Rows.

USING > SQL SCRIPTING
EMBARCADERO TECHNOLOGIES > BOOKNAMEVARIABLE 721
Resizing Rows to a New Height
To resize rows to a new height, do the following:
1 Select one or more rows by clicking the numbered row headings to the left of the rows.
2 Change the pointer to a solid horizontal bar with arrows on top and bottom by moving it to one of the upper or
lower borders of the row heading.
3 Click and grab the row border and drag the pointer to enlarge or shrink the height of the row.
Resizing Columns to Their Default Widths
To resize columns to their default widths, do the following:
1 Select one or more columns by clicking the column headings.
2 Right-click the selected columns, and then click Resize Columns.
Resizing Columns to a New Width
To resize columns to a new width, do the following:
1 Select one or more columns by clicking the column headings.
2 Change the pointer to a solid horizontal bar with arrows on top and bottom by moving it to one of the upper or
lower borders of the column heading.
3 Click and grab the column border and drag the pointer to enlarge or shrink the height of the column.
For more information, see Editing Result Sets
.
Sorting Data
To order and organize data in a coherent manner, you can sort columns alphanumerically in single result sets.
Sorting Data
To sort data, do the following:
1 In the data grid, select the column(s) you want to sort.
2 Double click the column header(s) to sort the data in the column in ascending, alphanumeric order. To sort the
column in descending order, double click the column header again.
NOTE: This option is not valid for multiple result sets.
For more information, see Editing Result Sets
.
Formatting Result Sets
The ISQL Editor provides flexibility in formatting result sets, for analysis and reporting, from within a Result Window.
Result sets can be formatted to best suit your purpose, whether it be sending via e-mail, printing, or exporting a file to
other programs, such as Microsoft Excel. Some of these features change only the screen display of the results, while
others allow you to format for printing.
Topics
•
Setting Alignment Properties
• Setting Border Properties
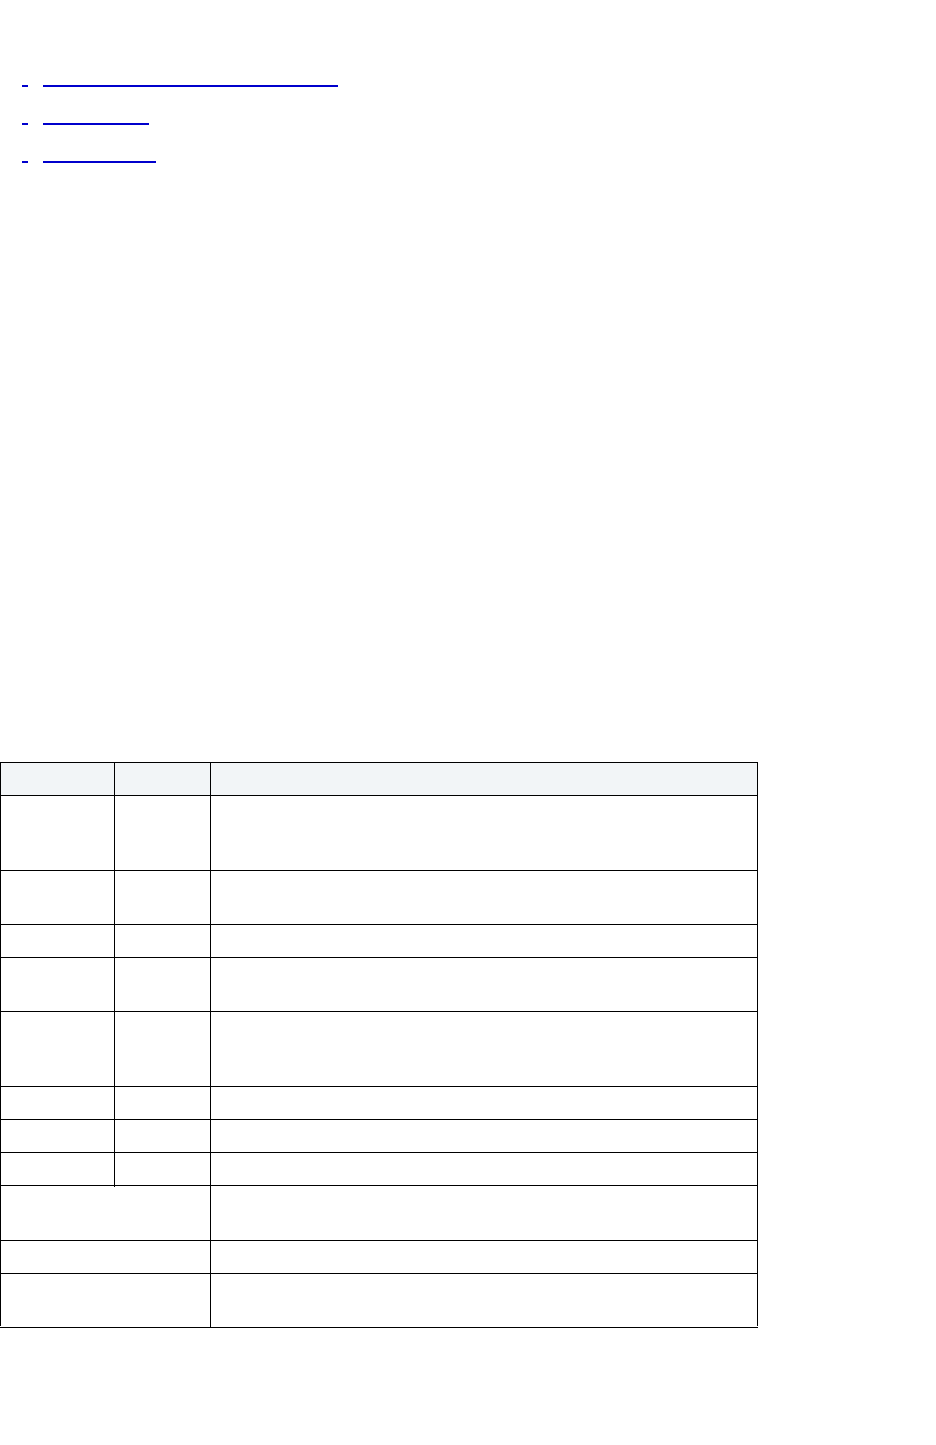
USING > SQL SCRIPTING
EMBARCADERO TECHNOLOGIES > BOOKNAMEVARIABLE 722
• Setting Result Set Display Properties
• Setting Fonts
• Setting Colors
Setting Alignment Properties in Result Windows
You can use the format menu or the shortcut menu to alter result set alignment properties. Selecting the Alignment
command displays the Format Styles tabbed dialog box:
Setting Alignment Properties
To set alignment properties, do the following:
1On the Format menu, click Alignment.
OR
Right-click the Result data grid, and then click Alignment.
Rapid SQL opens the Format Styles dialog box.
2 Click the Align Tab.
3 To change Horizontal properties, click the appropriate option button in the Horizontal box.
4 To enable Wrap Text, Allow Enter and/or Auto Size, select the appropriate check boxes.
5 To disable Wrap Text, Allow Enter and/or Auto Size, select the appropriate check boxes and deselect these
options.
The table below describes alignment properties:
Property Option Description
Horizontal Standard Aligns data in cells based on their default datatype alignment
properties. For example, numbers are right aligned, whereas text is left
aligned.
Left
Aligned
Forces all data to be left aligned, regardless of datatype
Center Forces centering of all data, regardless of datatype
Right
Aligned
Forces all data to be right aligned, regardless of datatype
Vertical Standard Aligns data in cells based on their default datatype alignment
properties. For example, numbers are right aligned, whereas text is left
aligned.
Top Forces all data to be aligned to the top of each cell
Center Forces all data to be aligned in the center of each cell
Bottom Forces all data to be aligned at the bottom of each cell
Wrap Text Specifies that data exceeding the length of the cell should wrap to
additional lines in the same cell
Allow Enter Specifies that the contents of cells can be edited or not
Auto Size Specifies whether or not rows should size automatically to
accommodate the longest data item in a column

USING > SQL SCRIPTING
EMBARCADERO TECHNOLOGIES > BOOKNAMEVARIABLE 723
For more information, see Formatting Result Sets.
Format Border Styles
You can use the format menu or the shortcut menu to alter border properties. Selecting the Border command displays
the Format Styles tabbed dialog box.
Completing the Format Styles Dialog Box
To complete the Format Styles dialog box, do the following:
1On the Format menu, click Borders.
OR
Right-click the Result data grid, and then click Borders.
Rapid SQL opens the Format Styles dialog box.
2 Click the Borders Tab.
3On the Border box, you can indicate whether or not a border should appear on the top, bottom, right, left, or for a
range of cells by clicking the corresponding boxes.
4 To set a range of cells apart by setting a particular border style around that range, select the range in the result
set before opening the Format Styles dialog box. To select the Range property, click the range box.
5 In the Type box, you can select the type of line you want to border the cell or cells by clicking the corresponding
boxes.
6 To select a color, click the Color list, and then click the border color.
7 Click OK.
Rapid SQL saves your changes and closes the Format Styles dialog box.
For more information, see Formatting Result Sets
.
Display Settings
You can use the format menu or the shortcut menu to alter display properties. Selecting the Properties command
displays the Display Setting dialog box.
The Display Settings dialog box lets you set a number of format properties for the result set window:
• How titles and grid lines are displayed.
• How lines in the grid are displayed.
• How the result set window background is displayed.
• How current cells, rows and columns are indicated.

USING > SQL SCRIPTING
EMBARCADERO TECHNOLOGIES > BOOKNAMEVARIABLE 724
Completing the Display Settings Dialog Box
To complete the Display Settings dialog box, do the following:
1On the Format menu, click Properties.
OR
Right-click the Result data grid, and then click Properties.
Rapid SQL opens the Display Settings dialog box.
2In the Titles and Gridlines box, select the target display properties check boxes. The change is displayed in the
right-pane Preview window of the Properties dialog box.
3 In the Color box, click the property you want to change, and then click the new color. Changes are propagated
automatically when you change them.
4 To alter the user properties, in the User Properties list, click the attribute you want applied to the current cell.
5 To save your changes to the current configuration, select the Save settings to profile check box.
6 Click OK.
Rapid SQL saves your changes and closes the Properties dialog box.
For more information, see Formatting Result Sets.
Format Font Styles
You can use the format menu or the shortcut menu to alter font properties. Selecting the Font command displays the
Format Styles tabbed dialog box.
Completing the Format Styles Dialog Box
To complete the Format Styles dialog box, do the following:
1On the Format menu, click Font.
OR
Right-click the Result data grid, and then click Font.
Rapid SQL opens the Format Styles dialog box.
2 Click the Font Tab.
3 In the Font Combo box, type or click the font you want to use.
4 In the Outline Combo box, type or click the outline you want to use.
5 In the Size Combo box, type or click the size you want to use.
6 To make a line cross through the length of the text, in the Effects box, select the Strikeout check box.
7 To underline the text, in the Effects box, select the Underline check box.
8 To change the text color, click the Text Color list, and then click the new color.
The Preview box displays the sample text of your selections
For more information, see Formatting Result Sets
.

USING > PERMISSIONS MANAGEMENT
EMBARCADERO TECHNOLOGIES > BOOKNAMEVARIABLE 725
Format Color Styles
You can use the format menu or the shortcut menu to alter color properties. Selecting the Color command displays the
Format Styles tabbed dialog box.
The table below describes the options and functionality on the Format Styles dialog box:
Completing the Format Styles Dialog Box
To complete the Format Styles dialog box, do the following:
1On the Format menu, click Color.
OR
Right-click the Result data grid, and then click Color.
Rapid SQL opens the Format Styles dialog box.
For more information, see Formatting Result Sets
.
Permissions Management
Rapid SQL includes permissions management capabilities that include:
•
Explicit Permissions
• Cascading Permissions
• Using Roles to Grant Permissions and Privileges
• Using Roles to Revoke Permissions and Privileges
• Grant Privilege(s) To
• Revoke Privilege(s) From
• Deny Privileges From
Option Description
Interior To change the result set pattern, in the box, click the
list, and then click a new pattern.
To set the foreground color of the result set, in the
box, click a foreground group color button.
To set the background color of the result set, in the
box, click a background group color button.
3D-Effect To change the 3D-Effect, in the box, click the
appropriate option button:
The Normal option button provides a standard flat
appearance.
The Raised option button provides a raised 3D
appearance in the selected cells.
The Inset option button provides a depressed
appearance in the selected cells. The default is
typically set to Normal.

USING > PERMISSIONS MANAGEMENT
EMBARCADERO TECHNOLOGIES > BOOKNAMEVARIABLE 726
Explicit Permissions
Explicit permissions are permissions specifically granted by one user to another. Granting a permission is an integral
part of database security and management. Rapid SQL tracks explicit permission changes across your enterprise.
Multiple explicit permissions can be consolidated in roles. Different groups and roles can share permissions for an
object. Rapid SQL lets you grant permissions with the Roles Editor. Embarcadero lets you edit permissions on the
Privileges tabs of the object editors.
TIP: The Admin option is similar to the grantable option for privileges. If the user has the admin option,
they can grant that role to other people.
TIP: In most cases, you will want to make all roles granted, default roles. If you do not make a role
default for a user, they will have to enable it with a SQL command. To avoid this complication,
assign roles as default unless business rules specify otherwise.
TIP: The Grantable option gives the user the ability to grant that privilege to other users. Use the
Grantable option SPARINGLY.
For more information, see Permissions Management
.
Cascading Permissions
Cascading permissions are the path of privileges granted from one user to another user, group, or role. Using
cascading permissions is a way to manage multiple sets of permissions and privileges for groups of users. When you
drop a user with a revoke cascade command, all permissions and privileges granted by the dropped user are also
revoked. Embarcadero lets you edit and set grant permission parameters with the Permissions Editor.
Once a user with grant permission privileges is dropped with cascade, reinstate permissions for all affected users.
For more information, see Permissions Management
.
Using Roles to Grant Permissions and Privileges
Roles are sets of user privileges you associate with access to objects within a database. Roles streamline the process
of granting permissions. You can use roles to grant sets of permissions and privileges to users and groups. Rapid SQL
lets you grant permissions to roles with the Roles Editor.
For more information, see Permissions Management
.
Using Roles to Revoke Permissions and Privileges
Roles can be effective in revoking permissions and privileges from users. Rather than individually revoke permissions
from users, you can revoke groups of permissions from multiple users simultaneously using roles. Rapid SQL lets you
revoke permissions with the Roles Editor.
Rapid SQL lets you identify existing users and their database permissions, and to detect and manage changes to user
permissions by rolling change back or forward. Rapid SQL lets you manage database permissions in a cross-platform
database environment. and gives you the ability to compare objects/permissions and migrate them to other instances.
Using the compare functionality for permissions management, Rapid SQL gives you:
• Enhanced permissions management across the enterprise (Oracle, Sybase ASE, Microsoft SQL Server, and IBM
DB2 UDB for Linux, Unix, and Windows).
• Faster detection of changed user rights.
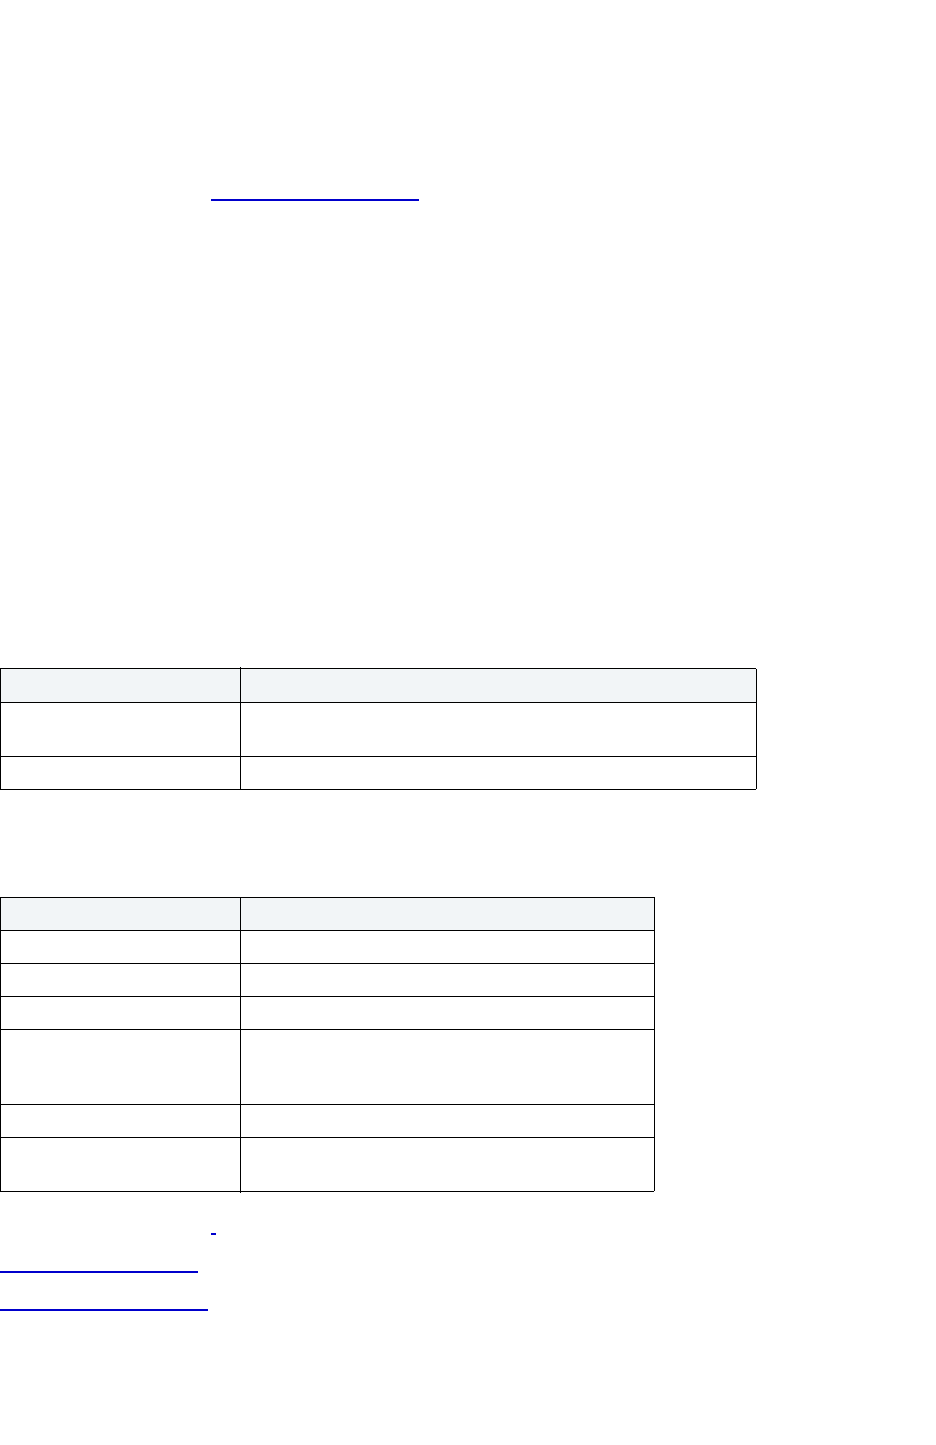
USING > PERMISSIONS MANAGEMENT
EMBARCADERO TECHNOLOGIES > BOOKNAMEVARIABLE 727
• Ability to detect database accounts (users/logins) that are invalid.
• Rollback of invalid permissions in a single click.
• Archives of users, groups, roles and their permissions.
For more information, see Permissions Management
.
Grant Privilege(s) To
The Grant Privilege(s) To dialog box lets you select or clear the check boxes corresponding to the target privileges.
Permissions and privileges allow or limit access to system database administration and database objects. To manage
databases, it is important to monitor who can access the enterprise structure and change the underlying schema. It is
also important to monitor who can grant and revoke permissions and privileges in the enterprise. Rapid SQL lets you
manage permissions and privileges in the Grant Privilege(s) To dialog box.
On the Privileges Tab of the editor, you can see whether a privilege was inherited from a role or group, or if it was
granted explicitly by a user.Rapid SQL also shows if the privilege is grantable (granted with the GRANT OPTION.) The
table below describes the icons:
NOTE: The available privileges depend on the target DBMS and object.
The table below describes the options and functionality on the Grant Privilege(s) From Dialog Box:
The table below describes the object permissions:
For more information, see:
Completing a Dialog Box
Permissions Management
Option Description
Privilege Lets you select or clear the check boxes corresponding to the
target privileges.
Grantable Select No to prevent cascading the privileges to other users.
Object Permission(s)
Index CONTROL
Packages BIND, CONTROL, EXECUTE
Schema ALTERIN, CREATIN, DROPIN (w/GRANT OPTION)
Tables ALTER, CONTROL, DELETE, INDEX, INSERT,
REFERENCES (& on column), SELECT, UPDATE (&
on column) (w/GRANT OPTION)
Tablespaces USE (w/GRANT OPTION)
Views CONTROL, DELETE, INSERT, SELECT, UPDATE
(& on column) (w/GRANT OPTION)
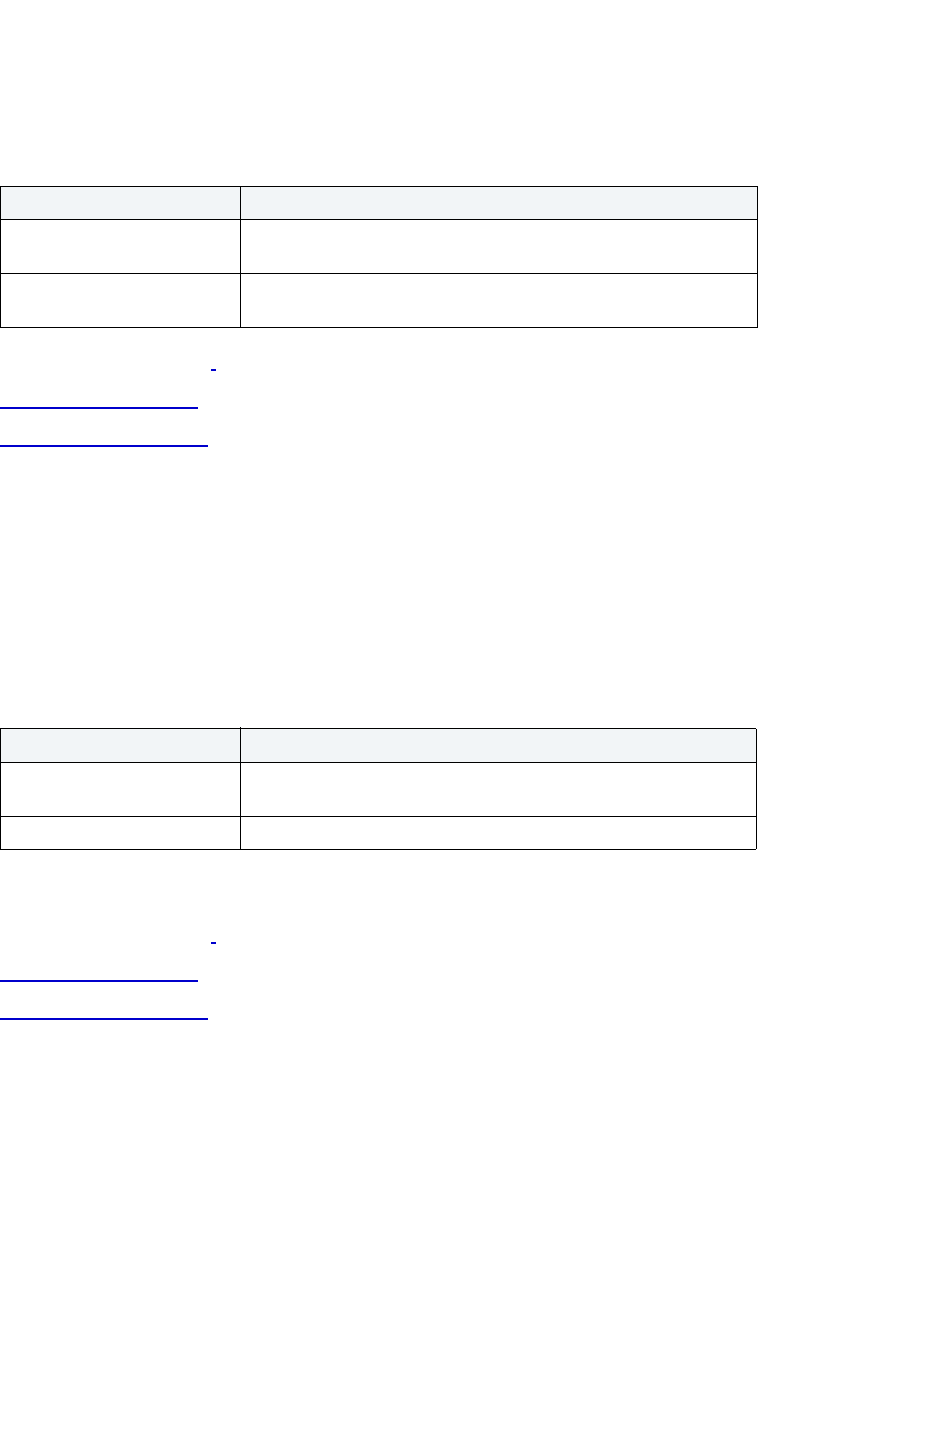
USING > PROJECT MANAGEMENT
EMBARCADERO TECHNOLOGIES > BOOKNAMEVARIABLE 728
Revoke Privilege(s) From
The table below describes the options and functionality on the Revoke Privilege(s) From dialog box:
For more information, see:
Completing a Dialog Box
Permissions Management
Deny Privileges From
NOTE: Deny Privileges is available for Microsoft SQL Server only.
The Deny Privileges From dialog box lets you deny a privilege from a security account in the current database.
The table below describes the options and functionality on the Deny Privilege(s) From dialog box:
TIP: On the editor, the Deny privilege can be Revoked, just as a Grant permission can be revoked.
For more information, see:
Completing a Dialog Box
Permissions Management
Project Management
Rapid SQL database project management facilities help you organize, alter, and keep track of changes to database
objects or SQL scripts. The project management facilities act as a repository to maintain all source code for a
database project. Rapid SQL also incorporates version control functions and build management facilities to help you
manage and build projects. Once a project has been created, Rapid SQL lets you:
• Review a file's history.
• Return to earlier versions of a file.
Option Description
Privilege Lets you select or clear the check boxes corresponding to the
target privileges.
Cascade Select No to prevent cascading the revocation privileges to other
users.
Option Description
Privilege Lets you select or clear the check boxes corresponding to the
target privileges.
Cascade Select No to prevent cascading the deny privileges to other users.

USING > PROJECT MANAGEMENT
EMBARCADERO TECHNOLOGIES > BOOKNAMEVARIABLE 729
• Develop concurrently.
A project generally includes SQL script files that you can maintain and create in unison with your database
administration and development cycle. Projects can also contain subfolders (for easy categorization) as well as other
projects (subprojects.) You can create projects manually by inserting existing SQL script files. You can also create
projects automatically by reverse-engineering a database schema or an existing version control project.
When administering or developing SQL database schemas, SQL source code files are the foundation of effective
change management for database objects. The DDL commands used to create database objects on SQL database
servers are often in a constant state of flux as new columns and constraints are added to table schemas or stored
procedure logic is changed. The ability to track and store these changes to files directly from Rapid SQL alleviates any
disruption in the development environment.
Lengthy script files containing the DDL to compile stored procedures and triggers on a database server such as
Oracle or Sybase Adaptive Server go through constant revisions similar to C program files and word processing
documents. Rapid SQL's Project Management facilities let you effectively monitor revisions for your database servers.
For more information, see:
Create a New Project
Working With Projects
Create a New Project
Creating a project can be a very time-consuming task. Rapid SQL eases this task by providing step-by-step wizards to
guide you through the process. You have a variety of options to choose from when you create a new project. Rapid
SQL lets you create new projects:
•
From a database.
• From existing files.
• From a version control project.
• Without initialization.
The New Project dialog box
lets you select how you want to create a new project. Using the New Project dialog box,
you can name, specify a file location, and provide a description of the project.
New Project Dialog Box
The New Project dialog box lets you select how you want to create a new project. Using the New Project dialog box,
you can name, specify a file location, and provide a description of the project.
Important Notes
None
The table below describes the options and functionality of the New Project dialog box:
Option Description
Name Lets you enter a name for the project.
Location Lets you type or browse and locate a directory for the project.
NOTE: This is set as the working directory for your project.
Description OPTIONAL: Lets you enter a description of the project.

USING > PROJECT MANAGEMENT
EMBARCADERO TECHNOLOGIES > BOOKNAMEVARIABLE 730
For more information, see Completing the New Project Dialog Box.
Completing the New Project Dialog Box
To complete the New Project Dialog Box, do the following:
1 On the File menu, select New, and then Project.
Rapid SQL opens the New Project Dialog Box.
2In Name, enter a name for the project.
3In Location, type or browse and locate a directory for the project.
4 OPTIONAL: In Description, lets you enter a description of the project.
5In Initialize New Project, select how you want to create a new project.
6 Click OK.
Create a New Project From a Database
Rapid SQL offers a context-sensitive wizard that reverse-engineers all or part of an existing database. When
extracting database schema, Rapid SQL captures the complete definition of the following objects:
• Tables
• Views
• Stored Procedures
• Functions
Rapid SQL then creates a project containing files based on the relevant object types. Rapid SQL creates a separate
file for each database object.
Reverse engineering is a powerful tool for analyzing, controlling, and documenting existing database objects. You can
use the extracted SQL source code for archival and reference purposes.
Important Notes:
• You must create a New Project from a Database in order to access the New Project Reverse Engineering Wizard.
• Rapid SQL automatically discovers and sets the project script file build order by referencing the system catalog to
determine dependencies.
• In the New Project dialog box
, you must select the From Database option.
Initialize New Project Lets you select how you want to create a new project.
From Database
- Lets you reverse engineer an existing database.
From Existing Files - Lets you create a project from scratch, or use
an existing project.
From Version Control
- Lets you reverse-engineer a project from
existing version control system projects. This is helpful for users
who have already created database projects in their version control
systems.
Do Not Initialize
- Lets you create an empty project where you can
later add files and/or database objects.
Option Description

USING > PROJECT MANAGEMENT
EMBARCADERO TECHNOLOGIES > BOOKNAMEVARIABLE 731
For more information, see Creating a New Project from a Database.
Creating a New Project from a Database
To create a new project, do the following:
1On the File menu, click New, and then click Project.
OR
On the Main toolbar, click the drop-down arrow to the right of the New button.
OR
On the Project toolbar, click the New Project.
OR
In the workspace, right-click New, and then click Project.
Rapid SQL opens the New Project dialog box.
2 Complete the New Project
dialog box and select the From Database option.
3 Click OK.
Rapid SQL opens the New Project Reverse Engineering Wizard.
4 Complete the New Project Reverse Engineering Wizard
.
Completing the New Project Reverse Engineering Wizard
NOTE: You must create a New Project from a Database in order to access the New Project Reverse
Engineering Wizard.
NOTE: Rapid SQL automatically discovers and sets the project script file build order by referencing the
system catalog to determine dependencies.
To complete the New Project Reverse Engineering Wizard, do the following:
1 Complete the New Project dialog box, and then click OK.
NOTE: You must select the From Database option.
Rapid SQL opens the New Project Reverse Engineering Wizard.
2 Complete the wizard.
3 To make changes, click Back to the appropriate panels of the Wizard and make changes.
4 When you are satisfied with the definition, click Execute.
Rapid SQL starts creating project files from database.
For more information, see New Project Reverse Engineering Wizard - Panel
.
New Project Reverse Engineering Wizard - Panel 1
The first panel of the New Project Reverse Engineering Wizard lets you specify the datasource that you want to
reverse engineer into a project.
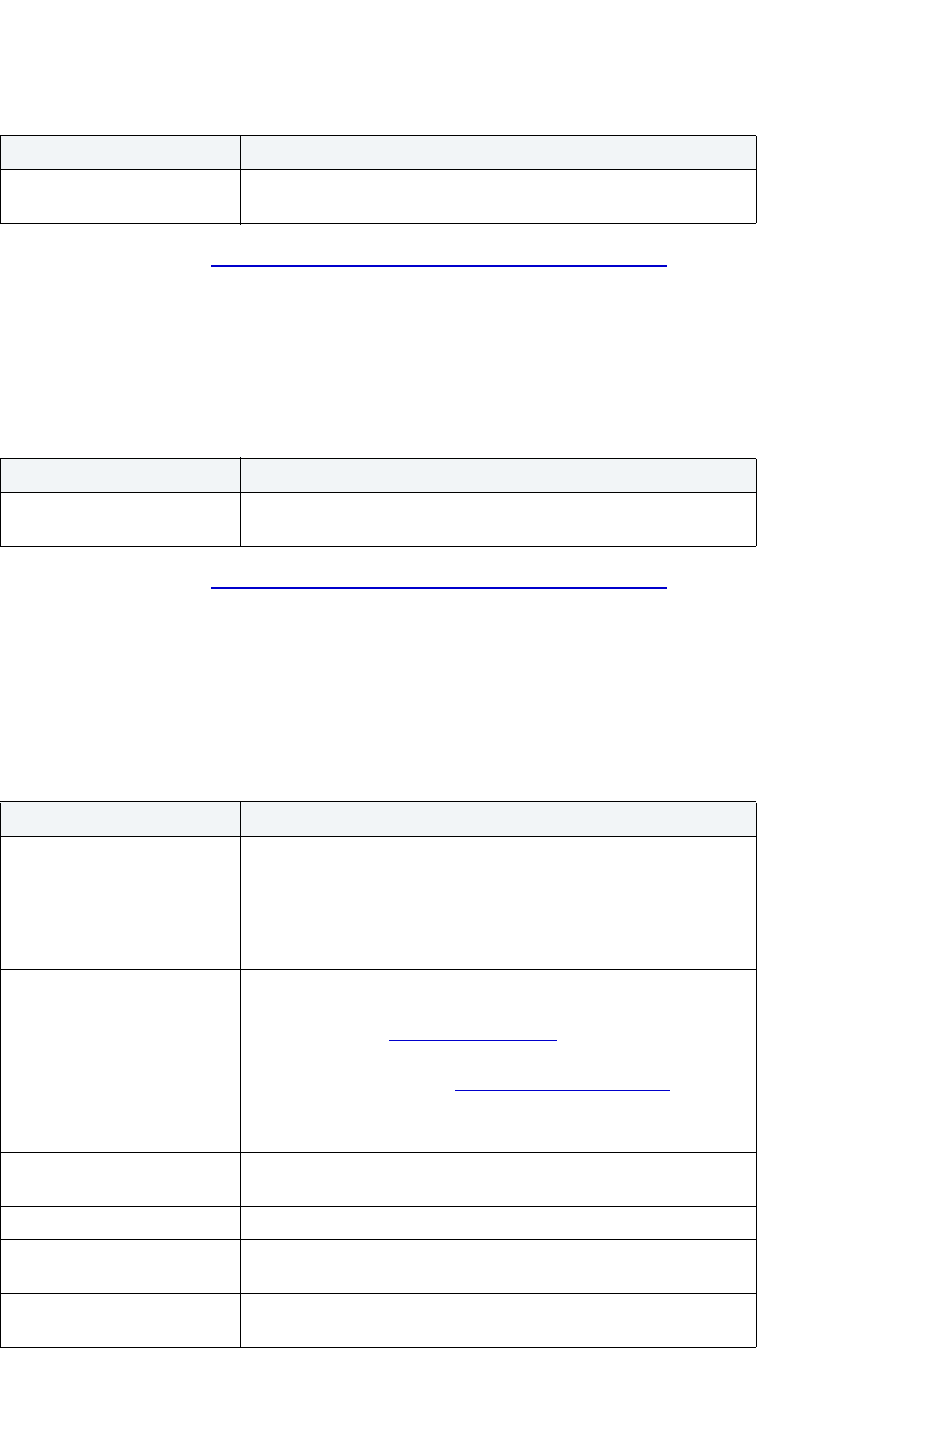
USING > PROJECT MANAGEMENT
EMBARCADERO TECHNOLOGIES > BOOKNAMEVARIABLE 732
The table below describes the options and functionality of the first panel of the New Project Reverse Engineering
Wizard:
For more information, see Completing the New Project Reverse Engineering Wizard.
New Project Reverse Engineering Wizard - Panel 2
The second panel of the New Project Reverse Engineering Wizard lets you specify the target database on the server.
The table below describes the options and functionality of the second panel of the New Project Reverse Engineering
Wizard:
For more information, see Completing the New Project Reverse Engineering Wizard
.
New Project Reverse Engineering Wizard - Panel 2
The third panel of the New Project Reverse Engineering Wizard lets you specify the database object owners, the
database object types, and general script types of the objects you want to extract.
The table below describes the options and functionality of the third panel of the New Project Reverse Engineering
Wizard:
Option Description
Select a Datasource Lets you select a datasource to reverse engineer. Select a
datasource.
Option Description
Select Database to
reverse-engineer
Lets you select a database to reverse engineer. Select a database.
Option Description
Select Database Object
Types
Owner list - Lets you select the owner of the objects you want to
extract.
Objects - Lets you select the objects types you want to extract.
TIP: To select or deselect all object types right-click to Select or
Unselect all.
Extract Scope Lets you select the objects to extract from the database.
All Objects - Lets you extract all objects for each object type that
you select. Opens Panel 4 for All Objects
.
Selected Objects Only - Lets you specify the specific objects that
you want to extract. Opens Panel 4 for Selected Objects
.
NOTE: Rapid SQL continues to a different Panel 4 depending on
which option you choose for the Extract Scope.
Include Indexes with Table
DDL
If selected, includes indexes when extracting table DDL.
Include FKs with Table DDL If selected, includes foreign keys when extracting table DDL.
Include Drop Statement If selected, includes drop statements when extracting database
SQL.
Include Object Privileges If selected, includes object privileges when extracting database
SQL.
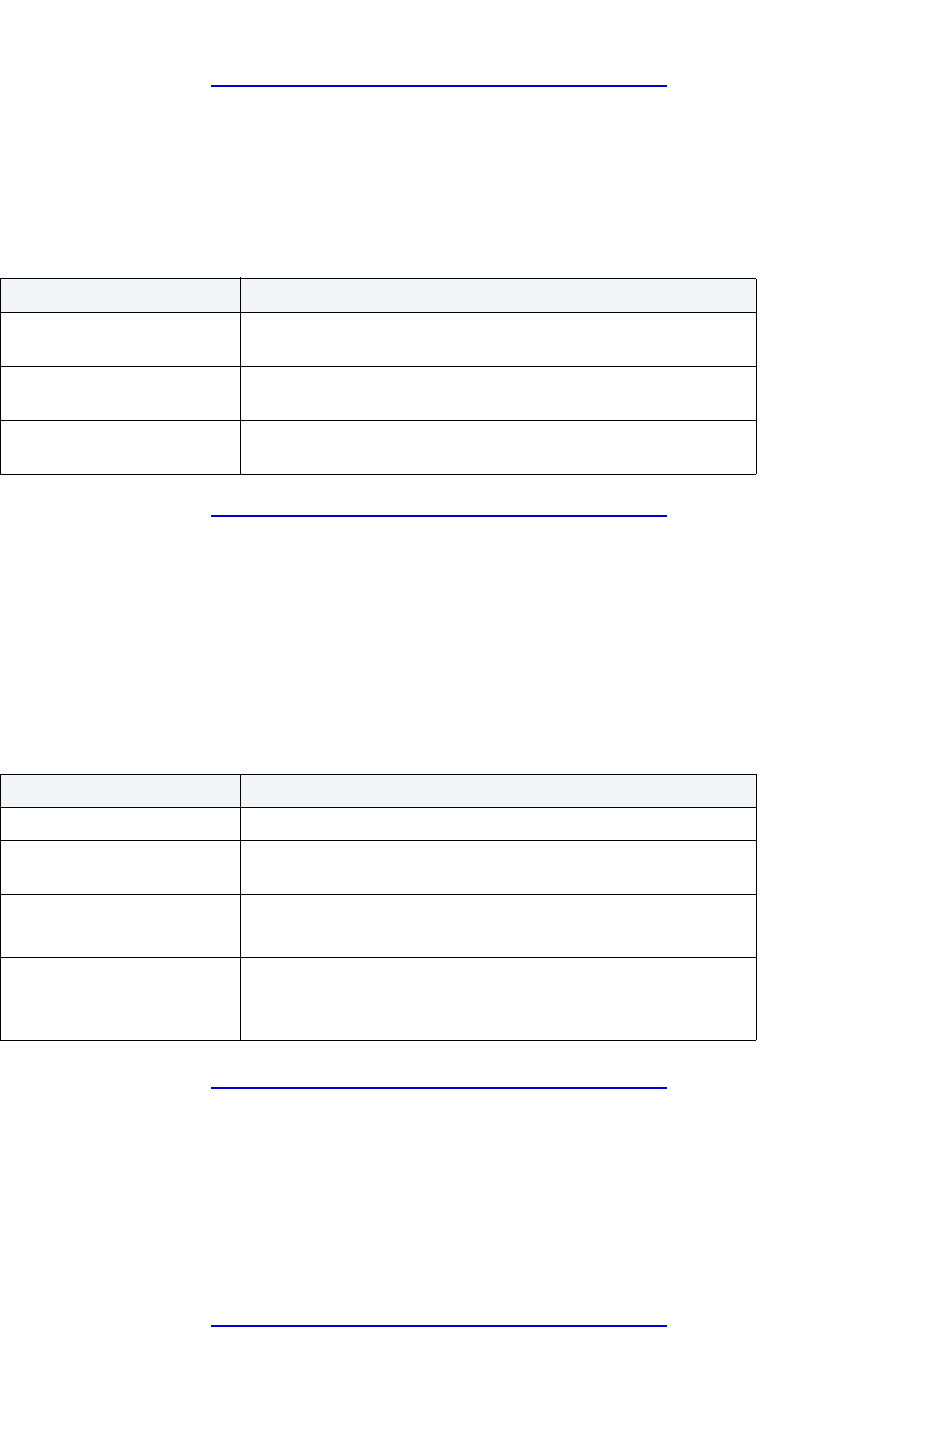
USING > PROJECT MANAGEMENT
EMBARCADERO TECHNOLOGIES > BOOKNAMEVARIABLE 733
For more information, see Completing the New Project Reverse Engineering Wizard.
New Project Reverse Engineering Wizard - Panel 3 for All Objects
This panel of the New Project Reverse Engineering Wizard lets you specify the ownership.
The table below describes the options and functionality of the fourth panel of the New Project Reverse Engineering
Wizard for All Objects:
For more information, see Completing the New Project Reverse Engineering Wizard
.
New Project Reverse Engineering Wizard - Panel 4 for Selected Objects
This panel of the New Project Reverse Engineering Wizard only applies if you have chosen to generate a customized
script. You can select specify objects and set script options for each object type.
The table below describes the options and functionality of the fourth panel of the New Project Reverse Engineering
Wizard for selected objects.
NOTE: You must select options and statements for each object type you select.
For more information, see Completing the New Project Reverse Engineering Wizard
.
New Project Reverse Engineering Wizard - Panel 4
This panel of the New Project Reverse Engineering Wizard lets you review the Reverse Engineering definition to verify
its accuracy.
NOTE: If you have specified to integrate Rapid SQL with an underlying version control system during
installation, Rapid SQL asks to add the new files to version control. Click Yes to add the files.
For more information, see Completing the New Project Reverse Engineering Wizard
.
Option Description
Retain Select to include the existing object owners' names in the CREATE
statements.
Exclude Select to exclude the object owners' names in the CREATE
statements.
Transfer Select to include the designated owner's name in the CREATE
statements. Select a user.
Option Description
Object Type Lets you select an object type.
Object list Lists the owner and names of objects for the selected type in the
database.
Options for Objects Lets you select an option for the object type.
NOTE: Options vary depending on the object type selected.
Statements Lets you select a script option for the particular object type.
NOTE: Statements vary depending on the option and object type
selected.

USING > PROJECT MANAGEMENT
EMBARCADERO TECHNOLOGIES > BOOKNAMEVARIABLE 734
Create a New Project From Existing Files
Rapid SQL lets you create a new project from:
• Scratch.
• Existing files.
To create a new project from an existing file, do the following:
1On the File menu, click New, and then click Project.
OR
On the Main toolbar, click the drop-down arrow to the right of the New button.
OR
On the Project toolbar, click the New Project.
OR
In the workspace, right-click New, and then click Project.
Rapid SQL opens the New Project dialog box.
2 Complete the New Project dialog box
and select the From Existing Files option.
3 Click OK.
Rapid SQL opens the Add File(s) to Project dialog box.
4 In the Add File(s) to Project dialog box, type the files that you want to add in the File name field. Use the
following to help locate the files:
•In Directories, browse by clicking a directory.
• In the List files of type list, select a file type.
• In the Drives list, select a drive.
5 Click Add to add a file or click Add All to add all the files.
6 When you finish, click OK.
Rapid SQL creates the project.
NOTE: If you have specified to integrate Rapid SQL with an underlying version control system during
installation, Rapid SQL asks to add the new files to version control. Click Yes to add the files.
Create a New Project From a Version Control Project
Rapid SQL lets you reverse-engineer a project from existing version control system projects. This is helpful if you have
already created database projects in a version control system.
NOTE: The Intersolv PVCS API does not support the creation of a project from a source code control
project.
Rapid SQL also lets you create a project from a version control project that contains sub-directories, while including
files from those sub-directories in the Rapid SQL project.

USING > PROJECT MANAGEMENT
EMBARCADERO TECHNOLOGIES > BOOKNAMEVARIABLE 735
To create a new project from a Version Control project, do the following:
1On the File menu, click New, and then click Project.
OR
On the Main toolbar, click the drop-down arrow to the right of the New button.
OR
On the Project toolbar, click the New Project.
OR
In the workspace, right-click New, and then click Project.
Rapid SQL opens the New Project dialog box.
2 Complete the New Project dialog box
and select From Version Control Project.
3 Click OK.
Rapid SQL opens the Choose project from (Version Control name) dialog box.
4 Select the project or files you want to include, and then click OK.
Rapid SQL opens the Files to be included in (project path) dialog box.
5 Select the project of files you want to include, and then click OK.
Rapid SQL creates the project.
Create a New Project Without Initialization
Rapid SQL gives you the option to not initialize a project. Rapid SQL creates a project tab with the name you specify
in the New Project dialog box. This tab functions as a shell to:
• Add files.
• Add database objects
.
To create a new project without initialization, do the following:
1On the File menu, click New, and then click Project.
OR
On the Main toolbar, click the drop-down arrow to the right of the New button.
OR
On the Project toolbar, click the New Project.
OR
In the workspace, right-click New, and then click Project.
Rapid SQL opens the New Project dialog box.
2 Complete the New Project dialog box
and select the Do Not Initialize option.
3 Click OK.
Rapid SQL creates the Project Tab.

USING > PROJECT MANAGEMENT
EMBARCADERO TECHNOLOGIES > BOOKNAMEVARIABLE 736
Working with Projects
A project is similar to a file system. Both are a collection of files that you create and maintain. Because projects are
hierarchical, you can place a subproject under another project, and a subproject under a subproject. Once you have
created a new project, Rapid SQL provides many functions to help you maintain and modify the project.
Related Topics
New Project Dialog Box
Opening an Existing Project
Opening a Recent Project
Closing a Project
Build Project
Set Build Order
Add Database Object File(s) to Project Wizard
Execute Project Files
Add File(s) to a Project
Open a File from a Project
Subprojects
Project Properties
Confirm Delete Dialog Box
Opening an Existing Project
To open an existing project, do the following:
1 On the File menu click Open Project.
Rapid SQL opens the Open Project dialog box.
2In File name, type the name and location of the project or use browse to locate the project.
NOTE: Project files are designated with a *.epj extension.
3 Click Open.
Rapid SQL opens the Project Tab containing the project.
For more information, see Working with Projects.
Opening a Recent Project
To open a recent project, do the following:
1 On the File menu select Recent Project, and then select a project.
Rapid SQL opens the Project Tab containing the project.
For more information, see Working with Projects
.
USING > PROJECT MANAGEMENT
EMBARCADERO TECHNOLOGIES > BOOKNAMEVARIABLE 737
Closing a Project
To close a project, do the following:
1 On the File menu, click Close Project.
2 On the Project Tab, right-click and then click Close Project.
Rapid SQL closes the project.
For more information, see Working with Projects
.
Build Project
The Build Project dialog box lets you:
• Generate a project build script and display it in a SQL window.
• Execute the project build immediately on build target.
• Schedule a project build.
Important Notes
None
The table below describes the Build Project dialog box:
For more information, see Completing the Build Project Dialog Box
.
Completing the Build Project Dialog Box
To complete the Build Project dialog box, do the following:
1 On the File menu click Open Project.
Rapid SQL opens the Open Project dialog box.
2In File name, type the name and location of the project or use browse to locate the project.
NOTE: Project files are designated with a *.epj extension.
Option Description
Datasource Displays the target datasource.
Database Displays the target database.
Build subprojects Select to include subprojects.
Generate a Project Build
Script and Display it in a SQL
window.
Select to generate the project build script and have
Rapid SQL display it in a SQL window.
Execute Project Build
Immediately on Build Target
Select to execute build immediately.
Schedule Project Build for a
Later Time
Select to schedule the build and then specify optional
options.

USING > PROJECT MANAGEMENT
EMBARCADERO TECHNOLOGIES > BOOKNAMEVARIABLE 738
3 Click Open.
Rapid SQL opens the Project Tab containing the project.
1On the Project Tab, right-click the target project, and then select Build.
Rapid SQL opens the Build Project dialog box.
2 Select options.
3 Click OK.
Rapid SQL builds the project according to your specifications.
Set Build Order
You can specify the order in which you want Rapid SQL to build your project files in the Set Build Order dialog box. If
you created your project manually or from a version control project, you must specify a build order, otherwise the files
are built in the order that they appear in the tree of the Project Tab.
Setting Build Order
1 On the File menu click Open Project.
Rapid SQL opens the Open Project dialog box.
2In File name, type the name and location of the project or use browse to locate the project.
NOTE: Project files are designated with a *.epj extension.
3 Click Open.
Rapid SQL opens the Project Tab containing the project.
4On the Project menu, click Build Order.
OR
On the Project toolbar, click Build Order.
OR
On the Project Tab, right-click a project file, and then click Build.
Rapid SQL opens the Set Build Order dialog box.
5 Click the files you want to move and then click the Up and Down to change the order to build the files.
6 When you finish specifying the order, select OK.
Rapid SQL sets the build order.
NOTE: The next time you build the project, Rapid SQL uses this build order.
Add Database Object File(s) to Project Wizard
You can add database objects to an existing project using a simple wizard that can reverse-engineer an entire
database or any portion of it. This lets you keep your project in sync with databases where objects are constantly
being created and updated.
For more information, see:

USING > PROJECT MANAGEMENT
EMBARCADERO TECHNOLOGIES > BOOKNAMEVARIABLE 739
Working with Projects
Completing the Add Database Object File(s) to Project Wizard
Completing the Add Database Object File(s) to Project Wizard
To add database objects to a project, do the following:
1 On the File menu click Open Project.
Rapid SQL opens the Open Project dialog box.
2In File name, type the name and location of the project or use browse to locate the project.
NOTE: Project files are designated with a *.epj extension.
3 Click Open.
Rapid SQL opens the Project Tab containing the project.
4On the Project menu, click Add Database Objects.
OR
On the Project toolbar click Add Database Objects.
OR
On the Project Tab, right-click and then click Add Database Objects.
Rapid SQL opens the first panel of the Add Database Object File(s) to Project Wizard
.
For more information, see Add Database Objects to a Project Wizard
.
Add Database Object File(s) to Project Wizard - Panel 1
The first panel of the Add Database Object File(s) to Project Wizard lets you specify the datasource that you want to
reverse engineer into a project.
The table below describes the options and functionality of the first panel of the Add Database Object File(s) to Project:
For more information, see Completing the Add Database Object File(s) to Project Wizard
.
Add Database Object File(s) to Project Wizard - Panel 2
The second panel of the Add Database Object File(s) to Project Wizard lets you specify the target database on the
server.
The table below describes the options and functionality of the second panel of the Add Database Object File(s) to
Project:
Option Description
Select a Datasource Lets you select a datasource to reverse engineer.
Option Description
Select Database to
reverse-engineer
Lets you select a database to reverse engineer.

USING > PROJECT MANAGEMENT
EMBARCADERO TECHNOLOGIES > BOOKNAMEVARIABLE 740
For more information, see Completing the Add Database Object File(s) to Project Wizard.
Add Database Object File(s) to Project Wizard - Panel 3
The third panel of the Add Database Object File(s) to Project Wizard lets you specify the database object owners, the
database object types, and general script types of the objects you want to extract.
The table below describes the options and functionality of the third panel of the Add Database Object File(s) to
Project:
For more information, see Completing the Add Database Object File(s) to Project Wizard
.
Add Database Object File(s) to Project Wizard - Panel 4 for Selected Objects
This panel of the Add Database Object File(s) to Project Wizard only applies if you have chosen to generate a
customized script. You can select specify objects and set script options for each object type.
The table below describes the options and functionality of the fourth panel of the Add Database Object File(s) to
Project for selected objects.
NOTE: You must select options and statements for each object type you select.
Option Description
Select Database Object
Types
Owner list - Lets you select the owner of the objects you want to
extract.
Objects - Lets you select the objects types you want to extract.
TIP: To select or deselect all object types, in the Object list,
right-click to Select or Unselect all.
Extract Scope Lets you select the objects to extract from the database.
All Objects - Lets you extract all objects for each object type that
you select. Opens Panel 4 for All Objects
.
Selected Objects Only - Lets you specify the specific objects that
you want to extract. Opens Panel 4 for Selected Objects
.
NOTE: Rapid SQL opens a different Panel 4 depending on which
option you choose for the Extract Scope.
Include Indexes with Table
DDL
Includes indexes when extracting table DDL.
Include FKs with Table DDL Includes foreign keys when extracting table DDL.
Include Drop Statement Includes drop statements when extracting database SQL.
Include Object Privileges Includes object privileges when extracting database SQL.
Option Description
Object Type list Lets you select an object type.
Object list Lists the owner and names of objects for the selected type in the
database.
Options for Object list Lets you select an option for the object type.
NOTE: Options vary depending on the object type selected.
USING > PROJECT MANAGEMENT
EMBARCADERO TECHNOLOGIES > BOOKNAMEVARIABLE 741
For more information, see Completing the Add Database Object File(s) to Project Wizard.
Add Database Object File(s) to Project Wizard - Panel 4 for All Objects
The fourth panel of the Add Database Object File(s) to Project Wizard lets you specify the ownership.
The table below describes the options and functionality of the fourth panel of the Add Database Object File(s) to
Project for All Objects:
For more information, see Completing the Add Database Object File(s) to Project Wizard
.
Add Database Object Files(s) to Project Wizard - Panel 5
This panel of the Add Database Object File(s) to Project Wizard lets you retain, exclude, or transfer object ownership.
The table below describes the options and functionality on this panel:
For more information, see Completing the Add Database Object File(s) to Project Wizard
.
Add Database Object File(s) to Project Wizard - Panel 6
This panel of the Add Database Object File(s) to Project Wizard lets you review the Reverse Engineering definition to
verify its accuracy.
NOTE: If you have specified to integrate Rapid SQL with an underlying version control system during
installation, Rapid SQL asks to add the new files to version control. Click Yes to add the files.
For more information, see Completing the Add Database Object File(s) to Project Wizard
.
Statement list Lets you select a script option for the particular object type.
NOTE: Statements vary depending on the option and object type
selected.
Option Description
Retain Select to include the existing object owners' names in the CREATE
statements.
Exclude Select to exclude the object owners' names in the CREATE
statements.
Transfer Select to include the designated owner's name in the CREATE
statements. Select a user.
Option Description
Retain Select to retain object ownership.
Exclude Select to exclude object ownership.
Transfer ownership to
following user:
Select to transfer ownership, and then select the target user from
the list.
Option Description
USING > PROJECT MANAGEMENT
EMBARCADERO TECHNOLOGIES > BOOKNAMEVARIABLE 742
Execute Project Files
You can directly execute project script files from the Project Tab using the File Execution Facility. You can also execute
multiple scripts in parallel against different datasources. If a file has been placed under version control, you need to
perform a Check Out operation to execute the file. Otherwise, the file opens in read-only mode.
For more information, see:
Working with Projects
Executing Project Files
Executing Project Files
To execute project files, do the following:
1On the Project Tab, right-click the files you want to execute, and then click File Execution Facility.
Rapid SQL opens the File Execution Facility dialog box.
For more information, see Execute Project Files
.
Add File(s) to a Project
You can add external files to your project. This lets you manipulate and expand your project as needed.
The Add File(s) to Project dialog box lets you add files to a project.
The table below describes the options and functionality of the Add Files to Project dialog box:
For more information, see:
Working with Projects
Completing the Add Files to Project Dialog Box
Option Description
File Name Lets you type the files that you want to add.
Directories Lets you browse by select a directory.
List files of type Lets you select a file type.
Drives Lets you select a drive.
Network Open the Map Network Drive dialog box.
Add Lets you add a file.
Add All Lets you add all the files.

USING > PROJECT MANAGEMENT
EMBARCADERO TECHNOLOGIES > BOOKNAMEVARIABLE 743
Completing the Add File(s) to Project Dialog Box
To add files to a project from, do the following:
1On the Project menu, click Add Files.
OR
On the Project Tab, right-click and then click Add Files.
Rapid SQL opens the Add Files to Project
dialog box.
2In File name, type the file name(s) or select the file(s) that you want to add to the project.
3 In Directories browse for the project. that contains the file(s) that you want to add to the project.
4 In the List files of type select the type of files you want to add to the project.
5In Drives select a drive.
6 Click Network to open the Map Network Drive dialog box.
7 Click Add to add a file or click Add All to add all of the files.
8 Click OK.
Rapid SQL adds the files to the project.
Open a File from a Project
You can open a file directly from the Project Tab using a number of different methods.
For more information, see:
Working with Projects
Opening a File from a Project
Opening a File from a Project
To open a file from a project, do the following:
1 On the Project Tab, right-click the file(s) you want to open, and then click Open.
OR
On the Project Tab, double-click the file(s).
Rapid SQL opens the file(s) in a new SQL window.
For more information, see Open a File from a Project
.
Subprojects
Subprojects are projects within projects. you can use them to help categorize your source code files. On the Project
Tab of the Database Explorer Rapid SQL lets you:
• Create subprojects.
• Delete subprojects
.
• Rename subprojects
.

USING > PROJECT MANAGEMENT
EMBARCADERO TECHNOLOGIES > BOOKNAMEVARIABLE 744
• Sort subprojects.
For more information, see Working with Projects
.
Creating a New Subproject
Rapid SQL offers three ways to create a new subproject:
1 On the File menu click Open Project.
Rapid SQL opens the Open Project dialog box.
2In File name, type the name and location of the project or use browse to locate the project.
NOTE: Project files are designated with a *.epj extension.
3 Click Open.
Rapid SQL opens the Project Tab containing the project.
4On the Project menu, click New SubProject.
OR
On the Project toolbar, click New SubProject.
OR
On the Project Tab, right-click the project or subproject, and then click New SubProject.
5 Type the name of the new subproject and then press Enter.
For more information, see Subprojects
.
Deleting a Subproject
To delete a project, do the following:
1 On the File menu click Open Project.
Rapid SQL opens the Open Project dialog box.
2In File name, type the name and location of the project or use browse to locate the project.
NOTE: Project files are designated with a *.epj extension.
3 Click Open.
Rapid SQL opens the Project Tab containing the project.
4 On the Project Tab, right-click a subproject, and then click Delete.
OR
On the Project Tab, select a subproject, and then click Delete.
Rapid SQL opens the Confirm Delete dialog box.
5 In the Confirm Delete dialog box, select the Delete local copy to delete the local copy of the subproject, and
then click OK.
Rapid SQL deletes the subproject.
For more information, see Subprojects
.

USING > PROJECT MANAGEMENT
EMBARCADERO TECHNOLOGIES > BOOKNAMEVARIABLE 745
Confirm Delete Dialog Box
The table below describes the options and functionality on the Confirm Delete Dialog Box:
For more information, see Deleting a Subproject
.
Renaming a Subproject
To rename a subproject, do the following:
1 On the File menu click Open Project.
Rapid SQL opens the Open Project dialog box.
2In File name, type the name and location of the project or use browse to locate the project.
NOTE: Project files are designated with a *.epj extension.
3 Click Open.
Rapid SQL opens the Project Tab containing the project.
4 On the Project Tab, right-click a subproject, and then click Rename.
5 Type the name of the new subproject and then press Enter.
Rapid SQL renames the subproject.
For more information, see Subprojects
.
Sorting Subprojects
So sort a subproject, do the following:
1 On the File menu click Open Project.
Rapid SQL opens the Open Project dialog box.
2In File name, type the name and location of the project or use browse to locate the project.
NOTE: Project files are designated with a *.epj extension.
3 Click Open.
Rapid SQL opens the Project Tab containing the project.
4 On the Project Tab, right-click the directory containing the subprojects you want to sort and then click Sort.
Rapid SQL sorts the subproject(s).
For more information, see Subprojects
.
Option Description
Delete local copy Deletes the local copy of the subproject.

USING > PROJECT MANAGEMENT
EMBARCADERO TECHNOLOGIES > BOOKNAMEVARIABLE 746
Project Properties
Rapid SQL lets you view properties of Projects, Subprojects and individual files in Projects or Subprojects. The Project
Properties, Subproject Properties, and File Properties dialog boxes display information about the Projects,
Subprojects, and files.
For more information, see Working with Projects
.
Viewing Project Properties
To view project properties, do the following:
1 On the File menu click Open Project.
Rapid SQL opens the Open Project dialog box.
2In File name, type the name and location of the project or use browse to locate the project.
NOTE: Project files are designated with a *.epj extension.
3 Click Open.
Rapid SQL opens the Project Tab containing the project.
4On the Project menu, click Project Properties.
OR
On the Project Tab, right-click a project and then click Properties.
Rapid SQL opens the Project File Properties dialog box.
5 Complete the Project File Properties dialog box
.
6 Click OK.
For more information, see:
Project Properties
Project File Properties Dialog Box
Project File Properties Dialog Box
The table below describes the options and functionality of the Project Properties dialog box:
For more information, see Viewing Project Properties
.
Option Description
Name Displays the name of the project.
Full Specification Displays the project location.
Description Displays the project description.
OPTIONAL: Lets you type or edit the project description.
Associated Datasource Lets you select a datasource for the project.
Associated Database Lets you type the name of the database.
USING > PROJECT MANAGEMENT
EMBARCADERO TECHNOLOGIES > BOOKNAMEVARIABLE 747
Viewing Subproject Properties
To view subproject properties, do the following:
1 On the File menu click Open Project.
Rapid SQL opens the Open Project dialog box.
2In File name, type the name and location of the project or use browse to locate the project.
NOTE: Project files are designated with a *.epj extension.
3 Click Open.
Rapid SQL opens the Project Tab containing the project.
4 On the Project Tab, select a subproject.
5 Right-click the subproject, and then click Properties.
Rapid SQL opens the Subproject Properties dialog box.
6 Complete the Subproject Properties dialog box
.
7 Click OK.
For more information, see:
Project Properties
Subproject Properties Dialog Box
Subproject Properties Dialog Box
The table below describes the options and functionality of the Subproject Properties dialog box:
For more information, see Viewing Subproject Properties
.
Viewing File Properties
To view file properties, do the following:
1 Click File and then Open Project.
Rapid SQL opens the Open Project dialog box.
2 Type the project name or select the project.
3 Click Open.
Rapid SQL opens the project on the Projects Tab.
4 On the Project Tab, select a file.
Option Description
Name Displays the name of the subproject. You can enter or edit the
subproject name.
Full Specification Displays the subproject location.
Status Displays the subproject status.
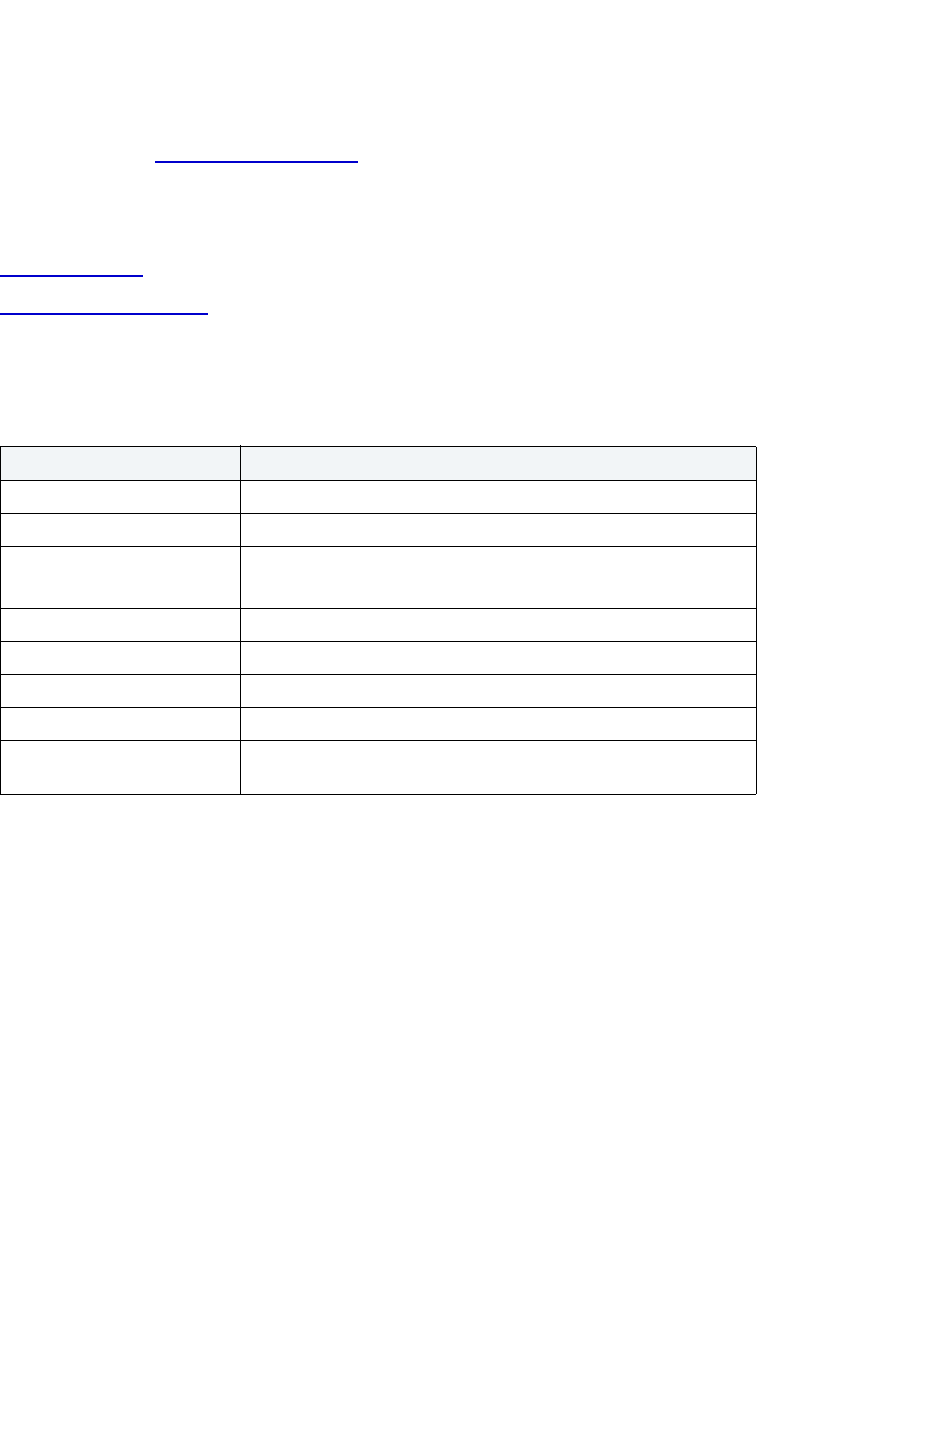
USING > VERSION CONTROL
EMBARCADERO TECHNOLOGIES > BOOKNAMEVARIABLE 748
5 Right-click the file, and then click Properties.
Rapid SQL opens the File Properties dialog box.
6 Complete the File Properties dialog box.
7 Click OK.
For more information, see:
Project Properties
File Properties Dialog Box
File Properties Dialog Box
The table below describes the options and functionality of the File Properties dialog box:
Version Control
Version control archives files and tracks changes to files over time. With an integrated version control in Rapid SQL,
you can easily track changes to database objects.
Version control addresses the following issues:
• Team Development By controlling access to a file so that only one person at a time can modify, it prevents
accidental replacement or loss of another user's changes.
• Version Tracking By archiving and tracking versions of source code files, you can to retrieve them if necessary,
thereby effectively creating files so that source code can be reused.
• Safety By adding database object scripts and files, it creates backups in case of loss, thereby ensuring a
recovered version of source code.
When you create a project, Rapid SQL lets you place the project immediately into version control. You can also add
projects and files to version control later.
Option Description
Name Displays the file name.
Full Specification Displays the file location.
Description Displays the file description.
OPTIONAL: Type or edit the file description.
Include In Build Sets the file to be included in the build.
Last Modified Displays the date and time of the last modification.
Size Displays the file size.
Status Displays the file status.
Object Type Displays the file object type. Select an object type if the file is
unspecified.

USING > VERSION CONTROL
EMBARCADERO TECHNOLOGIES > BOOKNAMEVARIABLE 749
To use integrated version control in Rapid SQL, you must have the version control client software installed on the
same computer as Rapid SQL. You must also select the appropriate version control system during installation or after
installation on the Version Control Tab of the Option Editor.
Rapid SQL offers version control integration for the following version control systems:
• Rational ClearCase 5.0 and 6.0
•
Merant/Intersolv PVCS Version Manager version 6.0
• Microsoft Visual SourceSafe 5.0 and 6.0
• MKS Source Integrity version 7.3c
For more information, see:
Version Control Integration
Version Control Configuration
Using Version Control
Version Control Integration
Rapid SQL offers version control integration so you can take advantage of the following version control systems:
• Rational ClearCase 5.0 and 6.0
• Merant Version Manager version 6.0 or later
• Microsoft Visual SourceSafe 5.0 and 6.0
• MKS Source Integrity version 7.3c
For more information, see:
Integrating with Merant Version Manager
Integrating with Microsoft Visual Source Safe
Integrating with MKS Source Integrity
Integrating with Merant Version Manager
Rapid SQL works with Merant Version Manager version 6.0. or later.
To integrate Merant Version Manager with Rapid SQL, do the following:
1 Install Merant Version Manager (formerly PVCS) 8.0.
2 In the setup option for the client, select IDE Client.
This installs the correct DLLs and registry entries, and "Merant Version Manager" appears in the Version Control
Tab of the Options Editor.
NOTE: To use Rapid SQL with an existing Merant project, you must import the individual files into a native
Rapid SQL project. Merant does not provide the third party API support for projects that it does
for basic version control operations on archived files.
For more information, see Version Control Integration
.

USING > VERSION CONTROL
EMBARCADERO TECHNOLOGIES > BOOKNAMEVARIABLE 750
Integrating with Microsoft Visual SourceSafe
Rapid SQL works with Microsoft Visual SourceSafe versions 5.0. and 6.0. Rapid SQL uses your default Visual
SourceSafe database unless you override the setting on the Version Control Tab of the Option Editor. This file is
always called srcsafe.ini.
Troubleshooting
If you are having trouble configuring Rapid SQL to use Visual SourceSafe, check the system registry to determine that
the COM automation portion of Visual SourceSafe has been properly installed. To check the registry, do the following:
1 From the Windows Start button, click Run and then type REGEDIT to view the system registry.
Windows opens the Registry Editor.
2 Click the HKEY_CLASSES_ROOT directory.
3 Click the SourceSafe key.
4 Ensure that the Key contains the subkeys CLSID and CurVer.
5 If either of these keys are missing, reinstall Visual SourceSafe.
For more information, see Version Control Integration
.
Integrating with MKS Source Integrity
Rapid SQL works with MKS Source Integrity version 7.3c.
1 After installing MKS Source Integrity, install the MKS Source Integrity Extensions.
For more information, see Version Control Integration
.
Version Control Configuration
Rapid SQL lets you configure version control. You can add or remove entire projects or specific files to and from
version control. The Version Control Tab of the Option Editor lets you configure version controls to your specific needs.
To use version control functions, you must have a version control system up and running on your system. You can
integrate Rapid SQL with:
• Rational ClearCase 5.0 and 6.0
•
Merant Version Manager version 6.0 or later
• Microsoft Visual SourceSafe 5.0 and 6.0
• MKS Source Integrity version 7.3c
Configuring Version Control During Installation
1 If you have version control installed on your machine, during the Rapid SQL installation, select the option for your
version control system.
NOTE: If you select None, Rapid SQL does not support any version control functions in Rapid SQL until
you select a version control system from the application. See below.
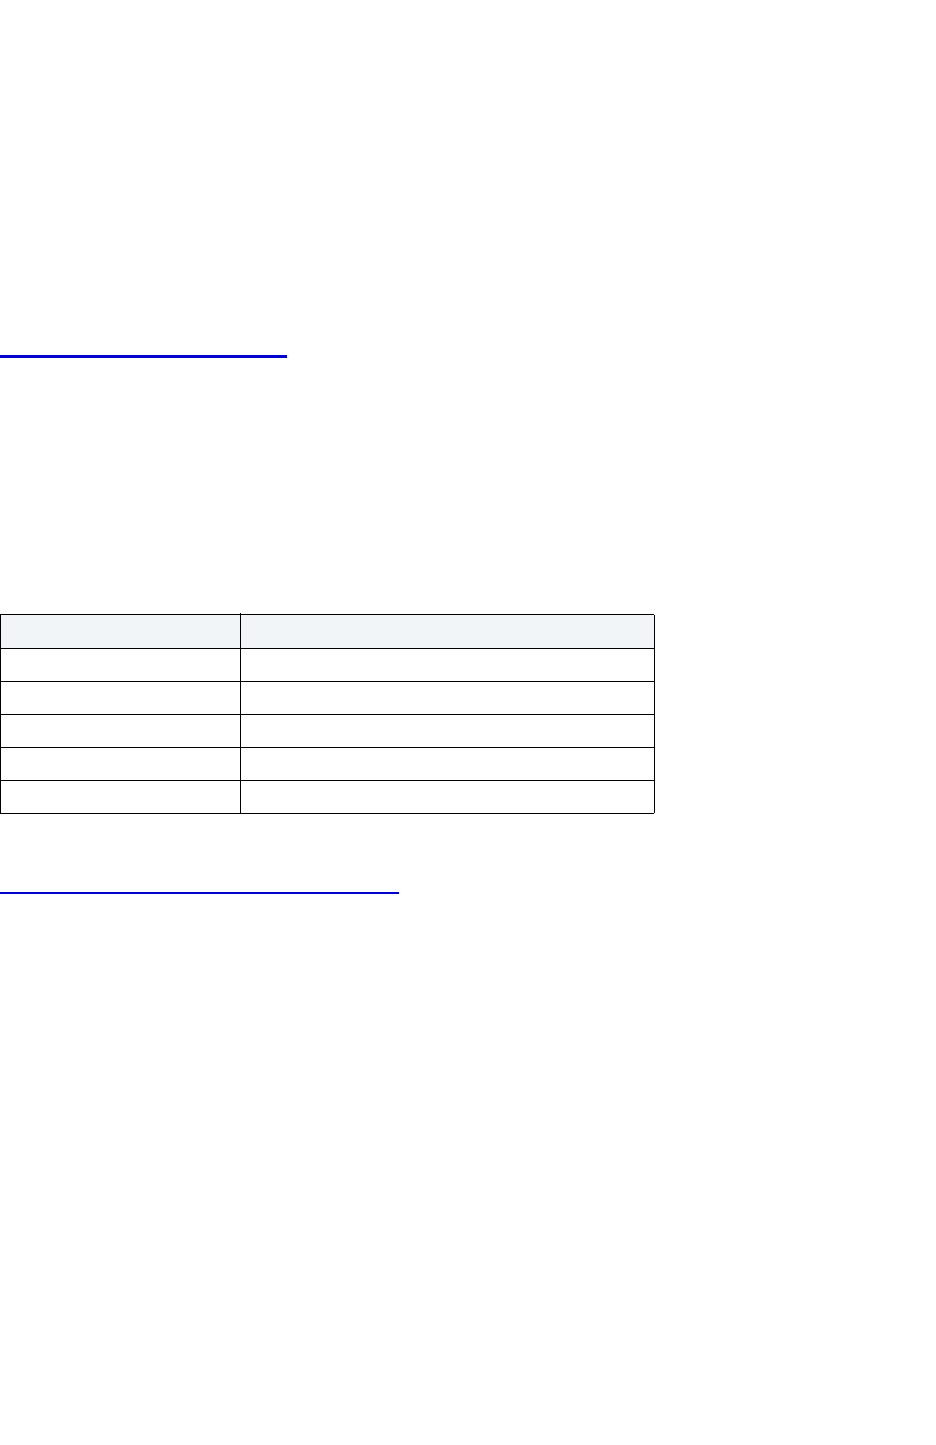
USING > VERSION CONTROL
EMBARCADERO TECHNOLOGIES > BOOKNAMEVARIABLE 751
Configuring Version Control After Installation
1 On the File menu, click Options.
Rapid SQL opens the Options Editor.
2Select Version Control to open the Version Control Tab.
3 Select your version control system.
4 Click OK.
Working with Projects in Version Control
Projects can exist independently of version control. You can add an entire project to version control at any point. When
you decide to place a project under version control, Rapid SQL creates a project on the underlying version control
system that has been specified.
Once a project or file has been added to version control, the features of your version control system are available
directly from the Project Tab within Rapid SQL. Any changes you make to a project or file from within Rapid SQL are
simultaneously changed in your version control system.
The table below describes the options and functionality on the Add to Version Control dialog box:
For more information, see:
Completing the Add to Version Control Dialog Box
Completing the Add to Version Control Dialog Box
To add a project to version, do the following:
1 Click File and then Open Project.
Rapid SQL opens the Open Project dialog box.
2 Type the project name or select the project.
3 Click Open.
Rapid SQL opens the project on the Projects Tab.
4On the Project menu, click Version Control.
OR
On the Project Tab, right-click a project file.
Rapid SQL opens the Add to Version Control dialog box.
Option Description
Files to be added Lets you select files to add to Version Control.
Comment OPTIONAL: Lets you add a comment.
Check out immediately Select to add file and keep it checked-out.
Store only latest Select to add the latest version.
Remove local copy Select to add file and remove the local copy.

USING > VERSION CONTROL
EMBARCADERO TECHNOLOGIES > BOOKNAMEVARIABLE 752
5 Click Add to Version Control.
6 Select options.
7 Click OK to add a project, and then click Create.
Rapid SQL adds the project to version control.
NOTE: Rapid SQL dims the project file icon to indicate that the project has been placed under version
control.
For information on opening projects, see Working with Projects
.
Working with Files in Version Control
Rapid SQL lets you view and work with files stored in various projects in a version control system without including the
files in a Rapid SQL project. The Add Version Control Files dialog box lets you create a list of files in a version control
system, select the version control project, and then add it and its files to the VC Files Tab.
The table below describes the options and functionality on the Add Version Control Files dialog box:
For more information, see:
Completing the Add Version Control Files Dialog Box
Option Description
Project Lets you type the version control project path.
Browse Click to open Choose project from (version control name) dialog
box.
List Files Click to view the project's files in the Version control project files
tree.
File Types Click to list the project's available files, filtered by file type.
Version control project files List the project available files.
NOTE: If the VC Files Tab is already open and contains files from
the project previously selected in the Add Version Control Files
dialog box, only files not already in the VC Files Tab will be listed.
Add Click to add selected file(s) to the Files being added to version
control files list box.
Add All Click to add all file(s) to the Files being added to version control
files list box.
Files being added to version
control files list
Displays the files that will appear on the VC Tab.
Remove Click to remove selected file from the Files being added to version
control files list box.
Check Out Select to automatically check out the file from version control on
the VC Files Tab.
Get Latest Version Select to automatically get latest version of the file from version
control on the VC Files Tab.

USING > VERSION CONTROL
EMBARCADERO TECHNOLOGIES > BOOKNAMEVARIABLE 753
Completing the Add Version Control Files Dialog Box
To add files to version control, do the following:
1 Click File and then Open Version Control Files List.
Rapid SQL opens the version control system login dialog box.
2 Type login information.
Rapid SQL opens the Add Version Control Files dialog box.
3In Project, type the project name, or click Browse to open the Choose project from (version control name)
dialog box.
4 Select the project and click OK.
Rapid SQL displays the files in the Version control project files box.
5 Click File Types to list the project's available files, filtered by file type.
6In List files of type select the type of files to list.
7 In the Version control project files box, select the target files and click Add or Add All to add the files to the
version control files list.
8In Options, select Check Out or Get Latest Version.
9 Click OK.
Rapid SQL opens the Check Out File or Get File dialog box.
10 In Comment, type a comment. If you select multiple files, the comment will apply to all the files.
11 In To, type the directory to place the file(s).
12 For SourceSafe, for advanced options, click Advanced.
13 Click OK.
Rapid SQL adds the files in the Files being added to version control files list box to the VC Files Tab
. If you
selected the Check Out option, Rapid SQL opens the Check Out (Files) dialog box. If you selected the Get
Latest Version option, Rapid SQL opens the Get from Version Control
dialog box.
Using Version Control
Once you add a project or file to version control, most functions found in the underlying version control system are
available directly from the Rapid SQL interface, including the VC Files Tab
. Basic version control procedures include:
•
Get Latest Version
• Check Out
• Check In
• Undo Check Out
•
Open
• Show History
• Show Difference
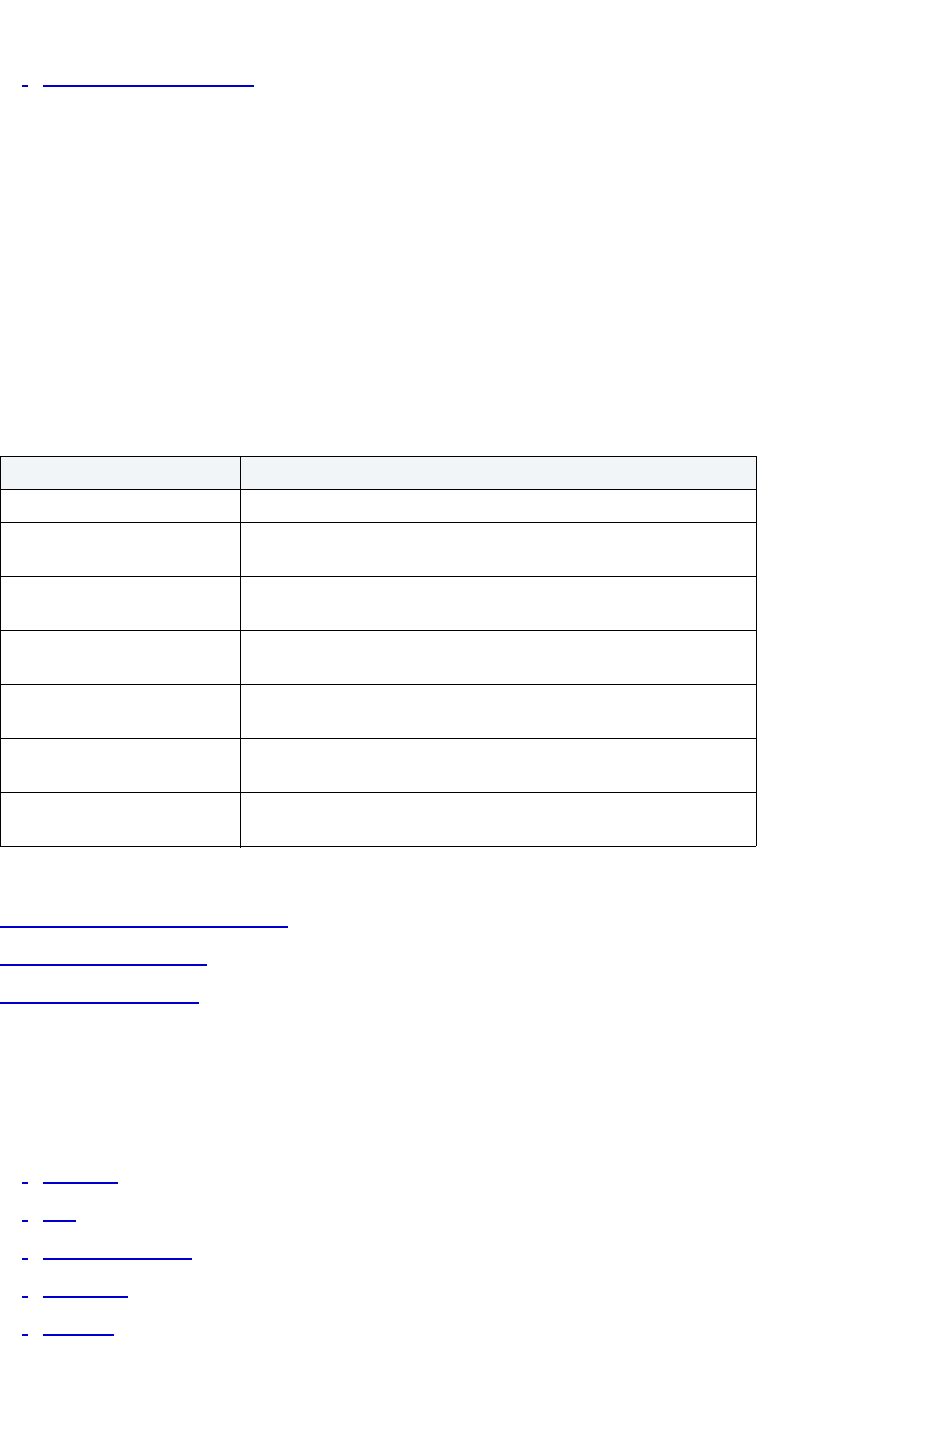
USING > VERSION CONTROL
EMBARCADERO TECHNOLOGIES > BOOKNAMEVARIABLE 754
• Version Control Properties
NOTE: Your Rapid SQL version control functionality depends on your underlying version control system.
For more information on version control procedures, consult the documentation included with your
version control system.
VC Files Tab
The VC Files Tab displays version control files listed in the *.evc (Embarcadero version control file.) The tab displays
file icons indicating their current status, for example if they are checked out to the user logged in to the source control
system. The files can be opened from this list, as well as operated on to manipulate their version control properties.
For example, a file can be checked out or checked into the system from the VC File Tab.
The table below describes the VC Files Tab icons:
For more information, see:
VC Files Tab Available Functionality
Opening the VC Files Tab
Closing the VC Files Tab
VC Files Tab Available Functionality
Once the files are on the list in the VC Files Tab, you can use the various version control functionalities.
At the VC Files level, Rapid SQL lets you:
•
Add Files
• Sort
• Get Latest Version
• Check Out
• Check In
Icon Description
File File is not checked out by anyone.
File with single red check
mark
File is checked out non-exclusively and only by the user logged
into source control.
File with a single black check
mark
File is checked out non-exclusively only by a one user who is not
the user logged into source control.
File with a single red check
mark and a red border
File is checked out exclusively and only by the user logged in to
source control.
File with a single black check
mark and a red border
File is checked out exclusively and only by a user who is not the
user logged in to source control.
File with two red check marks File is checked out by multiple users, including the user logged in
to source control.
File with two black check
marks
File is checked out by multiple users, not including the user logged
in to source control.

USING > VERSION CONTROL
EMBARCADERO TECHNOLOGIES > BOOKNAMEVARIABLE 755
• Undo Checkout
• Remove from Version Control
• Expand All
• Collapse All
• Refresh
• Close Files List
At the Project level, Rapid SQL lets you:
•
Add Files
• Delete
• Sort
• Get Latest Version
• Check Out
• Check In
• Undo Checkout
• Remove from Version Control
• Expand All
• Collapse All
• Refresh
• Close Files List
At the Directory (file type) level, Rapid SQL lets you:
•
Add Files
• Delete
• Sort
• Get Latest Version
• Check Out
• Check In
• Undo Checkout
• Remove from Version Control
• Expand All
• Collapse All
• Refresh
• Close Files List
At the File level, Rapid SQL lets you:
•
Open

USING > VERSION CONTROL
EMBARCADERO TECHNOLOGIES > BOOKNAMEVARIABLE 756
• Delete
• Get Latest Version
• Check Out
• Check In
• Undo Checkout
• Show History
• Show Differences
• Remove from Version Control
• Version Control Properties
• Refresh
• Close Files List
For more information, see:
Opening the VC Files Tab
Closing the VC Files Tab
Working with Files in Version Control
Opening the VC Files Tab
1Select File, Open Version Control File List.
If you have files on your version control list, Rapid SQL opens the VC Files Tab. If you do not have files on your
version control list, Rapid SQL opend the Add Version Control Files dialog box.
For more information, see:
Working with Files in Version Control
Closing the VC Files Tab
Closing the VC Files Tab
1Select File, Close Version Control File List.
Rapid SQL closes the VC Files Tab.
For more information, see:
Working with Files in Version Control
Opening the VC Files Tab
Version Control Functionality - Open
The Open functionality opens the selected file(s) with the application registered for the type(s) of the selected file(s).
For more information, see Working with Files in Version Control
.

USING > VERSION CONTROL
EMBARCADERO TECHNOLOGIES > BOOKNAMEVARIABLE 757
Version Control Functionality - Delete
The Delete functionality deletes the local copy of the selected item from the tree. To remove a file from version control,
see Remove From Version Control
.
For more information, see Working with Files in Version Control
.
Version Control Functionality - Sort
The Sort functionality sorts the tree items alphabetically.
For more information, see Working with Files in Version Control
.
Version Control Functionality - Get Latest Version
The Get Latest Version functionality lets you access the latest version of a file for viewing only. The Get functionality
creates a local copy of the most current version of a project file in your working folder. The file is read-only, so any
modifications cannot be saved.
Before working with a project, you should perform a Get on the entire project to ensure that you are working with the
latest copy of the project. You should also perform a project-level, recursive Get at intervals to ensure that you have
the latest version of files, in the event that they have been altered by others working on the same project.
The following table describes the option and functionality on the Get from Version Control dialog box:
TIP: You can specify the file directory in the Version Control Working Directory
option of the Options
Editor.
Getting Latest Version of a Project
To get the latest version of project, do the following:
1 Click File and then Open Project.
Rapid SQL opens the Open Project dialog box.
2 Type the project name or select the project.
3 Click Open.
Rapid SQL opens the project on the Projects Tab.
4 Click the project or target files.
Option Description
Files to Get Lets you select file(s) to get latest version of.
Advanced Click to open the Advanced Get Options dialog box.

USING > VERSION CONTROL
EMBARCADERO TECHNOLOGIES > BOOKNAMEVARIABLE 758
5On the Project menu, click Version Control.
OR
On the Project toolbar, click Version Control.
OR
On the Project Tab, right-click a project or file.
Rapid SQL opens the Get From Version Control dialog box.
6 Click Get Latest Version.
Rapid SQL opens the Get From Version Control dialog box.
7In the Files to Get box, click the project or files.
8 For advanced options, click Advanced.
9 Click OK.
Rapid SQL writes the most current version of the file to your working directory.
Getting Latest Version of a File
To get the latest version of a file, do the following:
1 On the VC Tab, right-click the target file(s) and select Get Latest Version.
Rapid SQL opens the Get From Version Control dialog box.
2 Click Get Latest Version.
Rapid SQL opens the Get From Version Control dialog box.
3In the Files to Get box, select the file(s).
4 For advanced options, click Advanced.
5 Click OK.
Rapid SQL writes the most current version of the file to the VC Tab.
For more information, see Using Version Control
.
Version Control Functionality - Check Out
The Check Out functionality retrieves a copy of one or more selected files and creates a writable working file copy in
the working directory. You must perform a Check Out to edit any file that has been placed under version control.
You can check out a single file, multiple files at once or an entire project. Rapid SQL displays a red check mark over
the file icon to indicate that the file has been checked out and is writable. This does not prevent other users from
performing a Get or a Check Out on the file unless you are using the exclusive Check Out feature found in MKS
Source Integrity and Merant/Intersolv PVCS.
The following table describes the options and functionality on the Check Out File(s) dialog box:

USING > VERSION CONTROL
EMBARCADERO TECHNOLOGIES > BOOKNAMEVARIABLE 759
TIP: You can specify the file directory in the Version Control Working Directory option of the Options
Editor.
Checking Out a Project
To check-out a project, do the following:
1 Click File and then Open Project.
Rapid SQL opens the Open Project dialog box.
2 Type the project name or select the project.
3 Click Open.
Rapid SQL opens the project on the Projects Tab.
4 Select the target project.
5On the Project menu, click Version Control.
OR
On the Project toolbar, click Check Out.
OR
On the Project Tab, right-click a project.
6Select Check Out.
Rapid SQL opens the Check Out dialog box.
7 In the Files to Be Checked Out box select the project.
8 For advanced options, click Advanced.
9 Click OK.
Rapid SQL checks out the project or files from version control and writes the most current version of the file to
your working directory.
Check Out a File
To check out a file, do the following:
1 On the VC Tab, right-click the target file(s) and select Check Out.
Rapid SQL opens the Check Out File(s) dialog box.
2 In the Check Out File(s) dialog box select the files.
3 For advanced options, click Advanced.
Option Description
Files to be Checked Out Displays list of files that are eligible for check out. A black mark
indicates that another user has the file(s) checked out.
Advanced Click to open the Advanced Check Out Options dialog box.
USING > VERSION CONTROL
EMBARCADERO TECHNOLOGIES > BOOKNAMEVARIABLE 760
4 Click OK.
Rapid SQL checks out the file(s) from version control and writes the most current version of the file to the VC
Tab.
For more information, see Using Version Control
.
Version Control Functionality - Check In
After editing your files, you must Check In the revised file in order save the changes you made to the file in a project.
The Check In functionality stores the new version of the updated file in the current project. The Check In functionality
is only available if you have Checked Out a file. You have the option to Check In an entire project or individual files.
TIP: You can specify the file directory in the Version Control Working Directory
option of the Options
Editor.
The table below describes the options and functionality on the Check In dialog box:
Checking In a Project
To check-in a project, do the following:
1 Click File and then Open Project.
Rapid SQL opens the Open Project dialog box.
2 Type the project name or select the project.
3 Click Open.
Rapid SQL opens the project on the Projects Tab.
4On the Project menu, click Version Control, and then Check In.
OR
On the Version Control toolbar, click Check In.
OR
On the Project Tab, right-click a project or file, and then Check In.
Rapid SQL opens the Check In dialog box.
5 In the Files to Be Checked In box click the project or files.
6 To update the version control copy but keep the project or files checked out so that you can continue working,
select the Keep Checked Out check box.
7 To remove the file from the working directory and from the *.xml file, and from the VC Files Tab, select Remove
Local Copy.
Option Description
Files to be checked in Lets you specify the file(s) to check in.
Keep checked out Adds latest version(s) of file(s) to source control but keeps the
file(s) checked out.
Comment OPTIONAL: Lets you type an optional comment.

USING > VERSION CONTROL
EMBARCADERO TECHNOLOGIES > BOOKNAMEVARIABLE 761
8 OPTIONAL: In the Comment text box type a description of the changes.
9 Click OK.
Rapid SQL saves the modified project into version control.
Check In a File
To check in a file, do the following:
1 On the VC Tab, right-click the target file(s) and select Check In.
Rapid SQL opens the Check In File(s) dialog box.
2 In the Check In File(s) dialog box select the files.
3 To update the version control copy but keep the files checked out so that you can continue working, select the
Keep Checked Out check box.
4 To remove the file from the working directory and from the *.evc file, and from the VC Files Tab, select Remove
Local Copy.
5 OPTIONAL: In the Comment text box type a description of the changes.
6 Click OK.
Rapid SQL saves the modified file(s) into version control.
For more information, see Using Version Control
.
Version Control Functionality - Undo Check Out
If you decide that you do not want to save any revisions you have made to a checked out file, you can undo the
procedure that releases the lock placed on the project or file. However, you do not have the option of deleting the local
copy of the file.
TIP: You can specify the file directory in the Version Control Working Directory
option of the Options
Editor.
The table below describes the options and functionality on the Undo Check Out dialog box.
Undoing Checkout for a Project
To undo a checkout, do the following:
1 Click File and then Open Project.
Rapid SQL opens the Open Project dialog box.
2 Type the project name or select the project.
Option Description
Cancel the checkout for the
following files
Lets you specify the files to undo checkout.
Advanced Opens the Undo Check Out Advanced Options dialog box that lets
you leave, replace, or apply the default action to your local copy.

USING > VERSION CONTROL
EMBARCADERO TECHNOLOGIES > BOOKNAMEVARIABLE 762
3 Click Open.
Rapid SQL opens the project on the Projects Tab.
4 Click the project.
5On the Project menu, click Version Control.
OR
On the Project toolbar, click Undo Check Out.
OR
On the Project Tab, right-click a project or file.
6 Click Undo Check Out.
Rapid SQL opens the Undo Check Out dialog box.
7 In the Cancel the check out for the following files box of the Undo Check Out dialog box, click the project.
8 Click OK.
Rapid SQL undoes the check out the project from version control.
NOTE: If you Undo Check Out, you lose any changes you have made to the local copy of your project.
Undoing Checkout for a File
To undo checkout for a file, do the following:
1 On the VC Tab, right-click the target file(s) and select Undo Checkout.
Rapid SQL opens the Undo Checkout dialog box.
2 In the Cancel the check out for the following files box of the Undo Check Out dialog box, click the project.
3 Click OK.
Rapid SQL undoes the check out the file from version control.
NOTE: If you Undo Check Out, you lose any changes you have made to the local copy of your file(s).
For more information, see Using Version Control
.
Version Control Functionality - Show History
The Show History functionality lets you view the history of version control files.
Showing History for a Project
To show history, do the following:
1 Click File and then Open Project.
Rapid SQL opens the Open Project dialog box.
2 Type the project name or select the project.
3 Click Open.
Rapid SQL opens the project on the Projects Tab.

USING > VERSION CONTROL
EMBARCADERO TECHNOLOGIES > BOOKNAMEVARIABLE 763
4 Click the target file.
5On the Project menu, click Version Control, and then select Show History.
OR
On the Project Tab, right-click the a file, and then select Show History.
Rapid SQL opens the History Options dialog box.
NOTE: The History dialog box depends on your version control system.
Showing History for a File
To show history, do the following:
1 On the VC Tab, right-click the target file(s) and select Show History.
Rapid SQL opens the History Options dialog box.
NOTE: The History dialog box depends on your version control system.
For more information, see Using Version Control
.
Version Control Functionality - Show Differences
The Show Differences functionality lets you view any differences between the current files in your working folder and
the master files in the version control database. You cannot make changes to the files from this dialog box because it
is used for display purposes only.
Viewing Project Differences
To view project differences, do the following:
1 Click File and then Open Project.
Rapid SQL opens the Open Project dialog box.
2 Type the project name or select the project.
3 Click Open.
Rapid SQL opens the project on the Projects Tab.
4 Click the target file.
5On the Project menu, click Version Control.
OR
On the Project Tab, right-click a file.
6 Click Show Differences.
Rapid SQL opens the Differences dialog box.
If the file in your working directory is the same as the one in the project, a message tells you they are identical. If
there are differences, the Differences dialog box from your version control system opens and displays the two
versions of the file side-by-side, highlighting any differences.
7 In the Differences dialog box, you can maneuver through the files by using the Up and Down arrows.

USING > VERSION CONTROL
EMBARCADERO TECHNOLOGIES > BOOKNAMEVARIABLE 764
8To set Diff Options, click the Options button.
NOTE: The Differences dialog box and Options depend on your version control system.
Showing History for a File
To show history, do the following:
1 On the VC Tab, right-click the target file(s) and select Show History.
Rapid SQL opens the Difference Options dialog box.
2 In the Difference Options dialog box, you can maneuver through the files by using the Up and Down arrows.
NOTE: The Difference Options dialog box and options depend on your version control system.
For more information, see Using Version Control.
Version Control Functionality - Remove from Version Control
The Remove from Version Control functionality lets you remove entire projects or files from version control.
NOTE: This functionality does not destroy the file permanently from the source control system or remove
the local copies of the file(s).
Removing a Project from Version Control
To remove a project from Version Control, do the following:
1 Click File and then Open Project.
Rapid SQL opens the Open Project dialog box.
2 Type the project name or select the project.
3 Click Open.
Rapid SQL opens the project on the Projects Tab.
4On the Project menu, click Version Control, and then click Remove from Version Control.
OR
On the Project Tab, right-click a project file, and then click Remove from Version Control.
Rapid SQL opens the Remove File(s) dialog box.
5 To permanently destroy the project select the check box, click OK.
Rapid SQL removes the project from version control. The project remains active in Rapid SQL.
Removing a File from Version Control
The table below describes the options and functionality of the Remove Files dialog box:
Option Description
Files to be removed Lets you specify the files to be removed from version control.
NOTE: Does not delete the file(s) in version control.

USING > VERSION CONTROL
EMBARCADERO TECHNOLOGIES > BOOKNAMEVARIABLE 765
To remove a file from Version Control, do the following:
1 On the VC Tab, right-click the target file(s) and select Remove from Version Control.
Rapid SQL opens the Remove File(s) dialog box.
2 Specify the file(s).
3 Click OK.
Rapid SQL removes the file(s) from version control. The project remains active in Rapid SQL.
For more information, see Working with Files in Version Control
.
Version Control Properties
The Version Control File Properties dialog box displays general information and check out status, links, and paths.
Viewing Version Control Properties for a Project
To view the version control properties, do the following:
1 Click File and then Open Project.
Rapid SQL opens the Open Project dialog box.
2 Type the project name or select the project.
3 Click Open.
Rapid SQL opens the project on the Projects Tab.
4 Click the target file.
5On the Project menu, click Version Control, and then Version Control Properties.
OR
On the Project Tab, right-click the a file, and then select Version Control Properties.
Rapid SQL opens the Version Control Properties dialog box.
6 Review properties.
7 Click Close.
Viewing Version Control Properties for a File
To view the version control properties, do the following:
1 On the VC Tab, right-click the target file(s) and select Version Control Properties.
Rapid SQL opens the Version Control Properties dialog box.
2 Review properties.
3 Click Close.
For more information, see Using Version Control
.
Version Control Functionality - Expand All
The Expand All functionality expands all tree items under the selected item(s).

USING > VERSION CONTROL
EMBARCADERO TECHNOLOGIES > BOOKNAMEVARIABLE 766
For more information, see Working with Files in Version Control.
Version Control Functionality - Collapse All
The Collapse All functionality collapses all tree items under a selected item(s).
For more information, see Working with Files in Version Control
.
Version Control Functionality - Refresh
The Refresh functionality obtains the current version control status for the file(s).
For more information, see Working with Files in Version Control
.
Version Control Functionality - Close Files List
The Close Files List functionality closes the list of files.
For more information, see Working with Files in Version Control
.
TOOLS > VERSION CONTROL
EMBARCADERO TECHNOLOGIES > BOOKNAMEVARIABLE 767
Tools
Rapid SQL incorporates a number of powerful tools to help you create, edit and manage your development
environment. You can use Tools to:
• Conduct extensive database searches across multiple databases.
• Execute scripts or files across multiple databases.
• Schedule tasks.
• Identify differences in files or objects.
• Graphically build complex queries.
• Auto-generate complete procedures and packages.
• Code and test basic macros.
• Administer your ODBC data sources.
Tools is divided into sections. The table below describes each section:
Section Description
Find in Files This section describes the Find in Files dialog box that lets you find
a phrase or character in your files.
Database Search
This section describes the powerful database search utility that
helps you to find instances of a string across multiple databases.
Script Execution Facility
This section describes the Script Execution Facility, a stand-alone
utility that establishes multiple threads and database connections
letting you simultaneously execute SQL statements against
multiple Oracle, Sybase Adaptive Server, Microsoft SQL Server,
and IBM DB2 UDB for Linux, Unix, and Windows datasources.
File Execution Facility
This section describes the File Execution Facility, a stand-alone
utility that establishes multiple threads and database connections
that lets you execute parallel queries and ANSI SQL files against
multiple, cross-platform datasources.
Scheduling
The DBArtisan scheduling programs and utilities let you schedule
and execute jobs on local datasources anytime.
Visual Difference
DBArtisan lets you compare two files or database objects. Using
the Visual Difference Utility, you can easily synchronize and
analyze database objects or files across multiple database
platforms.
Query Builder
This section describes Query Builder, a tool that lets you construct,
structure, and manipulate up to five different types of queries
simultaneously.
Data Editor
This section describes the Data Editor to edit your tables in
real-time. The Data Editor supports all editable datatypes and is an
alternative way to add, edit, or delete data from your tables.
Embarcadero Products
The Tools menu lists all installed Embarcadero Technologies
products. This lets you toggle to or start another Embarcadero
product.
TOOLS > VERSION CONTROL
EMBARCADERO TECHNOLOGIES > BOOKNAMEVARIABLE 768
Code Workbench This section describes the Code Workbench that lets you enable
table column look-up and population in the ISQL window, define
auto replacement expressions that can be used to quickly insert
commonly used blocks of SQL syntax or commands in any open
window and to import and export Code Workbench specific
settings for client sharing purposes.
Section Description
Find in Files This section describes the Find in Files dialog box that lets you find
a phrase or character in your files.
Database Search
This section describes the powerful database search utility that
helps you to find instances of a string across multiple databases.
Script Execution Facility
This section describes the Rapid SQL Script Execution Facility, a
stand-alone utility that establishes multiple threads and database
connections letting you simultaneously execute SQL statements
against multiple Oracle, Sybase Adaptive Server, Microsoft SQL
Server, and IBM DB2 UDB for Open Systems datasources.
File Execution Facility
This section describes the Rapid SQL File Execution Facility, a
stand-alone utility that establishes multiple threads and database
connections that lets you execute parallel queries and ANSI SQL
files against multiple, cross-platform datasources.
Scheduling
The Rapid SQL scheduling programs and utilities let you schedule
and execute jobs on local datasources anytime.
Visual Difference
Rapid SQL lets you compare two files or database objects. Using
the Visual Difference Utility, you can easily synchronize and
analyze database objects or files across multiple database
platforms.
Query Builder
This section describes Query Builder, a tool that lets you construct,
structure, and manipulate up to five different types of queries
simultaneously.
Data Editor
This section describes the Data Editor to edit your tables in
real-time. The Data Editor supports all editable datatypes and is an
alternative way to add, edit, or delete data from your tables.
Code Generation Facility
This section describes the Code Generation Facility that offers a
quick way to generate DML statements for tables and views.
Import Data This section describes the Import Data Wizard that lets you create
insert statements based on external files including Excel
spreadsheets and text files.
Embarcadero Products
The Tools menu lists all installed Embarcadero Technologies
products. This lets you toggle to or start another Embarcadero
product.
Code Workbench This section describes the Code Workbench that lets you enable
table column look-up and population in the ISQL window, define
auto replacement expressions that can be used to quickly insert
commonly used blocks of SQL syntax or commands in any open
window and to import and export Code Workbench specific
settings for client sharing purposes.
Section Description
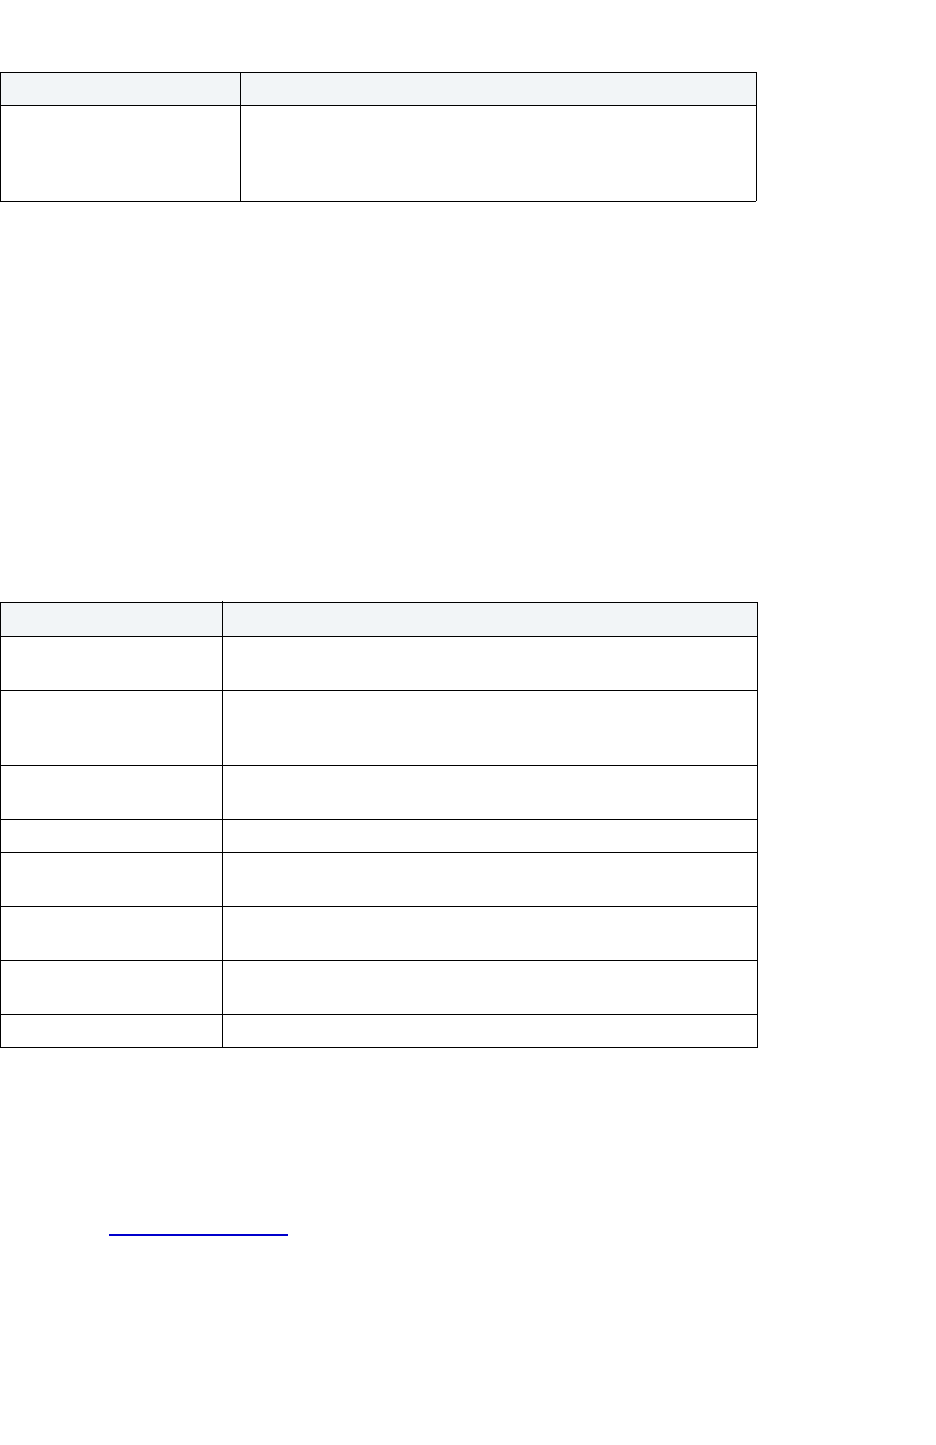
TOOLS > FIND IN FILES
EMBARCADERO TECHNOLOGIES > BOOKNAMEVARIABLE 769
Find in Files
The Find in Files dialog box lets you find a phrase or character in your files.
Completing the Find in Files Dialog Box
1 On the Tools menu, click Find in Files.
OR
On the Tools toolbar, click Find in Files.
Rapid SQL opens the Find in Files dialog box.
The table below describes the options and functionality on the Find in Files dialog box.:
NOTE: You can also use the Find feature to locate a phrase or character in an ISQL window.
Database Search
The powerful database search utility helps you to find instances of a string across multiple databases.
Code Analyst This section describes the Code Analyst that lets you capture
response time metrics on stored procedures. You can select one or
multiple objects, execute them, view the results, and save those
results for later viewing or comparing.
Option Description
Find what Specifies the character(s) or phrase you want to find. Use the browse
arrow button next to the textbox to choose options from a pop-up list.
In files/file types Specifies the files in which to search for the character(s) or phrase.
Either enter the filename(s) in the drop-down box, or click the arrow
to choose a file type.
In folder Specifies the directory where the file(s) is located. Click the browse
button to view your Windows Explorer.
Match whole word only Specifies the application to find only the entire phrase.
Match case Specifies the application to find only the specified phrase in the case
you have entered.
Regular Expression Tells the application whether the specified character(s) is a regular
expression.
Look in subfolders Specifies the application to search the file(s) any folders located
within the specified folder.
Output to Pane 2 Specifies the application to display the results in another window.
Section Description

TOOLS > DATABASE SEARCH
EMBARCADERO TECHNOLOGIES > BOOKNAMEVARIABLE 770
Starting the Database Search Wizard
1 On the Tools menu, click Database Search.
OR
On the Tools toolbar, click Database Search.
Rapid SQL opens the first panel of the Database Search Wizard
.
Database Search Wizard - Panel 1
The first panel of the Database Search Wizard lets you specify the owner.
The table below describes the options and functionality on the first panel of the Database Search Wizard:
1 Click Next.
Rapid SQL opens the next panel of the wizard.
Database Search Wizard - Panel 2
The second panel of the Database Search Wizard lets you specify the search criteria.
The table below describes the options and functionality on the second panel of the Database Search Wizard:
1 Click Execute to start the operation.
Rapid SQL displays a progress dialog box while the search runs. When the search completes, Rapid SQL opens
the Database Search Window
.
Option Description
Select the owner(s) whose
objects you would like to
search
Lets you expand the nodes, select the target owner, and then click
the right arrow button to include the target owner.
Option Description
Search Database For Lets you enter the search string.
Strings can also be searched for using DB2-standard wildcards. And
for multiple string searches, separate each string with a vertical bar
(for example, DEPARTMENTS|wage_cap|status). When searching
for strings that already contain vertical bars, enclose each string in
double quotation marks.
Match Case Select Yes tot make the search case sensitive.
NOTE: IBM DB2 UDB for OS/390 and Microsoft SQL Server 7.0 or
before searches are always case insensitive.
Search DDL of these
Objects
In the grid, select the target object check boxes.
NOTE: Event Monitors are available for IBM DB2 UDB for Linux,
Unix, and Windows only.

TOOLS > SCRIPT EXECUTION FACILITY
EMBARCADERO TECHNOLOGIES > BOOKNAMEVARIABLE 771
Database Search Results
Rapid SQL displays Database Search operation results in a Database Search Window, listing all of the objects
containing the search string in the left pane. You can browse instances of the search string by selecting different
objects in the tree. The DDL of the objects displays in the right pane and the search string is highlighted.
The table below describes the buttons on the Database Search Window toolbar:
Script Execution Facility
Rapid SQL’s Script Execution Facility is a stand-alone utility that establishes multiple threads and database
connections letting you simultaneously execute SQL statements against multiple Oracle, Sybase Adaptive Server,
Microsoft SQL Server, and IBM DB2 UDB for Linux, Unix, and Windows datasources. After completing a scheduled
job, Rapid SQL generates a results report that lists errors, verifies script execution, and details the output of the job.
The Script Execution Facility also works in conjunction with Rapid SQL’s scheduling facilities, letting you schedule
script execution jobs. When used in conjunction with a scheduler, Rapid SQL can automatically send the results report
to any e-mail or network recipients. The Script Execution Facility is a tabbed dialog box where you set the parameters
and options for the script execution. In the Script Execution Facility dialog box you can:
• Type or paste the target SQL script.
• Specify the datasources against which to execute the script.
• Specify the output mode for the results report.
• Open one of the Rapid SQL scheduling programs to schedule the script execution.
• Specify execution notification e-mail and Net Send addresses.
For more information, see Completing the Script/File Execution Facility
.
File Execution Facility
Rapid SQL’s File Execution Facility is a stand-alone utility that establishes multiple threads and database connections
that lets you execute parallel queries and ANSI SQL files against multiple, cross-platform datasources. The Script
Execution Facility also works in conjunction with Rapid SQL’s scheduling facilities, letting you schedule script
execution jobs. After completing a scheduled job, Rapid SQL generates a results report that lists errors, verifies
execution, and details the output of the job. When used in conjunction with a scheduler, Rapid SQL can automatically
send the results report to any e-mail or network recipients. The File Execution Facility is a tabbed dialog box where
you set the parameters and options for the file execution. In the File Execution Facility dialog box you can:
• Specify the target files or ANSI SQL scripts.
• Specify the datasources against which to execute the files.
• Specify the output mode for the results report.
Button Description
Search Opens the first panel of the Database Search Wizard.
Criteria Opens the Search Criteria dialog box.
Open Opens the editor for the target object.
Extract Lets you extract the target object.
Print Lets you print the target object SQL.
TOOLS > FILE EXECUTION FACILITY
EMBARCADERO TECHNOLOGIES > BOOKNAMEVARIABLE 772
• Open one of the Rapid SQL scheduling programs to schedule the file execution.
• Specify execution notification e-mail and Net Send addresses.
For more information, see Completing the Script/File Execution Facility.
Completing the Script/File Execution Facility
Rapid SQL lets you run parallel queries against multiple datasources with the File Execution Facility.
1 On the Tools menu, click Script Execution Facility or File Execution Facility.
OR
On the Tools toolbar, click Script Execution Facility or File Execution Facility.
Rapid SQL opens the Script or File Execution Facility dialog box.
2 Complete the Script
Tab (Script Execution Facility)
3 Complete the Files
Tab (File Execution Facility)
4 Complete the Target
Tab.
5 Complete the Output
Tab.
6 Complete the Notify
Tab.
For more information, see:
File Execution Facility
Script Execution Facility
Script Execution Facility - Script Tab
The table below describes the options and functionality on the Script Tab of the File/Script Execution Facility:
For more information, see:
File Execution Facility
Script Execution Facility
Completing the Script/File Execution Facility
File Execution Facility - Files Tab
The table below describes the options and functionality on the Files Tab of the File Execution Facility:
Option Description
Script box Lets you type or paste a script.
Option Description
Show Full File Paths Select to display the full path. Deselect to display only the file
name.
TOOLS > FILE EXECUTION FACILITY
EMBARCADERO TECHNOLOGIES > BOOKNAMEVARIABLE 773
For more information, see:
File Execution Facility
Script Execution Facility
Completing the Script/File Execution Facility
File/Script Execution Facility - Target Tab
The table below describes the options and functionality on the Target Tab of the File/Script Execution Facility:
For more information, see:
File Execution Facility
Script Execution Facility
Completing the Script/File Execution Facility
File/Script Execution Facility - Output Tab
The table below describes the options and functionality on the Output Tab of the File/Script Execution Facility:
File Name Displays the file names.
Add Click to open the Select Files dialog box.
Remove Click to remove the selected file.
View Opens the View File dialog box.
Up Click to move the selected file up in the list.
Down Click to move the selected file down in the list.
Option Description
Select the Target
Datasource(s) to Execute the
Script Against
Only Connected Datasources - Displays only datasources that are
currently connected in the Datasource grid.
All DBMS Types - Displays all DBMS types in the Datasource grid.
Datasource grid Displays the target datasource(s) to execute the script/file against.
Select a datasource name. If the datasource has multiple
databases, type in a database in the Database box.
Option Description
Graphical Output If selected, specifies a graphical output.
Option Description

TOOLS > SCHEDULING
EMBARCADERO TECHNOLOGIES > BOOKNAMEVARIABLE 774
For more information, see:
File Execution Facility
Script Execution Facility
Completing the Script/File Execution Facility
File/Script Execution Facility - Notify Tab
The table below describes the options and functionality on the Notify Tab of the File/Script Execution Facility:
For more information, see:
File Execution Facility
Script Execution Facility
Completing the Script/File Execution Facility
Scheduling
The Rapid SQL scheduling programs and utilities let database administrators schedule and execute jobs on local
datasources 24-hours-a-day, 7-days-a-week. After completing a scheduled job, Rapid SQL generates a results report
that lists errors, verifies script execution, and details the output of the job. Rapid SQL can automatically send the
results report to any e-mail or network recipients.
Rapid SQL offers the following programs and utilities to let you schedule routine tasks and jobs:
•
Embarcadero Job Scheduler
• Microsoft Task Scheduler
• Embarcadero ETSQLX
File Output If selected, specifies a file output.
Directory - Type or browse to enter the full path and directory name
in which you want to place the output file.
File Type - Specifies a file type.
Include column titles when saving - If selected, lets you save
column titles.
Open files with registered applications - If selected, opens files with
registered applications.
Option Description
Job Description Lets you enter a job description. This description will be the subject
of the notification E-mail.
E-mail address Lets you enter E-mail addresses. Separate each E-mail address
with a semicolon (;).
Net Send User Names Lets you enter net send user names. Separate each name with a
semicolon (;).
Option Description

TOOLS > SCHEDULING
EMBARCADERO TECHNOLOGIES > BOOKNAMEVARIABLE 775
The default scheduler for the Rapid SQL Script Execution Facility and File Execution Facility is the Embarcadero Job
Scheduler. The Embarcadero Job Scheduler is sold separately. If you do not have the Embarcadero Job Scheduler,
the Script Execution Facility and the File Execution use the Microsoft Task Scheduler for scheduling jobs.
Rapid SQL’s scheduling facilities let you:
• Execute scheduled jobs without running Rapid SQL.
• Run batch files to automate tasks.
• Run a script in parallel against multiple datasources.
• Automatically send result reports to e-mail or network recipients when jobs complete.
Embarcadero Job Scheduler
Embarcadero Job Scheduler is the default scheduling application for Rapid SQL. If you do not have Embarcadero Job
Scheduler installed, you can schedule jobs with the Microsoft Task Scheduler.
NOTE: Embarcadero Job Scheduler is sold separately. For information, go to Embarcadero
Technologies Web site.
Embarcadero Job Scheduler is a full-featured job scheduling application that lets you schedule routine tasks including
database administration, batch processing and system backup. Embarcadero Job Scheduler performs such tasks as
executing command line batches and SQL scripts, and then transmits customized, notification messages via e-mail or
network broadcast. Embarcadero Job Scheduler includes an easy-to-use interface for defining and managing tasks
and notifications, calendars, client machines and users.
The table below describes the tabs of the Job Scheduler dialog box:
This section includes the following:
•
Scheduling a Job
• Opening the Embarcadero Job Scheduler through Rapid SQL
Tab Description
General On the tab, specify the job settings.
For more information on job settings, see
“Embarcadero Job Scheduler Application” in the
Embarcadero Job Scheduler documentation.
Schedule On the tab, select the time parameters.
For more information on time parameters, see
“Calendars” in the Embarcadero Job Scheduler
documentation.
Notification On the tab, specify the notification parameters.
For more information on notifications, see
“Notifications” in the Embarcadero Job Scheduler
documentation.
EMBARCADERO TECHNOLOGIES > BOOKNAMEVARIABLE 776
Opening the Embarcadero Job Scheduler Through Rapid SQL
1 On the Tools menu, click Task Scheduler.
OR
On the Tools toolbar, click Task Scheduler.
Rapid SQL opens the Embarcadero Job Scheduler.
TIP: For more information on using the Embarcadero Job Scheduler, see the Embarcadero Job
Scheduler Documentation.
Microsoft Task Scheduler
If you do not have the Embarcadero Job Scheduler add-on program, Rapid SQL lets you use the Microsoft Task
Scheduler to schedule jobs. The Microsoft Task Scheduler is included with various Microsoft applications. If you do not
have either of these programs on your system, the first time you attempt to schedule a job, Rapid SQL provides you
with a link to the Microsoft Web site where you can download the Microsoft Task Scheduler at no cost.
The table below describes the options and functionality on the Schedule Action dialog box:
The table below describes the tabs on the Job Scheduler dialog box:
NOTE: Rapid SQL’s ETSQLX
command line utility runs a scheduled job even if Rapid SQL is not running.
This section includes the following:
• Scheduling a Job
• Opening the Microsoft Scheduled Task Directory Through Rapid SQL
Select Directory
The select directory dialog box lets you locate the directory in which to place the output file.
For more information, see Microsoft Task Scheduler
.
Option Description
Job Name Lets you type the name of the job.
Job Description Lets you type a job description that will appear in the subject line in
your e-mail and Net Send messages.
E-mail Address(es) Lets you type the e-mail address(es) to which you want to send
notifications.
Net Send Lets you type the network user(s) to whom you want to send
notifications.
Action Output Directory Lets you type the full path for the directory in which to place the
output file or click browse to open the Select Directory
dialog box.
Tab Description
Schedule Lets you set your scheduling parameters.
Settings Lets you set your settings parameters.

TOOLS > VISUAL DIFFERENCE
EMBARCADERO TECHNOLOGIES > BOOKNAMEVARIABLE 777
Opening the Microsoft Scheduled Task Directory Through Rapid SQL
In the Microsoft Scheduled Tasks directory, Microsoft lets you create, view, edit, and delete jobs.
1 On the Tools menu, click Task Scheduler.
OR
On the Tools toolbar, click Task Scheduler.
Rapid SQL opens the Microsoft Scheduled Tasks directory.
Scheduling a Job
1 In a dialog box or wizard, click the Schedule button.
Rapid SQL opens the Schedule Job dialog box.
2In Job Scheduler, select Embarcadero Job Scheduler or Microsoft Task Scheduler.
3 To set the selected scheduler as the default, select Set as default.
4 Click OK.
Rapid SQL opens the Embarcadero Job Scheduler
or Microsoft Task Scheduler.
TIP: For more information on using the Embarcadero Job Scheduler, see the Embarcadero Job
Scheduler documentation.
ETSQLX Command Line Utility
Rapid SQL’s ETSQLX command line utility, is a multi threaded, cross-platform, SQL scripting engine. You can use
ETSQLX in conjunction with the Microsoft Task Scheduler to schedule and automate routine jobs. ETSQLX creates
batch files (with the extension.cfg) containing commands to execute automated and scheduled jobs. ETSQLX creates
a directory, CFG, in which it stores the.cfg files. You can run.cfg files directly from the command line.
NOTE: ETSQLX supports.csv,.tab,.htm, and.html formats for result reports attachments.
Visual Difference
Rapid SQL lets you compare two files or database objects. Using the Visual Difference dialog box, you can easily
synchronize and analyze database objects or files across multiple database platforms. The files are displayed side by
side in the Visual Difference dialog box. The Visual Difference Utility highlights any differences between two files.
Viewing differences between objects and files helps you negotiate between the different phases of development as
well as providing a visual aid to rapidly changing and evolving production environments.
NOTE: Because contents of the Visual Difference dialog box are read-only, you will not be able to modify
your files or objects directly from this dialog box.
The Visual Difference dialog box is composed of two panes; the left pane displays your source object or file and the
right pane shows your target object or file. The Visual Difference dialog box also contains its own toolbar which lets
you:
• Search
• Navigate differences

TOOLS > VISUAL DIFFERENCE
EMBARCADERO TECHNOLOGIES > BOOKNAMEVARIABLE 778
• Set options
•Print
Opening the Visual Difference Dialog Box
1 On the Tools menu, click Visual Diff.
OR
On the Tools toolbar, click Visual Diff.
Rapid SQL opens the Visual Difference dialog box.
For more information, see:
Comparing Files
Comparing Database Objects
Navigating in the Visual Difference Dialog Box
Printing a Pane of the Visual Difference Dialog Box
Searching in the Visual Difference Dialog Box
Setting Options in the Visual Difference Dialog Box
Comparing Files
You can compare two files side-by-side in the Visual Difference dialog box. The file you want to compare is called the
Source. The file you want to compare the first file to is the Target.
Comparing Items
1 On the Tools menu, click Visual Diff.
OR
On the Tools toolbar, click Visual Diff.
Rapid SQL opens the Visual Difference dialog box.
2 On the Visual Difference toolbar, click the Source icon or click the Down arrow next to the Source icon and
then click File.
Rapid SQL opens the Select the 1st File to Compare dialog box.
3 Click the file that you want to be the Source file.
4 On the Visual Difference toolbar, click the Target icon or click the Down arrow next to the Target icon and then
click File.
Rapid SQL opens the Select the 2nd File to Compare dialog box.
NOTE: The Visual Difference Utility highlights all differences between the two files.
For more information, see Visual Difference Utility
.

TOOLS > VISUAL DIFFERENCE
EMBARCADERO TECHNOLOGIES > BOOKNAMEVARIABLE 779
Comparing Database Objects
The schema of database objects is automatically extracted so you can view the underlying differences between object
and perform a side-by-side comparison in the Visual Difference Dialog.
Comparing Database Objects
1 On the Tools menu, click Visual Diff.
OR
On the Tools toolbar, click Visual Diff.
Rapid SQL opens the Visual Difference dialog box.
2 On the Visual Difference toolbar, click the Down arrow next to the Source icon and then click Database
Object.
Rapid SQL opens the Select the 1st Database Object to Compare dialog box.
3 Click the datasource and then click OK to connect.
4 Navigate through the datasource tree and double-click the database object that you want to be the Source.
5 On the Visual Difference toolbar, click the Down arrow next to the Target icon and then click Database Object.
Rapid SQL opens the Select the 2nd Database Object to Compare dialog box.
NOTE: The Visual Difference Utility highlights all differences between the two database objects.
For more information, see Visual Difference Utility
.
Navigating in the Visual Difference Dialog Box
You can navigate through the Visual Difference dialog box using the up and down arrow buttons. You can move back
and forth between highlighted differences in your compared files or database objects.
Going To the Next Difference
1 From the Visual Difference dialog box, click down arrow to go to the next difference.
Going To the Previous Difference
1 From the Visual Difference dialog box, click up arrow to go to the next difference.
For more information, see Visual Difference Utility
.
Printing a Pane of the Visual Difference Dialog Box
You can print each pane of the Visual Difference dialog box.
Printing a Pane of the Visual Difference Dialog Box
1 Position your cursor inside the pane you want to print.
2 Click the Print icon on the Visual Difference toolbar.
Rapid SQL opens the Print Setup dialog box.

TOOLS > VISUAL DIFFERENCE
EMBARCADERO TECHNOLOGIES > BOOKNAMEVARIABLE 780
3 Click OK to print the pane.
NOTE: You can only print one pane of the Visual Difference dialog box at a time.
For more information, see Visual Difference Utility.
Searching in the Visual Difference Dialog Box
The Visual Difference dialog box lets you search for text in your files or database objects.
Searching for Text
1 Place your cursor inside the pane you want to search.
2 Click the Find icon on the Visual Difference toolbar.
Rapid SQL opens the Find dialog box.
3 In the Find What box, enter the search string.
4 To match whole words only, select the Match whole word only check box.
5 To make the search case sensitive, select the Match case check box.
6 Click Find Next to find the next occurrence of your search string. You can also click the Find Next icon on the
Visual Difference toolbar to search for the next occurrence at a later time.
For more information, see Visual Difference Utility
.
Setting Options in the Visual Difference Dialog Box
The Visual Difference dialog box lets you set display and comparison options to help you customize the dialog box to
view differences in a comprehensive manner.
Setting Options
1 Click the Options icon on the Visual Difference toolbar.
Rapid SQL opens the Visual Diff Options dialog box.
The following table describes the check box options:
Option Description Default
Display Line Numbers Indicates that line numbers should
appear in the Visual Diff dialog box.
Off
Display Hidden Characters Indicates that hidden characters
(nonprintable) should be displayed.
Off
Ignore White Space Indicates that White Space (such as
spaces, carriage returns, line feeds, and
tabs) should be ignored. If this option is
set on, text will be considered
equivalent regardless of white space,
otherwise the text will be shown as
being different.
On
TOOLS > QUERY BUILDER
EMBARCADERO TECHNOLOGIES > BOOKNAMEVARIABLE 781
2 Click OK.
Rapid SQL accepts the options.
For more information, see Visual Difference Utility
.
Query Builder
Query Builder is a database productivity tool that lets you construct, structure, and manipulate up to five different types
of queries simultaneously. It includes a separate graphical interface that opens within your current workspace. You can
run Query Builder against all Embarcadero Technologies supported database platforms.
Query Builder displays the interconnections of your queries as you work. The powerful visual components of Query
Builder let you see your query grow and change to fit your needs. Query Builder eases the task of drawing data from
tables by automatically creating correct SQL code as you build a statement. You can use Query Builder to create and
execute SELECT statements for tables and views. You can also test queries, and easily adjust your information,
before you save. Query Builder does not rely on knowledge of the underlying SQL code.
You can save and reopen queries in Query Builder. Query Builder automatically checks for changes in your tables or
columns between the time you save the query and the time you reopen it.
The table below describes the types of queries available in Query Builder:
NOTE: You can execute SELECT statements directly from Query Builder. INSERT, UPDATE, DELETE,
and CREATE VIEW statements must be moved to an ISQL Editor for execution.
For more information, see:
Query Builder Design
Using Query Builder
Ignore Hidden Characters Indicates that hidden characters
(nonprintable) should be excluded.
Off
Ignore Case Indicates that case should not be a
differentiating factor.
On
Query Type Description
SELECT Create, manipulate and execute SELECT Statements for tables
and views.
INSERT
Create and manipulate INSERT Statements for tables.
UPDATE
Create and manipulate UPDATE Statements for tables.
DELETE
Create and manipulate DELETE Statements for tables.
CREATE VIEW
Create and manipulate CREATE VIEW Statements for tables and
views.
Option Description Default
TOOLS > QUERY BUILDER
EMBARCADERO TECHNOLOGIES > BOOKNAMEVARIABLE 782
Query Builder Design
Query Builder lets you build DML statements using an intuitive, graphical interface. It offers you a powerful and flexible
way to quickly create complex statements without sacrificing time manipulating SQL code. Query Builder lets you add
tables or columns, create joins, and change statements within the graphic display without leaving Rapid SQL. It also
lets you have multiple sessions working at the same time.
Query Builder includes many different features to assist you in building and manipulating your query:
•
Query Builder Statement Properties
• Workspace Windows
• Query Builder Explorer
• Tool Bar
• SQL Diagram Pane
• SQL Statement Pane
For more information, see Build Query.
Workspace Windows
The Workspace Windows provide a comprehensive view of your data structure and query. The table below describes
the Workspace Windows:
For more information, see Build Query
.
Query Builder Explorer Window
The Query Builder Explorer is a separate tree that exposes all the tables and views in your target database. It also
displays your current query structure. The Query Builder Explorer includes two tabs that display information about the
selected objects:
•
Tables/Views
• DML
Tables/Views Tab
The Tables/View Tab displays information about the selected tables or views. You can use the drop-down lists to
change your table or view, and when appropriate, the owner. The table below describes each drop-down list on the
Tables/Views Tab:
Pane Description
Query Builder Explorer
Window
Includes two tabs that display selected object details:
Tables/Views
DML
SQL Diagram Pane
Displays tables or views included in the current query.
SQL Statement Pane
Displays the SQL code, and when appropriate, a Results Tab.

TOOLS > QUERY BUILDER
EMBARCADERO TECHNOLOGIES > BOOKNAMEVARIABLE 783
NOTE: To change your current database, select the new database in the Explorer, and then open another
Query Builder session. Query Builder prompts you to save the current session prior to opening a
new session.
DML Tab
The DML Tab displays all the basic elements of a query statement in the SQL Statement Tree. You can access any
element of the current statement display and perform SQL editing from the SQL Statement Tree.
For more information, see:
Creating a Clause Using the SQL Statement Tree
Build Query
SQL Diagram Pane
The SQL Diagram Pane displays tables, views, and joins included in the current query. You can manipulate elements
of your query, using the mouse functionality, in the SQL Diagram Pane. From the SQL Diagram Pane you can:
• Add and Remove tables and views
.
• Create and delete joins
.
• Add and Subtract columns
.
All changes in the SQL diagram reflect in correct SQL code in the SQL Statement Pane.
For more information, see Build Query
.
SQL Statement Pane
The SQL Statement Pane displays the current query SQL code. When you run a query, Query Builder displays results
to your query in the SQL Statement Pane. The SQL Statement Pane is divided into two tabs:
•
SQL Tab
• Results Tab
SQL Tab
The SQL Tab displays the query in progress. It displays each element of your query as you build it, and updates as
you do edits such as selecting or deselecting columns, adding clauses, and creating joins. Rapid SQL lets you open
the current statement directly into an ISQL editor or copy it to the clipboard for later use.
Results Tab
The Results Tab displays the results of your executed query in the Results grid. To edit data, use the Data Editor
application from Query Builder. When you begin building a new query, the tab title changes to Old Results until you
execute the new query.
For more information, see Build Query.
List Description
First Displays all databases for a target Microsoft SQL
Server or Sybase ASE.
Second Displays all valid owners.
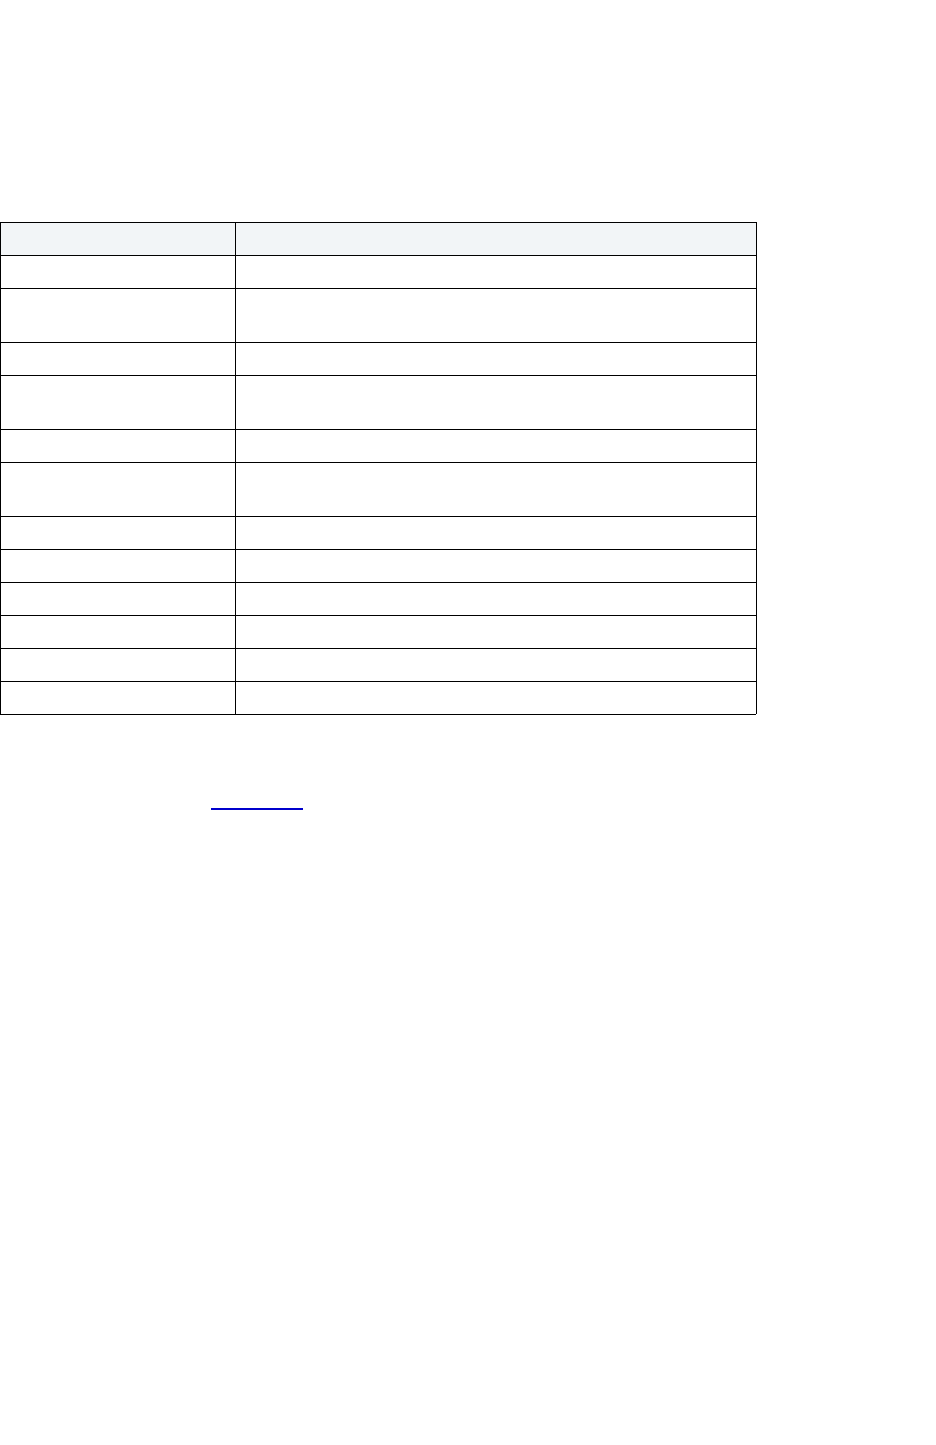
TOOLS > QUERY BUILDER
EMBARCADERO TECHNOLOGIES > BOOKNAMEVARIABLE 784
Query Builder Tool Bar
The Query Builder tool bar lets you access commonly used features.
The table below describes Query Builder tool bar functionality:
NOTE: Query Builder adjusts tool availability to match the current query functionality.
For more information, see Build Query
.
Tables and Views Shortcut Menus
Query Builder includes a shortcut menu that lets you manipulate a table or view. The table below describes the table
shortcut options:
Name Function
Copy Copies the current SQL statement to the clipboard.
Statement Box Displays the type of statement currently on display in the main
workspace window.
Stop Execution Stops an executing query.
Execute Executes the current SELECT or CREATE VIEW statement. If the
button is not available, the statement is not executable.
New Adjusts to the target node in the Query Builder Explorer window.
Edit Displays, on the DML Tab, the ORDER BY or GROUP BY dialog
boxes when target node is selected.
Delete Deletes the target object.
Auto Layout Resets the main workspace to the auto layout mode.
Auto Join Finds and joins, automatically, like items by name.
Statement Check Checks query syntax.
Edit Data Opens Data Editor.
Close Closes the current query.

TOOLS > QUERY BUILDER
EMBARCADERO TECHNOLOGIES > BOOKNAMEVARIABLE 785
NOTE: Your selection applies to all selected tables and views.
For more information, see Build Query
.
Tables and Views Keyboard Commands
Query Builder provides a number of keyboard shortcuts that let you quickly construct queries. The table below
describes the keyboard commands:
For more information, see Build Query
.
Query Builder Dialog Boxes
Query Builder includes a number of dialog boxes to assist you in building and customizing your query.
Option Description
Delete Removes the table from the SQL Diagram Pane, and the SQL
Statement.
Title Font Specifies the table title font for this diagram.
Column Font Specifies the column font for this diagram.
Background Color Specifies the table background color for this diagram.
Select Star Selects every column in the table.
Select None Deselects every column in the table.
Bring to Front Moves the table to the top layer of the diagram.
Properties Opens the Table Properties dialog box
.
Keyboard Command Location Description
ESCAPE SQL Diagram Pane Breaks off a join.
F5 Query Builder Refreshes screen and runs Schema
Change Detection. In a CREATE VIEW,
this key adds the new view to the Table
Tree Pane.
CTRL A SQL Diagram Pane Selects all tables and joins in the
current diagram.
F1 Query builder and application Obtains context sensitive Help.
Dialog Box Description
Statement Properties Specifies general properties in an individual Query Builder session.
Table Properties
Specifies column selection and alias names for a table or view.
Column Properties
Specifies column functionality within SELECT and CREATE VIEW
statements.

TOOLS > QUERY BUILDER
EMBARCADERO TECHNOLOGIES > BOOKNAMEVARIABLE 786
For more information, see Build Query.
Statement Properties
The Statement Properties dialog box lets you customize properties in an individual Query Builder session. For
example, you can set options to limit the number of rows returned in a query to save execution time, or turn off the
auto join function to manually control all joins for an individual query. The table below describes the options and
functionality of the Statement Properties dialog box.

TOOLS > QUERY BUILDER
EMBARCADERO TECHNOLOGIES > BOOKNAMEVARIABLE 787
NOTE: If you set options while Query Builder is running, Rapid SQL displays a warning indicating that
you are about to change options or properties.
For more information, see Completing the Statement Properties Dialog Box
.
Interface
Element
Option Description Default
Code Generation Generate Use
Database
statement
Adds a line of SQL code indicating
which database or instance is used in
the statement.
Selected
Generate owner
names
Adds a line of SQL code showing the
table owner name as part of the query.
Selected
Include Row
Count limits
Includes the output row limit set in the
Execution settings.
Selected
Execution Max Row Count in
Results Set
Sets row count limits to build and check
a query without congesting server
processes when a query executes.
1000 rows
General Show Column
Data types in
Query Diagram
Lets Query Builder reveal the data type
in each column for tables in the SQL
Diagram Pane.
Not selected
Confirm on Item
delete
Lets Query Builder open a Confirm
Delete dialog box when an item is
deleted.
NOTE: Clearing this function can result
in unexpected changes to your query
diagram and statement.
Selected
Auto populate
views
Lets Query Builder automatically
populate views.
Not selected
Auto Join Require Indexes Joins indexed columns automatically,
and requires indexed columns for joins.
Selected
Require same
data type
Automatically joins columns with the
same data type.
Selected
Syntax Checker Automatic Syntax
Check
Lets Query Builder check syntax every
time an execute statement, refresh or
copy statement begins.
Selected
Run Automatically Lets Query Builder automatically detect
like names and data types and create
joins for multiple tables.
Selected
Display Columns Font Lets you set the font, font style, size,
and color of column fonts.
Available
Title Font Lets you set the font, font style, size,
and color of table/view title fonts.
Available
Table Color Lets you set the background color of
your tables in the SQL Diagram Pane.
Available
TOOLS > QUERY BUILDER
EMBARCADERO TECHNOLOGIES > BOOKNAMEVARIABLE 788
Completing the Statement Properties Dialog Box
To complete the Statement Properties dialog box, do the following:
1 On the Query Builder menu, click Statement Properties.
OR
In the SQL Diagram Pane, right-click, and then click Statement Properties.
2 Set options.
3 Click OK.
Query Builder saves the options.
For more information, see Build Query
.
Table Properties
The Tables Properties dialog box lets you set parameters for tables or views in your SQL Diagram. The table below
describes the options and functionality on the Table Properties dialog box.
For more information, see Completing the Table Properties Dialog Box
.
Completing the Table Properties Dialog Box
To complete the Table Properties dialog box, do the following:
1 Double click the target table or view title bar.
OR
Right-click target table or view, and then click Properties.
2 If you only want to hide or display columns in your table, click the arrow button on the table title bar.
3 You can also edit view properties from the Table Properties dialog box.
4 Click OK.
Query Builder saves the changes.
For more information, see Build Query
.
Option Description
Table Alias Creates an alias name for your table.
Show Datatypes Shows or hides the datatype for every column in the target table.
Displayed Columns Displays columns visible in the SQL Diagram.
Hidden Columns Displays columns hidden in the SQL Diagram.
Hide All Moves all non selected columns in the table to the Hidden
Columns window.
Display All Moves all columns in the table to the Displayed Columns window.
Right Arrow Moves a target file from Displayed Columns to Hidden Columns.
Left Arrow Moves a target file from Hidden Columns to Displayed Columns.

TOOLS > QUERY BUILDER
EMBARCADERO TECHNOLOGIES > BOOKNAMEVARIABLE 789
Column Properties
The Column Properties dialog box lets you set properties for individual columns in your SELECT or CREATE VIEW
statements. You can set aggregate functions and create an alias for an individual column.
The Column Properties dialog box is not available for INSERT, UPDATE or DELETE statements.
The table below describes the options and functions Columns Properties dialog box:
Completing the Column Properties Dialog Box
To complete the Column Properties dialog box, do the following:
1 On the SQL Statement Tree, double-click target column.
2 Select options.
3 Click OK.
For more information, see Build Query
.
Interface Element Description
Tables/Views Displays all tables and views in the SQL Diagram Pane.
Aggregate Specifies aggregate options for the target column.
AVG - An average is taken for a column with an int or numeric
datatype.
COUNT - Returns the number of rows which contain data for the
target column.
MAX - Returns the highest number in a row in the column.
MIN - Returns the lowest number in a row in the column.
SUM - Returns the sum of the target column in all rows which
contain data. This function is only operable on int or numeric
datatypes.
Alias Displays the alias name for the target column. Lets you type the
name of the alias.
NOTE: Query Builder displays the results of an aggregate column
without a column name unless you create an alias for that column.
Available Columns Displays all available columns in the target table or view.
Selected Columns Displays all selected columns in the target table or view. To create
an aggregate function or alias for a different column, select target
column, select an aggregate function, and then type the name of
the alias.
Select All Moves all columns in the Available Columns box to the Selected
Columns box.
Clear All Moves all columns in the Selected Columns box to the Available
Columns box.
Right Arrow Moves target column in the Available Columns box to the Selected
Columns box.
Left Arrow Moves target column in the Selected Columns box to the Available
Columns box.
Select List Statement Displays the current query.

TOOLS > QUERY BUILDER
EMBARCADERO TECHNOLOGIES > BOOKNAMEVARIABLE 790
Join Properties
Query Builder lets you edit joins with the Join editor. You can edit join parameters in a SELECT, UPDATE, DELETE,
and CREATE VIEW Statement.
The table below describes the options and functionality on the Join dialog box.
NOTE: For IBM DB2 UDB for Linux, Unix, and Windows servers, there is an additional join object in the
SQL Statement Tree. The Join On node displays join relations between columns in IBM DB2 UDB
for Linux, Unix, and Windows tables and views.
Completing the Join Dialog Box
To complete the Join dialog box, do the following:
1 In the SQL Diagram Pane, right-click the target join, and then click Properties.
OR
In the SQL Diagram Pane, double-click the target join.
OR
On the SQL Statement Tree, expand the Where and And nodes, and then double-click the target join.
2 Select options.
3 Click OK.
For more information, see Build Query
.
Using Query Builder
Query Builder provides a visual display of your queries as you construct them. You can run Query Builder against any
registered datasource in Rapid SQL. Query Builder lets you build five separate types of queries simultaneously:
•
SELECT
• INSERT
• UPDATE
• DELETE
• CREATE VIEW
Option Description
From Table Column The primary column in the join.
To Table Column The secondary column in the join.
Select the join relation
operator
Click the target join operator. If it is not equals, the operator
displays on the join in the SQL Diagram Pane.
Join Type: Inner Click to make the join an inner join. Aggregates are only available
for inner joins.
Join Type: Left Outer Click to make the join a left outer join.
Join Type: Right Outer Click to make the join a right outer join.

TOOLS > QUERY BUILDER
EMBARCADERO TECHNOLOGIES > BOOKNAMEVARIABLE 791
You can execute a SELECT statement from Query Builder. To execute an INSERT, UPDATE, DELETE, and CREATE
VIEW statement, copy them to an ISQL Editor. You can also copy the statements to the clipboard for later use in the
ISQL Editor. Query Builder also lets you save a statement at any time so that you can open them later for editing or
execution.
Rapid SQL lets you open Query Builder with multiple tables
or views with the same or different owners. If you open
tables or views with different owners, Query Builder displays “All Owners” in the Owner drop-down list. You can start
multiple Query Builder sessions from Rapid SQL. You can use different tables and views for each query. You can also
toggle back and forth among each of the queries.
You can save and reopen queries in Query Builder. Query Builder automatically checks for changes in your database
or instance between the time you save the query and the time you reopen it with the Schema Change detection
component.
Query Builder is integrated with Data Editor
so you can edit data in real time and then continue to build your query with
the new information embedded in the query.
Using Query Builder
To use Query Builder, do the following:
•
Select an instance or database
• Select a statement.
• Select a table(s) or view(s).
• Select a column or columns.
NOTE: You can start Query Builder directly from a table or view which automatically selects the instance
or database which contains that table or view.
1 On the Tools menu, click Query Builder.
OR
On the Datasource Explorer, expand the Database or Schema node, click Tables, and then on the Command
Menu, click Build Query.
OR
On the Tools tool bar, click Build Query.
OR
On the Explorer, expand Tables, right-click the target table(s), and then click Build Query.
OR
On the Explorer, expand Views, right-click the target view(s), and then click Build Query.
Rapid SQL opens Query Builder.
Selecting a Database
To create an SQL statement, first select an instance or database.
NOTE: You can start Query Builder directly from a table or view which automatically selects the database
which contains that table or view.

TOOLS > QUERY BUILDER
EMBARCADERO TECHNOLOGIES > BOOKNAMEVARIABLE 792
If you are working with Microsoft SQL Server or Sybase ASE, Query Builder provides two drop-down lists. The first
drop-down list displays all available databases for the target server. The second drop-down list displays owners.
If you are working with Oracle or IBM DB2 UDB for Linux, Unix, and Windows the first drop-down list is unavailable.
NOTE: You can start Query Builder directly from a table or view which automatically selects the database
which contains that table or view.
1Start Query Builder.
2 In the database drop-down list, click the target instance or database.
3 In the owners drop-down list, select the appropriate owner.
Query Builder is ready for Statement selection.
4 To select different instances or databases while Query Builder is running, on the Tables/Views Tab, in the
database drop-down list, click the target instance or database.
Rapid SQL clears the current query and displays a warning prompt.
5 To save the current query, click Yes.
Rapid SQL opens the Save As dialog box.
6 To continue without saving, click No.
Rapid SQL clears the SQL Diagram Pane and SQL Statement Pane.
For more information on saving queries in Query Builder, see Saving and Reopening Queries
.
Selecting a Statement
Query Builder lets you build SELECT, INSERT, UPDATE, DELETE, and CREATE VIEW queries simultaneously.
To select a statement, do the following:
1 On the Query Builder tool bar, click the statement drop-down list, and then click the target statement type.
OR
In the SQL Diagram Pane, right-click, and then click the target statement type.
For more information, see Using Query Builder
.
Selecting Tables and Views
To build a query, open one or more tables or views in the SQL Diagram Pane. You can use different tables or views for
each type of query.
TIP: For multiple tables: Press SHIFT+click for adjacent tables or CTRL+click for nonadjacent tables.
You can also drag the bounding line with your pointer to select multiple tables.

TOOLS > QUERY BUILDER
EMBARCADERO TECHNOLOGIES > BOOKNAMEVARIABLE 793
To select a Table or View, do the following:
1 In the Tables/Views Tab, drag the target table or view to the Diagram Pane.
OR
In the Tables/Views Tab, click target table or view and then, on the Query Builder tool bar, click Add.
OR
In the Tables/Views Tab, right-click target table or view, and then click Add.
Query Builder displays the target table(s) and view(s) in the SQL Diagram Pane.
For more information, see Using Query Builder
.
Selecting Columns
You must select at least one column to build a query. Query Builder displays columns in each table in the SQL
Diagram window. By default, Query Builder exposes every column in a table. You can select the columns you want to
use for your query. Query Builder orders them, in your statement, in the select order.
Query Builder lets you select columns in the:
• SQL Diagram Pane
.
• SQL Statement Tree
.
You can select an individual column or all columns. Query Builder orders them, in your statement, in the select order.
You can reorder columns after you set them in your diagram or statement.
For more information, see:
Selecting Columns in the SQL Diagram Pane
Selecting Columns in the SQL Statement Tree
Selecting All Columns
Selecting Columns in the SQL Diagram Pane
To select a column in the SQL Diagram Pane, do the following:
1 Select the check box to the left of the target column name.
For more information, see Using Query Builder
.
Selecting Columns in the SQL Statement Tree
Query Builder lets you select and set individual properties using the Selected Column Properties Dialog Box.
For more information, see Using Query Builder
.
Selecting All Columns
Query Builder uses columns in statements based on the order of selection. When you select all columns, Query
Builder displays the columns in the order they appear in the table.
NOTE: Query Builder lets you select all columns in single or multiple tables.
TOOLS > QUERY BUILDER
EMBARCADERO TECHNOLOGIES > BOOKNAMEVARIABLE 794
To select all columns, do the following:
1 On the Query Builder menu, click Select Star.
OR
On the SQL Statement Tree, or in the SQL Diagram, right-click target table, or any of a group of selected
tables, and then click Select Star.
For more information, see Using Query Builder
.
Building a Query
Query Builder lets you build five different queries, which you can run separately or simultaneously, depending on your
needs. The table below describes these queries:
To build a Query, do the following:
•
Select an instance or database.
• Select a Statement.
• Select your table(s) or view(s)
.
• Select your columns
.
NOTE: You can start Query Builder directly from a table or view which automatically selects the database
which contains that table or view.
Query Builder lets you build queries that include both tables
and views in the SQL Diagram Pane for SELECT and
CREATE VIEW statements. For the INSERT, UPDATE, and DELETE statements, use one or the other object, but you
cannot use both.
Once you make your selections, you can edit, restructure, and streamline your query. Query Builder offers many
options for streamlining your queries.
For more information, see:
Working with Tables and Views in the SQL Diagram Pane
Working with Columns in the SQL Diagram Pane
Joins
Creating a Clause using the SQL Statement Tree
Moving Tables and Columns in the SQL Statement Tree
Subqueries
Query Type Description
SELECT Lets you create, manipulate and execute SELECT Statements for tables
and views.
INSERT
Lets you create and manipulate INSERT Statements for tables.
UPDATE
Lets you create and manipulate UPDATE Statements for tables.
DELETE
Lets you create and manipulate DELETE Statements for tables.
CREATE VIEW
Lets you create and manipulate CREATE VIEW Statements for tables and
views.

TOOLS > QUERY BUILDER
EMBARCADERO TECHNOLOGIES > BOOKNAMEVARIABLE 795
Aliases
Building a SELECT Statement
Query Builder lets you construct and execute simple-to-complex SELECT statements using data from any table or
view. You can also create and edit joins
for SELECT statements. Query Builder can check your query and warn you if
there are syntax errors with the Syntax Checker
.
To build a SELECT statement, do the following:
1 On the Tools menu, click Query Builder.
OR
On the Datasource Explorer, expand the Database or Schema node, click Tables, and then on the Command
menu, click Build Query.
OR
On the Tools tool bar, click Query Builder.
OR
On the Explorer, expand Tables, right-click the target table(s), and then click Build Query.
OR
On the Explorer, expand Views, right-click the target view(s), and then click Build Query.
Rapid SQL opens Query Builder.
2 In the statement drop-down list, click SELECT.
3 In the Table Tree Pane, select target table(s) or view(s) and move them to the SQL Diagram Pane.
4 In the target table or view, click target column(s), or click Select Star to select every column.
5 To check syntax, click Check.
6 To copy the statement, click Copy.
7 To execute the statement, click Execute.
Copying a SELECT Statement from the SQL Statement Pane
To copy any part of a statement from the SQL Statement Pane, do the following:
1 Open Query Builder, then begin a new SELECT statement.
OR
Open an existing SELECT statement.
2 In the SQL Statement Pane, select all, or the target portion of the statement.
3 On the Query Builder tool bar, click Copy.
OR
In the SQL Statement Pane, right-click, and then click Copy.
Query Builder makes the target statement portion available on the clipboard.
For more information, see Building a Query
.

TOOLS > QUERY BUILDER
EMBARCADERO TECHNOLOGIES > BOOKNAMEVARIABLE 796
Building an INSERT Statement
Query Builder lets you construct and execute simple-to-complex INSERT statements using data from any table. To
execute an INSERT statement, copy it to an ISQL Editor. You can also copy the statement to the clipboard for later
use in the ISQL Editor. Query Builder also lets you save
your statement at any time so that you can open it later for
editing or execution.
Building an INSERT Statement
To build an INSERT Statement, do the following:
1 On the Tools menu, click Query Builder.
OR
On the Datasource Explorer, expand the Database or Schema node, click Tables, and then on the Command
menu, click Build Query.
OR
On the Tools tool bar, click Query Builder.
OR
On the Explorer, expand Tables, right-click the target table(s), and then click Build Query.
OR
On the Explorer, expand Views, right-click the target view(s), and then click Build Query.
Rapid SQL opens Query Builder.
2 In the statement drop-down list, click INSERT.
3 In the Table Tree Pane, select target table, and move it to the SQL Diagram Pane.
4 In the target table, click target column(s).
Copying an INSERT Statement from the SQL Statement Pane
To copy any part of a statement from the SQL Statement Pane, do the following:
1 Open Query Builder, then begin a new INSERT statement.
OR
Open an existing INSERT statement.
2 In the SQL Statement Pane, select all, or the target portion of the statement.
3 On the Query Builder tool bar, click Copy.
OR
In the SQL Statement Pane, right-click, and then click Copy.
Query Builder makes the target statement portion available on the clipboard.
For more information, see Building a Query
.
Building an UPDATE Statement
Query Builder lets you construct and execute simple-to-complex UPDATE statement using data from any table. To
execute an UPDATE statement, copy it to an ISQL Editor. You can also copy the statement to the clipboard for later
use in the ISQL Editor. Query Builder also lets you save your statement at any time so that you can open it later for
editing or execution.

TOOLS > QUERY BUILDER
EMBARCADERO TECHNOLOGIES > BOOKNAMEVARIABLE 797
Building an UPDATE Statement
To build an UPDATE statement, do the following:
1 On the Tools menu, click Query Builder.
OR
On the Datasource Explorer, expand the Database or Schema node, click Tables, and then on the Command
menu, click Build Query.
OR
On the Tools tool bar, click Query Builder.
OR
On the Explorer, expand Tables, right-click the target table(s), and then click Build Query.
OR
On the Explorer, expand Views, right-click the target view(s), and then click Build Query.
Rapid SQL opens Query Builder.
2 In the statement drop-down list, click UPDATE.
3 In the Table Tree Pane, select target table and move it to the SQL Diagram Pane.
4 In the target table, click target column(s).
Copying an UPDATE Statement from the SQL Statement Pane
To copy any part of a statement from the SQL Statement Pane, do the following:
1 Open Query Builder, then begin a new UPDATE statement.
OR
Open an existing UPDATE statement.
2 In the SQL Statement Pane, select all, or the target portion of the statement.
3 On the Query Builder tool bar, click Copy.
OR
In the SQL Statement Pane, right-click, and then click Copy.
Query Builder makes the target statement portion available on the clipboard.
For more information, see Building a Query
.
Building a DELETE Statement
Query Builder lets you construct DELETE statements using data from any table. Query Builder displays a Confirmation
Option Message box when you create a DELETE statement. You can set the Statement Properties
dialog box to
display or hide this message when creating a DELETE statement.
To execute a DELETE statement, copy it to an ISQL Editor. You can also copy the statement to the clipboard for later
use in the ISQL Editor. Query Builder also lets you save
your statement at any time so that you can open it later for
editing or execution.

TOOLS > QUERY BUILDER
EMBARCADERO TECHNOLOGIES > BOOKNAMEVARIABLE 798
Building a DELETE Statement
To build a DELETE statement, do the following:
1 On the Tools menu, click Query Builder.
OR
On the Datasource Explorer, expand the Database or Schema node, click Tables, and then on the Command
menu, click Build Query.
OR
On the Tools tool bar, click Query Builder.
OR
On the Explorer, expand Tables, right-click the target table(s), and then click Build Query.
OR
On the Explorer, expand Views, right-click the target view(s), and then click Build Query.
Rapid SQL opens Query Builder.
2 In the statement drop-down list, click DELETE.
3 In the Table Tree Pane, select target table, and move it to the SQL Diagram Pane.
Copying a DELETE Statement from the SQL Statement Pane
To copy any part of a statement from the SQL Statement Pane, do the following:
1 Open Query Builder, then begin a new DELETE statement.
OR
Open an existing DELETE statement.
2 In the SQL Statement Pane, select all, or the target portion of the statement.
3 On the Query Builder tool bar, click Copy.
OR
In the SQL Statement Pane, right-click, and then click Copy.
Query Builder makes the target statement portion available on the clipboard.
For more information, see Building a Query
.
Building a CREATE VIEW Statement
Query Builder lets you construct and execute simple-to-complex CREATE VIEW statements using data from any table
or view. You can also copy the statement to the clipboard for later use in the ISQL Editor. Query Builder also lets you
save
your statement at any time so that you can open it later for editing or execution.

TOOLS > QUERY BUILDER
EMBARCADERO TECHNOLOGIES > BOOKNAMEVARIABLE 799
To build a CREATE VIEW statement, do the following:
1 On the Tools menu, click Query Builder.
OR
On the Datasource Explorer, expand the Database or Schema node, click Tables, and on the Command
menu, click Build Query.
OR
On the Tools tool bar, click Query Builder.
OR
On the Explorer, expand Tables, right-click the target table(s), and then click Build Query.
OR
On the Explorer, expand Views, right-click the target view(s), and then click Build Query.
Rapid SQL opens Query Builder.
2 In the statement drop-down list, click CREATE VIEW.
3 In the Table Tree Pane, select target table or view and move it to the SQL Diagram Pane.
NOTE: Query Builder supports multiple tables and views in a CREATE VIEW statement.
4 In the target table or view, click the target column(s).
5 To check syntax, click Check.
6 To copy the statement, click Copy.
7 To execute the CREATE VIEW Statement, click the SQL Statement Pane, and then press any key.
Query Builder opens the Edit SQL dialog box.
8 Click OK.
CAUTION: If you have used this method previously, and you selected the Please do not show me this dialog
again check box, on the Edit SQL dialog box, Query Builder does not display the Edit SQL dialog
box. It pastes your statement directly to the ISQL Editor.
Rapid SQL opens the ISQL Editor.
9 In the ISQL Editor, on the line, CREATE VIEW NAME AS, replace the word NAME with a name for your view.
10 On the tool bar, click Execute.
Rapid SQL executes the CREATE VIEW query.
11 To close the Editor, click Close.
Rapid SQL opens the ISQL Editor save message.
12 Click No.
Rapid SQL returns to Query Builder.

TOOLS > QUERY BUILDER
EMBARCADERO TECHNOLOGIES > BOOKNAMEVARIABLE 800
13 To add the view to the table tree, on the Query Builder menu, click Refresh.
OR
Press F5.
Query Builder adds the view to the Table Tree Pane.
Copying a CREATE VIEW Statement from the SQL Statement Pane
To copy any part of a statement from the SQL Statement Pane, do the following:
1 Open Query Builder, then begin a new CREATE VIEW statement.
OR
Open an existing CREATE VIEW statement.
2 In the SQL Statement Pane, select all, or the target portion of the statement.
3 On the Query Builder tool bar, click Copy.
OR
In the SQL Statement Pane, right-click, and then click Copy.
Query Builder makes the target statement portion available on the clipboard.
For more information, see Building a Query
.
Working with Tables and Views in the SQL Diagram Pane
Query Builder lets you organize your tables and views in the SQL Diagram Pane. You can also customize
appearance, change visual aspects, and adjust layout while continuing to manufacture a query. You can resize or
customize a selected table and view, or move them to the front or back of the diagram. The key symbol indicates a
column that is indexed or participates in a primary key.
• Selecting and Deselecting Tables and Views
• Moving Tables and Views
• Moving Additional Tables and Views to the SQL Diagram Pane
• Deleting Tables and Views
Query Builder can automatically dictate a layout in the SQL Diagram Pane using the Auto Layout button.
Selecting and Deselecting Tables and Views
You can select tables and views in the SQL Diagram Pane. You can make changes to more than one table or view
simultaneously by selecting multiple tables or views.
To select and deselect Tables and Views, do the following:
1 To select a table, click the table title bar.
2 To select more than one table, drag the pointer to enclose all target tables with the bounding line.
Query Builder selects all target tables; none have handles.
3 To select all tables, in the SQL Diagram, right-click, and then click Select All.
4 Click the SQL Diagram workspace to deselect all tables.

TOOLS > QUERY BUILDER
EMBARCADERO TECHNOLOGIES > BOOKNAMEVARIABLE 801
For more information, see Working with Tables and Views.
Moving Tables and Views
Query Builder lets you move tables and views in the SQL Diagram Pane. It also moves selections and joins with the
tables and views.
To move Tables and Views, do the following:
1 To move a table or view, drag the title bar to the target location.
NOTE: If you select more than one table or view, Query Builder moves all selected tables and views and
any joins with the pointer.
For more information, see Working with Tables and Views
.
Moving Additional Tables and Views to the SQL Diagram Pane
Query Builder sets tables and views in your statement in the order that you move them to the SQL Diagram Pane.
Tables and views moved into the Diagram Pane appear first in your statement, including all joins connecting that table.
To change the order of tables, move them back into the Table Tree and re-select them in the order in which you would
like to join them.
Moving Additional Tables or Views
To move additional tables or views, do the following:
1 Click the target table or view and drag it to the Diagram Pane.
For multiple tables or views: Use SHIFT+click for adjacent tables or views or use CTRL+click for nonadjacent
tables and views.
OR
Click the target table or view, and then on the Query Builder tool bar, click Add.
OR
Right-click the target table or view, and then click Add.
For multiple tables or views: Use SHIFT+click for adjacent tables or views or use CTRL+click for non-adjacent
tables and views.
NOTE: Moving a table or view to the SQL Diagram Pane is not available while a query is executing.
For more information, see Working with Tables and Views
.

TOOLS > QUERY BUILDER
EMBARCADERO TECHNOLOGIES > BOOKNAMEVARIABLE 802
Deleting a Table or View
To delete tables from the SQL Diagram Pane, do the following:
1 Right-click the target table or view, and then click Delete.
OR
In the SQL Diagram, click target table or view, and then on the Query Builder tool bar, click Delete.
OR
In the SQL Diagram, right-click the target table or view, and then click Delete.
Query Builder deletes the table from the SQL Diagram, SQL Statement, and SQL Statement Tree.
For more information, see Working with Tables and Views
.
Working with Columns in the SQL Diagram Pane
You can customize queries by selecting and deselecting columns in the SQL Diagram Pane. You can customize
columns using the Selected Column Properties dialog box.
Selecting and Deselecting Columns
You can select and deselect columns in the SQL Diagram. Query Builder lets you select and deselect individual
columns or all columns. Your results reflect the order of selection. You can change the order of columns after you set
them in your diagram or statement.
TIP: You can also select, re-order and deselect columns in the SQL Statement Tree
.
Selecting Individual Columns
To select individual columns, do the following:
1 To select a column, in the SQL Diagram, select the check box to the left of the target column name.
Deselecting Individual Columns
To deselect individual columns, do the following:
1 To deselect a column, in the SQL Diagram, select the check box to the left of the target column name.
NOTE: When you clear the columns, Query Builder deletes the columns and any sub clauses from the
SQL Statement Pane and SQL Statement Tree.
Selecting All Columns
To select all columns, do the following:
1 On the Query Builder menu, click Select Star.
OR
On the SQL Statement Tree, or in the SQL Diagram, right-click target table, or any of a group of selected
tables, and then click Select Star.
NOTE: Query Builder uses columns in statements based on the order of selection. When you select all
columns, Query Builder displays the columns as they appear in the table.

TOOLS > QUERY BUILDER
EMBARCADERO TECHNOLOGIES > BOOKNAMEVARIABLE 803
Deselecting All Columns
To deselect all columns, do the following:
1 On the Query Builder menu, click Select None.
OR
On the SQL Statement Tree, or in the SQL Diagram, right-click target table, or any of a group of selected
tables, and then click Select None.
Query Builder adds or removes selected columns from the SQL Statement Tree and the SQL Statement Pane.
Selecting ALL or DISTINCT Columns
Selecting ALL or DISTINCT columns is a way to filter data in your query. Selecting ALL columns means all rows
displays results in the grid regardless of duplication in non-primary key columns. The DISTINCT column function is a
query process that limits duplicate data in non-primary key columns to rows with the first iteration of any identical data.
For example, if there are two identical addresses for different last names, and the column with a primary key does not
participate in the query, only the row with the first instance of the address displays in the results of the query.
To select ALL or DISTINCT columns, do the following:
1 In the Statement Tree pane, right-click the ALL or DISTINCT node, click Properties, and then select the ALL or
DISTINCT check box.
OR
In the Statement Tree pane, double click the ALL or DISTINCT node. Query Builder toggles to the opposite
function.
NOTE: You can change between ALL or DISTINCT at any time prior to executing or copying a query.
Joins
Joins let you distill the information in your database to a usable form. Query Builder lets you create, manipulate, and
edit work with joins without requiring knowledge of the underlying SQL code. Query Builder lets you create any type of
join for SELECT and CREATE VIEW Statements. You can create self joins for UPDATE or DELETE Statements. You
cannot create joins for INSERT Statements.
Query Builder includes four types of joins. The table below describes joins and their availability in Query Builder:
Join Statement Availability Description
Inner Join SELECT, CREATE VIEW,
DELETE, UPDATE
Returns data from the joined tables that match
the query’s join criteria and set a relation
between tables or views. Inner joins return
results where the join condition is true.
Left Outer Join
SELECT, CREATE VIEW Returns all data from the primary table and data
from the joined tables that match the query’s join
criteria and set a join relation operator from a
column in a primary table or view to a column in
a secondary table or view.

TOOLS > QUERY BUILDER
EMBARCADERO TECHNOLOGIES > BOOKNAMEVARIABLE 804
In the Query Builder SQL Diagram Pane, you can create, edit, and delete joins. You can edit joins in the Join dialog
box.
Joins are the way you can filter data in relational databases. Query Builder lets you change the types of joins
between
tables, views and columns. It is important that you have some knowledge of the data in your tables, and the datatypes
for each column. This information helps you frame a better query, and filter your data for maximum effect.
For more information, see Joins.
Inner Joins
Inner joins are the most common types of joins for SELECT statements. An inner join returns information from two
tables where the relation between two target columns is true for both columns.
The join operand determines the relation results, for example, if the join operand is equals, then identical data, in two
columns, is the only result. If the join operand is not equals, Query Builder only returns data that is different between
two columns.
For example, if you have an inner join matching territory numbers between the table dbo.Managers and dbo.Clients,
running the query returns all Managers and Clients with matching territory numbers:
Query Builder displays the following results from this query with an inner join
NOTE: Query Builder displays results of columns in the order of selection. You can reorder columns by
deselecting and selecting in the SQL Diagram Pane, the Selected Columns Properties dialog box,
or the SQL Statement Tree.
For more information, see Joins
.
Left Outer Joins
Left outer joins bring back a different data set than inner joins. Left outer joins retrieve all the data in columns selected
from the primary table, and only matching data from the joined or secondary table.
For example, in the same pair of tables, a left inner join from dbo.Managers to dbo.Clients, where the columns Current
Territory and Territory are joined, displays different results.
NOTE: There is one additional manager who does not have a client, but because a left outer join includes
all data from selected columns in the primary table, the last entry in the illustration is displayed.
For more information, see Joins
.
Right Outer Joins
Right outer joins return opposite results from a left outer join. In a right outer join, you are asking for all the information
in the secondary table’s column, and the join operator’s matching information from the primary table.
Right Outer Join SELECT, CREATE VIEW Returns all data from the primary table and data
from the joined tables that match the query’s join
criteria and set a join relation operator from a
column in a secondary table or view to a column
in a primary table or view.
Self Join
SELECT, CREATE VIEW Set a relation between columns in the same
table.
Join Statement Availability Description

TOOLS > QUERY BUILDER
EMBARCADERO TECHNOLOGIES > BOOKNAMEVARIABLE 805
For example, in the same set of data we used in the left outer join example, a right outer join returns all clients from
dbo.Client, and only managers who match territory numbers, in the joined column.
NOTE: The managers are the same as the first, inner join, but a right outer join returns the additional
clients without matching managers.
For more information, see Joins.
Self Joins
A self join is a join within a single table. Query Builder lets you return specific information from a single table using a
self join.
For example, in our example table, there is a column for the number of clients and another column with the goal client
total for a territory.
A self join can ascertain which managers are reaching their quota. Notice that the join relation operator in the example
is greater than or equal to, which shows managers exceeding quota as well.
For more information, see Joins
.
Adding and Deleting a Join in the SQL Diagram Pane
Query Builder lets you add and delete joins. This method adds a WHERE clause in your query. You can join different
tables and or views in a SELECT or CREATE VIEW statement.
Adding a Join
To add a Join, do the following:
1 In the SQL Diagram Pane, drag the target column to the second column.
Query Builder displays both a line joining the two columns in the SQL Diagram Pane and the corresponding SQL
code in the SQL Statement Pane.
Removing a Join
Query Builder lets you remove joins from your query. Query Builder automatically deletes joins from the query in the
SQL Statement Pane, when you remove them from the SQL Diagram Pane.
To remove a join, do the following:
1 Click the target join, and then on the Query Builder tool bar, click Delete.
OR
Right-click the target join, and then click Delete.
Query Builder deletes the Join.
For more information, see Joins
.
Editing Joins
Query Builder lets you edit joins with the Join editor. You can edit join parameters in a SELECT, UPDATE, DELETE,
and CREATE VIEW Statement.

TOOLS > QUERY BUILDER
EMBARCADERO TECHNOLOGIES > BOOKNAMEVARIABLE 806
The table below describes the options in the Join dialog box:
Completing the Join Dialog Box
1 In the SQL Diagram Pane, right-click the target join, and then click Properties.
OR
In the SQL Diagram Pane, double-click the target join.
OR
On the SQL Statement Tree, expand the Where and And nodes, and then double-click the target join.
Query Builder opens the Join dialog box.
NOTE: For IBM DB2 UDB for Linux, Unix, and Windows servers, there is an additional join object in the
SQL Statement Tree. The Join On node displays join relations between columns in IBM DB2 UDB
for Linux, Unix, and Windows tables and views.
Changing a Join Color
Query Builder lets you change the color at a join in the SQL Diagram Pane. Complex statements using many tables
and multiple joins can be easier to view if joins have different colors.
To change the color of a join, do the following:
1 Right-click the target join, and then click Color.
Query Builder opens the Color dialog box.
2 In the Basic colors grid, click a target color
OR
Click Define Custom Colors, then create a custom color.
NOTE: Query Builder lets you save custom colors for the current color. Click Add to Custom Color to have
the option of using that color for your queries.
3 Click OK.
For more information, see Joins.
Option Description
From Table Column The primary column in the join.
To Table Column The secondary column in the join.
Select the join relation
operator
Click the target join operator. If it is not equals, the operator
displays on the join in the SQL Diagram Pane.
Join Type: Inner Click to make the join an inner join. Aggregates are only available
for inner joins.
Join Type: Left Outer Click to make the join a left outer join.
Join Type: Right Outer Click to make the join a right outer join.

TOOLS > QUERY BUILDER
EMBARCADERO TECHNOLOGIES > BOOKNAMEVARIABLE 807
Auto Layout
The Auto Layout function displays tables and views in the SQL Diagram Pane. It makes the best use of the available
area in the SQL Diagram Pane by placing your tables and views in the most efficient manner. If the automatic join
function is on, Query Builder displays all joins between columns in your diagram. Query Builder lets you run the
automatic layout function any time you have tables or views in the SQL Diagram Pane.
Using Auto Layout
To use Auto Layout, do the following:
1 On the Query Builder menu, click Auto Layout.
OR
On the Query Builder tool bar, click Auto Layout.
OR
In the SQL Diagram Pane, right-click, and then click Auto Layout.
Query Builder organizes your tables in the SQL Diagram Pane.
Auto Joins
Query Builder includes an automatic join function that displays joins between selected tables and views in the SQL
Diagram Pane. The Auto Join function seeks columns with the same name and data type. You can set global
automatic join parameters in the Rapid SQL Options Editor. You can use the Statement Properties Editor
to set local
join parameters for the current Query Builder session without changing the global parameters.
Using Auto Join
To use Auto Join, do the following:
1 On the Query Builder menu, click Auto Join.
OR
On the Query Builder tool bar, click Auto Join.
OR
In the SQL Diagram Pane, right-click, and then click Auto Join.
Query Builder joins columns in the SQL Diagram Pane.
Creating a Clause Using the SQL Statement Tree
Query Builder lets you build more detailed WHERE, ORDER BY, GROUP BY, and HAVING clauses using the SQL
Statement Tree. Query Builder lets you add clauses to SELECT, UPDATE, DELETE, and CREATE VIEW statements.
NOTE: Query Builder does not support clauses for INSERT statements.
The table below describes these clauses:
Clause Description
WHERE Limits rows in the query.
ORDER BY
Orders the results of the query to a target column.
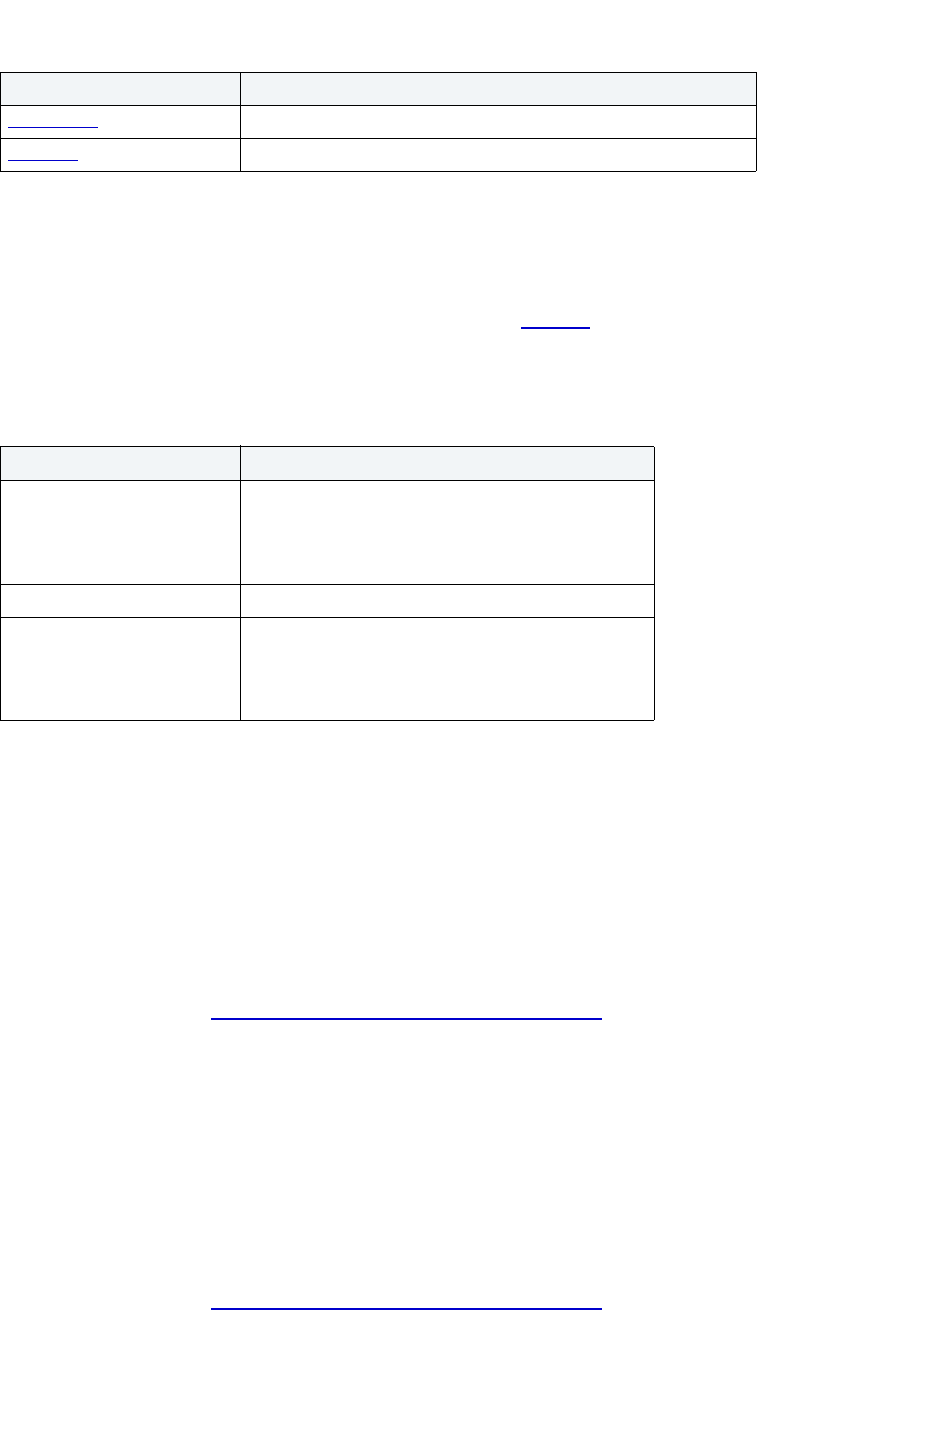
TOOLS > QUERY BUILDER
EMBARCADERO TECHNOLOGIES > BOOKNAMEVARIABLE 808
Creating a WHERE Clause
Query Builder lets you create a WHERE clause from the SQL Statement Tree which automatically displays in your
query.
NOTE: Any additional WHERE clauses are displayed as HAVING
clauses.
The table below describes the options and functionality on the Where dialog box.
NOTE: Query Builder does not display clause phrases created from the SQL Statement Tree in the SQL
Diagram Pane.
Creating a WHERE Clause
To Create a WHERE clause, do the following:
1 Click the WHERE node, and then on the Query Builder tool bar, click New.
OR
Right-click the WHERE node, and then click New.
For more information, see Creating a Clause using the SQL Statement Tree
.
Deleting a WHERE Clause
To delete a WHERE clause, do the following:
1 Expand the AND node, and then on the Query Builder tool bar, click Delete.
OR
Expand the AND node, right-click target column and then click Delete.
Query Builder deletes the target clause and removes it from the SQL Statement Pane.
For more information, see Creating a Clause using the SQL Statement Tree
.
GROUP BY Groups target columns in the query.
HAVING
Filters out groups of data.
Option Description
Operand (Left) Lets you click the target column for the first part of
your WHERE clause.
NOTE: Query Builder lists every column in all tables
in the SQL Diagram in the Operand lists.
Operator Lets you select the target operator.
Operand (Right) Lets you click the target column for the second part of
your WHERE clause.
Query Builder automatically writes the query
language in the Statement option box.
Clause Description

TOOLS > QUERY BUILDER
EMBARCADERO TECHNOLOGIES > BOOKNAMEVARIABLE 809
Creating an AND Clause in a WHERE Clause
Query Builder lets you add an AND clause from the SQL Statement Tree which automatically displays in your query.
The table below describes the options and functionality on the Where dialog box.
To open the Where dialog box, do the following:
1 Click the AND node, and then on the Query Builder tool bar, click New.
OR
Expand the WHERE node, right-click the AND node, and then click New.
For more information, see Creating a Clause using the SQL Statement Tree
.
Deleting an AND Clause
To delete an AND clause, do the following:
1 Expand the AND node, click target column, and then on the Query Builder tool bar, click Delete.
OR
Expand the AND node, click target column, and then on the keyboard press DELETE.
OR
Expand the AND node, right-click the target column, and then click Delete.
Query Builder deletes the target clause and removes it from the SQL Statement Pane.
For more information, see Creating a Clause using the SQL Statement Tree
.
Inserting an AND or OR Clause
Query Builder lets you insert an AND or an OR WHERE clause from the SQL Statement Tree which automatically
displays in your query. Query Builder lets you insert AND or OR clauses at any appropriate point in the SQL Statement
Tree.
The table below describes the options and functionality on the Where dialog box.
Option Description
Operand (Left) Lets you click the target column for the first part of
your WHERE clause.
Operator Lets you select the target operator.
Operand (Right) Lets you click the target column for the second part of
your WHERE clause.
Query Builder automatically writes the query
language in the Statement option box.
New Button Click to clear your selections but remain in the Where
dialog box.
Query Builder adds another AND clause to your
query.
TOOLS > QUERY BUILDER
EMBARCADERO TECHNOLOGIES > BOOKNAMEVARIABLE 810
To insert an AND or OR Clause, do the following:
1 On the SQL Statement Tree, expand the WHERE node, right-click the target AND node, then click Insert, and
then click And or Or.
For more information, see Creating a Clause using the SQL Statement Tree
.
Deleting an OR Clause
To delete an OR clause, do the following:
1 Expand the OR node, and then on the Query Builder tool bar, click Delete.
OR
Expand the OR node, right-click the target column and then click Delete.
Query Builder deletes the target clause and removes it from the SQL Statement Pane.
For more information, see Creating a Clause using the SQL Statement Tree
.
Creating an ORDER BY Clause
Query Builder lets you create an ORDER BY clause from the SQL Statement Tree which automatically displays in
your query.
The table below describes the Order By Columns dialog box.
Option Description
Operand (Left) Lets you click the target column for the first part of
your WHERE clause.
Operator Lets you select the target operator.
Operand (Right) Lets you click the target column for the second part of
your WHERE clause.
Query Builder automatically writes the query
language in the Statement option box.
New Button Click to clear your selections but remain in the Where
dialog box.
Query Builder adds another AND clause to your
query.
Option Description
Available Columns Select target column(s) and click the right arrow.
Query Builder moves target column from the
Available Columns list to the Order By Columns list.
NOTE: Query Builder sorts query results based on
the order that columns are placed in the ORDER BY
clause.

TOOLS > QUERY BUILDER
EMBARCADERO TECHNOLOGIES > BOOKNAMEVARIABLE 811
To open the Order By Columns dialog box, do the following:
1 On the SQL Statement Tree, click the ORDER BY node, and then on the Query Builder tool bar, click
Properties.
OR
On the SQL Statement Tree, right-click the ORDER BY node, and then click Properties.
For more information, see Creating a Clause using the SQL Statement Tree
.
Changing the Sort Order in an ORDER BY Clause
To quickly change the sort order of a column in a query, do the following:
1 On the SQL Statement Tree, expand the ORDER BY node, and then double-click the target column.
OR
On the SQL Statement Tree, expand the ORDER BY node, then right-click the target column, and then click
Properties.
Query Builder opens the Order dialog box.
2 Click the target sort order, and then click OK.
Query Builder appends the Order By clause for target column with the appropriate sort order in the SQL
Statement Pane.
For more information, see Creating a Clause using the SQL Statement Tree.
Deleting an ORDER BY Clause
To delete an ORDER BY clause, do the following:
1 Expand the ORDER BY node, and then on the Query Builder tool bar, click Delete.
OR
Expand the ORDER BY node, right-click the target column, and then click Delete.
Query Builder deletes the target clause and removes it from the SQL Statement Pane.
For more information, see Creating a Clause using the SQL Statement Tree
.
Creating a GROUP BY Clause
The table below describes the options and functionality on the Group By Columns dialog box.
Order Lets you select the target sort order.
ASC - Ascending
DESC - Descending
Query Builder displays the SQL language in the
Order By Statement box.
Option Description

TOOLS > QUERY BUILDER
EMBARCADERO TECHNOLOGIES > BOOKNAMEVARIABLE 812
Creating a GROUP BY Clause
To create a GROUP BY clause from the SQL Statement Tree which automatically displays in your query, do the
following:
1 On the SQL Statement Tree, double-click the GROUP BY node.
OR
On the SQL Statement Tree, right-click the GROUP BY node, and then click New.
Query Builder adds all the selected columns in your table(s) to the GROUP BY node in the SQL Statement Tree,
and to the appropriate location in the SQL Statement Pane.
2 On the GROUP BY node, double-click any column.
OR
On the GROUP BY node, click any column, then on the Query Builder menu, click New.
OR
On the GROUP BY node, right-click any column, then click Properties.
For more information, see Creating a Clause using the SQL Statement Tree
.
Deleting a GROUP BY Clause
To delete a GROUP BY clause, do the following:
1 On the SQL Statement Treeexpand the GROUP BY node, and then on the Query Builder tool bar, click Delete.
OR
On the SQL Statement TreeExpand the GROUP BY node, right-click the target column, and then click Delete.
Query Builder deletes the target clause and removes it from the SQL Statement Pane.
For more information, see Creating a Clause using the SQL Statement Tree
.
Option Description
Selected Columns Select target column(s) and click the right arrow. Or
click the Select All button. Query Builder moves
target column from the Selected Columns list to the
Group By Columns list.
NOTE: Query Builder sorts query results based on
the order that columns are placed in the ORDER BY
clause.
Clear All Button Click to move target column from the Group By
Columns list to the Selected Columns list.
Query Builder displays the SQL language in the
Group By Statement window.

TOOLS > QUERY BUILDER
EMBARCADERO TECHNOLOGIES > BOOKNAMEVARIABLE 813
Creating a HAVING Clause
A HAVING clause is a type of WHERE clause. It filters additional information from your tables. Query Builder lets you
create a HAVING clause from the SQL Statement Tree which automatically displays in your query. Query Builder lists
every column in all tables in the SQL Diagram in the Operand lists. Query Builder displays the datatype of a column in
the operand boxes.
The table below describes the options and functionality on the Having dialog box.
NOTE: Query Builder does not display clause phrases created from the SQL Statement Tree in the SQL
Diagram Pane.
To create a HAVING clause, do the following:
1 On the SQL Statement Tree, expand the HAVING node, and then expand the And node. If there is not a join
listed on the And node, double-click And. If there is a join listed, use the shortcut option below.
OR
On the SQL Statement Tree, right-click the HAVING node, and then click New.
For more information, see Creating a Clause using the SQL Statement Tree
.
Deleting a HAVING Clause
To delete a HAVING clause, do the following:
1 On the SQL Statement Treeexpand the HAVING node, and then on the Query Builder tool bar, click Delete.
OR
On the SQL Statement Tree expand the HAVING node, right-click the target column, and then click Delete.
Query Builder deletes the target clause and removes it from the SQL Statement Pane.
For more information, see Creating a Clause using the SQL Statement Tree
.
Changing Tables and Columns Location in the SQL Statement Tree
Query Builder lets you move tables and columns on the SQL Statement Tree by dragging them to new locations. You
can move columns from the AND and OR nodes to an AND or OR node on the WHERE and HAVING clause nodes.
Query Builder changes the query in the SQL Statement Pane to match each move. Query Builder moves tables or
columns you are dragging below target table or column.
Option Description
Operand (Left) Lets you click the target column for the first part of
your HAVING clause.
Operator Lets you select the target operator.
Operand (Right) Lets you click the target column for the second part of
your HAVING clause.
Query Builder automatically writes the query
language in the Statement option box.
New Button Click to clear your selections but remain in the
Having dialog box.
Query Builder adds another AND clause to your
query.
TOOLS > QUERY BUILDER
EMBARCADERO TECHNOLOGIES > BOOKNAMEVARIABLE 814
To move a table or column in the SQL Statement Tree, do the following:
1 Expand target node, then drag the target table or column to a new location.
Query Builder makes the appropriate change in the query in the SQL Statement Pane.
NOTE: Query Builder lets you select multiple tables or columns.
2 To move a table or column to the bottom of a node, drag it to the target node.
Query Builder displays the target table or column at the bottom of target node.
For more information, see Creating a Clause using the SQL Statement Tree
.
Subqueries
Query Builder lets you build subqueries for SELECT and CREATE VIEW statements in the WHERE or HAVING
clause. The table below describes the options available for a subquery in Query Builder:
The table below describes the options and functionality on the Where or Having dialog boxes.
To use the WHERE
and HAVING dialog boxes to create subqueries, do the following:
1 On the SQL Statement Tree, expand the Where or Having node, and then expand the And node. If there is not
a join listed on the And node, double-click And. If there is a join listed, use the shortcut option below.
OR
On the SQL Statement Tree, right-click the Where or Having node, and then click New.
For more information, see Creating a Clause using the SQL Statement Tree
.
Operand Location Description
EXISTS Left operand Specifies data that exists in a column.
NOT
EXISTS
Left operand Specifies data that does not exist in a column.
ANY Right operand Specifies data satisfying the operator parameters.
ALL Right operand Specifies data satisfying the operator parameters.
SELECT Right operand Specifies data satisfying the operator parameters.
Option Description
Operand (Left) Lets you click the target column for the first part of
your clause.
Operator Lets you select the target operator.
Operand (Right) Lets you click the target column for the second part of
your clause.
Query Builder displays the working subquery in the
Statement window.
Subquery Paste or type the SUBQUERY statement.
TOOLS > QUERY BUILDER
EMBARCADERO TECHNOLOGIES > BOOKNAMEVARIABLE 815
Syntax Checker
The Syntax Checker scans SQL statements for errors. You can check your syntax at any time while you are fashioning
a query, or a Procedure or Function. Query Builder can automatically run a syntax check to validate your query when
you are executing or copying a statement.
NOTE: Query Builder lets you continue with your query even if there are errors detected in the syntax.
Using the Syntax Checker
The table below describes the possible syntax errors the Query Builder Syntax Checker tool displays, in order:
Saving and Reopening Queries
You can save and reopen queries in Query Builder. Saving a query saves the SQL Diagram, SQL Statement, and
Query Builder Explorer view. Query Builder automatically checks for changes in your database or instance between
the time you save the query and the time you reopen it. Query Builder prompts you to save any time you try to close
Query Builder, or any time you attempt quitting Rapid SQL.
Query Builder runs Schema Change detection any time you set a query to execute, refresh the data, or open a saved
query.
Rapid SQL lets you open multiple saved queries simultaneously.
Saving Queries
To save a query using standard Save and Save As functions, do the following:
1 On the File menu, click Save or Save As.
OR
On the Main tool bar, click Save As.
Rapid SQL opens the Save As dialog box.
Error Description
Does the query contain
duplicate aliases
?
Query Builder returns an error message when it
detects duplicate aliases.
If the query has a HAVING
clause, is there a GROUP BY
clause?
Query Builder returns an error message when it
detects a HAVING clause without a GROUP BY
clause.
If there are aggregates, or a
GROUP BY
clause, are all
columns in one or the other?
Query Builder returns an error message when it
detects an aggregate, or a GROUP BY clause
without all columns in one or the other.
Are there joins
against
non-indexed columns, or
columns not participating in a
primary key?
Query Builder returns a warning when it detects a
join against a non-indexed column, or a column not
participating in a primary key.
Are there joins between
different datatypes?
Query Builder returns a warning when it detects a
join between different datatypes.
Are there cross-products in
the query?
Query Builder returns a warning when it detects a
cross-product in the query.

TOOLS > QUERY BUILDER
EMBARCADERO TECHNOLOGIES > BOOKNAMEVARIABLE 816
2 In the File name box, type the name of the query.
NOTE: By default, the product appends the.qbl extension to Query Builder files. If there is more than one
Query Builder session in progress when you save, the file is further appended with an integer, for
example.qbl2.
TIP: Rapid SQL lets you save data in text (*.txt) and XML (*.xml) file formats.
3 Click OK.
Rapid SQL saves the file and closes the Save As dialog box.
Reopening Queries
You can open a query using standard Open functions. Query Builder displays the Query Builder diagram, statement
and Query Builder Explorer Pane and it checks the instance or database for schema changes.
The Query Builder Schema Change Detection component checks for:
• Renamed or dropped tables referenced in the query. Renamed tables that have been renamed are considered
dropped.
• Renamed or dropped columns referenced in the query. Renamed columns are considered dropped and inserted.
• Columns
added or reordered in tables referenced in the query.
If Query Builder detects a change, it opens the Schema Change Detected dialog box. The dialog box displays details
of changes to your schema.
Query Builder opens an ISQL Editor with the last saved versions of the SQL statement.
Using Data Editor with Query Builder
SELECT statements. Rapid SQL lets you open multiple Data Editor sessions so that you can continue to change your
data until you find the best match for your query.
CAUTION: Data Editor is a real-time editor. Changes in your data using Data Editor are permanent.
Opening the Data Editor from Query Builder
To open the Data Editor from Query Builder, do the following:
1 On the Tools menu, click Query Builder.
OR
On the Datasource Explorer, expand the Database or Schema node, click Tables, and then on the Command
menu, click Build Query.
OR
On the Tools tool bar, click Query Builder.
OR
On the Explorer, expand Tables, right-click the target table(s), and then click Build Query.
OR
On the Explorer, expand Views, right-click the target view(s), and then click Build Query.
Rapid SQL opens Query Builder.

TOOLS > DATA EDITOR
EMBARCADERO TECHNOLOGIES > BOOKNAMEVARIABLE 817
2 Select a database or instance.
3 Select a table
.
4 Select a column
, or columns.
5 On the Query Builder menu, click Edit Data.
OR
On the Query Builder tool bar, click Edit Data.
Rapid SQL opens Data Editor.
For more information on using the Data Editor, see Using Data Editor
.
Data Editor
The Edit Data function opens the Data Editor. You can use the Data Editor to edit your tables in real-time. The Data
Editor supports all editable datatypes and is an alternative way to add, edit, or delete data from your tables.
NOTE: You can use Data Editor within Query Builder
to edit data in tables while you create SELECT
statements. You can open multiple Data Editor sessions so that you can continue to change your
data until you find the best match query.
The Data Editor includes a Data Editor Filter
that lets you select the columns in your table that you want to edit. You
must select at least one column to use the Data Editor. The Data Editor Filter is not available for the Query Builder.
For more information, see:
Data Editor Design
Using Data Editor
Data Editor Design
The Data Editor includes the following components:
•
Edit Window
• ISQL Window
• Tool Bar
• Data Editor Filter
• Date/Time Format Builder
• Using Data Editor
Data Editor Edit Window
Data Editor displays all the information in the target table in the Data Editor Edit Window. You can edit data directly in
this window.
For more information, see:
ISQL Window
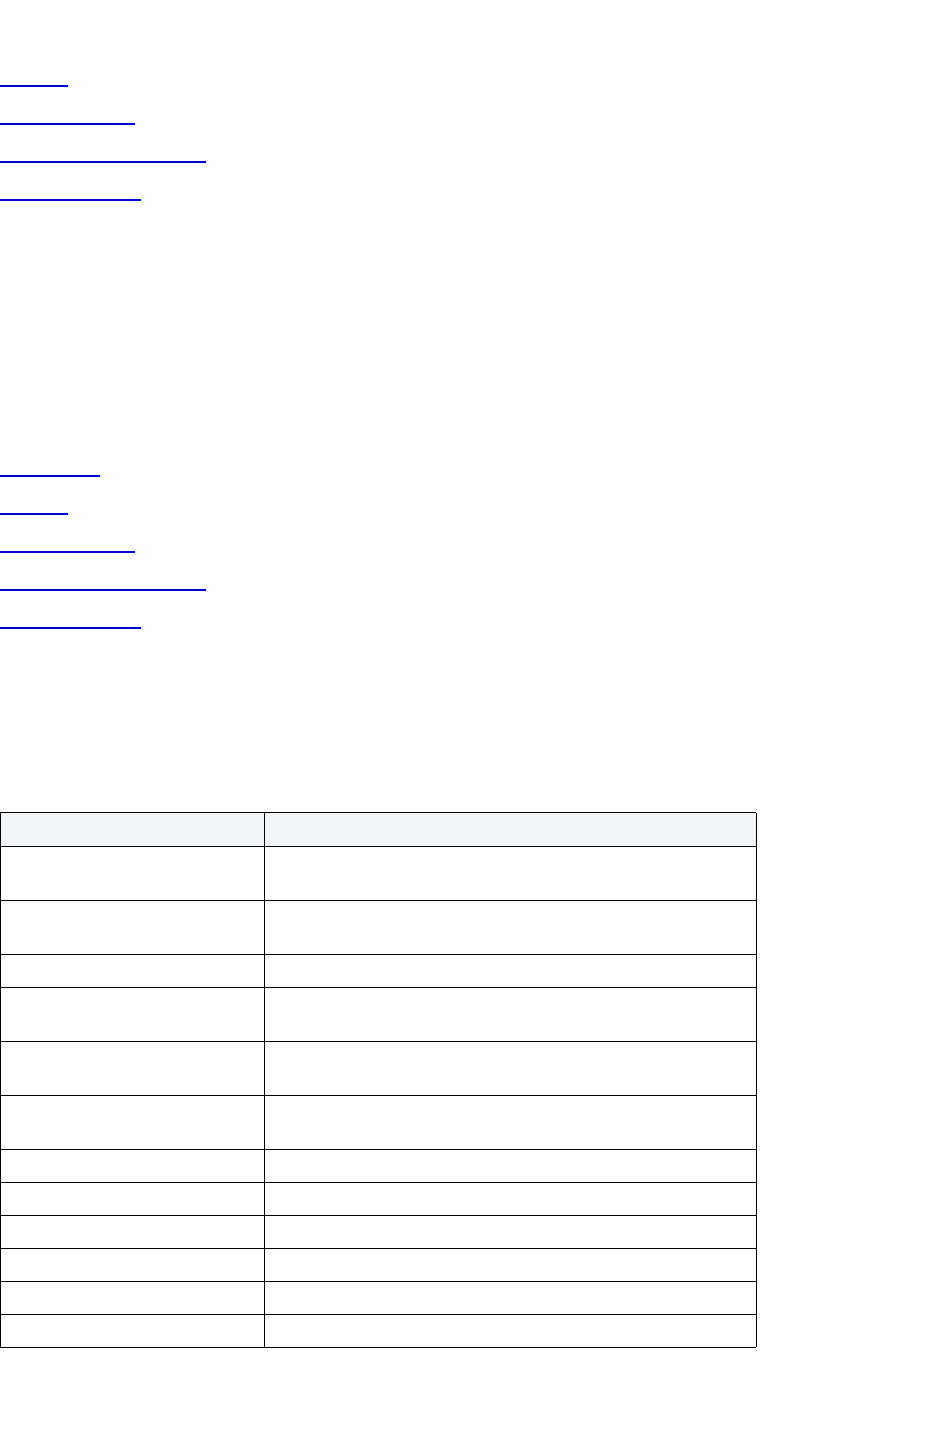
TOOLS > DATA EDITOR
EMBARCADERO TECHNOLOGIES > BOOKNAMEVARIABLE 818
Tool Bar
Data Editor Filter
Date/Time Format Builder
Using Data Editor
Data Editor ISQL Window
The Data Editor ISQL Window displays the active SQL statement, which uses the data from the target table.
When appropriate, Data Editor displays a History Tab. The History Tab displays all SQL Statements created in the
current session. If there is an error, Data Editor displays an Error Tab. The Error Tab details any errors in data entry
encountered during execution.
For more information, see:
Edit Window
Tool Bar
Data Editor Filter
Date/Time Format Builder
Using Data Editor
Data Editor Tool Bar
The Data Editor tool bar lets you access commonly used features.
The table below describes the function of each Data Editor tool.
Description Function
Stop Button. Stops loading data to the Data Editor. Data Editor displays rows
up to the stopping point.
List of options for the target
table.
Displays the editing mode for the target table.
Execute SQL button Executes the current SQL statement for the target table.
Insert Record button Inserts new record for the target table. New records display at
the end of the table.
Save Current Row button Saves data in the current selected row. Data Editor prompts to
save when you attempt to leave a row in Live mode.
Remove Data button Removes data in target row. Data Editor displays an optional
prompt.
Clear SQL Text button Clears SQL text from the SQL Statement Pane.
Undo button Undoes the most recent operation.
Redo button Redoes the most recent operation.
First Record button Moves to the first record in the target table.
Last Record button Moves to the final record in the target table.
Filter Data button Filters table using the target cell as the filter parameter.

TOOLS > DATA EDITOR
EMBARCADERO TECHNOLOGIES > BOOKNAMEVARIABLE 819
For more information, see:
Edit Window
ISQL Window
Data Editor Filter
Date/Time Format Builder
Using Data Editor
Data Editor Filter
The Data Editor Filter displays the columns of a target table and the corresponding SELECT SQL Statement. You can
select columns from the filter for selective data editing.
For more information, see:
Edit Window
ISQL Window
Tool Bar
Date/Time Format Builder
Using Data Editor
Using Data Editor
Data Editor lets you edit data in your tables with any editable datatype without leaving the parent application. Data
Editor lets you use your new data immediately.
CAUTION: Data Editor is a real-time editor. Changes in your data using Data Editor are permanent.
The table below describes the functions and options of the Data Editor:
Refresh button Reloads data for target table
Calendar button Sets correct format for target date/time cell. Enables the
Calendar window.
Date/Time Format Builder button Opens the Date/Time Format Builder dialog box
.
Date/Time Format Undo button. Undoes the last date/time format display.
Date/Time Format Redo button. Redoes the last date/time format display.
Close button Closes and exits Data Editor.
Description Function

TOOLS > DATA EDITOR
EMBARCADERO TECHNOLOGIES > BOOKNAMEVARIABLE 820
NOTE: You can also use the Data Editor to edit date and time functions in a table.
NOTE: If you make an incorrect edit in a cell, Data Editor displays the error on the Error Tab of the ISQL
Editor. Data Editor does not incorporate this error(s) in data into the table. Data Editor saves any
changes in data prior to the error message.
CAUTION: Data Editor is a real-time editor. Changes in your data using Data Editor are permanent.
For more information, see:
Edit Window
ISQL Window
Tool Bar
Data Editor Filter
Date/Time Format Builder
Editing Date and Time Functions
The Data Editor lets you edit date and time functions in a table. Data Editor uses a calendar tool to guarantee accurate
input for date and time data. You can also change the display of date and time using the Date/Time Format Builder
.
For more information, see:
Calendar Button
Date/Time Format Builder
Date/Time Format Builder
The Date/Time Format Builder lets you customize your date/time display. The Data Editor uses this format to display
your dates and times. You control how the Data Editor displays the dates and time by using predefined formats, or by
customizing a format to fit your needs.
The Data Editor uses the default date/time format of your Operating System. If you do not make any global changes in
Rapid SQL, the Date/Time Format Builder displays dates and times using the default formats of your operating
system.If you make changes to dates and times in the Data Editor, Rapid SQL commits the changes in the format
used by the database.
NOTE: The changes you make using the Date/Time Format Builder do not affect the way your database
stores dates and times.
Option Description
Live Edits data one row at a time. You must execute when you leave the
row.
Batch Edits data in multiple rows before executing.
TOOLS > DATA EDITOR
EMBARCADERO TECHNOLOGIES > BOOKNAMEVARIABLE 821
Editing the Date/Time Display
You can edit the date/time display on a global, table, or column level. The table below describes the different ways you
can edit your date/time format display:
NOTE: Date/Time formats changed on a table or column level are valid for that session only.
Editing Date/Time Globally
You can use the Options Editor to make global changes to your date/time display in the Data Editor. When you change
the date/time format, using the Options Editor, the Data Editor displays all dates and times in the global manner. To
change the date/time display for a particular session, see Editing Grid Date/Time Format
or Editing Column Date/Time
Format.
To edit the date and time globally, do the following:
1 On the File menu, click Options.
OR
On the Main tool bar, click Options.
Rapid SQL opens the Options Editor.
2 On the Options Editor, click the Data Editor Tab.
3 On the Data Editor Tab, click ...
Rapid SQL opens the Date/Time Format Builder dialog box.
4 On the Date/Time Format Builder dialog box, click the Date/Time Format list, and then click the target
predefined date/time format.
5 To customize the date/time format to your specifications, click Customize.
Rapid SQL opens the Date/Time Format Builder dialog box.
6 On the Date/Time Format Builder dialog box, select the appropriate Date/Time Format Options:
Option Description Access
Global Lets you make global changes to the Data Editor date
display.
Options Editor
Grid
Lets you make changes to the date display of the entire
Data Editor grid for that session only.
Data Editor grid
Column
Lets you make changes to the date display of a single
column in the Data Editor for that session only.
Data Editor column
Option Description
Date/Time Format Displays the predefined Date/Time format.
Day Format Lets you choose the day display.
Separator Lets you choose the display separator between the day, month,
and year.
Month Format Lets you choose the month display.
Year Format Lets you choose the year display.
Date Order Lets you choose the date order display.
Hour Format Lets you choose the hour display.

TOOLS > DATA EDITOR
EMBARCADERO TECHNOLOGIES > BOOKNAMEVARIABLE 822
7 When you have finished selecting the Date/Time format options, click OK.
Rapid SQL accepts the date/time format changes and closes the Date/Time Format Builder dialog box.
8 On the Options Editor, select the appropriate Default Date/Time Format options:
9 Click OK.
Rapid SQL accepts the Default Date/Time Format changes and closes the Options Editor.
NOTE: To use a different format for a particular session, change the date/time at the session level.
Editing Grid Date/Time
You can change the date/time display for a particular session when working in the Data Editor. The Data Editor does
not maintain the format changes once you close your session. To make this display permanent, use the Editing Global
Date/Time Format.
To edit the grid date and time, do the following:
1 On the Datasource Explorer, select the target table.
2 Right-click the table, and then click Edit Data.
Rapid SQL opens the Data Editor
.
3 On the Data Editor tool bar, click Date/Time Format Builder.
Rapid SQL opens the Date/Time Format Builder.
4 On the Date/Time Format Builder, click the Date/Time Format list, and then click the target predefined
date/time format.
5 To customize the date/time format to your specifications, click Customize.
Rapid SQL opens the Date/Time Format Builder dialog box.
6 On the Date/Time Format Builder dialog box, select the appropriate Date/Time Format Options:
Minute Lets you choose the minute display.
Sec Format Lets you choose the second display.
AM/PM Lets you choose the AM/PM display.
Date/Time Order Lets you choose the date/time order display.
Format Display Displays the current format.
Sample Displays a sample of the current format.
Option Description
Use Calendar Control as
default
If selected, Rapid SQL uses the Calendar Control window.
Two-digit year system setting
warning
If selected, Rapid SQL sends a warning when you use a two-digit
year system setting.
Option Description
Date/Time Format Displays the predefined Date/Time format.
Option Description
TOOLS > DATA EDITOR
EMBARCADERO TECHNOLOGIES > BOOKNAMEVARIABLE 823
7 When you have finished selecting the Date/Time format options, click OK.
Rapid SQL accepts the date/time format changes and closes the Date/Time Format Builder dialog box.
• To undo changes, on the Data Editor tool bar, click Undo Change.
• To redo changes, on the Data Editor tool bar, click Redo Change.
NOTE: Date/Time formats changed on a table level are valid for that session only.
Editing Column Date/Time
You can change the date/time display for a particular column when working in the Data Editor. The Data Editor does
not maintain the format changes once you close your session. To change the format for the entire grid, see Editing
Grid Date/Time Format. To make this display permanent, Editing Global Date/Time Format.
To edit the column date and time, do the following:
1 On the Datasource Explorer, select the target table.
2 Right-click the table, and click Edit Data.
Rapid SQL opens the Data Editor
.
3 On the Data Editor, click the column header to select the column.
4 Right-click the column and click Format.
Rapid SQL opens the Date/Time Format Builder.
5 On the Date/Time Format Builder dialog box, click the Date/Time Format list, and then click the target
predefined date/time format.
6 To customize the date/time format to your specifications, click Customize.
Rapid SQL opens the Date/Time Format Builder dialog box.
Day Format Lets you choose the day display.
Separator Lets you choose the display separator between the day, month,
and year.
Month Format Lets you choose the month display.
Year Format Lets you choose the year display.
Date Order Lets you choose the date order display.
Hour Format Lets you choose the hour display.
Minute Lets you choose the minute display.
Sec Format Lets you choose the second display.
AM/PM Lets you choose the AM/PM display.
Date/Time Order Lets you choose the date/time order display.
Format Display Displays the current format.
Sample Displays a sample of the current format.
Option Description
TOOLS > CODE GENERATION FACILITY
EMBARCADERO TECHNOLOGIES > BOOKNAMEVARIABLE 824
7 On the Date/Time Format Builder dialog box, select the appropriate Date/Time Format Options:
8 When you have finished selecting the Date/Time format options, click OK.
Rapid SQL accepts the date/time format changes and closes the Date/Time Format Builder dialog box.
• To undo changes, on the Data Editor tool bar, click Undo Format.
• To redo changes, on the Data Editor tool bar, click Redo Format.
NOTE: Date/Time formats changed on a column level are valid for that session only.
Page Setup
The table below describes the options and functionality on the Page Setup dialog box:
Code Generation Facility
The Rapid SQL Code Generation Facility offers a quick way to generate DML statements for tables and views. The
Code Generation Facility provides an efficient way to establish and enforce coding standards within the application by
generating code with standardized formatting. The Code Generation Facility also lets you:
Option Description
Date/Time Format Displays the predefined Date/Time format.
Day Format Lets you choose the day display.
Separator Lets you choose the display separator between the day, month,
and year.
Month Format Lets you choose the month display.
Year Format Lets you choose the year display.
Date Order Lets you choose the date order display.
Hour Format Lets you choose the hour display.
Minute Lets you choose the minute display.
Sec Format Lets you choose the second display.
AM/PM Lets you choose the AM/PM display.
Date/Time Order Lets you choose the date/time order display.
Format Display Displays the current format.
Sample Displays a sample of the current format.
Option Functionality
Margins Lets you select the size of the left, right, top, and
bottom margins.
Titles and Gridlines Lets you select options.
Preview Displays how the table will appear when printed.
Page Order Lets you specify when to print columns and rows.
Center on Page Lets you select how table floats on the page.

TOOLS > CODE GENERATION FACILITY
EMBARCADERO TECHNOLOGIES > BOOKNAMEVARIABLE 825
• Create packages and procedures for Oracle.
• Create procedures for IBM DB2 UDB, Microsoft SQL Server, and Sybase ASE.
NOTE: The Code Generation Facility can generate procedures for IBM DB2 UDB that are based on
tables but not views.
The table below describes the options and functionality on the Embarcadero Code Generator:
Option Description
Datasource List To change the default datasource, click the list and then click a new
datasource.
NOTE: If you are not connected to the target datasource, click the
Connect button to establish a connection.
The current datasource, and database and datasource user name
where applicable, are preselected when you open Code Generation
Facility.
Database List Lets you click the list and then click a target database.
Owner List Lets you click the list and then click the new owner.
Tables Option Button Click this option to see a list of the tables in the scroll box. In the scroll
box, click the target table to be used as a code generation base.
NOTE: The list of objects corresponds to the selected datasource
owner schema. If there are no tables in the target schema, the list will
be empty.
Views Option Button Click this option to see a list of the views in the scroll box. In the scroll
box, click the target view to be used as a code generation base.
NOTE: The list of objects corresponds to the selected datasource
owner schema. If there are no views in the target schema, the list will
be empty.
Select 1 or More Where
Clause
In the grid, select the check boxes that correspond to the target
where clauses.
NOTE: Columns of primary keys are preselected.
Select 1 or More Output
Columns
In the grid, select the check boxes that correspond to the target
output columns.
NOTE: All existing columns are preselected.
Provide and Output File
Name
In the box, enter the file name in the File box or click the Browse
button to locate the output file.
Open Select to open the file after the procedure runs.
Execute Immediately Select to execute the file immediately.
Generate To generate an SQL statement for tables, click the Object Type list
and then click the object type.
NOTE: If you are generating an SQL statement for Views, you only
have the Select option.
Grant Execute to If you are a DBA or have DBA privileges, select the Users, Roles, and
Groups check boxes to grant execute privileges.

TOOLS > IMPORT DATA
EMBARCADERO TECHNOLOGIES > BOOKNAMEVARIABLE 826
Using the Code Generation Facility
1 On the Tools menu, click Code Generation Facility.
OR
On the Tools toolbar, click Code Generation Facility.
Rapid SQL opens the Embarcadero Code Generator dialog box.
Import Data
It is often necessary to import data into database tables from an external source. Developers commonly need to bring
sample test data into a database to assist with Use Case scenarios. These scenarios may simulate particular data
retrievals where segments of the data are preferred over performing a full data load. Business Analysts often acquire
spreadsheets from outside sources. It is helpful to them to load this data into tables to perform more in-depth queries
and pull meaningful data to make informed decisions.
To leverage the power of Microsoft Excel, database users may prefer to pull data from the database and load it into
spreadsheet. Once using manipulations like Average, Aggregate, Row Count, or simple additions or deletions have
been used on the data, the need remains to import this massaged data back into the database. Additionally, once the
data is placed back in the database, recurring reporting and documentation are easily accomplished.
Rapid SQL’s Import Data tool eliminates the time-consuming, manual process of working with data. The Import Data
Wizard lets you pull data from a text file or a Microsoft Excel spreadsheet.
Important Notes
None
Completing the Import Data Wizard
1 On the Tools menu, click Import Data.
Rapid SQL opens the first panel
of the Import Data Wizard.
2 On the first panel of the Wizard, specify the location of the file and enter the catalogue, schema (owner), and
table into which the data will be imported.
3 Click Next.
4 On the second panel of the Wizard, select the character delimited type for the columns in the data file – Tab,
Semi colon, Comma, Space, or Other (Custom – Tilde, Ampersand etc.)
5 You can select the option that the first row of the data contains field names.
6 Click Next.
7 On the third panel of the Wizard, you can preview and confirm the data format. You can also use the custom
mapping to match columns in the table.
8 If you need to make any changes, click Back to scroll back to the appropriate panels of the wizard to make your
corrections.
9 Click Finish.
Rapid SQL generates the Insert statements that can be saved as a *.sql file for re-use across several
datasources (versus simply loading the data directly into the database).
TOOLS > IMPORT DATA
EMBARCADERO TECHNOLOGIES > BOOKNAMEVARIABLE 827
Import Data Wizard - Panel 1
The table below describes the options and functionality on this panel of the Import Data Wizard:
For more information, see Import Data
.
Import Data Wizard - Panel 2 for Text Files
The table below describes the options and functionality on this panel of the Import Data Wizard:
For more information, see Import Data
.
Import Data Wizard - Panel 3 for Text Files
This panel of the Import Data Wizard lets you assign column names to fields. Column names in red indicate an invalid
mandatory column names. Blue columns are already used.
For more information, see Import Data
.
Import Data Wizard - Panel 2 for Excel Files
The table below describes the options and functionality on this panel of the Import Data Wizard:
Option Description
Specify the file to be used in
this data load operation.
Lets you type the file path or browse for the file.
Which table do you want to
load data into?
Lets you select the catalog, schema, and the table to create the
insert statements.
Option Description
What character delimited the
columns in the data file?
Lets you select the character delimited type for the columns in the
data file: Tab, Semicolon, Comma, Space, or Other (Custom –
Tilde, Ampersand etc.)
First Row Contains Field
Names
Select for the first row of the data to contain field names.
Option Description
The spreadsheet you have
selected contains more than
one worksheet. Which
worksheet contains the data
you wish to import?
Lets you select the worksheet to import.
Start Cell Lets you type the first cell of data to import.
End Cell Lets you type the last cell of data to import.
TOOLS > EMBARCADERO PRODUCTS
EMBARCADERO TECHNOLOGIES > BOOKNAMEVARIABLE 828
For more information, see Import Data.
Embarcadero Products
The Tools menu lists all installed Embarcadero Technologies products. This lets you toggle to or start another
Embarcadero product.
To open the Performance Center web client, do the following:
Code Workbench
The Code Workbench tool reduces the time needed for the most common day-to-day coding tasks. The Code
Workbench lets you:
• Enable table column auto lookup and population in the ISQL Window
.
• Define auto replacement expressions that can be used to quickly insert commonly used blocks of SQL syntax or
commands.
• Create customized code templates of blocks of code that you can add to scripts.
• Import and Export Code Workbench settings for client sharing purposes.
NOTE: No privileges are required to use the Code Workbench options.
Important Notes
When installing Rapid SQL 7.3 on a machine that already has Rapid SQL 7.3 or DBArtisan 7.3 or later, the Code
Workbench settings are not installed by default. This is to protect any modifications that have been made to the
current settings. To import the settings that are shipped with the latest release, select Tools, Code Workbench. Select
the Import Settings option, and then select C:\Program Files\Embarcadero\RapidSQL\codeworkbench.xml.
CAUTION: This will overwrite the current settings.
The table below describes the options and functionality on the Code Workbench dialog box.
First Row Contains Field
Names
Select to assign column names to fields in the grid.
Tab Option Description
Settings Enable Column Auto Lookup Lets you easily add columns to
ISQL Window queries without
having to type. The ISQL Window
auto-populates table columns.
Popup Delay Lets you specify setting how long
(in milliseconds) the editor should
wait before populating and
presenting the column list.
Option Description
TOOLS > CODE WORKBENCH
EMBARCADERO TECHNOLOGIES > BOOKNAMEVARIABLE 829
Common Tasks
Using Column Auto Lookup in the ISQL Window
Creating and Modifying Code Workbench Code Templates
Defining the Hot Key for the Code Templates Dialog Box
Using Code Templates in the ISQL Window
Creating and Modifying Code Workbench Auto Replace Shortcuts
Enable Auto Replacement Lets you define simple keystrokes
that will be automatically replaced
with predefined expressions when
some activation keyboard event is
performed (space, new line,
special character, etc.). This also
lets you define correction actions
for common misspellings or SQL
syntax coding errors.
Enable Code Templates When you press the defined hot
key in the ISQL Window, the
application will open the Code
Templates dialog box. You can
define the hot key in the Customize
Dialog Box.
Edit Hot Keys Lets you change the hot key for the
Code Templates dialog box. Opens
the Customize Dialog Box
.
Code Templates Add Opens the Edit Code Template
dialog box.
Edit Opens the Edit Code Template
dialog box.
Delete Click to delete the selected code
template.
Auto Replace Add Click to open the Edit Auto
Replace Expression dialog box.
Edit Click to open the Edit Auto
Replace Expression dialog box.
Clone Click to open the Edit Auto
Replace Expression dialog box.
Delete Click to delete the selected auto
replace expression.
Import Settings Click to import settings from a local
or network directory.
Export Settings Click to export your settings to a
local or network directory.
Restore Settings Click to restore the Code
Workbench settings to the original
settings.
Tab Option Description

TOOLS > CODE WORKBENCH
EMBARCADERO TECHNOLOGIES > BOOKNAMEVARIABLE 830
Using Code Workbench Auto Replace Shortcuts in the ISQL Window
Importing and Exporting Settings in Code Workbench
Code Workbench Tutorial
Code Workbench creates a personal toolbox of coding accessories for the ISQL Window. This tutorial will take you
through the steps of using the Code Workbench.
1Select Tools, and then Code Workbench.
2 On the Settings Tab keep defaults.
3 On the Auto Replace Tab, Code Workbench includes a set of Auto Replace entries.
4 Close the Code Workbench.
5Select File, New, and then SQL.
6In the ISQL Window, type a replace expression. For example, type beg.
The application displays begin.
1 For Microsoft SQL Server, connect to the Northwind database.
2 Confirm that the Northwind database is selected in the database list.
3Select File, New, and then SQL.
4 Type select * from dbo.Orders t1
5 On the next line type where t1.
The application displays a list of columns for the target table.
6 You can use your keyboard arrow keys or the mouse to select the column.
The application pastes the column name in the ISQL Window.
7Select File, New, and then SQL.
8 In the ISQL Window, open the Code Templates dialog box by pressing CTRL+SPACE.
9 Select the code template to be inserted into the ISQL window.
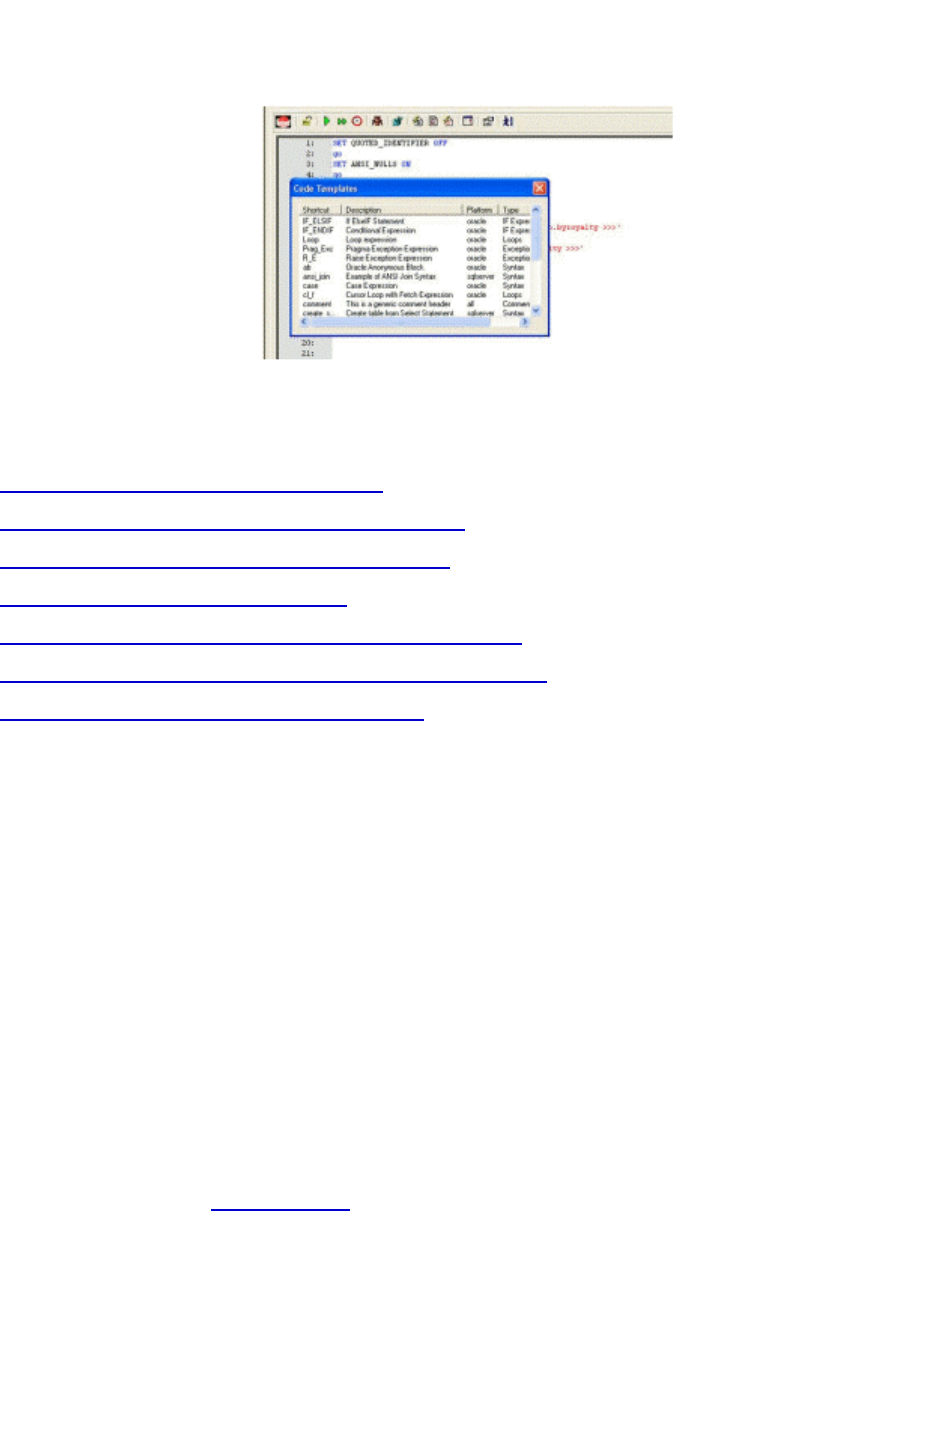
TOOLS > CODE WORKBENCH
EMBARCADERO TECHNOLOGIES > BOOKNAMEVARIABLE 831
The application pastes the code template into the ISQL Window.
Common Tasks
Using Column Auto Lookup in the ISQL Window
Creating and Modifying Code Workbench Code Templates
Defining the Hot Key for the Code Templates Dialog Box
Using Code Templates in the ISQL Window
Creating and Modifying Code Workbench Auto Replace Shortcuts
Using Code Workbench Auto Replace Shortcuts in the ISQL Window
Importing and Exporting Settings in Code Workbench
Using Column Auto Lookup in the ISQL Window
In the ISQL Window, when Enable Auto Replacement is selected on the Setting Tab, the application uses "dot
completion" auto population to display the list of columns for the target table.
1 For example, for Microsoft SQL Server, connect to the Northwind database.
2 Confirm that the Northwind database is selected in the database list.
3Select File, New, and then SQL.
4 Type select * from dbo.Orders t1
5 On the next line type where t1.
The application uses "dot completion" auto population to display the list of columns for the target table.
6 Use your keyboard arrow keys or the mouse to select the column.
The application pastes the column name in the ISQL Window.
For more information, see Code Workbench
.

TOOLS > CODE WORKBENCH
EMBARCADERO TECHNOLOGIES > BOOKNAMEVARIABLE 832
Creating and Modifying Code Workbench Code Templates
Code templates are complete code blocks that can be easily added to open windows or scripts with a few keystrokes.
Templates let you define standard comment blocks or add common exit and error handling routines to new or existing
objects. The Edit Code Template dialog box lets you modify an existing code template or create a new template.
TIP: When you Paste SQL, you cannot customize the actual script templates, but you can customize
code templates.
1Select Tools, Code Workbench.
2On the Code Template Tab, select Add.
The application opens the Edit Code Template dialog box.
3In Shortcut, type a new template name or select an existing template.
4In Description, type a description.
5In Platform assign the template to a specific DBMS platform. Groups and sorts in the Code Templates tab and
helps you browse available code templates from an open, editable window (ISQL, text, HTML, Java, etc.).
6In Type assign the template to a specific code type. You can type or select a type. Groups and sorts in the Code
Templates tab and helps you browse available code templates from an open, editable window (ISQL, text, HTML,
Java, etc.).
7 In the window type the template code.
8 Click OK.
Code Workbench creates the template and displays it on the Code Templates Tab.
For more information, see Code Workbench
.
Defining the Hot Key for the Code Templates Dialog Box
When you press the hot key in the ISQL Window, the application will open the Code Templates dialog box. You can
define the hot key for the Code Templates dialog box in the Customize Dialog Box.
1Select Tools, Code Workbench.
2On the Settings Tab, select Edit Hot Keys.
The application opens the Customize Dialog Box
.
For more information, see Code Workbench
.
Using Code Templates in the ISQL Window
Code templates are complete code blocks that can be easily added to scripts with a few keystrokes. Templates let you
define standard comment blocks or add common exit and error handling routines to new or existing objects.
1Select File, New, and then SQL.
2 In the ISQL Window, open the Code Templates dialog box by pressing CTRL+SPACE.
3 In the Code Templates dialog box, select the desired code template to be inserted into the ISQL window.
The application pastes the code template into the ISQL Window.
For more information, see Code Workbench
.

TOOLS > CODE WORKBENCH
EMBARCADERO TECHNOLOGIES > BOOKNAMEVARIABLE 833
Creating and Modifying Code Workbench Auto Replace Shortcuts
The Edit Auto Replace Expression dialog box lets you define shortcut expressions for commonly used SQL syntax or
commands. You can define what keys or key combination activate the auto replacement of the defined shortcut.
1Select Tools, Code Workbench.
2On the Auto Replace Tab, select Add.
3In Expression type a new expression.
4In Activation type activation information. For example, CTRL+SPACE.
5In Replace With type replace with information.
6 Click OK.
The replace expression is now ready for use in the ISQL Window.
For more information, see:
Using Code Workbench Auto Replace Shortcuts in the ISQL Window
Code Workbench
Using Code Workbench Auto Replace Shortcuts in the ISQL Window
When Enable Auto Replacement is selected on the Setting Tab of the Code Workbench, you can type a replace
expression in the ISQL Window instead of typing a complete command.
1Select File, New, and then SQL.
2In the ISQL Window, type a replace expression. For example, type beg.
The application displays begin.
For more information, see Code Workbench
.
Importing and Exporting Settings in Code Workbench
The feature helps standardize your application settings. Exporting settings is useful when you want to give your
templates and auto replace expressions to another ISQL Window user. Importing settings is useful when another user
wants to give you their templates and auto replace expressions.
Importing Settings
1Select Tools, Code Workbench.
2 Click Import Settings.
Code Workbench opens the Open dialog box.
3 Locate the .xml file, and then click Open.
Code Workbench imports the settings.

TOOLS > CODE ANALYST
EMBARCADERO TECHNOLOGIES > BOOKNAMEVARIABLE 834
Exporting Settings
1Select Tools, Code Workbench.
2 Click Export Settings.
Code Workbench opens the Save As dialog box.
3 Specify a location, and file name, and then click Save.
Code Workbench saves your settings as an .xml file. You can send the .xml file to the user you want to import
your settings.
For more information, see Code Workbench
.
Code Analyst
The Code Analyst is a tool to identify time-consuming lines of code. Code Analyst lets you:
• Perform detailed response time analysis on the execution of Procedures and Functions.
• Benchmark the execution of one or more procedures or functions to determine exactly what code objects and
lines of code are taking the longest to run.
• Save response time metrics and perform intelligent compares against current execution times so you can
determine deviations from previous acceptable response times.
TIP: You can set Code Analyst options in the Options Editor - Code Analyst Tab
.
Important Notes
• For DB2, before profiling with Code Analyst, Compile all procedures with the debugging option selected.
• For Oracle, when using the Oracle Debugger, Compile
all procedures with the debugging option selected before
profiling with Code Analyst.
Common Tasks
Creating a Code Analyst Session
Identifying and Fixing Bottlenecks Using Code Analyst
Comparing Code Analyst Sessions
Cloning a Code Analyst Session
Deleting a Code Analyst Session
Stopping a Code Analyst Session Execution
Executing a Code Analyst Session
Scheduling a Code Analyst Session
Unscheduling a Code Analyst Session
Refreshing a Code Analyst Session
Saving Results in Code Analyst
Printing Results in Code Analyst
Viewing Run Details in Code Analyst

TOOLS > CODE ANALYST
EMBARCADERO TECHNOLOGIES > BOOKNAMEVARIABLE 835
Viewing Unit Summary Information in Code Analyst
Viewing Unit Details in Code Analyst
Setting View Options for the Unit Detail Tab in Code Analyst
Extracting SQL Text in Code Analyst
Executing SQL in Code Analyst
Code Analyst DBMS Notes
Code Analyst is available for:
• Microsoft SQL Server 7 or later
• Oracle 7 or later
• IBM DB2 UDB 8
• Sybase ASE 12.0.0.3 or later
Rapid SQL utilizes debugger technology to capture the data for each line of executed code. For Oracle, you can use
the debugger or using Oracle's supplied DBMS_Profiler package.
TIP: For Oracle, you can specify to use the debugger or the DBMS_Profiler package on the Options
Editor - Code Analyst Tab.
The Code Analyst will step through each line of code, stopping to record data for those lines of code onto which a
breakpoint can be issued. Some debuggers cannot capture time metrics for all lines of a stored procedure or function.
Procedures and functions that contain looping constructs will require more time to run. The additional amount of time
needed to run is proportional to the number of iterations in the loop.
For more information, see:
IBM DB2 UDB 8i Data Captured by Code Analyst
Microsoft SQL Server Data Captured by Code Analyst
Oracle Data Captured by Code Analyst
Sybase ASE Data Captured by Code Analyst
IBM DB2 UDB 8i Data Captured by Code Analyst
Code Analyst utilizes the IBM Debugger when capturing time data.
The debugger is verified to run on IBM DB2 UDB version 7.2 and up. There is a known issue running version 7.2 with
Fixpack 9.
DB2 has documented limitations on lines of code can be profiled.

TOOLS > CODE ANALYST
EMBARCADERO TECHNOLOGIES > BOOKNAMEVARIABLE 836
The following are SQL statements that are NOT valid break point lines:
BEGIN
BEGIN
BEGIN NOT ATOMIC
BEGIN ATOMIC
CLOSE CURSOR
DECLARE cursor WITH RETURN FOR <sql statement>
DECLARE , var without default
DECLARE CONDITION (CONDITION) FOR SQLSTATE (VALUE) "..."
DECLARE CONTINUE HANDLER
DECLARE CURSOR
DECLARE EXIT HANDLER
DECLARE RESULT_SET_LOCATOR [VARYING]
DECLARE SQLSTATE
DECLARE SQLCODE (unless there is a default)
DECLARE UNDO HANDLER (unless they are entered)
DO
ELSE
END
END CASE
END IF
END FOR
END REPEAT
END WHILE
ITERATE
LEAVE
LOOP
OPEN CURSOR
REPEAT (as a keyword alone)
RESIGNAL
SIGNAL
THEN
labels, e.g. P1:
NOTE: Code containing these statements will not have times associated with them.

TOOLS > CODE ANALYST
EMBARCADERO TECHNOLOGIES > BOOKNAMEVARIABLE 837
For more information, see Code Analyst DBMS Notes.
Microsoft SQL Server Data Captured by Code Analyst
In order to execute a Code Analyst session against a Microsoft SQL Server database, the SQL Server debugger must
be installed and functioning properly. Please refer to Embarcadero SQL Debugger for Microsoft SQL Server for details
concerning set up.
Related Information
Code Analyst DBMS Notes
Oracle Data Captured by Code Analyst
When using the PL/SQL Profiler, Oracle has documented an issue regarding extremely large times being returned by
the profiler. The times are sometimes hundred times larger than the actual run time of the stored procedure or
function. Oracle documents that this is a vendor/os problem rather than an Oracle problem, because the RDTSC
instruction is reporting wrong time stamp counter. They indicate that they have seen this problem on some INTEL
Pentium processors.
Related Information
Code Analyst DBMS Notes
Sybase ASE Data Captured by Code Analyst
Sybase has documented a problem with their debugger API. The problem involves reporting the wrong line number
through the debugger. Because of this bug, Code Analyst may report back data for blank lines or lines that contain
comments. Sybase has fixed this problem release 12.5.2 of the database. All procedures affected must be dropped
and recreated in order to correct the problem.
Related Information
Code Analyst DBMS Notes
Code Analyst Requirements
Debuggers
The Code Analyst uses the Embarcadero SQL Debuggers to profile, so you need valid Embarcadero SQL Debugger
licenses. Rapid SQL Pro includes all the necessary licenses.
TIP: Select Help>About to open the About Embarcadero Rapid SQL dialog box that displays your
license information.
For more information on configuring the debuggers, see:
Embarcadero SQL Debugger for IBM DB2 UDB for Linux, Unix, and Windows Requirements
Embarcadero SQL Debugger for IBM DB2 UDB for Linux, Unix, and Windows Requirements
Embarcadero SQL Debugger for Oracle Options
Embarcadero SQL Debugger for Oracle Interface

TOOLS > CODE ANALYST
EMBARCADERO TECHNOLOGIES > BOOKNAMEVARIABLE 838
Using Code Analyst with the Oracle Profiler
Oracle users have the option of either using the Oracle Debugger or the Oracle Profiler with Code Analyst to capture
statistics. To use Code Analyst with the profiler option, Oracle’s profiler package must be installed. The install is user
specific, so it must be installed by each user wishing to use Code Analyst. To install the package, users can invoke the
Rapid SQL PL/SQL Profiler.
TIP: You can set profiler options in the Options Editor - Code Analyst Tab
. You can specify that Code
Analyst display the actual run time on the database, and does not include the time it takes to get
to the server.
Privileges
For Oracle, SYS privileges are required to install the Code Analyst tables. If you do not have SYS privileges, ask your
Server Administrator to log into the Oracle datasource as SYSDBA, and then open Code Analyst to install the tables.
During install, the following privileges are set for the Code Analyst tables.
• DB2 – Permissions are granted to the Public Group
• Oracle – Permissions are granted to the Public group.
• Microsoft SQL Server – Permissions are granted to the Public role.
• Sybase – Permissions are granted to the Public group.
All users can use the Code Analyst but each user will only see their own run ids. Users need to belong to the public
group.
TIP: You can check this/modify privileges in the Users Editor.
Installing Code Analyst
To install Code Analyst, do the following:
1 On the Tools menu, select Code Analyst.
2In Select the database you would like to install the tables on, select a database.
3 For IBM DB2 UDB for Open Systems, in select the tablespace you would like to install the tables on, select a
tablespace.
4 For IBM DB2 UDB for Open Systems, in select the schema you would like to install the tables on, select a
schema. The default is EMBTCA schema.
5In Select the filegroup you would like to install the tables to, select a filegroup.
Code Analyst installs the following repository tables in the repository:
• EMBT_CODE_ANA_RUNS - Holds all the code analyst sessions created by users.
• EMBT_CODE_ANA_UNITS - Holds all the objects to be run for all.
• EMBT_CODE_ANA_PARAMS - Contains all the parameters for the objects that were run.
• EMBT_CODE_ANA_DATA - Contains the run data and is used to populate all the charts and statistics.
• EMBT_CODE_ANA_VERSION - Contains the version number of code analyst.
Code Analyst opens to the Run Summary tab.
6 Create a session using the Creating a Code Analyst Session
.

TOOLS > CODE ANALYST
EMBARCADERO TECHNOLOGIES > BOOKNAMEVARIABLE 839
Uninstalling Code Analyst
The Uninstall functionality lets you uninstall Code Analyst from the server.
NOTE: To uninstall a repository table, you need create table and grant privileges. Generally, you need
sysadmin privileges.
1 On the Tools menu, select Code Analyst.
2 Select a session or object, and then select Uninstall.
Code Analyst removes the repository tables in the repository:
• EMBT_CODE_ANA_RUNS - Holds all the code analyst sessions created by users.
• EMBT_CODE_ANA_UNITS - Holds all the objects to be run for all.
• EMBT_CODE_ANA_PARAMS - Contains all the parameters for the objects that were run.
• EMBT_CODE_ANA_DATA - Contains the run data and is used to populate all the charts and statistics.
• EMBT_CODE_ANA_VERSION - Contains the version number of code analyst.
Code Analyst Product Design
Code Analyst performs detailed response time analysis. Code Analyst steps through each line of code and profiles
those lines of code that the debugger or profiler can capture time metrics for.
NOTE: Some debuggers do not capture time metrics for all lines of a procedure or function. For more
information, see Code Analyst DBMS Notes
.
After capturing the time metrics, Code Analyst displays the data in an easy-to-read format on the tabs.
The Code Analyst is comprised of the following tabs:
Tab Option Description
Run Summary Session Lets you select the run session(s).
Session Displays the name of the session as created by the user.
Run ID Displays the run ID for the run(s). This number is system
generated.
Run Date Displays the time and date of the session.
Total Profile Time (ms) Displays the total time taken for the profiled code to execute. This
time is limited to the lines of code that are profiled. Overhead is not
included in this calculation.
Total Analysis Time Displays the total time taken for the session to complete, including
all overhead time needed to analyze the procedure or function.
Scheduler Displays the scheduler used to schedule the session. This
information displays until the scheduled job has been run.
Run Detail Session Lets you select the object execution session.
Run Lets you select the object execution.
Unit Type Lets you select the object type for the object execution.
Unit Owner Lets you select the object owner for the object execution.

TOOLS > CODE ANALYST
EMBARCADERO TECHNOLOGIES > BOOKNAMEVARIABLE 840
Unit Database Lets you select the object database for the object execution.
Time Unit Lets you specify the time unit for the Unit Execution graph.
Unit Owner Displays the owner of the procedure or function.
Unit Name Displays the name of the procedure or function.
Unit Type Displays the types of captured objects, including Anonymous
Block, Function, Package Body, and Procedure for Oracle
databases. Also displays SQL Statement and Procedure for the
other platforms.
Unit Database Displays the database on which the object is stored.
Total Profiled Time Displays the total time taken for the profiled code to execute.
% of Profiled Time Displays the percentage of the Total Profiled Time for the run that
this unit accounts for.
Comparison Base Run Lets you select the earlier object execution.
New Run Lets you select the later object execution.
Unit Owner Displays the owner of the procedure or function.
Unit Name Displays the name of the procedure or function.
Unit Type Displays the types of captured objects, including Anonymous
Block, Function, Package Body, and Procedure for Oracle
databases. Also displays SQL Statement and Procedure for the
other platforms.
Unit Database Displays the object database for the object execution.
Time Diff Displays the time difference in milliseconds between the base run
and the new run.
New Profiled Time Displays the profiled time of the new run.
Base Profiled Time Displays the profiled time of the base run.
Unit Summary Unit Owner Lets you select the object owner for the session(s).
Unit Name Lets you select the object name for the session(s).
Unit Database Lets you select the object database for the session(s).
Number of Top Runs Lets you specify the number of top object executions to display in
the Top 5 Runs graph and select the unit of time for the Unit Time
graph.
Session Displays the name of the session as created by the user.
Run ID Displays the unique id for the Run. This number is system
generated.
Run Date Displays the time and date of the session.
Total Analysis Time Displays the total time taken for the session to complete, including
all overhead time needed to analyze the procedure or function.
Total Profiled Time Displays the total time taken for the profiled code to execute.
Unit Profiled Time Displays the unit time for the session(s).
% of Profiled Time Displays the percentage of the Total Profiled Time for the run that
this unit accounts for.
% of Run Time Displays the percentage of object execution time for the session(s).
Tab Option Description
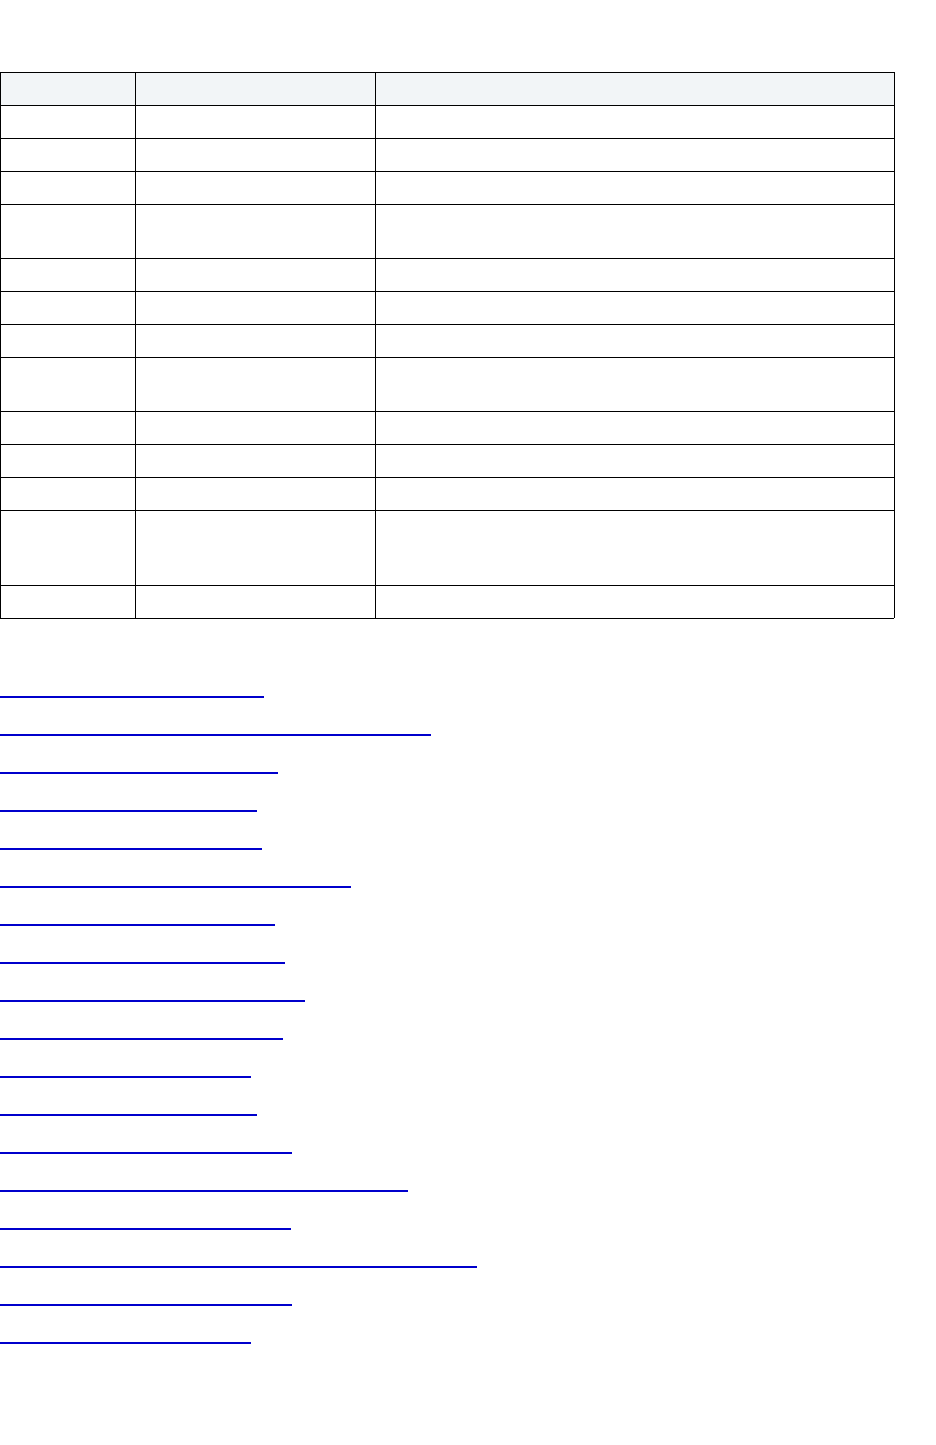
TOOLS > CODE ANALYST
EMBARCADERO TECHNOLOGIES > BOOKNAMEVARIABLE 841
Common Tasks
Creating a Code Analyst Session
Identifying and Fixing Bottlenecks Using Code Analyst
Comparing Code Analyst Sessions
Cloning a Code Analyst Session
Deleting a Code Analyst Session
Stopping a Code Analyst Session Execution
Executing a Code Analyst Session
Scheduling a Code Analyst Session
Unscheduling a Code Analyst Session
Refreshing a Code Analyst Session
Saving Results in Code Analyst
Printing Results in Code Analyst
Viewing Run Details in Code Analyst
Viewing Unit Summary Information in Code Analyst
Viewing Unit Details in Code Analyst
Setting View Options for the Unit Detail Tab in Code Analyst
Extracting SQL Text in Code Analyst
Executing SQL in Code Analyst
Unit Detail Session Lets you select the session.
Run Lets you select the object execution.
Unit Name Lets you select the object name for the session.
Number of Top Lines Lets you specify the number of top lines in the Top 5 Lines
Execution Time graph and select the total time units.
Percentage Calculation Lets you specify total object execution time or object run time.
Calls Displays the number of times the line was executed.
Total Time Displays the total time the line was executed.
% of Total Profiled Displays the percentage of the Total Profiled Time that this line of
code was responsible for.
Avg Time Displays the average profiled time for this line.
Min Time Displays the minimum recorded time for execution of this line.
Max Time Displays the maximum recorded time for execution of this line.
Dependency Displays the UNIT_NUMBER of the dependency object that was
called by that line. Lets you right-click and quickly go to that
UNIT_NUMBER to see its Unit detail information.
Source Displays the object’s SQL source code.
Tab Option Description

TOOLS > CODE ANALYST
EMBARCADERO TECHNOLOGIES > BOOKNAMEVARIABLE 842
Code Analyst Tutorial
The following tutorial guides you through the process of using the Code Analyst.
Creating a Code Analyst Session
1 On the Tools menu, select Code Analyst.
Initially, Code Analyst installs the repository tables. For more information, see Installing Code Analyst
. Then
Rapid SQL opens the Code Analyst to the Run Summary tab.
2 On the Code Analyst Tools toolbar, click the Create New Collection button.
Rapid SQL opens the first panel of the Code Analyst Wizard.
3 Select the individual object or group of objects to analyze. In this example, an individual stored procedure
(CREATE_ADMISSION2) is selected.
TIP: Code Analyst does not let you select objects that do not have stored procedures.
4 Click Next.
If the object(s) selected to be analyzed requires parameters, the second panel of the wizard prompts you to enter
the parameters.
5 Double-click the object to set the parameters.
6 For IBM DB2 UDB for Open Systems and Oracle, the Compile button opens the Confirm Compile dialog box
that lets you compile the objects to ensure that the Code Analyst can capture the time metrics.
7 Click Finish.
Code Analyst displays a message that the Code Analyst will run longer than the actual code. Then Code Analyst
analyzes the objects, using the Embarcadero SQL Debugger to profile and then opens the Run Detail tab.
TIP: You can select the "Please do not show me this dialog again" option in the dialog box or set the
option on the Options Editor - Code Analyst Tab
.
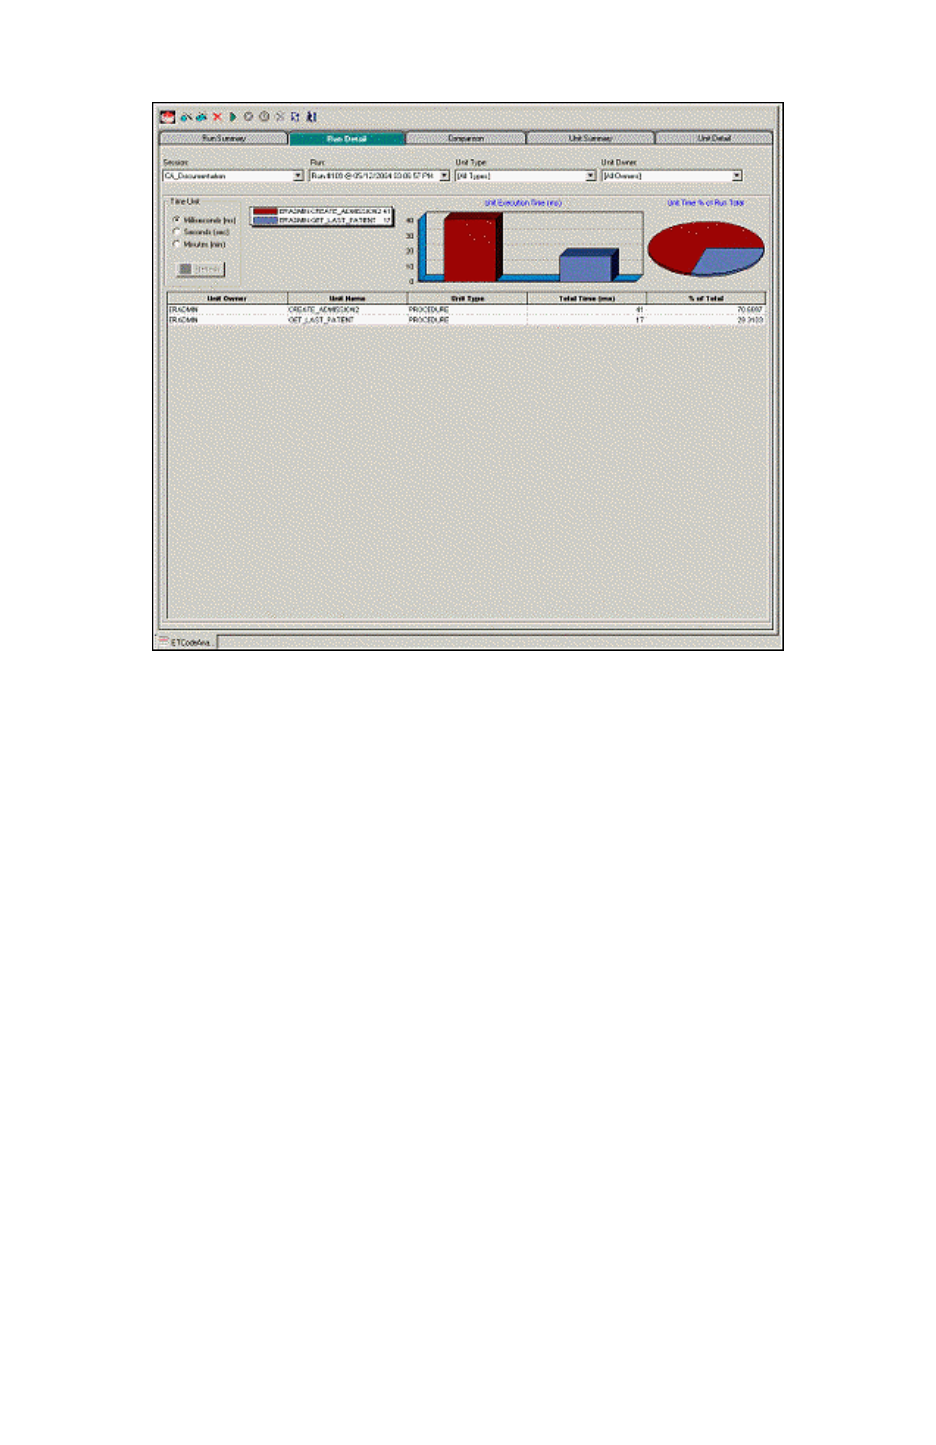
TOOLS > CODE ANALYST
EMBARCADERO TECHNOLOGIES > BOOKNAMEVARIABLE 843
Identifying and Fixing Bottlenecks Using Code Analyst
The Run Detail tab displays the total time for the objects being analyzed. The tab information may be enough to
identify the potential bottleneck.
1 To view more detailed information, double-click the Unit Name.
Code Analyst opens to the Unit Detail tab.
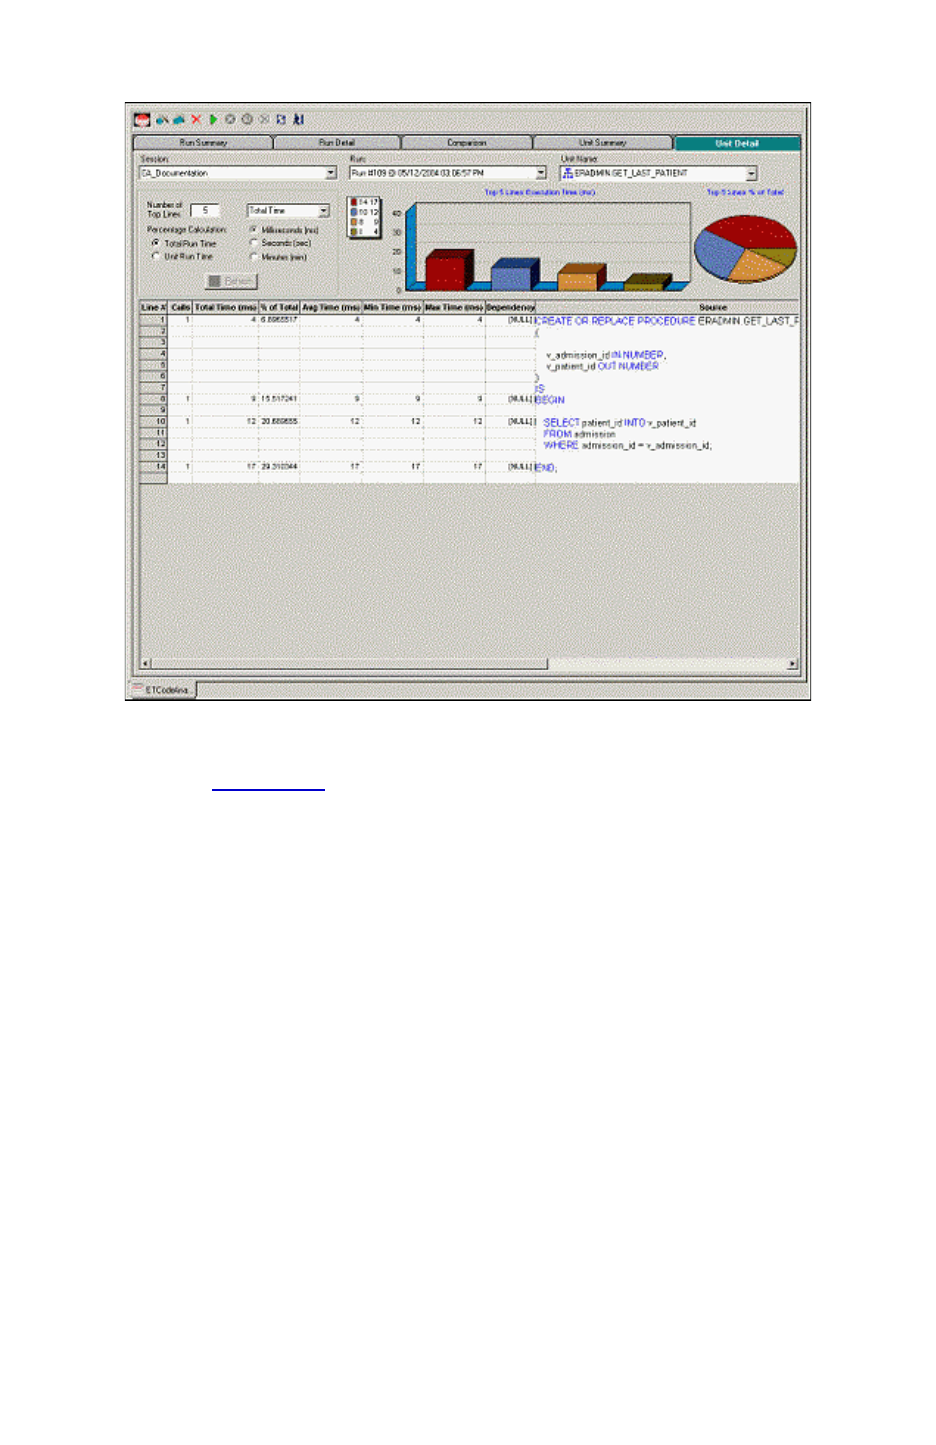
TOOLS > CODE ANALYST
EMBARCADERO TECHNOLOGIES > BOOKNAMEVARIABLE 844
The Unit Detail Tab displays the object code and other information related to the individual lines of code. You can
determine which line of code is taking too long and why. The Unit Detail Tab is where you troubleshoot, and then
resolve the problem in the Object Editors
.
2In Rapid SQL, open the object editor, and then modify the code on the Definition tab.
3 Click Alter.
4In Code Analyst, on the Unit Detail Tab, click Execute.
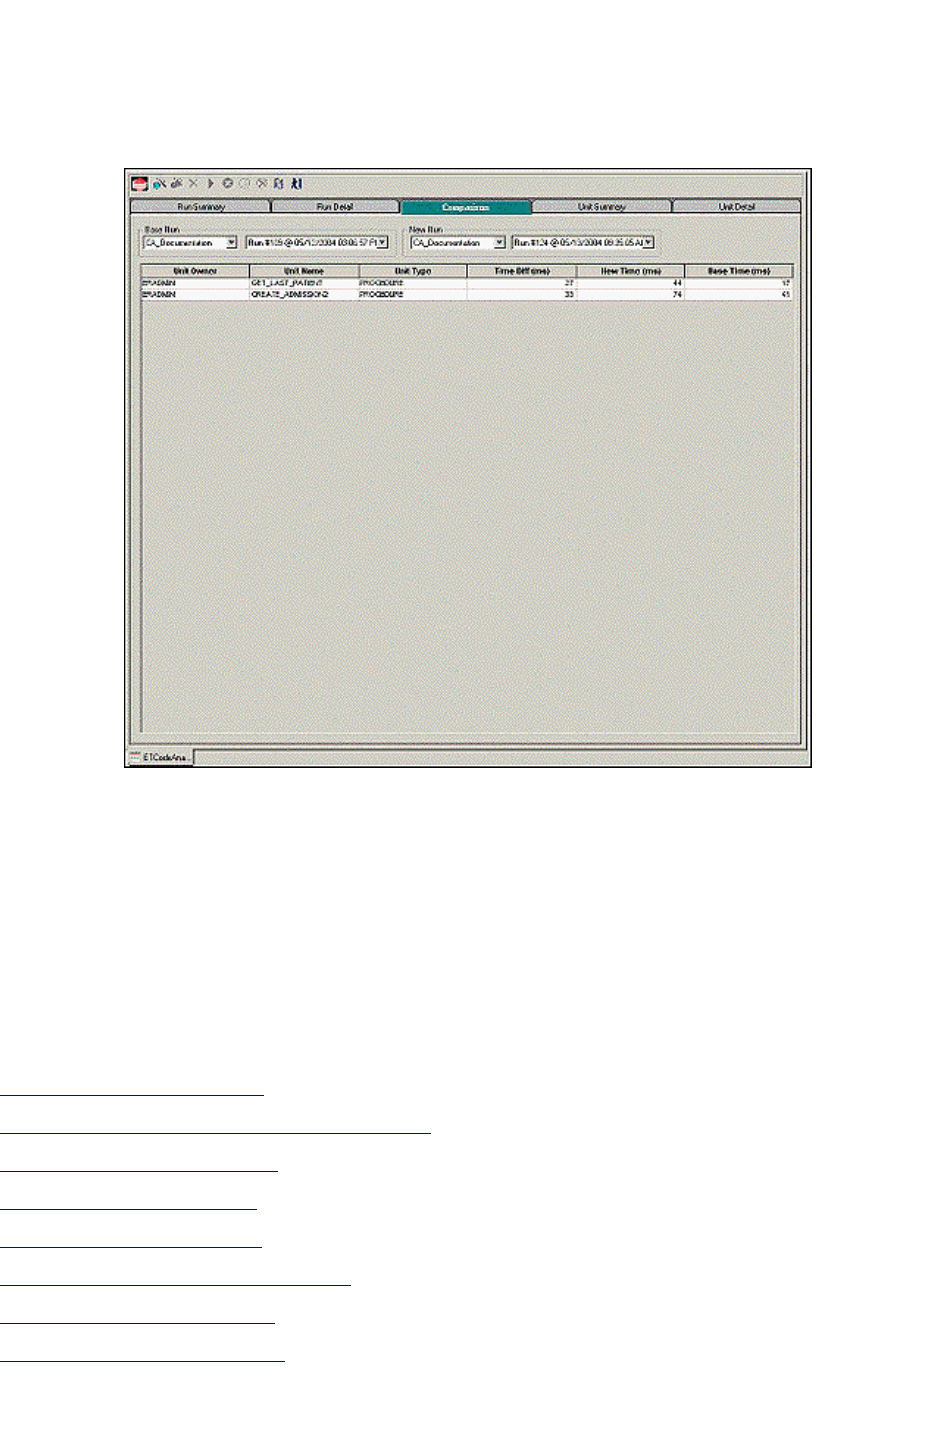
TOOLS > CODE ANALYST
EMBARCADERO TECHNOLOGIES > BOOKNAMEVARIABLE 845
Comparing Code Analyst Sessions
1 Click the Comparison tab.
Code Analyst has a Comparison facility to allow quick compares of two object executions, showing the base time and
the new time, as well as the time differences. The Comparison tab lets you compare which of the two procedures or
functions ran faster.
2 Examine the Time Diff which indicates improvement to code.
3 If necessary, continue to modify the code on the Definition tab of the object editor, and then press Alter.
4In Code Analyst, on the Unit Detail Tab, click Execute.
5 Examine the Time Diff until the bottleneck is solved.
Common Tasks
Creating a Code Analyst Session
Identifying and Fixing Bottlenecks Using Code Analyst
Comparing Code Analyst Sessions
Cloning a Code Analyst Session
Deleting a Code Analyst Session
Stopping a Code Analyst Session Execution
Executing a Code Analyst Session
Scheduling a Code Analyst Session

TOOLS > CODE ANALYST
EMBARCADERO TECHNOLOGIES > BOOKNAMEVARIABLE 846
Unscheduling a Code Analyst Session
Refreshing a Code Analyst Session
Saving Results in Code Analyst
Printing Results in Code Analyst
Viewing Run Details in Code Analyst
Viewing Unit Summary Information in Code Analyst
Viewing Unit Details in Code Analyst
Setting View Options for the Unit Detail Tab in Code Analyst
Extracting SQL Text in Code Analyst
Executing SQL in Code Analyst
Using the Code Analyst
When working with database code stored in database objects, it is sometimes difficult to pinpoint bottlenecks within
the code. When situations like this arise, Code Analyst can assist in identifying the trouble spots. Code Analyst can be
used to analyze one object or a group of objects. You select one or multiple objects, execute them, view the results,
and save those results for later viewing or comparing.
Common Tasks
Creating a Code Analyst Session
Identifying and Fixing Bottlenecks Using Code Analyst
Comparing Code Analyst Sessions
Cloning a Code Analyst Session
Deleting a Code Analyst Session
Stopping a Code Analyst Session Execution
Executing a Code Analyst Session
Scheduling a Code Analyst Session
Unscheduling a Code Analyst Session
Refreshing a Code Analyst Session
Saving Results in Code Analyst
Printing Results in Code Analyst
Viewing Run Details in Code Analyst
Viewing Unit Summary Information in Code Analyst
Viewing Unit Details in Code Analyst
Setting View Options for the Unit Detail Tab in Code Analyst
Extracting SQL Text in Code Analyst
Executing SQL in Code Analyst

TOOLS > CODE ANALYST
EMBARCADERO TECHNOLOGIES > BOOKNAMEVARIABLE 847
Creating a Code Analyst Session
The Code Analyst Wizard creates a new Code Analysis session that creates data for the Code Analyst tabs:
1 On the Tools menu, select Code Analyst.
2 On the Code Analyst Tools toolbar, click Create New Collection.
Rapid SQL opens the first panel of the Code Analyst Wizard.
3 Select the individual object or group of objects to analyze.
4 Click Next.
If the object(s) selected to be analyzed requires parameters, the second panel of the wizard prompts you to enter
the parameters.
5 Double-click the object to set the parameters.
6 For IBM DB2 UDB for Open Systems and Oracle, the Compile button opens the Confirm Compile dialog box
that lets you compile the objects to ensure that the Code Analyst can capture the time metrics.
7 Click Finish.
Code Analyst displays a message that the Code Analyst will run longer than the actual code. Then Code Analyst
analyzes the objects, using the Embarcadero SQL Debugger to profile and then opens the Run Detail tab.
TIP: You can also select the "Please do not show me this dialog again" option in the dialog box or set
the option on the Options Editor - Code Analyst Tab
.
For more information, see Code Analyst Wizard
.
Code Analyst Wizard
The table below describes the options and functionality of the Code Analyst Wizard:
Option Description
Session Name Lets you type a name.
Select by Owner Code Analyst Wizard queries the database to get the list of
procedures and functions and lets you select objects to retrieve
Codes for. Select to display available objects by owner, and then
select the database(s).
Select by Object Code Analyst Wizard queries the database to get the list of
procedures and functions and lets you select objects to retrieve
Codes for. Select to display available objects by object, and then
select the object(s).
Object Name Double-click each object to specify the input parameters.
Specify which object executes first by clicking the Up and Down
buttons.
Compile IBM DB2 UDB FOR OPEN SYSTEMS AND ORACLE ONLY:
Opens the Confirm Compile dialog box that lets you compile the
objects to ensure that the Code Analyst can capture the time
metrics.
Schedule Opens the Select Scheduler dialog box or opens scheduling
application.

TOOLS > CODE ANALYST
EMBARCADERO TECHNOLOGIES > BOOKNAMEVARIABLE 848
For more information, see: Creating a Code Analyst Session.
Identifying and Fixing Bottlenecks Using Code Analyst
The Unit Detail Tab displays the object code and other information related to the individual lines of code. You can
identify time-consuming lines of code in the Unit Detail Tab. The Unit Detail Tab is where you troubleshoot, and then
resolve the problem in the Object Editors.
1 On the Tools menu, select Code Analyst.
2 Click the Unit Detail Tab.
Percent of Run Time displays the percentage of object execution time for the session(s).
3 Identify an object that contains time-consuming code.
4In Rapid SQL, open the object editor, and then modify the code on the Definition tab.
5 Click Alter.
6In Code Analyst, on the Unit Detail Tab, click Execute.
7 Click the Comparison tab.
The Comparison Tab lets you compare times of the objects in two different object executions to determine which run
was more efficient. The Comparison Tab displays the base time and the new time, as well as the time differences. The
Comparison tab lets you compare which of the two procedures or functions ran faster.
8 Examine the Time Diff which indicates improvement to code.
9 If necessary, continue to modify the code on the Definition tab of the object editor, and then press Alter.
10 Create new Code Analyst sessions and examine the Time Diff until the bottleneck is solved.
For more information, see:
Code Analyst Product Design
Using the Code Analyst
Comparing Code Analyst Sessions
The Comparison Tab lets you compare times of the objects in two different object executions to determine which run
was more efficient. The Comparison Tab displays the base time and the new time, as well as the time differences. The
Comparison tab lets you compare which of the two procedures or functions ran faster.
1 On the Tools menu, select Code Analyst.
2 On the Run Summary tab, right-click the sessions, and then select Compare.
3 Examine the Time Diff which indicates improvement to code.
For more information, see:
Code Analyst Product Design
Using the Code Analyst
Finish Code Analyst analyzes the code.
Option Description

TOOLS > CODE ANALYST
EMBARCADERO TECHNOLOGIES > BOOKNAMEVARIABLE 849
Cloning a Code Analyst Session
The Clone Collection functionality lets you clone an existing Code Analyst session using the Code Analyst Wizard.
Clone lets you reset the parameters or the order of the objects in the session without creating a new session.
1 On the Tools menu, select Code Analyst.
2 On the Run Summary tab, select the session to clone.
3 On the Code Analyst Tools toolbar, click Clone Collection.
Rapid SQL opens the first panel of the Code Analyst Wizard
.
For more information, see:
Code Analyst Product Design
Using the Code Analyst
Deleting a Code Analyst Session
The Delete Collection functionality lets you delete the selected Code Analyst session.
1 On the Tools menu, select Code Analyst.
2 On the Run Summary tab, select the session to delete.
3 On the Code Analyst Tools toolbar, click Delete Collection.
Code Analyst deletes the session.
For more information, see:
Code Analyst Product Design
Using the Code Analyst
Stopping a Code Analyst Session Execution
The Stop Execution kills the execution of the selected collection.
1 On the Tools menu, select Code Analyst.
2 On the Run Summary tab, select the session to kill.
3 On the Code Analyst Tools toolbar, click Stop Execution.
Code Analyst kills the execution.
For more information, see:
Code Analyst Product Design
Using the Code Analyst

TOOLS > CODE ANALYST
EMBARCADERO TECHNOLOGIES > BOOKNAMEVARIABLE 850
Executing a Code Analyst Session
The Execute Collection functionality extracts the SQL text and then executes the code.
1 On the Tools menu, select Code Analyst.
2 On the Run Summary tab, select the session to execute.
3 On the Code Analyst Tools toolbar, click Execute Collection.
Code analyst extracts and executes the SQL.
For more information, see:
Code Analyst Product Design
Using the Code Analyst
Scheduling a Code Analyst Session
The Schedule Session functionality lets you schedule the session for a future run.
1 On the Tools menu, select Code Analyst.
2 On the Run Summary tab, select the session to schedule.
3 On the Code Analyst Tools toolbar, click Schedule Session.
Code Analyst opens the default scheduler.
For more information, see:
Scheduling
Code Analyst Product Design
Using the Code Analyst
Unscheduling a Code Analyst Session
The Delete Session functionality lets you remove the session from a schedule.
1 On the Tools menu, select Code Analyst.
2 On the Run Summary tab, select the session to unschedule.
3 On the Code Analyst Tools toolbar, click Delete Session.
For more information, see:
Scheduling
Code Analyst Product Design
Using the Code Analyst

TOOLS > CODE ANALYST
EMBARCADERO TECHNOLOGIES > BOOKNAMEVARIABLE 851
Refreshing a Code Analyst Session
The Refresh Data functionality refreshes the data.
1 On the Tools menu, select Code Analyst.
2 On the tab, on the Code Analyst Tools toolbar, click Refresh Data.
For more information, see:
Code Analyst Product Design
Using the Code Analyst
Saving Results in Code Analyst
The Save functionality lets you save results for later viewing or comparing.
1 On the Tools menu, select Code Analyst.
2 On the tab, right-click the session or unit, and then select Save.
Code Analyst opens the Save Results dialog box.
For more information, see:
Code Analyst Product Design
Using the Code Analyst
Printing Results in Code Analyst
The Print functionality lets you print results for later viewing or comparing.
1 On the Tools menu, select Code Analyst.
2 On the tab, right-click the session or unit, and then select Print.
Code Analyst opens the Print Results dialog box.
For more information, see:
Print
Code Analyst Product Design
Using the Code Analyst
Viewing Run Details in Code Analyst
The Run Detail tab displays the total time for the objects being analyzed. The tab information may be enough to
identify the potential bottleneck.
To open the Run Details Tab in Code Analyst, do the following:
1 On the Tools menu, select Code Analyst.
2 On the Run Summary tab, right-click the session, and then select Run Detail.
OR
3 On the Unit Summary tab, right-click the session, and then select Run Detail.

TOOLS > CODE ANALYST
EMBARCADERO TECHNOLOGIES > BOOKNAMEVARIABLE 852
For more information, see:
Code Analyst Product Design
Using the Code Analyst
Viewing Unit Summary Information in Code Analyst
The Unit Summary Tab in Code Analyst displays the individual runs for a session.
To open the Unit Summary Tab in Code Analyst, do the following:
1 On the Tools menu, select Code Analyst.
2 On the Comparison tab, right-click the session, and then select Unit Summary.
For more information, see:
Code Analyst Product Design
Using the Code Analyst
Viewing Unit Details in Code Analyst
The Unit Detail Tab displays the object code and other information related to the individual lines of code. You can
identify time-consuming lines of code in the Unit Detail Tab. The Unit Detail Tab is where you troubleshoot, and then
resolve the problem in the Object Editors
.
To open the Unit Details tab in Code Analyst, do the following:
1 On the Tools menu, select Code Analyst.
2 On the Unit Summary tab, right-click the session, and then select Unit Detail.
For more information, see:
Code Analyst Product Design
Using the Code Analyst
Setting View Options for the Unit Detail Tab in Code Analyst
The table below describes the options on the shortcut menu for the Unit Details Tab in Code Analyst:
Option Description
Dependency Details Displays dependency details.
Show Only Hit Lines Displays only those lines with time metrics.
Show Only Missed Lines Displays only those lines without time metrics.
Show All Lines Resets the view to show all lines.
Advanced View Displays the default view.
Normal View Displays a limited number of data columns.

TOOLS > CODE ANALYST
EMBARCADERO TECHNOLOGIES > BOOKNAMEVARIABLE 853
Extracting SQL Text in Code Analyst
The Extract SQL Text functionality extracts SQL text to an ISQL window.
1 On the Tools menu, select Code Analyst.
2 On the Unit Detail tab, right-click the session, and then select Extract SQL Text.
Code analyst extracts the SQL text to an ISQL window.
For more information, see:
Extract
Code Analyst Product Design
Using the Code Analyst
Executing SQL in Code Analyst
The Execute SQL functionality extracts SQL text to an ISQL window, and then executes the code.
1 On the Tools menu, select Code Analyst.
2 On the Unit Detail tab, right-click the session, and then select Execute SQL.
Code analyst extracts the SQL text to an ISQL window and executes the code.
For more information, see:
Execute
Code Analyst Product Design
Using the Code Analyst
RAPID SQL ADD-ON TOOLS > EMBARCADERO SQL DEBUGGER FOR IBM DB2 UDB FOR LINUX, UNIX, AND WINDOWS
EMBARCADERO TECHNOLOGIES > BOOKNAMEVARIABLE 854
Rapid SQL Add-On Tools
Rapid SQL includes the following add-on tools:
Embarcadero SQL Debugger for IBM DB2 UDB
Embarcadero SQL Debugger for Microsoft SQL Server
Embarcadero SQL Debugger for Oracle
Embarcadero SQL Debugger for Sybase ASE
Rapid SQL PL/SQL Profiler
Embarcadero SQL Debugger for IBM DB2 UDB for Linux,
Unix, and Windows
Embarcadero SQL Debugger for IBM DB2 UDB for Linux, Unix, and Windows lets you locate and fix bugs in
procedures and triggers for IBM DB2 UDB for Linux, Unix, and Windows version 7.2 or later. Embarcadero SQL
Debugger for IBM DB2 UDB for Linux, Unix, and Windows lets you debug triggers by debugging the procedures that
call them.
NOTE: The Embarcadero SQL Debugger for IBM DB2 UDB for Linux, Unix, and Windows is an optional
add-on module.
TIP: For Rapid SQL, Code Analyst
is a tool to identify time-consuming lines of code. Code Analyst lets
you perform detailed response time analysis on the execution of Procedures and Functions.
The table below describes the sections of this chapter:
Embarcadero SQL Debugger for IBM DB2 UDB for Linux, Unix, and
Windows Features
The Embarcadero SQL Debugger for IBM DB2 UDB for Linux, Unix, and Windows lets you identify problems within
your code. The Embarcadero SQL Debugger for IBM DB2 UDB for Linux, Unix, and Windows lets you:
Section Description
Embarcadero SQL Debugger
for IBM DB2 UDB for Linux,
Unix, and Windows Features
This section describes how Embarcadero SQL Debugger for IBM
DB2 UDB for Linux, Unix, and Windows lets you identify problems
within your code.
Embarcadero SQL Debugger
for IBM DB2 UDB for Linux,
Unix, and Windows Interface
This section describes the Embarcadero SQL Debugger for IBM
DB2 UDB for Linux, Unix, and Windows graphical interface that
includes an editor window and four debug view windows.
Embarcadero SQL Debugger
for IBM DB2 UDB for Linux,
Unix, and Windows
Functionality
This section describes the functionality on the Embarcadero SQL
Debugger for IBM DB2 UDB for Linux, Unix, and Windows.
Using the Embarcadero SQL
Debugger for IBM DB2 UDB
for Linux, Unix, and Windows
This section describes how to run a debug session.
RAPID SQL ADD-ON TOOLS > EMBARCADERO SQL DEBUGGER FOR IBM DB2 UDB FOR LINUX, UNIX, AND WINDOWS
EMBARCADERO TECHNOLOGIES > BOOKNAMEVARIABLE 855
• Interactively step through the flow of script execution.
• Examine the value of variables.
• Solve logical problems with your script design.
NOTE: The Debugger is available on the Rapid SQL main menu, the Procedures window, the DDL Editor
and ISQL windows.
The Embarcadero SQL Debugger for IBM DB2 UDB for Linux, Unix, and Windows offers fundamental debugging
features and options to fine tune debugging. The table below describes these features:
To set specific Debugger values on Rapid SQL’s Options Editor, see Debugger Options
.
Embarcadero SQL Debugger for IBM DB2 UDB for Linux, Unix, and Windows
Requirements
Embarcadero SQL Debugger for IBM DB2 UDB for Linux, Unix, and Windows requires proper configuration of the
server and client.
For more information, see:
Prerequisites for Adding and Compiling Procedures
Configuring the IBM DB2 UDB for Linux, Unix, and Windows Server for Procedures
Prerequisites for Debugging Procedures
Prerequisites for Adding and Compiling Stored Procedures
The Embarcadero SQL Debugger for IBM DB2 UDB for Linux, Unix, and Windows requires the following products and
components.
Client
• IBM DB2 UDB for Linux, Unix, and Windows 7.2 or later
• DB2 Application Development Client
• DB2 Administration Client
• Communications Protocols
• Stored Procedure Builder
Debugging Feature Description
Step Into Lets you execute each instruction step-by-step and step inside a
stored object
.
Step Out Lets you stop stepping through the current object and execute the
remainder of the script
. This option is only active when the pointer
indicates a child dependent instruction
.
Step Over Lets you execute the current instruction without stepping into any
child dependents
.
Breakpoints Lets you specify positions in a program where the debugger stops
execution
.

RAPID SQL ADD-ON TOOLS > EMBARCADERO SQL DEBUGGER FOR IBM DB2 UDB FOR LINUX, UNIX, AND WINDOWS
EMBARCADERO TECHNOLOGIES > BOOKNAMEVARIABLE 856
• Applications Development Interfaces
• System Bind Files
• DB2 Connect Server Support
• Documentation
• Base DB2 UDB for Windows/Unix Support
• Administration and Configuration Tools
Server
• IBM DB2 UDB for Linux, Unix, and Windows 7.2 or later
• DB2 Enterprise Edition
• Communications Protocols
• Stored Procedure Builder
• Applications Development Interfaces
• System Bind Files
• DB2 Connect Server Support
• Documentation
• Base DB2 UDB for Windows/Unix Support
• Administration and Configuration Tools
• Microsoft Visual Studio, Visual C++
NOTE: The server must have a local directory structure and file C:\program
files\sqllib\function\routine\sr_cpath.bat. This file is installed with IBM DB2 UDB 7.2 and includes
the C compiler options needed to compile the procedure on the server. If it is not found, install the
IBM DB2 UDB 7.2 Administration and Configuration Tools option on the server.
Configuring the IBM DB2 UDB for Linux, Unix, and Windows Server for Procedures
Rapid SQL lets you create procedures on the targeted server using Rapid SQL.
To create or run any procedure, set up the configuration environment and enable the C compiler options on the server.
To configure your server, do the following:
1 Open a DB2 Command Window, and then type:
DB2set DB2_SQLROUTINE_COMPILER_PATH="C:\program
files\sqllib\function\routine\sr_cpath.bat"
DB2 sets the DB2_SQLROUTINE_COMPILER_PATH DB2 registry variable to call the required initialization
script for the C compiler on the server.
To enable the C compiler options on your server:
1 Open the file C:\program files\sqllib\function\routine\sr_cpath.bat.
2 Remove the REM (remarks) prefix on the lines that match the version of Visual Studio that is installed on the
server. VCV6 = version 6.0 and VCV5 = version 5.0.
NOTE: Only remove the REM prefix on the lines that apply to your installation of Visual Studio
RAPID SQL ADD-ON TOOLS > EMBARCADERO SQL DEBUGGER FOR IBM DB2 UDB FOR LINUX, UNIX, AND WINDOWS
EMBARCADERO TECHNOLOGIES > BOOKNAMEVARIABLE 857
3 Restart the DB2 services on the server.
Prerequisites for Debugging Procedures
To enable debugging on the server, do the following:
1 Open a DB2 Command window and type:
Db2set DB2ROUTINE_DEBUG=ON
NOTE: Client must have a licensed or evaluation copy of the Embarcadero UDB SQL Debugger.
Embarcadero SQL Debugger for IBM DB2 UDB for Linux, Unix, and Windows
Options
You can specify debugger options from the Debug Tab of Rapid SQL’s Options editor. The Debug Tab of the Options
Editor lets you set the duration of your debug initialization and debug session, enable DBMS output, and refresh
dependencies.
Setting Debugger Options
To set debugger options, do the following:
1 On the File menu, click Options.
OR
On the Main toolbar, click Options.
Rapid SQL opens the Options Editor.
2 Specify debugger options. The table below describes the options available:
3 Click Close.
Rapid SQL closes the Options Editor.
For more information, see Embarcadero SQL Debugger for IBM DB2 UDB for Linux, Unix, and Windows Features
.
Embarcadero SQL Debugger for IBM DB2 UDB for Linux, Unix, and
Option Description Default
Initialization
Timeout (seconds)
Specifies the number of seconds Rapid SQL tries to initialize
the debugger. If it cannot initialize the debugger in the specified
time, a message displays in the Debug Output window.
60
Debug Session
Timeout (seconds)
Specifies, in seconds, the length of your debug session. 7200
Enable DBMS
Output
Toggles the print output. Enable this option if you use
dbms_output.put_line calls in your procedures and you want
these lines displayed.
Selected
Refresh
Dependencies for
each run
Refreshes dependencies for each run. This potentially
time-consuming process is useful if the target procedure has
rapidly varying dependencies that can require updating during
the debugging process.
Cleared

RAPID SQL ADD-ON TOOLS > EMBARCADERO SQL DEBUGGER FOR IBM DB2 UDB FOR LINUX, UNIX, AND WINDOWS
EMBARCADERO TECHNOLOGIES > BOOKNAMEVARIABLE 858
Windows Interface
The Embarcadero SQL Debugger for IBM DB2 UDB for Linux, Unix, and Windows includes an editor
window and four debug view windows
. When you open a debug session, Rapid SQL extracts the code for the
object into a DDL Editor and opens four debug view windows at the bottom of the screen
. The four debug
view windows are optional, dockable windows designed to let you debug your script
.
TIP: All Embarcadero debuggers display Performance Metrics that let you measure the execution time
of each statement in the debug session.
The Embarcadero SQL Debugger for IBM DB2 UDB for Linux, Unix, and Windows’s includes five windows:
1
DDL Editor window
2 Watch window
3 Variables window
4 Call Stack window
5 Dependency Tree window
Working with T-SQL Debugger Windows
Rapid SQL lets you resize, move, dock and float the following windows:
•
Watch window
• Variables window
• Call Stack window
• Dependency Tree window
1 To resize the target window, click its frame and drag it.
Rapid SQL resizes the window.
2 To move and dock the target window, click its grab bar and drag it.
Rapid SQL moves the window to its new location and docks it with surrounding windows.
3 To float the target window, press Shift, then click its grab bar and drag it.
Rapid SQL frames the window in its own floating frame and moves the window to its new location.
DDL Editor Window for Embarcadero SQL Debugger for IBM DB2 UDB for Linux,
Unix, and Windows
The DDL Editor displays your code in read-only format. When you start debugging, the SQL Embarcadero SQL
Debugger for IBM DB2 UDB for Linux, Unix, and Windows extracts your code into a DDL Editor. The DDL Editor uses
the default Rapid SQL syntax coloring.
For more information, see Embarcadero SQL Debugger for IBM DB2 UDB for Linux, Unix, and Windows Interface
.
Watch Window for Embarcadero SQL Debugger for IBM DB2 UDB for Linux, Unix,
and Windows
The Watch window displays the watch variables for the database object you are debugging. The Watch window also
lets you specify variables you want to evaluate or modify while debugging your program.

RAPID SQL ADD-ON TOOLS > EMBARCADERO SQL DEBUGGER FOR IBM DB2 UDB FOR LINUX, UNIX, AND WINDOWS
EMBARCADERO TECHNOLOGIES > BOOKNAMEVARIABLE 859
For example, to check what happens when a variable (x) has a value of 100, you can double-click the variable in the
DDL Editor, drag it into the Watch Window, and change the value to 100. When you execute the script, the Debugger
uses the value x =100. This window is only visible when the T-SQL Debugger is active.
NOTE: Until you step at least once into a script, variables are not defined. Therefore, step at least once
before dragging or typing a local variable in the Watch Window.
NOTE: When you exit a debug session and reenter it, the Embarcadero SQL Debugger for IBM DB2 UDB
for Linux, Unix, and Windows retains any watch variables or breakpoints you have set.
Opening and Closing the Watch Window
To open and close the Watch Window, do the following:
1 On the Debug Menu, on the Debug Views sub-menu, select or clear Watch.
OR
Press ALT+3.
Setting a Watch Variable
To set a Watch Variable, do the following:
1 In the DDL Editor, double-click the target variable and drag it to the Watch window.
2 In the Watch window, change the value of the variable.
3On the DDL Editor, click Debug.
The Embarcadero SQL Debugger for IBM DB2 UDB for Linux, Unix, and Windows executes the script using the
new variable.
Removing a Watch Variable
To remove a Watch variable, do the following:
1 In the Watch window, click the target variable and press DELETE.
For more information, see Embarcadero SQL Debugger for IBM DB2 UDB for Linux, Unix, and Windows Interface
.
Variables Window for Embarcadero SQL Debugger for IBM DB2 UDB for Linux,
Unix, and Windows
The Variables window displays the local variables and their current values during script execution.
NOTE: You cannot edit the variables in the Variables window.
If the DDL Editor displays an external database object, and that object is a dependent of the object you are debugging,
then the Variables Window automatically refreshes and displays the variables for that particular object. The Variables
Window is only visible when the Debugger is active.
The Embarcadero SQL Debugger for IBM DB2 UDB for Linux, Unix, and Windows also lets you monitor your variables
while debugging.

RAPID SQL ADD-ON TOOLS > EMBARCADERO SQL DEBUGGER FOR IBM DB2 UDB FOR LINUX, UNIX, AND WINDOWS
EMBARCADERO TECHNOLOGIES > BOOKNAMEVARIABLE 860
Opening and Closing the Variables Window
To open and close the Variables Window, do the following:
1 On the Debug Menu, on the Debug Views sub-menu, select or clear Variable.
OR
Press ALT+4.
Monitoring Variables
To monitor the values of your variables while debugging, do the following:
1 In the SQL Editor, hold the pointer over the target variable.
Rapid SQL opens a ScreenTip displaying the current value of that variable.
For more information, see Embarcadero SQL Debugger for IBM DB2 UDB for Linux, Unix, and Windows Interface
.
Call Stack Window for mbarcadero SQL Debugger for IBM DB2 UDB for Linux,
Unix, and Windows
The Call Stack window displays the stack of currently active calls. The Call Stack Window is only visible when the
Debugger is active.
Opening and Closing the Call Stack Window
To open and close the Call Stack Window, do the following:
1 On the Debug Menu, on the Debug Views sub-menu, select or clear Call Stack.
OR
Press ALT+5.
Using the Call Stack Window
To display a line of code that references the call in the DDL Editor, do the following:
1 In the Call Stack window, double-click the target line.
In the DDL Editor, Rapid SQL displays a green arrow on the line of the referenced call.
For more information, see Embarcadero SQL Debugger for IBM DB2 UDB for Linux, Unix, and Windows Interface
.
Dependency Tree Window for Embarcadero SQL Debugger for IBM DB2 UDB for
Linux, Unix, and Windows
The Dependency Tree window displays any external database objects the script accesses. Rapid SQL displays these
database objects in a hierarchical tree, with the child objects as database objects accessed by the parent objects. You
can use this window to display the code for a dependent database object in the DDL Editor window. This window is
only visible when the Debugger is active.

RAPID SQL ADD-ON TOOLS > EMBARCADERO SQL DEBUGGER FOR IBM DB2 UDB FOR LINUX, UNIX, AND WINDOWS
EMBARCADERO TECHNOLOGIES > BOOKNAMEVARIABLE 861
Opening and Closing the Dependency Tree Window
To open and close the Dependency Tree Window, do the following:
1 On the Debug Menu, on the Debug Views sub-menu, select or clear Dependencies.
OR
Press ALT+6.
Displaying Dependencies
To display the code for a dependent database object in the DDL Editor window, do the following:
1 In the Dependency Tree window, double-click the target object.
Rapid SQL displays the SQL of the target object in the DDL Editor window.
For more information, see Embarcadero SQL Debugger for IBM DB2 UDB for Linux, Unix, and Windows Interface
.
Embarcadero SQL Debugger for IBM DB2 UDB for Linux, Unix, and
Windows Functionality
The Embarcadero SQL Debugger for IBM DB2 UDB for Linux, Unix, and Windows offers the following functionality:
•
Input Parameters
• Step Into
• Step Out
• Step Over
• Run to Cursor
• Insert or Remove a Breakpoint
• Toggle Breakpoint
• Go
• Stop
• Restart
• Break
• Close
To use these functionalities, first open a debugging session
.
Input Parameters for Embarcadero SQL Debugger for IBM DB2 UDB for Linux,
Unix, and Windows
Input parameters are set when you first create an object. If the object you want to debug requires input parameters,
Rapid SQL opens a Procedure Execution dialog box and prompts you for the input parameters when you open a
debugging session.
The Procedure Execution dialog box also lets you:
• Save input parameters as *.prm files to preserve specific input parameter configurations.
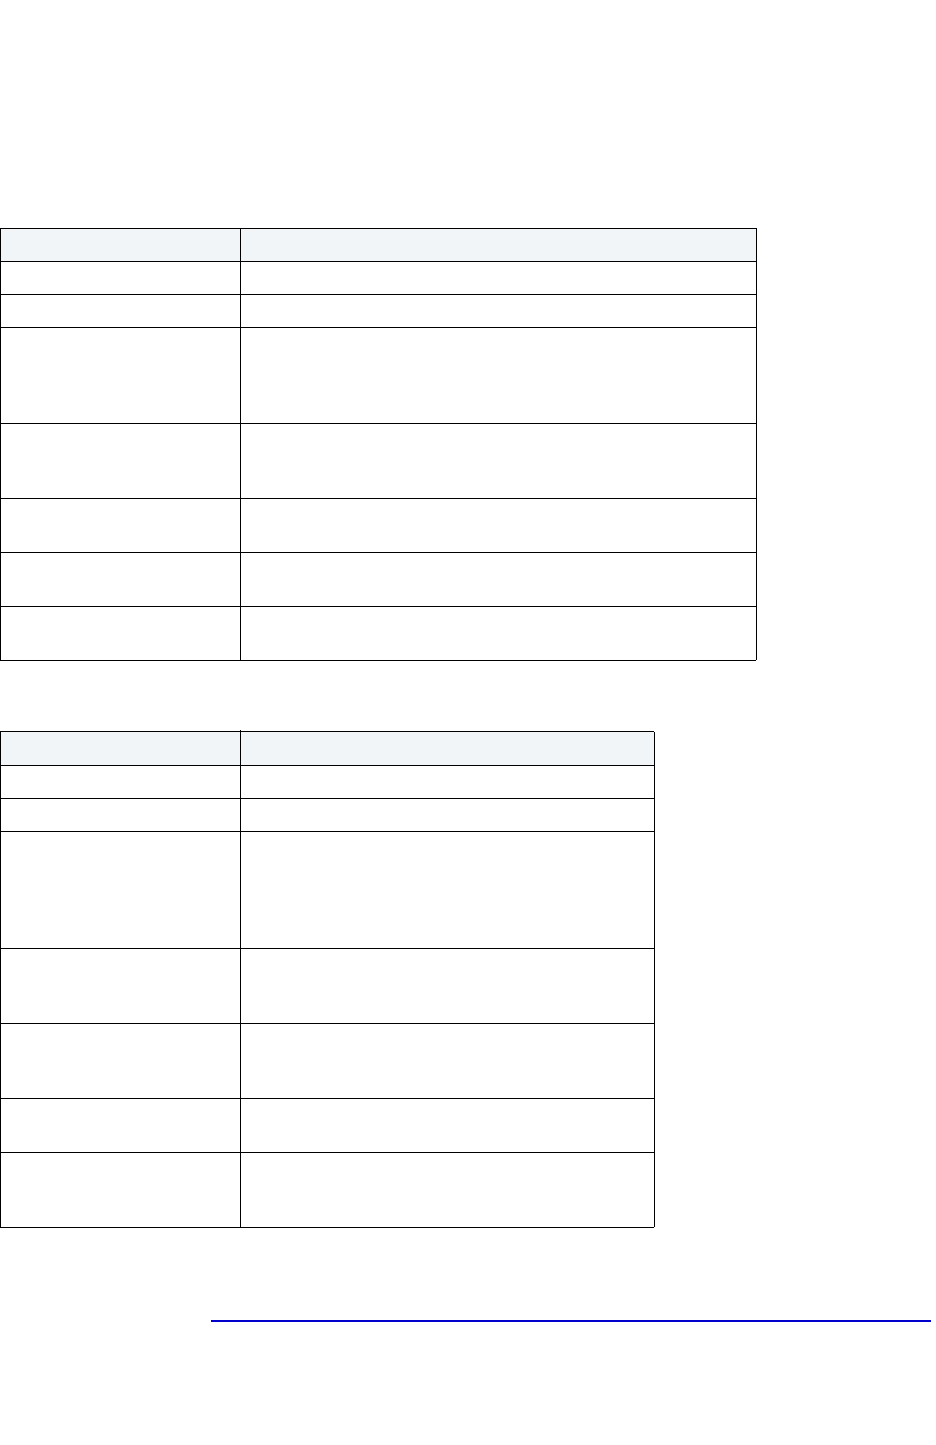
RAPID SQL ADD-ON TOOLS > EMBARCADERO SQL DEBUGGER FOR IBM DB2 UDB FOR LINUX, UNIX, AND WINDOWS
EMBARCADERO TECHNOLOGIES > BOOKNAMEVARIABLE 862
• Open *.prm files to save the effort of reentering specific input parameters.
• Reset parameters to their default setting.
The table below describes the options and functionality on Procedure Execution dialog box:
The following table describes the options available in this dialog box:
NOTE: You cannot debug a script that requires input parameters until you provide input parameters.
For more information, see Embarcadero SQL Debugger for IBM DB2 UDB for Linux, Unix, and Windows Functionality
.
Dialog box component Description
Owner drop-down list Displays the current procedure’s owner
Procedure drop-down list Displays the name of the current procedure.
Parameter window Specify the required input parameters in this window. If input
parameters are not required for the execution of the target
procedure, a message appears in this window, stating that the
procedure “has no input parameters. Press execute to run it.”
Open button Click to open an Open dialog box, from which you can open an
existing *.prm file. The saved parameters immediately populate the
dialog box upon opening.
Save button Click to save the values of your input parameters as a *.prm file.
You can reopen a saved *.prm file from this dialog box at any time.
Reset button Click to reset the parameters in the Parameter window to their
default values.
Execute button Click to execute the procedure once you have entered values for
all required parameters in the Parameter window.
Option Description
Owner Displays the current procedure’s owner.
Procedure Displays the name of the current procedure.
Parameter Specify the required input parameters in this window.
If input parameters are not required for the execution
of the target procedure, a message displays in this
window, stating that the procedure “has no input
parameters. Press execute to run it.”
Open Click to open an existing *.prm file. The saved
parameters immediately populate the dialog box
upon opening.
Save Click to save the values of your input parameters as
a *.prm file. You can reopen a saved *.prm file from
this dialog box at any time.
Reset Click to reset the parameters in the Parameter
window to their default values.
Continue Click to execute the procedure once you have
entered values for all required parameters in the
Parameter window.

EMBARCADERO TECHNOLOGIES > BOOKNAMEVARIABLE 863
Step Into for Embarcadero SQL Debugger for IBM DB2 UDB for Linux, Unix, and
Windows
After you open a debugging session, Step Into lets you execute the current instruction. If the current instruction makes
a call to a stored SQL object, the Embarcadero SQL Debugger for IBM DB2 UDB for Linux, Unix, and Windows steps
inside the nested child object.
To use the Step Into facility, do the following:
1 On the Debug menu, click Step Into.
OR
On the DDL Editor toolbar, click Step Into.
OR
In the DDL Editor window, right-click, and then click Step Into.
OR
Press F11.
The Embarcadero SQL Debugger for IBM DB2 UDB for Linux, Unix, and Windows moves the arrow to execute
the current instruction.
For more information, see Embarcadero SQL Debugger for IBM DB2 UDB for Linux, Unix, and Windows Functionality
.
Step Out for Embarcadero SQL Debugger for IBM DB2 UDB for Linux, Unix, and
Windows
After you open a debugging session, Step Out lets you execute the remainder of the dependent child object and
resumes line-by-line, step-debugging in the parent object.
NOTE: Step Out is only active when the pointer indicates a child dependent instruction.
To use the Step Out facility, do the following:
1 On the Debug menu, click Step Out.
OR
On the DDL Editor toolbar, click Step Out.
OR
In the DDL Editor window, right-click, and then click Step Out.
OR
Press SHIFT+F11.
The Embarcadero SQL Debugger for IBM DB2 UDB for Linux, Unix, and Windows stops stepping through the
current object and executes the remainder of the script.
For more information, see Embarcadero SQL Debugger for IBM DB2 UDB for Linux, Unix, and Windows Functionality
.
Step Over for Embarcadero SQL Debugger for IBM DB2 UDB for Linux, Unix, and
Windows
After you open a debugging session, Step Over lets you execute the current instruction without stepping into a nested
child object if the instruction makes a call to a dependent object.

RAPID SQL ADD-ON TOOLS > EMBARCADERO SQL DEBUGGER FOR IBM DB2 UDB FOR LINUX, UNIX, AND WINDOWS
EMBARCADERO TECHNOLOGIES > BOOKNAMEVARIABLE 864
To use the Step Over, do the following:
1 On the Debug menu, click Step Over.
OR
On the DDL Editor toolbar, click Step Over.
OR
In the DDL Editor window, right-click, and then click Step Over.
OR
Press F10.
The Embarcadero SQL Debugger for IBM DB2 UDB for Linux, Unix, and Windows executes the current
instruction.
For more information, see Embarcadero SQL Debugger for IBM DB2 UDB for Linux, Unix, and Windows Functionality
.
Run to Cursor for Embarcadero SQL Debugger for IBM DB2 UDB for Linux, Unix,
and Windows
After you open a debugging session, Run to Cursor lets you execute all instructions between the yellow arrow and the
cursor.
To use the Run to Cursor facility, do the following:
1 Scroll down from the yellow arrow to the target line.
2 Click the target line.
Embarcadero SQL Debugger for IBM DB2 UDB for Linux, Unix, and Windows places the cursor on the target
line.
3 On the Debug menu, click Run to Cursor.
OR
On the DDL Editor toolbar, click Run to Cursor.
OR
In the DDL Editor window, right-click, and then click Run to Cursor.
OR
Press CTRL+F10.
The Embarcadero SQL Debugger for IBM DB2 UDB for Linux, Unix, and Windows executes all instructions
between the pointer and the cursor.
For more information, see Embarcadero SQL Debugger for IBM DB2 UDB for Linux, Unix, and Windows Functionality
.
Insert or Remove Breakpoint for Embarcadero SQL Debugger for IBM DB2 UDB for
Linux, Unix, and Windows
A breakpoint is a position in a program where a debugger stops execution. When you start debugging, Embarcadero
SQL Debugger for IBM DB2 UDB for Linux, Unix, and Windows opens the script in a DDL Editor. A yellow arrow
pointer indicates which line the Embarcadero SQL Debugger for IBM DB2 UDB for Linux, Unix, and Windows
executes next.

RAPID SQL ADD-ON TOOLS > EMBARCADERO SQL DEBUGGER FOR IBM DB2 UDB FOR LINUX, UNIX, AND WINDOWS
EMBARCADERO TECHNOLOGIES > BOOKNAMEVARIABLE 865
The Embarcadero SQL Debugger for IBM DB2 UDB for Linux, Unix, and Windows executes all lines of code between
the yellow arrow and the first breakpoint. If no breakpoints are present, Embarcadero SQL Debugger for IBM DB2
UDB for Linux, Unix, and Windows debugs the entire script.
While debugging you can set one or more breakpoints in the currently executing object or in any object in the program
call stack. You can toggle
, temporarily disable or enable breakpoints without having to add or remove breakpoints.
Rapid SQL’s Embarcadero SQL Debugger for IBM DB2 UDB for Linux, Unix, and Windows displays each enabled
breakpoint as a red dot in the left margin of the DDL Editor Window, and each disabled breakpoint as a red circle.
Rapid SQL stores all breakpoints you set so that when you debug the same script on separate occasions, you can
reuse the same breakpoints. After you open a debugging session
, you can insert a breakpoint on the line where your
cursor is located, and you can remove a breakpoint on the line where your cursor is located.
NOTE: Script execution stops at the first breakpoint.
To insert and remove breakpoints, do the following:
1 In the DDL Editor window, click the target line of SQL.
2 On the Debug menu, click Breakpoint.
OR
On the DDL Editor toolbar, click Breakpoint.
OR
In the DDL Editor window, right-click, and then click Breakpoint.
OR
Press F9.
The Embarcadero SQL Debugger for IBM DB2 UDB for Linux, Unix, and Windows inserts a new breakpoint or
removes an existing breakpoint on the target line of code.
For more information, see Embarcadero SQL Debugger for IBM DB2 UDB for Linux, Unix, and Windows Functionality
.
Toggle Breakpoint for Embarcadero SQL Debugger for IBM DB2 UDB for Linux,
Unix, and Windows
After you open a debugging session and insert a breakpoint, Toggle Breakpoint lets you enable or disable that
breakpoint. Embarcadero SQL Debugger for IBM DB2 UDB for Linux, Unix, and Windows displays each enabled
breakpoint as a red dot in the left margin of the DDL Editor Window, and each disabled breakpoint as a red circle.
You can toggle any breakpoint in the DDL Editor window. When you exit a debugging session and reenter it, the
Embarcadero SQL Debugger for IBM DB2 UDB for Linux, Unix, and Windows retains any breakpoints you set.

RAPID SQL ADD-ON TOOLS > EMBARCADERO SQL DEBUGGER FOR IBM DB2 UDB FOR LINUX, UNIX, AND WINDOWS
EMBARCADERO TECHNOLOGIES > BOOKNAMEVARIABLE 866
To use the Toggle Breakpoint facility, do the following:
1 In the DDL Editor window, click the line of the target breakpoint.
2 On the Debug menu, click Enable/Disable Breakpoint.
OR
On the DDL Editor toolbar, click Enable/Disable Breakpoit.
OR
In the DDL Editor window, right-click, and then click Enable/Disable Breakpoint.
OR
Press CTRL+F9.
The Embarcadero SQL Debugger for IBM DB2 UDB for Linux, Unix, and Windows toggles the breakpoint
indicated by the pointer.
For more information, see Embarcadero SQL Debugger for IBM DB2 UDB for Linux, Unix, and Windows Functionality
.
Go for Embarcadero SQL Debugger for IBM DB2 UDB for Linux, Unix, and
Windows
After you open a debugging session, Go lets you execute all instructions stopping only when when it encounters a
breakpoint or when the program is complete.
To use the Go facility, do the following:
1 On the Debug menu, click Go.
OR
On the DDL Editor toolbar, click Go.
OR
In the DDL Editor window, right-click, and then click Go.
OR
Press F5.
The Embarcadero SQL Debugger for IBM DB2 UDB for Linux, Unix, and Windows executes all instructions.
For more information, see Embarcadero SQL Debugger for IBM DB2 UDB for Linux, Unix, and Windows Functionality
.
Stop for Embarcadero SQL Debugger for IBM DB2 UDB for Linux, Unix, and
Windows
After you open a debugging session, Stop lets you halt the script execution and terminate the session.

RAPID SQL ADD-ON TOOLS > EMBARCADERO SQL DEBUGGER FOR IBM DB2 UDB FOR LINUX, UNIX, AND WINDOWS
EMBARCADERO TECHNOLOGIES > BOOKNAMEVARIABLE 867
To use the Stop facility, do the following:
1 On the Debug menu, click Stop Debugging.
OR
On the DDL Editor toolbar, click Stop Debugging.
OR
In the DDL Editor window, right-click, and then click Stop Debugging.
OR
Press SHIFT+F5.
The Embarcadero SQL Debugger for IBM DB2 UDB for Linux, Unix, and Windows stops the script execution and
terminates the session.
For more information, see Embarcadero SQL Debugger for IBM DB2 UDB for Linux, Unix, and Windows Functionality
.
Restart for Embarcadero SQL Debugger for IBM DB2 UDB for Linux, Unix, and
Windows
After you open a debugging session, Restart lets you terminate the current debug session and open a new one. When
the new session opens, Rapid SQL prompts you for new input parameters.
To use the Restart facility, do the following:
1 On the Debug menu, click Restart.
OR
On the DDL Editor toolbar, click Restart.
OR
In the DDL Editor window, right-click, and then click Restart.
OR
Press CTRL+SHIFT+F5.
The Embarcadero SQL Debugger for IBM DB2 UDB for Linux, Unix, and Windows restarts the debug session.
For more information, see Embarcadero SQL Debugger for IBM DB2 UDB for Linux, Unix, and Windows Functionality
.
Break for Embarcadero SQL Debugger for IBM DB2 UDB for Linux, Unix, and
Windows
After you open a debugging session, Break lets you pause the debug session.

RAPID SQL ADD-ON TOOLS > EMBARCADERO SQL DEBUGGER FOR IBM DB2 UDB FOR LINUX, UNIX, AND WINDOWS
EMBARCADERO TECHNOLOGIES > BOOKNAMEVARIABLE 868
To use the Break facility, do the following:
1 On the Debug menu, click Break.
OR
On the DDL Editor toolbar, click Break.
OR
In the DDL Editor window, right-click, and then click Break.
The Embarcadero SQL Debugger for IBM DB2 UDB for Linux, Unix, and Windows suspends the debug session.
For more information, see Embarcadero SQL Debugger for IBM DB2 UDB for Linux, Unix, and Windows Functionality
.
Close for Embarcadero SQL Debugger for IBM DB2 UDB for Linux, Unix, and
Windows
After you open a debugging session, Close lets you close the DDL Editor and the Embarcadero SQL Debugger for
IBM DB2 UDB for Linux, Unix, and Windows.
To use the Close facility, do the following:
1 On the DDL Editor toolbar, click Close.
OR
In the upper right corner of the window, click Close.
OR
In the DDL Editor window, right-click, and then click Close.
The Embarcadero SQL Debugger for IBM DB2 UDB for Linux, Unix, and Windows closes the debug session.
For more information, see Embarcadero SQL Debugger for IBM DB2 UDB for Linux, Unix, and Windows Functionality
.
Using the Embarcadero SQL Debugger for IBM DB2 UDB for Linux,
Unix, and Windows
This section offers a general overview of how to use Embarcadero SQL Debugger for IBM DB2 UDB for Linux, Unix,
and Windows’s full range of debugging functionality. After you open a debugging session for any procedure or trigger,
you can begin debugging
.
Opening a Debugging Session in IBM DB2 UDB for Linux, Unix, and Windows
When you open a debugging session, Rapid SQL opens the five windows of the Embarcadero SQL Debugger for IBM
DB2 UDB for Linux, Unix, and Windows interface. If the target script requires input parameters, Rapid SQL opens a
Procedure Execution dialog box and prompts you for the necessary input parameters before displaying the target
code in the SQL Editor window. When Rapid SQL displays the target script in the SQL Editor window, you can begin
debugging.
NOTE: Embarcadero SQL Debugger for IBM DB2 UDB for Linux, Unix, and Windows only lets you debug
the SQL script of procedures or triggers.

RAPID SQL ADD-ON TOOLS > EMBARCADERO SQL DEBUGGER FOR IBM DB2 UDB FOR LINUX, UNIX, AND WINDOWS
EMBARCADERO TECHNOLOGIES > BOOKNAMEVARIABLE 869
To debug triggers by debugging the procedures that call them, do the following:
1 On the Explorer Tab, click the node of the target trigger or procedure. The node expands and displays the Code
object.
2 Double-click Code. The DDL Editor opens and displays the code of the target object.
3 On the Debug menu, click Start Debugging.
OR
On the SQL Editor toolbar, click Debug.
OR
In the DDL Editor window, right-click, and then click Debug.
OR
Press CTRL+F5.
4 On the toolbar, click Debug.
OR
In the DDL Editor window, right-click, and then click Debug.
If the script requests input parameters, Rapid SQL opens a Procedure Execution dialog box. If the script does
not require input parameters, Rapid SQL displays the script in the DDL Editor window for you to begin
debugging.
NOTE: You cannot use the Embarcadero SQL Debugger for IBM DB2 UDB for Linux, Unix, and Windows
until it has fully initialized.
5 In the Procedure Execution dialog box, specify the appropriate parameters, and then click Continue.
Rapid SQL displays the script in the DDL Editor window for you to begin debugging
.
Debugging an SQL Script with Embarcadero SQL Debugger for IBM DB2 UDB for
Linux, Unix, and Windows
After you open a debugging session and enter any required input parameters, you can begin working with your script
in the Embarcadero SQL Debugger for IBM DB2 UDB for Linux, Unix, and Windows.
Debugging an SQL Script
To debug a SQL Script, do the following:
1 On the Debug menu, click one of the T-SQL Debugger options (Step Into
, Step Over, and so forth) or click Go.
OR
On the DDL Editor toolbar, click one of the T-SQL Debugger options (Step Into, Step Over, and so on) or click
Go.
NOTE: You can monitor the progress of your debug session in the Variables window.

RAPID SQL ADD-ON TOOLS > EMBARCADERO SQL DEBUGGER FOR MICROSOFT SQL SERVER
EMBARCADERO TECHNOLOGIES > BOOKNAMEVARIABLE 870
2 On the Debug menu, click Breakpoint.
OR
On the DDL Editor toolbar, click Breakpoint.
OR
Press F9.
NOTE: When you set a breakpoint, the Call Stack window shows what was called before the breakpoint.
NOTE: You can use the Run to Cursor option to test the lines of code between a breakpoint and your
cursor (indicated by the yellow arrow in the DDL Editor).
3 To check your variables:
1) In the DDL Editor, click a variable in your script and drag it to the Watch window.
2) In the Watch window, change the value of the watch variable, and then click Go to run your script and see
the results of the new value.
4 To check a record in stored objects:
1) Drag the record to the Watch window.
2) In the Watch window, change the value of the record, then click Go to run your script and see the results of
the new value.
5 To check the dependencies:
1) In the Dependency Tree window double-click the target dependent object to extract the code into a new
DDL Editor.
2) Step through the script while monitoring the Dependency Tree window.
6 When you finish debugging the script, click Close.
Rapid SQL closes the T-SQL Debugger DDL Editor.
NOTE: When you exit a debug session and reenter it, the Embarcadero SQL Debugger for MSSQL
retains any watch variables or breakpoints you have set.
Embarcadero SQL Debugger for Microsoft SQL Server
Embarcadero SQL Debugger for Microsoft is a programming tool that helps you locate and fix bugs in Microsoft SQL
Server procedures and triggers for Microsoft SQL Server version 7.0 or later.
NOTE: The Embarcadero SQL Debugger for Microsoft is an optional add-on module.
Objects
You can use Embarcadero SQL Debugger for Microsoft to debug the following objects:
• Procedures
• Triggers
You can only debug triggers by debugging the procedures that call them.
TIP: The ‘Code Analyst
is a tool to identify time-consuming lines of code. Code Analyst lets you
perform detailed response time analysis on the execution of Procedures and Functions.
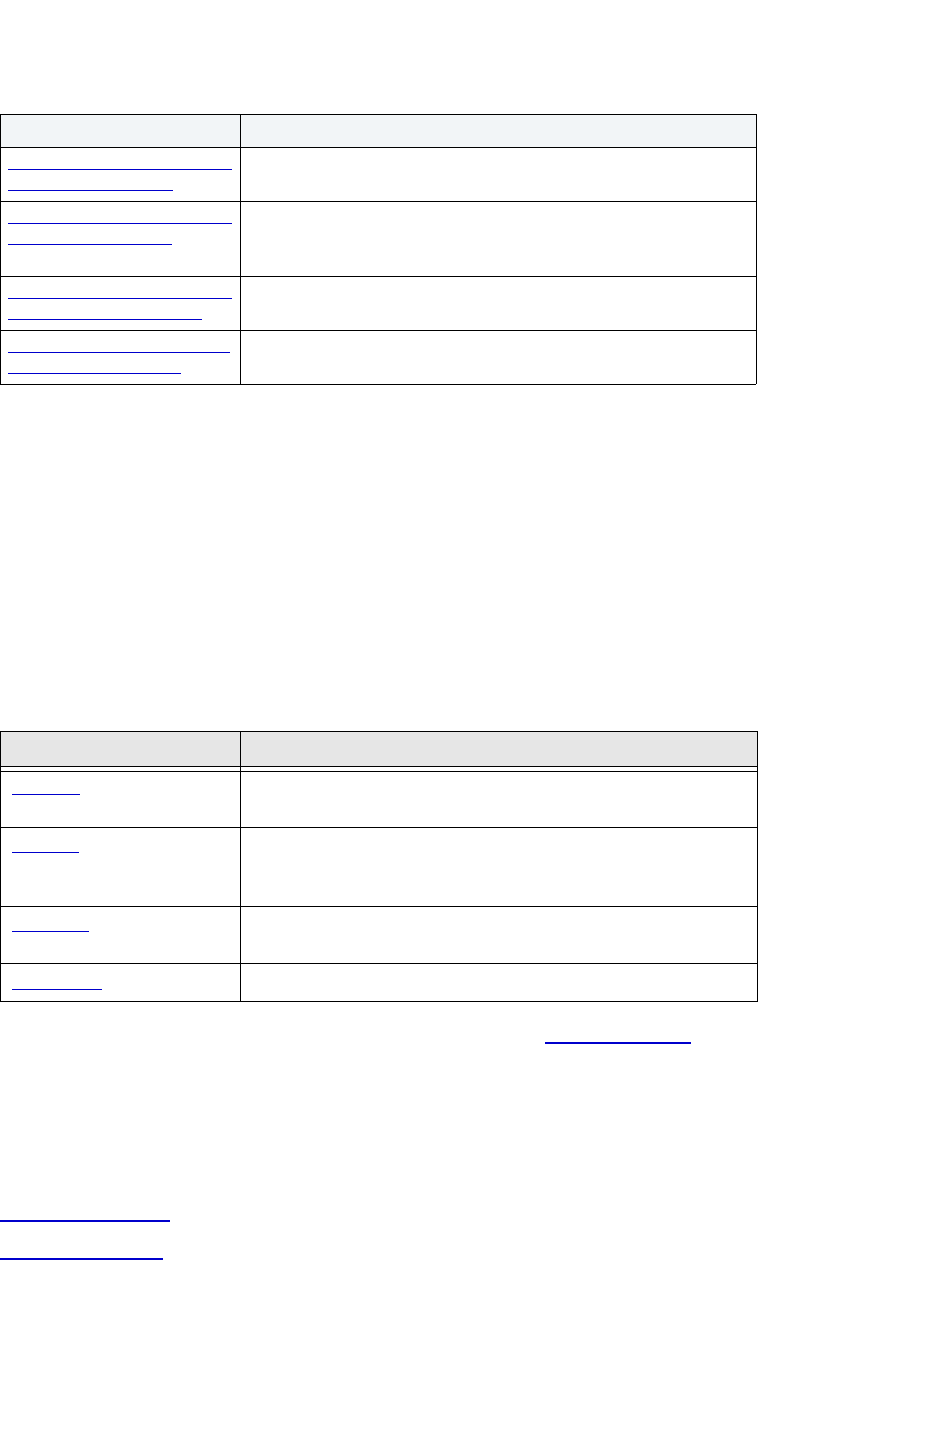
RAPID SQL ADD-ON TOOLS > EMBARCADERO SQL DEBUGGER FOR MICROSOFT SQL SERVER
EMBARCADERO TECHNOLOGIES > BOOKNAMEVARIABLE 871
The table below describes the sections of this chapter:
Embarcadero SQL Debugger for Microsoft Features
The Embarcadero SQL Debugger for Microsoft helps you identify problems within your code. The Embarcadero SQL
Debugger for Microsoft lets you:
• Interactively step through the flow of script execution.
• Examine the value of variables.
• Solve logical problems with your script design.
The Embarcadero SQL Debugger for Microsoft offers fundamental debugging features and several options to help fine
tune debugging, as listed in the table below:
To set specific Debugger values on Rapid SQL’s Options Editor, see Debugger Options
.
Embarcadero SQL Debugger for Microsoft Requirements
To use the Embarcadero SQL Debugger for Microsoft, you must properly configure the server and client. For more
information, see:
Server Requirements
Client Requirements
Section Description
Embarcadero SQL Debugger
for Microsoft Features
This section describes how Embarcadero SQL Debugger for
Microsoft helps you identify problems within your code.
Embarcadero SQL Debugger
for Microsoft Interface
This section describes the Embarcadero SQL Debugger for
Microsoft graphical interface that includes an editor window and
four debug view windows.
Embarcadero SQL Debugger
for Microsoft Functionality
This section describes the way in which Embarcadero SQL
Debugger for Microsoft functions.
Using the Embarcadero SQL
Debugger for Microsoft
This section describes how to run a debug session.
Debugging Feature Description
Step Into Lets you execute each instruction step-by-step and step inside a
stored object
.
Step Out Lets you stop stepping through the current object and execute the
remainder of the script
. This option is only active when the pointer
indicates a child dependent instruction
.
Step Over Lets you execute the current instruction without stepping into any
child dependents
.
Breakpoints A position in a program where the debugger stops execution.

RAPID SQL ADD-ON TOOLS > EMBARCADERO SQL DEBUGGER FOR MICROSOFT SQL SERVER
EMBARCADERO TECHNOLOGIES > BOOKNAMEVARIABLE 872
Server Requirements
To use the Embarcadero SQL Debugger for Microsoft you must be running Windows 2000 or Windows NT 4.0 or later,
and your Microsoft SQL Server version must be 7.0 or later.
Setting Up the Server
There are three parts to setting up the server:
•
Installing the Microsoft SQL Debugger Interface subcomponent.
• Configuring the Service.
• Configuring DCOM on the server
Enabling SQL Debugger for Microsoft on SQL Server SP3
SQL Debugging is disabled by default in SQL Server SP3 and greater. Please refer to Microsoft Support
for
information regarding enabling the SQL Debugger for Microsoft on SQL Server SP3.
Installing the Microsoft SQL Debugger Interface Subcomponent
The Microsoft server must have the Development Tools, Debugger Interface subcomponent of Microsoft SQL Server
7.0. To determine if the Debugger Interface subcomponent is installed, locate the following files in the \Program
Files\Common Files\Microsoft Shared\SQL Debugging directory:
• SQLDBREG.exe
•SQLDBG.dll
If these files are not in the \Program Files\Common Files\Microsoft Shared\SQL Debugging directory, you must install
them before running the Embarcadero SQL Debugger for Microsoft.
Installing the Microsoft SQL Debugger Interface on the Server
To install the Debugger Interface subcomponent on the server after the initial installation, do the following:
1Start Microsoft Visual Studio, Enterprise Edition Setup.
OR
Start Microsoft SQL Server 7.0 Setup.
2Select Custom Install.
Microsoft SQL Server opens the Select Components dialog box:
3 In the Components box, select the Development Tools check box.
4 In the Sub-components box, select the Debugger Interface check box.
5 Click Next.
Microsoft SQL Server proceeds through the Microsoft SQL Server wizard to install the components.
Configuring the Service
Configuring the service is an operating-system-dependent operation. See the instructions below for your server
operating system.
•
WIndows 2000
• Windows NT 4.0

RAPID SQL ADD-ON TOOLS > EMBARCADERO SQL DEBUGGER FOR MICROSOFT SQL SERVER
EMBARCADERO TECHNOLOGIES > BOOKNAMEVARIABLE 873
Windows 2000
1 On the Windows taskbar, click the Start button, click Settings, and then click Control Panel.
2 Double-click Administrative Tools, and then click Services.
Windows opens the Services explorer.
3 In the right pane of the Services explorer, right click MSSQLServer, and then click Properties.
Windows opens the Net Logon Properties dialog box.
4 Click the Logon Tab.
5 Select the This Account option button.
6 In the This Account box, type (or browse to locate) the logon user account (including domain name, if
necessary) of the person using the Embarcadero SQL Debugger for Microsoft.
NOTE: This person must have admin permissions on the server.
7 In the Password and Confirm Password boxes, type the password.
8 Click Apply.
9 Click the General Tab.
10 Click Start.
Windows starts the server and applies the changes.
Important Notes about Microsoft SQL Server 2000 Service Pack 3 (SP3)
By default, after you install Microsoft SQL Server 2000 Service Pack 3 (SP3), you cannot use the Embarcadero SQL
Debugger for Microsoft. You may receive the following error message:
“Server: Msg 514, Level 16, State 1, Procedure sp_sdidebug, Line 1 [Microsoft][ODBC SQL Server Driver][SQL
Server]Unable to communicate with debugger on [SQL Server Name] (Error = 0x80070005). Debugging
disabled for connection 53.”
Microsoft made this change for security reasons. To enable debugging, a member of the sysadmins server role, such
as sa, must explicitly enable debugging by running the following code:
Exec sp_sdidebug 'legacy_on'
You must repeat this procedure whenever you restart the server.
Windows NT 4.0
1 On the Windows taskbar, click the Start button, select Settings and then click Control Panel.
2 Double-click Services.
Windows opens the Services dialog box.
3 In the Service list, select MSSQLServer and then click Startup.
4 In the Log On As: box, select the This Account option button.
5In the This Account box, type the logon user account (including domain name, if necessary) of the person using
the Embarcadero SQL Debugger for Microsoft.
NOTE: This person must have admin permissions on the server.
6 In the Password and Confirm Password boxes, type the password.

RAPID SQL ADD-ON TOOLS > EMBARCADERO SQL DEBUGGER FOR MICROSOFT SQL SERVER
EMBARCADERO TECHNOLOGIES > BOOKNAMEVARIABLE 874
7 Click OK.
Windows returns to the Services dialog box.
8 Click Start.
Windows starts the server and applies the changes.
Configuring DCOM on the Server
To configure DCOM, do the following:
1 After the server restarts, on the Windows taskbar, click the Start button, and then click Run.
2 In the Open box, type dcomcnfg.exe.
3 Click OK.
Windows opens the Distributed COM Configuration Properties dialog box.
4 Click the Default Security Tab.
5 In the Default Access Permissions box, click Edit Default.
Windows opens the Registry Value Permissions dialog box.
6 Click Add.
Windows opens the Add Users and Groups dialog box.
7 In the Names box, select SYSTEM, and then click Add.
8 Click the Type of Access list and then click Allow Access.
9 To let any user use the Embarcadero SQL Debugger for Microsoft, you must grant them remote access on the
server. To grant remote access, you must configure their DCOM permissions on the server. In the Names box,
click the target users and then click Add.
NOTE: You can add individual users or groups.
10 Click the Type of Access list and then click Allow Access.
11 Click OK.
12 Restart the server to apply the changes.
Client Requirements
There are three categories of client requirements for the Embarcadero SQL Debugger for Microsoft:
• Operating System
• Microsoft SQL Server 7.0, Client Connectivity Component
• Microsoft SQL Server 7.0, Development Tools - Debugger Interface Subcomponent
Operating System
The client must be running one of the following operating systems:
• Microsoft Windows 95
• Microsoft Windows 98

RAPID SQL ADD-ON TOOLS > EMBARCADERO SQL DEBUGGER FOR MICROSOFT SQL SERVER
EMBARCADERO TECHNOLOGIES > BOOKNAMEVARIABLE 875
• Microsoft Windows NT 4.0 or later
Important Notes about Microsoft SQL Server 2000 Service Pack 3 (SP3)
By default, after you install Microsoft SQL Server 2000 Service Pack 3 (SP3), you cannot use the Embarcadero SQL
Debugger for Microsoft. You may receive the following error message:
“Server: Msg 514, Level 16, State 1, Procedure sp_sdidebug, Line 1 [Microsoft][ODBC SQL Server Driver][SQL
Server]Unable to communicate with debugger on [SQL Server Name] (Error = 0x80070005). Debugging
disabled for connection 53.”
Microsoft made this change for security reasons. To enable debugging, a member of the sysadmins server role, such
as sa, must explicitly enable debugging by running the following code:
Exec sp_sdidebug 'legacy_on'
You must repeat this procedure whenever you restart the server.
Client Connectivity
The client must have the Client Connectivity component of Microsoft SQL Server 7.0 or later.
Microsoft Debugger Interface
The client must have the Development Tools, Debugger Interface subcomponent of Microsoft SQL Server 7.0 or later.
To determine if the Debugger Interface subcomponent is installed, locate the following files in the \Program
Files\Common Files\Microsoft Shared\SQL Debugging directory:
• SQLDBREG.exe
•SQLDBG.dll
If these files are not in the \Program Files\Common Files\Microsoft Shared\SQL Debugging directory, you must install
them before running the Embarcadero SQL Debugger for Microsoft.
Installing the Microsoft SQL Debugger Interface on the Client
To install the Debugger Interface subcomponent on the client:
1 Start the Microsoft SQL Server Setup program.
2Select Custom Install.
Microsoft SQL Server opens the Select Components dialog box.
3 In the Components box, select the Development Tools check box.
4 In the Sub-Components box, select the Debugger Interface check box.
5 Click Next.
Microsoft SQL Server proceeds through the Microsoft SQL Server Wizard to install the components.
Embarcadero SQL Debugger for Microsoft Options
You can specify T-SQL Debugger options from the Debug Tab of Rapid SQL’s Options editor. The Debug Tab of the
Options Editor lets you set the duration of your debug initialization and debug session, enable DBMS output, and
refresh dependencies.

RAPID SQL ADD-ON TOOLS > EMBARCADERO SQL DEBUGGER FOR MICROSOFT SQL SERVER
EMBARCADERO TECHNOLOGIES > BOOKNAMEVARIABLE 876
Setting Debugger Options
To set debugger options, do the following:
1 On the File menu, click Options.
OR
On the Main toolbar, click Options.
Rapid SQL opens the Options Editor.
2 Specify debugger options. The table below describes the options available:
3 Click Close.
Rapid SQL closes the Options Editor.
Embarcadero SQL Debugger for Microsoft Interface
The Embarcadero SQL Debugger for Microsoft has a graphical interface that includes an editor window
and four debug view windows
. When you open a debug session, Rapid SQL extracts the code for the object
into a DDL Editor and opens four debug view windows at the bottom of the screen
. The four debug view
windows are optional, dockable windows designed to help you debug your script
.
TIP: All Embarcadero debuggers display Performance Metrics that let you measure the execution time
of each statement in the debug session.
Embarcadero SQL Debugger for Microsoft’s five windows are:
1
DDL Editor window
2 Watch window
3 Variables window
4 Call Stack window
5 Dependency Tree window
Working with T-SQL Debugger Windows
Rapid SQL lets you resize, move, dock and float the following T-SQL Debugger windows:
•Watch
Option Description Default
Initialization
Timeout (seconds)
Specifies the number of seconds Rapid SQL tries to initialize
the debugger. If it cannot initialize the debugger in the specified
time, a message displays in the Debug Output window.
60
Debug Session
Timeout (seconds)
Specifies, in seconds, the length of your debug session. 7200
Enable DBMS
Output
Toggles the print output. Enable this option if you use
dbms_output.put_line calls in your procedures and you want
these lines displayed.
Selected
Refresh
Dependencies for
each run
Refreshes dependencies for each run. This potentially
time-consuming process is useful if the target procedure has
rapidly varying dependencies that can require updating during
the debugging process.
Cleared

RAPID SQL ADD-ON TOOLS > EMBARCADERO SQL DEBUGGER FOR MICROSOFT SQL SERVER
EMBARCADERO TECHNOLOGIES > BOOKNAMEVARIABLE 877
• Variables
• Call Stack
• Dependency Tree
To work with the above windows, do the following:
1 To resize the target window, click its frame and drag it
Rapid SQL resizes the window.
2 To move and dock the target window, click its grab bar and drag it.
Rapid SQL moves the window to its new location and docks it with surrounding windows.
3 To float the target window, press Shift, then click its grab bar and drag it.
Rapid SQL frames the window in its own floating frame and moves the window to its new location.
DDL Editor Window
The Embarcadero SQL Debugger for Microsoft provides a DDL Editor that displays your code in read-only format.
When you start debugging, the SQL Embarcadero SQL Debugger for Microsoft extracts your code into a DDL Editor.
The DDL Editor uses the default Rapid SQL syntax coloring.
Watch Window
The Rapid SQL Embarcadero SQL Debugger for Microsoft provides a watch window that displays the watch variables
for the database object you are debugging and lets you specify variables you want to evaluate or modify while
debugging your program. For example, to check what happens when a variable (x) has a value of 100, you can
double-click the variable in the DDL Editor, drag it into the Watch Window, and change the value to 100. When you
execute the script, the Debugger uses the value x =100. This window is only visible when the T-SQL Debugger is
active.
NOTE: Until you step at least once into a script, variables are not defined. Therefore, you must step at
least once before dragging or typing a local variable in the Watch Window.
NOTE: When you exit a debug session and reenter it, the Embarcadero SQL Debugger for Microsoft
retains any watch variables or breakpoints you have set.
Opening and Closing the Watch Window
To open and close the Watch Window, do the following:
1 On the Debug Menu, on the Debug Views sub-menu, select or clear Watch.
OR
Press ALT+3.
Setting a Watch Variable
To set a Watch Variable, do the following:
1 In the DDL Editor, double-click the target variable and drag it to the Watch window.
NOTE: Microsoft SQL Server requires that local variables begin with @. You must drag the @ to the
Watch Window.

RAPID SQL ADD-ON TOOLS > EMBARCADERO SQL DEBUGGER FOR MICROSOFT SQL SERVER
EMBARCADERO TECHNOLOGIES > BOOKNAMEVARIABLE 878
2 In the Watch window, change the value of the variable.
3On the DDL Editor, click Go.
The Embarcadero SQL Debugger for Microsoft executes the script using the new variable.
Removing a Watch Variable
To remove a Watch Variable, do the following:
1 In the Watch window, click the target variable and press DELETE.
Variables Window
The Embarcadero SQL Debugger for Microsoft provides a variables window that displays the local variables and their
current values during script execution. You cannot edit the variables in the Variables window. If the DDL Editor
displays an external database object, and that object is a dependent of the object you are debugging, then the
Variables Window automatically refreshes and displays the variables for that particular object. The Variables Window
is only visible when the Debugger is active.
The Embarcadero SQL Debugger for Microsoft also lets you monitor your variables while debugging.
Opening and Closing the Variables Window
To open and close the Variables Window, do the following:
1 On the Debug Menu, on the Debug Views sub-menu, select or clear Variable.
OR
Press ALT+4.
Monitoring Variables
To monitor the values of your variables while debugging, do the following:
1 In the SQL Editor, hold the pointer over the target variable.
Rapid SQL opens a ScreenTip displaying the current value of that variable.
Call Stack Window
The Embarcadero SQL Debugger for Microsoft provides a call stack window that displays the stack of currently active
calls. The Call Stack Window is only visible when the Debugger is active.
Opening and Closing the Call Stack Window
To open and close the Call Stack Window, do the following:
1 On the Debug Menu, on the Debug Views sub-menu, select or clear Call Stack.
OR
Press ALT+5.

RAPID SQL ADD-ON TOOLS > EMBARCADERO SQL DEBUGGER FOR MICROSOFT SQL SERVER
EMBARCADERO TECHNOLOGIES > BOOKNAMEVARIABLE 879
Using the Call Stack Window
To display a line of code that references the call in the DDL Editor, do the following:
1 In the Call Stack window, double-click the target line.
In the DDL Editor, Rapid SQL displays a green arrow on the line of the referenced call.
Dependency Tree Window
The Embarcadero SQL Debugger for Microsoft provides a dependency tree window that displays any external
database objects the script accesses. Rapid SQL displays these database objects in a hierarchical tree, with the child
objects as database objects accessed by the parent objects. You can use this window to display the code for a
dependent database object in the DDL Editor window. This window is only visible when the Debugger is active.
Opening and Closing the Dependency Tree Window
To open and close the Dependency Tree Window, do the following:
1 On the Debug Menu, on the Debug Views sub-menu, select or clear Dependencies.
OR
Press ALT+6.
Displaying Dependencies
To display the code for a dependent database object in the DDL Editor window, do the following:
1 In the Dependency Tree window, double-click the target object.
Rapid SQL displays the SQL of the target object in the DDL Editor window.
Embarcadero SQL Debugger for Microsoft Functionality
The Embarcadero SQL Debugger for Microsoft offers the following functionality:
•
Input Parameters
• Step Into
• Step Out
• Step Over
• Run to Cursor
• Insert or Remove a Breakpoint
• Toggle Breakpoint
• Go
• Stop
• Restart
• Break
• Close
To make use of the above functionality, you must first open a debugging session
.
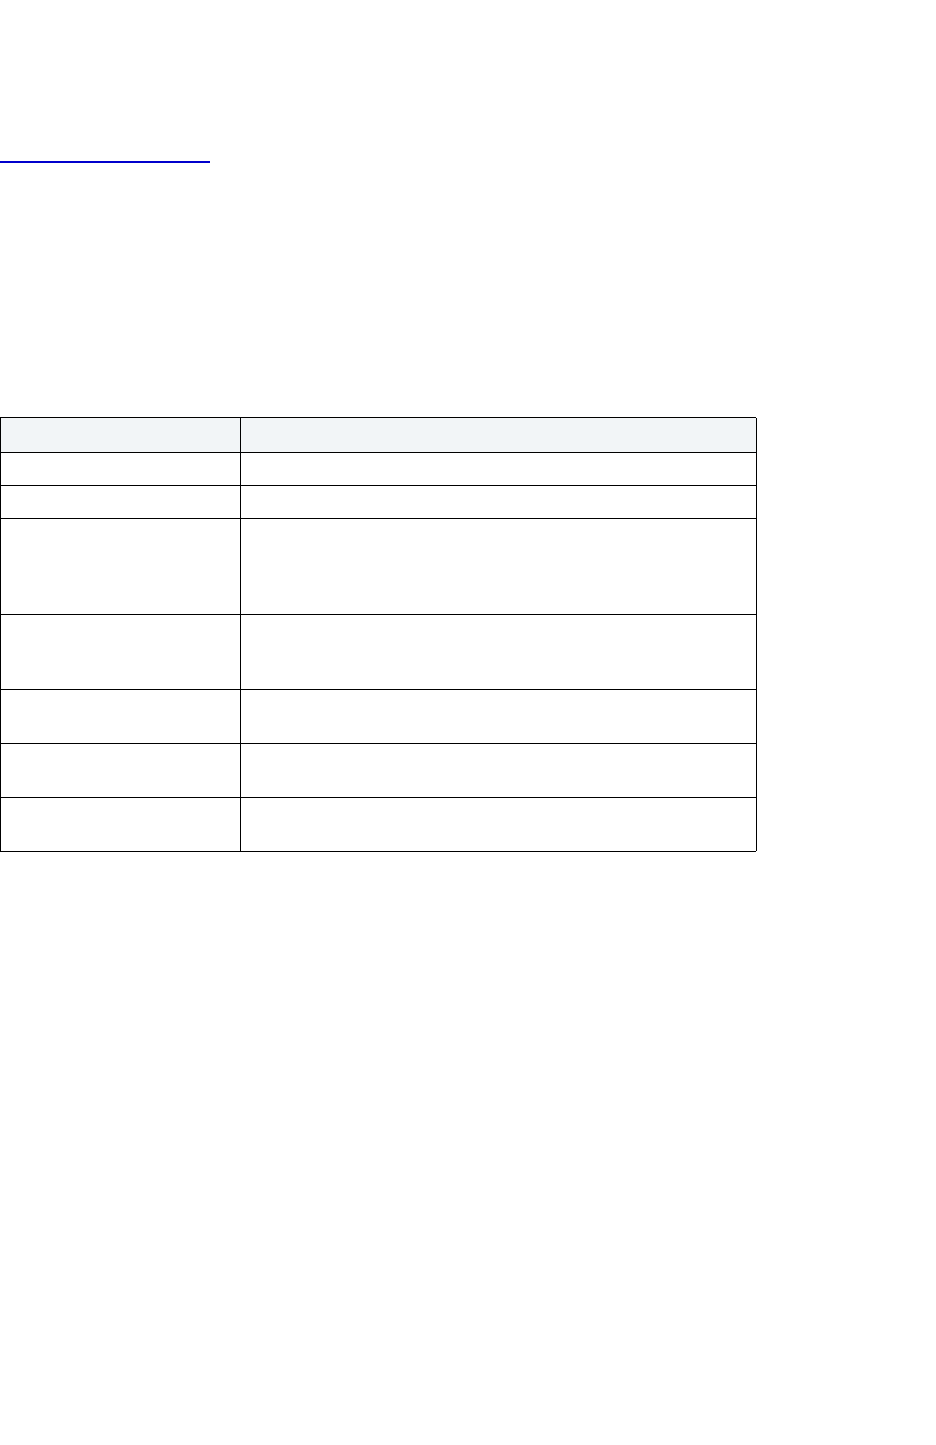
RAPID SQL ADD-ON TOOLS > EMBARCADERO SQL DEBUGGER FOR MICROSOFT SQL SERVER
EMBARCADERO TECHNOLOGIES > BOOKNAMEVARIABLE 880
Input Parameters
Input parameters are set when you first create an object. If the object you want to debug requires input parameters,
Rapid SQL opens a Procedure or Trigger Execution dialog box and prompts you for the input parameters when you
open a debugging session
.
This dialog box also lets you:
• Save input parameters as *.prm files to preserve specific input parameter configurations.
• Open *.prm files to save the effort of reentering specific input parameters.
• Reset parameters to their default setting.
The table below describes the options and functionality on Procedure Execution dialog box:
The following table describes the options available in this dialog box:
Dialog box component Description
Owner drop-down list Displays the current procedure’s owner
Procedure drop-down list Displays the name of the current procedure.
Parameter window Specify the required input parameters in this window. If input
parameters are not required for the execution of the target
procedure, a message appears in this window, stating that the
procedure “has no input parameters. Press execute to run it.”
Open button Click to open an Open dialog box, from which you can open an
existing *.prm file. The saved parameters immediately populate the
dialog box upon opening.
Save button Click to save the values of your input parameters as a *.prm file.
You can reopen a saved *.prm file from this dialog box at any time.
Reset button Click to reset the parameters in the Parameter window to their
default values.
Execute button Click to execute the procedure once you have entered values for
all required parameters in the Parameter window.

RAPID SQL ADD-ON TOOLS > EMBARCADERO SQL DEBUGGER FOR MICROSOFT SQL SERVER
EMBARCADERO TECHNOLOGIES > BOOKNAMEVARIABLE 881
NOTE: You cannot debug a script that requires input parameters until you provide input parameters.
Step Into
After you open a debugging session, Step Into lets you execute the current instruction. If the current instruction makes
a call to a stored SQL object, the Embarcadero SQL Debugger for Microsoft steps inside the nested child object.
Step Into
To use the Step Into facility, do the following:
1 On the Debug menu, click Step Into.
OR
On the DDL Editor toolbar, click Step Into.
OR
In the DDL Editor window, right-click and then click Step Into.
OR
Press F11.
The Embarcadero SQL Debugger for Microsoft moves the arrow to execute the current instruction.
Step Out
After you open a debugging session, Step Out lets you execute the remainder of the dependent child object and
resumes line-by-line, step-debugging in the parent object.
NOTE: Step Out is only active when the pointer indicates a child dependent instruction.
Option Description
Owner Displays the current procedure’s owner.
Procedure Displays the name of the current procedure.
Parameter Specify the required input parameters in this window.
If input parameters are not required for the execution
of the target procedure, a message displays in this
window, stating that the procedure “has no input
parameters. Press execute to run it.”
Open Click to open an existing *.prm file. The saved
parameters immediately populate the dialog box
upon opening.
Save Click to save the values of your input parameters as
a *.prm file. You can reopen a saved *.prm file from
this dialog box at any time.
Reset Click to reset the parameters in the Parameter
window to their default values.
Continue Click to execute the procedure once you have
entered values for all required parameters in the
Parameter window.

RAPID SQL ADD-ON TOOLS > EMBARCADERO SQL DEBUGGER FOR MICROSOFT SQL SERVER
EMBARCADERO TECHNOLOGIES > BOOKNAMEVARIABLE 882
Step Out
To use the Step Out facility, do the following:
1 On the Debug menu, click Step Out.
OR
On the DDL Editor toolbar, click Step Out.
OR
In the DDL Editor window, right-click and then click Step Out.
OR
Press SHIFT+F11.
The Embarcadero SQL Debugger for Microsoft stops stepping through the current object and executes the
remainder of the script.
Step Over
After you open a debugging session, Step Over lets you execute the current instruction without stepping into a nested
child object if the instruction makes a call to a dependent object.
Step Over
To use the Step Over facility, do the following:
1 On the Debug menu, click Step Over.
OR
On the DDL Editor toolbar, click Step Over.
OR
In the DDL Editor window, right-click and then click Step Over.
OR
Press F10.
The Embarcadero SQL Debugger for Microsoft executes the current instruction.
Run to Cursor
After you open a debugging session, Run to Cursor lets you execute all instructions between the yellow arrow and the
cursor.
Run to Cursor
To use the Run to Cursor facility, do the following:
1 Scroll down from the yellow arrow to the target line.
2 Click the target line.
Embarcadero SQL Debugger for Microsoft places the cursor on the target line.

RAPID SQL ADD-ON TOOLS > EMBARCADERO SQL DEBUGGER FOR MICROSOFT SQL SERVER
EMBARCADERO TECHNOLOGIES > BOOKNAMEVARIABLE 883
3 On the Debug menu, click Run to Cursor.
OR
On the DDL Editor toolbar, click Run to Cursor.
OR
In the DDL Editor window, right-click and then click Run to Cursor.
OR
Press CTRL+F10.
The Embarcadero SQL Debugger for Microsoft executes all instructions between the pointer and the cursor.
Insert or Remove Breakpoint
A breakpoint is a position in a program where a debugger stops execution. When you start debugging, Embarcadero
SQL Debugger for Microsoft opens the script in a DDL Editor. A yellow arrow pointer indicates which line the
Embarcadero SQL Debugger for Microsoft executes next. The Embarcadero SQL Debugger for Microsoft executes all
lines of code between the yellow arrow and the first breakpoint. If no breakpoints are present, Embarcadero SQL
Debugger for Microsoft debugs the entire script.
While debugging you can set one or more breakpoints in the currently executing object or in any object in the program
call stack. Breakpoints can be toggled, temporarily disabled, or enabled, without having to add or remove them. Rapid
SQL Embarcadero SQL Debugger for Microsoft displays each enabled breakpoint as a red dot in the left margin of the
DDL Editor Window, and each disabled breakpoint as a red circle.
Rapid SQL stores all breakpoints you set so that when you debug the same script on separate occasions, you can
reuse the same breakpoints. After you open a debugging session, Insert Break lets you insert a breakpoint on the line
where your cursor it located, and Remove Break lets you remove a breakpoint on the line where your cursor is
located.
NOTE: Script execution stops at the first breakpoint.
Inserting or Removing a Breakpoint
To insert of remove a breakpoint, do the following:
1 In the DDL Editor window, click the target line of SQL.
2 On the Debug menu, click Breakpoint.
OR
On the DDL Editor toolbar, click Breakpoint.
OR
In the DDL Editor window, right-click and then click Breakpoint.
OR
Press F9.
The Embarcadero SQL Debugger for Microsoft inserts a new breakpoint or removes an existing breakpoint on
the target line of code.

RAPID SQL ADD-ON TOOLS > EMBARCADERO SQL DEBUGGER FOR MICROSOFT SQL SERVER
EMBARCADERO TECHNOLOGIES > BOOKNAMEVARIABLE 884
Toggle Breakpoint
After you open a debugging session and insert a breakpoint, Toggle Breakpoint lets you enable or disable that
breakpoint. Embarcadero SQL Debugger for Microsoft displays each enabled breakpoint as a red dot in the left margin
of the DDL Editor Window, and each disabled breakpoint as a red circle. You can toggle any breakpoint in the DDL
Editor window. When you exit a debugging session and reenter it, the Embarcadero SQL Debugger for Microsoft
retains any breakpoints you set.
Toggling a Breakpoint
To toggle a breakpoint, do the following:
1 In the DDL Editor window, click the line of the target breakpoint.
2 On the Debug menu, click Enable/Disable Breakpoint.
OR
On the DDL Editor toolbar, click Enable/Disable Breakpoint.
OR
In the DDL Editor window, right-click and then click Enable/Disable Breakpoint.
OR
Press CTRL+F9.
The Embarcadero SQL Debugger for Microsoft toggles the breakpoint indicated by the pointer.
Go
After you open a debugging session, Go lets you execute all instructions stopping only when when it encounters a
breakpoint or when the program is complete.
Go
To use the Go facility, do the following:
1 On the Debug menu, click Go.
OR
On the DDL Editor toolbar, click Go.
OR
In the DDL Editor window, right-click and then click Go.
OR
Press F5.
The Embarcadero SQL Debugger for Microsoft executes all instructions.
Stop
After you open a debugging session, Stop lets you halt the script execution and terminate the session.

RAPID SQL ADD-ON TOOLS > EMBARCADERO SQL DEBUGGER FOR MICROSOFT SQL SERVER
EMBARCADERO TECHNOLOGIES > BOOKNAMEVARIABLE 885
Stop
To stop the debugger, do the following:
1 On the Debug menu, click Stop Debugging.
OR
On the DDL Editor toolbar, click Stop Debugging.
OR
In the DDL Editor window, right-click and then click Stop Debugging.
OR
Press SHIFT+F5.
The Embarcadero SQL Debugger for Microsoft stops the script execution and terminates the session.
Restart
After you open a debugging session, Restart lets you terminate the current debug session and open a new one. When
the new session opens, Rapid SQL prompts you for new input parameters.
Restart
To restart the debugger, do the following:
1 On the Debug menu, click Restart.
OR
On the DDL Editor toolbar, click Restart.
OR
In the DDL Editor window, right-click and then click Restart.
OR
Press CTRL+SHIFT+F5.
The Embarcadero SQL Debugger for Microsoft restarts the debug session.
Break
After you open a debugging session, Break lets you pause the debug session.
Break
To pause the debugger, do the following:
1 On the Debug menu, click Break.
OR
On the DDL Editor toolbar, click Break.
OR
In the DDL Editor window, right-click and then click Break.
The Embarcadero SQL Debugger for Microsoft suspends the debug session.

RAPID SQL ADD-ON TOOLS > EMBARCADERO SQL DEBUGGER FOR MICROSOFT SQL SERVER
EMBARCADERO TECHNOLOGIES > BOOKNAMEVARIABLE 886
Close
After you open a debugging session, Close lets you close the DDL Editor and the Embarcadero SQL Debugger for
Microsoft.
Close
1 On the DDL Editor toolbar, click Close.
OR
In the upper right corner of the window, click Close.
OR
In the DDL Editor window, right-click and then click Close.
The Embarcadero SQL Debugger for Microsoft closes the debug session.
Using the Embarcadero SQL Debugger for Microsoft
This section offers a general overview of how to use Embarcadero SQL Debugger for Microsoft’s full range of
debugging functionality
. After you open a debugging session for any procedure or trigger, you can begin debugging.
For more detailed information, see Debugging a Sample Script
.
Opening a Debugging Session
When you open a debugging session, Rapid SQL opens the five windows of the Embarcadero SQL Debugger for
Microsoft interface. If the target script requires input parameters, Rapid SQL opens a Procedure Execution dialog box
and prompts you for the necessary input parameters before displaying the target code in the SQL Editor window.
When Rapid SQL displays the target script in the SQL Editor window, you can begin debugging
.
NOTE: Rapid SQL Embarcadero SQL Debugger for Microsoft only lets you debug the SQL script of
procedures or triggers.
Opening a Debugging Session
To debug a trigger or procedure, do the following:
1 On the Explorer Tab, click the node of the target procedure.
Rapid SQL opens the node and displays two items: Code and Privileges.
2 Under the target object node, double-click Code.
Rapid SQL opens a DDL Editor displaying the code of the target object.

RAPID SQL ADD-ON TOOLS > EMBARCADERO SQL DEBUGGER FOR MICROSOFT SQL SERVER
EMBARCADERO TECHNOLOGIES > BOOKNAMEVARIABLE 887
3 On the Debug menu, click Start Debugging.
OR
On the SQL Editor toolbar, click Debug.
OR
In the DDL Editor window, right-click and then click Debug.
OR
Press CTRL+F5.
If the script requests input parameters, Rapid SQL opens a Procedure Execution dialog box. If the script does
not require input parameters, Rapid SQL displays the script in the DDL Editor window for you to begin
debugging.
NOTE: You cannot use the Embarcadero SQL Debugger for Microsoft until it has fully initialized.
4 In the Procedure Execution dialog box, specify the appropriate parameters, and then click Continue.
Rapid SQL displays the script in the DDL Editor window for you to begin debugging
.
Debugging an SQL Script
After you open a debugging session and enter any required input parameters, you can begin working with your script
in the Embarcadero SQL Debugger for Microsoft.
Debugging an SQL Script
To debug a SQL script, do the following:
1 On the Debug menu, click one of the Embarcadero SQL Debugger for MSSQL Server options (Step Into
, Step
Over, and so forth) or click Go.
OR
On the DDL Editor toolbar, click one of the Embarcadero SQL Debugger for MSSQL Server options (Step Into,
Step Over
, and so on) or click Go.
NOTE: You can monitor the progress of your debug session in the Variables window.
2 On the Debug menu, click Breakpoint.
OR
On the DDL Editor toolbar, click Breakpoint.
OR
Press F9.
NOTE: When you set a breakpoint, the Call Stack window shows what was called before the breakpoint.
NOTE: You can use the Run to Cursor option to test the lines of code between a breakpoint and your
cursor (indicated by the yellow arrow in the DDL Editor).

RAPID SQL ADD-ON TOOLS > EMBARCADERO SQL DEBUGGER FOR MICROSOFT SQL SERVER
EMBARCADERO TECHNOLOGIES > BOOKNAMEVARIABLE 888
3 To check your variables, do the following:
1) In the DDL Editor, click a variable in your script and drag it to the Watch window.
2) In the Watch window, change the value of the watch variable and then click Go to run your script and see the
results of the new value.
4 To check a record in stored objects, do the following:
1) Drag the record to the Watch window.
2) In the Watch window, change the value of the record, then click Go to run your script and see the results of
the new value.
5 To check the dependencies, do the following:
1) In the Dependency Tree window double-click the target dependent object to extract the code into a new
DDL Editor.
2) Step through the script while monitoring the Dependency Tree window.
6 When you finish debugging the script, click Close.
Rapid SQL closes the T-SQL Debugger DDL Editor.
NOTE: When you exit a debug session and reenter it, the Embarcadero SQL Debugger for MSSQL
retains any watch variables or breakpoints you have set.
Debugging a Sample Script
This walk-through demonstrates basic debugging functionality. During the course of this walk-through you debug two
procedures using the Embarcadero SQL Debugger for Microsoft.
This section is divided into the following seven sections, each designed to familiarize you with basic debugging
features and functionality:
•
Getting Started
• Testing a Procedure
• Starting the Debugging Session
• Breakpoints
• Step Into
• Step Out
• Correcting the Script
Getting Started
This part of Debugging the Sample Script explains how to create the following two procedures to be used for
debugging:
• check_modulo
• calculate_sum_with_overflow_bug
NOTE: The procedure calculate_sum_with_overflow_bug intentionally includes a bug which prevents it
from executing successfully. You use the Embarcadero SQL Debugger for Microsoft to identify
this bug.

RAPID SQL ADD-ON TOOLS > EMBARCADERO SQL DEBUGGER FOR MICROSOFT SQL SERVER
EMBARCADERO TECHNOLOGIES > BOOKNAMEVARIABLE 889
Overview
The Getting Started section guides you through:
•
Creating procedure 1.
• Creating procedure 2.
• Confirming the creation of the procedures.
Creating Procedure 1
Procedure 1, check_modulo, calculates the modulo of any two user-specified numbers. The user passes the numbers
into the procedure as input parameters. The procedure returns the result as an output parameter. If the modulo equals
zero, procedure execution returns the output “YES”. If the modulo is not zero, procedure execution returns the output
“NO”. This procedure is nested in the second procedure, calculate_sum_with_overflow_bug.
To create this procedure, you must open Rapid SQL, connect to a MSSQL datasource, open a new SQL editor and, in
the SQL editor, type or copy and paste the following code:
CREATE PROCEDURE
username.check_modulo
@p_dividend_in INT,
@p_divisor_in INT,
@result VARCHAR(3)OUTPUT
AS
IF @p_dividend_in % @p_divisor_in = 0
SELECT @result = 'YES'
ELSE
SELECT @result = 'NO'
go
NOTE: For the purposes of this walk-through, this procedure was created under the user name Spence.
Before executing the DDL above, substitute your user name for the word “username”.
Creating Procedure 1
To create Procedure 1, do the following:
1Start Rapid SQL.
2 Connect to a Microsoft SQL Server 7.0 datasource.
3 On the Datasource menu, click the database node and then click the target database.
NOTE: For this walk-through, we recommend that you select a non-production database.
4 On the Main toolbar, click New.
OR
On the File menu, click New, and then click SQL.
OR
Press CTRL+N.
Rapid SQL opens an SQL Editor in the current workspace.
5 In the SQL Editor, type the DDL for procedure check_modulo.
NOTE: You must substitute your user name once in the DDL for this procedure.

RAPID SQL ADD-ON TOOLS > EMBARCADERO SQL DEBUGGER FOR MICROSOFT SQL SERVER
EMBARCADERO TECHNOLOGIES > BOOKNAMEVARIABLE 890
6 On the SQL Editor toolbar, click Execute.
Rapid SQL executes the script and creates Procedure 1, then opens the SQL Editor Results Tab with the results
of the script execution. If you were not able to create the procedure, check the error messages to determine the
problem.
Creating Procedure 2
Procedure 2, calculate_sum_with_overflow_bug, requires two user-specified numbers as input parameters. Upon
execution, the procedure calculates the sum of the all numbers divisible by five between the two user-specified
numbers. This procedure calls sample procedure 1 (check_modulo) to calculate the modulo of the user-specified
numbers.
NOTE: The procedure calculate_sum_with_overflow_bug intentionally includes a bug which prevents it
from executing successfully. You use the Embarcadero SQL Debugger for Microsoft to identify
this bug.
CAUTION: When inputting parameters, you must enter the smaller number in the @p_num1_in int box.
To create this procedure, you must open Rapid SQL, connect to a MSSQL datasource, open a new SQL editor and, in
the SQL editor, type or copy and paste the following code:
CREATE PROCEDURE
username.calculate_sum_with_overflow_bug
@p_num1_in INT,
@p_num2_in INT,
@result TINYINT OUTPUT
/*INT-Integer (whole number) data from -2^31 (-2,147,483,648)
through 2^31 - 1 (2,147,483,647).
TINYINT-Integer data from 0 through 255.*/
AS
DECLARE @temp INT
DECLARE @temp_1 INT
DECLARE @v_divisor INT
DECLARE @v_condition VARCHAR(3)
SET @temp = @p_num1_in
SET @temp_1 = 0
SET @v_divisor = 5
SET @v_condition = 'NO'
WHILE 1=1
BEGIN
SELECT @temp = @temp + 1 /*Increase temp starting from p_num1*/
IF @temp = @p_num2_in /*Check if we reached p_num2*/
/*If yes, leave the LOOP*/
BREAK
/*Call Procedure 2 to check if number is divisable by 5*/
EXEC username.check_modulo @temp,@v_divisor,@result=@v_condition output
IF @v_condition = 'YES'
SELECT @temp_1 = @temp_1 + @temp
END /*WHILE LOOP*/
SELECT @result = @temp_1
RETURN
go
NOTE: For the purposes of this walk-through, this procedure was created under the user name Spence.
Before executing the DDL above, substitute your user name for the word “username”.

RAPID SQL ADD-ON TOOLS > EMBARCADERO SQL DEBUGGER FOR MICROSOFT SQL SERVER
EMBARCADERO TECHNOLOGIES > BOOKNAMEVARIABLE 891
Creating Procedure 2
To create Procedure 2, do the following:
1Start Rapid SQL.
2 Connect to a Microsoft SQL Server 7.0 datasource.
3 On the Datasource menu, click the database node and then click the target database.
NOTE: For this walk-through, we recommend that you select a non-production database.
4 On the Main toolbar, click New.
OR
On the File menu, click New, and then click SQL.
OR
Press CTRL+N.
Rapid SQL opens an SQL Editor in the current workspace.
5 In the SQL Editor, type the DDL for procedure calculate_sum_with_overflow_bug.
NOTE: You must substitute your user name twice in the DDL for this procedure.
6 On the SQL Editor toolbar, click Execute.
Rapid SQL executes the script and creates Procedure 2, then opens the SQL Editor Results Tab with the results
of the script execution. If you were not able to create the procedure, check the error messages to determine the
problem.
Confirming the Creation of the Procedures
After you create Procedure 1 and Procedure 2, you can confirm their creation in Rapid SQL’s Database Explorer.
Confirming the Creation of the Procedures
To confirm creation of the procedures, do the following:
1 On the Explorer Tab, click the Explorer list, and then click Organize By Owner.
The Explorer Tab refreshes with the new display configuration.
2 On the Explorer Tab, double-click the Databases node, and then double-click the target database node.
Rapid SQL displays the list of object owners.
3 Double-click your user name to display a list of your objects.
4 Double-click Procedures to display a list of procedures and confirm the creation of check_modulo and
calculate_sum_with_overflow_bug.
You are now ready to begin testing a procedure
.

RAPID SQL ADD-ON TOOLS > EMBARCADERO SQL DEBUGGER FOR MICROSOFT SQL SERVER
EMBARCADERO TECHNOLOGIES > BOOKNAMEVARIABLE 892
Testing a Procedure
After you confirm the creation of the procedures, you must execute the procedure calculate_sum_with_overflow_bug
(which includes a bug) to view its error message. This procedure requires two integer input parameters: @p_num1_in
int and @p_num2_in int. For all integers between these two integers, this procedure identifies those divisible by 5,
and then returns their sum.
CAUTION: When inputting parameters, you must enter the smaller number in the @p_num1_in int box.
Testing a Procedure
To test a procedure, do the following:
1 On the Explorer Tab, right-click calculate_sum_with_overflow_bug, and then click Execute.
Rapid SQL opens the Procedure Execution window.
2 In the Value column of the @p_num1_in row, type 1.
3 In the Value column of the @p_num2_in row, type 11.
4 Click Execute.
Rapid SQL compiles the procedure and opens a Results Tab, displaying the sum 15. There are two numbers
between 1 and 11 that are divisible by 5: 5, and 10. The sum of these two numbers is 15.
5 On the Explorer Tab, right-click calculate_sum_with_overflow_bug, and then click Execute.
Rapid SQL again opens the Procedure Execution window.
6 In the Value column of the @p_num1_in row, type 100.
7 In the Value column of the @p_num2_in row, type 121.
8 On the Procedure Execution window toolbar, click Execute.
Rapid SQL returns an error stating “Arithmetic overflow occurred”. You are now ready to Start the Debugging
Session.
Starting the Debugging Session
After you test the procedure, you must open the procedure in Embarcadero SQL Debugger for Microsoft and enter
input parameters before debugging. To start a session, do the following:
1 On the Explorer Tab, right-click the procedure, calculate_sum_with_overflow_bug, and then click Debug to
start the debug session.
Rapid SQL extracts the DDL for the procedure into a DDL Editor and opens the Procedure Execution dialog box.
2 In the Value column of the @p_num1_in row, type 100.
3 In the Value column of the @p_num2_in row, type 121.
4 Click Continue.
Rapid SQL closes the dialog box and opens the Embarcadero SQL Debugger interface, which includes the
following five windows:
•
DDL Editor
• Watch Window
• Variables Window
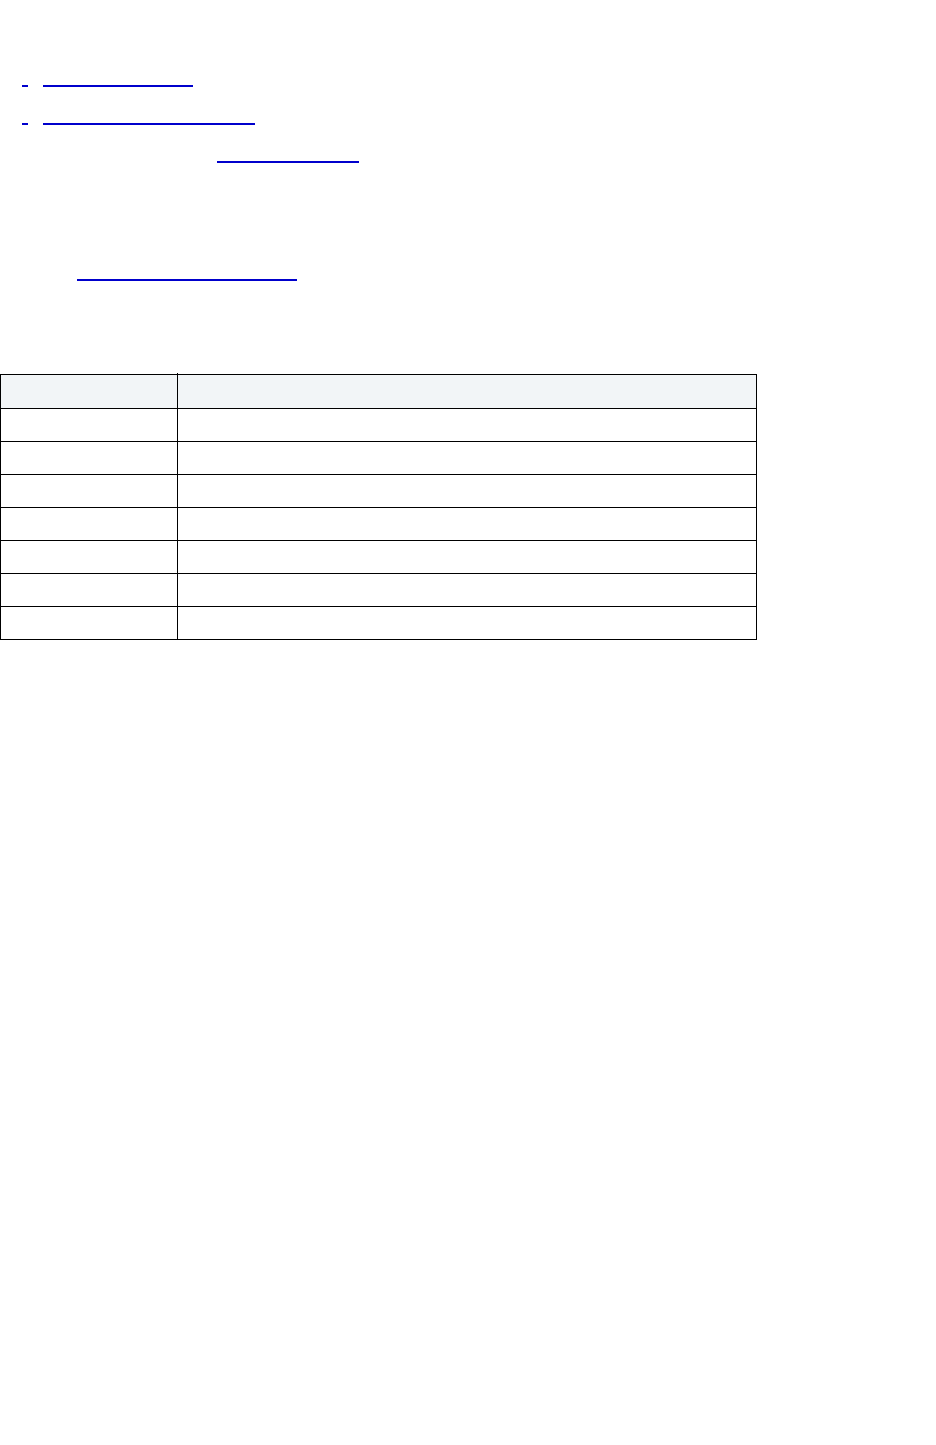
RAPID SQL ADD-ON TOOLS > EMBARCADERO SQL DEBUGGER FOR MICROSOFT SQL SERVER
EMBARCADERO TECHNOLOGIES > BOOKNAMEVARIABLE 893
• Call Stack Window
• Dependency Tree Window
You are now ready to insert breakpoints.
Breakpoints
After you start the debugging session, you must insert a breakpoint into the code of the procedure
calculate_sum_with_overflow_bug. Then you must run to the breakpoint. After you run to the breakpoint,
Embarcadero SQL Debugger displays a yellow arrow on the red breakpoint icon and populates the Variables Window
with values for the following variables:
Breakpoints
To insert a breakpoint, do the following:
1 In the DDL Editor, scroll to and click the following line:
EXEC username.check_modulo @temp,@v_divisor,@result=@v_condition output
NOTE: This line is located near the end of the procedure’s code.
2 On the Debug menu, click Breakpoint.
OR
On the DDL Editor toolbar, click Breakpoint.
OR
In the DDL Editor window, right-click and then click Breakpoint.
OR
Press F9.
Rapid SQL inserts a breakpoint (indicated by dot) next to the number of the target line.
Variable Value
@temp Current number
@p_num2_in Second input parameter
@p_num1_in First input parameter
@temp_1 Sum of the numbers, between the input parameters, divisible by 5
@result Condition of the output parameter
@v_condition Output parameter
@v_divisor Divisor

RAPID SQL ADD-ON TOOLS > EMBARCADERO SQL DEBUGGER FOR MICROSOFT SQL SERVER
EMBARCADERO TECHNOLOGIES > BOOKNAMEVARIABLE 894
3 On the Debug menu, click Go.
OR
On the DDL Editor toolbar, click Go.
OR
In the DDL Editor window, right-click and then click Go.
OR
Press F5.
Rapid SQL Embarcadero SQL Debugger for Microsoft displays the value of the variables before the breakpoint
in the Variables Window.
You are now ready to Step Into
the code.
Step Into
After setting the breakpoint, you must step into the dependent procedure, check_modulo.To step into the dependent
procedure, do the following:
1 On the Debug menu, click Step Into.
OR
On the DDL Editor toolbar, click Step Into.
OR
In the DDL Editor window, right-click and then click Step Into.
OR
Press F11.
Rapid SQL extracts the DDL for the dependent, nested procedure into the DDL Editor.
2 Step Into again.
Rapid SQL executes the next part of the code and displays the values for the variables in the Variables Window.
The Call Stack Window displays calls to the procedures.
You are now ready to Step Out
of the code.

RAPID SQL ADD-ON TOOLS > EMBARCADERO SQL DEBUGGER FOR MICROSOFT SQL SERVER
EMBARCADERO TECHNOLOGIES > BOOKNAMEVARIABLE 895
Step Out
After you Step Into the modulo_check (nested procedure) code, you must step back out and return to the
calculate_sum_with_overflow_bug (outside procedure) code. To step back out and return, do the following:
1 On the Debug menu, click Step Out.
OR
On the DDL Editor toolbar, click Step Out.
OR
In the DDL Editor window, right-click and then click Step Out.
OR
Press SHIFT+F11.
Rapid SQL opens the DDL Editor containing the code for calculate_sum_with_overflow_bug.
2 On the Debug menu, click Go.
OR
On the DDL Editor toolbar, click Go.
OR
In the DDL Editor window, right-click and then click Go.
OR
Press F5.
When the value of the variable, @temp is equal to the value of the variable, @p_num2_in, the WHILE LOOP is
complete and the Embarcadero SQL Debugger for Microsoft continues to the next executable statement in the
code.
3 While monitoring the value of the variables in the Variables Window, continue to click Go to cycle through the
WHILE LOOP.
After executing the SELECT and RETURN statements, Rapid SQL closes the Debugger and opens a DDL Editor
to the Results Tab.
Now you are ready to correct the script
.
Correcting the Script
When you finished Stepping Out of the nested code and encounter the error, you must do the following to fully fix the
bug:
• Locate the source of the error
• Scroll to the line in the script displaying the error
• Analyze the code
• Correct the error
• Compile the corrected script
When you first executed the procedure, Rapid SQL displayed the error message “Arithmetic overflow error for data
type tinyint, value = 450”. According to Microsoft SQL Server Books Online: “This error occurs when an attempt is
made to convert a float or real data type value into a data type that cannot store the result. This error prevents the
operation from being completed.”

RAPID SQL ADD-ON TOOLS > EMBARCADERO SQL DEBUGGER FOR ORACLE
EMBARCADERO TECHNOLOGIES > BOOKNAMEVARIABLE 896
The data type used in this procedure (TINYINT) stores values from 0 to 255. The sum of the four numbers between
100 and 121 that are divisible by 5 (105, 110, 115, and 120) is 450. But because the TINYINT variable @result can
only accept a maximum value of 255, Rapid SQL returns the error message and the procedure fails.
Correcting the Script
To correct the script, do the following:
1 On the Explorer Tab, right-click calculate_sum_with_overflow_bug, and then click Extract.
Rapid SQL extracts the DDL for the procedure into a DDL Editor.
2 On the Edit toolbar, click Find.
Rapid SQL opens the Find dialog box.
3 In the Find What box, type TINYINT.
4 Click Find Next.
Rapid SQL selects the first occurrence of TINYINT.
5 Change the data type for @result from TINYINT to INT.
6 On the DDL Editor toolbar, click Execute to execute the modified script.
Rapid SQL executes the script and opens the Results Tab.
7 On the Explorer Tab, right-click calculate_sum_with_overflow_bug, and then click Execute.
Rapid SQL opens the Procedure Execution dialog box.
8 In the Value column of the @p_num1_in row, type 100.
9 In the Value column of the @p_num2_in row, type 121.
10 Click Execute.
Rapid SQL executes the procedure with the new data type and opens the Results Tab, returning the value 450.
You successfully corrected the script and debugged the procedure.
Embarcadero SQL Debugger for Oracle
Embarcadero SQL Debugger for Oracle is a programming tool that lets you debug functions, procedures and triggers
for Oracle versions 7.3.3 or later.
Objects
Using Embarcadero SQL Debugger for Oracle, you can debug the following objects:
• Functions
• Procedures
• Triggers
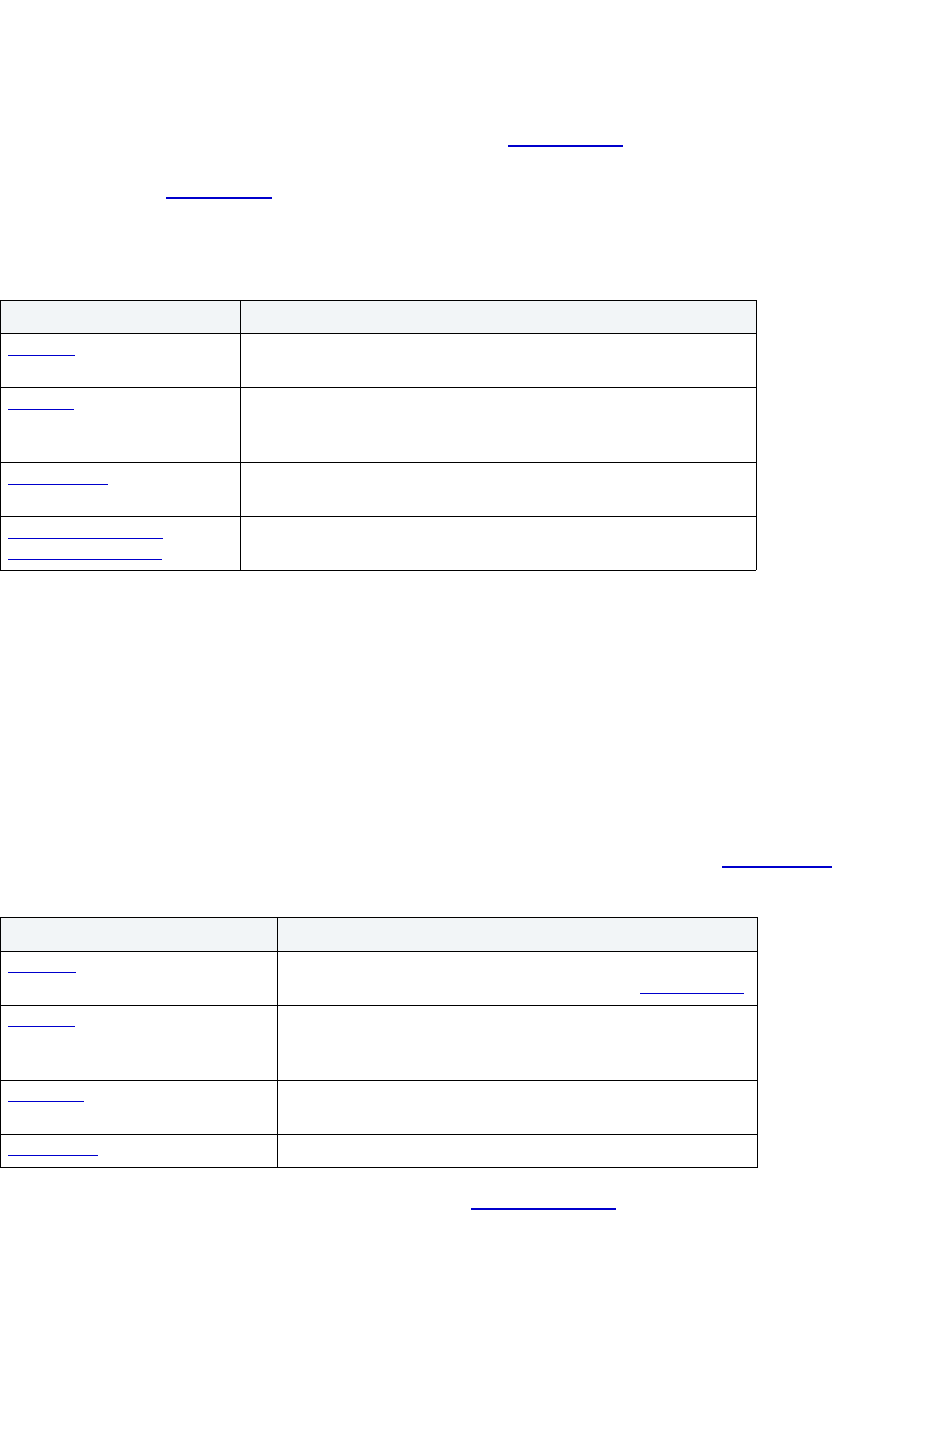
RAPID SQL ADD-ON TOOLS > EMBARCADERO SQL DEBUGGER FOR ORACLE
EMBARCADERO TECHNOLOGIES > BOOKNAMEVARIABLE 897
You can only debug triggers by debugging the functions or procedures that call them. You cannot debug packages,
but you can debug the functions and procedures within packages.
NOTE: You cannot debug any objects contained in the Exclusion List.
TIP: The Code Analyst
is a tool to identify time-consuming lines of code. Code Analyst lets you
perform detailed response time analysis on the execution of Procedures and Functions.
The table below describes the sections of this chapter:
Debugging Features
Embarcadero SQL Debugger for Oracle is designed to help identify problems within your code. Embarcadero SQL
Debugger for Oracle lets you:
• Interactively step through the flow of script execution.
• Examine the value of variables.
• Solve logical problems with your script design.
Embarcadero SQL Debugger for Oracle offers fundamental debugging features, an Oracle Exclusion List
and several
options to help fine tune debugging, as listed in the table below:
To set specific Debugger values on the Options Editor, see Debugger Options
.
Section Description
Features This section describes how the Embarcadero SQL Debugger for
Oracle helps you identify problems within your code.
Interface
This section describes the Embarcadero SQL Debugger for Oracle
graphical interface that includes an editor window and four debug
view windows.
Functionality
This section describes the functions of the Embarcadero SQL
Debugger for Oracle.
Using Embarcadero
Debugger for Oracle
This section describes how to run a debug session.
Debugging Feature Description
Step Into Lets you execute each instruction step-by-step and step
inside a stored object if the object is not on the Exclusion List
.
Step Out
Lets you stop stepping through the current object and execute
the remainder of the script. This option is only active when the
pointer indicates a child-dependent instruction.
Step Over
Lets you execute the current instruction without stepping into
any child dependents.
Breakpoints
A position in a program where the debugger stops execution.

RAPID SQL ADD-ON TOOLS > EMBARCADERO SQL DEBUGGER FOR ORACLE
EMBARCADERO TECHNOLOGIES > BOOKNAMEVARIABLE 898
Exclusion List
Upon installation, Rapid SQL sets up an Exclusion List on your computer which includes packages that the application
cannot debug. The Exclusion List is located in the Rapid SQL directory, at the default installation location C:\Program
Files\Embarcadero\Nov2001Shared\deborcex.etd. You can add or remove packages from this file by editing the
Exclusion List.
Editing the Exclusion List
To Edit the Exclusion List, do the following:
1 Open the Exclusion List, deborcex.etd, in a text editor, such as Notepad or WordPad.
2 To add a package, enter the name of the package at the end of the list. Use the following format:
OWNER.OBJECT_NAME.
NOTE: There must be a carriage return after each item on the list.
3 To remove a package from the Exclusion List, delete the package from the list.
NOTE: Embarcadero SQL Debugger for Oracle does debug a package procedure listed on the Exclusion
List.
4 Save the changes to deborcex.etd.
Embarcadero SQL Debugger for Oracle Options
You can specify PL/SQL Debugger options from the Debug Tab of Rapid SQL’s Options editor. The Debug Tab of the
Options Editor lets you set the duration of your debug initialization and debug session, enable DBMS output, and
refresh dependencies.
Setting Debugger Options
To set debugger options, do the following:
1 On the File menu, click Options.
OR
On the Main toolbar, click Options.
Rapid SQL opens the Options Editor.
2 On the Debug Tab, specify debugger options. The table below describes the options available:
Option Description Default
Initialization
Timeout (seconds)
Specifies the number of seconds Rapid SQL tries to initialize
the debugger. If it cannot initialize the debugger in the specified
time, a message displays in the Debug Output window.
60
Debug Session
Timeout (seconds)
Specifies, in seconds, the length of your debug session. 7200
Enable DBMS
Output
Toggles the print output. Enable this option if you use
dbms_output.put_line calls in your procedures and you want
these lines displayed.
Selected
Refresh
Dependencies for
each run
Refreshes dependencies for each run. This potentially
time-consuming process is useful if the target procedure has
rapidly varying dependencies that can require updating during
the debugging process.
Cleared

RAPID SQL ADD-ON TOOLS > EMBARCADERO SQL DEBUGGER FOR ORACLE
EMBARCADERO TECHNOLOGIES > BOOKNAMEVARIABLE 899
3 Click Close.
Rapid SQL closes the Options Editor.
Embarcadero SQL Debugger for Oracle Interface
Embarcadero SQL Debugger for Oracle has a graphical interface that includes an editor window and four debug view
windows. When you open a debug session, Rapid SQL extracts the code for the object into an SQL Editor and opens
four debug view windows at the bottom of the screen.
TIP: All Embarcadero debuggers display Performance Metrics that let you measure the execution time
of each statement in the debug session.
The four debug view windows are optional, dockable, floatable windows designed to help debug your script.
Embarcadero SQL Debugger for Oracle’s five windows are:
•
SQL Editor window
• Watch window
• Variables window
• Call Stack window
•
Dependency Tree window
Working with Embarcadero SQL Debugger Windows
Rapid SQL lets you resize, move, dock and float the following Debugger windows:
•Watch
• Variables
• Call Stack
• Dependency Tree
To work with the above windows, do the following:
1 To resize the target window, click its frame and drag it
Rapid SQL resizes the window.
2 To move and dock the target window, click its grab bar and drag it.
Rapid SQL moves the window to its new location and docks it with surrounding windows.
3 To float the target window, press Shift, then click its grab bar and drag it.
Rapid SQL frames the window in its own floating frame and moves the window to its new location.
SQL Editor Window
Embarcadero SQL Debugger for Oracle provides an SQL Editor window that displays your code in Read-Only format.
When you start debugging, Embarcadero SQL Debugger for Oracle extracts your code into an SQL Editor window,
making it editable. The SQL Editor uses the default Rapid SQL syntax coloring
.
NOTE: Rapid SQL displays LOB datatypes, and REF CURSOR variables, in the Results Tab.

RAPID SQL ADD-ON TOOLS > EMBARCADERO SQL DEBUGGER FOR ORACLE
EMBARCADERO TECHNOLOGIES > BOOKNAMEVARIABLE 900
Watch Window
Embarcadero SQL Debugger for Oracle provides a Watch window that displays the watch variables for the database
object you are debugging and lets you specify variables you want to evaluate or modify while debugging your
program. For example, to check what happens when a variable (x) has a value of 100, you can double-click that
variable in the SQL Editor, drag it into the Watch window, and change the value to 100. When you execute the script,
the debugger uses the value x=100. This window is only visible when the PL/SQL Debugger is active.
NOTE: You can type a fully qualified record variable into the Watch window.
NOTE: When you exit a debug session and reenter it, the Embarcadero SQL Debugger for Oracle retains
any watch variables or breakpoints you have set.
Opening and Closing the Watch Window
To open and close the Watch Window, do the following:
1 On the Debug Menu, on the Debug Views sub-menu, select or clear Watch.
OR
Press ALT+3.
Setting a Watch Variable
To set a Watch Variable, do the following:
1 In the SQL Editor, double-click the target variable and drag it to the Watch window.
2 In the Watch window, change the value of the variable.
3On the SQL Editor toolbar, click Go.
Rapid SQL executes the script using the new value of the variable.
Removing a Watch Variable
1 In the Watch window, click the target variable and press DELETE.
Variables Window
Embarcadero SQL Debugger for Oracle provides a Variables window that displays the local variables and their current
values during script execution. You cannot edit variables in the Variables window. This window is only visible when the
Debugger is active. If the SQL Editor displays an external database object, and that object is a dependent of the object
you are debugging, then the Variables window automatically refreshes and displays the variables for that particular
object.
The Embarcadero SQL Debugger for Oracle also lets you monitor the value of your variables while debugging.
Opening and Closing the Variables Window
To open and close the Variables Window, do the following:
1 On the Debug Menu, on the Debug Views sub-menu, select or clear Variable.
OR
Press ALT+4.

RAPID SQL ADD-ON TOOLS > EMBARCADERO SQL DEBUGGER FOR ORACLE
EMBARCADERO TECHNOLOGIES > BOOKNAMEVARIABLE 901
Monitoring Variables
To monitor the values of your variables while debugging, do the following:
1 In the SQL Editor, hold the pointer over the target variable.
Rapid SQL opens a ScreenTip displaying the current value of that variable.
Call Stack Window
Embarcadero SQL Debugger for Oracle provides a Call Stack window that displays the stack of currently active
function calls. The Call Stack window is only visible when the PL/SQL Debugger is active.
Opening and Closing the Call Stack Window
To open and close the Call Stack Window, do the following:
1 On the Debug Menu, on the Debug Views sub-menu, select or clear Call Stack.
OR
Press ALT+5.
Using the Call Stack Window
To display a line of code that references the call in the SQL Editor, do the following:
1 In the Call Stack window, double-click the target line.
In the SQL Editor, Rapid SQL displays a green arrow on the line of the referenced call.
Dependency Tree Window
Embarcadero SQL Debugger for Oracle provides a Dependency Tree window that displays any external database
objects the script accesses. Rapid SQL displays these database objects in a hierarchical tree, with the child objects as
database objects accessed by the parent objects. You can use this window to display the code for a dependent
database object in the SQL Editor window. This window is only visible when the Debugger is active.
Opening and Closing the Dependency Tree Window
To open and close the Dependency Tree Window, do the following:
1 On the Debug Menu, on the Debug Views sub-menu, select or clear Dependencies.
OR
Press ALT+6.
Displaying Dependencies
To display the code for a dependent database object in the SQL Editor window, do the following:
1 In the Dependency Tree window, double-click the target object.
Rapid SQL displays the SQL of the target object in the SQL Editor window.
Embarcadero SQL Debugger for Oracle Functionality
Embarcadero SQL Debugger for Oracle offers you the following functionality:

RAPID SQL ADD-ON TOOLS > EMBARCADERO SQL DEBUGGER FOR ORACLE
EMBARCADERO TECHNOLOGIES > BOOKNAMEVARIABLE 902
• Input Parameters
• Step Into
• Step Out
• Step Over
• Run to Cursor
• Insert or Remove Breakpoint
• Toggle Breakpoint
• Go
• Stop
• Restart
• Break.
•
Close
To make use of the above functionality, you must first open a debugging session.
Input Parameters
Input parameters are set when you first create an object. If the object you want to debug requires input parameters,
Rapid SQL opens a Function, Procedure, or Trigger Execution dialog box and prompts you for the input parameters
when you open a debugging session
.
This dialog box also lets you:
• Save input parameters as *.prm files to preserve specific input parameter configurations.
• Open *.prm files to save the effort of reentering specific input parameters.
• Reset parameters to their default setting.
The table below describes the options and functionality on Procedure Execution dialog box:
The following table describes the options available in this dialog box:
Dialog box component Description
Owner drop-down list Displays the current procedure’s owner
Procedure drop-down list Displays the name of the current procedure.
Parameter window Specify the required input parameters in this window. If input
parameters are not required for the execution of the target
procedure, a message appears in this window, stating that the
procedure “has no input parameters. Press execute to run it.”
Open button Click to open an Open dialog box, from which you can open an
existing *.prm file. The saved parameters immediately populate the
dialog box upon opening.
Save button Click to save the values of your input parameters as a *.prm file.
You can reopen a saved *.prm file from this dialog box at any time.
Reset button Click to reset the parameters in the Parameter window to their
default values.
RAPID SQL ADD-ON TOOLS > EMBARCADERO SQL DEBUGGER FOR ORACLE
EMBARCADERO TECHNOLOGIES > BOOKNAMEVARIABLE 903
NOTE: You cannot debug a script that requires input parameters until you provide input parameters.
Step Into
After you open a debugging session, Step Into lets you execute the current instruction. If the current instruction makes
a call to a stored Oracle object, Embarcadero SQL Debugger for Oracle steps inside the nested child object.
NOTE: Oracle 7.3 has problems running the debugger on an object with cursors.
Step Into
To use the Step Into facility, do the following:
1 On the Debug menu, click Step Into.
OR
On the SQL Editor toolbar, click Step Into.
OR
In the SQL Editor window, right-click and then click Step Into.
OR
Press F11.
Embarcadero SQL Debugger for Oracle moves the arrow to execute the current instruction.
Execute button Click to execute the procedure once you have entered values for
all required parameters in the Parameter window.
Option Description
Owner Displays the current procedure’s owner.
Procedure Displays the name of the current procedure.
Parameter Specify the required input parameters in this window.
If input parameters are not required for the execution
of the target procedure, a message displays in this
window, stating that the procedure “has no input
parameters. Press execute to run it.”
Open Click to open an existing *.prm file. The saved
parameters immediately populate the dialog box
upon opening.
Save Click to save the values of your input parameters as
a *.prm file. You can reopen a saved *.prm file from
this dialog box at any time.
Reset Click to reset the parameters in the Parameter
window to their default values.
Continue Click to execute the procedure once you have
entered values for all required parameters in the
Parameter window.
Dialog box component Description

RAPID SQL ADD-ON TOOLS > EMBARCADERO SQL DEBUGGER FOR ORACLE
EMBARCADERO TECHNOLOGIES > BOOKNAMEVARIABLE 904
Step Out
After you open a debugging session, Step Out lets you execute the remainder of the dependent child object and
resumes line-by-line, step-debugging in the parent object.
NOTE: Step Out is only active when the pointer indicates a child-dependent instruction.
NOTE: Oracle 7.3 has problems running the debugger on an object with cursors.
Step Out
To use the Step Out facility, do the following:
1 On the Debug menu, click Step Out.
OR
On the SQL Editor toolbar, click Step Out.
OR
In the SQL Editor window, right-click and then click Step Out.
OR
Press SHIFT+F11.
Embarcadero SQL Debugger for Oracle stops stepping through the current object and executes the remainder of
the script.
Step Over
After you open a debugging session, Step Over lets you execute the current instruction without stepping into a nested
child object if the instruction makes a call to a dependent object.
NOTE: Oracle 7.3 has problems running the debugger on an object with cursors.
Step Over
To use the Step Over facility, do the following:
1 On the Debug menu, click Step Over.
OR
On the SQL Editor toolbar, click Step Over.
OR
In the SQL Editor window, right-click and then click Step Over.
OR
Press F10.
Embarcadero SQL Debugger for Oracle executes the current instruction.
Run to Cursor
After you open a debugging session, Run to Cursor lets you execute all instructions between the yellow arrow and
your cursor.

RAPID SQL ADD-ON TOOLS > EMBARCADERO SQL DEBUGGER FOR ORACLE
EMBARCADERO TECHNOLOGIES > BOOKNAMEVARIABLE 905
Run to Cursor
To use the Run to Cursor facility, do the following:
1 Scroll down from the yellow arrow to the target line.
2 Click the target line.
Embarcadero SQL Debugger for Oracle places the cursor on the target line.
3 On the Debug menu, click Run to Cursor.
OR
On the SQL Editor toolbar, click Run to Cursor.
OR
In the SQL Editor window, right-click and then click Run to Cursor.
OR
Press CTRL+F10.
Embarcadero SQL Debugger for Oracle executes all instructions between the pointer and your cursor.
Insert or Remove a Breakpoint
A breakpoint is a position in a program where a debugger stops execution. When you start debugging, Embarcadero
SQL Debugger for Oracle opens the script in an SQL Editor window. A yellow pointer indicates which line the
Debugger executes next. Embarcadero SQL Debugger for Oracle executes all lines of code between the pointer and
the first breakpoint. If no breakpoints are present, Embarcadero SQL Debugger for Oracle debugs the entire script.
While debugging, you can set one or more breakpoints in the currently executing object or in any object in the program
call stack. Breakpoints can be toggled, temporarily disabled, or enabled, without having to add or remove them.
Embarcadero SQL Debugger for Oracle displays each enabled breakpoint as a red dot in the left margin of the SQL
Editor Window, and each disabled breakpoint as a red circle.
Rapid SQL stores all breakpoints you set, so that when you debug the same script on separate occasions, you can
reuse the same breakpoints.
After you open a debugging session
, you can insert a breakpoint on the line where your cursor is located, and you can
remove a breakpoint on the line where your cursor is located.
NOTE: Script execution stops at the first breakpoint.

RAPID SQL ADD-ON TOOLS > EMBARCADERO SQL DEBUGGER FOR ORACLE
EMBARCADERO TECHNOLOGIES > BOOKNAMEVARIABLE 906
Inserting or Removing a Breakpoint
To insert and remove a breakpoint, do the following:
1 In the SQL Editor window, click the target line of SQL.
2 On the Debug menu, click Breakpoint.
OR
On the SQL Editor toolbar, click Breakpoint.
OR
In the SQL Editor window, right-click and then click Breakpoint.
OR
Press F9.
Embarcadero SQL Debugger for Oracle inserts a new breakpoint or removes an existing breakpoint on the target
line of code.
Toggle Breakpoint
After you open a debugging session and insert a breakpoint, Toggle Breakpoint lets you enable or disable that
breakpoint. Embarcadero SQL Debugger for Oracle displays each enabled breakpoint as a red dot in the left margin of
the SQL Editor Window, and each disabled breakpoint as a red circle. You can toggle any breakpoint in the SQL Editor
window. When you exit a debugging session and reenter it, the Embarcadero SQL Debugger for Oracle retains any
breakpoints you set.
Toggling a Breakpoint
To toggle a breakpoint, do the following:
1 In the SQL Editor window, click the line of the target breakpoint.
2 On the Debug menu, click Enable/Disable Breakpoint.
OR
On the SQL Editor toolbar, click Enable/Disable Breakpoint.
OR
In the SQL Editor window, right-click and then click Enable/Disable Breakpoint.
OR
Press CTRL+F9.
Embarcadero SQL Debugger for Oracle toggles the breakpoint indicated by the pointer.
Go
After you open a debugging session, Go lets you execute all instructions, stopping only when it encounters a
breakpoint or when the program is complete.

RAPID SQL ADD-ON TOOLS > EMBARCADERO SQL DEBUGGER FOR ORACLE
EMBARCADERO TECHNOLOGIES > BOOKNAMEVARIABLE 907
Go
Go use the Go facility, do the following:
1 On the Debug menu, click Go.
OR
On the SQL Editor toolbar, click Go.
OR
In the SQL Editor window, right-click and then click Go.
OR
Press F5.
Embarcadero SQL Debugger for Oracle executes all instructions.
Stop
After you open a debugging session, Stop lets you halt the script execution and terminate the session.
Stop
To stop the debugger, do the following:
1 On the Debug menu, click Stop Debugging.
OR
On the SQL Editor toolbar, click Stop Debugging.
OR
In the SQL Editor window, right-click and then click Stop Debugging.
OR
Press SHIFT+F5.
Embarcadero SQL Debugger for Oracle stops the script execution and terminates the session.
Restart
After you open a debugging session, Restart lets you terminate the current debug session and open a new one. When
the new session opens, Rapid SQL prompts you for new input parameters.

RAPID SQL ADD-ON TOOLS > EMBARCADERO SQL DEBUGGER FOR ORACLE
EMBARCADERO TECHNOLOGIES > BOOKNAMEVARIABLE 908
Restart
To restart the debugger, do the following:
1 On the Debug menu, click Restart.
OR
On the SQL Editor toolbar, click Restart.
OR
In the SQL Editor window, right-click and then click Restart.
OR
Press CTRL+SHIFT+F5.
Embarcadero SQL Debugger for Oracle restarts the debug session.
Break
After you open a debugging session, Break lets you pause the debug session.
Break
To pause the session, do the following:
1 On the Debug menu, click Break.
OR
On the SQL Editor toolbar, click Break.
OR
In the SQL Editor window, right-click and then click Break.
Embarcadero SQL Debugger for Oracle suspends the debug session.
Close
After you open a debugging session, Close lets you close the SQL Editor and the Embarcadero SQL Debugger for
Oracle.
Close
To close the SQL Editor and the debugger, do the following:
1 On the SQL Editor toolbar, click Close.
OR
In the upper right corner of the window, click Close.
OR
In the SQL Editor window, right-click and then click Close.
Embarcadero SQL Debugger for Oracle closes the debug session.

RAPID SQL ADD-ON TOOLS > EMBARCADERO SQL DEBUGGER FOR ORACLE
EMBARCADERO TECHNOLOGIES > BOOKNAMEVARIABLE 909
Using the Embarcadero SQL Debugger for Oracle
This section offers a general overview of how to use Embarcadero SQL Debugger for Oracle’s full range of debugging
functionality. After you open a debugging session for any Oracle procedure or function, you can begin debugging.
For more detailed information, see Debugging a Sample Script
.
Opening a Debugging Session
When you open a debugging session, Rapid SQL opens the five windows of the Embarcadero SQL Debugger for
Oracle interface. If the target script requires input parameters, Rapid SQL opens a Procedure or Function Execution
dialog box and prompts you for the necessary input parameters before displaying the target code in the SQL Editor
window. When Rapid SQL displays the target script in the SQL Editor window, you can begin debugging
.
NOTE: Embarcadero SQL Debugger for Oracle only lets you debug the SQL script of functions, triggers
and procedures.
Opening a Debugging Session
To debug a function, trigger or procedure, do the following:
1 On the Explorer Tab, click the node of the target function, trigger, or procedure.
Rapid SQL opens the node and displays two items: Code and Privileges.
2 Under the target object node, double-click Code.
Rapid SQL opens an SQL editor displaying the code of the target object.
3 On the Debug menu, click Start Debugging.
OR
On the SQL Editor toolbar, click Debug.
OR
In the SQL Editor window, right-click and then click Debug.
OR
Press CTRL+F5.
If the script requests input parameters, Rapid SQL opens the Procedure or Function Execution dialog box. If the
script does not require input parameters, Rapid SQL displays the script in the SQL Editor window for you to
begin debugging
.
NOTE: You cannot use the Embarcadero SQL Debugger for Oracle until it has fully initialized.
4 In the Procedure or Function Execution dialog box, specify the appropriate parameters, and then click
Continue.
Rapid SQL displays the script in the SQL Editor window for you to begin debugging
.
NOTE: If the script requires Oracle types (tables, records, or Booleans) as input parameters, the PL/SQL
Debugger generates an anonymous block.
Debugging an SQL Script
After you open a debugging session and enter any required input parameters, you can begin working with your script
in the Debugger.

RAPID SQL ADD-ON TOOLS > EMBARCADERO SQL DEBUGGER FOR ORACLE
EMBARCADERO TECHNOLOGIES > BOOKNAMEVARIABLE 910
Debugging an SQL Script
To debug an SQL script, do the following:
1On the Debug menu, click one of the PL/SQL Debugger options (Step Into
, Step Over, and so forth) or click Go.
OR
On the SQL Editor toolbar, click one of the PL/SQL Debugger options (Step Into
, Step Over, and so on) or click
Go.
NOTE: You can monitor the progress of your debug session in the Variables window.
2 On the Debug menu, click Breakpoint.
OR
On the SQL Editor toolbar, click Breakpoint.
OR
Press F9.
NOTE: When you set a breakpoint, the Call Stack window shows what was called before the breakpoint.
NOTE: You can use the Run to Cursor
option to test the lines of code between a breakpoint and your
cursor (indicated by the yellow arrow in the SQL Editor).
3 To check your variables, do the following:
1) In the SQL Editor, click a variable in your script and drag it to the Watch window.
2) In the Watch window, change the value of the watch variable and then click Go to run your script and see the
results of the new value.
4 To check record in stored objects, do the following:
1) Drag the record to the Watch window.
2) In the Watch window, change the value of the record, then click Go to run your script and see the results of
the new value.
5 To check the dependencies, do the following:
1) In the Dependency Tree window double-click the target dependent object to extract the code into a new
SQL Editor.
2) Step through the script while monitoring the Dependency Tree window.
6 When you finish debugging the script, click Close.
Rapid SQL closes the PL/SQL Debugger SQL Editor.
NOTE: When you exit a debug session and reenter it, the Embarcadero SQL Debugger for Oracle retains
any watch variables or breakpoints you have set.
Debugging a Sample Script
The Rapid SQL installation includes a sample script intended to walk you through basic debugging functionality. The
sample script creates a package that includes functions and procedures that you debug.
NOTE: To create the sample package, you must have CREATE privileges.

RAPID SQL ADD-ON TOOLS > EMBARCADERO SQL DEBUGGER FOR ORACLE
EMBARCADERO TECHNOLOGIES > BOOKNAMEVARIABLE 911
Overview
Debugging a Sample Script is divided into three sections that will familiarize you with basic debugging features and
functionality. These sections are:
• Getting Started
, which guides you through creating the package you will use in Debugging Sample Script 1 and
Debugging Sample Script 2.
• Debugging Sample Script 1
, which guides you through debugging functionality and demonstrates the
Embarcadero SQL Debugger for Oracle interface features.
• Debugging Sample Script 2
, which guides you through debugging functionality and error correction.
NOTE: For the purposes of this walk-through we have created this package under the user name
DEMO_SPENCE.
Getting Started
The Rapid SQL installation includes a sample script that you execute to create a package containing functions and
procedures. These functions and procedures demonstrate basic debugging features available in the Embarcadero
SQL Debugger for Oracle
NOTE: To create the sample package, you must have CREATE privileges.
The Rapid SQL installation places the script in the C:\Program Files\Embarcadero\RSQL600\UsrScrpt directory.
NOTE: The default for the Rapid SQL directory is C:\Program Files\Embarcadero. If you changed the
default, the sample script will still be located in the RSQL600\UsrScrpt directory.
If you create the package included with the Rapid SQL installation, you can delete it and its objects from your system
when you finish working with them. The objects to delete are as follows:
• The package COUNT_TIME_INTERVAL
• The package function WEEKEND_DAYS_( )
• The package function WORKING_DAYS_( )
• The package function YEARS_ELAPSED_BETWEEN_( )
• The procedure YEARS_ELAPSED
• The procedure YEARS_ELAPSED_Y2K
Overview
The Getting Started section guides you through:
• Opening the sample debug script.
• Executing the sample debug script.
• Changing the Explorer Tab display.
• Confirming the creation of the package, including its functions and procedures.

RAPID SQL ADD-ON TOOLS > EMBARCADERO SQL DEBUGGER FOR ORACLE
EMBARCADERO TECHNOLOGIES > BOOKNAMEVARIABLE 912
Getting Started
1Start Rapid SQL.
2 On the File menu, click Open.
Rapid SQL opens the Open File(s) dialog box.
3 In the Open File(s) dialog box, go to RSQL600\UsrScrpt\DEBUGGER_DEMO.sql, and then click Open.
NOTE: During the installation Rapid SQL places DEBUGGER_DEMO.sql in the following directory:
C:\Program Files\Embarcadero\RSQL600\UsrScrpt.
Rapid SQL opens the What type of file dialog box.
4 On the What type of file dialog box, click The file includes the DDL to create a database object, and then
click OK.
Rapid SQL opens the target script in an SQL Editor.
5 On the SQL Editor toolbar, click Execute to execute the script and create the package.
Rapid SQL executes the target script and opens the SQL Editor Results Tab, displaying the results of the script
execution. If you were not able to create the package, check the error messages to determine the problem.
6 On the Explorer Tab list, click Organize by Owner.
Rapid SQL displays a list of owners in the Database Explorer.
7 On the Explorer Tab, double-click your owner name.
Rapid SQL displays a list of your schema objects.
8 Under your owner node, double-click the Packages node.
Rapid SQL displays COUNT_TIME_INTERVAL, confirming the package’s creation. You are now ready to begin
debugging Sample Script 1
and Sample Script 2.
Debugging Sample Script 1
Sample Script 1 demonstrates Embarcadero SQL Debugger for Oracle’s basic features and functionality with the
function WORKING_DAYS( ), which counts the number of business days between two dates.
Overview
Debugging Sample Script 1 is divided into five parts:
•
Starting the Debug Session
• Entering Input Parameters
• Inserting Breakpoints
• Stepping Into
• Viewing Debug Session Results
Sample Script 1 - Starting the Debug Session
After you open and execute DEBUGGER_DEMO.sql, you can begin debugging Sample Script 1. To begin debugging
the function WORKING_DAYS( ), you must start a debug session.

RAPID SQL ADD-ON TOOLS > EMBARCADERO SQL DEBUGGER FOR ORACLE
EMBARCADERO TECHNOLOGIES > BOOKNAMEVARIABLE 913
Starting the Debug Session
To start the debug session, do the following:
1 On the Explorer Tab, under the Packages node, double-click the COUNT_TIME_INTERVAL node.
Rapid SQL opens the COUNT_TIME_INTERVAL node and displays the following items:
2 Under the COUNT_TIME_INTERVAL node, double-click Functions.
Rapid SQL opens the Functions node and displays the following items:
3 Under the Functions node, right-click WORKING_DAYS ( ), and then click Debug to start the debug session.
Rapid SQL opens the Function Execution dialog box with the current date in the boxes. You are now ready to
begin working with input parameters
.
Sample Script 1 - Entering Input Parameters
After you start a debugging session, you can enter input parameters. You cannot debug a script that requires input
parameters until you input those parameters in the Function Execution dialog box.
Input Parameters
To input parameters, do the following:
4 At the end of the P_START_DATE DATE row, click the drop-down arrow.
Rapid SQL opens a calendar.
5 On the calendar, click left arrow to set the month to November 1999.
6 Click 1.
Rapid SQL displays 11/01/1999 in the Value column of P_START_DATE.
7 Click the P_END_DATE DATE box, and then click the drop-down arrow.
Rapid SQL opens a new calendar.
8 On the calendar, click left arrow to set the month to November 1999.
9 Click 8.
Rapid SQL displays 11/08/1999 in the Value column of P_END_DATE.
10 Click Continue.
Rapid SQL closes the Function Execution dialog box, and then opens the following five Embarcadero SQL
Debugger for Oracle interface windows:
• SQL Editor
, which displays the SQL code for the function.
•
Watch window.
• Variables window.
• Call Stack window.
• Dependency Tree window
, which displays the dependent objects.
You are now ready to begin inserting breakpoints
.

RAPID SQL ADD-ON TOOLS > EMBARCADERO SQL DEBUGGER FOR ORACLE
EMBARCADERO TECHNOLOGIES > BOOKNAMEVARIABLE 914
Sample Script 1- Inserting Breakpoints
After you input parameters in the Input Parameters dialog box, you can begin inserting breakpoints. In this example,
the breakpoints must be inserted in the extracted dependent object code. After you extract this code, you must locate
the target breakpoint lines by searching for the text DBMS_OUTPUT.
Breakpoints
To insert breakpoints, do the following:
1 In the Dependency Tree window, double-click the COUNT_TIME_INTERVAL package body.
Rapid SQL displays the SQL code for the package body in the SQL Editor window.
2 On the Edit toolbar, click Find.
Rapid SQL opens the Find dialog box.
3 On the Find dialog box, in the Find What box, type DBMS_OUTPUT.
4 Click Find Next.
In the SQL Editor, Rapid SQL highlights the first occurrence of DBMS_OUTPUT, on line 22.
5 On the SQL Editor toolbar, click Breakpoint.
Rapid SQL inserts a breakpoint next to the target line number.
6 On the Find dialog box, click Find Next.
Rapid SQL highlights the next occurrence of DBMS_OUTPUT.
7 Click Find Next a third time.
Rapid SQL highlights the next occurrence of DBMS_OUTPUT, on line 35.
8 On the Find dialog box, click Cancel.
Rapid SQL closes the Find dialog box.
9 On the SQL Editor toolbar, click Breakpoint to insert a second breakpoint.
You should now have breakpoints set at lines 22 and 35. You are now ready to begin stepping into
the code.
Sample Script 1- Stepping Into
After you insert breakpoints, you can step into the function code.
Step Into
To Step Into the code, do the following:
1 On the SQL Editor toolbar, click Go.
Embarcadero SQL Debugger for Oracle begins debugging and runs to the first breakpoint, placing the yellow
arrow on line 22.
2 On the SQL Editor toolbar, click Step Into .
Embarcadero SQL Debugger for Oracle moves the yellow arrow to the next line of the code.
3 Click Step Into again to enter the LOOP block.
Embarcadero SQL Debugger for Oracle displays the value of the variables in the Variables window.

RAPID SQL ADD-ON TOOLS > EMBARCADERO SQL DEBUGGER FOR ORACLE
EMBARCADERO TECHNOLOGIES > BOOKNAMEVARIABLE 915
4 Click Step Into again to start moving through the LOOP block.
In the Variables window, Embarcadero SQL Debugger for Oracle updates the value of variable v_currdate from
01-NOV-1999 to 02-NOV-1999.
5 Click Step Into two more times.
In the Variables window, Embarcadero SQL Debugger for Oracle updates the value of v_theday from NULL to
Tuesday.
NOTE: If you continued stepping through the LOOP block, the Embarcadero SQL Debugger for Oracle
would continue to update v_currdate and v_theday until v_currdate is greater than p_end_date.
6 On the SQL Editor toolbar, click Go.
Embarcadero SQL Debugger for Oracle runs to the next breakpoint.
7 On the SQL Editor toolbar, click Go once more.
Rapid SQL PL/SQL concludes the debug session and displays the Debug Session Results box
.
Sample Script 1 - Viewing Debug Session Results
After Stepping Into and running to the end of the code, Embarcadero SQL Debugger for Oracle displays a Debug
Session Results box containing the following information:
• Variable output
• DBMS_OUTPUT
NOTE: In this example, the Embarcadero SQL Debugger for Oracle displays a Debug Session Results
box because the sample program includes DBMS_OUTPUT.
Debug Session Results
1 Click OK.
Rapid SQL closes the Debug Session Results box and terminates your debug session.
Debugging Sample Script 2
Sample Script 2 demonstrates Embarcadero SQL Debugger for Oracle’s functionality when used on a function
containing a bug which prevents it from executing successfully. The buggy function, WEEKEND_DAYS( ), requires
input parameters and counts the number of weekend days between two dates. In this section you must use
Embarcadero SQL Debugger for Oracle to identify the bug, and then correct the script so that it can execute
successfully.
Overview
Debugging Sample Script 2 is divided into six parts:
• Executing the Function
• Starting the Debug Session
• Entering Input Parameters
• Inserting Breakpoints
• Stepping Into

RAPID SQL ADD-ON TOOLS > EMBARCADERO SQL DEBUGGER FOR ORACLE
EMBARCADERO TECHNOLOGIES > BOOKNAMEVARIABLE 916
• Correcting the Function
Sample Script 2 - Executing the Function
After you open and execute DEBUGGER_DEMO.sql, you can begin debugging Sample Script 2. To begin debugging
the function WEEKEND_DAYS ( ), you must first execute the function to discover the type of error it returns when it
fails to execute.
Executing the Function
To execute the function, do the following:
1 On the Explorer Tab, under the Packages node, double-click the COUNT_TIME_INTERVAL node.
Rapid SQL opens the COUNT_TIME_INTERVAL node and displays the following items:
2 Double-click the Functions node.
Rapid SQL opens the Functions node and displays the following items:
3 Click WEEKEND_DAYS ( ), then right-click it and click Execute.
Rapid SQL opens the Function Execution dialog box.
4 In the Value column of the P_START_DATE row, type 11/01/1999.
5 In the Value column of the P_END_DATE row, type 11/30/1999.
6 Click Execute.
Rapid SQL attempts to execute the function but returns an error indicating that the character string buffer is too
small.
You are now ready to start the debug session
.
Sample Script 2 - Starting the Debug Session
After you unsuccessfully execute the function WEEKEND_DAYS( ) and Rapid SQL displays the nature of its execution
error, you can start a debugging session to determine the actual cause of the error.
Starting the Debugging Session
To start the debugging session, do the following:
1 On the Explorer Tab, under the COUNT_TIME_INTERVAL node, under the Functions node, right-click
WEEKEND_DAYS ( ), and then click Debug to start the debug session.
Rapid SQL opens the Function Execution dialog box.
You are now ready to begin entering input parameters
.
Sample Script 2 - Entering Input Parameters
After you start the debug session, you can enter input parameters in the Function Execution dialog box.

RAPID SQL ADD-ON TOOLS > EMBARCADERO SQL DEBUGGER FOR ORACLE
EMBARCADERO TECHNOLOGIES > BOOKNAMEVARIABLE 917
Entering Input Parameters
To enter the input parameters, do the following:
1 At the end of the P_START_DATE row, click the drop-down arrow.
Rapid SQL opens a calendar.
2 On the calendar, click left arrow to set the month to November 1999.
3 Click 1.
Rapid SQL displays 11/01/1999 in the Value column of the P_START_DATE row.
4 At the end of the P_END_DATE row, click the drop-down arrow.
Rapid SQL opens a new calendar.
5 On the calendar, click left arrow to set the month to November 1999.
6 Click 30.
Rapid SQL displays 11/08/1999 in the Value column of the P_END_DATE row.
7 Click Continue.
Rapid SQL closes the Function Execution dialog box, and then opens the following five Embarcadero SQL
Debugger for Oracle interface windows:
• SQL Editor
, which displays the SQL code for the function.
•
Watch window.
• Variables window.
• Call Stack window.
• Dependency Tree window
, which displays the dependent objects.
You are now ready to begin inserting breakpoints
.
Sample Script 2- Inserting Breakpoints
After you enter input parameters, you can begin inserting breakpoints. In this example, the breakpoints must be
inserted in the extracted dependent object code. After you extract this code, you must locate the target breakpoint
lines by searching for a particular line of code.
Breakpoints
To insert breakpoints, do the following:
1 In the Dependency Tree window, double-click the COUNT_TIME_INTERVAL package body.
Rapid SQL displays the SQL code for the package body in the SQL Editor window.
2 On the Edit toolbar, click Find.
Rapid SQL opens the Find dialog box.
3 On the Find dialog box, in the Find What box, type Function weekend_days, and then click Find Next.
Embarcadero SQL Debugger for Oracle highlights the first occurrence of Function weekend_days.
4 On the Find dialog box, click Cancel.
Rapid SQL closes the Find dialog box.

RAPID SQL ADD-ON TOOLS > EMBARCADERO SQL DEBUGGER FOR ORACLE
EMBARCADERO TECHNOLOGIES > BOOKNAMEVARIABLE 918
5 Click line 60, the first line of executable code:
6 On the SQL Editor toolbar, click Breakpoint.
Rapid SQL inserts a breakpoint next to the line number.
7 Click Go to start debugging and run to the breakpoint.
Embarcadero SQL Debugger for Oracle places the yellow arrow on line 60 and populates the Variables window
with the first set of variables in the function code.
Embarcadero SQL Debugger for Oracle also populates the Call Stack window with everything called before the
breakpoint.
You are now ready to begin stepping into
the function.
Sample Script 2- Stepping Into
After you set and run to the breakpoint, you can step into the function to locate the cause of the error. To locate the
cause of the error, you must monitor the Variables window. As you step through the code, the Variables window
updates with the value of the variables.
Step Into
To step into the function, do the following:
1 On the SQL Editor toolbar, click Step Into.
Rapid SQL moves the yellow arrow to the next line of the code, line 64.
2 On the SQL Editor toolbar, click Step Into.
Embarcadero SQL Debugger for Oracle’s Variables window updates the value of v_currdate to 02-NOV-1999.
3 On the SQL Editor toolbar, click Step Into.
Rapid SQL moves the yellow arrow to the next line of the code, line 66.
4 On the SQL Editor toolbar, click Step Into.
Rapid SQL moves the yellow arrow to the next line of the code, line 67, and, in the Variables window, updates
the value of v_theday to Tuesday.
5 On the SQL Editor toolbar, click Step Into.
Rapid SQL moves the yellow arrow back to line 64 to repeat the loop.
6 On the SQL Editor toolbar, click Step Into.
Embarcadero SQL Debugger for Oracle’s Variables window updates the value of v_currdate to 03-NOV-1999.
7 On the SQL Editor toolbar, click Step Into.
Rapid SQL moves the yellow arrow to the next line of the code, line 66.
8 On the SQL Editor toolbar, click Step Into.
The Embarcadero SQL Debugger for Oracle locates the error. The application terminates the debug session,
returns an error indicating that the numeric or value character string buffer is too small, extracts the
COUNT_TIME_INTERVAL package code into an SQL Editor, and returns an error indicating the line on which
the code failed. You are now ready to correct the script
.

RAPID SQL ADD-ON TOOLS > EMBARCADERO SQL DEBUGGER FOR SYBASE ASE
EMBARCADERO TECHNOLOGIES > BOOKNAMEVARIABLE 919
Sample Script 2 - Correcting the Script
After you step through the SQL code and locate the error, you can correct the bug in Sample Script 2. When
Embarcadero SQL Debugger for Oracle locates an error, it extracts the target package body into an SQL Editor. To
correct this script, you must do the following:
• Scroll to the incorrect line in the script
• Analyze the code
• Correct the error
• Execute the corrected SQL script
• Execute the WEEKEND_DAYS ( ) function
The code in Sample Script 2 fails on line 66, returning an error when the variable v_theday increments from the value
Tuesday to the value Wednesday. The cause of this error is found in the declarations section of the function script,
where the width of the VARCHAR2 variable v_theday is set to 8. Because “Wednesday” includes nine characters, the
value of the variable v_theday fails when it attempts to place a nine-character value in an eight-character variable. To
correct this error, you must increase the width of the variable v_theday to accommodate nine characters.
Correcting the Script
To correct the script, do the following:
1 On the Explorer Tab, under the Packages node, under the COUNT_TIME_INTERVAL. node, right-click
Package Body, and then click Extract.
Rapid SQL extracts the package body into an SQL Editor.
2 In the SQL Editor, scroll to line 57, the line defining the variable v_theday.
3 On line 57, change the value of the width from 8 to 9.
4 On the SQL Editor toolbar, click Execute to execute the script.
Rapid SQL successfully executes the script.
5 On the Explorer Tab, under the COUNT_TIME_INTERVAL package node, under the Functions node, click
WEEKEND_DAYS ( ).
6 Right-click WEEKEND_DAYS ( ), and then click Execute.
Rapid SQL opens the Function Execution dialog box.
7 In the Value column of the P_START_DATE row, type 11/01/1999.
8 In the Value column of the P_END_DATE row, type 11/30/1999.
9 Click Execute.
Rapid SQL successfully executes the corrected function.
Embarcadero SQL Debugger for Sybase ASE
Embarcadero SQL Debugger for Sybase is a programming tool that lets you debug Sybase objects in the following
Sybase versions:
•12
RAPID SQL ADD-ON TOOLS > EMBARCADERO SQL DEBUGGER FOR SYBASE ASE
EMBARCADERO TECHNOLOGIES > BOOKNAMEVARIABLE 920
• 12.0 (special version)
• 12.5
Objects
Using Embarcadero SQL Debugger for Sybase, you can debug the following objects:
• Procedures
• Triggers
You can only debug triggers by debugging the procedures that call them.
TIP: The Code Analyst
is a tool to identify time-consuming lines of code. Code Analyst lets you perform
detailed response time analysis on the execution of Procedures and Functions.
The table below describes the sections of this chapter:
Embarcadero SQL Debugger for Sybase Features
Embarcadero SQL Debugger for Sybase is designed to help identify problems within your code. Embarcadero SQL
Debugger for Sybase lets you:
• Interactively step through the flow of script execution.
• Examine the value of variables.
• Solve logical problems with your script design.
Embarcadero SQL Debugger for Sybase offers fundamental debugging features and several options to help fine tune
debugging, as listed in the table below:
Section Description
Features This section describes how Embarcadero SQL Debugger for
Sybase helps you identify problems within your code.
Interface
This section describes Embarcadero SQL Debugger for Sybase’s
graphical interface, which includes an editor window and four
debug view windows.
Functionality
This section describes the way in which Embarcadero SQL
Debugger for Sybase functions.
Using Embarcadero SQL
Debugger for Sybase
This section describes how to run a debug session.
Debugging Feature Description
Step Into Lets you execute each instruction step-by-step and step
inside a stored object.
Step Out
Lets you stop stepping through the current object and execute
the remainder of the script. This option is only active when the
pointer indicates a child-dependent instruction.
Step Over
Lets you execute the current instruction without stepping into
any child dependents.
Breakpoints
A position in a program where the debugger stops execution.
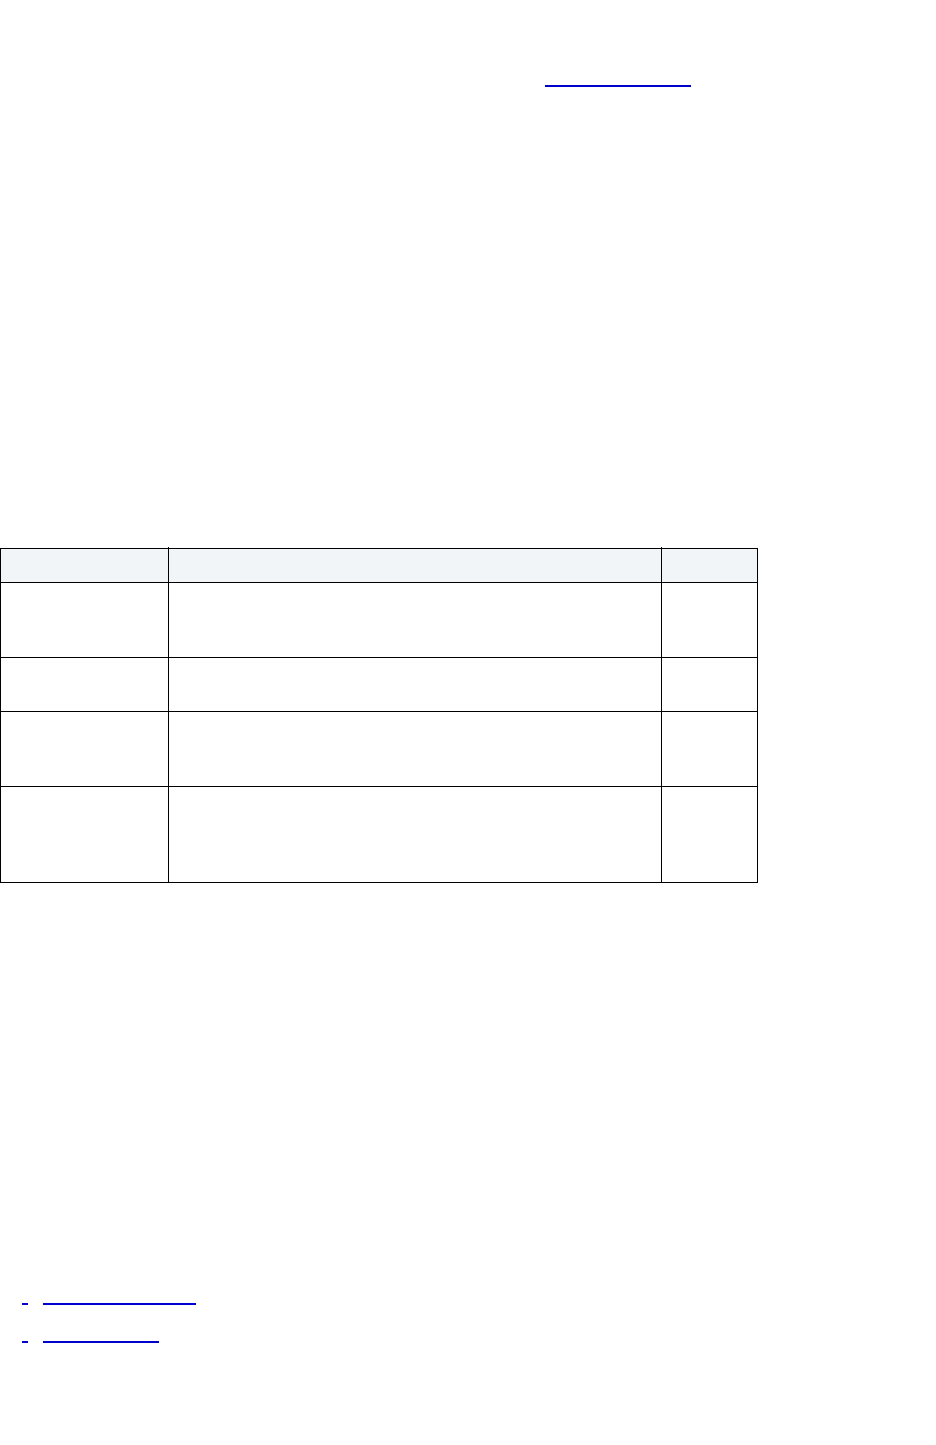
RAPID SQL ADD-ON TOOLS > EMBARCADERO SQL DEBUGGER FOR SYBASE ASE
EMBARCADERO TECHNOLOGIES > BOOKNAMEVARIABLE 921
To set specific Debugger values on Rapid SQL’s Options Editor, see Debugger Options.
Embarcadero SQL Debugger for Sybase Options
You can specify Debugger options from the Debug Tab of Rapid SQL’s Options editor. The Debug Tab of the Options
Editor lets you set the duration of your debug initialization and debug session, enable DBMS output, and refresh
dependencies.
Setting Debugger Options
To set debugger options, do the following:
1 On the File menu, click Options.
OR
On the Main toolbar, click Options.
Rapid SQL opens the Options Editor.
2 On the Debug Tab, specify debugger options. The table below describes the options available:
3 Click Close.
Rapid SQL closes the Options Editor.
Embarcadero SQL Debugger for Sybase Interface
Embarcadero SQL Debugger for Sybase has a graphical interface that includes an editor window and four debug view
windows. When you open a debug session, Rapid SQL extracts the code for the object into a DDL Editor and opens
four debug view windows at the bottom of the screen.
TIP: All Embarcadero debuggers display Performance Metrics that let you measure the execution time
of each statement in the debug session.
The four debug view windows are optional, dockable windows designed to help debug your script. Embarcadero SQL
Debugger for Sybase’s five windows are:
•
DDL Editor window
• Watch window
Option Description Default
Initialization
Timeout (seconds)
Specifies the number of seconds Rapid SQL tries to initialize
the debugger. If it cannot initialize the debugger in the specified
time, a message displays in the Debug Output window.
60
Debug Session
Timeout (seconds)
Specifies, in seconds, the length of your debug session. 7200
Enable DBMS
Output
Toggles the print output. Enable this option if you use
dbms_output.put_line calls in your procedures and you want
these lines displayed.
Selected
Refresh
Dependencies for
each run
Refreshes dependencies for each run. This potentially
time-consuming process is useful if the target procedure has
rapidly varying dependencies that can require updating during
the debugging process.
Cleared

RAPID SQL ADD-ON TOOLS > EMBARCADERO SQL DEBUGGER FOR SYBASE ASE
EMBARCADERO TECHNOLOGIES > BOOKNAMEVARIABLE 922
• Variables window
• Call Stack window
•
Dependency Tree window
Working with Debugger Windows
Rapid SQL lets you resize, move, dock and float the following Debugger windows:
•Watch
• Variables
• Call Stack
• Dependency Tree
To work with the above windows, do the following:
1 To resize the target window, click its frame and drag it.
Rapid SQL resizes the window.
2 To move and dock the target window, click its grab bar and drag it.
Rapid SQL moves the window to its new location and docks it with surrounding windows.
3 To float the target window, press Shift, then click its grab bar and drag it.
Rapid SQL frames the window in its own floating frame and moves the window to its new location.
DDL Editor Window
Embarcadero SQL Debugger for Sybase provides a DDL Editor window that displays your code in read-only format.
When you start debugging, Embarcadero SQL Debugger for Sybase extracts your code into a DDL Editor window,
making it editable. The DDL Editor uses the default Rapid SQL syntax coloring.
Watch Window
Embarcadero SQL Debugger for Sybase provides a Watch window that displays the watch variables for the database
object you are debugging and lets you specify variables you want to evaluate or modify while debugging your
program. For example, to check what happens when a variable (x) has a value of 100, you can double-click that
variable in the DDL Editor and drag it into the Watch window. In the Watch window, change the value to 100. When
you execute the script, the debugger uses the value x=100. This window is only visible when Embarcadero SQL
Debugger for Sybase is active.
NOTE: You can type a fully qualified record variable into the Watch window.
NOTE: When you exit a debug session and reenter it, Embarcadero SQL Debugger for Sybase retains
any watch variables or breakpoints you have set.
Opening and Closing the Watch Window
To open and close the Watch Window, do the following:
1 On the Debug Menu, on the Debug Views sub-menu, select or clear Watch.
OR
Press ALT+3.

RAPID SQL ADD-ON TOOLS > EMBARCADERO SQL DEBUGGER FOR SYBASE ASE
EMBARCADERO TECHNOLOGIES > BOOKNAMEVARIABLE 923
Setting a Watch Variable
To set a Watch Variable, do the following:
1 In the DDL Editor, double-click the target variable and drag it to the Watch window.
2 In the Watch window, in the Value column, change the value of the variable.
3On the DDL Editor toolbar, click Go to execute the script using the new value of the variable.
Rapid SQL executes the script using the new value of the variable.
Removing a Watch Variable
To remove a Watch Variable, do the following:
1 In the Watch window, delete the variable.
Variables Window
Embarcadero SQL Debugger for Sybase provides a Variables window that displays the local variables and their
current values during script execution. You cannot edit variables in the Variables window. This window is only visible
when the Debugger is active. If the DDL Editor displays an external database object, and that object is a dependent of
the object you are debugging, then the Variables window automatically refreshes and displays the variables for that
external object.
Embarcadero SQL Debugger for Sybase also lets you monitor the value of your variables while debugging.
Opening and Closing the Variables Window
To open and close the Variables Window, do the following:
1 On the Debug Menu, on the Debug Views sub-menu, select or clear Variable.
OR
Press ALT+4.
Monitoring Variables
To monitor the values of your variables while debugging, do the following:
1 In the DDL Editor, hold the pointer over the target variable.
Rapid SQL opens a ScreenTip displaying the current value of that variable.
Call Stack Window
Embarcadero SQL Debugger for Sybase provides a Call Stack window that displays the stack of currently active calls.
The Call Stack window is only visible when the Debugger is active.
Opening and Closing the Call Stack Window
To open and close the Call Stack Window, do the following:
1 On the Debug Menu, on the Debug Views sub-menu, select or clear Call Stack.
OR
Press ALT+5.

RAPID SQL ADD-ON TOOLS > EMBARCADERO SQL DEBUGGER FOR SYBASE ASE
EMBARCADERO TECHNOLOGIES > BOOKNAMEVARIABLE 924
Using the Call Stack Window
To display a line of code that references the call in the DDL Editor, do the following:
1 In the Call Stack window, double-click the target line.
In the DDL Editor, Rapid SQL displays a green arrow on the line of the the referenced call.
Dependency Tree Window
Embarcadero SQL Debugger for Sybase provides a Dependency Tree window that displays any external database
objects accessed by the script. Rapid SQL displays these database objects in a hierarchical tree, with the child objects
as database objects accessed by the parent objects. You can use this window to display the code for a dependent
database object in the DDL Editor window. This window is only visible when the Debugger is active.
Opening and Closing the Dependency Tree Window
To open and close the Dependency Tree Window, do the following:
1 On the Debug Menu, on the Debug Views sub-menu, select or clear Dependencies.
OR
Press ALT+6.
Displaying Dependencies
To display the code for a dependent database object in the DDL Editor window, do the following:
1 In the Dependency Tree window, double-click the target object.
Rapid SQL displays the SQL of the target object in the DDL Editor window.
Embarcadero SQL Debugger for Sybase Functionality
Embarcadero SQL Debugger for Sybase offers you the following functionality:
•
Input parameters
• Step Into
• Step Out
• Step Over
• Run to Cursor
• Insert or Remove Breakpoint
• Toggle Breakpoint
• Go
• Stop
• Restart
• Break
• Close
To make use of the above functionality, you must first open a debugging session.
RAPID SQL ADD-ON TOOLS > EMBARCADERO SQL DEBUGGER FOR SYBASE ASE
EMBARCADERO TECHNOLOGIES > BOOKNAMEVARIABLE 925
Input Parameters
Input parameters are set when you first create an object. If the object you want to debug requires input parameters,
Rapid SQL opens a Procedure Execution dialog box and prompts you for the input parameters when you open a
debugging session.
This dialog box also lets you:
• Save input parameters as *.prm files to preserve specific input parameter configurations.
• Open *.prm files to save the effort of reentering specific input parameters.
• Reset parameters to their default setting.
The table below describes the options and functionality on Procedure Execution dialog box:
The following table describes the options available in this dialog box:
Dialog box component Description
Owner drop-down list Displays the current procedure’s owner
Procedure drop-down list Displays the name of the current procedure.
Parameter window Specify the required input parameters in this window. If input
parameters are not required for the execution of the target
procedure, a message appears in this window, stating that the
procedure “has no input parameters. Press execute to run it.”
Open button Click to open an Open dialog box, from which you can open an
existing *.prm file. The saved parameters immediately populate the
dialog box upon opening.
Save button Click to save the values of your input parameters as a *.prm file.
You can reopen a saved *.prm file from this dialog box at any time.
Reset button Click to reset the parameters in the Parameter window to their
default values.
Execute button Click to execute the procedure once you have entered values for
all required parameters in the Parameter window.

RAPID SQL ADD-ON TOOLS > EMBARCADERO SQL DEBUGGER FOR SYBASE ASE
EMBARCADERO TECHNOLOGIES > BOOKNAMEVARIABLE 926
NOTE: You cannot debug a script that requires input parameters until you provide input parameters.
Step Into
After you open a debugging session, Step Into lets you execute the current instruction. If the current instruction makes
a call to a stored Sybase object, Embarcadero SQL Debugger for Sybase steps inside the nested child object.
Step Into
To use the Step Into facility, do the following:
1 On the Debug menu, click Step Into.
OR
On the DDL Editor toolbar, click Step Into.
OR
In the DDL Editor window, right-click and then click Step Into.
OR
Press F11.
Embarcadero SQL Debugger for Sybase moves the arrow to execute the current instruction.
Step Out
After you open a debugging session, Step Out lets you execute the remainder of the dependent child object and
resumes line-by-line, step-debugging in the parent object.
NOTE: Step Out is only active when the pointer indicates a child-dependent instruction.
Option Description
Owner Displays the current procedure’s owner.
Procedure Displays the name of the current procedure.
Parameter Specify the required input parameters in this window.
If input parameters are not required for the execution
of the target procedure, a message displays in this
window, stating that the procedure “has no input
parameters. Press execute to run it.”
Open Click to open an existing *.prm file. The saved
parameters immediately populate the dialog box
upon opening.
Save Click to save the values of your input parameters as
a *.prm file. You can reopen a saved *.prm file from
this dialog box at any time.
Reset Click to reset the parameters in the Parameter
window to their default values.
Continue Click to execute the procedure once you have
entered values for all required parameters in the
Parameter window.

RAPID SQL ADD-ON TOOLS > EMBARCADERO SQL DEBUGGER FOR SYBASE ASE
EMBARCADERO TECHNOLOGIES > BOOKNAMEVARIABLE 927
Step Out
To use the Step Out facility, do the following:
1 On the Debug menu, click Step Out.
OR
On the DDL Editor toolbar, click Step Out.
OR
In the DDL Editor window, right-click and then click Step Out.
OR
Press SHIFT+F11.
Embarcadero SQL Debugger for Sybase stops stepping through the current object and executes the remainder
of the script.
Step Over
After you open a debugging session, Step Over lets you execute the current instruction without stepping into a nested
child object if the instruction makes a call to a dependent object.
Step Over
To use the Step Over facility, do the following:
1 On the Debug menu, click Step Over.
OR
On the DDL Editor toolbar, click Step Over.
OR
In the DDL Editor window, right-click and then click Step Over.
OR
Press F10.
Embarcadero SQL Debugger for Sybase executes the current instruction.
Run to Cursor
After you open a debugging session, Run to Cursor lets you execute all instructions between the yellow arrow and
your cursor.
Run to Cursor
To use the Run to Cursor facility, do the following:
1 Scroll down from the yellow arrow to the target line.
2 Click the target line.
Embarcadero SQL Debugger for Sybase places the cursor on the target line.

RAPID SQL ADD-ON TOOLS > EMBARCADERO SQL DEBUGGER FOR SYBASE ASE
EMBARCADERO TECHNOLOGIES > BOOKNAMEVARIABLE 928
3 On the Debug menu, click Run to Cursor.
OR
On the DDL Editor toolbar, click Run to Cursor.
OR
In the DDL Editor window, right-click and then click Run to Cursor.
OR
Press CTRL+F10.
Embarcadero SQL Debugger for Sybase executes all instructions between the yellow arrow and your cursor.
Insert or Remove a Breakpoint
A breakpoint is a position in a program where a debugger stops execution. When you start debugging, Embarcadero
SQL Debugger for Sybase opens the script in a DDL Editor window. A yellow pointer indicates which line the
Debugger executes next. Embarcadero SQL Debugger for Sybase executes all lines of code between the pointer and
the first breakpoint. If no breakpoints are present, Embarcadero SQL Debugger for Sybase debugs the entire script.
While debugging, you can set one or more breakpoints in the currently executing object or in any object in the program
call stack. Breakpoints can be toggled (temporarily disabled or enabled) without having to remove or reinsert them.
Embarcadero SQL Debugger for Sybase displays each enabled breakpoint as a red dot in the left margin of the DDL
Editor Window, and each disabled breakpoint as a red circle.
Rapid SQL stores all breakpoints you set so that when you debug the same script on separate occasions, you can
reuse the same breakpoints each time.
After you open a debugging session
, you can insert a breakpoint on the line where your cursor it located, and you can
remove a breakpoint on the line where your cursor is located.
NOTE: Script execution stops at the first breakpoint.
Inserting or Removing a Breakpoint
To insert or remove a breakpoint, do the following:
1 In the DDL Editor window, click the target line of SQL.
2 On the Debug menu, click Breakpoint.
OR
On the DDL Editor toolbar, click Breakpoint.
OR
In the DDL Editor window, right-click and then click Breakpoint.
OR
Press F9.
Embarcadero SQL Debugger for Sybase inserts a new breakpoint or removes an existing breakpoint on the
target line of code.

RAPID SQL ADD-ON TOOLS > EMBARCADERO SQL DEBUGGER FOR SYBASE ASE
EMBARCADERO TECHNOLOGIES > BOOKNAMEVARIABLE 929
Toggle Breakpoint
After you open a debugging session and insert a breakpoint, Toggle Breakpoint lets you enable or disable that
breakpoint. Embarcadero SQL Debugger for Sybase displays each enabled breakpoint as a red dot in the left margin
of the DDL Editor Window, and each disabled breakpoint as a red circle. You can toggle any breakpoint in the DDL
Editor window. When you exit a debugging session and reenter it, the Embarcadero SQL Debugger for Sybase retains
any breakpoints you set.
Toggling a Breakpoint
To toggle a breakpoint, do the following:
1 In the DDL Editor window, click the line of the target breakpoint.
2 On the Debug menu, click Enable/Disable Breakpoint.
OR
On the DDL Editor toolbar, click Enable/Disable Breakpoint.
OR
In the DDL Editor window, right-click and then click Enable/Disable Breakpoint.
OR
Press CTRL+F9.
Embarcadero SQL Debugger for Sybase toggles the breakpoint indicated by the pointer.
Go
After you open a debugging session, Go lets you execute all instructions, stopping only when it encounters a
breakpoint or when the program is complete.
Go
To use the Go facility, do the following:
1 On the Debug menu, click Go.
OR
On the DDL Editor toolbar, click Go.
OR
In the DDL Editor window, right-click and then click Go.
OR
Press F5.
Embarcadero SQL Debugger for Sybase executes all instructions.
Stop
After you open a debugging session, Stop lets you halt the script execution and terminate the session.

RAPID SQL ADD-ON TOOLS > EMBARCADERO SQL DEBUGGER FOR SYBASE ASE
EMBARCADERO TECHNOLOGIES > BOOKNAMEVARIABLE 930
Stop
To stop the debugger, do the following:
1 On the Debug menu, click Stop Debugging.
OR
On the DDL Editor toolbar, click Stop Debugging.
OR
In the DDL Editor window, right-click and then click Stop Debugging.
OR
Press SHIFT+F5.
Embarcadero SQL Debugger for Sybase stops the script execution and terminates the session.
Restart
After you open a debugging session, Restart lets you terminate the current debug session and open a new one. When
the new session opens, Rapid SQL prompts you for new input parameters.
Restart
To restart the debugger, do the following:
1 On the Debug menu, click Restart.
OR
On the DDL Editor toolbar, click Restart.
OR
In the DDL Editor window, right-click and then click Restart.
OR
Press CTRL+SHIFT+F5.
Embarcadero SQL Debugger for Sybase restarts the debug session.
Break
After you open a debugging session, Break lets you pause the debug session.
Break
To pause the debugger, do the following:
1 On the Debug menu, click Break.
OR
On the DDL Editor toolbar, click Break.
OR
In the DDL Editor window, right-click and then click Break.
Embarcadero SQL Debugger for Sybase suspends the debug session.

RAPID SQL ADD-ON TOOLS > EMBARCADERO SQL DEBUGGER FOR SYBASE ASE
EMBARCADERO TECHNOLOGIES > BOOKNAMEVARIABLE 931
Close
After you open a debugging session, Close lets you close the DDL Editor and Embarcadero SQL Debugger for
Sybase.
Close
To close the DDL Editor and debugger, do the following:
1 On the DDL Editor toolbar, click Close.
OR
In the upper right corner of the window, click Close.
OR
In the DDL Editor window, right-click and then click Close.
Embarcadero SQL Debugger for Sybase closes the debug session.
Using Embarcadero SQL Debugger for Sybase
This section offers a general overview of how to use Embarcadero SQL Debugger for Sybase’s full range of
debugging functionality. After you open a debugging session for any Sybase procedure or trigger, you can begin
debugging.
Opening a Debugging Session
When you open a debugging session, Rapid SQL opens the five windows of the Embarcadero SQL Debugger for
Sybase interface. If the target script requires input parameters, Rapid SQL opens a Procedure Execution dialog box
and prompts you for the necessary input parameters before displaying the target code in the DDL Editor window.
When Rapid SQL displays the target script in the DDL Editor window, you can begin debugging
.
NOTE: Embarcadero SQL Debugger for Sybase only lets you debug the SQL script of triggers and
procedures.
Opening a Debugging Session
To debug a trigger or procedure, do the following:
1 On the Explorer Tab, click the node of the target procedure.
Rapid SQL opens the node and displays two items: Code and Privileges.
2 Under the target object node, double-click Code.
Rapid SQL opens an DDL Editor displaying the code of the target object.

RAPID SQL ADD-ON TOOLS > EMBARCADERO SQL DEBUGGER FOR SYBASE ASE
EMBARCADERO TECHNOLOGIES > BOOKNAMEVARIABLE 932
3 On the Debug menu, click Start Debugging.
OR
On the DDL Editor toolbar, click Debug.
OR
In the DDL Editor window, right-click and then click Debug.
OR
Press CTRL+F5.
If the script requests input parameters, Rapid SQL opens a Procedure Execution dialog box. If the script does
not require input parameters, Rapid SQL displays the script in the DDL Editor window for you to begin
debugging.
NOTE: You cannot use Embarcadero SQL Debugger for Sybase until it has fully initialized.
4 In the Procedure Execution dialog box, type the parameters, and then click OK.
Rapid SQL displays the script in the DDL Editor window for you to begin debugging
.
NOTE: If the script requires Sybase types (tables, records, or Booleans) as input parameters,
Embarcadero SQL Debugger for Sybase generates an anonymous block.
Debugging an SQL Script
After you open a debugging session and enter any required input parameters, you can begin working with your script
in Embarcadero SQL Debugger for Sybase.
Debugging an SQL Script
To debug a SQL script, do the following:
1 On the Debug menu, click an Embarcadero SQL Debugger for Sybase option (Step Into
, Step Over, and so forth)
or click Go.
OR
On the DDL Editor toolbar, click an Embarcadero SQL Debugger for Sybase option (Step Into
, Step Over, and
so on) or click Go.
NOTE: You can monitor the progress of your debug session in the Variables window.
2 On the Debug menu, click Breakpoint.
OR
On the DDL Editor toolbar, click Breakpoint.
NOTE: When you set a breakpoint, the Call Stack window shows what was called before the breakpoint.
NOTE: You can use the Run to Cursor
option to test the lines of code between a breakpoint and your
cursor (indicated by the yellow arrow in the DDL Editor).

RAPID SQL ADD-ON TOOLS > RAPID SQL PL/SQL PROFILER
EMBARCADERO TECHNOLOGIES > BOOKNAMEVARIABLE 933
3 To check your variables, do the following:
1) In the DDL Editor, click a variable in your script and drag it to the Watch window.
2) In the Watch window, change the value of the watch variable and then click Go to run your script and see the
results of the new value.
4 To check record in stored objects, do the following:
1) Drag the record to the Watch window.
2) In the Watch window, change the value of the record, then click Go to run your script and see the results of
the new value.
5 To check the dependencies, do the following:
1) In the Dependency Tree window double-click the target dependent object to extract the code into a new
DDL Editor.
2) Step through the script while monitoring the Dependency Tree
window.
6 When you finish debugging the script, click Close.
Rapid SQL closes an Embarcadero SQL Debugger for Sybase’s DDL Editor.
NOTE: When you exit a debug session and reenter it, Embarcadero SQL Debugger for Sybase retains
any watch variables or breakpoints you have set.
Rapid SQL PL/SQL Profiler
The Rapid SQL PL/SQL Profiler module lets you capture metrics of various PL/SQL programmable objects as they are
executed in the database. Developers can use data collected in profile sessions to improve performance of PL/SQL
code execution. Rapid SQL PL/SQL Profiler collects and stores data in database tables and helps identify and isolate
performance problems, and provide code coverage information. The Rapid SQL PL/SQL Profiler lets you:
• Graphically browse PL/SQL profiling data within the Explorer Tab
• View profiling data in the right pane of the application, which is populated as you navigate the Explorer Tab
• Start and stop PL/SQL profiling sessions with a single click
• Graphically analyze time spent in each programmable object (unit)
• Graphically analyze time spent in each source code line of a unit
The table below describes the sections of this chapter:
NOTE: The Rapid SQL PL/SQL Profiler is an optional add-on module.
For more information, see:
Setting Up Rapid SQL PL/SQL Profiler
Section Description
Setting Up the Profiler This section describes the process of setting up Rapid SQL
PL/SQL Profiler.
Profiler Functionality
This section describes the functionary of Rapid SQL PL/SQL
Profiler.
Using the Profiler
This section describes how to run a profile session.

RAPID SQL ADD-ON TOOLS > RAPID SQL PL/SQL PROFILER
EMBARCADERO TECHNOLOGIES > BOOKNAMEVARIABLE 934
Rapid SQL PL/SQL Profiler Explorer
Rapid SQL PL/SQL Profiler Functionality
Using Rapid SQL PL/SQL Profiler
Setting Up Rapid SQL PL/SQL Profiler
The profiling tables must be on the server before using the Rapid SQL PL/SQL Profiler. The first time you open the
PL/SQL Profiler, Rapid SQL checks the server for the profiling tables. If the profiling tables are not on the server,
Rapid SQL automatically installs profiling tables on the server.
Rapid SQL PL/SQL Profiler Explorer
The Rapid SQL PL/SQL Profiler displays profiling data in the right pane of the application, which is populated as you
navigate the Explorer Tab.
The table below describes the nodes of the Rapid SQL PL/SQL Profiler Explorer and the corresponding information in
the right pane of the application:
Rapid SQL PL/SQL Profiler Functionality
Rapid SQL PL/SQL Profiler offers you the following functionality:
• Start
• Flush
• Run Summary
• Run Detail
• Unit Summary
• Unit Detail
• Clear Profile Table
• Stop
Node Right pane information
PL/SQL Code Profiling Contain all Comment, Run ID and Run Date\time data that is
current stored in the Profiling tables.
Label\Comment level Contains all Run ID and Run Date\time data for the specific
Label\Comment.
Run level Contains all Unit, Unit Name, Unit Type, Run Date\time data for the
specific Run ID.

RAPID SQL ADD-ON TOOLS > RAPID SQL PL/SQL PROFILER
EMBARCADERO TECHNOLOGIES > BOOKNAMEVARIABLE 935
Start
Rapid SQL PL/SQL Profiler lets you begin a new profiling session or open a previous profiling session with the Start
command.
Starting a New Profile Session
To start a new Profiler session, do the following:
1 On the Tools menu, click PL/SQL Profiler and then click Start.
OR
On the PL/SQL Profiler toolbar, click Execute.
OR
On the Explorer Tab, right-click the PL/SQL Code Profiling node, and then click Start.
Rapid SQL opens the PL/SQL Profiler - Start dialog box.
2 In the Profile Label box, type the name of the new profile.
NOTE: Each user can own one or more Profiles.
3 Click OK to begin profiling.
Starting an Existing Profile Session
To start an existing Profiler session, do the following:
1 On the Explorer Tab, expand the PL/SQL Code Profiling node.
Rapid SQL displays the list of existing Profiles.
2On the Tools menu, click PL/SQL Profiler, and then click Start.
OR
On the PL/SQL Profiler toolbar, click Execute.
OR
On the Explorer Tab, right-click the PL/SQL Profiler node, and then click Start.
OR
On the Explorer Tab, right-click the target Profile, and then click Start.
Rapid SQL opens the PL/SQL Profiler - Start dialog box.
3 Click the Profile Label list and then click the existing profile.
4 Click OK to begin profiling.
Flush
Rapid SQL PL/SQL Profiler lets you move the data from the dynamic tables into Analysis tables with the Flush
command.

RAPID SQL ADD-ON TOOLS > RAPID SQL PL/SQL PROFILER
EMBARCADERO TECHNOLOGIES > BOOKNAMEVARIABLE 936
Flushing a Profile
To flush a Profile, do the following:
1On the Tools menu, click PL/SQL Profiler and then click Flush.
OR
On the PL/SQL Profiler toolbar click Flush.
OR
On the Explorer Tab, right-click the PL/SQL Code Profiling node, and then click Flush.
Rapid SQL opens the PL/SQL Profiler - Flush dialog box.
2 In the PL/SQL Profiler - Flush dialog box:
• Click Flush to delete the data in a running profile.
• Click Flush & Analyze to open the PL/SQL Profiler Run Detail
window.
• Click Cancel to abort the flush and continue the profiling session.
NOTE: You can only Flush a running Profile.
Run Summary
The Rapid SQL PL/SQL Profiler Run Summary window lets you view the following information for each of your
profiles:
•Run ID
• Run Date
• Total Time
Opening the Run Summary Window
To open the Run Summary Window, do the following:
1 On the Explorer Tab, expand the PL/SQL Code Profiling node.
Rapid SQL displays the list of existing Profiles.
2On the Tools menu, click PL/SQL Profiler, and then click Run Summary.
On the PL/SQL Profiler toolbar click Run Summary.
On the Explorer Tab, right-click the PL/SQL Profiler node, and then click Run Summary.
On the Explorer Tab, right-click the target Profile, and then click Run Summary.
3
Rapid SQL opens the PL/SQL Profiler - Run Summary window.
4 Click the Profile Label list, and then click the target profile.
Run Detail
The Rapid SQL PL/SQL Profiler Run Detail window lets you view the following information for each of your profiles:
• Run Number
• Run Date

RAPID SQL ADD-ON TOOLS > RAPID SQL PL/SQL PROFILER
EMBARCADERO TECHNOLOGIES > BOOKNAMEVARIABLE 937
•Run Time
The Rapid SQL PL/SQL Profiler lets you view the information for all runs or you can view profile information based on
the unit type or unit owner.
The Rapid SQL PL/SQL Profiler Run Detail window lets you view results in milliseconds, seconds and minutes. The
Run Detail window also contains graphical displays of the profiling data that you can go to the specific unit within the
summary portion of the window.
Opening the Run Detail Window
To open the Run Detail Window, do the following:
1 On the Explorer Tab, expand the PL/SQL Code Profiling node.
Rapid SQL displays the list of existing Profiles.
2 On the Tools menu, click PL/SQL Profiler and then click Run Detail.
OR
On the PL/SQL Profiler toolbar click Run Detail.
OR
On the Explorer Tab, right-click the PL/SQL Code Profiling node and then click Run Detail.
OR
Right-click the target run and then click Run Detail.
OR
In a PL/SQL Profiler - Run Summary
window right-click and then click Detail.
OR
In a PL/SQL Profiler - Unit Summary window right-click and then click Detail.
Rapid SQL opens the PL/SQL Profiler - Run Detail window.
3 In the PL/SQL Profiler - Run Detail window:
• Click the Label list box and then click the target profile.
• Click the Run list and then click the target run.
• Click the Unit Type list and then click the target unit type(s).
• Click the Unit Owner list and then click the target unit owner(s) to populate the table.
Unit Summary
The Rapid SQL PL/SQL Profiler Unit Summary window lets you view the following information for each of your
profiles:
•Run ID
• Run Date
•Run Time
•Unit Time
• Percentage of Run Time

RAPID SQL ADD-ON TOOLS > RAPID SQL PL/SQL PROFILER
EMBARCADERO TECHNOLOGIES > BOOKNAMEVARIABLE 938
The Rapid SQL PL/SQL Profiler Unit Summary window lets you view results in milliseconds, seconds and minutes.
The Unit Summary window also displays graphs of execution statistics for the top N runs and associated units. You
can use the graphical displays to go to the specific run within summary portion of the window.
Opening the Unit Summary Window
To open the Unit Summary Window, do the following:
1 On the Tools menu, click PL/SQL Profiler, and then click Unit Summary.
OR
On the PL/SQL Profiler toolbar click Unit Summary.
OR
On the Explorer Tab, right-click the PL/SQL Code Profiling node, and then click Unit Summary.
Rapid SQL opens the PL/SQL Profiler - Unit Summary window.
2 In the PL/SQL Profiler - Unit Summary window:
• Click the Unit Owner list and then click the target unit owner.
• Click the Unit Name list and then click the target unit name to populate the table.
Clear Profile Table
Rapid SQL PL/SQL Profiler lets you delete data from the user's profile tables with the command Clear Profile Table.
Clearing a Profile Table
To clear a profile table, do the following:
1On the Tools menu, click PL/SQL Profiler, and then click Clear Profile Table.
OR
On the PL/SQL Profiler toolbar, click Clear Profile Table.
OR
On the Explorer Tab, right-click the PL/SQL Code Profiling node, and then click Clear Profile Table.
Rapid SQL clears the profile table.
2 In the dialog box, if you are sure that you want to clear out the profiler tables, click Yes.
Unit Detail
The Rapid SQL PL/SQL Profiler Unit Detail window lets you view the following information for each of your profiles:
• Average Time
• Source
• PL/SQL Script

RAPID SQL ADD-ON TOOLS > RAPID SQL PL/SQL PROFILER
EMBARCADERO TECHNOLOGIES > BOOKNAMEVARIABLE 939
The Rapid SQL PL/SQL Profiler Unit Detail window lets you view results in milliseconds, seconds and minutes. The
Unit Detail window also provides two calculation options for viewing unit execution time as a percentage of total
execution time (total run vs unit run). The Rapid SQL PL/SQL Profiler Unit Detail window also displays graphs of
execution statistics for the top N run. You can use the graphical displays to go to the specific line within source code
portion of the window.The graphical display portion of the window contains options for viewing advanced statistics.
The Advanced View
of the Rapid SQL PL/SQL Profiler Unit Detail window, lets you view the following information for
each of your profiles:
• Hit Lines
• Missed Lines
• Line Number
•Calls
• Total Time
• Percentage of the Total Time
• Average Time
• Minimum Time
• Maximum Time
Opening the Unit Detail Window
To open the Unit Detail Window, do the following:
1 On the Explorer Tab, expand the PL/SQL Code Profiling node.
Rapid SQL displays the list of existing Profiles.
2 On the Tools menu, click PL/SQL Profiler and then click Unit Detail.
OR
On the PL/SQL Profiler toolbar click Unit Detail.
OR
On the Explorer Tab, right-click the PL/SQL Code Profiling node and then click Unit Detail.
OR
Right-click the target run and then click Unit Detail.
OR
In a PL/SQL Profiler - Run Summary
window right-click and then click Unit Detail.
OR
In a PL/SQL Profiler - Unit Summary window right-click and then click Unit Detail.
Rapid SQL opens the PL/SQL Profiler - Unit Detail window.

RAPID SQL ADD-ON TOOLS > RAPID SQL PL/SQL PROFILER
EMBARCADERO TECHNOLOGIES > BOOKNAMEVARIABLE 940
3 In the PL/SQL Profiler - Unit Detail window, do any of the following:
• Click the Label list and then click the target profile.
• Click the Run list and then click the target run.
• Click the Unit list and then click the target unit to populate the table.
• Right-click and then click Show Only Hit Lines to populate the table with the Average Time and Source for
hit lines.
• Right-click and then click Show Only Missed Lines to populate the table with the Average Time and Source
for missed lines.
Opening the Unit Detail Window Advanced View
To open the Unit Detail Window Advanced View, do the following:
1 In the Unit Detail table, right-click and then click Advanced View to populate the table with advanced view
information.
Stop
Rapid SQL PL/SQL Profiler command Stop pauses the data gathering operation. Stop & Analyze populates the
summary tables so you can view the Unit Detail and Run Summary windows
Stopping a Profiling Session
To stop a Profiling session, do the following:
1On the Tools menu, click PL/SQL Profiler and then click Stop.
OR
On the PL/SQL Profiler toolbar click Stop.
OR
On the Explorer Tab, right-click the PL/SQL Code Profiling node, and then click Stop.
Rapid SQL opens the PL/SQL Profiler - Stop dialog box.
2 In the PL/SQL Profiler - Stop dialog box:
• Click Stop to stop the profiling session.
• Click Stop & Analyze to open the PL/SQL Profiler Run Detail
window.
• Click Cancel to continue the profiling session.
Using Rapid SQL PL/SQL Profiler
The steps below provide a high level overview of running a profiling session:
• Starting the Session
• Executing the Sample Script
• Stopping and Analyzing the Session
For more information, see Sample Profiling Session
.

RAPID SQL ADD-ON TOOLS > RAPID SQL PL/SQL PROFILER
EMBARCADERO TECHNOLOGIES > BOOKNAMEVARIABLE 941
Using the Rapid SQL PL/SQL Profiler
NOTE: The first execution of a PL/SQL unit can take more time to execute because the code is loading
into memory; subsequent runs take less time.
To use the Profiler, do the following:
1 On the Tools menu, click PL/SQL Profiler and then click Start.
OR
On the PL/SQL Profiler toolbar, click Start.
Rapid SQL opens the PL/SQL Profiler - Start dialog box.
2 In the Profile Label box, enter the name of the new profile.
NOTE: Each user can own one or more Profiles.
3 Click OK.
Rapid SQL begins profiling.
4 In the Explorer Tab, execute one of the following PL/SQL database objects:
• Procedure
• Function
• Package Procedure
• Package Function
Profiler displays profiling data in the right pane of the application.
5 On the Tools menu, click PL/SQL Profiler and then click Stop
.
Rapid SQL opens the PL/SQL Profiler - Stop dialog box.
6 In the PL/SQL Profiler - Stop dialog box, do any of the following:
• Click Stop to stop the profiling session.
• Click Stop & Analyze to open the PL/SQL Profiler Run Detail window.
• Click Cancel to continue the profiling session.
7 If you clicked Stop & Analyze do the following:
• Click the Label list and then click the target profile.
• Click the Run list and then click the target run.
• Click the Unit Type list and then click the target unit type(s).
• Click the Unit Owner list and then click the target unit owner(s) to populate the table.
8Use the Tools menu to open any of the following PL/SQL Profiler windows:
• PL/SQL Profiler Run Summary
• PL/SQL Profiler Unit Summary
• PL/SQL Profiler Unit Detail

RAPID SQL ADD-ON TOOLS > RAPID SQL PL/SQL PROFILER
EMBARCADERO TECHNOLOGIES > BOOKNAMEVARIABLE 942
Sample Profiling Session
The Rapid SQL installation includes two scripts for the sample profiling session:
• PROFILER_BUILD_DEMO.SQL
• PROFILER_DEMO.SQL
The PROFILER_BUILD_DEMO.SQL creates the objects that you will profile in the walk-through, and the
PROFILER_DEMO.SQL is what you will profile during the walk-through.
NOTE: To create the objects in the PROFILER_BUILD_DEMO.SQL script, you must have CREATE
privileges.
The sample script demonstrates the following features of the Rapid SQL PL/SQL Profiler:
• Unit Detail
•Run Detail
• Show Only Hit Lines
• Advanced View
During the installation, Rapid SQL places the scripts in the C:\Program Files\Embarcadero\RSQL600\UsrScrpt
directory.
NOTE: The default for the Rapid SQL directory is C:\Program Files\Embarcadero. If you changed the
default, the sample scripts will still be located in the RSQL600\UsrScrpt directory.
Overview
Sample Profiling Session is divided into six parts:
• Getting Started
• Starting the Session
• Executing the Sample Script
• Stopping the Session
• Rerunning & Reexecuting the Session
• Stopping & Analyzing
Sample Profiling Session - Getting Started
In this step of Sample Profiling Session, you create the objects that you will profile in the walk-through.
Overview
The Getting Started section guides you through:
• Opening PROFILER_BUILD_DEMO.SQL
• Changing the Explorer tab Display
• Confirming the Creation of the Package

RAPID SQL ADD-ON TOOLS > RAPID SQL PL/SQL PROFILER
EMBARCADERO TECHNOLOGIES > BOOKNAMEVARIABLE 943
Getting Started
1Start Rapid SQL.
2 On the File menu, click Open.
Rapid SQL opens the Open Files dialog box.
NOTE: The default for the Rapid SQL directory is C:\Program Files\Embarcadero. If you changed the
default, the sample scripts will still be located in the RSQL600\UsrScrpt directory.
3 In the Open Files dialog box, type the path to the UsrScrpt directory, press ENTER and then double-click
PROFILER_BUILD_DEMO.SQL to open the script in an SQL Editor window.
Rapid SQL opens the PROFILER_BUILD_DEMO.SQL script in an SQL Editor window
4 On the SQL Editor window, click Execute.
Rapid SQL executes the script and creates the package.
5 On the Explorer Tab list, click Organize by Owner.
6 On the Explorer Tab, click the node of your owner name.
Rapid SQL displays your schema objects.
7 Double-click the Packages node to display PF_COUNT_TIME_INTERVAL and confirm its creation.
NOTE: If you were not able to create the package, check the error messages to determine the problem.
Sample Profiling Session - Starting the Session
In this step of Sample Profiling Session, you start the profiling session.
Sample Profiling Session - Starting the Session
To start the session, do the following:
1 On the File Menu, click Open to open the Open Files dialog box.
2 In the Open Files dialog box, type the path to the UsrScrpt directory, press ENTER and then double-click
PROFILER_DEMO.SQL to open the script in an SQL Editor.
Rapid SQL opens the PROFILER_DEMO.SQL script in an SQL Editor.
3 On the Tools menu, click PL/SQL Profiler and then click Start.
Rapid SQL opens the PL/SQL Profiler - Start dialog box.
4 In the Profile Label list, type DemoProfile.
5 Click OK to begin the profiling session.
Rapid SQL begins the profiling session.
If this is the first time you start the Rapid SQL PL/SQL Profiler, Rapid SQL displays a message that user profiling
tables need to be installed.
6 Click Yes.
Rapid SQL opens SQL*Plus to create the tables. You will need to start the profiling session again (see Step 3).

RAPID SQL ADD-ON TOOLS > RAPID SQL PL/SQL PROFILER
EMBARCADERO TECHNOLOGIES > BOOKNAMEVARIABLE 944
Sample Profiling Session - Executing the Sample Script
In this step of Sample Profiling Session, you execute the DEMO script.
Sample Profiling Session - Executing the Sample Script
To execute the sample script, do the following:
1 On the SQL Editor window toolbar, click Execute.
Rapid SQL executes the script and opens a Results Tab.
Sample Profiling Session - Stopping the Session
In this step of Sample Profiling Session, you stop the profiling run.
Sample Profiling Session - Stopping the Session
To stop the session, do the following:
1 On the Tools menu, click PL/SQL Profiler and then click Stop.
Rapid SQL opens the PL/SQL Profiler - Stop dialog box.
2 Click Stop.
Sample Profiling Session - Rerunning & Reexecuting the Session
In this step of Sample Profiling Session, you run the same profile session and execute the DEMO script again.
Sample Profiling Session - Rerunning & Reexecuting the Session
To rerun and reexecute the session, do the following:
1 In the SQL Editor, click the Query Tab.
2 On the Tools menu, click PL/SQL Profiler and then click Start.
Rapid SQL opens the PL/SQL Profiler - Start dialog box again.
3 Click the down arrow on the Profile Comment list and then click DemoProfile.
4 Click OK to begin the profiling session.
5 On the SQL Editor toolbar, click Execute.
Rapid SQL executes the script again and opens the Results Tab.
Sample Profiling Session - Stopping & Analyzing
In this step of Sample Profiling Session, you stop profiling and analyze the runs.
Sample Profiling Session - Stopping & Analyzing
To stop and analyze, do the following:
1 On the Tools menu, click PL/SQL Profiler and then click Stop.
Rapid SQL opens the PL/SQL Profiler - Stop dialog box again.

RAPID SQL ADD-ON TOOLS > RAPID SQL PL/SQL PROFILER
EMBARCADERO TECHNOLOGIES > BOOKNAMEVARIABLE 945
2 Click Stop & Analyze.
Rapid SQL opens the PL/SQL Profiler - Run Detail window.
3 Click the Run list and then click Run#x.
NOTE: Rapid SQL assigns a number to each profiling session. These numbers increase incrementally
each time you run a profiling session. x= the number that was assigned to your first run.
Rapid SQL PL/SQL Profiler populates the grid with information on the procedure, package body, and package
specification.
NOTE: For the purposes of this walk-though we have created this package under the account SCOTT.
4 Click the Run list again and then click the Run# for your second run.
Notice this time there is no information on the package specification. It was created in the first run.
5 Right-click and then click Detail.
Rapid SQL PL/SQL Profiler opens the PL/SQL Profiler - Unit Detail window and populates the grid with the
average time to execute each unit and the source code. Notice the time to execute SELECT object_name, in the
example is 126 ms.
6 In the PL/SQL Profiler - Unit Detail window, click the Run list and then click Run#x for your first run.
7 Click the Unit list and then click user name.PF_COUNT_SYSTEM_OBJECTS.
Notice the time to execute SELECT object_name is considerably greater: in the example it is 24476 ms.
8 Right-click and then click Show Only Hit Lines.
THE RAPID SQL PL/SQL PROFILER SHOWS ONLY THE LINES OF CODE THAT EXECUTED.
9 Right-click and then click Advanced View.
The Rapid SQL PL/SQL Profiler opens the Advanced View window.
10 Continue clicking the Run and Unit lists to compare the performance of each run and each session.
This concludes the Sample Profiling Session. You can now delete the objects created during the Sample Profiling
Session. They are:
• Check Constraints, PLSQL_PROFILER_UNITS, PLSQL_PROFILER_DATA
• Foreign Keys, PLSQL_PROFILER_UNITS, PLSQL_PROFILER_DATA
• Package, PF_COUNT_TIME_INTERVAL
• Package functions, WEEKEND_DAYS_( ), WORKING_DAYS_( ), YEAR
• S_ELAPSED_BETWEEN_ ()
• PL/SQL code Profiles, DemoProfile
• Primary Keys, PLSQL_PROFILER_RUNS, PLSQL_PROFILER_UNITS, PLSQL_PROFILER_DATA
• Procedure, PF_COUNT_SYSTEM_OBJECTS
• Sequence, PLSQL_PROFILER_RUNNUMBER
• Tables, PLSQL_PROFILER_RUNS, PLSQL_PROFILER_UNITS, PLSQL_PROFILER_DATA

EMBARCADERO TECHNOLOGIES > RAPID SQL USER GUIDE 946
Index
A
Activate Logging 552
Add Cluster Column 564
Add Column 554
Add Container 161
Add Database Fragment 553
Add Database Object Files(s) to Project Wizard
Panel 1 739
Panel 2 739
Panel 3 740
Panel 4 for All Objects 741
Panel 4 for Selected Objects 740
Panel 5 741
Panel 6 741
Add Datafile 565
Add Parameter 561
Add Partition 561
Additional resources 14
Alias Wizard
Panel 1 for IBM DB2 UDB 358
Panel 1 for IBM DB2 UDB for OS/390 and z/OS 392
Panel 2 for IBM DB2 UDB 358
Panel 2 for IBM DB2 UDB for OS/390 and z/OS 392
Alias Wizard for IBM DB2 UDB 358
Alias Wizard for IBM DB2 UDB for OS/390 and z/OS 392
Alias Wizard for Microsoft SQL Server 421
Alias Wizard for Sybase ASE 526
Aliases 99
Creating for IBM DB2 UDB 358
Creating for IBM DB2 UDB for OS/390 and z/OS 392
Creating for Sybase ASE 526
Editing for Microsoft SQL Server 218
Editing for Sybase 318
Aliases Editor for IBM DB2 UDB 133
Aliases Editor for IBM DB2 UDB for OS/390 and z/OS 169
Aliases Editor for Microsoft SQL Server 218
Aliases Editor for Sybase 318
Allocating Extent 566
Analyze 568
Analyze Code 677
Analyzing
Index Partitions 568
Application
Options 58
Auto Commit Status 678
B
Backup Device Wizard for Microsoft SQL Server 426
Backup Devices
Creating for Microsoft SQL Server 426
Begin Transaction ON/OFF 678
Bind Data Cache 572
Bind Package 572
Bind Plan 575
Bookmarks 47
, 699
Clearing 700
Goto 699
Moving 699
Browser
Options 72
Browsers
Copying 42
Displaying Dependencies 43
Extracting DDL 43
Main Menu 43
Object Types 39
Opening 39
Printing 42
Refreshing 44
Searching 42
Shortcut Menu 43
Sorting 43
Toolbar 38
, 43
Buffer Pool Wizard
Panel 2 for IBM DB2 UDB for OS/390 and z/OS 393
Panel 3 for IBM DB2 UDB for OS/390 and z/OS 393
C
Cascading Permissions 726
Change Category 579
Change Container Size 580
Change Password 581
Change Status 582
Check Constraints 100
Changing Constraint Status 582
, 663
Creating for IBM DB2 UDB 600
Creating for IBM DB2 UDB for OS/390 and z/OS 600
Creating for Microsoft SQL Server 600
Creating for Oracle 600
Creating for Sybase ASE 600
Editing for IBM DB2 UDB 134
Editing for IBM DB2 UDB for OS/390 and z/OS 170
Editing for Microsoft SQL Server 218
Editing for Sybase 318
Modifying for IBM DB2 UDB 600
Check Constraints Editor for IBM DB2 UDB 134
Check Constraints Editor for IBM DB2 UDB for OS/390 and
z/OS 170
Check Constraints Editor for Microsoft SQL Server 218
Check Constraints Editor for Sybase 318
Checking Syntax 677
Checkpoint 584
Clone Partition 584
Clone Table 585
Cluster Wizard
Panel 1 for Oracle 452
Panel 2 for Oracle 452
Panel 3 for Oracle 453
Panel 4 for Oracle 453
Panel 5 for Oracle 454
Panel 6 for Oracle 454
Panel 7 for Oracle 455

INDEX >
EMBARCADERO TECHNOLOGIES > RAPID SQL USER GUIDE 947
Cluster Wizard for Oracle 451
Clusters 100
Analyzing 568
Creating for Oracle 451
Coalesce 585
Coalesce Partition 264
Coalescing
Index Partitions 264
Code Analyst 834
Clone 849
Cloning Sessions 849
Common Tasks 834
Comparing Sessions 848
Creating a Session 847
DBMS Support 835
Debuggers 837
Deleting a Session 849
Execute 850
Executing a Session 850
Executing SQL 853
Extracting SQL 853
IBM DB2 UDB Data 835
Identifying and Fixing Bottlenecks 848
Identifying Time-consuming Lines of Code 848
Installing 838
Killing a Session Execution 849
Microsoft SQL Server Data 837
Oracle Data 837
Oracle Profiler 838
Printing Results 851
Privileges 838
Product Design 839
Refresh 851
Refreshing a Session 851
Requirements 837
Saving Results 851
Schedule 850
Scheduling a Session 850
Setting View Options for the Unit Detail Tab 852
Stopping a Session Execution 849
Sybase ASE 837
Tabs 839
Tutorial 842
Uninstalling 839
Unschedule 850
Unscheduling a Session 850
Using 846
Viewing Run Details 851
Viewing Unit Details 852
Viewing Unit Summary Information 852
Wizard 847
Code Formatting 677
Code Templates 687
, 832
Hot Key 832
Code Workbench 828
Creating Auto Replace Shortcuts 833
Creating Code Templates 832
Exporting Settings 833
Importing Settings 833
Modifying Auto Replace Shortcuts 833
Modifying Code Templates 832
Setting Column Auto Lookup 831
Tutorial 830
Collation Properties 558
Collecting Column Statistics 674
Collecting column statistics 671
Collecting distribution statistics 671
Collecting Distribution Statistics for Tables 674
Collecting Extended Index Statistics 674
Collecting extended index statistics 671
Collecting sample statistics 673
Collecting Sample Statistics for Indexes 674
Column Auto Lookup 831
Column Rename 650
Compile 586
Configuration 56
Configuring Rapid SQL 56
Connection
Options 59
Connection Editor 589
Convert to Partitioned 589
Copy Object Names 591
Create Alias 591
Create Insert Statements 593
Create Like 594
Create Primary Key Constraint 406
Create Remote Login 238
Create Synonym 601
Create Unique Key Dialog Box for Sybase ASE 417
Create Unique Keys Dialog Box for Oracle 548
Create User Message Text 601
Creating INSERT Statements 826
Creating Objects 356
D
Data Cache Wizard for Sybase ASE 529
Data Caches
Creating for Sybase ASE 529
Data Editor 620
Calendar 820
Data Editor Filter 819
Date Functions 820
Date/Time Format Builder 820
Edit Window 817
Editing Date and Time Functions 820
Editing Date/Time 820
Modifying Criteria 819
Setting Options 76
SQL Window 818
Time Functions 820
Toolbar 818
Data Editor Filter 819

INDEX >
EMBARCADERO TECHNOLOGIES > RAPID SQL USER GUIDE 948
Database Device Wizard
Panel 1 for Microsoft SQL Server 422
Panel 1 for Sybase ASE 527
Panel 2 422
Panel 2 for Sybase ASE 527
Panel 3 for Microsoft SQL Server 422
Panel 3 for Sybase ASE 528
Database Device Wizard for Microsoft SQL Server 421
Database Device Wizard for Sybase ASE 526
Database Devices
Creating for Microsoft SQL Server 421
Creating for Sybase ASE 526
Editing for Microsoft SQL Server 219
Editing for Sybase 318
Database Devices Editor for Microsoft SQL Server 219
DDL Tab 219
Information Tab 219
Mirror Tab 219
Space Tab 219
Database Devices Editor for Sybase 318
DDL Tab 318
Information Tab 318
Mirror Tab 318
Space Tab 318
Database Link Wizard
Panel 1 for Oracle 456
Panel 2 for Oracle 456
Database Link Wizard for Oracle 455
Database Links 101
Creating for Oracle 455
Database Object Finder 96
Database Search
Results 771
Database Search Wizard 770
Panel 1 770
Panel 2 770
Database Wizard
Panel 1 for Microsoft SQL Server 423
Panel 1 for Sybase ASE 528
Panel 2 for Microsoft SQL Server 424
Panel 2 for Sybase ASE 529
Panel 3 for Microsoft SQL Server 424
Panel 3 for Sybase ASE 529
Panel 4 for Microsoft SQL Server 425
Database Wizard for IBM DB2 UDB 359
Database Wizard for IBM DB2 UDB for OS/390 and
z/OS 393
Database Wizard for Microsoft SQL Server 423
Database Wizard for Sybase ASE 528
Databases 102
Attach 613
Checkpoint 584
Coalescing 585
Creating for IBM DB2 UDB for OS/390 and z/OS 393
Creating for Microsoft SQL Server 423
Creating for Sybase ASE 528
DBCC 605
Detach 613
Editing for Microsoft SQL Server 219
Editing for Sybase 318
Setting Online/Offline 659
Databases Editor for Microsoft SQL Server 219
DDL Tab 224
Placement Tab 220
Space Tab 223
Transaction Log Tab 220
Databases Editor for Sybase 318
DDL Tab 321
Options Tab 320
Placement Tab 318
Space Tab 320
DataLink Options 603
Datasource Catalog 82
Sharing 82
Datasource Explorer
Connections 35
DDF 35
Parameters 35
Subsystem Node 35
Datasource Groups 98
Changing 83
Modifying 95
Removing 94
Datasource Lock 677
Datasource Management 31
Datasource Organizer 31
Datasource Registration Wizard 90
Opening 90
Panel 1 91
Panel 2 91
Panel 3 92
Datasources 81
Auto-Discover 83
Connecting 84
Discovering 83
, 85
Editing 89
Managing 88
Modifying 87
Properties 90
Registering 96
Selecting 93
DBCC 603
Databases 605
Indexes 607
Tables 606
DBCC Traceflags 710
DBRM 103
DDL Editors 678
Opening 678
DDL Extraction
Options 64
Deallocate Unused Space 611
Default Wizard for Microsoft SQL Server 425
Default Wizard for Sybase ASE 530
Defaults 103
Creating for Microsoft SQL Server 425
Creating for Sybase ASE 530
Editing for Microsoft SQL Server 224
Editing for Sybase 321
Defaults Editor for Microsoft SQL Server 224
Bindings Tab 224
Definition Tab 224

INDEX >
EMBARCADERO TECHNOLOGIES > RAPID SQL USER GUIDE 949
Defaults Editor for Sybase 321
Bindings Tab 321
Definition Tab 321
Dialog Box
Create Unique Key Constraint for IBM DB2 UDB for
OS/390 and z/OS 417
Create Unique Key Constraint for Microsoft SQL
Server 446
Create Unique Key for Sybase ASE 548
Grant Privileges To 727
Revoke Privileges From 728
Dialog Boxes 46
Completing 356
Directories
Creating for Oracle 456
Modifying for Oracle 457
Options 74
Directory Wizard for Oracle 456
Disable Job Queues 616
Disable Triggers 617
Discussion Groups 14
Disk Resize 618
Display
Customizing
Output Window 37
Documentation 14
Drop 619
Dump Device Wizard for Microsoft SQL Server 426
Dump Device Wizard for Sybase ASE 530
Dump Devices
Creating for Microsoft SQL Server 426
Creating for Sybase ASE 530
Editing for Sybase 322
Dump Devices Editor for Sybase 322
E
Edit Data 620
Editing Result Sets 716
Adding a Column 719
Adding a Row 719
Columns 718
Copying 717
Cutting 717
Deleting a Column 720
Deleting a Row 720
Formatting Result Sets 721
Inserting a Column 720
Inserting a Row 719
Pasting 717
Resizing Columns 721
Resizing Rows 720
Rows 717
Sorting Data 721
Editing SQL Scripts 691
Changing Case 696
Commenting Code 696
Copying and Pasting a Column 698
Copying and Pasting Text 697
Cutting and Pasting a Column 698
Cutting and Pasting Text 697
Pasting SQL Statements 693
Pasting SQL Syntax 692
Selecting a Block of Text 695
Selecting Text 695
Setting Bookmarks 699
Uncommenting Code 696
Editors 132
Embarcadero Job Scheduler 775
Opening 776
Embarcadero SQL Debugger for IBM DB2 UDB 854
Embarcadero SQL Debugger for IBM DB2 UDB for
Windows/Unix
Basics
Interface 857
DDL Editor 858
Features 857
Functionality 861
, 863
Break 867
Breakpoints 864
–865
Close 868
Go 866
Input Parameters 861
Restart 867
Run to Cursor 864
Step Into 863
Step Out 863
Step Over 863
Stop 866
Interface
Call Stack Window 860
Dependency Tree Window 860
Variables Window 859
Watch Window 858
Options 857
Requirements 855
Using 868
Debugging an SQL Script 869
Opening a Debugging Session 868
Embarcadero SQL Debugger for Microsoft 870
Basics
Requirements
Client 874

INDEX >
EMBARCADERO TECHNOLOGIES > RAPID SQL USER GUIDE 950
Server 872
Break 885
Call Stack Window 878
DDL Editor 877
Debugging an SQL Script 887
Dependency Tree Window 879
Features 871
Functionality 879
Breakpoints 883
–884
Close 886
Go 884
Input Parameters 880
Run to Cursor 882
Step Out 881
Step Over 882
Interface 876
Variables Window 878
Opening a Debugging Session 886
Options 875
Requirements 871
Restart 885
Step Into 881
Stop 884
Using 886
Debugging a Sample Script 888
Watch Window 877
Embarcadero SQL Debugger for Oracle 896
Breakpoints
Insert 905
Debugging a Sample Script 910
Getting Started 911
Sample Script 1 912
Sample Script 2 915
Debugging a SQL Script 909
Debugging Sample Script 2 915
Exclusion List 898
Features 897
Functionality 901
Breakpoint 905
Breakpoints
Remove 905
Restart 907
Toggle 906
Close 908
Go 906
Input Parameters 902
Pause 908
Run to Cursor 904
Step Into 903
Step Out 904
Step Over 904
Stop 907
Interface 899
Call Stack Window 901
Dependency Tree Window 901
Watch Window 900
Objects 896
Options 898
SQL Editor Window 899
Using 909
Opening a Debugging Session 909
Variables Window 900
Embarcadero SQL Debugger for Sybase 919
Features 920
Functionality
924
Breakpoint 928
Breakpoints
Insert 928
Remove 928
Restart 930
Toggle 929
Close 931
Go 929
Input Parameters 925
Pause 930
Run to Cursor 927
Step Into 926
Step Out 926
Step Over 927
Stop 929
Interface
921
Call Stack Window 923
DDL Editor Window 922
Dependency Tree Window 924
Variables Window 923
Watch Window 922
Objects 920
Options 921
Using 931
Debugging an SQL Script 932
Opening a Debugging Session 931
EMEA
Technical Support 14
Enable Job Queues 616
Enable Triggers 617
Error 620
Estimate Size 621
Event Monitor Wizard 361
Excel 2000 715

INDEX >
EMBARCADERO TECHNOLOGIES > RAPID SQL USER GUIDE 951
Excel Spreadsheets
Importing 826
Execute 622
Executing Procedures 677
Executing Scripts 700
Cancelling a Query 703
Compilation Error Tab 702
Executing from Command History 702
Executing Partial Scripts 700
Plan Facility 704
Query Options 705
Script Execution Facility 701
Step Execution Facility 703
Token Matching Capability 711
Explicit Permissions 726
Explorer
Options 61
Explorer Tab
Creating New Objects 33
Datasource Node 32
Extracting DDL 33
Organizing 32
By Object Owner 32
By Object Type 33
System Objects 33
Extended Procedure Wizard for Microsoft SQL Server 426
Extended Procedure Wizard for Sybase ASE 531
Extended Procedures 104
Editing for Microsoft SQL Server 225
Editing for Sybase 322
Extended Procedures Editor for Microsoft SQL Server 225
Definition Tab 225
Dependencies Tab 226
Privileges Tab 226
Extended Procedures Editor for Sybase 322
Definition Tab 322
Dependencies Tab 323
Privileges Tab 323
Extended Stored Procedure
Creating for Sybase ASE 539
Extract 625
F
FAQs 14
Filter 626
Filtering Results 626
Flush Cache 627
Foreign Key Wizard
Panel 1 for IBM DB2 UDB 362
Panel 1 for IBM DB2 UDB for OS/390 and z/OS 395
Panel 1 for Microsoft SQL Server 427
Panel 1 for Oracle 457
Panel 1 for Sybase ASE 532
Panel 2 for IBM DB2 UDB 362
Panel 2 for IBM DB2 UDB for OS/390 and z/OS 395
Panel 2 for Microsoft SQL Server 428
Panel 2 for Oracle 458
Panel 2 for Sybase ASE 532
Panel 3 for IBM DB2 UDB 363
Panel 3 for IBM DB2 UDB for OS/390 and z/OS 396
Panel 3 for Microsoft SQL Server 429
Panel 3 for Oracle 458
Panel 3 for Sybase ASE 532
Foreign Key Wizard for IBM DB2 UDB 361
Foreign Key Wizard for IBM DB2 UDB for OS/390 and
z/OS 394
Foreign Key Wizard for Microsoft SQL Server 427
Foreign Key Wizard for Oracle 457
Foreign Keys 104
Changing Constraint Status 582
, 663
Creating for IBM DB2 UDB 361
Creating for IBM DB2 UDB for OS/390 and z/OS 394
Creating for Microsoft SQL Server 427
Creating for Oracle 457
Creating for Sybase ASE 531
Editing for IBM DB2 UDB 136
Editing for IBM DB2 UDB for OS/390 and z/OS 173
Editing for Microsoft SQL Server 227
Editing for Sybase 324
Foreign Keys Editor for IBM DB2 UDB 136
Foreign Keys Editor for IBM DB2 UDB for OS/390 and
z/OS 173
Foreign Keys Editor for Microsoft SQL Server 227
Columns Tab 227
DDL Tab 227
Foreign Keys Editor for Sybase 324
Columns Tab 324
DDL Tab 324
Format 677
Formatting Code 677
Formatting Result Sets 721
Changing Display Properties 724
Display Properties 723
Setting Alignment Properties 722
Setting Border Properties 723
Setting Colors 725
Setting Fonts 724
Forums 14
Free Packages 627
Free Plans 628
Full Screen Mode 55
Activating 56
Dismissing 56
Toolbar 56

INDEX >
EMBARCADERO TECHNOLOGIES > RAPID SQL USER GUIDE 952
Function Wizard
Panel 1 for IBM DB2 UDB 364
Panel 1 for IBM DB2 UDB for OS/390 and z/OS 396
Panel 1 for Microsoft SQL Server 429
Panel 2 for IBM DB2 UDB 364
Panel 2 for IBM DB2 UDB for OS/390 and z/OS 397
Panel 2 for Microsoft SQL Server 429
Panel 3 for IBM DB2 UDB 366
Panel 3 for IBM DB2 UDB for OS/390 and z/OS 398
Panel 4 for IBM DB2 UDB 366
Panel 4 for IBM DB2 UDB for OS/390 and z/OS 399
Panel 5 for IBM DB2 UDB 367
Panel 5 for IBM DB2 UDB for OS/390 and z/OS 399
Panel 6 for IBM DB2 UDB for OS/390 and z/OS 400
Function Wizard for IBM DB2 UDB 363
Function Wizard for IBM DB2 UDB for OS/390 and z/OS 396
Function Wizard for Microsoft SQL Server 429
Function Wizard for Oracle 458
Functions 105
Compiling 587
Creating for IBM DB2 UDB 363
Creating for IBM DB2 UDB for OS/390 and z/OS 396
Creating for Microsoft SQL Server 429
Creating for Oracle 458
Editing for IBM DB2 UDB 137
Editing for IBM DB2 UDB for OS/390 and z/OS 174
Synonyms 601
Functions Editor for IBM DB2 UDB 137
Functions Editor for IBM DB2 UDB for OS/390 and z/OS 174
Functions Editor for Microsoft SQL Server 228
Definition Tab 228
Dependencies Tab 228
Privileges Tab 229
G
General Application
Setting Options 58
Generate Package 629
Generate Procedure 629
Generate Reports 656
Generate Select Statement 629
Generate Statements 629
Grant Roles 630
Group Wizard for Microsoft SQL Server 430
Group Wizard for Sybase ASE 533
Groups
Creating for Microsoft SQL Server 430
Creating for Sybase ASE 533
Editing for IBM DB2 UDB for OS/390 and z/OS 178
Editing for Sybase 324
Groups Editor for IBM DB2 UDB for OS/390 and z/OS 178
Groups Editor for Sybase 324
DDL Tab 326
Privileges Tab 325
Users Tab 325
H
Histogram Statistics 571
I
Impact Analysis 631
Import Data Wizard 826
Index Constraint 631
Index Partitions
Coalescing 264
Rebuilding Unusable Local Indexes 264
Splitting 265
Index Wizard
Panel 1 for IBM DB2 UDB 369
Panel 1 for IBM DB2 UDB for OS/390 and z/OS 401
Panel 1 for Microsoft SQL Server 431
Panel 1 for Oracle 460
Panel 1 for Sybase ASE 534
Panel 10 for Oracle 466
Panel 2 for IBM DB2 UDB 369
Panel 2 for IBM DB2 UDB for OS/390 and z/OS 402
Panel 2 for Microsoft SQL Server 431
Panel 2 for Oracle 461
Panel 2 for Sybase ASE 534
Panel 3 for IBM DB2 UDB 370
Panel 3 for IBM DB2 UDB for OS/390 and z/OS 402
Panel 3 for Microsoft SQL Server 432
Panel 3 for Oracle 461
Panel 3 for Sybase ASE 534
Panel 4 for IBM DB2 UDB 371
Panel 4 for IBM DB2 UDB for OS/390 and z/OS 403
Panel 4 for Microsoft SQL Server 432
Panel 4 for Oracle 461
Panel 4 for Sybase ASE 535
Panel 5 for IBM DB2 UDB for OS/390 and z/OS 403
Panel 5 for Microsoft SQL Server 432
Panel 5 for Oracle 462
Panel 5 for Sybase ASE 535
Panel 6 for IBM DB2 UDB for OS/390 and z/OS 404
Panel 6 for Oracle 462
Panel 6 for Sybase ASE 535
Panel 7 for IBM DB2 UDB for OS/390 and z/OS 404
Panel 7 for Oracle 463
Panel 7 for Sybase ASE 536
Panel 8 for Oracle 463
Panel 9 for Oracle 464
Index Wizard for IBM DB2 UDB 368
Index Wizard for IBM DB2 UDB for OS/390 and z/OS 401
Index Wizard for Microsoft SQL Server 430
Index Wizard for Oracle 459
Index Wizard for Sybase ASE 533
Indexes 106
Analyzing 568
Creating for IBM DB2 UDB 368
Creating for IBM DB2 UDB for OS/390 and z/OS 401
Creating for Microsoft SQL Server 430
Creating for Oracle 459
Creating for Sybase ASE 533
DBCC 607
Deallocating Unused Space 611
Editing for IBM DB2 UDB 140
Editing for IBM DB2 UDB for OS/390 and z/OS 179
Editing for Microsoft SQL Server 229
Editing for Sybase 326
Modifying for IBM DB2 UDB 374
Partitions 108
Range-List Composite Partitioning 464
Rebuilding 646

INDEX >
EMBARCADERO TECHNOLOGIES > RAPID SQL USER GUIDE 953
Indexes Editor for IBM DB2 UDB 140
Indexes Editor for IBM DB2 UDB for OS/390 and z/OS 179
Indexes Editor for Microsoft SQL Server 229
Attributes Tab 231
Columns Tab 230
DDL Tab 232
Statistics Tab 232
Storage Tab 231
Indexes Editor for Sybase 326
Attribute Tab 327
Columns Tab 327
DDL Tab 328
Statistics Tab 328
Storage Tab 328
Index-Organized Tables
Creating for Oracle 505
Insert Column 554
Insert Parameter 561
Insert Partition 561
Instance 109
ISQL WIndow
Code Templates 832
ISQL Window
Code Templates 832
Column Auto Lookup 831
Using Auto Replace Shortcuts 833
ISQL Window Status Bar 678
J
Java
Options 75
Java Classes 110
Java Resources 110
Java Sources 110
Job Queue Wizard 466
Job Queues 110
K
Keyboard Commands 53
Keyboard Emulation Mode 678
Knowledge Base 14
L
Libraries 111
Creating for Oracle 468
Library Wizard for Oracle 468
Licensing 14
Linked Server Wizard for Microsoft SQL Server 433
Linked Servers
Creating for Microsoft SQL Server 433
Load Java 631
LOB Tables 411
Lock
Datasource 677
Lock Table 633
Log Storage Definition 633
Logging
Options 60
Login Wizard
Panel 1 for Microsoft SQL Server 436
Panel 1 for Sybase ASE 537
Panel 2 for Microsoft SQL Server 436
Panel 2 for Sybase ASE 537
Panel 3 for Microsoft SQL Server 437
Panel 3 for Sybase ASE 538
Panel 4 for Sybase ASE 538
Login Wizard for Microsoft SQL Server 435
Login Wizard for Sybase ASE 536
Logins 111
Creating for Microsoft SQL Server 435
Creating for Sybase ASE 536
Editing for Microsoft SQL Server 232
Editing for Sybase 329
Logins Editor for Microsoft SQL Server 232
DDL Tab 233
Definition Tab 233
Roles Tab 233
Users Tab 233
Logins Editor for Sybase 329
Accounting Tab 330
DDL Tab 330
Definition Tab 329
Roles Tab 330
Users Tab 330
M
Mailing Result Sets 714
Map
Tablespace 303
Mark Index Partition Unusable 264
Mark Unusable
Local Indexes 264
Materialized Query Tables 112
Materialized View Log Wizard
Panel 1 for Oracle 478
Panel 2 for Oracle 479
Panel 3 for Oracle 479
Panel 4 for Oracle 480
Panel 5 for Oracle 480
Panel 6 for Oracle 481
Materialized View Log Wizard for Oracle 478
Materialized View Logs 113
Creating for Oracle 478
Materialized View Wizard
Panel 1 for Oracle 469
Panel 10 for Oracle 475
Panel 2 for Oracle 469
Panel 3 for Oracle 471
Panel 4 for Oracle 472
Panel 5 for Oracle 472
Panel 6 for Oracle 473
Panel 7 for Oracle 473
Panel 8 for Oracle 474
Panel 9 for Oracle 474
Materialized View Wizard for Oracle 468
Materialized Views 113
Compiling 587
Creating for Oracle 468
Range-List Composite Partitioning 476
Synonyms 601

INDEX >
EMBARCADERO TECHNOLOGIES > RAPID SQL USER GUIDE 954
Menus 46
Customizing 51
Main Menu 46
Shortcut Menus 48
Tools Menu 51
Mirror Device 219
Modify Cluster Column 564
Modify Column 554
Modify Datafile 565
Modify Parameter 561
Modify Partition 561
Modify User Message Text 601
Move Log 635
N
New Project Reverse Engineering Wizard
Panel 2 732
Panel 3 732
Panel 4 733
Panel 4 for Selected Objects 733
Panel 5 733
Node Group Wizard for IBM DB2 UDB 374
Node Groups
Creating for IBM DB2 UDB 374
Nodegroups
Editing for IBM DB2 UDB for OS/390 and z/OS 182
Nodegroups Editor for IBM DB2 UDB for OS/390 and
z/OS 182
O
Object Types
Creating for Oracle 521
Objects
Creating 356
Editors 132
OMF
Oracle Managed Files 96
Options
Auto Format 70
Browser 72
Connection 59
Datasource 57
DDL Extraction 64
Directories 74
Explorer 61
General Application 58
ISQL Execution 62
ISQL Results 68
Java 75
Logging 60
SQL Editor 66
Version Control 73
Oracle Job Queues 114
Oracle Managed Files 517
Outline Wizard
Panel 1 for Oracle 482
Panel 2 for Oracle 482
Outline Wizard for Oracle 481
Outlines 114
P
Package Bodies 116
Compiling 587
Package Wizard for Oracle 482
Packages 115
Compiling 587
Creating for Oracle 482
Editing for IBM DB2 UDB 147
Editing for IBM DB2 UDB for OS/390 and z/OS 183
Rebinding 644
Synonyms 601
Packages Editor for IBM DB2 UDB 147
Packages Editor for IBM DB2 UDB for OS/390 and
z/OS 183
Partition Upper Bound 638
Partitioned Columns 637
Partitioning 510
Composite 510
Hash 510
List 510
Range 510
Passwords
Changing 581
Paste Columns for Check Constraint 639
Permissions
Cascading 726
Explicit 726
Using Roles to Grant 726
Using Roles to Revoke 726
Permissions Management 725
PL/SQL Profiler 933
Functionality 934
Clear Profile Table 938
Run Detail 936
Run Summary 936
Start 935
Stop 940
Unit Detail 938
Advanced View 940
Unit Summary 937
Requirements 933
–934
Using 940
Sample Session 942
Place 640
Preview 641
Preview Create 641
Primary Keys 116
Changing Constraint Status 582
, 663
Creating for IBM DB2 UDB 374
Creating for IBM DB2 UDB for OS/390 and z/OS 406
Creating for Oracle 483
Creating for Sybase ASE 539
Editing for IBM DB2 UDB 149
Editing for IBM DB2 UDB for OS/390 and z/OS 191
Editing for Microsoft SQL Server 233
Editing for Sybase 330
Primary Keys Editor for IBM DB2 UDB 149
Primary Keys Editor for IBM DB2 UDB for OS/390 and
z/OS 191

INDEX >
EMBARCADERO TECHNOLOGIES > RAPID SQL USER GUIDE 955
Primary Keys Editor for Microsoft SQL Server 233
Attributes Tab 234
Columns Tab 234
DDL Tab 236
Statistics Tab 236
Storage Tab 235
Primary Keys Editor for Sybase 330
Attributes Tab 332
Columns Tab 331
DDL Tab 333
Statistics Tab 333
Storage Tab 332
Privileges
Deny Privileges From 728
Grant Privileges 727
Revoke Privileges To 728
Procedure Wizard
Panel 1 for IBM DB2 UDB 375
Panel 1 for IBM DB2 UDB for OS/390 and z/OS 407
Panel 1 for Microsoft SQL Server 438
Panel 2 for IBM DB2 UDB 376
Panel 2 for IBM DB2 UDB for OS/390 and z/OS 407
Panel 2 for Microsoft SQL Server 438
Panel 3 for IBM DB2 UDB 376
Panel 3 for IBM DB2 UDB for OS/390 and z/OS 408
Panel 4 for IBM DB2 UDB 377
Panel 4 for IBM DB2 UDB for OS/390 and z/OS 408
Procedure Wizard for IBM DB2 UDB 375
Procedure Wizard for IBM DB2 UDB for OS/390 and
z/OS 406
Procedure Wizard for Microsoft SQL Server 438
Procedure Wizard for Oracle 484
Procedure Wizard for Sybase ASE 539
Procedures 117
Compiling 588
Creating for IBM DB2 UDB 375
Creating for IBM DB2 UDB for OS/390 and z/OS 406
Creating for Microsoft SQL Server 438
Creating for Oracle 484
Creating for Sybase ASE 539
Editing for IBM DB2 UDB 149
Editing for IBM DB2 UDB for OS/390 and z/OS 192
Editing for Microsoft SQL Server 236
Editing for Sybase 333
Recompiling 586
Synonyms 601
Procedures Editor for IBM DB2 UDB 149
Procedures Editor for IBM DB2 UDB for OS/390 and
z/OS 192
Procedures Editor for Microsoft SQL Server 236
Definition Tab 236
Dependencies Tab 237
Privileges Tab 237
Procedures Editor for Sybase 333
Definition Tab 333
Dependencies Tab 334
Privileges Tab 334
Product Design 31
Profile Wizard
Panel 1 for Oracle 485
Panel 2 for Oracle 485
Panel 3 for Oracle 486
Panel 4 for Oracle 486
Panel 5 for Oracle 487
Panel 6 for Oracle 487
Panel 7 for Oracle 487
Profile Wizard for Oracle 485
Profiler
Setting Up 934
Profiles 118
Creating for Oracle 485
Projects
Adding Database Objects 738
Adding Files 742
Build Order 738
Closing 737
Creating 729
Creating From a Database 730
Creating From a Version Control Project 734
Creating From Existing Files 734
Creating Without Initialization 735
Executing Files 742
File Properties 746
Management 728
New Project 729
Opening a File 743
Opening a Recent Project 736
Opening an Existing Project 736
Project Management 728
Properties 746
Setting the Build Order 738
Subproject Properties 747
Subprojects 743
Creating 744
Deleting 744
Renaming 745
Sorting 745
Working with 736

INDEX >
EMBARCADERO TECHNOLOGIES > RAPID SQL USER GUIDE 956
Q
Query Builder 579
Adding a Join 805
Auto Join Properties 787
Auto Joins 807
Auto Layout 807
Building a CREATE VIEW Statement 798
Building a DELETE Statement 797
Building a Query 794
Building a SELECT Statement 795
Building an INSERT Statement 796
Building an UPDATE Statement 796
Column Properties 789
Creating a Clause 807
Creating a GROUP BY Clause 811
Creating a HAVING Clause 813
Creating a WHERE Clause 808
Creating an AND Clause 809
Creating an ORDER BY Clause 810
Design 782
Display Options 787
DML Tab 783
Editing Joins 805
Execution Properties 787
Explorer 782
General Properties 787
Getting Started 791
Inserting an AND or OR Clause 809
Joins 803
Editing 805
Inner 804
Left Outer 804
Properties 790
Self 805
Keyboard Commands 785
Moving Additional Tables to the SQL Diagram
Pane 801
Moving Columns in the SQL Statement Tree 813
Moving Tables 801
Moving Tables and Columns in the SQL Statement
Tree 813
Moving Tables and Views 801
Moving Tables in the SQL Statement Tree 813
Opening Queries 815
Removing a Join 805
Results Tab 783
Saving Queries 815
Saving Queries as XML 815
Schema Change Detection 816
Selecting a Statement 792
Selecting ALL Columns 802
Selecting an Instance or Database 791
Selecting Columns 793
Selecting Columns in the SQL Diagram Pane 793
Selecting Columns in the SQL Statement Tree 793
Selecting DISTINCT Columns 803
Selecting Tables 800
Setting Column Properties 789
Setting Options 77
SQL Diagram Pane 783
SQL Statement Pane 783
SQL Tab 783
Statement Properties 786
Subqueries 814
Syntax Checker 815
Table Properties 788
Table Shortcut Menus 784
Tables in the SQL Diagram Pane 800
Tables/Views Tab 782
Toolbar 784
Using 790
Using Data Editor with Query Builder 816
View Properties 788
Working with Tables in the SQL Diagram Pane 800
Workspace Window Options 782
Query Options 705
Query Plan Facility 704
Quiesce Instance 642
Quiesce Tablespaces 642
R
Raw Partitions 161
Reassign by Category 643
Rebind Packages 644
Rebind Plans 645
Rebuild Outlines 648
Rebuilding
Indexes for Index Partitions 264
Recompile 648
Redistribute 649
Redo Log Group Wizard
Panel 1 for Oracle 488
Panel 2 for Oracle 489
Redo Log Group Wizard for Oracle 488
Redo Log Groups 119
REF CURSOR
Display in ISQL Window 676
Refresh Summary Table 649
Remote Server Wizard
Panel 1 for Microsoft SQL Server 440
Panel 1 for Sybase ASE 540
Panel 2 for Microsoft SQL Server 440
Panel 2 for Sybase ASE 541
Panel 3 for Sybase ASE 541
Remote Server Wizard for Microsoft SQL Server 439
Remote Server Wizard for Sybase ASE 540
Remote Servers 119
Creating for Microsoft SQL Server 439
Creating for Sybase ASE 540
Editing for Microsoft SQL Server 238
Editing for Sybase 335
Remote Servers Editor for Microsoft SQL Server 238
DDL Tab 238
Information Tab 238
Logins Tab 238
Remote Servers Editor for Sybase 335
DDL Tab 335
Information Tab 335
Logins Tab 335
Rename 650
Reorganize 652
Report 656
Resize 720

INDEX >
EMBARCADERO TECHNOLOGIES > RAPID SQL USER GUIDE 957
Restart 657
Result Sets
Closing 715
Editing 716
Formatting 721
Mailing 714
Saving 715
Saving as XML 715
Results Editor 711
Closing a Result Set 716
Closing a Result Window 715
Configuring 712
Editing Result Sets 716
Exporting Data 714
Mailing a Result Set 714
Multiple Result Sets 712
One Attached Tab Window 712
One Separate Unattached Window 713
Opening Result Files 682
Read-only Mode 714
Renaming a Result Window 715
Saving Results 715
Separate Unattached Windows 712
Single Result Sets 713
Status Bar 714
Revoke Role 658
Right Outer Joins 804
Role Wizard
Panel 1 for Microsoft SQL Server 441
Panel 2 for Sybase ASE 542
Role Wizard for Microsoft SQL Server 441
Role Wizard for Oracle 490
Role Wizard for Sybase ASE 542
Roles 119
Creating for Microsoft SQL Server 441
Creating for Oracle 490
Creating for Sybase ASE 542
Editing for Microsoft SQL Server 238
Editing for Oracle 283
Editing for Sybase 335
Roles Editor for Microsoft SQL Server 238
Privileges Tab 238
Users Tab 238
Roles Editor for Oracle 283
Authentication Tab 284
DDL Tab 285
Privileges Tab 284
Users Tab 284
Roles Editor for Sybase 335
Authentication Tab 336
DDL Tab 337
Logins Tab 336
Privileges Tab 336
Roles Tab 336
Rollback Segment Wizard
Panel 1 for Oracle 491
Panel 2 for Oracle 491
Panel 3 for Oracle 491
Rollback Segment Wizard for Oracle 490
Rollback Segments 119
Creating for Oracle 490
Rule Wizard for Microsoft SQL Server 441
Rule Wizard for Sybase ASE 543
Rules 120
Creating for Microsoft SQL Server 441
Creating for Sybase ASE 543
Editing for Microsoft SQL Server 239
Editing for Sybase 337
Rules Editor for Microsoft SQL Server 239
Bindings Tab 239
Definition Tab 239
Rules Editor for Sybase 337
Bindings Tab 337
Definition Tab 337
S
Scheduling
Embarcadero Job Scheduler 775
ISQL Window Scripts 774
Microsoft Task Scheduler 776
Scheduling a Job 777
Schema 658
Script Execution Facility
Using 772
Script Files 679
Inserting Files 681
Segment Wizard
Panel 1 for Microsoft SQL Server 442
Panel 1 for Sybase ASE 544
Panel 2 for Microsoft SQL Server 443
Panel 2 for Sybase ASE 544
Segment Wizard for Microsoft SQL Server 442
Segment Wizard for Sybase ASE 543
Segments 121
Creating for Microsoft SQL Server 442
Creating for Sybase ASE 543
Editing for Sybase 338
Segments Editor for Sybase 338
DDL Tab 339
Location Tab 338
Objects Tab 338
Space Tab 339
Threshold Tab 339
Select * From 659
Selecting Columns 132
Sequence Wizard
Panel 1 for Oracle 492
Panel 2 for Oracle 493
Panel 3 for Oracle 493
Sequence Wizard for Oracle 492
Sequences 121
Creating for Oracle 492
Synonyms 601
Server Messages 37
Servers
Configuring 96
Disconnecting 85
Session Files
Executing 96
Session Recording 96
Set Online/Offline 659
Set Tablespaces Quota 660
Set UNDO Tablespace 661

INDEX >
EMBARCADERO TECHNOLOGIES > RAPID SQL USER GUIDE 958
Setting Access Levels While Updating Statistics 674
Setting Data Editor Options 76
Shortcut Menu 34
Shrink 662
Snapshot Log Wizard
Panel 1 for Oracle 497
Panel 2 for Oracle 497
Panel 3 for Oracle 498
Snapshot Log Wizard for Oracle 497
Snapshot Logs 122
Creating for Oracle 497
Snapshot Wizard
Panel 1 for Oracle 494
Panel 2 for Oracle 495
Panel 3 for Oracle 495
Panel 4 for Oracle 495
Panel 5 for Oracle 496
Snapshot Wizard for Oracle 494
Snapshots 121
Creating for Oracle 494
Synonyms 601
Split Partition 265
Splitting
Index Partitions 265
SQL Editor 676
Closing a Query Window Tab 688
Closing a Script 691
Closing the Error List 691
Editing a Script 691
Executing Scripts 700
Goto 686
ISQL Windows 677
Navigating 686
Opening DDL Editors 679
Opening Script Files 679
Opening SQL Windows 678
Options 66
Regular Expressions 685
Renaming a Query Window Tab 688
Saving a Script 690
Windows 682
Splitting 682
SQL Execution
Setting Options 62
SQL Results
Options 68
SQL Scripting 676
DDL Editor 678
Results Editor 711
SQL Editor 676
SQL Windows 677
Find and Replace 682
Replacing 684
Searching 683
Status 663
Step Execution Facility 704
Stogroup Wizard for IBM DB2 UDB for OS/390 and
z/OS 408
Stogroups 122
Creating for IBM DB2 UDB for OS/390 and z/OS 408
Stripe Sets 161
Structured Types 123
Summary Definition 666
Switch Online 666
Synonym Wizard
Panel 1 for Oracle 499
Panel 2 for Oracle 499
Panel 3 for Oracle 499
Synonym Wizard for IBM DB2 UDB for OS/390 and
z/OS 409
Synonym Wizard for Oracle 498
Synonyms 124
Creating for IBM DB2 UDB for OS/390 and z/OS 409
Creating for Oracle 498
Syntax Check 677
T
Table Wizard
Composite Partitioning for Oracle 511
Hash Partitioning for Oracle 514
Last Panel for Heap-Organized Tables for Oracle 505
Last Panel for Oracle 514
Panel 1 for Heap-Organized Tables for Oracle 501
Panel 1 for IBM DB2 UDB 381
Panel 1 for IBM DB2 UDB for OS/390 and z/OS 410
Panel 1 for Index-Organized Tables for Oracle 505
Panel 1 for Microsoft SQL Server 443
Panel 1 for Sybase ASE 544
Panel 2 for IBM DB2 UDB 382
Panel 2 for IBM DB2 UDB for OS/390 and z/OS 411
Panel 2 for Index-Organized Tables for Oracle 506
Panel 2 for Microsoft SQL Server 444
Panel 2 for Sybase ASE 545
Panel 3 for Heap-Organized Tables for Oracle 502
Panel 3 for IBM DB2 UDB 382
Panel 3 for IBM DB2 UDB for OS/390 and z/OS 411
Panel 3 for Index-Organized Tables for Oracle 506
Panel 3 for Microsoft SQL Server 444
Panel 3 for Sybase ASE 545
Panel 4 for Heap-Organized Tables for Oracle 502
Panel 4 for Index-Organized Tables for Oracle 507
Panel 4 for Sybase ASE 546
Panel 5 for Heap-Organized Tables for Oracle 503
Panel 5 for Index-Organized Tables for Oracle 507
Panel 6 for Heap-Organized Tables for Oracle 503
Panel 6 for Index-Organized Tables for Oracle 508
Range Partitioning for Oracle 514
Table Wizard - Panel 2 for Heap-Organized Tables for
Oracle 501
Table Wizard for IBM DB2 UDB 381
Table Wizard for IBM DB2 UDB for OS/390 and z/OS 410
Table Wizard for Microsoft SQL Server 443
Table Wizard for Oracle 500
Table Wizard for Sybase ASE 544

INDEX >
EMBARCADERO TECHNOLOGIES > RAPID SQL USER GUIDE 959
Tables 124
Analyzing 568
Creating for IBM DB2 UDB 381
Creating for IBM DB2 UDB for OS/390 and z/OS 410
Creating for Microsoft SQL Server 443
Creating for Oracle 500
Creating for Sybase ASE 544
DBCC 606
Deallocating Unused Space 611
Editing for IBM DB2 UDB 155
Editing for IBM DB2 UDB for OS/390 and z/OS 199
Editing for Microsoft SQL Server 239
Editing for Sybase 340
Histograms 568
Moving Tables in the SQL Diagram Pane 801
Partitioning for Oracle 510
Range-List Composite Partitioning 512
Reorganizing 654
Tables Editor for IBM DB2 UDB 155
Tables Editor for IBM DB2 UDB for OS/390 and z/OS 199
Tables Editor for Microsoft SQL Server 239
Columns Tab 240
Constraints Tab 241
DDL Tab 243
Dependencies Tab 242
Full-Text Indexing Tab 243
Privileges Tab 242
Space Tab 242
Storage Tab 242
Tables Editor for Sybase 340
Columns Tab 340
Constraints Tab 341
DDL Tab 344
Dependencies Tab 343
Partitions Tab 343
Privileges Tab 343
Space Tab 342
Storage Tab 342
Tablespace Container
Stipe Sets 161
Tablespace Wizard
Panel 1 for IBM DB2 UDB 384
Panel 1 for IBM DB2 UDB for OS/390 and z/OS 412
Panel 1 for Oracle 515
Panel 2 for IBM DB2 UDB 384
Panel 2 for IBM DB2 UDB for OS/390 and z/OS 413
Panel 2 for Oracle 516
Panel 3 for IBM DB2 UDB 385
Panel 3 for IBM DB2 UDB for OS/390 and z/OS 414
Panel 3 for Oracle 517
Panel 4 for Oracle 518
Tablespace Wizard for IBM DB2 UDB 383
Tablespace Wizard for IBM DB2 UDB for OS/390 and
z/OS 412
Tablespace Wizard for Oracle 515
Tablespaces 126
Changing Status 582
Creating for IBM DB2 UDB 383
Creating for IBM DB2 UDB for OS/390 and z/OS 412
Creating for Oracle 515
Quiescing 642
Tablespaces Editing for IBM DB2 UDB 160
Tablespaces Editing for IBM DB2 UDB for OS/390 and
z/OS 204
Tablespaces Editor for IBM DB2 UDB 160
Tablespaces Editor for IBM DB2 UDB for OS/390 and
z/OS 204
Tablespaces Editor for Oracle 301
Task Scheduler 776
Technical Requirements 13
Technical Support 14
Text Files
Importing 826
Toggle 676
Token Matching Capability 711
Toolbars
Customizing 51
Tools
Code Workbench 828
Data Editor 817
Database Search 769
Embarcadero Products 828
File Execution Facility 771
Find in Files 769
Query Builder 781
Scheduling 774
Script Execution Facility 771
Visual Difference 777
Tools Menu
Customizing 51
Transaction Log
Moving 635
Trigger Wizard
Panel 1 for IBM DB2 UDB 386
Panel 1 for IBM DB2 UDB for OS/390 and z/OS 415
Panel 1 for Oracle 519
Panel 1 for Sybase ASE 546
Panel 2 for IBM DB2 UDB 387
Panel 2 for IBM DB2 UDB for OS/390 and z/OS 416
Panel 2 for Microsoft SQL Server 445
Panel 2 for Oracle 519
Panel 2 for Sybase ASE 547
Panel 3 for IBM DB2 UDB 387
Panel 3 for IBM DB2 UDB for OS/390 and z/OS 416
Panel 3 for Microsoft SQL Server 446
Panel 3 for Oracle 519
Panel 3 for Sybase ASE 547
Panel 4 for IBM DB2 UDB 387
Panel 4 for IBM DB2 UDB for OS/390 and z/OS 417
Panel 4 for Microsoft SQL Server 446
Panel 4 for Oracle 520
Panel 5 for Oracle 520
Trigger Wizard for IBM DB2 UDB 386
Trigger Wizard for IBM DB2 UDB for OS/390 and z/OS 415
Trigger Wizard for Microsoft SQL Server 444
Trigger Wizard for Oracle 518
Trigger Wizard for Sybase ASE 546

INDEX >
EMBARCADERO TECHNOLOGIES > RAPID SQL USER GUIDE 960
Triggers 127
Creating for IBM DB2 UDB 386
Creating for IBM DB2 UDB for OS/390 and z/OS 415
Creating for Microsoft SQL Server 444
Creating for Oracle 518
Creating for Sybase ASE 546
Editing for IBM DB2 UDB 163
Editing for IBM DB2 UDB for OS/390 and z/OS 209
Editing for Microsoft SQL Server 244
Editing for Sybase 344
Triggers Editor for IBM DB2 UDB 163
Triggers Editor for IBM DB2 UDB for OS/390 and z/OS 209
Triggers Editor for Microsoft SQL Server 244
Definition Tab 244
Dependencies Tab 244
Triggers Editor for Sybase 344
Definition Tab 344
Dependencies Tab 345
Truncate 667
Truncating
Tables 667
Type Bodies 128
Compiling 589
Types 127
Compiling 589
U
Unique Keys 129
Creating for IBM DB2 UDB for OS/390 and z/OS 417
Creating for Microsoft SQL Server 446
Creating for Oracle 521
Creating for Sybase ASE 548
Editing for IBM DB2 UDB 164
Editing for IBM DB2 UDB for OS/390 and z/OS 210
Editing for Microsoft SQL Server 245
Editing for Sybase 345
Unique Keys Editor for IBM DB2 UDB 164
Unique Keys Editor for IBM DB2 UDB for OS/390 and
z/OS 210
Unique Keys Editor for Microsoft SQL Server 245
Attributes Tab 246
Columns Tab 245
DDL Tab 247
Statistics Tab 247
Storage Tab 246
Unique Keys Editor for Sybase 345
Attributes Tab 346
Columns Tab 346
DDL Tab 347
Statistics Tab 347
Storage Tab 347
Unusable Indexes
Marking 264
Rebuilding 264
Update Statistics 671
Updating Table Statistics 674
User Datatype Wizard
Panel 1 for IBM DB2 UDB 390
Panel 1 for IBM DB2 UDB for OS/390 and z/OS 418
Panel 1 for Microsoft SQL Server 449
Panel 1 for Sybase ASE 548
Panel 2 for IBM DB2 UDB 390
Panel 2 for IBM DB2 UDB for OS/390 and z/OS 418
Panel 2 for Microsoft SQL Server 449
Panel 2 for Sybase ASE 549
Panel 3 for Sybase ASE 549
User Datatype Wizard for IBM DB2 UDB 388
User Datatype Wizard for IBM DB2 UDB for OS/390 and
z/OS 417
User Datatype Wizard for Microsoft SQL Server 449
User Datatype Wizard for Sybase ASE 548
User Datatypes 129
Creating for IBM DB2 UDB 389
Creating for IBM DB2 UDB for OS/390 and z/OS 417
Creating for Microsoft SQL Server 449
Creating for Sybase ASE 548
Editing for IBM DB2 UDB 165
Editing for IBM DB2 UDB for OS/390 and z/OS 211
Editing for Sybase 347
Editor for Microsoft SQL Server 249
User Datatypes Editor for IBM DB2 UDB 165
User Datatypes Editor for IBM DB2 UDB for OS/390 and
z/OS 211
User Datatypes Editor for Sybase 347
User Message Wizard for Microsoft SQL Server 447
User Message Wizard for Sybase ASE 550
User Messages
Creating for Microsoft SQL Server 447
Creating for Sybase ASE 550
Editing for Microsoft SQL Server 250
User Messages Editor for Microsoft SQL Server 250
DDL Tab 250
Information Tab 250
User Wizard
Panel 1 for Microsoft SQL Server 448
Panel 1 for Oracle 523
Panel 1 for Sybase ASE 550
Panel 2 for Microsoft SQL Server 448
Panel 2 for Oracle 523
Panel 3 for Oracle 524
Panel 4 for Oracle 524
User Wizard for Microsoft SQL Server 448
User Wizard for Oracle 522
User Wizard for Sybase ASE 550
Users 130
Creating for Microsoft SQL Server 448
Creating for Oracle 522
Creating for Sybase ASE 550
Editing for IBM DB2 UDB 213
Editing for Microsoft SQL Server 247
Editing for Sybase 348
SCHEMA 130
SQLID 130
Users Editor for IBM DB2 UDB 213

INDEX >
EMBARCADERO TECHNOLOGIES > RAPID SQL USER GUIDE 961
Users Editor for Microsoft SQL Server 247
DDL Tab 249
Definition Tab 248
Object Tab 248
Privileges Tab 248
Users Editor for Sybase 348
DDL Tab 350
Definition Tab 348
Objects Tab 349
Privileges Tab 349
V
VC Files Tab
Closing 756
Opening 756
VC Files Tab Functionality 754
Version Control 748
Adding Files to Version Control 752
Basics 753
Checking In Projects or Files 760
Checking Out Projects or Files 758
Collapse All 766
Expand All 765
Getting Latest Version 757
Integrating with Merant/Intersolv PVCS Version
Manager 749
Integrating with Microsoft Visual SourceSafe 750
Integrating with MKS Source Integrity 750
MKS Source Integrity 750
Options 73
Properties 765
Refresh 766
Removing a Project or File 764
Removing a Project or File from Version Control 764
Undoing a Check Out 761
VC Files Tab 754
Viewing File Differences 763
Viewing History 762
Visual SourceSafe 750
Working with Files 752
View Wizard for IBM DB2 UDB 390
View Wizard for IBM DB2 UDB for OS/390 and z/OS 419
View Wizard for Oracle 524
View Wizard for Sybase ASE 551
Views 131
Creating for IBM DB2 UDB 390
Creating for IBM DB2 UDB for OS/390 and z/OS 419
Creating for Microsoft SQL Server 450
Creating for Oracle 524
Creating for Sybase ASE 551
Editing for IBM DB2 UDB 166
Editing for IBM DB2 UDB for OS/390 and z/OS 215
Editing for Microsoft SQL Server 250
Editing for Sybase 350
Views Editor for IBM DB2 UDB 166
Views Editor for IBM DB2 UDB for OS/390 and z/OS 215
Views Editor for Microsoft SQL Server 250
Columns Tab 251
Definition Tab 251
Dependencies Tab 252
Privileges Tab 252
Views Editor for Sybase 350
Columns Tab 350
Definition Tab 351
Dependencies Tab 352
Privileges Tab 351
Visual Difference
Comparing Files 778
Navigating 779
Opening 778
Options 780
Printing 779
Searching 780
X
XML 715
