Jones College of Business -Carlos Coronel x2359 Page 1 of 3
CREATING COLLABORATIVE DOCUMENTS FOR CLASSES
Are you planning to use collaborative Word/PowerPoint/Excel documents for your classes? If so, see the
instructions below. I hope this helps you get ready for your classes. If you have any questions, please
feel free to contact us. To create collaborative documents in Office 365, follow the instructions below.
In OneDrive:
1) Login to OneDrive
Go to https://portal.office.com
and login with your MTSU credentials. Then, click on the
OneDrive icon.
2) Create a folder for the collaborative documents for your classes.
The main point here is to use a proper naming convention to organize your folder and files. First,
create a folder to store all class-related documents. For example: create a CLASSES folder to
keep all the files you share among your classes. Then, create a sub-folder GROUPS to store all
the collaborative documents.
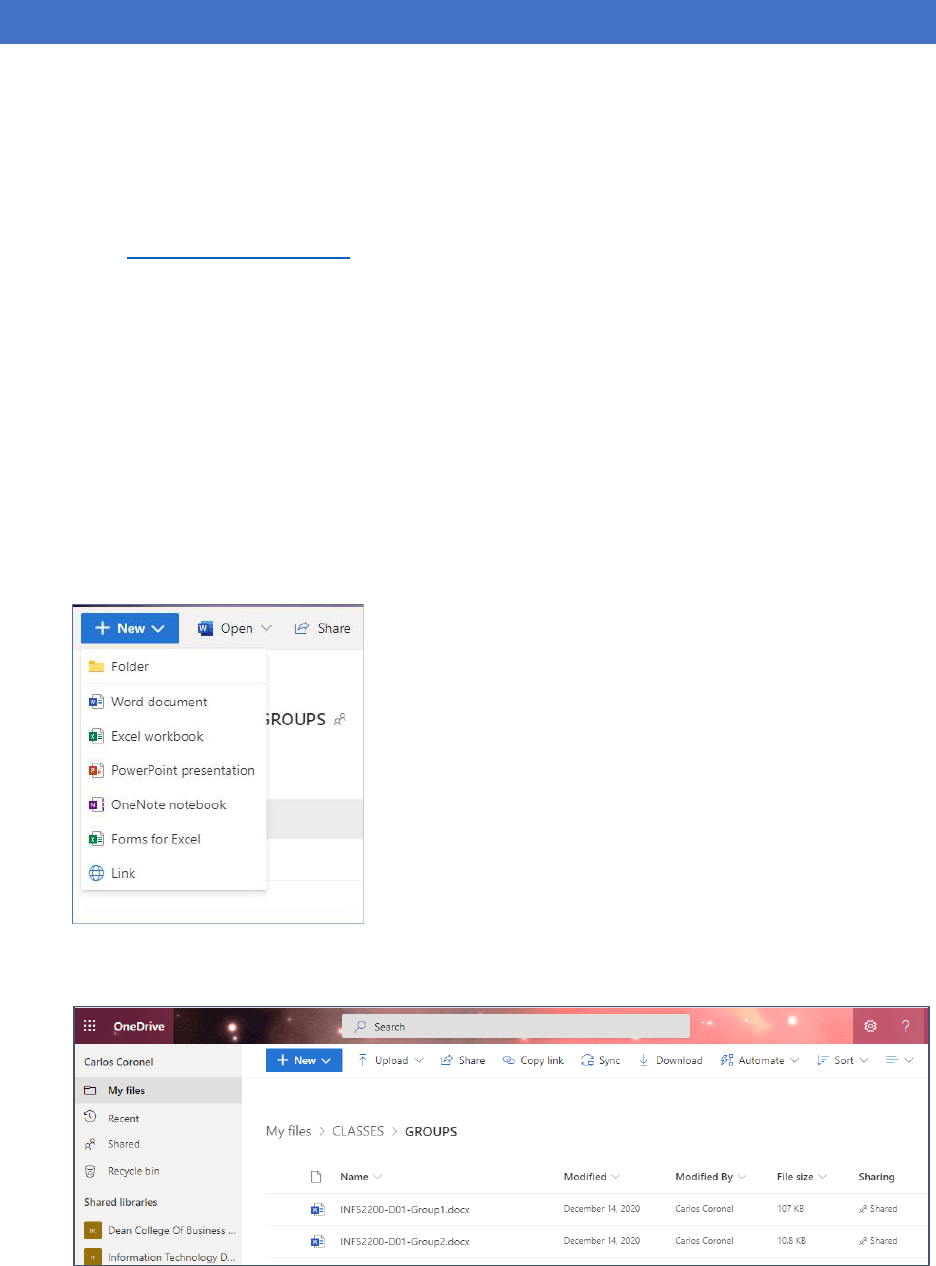
3) Create the document(s).
To organize your files, use a naming convention. For example, create two collaborative
documents: INFS-2200-D01-Group1.docx and INFS-2200-D01-Group2.docx. In the GROUPS
subfolder, click on + New and select Word document. You could also create Excel and
PowerPoint documents.
Word Online opens, click on File, Save As, Rename – enter a name for the document and hit
ENTER. Go back to OneDrive and repeat the steps above to create a second document. You have
now created two Word documents.
You can add instructions inside the document(s) for each group.
Jones College of Business -Carlos Coronel x2359 Page 2 of 3
CREATING COLLABORATIVE DOCUMENTS FOR CLASSES
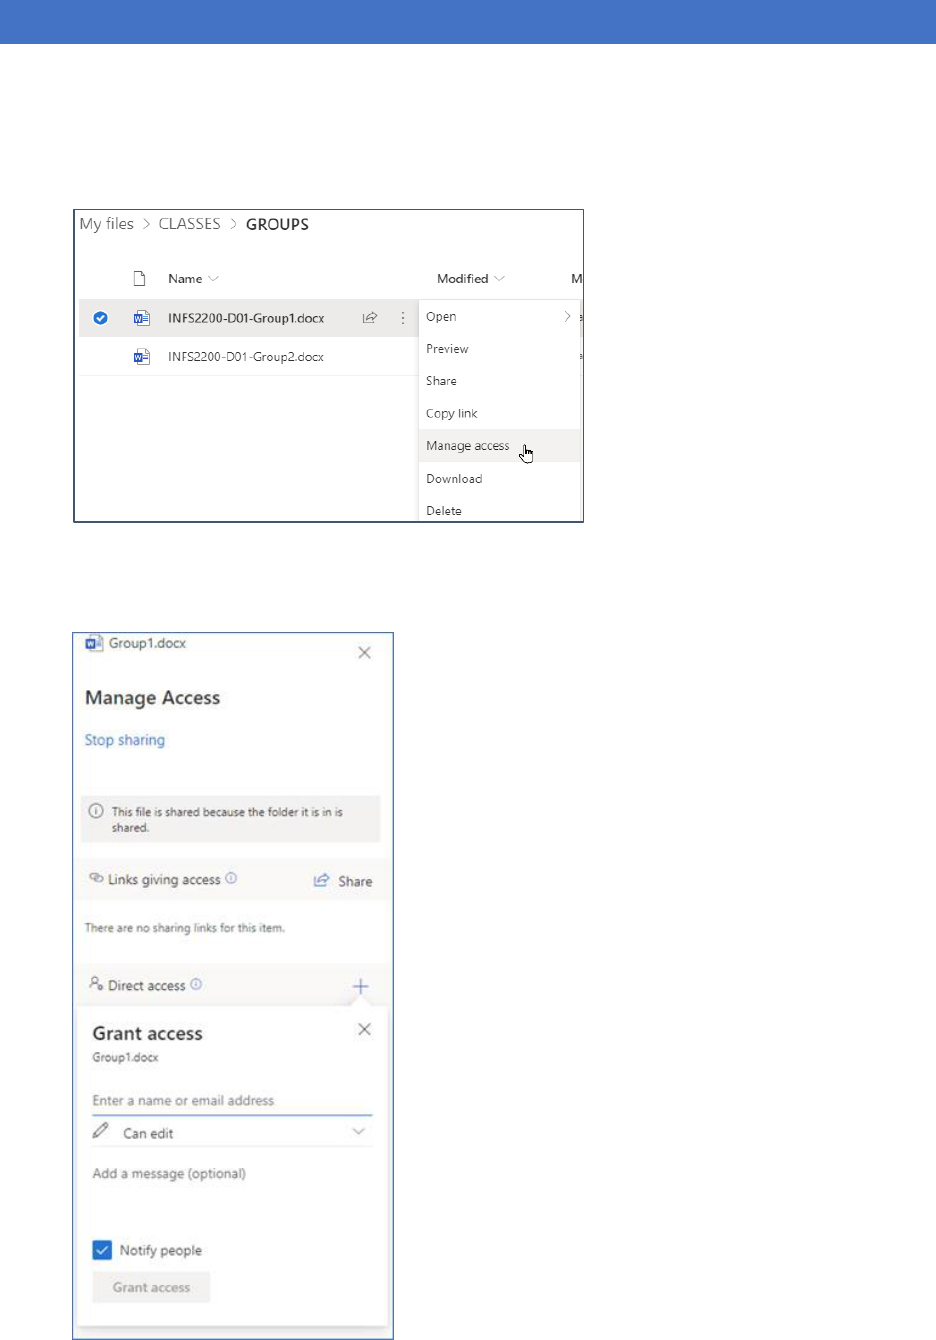
4) Assign Edit rights to students. For each document, assign what students can edit the file. For
example, for INFS-2200-D01-Group1.docx, assign edit rights to student1, student2, and
student3. For Group2.docx, assign edit rights to student4 and student5. For each file, click on
the (:) three dots, then click on Manage access.
Next, in the Manage Access window, under Direct Access, use the + plus sign to add the
student's MTSU email, and click on Grant Access. By default, the access is "Can edit," but you
can change it to "Can view." Repeat this process for each student. Check the Notify people
checkmark to send an email to each student.
Jones College of Business -Carlos Coronel x2359 Page 3 of 3
CREATING COLLABORATIVE DOCUMENTS FOR CLASSES
5) Students get a notification. Students will get emails in their MTSU email, informing them that
they have access to the file. To access the file, the student can click on the link in the email or go
to https://portal.office.com
, click on the OneDrive icon, click on Shared, and see the shared file
there. Double click on the file name to open the file.
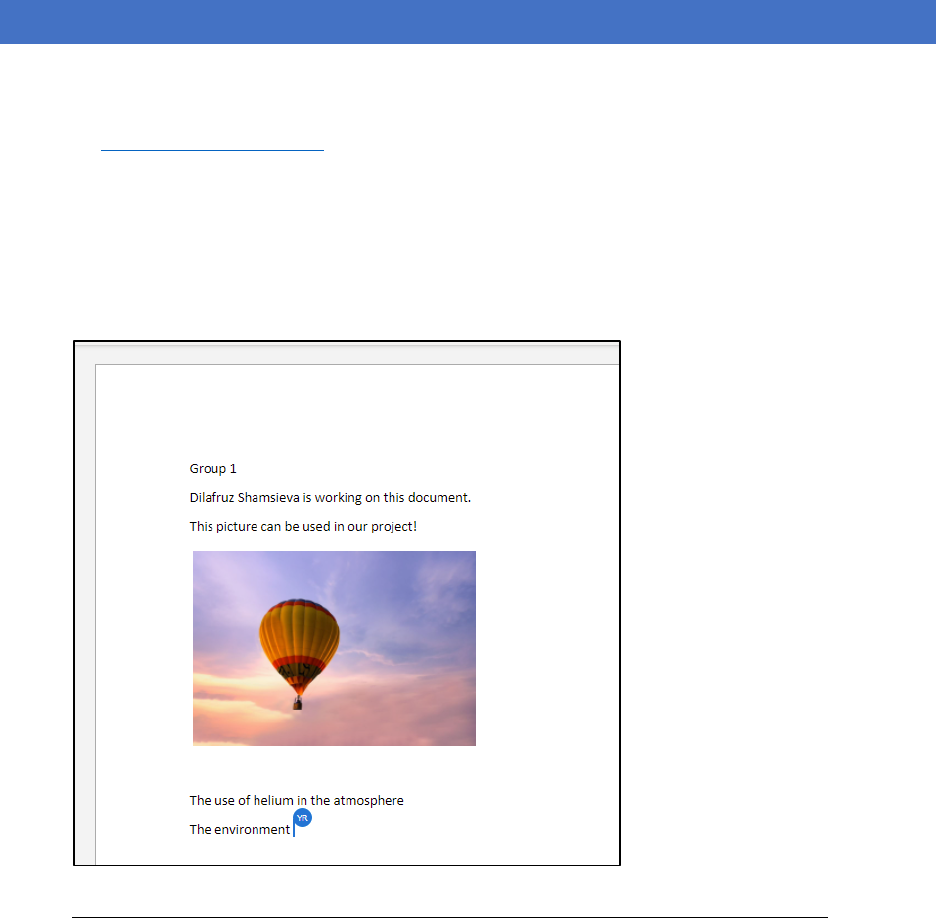
6) Multiple students can edit the file at the same time.
When multiple users edit the document, the users see multiple cursors with the initials of each
user. See the picture below. The program will save changes in real-time. The teacher can see a
log of all the changes each student makes to the file.
We recommend making sure students edit the file in Word/Excel/PowerPoint Online.
Notice that you can give your students instructions to access the shared files in advance of Zoom
meetings. In reality, the one-line instruction would be to login to portal.office.com and click on
OneDrive, click on Shared, and then click on the file to start collaborating with your group.
At the end of the semester, you could remove the student access to the file. Also, you could move the
files to another folder for archiving purposes. These steps prevent student access to the files after the
class ends.
