
SocialMiner Configuration
This section outlines the initial setup that must be performed when SocialMiner is first installed as well as
the ongoing user-configurable options that can be used once the system is up and running.
The Feeds, Filters, and Campaigns panels are all found on the Configuration tab.
The Notifications and Reply Templates panels are found on the Administration tab.
You can sort and search the list appearing in any panel. Sort the list by selecting the heading or arrows at
the top of the panel. After you select a heading, an arrow appears indicating the sort method (ascending or
descending). To search a list, enter your search text in the Search text box above the list.
•
Feeds, page 1
•
Campaigns, page 17
•
Reply Templates, page 19
•
Filters, page 20
•
Notifications, page 23
Feeds
The Manage Feeds panel lets you view, delete, add, and edit feeds.
A feed is a stream of contacts coming from a single source. Setting up feeds is a foundational step for your
SocialMiner system. (You need to configure at least one feed and add it to a campaign before you can start
seeing contacts on your home page.)
SocialMiner uses a process called de-duplication to automatically remove duplicate contacts. For example,
if a user configures several overlapping feeds that capture the same result, then SocialMiner does not capture
the same contact twice. The de-duplication functionality relies on the unique URL of the post. For example,
each Tweet or blog has a unique URL. Before SocialMiner creates a new contact in the data store, it verifies
that the URL of that contact is not already in the data store.
Cisco SocialMiner User Guide, Release 11.0(1)
1
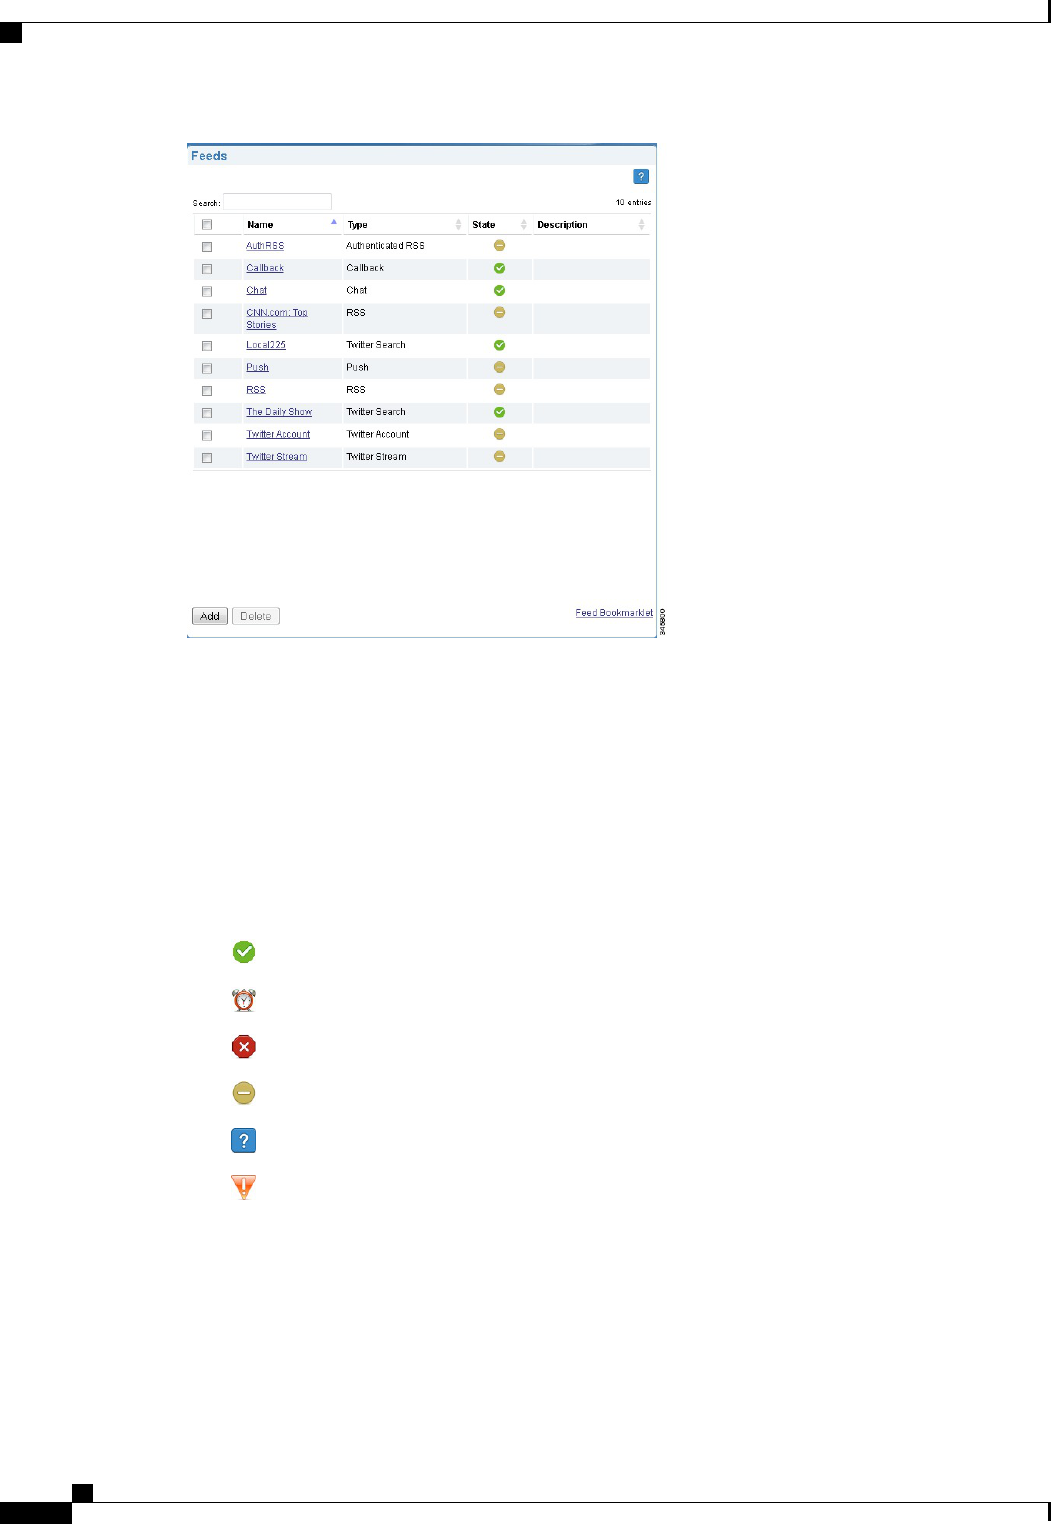
Feed types are:
• Chat—Use this feed type to create social contacts for chat. (Only the SocialMiner Administrator sees
Chat as an option on the feed Type drop-down.)
• Email—An IMAP email feed. You can view email feeds in the SocialMiner user interface. However,
you cannot create a new email feed or modify an existing one. Email feeds are only used when SocialMiner
is deployed with Unified CCX. In this integrated deployment, Unified CCX automatically creates email
feeds as needed.
Icons are used as visual indicators to display the state of each feed. Hover the cursor over the icon to display
a tool tip that explains the state.
•
The feed is operating normally.
•
Scheduled. This is a brief interim state. Feeds are normally in this state for a very short time.
•
An error occurred. Hover over the error icon to display a tool tip with the error text.
•
The feed has been created, but is not assigned to any campaigns.
•
The status of the feed cannot be determined.
•
The Twitter or callback rate limit was reached. When the rate limit is reached on a Twitter feed, you
can hover your cursor over the icon to display when the Twitter feed will be available again.
Contacts retrieved by feeds are time-limited by the number of days defined in the Purge Social Contacts older
than (days) setting of the Purge Settings tool on the Administration tab. The default is to retain social contacts
for 30 days.
Cisco SocialMiner User Guide, Release 11.0(1)
2
SocialMiner Configuration
Feeds

If you change a feed (for example, to rename it, change the URL, or change the polling interval), you do not
need to re-add it to the campaign.
Adding and Editing Feeds
To create a feed, click New in the Manage Feeds panel. To edit the settings for a feed, select its name.
Select the feed type and complete the fields for the feed type. The fields vary by feed type, which are described
below.
Adding Feeds Using the Feed Bookmarklet
The link at the bottom of the Manage Feeds panel, Feed Bookmarklet, initiates the process to create a
bookmarklet in your browser that you can use to create feeds.
Deleting Feeds
Select the checkbox to the left of one or more feed names and click Delete. A confirmation dialog box appears.
Click OK to confirm deletion of the selected feed(s).
Polling Interval for Feeds
The polling interval controls how often SocialMiner updates the feed. A shorter polling interval provides
more frequent updates but creates more load on the SocialMiner server and on the sites publishing the feed.
Some sites may have recommendations or restrictions on frequent polling and could block an application that
polls too frequently.
The default SocialMiner polling interval for feeds is five minutes.
Minimum Age for Feeds
Use the minimum age setting to filter out recent posts.
Automatic Tags for Feeds
All feeds support automatic tagging, which allows you to specify up to 20 tags that are applied to new contacts
for a feed across all campaigns that include that feed.
To add an automatic tag to the feed, enter one or more (separated by commas) tags into the Automatic Tags
text box, then click Add.
To remove an automatic tag from the feed, select the small x next to the tag name.
Extension Fields in Chat Feed Sample Code
Extension fields are a collection of custom name and value pairs that can be added to social contacts using
the push feed and chat feed sample code. You can add social contact data to email and IM notifications by
including extension fields as notification body variables.
You can add a maximum of 100 extension fields; up to one megabyte of information.
The following sections describe how to configure specific feed types. Fields marked with an asterisk (*) on
the form are required. All other fields are optional.
Cisco SocialMiner User Guide, Release 11.0(1)
3
SocialMiner Configuration
Feeds

RSS and Authenticated RSS Feeds
RSS is one of the simplest and most widely-available means for SocialMiner to capture social contacts because
there are many forum and blog sites that support RSS. You can create an RSS feed as described below; you
can also create a feed using the feed bookmarklet.
SocialMiner supports the following RSS feed standards:
•
RSS 1.0
•
RSS 2.0
•
ATOM 1.0
The authenticated RSS feed type is similar to RSS but requires basic authentication. The username and
password are encrypted and stored in the SocialMiner configuration database.
Paging from RSS Feeds
SocialMiner does not support the reading of multiple pages from an RSS feed. SocialMiner captures the posts
that are presented on the first (main) page returned by a site. This limitation prevents the system from capturing
posts prior to the current page of results and allows SocialMiner to capture all results going forward as long
as the site generates a page or less of results in each interval.
Some sites allow the URL to specify the number of results on a page. If you use this feature to set the number
of results to return and you also regulate the polling interval, you can optimize system performance and reduce
load on the site while ensuring all posts are captured.
Configure RSS and Authenticated RSS Feeds
1
Access the Manage Feeds panel.
2
Click New.
3
Select RSS or Authenticated RSS as the feed type, then enter information in the following fields:
a
Name
b
Description
c
URL—this must be a valid RSS Feed.
d
Username—username for the feed. (Not applicable for RSS feeds, required for authenticated RSS
feeds.)
e
Password—password for the feed. (Not applicable for RSS feeds, optional for authenticated RSS feeds.)
f
Polling Interval—number of minutes to wait between refreshing this feed.
g
Minimum age—the number of hours old a post must be before it is included as a result. (This lets you
exclude recent posts.)
h
Automatic tags—provide automatic tags for the feed.
4
Click Save to save the feed.
Push Feed
The push feed allows you to "push" social contacts directly to SocialMiner through HTTP GET or POST
requests. A push feed is an interface for generating a social contact through a web form. For example, you
Cisco SocialMiner User Guide, Release 11.0(1)
4
SocialMiner Configuration
RSS and Authenticated RSS Feeds

might want to create a social contact to test the routing of email notifications. You might also want to create
a social contact for a response to a feedback form on your website.
The SocialMiner Administrator can add, edit, and delete push feeds. Non-administrators can only see, use,
and add push feeds to campaigns on the Configuration tab.
Configure a Push Feed
1
Access the Manage Feeds panel.
2
Click New.
3
Select Push as the feed type, then enter information in the following fields:
a
Name
b
Description
c
Reply template—the reply template to be used for replying to social contacts obtained from this feed.
d
Automatic tags—provide automatic tags for the feed.
4
Click Save to save the feed.
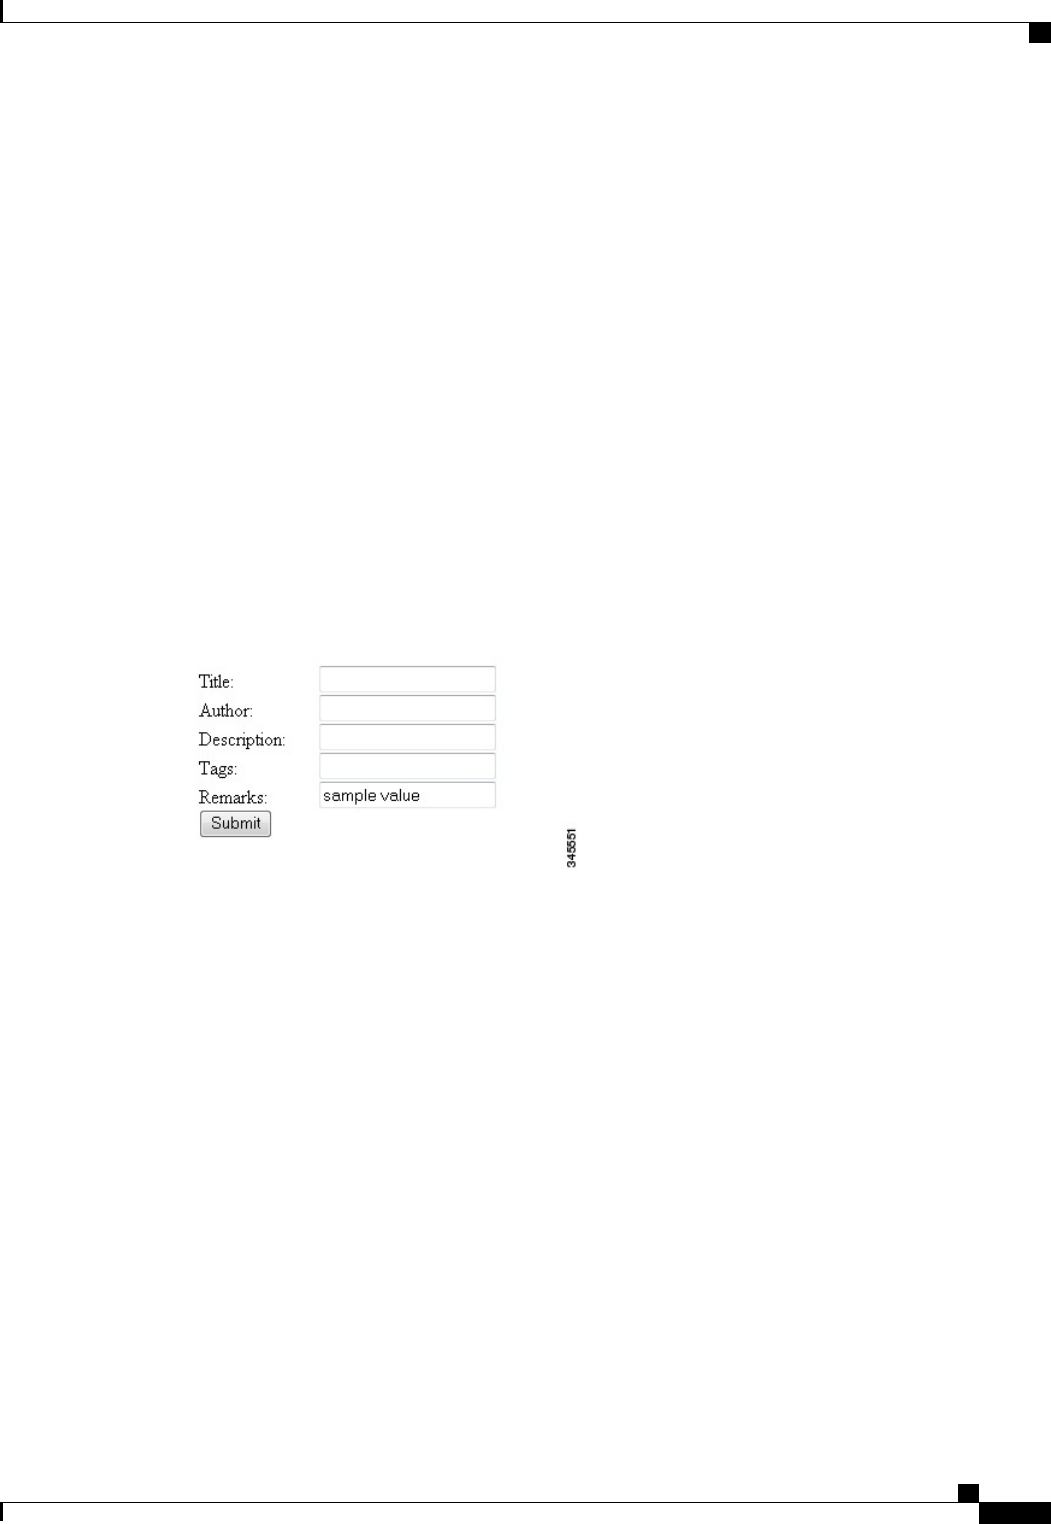
5
Select the saved push feed from the list of feeds to open it in edit mode. You see a Sample Code link
which contains working HTML code containing the correct IP address and feed id values for the instance
you are working on. It also displays the form fields you need to get from the user and some examples of
optional fields you can include, such as tags and extension fields.
In the following example, we use extension field 'Remarks'.
<style type='text/css'>span { display: inline-block; width: 100px; }</style>
<meta http-equiv="Content-Type" content="text/html; charset=utf-8">
<form action='http://<ServerIP>:<Port>/ccp-webapp/ccp/pushfeed/117835' method='get'>
<span>Title:</span>
<input id='title' type='text' name='title' /><br/>
<span>Author:</span>
<input id='author' type='text' name='author' /><br/>
<span>Description:</span>
<input id='description' type='text' name='description' /><br/>
<span>Tags:</span>
<input id='tags' type='text' name='tags' /><br/>
<span>Remarks:</span>
<input id='remarks' type='text' name='extensionField_remarks' value='sample value'
/><br>
<input id='submit' type='submit' value='Submit'/>
</form>
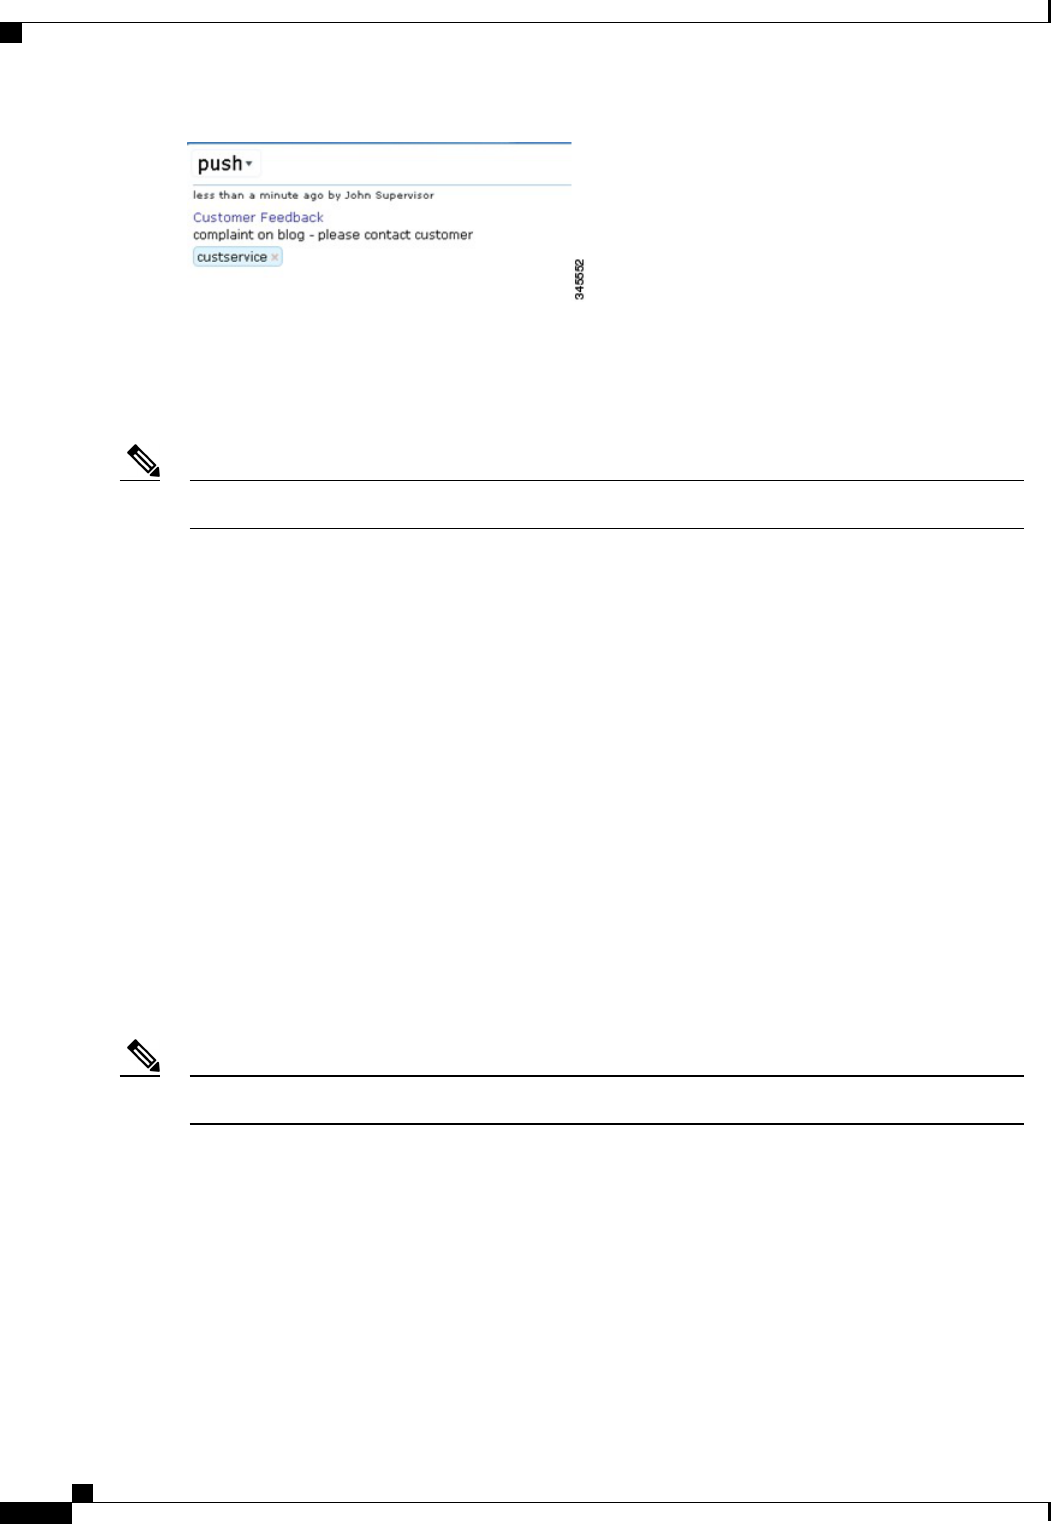
6
Copy the code from the sample code link and save it as HTML. Edit the fields; then click Submit on the
HTML form.
The social contact will appear in the campaign that includes the push feed.
If the tags in the push feed code are associated with notification rules, the notifications will trigger immediately
when the social contact is submitted.
You can have multiple independent push feeds on one SocialMiner system.
The push feed must be associated with a campaign in order to activate. Create a test campaign prior to testing
your push feed.
Cisco SocialMiner User Guide, Release 11.0(1)
5
SocialMiner Configuration
Push Feed
Facebook Fan Page Feed
The Facebook Fan Page feed captures all posts and comments published on configured Facebook fan pages.
The Facebook Fan Page feed does not capture replies to comments or private messages.Note
Facebook posts and comments are captured by SocialMiner and rendered in a time-sorted stream. This rendering
differs from the standard fan page layout. The goal of this layout is to ensure that 100% of the posts and
comments are noticed by the consumer of the results. It is more difficult to achieve this goal when viewing
the posts and comments directly on Facebook, as they are grouped by post instead of time-sorted.
When displayed in SocialMiner, Facebook posts and comments are differentiated by the format of the title.
•
Facebook post from [first name] [last name]
•
Facebook comment from [first name] [last name] for "[post]"
The link in the title provides a direct link to the post on Facebook. Note that Facebook does not anchor
comments, therefore the link takes the browser to the posts to which the comment refers and not directly to
the comment.
SocialMiner requires a clean fan page “Vanity URL”. Facebook appends certain parameters to a URL
depending on how you navigated to the URL. For example, when you find the Cisco Contact Center fan page
through Facebook search, you see this URL: http://www.facebook.com/#!/CiscoCC?ref=ts. However the
direct URL for the fan page is http://www.facebook.com/CiscoCC. This base URL is what Facebook refers
to as the “Vanity URL”. The name “CiscoCC” was registered by the administrator of this page.
Some uncommon fan pages have a number instead of a text name (they have not yet registered a Vanity URL).
In this case, the URL with the number satisfies the requirements of the SocialMiner configuration.
SocialMiner retrieves a maximum of 50 posts and 500 comments per post for each polling interval.Note
Configure a Facebook Fan Page Feed
1
Access the Manage Feeds panel.
2
Click New.
3
Select Facebook Fan Page as the feed type, then enter information in the following fields:
a
Name
b
Description
c
URL—this must be a valid Facebook fan page (the URL must start with http://www.facebook.com).
Cisco SocialMiner User Guide, Release 11.0(1)
6
SocialMiner Configuration
Facebook Fan Page Feed

d
Polling interval—the number of minutes to wait before refreshing this feed.
e
Minimum age—the number of hours old a post must be before it is included as a result. (This allows
you to exclude recent posts.)
f
Reply template—the reply template to be used for replying to social contacts obtained from this feed
(defaults to the Cisco Facebook Reply Template).
g
Automatic tags—provide automatic tags for the feed.
4
Click Save.
5
Save redirects you to request authorization from Facebook that allows SocialMiner to post to the fan page.
This opens Facebook.
6
Sign in with your organization's Facebook username and password and then click Allow to allow the Cisco
Facebook reply template to post to the Facebook fan page.
Successful authorization creates and saves the feed.
Edit a Facebook Feed
To edit the feed, simply select the feed name to open the feed, make the changes, and click Save.
When you edit a Facebook feed, there are three buttons: Cancel, Save, and Reauthorize and Save.
If the icon next to a Facebook feed is red and the hover text for that icon reports authorization issues, open
the feed as if to edit it and click Reauthorize and Save to initiate the Facebook authorization process.
Posted replies will appear as being from the user who authenticated the posting. For example, if the posting
was authorized by the Facebook account for Harrison Dental and employee Dr. Lee replies to a social contact,
the reply is from Harrison Dental and not from Dr. Lee's own Facebook account.
Chat Feed
A chat feed is a variation of a push feed that contains sample HTML code for the fields a customer sees in a
click-to-chat request form. When the customer clicks on a chat button and submits the form, a social contact
is created and added to the campaign for the chat feed. SocialMiner displays a welcome screen, sets up a chat
session for that social contact, and logs the user represented by that social contact into the chat session.
The SocialMiner Administrator can add, edit, search, and delete chat feeds as well as set the values for the
chat join and chat inactivity timeouts. These values are set on a feed-by-feed basis.
Users can see, use, and add chat feeds to campaigns on the Configuration tab.
You cannot configure a chat feed from the SocialMiner user interface. Unified CCX automatically creates
chat feeds as required in an integrated deployment with SocialMiner and Finesse.
Configure a Chat Feed
1
Access the Manage Feeds panel.
2
Click New.
3
Select Chat as the feed type, then enter information in the following fields:
a
Name
b
Description
c
Chat join timeout—define how long the system waits for an agent to join the chat during the setup
process before sending the customer the chatAgentJoinTimeout message (see below).
Cisco SocialMiner User Guide, Release 11.0(1)
7
SocialMiner Configuration
Chat Feed
d
Chat inactivity timeout—define how long the system waits before automatically closing the chat session
if there is no customer activity.
e
Reply template—select Cisco Chat. The Cisco Multi-session chat option is only used when SocialMiner
is deployed with Unified CCX and Cisco Finesse for multisession chat.
f
Automatic tags—provide automatic tags for the feed.
4
Click Save.
5
Select the saved chat feed from the list of feeds to open it in edit mode.
6
Select the Sample Code link to open sample code that contains working HTML with the form fields you
need to make the POST request for the chat feed.
7
Save the code from the Sample Code link locally and modify it as needed.
For example:
Replace "./img/ciscoLogoColor.p ng" with the location of your own logo and replace the default
extensionField_chatError and extensionField_chatWaiting text strings with the messages you want the
customer to see for each circumstance.
8
Add the HTML to your website.
•
The HTML code from the Sample Code link includes the SocialMiner server IP address and feed
ID (100045 in the following example). If you have multiple chat feeds, the Feed ID will be different
for each one; be sure to copy the sample code from the correct chat feed.
•
The code also contains form fields: Title, Author, Description, Tags, and three extension fields.
•
In general, extension fields are a collection of custom name/value pairs that can be added to social
contacts and are subsequently displayed in the Agent Chat user interface. For example, a 'Remarks'
extension field appears in the sample form below. The name of the field and the value entered by
the customer are added to the social contact and are displayed to the agent.
•
Four hidden extension fields are special extension fields used to customize the customer chat user
interface - they are not added to the social contact and therefore are not displayed in the agent chat
user interface.
•
extensionField_chatAgentJoinTimeOut
•
extensionField_chatError
•
extensionField_chatLogo
•
extensionField_chatWaiting
During the chat setup process, if no agent responds before the chat join timeout, the customer is sent a message
(defined in extensionField_chatAgentJoinTimeout) indicating that they can continue waiting or try again later.
Users must localize the messages they insert in the sample form in order for it to appear appropriately in
their customer chat interface. For localization into languages that use characters outside the ASCII set,
the characters need to be encoded into HTML character references to avoid corruption.
Note
The sample code also includes a Submit button.
Cisco SocialMiner User Guide, Release 11.0(1)
8
SocialMiner Configuration
Chat Feed
Here is an example of the SocialMiner code for a chat feed. This example is for illustration purposes only -
do not copy and paste from this example as the server address and feed ID will not be appropriate for your
instance. Always use the code from the Sample Code link.
<style type='text/css'>span { display: inline-block; width: 100px; }</style>
<meta http-equiv="Content-Type" content="text/html; charset=utf-8">
<form action='https://<SocialMinerServer>/ccp/chat/form/100045' method='post'>
<span>Title:</span>
<input type='text' name='title' /><br/>
<span>Author:</span>
<input type='text' name='author' /><br/>
<span>Description:</span>
<input type='text' name='description' /><br/>
<span>Tags:</span>
<input type='text' name='tags' /><br/>
<span>Remarks:</span>
<input type='text' name='extensionField_remarks' value='sample value' /><br>
<input type='submit' value='Submit'/>
<input type="hidden" name="extensionField_chatLogo" value="./img/ciscoLogoColor.png">
<input type="hidden" name="extensionField_chatWaiting" value=
"Welcome, please wait while we connect you with a customer care representative.">
<input type="hidden" name="extensionField_chatAgentJoinTimeOut" value=
"All customer care representatives are busy assisting other clients.
Please continue to wait or try again later.">
<input type="hidden" name="extensionField_chatError" value=
"Sorry, the chat service is not available. Please try again later.">
</form>
When a user completes and submits the form, a URL to the new social contact is returned. The user sees an
interface with the welcome message.
If no agent picks up the chat before the first timeout, the message changes to indicate no agent is available.
If the system reaches the second timeout before an agent picks up the chat, the user receives the chat error
message.
Modify the Sample Code for a Chat Feed
You can modify the content within the span tags and add more extension fields. You cannot delete the title
or author.
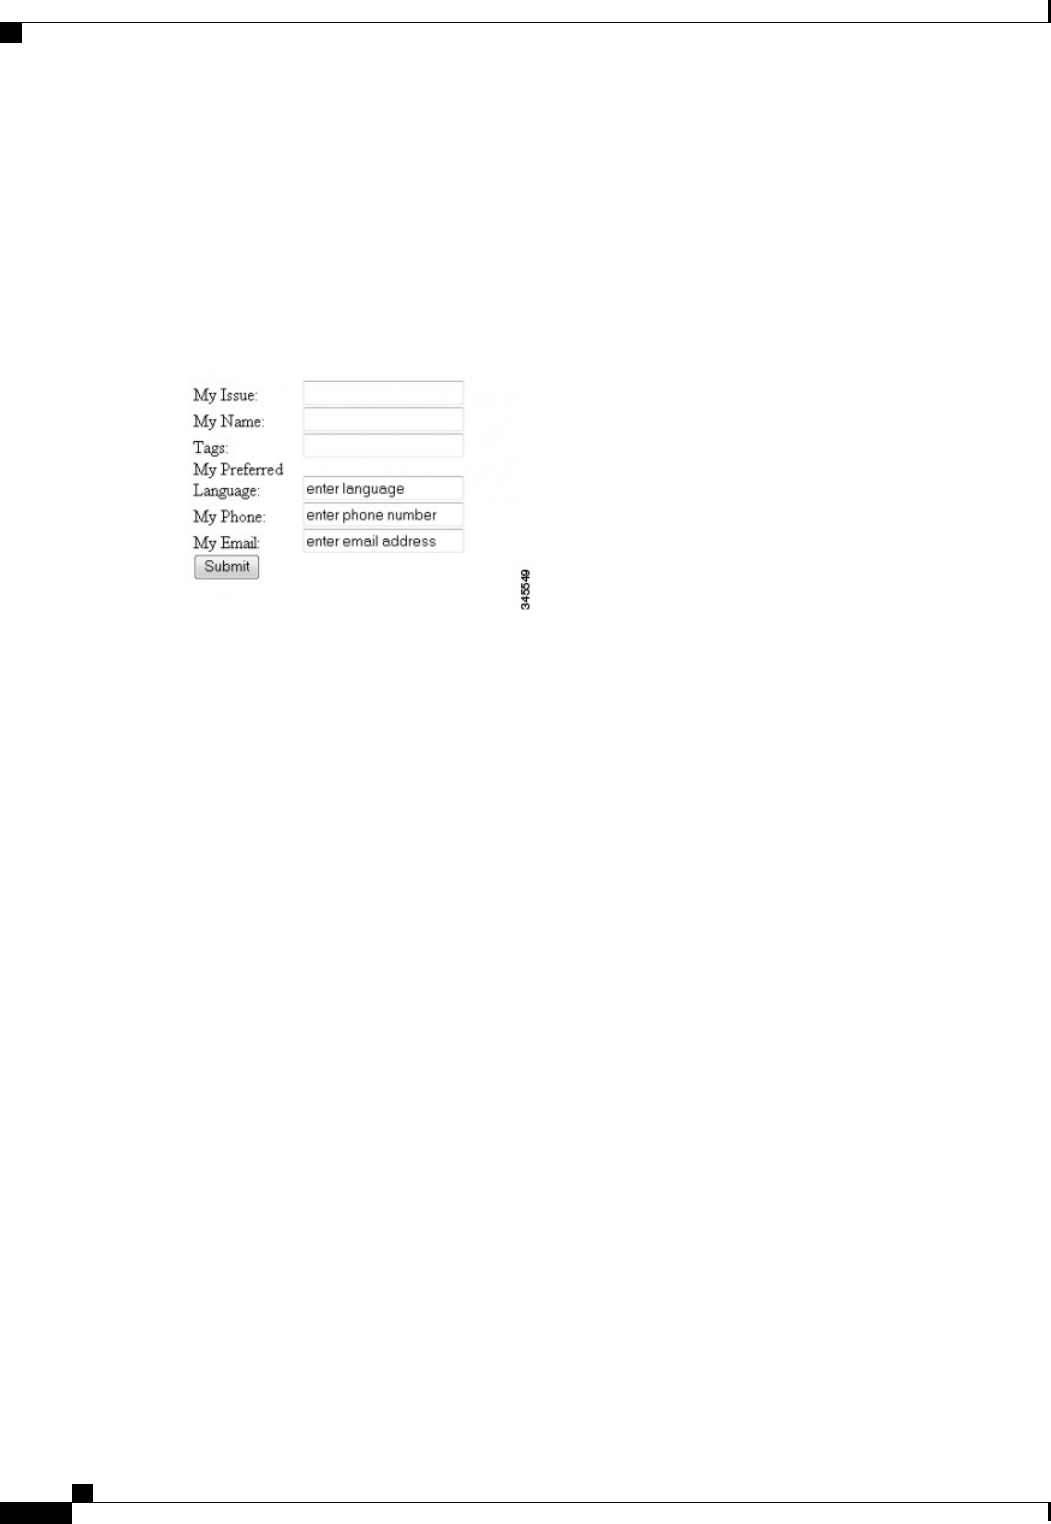
Example of a Modified Form
In this modified form, the label for "Title" was changed to "My Issue". The label for "Author" was changed
to "My Name". "Description" was removed. The "Remarks" extension field was removed, and three extension
fields were added: "My Preferred Language", "My Phone", and "My Email".
<style type='text/css'>span { display: inline-block; width: 100px; }</style>
<meta http-equiv="Content-Type" content="text/html; charset=utf-8">
<form action='https://<ServerIP>:<Port>/ccp/chat/form/100051' method='post'>
<span>My Issue:</span>
<input type='text' name='title' /><br/>
Cisco SocialMiner User Guide, Release 11.0(1)
9
SocialMiner Configuration
Chat Feed
<span>My Name:</span>
<input type='text' name='author' /><br/>
<span>Tags:</span>
<input type='text' name='tags' /><br/>
<span>My Preferred Language:</span>
<input type='text' name='extensionField_language’ value='enter language' /><br>
<span>My Phone:</span>
<input type='text' name='extensionField_phone’ value='enter phone number' /><br>
<span>My Email:</span>
<input type='text'name='extensionField_email’ value='enter email address' /><br>
<input type='submit' value='Submit'/>
</form>
Callback Feed
A callback feed allows callback applications to submit customer requests to CCE for a return phone call (a
callback) from a contact center agent.
The SocialMiner Administrator can add, edit, and delete callback feeds. Non-administrators can see callback
feeds on the Configuration tab and add them to campaigns.
Before creating an agent request with the Callback API , you must have a Callback feed assigned to a campaign
and a 'Connection to CCE' notification set up with a tag that matches the tag defined in this feed.
Configure a Callback Feed
1
Access the Manage Feeds panel.
2
Click New.
3
Select Callback as the feed type, then enter information in the following fields:
a
Name
b
Description
c
Automatic tags—Configure the feed to automatically tag all callback requests that come in on that
feed. This tag must match the tag on the Connection to CCE notification in order to trigger the
notification.
Reply template automatically defaults to "No reply template".
4
Click Save to save the feed.
Cisco SocialMiner User Guide, Release 11.0(1)
10
SocialMiner Configuration
Callback Feed

Twitter Account Feed
This feed captures mentions (tweets that include "@USERNAME") and direct messages to the @USERNAME
account. The feed also captures the tweet type, such as "retweet" or "in-reply-to". You can have only one
Twitter account for each user on a SocialMiner system.
The Twitter account feed is configured using OAuth. During feed configuration, SocialMiner redirects the
user to Twitter to validate the Twitter account. This provides a security benefit as using OAuth avoids storing
the user's Twitter account information on the SocialMiner server.
Twitter provides a list of applications (connections) that have been granted access to a Twitter account. A
Twitter user can revoke access at any time. See http://twitter.com/settings/connections.
Configure a Twitter Account Feed
1
Access the Manage Feeds panel.
2
Click New.
3
Select the Twitter Account as the feed type, then enter information in the following fields:
•
Name
•
Description
• Username—a valid existing Twitter username. Note: Only one Twitter account feed per Twitter
username on a SocialMiner server is allowed.
• Polling Interval—the number of minutes to wait between refreshing this feed.
• Minimum age—the number of hours old a post must be before it is included as a result. (This allows
you to exclude recent posts.)
• Reply template—the reply template to be used for replying to social contacts obtained from this feed
(defaults to the Cisco Twitter Reply Template).
• Automatic tags—provide automatic tags for the feed.
4
Click Save.
Save redirects you to the Twitter authentication service, which lets you approve using this application with
your Twitter account. (You may need to authorize pop-ups in your browser.) Follow the directions to enter
credentials to authorize access to the Twitter account.
If you are already signed in to Twitter (using the same account you entered during feed configuration), click
Allow.
If you are not signed in to Twitter, you are prompted to enter the Twitter username and password for the
account. If you are signed in to a different Twitter account, click Sign Out; then sign in with the account you
want to authorize and click Authorize app. After you click Authorize app, the browser window closes and
you return to the Feeds panel with your new feed successfully created.
You have now authorized SocialMiner to access all Twitter functionality for this account.
Twitter provides SocialMiner with a key to enable access to the account. If any issues arise, you can re-authorize
the account in the edit mode (as described below).
Cisco SocialMiner User Guide, Release 11.0(1)
11
SocialMiner Configuration
Twitter Account Feed
Edit a Twitter Account Feed
When you open a Twitter account feed to edit it, there are two buttons: Reauthorize and Save and Save.
If the icon next to a Twitter account feed is red and the hover text for that icon reports 'authorization issues',
edit the feed and click Reauthorize and Save to initiate the Twitter authorization process.
For all other changes to the feed, just edit the fields and click Save.
Twitter Rate Limit
Twitter accounts are rate-limited by Twitter. When the Twitter rate limit has been reached, the hover text for
the feed warning icon shows text something like this:
"Rate limit reached. Feed will reactivate at 10:39 AM. Last successful fetch time was 2 minutes ago. Success
rate is 50%."
Polling rates have an impact on how quickly a feed reaches its limit. A good default polling rate is every
5 minutes.
Note
Twitter Stream Feed
The Twitter stream feed allows you to monitor public Twitter time lines for one or more keywords. This feed
delivers tweets in real time and it is the integration method recommended by Twitter for high-volume
applications like SocialMiner.
The SocialMiner Administrator can add, edit, and delete Twitter stream feeds. Non-administrators can see
Twitter stream feeds on the Configuration tab and add them to campaigns.
There are some disadvantages to the Twitter streaming API. It has limited search and filter capabilities and
it does not support non-space delimited languages such as Chinese, Japanese, Korean, (CJK) and Arabic. For
more information about Twitter streaming API limitations, see the track section for Streaming API request
parameters on the Twitter Developers site.
Twitter allows only one streaming connection for each account, which SocialMiner enforces by only
allowing you to create one Twitter stream feed for each account.
Note
The Twitter stream feed is configured using OAuth. During feed configuration, SocialMiner redirects the user
to Twitter to validate the Twitter account. This provides a security benefit as using OAuth avoids the storage
of the user's Twitter account information on the SocialMiner server.
When tweets are captured by SocialMiner using the Twitter stream, the heading in the social contact indicates
the type of tweet. For example, the heading indicates if the social contact is a "Tweet" or "ReTweet" or if it
is "in-reply-to".
Configure a Twitter Stream Feed
1
Access the Manage Feeds panel.
2
Click New.
3
Select Twitter Stream as the feed type, then enter information in the following fields:
Cisco SocialMiner User Guide, Release 11.0(1)
12
SocialMiner Configuration
Twitter Stream Feed

Name
a
b
Description
c
Search criteria—a comma separated listed of words to search on. Up to 200 keywords can be defined
for a total limit of 2000 bytes.
See the table below for examples of what results you will get when entering different parameters when
searching using Twitter Streams.
•
Each keyword must be between 1-60 bytes.
•
At least one keyword must be defined.
•
Commas in the keyword search stand for OR. Spaces in the keyword search stand for AND. You
cannot search for exact strings. For example, if you enter "Cisco Telepresence" then the social
contact returned contains Cisco and Telepresence in them, but not necessarily the phrase Cisco
Telepresence.
•
Do not use a space after a comma. If you use a space after a comma then only the first keyword
is matched.
d
Username—a valid existing Twitter username.
e
Reply template—the reply template to be used for replying to social contacts obtained from this feed
(defaults to the Cisco Twitter reply template).
f
Automatic tags—provide automatic tags for the feed.
4
Click Save to save the feed. When you click Save, the OAuth process starts similar to Twitter Account.
Edit a Twitter Stream Feed
Open a Twitter stream feed to edit it. In the edit window there are three buttons: Reauthorize and Save, Save,
and Cancel.
If the icon next to a Twitter stream feed is red and the hover text for that icon reports 'authorization issues',
edit the feed and click Reauthorize and Save to initiate the Twitter authorization process.
For all other changes to the feed, just edit the fields and click Save.
Twitter Stream Track Keyword Examples
The Twitter stream API accepts a comma-separated list of words or phrases (commas act as logical 'or' and
spaces act as logical 'and' when searching).
This table show a few examples (provided by Twitter) of the results you get when you enter different parameters
using Twitter stream. For the full table of examples, see the track section for Streaming API request parameters
on the Twitter Developers site.
Cisco SocialMiner User Guide, Release 11.0(1)
13
SocialMiner Configuration
Twitter Stream Feed
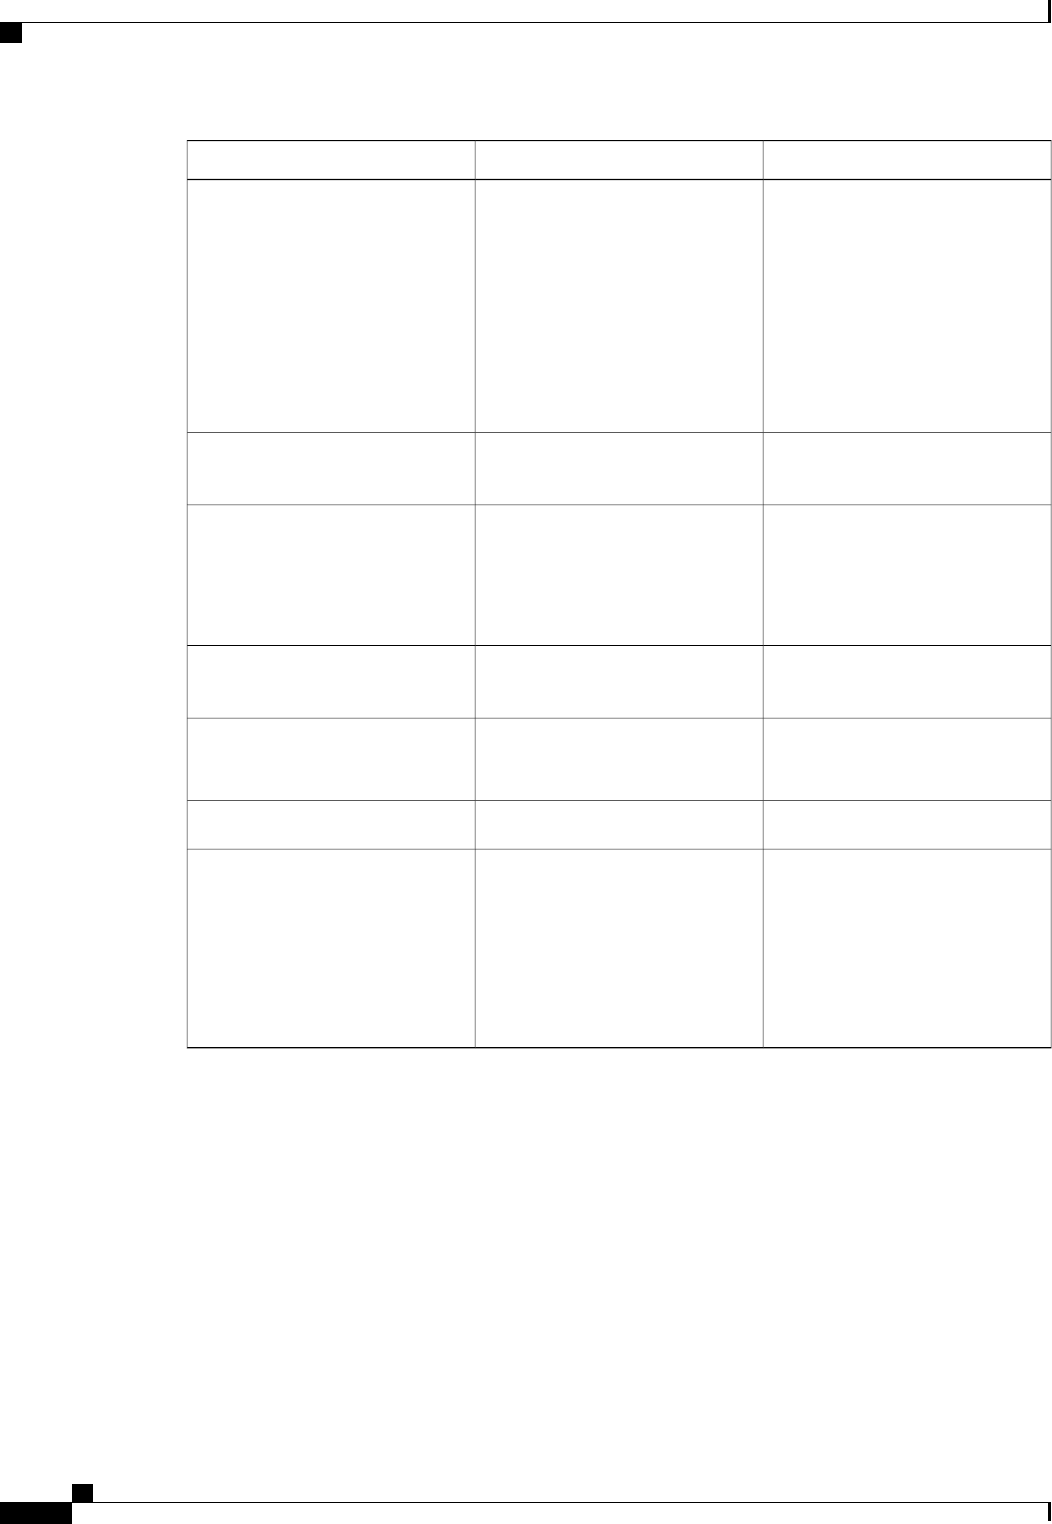
...it will not match...it will matchIf you enter this...
TwitterTracker
#newtwitter
TWITTER
twitter
"Twitter"
twitter.
#twitter
@twitter
http://twitter.com
twitter
Someday I'd like to visit
@Twitter's office.
I like Twitter's new design.Twitter's
I'm new to Twitter.The Twitter API is awesome.
The twitter streaming service is
fast.
Twitter has a streaming API.
twitter api, twitter streaming
There is no
example.com/foobarbaz
Someday I will visit example.comexample.com
example.comexample.com/foobarbaz
www.example.com/foobarbaz
example.com/foobarbaz
www.example.com/foobarbazwww.example.com/foobarbaz
example.com
www.example.com
foo.example.com
I hope my startup isn't merely
another example of a dot com
boom.
example com
Twitter Search Feed
The Twitter search feed type allows you to monitor public Twitter time lines for one or more keywords.
SocialMiner users can add, edit, and delete Twitter search feeds and use them in campaigns.
The Twitter search feed is configured using OAuth. During feed configuration, SocialMiner redirects the user
to Twitter to validate the Twitter account. This provides a security benefit as using OAuth avoids storing the
user's Twitter account information on the SocialMiner server.
Cisco SocialMiner User Guide, Release 11.0(1)
14
SocialMiner Configuration
Twitter Search Feed
Configure a Twitter Search Feed
1
Access the Manage Feeds panel.
2
Click New.
3
Select Twitter Search as the feed type, then enter information in the following fields:
a
Name
b
Description
c
Search criteria—Up to 1000 characters are allowed by Twitter to form the search query (including
operators). Twitter may additionally limit queries by complexity.
•
At least one keyword must be defined.
•
Spaces in the keyword search stand for AND. Use OR between words to search for phrases
containing one word or the other. Use quotes to search for exact strings (for example, enter "Cisco
Telepresence" to find the phrase Cisco Telepresence).
•
Note that Twitter search does NOT use commas to delineate search terms like Twitter stream
does. See below for other examples of Twitter searches.
d
Username—a valid existing Twitter username.
e
Polling Interval—the number of minutes to wait between refreshing this feed.
f
Reply template—the reply template to be used for replying to social contacts obtained from this feed
(defaults to the Cisco Twitter Reply Template).
g
Automatic tags—provide automatic tags for the feed.
4
Click Save to save the feed. When you click Save, the oAuth process starts similar to Twitter Account.
Editing a Twitter Search Feed
Open a Twitter search feed to edit it. In the edit window there are three buttons: Reauthorize and Save, Save,
and Cancel.
If the icon next to a Twitter search feed is red and the hover text for that icon reports 'authorization issues',
edit the feed and click Reauthorize and Save to initiate the Twitter authorization process.
For all other changes to the feed, just edit the fields and click Save.
Twitter Search Examples
Twitter search does not accept comma-separated lists like the Twitter streaming API does. The default operator
for spaces is 'and', and all other operators (including 'or') must be specified.
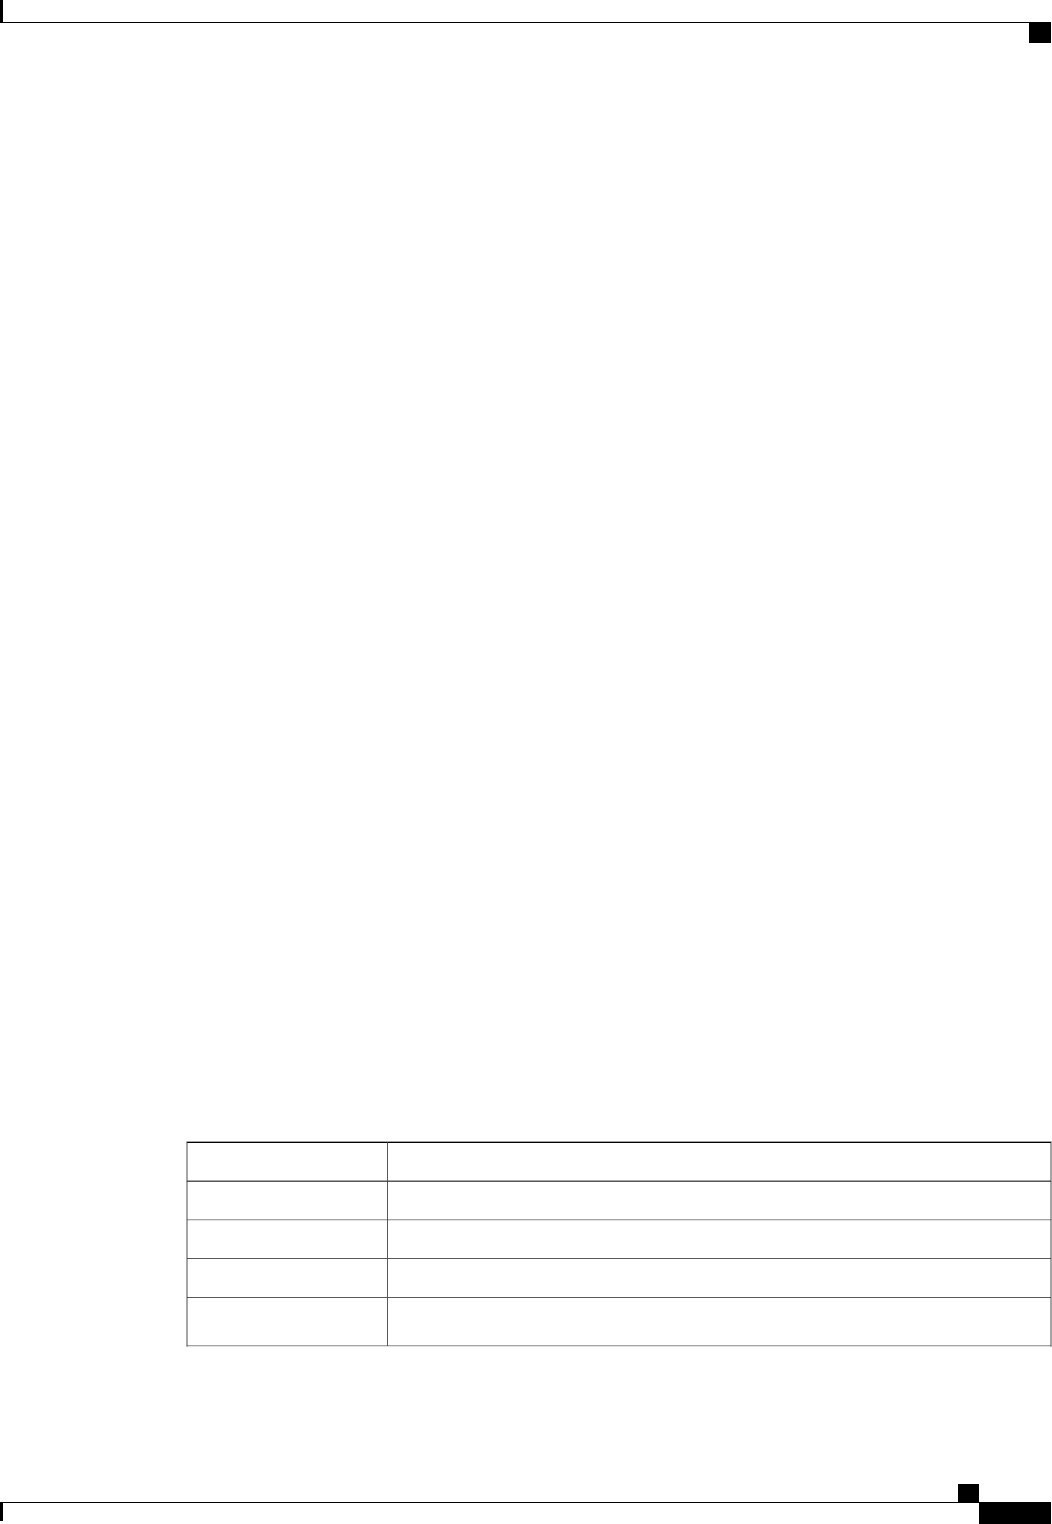
Here are some examples (provided by Twitter) of how to find terms using the Twitter search feed. The full
list of Twitter search operators is found in the "Operators" section of the Twitter search API site.
...to find TweetsEnter this....
containing both words "twitter" and "search". This is the default operator.twitter search
containing either "love" or "hate" (or both).love OR hate
containing "beer" but not "root".beer - root
containing the hashtag "haiku".#haiku
Cisco SocialMiner User Guide, Release 11.0(1)
15
SocialMiner Configuration
Twitter Search Feed

...to find TweetsEnter this....
sent from person "alexiskold".from:
alexiskold
sent to person "techcrunch".to:
techcrunch
referencing person "mashable".@ mashable
containing "superhero" and sent since date "2010-12-27" (year-month-day).superhero since:
2010-12-27
containing "ftw" and sent up to date "2010-12-27".ftw until:2010-12-27
containing "movie", but not "scary", and with a positive attitude.movie -scary :)
containing "flight" and with a negative attitude.flight :(
containing "traffic" and asking a question.traffic ?
containing "hilarious" and linking to URLs.hilarious filter:links
containing "news" and entered via TwitterFeed.news
source:twitterfeed
Email Feed
You cannot configure an email feed from the SocialMiner user interface. Unified CCX automatically creates
email feeds as required in an integrated deployment with SocialMiner and Finesse.
Bookmarklet
SocialMiner supports the creation of RSS feeds using a bookmarklet.
Bookmarklets are "smart bookmarks" that include JavaScript. Creating a feed using the feed bookmarklet is
a one-click method for adding feeds to SocialMiner and eliminates the need to complete fields on the New
Feed form and avoids errors when copying and pasting the URL.
Cisco SocialMiner User Guide, Release 11.0(1)
16
SocialMiner Configuration
Email Feed
Get and Use the Feed Bookmarklet
Procedure
Step 1
From the Manage Feeds panel, drag the Feed Bookmarklet link at the bottom of the panel to the Bookmarks
toolbar in your browser. (If you select the Feed BookMarklet link directly, you see a message instructing you
to drag the link to the toolbar.) You may be prompted to confirm that you want to add the bookmarklet.
Step 2
Navigate to a website with RSS feeds.
Step 3
From that page, select the feed bookmarklet bookmark that you dragged to the Bookmarks toolbar. A message
displays if the page has no feeds.
Step 4
If you are prompted to sign in, enter your SocialMiner credentials. (You must authenticate once per browser
session.)
Step 5
SocialMiner captures all feeds on the page and filters them with icons indicating whether they are standard
feeds or possible feeds.
•
A green checkmark displays for standard feeds. SocialMiner qualifies RSS feeds as "standard" when
their URLs are indicated as such by the website.
•
A blue question mark indicates that the feed is possibly an RSS feed, but may not be. SocialMiner
qualifies RSS feeds as "possible" when their URLs simply contain "rss", "atom", or "feed".
Some URLs may be filtered out of the list even if they meet the above criteria. For example, URLs that include
embedded scripting will not be captured and displayed.
Step 6
Select the link that you want to add as a feed. The SocialMiner window updates to indicate that the feed was
saved, along with the name and URL of the feed. You see an error message if there was a problem saving the
feed.
Step 7
Close and re-open the feed bookmarklet for each URL in the list that you want to save. You see an error if
you try to save a duplicate feed (a feed with the same name as one that is already saved).
Step 8
After saving the feed(s), navigate to the SocialMiner Configuration tab. The feeds are displayed in the Feeds
panel. Feed names are truncated at 85 characters.
Step 9
Edit the name, description, polling interval, and minimum age of the feeds and add automatic tags. Feeds
created using the bookmarklet default to "No reply template".
Step 10
Add the feeds to a campaign.
Campaigns
The Manage Campaigns panel on the Configuration tab lists campaigns and shows the name, the number of
contacts that match this campaign, a description, and a link to an RSS feed for that campaign.
You must create at least one campaign and select at least one feed for that campaign before you see any
contacts on the Home tab.
Cisco SocialMiner User Guide, Release 11.0(1)
17
SocialMiner Configuration
Campaigns

Campaigns group contacts for handling by the customer care team. Contacts are included in a campaign when
one or more feeds are selected to be part of the campaign. When a feed becomes part of a campaign, new
contacts that arrive on that feed are immediately added to the campaign and appear on the Home tab.
This list updates in real time (but depends on the configured polling interval of the campaign). For example,
it updates when another user adds a new campaign to the system.
Results are updated every 10 seconds. The results number is bold if additional results were recently obtained.
Campaigns can also have filters that are used to narrow or modify the contacts that are included in the campaign.
Contacts can be discarded, but they are not actually removed from a campaign until they are purged or the
campaign is deleted.
Add Campaign
To add a campaign, click New in the Manage Campaigns panel.
Fill out the following fields, and then click Save to save the new campaign.
•
Name (required)
•
Description
Use the arrows in the Feeds and Filters panels to move one or several feeds and filters between the Available
and Selected panels. You can save a campaign without adding a feed, but no contacts will be retrieved for
that campaign. Adding a filter to a campaign is optional.
Once you click Save, the contacts for the configured feeds are added to the campaign. Once added, contacts
can be discarded but cannot be removed from the campaign except by a purge. If a feed is removed from
a campaign, new contacts captured by that feed are no longer added to the campaign, but the contacts
previously included are not removed until a purge.
If a feed is accidentally added to a campaign and the contacts must be removed immediately from that
campaign, the only recourse is to delete the entire campaign and recreate it.
Note
Adding a feed to multiple campaigns does not duplicate the contacts in the data store; the contacts for that
feed are simply counted in both campaigns.
Add a Chat Invitation Feed to a Campaign
A drop-down menu allows a SocialMiner user to add a chat invitation feed to a campaign.
The drop-down lists all available chat feeds. Select an appropriate chat feed to add to the campaign as the
chat invitation feed and click Save. When a chat feed is selected as the chat invitation feed for a campaign,
that feed is moved to the selected feed list (to ensure that the chat contact created when the chat invitation is
accepted by the customer comes back to the same campaign). If the chat feed designated as the chat invitation
feed is manually removed from the selected feed list, the chats will go to any other campaign(s) that include
that chat feed.
Once a chat invitation feed has been added to the campaign, an Insert Chat Invitation button appears in the
Twitter and Facebook reply templates. The Insert Chat Invitation button lets the agent invite users into a
chat session by sending a URL in the reply or direct message. The customer selects the URL to accept the
invitation, which creates the new chat social contact and initiates the chat session.
Cisco SocialMiner User Guide, Release 11.0(1)
18
SocialMiner Configuration
Add Campaign

Edit Campaign
To edit a campaign, select the name of the campaign in the campaign list view.
Fill out the following fields, and then click Save to save your changes.
•
Name (required)
•
Description
Use the arrows in the Feeds and Filters panels to move one or several feeds and filters between the Available
and Selected panels.
Delete Campaign
To delete a campaign, check the checkbox to the left of one or more campaign names and click Delete. A
confirmation dialog box appears. Click OK to confirm the deletion of the selected campaigns.
Reply Templates
The Manage Reply Templates panel in the Administration tab lists all available reply templates.
Only the Administrator (the application user created during installation) can access the Manage Reply Templates
panel.
The panel lists the system-defined and the custom reply templates (the custom templates show both their name
and URL).
There are five system-defined reply templates that cannot be edited or deleted.
•
Cisco Chat is the default template for both standalone SocialMiner and Unified CCX single-session
chat feeds. This template opens the chat session for the agent and displays a message to the user indicating
that the agent has joined.
•
Cisco Email is the default template for Unified CCX email. You cannot use this template in a standalone
SocialMiner deployment.
•
Cisco Multi-session Chat is the default template for Unified CCX multi-session chat. You cannot use
this reply template in a standalone SocialMiner deployment.
Custom templates
The SocialMiner Administrator can develop custom reply templates and use them for RSS, Twitter, Facebook,
or Push feeds (but not for chat or email feeds). Until the Administrator creates a custom template, No reply
template is the only reply template option for an RSS feed.
See below for information on adding custom reply templates.
Once added, selecting the reply template name allows you to edit the name and URL. Select the checkbox to
the left of one or more custom template names and click Delete to delete the reply template.
Reply templates must conform to the OpenSocial standard. Some tips for converting existing HTML pages
into OpenSocial standard can be found here.
Cisco SocialMiner User Guide, Release 11.0(1)
19
SocialMiner Configuration
Edit Campaign

After you have created your reply template, host it on a webserver that is accessible by SocialMiner and use
the Reply Template panel to provide a name for the reply template and its location.
Add Custom Reply Template
To add a custom reply template
1
Click the New button in the Manage Reply Templates panel.
2
Enter a name.
3
Enter the URL for the location of the custom template code.
4
Click Save.
An example of code for a reply template is provided on the system at
http://<servername>/templates/reply/custom_reply_sample.jsp (where <servername> is the name of your
SocialMiner server).
The source code is commented and provides details on the SocialMiner javascript functions required.
Additional training for developing custom reply templates is available at the SocialMiner Lab Wiki.
For more information about using custom reply templates, see the Cisco SocialMiner Developer Guide.
Note
Filters
The Manage Filters panel on the Configuration tab shows the name, type, and a description for each filter you
have created. An icon next to each filter shows its current status.
A filter modifies and takes action on contacts as they enter the system and before they appear on the Home
tab, allowing the customer care team to focus on the most actionable contacts.
Filters are run against contacts as they enter a campaign; they do not run retroactively against contacts that
are already in a campaign.
Context Service Integration filters are added to a campaign created from Unified CCX. Manual filters cannot
be added in the Unified CCX deployment.
You create filters in the Manage Filters panel and then apply them to campaigns in the Edit Campaign panel
by moving them between the Available and Selected panels (similar to adding and removing feeds). SocialMiner
allows a total of 20 filters, with a maximum of 10 filters to a campaign. Applying multiple filters to a campaign
creates opportunities to layer filtering strategies to fine-tune results.
When multiple filters are applied to a campaign, they are processed simultaneously. For this reason, you
might have unexpected results for contacts that have been processed by multiple filters.
Note
Cisco SocialMiner User Guide, Release 11.0(1)
20
SocialMiner Configuration
Add Custom Reply Template

Preinstalled Filters
Preinstalled filters are configured when you install SocialMiner and are managed by the SocialMiner application.
The Context Service Integration filter is a preinstalled filter. You cannot delete or modify preinstalled filters.
Filter States
Icons are used as visual indicators to display the state of each filter. Hover the cursor over the icon to display
a tool tip that explains the state.
•
A green check mark means the filter is working properly.
•
A red x means an error occurred in the uploaded script, or the script filter violates SocialMiner security
restrictions. Hover over the error icon to display a tool tip with the error text.
•
A blue question mark appears when the filter status cannot be determined (such as when the Runtime
service is down) and during a brief interim state while SocialMiner checks the status of the filter (after
which the icon changes to red or green).
Cisco Support and the SocialMiner Forum on Cisco DevNet do not assist with Groovy script issues. Direct
all troubleshooting requests to your script developer.
Note
Deleting Filters
Select the checkbox to the left of one or more filter names and click Delete to delete the filter. A confirmation
dialog box appears. Click OK to confirm deletion of the selected filter(s).
Adding and Editing Filters
SocialMiner supports three types of filters that are described below, along with instructions about how to add
and edit each type of filter.
Bayesian Filters
A Bayesian filter is a trainable filtering technology based on a Bayesian statistical probability model.
Add a Bayesian Filter
1
Access the Manage Filters panel on the Configuration tab.
2
Click New.
3
Select Bayesian as the filter type, then enter information in the following fields:
Name (must be unique)
Description
4
Click Save.
Once a Bayesian filter is added, go to Settings on the Home tab (see Train Bayesian Filters) to enable training
for the filter.
Cisco SocialMiner User Guide, Release 11.0(1)
21
SocialMiner Configuration
Bayesian Filters

Edit a Bayesian Filter
1
Select the filter's name.
2
Change the field values.
3
Click Save.
Author Filters
The author filter allows you to exclude social contacts created by specific authors from being included in a
campaign. For example, you may want to filter out your own posts or posts from team members.
Adding an author filter to keep your posts from showing up in your campaign reduces the number of posts
you need to handle. It also improves the accuracy of the reporting metrics by excluding your own posts.
Add an Author Filter
1
Access the Manage Filters panel on the Configuration tab.
2
Click New.
3
Select Author as the filter type, then enter information in the following fields:
•
Name (must be unique)
•
Desciption
• Authors—enter the name of an author to exclude from the feed.
•
Repeat steps 2 and 3 for each additional author to be excluded from the feed.
4
Click Save.
Edit an Author Filter
1
Select the filter's name.
2
Change the field values.
3
Click Save.
Script Filters
A script filter is custom code that system developers can create in the Groovy scripting language. A script
filter can apply tags, change content, and integrate with external systems to leverage services such as performing
translation or invoking a Klout score for a social contact retrieved from a Twitter account feed.
The SocialMiner Administrator can add, import, edit, and delete Script filters. Non-administrators can see
script filters on the Configuration tab and add them to campaigns.
You can upload multiple Groovy scripts and attach each to a SocialMiner script filter. There are examples of
script filters in the SocialMiner Developer Guide and on Cisco DevNet.
SocialMiner runs scripts in Groovy 1.8.
Cisco SocialMiner User Guide, Release 11.0(1)
22
SocialMiner Configuration
Author Filters

During the upload, SocialMiner performs a basic syntactic validation but cannot validate that the script
will work as expected. For this reason, test your scripts on a lab system before using them in production.
SocialMiner also performs security checks on each script. For example, a script does not run if it shuts
down the system, takes longer than 30 seconds to execute, or accesses the SocialMiner file system.
For more on script security, see the SocialMiner Developer Guide. You can also open the runtime error
logs in the log directory to see the list of security breaches.
Under the filename "runtime/", open the Error-runtime log and search for SCRIPT_FILTER_EXCEPTION.
You can upload scripts that fail the security model and apply them to campaigns, but they have no effect
on the contacts. The Filters panel shows a red (failure) icon for the insecure script. Hover over the red
"failed state" icon for information about the error.
Note
To add a Script filter:
1
Click New on the Manage Filters panel.
2
Select Script as the filter type, then enter information in the following fields:
•
Name (must be unique)
•
Description
3
Click the Browse/Choose File button (the button name varies by browser). Navigate to the groovy file
on your local machine or network and select it.
4
Click Save.
To edit a Script filter:
•
Select the name of the filter.
•
Click the Show Source button to open the groovy script file in a separate window .
You can review and select/copy (but not edit) the source. You can also upload a new script file in Edit
mode.
Errors can result if an editor such as Notepad is used to edit a script written in a language containing
multi-byte characters. Eclipse and Notepad++ are the most reliable editors to use for editing scripts.
Note
Notifications
The Manage Notifications panel on the Administration tab lets you view, delete, edit, and add notification
rules. You set up notification rules to send messages in reference to tagged contacts.
Only the SocialMiner Administrator, who is the application user created during install time, can use the
tools in the Manage Notifications panel.
Note
The Manage Notifications panel shows the following information for all defined notification rules:
Cisco SocialMiner User Guide, Release 11.0(1)
23
SocialMiner Configuration
Notifications
• Name—the name of the notification.
• Type—the type of notification.
• State—the status of the notification.
• Tags—the tag or tags that trigger the notification.
• Campaign—the campaign associated with this notification.
Icons are used as visual indicators to display the state of each notification. Hover the cursor over the icon to
display a tool tip that explains why the notification is in the current state and the last time the state changed.
•
The notification is operating normally.
•
The notification is in an unknown state.
•
An error occurred. Mouse over the error icon to display a tool tip with the error text.
•
The limit of 40 incoming callback contacts per minute was reached; any additional contacts are
discarded.
Administrators can add, edit, or delete notifications. See the section below for adding or editing notifications.
To delete a notification, select the checkbox next to the notification name and click Delete; then click OK in
the confirmation window.
IM and Email Notifications do not accept replies. The intent is to notify only; not to open a dialog.
If a reply template is associated with the social contact for which the notification is sent, selecting the link in
the IM or email opens the reply template for that social contact.
Add and Edit Notifications
Add
To add a notification, click the New button in the Manage Notifications panel.
Enter or edit the following fields:
• Type—Notification types are:
◦ Email—The notification is sent over email. A mail notifications server must be configured on the
System Administration tab to use this type.
◦ IM—The notification is sent over IM. An XMPP notifications server must be configured on the
System Administration tab to use this type.
◦ HTTP—Allows for notifications over HTTP using REST to contact an external service.
• Name—The name of the notification.
• Description—A brief description of the notification (optional).
• Campaign—Select a campaign with which you are associating this notification.
Cisco SocialMiner User Guide, Release 11.0(1)
24
SocialMiner Configuration
Add and Edit Notifications

• Tags—Define the tags for this notification. Notifications are sent when a social contact is tagged with
one or more of these tags and exists in the selected campaign. Click Add after each tag you enter.
Auto-tagging (or adding multiple tags in one operation) generates multiples of the same notifications to
the same recipients list. To remove a tag, select the x at the right of the tag name.
• Addresses—Enter an email address for this notification. Click Add after each address you enter.
Addresses are used only for Email and IM notifications. To delete an address, select the x at the right
of the address.
• Subject—The email subject for this notification. This field is available only for Email notifications and
is blank by default. Enter a subject for email notification.
• Body—The body for this notification. This field is used only for Email notifications. HTML tags are
supported for Email notifications. The body of the message supports notification body variables. For
more information, see Notification Body Variables, on page 25.
• Message—The message for this notification. This field is similar to the body field used only for IM
notifications. IM notifications are sent using plain text. They also support notification body variables.
For more information, see Notification Body Variables, on page 25.
• URL—The URL of a REST API that identifies where to send the notification. This field is used only
for HTTP notifications.
• Verify SSL certificates?—If checked, SSL certificates will be verified as trusted for notifications sent
over SSL. If unchecked, certificates will not be verified. This checkbox is used only for HTTP notifications
and is checked by default.
• Username—If authentication is required for the URL to the REST API, enter the authorized username.
This field is used only for HTTP notifications.
• Password—If authentication is required for the URL to the REST API, enter the password for the
authorized username. This field is used only for HTTP notifications.
• Dialed Number/Script Selector—Select a dialed number/script selector (configured in CCE) for the
Connection to CCE notification type.
• Media Routing Domain—The Cisco_Voice media routing domain enables voice callback requests to
be routed to contact center agents.
Edit
Select the name of a notification rule to open a window where you can edit its fields.
Notification Body Variables
The notification body for emails and instant messages can contain keywords in the syntax ${KEYWORD}.
These keywords are replaced with values from the contact that they are associated with.
By default, the body of the message contains a variable for the URL of the contact, which
is${SC_SCREEN_URL}.
You can add the following variables to the body of the notification to include the value of the variable in the
notification. For Email Notifications, you can also use HTML tags to stylize the notification. IM notifications
are sent using plain text.
Cisco SocialMiner User Guide, Release 11.0(1)
25
SocialMiner Configuration
Notification Body Variables

Keywords are listed here as all upper-case, but they are not case sensitive.Note
• ${SC_AUTHOR}—the author of the social contact (not available in all feeds).
• ${SC_CREATED_DATE}—the date the social contact was created in the system.
• ${SC_DESCRIPTION}—the description of the social contact. Typically this is the tweet, RSS post, or
Facebook fan page post.
• ${SC_PUBLISHED_DATE}—the published date of the social contact (not available in all feeds).
• ${SC_SCREEN_URL}—the URL to the social contact in the results gadget. Selecting this URL allows
you to instantly reserve/reply to the social contact.
• ${SC_SOURCE_TYPE}—the feed type of the social contact (such as RSS, Twitter Stream, Twitter
Account, or Facebook).
• ${SC_TAGS}—the tags for this social contact.
• ${SC_TITLE}—the title of the social contact.
• ${SC_EXTENSION_FIELDS.<fieldname>}—adds a specific, named extension field for the social
contact. You can add a maximum of 100 extension fields and up to one megabyte of information.
• ${SC_EXTENSION_FIELDS}—adds all extension fields that exist for the social contact. They appear
in the body in alphabetical order by name in the format Name: Value. If no value was defined, you see
Name: (-). If there are no extension fields, the variable is removed from the message body.
For example, if the body an email notification includes the following:
•
The author of this Social Contact is: ${SC_AUTHOR}. <br />
•
The message contents are as follows: ${SC_DESCRIPTION} .<br />
•
You can Reserve or Reply to the Social Contact <a href="${SC_SCREEN_URL}">here</a>.
With ${SC_AUTHOR} set to Joe Somebody and ${SC_DESCRIPTION} set to This is a TWEET, the email
notification that is sent appears as:
The author of this Social Contact is: Joe Somebody.
The message contents are as follows: This is a TWEET.
You can Reserve or Reply to the Social Contact here.
Cisco SocialMiner User Guide, Release 11.0(1)
26
SocialMiner Configuration
Notification Body Variables
