
Notes
2013
GarageBand How-To
Katie Wardrobe
Midnight Music

GarageBand How-To 4
Starting a New Project 4
GarageBand Screen 5
LCD Display 5
Zooming 5
Using Loops 5
Searching for loops 5
Adding a loop to your project 5
Reset the loop browser 6
Playback 6
Adding Sound Effects 6
A Word About Snapping 6
Adding a software instrument 6
Add a new Software Instrument track 6
Change instrument sound 7
Recording a software instrument 7
Prepare to record 7
Record some music 7
Recording a drum pattern 8
Prepare to record 8
Set up the cycle region 8
Record the pattern 8
Quantize 9
Recording a speaking or singing track 9
Delete a track 10
Editing Regions 10
Increase the length of a loop 10
Trim (or Resize) a Loop 10
Copy and paste loops 11

Split 11
The Edit window 11
Editing MIDI 11
Edit notes 11
Transpose 12
Fade-ins and Fade-outs (Track and Project Volume) 12
Varying the volume of the overall project 12
Varying the volume on a single track 12
Adding Markers or Chapters 12
Creating your own loops 13
Using a part of an existing loop #1 13
Using part of an existing loop #2 13
Making a new loop from scratch 13
Importing extra loops into GarageBand 13
Adding loops one at a time 13
Adding a folder of loops 14
Sharing loops with students 14
Location of loops on your Mac 14
To share loops with students 14
Region colours 15
About different region colours 15
Exporting a project 15
3

GarageBand How-To
Starting a New Project
!"#$%&'(')#*'$+%'$+%,-.,/%0$%New$Project%'$+%,1002#%304(%"(05#,6%63"#7%%8026%'(#%2#-9:#;"-'$'60(3%'$+%
.62%$06%61#%#$+%09%61#%<0(-+%.9%304%,1002#%61#%<(0$)%0$#=
>#;6?
•
&.@#%304(%"(05#,6%'%A6-#
•
B#-#,6%61#%6#C"0D%AC#%2.)$'64(#%'$+%/#3%2.)$'64(#%2#E$)2
•
F-.,/%F(#'6#
4
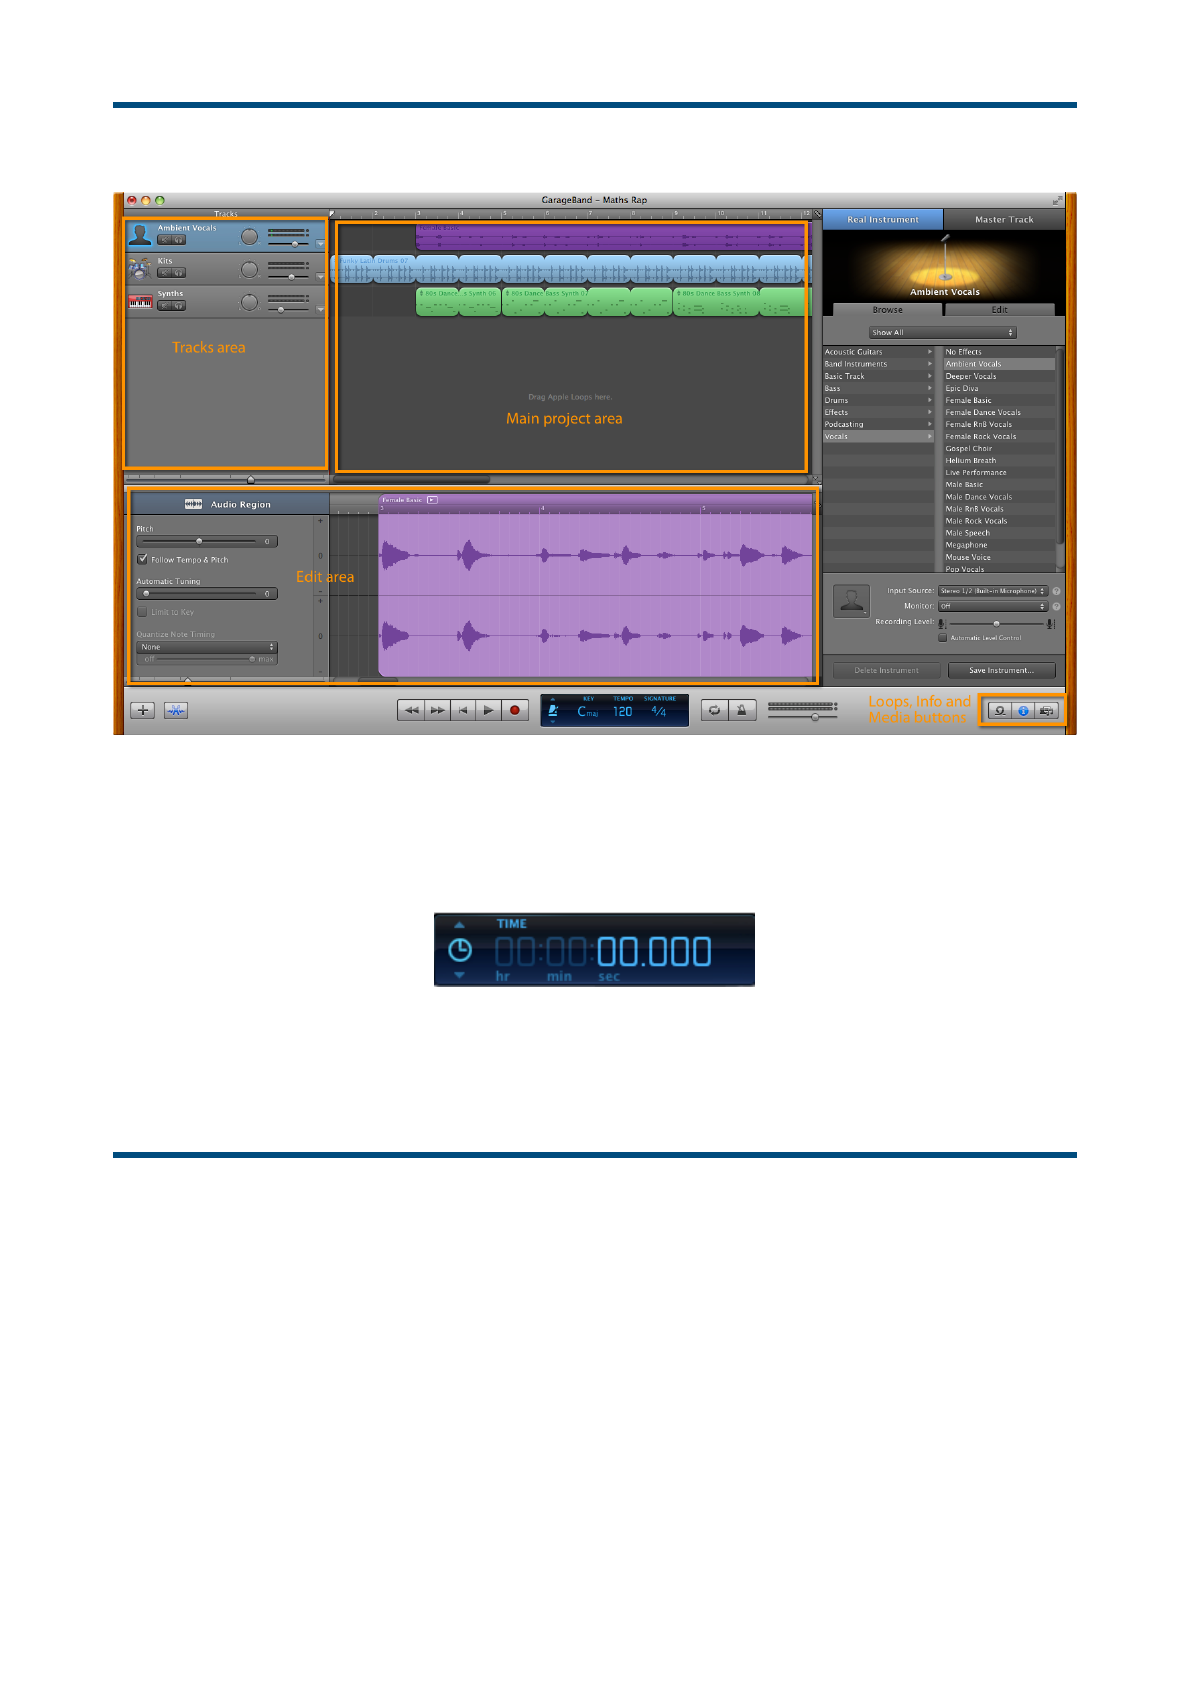
GarageBand Screen
LCD Display
G1#%HFI%+.2"-'3%'6%J0K0C%'--0<2%304%60%@.#<%L@#%+.M#(#$6%C0+#2?%G.C#D%8#'24(#2D%F10(+D%G4$#(%'$+%
N(05#,67%%
Zooming
G0%O00C%61#%"(05#,6%'(#'%.$%'$+%046D%304%,'$%42#%61#%O00C%2-.+#(%<1.,1%'""#'(2%'6%61#%J0K0C%09%61#%6(',/%
1#'+#(%'(#'7%
Using Loops
Searching for loops
•
To see the GarageBand loop library, click on the Loop library button
•
You can use the buttons at the top to narrow your choices: select loops by style, mood or
instruments.
•
Click on the loop name to hear it playback
Adding a loop to your project
•
When you’ve found one you like, drag it into the project area.
5

•
GarageBand will automatically create a new track.
•
Each loop or snippet of music that appears in your GarageBand project is known as a Region.
Reset the loop browser
P1#$%304%2#'(,1%90(%304(%$#;6%-00"D%61#%"(#@.042%2#'(,1%<.--%2A--%J#%',A@#%Q.#7%304R--%0$-3%2##%61#%-00"2%61'6%
<#(#%(#-#@'$6%60%61#%-'26%2#'(,1S7%%
G0%(#2#6%61#%-00"%J(0<2#(D%,-.,/%0$%61#%T#2#6%J4K0$%'6%61#%60"7
Playback
U04%,'$%"-'3%J',/%61#%C0@.#%.$%'%$4CJ#(%09%<'32?
•
F-.,/%0$%61#%"-'3J',/%J4K0$2%0$%61#%2,(##$
•
V2#%61#%Bpace$bar$60%26'(6%'$+%260"%"-'3J',/
•
V2#%61#%Home$'$+%End$/#32%60%54C"%60%26'(6%0(%L$.21
•
V2#%61#%(.)16%'$+%-#W%arrow$keys$60%C0@#%61(04)1%61#%C0@.#%.$%2C'--%.$,(#C#$62%
•
G1#%2.O#%09%61#%.$,(#C#$6%+#"#$+2%4"0$%61#%O00C%-#@#-%304R(#%<0(/.$)%.$7%%X00C%.$%42.$)%61#%slider$
4$+#(%61#%G(',/%Y#'+#(2%'(#'7%%Z((0<%-#W%'$+%(.)16%')'.$%60%2##%61#%#M#,6
Adding Sound Effects
A Word About Snapping
Snapping is a feature that causes loops or recorded audio to “snap” to the beginning of a bar, or to a
specic beat. This is highly useful when you’re doing a music project since you’ll nearly always want the
music to adhere to bars and beats in a song.
However, if you are working on podcasting, storytelling, or adding sounds effects to a lm scoring
project, it’s unlikely that you’ll want snapping enabled since dialogue and sound effects don’t conform to
bars and beats.
You can turn snapping off by going to Control > Snap To Grid (make sure it is unchecked)
In a musical project you can also adjust the snapping increment by zooming in or out.
Adding a software instrument
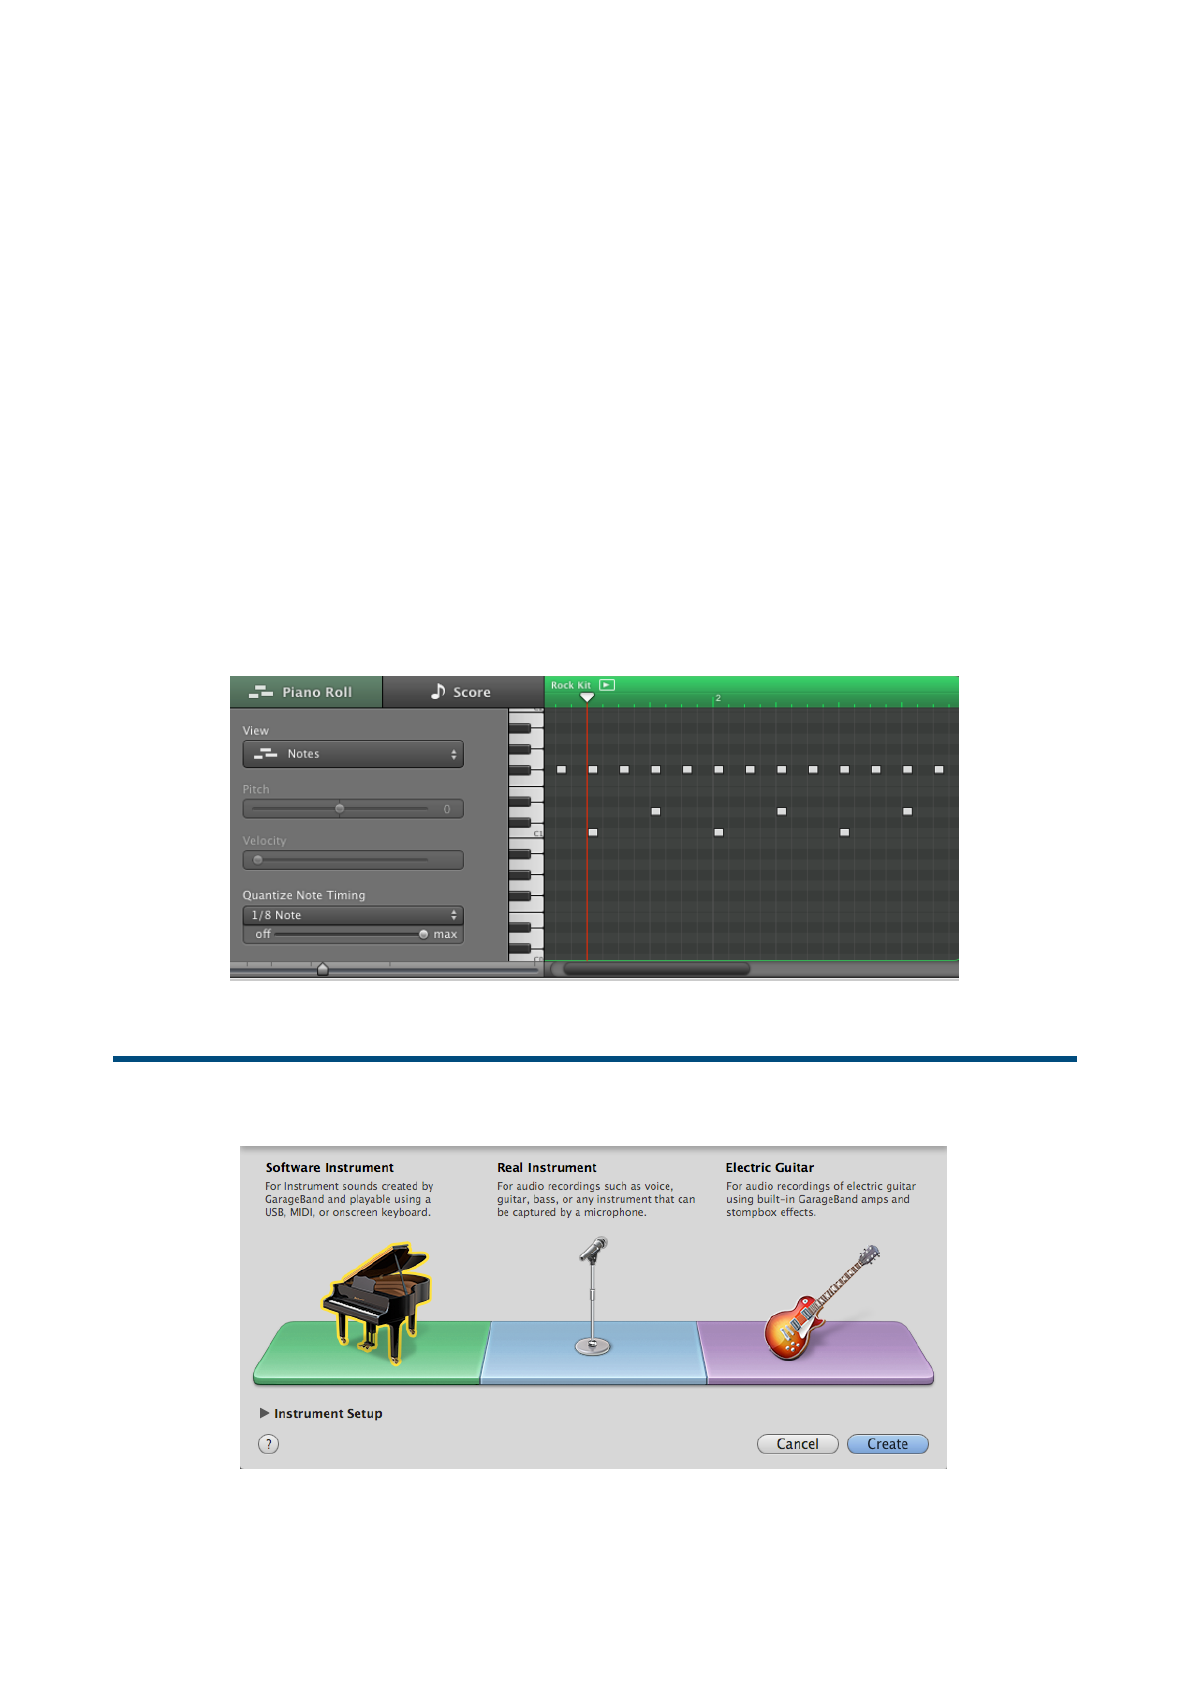
Add a new Software Instrument track
•
Go to Track > New track and choose Software Instrument and then click Create
•
A new track will be created with the default Grand Piano sound
6
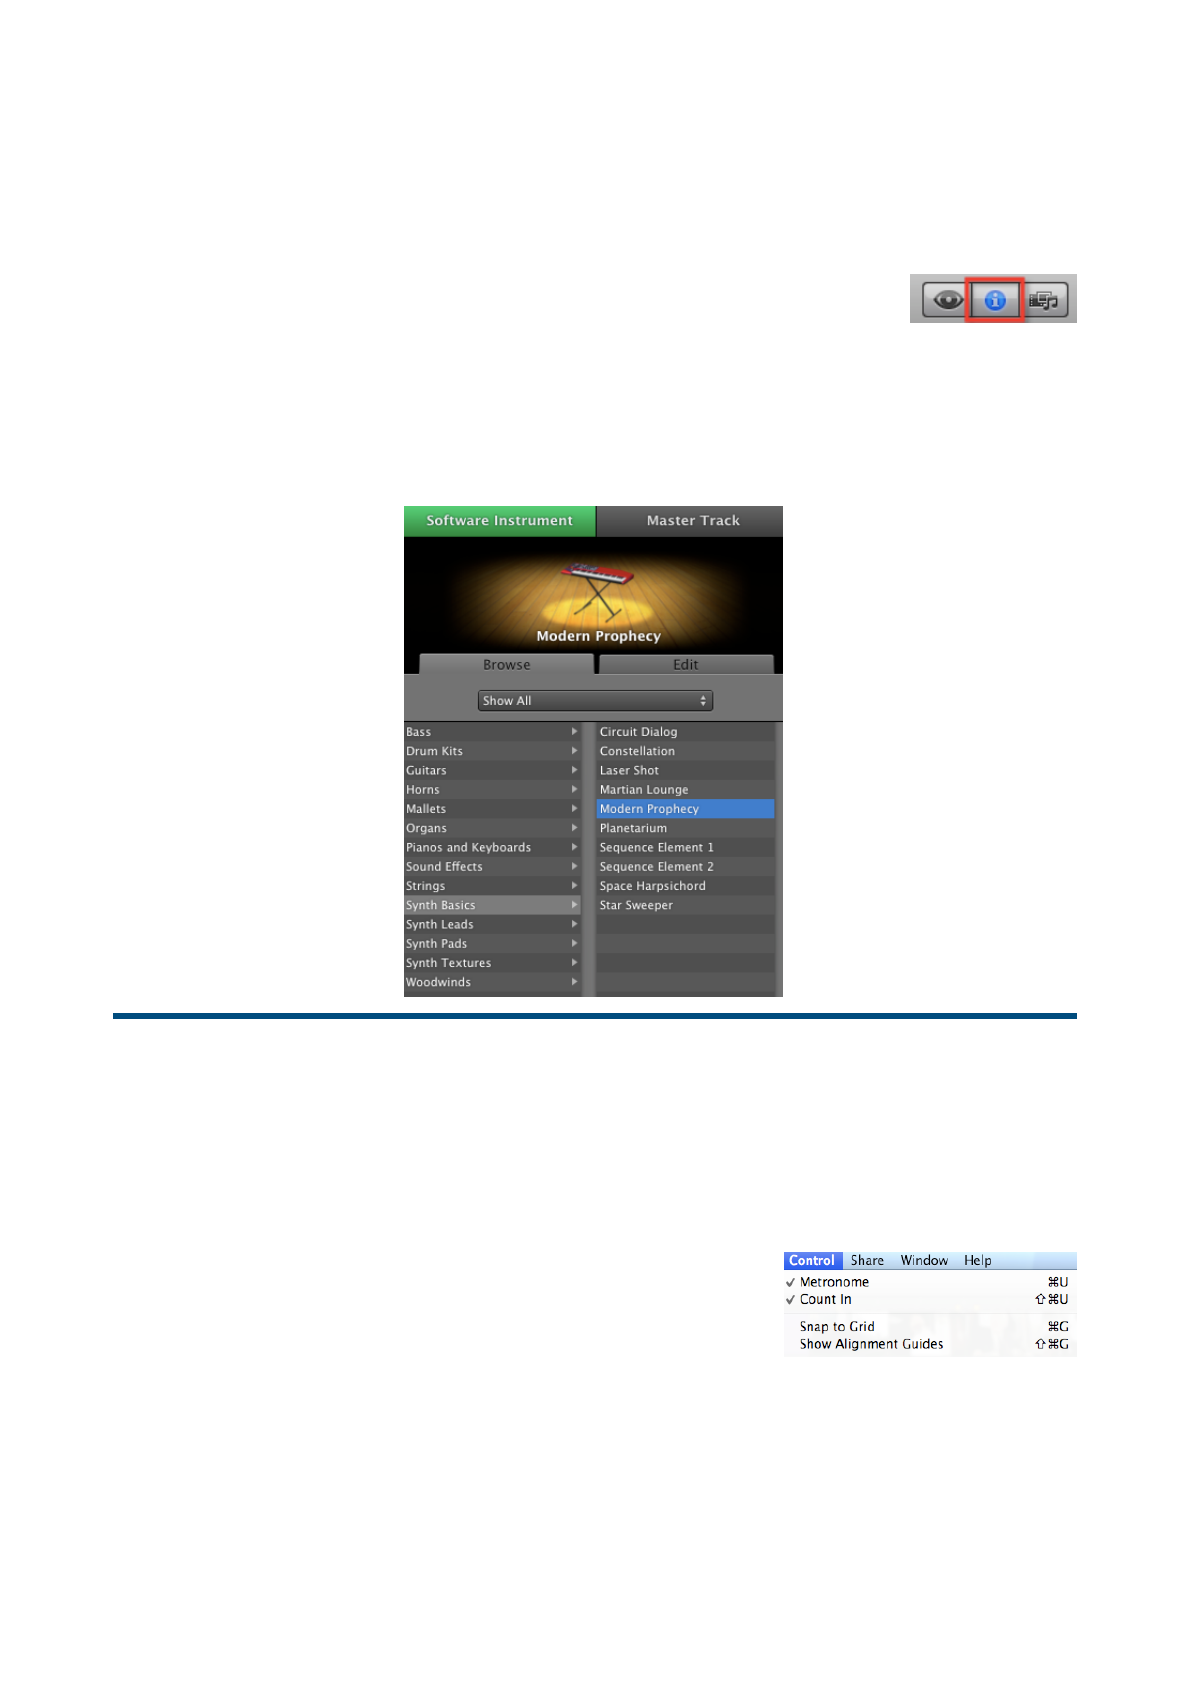
Change instrument sound
To change the instrument sound:
•
First, open the Musical Typing window by going to Window > Musical Typing. This allows you to
play notes by using the keys on your computer keyboard
•
Bring up the Track info pane by selecting the new track you just added and
clicking on the “I” information button
•
Select an instrument family on the left-hand side of the panel
•
Then select a specic instrument within that family on the right-hand side of the panel
•
Press the letters A – L on your computer keyboard to audition different sounds
Recording a software instrument
Prepare to record
•
Before you record, make sure the Musical Typing window is open, or that you have access to a MIDI
keyboard
•
If you’re going to play something musical (in time to a beat), go to
Control > Metronome and then Control > Count-in to turn on
those options. If you’re going to play something non-musical (like
sound effects) then turn those options off
Record some music
•
Make sure the instrument track is selected
•
Rewind the playback line to beginning (or move it to the place you want to start recording from)
•
Press the Record button, wait for the count-in bar (if applicable) and then record the part
7
Recording a drum pattern
The steps for recording a drum part are essentially the same as the Recording a Software Instrument
instructions, but there are a couple of other things you should do:
Prepare to record
•
Before you record, make sure the Musical Typing window is open, or that you have access to a MIDI
keyboard
•
Locate the kick, snare and hi-hat sounds! Make sure your Musical Typing keyboard is using the C1
octave. The kick can then be triggered with the A key on your computer keyboard, the snare with
the S key and the closed hi-hat with the T key
•
Make sure the Metronome and Count-in are turned on: go to Control > Metronome and then
Control > Count-in
•
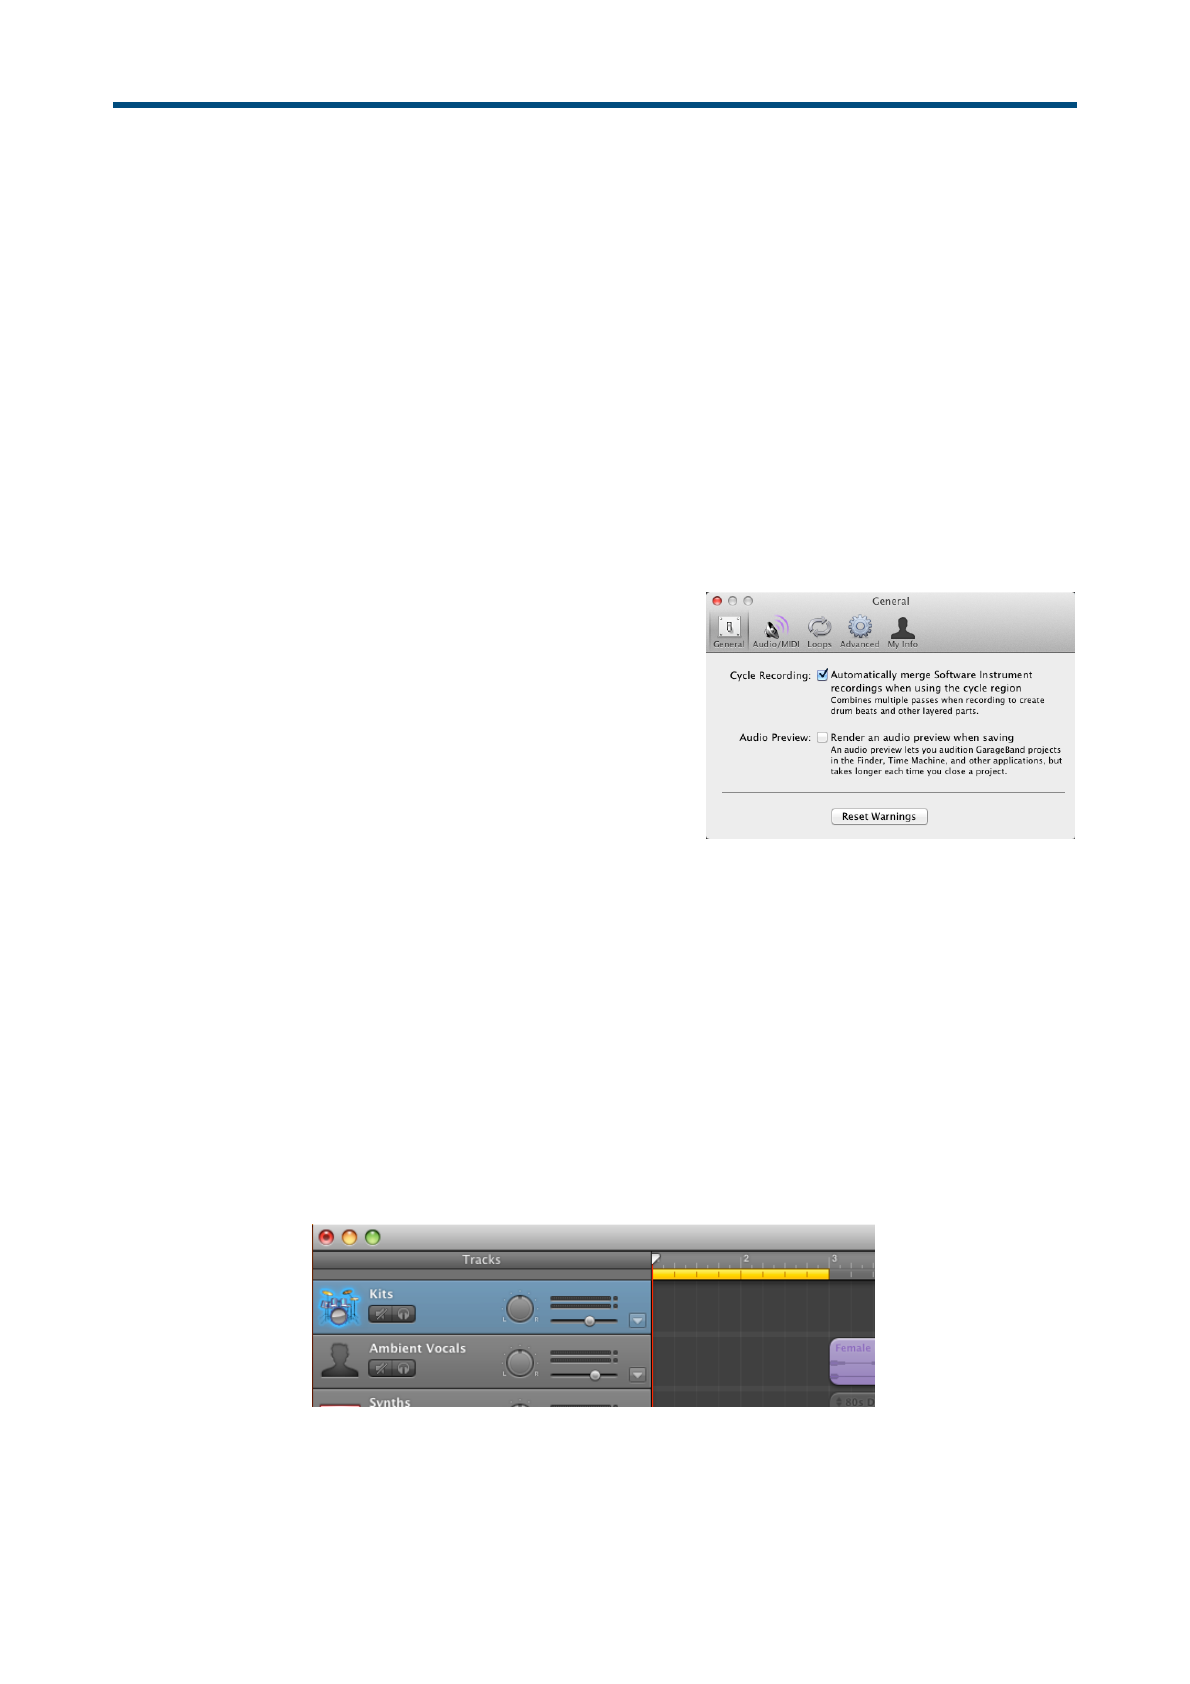
Go to GarageBand > Preferences and under the
General settings, make sure Cycle Recording is
checked. This allows you to play each part of a drum
pattern (ie. the kick drum, the snare, the hi-hat) one at a
time while recording instead of having to play them all
simultaneously. GarageBand will then merge all the
recordings together
Set up the cycle region
When recording drum patterns, it’s a good idea to record just one or two bars. You can then drag the end
of your recorded region to make the pattern longer. To record the pattern, we’ll set up a one or two-bar
cycle which GarageBand will play over and over. On each “pass” of the cycle you can record a different
part of the drum pattern.
•
Click on the Cycle Region button located to the right of the LCD display. A yellow bar will appear in
the Timeline
•
Adjust the length of the yellow bar by dragging the end. I usually suggest making the cycle region
two bars long
Record the pattern
•
Make sure the drum track is selected
•
Rewind the playback line to beginning of the yellow cycle region
8
•
If you do not feel condent about playing the drum pattern at the project tempo, slow the tempo
down rst, before hitting the record button!
•
Press the Record button, wait for the count-in bar and then record the kick drum part
•
When the playback line returns to the beginning of the cycle region, play the snare part
•
When it returns to the beginning again, play the hi-hat part
It doesn’t matter if you don’t start playing each part straight away, one after the other, just wait for the
beginning of the cycle region and then play. You can even stop or pause the recording and then start
recording again
Quantize
You can quantize the drum pattern to even-up any uneven playing:
•
Double-click on the drum pattern region to open the Editor
•
Under Quantize Note Timing, select an appropriate value from the drop-down menu (usually 8th or
16th notes)
Recording a speaking or singing track
To record a speaking or singing track:
9

•
Add a new track by clicking on the New Track button (looks like a plus sign - bottom left of the
screen)
•
Choose Real instrument
•
A new track will be added to your project called “No effects”
•
Open the track information, click on Vocals in the left
column
•
Choose an appropriate vocal effect from the list on the right
•
If you’d like to hear the effect while you record (particularly
useful for singers because it will make you sound as though
you’re in a room with a nice acoustic), make sure Monitor is
set to “On” and put headphones on your singer
•
Using voice effects can also give students a boost in
condence - they’re more comfortable recording their voice
when it sounds different, or is disguised a little!
Delete a track
To delete a track:
•
Select the track
•
Go to Track > Delete Track or use the shortcut Command+Delete
Editing Regions
Increase the length of a loop
•
You can lengthen a loop by hovering your mouse at the top right corner until you see a circular
arrow. Click and drag your mouse to the right to increase the length
Trim (or Resize) a Loop
To edit a loop:
•
Select the region (loop) and hover the mouse at bottom right of the
region until it turns into the Resize pointer
•
Click and drag to the left to shorten the region
10

•
You can also shorten the region by editing the audio le in the Edit window where you can see
more detail
Copy and paste loops
•
Select a region
•
Press ⌘C to copy it
•
Place the playback line at the destination point
•
Paste by pressing ⌘V
Split
•
Select the region you want to split
•
Place the playback line (cursor) at the point you want to split the region
•
Go to Edit > Split
The Edit window
To edit regions in more detail, you can use the Edit window.
•
Select the track you wish to edit
•
Click on the scissors button beneath the track headers area
•
The selected region will appear in detail at the bottom of the screen
Editing MIDI
Edit notes
To edit a MIDI region (correct mistakes, or add new notes):
•
First select the region
•
Open the Edit window
•
M'/#%24(#%61#%"'(6%304%<'$6%60%#+.6%.2%210<.$)%.$%61#%[+.A$)%<.$+0<%'6%61#%J0K0C%09%61#%2,(##$7%%
U04%C'3%$##+%60%2,(0--%4"%0(%+0<$%4$A-%304%,'$%2##%61#%8\I\%$06#2
Select a note and then:
•
Drag it up or down to change the pitch
•
Drag it left or right to change the rhythmic position
•
Shorten or lengthen the note by dragging the end
You can select more than one note by Shift-clicking on each one and edit them all simultaneously.
11
Transpose
Groups of notes can be transposed in the Editing window
•
Select all the notes in that loop by clicking
and dragging a box around them (they
should all be bright green)
•
Drag one of the notes up (all the other
notes will move up simultaneously)
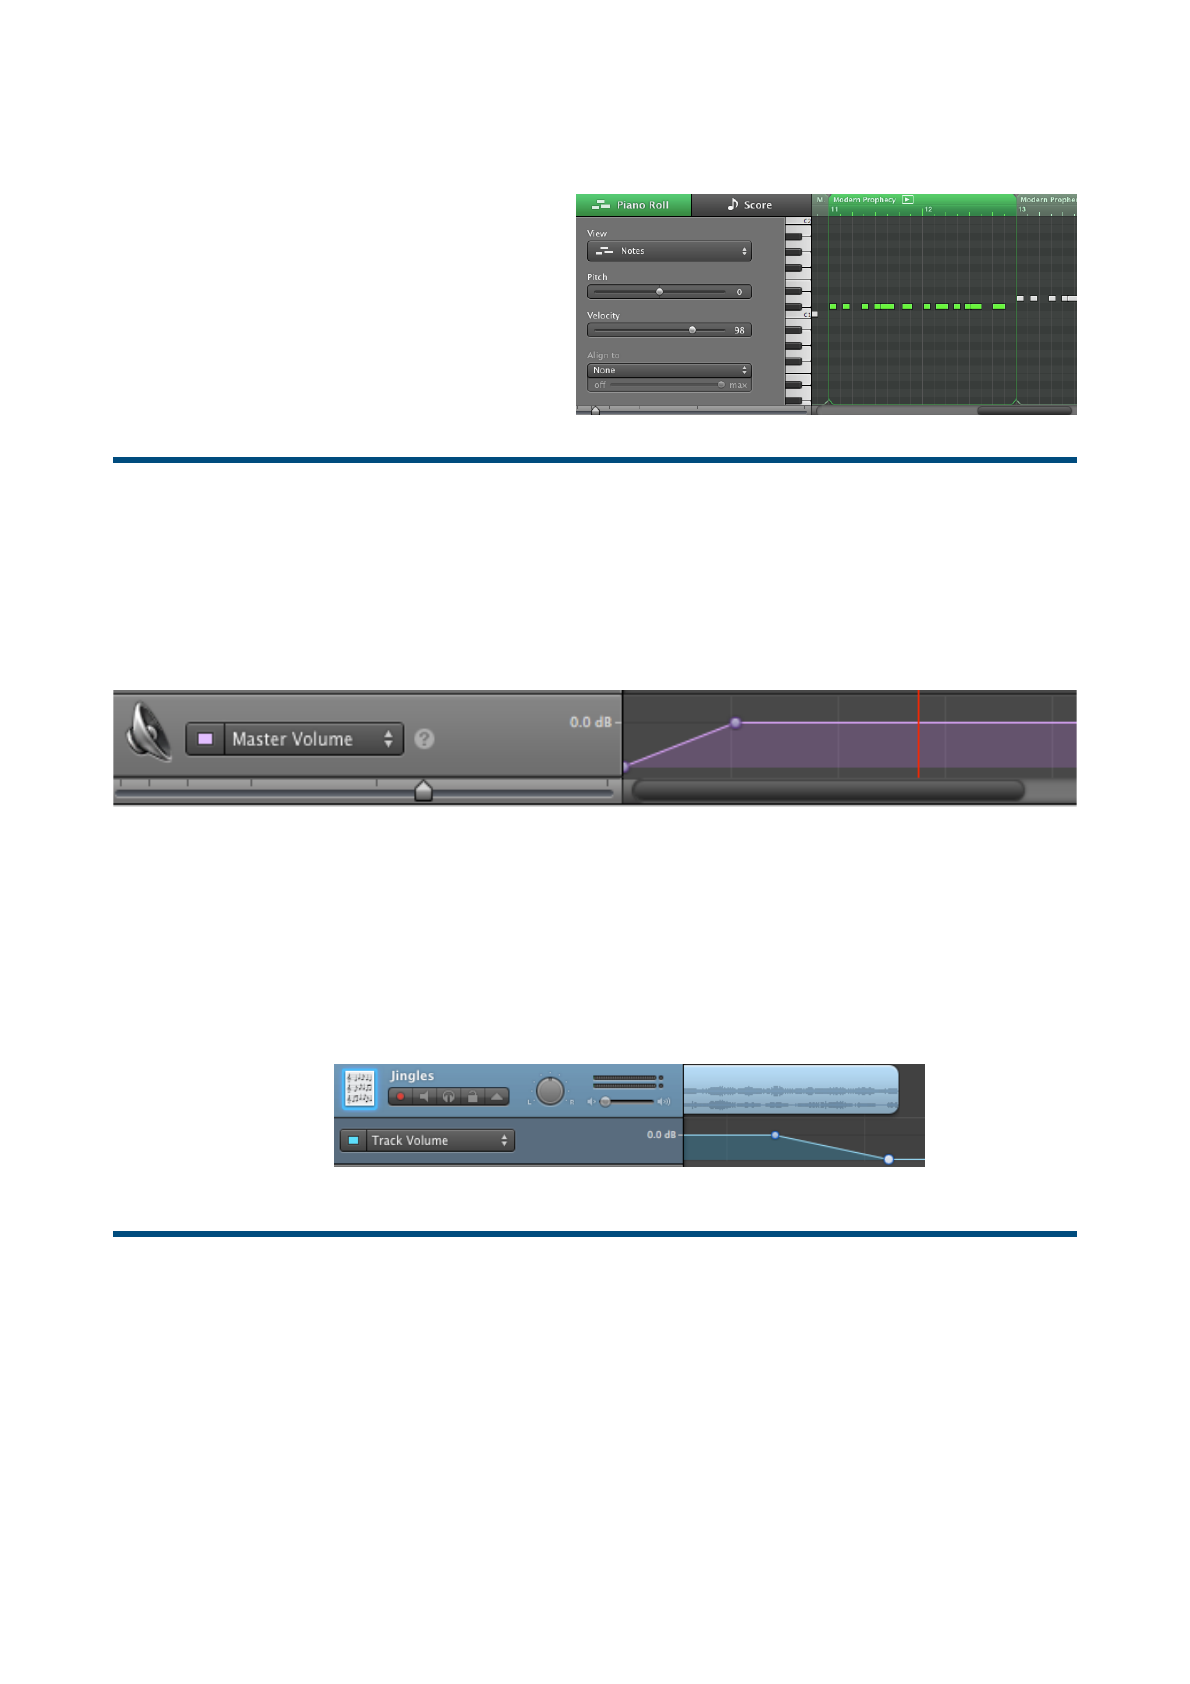
Fade-ins and Fade-outs (Track and Project Volume)
Varying the volume of the overall project
•
Go to Track > Show Master Track
•
You can click on the Volume line to add “points”. Drag the points up or down to vary the volume
Varying the volume on a single track
•
You can fade SFX and music in or out by adding a “volume envelope” to that track
•
Click on the small triangle under the track name (View/hide automation). The track volume info
will appear.
•
Click on the volume line to create points and drag the points up or down to adjust the volume level
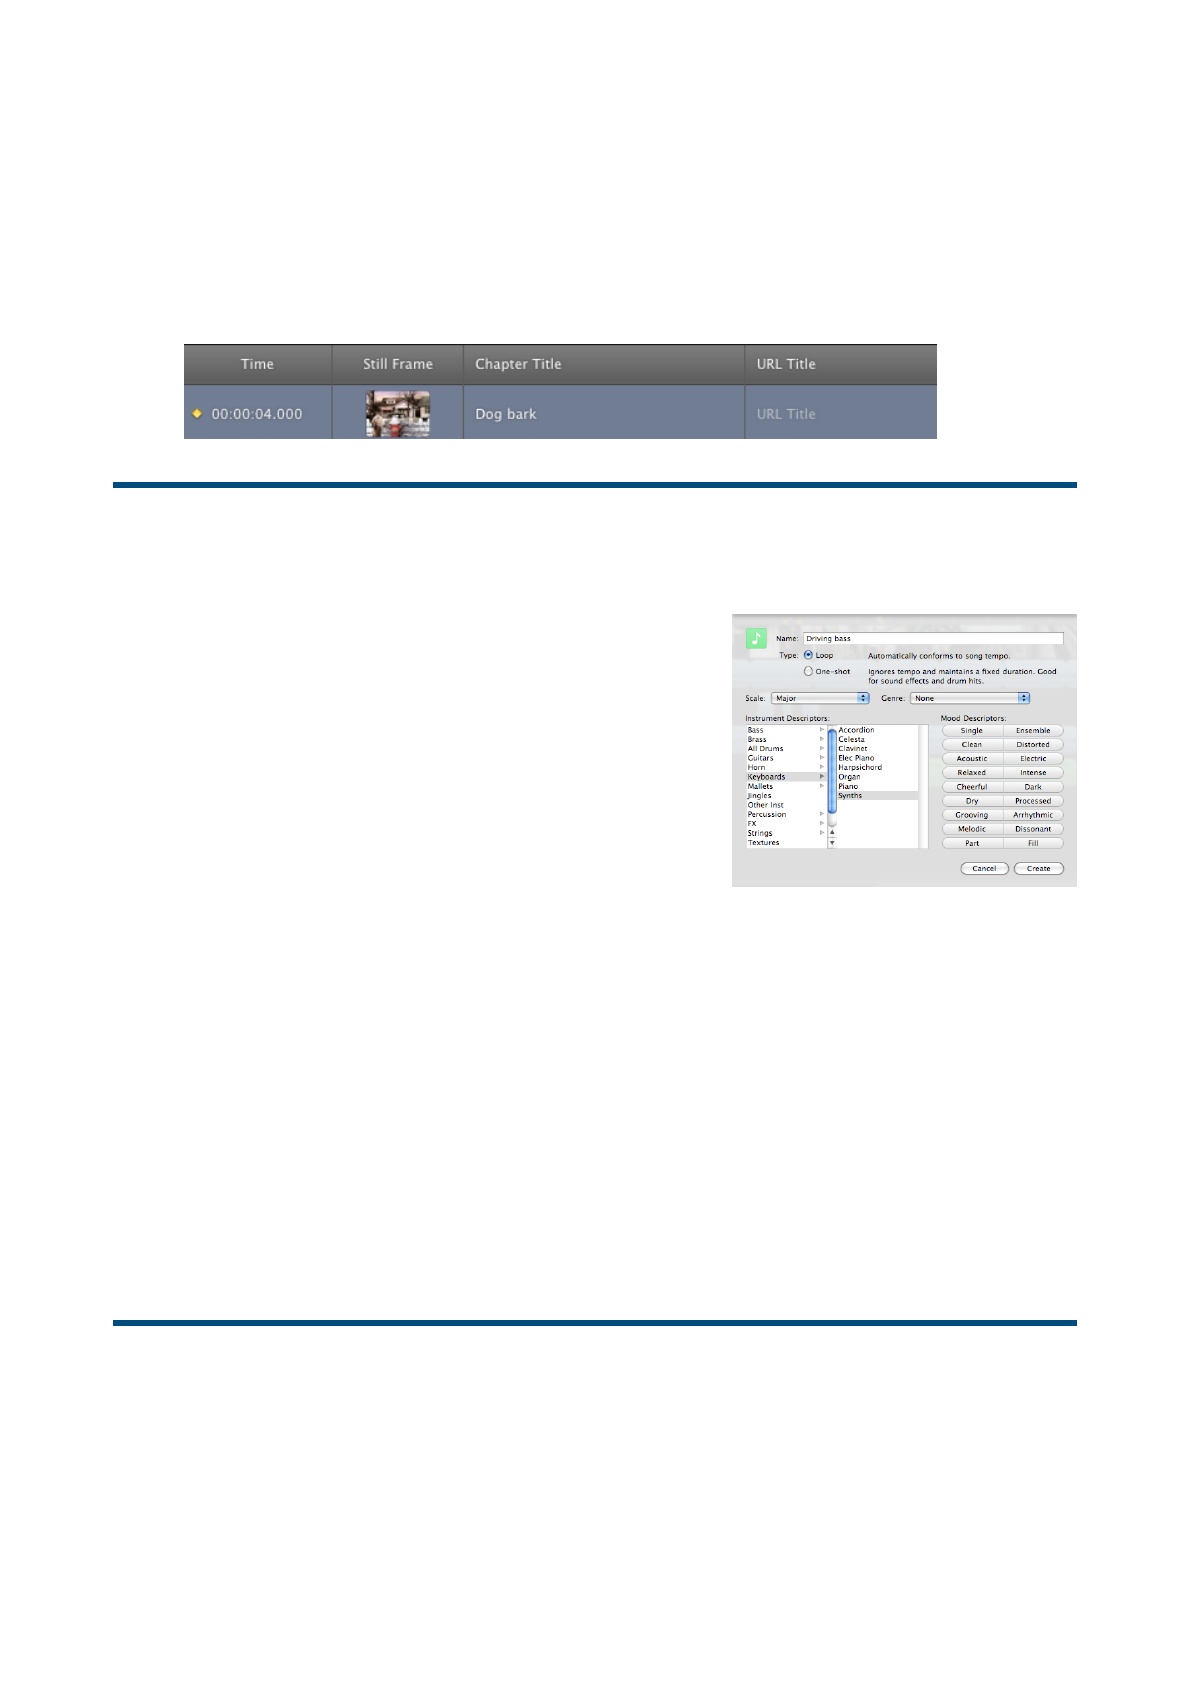
Adding Markers or Chapters
When doing lm scoring or podcasting, you can identify Chapters to keep track of different sections of
your project.
To add a marker, identify the exact moment that you want the marker to appear
•
First of all, turn off Snap to Grid by going to Control > Snap to Grid
•
Zoom in using slider under the Track headers area if you haven’t already
12
•
Play through the project and press the space bar at the moment you want the marker to appear.
To ne-tune the position of the playback line, “scrub” through project backwards or forwards frame
by frame using the arrow keys until you nd exact moment
•
Press P (which stands for hit point, but which GarageBand terms a “marker”). A yellow triangle will
be added to the timeline, just above the movie track
•
Click on marker name in Edit window and rename it
Crea9ng$your$own$loops
Using a part of an existing loop #1
•
Trim the ends of an existing loop to create a shorter version
•
While it is selected, go to Edit > Add to loop library
•
A window will open and you can name the loop, classify it
and choose mood descriptors (it’s a good idea to do this
because it will be easier to nd the loop in future projects)
Using part of an existing loop #2
•
Select a portion of loop in the Edit window at the bottom
•
Listen to it to make sure you’ve selected the right part
•
Click on it again – the selected portion will be separated from the remainder of the loop
•
While it is selected, go to Edit > Add to loop library
•
Give the new loop a name and tags etc
Making a new loop from scratch
•
Record some music (either by recording a live instruments, or a software instrument)
•
Trim the loop to make sure you have exactly the part you want
•
While the loop is selected, go to Edit > Add to loop library
Importing extra loops into GarageBand
U04%,'$%+0<$-0'+%-00"2%9(##%9(0C%61#%.$6#($#6D%0(%#@#$%0"#$%-00"2%9(0C%061#(%"(0)('C2%24,1%'2%Z,.+%842.,%
B64+.0%'$+%61#$%.C"0(6%61#C%.$60%&'(')#*'$+7
Adding loops one at a time
•
Open GarageBand and start a new project (or open an existing one).
13
•
Click on the loops browser button
•
Open the Finder window and resize it so that you can see both the Finder and the Loop browser in
GarageBand
•
Locate the loop you want to import and drag it from the Finder on to the Loop browser (a small
green plus sign will appear on the loop you’re dragging)
•
When you let go, a window will open, allowing you to give the loop a title and some tags. When
you’re done, click Create and the loop will be saved into your loop library
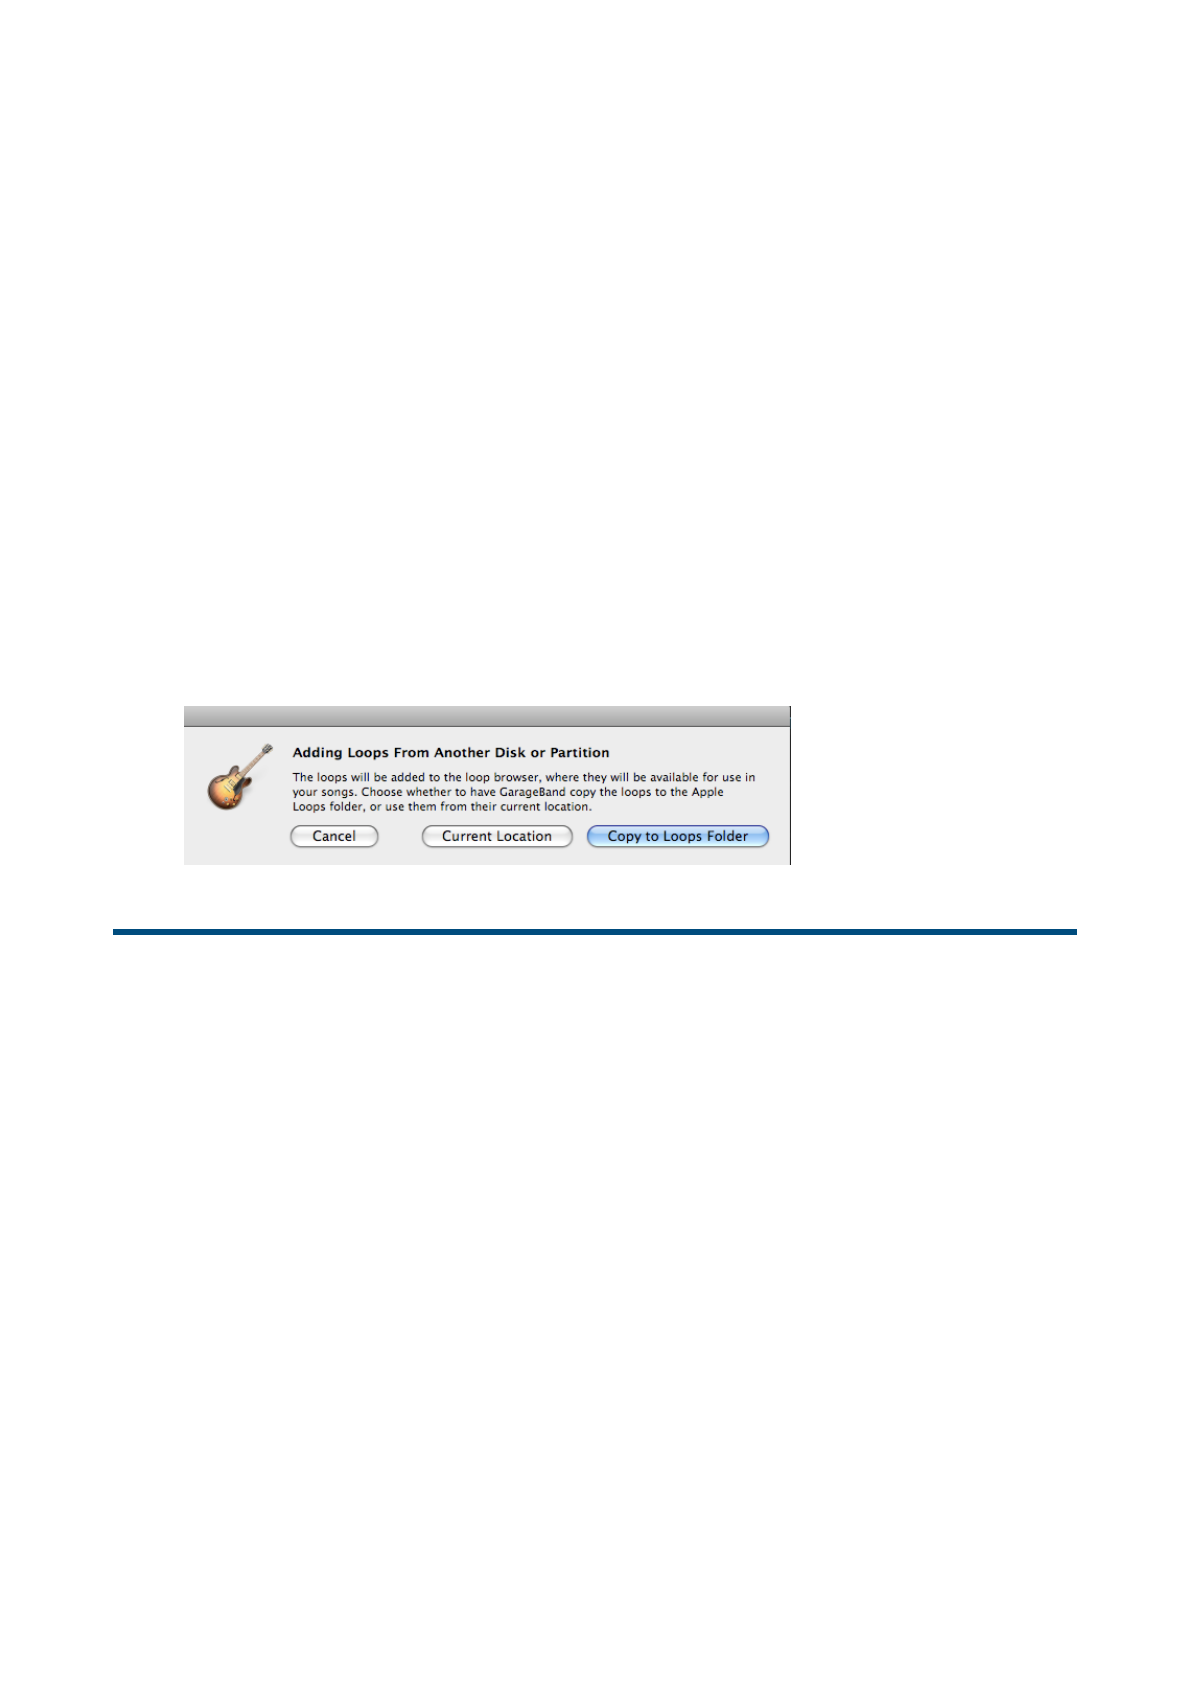
Adding$a$folder$of$loops
•
You can also add an entire folder of loops to GarageBand.
•
Locate the folder of loops in the Finder
•
Drag the folder from the Finder onto the Loop browser
•
GarageBand will ask you whether you want to use the loops from their current location or whether
you’d like to copy the loops to the Apple Loops folder. Choose Copy To Loops folder
Sharing loops with students
Location of loops on your Mac
•
On newer Macs: Macintosh HD > Library > Audio > Apple Loops > Apple > Apple Loops for
GarageBand (for music) and iLife Sound Effects (for sound effects)
•
On older Macs: Macintosh HD > Library > Application Support > GarageBand
To share loops with students
•
First locate the loop: open the Finder and go to Home (your username) > Library > Audio >
Apple Loops > User loops
•
Once you’ve found the loop, you can share it with students the same way you’d share any le: put it
on a USB ash drive, burn it to CD, email it (if it’s small) or put it on your school network drive
14

Region colours
About different region colours
Each region has a specic colour which indicates what type of region it is:
•
Green – MIDI software instrument
•
Blue – audio loop (an Apple loop or sound effect)
•
Orange – imported audio
•
Purple – real instrument recording (something you recorded through a microphone)
Exporting a project
•
Go to the Share menu and choose one of the options.
•
Export Song to disk allows you to save your project as an MP3 le on your computer hard drive.
•
Sharing the project to iTunes will send the song or podcast straight to your iTunes library.
15
