1
IRIS CONNECT
User Manual
2
Table of Contents
Getting To Know Your Phone ............................................................. 6
Getting Started ................................................................................... 9
Connecting to Mobile Networks ........................................... 16
Connecting to Bluetooth Devices ......................................... 16
Connecting to Your Computer via USB ................................ 17
Connecting to Virtual Private Networks................................ 18
Sharing Files With Nearby Devices ..................................... 19
Sharing Your Mobile Data Connection Through Tethering ... 21
Personalize Your Phone ................................................................... 22
Changing the System Language .......................................... 22
Setting the Date and Time ................................................... 22
Using the Notification Panel ................................................. 23
Changing the Ringtone and Notification Sound ................... 23
Switching to Silent or Vibration Mode .................................. 24
Using Do Not Disturb Mode ................................................. 25
Setting the Home Screen Transition Effect .......................... 26
3
Protecting Your Phone With Screen Locks .......................... 27
Using Your Fingerprint ......................................................... 28
Protecting Your Phone With App Pinning ............................. 30
Phone Calls ...................................................................................... 31
Message Options ................................................................. 33
Email ................................................................................................ 34
Setting Up the First Email Account ...................................... 34
Checking Your Emails .......................................................... 34
Camera ............................................................................................ 35
Customizing Camera and Video Settings ............................ 36
Google Apps ..................................................................................... 37
Changing Settings ............................................................................ 38
Apps..................................................................................... 40
Notifications ......................................................................... 40
Battery ................................................................................. 40
Storage ................................................................................ 41
Sound and vibration ............................................................. 41
4
Display ................................................................................. 41
Wallpaper ............................................................................. 42
Applying New Wallpapers .................................................... 42
Accessibility ......................................................................... 42
Security ................................................................................ 43
Location ............................................................................... 44
Safety and emergency ......................................................... 45
Password and Accounts....................................................... 45
Digital Wellbeing and Parental Controls ............................... 45
Google ................................................................................. 46
System ................................................................................. 46
About Phone ........................................................................ 47
Safety Precautions ........................................................................... 48
Hearing Aid Compatibility (HAC) regulations for Mobile Phones ...... 49
FCC RF Exposure Information (SAR) .............................................. 51
Legal ................................................................................................ 55
5
Welcome!
Thank you for choosing IRIS CONNECT.
This User Manual will help you get the most out of your new phone.
You’ll find instructions to help you begin using your device.
If you need more assistance, feel free to contact us by using the
contact information listed below. We’re always happy to help you!
Need More Information?
Visit our website at Consumer Cellular.com/Help
Call us at (888) 835-6047
6
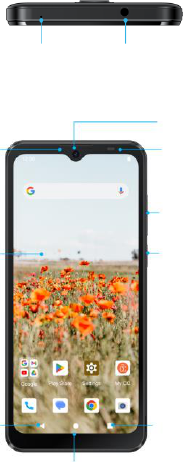
Getting To Know Your Phone
Microphone
3.5 mm Headset Jack
Front Camera
LED Indicator
Earpiece
Volume Keys
Home Screen
Power Key
Recent App
Keys
Back Key
7
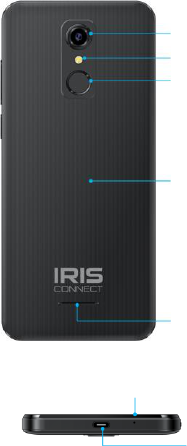
Rear Camera
Flash
Fingerprint
Sensor
Battery Cover
Speaker
Microphone
Home Key

8
Key Functions
Key
Description
Power key
Press and hold to power off or restart.
Press to turn off or on the screen display.
Home key
Press to return to the home screen from any
application or screen.
Recent apps key
Press to see recently used applications.
Back key
Press to go to the previous screen.
Volume keys
Press or hold to turn the volume up or down.
9
Getting Started
Initial Setup
The Setup Wizard built into your phone will help guide you through
this process.
NOTE: Your setup may be different than the instructions in this User
Manual because of software updates or if you choose different
options. If the steps are different, just follow your smartphone's
on-screen instructions for setup.
Activate the eSIM (electronic SIM)
Your IRIS Connect comes with an eSIM and no physical SIM is
needed to activate your service. To activate your eSIM, turn on your
phone and follow these steps:
1. Select your language and select the keyboard.
2. Select your Wi-Fi network from the list.
3. Download the eSIM.
4. If Download eSIM fails. If you are prompted to scan a QR code, find
it in your Consumer Cellular packing slip or email if purchased at a
retailer.
10
Keep Your Phone Up to Date
Keep your phone up to date and accept available software updates to
get new and enhanced features for your phone. Updating the
software may also improve your phone's performance.
Charging the Phone
Your phone’s battery should have enough power for the phone to turn
on, find a signal, and make a few calls. You should fully charge the
battery as soon as possible.
IMPORTANT! Use only approved chargers and USB cables.
1. Plug cable into phone and wall charger.
2. Plug wall charger into a wall outlet.
11
Extending the Battery Life
Active applications, screen brightness levels, Bluetooth and Wi-Fi
usage, and GPS functionality can drain your battery. You can follow
the helpful tips below to conserve your battery power:
• Reduce the screen backlight time.
• Lower the screen brightness.
• Turn auto-sync, Wi-Fi, and Bluetooth off when not in use.
• Disable the GPS function when not in use. Most applications using
this function will periodically query the GPS satellites for your current
location; each query drains your battery.
• Use the Battery saver feature.
12
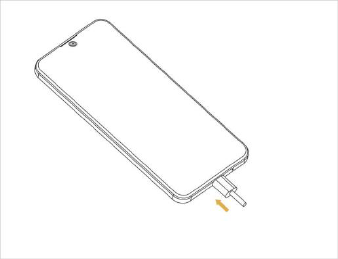
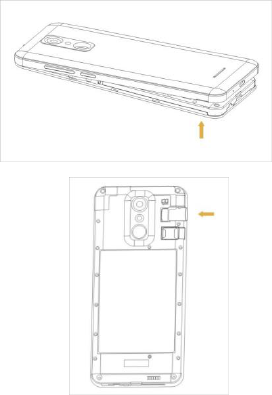
Installing a memory Card (Not Included)
1. Put your fingernail in the small slot at the bottom of the phone, lift
and remove the cover gently.
2. Place the memory card in the slot face down and slide it to the right
to lock it in place.
3. Put back the back cover.
NOTE: Use a fast microSD memory card (up to 256 GB) from a
well-known manufacturer.
13
Powering Your Phone On/Off
• Press and hold the Power Key on the right side of your phone to
turn it on.
• To turn it off, press and hold the Power Key to open the options
menu.
NOTE: If the phone freezes or takes too long to respond, press and
hold the Power Key for about 10 seconds to restart the phone.
Setting Up Your Phone for the First Time
When you first power on your phone after you purchase it or reset it to
factory settings, you will need to set it up before using it. First
configure Talkback or other accessibility features and tap Next, and
then follow the prompts to set up your language, Wi-Fi, name,
protection, Google services, and other options.
Locking/Unlocking the Screen and Keys
Your phone allows you to quickly lock the screen and keys (put the
phone into Sleep mode) when not in use and also to turn the screen
back on and unlock it when you need it.
Locking the Screen and Keys
To quickly turn the screen off and lock the keys, press the
Power Key.
14
NOTE: To save battery power, the phone automatically turns off the
screen after a certain period of time when you leave it idle. You will
still be able to receive messages and calls while the phone screen is
off.
Unlocking the Screen and Keys
1. Press the Power Key to turn the screen on.
2. Press and hold a blank area of the screen or the lock icon on the
lock screen to unlock the phone.
NOTE: If you have set a fingerprint, an unlock pattern, a PIN, or a
password for your phone, you’ll need to use your fingerprint, draw the
pattern or enter the PIN/password to unlock your screen.
Using the Touch Screen
Your phone’s touch screen lets you control actions through a variety
of touch gestures.
• Tap – When you want to type using the on-screen keyboard, select
on-screen items (such as application and settings icons), or press
on-screen buttons, simply tap them with your finger.
• Press and Hold – To open the available options for an item
(For example, an app icon or a link in a web page), press and hold the
item.
• Swipe or Slide – To swipe or slide means to quickly drag your finger
vertically or horizontally across the screen.
15
• Drag – To drag, press and hold your finger with some pressure
before you start to move your finger. While dragging, do not release
your finger until you have reached the target position.
• Pinch – In some apps (such as Maps, web browser, and Gallery),
you can zoom in and out by placing two fingers on the screen at once
and pinching them together (to zoom out) or spreading them apart (to
zoom in).
• Rotate the Screen – For most screens, you can automatically
change the screen orientation from portrait to landscape by turning
the phone sideways.

16
Connecting To Networks and
Devices
Connecting to Mobile Networks
1. Swipe up from the bottom of the home screen and tap
Settings.
2. Tap Network & internet.
3. Tap Internet to locate a WiFi network, and then tap the network
name from the list.
4. Enter the network password and tap CONNECT.
Connecting to Bluetooth Devices
1. Swipe up from the bottom of the home screen and tap Settings
then Connected Devices.
2. Tap Pair new device to see Bluetooth devices around you.
3. When Bluetooth is on, the icon appears in the Status Bar.

17
Connecting to Your Computer via USB
You can connect your phone to a computer with a USB cable and
transfer music, pictures, and other files in both directions.
Your phone stores these files in the internal storage or on a
removable memory card.
Connecting Your Phone to a Computer via USB
1. Connect your phone to the PC with a USB cable.
2. Choose one of the following options:
• File transfer: Transfer files on Windows. Transfer files on
Windows®PC or Mac®.
• USB tethering: Access Internet on PC by sharing mobile network of
your phone.
• MIDI: Transfer Windows media to the phone.
• PTP: Transfer photos or files if File transfer is not supported by your
computer.
• No data transfer: Only charge your phone via USB.
Disconnecting Your Phone from the Computer
To disconnect the phone from the computer, simply unplug the
USB cable when you’re finished.

18
Connecting to Virtual Private Networks
Virtual private networks (VPNs) allow you to connect to the resources
inside a secured local network. VPNs are commonly deployed by
corporations, schools, and other institutions to let people access local
network resources when not on campus, or when connected to a
wireless network.
Depending on the type of VPN you are using, you may be required to
enter your login credentials or install security certificates before you
can connect to your VPN. You can get this information from your
network administrator.
NOTE: You need to set a lock screen pattern, PIN, or password
before you can use credential storage (VPN).
Adding a VPN
1. Swipe up from the bottom of the home screen and tap Settings >
Network & internet > VPN.
2. Tap and enter the VPN name.
3. Enter the server address and other information provided by your
network administrator. Swipe up and check Show advanced options
to fill out additional details.
4. Tap SAVE.
The VPN is added to the list on the VPN screen.

19
Connecting to a VPN
1. Swipe up from the bottom of the home screen and tap
Settings > Network & internet > VPN.
2. Tap the VPN that you want to connect to.
3. When prompted, enter any requested credentials and then tap
CONNECT.
Modifying a VPN
1. Swipe up from the bottom of the home screen and tap Settings >
Network & internet > VPN.
2. Tap beside the VPN that you want to modify.
3. Edit the VPN settings and then tap SAVE.
Sharing Files With Nearby Devices
With Nearby Share, you can share photos, videos, and documents
with nearby devices via Bluetooth or Wi-Fi.
Turn Sharing On or Off
1. On your phone, make sure Bluetooth, Wi-Fi, and Location are
turned on.
2. Open Settings and touch Connected devices > Connection
preferences > Nearby Share.
3. Touch the switch at the top to turn Nearby Share on or off.

20
Share Content with Someone
1. Open the content, like a photo or webpage on your phone.
2. Find and touch the Share option and then select Nearby Share.
3. Touch to turn on if Nearby Share is switched off.
4. Hold your phone and your friend's device which supports the
Nearby Share feature close to each other.
NOTE: Make sure both devices are unlocked, and have Nearby
Share, Wi-Fi, Bluetooth and location turned on.
5. If prompted, touch the Nearby Share notification on your friend's
device to make that device visible to nearby devices.
6. On your phone, your friend's device name will appear and touch
the device name to send the content.
7. Accept the sharing on your friend's device.
Set Data Usage for Sharing
1. Open Settings and touch Connected devices > Connection
preferences > Nearby Share.
2. Touch Data and choose one of the following options.
• Data: Mobile data may be used for small files. Charges may
app
• Wi-Fi only: Never use mobile data to share.
• Without internet: Files will always be shared offline.

21
Sharing Your Mobile Data Connection Through
Tethering
You can use tethering to share your phone's Internet connection with
a computer that connects to your phone by Bluetooth or via a USB
cable.
NOTE: You cannot transfer files between your phone and the
computer when the phone is USB tethered.
1. Open Settings and touch Network & internet > Hotspot &
tethering.
2. Switch on USB tethering or Bluetooth tethering.
• For USB tethering, connect your phone to the computer with the
supplied USB cable before touching USB tethering.
• For Bluetooth tethering, pair your phone with the computer via
Bluetooth and set the computer to obtain its network connection via
Bluetooth.
NOTE: To stop sharing your data connection, switch off USB
tethering or Bluetooth tethering.

22
Personalize Your Phone
Changing the System Language
1. Swipe up from the bottom of the home screen and tap Settings >
System > Languages & input > Languages. The first language in
the list is the default system language.
2. Tap Add a language to add another language to the list.
3. To change the system language, press and hold next to the
language you want and drag it to the top of the list.
NOTE: To remove languages from the list, tap > Remove and
select the languages you want to delete.
Setting the Date and Time
1. Swipe up from the bottom of the home screen and tap Settings >
System > Date & time.
2. Set the date, time, time zone, and time format.
23
Using the Notification Panel
When you receive new notifications, such as messages or missed
calls, icons appear at the top of the screen.
To see more information about the notifications, swipe down from the
top of the screen. To close the view, swipe up on the screen.
To change the notification settings of an app, tap Settings >
Notifications > App notifications, tap the app name to change the
settings.
Changing the Ringtone and Notification Sound
You can quickly customize the default ringtone for incoming calls and
the default notification sound.
1. Swipe up from the bottom of the home screen and tap
Settings > Sound & vibration.
2. Tap Phone ringtone or Default notification ringtone.
3. Scroll through the list and select the ringtone you’d like to use.
4. Tap OK.
Adjusting Volumes
1. Swipe up from the bottom of the home screen and tap Settings >
Sound & vibration.
24
2. Drag the sliders below Media volume, Call volume, Ring &
notification volume, and Alarm volume to adjust the volume for
each type of audio.
NOTE: You can adjust the media volume when a media application is
in use by pressing the Volume key. If no media application is active,
press the Volume key to adjust ringtone volume (or the earpiece
volume during a call).
Switching to Silent or Vibration Mode
You can set the phone to silent or vibration mode by using one of the
following methods.
• Press the Volume up/down key when no media application is active
to show the volume management window. Drag the slider to the left or
keep pressing the Volume down key to switch the phone to vibration
mode. Press the key again in vibration mode to switch the phone to
silent mode.
• Swipe down from the top of the screen to open the Notification Panel
and drag the panel downwards. Tap Sound or Vibrate to switch the
phone to vibration or silent mode.
NOTE: To restore normal sound settings, press or hold the Volume
up key.
25
Using Do Not Disturb Mode
You can limit interruptions with Do not disturb mode. This mode
silences your phone so that it doesn’t make sounds or vibrate when
you don’t want it to.
To turn on Do Not Disturb mode:
1. Swipe up from the bottom of the home screen and tap Settings >
Sound & vibration > Do not disturb.
2. Tap TURN ON NOW or TURN OFF NOW.
3. Set the detailed settings.
Set the Exceptions for Do Not Disturb Mode
1. Swipe up from the bottom of the home screen and tap Settings >
Sound & vibration > Do not disturb.
2. Select the following options and choose what to allow.
• People: Allow calls, messages, or conversations.
• Apps:
• Alarms & other interruptions: Allow alarms, media sounds, touch
sounds, reminders, or calendar events.
Set an Automatic Schedule
You can set automatic schedules to activate Do Not Disturb mode for
specific times or events.
1. Swipe up from the bottom of the home screen and tap Settings >
Sound & vibration > Do not disturb > Schedules.
2. Touch an existing schedule to turn it on or off.
Touch Add more to create your own schedules.

26
Set How Long Do Not Disturb Mode Lasts
1. Swipe up from the bottom of the home screen and tap Settings >
Sound & vibration > Do not disturb > Duration for Quick Settings.
2. Set how long Do Not Disturb mode will stay on when you turn it on.
Choose Settings for Hidden Notifications
1. Swipe up from the bottom of the home screen and tap Settings >
Sound & vibration > Do not disturb > Display options for hidden
notifications.
2. Set notification behavior in Do Not Disturb mode. You can block
sound or visuals from notifications, or customize more restrictions.
Setting the Home Screen Transition Effect
1. Press and hold an empty place on the home screen.
2. Touch Home settings.
3. Tap an effect and the phone will demonstrate how it works.
When you have found one you like, press the Home key to exit.
Changing Screen Brightness
1. Swipe up from the bottom of the home screen and tap
Settings > Display > Brightness level.
3. Drag the slider to manually adjust the screen brightness.

27
Choosing Your Wallpaper
You can set the wallpaper for the home screen or lock screen.
1. Press and hold an empty place on the home screen and then touch
Wallpapers.
2. Select preset wallpaper, or touch Photos to select a picture and
pan and zoom on it to select the area for the wallpaper.
3. Touch Set wallpaper and choose where the wallpaper should be
used.
Protecting Your Phone with Screen Locks
You can protect your phone by creating a screen lock. When it
is enabled, you need to swipe up on the screen, and then draw a
pattern or enter a numeric PIN or password to unlock the phone’s
screen and keys.
1. Swipe up from the bottom of the home screen and tap Settings >
Security.
2. Touch Screen lock.
3. Touch None, Swipe, Pattern, PIN, or Password.
• Touch None to disable screen lock protection.
• Touch Swipe to enable screen lock and allow unlocking with a
"swipe" gesture. You can unlock the screen by touching the display
and sliding up.
• Touch Pattern to create a pattern that you must draw to unlock the
screen.

28
• Touch PIN or Password to set a numeric PIN or a password that
you must enter to unlock the screen.
For Pattern, PIN, or Password lock, select how you would like
notifications and their contents to show when the phone is locked.
Then tap DONE.
NOTE: Remember the pattern, PIN or password you set. Otherwise,
you will have to upgrade the phone software to use the phone.
Using Your Fingerprint
With the fingerprint sensor on the back of your phone, you can
register fingerprints and use them to unlock the phone, or open a
bound app when the screen is off or locked. You can also use swipe
functions.
NOTES:
• The fingerprint feature is usable only when a screen lock (Pattern,
PIN, or Password) is enabled. When the screen lock is reset to Swipe,
all registered fingerprints are erased.
• If you restart your phone, you need to enter the screen lock pattern,
PIN or password you set to unlock the screen for the first time.

29
Register a Fingerprint
1. Swipe up from the bottom of the home screen and tap Settings >
Security > Fingerprint.
2. Enter the screen lock pattern, PIN or password you set. If you
haven't set a screen lock, follow the prompts to set it.
3. Follow the prompts to record the center and the edges of a finger.
NOTE: Touch an existing fingerprint record to change its name or
delete it.
Set Fingerprint Functions
1. Swipe up from the bottom of the home screen and tap Settings >
Security > Fingerprint.
2. Enter the screen lock pattern, PIN or password you set.
3. You can set the following options.
• Wake up and unlock your phone: Unlock the phone with a registered
fingerprint when the screen is off or locked.
• Simple touch: When the screen is off or locked, you can quickly
open a selected app with a registered fingerprint. Each registered
fingerprint can be assigned to a different app.

30
Protecting Your Phone with App Pinning
You can pin an app's screen to keep it in view until you unpin it.
This feature can be used, for example, to let a trusted friend play a
specific game.
NOTE: When an app is pinned, the pinned app may open other apps
and your personal data may be accessible.
Turn On App Pinning
1. Open Settings and touch Security > More security settings >
App pinning.
2. Touch the On/Off switch.
3. Read the on-screen prompts and touch OK.
4. To add security for unpinning, switch on Lock device when
unpinning and set up a screen lock with or without fingerprint as
prompted, or switch on Ask for unlock pattern before unpinning, Ask
for PIN before unpinning, or Ask or password before unpinning if
you've set a screen lock already.
Pin an App
1. Ensure that app pinning is turned on.
2. Open the recent apps list. If the app you want to keep in view
is not in recent apps, open it first.
3. Tap the app icon at the top of the screen, and select Pin.
31
Phone Calls
You can place calls from the Phone app, the Contacts app,or other
apps or widgets that display contact information.
Wherever you see a phone number, you can usually tap it to dial.
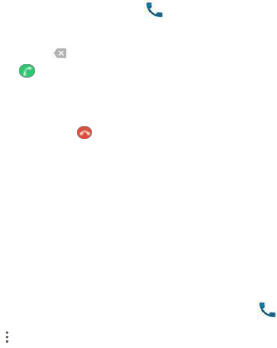
Placing a Call by Dialing
1. From the home screen, tap .
2. Enter the phone number or the contact name with the onscreen
keypad. Tap to delete incorrect digits.
3. Tap below the keypad to dial.
Ending a Call
During a call, tap on the screen.
You can also tap the search box at the top of the Phone app screen
and enter the phone number or contact name you want to call. Tap the
matching contact to place the call.
Working With the Call History
The call history is a list of all the calls you’ve placed, received,
or missed. It provides a convenient way to redial a number, return a
call, or add a number to your Contacts.
To open the call history, from the home screen, tap
> > Call history.
32
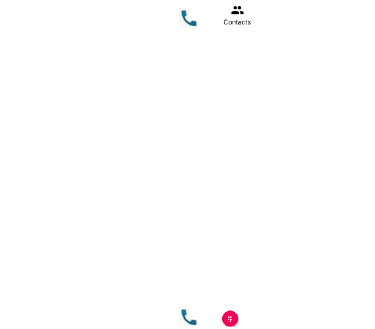
Call Your Contacts
1. From the home screen, touch > to view all your
contacts.
2. Touch a contact and then touch the number to place a voice call, or
to start a Google Meet video call.
Using Voicemail
If you have set the phone to divert calls to voicemail, callers can leave
voicemail messages when they cannot reach you.
Here’s how to set up and use your phone’s voicemail feature.
Setting Up Voicemail
You should set up your voicemail and personal greeting as soon as
your phone is activated. Always use a password to protect against
unauthorized access.
1. From the home screen, touch > .
2. Press and hold the 1 key in the dialer.
3. Follow the voice prompts to create your password, record your
name announcement, and record your greeting.
33
Messages
You can use Messages to exchange text messages (SMS) and
multimedia messages (MMS), and chat messages.
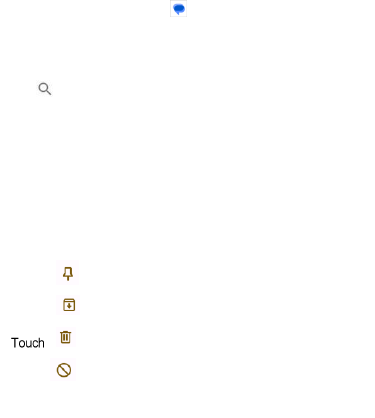
Opening the Messages Screen
From the Home Screen, touch .
The Messages screen opens, where you can create a new message,
search for messages, or open an ongoing message thread.
• Tap Start chat to write a new text or multimedia message.
• Tap to search for a message using keywords.
• Tap an existing message thread to open the conversation.
Message Options
On the Messages screen, touch and hold a thread and the following
options are available.
• Touch to mark the message.
• Touch to archive the thread.
• > Delete to delete the thread.
• Touch > OK to block the contact or number in the thread, and
the thread will be moved to "Spam & blocked."
34
Email
Use it to read and send emails from Microsoft Exchange ActiveSync,
Gmail, Hotmail, and more.
Setting Up the First Email Account
1. On the Home screen, tap Email.
2. Select an email server, and then enter the email address and
password.
3. Tap NEXT to let the phone retrieve the network parameters
automatically.
Follow the on-screen instructions to finish the setup.
Your phone will show the inbox of the email account and start to
download email messages.
Checking Your Emails
Your phone can automatically check for new emails at the interval you
set when setting up the account.
You can also check new emails manually by swiping down on the
message list.

35
Camera
You can use the camera or video camera to take and share pictures
and videos.
1. On the Home screen, tap .
2. Aim the camera at the subject and make any necessary.
3. Lightly tap to take the picture.
Effects
Settings
Camera Mode
Flash
Record a
video
Take a photo
Zoom in/out
Pro Mode
Captured
photos/videos
Switch View Mode
Shutter
36
Customizing Camera and Video Settings
Before capturing a photo or a video, you can tap to open the following
camera and camcorder setting options.
NOTE: Some camera and video options will change in different
camera modes.
• CAMERA
Countdown timer: Set a time delay before the camera takes a
picture after you tap the shutter icon, or turns off this feature.
Continuous shot: Turn on to continuous take photo.
Picture size: Set the image size for your photo.
Picture quality: Set the quality for your photo.
Exposure: Set the exposure.
White balance: Choose the white balance.
Shutter sound: Turn on or off the shutter sound.
• VIDEO
Video quality: Set the quality for your video.
Video duration: Set a time duration when you capturing a video.
Image stabilization: Turn on or off the image stabilization.
Noise reduction: Turn to reduce the noise.
Video encoder: Set the video encoder.
Encoder profile: Set the encoder profile.
Audio encoder: Set the audio encoder.
Video rotation: Choose to rotate the video.
37
Time lapse: Set the time interval between each frame when you shot
time lapse videos with the back camera.
Google Apps
Open Settings and touch Google to manage settings for Google apps
and services.
NOTE: Some Google services may not be available in your region.
• Chrome: Use the Chrome app to browse the Internet and
get your bookmarks, browsing history, and more synced
with your Google account.
• Drive: Store files on Google servers for free after you sign in to
your Google account. You can access them on your computers,
your phones and other devices, share them, or collaborate with
others.
• Gmail: Send and receive emails via your Gmail account or
other personal email accounts.
• Google: Use Google search or get information when you
need it with Google Now.
• Maps: Find your place and find your way in the world.
• Photos: Manage photos on the phone and your Google
account.
• YT Music: Play music on the phone and on your Google
account.
• Play Store: Purchase and download apps, games, and

38
more from the Google Play Store.
• YouTube: Watch video clips from YouTube.com, or upload
your own and share with the world.
Changing Settings
The Settings app contains most of the tools for customizing and
configuring your phone.
Network and internet
Wi-Fi
Open Settings and touch Network & internet > Wi-Fi. You can turn
Wi-Fi on or off and configure your Wi-Fi connections.
Airplane Mode
Open Settings and touch Network & internet > Airplane mode to
turn Airplane mode on or off. All the phone’s radios that transmit voice
or data are turned off when airplane mode is on.
Hotspot and Tethering
Open Settings and touch Network & internet > Hotspot & tethering
to share your phone's mobile data connection withPCs or other
devices.
Data Saver
Open Settings and touch Network & internet > Data Saver to enable
or disable Data Saver, which prevents apps from using data

39
connection in the background. Apps you're currently using can access
data, but may do so less frequently when Data Saver is enabled. You
can touch Unrestricted data to allow some apps to always have data
connection access, even when Data Saver is enabled.
VPN
Open Settings and touch Network & internet > VPN to set up and
connect to virtual private networks.
Private DNS
To get information from a website, your phone first asks where the
website is. Private DNS is a way to help secure these questions and
answers. We recommend keeping Private DNS turned on.
Open Settings and touch Network & internet > VPN > Private DNS
to turn Private DNS on or off, or change its settings.
Connected Devices
Open Settings and touch Connected devices > Connection
preferences to use the following features.
• Bluetooth: Turn Bluetooth on or off and configure your Bluetooth
connections.
• Printing: Use the default printing service or other printer plug-ins
installed from the Google Play Store or your printer manufacturer for
wireless printing.
• Chromebook: Link devices so you can text from your computer,
share your phone’s internet connection and simplify unlocking.

40
• Nearby Share: Use Bluetooth or Wi-Fi to share contents with other
devices near your phone.
• Android Auto: Use apps on your car screen.
Apps
Open Settings and touch Apps. Touch All apps to see all apps
installed on your phone and manage them.
Touch an app to see its information and configure the available
options.
Notifications
Open Settings and touch Notifications to manage app notifications.
Battery
Open Settings and touch Battery to view the battery level,enable
different battery saving modes, check what has been using the
battery, and manage apps intelligently or set more options to improve
battery life.

41
Storage
Open Settings and touch Storage to view the memory information of
the internal phone storage and the microSD card (if one is installed).
When you connect a USB storage device (such as a USB flash)
to your phone with an OTG adapter cable, you can view its storage
status, unmount it, or erase all data on it.
Sound and vibration
Open Settings and touch Sound& vibration. Adjust different types of
volume, set Do Not Disturb options, set up ringtone, notification and
alarm sound, and set other sounds and vibrations.
Display
Open Settings and touch Display to configure the display options,
including brightness level, Dark theme, Night Light, wallpapers,
screen timeout, auto-rotate screen, lock screen options, etc.

42
Wallpaper
Applying New Wallpapers
You can set the wallpaper for the home screen or lock screen.
1. Open Settings and touch Wallpaper.
2. Tap Live Wallpapers, Live Wallpapers, or Photos. Select an
image or an animation. Some cropping may be needed for Gallery
and Photos images.
3. If necessary, tap OK or SET WALLPAPER.
NOTE: In addition, you can press and hold an empty place on the
home screen, tap Wallpapers. Then select a built-in image or a live
wallpaper from your Gallery.
Accessibility
Open Settings and touch Accessibility to configure accessibility
options and services on your phone, such as using color correction or
Display size and text for users with sight problems.

43
Security
Open Settings and touch Security to configure options that help keep
your phone and data safe.
• Google Play Protect: Google Play Protect regularly checks your
apps and phone for harmful behavior and warns you about any
detected potential harm.
• Find My Device: Use Find My Device to locate, lock, or wipe your
lost device remotely. The lost device must be signed in to a Google
account.
• Security update: Check for security update of your system.
• Screen lock: Disable the screen lock or enable it with swipe, pattern,
PIN, or password.
• Fingerprint: Set up fingerprints and enables them to unlock the
phone or quickly open a selected app. You can also enable the swipe
functions of the fingerprint sensor.
• More security settings: Set other security settings.
Privacy
Open Settings and touch Privacy to configure the privacy settings.
• Privacy dashboard: Show which apps recently used permissions.
• Permission manager: Check what apps have been allowed to
access certain permissions. You can also change the app
permissions.
44
WARNING! Changing the app permissions may result in the app not
working correctly or as originally intended.
• Show passwords: Display passwords as you enter them.
• Notifications on lock screen: Choose what notification contents
• Show media on lock screen: Display media player on lock screen.
• Android System Intelligence: Get suggestions based on the
people,apps,and content you interact with.
• App content: Allow apps to send content to the Android system.
• Show clipboard access: Show a message when apps access text,
images, or other content you have copied.
• Autofill service from Google: Set the options of Autofill with
Google. With a single touch, you can fill in passwords, addresses,
credit cards, and other information saved to your
• Advanced: Set advanced options such as Google location history,
activity controls, Ads personalization, and usage & diagnostics.
Location
Open Settings and touch Location to manage location services,
which help your phone and apps determine your location. To use
location-related applications, such as finding your location on Google
Maps, you must have location services enabled on your phone.

45
Safety and emergency
Open Settings and touch Safety & emergency to set your personal
safety, emergency contacts, emergency SOS and etc.
NOTE: This phone, like any other wireless phone, operates using
radio signals, which cannot guarantee connection in all conditions.
Therefore, you must never rely solely on any wireless phone for
emergency communications.
Password and Accounts
Open Settings and touch Password & Accounts to manage your
accounts and synchronization. Touch Add account to sign in to or
create accounts on your phone. Touch an account you have added to
adjust its settings.
Digital Wellbeing and Parental Controls
Open Settings and touch Digital Wellbeing & parental controls to
get information about how you spend time on your phone, like how
often you unlock it and how long you use each app. You can use that
information to improve your digital wellbeing. You can also help your
child balance their screen time with the Family Link app.
Touch Show your data to get information on how you spend

46
time on your phone and apps.
In the Parental controls section, touch Set up parental
controls to add content restrictions and set other limits for
your child with the Family Link app.
Google
Open Settings and touch Google to manage settings for Google apps
and services.
System
Languages and Input
Open Settings and touch System > Languages and input to
configure options related to system language, input methods and
assistance, speech output, mouse/trackpad input, and vibration
redirection.
Gestures
Open Settings and touch Gestures. You can set the phone with
special finger gestures, press and hold power key to enable each
function or etc.

47
Date & Time
Open Settings and touch System > Date & time to set date, time,
time zone, and the time format. You can also use network-provided
data.
Backup
Open Settings and touch System > Backup to manage data backup
options. To easily restore or switch phones at any time, you can
enable automatic backup to Google Drive of important data. You need
to sign in to your Google account to use this feature.
System Update
Open Settings and touch System > System update to check for
system updates and install them when they become available.
Reset Options
Open Settings and touch System > Reset options to reset network
settings, app preferences, or the phone to factory default status.
About Phone
Open Settings and touch About phone to view phone information,
SIM card status, legal information, and other information. You can
also touch Emergency information to edit your medical information
and emergency contacts for first responders to read from your lock
screen.
48
Safety Precautions
• Do not disassemble or open crush, bend or deform, puncture
or shred.
• Do not modify or remanufacture, attempt to insert foreign
objects into the battery, immerse or expose to water or other
liquids, expose to fire, explosion or other hazard.
• Only use the battery with a charging system that has been
qualified with the system per CTIA Certification Requirements
for Battery System Compliance to IEEE 1725. Use of an
unqualified battery or charger may present a risk of fire, explo-
sion, leakage, or other hazard.
• Replace the battery only with another battery that has been
qualified with the system per this standard, IEEE-Std-1725. Use
of an unqualified battery may present a risk of fire, explosion,
leakage or other hazard.
Only authorized service providers shall replace battery.
(If the battery is non-user replaceable).
• Promptly dispose of used batteries in accordance with local
regulations.
• Avoid dropping the phone or battery. If the phone or battery is
dropped, especially on a hard surface, and the user suspects
damage, take it to a service center for inspection.
• Improper battery use may result in a fire, explosion or other
hazard.
49
Hearing Aid Compatibility (HAC)
regulations for Mobile Phones
In 2003, the FCC adopted rules to make digital wireless
telephones compatible with hearing aids and cochlear implants.
Although analog wireless phones do not usually cause
interference with hearing aids or cochlear implants, digital
wireless phones sometimes do because of electromagnetic
energy emitted by the phone's antenna, backlight, or other
components. Your phone is compliant with FCC HAC
regulations (ANSI C63.19- 2011). While some wireless phones
are used near some hearing devices (hearing aids and
cochlear implants), users may detect a buzzing, humming, or
whining noise. Some hearing devices are more immune than
others to this interference noise and phones also vary in the
amount of interference they generate. The wireless telephone
industry has developed a rating system for wireless phones
to assist hearing device users in finding phones that may be
compatible with their hearing devices. Not all phones have
been rated. Phones that are rated have the rating on their box
or a label located on the box. The ratings are not guarantees.
Results will vary depending on the user's hearing device and
hearing loss. If your hearing device happens to be vulnerable
to interference, you may not be able to use a rated phone
successfully. Trying out the phone with your hearing device is

50
the best way to evaluate it for your personal needs.
This phone has been tested and rated for use with hearing aids
for some of the wireless technologies that it uses. However,
there may be some newer wireless technologies used in this
phone that have not been tested yet for use with hearing
aids. It is important to try the different features of this phone
thoroughly and in different locations, using your hearing aid
or cochlear implant, to determine if you hear any interfering
noise. Consult your service provider or the manufacturer of
this phone for information on hearing aid compatibility. If you
have questions about return or exchange policies, consult your
service provider or phone retailer.
M-Ratings:
Phones rated M3 or M4 meet FCC requirements
and are likely to generate less interference to hearing devices
than phones that are not labeled. M4 is the better/higher of the
two ratings.
T-Ratings:
Phones rated T3 or T4 meet FCC requirements and
are likely to be more usable with a hearing device's telecoil
“
”
“
”(
T Switch
or
Telephone Switch
) than unrated phones. T4 is
the better/higher of the two ratings. (Note that not all hearing
devices have telecoils in
them.)
Your phone meets the
T4/M4
level rating.
Hearing devices may also be rated. Your hearing device
manufacturer or hearing health professional may help you
find this rating. For more information about FCC Hearing Aid
Compatibility, please go
to
http://www.fcc.gov/cgb/dro.
51
FCC
RF
Exposure
Information
(SAR)
This phone is designed and manufactured not to exceed the emission
limits for exposure to radio frequency (RF) energy set by the Federal
Communications Commission of the United States.
During SAR testing, this device was set to transmit at its highest
certified power level in all tested frequency bands, and placed in
positions that simulate RF exposure in usage against the head with
no separation, and near
the body with the separation of 17
mm.
Although the SAR is determined at the highest certified power level,
the actual SAR level of the device while operating can be well below
the maximum value.
This is because the phone is designed to operate at multiple power
levels so as to use only the power required to reach the network. In
general, the closer you are to a wireless base station antenna, the
lower the power output.
The exposure standard for wireless devices employing a unit of
measurement is known as
the Specific Absorption Rate, or SAR.
The SAR limit set by the FCC
is
1.6W/kg.
This device is complied with SAR for general population / uncontrolled
exposure limits in ANSI/IEEE C95.1-1992 and had been tested in
accordance with the measurement methods
and procedures specified
in IEEE1528.
52
The FCC has granted an Equipment Authorization for this model
phone with all reported SAR levels evaluated as in compliance with
the FCC RF exposure guidelines. SAR
information on this model
phone is on file with the FCC and can be found under the Display
Grant section of
www.fcc.gov/ oet/ea/fccid
after searching on FCC ID:
2AWF6-SH4650.
For this device, the highest reported SAR value for usage against the
head is
1.117W/kg, and for usage near the body is
1.024W/kg.
While there may be differences between the SAR levels of various
phones and at various positions, they all meet the government
requirements.
SAR compliance for body-worn operation is based on a separation
distance of 17 mm between the unit and the human body. Carry this
device at least 17 mm away from your body to ensure RF exposure
level compliant or lower to the reported level. To support body-worn
operation, choose the belt clips or holsters, which do not contain
metallic components, to maintain a separation of 17 mm between this
device and your body.
RF exposure compliance with any body-worn accessory, which
contains metal, was not tested and certified, and using such
body-worn accessory should be avoided.
53
FCC Compliance
This device complies with part 15 of the FCC rules. Operation is
subject to the following two conditions: (1) this device may not
cause harmful interference, and (2) this device must accept any
interference received, including interference that may cause
undesired operation.
NOTE: The manufacturer is not responsible for any radio or TV
interference caused by unauthorized modifications or changes
to this equipment. Such modifications or changes could void the
User's authority to operate the equipment.
NOTE: This equipment has been tested and found to comply
with the limits for a Class B digital device, pursuant to part 15 of
the FCC Rules. These limits are designed to provide reason-
able protection against harmful interference in a residential
installation. This equipment generates uses and can radiate
radio frequency energy and, if not installed and used in accor-
dance with the instructions, may cause harmful interference to
radio communications. However, there is no guarantee that
interference will not occur in a particular installation.
If this equipment does cause harmful interference to radio or
television reception, which can be determined by turning the
equipment off and on, the user is encouraged to try to correct
the interference by one or more of the following measures:
‐Reorient or relocate the receiving antenna.
54
‐Increase the separation between the equipment and receiver.
‐Connect the equipment into an outlet on a circuit different
from that to which the receiver is connected.
‐Consult the dealer or an experienced radio/TV technician for
help.
55
Legal
Thank you for choosing this IRIS mobile device. In order to
keep your device in its best condition, please read this manual
and keep it for future reference.
Copyright © 2023 Consumer Cellular,Inc.
All rights reserved.
No part of this publication may be excerpted, reproduced, translated
or utilized in any form or by any means, electronic or mechanical,
including photocopying and microfilm, without the prior written
permission of Consumer Cellular,Inc.
We reserve the right to make modifications on print errors or update
specifications without prior notice.
Images and screenshots used in this manual may differ from
the actual product. Content in this manual may differ from the
actual product or software.
