Google Meet (formerly Google Hangouts)
● Hold real-time video meetings with up to 250 participants at a
time.
● Record meetings for students who can’t login in real-time or
would benefit from watching multiple times.
● Communicate to your students what time they should join
your meeting.
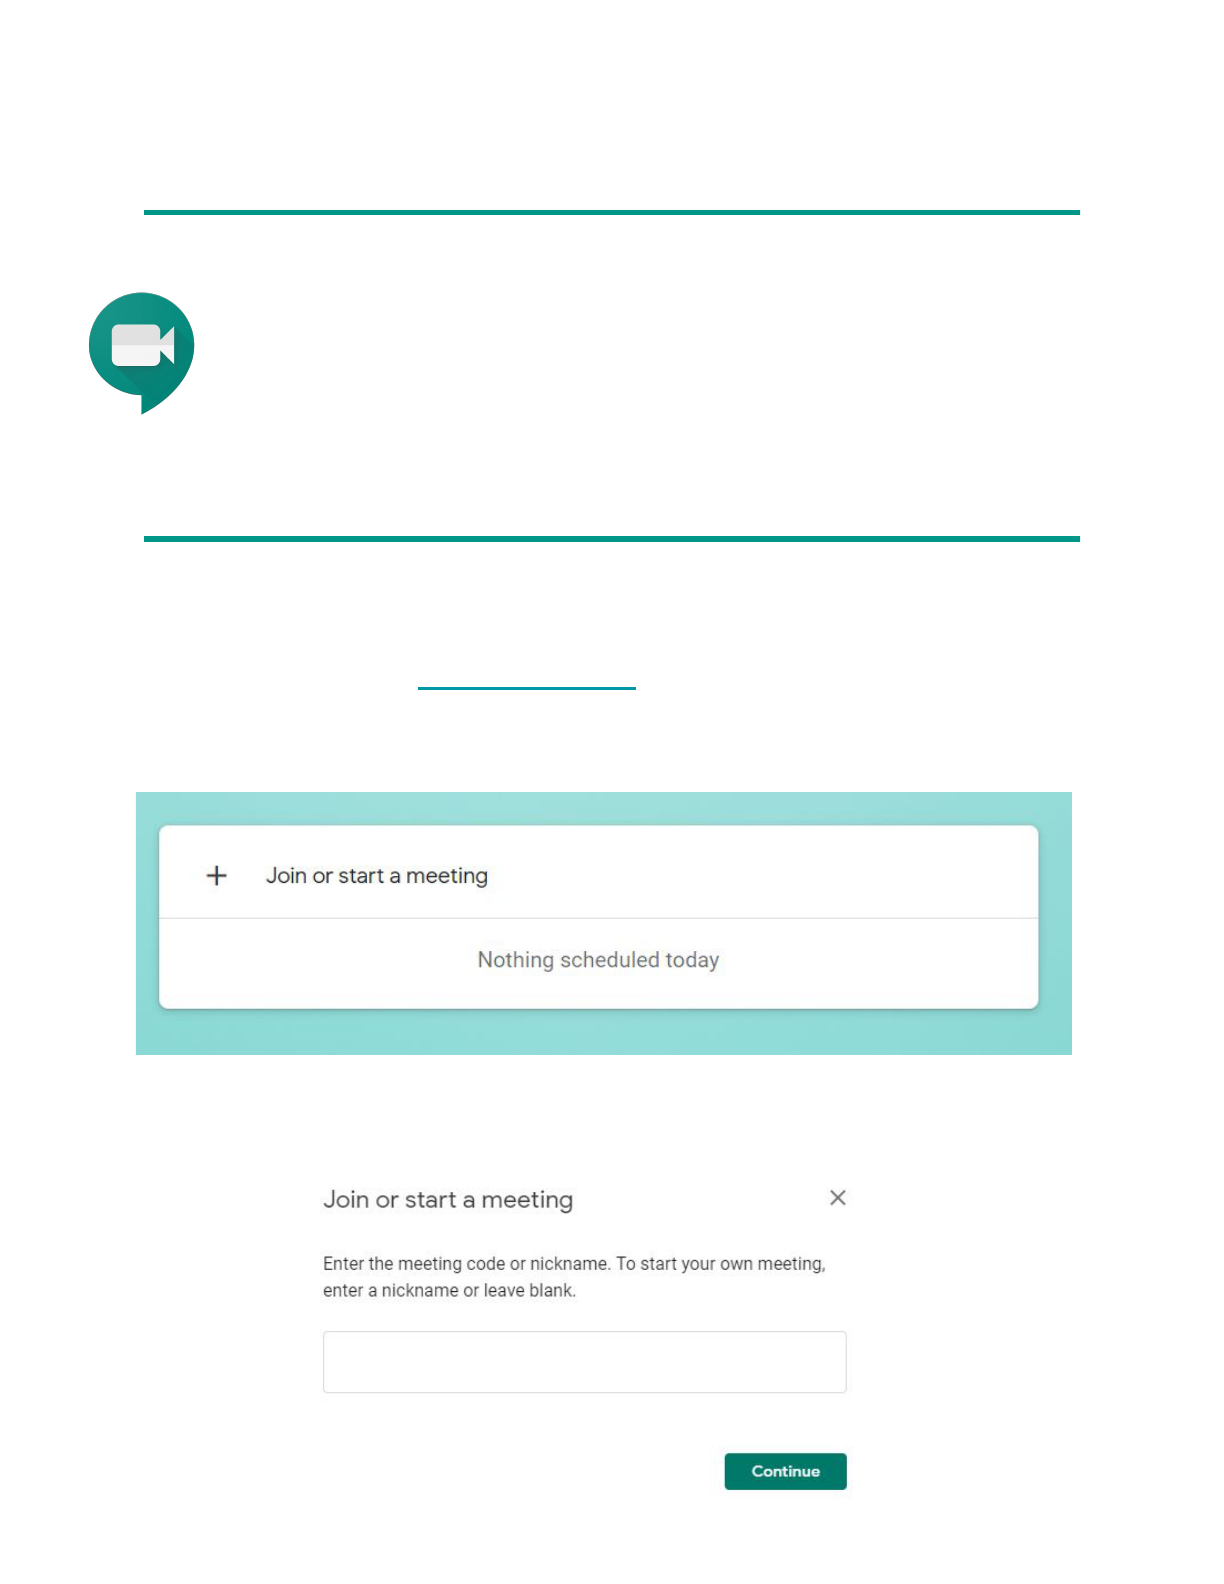
To start a video meeting that will connect you with students in real-time:
1. Using Chrome, go to meet.google.com
2. Click the + Join or start meeting.
3. Enter a nickname for your meeting (optional). Click continue.
4. Click the “Start Meeting” button.
To share your meeting details so students can connect:
5. Click on the “Copy joining info” option and then paste it where students
can access it (Schoology, Google Classroom, etc). You can delete the
phone number and PIN information. Students will be able to access the
meeting with the link.
Close the “Add Others” box with the X in the upper right hand corner.
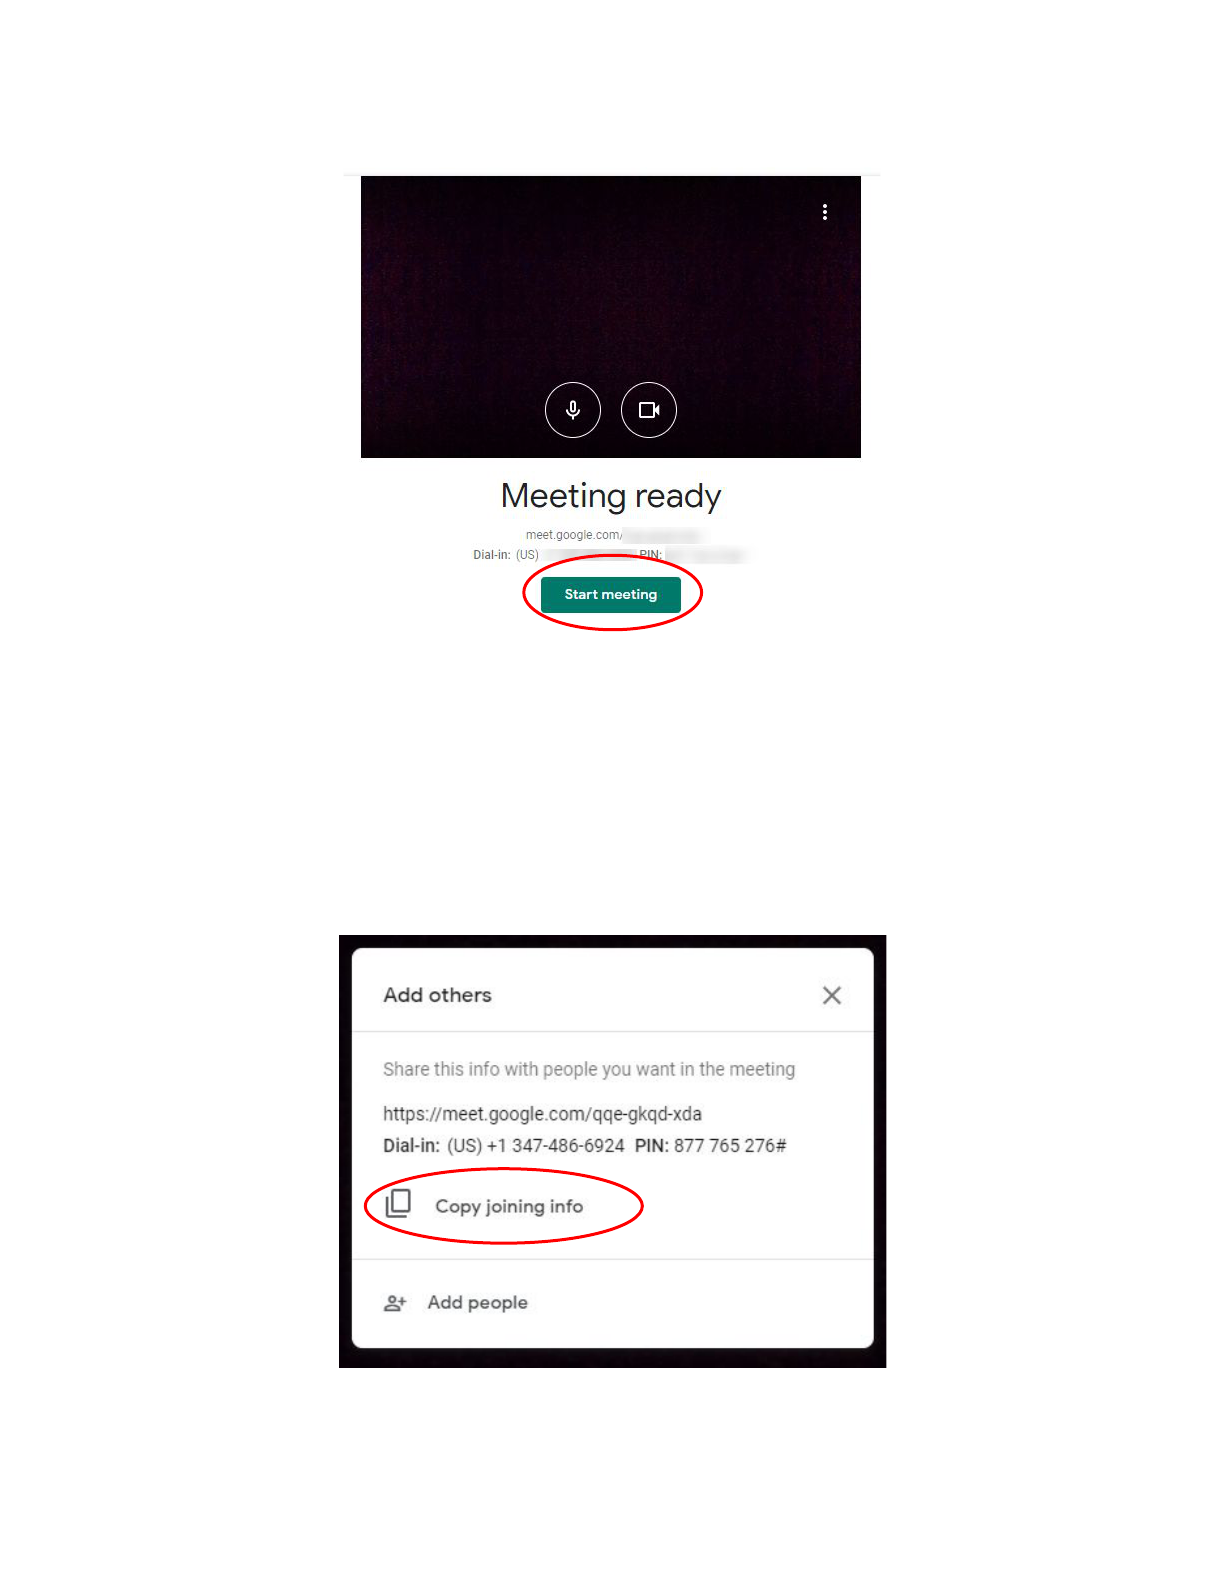
Using Google Meet Features
during a Video Call
See who is connected
Chat with those who are connected
Record a meeting to be viewed at a later time
You will need to click “accept” in the consent
window. It may take a few seconds for the recording
to begin. You will know it has started when you see
“REC” icon in the upper left corner. Click the 3 dots
again to stop the recording. The recording is saved
to a “Google Recordings” folder in your Google
Drive and can be shared with a link in the “Share”
settings found when you click on the 3 dots of the
saved video window.
Change the layout of your screen
Settings for your microphone and webcam
Present your entire screen or just one window
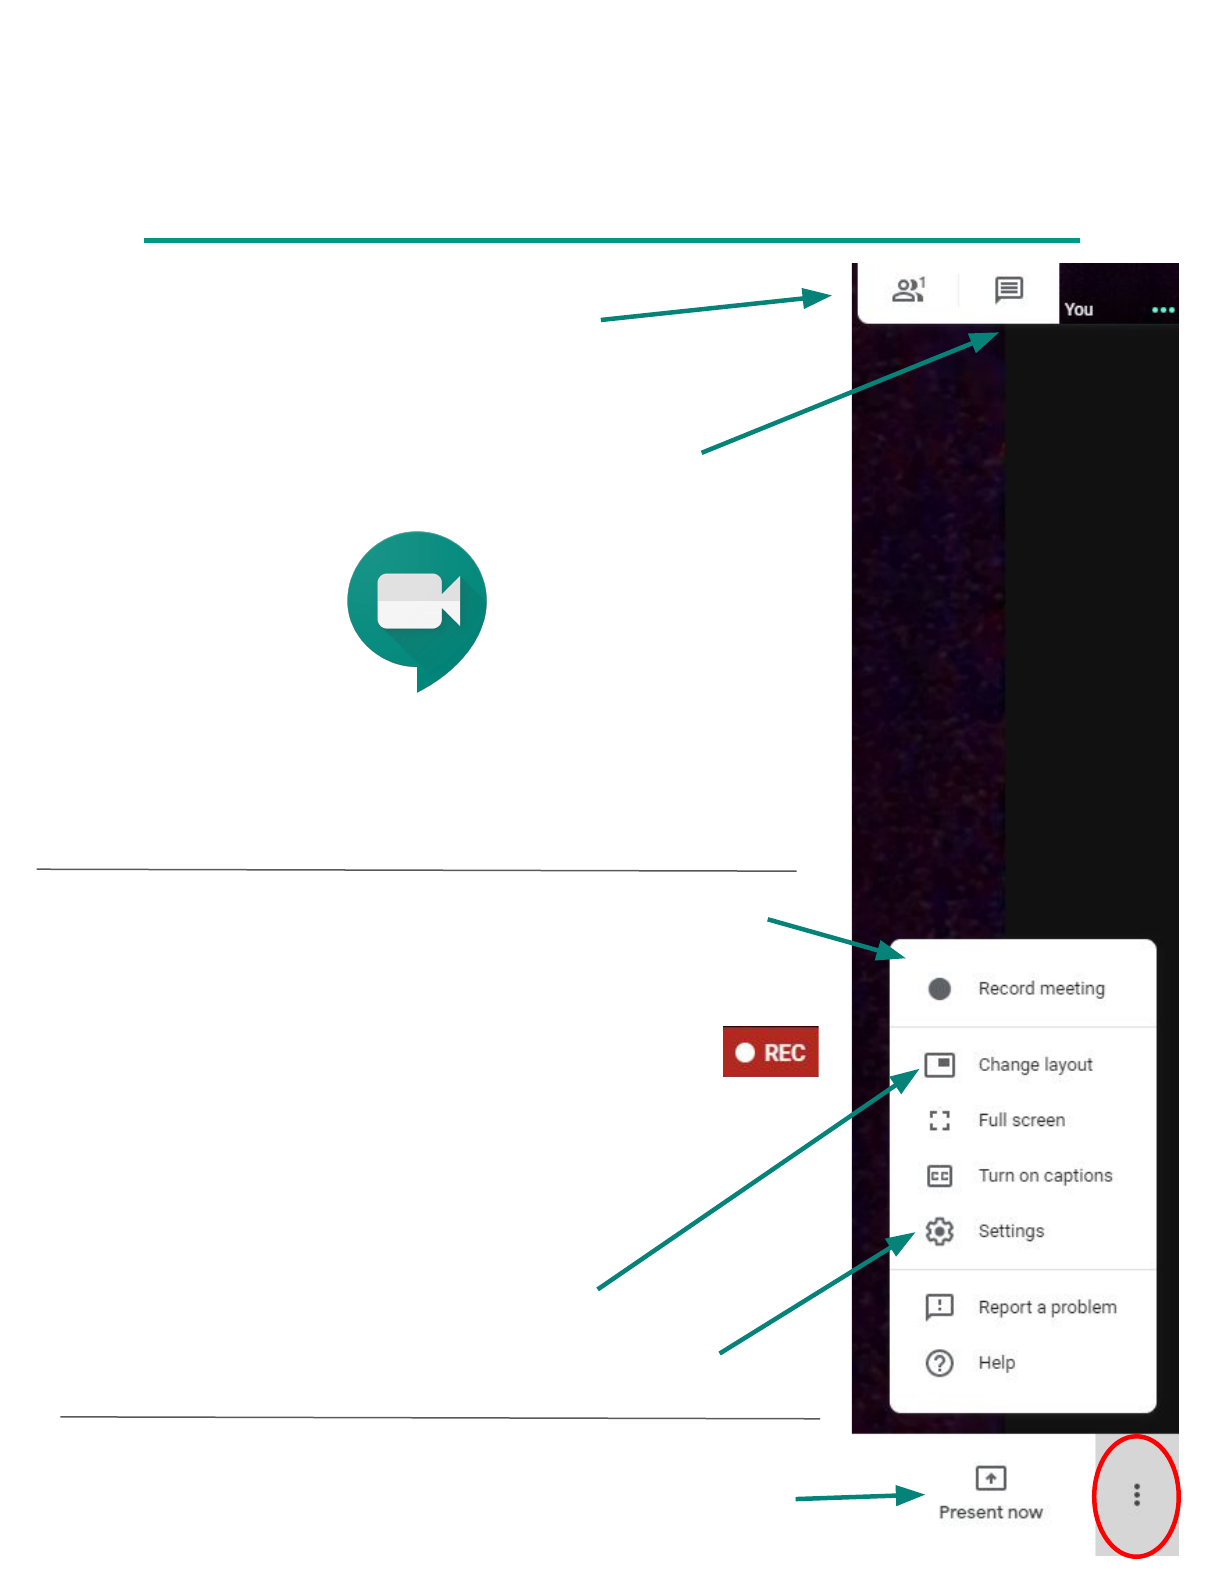
Click the 3 dots in the lower right hand
corner of the screen to display this menu.
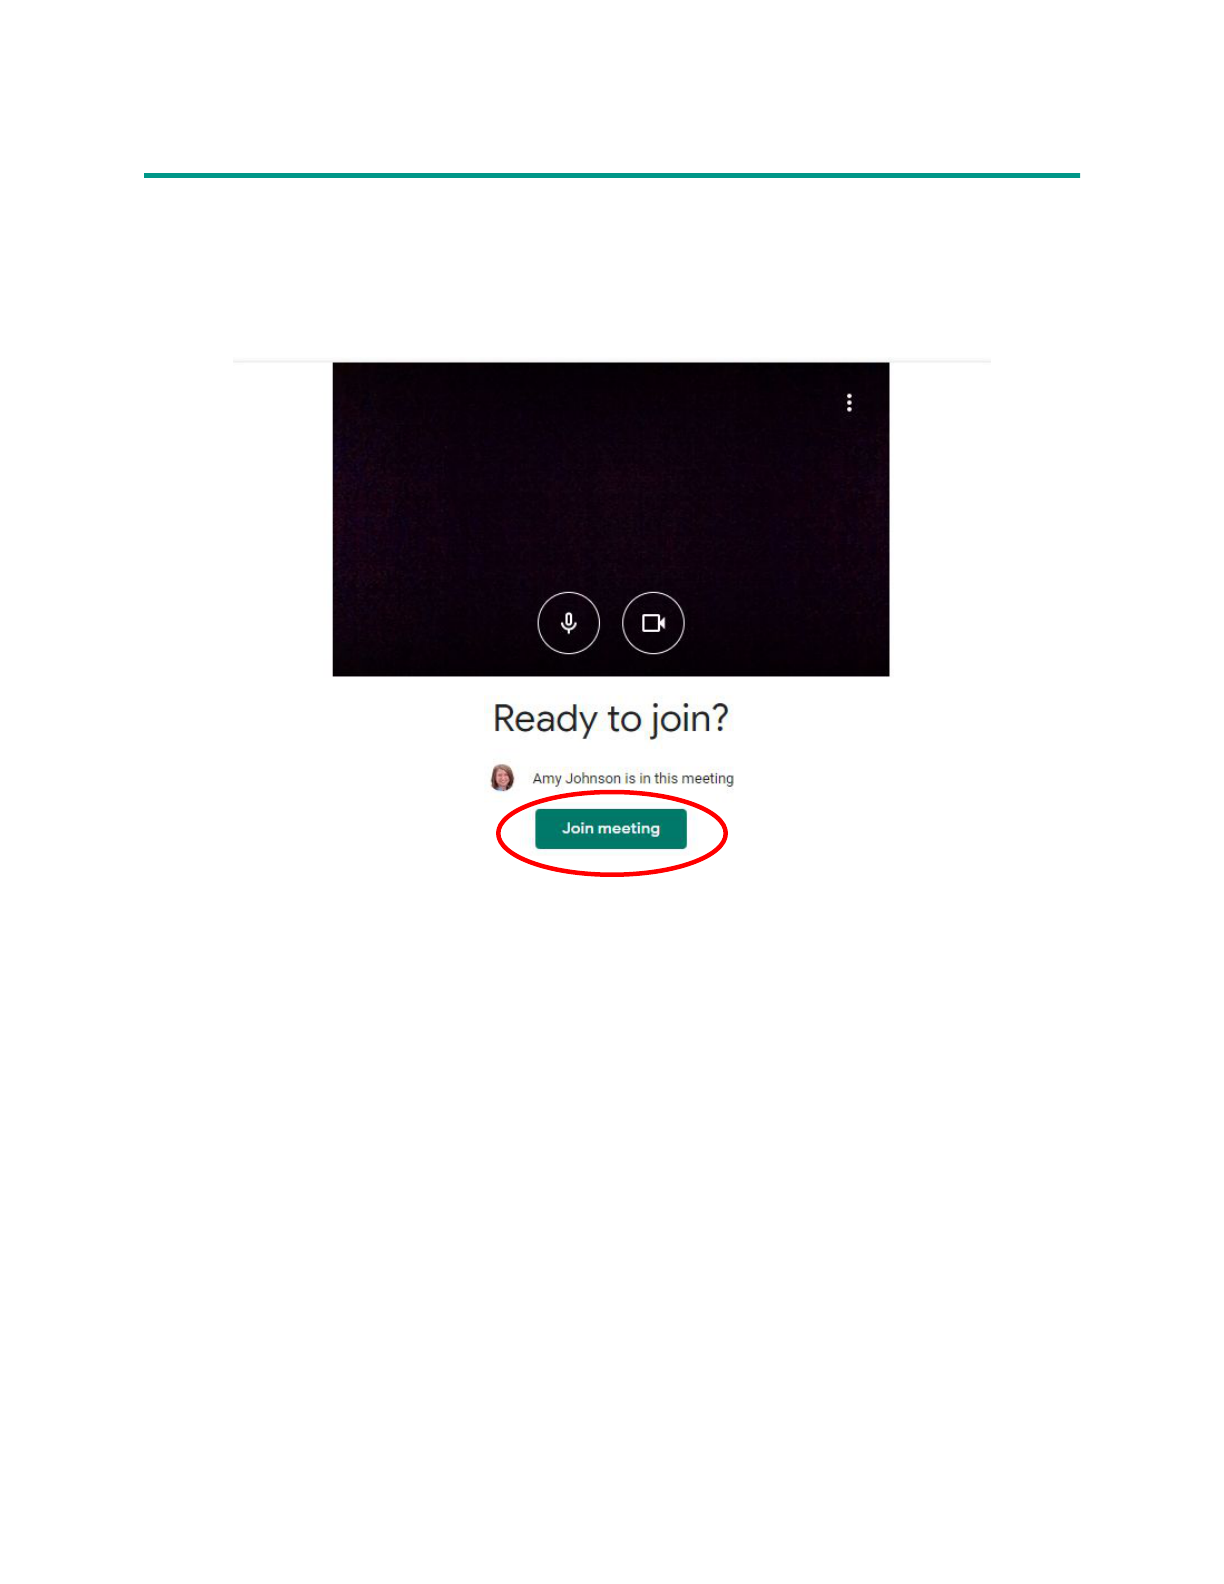
When students click on the link you provided they will be directed to a screen
where they can click to “Join Meeting.”
Joining a Google Meet
Once students have joined the meeting their screen will look exactly like yours.
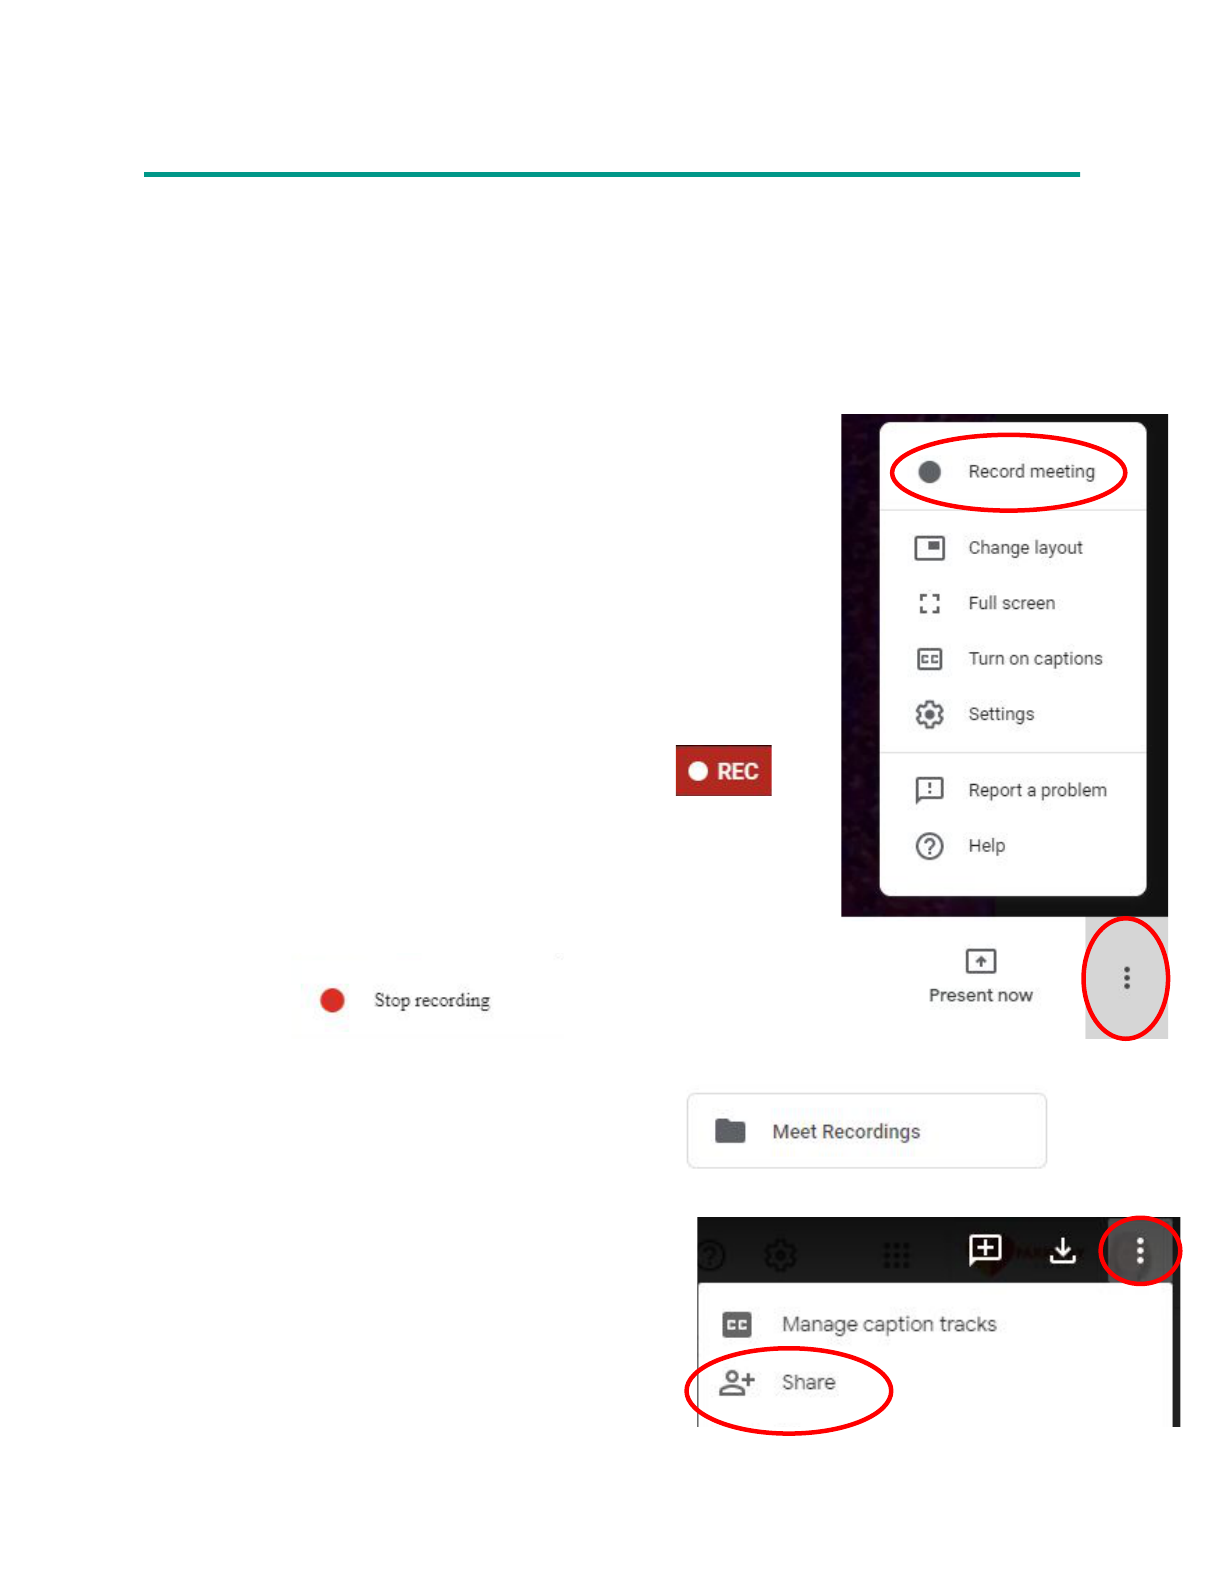
Record a Google Meet
1
2
In Google Meet you can record a video call to be viewed at a later time. The recording
automatically saves to a folder in your Google Drive that is created the first time you
record a meeting. The folder is called “Meet Recordings.” You can share your
recorded meet from the share settings in Google Drive.
1. Click on the 3 dots in the lower right corner
of your Google Meet.
2. Click on the Record Meeting option at the
top of the list.
3. To stop the recording, click on the 3 dots in
the lower right again and select “Stop
Recording” at the top of the list.
4. The recording will automatically save to
your Google Drive in a folder that is
created the first time you record a Meet.
It is called “Meet Recordings.”
You will need to click “Accept” on the
consent window to begin. It may take a
few seconds for the recording to begin.
You will know it has started when you see
“REC” icon in the upper left corner.
5. After opening the video in your Google
Drive, click on the 3 dots in the upper
right hand corner and select “Share.”
To share, go to Google Drive:
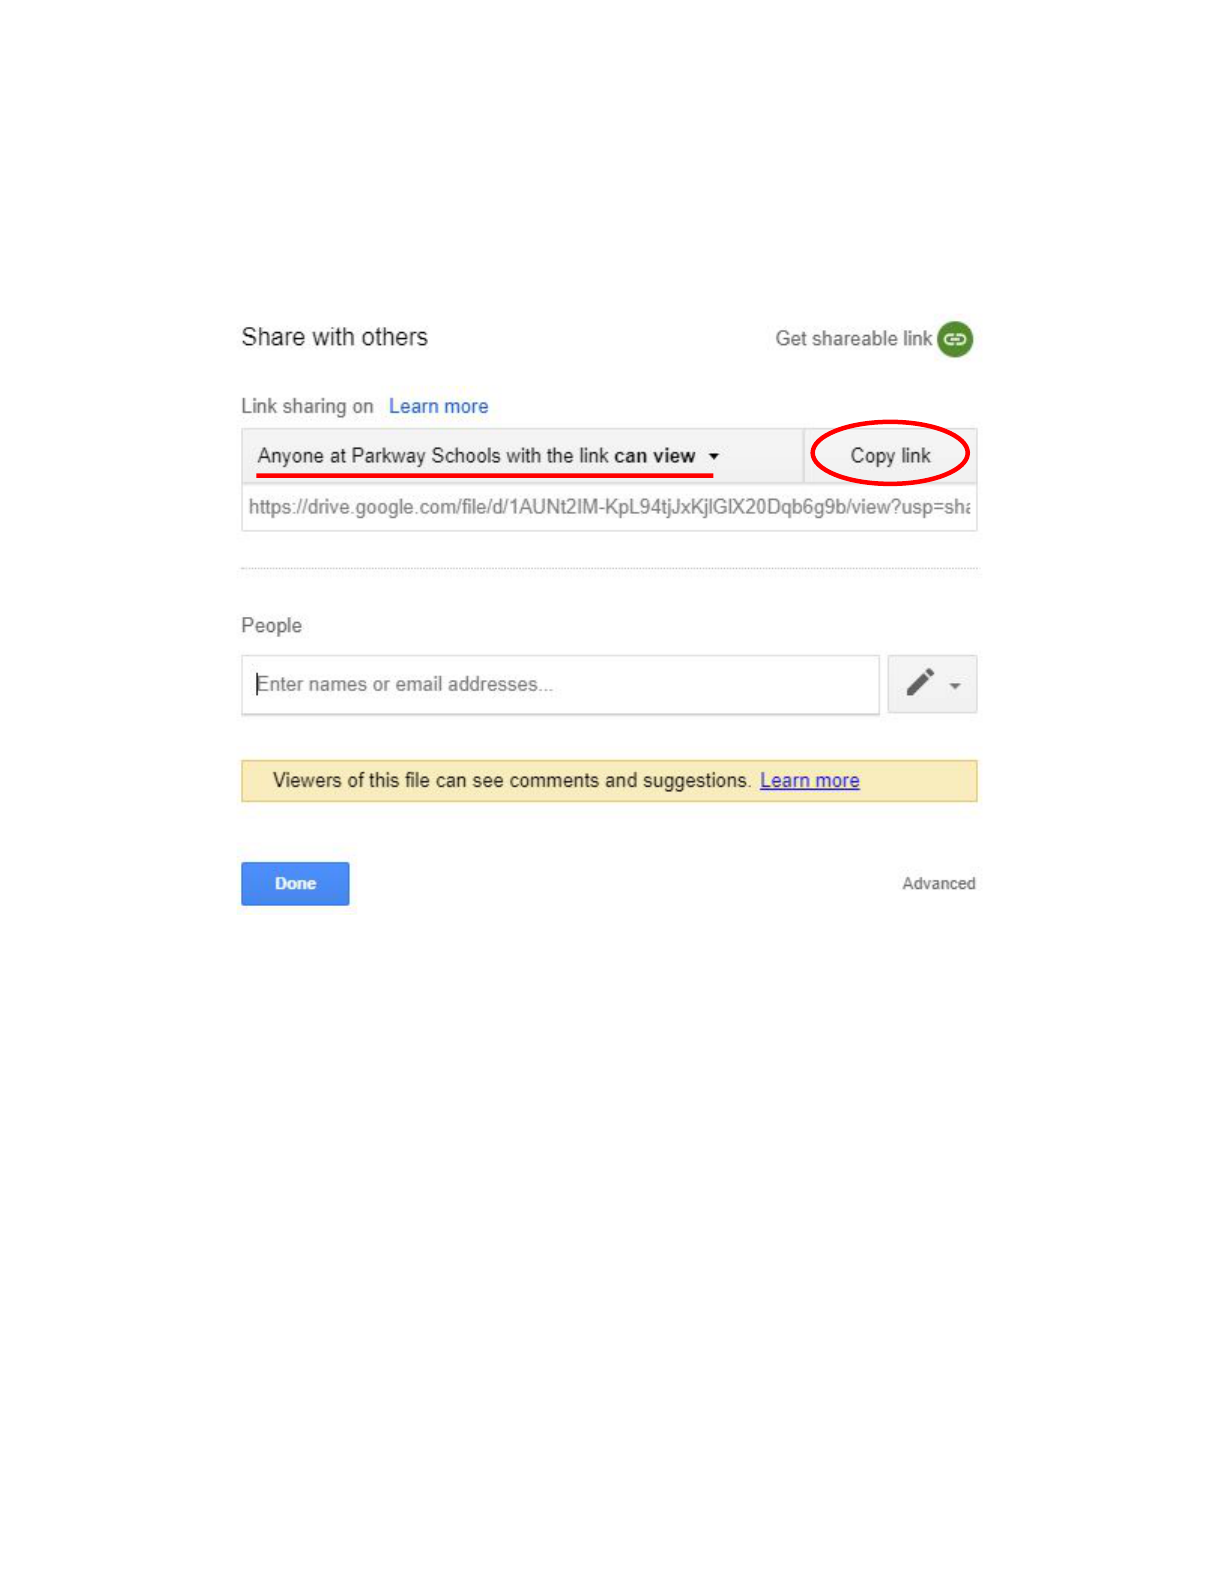
6. In the share window, make sure “Anyone at Parkway Schools with
the link can view” is selected and click on “copy the link” to share
with students.
Protecting Student Privacy:
When you do a recording in Google Meet, be sure that you know which
students are able to be recorded and which are not. If a student cannot be
recorded, they can simply be instructed to turn off their camera but still
participate in the Meet.
When sharing your recording, be aware of copyright and conscious of
where you post your video. Linking to the video in Schoology or sharing
directly is your best option.
