
Remote Capture
Scanner Installation
Guide
Welcome to Remote Capture.
This guide will walk you through the necessary steps to
prepare your system and install your scanner. Please first use
this Scanner Installation Guide and then, refer to the Remote
Capture User Guide if you have specific questions for
processing your work.

WELCOME TO REMOTE DEPOSIT CAPTURE
Page 2 of 9
©2021 JPMorgan Chase & Co. All Rights Reserved. JPMorgan Chase Bank, N.A. Member FDIC.
All services are subject to applicable laws and regulations and service terms.
Before You Begin
We recommend that you confirm the following before
installing your scanner:
Supported Operating Systems & Browsers:
Visit the Remote Capture Resource Center under the
Technology Requirements to obtain a list of supported
Operating Systems and Browsers:
https://www.jpmorgan.com/solutions/treasury-
payments/remote-capture-resource-center
Your Company’s Policies
Installing the scanner’s software may require some
changes to your settings. Ensure the following policies are
in place before you begin:
• Administrative rights to install software on your PC
Note: Most clients can perform the above tasks
themselves. However, if you work for a company that
assigns a dedicated person or department to maintain
your PC, you may require their assistance.
Your Scanner Parts and Accessories
Unpack your scanner and identify its parts and
accessories. Locate the power cord, USB cable and the
scanner feeder tray for initial setup.
Please visit the Remote Capture Resource Center under
the Technology Requirements to download all applicable
scanner drivers.
Note: To properly use the scanner, you will need an
available USB 2.0 port on your PC.
Preparing Your Work Area
• It is very important that you download the scanner
software before you plug the scanner into a power
source.
• Place the scanner at least 18 inches from any device
that may create interference (e.g., fans, heaters,
computer monitors, CPUs).
• Uninstall any software currently on your computer that
allows you to scan paper checks as it may interfere with
your new scanner causing operational difficulties.
WELCOME TO REMOTE DEPOSIT CAPTURE
Page 3 of 9
©2021 JPMorgan Chase & Co. All Rights Reserved. JPMorgan Chase Bank, N.A. Member FDIC.
All services are subject to applicable laws and regulations and service terms.
Set Up Your Scanner
NOTE: You must have administrator rights to your PC
to perform this task. If you work for a company that
assigns a dedicated person or department to maintain
your PC, you may have to have someone else install
these features.
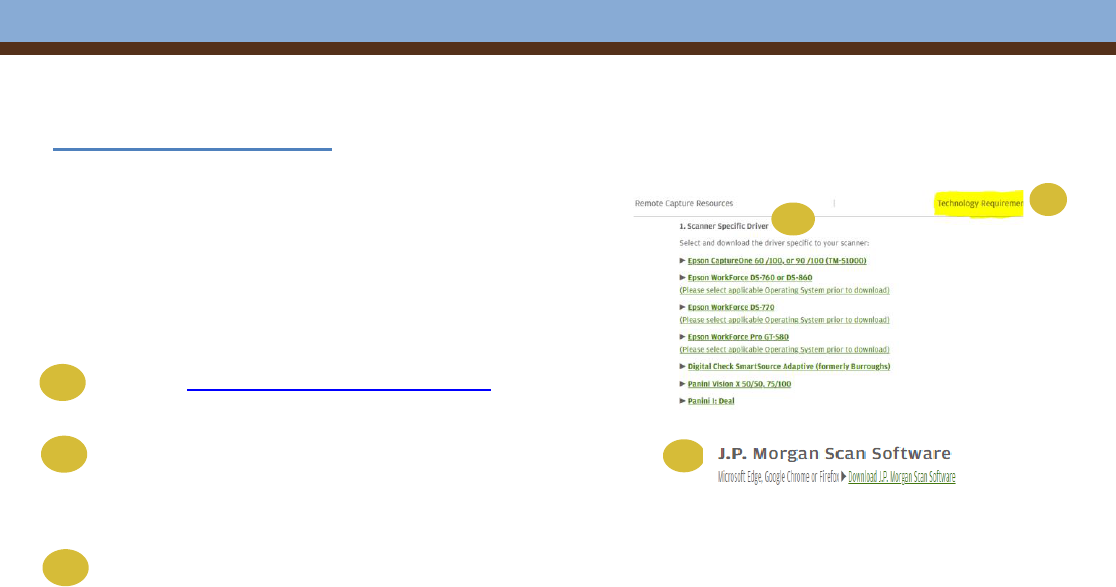
Do not connect the scanner to the PC.
Go to the Remote Capture Resource Center.
Select & download your Scanner Specific Driver.
Read the information provided on the screen and
click Install when prompted.
Select & download the J.P. Morgan
Scan software which will work with Microsoft Edge,
Google Chrome and/or Firefox.
Read the information provided on the screen and
click Install when prompted. See pages 4 & 5 for
additional details.
When you’ve completed the installation, restart your
computer.
Connect the Scanner to Your Computer
Connect the scanner to your computer by completing
these steps:
• Place the round power supply connector into the
back of the scanner and plug the power supply
into a power outlet.
• Place one end of the USB cable into the back of
the scanner and the other end into any USB port
on your computer.
• If the Found New Hardware wizard appears,
follow the necessary steps provided.
Note: For specific instructions on assembling your
scanner, connecting the scanner to your computer,
reading the status lights, or troubleshooting issues,
please refer to the scanner’s Operator Manual.
A
B
C
A
B
C
WELCOME TO REMOTE DEPOSIT CAPTURE
Page 4 of 9
©2021 JPMorgan Chase & Co. All Rights Reserved. JPMorgan Chase Bank, N.A. Member FDIC.
All services are subject to applicable laws and regulations and service terms.
Installation Steps
1.
Click on the Download Scan Software link to download the installation program from the Remote
Capture Resource Center or when prompted in the redesigned user interface
2.
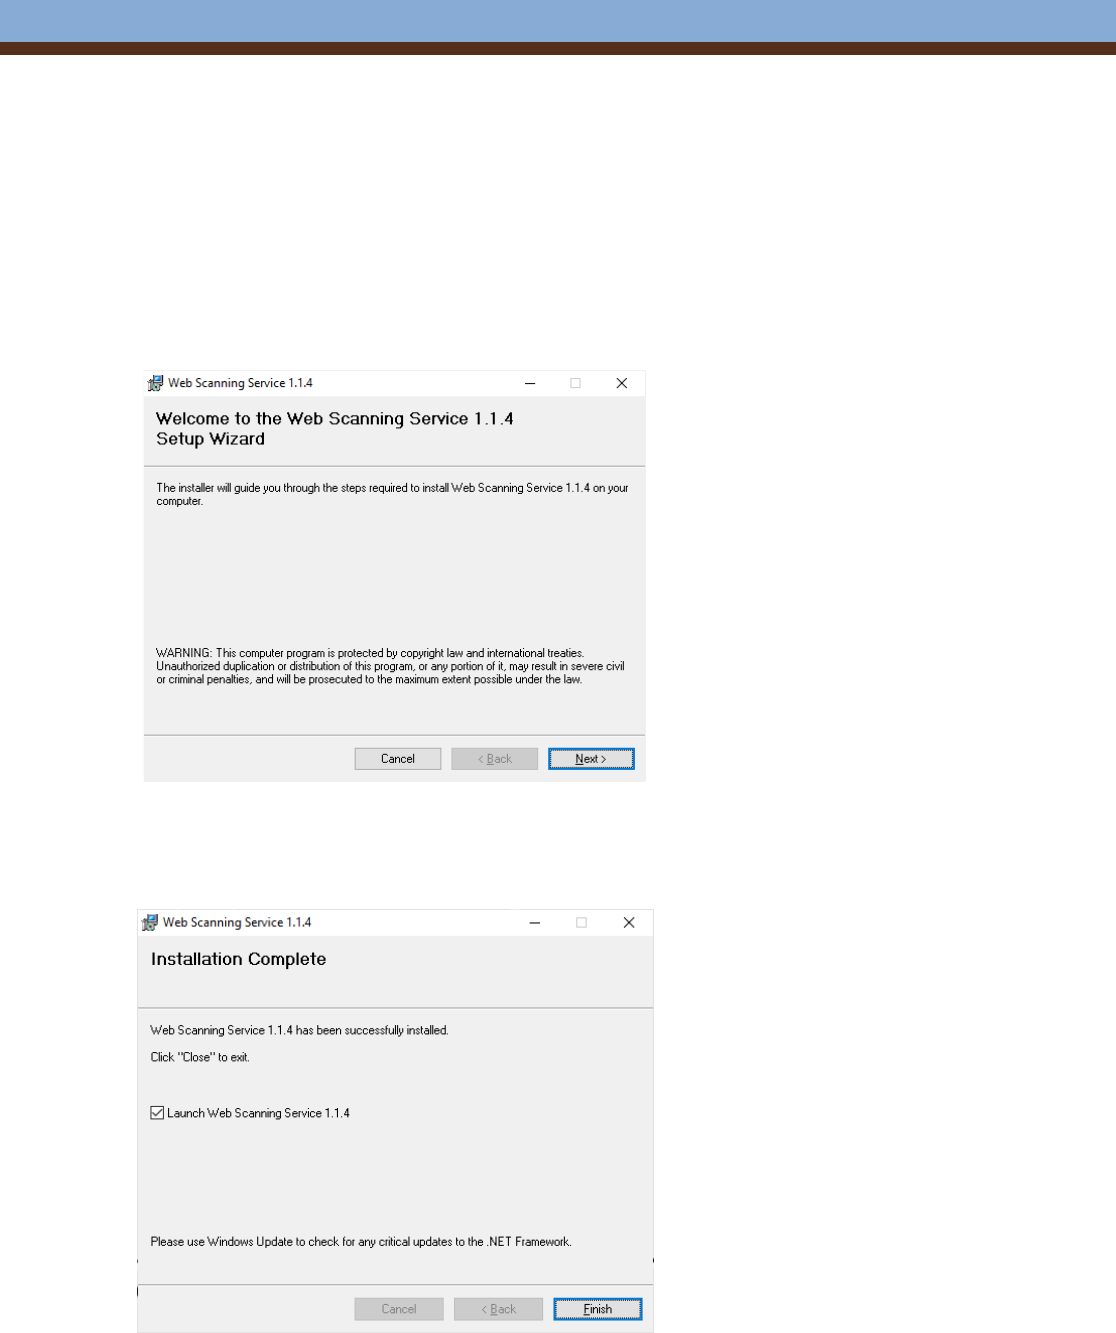
Run the installer.
a. Ensure Administrator rights are used when installing.
3.
Click through the wizard to complete the install.
4.
On the last page Ensure that the checkbox to launch web Scanning Service is checked.
5.
Click Finish
5
©2021 JPMorgan Chase & Co. All Rights Reserved. JPMorgan Chase Bank, N.A. Member FDIC.
All services are subject to applicable laws and regulations and service terms.
6.
Restart your computer
7.
Login as your normal user.
a. If logging in as the same User ID that was used to install the software then the scanner service will launch automatically
b. If logging with a different User ID than was used to install the software then the scanner service will need to be started manually
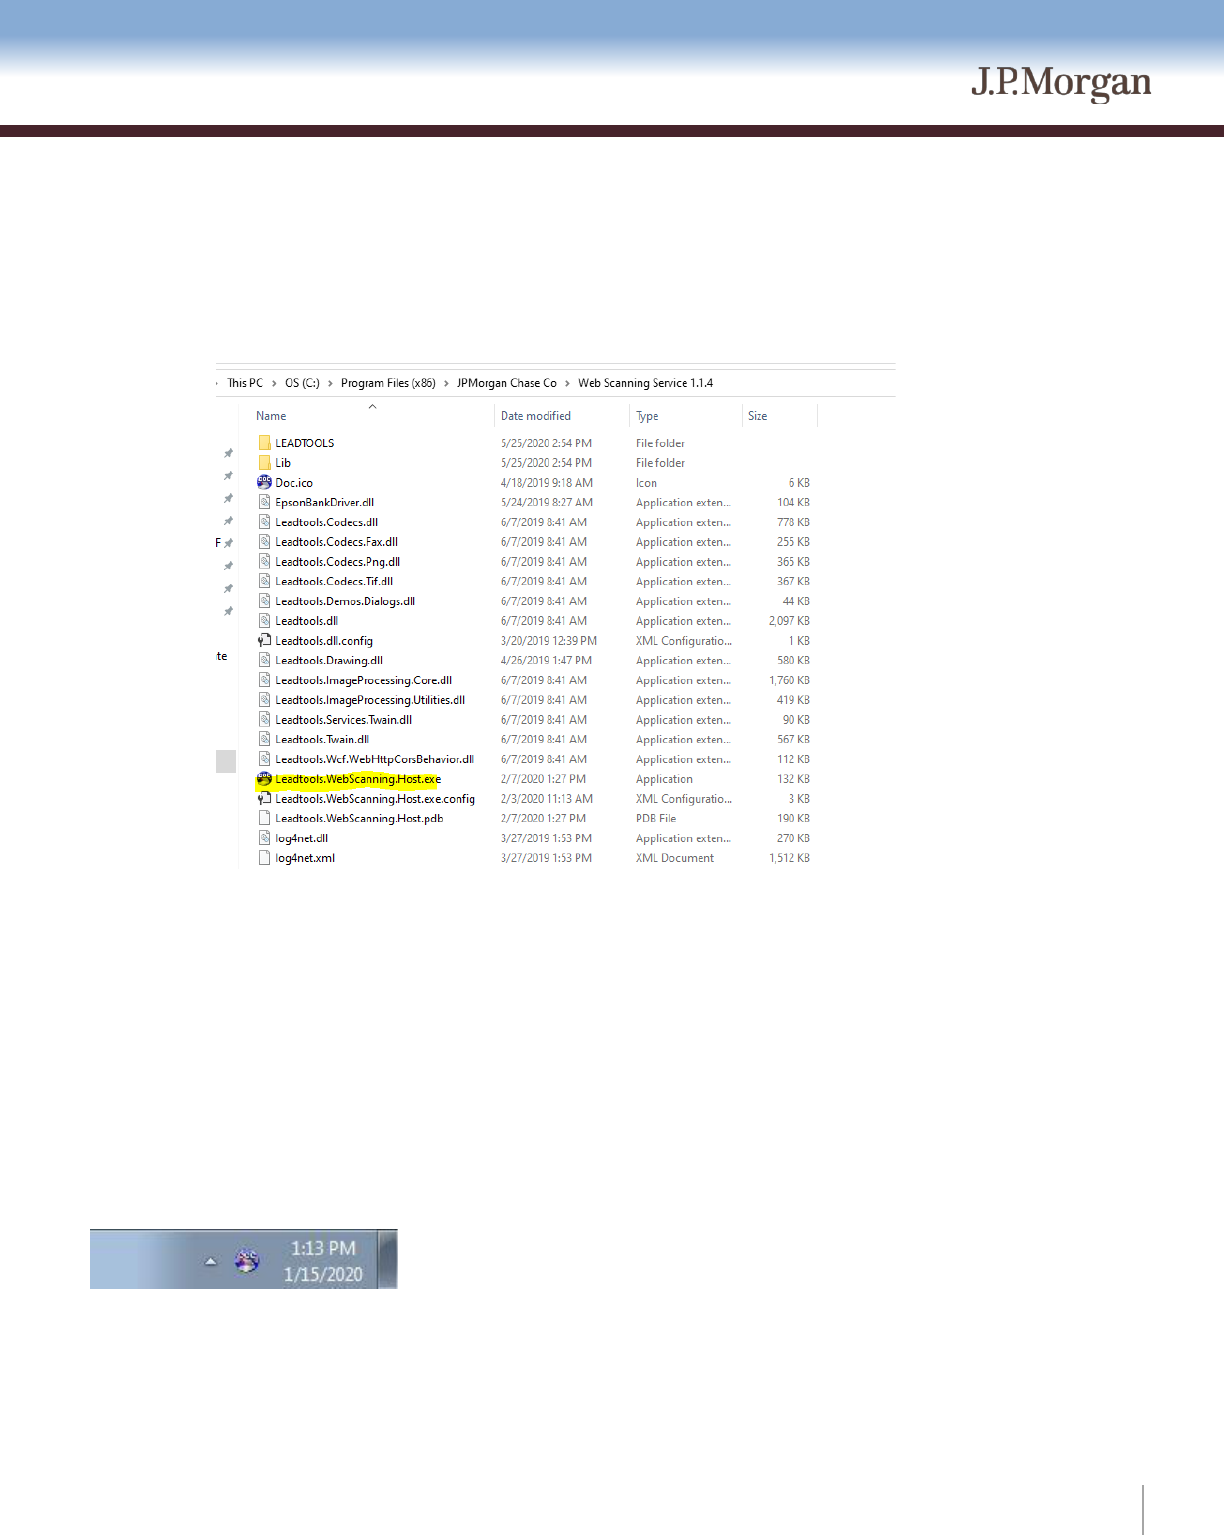
i. To run the scanner service manually
1. Open Windows Explorer
2. Navigate to C:\Program Files (x86)\JPMorgan Chase Co\Web Scanning Service 1.1.4\
3. Double click Leadtools.WebScanning.Host.exe.
Note: The file name may display without the “.exe” extension as: Leadtools.WebScanning.Host
8.
Verify that the scanner service is running. See section “Verify Scanner Service Is Running”
Note: If an administrator performed the install, the administrator should verify that the service is
installed and running before their task is complete.
Verify Scanner Service Is Running
When the scanner service is running its icon will appear in the system tray on the Windows toolbar.
If you do not see that icon then the scanner service is either not running or it is still starting. The scanner service is designed to start
automatically by default when you restart your computer.
6
©2021 JPMorgan Chase & Co. All Rights Reserved. JPMorgan Chase Bank, N.A. Member FDIC.
All services are subject to applicable laws and regulations and service terms.
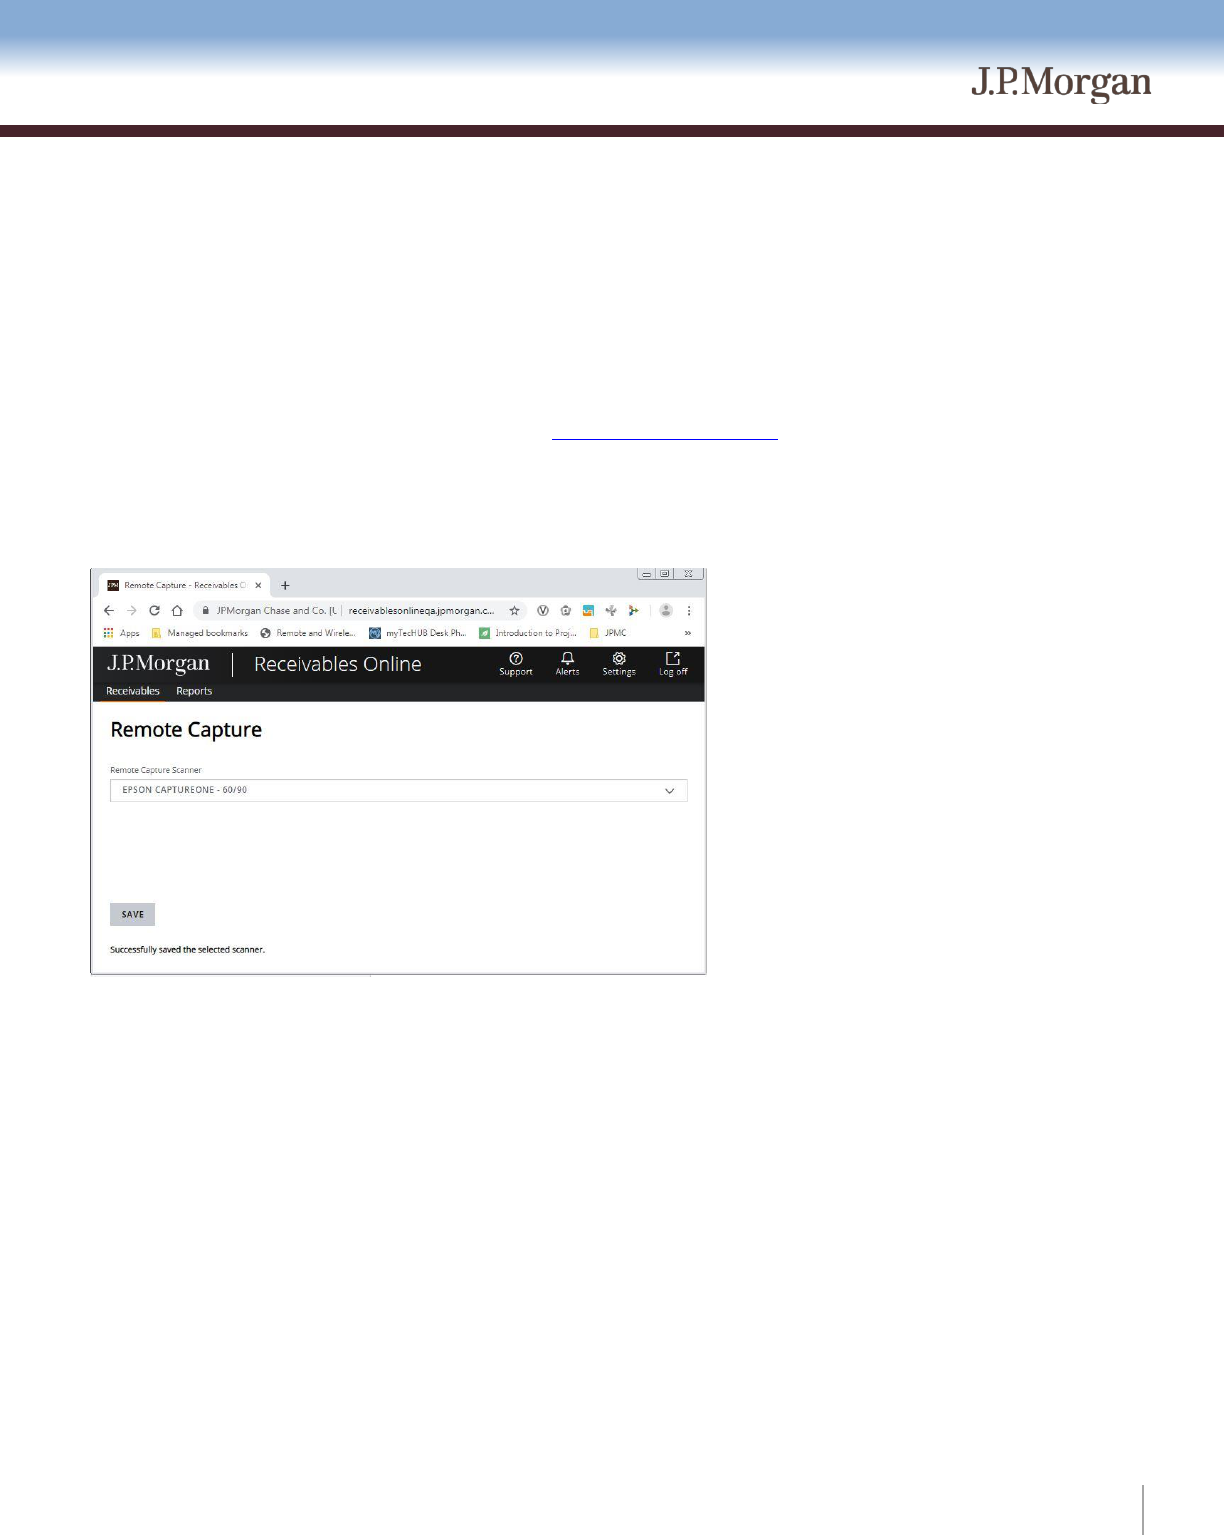
Set Default Scanner
Within Receivables Online, you’ll find a My Settings link on the top right-hand side of the page. Follow the steps below to set up your
installed scanner as the default scanner for Remote Deposit Capture.
Ensure that you are using an approved supported scanner. Refer to the Remote Capture Resource Center under Technology Requirements
1. Click on the Settings link in the upper right corner and select the Remote Capture link from the menu
2. Select your scanner from the dropdown list of supported scanners
3. Click the Save button. You will see a confirmation message when complete
You are now ready to scan your work through Remote Capture.
Additional Troubleshooting Setup Steps If Necessary
Additional steps may be necessary in certain types of environments depending on your web browser or version of Windows. If your web
browser is unable to communicate with the service you can try the following.
You may need to add a firewall exception to your version of Windows
1. From Control Panel find Allow apps to communicate through Windows Firewall
2. Click on Change Settings. Then Allow another app
3. Add the scanner service located at:
C:\Program Files (x86)\JPMorgan Chase Co\Web Scanning service 1.1.4\Leadtools.WebScanning.Host.exe
4. Restart your computer

7
©2021 JPMorgan Chase & Co. All Rights Reserved. JPMorgan Chase Bank, N.A. Member FDIC.
All services are subject to applicable laws and regulations and service terms.
Configuring Firefox
If using the Firefox web browser there may be additional security settings that you need to configure. See the Configuring Firefox
section below.
Firefox has additional security settings that could prevent your computer from communicating with the scanner service. If you are using
Firefox and you cannot communicate with the scanner service first try using Internet Explorer or Chrome to see if they work. If Internet
Explorer and/or Chrome can communicate with the service then the problem is likely a setting within Firefox. Below are two settings that
you can check.
8
©2021 JPMorgan Chase & Co. All Rights Reserved. JPMorgan Chase Bank, N.A. Member FDIC.
All services are subject to applicable laws and regulations and service terms.
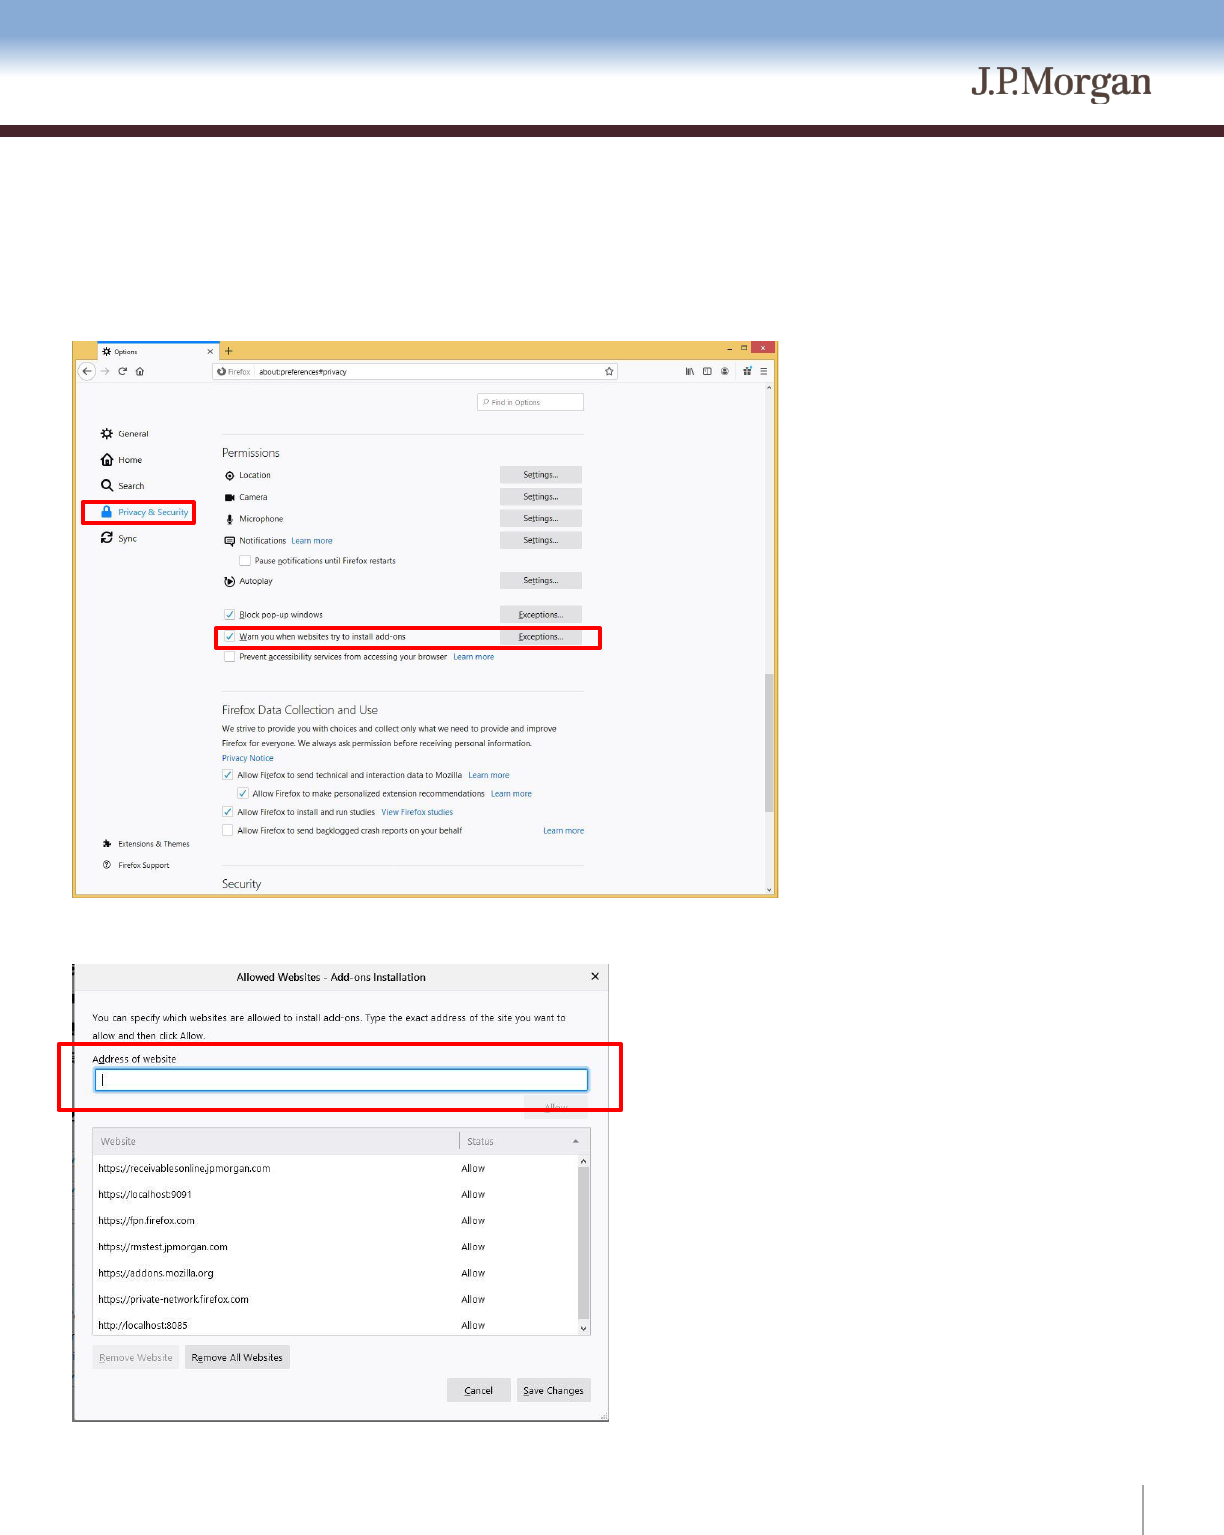
Exceptions to Allow Add-ons
You can tell Firefox to allow add-ons for the scan service by adding an exception for https://localhost:8085/ScanService
1. In Firefox go to options and select Privacy & Security
2. Click the Exceptions button next to the option for Warn you when websites try to install add-ons
3. In the address bar type the URL https://localhost:8085 and click Allow to add the exception.
4. Restart Firefox for the change to take effect.
5. If Firefox still is not able to communicate with the service you may need tell Firefox to allow the certificate by following steps below
9
©2021 JPMorgan Chase & Co. All Rights Reserved. JPMorgan Chase Bank, N.A. Member FDIC.
All services are subject to applicable laws and regulations and service terms.
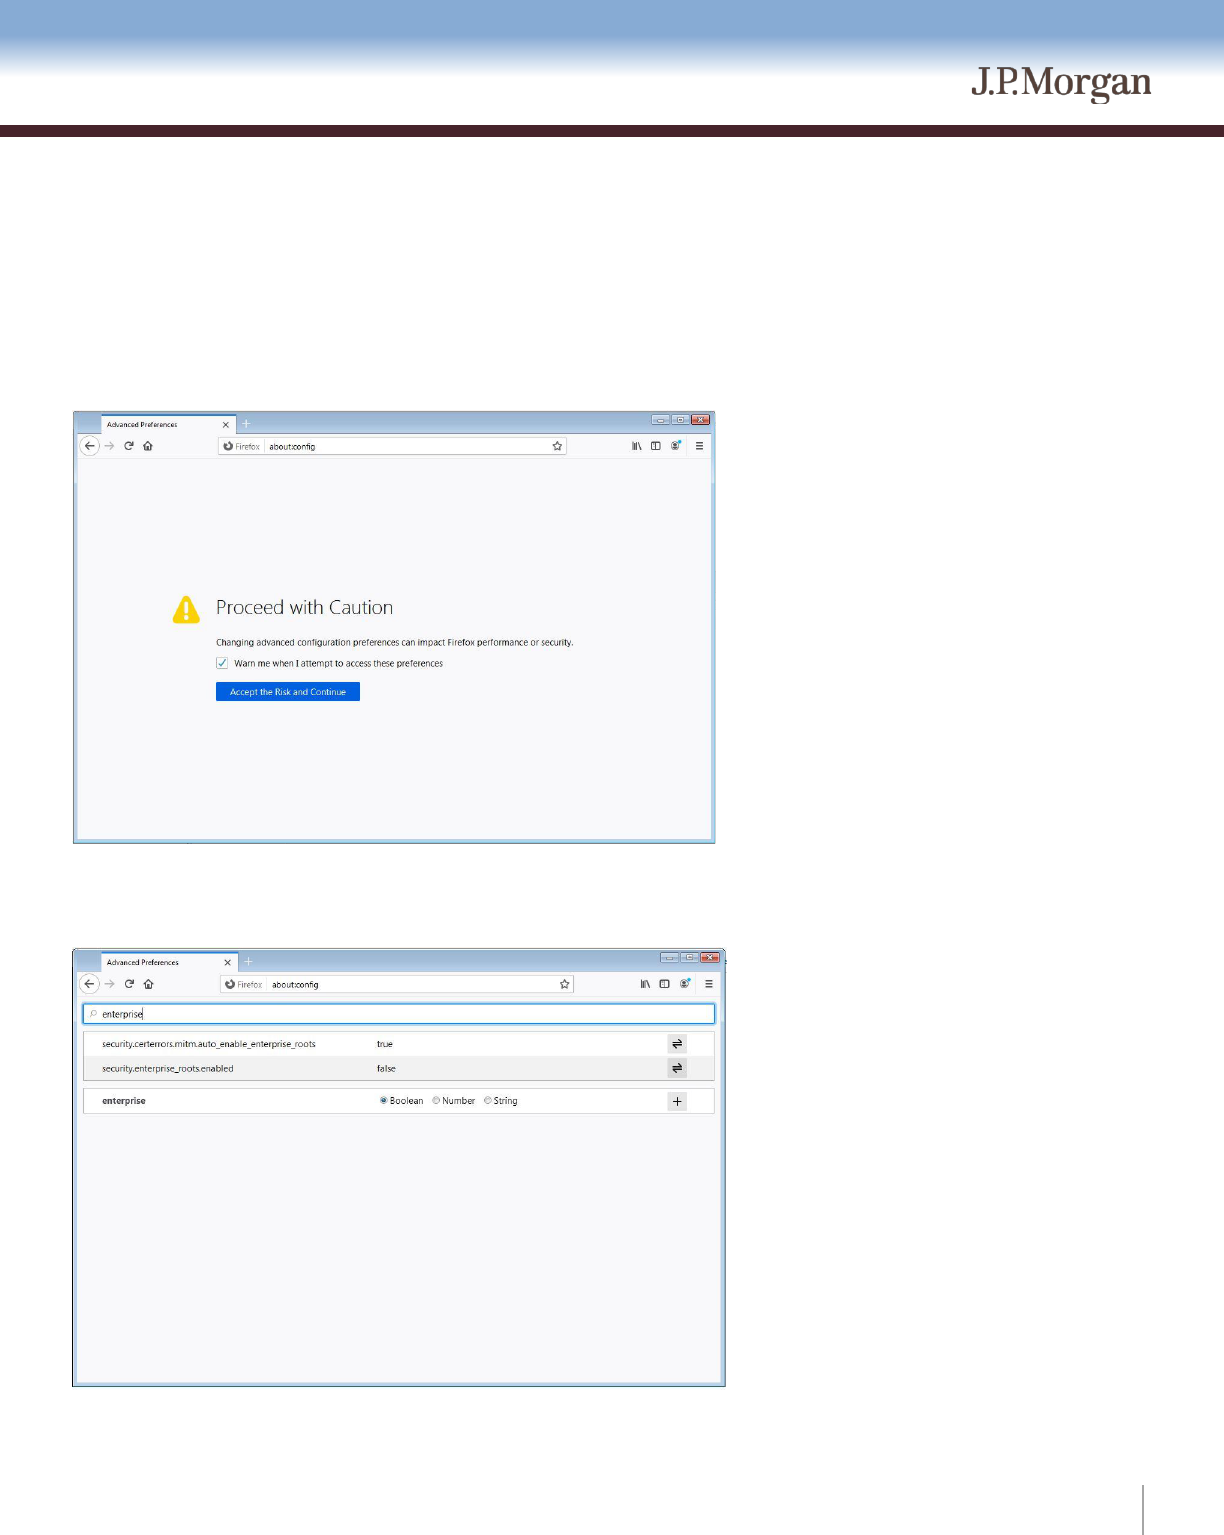
Configure Firefox to allow the certificate
In some cases you may need to tell Firefox to allow the scanner services certificate. If you have verified that communication works with
other browsers and you have completed the firewall exceptions above, your Windows Firewall is allowing the connection.
Try the following steps below. This step should only be done by an Administrator.
1. In the Firefox address bar type about:config. You will get a warning page similar to the following.
2. Click Accept the Risk and Continue.
3. The next screen will give you a text box to search for settings. Search for a setting named security.enterprise_roots.enabled.
4. Make sure that setting is marked as True.
5. Restart Firefox.
