
[1]
Oracle® Fusion Middleware
Developing Web Applications, Servlets, and JSPs for Oracle
WebLogic Server
12c (12.1.2)
E28105-08
March 2015
This document is a resource for software developers who
develop Web applications and components such as HTTP
servlets and JavaServer Pages (JSPs) for deployment on
WebLogic Server.
Oracle Fusion Middleware Developing Web Applications, Servlets, and JSPs for Oracle WebLogic Server, 12c
(12.1.2)
E28105-08
Copyright © 2007, 2015, Oracle and/or its affiliates. All rights reserved.
This software and related documentation are provided under a license agreement containing restrictions on
use and disclosure and are protected by intellectual property laws. Except as expressly permitted in your
license agreement or allowed by law, you may not use, copy, reproduce, translate, broadcast, modify, license,
transmit, distribute, exhibit, perform, publish, or display any part, in any form, or by any means. Reverse
engineering, disassembly, or decompilation of this software, unless required by law for interoperability, is
prohibited.
The information contained herein is subject to change without notice and is not warranted to be error-free. If
you find any errors, please report them to us in writing.
If this is software or related documentation that is delivered to the U.S. Government or anyone licensing it
on behalf of the U.S. Government, then the following notice is applicable:
U.S. GOVERNMENT END USERS: Oracle programs, including any operating system, integrated software,
any programs installed on the hardware, and/or documentation, delivered to U.S. Government end users
are "commercial computer software" pursuant to the applicable Federal Acquisition Regulation and
agency-specific supplemental regulations. As such, use, duplication, disclosure, modification, and
adaptation of the programs, including any operating system, integrated software, any programs installed on
the hardware, and/or documentation, shall be subject to license terms and license restrictions applicable to
the programs. No other rights are granted to the U.S. Government.
This software or hardware is developed for general use in a variety of information management
applications. It is not developed or intended for use in any inherently dangerous applications, including
applications that may create a risk of personal injury. If you use this software or hardware in dangerous
applications, then you shall be responsible to take all appropriate fail-safe, backup, redundancy, and other
measures to ensure its safe use. Oracle Corporation and its affiliates disclaim any liability for any damages
caused by use of this software or hardware in dangerous applications.
Oracle and Java are registered trademarks of Oracle and/or its affiliates. Other names may be trademarks of
their respective owners.
Intel and Intel Xeon are trademarks or registered trademarks of Intel Corporation. All SPARC trademarks
are used under license and are trademarks or registered trademarks of SPARC International, Inc. AMD,
Opteron, the AMD logo, and the AMD Opteron logo are trademarks or registered trademarks of Advanced
Micro Devices. UNIX is a registered trademark of The Open Group.
This software or hardware and documentation may provide access to or information about content,
products, and services from third parties. Oracle Corporation and its affiliates are not responsible for and
expressly disclaim all warranties of any kind with respect to third-party content, products, and services
unless otherwise set forth in an applicable agreement between you and Oracle. Oracle Corporation and its
affiliates will not be responsible for any loss, costs, or damages incurred due to your access to or use of
third-party content, products, or services, except as set forth in an applicable agreement between you and
Oracle.

iii
Contents
Preface ............................................................................................................................................................... xiii
Documentation Accessibility................................................................................................................... xiii
Conventions ............................................................................................................................................... xiii
1 Introduction and Roadmap
1.1 Document Scope and Audience................................................................................................ 1-1
1.2 Guide To This Document........................................................................................................... 1-1
1.3 Related Documentation.............................................................................................................. 1-3
1.4 Examples for the Web Application Developer ....................................................................... 1-3
1.4.1 Avitek Medical Records Application (MedRec).............................................................. 1-3
1.4.2 Web Application Examples in the WebLogic Server Distribution............................... 1-3
1.5 New and Changed Features In This Release .......................................................................... 1-4
2 Understanding Web Applications, Servlets, and JSPs
2.1 The Web Applications Container ............................................................................................. 2-1
2.1.1 Web Applications and Java EE .......................................................................................... 2-1
2.1.2 Web Application Development Key Points..................................................................... 2-2
2.2 Servlets.......................................................................................................................................... 2-2
2.2.1 Servlets and Java EE ............................................................................................................ 2-3
2.2.2 What You Can Do with Servlets........................................................................................ 2-3
2.2.3 Servlet Development Key Points....................................................................................... 2-4
2.3 JavaServer Pages ......................................................................................................................... 2-4
2.3.1 JSPs and Java EE .................................................................................................................. 2-4
2.3.2 What You Can Do with JSPs .............................................................................................. 2-5
2.3.3 Overview of How JSP Requests Are Handled ................................................................ 2-5
2.4 Web Application Developer Tools ........................................................................................... 2-5
2.4.1 Other Tools ........................................................................................................................... 2-5
2.5 Web Application Security.......................................................................................................... 2-6
2.6 Avoiding Redirection Attacks................................................................................................... 2-6
2.7 P3P Privacy Protocol .................................................................................................................. 2-6
2.8 Displaying Special Characters on Linux Browsers ................................................................ 2-7
3 Creating and Configuring Web Applications
3.1 WebLogic Web Applications and Java EE .............................................................................. 3-1
3.2 Directory Structure ..................................................................................................................... 3-1
iv
3.2.1 Accessing Information in WEB-INF.................................................................................. 3-2
3.2.2 Directory Structure Example ............................................................................................. 3-2
3.3 Main Steps to Create and Configure a Web Application...................................................... 3-3
3.3.1 Step One: Create the Enterprise Application Wrapper.................................................. 3-3
3.3.2 Step Two: Create the Web Application ............................................................................ 3-3
3.3.3 Step Three: Creating the build.xml File............................................................................ 3-4
3.3.4 Step Four: Execute the Split Development Directory Structure Ant Tasks................. 3-4
3.4 Configuring How a Client Accesses a Web Application ...................................................... 3-4
3.5 Configuring Virtual Hosts for Web Applications.................................................................. 3-5
3.5.1 Configuring a Channel-based Virtual Host..................................................................... 3-5
3.5.2 Configuring a Host-based Virtual Host ........................................................................... 3-5
3.6 Targeting Web Applications to Virtual Hosts ........................................................................ 3-5
3.7 Loading Servlets, Context Listeners, and Filters.................................................................... 3-5
3.8 Shared Java EE Web Application Libraries............................................................................. 3-6
4 Creating and Configuring Servlets
4.1 Configuring Servlets................................................................................................................... 4-1
4.1.1 Servlet Mapping................................................................................................................... 4-2
4.2 Setting Up a Default Servlet ...................................................................................................... 4-4
4.3 Servlet Initialization Attributes................................................................................................. 4-4
4.4 Writing a Simple HTTP Servlet................................................................................................. 4-5
4.5 Advanced Features ..................................................................................................................... 4-6
4.6 Complete HelloWorldServlet Example ................................................................................... 4-7
4.7 Debugging Servlet Containers .................................................................................................. 4-8
4.7.1 Disabling Access Logging .................................................................................................. 4-8
4.7.1.1 Usage .............................................................................................................................. 4-8
4.7.1.2 Example.......................................................................................................................... 4-8
4.7.1.3 Debugging Specific Sessions....................................................................................... 4-8
4.7.1.4 Usage .............................................................................................................................. 4-9
4.7.2 Tracking a Request Handle Footprint............................................................................... 4-9
4.7.2.1 Usage .............................................................................................................................. 4-9
5 Creating and Configuring JSPs
5.1 WebLogic JSP and Java EE ........................................................................................................ 5-1
5.2 Configuring JavaServer Pages (JSPs) ....................................................................................... 5-1
5.3 Registering a JSP as a Servlet..................................................................................................... 5-2
5.4 Configuring JSP Tag Libraries .................................................................................................. 5-2
5.5 Configuring Welcome Files ....................................................................................................... 5-3
5.6 Customizing HTTP Error Responses ....................................................................................... 5-4
5.7 Determining the Encoding of an HTTP Request.................................................................... 5-4
5.8 Mapping IANA Character Sets to Java Character Sets.......................................................... 5-4
5.9 Configuring Implicit Includes at the Beginning and End of JSPs........................................ 5-5
5.10 Configuring JSP Property Groups............................................................................................ 5-5
5.10.1 JSP Property Group Rules .................................................................................................. 5-6
5.10.2 What You Can Do with JSP Property Groups................................................................. 5-6
5.11 Writing JSP Documents Using XML Syntax ........................................................................... 5-6
5.11.1 How to Use JSP Documents ............................................................................................... 5-7
v
5.11.2 Important Information about JSP Documents................................................................. 5-7
6 Using JSF and JSTL
6.1 Using JSF and JSTL With Web Applications........................................................................... 6-1
6.1.1 JavaServer Faces (JSF) ......................................................................................................... 6-2
6.1.2 JavaServer Pages Standard Tag Libraries (JSTL) ............................................................ 6-2
6.2 JSF Compatibility with Previous Releases .............................................................................. 6-2
6.2.1 Deploying JSF 1.2 and JSTL Libraries............................................................................... 6-3
6.2.2 Referencing a JSF or JSTL Library ..................................................................................... 6-3
7 Configuring Resources in a Web Application
7.1 Configuring Resources in a Web Application ........................................................................ 7-1
7.2 Configuring Resources............................................................................................................... 7-1
7.3 Referencing External EJBs.......................................................................................................... 7-2
7.4 More about the ejb-ref* Elements ............................................................................................. 7-3
7.5 Referencing Application-Scoped EJBs ..................................................................................... 7-3
7.6 Serving Resources from the CLASSPATH with the ClasspathServlet................................ 7-5
7.7 Using CGI with WebLogic Server ............................................................................................ 7-6
7.7.1 Configuring WebLogic Server to Use CGI....................................................................... 7-6
7.7.2 Requesting a CGI Script...................................................................................................... 7-7
7.7.3 CGI Best Practices................................................................................................................ 7-7
8 WebLogic Annotation for Web Components
8.1 Servlet Annotation and Dependency Injection....................................................................... 8-1
8.1.1 Web Component Classes That Support Annotations..................................................... 8-2
8.1.2 Annotations Supported By a Web Container .................................................................. 8-2
8.1.2.1 Fault Detection and Recovery .................................................................................... 8-3
8.1.2.2 Limitations..................................................................................................................... 8-3
8.2 Annotating Servlets .................................................................................................................... 8-4
8.2.1 WLServlet.............................................................................................................................. 8-4
8.2.1.1 Attributes ....................................................................................................................... 8-4
8.2.1.2 Fault Detection And Recovery.................................................................................... 8-5
8.2.2 WLFilter ................................................................................................................................ 8-5
8.2.2.1 Attributes ....................................................................................................................... 8-5
8.2.2.2 Fault Detection and Recovery..................................................................................... 8-6
8.2.3 WLInitParam ........................................................................................................................ 8-6
8.2.3.1 Attributes ....................................................................................................................... 8-6
9 Servlet Programming Tasks
9.1 Initializing a Servlet.................................................................................................................... 9-1
9.1.1 Initializing a Servlet when WebLogic Server Starts........................................................ 9-2
9.1.2 Overriding the init() Method ............................................................................................. 9-2
9.2 Providing an HTTP Response................................................................................................... 9-3
9.3 Retrieving Client Input .............................................................................................................. 9-4
9.3.1 Methods for Using the HTTP Request.............................................................................. 9-6
vi
9.3.2 Example: Retrieving Input by Using Query Parameters ............................................... 9-6
9.4 Securing Client Input in Servlets.............................................................................................. 9-7
9.4.1 Using a WebLogic Server Utility Method ........................................................................ 9-8
9.5 Using Cookies in a Servlet ........................................................................................................ 9-8
9.5.1 Setting Cookies in an HTTP Servlet ................................................................................. 9-8
9.5.2 Retrieving Cookies in an HTTP Servlet ........................................................................... 9-9
9.5.3 Using Cookies That Are Transmitted by Both HTTP and HTTPS ............................... 9-9
9.5.4 Application Security and Cookies.................................................................................. 9-10
9.6 Response Caching.................................................................................................................... 9-10
9.6.1 Initialization Parameters.................................................................................................. 9-11
9.7 Using WebLogic Services from an HTTP Servlet................................................................ 9-11
9.8 Accessing Databases................................................................................................................ 9-11
9.8.1 Connecting to a Database Using a DataSource Object................................................ 9-12
9.8.1.1 Using a DataSource in a Servlet .............................................................................. 9-12
9.8.2 Connecting Directly to a Database Using a JDBC Driver ........................................... 9-12
9.9 Threading Issues in HTTP Servlets ....................................................................................... 9-12
9.10 Dispatching Requests to Another Resource......................................................................... 9-13
9.10.1 Forwarding a Request ...................................................................................................... 9-14
9.10.2 Including a Request.......................................................................................................... 9-14
9.10.3 RequestDispatcher and Filters........................................................................................ 9-14
9.11 Proxying Requests to Another Web Server.......................................................................... 9-15
9.11.1 Overview of Proxying Requests to Another Web Server ........................................... 9-15
9.11.1.1 Setting Up a Proxy to a Secondary Web Server .................................................... 9-15
9.11.2 Sample Deployment Descriptor for the Proxy Servlet ................................................ 9-16
9.12 Clustering Servlets................................................................................................................... 9-17
9.13 Referencing a Servlet in a Web Application ........................................................................ 9-18
9.14 URL Pattern Matching ............................................................................................................ 9-18
9.15 The SimpleApacheURLMatchMap Utility........................................................................... 9-18
9.16 A Future Response Model for HTTP Servlets...................................................................... 9-19
9.16.1 Abstract Asynchronous Servlet ...................................................................................... 9-19
9.16.1.1 doRequest ................................................................................................................... 9-19
9.16.1.2 doResponse................................................................................................................. 9-20
9.16.1.3 doTimeOut.................................................................................................................. 9-20
9.16.2 Future Response Servlet .................................................................................................. 9-21
10 Using Sessions and Session Persistence
10.1 Overview of HTTP Sessions................................................................................................... 10-1
10.2 Setting Up Session Management .......................................................................................... 10-1
10.2.1 HTTP Session Properties ................................................................................................. 10-1
10.2.2 Session Timeout ................................................................................................................ 10-2
10.2.3 Configuring WebLogic Server Session Cookies........................................................... 10-2
10.2.4 Configuring Application Cookies That Outlive a Session.......................................... 10-2
10.2.5 Logging Out....................................................................................................................... 10-3
10.2.6 Enabling Web Applications to Share the Same Session.............................................. 10-3
10.2.7 Limiting Number of Concurrent Requests for a Session ............................................ 10-3
10.3 Configuring Session Persistence............................................................................................ 10-4
10.3.1 Attributes Shared by Different Types of Session Persistence .................................... 10-4
vii
10.3.2 Using Memory-based, Single-server, Non-replicated Persistent Storage ................ 10-5
10.3.3 Using File-based Persistent Storage .............................................................................. 10-5
10.4 Using a Database for Persistent Storage (JDBC Persistence)............................................. 10-5
10.4.1 Configuring JDBC-based Persistent Storage................................................................. 10-5
10.4.2 Caching and Database Updates for JDBC Session Persistence .................................. 10-7
10.4.3 Using Cookie-Based Session Persistence....................................................................... 10-8
10.5 Using URL Rewriting Instead of Cookies ............................................................................ 10-8
10.5.1 Coding Guidelines for URL Rewriting.......................................................................... 10-9
10.5.2 URL Rewriting and Wireless Access Protocol (WAP) ............................................... 10-9
10.6 Session Tracking from a Servlet........................................................................................... 10-10
10.6.1 A History of Session Tracking ...................................................................................... 10-10
10.6.2 Tracking a Session with an HttpSession Object ......................................................... 10-11
10.6.3 Lifetime of a Session....................................................................................................... 10-12
10.6.4 How Session Tracking Works....................................................................................... 10-12
10.6.5 Detecting the Start of a Session..................................................................................... 10-12
10.6.6 Setting and Getting Session Name/Value Attributes .............................................. 10-13
10.6.7 Logging Out and Ending a Session.............................................................................. 10-13
10.6.7.1 Using session.invalidate() for a Single Web Application .................................. 10-13
10.6.7.2 Implementing Single Sign-On for Multiple Applications ................................. 10-14
10.6.7.3 Exempting a Web Application for Single Sign-on.............................................. 10-14
10.6.8 Configuring Session Tracking ...................................................................................... 10-14
10.6.9 Using URL Rewriting Instead of Cookies................................................................... 10-14
10.6.10 URL Rewriting and Wireless Access Protocol (WAP) .............................................. 10-15
10.6.11 Making Sessions Persistent .......................................................................................... 10-15
10.6.11.1 Scenarios to Avoid When Using Sessions............................................................ 10-16
10.6.11.2 Use Serializable Attribute Values.......................................................................... 10-16
10.6.11.3 Configuring Session Persistence ........................................................................... 10-16
10.6.12 Configuring a Maximum Limit on In-memory Servlet Sessions............................. 10-16
10.6.13 Enabling Session Memory Overload Protection ........................................................ 10-17
11 Application Events and Event Listener Classes
11.1 Overview of Application Event Listener Classes................................................................ 11-1
11.2 Servlet Context Events ............................................................................................................ 11-2
11.3 HTTP Session Events............................................................................................................... 11-2
11.4 Servlet Request Events ............................................................................................................ 11-3
11.5 Configuring an Event Listener Class .................................................................................... 11-3
11.6 Writing an Event Listener Class ............................................................................................ 11-3
11.7 Templates for Event Listener Classes ................................................................................... 11-4
11.7.1 Servlet Context Event Listener Class Example............................................................. 11-4
11.7.2 HTTP Session Attribute Event Listener Class Example.............................................. 11-5
11.8 Additional Resources .............................................................................................................. 11-5
12 Using the HTTP Publish-Subscribe Server
12.1 Overview of HTTP Publish-Subscribe Servers.................................................................... 12-1
12.1.1 How the Pub-Sub Server Works..................................................................................... 12-2
12.1.2 Channels............................................................................................................................. 12-3
viii
12.1.3 Message Delivery and Order of Delivery Guarantee.................................................. 12-3
12.2 Examples of Using the HTTP Publish-Subscribe Server.................................................... 12-4
12.3 Using the HTTP Publish-Subscribe Server: Typical Steps................................................. 12-4
12.3.1 Creating the weblogic-pubsub.xml File ........................................................................ 12-6
12.3.2 Programming Using the Server-Side Pub-Sub APIs ................................................... 12-8
12.3.2.1 Overview of the Main API Classes and Interfaces ............................................... 12-8
12.3.2.2 Getting a Pub-Sub Server Instance and Creating a Local Client ........................ 12-9
12.3.2.3 Publishing Messages to a Channel ......................................................................... 12-9
12.3.2.4 Subscribing to a Channel........................................................................................ 12-10
12.3.3 Configuring and Programming Message Filter Chains............................................ 12-10
12.3.3.1 Programming the Message Filter Class................................................................ 12-11
12.3.3.2 Configuring the Message Filter Chain.................................................................. 12-11
12.3.4 Updating a Browser Client to Communicate with the Pub-Sub Server ................. 12-12
12.3.5 Overriding the Default Servlet Mapping of the pubsub Java EE Library.............. 12-14
12.4 Getting Run-time Information about the Pub-Sub Server and Channels...................... 12-14
12.5 Enabling Security ................................................................................................................... 12-15
12.5.1 Use Pub-Sub Constraints............................................................................................... 12-15
12.5.1.1 Specify Access to Channel Operations ................................................................. 12-16
12.5.1.2 Restricting Access to All Channel Operations .................................................... 12-16
12.5.1.3 Opening Access to All Channel Operations ........................................................ 12-17
12.5.1.4 Updating a Constraint Requires Redeploy of Web Application ...................... 12-17
12.5.2 Map Roles to Principals ................................................................................................. 12-17
12.5.3 Configure SSL for Pub-Sub Communication.............................................................. 12-18
12.5.4 Additional Security Considerations............................................................................. 12-18
12.5.4.1 Use AuthCookieEnabled to Access Resources.................................................... 12-18
12.5.4.2 Locking Down the Pub-Sub Server....................................................................... 12-19
12.6 Advanced Topic: Using JMS as a Provider to Enable Cluster Support ......................... 12-20
12.6.1 Configuring JMS as a Handler...................................................................................... 12-20
12.6.2 Configuring Client Session Failover ............................................................................ 12-22
12.7
Advanced Topic: Persisting Messages to Physical Storage ............................................. 12-23
12.7.1 Configuring Persistent Channels.................................................................................. 12-23
13 WebLogic JSP Reference
13.1 JSP Tags ..................................................................................................................................... 13-1
13.2 Defining JSP Versions.............................................................................................................. 13-2
13.2.1 Rules for Defining a JSP File Version............................................................................. 13-3
13.2.2 Rules for Defining a Tag File Version............................................................................ 13-3
13.3 Reserved Words for Implicit Objects .................................................................................... 13-3
13.4 Directives for WebLogic JSP................................................................................................... 13-5
13.4.1 Using the page Directive to Set Character Encoding .................................................. 13-5
13.4.2 Using the taglib Directive................................................................................................ 13-5
13.5 Declarations .............................................................................................................................. 13-5
13.6 Scriptlets .................................................................................................................................... 13-6
13.7 Expressions .............................................................................................................................. 13-6
13.8 Example of a JSP with HTML and Embedded Java............................................................ 13-6
13.9 Actions ...................................................................................................................................... 13-7
13.9.1 Using JavaBeans in JSP .................................................................................................... 13-7
ix
13.9.1.1 Instantiating the JavaBean Object ........................................................................... 13-8
13.9.1.2 Doing Setup Work at JavaBean Instantiation........................................................ 13-8
13.9.1.3 Using the JavaBean Object ....................................................................................... 13-8
13.9.1.4 Defining the Scope of a JavaBean Object ............................................................... 13-9
13.9.2 Forwarding Requests ....................................................................................................... 13-9
13.9.3 Including Requests ........................................................................................................... 13-9
13.10 JSP Expression Language...................................................................................................... 13-10
13.10.1 Expressions and Attribute Values................................................................................ 13-10
13.10.2 Expressions and Template Text.................................................................................... 13-11
13.11 JSP Expression Language Implicit Objects......................................................................... 13-11
13.12 JSP Expression Language Literals and Operators............................................................. 13-12
13.12.1 Literals.............................................................................................................................. 13-12
13.12.2 Errors, Warnings, Default Values................................................................................. 13-13
13.12.3 Operators ......................................................................................................................... 13-13
13.12.4 Operator Precedence ...................................................................................................... 13-13
13.13 JSP Expression Language Reserved Words ....................................................................... 13-14
13.14 JSP Expression Language Named Variables...................................................................... 13-14
13.15 Securing User-Supplied Data in JSPs.................................................................................. 13-15
13.15.1 Using a WebLogic Server Utility Method ................................................................... 13-15
13.16 Using Sessions with JSP ........................................................................................................ 13-16
13.17 Deploying Applets from JSP ................................................................................................ 13-16
13.18 Using the WebLogic JSP Compiler...................................................................................... 13-17
13.18.1 JSP Compiler Syntax....................................................................................................... 13-18
13.18.2 JSP Compiler Options ................................................................................................... 13-18
13.18.3 Precompiling JSPs........................................................................................................... 13-20
13.18.3.1 Using the JSPClassServlet....................................................................................... 13-20
14 Filters
14.1 Overview of Filters .................................................................................................................. 14-1
14.1.1 How Filters Work ............................................................................................................. 14-1
14.1.2 Uses for Filters................................................................................................................... 14-2
14.2 Writing a Filter Class............................................................................................................... 14-2
14.3 Configuring Filters................................................................................................................... 14-2
14.3.1 Configuring a Filter .......................................................................................................... 14-2
14.3.2 Configuring a Chain of Filters ........................................................................................ 14-4
14.4 Filtering the Servlet Response Object.................................................................................... 14-4
14.5 Additional Resources .............................................................................................................. 14-4
15 Using WebLogic JSP Form Validation Tags
15.1 Overview of WebLogic JSP Form Validation Tags ............................................................. 15-1
15.2 Validation Tag Attribute Reference ...................................................................................... 15-2
15.2.1 <wl:summary>.................................................................................................................. 15-2
15.2.2 <wl:form> .......................................................................................................................... 15-3
15.2.3 <wl:validator>................................................................................................................... 15-3
15.3 Using WebLogic JSP Form Validation Tags in a JSP .......................................................... 15-4
15.4 Creating HTML Forms Using the <wl:form> Tag .............................................................. 15-5
x
15.4.1 Defining a Single Form .................................................................................................... 15-5
15.4.2 Defining Multiple Forms ................................................................................................. 15-5
15.4.3 Re-Displaying the Values in a Field When Validation Returns Errors..................... 15-5
15.4.3.1 Re-Displaying a Value Using the <input> Tag ..................................................... 15-5
15.4.3.2 Re-Displaying a Value Using the Apache Jakarta <input:text> Tag.................. 15-6
15.5 Using a Custom Validator Class............................................................................................ 15-6
15.5.1 Extending the CustomizableAdapter Class.................................................................. 15-7
15.5.2 Sample User-Written Validator Class............................................................................ 15-7
15.6 Sample JSP with Validator Tags ............................................................................................ 15-7
16 Using Custom WebLogic JSP Tags (cache, process, repeat)
16.1 Overview of WebLogic Custom JSP Tags ............................................................................ 16-1
16.2 Using the WebLogic Custom Tags in a Web Application.................................................. 16-1
16.3 Cache Tag.................................................................................................................................. 16-2
16.3.1 Refreshing a Cache ........................................................................................................... 16-2
16.3.2 Flushing a Cache............................................................................................................... 16-2
16.4 Process Tag................................................................................................................................ 16-6
16.5 Repeat Tag................................................................................................................................. 16-7
17 Using the WebLogic EJB to JSP Integration Tool
17.1 Overview of the WebLogic EJB-to-JSP Integration Tool .................................................... 17-1
17.2 Basic Operation ........................................................................................................................ 17-2
17.3 Interface Source Files............................................................................................................... 17-2
17.4 Build Options Panel................................................................................................................. 17-3
17.5 Troubleshooting ....................................................................................................................... 17-3
17.6 Using EJB Tags on a JSP Page ................................................................................................ 17-4
17.7 EJB Home Methods.................................................................................................................. 17-4
17.8 Stateful Session and Entity Beans.......................................................................................... 17-4
17.9 Default Attributes .................................................................................................................... 17-5
A web.xml Deployment Descriptor Elements
A.1 web.xml Namespace Declaration and Schema Location ..................................................... A-2
A.2 icon ............................................................................................................................................... A-2
A.3 display-name .............................................................................................................................. A-2
A.4 description................................................................................................................................... A-2
A.5 distributable................................................................................................................................ A-3
A.6 context-param............................................................................................................................. A-3
A.7 filter .............................................................................................................................................. A-4
A.8 filter-mapping............................................................................................................................. A-5
A.9 listener ......................................................................................................................................... A-5
A.10 servlet........................................................................................................................................... A-5
A.10.1 icon........................................................................................................................................ A-6
A.10.2 init-param ............................................................................................................................ A-7
A.10.3 security-role-ref................................................................................................................... A-7
A.11 servlet-mapping ......................................................................................................................... A-8
A.12 session-config ............................................................................................................................. A-8
xi
A.13 mime-mapping........................................................................................................................... A-9
A.14 welcome-file-list ......................................................................................................................... A-9
A.15 error-page.................................................................................................................................. A-10
A.16 jsp-config ................................................................................................................................... A-10
A.16.1 taglib ................................................................................................................................... A-10
A.16.2 jsp-property-group ........................................................................................................... A-11
A.17 resource-env-ref ....................................................................................................................... A-12
A.18 resource-ref ............................................................................................................................... A-13
A.19 security-constraint ................................................................................................................... A-14
A.19.1 web-resource-collection ................................................................................................... A-14
A.19.2 auth-constraint .................................................................................................................. A-14
A.19.3 user-data-constraint.......................................................................................................... A-15
A.20 login-config ............................................................................................................................... A-15
A.20.1 form-login-config.............................................................................................................. A-16
A.21 security-role .............................................................................................................................. A-16
A.22 env-entry ................................................................................................................................... A-17
A.23 ejb-ref ......................................................................................................................................... A-17
A.24 ejb-local-ref................................................................................................................................ A-18
A.25 web-app..................................................................................................................................... A-19
A.26 message-destination-ref .......................................................................................................... A-19
B weblogic.xml Deployment Descriptor Elements
B.1 weblogic.xml Namespace Declaration and Schema Location............................................. B-2
B.2 description................................................................................................................................... B-2
B.3 weblogic-version ........................................................................................................................ B-2
B.4 security-role-assignment........................................................................................................... B-2
B.5 run-as-role-assignment ............................................................................................................. B-3
B.6 resource-description .................................................................................................................. B-4
B.7 resource-env-description .......................................................................................................... B-4
B.8 ejb-reference-description........................................................................................................... B-4
B.9 service-reference-description ................................................................................................... B-4
B.10 session-descriptor ...................................................................................................................... B-5
B.11 jsp-descriptor............................................................................................................................ B-11
B.12 auth-filter................................................................................................................................... B-13
B.13 container-descriptor................................................................................................................. B-13
B.13.1 check-auth-on-forward .................................................................................................... B-13
B.13.2 filter-dispatched-requests-enabled................................................................................. B-14
B.13.3 redirect-with-absolute-url ............................................................................................... B-14
B.13.4 index-directory-enabled................................................................................................... B-14
B.13.5 index-directory-sort-by.................................................................................................... B-14
B.13.6 servlet-reload-check-secs ................................................................................................. B-14
B.13.7 resource-reload-check-secs.............................................................................................. B-15
B.13.8 single-threaded-servlet-pool-size................................................................................... B-15
B.13.9 session-monitoring-enabled............................................................................................ B-15
B.13.10 save-sessions-enabled ...................................................................................................... B-15
B.13.11 prefer-web-inf-classes ...................................................................................................... B-15
B.13.12 prefer-application-packages............................................................................................ B-16
xii
B.13.13 prefer-application-resources ........................................................................................... B-16
B.13.14 default-mime-type............................................................................................................ B-17
B.13.15 client-cert-proxy-enabled................................................................................................. B-17
B.13.16 relogin-enabled ................................................................................................................. B-17
B.13.17 allow-all-roles.................................................................................................................... B-17
B.13.18 native-io-enabled .............................................................................................................. B-17
B.13.19 minimum-native-file-size ................................................................................................ B-18
B.13.20 disable-implicit-servlet-mappings ................................................................................. B-18
B.13.21 temp-dir.............................................................................................................................. B-18
B.13.22 optimistic-serialization..................................................................................................... B-18
B.13.23 show-archived-real-path-enabled .................................................................................. B-18
B.13.24 require-admin-traffic........................................................................................................ B-18
B.13.25 access-logging-disabled ................................................................................................... B-19
B.13.26 prefer-forward-query-string ........................................................................................... B-19
B.13.27 container-initializer-enabled ........................................................................................... B-19
B.14 charset-params ......................................................................................................................... B-20
B.14.1 input-charset...................................................................................................................... B-20
B.14.2 charset-mapping ............................................................................................................... B-20
B.15 virtual-directory-mapping...................................................................................................... B-21
B.16 url-match-map.......................................................................................................................... B-21
B.17 security-permission ................................................................................................................. B-22
B.18 context-root............................................................................................................................... B-22
B.19 wl-dispatch-policy ................................................................................................................... B-23
B.20 servlet-descriptor ..................................................................................................................... B-23
B.21 work-manager .......................................................................................................................... B-24
B.22 logging....................................................................................................................................... B-25
B.23
library-ref .................................................................................................................................. B-27
B.24 fast-swap ................................................................................................................................... B-27
B.25 async-descriptor ....................................................................................................................... B-28
B.26 async-work-manager............................................................................................................... B-28
B.27 Backwards Compatibility Flags............................................................................................. B-28
B.27.1 Compatibility with JSP 2.0 Web Applications.............................................................. B-29
B.27.1.1 JSP Behavior and Buffer Suffix ................................................................................ B-29
B.27.1.2 Implicit Servlet 2.5 Package Imports ...................................................................... B-29
B.28 Web Container Global Configuration .................................................................................. B-29
C Support for GlassFish Deployment Descriptors
D Web Application Best Practices
D.1 CGI Best Practices ...................................................................................................................... D-1
D.2 Servlet Best Practices ................................................................................................................. D-1
D.3 JSP Best Practices........................................................................................................................ D-2
D.4 Best Practice When Subclassing ServletResponseWrapper................................................. D-2

xiii
Preface
This preface describes the document accessibility features and conventions used in this
guide—Developing Web Applications, Servlets, and JSPs for Oracle WebLogic Server.
Documentation Accessibility
For information about Oracle's commitment to accessibility, visit the Oracle
Accessibility Program website at
http://www.oracle.com/pls/topic/lookup?ctx=acc&id=docacc
.
Access to Oracle Support
Oracle customers that have purchased support have access to electronic support
through My Oracle Support. For information, visit
http://www.oracle.com/pls/topic/lookup?ctx=acc&id=info
or visit
http://www.oracle.com/pls/topic/lookup?ctx=acc&id=trs
if you are hearing
impaired.
Conventions
The following text conventions are used in this document:
Convention Meaning
boldface Boldface type indicates graphical user interface elements associated
with an action, or terms defined in text or the glossary.
italic Italic type indicates book titles, emphasis, or placeholder variables for
which you supply particular values.
monospace
Monospace type indicates commands within a paragraph, URLs, code
in examples, text that appears on the screen, or text that you enter.
xiv

1
Introduction and Roadmap 1-1
1
Introduction and Roadmap
This section describes the contents and organization of this guide—Developing Web
Applications, Servlets, and JSPs for Oracle WebLogic Server.
■ Section 1.1, "Document Scope and Audience"
■ Section 1.2, "Guide To This Document"
■ Section 1.3, "Related Documentation"
■ Section 1.4, "Examples for the Web Application Developer"
■ Section 1.5, "New and Changed Features In This Release"
1.1 Document Scope and Audience
This document is a resource for software developers who develop Web applications
and components such as HTTP servlets and JavaServer Pages (JSPs) for deployment
on WebLogic Server. This document is also a resource for Web application users and
deployers. It also contains information that is useful for business analysts and system
architects who are evaluating WebLogic Server or considering the use of WebLogic
Server Web applications for a particular application.
The topics in this document are relevant during the design and development phases of
a software project. The document also includes topics that are useful in solving
application problems that are discovered during test and pre-production phases of a
project.
This document does not address production phase administration, monitoring, or
performance tuning topics. For links to WebLogic Server documentation and resources
for these topics, see Section 1.3, "Related Documentation".
It is assumed that the reader is familiar with Java EE and Web application concepts.
This document emphasizes the value-added features provided by WebLogic Server
Web applications and key information about how to use WebLogic Server features and
facilities to get a Web application up and running.
1.2 Guide To This Document
■ This chapter, Chapter 1, "Introduction and Roadmap," introduces the organization
of this guide.
■ Chapter 2, "Understanding Web Applications, Servlets, and JSPs," provides an
overview of WebLogic Server Web applications, servlets, and JavaServer Pages
(JSPs).

Guide To This Document
1-2 Developing Web Applications, Servlets, and JSPs for Oracle WebLogic Server
■ Chapter 3, "Creating and Configuring Web Applications," describes how to create
and configure Web application resources.
■ Chapter 4, "Creating and Configuring Servlets," describes how to create and
configure servlets.
■ Chapter 5, "Creating and Configuring JSPs," describes how to create and configure
JSPs.
■ Chapter 6, "Using JSF and JSTL," describes how to configure JavaServer Faces (JSF)
and the JSP Tag Standard Library (JSTL).
■ Chapter 7, "Configuring Resources in a Web Application," describes how to
configure Web application resources.
■ Chapter 8, "WebLogic Annotation for Web Components," describes how to
simplify development by using annotations and resource injection with Web
components.
■ Chapter 9, "Servlet Programming Tasks," describes how to write HTTP servlets in
a WebLogic Server environment.
■ Chapter 10, "Using Sessions and Session Persistence," describes how to set up
sessions and session persistence.
■ Chapter 11, "Application Events and Event Listener Classes," discusses application
events and event listener classes.
■ Chapter 12, "Using the HTTP Publish-Subscribe Server," provides an overview of
the HTTP Publish-Subscribe server and information on how you can use it in your
Web applications
■ Chapter 13, "WebLogic JSP Reference," provides reference information for writing
JavaServer Pages (JSPs).
■ Chapter 14, "Filters," provides information about using filters in a Web application.
■ Chapter 15, "Using WebLogic JSP Form Validation Tags," describes how to use
WebLogic JSP form validation tags.
■ Chapter 16, "Using Custom WebLogic JSP Tags (cache, process, repeat)," describes
the use of three custom JSP tags—
cache
,
repeat
, and
process
—provided with the
WebLogic Server distribution.
■ Chapter 17, "Using the WebLogic EJB to JSP Integration Tool," describes how to
use the WebLogic EJB-to-JSP integration tool to create JSP tag libraries that you can
use to invoke EJBs in a JavaServer Page (JSP). This document assumes at least
some familiarity with both EJB and JSP.
■ Appendix A, "web.xml Deployment Descriptor Elements," describes the
deployment descriptor elements defined in the
web.xml
schema under the root
element
<web-app>.
■ Appendix B, "weblogic.xml Deployment Descriptor Elements," provides a
complete reference for the schema for the WebLogic Server-specific deployment
descriptor
weblogic.xml
.
■ Appendix C, "Support for GlassFish Deployment Descriptors," provides a list of
the GlassFish deployment descriptors that are supported in WebLogic Server.
■ Appendix D, "Web Application Best Practices," contains Oracle best practices for
designing, developing, and deploying WebLogic Server Web applications and
application resources.

Examples for the Web Application Developer
Introduction and Roadmap 1-3
1.3 Related Documentation
This document contains Web application-specific design and development
information.
For comprehensive guidelines for developing, deploying, and monitoring WebLogic
Server applications, see the following documents:
■ Developing Applications for Oracle WebLogic Server is a guide to developing
WebLogic Server applications.
■ Deploying Applications to Oracle WebLogic Server is the primary source of
information about deploying WebLogic Server applications.
■ Upgrading Oracle WebLogic Server contains information about Web applications,
JSP, and servlet compatibility with previous WebLogic Server releases.
■ Servlet product overview at
http://www.oracle.com/technetwork/java/javaee/servlet/index.html
■ JavaServer Pages (JSP) product overview at
http://www.oracle.com/technetwork/java/javaee/jsp/index.htm
■ JavaServer Faces (JSF) product overview at
http://www.oracle.com/technetwork/java/javaee/javaserverfaces-139869.ht
ml
■ JavaServer Pages Standard Tag Library (JSTL) product overview at
http://www.oracle.com/technetwork/java/index-jsp-135995.html
■ For more information in general about Java application development, refer to
http://www.oracle.com/technetwork/java/javaee/overview/index.html
1.4 Examples for the Web Application Developer
In addition to this document, Oracle provides examples for software developers
within the context of the Avitek Medical Records Application (MedRec) sample,
discussed in the next section.
1.4.1 Avitek Medical Records Application (MedRec)
MedRec is an end-to-end sample Java EE application shipped with WebLogic Server
that simulates an independent, centralized medical record management system. The
MedRec application provides a framework for patients, doctors, and administrators to
manage patient data using a variety of different clients.
MedRec demonstrates WebLogic Server and Java EE features, and highlights
Oracle-recommended best practices. MedRec is optionally installed with the WebLogic
Server installation. You can start MedRec from the
ORACLE_HOME\user_
projects\domains\medrec
directory, where
ORACLE_HOME
is the directory you specified
as Oracle Home when you installed Oracle WebLogic Server. For more information,
see "Sample Applications and Code Examples" in Understanding Oracle WebLogic
Server.
1.4.2 Web Application Examples in the WebLogic Server Distribution
WebLogic Server optionally installs API code examples in the
EXAMPLES_HOME\wl_
server\examples\src\examples
directory, where
EXAMPLES_HOME
represents the
directory in which the WebLogic Server code examples are configured. For more

New and Changed Features In This Release
1-4 Developing Web Applications, Servlets, and JSPs for Oracle WebLogic Server
information about the WebLogic Server code examples, see "Sample Applications and
Code Examples" in Understanding Oracle WebLogic Server.
Oracle provides several Web application, servlet, and JSP examples with this release of
WebLogic Server. Oracle recommends that you run these Web application examples
before developing your own Web applications.
1.5 New and Changed Features In This Release
In this release, Oracle provides several new API samples that demonstrate the use of
Java EE 6 features, such as JSF, CDI, and servlet 3.0. Access the samples as described in
Section 1.4.2, "Web Application Examples in the WebLogic Server Distribution."
For a comprehensive listing of the new WebLogic Server features introduced in this
release, see What's New in Oracle WebLogic Server.

2
Understanding Web Applications, Servlets, and JSPs 2-1
2
Understanding Web Applications, Servlets, and
JSPs
[2]
This chapter provides an overview of WebLogic Server Web applications, servlets, and
JavaServer Pages (JSPs).
This chapter includes the following sections:
■ Section 2.1, "The Web Applications Container"
■ Section 2.2, "Servlets"
■ Section 2.3, "JavaServer Pages"
■ Section 2.4, "Web Application Developer Tools"
■ Section 2.5, "Web Application Security"
■ Section 2.6, "Avoiding Redirection Attacks"
■ Section 2.7, "P3P Privacy Protocol"
■ Section 2.8, "Displaying Special Characters on Linux Browsers"
2.1 The Web Applications Container
A Web application contains an application's resources, such as servlets, JavaServer
Pages (JSPs), JSP tag libraries, and any static resources such as HTML pages and image
files. A Web application adds service-refs (Web services) and message-destination-refs
(JMS destinations/queues) to an application. It can also define links to outside
resources such as Enterprise JavaBeans (EJBs).
2.1.1 Web Applications and Java EE
The Java EE programming model employs metadata annotations which simplify the
application development process by allowing a developer to specify within the Java
class itself how the application component behaves in the container, requests for
dependency injection, and so on. Annotations are an alternative to deployment
descriptors that were required by older versions of enterprise applications (Java EE 1.4
and earlier).
With Java EE annotations, the standard
application.xml
and
web.xml
deployment
descriptors are optional. The Java EE programming model uses the JDK annotations
feature for Web containers, such as EJBs, servlets, Web applications, and JSPs. See
Section 8, "WebLogic Annotation for Web Components" and
http://docs.oracle.com/javaee/6/api/
. For more information about Java EE Web

Servlets
2-2 Developing Web Applications, Servlets, and JSPs for Oracle WebLogic Server
application technologies, see
http://www.oracle.com/technetwork/java/javaee/tech/webapps-138511.html
.
However, Web applications deployed on WebLogic Server can still use a standard Java
EE deployment descriptor file and a WebLogic-specific deployment descriptor file to
define their resources and operating attributes.
2.1.2 Web Application Development Key Points
JSPs and HTTP servlets can access all services and APIs available in WebLogic Server.
These services include EJBs, database connections by way of Java Database
Connectivity (JDBC), Java Messaging Service (JMS), XML, and more.
A Web archive (WAR file) contains the files that make up a Web application. A WAR
file is deployed as a unit on one or more WebLogic Server instances. A WAR file
deployed to WebLogic Server always includes the following files:
■ One servlet or JavaServer Page (JSP), along with any helper classes.
■ An optional
web.xml
deployment descriptor, which is a Java EE standard XML
document that describes the contents of a WAR file.
■ A
weblogic.xml
deployment descriptor, which is an XML document containing
WebLogic Server-specific elements for Web applications.
■ A WAR file can also include HTML or XML pages and supporting files such as
image and multimedia files.
The WAR file can be deployed alone or packaged in an enterprise application archive
(EAR file) with other application components. If deployed alone, the archive must end
with a
.war
extension. If deployed in an EAR file, the archive must end with an
.ear
extension.
Oracle recommends that you package and deploy your standalone Web applications as
part of an enterprise application. This is an Oracle best practice which allows for easier
application migration, additions, and changes. Also, packaging your applications as
part of an enterprise application allows you to take advantage of the split
development directory structure, which provides a number of benefits over the
traditional single directory structure.
2.2 Servlets
A servlet is a Java class that runs in a Java-enabled server. An HTTP servlet is a special
type of servlet that handles an HTTP request and provides an HTTP response, usually
in the form of an HTML page. The most common use of WebLogic HTTP servlets is to
create interactive applications using standard Web browsers for the client-side
presentation while WebLogic Server handles the business logic as a server-side
process. WebLogic HTTP servlets can access databases, Enterprise JavaBeans,
messaging APIs, HTTP sessions, and other facilities of WebLogic Server.
Note: If you are deploying a directory in exploded format (not
archived), do not name the directory
.ear
,
.jar
, and so on. For more
information on archived format, see Section 2.4, "Web Application
Developer Tools".

Servlets
Understanding Web Applications, Servlets, and JSPs 2-3
2.2.1 Servlets and Java EE
WebLogic Server fully supports HTTP servlets as defined in the servlet 3.0
specification at
http://jcp.org/en/jsr/detail?id=315
. HTTP servlets form an
integral part of the Java EE standard.
With Java EE metadata annotations, the standard
web.xml
deployment descriptor is
optional. The servlet specification states annotations can be defined on certain Web
components, such as servlets, filters, listeners, and tag handlers. The annotations are
used to declare dependencies on external resources. The container will detect
annotations on such components and inject necessary dependencies before the
component's life cycle methods are invoked. See Section 8, "WebLogic Annotation for
Web Components".
The servlet specification defines the implementation of the servlet API and the method
by which servlets are deployed in enterprise applications. Deploying servlets on a Java
EE-compliant server, such as WebLogic Server, is accomplished by packaging the
servlets and other resources that make up an enterprise application into a single unit,
the Web application. A Web application utilizes a specific directory structure to contain
its resources and a deployment descriptor that defines how these resources interact
and how the application is accessed by a client. See Section 2.1, "The Web Applications
Container".
2.2.2 What You Can Do with Servlets
■ Create dynamic Web pages that use HTML forms to get end-user input and
provide HTML pages that respond to that input. Examples of this utilization
include online shopping carts, financial services, and personalized content.
■ Create collaborative systems such as online conferencing.
■ Have access to a variety of APIs and features by using servlets running in
WebLogic Server. For example:
– Session tracking—Allows a Web site to track a user's progress across multiple
Web pages. This functionality supports Web sites such as e-commerce sites
that use shopping carts. WebLogic Server supports session persistence to a
database, providing failover between server down time and session sharing
between clustered servers. For more information see Section 10.6, "Session
Tracking from a Servlet".
– JDBC drivers—JDBC drivers provide basic database access. With WebLogic
Server's multi-tier JDBC implementations, you can take advantage of
connection pools, server-side data caching, and transactions. For more
information see Section 9.8, "Accessing Databases".
– Enterprise JavaBeans—Servlets can use Enterprise JavaBeans (EJB) to
encapsulate sessions, data from databases, and other functionality. See
Section 7.3, "Referencing External EJBs", Section 7.4, "More about the ejb-ref*
Elements", and Section 7.5, "Referencing Application-Scoped EJBs".
– Java Messaging Service (JMS)—JMS allows your servlets to exchange
messages with other servlets and Java programs. See Developing JMS
Applications for Oracle WebLogic Server.
– Java JDK APIs—Servlets can use the standard Java JDK APIs.
– Forwarding requests—Servlets can forward a request to another servlet or
other resource. Section 9.10.1, "Forwarding a Request".

JavaServer Pages
2-4 Developing Web Applications, Servlets, and JSPs for Oracle WebLogic Server
■ Easily deploy servlets written for any Java EE-compliant servlet engine to
WebLogic Server.
2.2.3 Servlet Development Key Points
The following are a few key points relating to servlet development:
■ Programmers of HTTP servlets utilize a standard Java API,
javax.servlet.http
,
to create interactive applications.
■ HTTP servlets can read HTTP headers and write HTML coding to deliver a
response to a browser client.
■ Servlets are deployed to WebLogic Server as part of a Web application. A Web
application is a grouping of application components such as servlet classes,
JavaServer Pages (JSPs), static HTML pages, images, and security.
2.3 JavaServer Pages
JavaServer Pages (JSPs) are defined by a specification for combining Java with HTML
to provide dynamic content for Web pages. When you create dynamic content, JSPs are
more convenient to write than HTTP servlets because they allow you to embed Java
code directly into your HTML pages, in contrast with HTTP servlets, in which you
embed HTML inside Java code.
JSPs are Web pages coded with an extended HTML that makes it possible to embed
Java code in a Web page. JSPs can call custom Java classes, called
taglibs
, using
HTML-like tags. The WebLogic
appc
compiler
weblogic.appc
generates JSPs and
validates descriptors. You can also precompile JSPs into the
WEB-INF/classes/
directory or as a JAR file under
WEB-INF/lib/
and package the servlet class in the Web
archive to avoid compiling in the server. Servlets and JSPs may require additional
helper classes to be deployed with the Web application.
JSPs enable you to separate the dynamic content of a Web page from its presentation. It
caters to two different types of developers: HTML developers, who are responsible for
the graphical design of the page, and Java developers, who handle the development of
software to create the dynamic content.
2.3.1 JSPs and Java EE
WebLogic JSP supports the JSP 2.2 specification at
http://jcp.org/aboutJava/communityprocess/mrel/jsr245/index.html
. The main
theme for Java EE is ease of development. The platform's Web tier contributes
significantly to ease of development in two ways. First, the platform now includes the
JavaServer Pages Standard Tag Library (JSTL) and JavaServer Faces technology.
Second, all the Web-tier technologies offer a set of features that make development of
Web applications on Java EE much easier, such as:
■ An expression language (EL) syntax that allows deferred evaluation of
expressions, enables using expressions to both get and set data and to invoke
methods, and facilitates customizing the resolution of a variable or property
referenced by an expression.
■ Support for resource injection through annotations to simplify configuring access
to resources and environment data.
■ Complete alignment of JavaServer Faces technology tags and JavaServer Pages
(JSP) software code.

Web Application Developer Tools
Understanding Web Applications, Servlets, and JSPs 2-5
Because JSPs are part of the Java EE standard, you can deploy JSPs on a variety of
platforms, including WebLogic Server. In addition, third-party vendors and
application developers can provide JavaBean components and define custom JSP tags
that can be referenced from a JSP page to provide dynamic content.
2.3.2 What You Can Do with JSPs
■ Combine Java with HTML to provide dynamic content for Web pages.
■ Call custom Java classes, called
taglibs
, using HTML-like tags.
■ Embed Java code directly into your HTML pages, in contrast with HTTP servlets,
in which you embed HTML inside Java code.
■ Separate the dynamic content of a Web page from its presentation.
2.3.3 Overview of How JSP Requests Are Handled
WebLogic Server handles JSP requests in the following sequence:
1. A browser requests a page with a
.jsp
file extension from WebLogic Server.
2. WebLogic Server reads the request.
3. Using the JSP compiler, WebLogic Server converts the JSP into a servlet class that
implements the
javax.servlet.jsp.JspPage
interface. The JSP file is compiled
only when the page is first requested, or when the JSP file has been updated and
has a more recent timestamp. Otherwise, the previously compiled JSP servlet class
is re-used, making subsequent responses much quicker.
4. The generated
JspPage servlet
class is invoked to handle the browser request.
It is also possible to invoke the JSP compiler directly without making a request from a
browser. For details, see Section 13.18, "Using the WebLogic JSP Compiler".
Because the JSP compiler creates a Java servlet as its first step, you can look at the Java
files it produces, or even register the generated
JspPage servlet
class as an HTTP
servlet. See Section 2.2, "Servlets".
2.4 Web Application Developer Tools
Oracle provides several tools to help simplify the creating, testing, debugging, and
deploying of servlets, JSP, JSF-based Web applications.
■ Oracle JDeveloper is an enterprise IDE providing a unified development
experience for Oracle Fusion Middleware products. See "Oracle JDeveloper."
■ Oracle Enterprise Pack for Eclipse is an Eclipse-based development environment
with pre-packaged tooling for Web applications targeting the Oracle platform. See
"Oracle Enterprise Pack for Eclipse 12c."
Both tools provide advanced code editor features, collaborative teamwork
development, visual development and debugging, and streamlined deployment
capabilities.
2.4.1 Other Tools
You can use the WebLogic Ant utilities to create skeleton deployment descriptors.
These utilities are Java classes shipped with your WebLogic Server distribution. The
Ant task looks at a directory containing a Web application and creates deployment
descriptors based on the files it finds in the Web application. Because the Ant utility

Web Application Security
2-6 Developing Web Applications, Servlets, and JSPs for Oracle WebLogic Server
does not have information about all desired configurations and mappings for your
Web application, the skeleton deployment descriptors the utility creates are
incomplete. After the utility creates the skeleton deployment descriptors, you can use
a text editor, an XML editor, or the Administration Console to edit the deployment
descriptors and complete the configuration of your Web application.
2.5 Web Application Security
You can secure a Web application by restricting access to certain URL patterns in the
Web application or programmatically using security calls in your servlet code.
At run time, your user name and password are authenticated using the applicable
security realm for the Web application. Authorization is verified according to the
security constraints configured in
web.xml
or the external policies that might have
been created for the Web application using the Administration Console.
At run time, the WebLogic Server active security realm applies the Web application
security constraints to the specified Web application resources. Note that a security
realm is shared across multiple virtual hosts.
For detailed instructions and an example on configuring security in Web applications,
see Securing Resources Using Roles and Policies for Oracle WebLogic Server. For more
information on WebLogic security, refer to Developing Applications with the WebLogic
Security Service.
2.6 Avoiding Redirection Attacks
When a request on a Web application is redirected to another location, the Host header
contained in the request is used by default in the Location header that is generated for
the response. Because the Host header can be spoofed—that is, corrupted to contain a
different host name and other parameters—this behavior can be exploited to launch a
redirection attack on a third party.
To prevent the likelihood of this occurrence, set the
FrontendHost
attribute on either
the WebServerMBean or ClusterMBean to specify the host to which all redirected
URLs are sent. The host specified in the
FrontendHost
attribute will be used in the
Location header of the response instead of the one contained in the original request.
For more information, see
FrontendHost
in MBean Reference for Oracle WebLogic Server.
2.7 P3P Privacy Protocol
The Platform for Privacy Preferences (P3P) provides a way for Web sites to publish
their privacy policies in a machine-readable syntax. The WebLogic Server Web
application container can support P3P.
There are three ways to tell the browser about the location of the
p3p.xml
file:
■ Place a policy reference file in the "well-known location" (at the location
/w3c/p3p.xml
on the site).
■ Add an extra HTTP header to each response from the Web site giving the location
of the policy reference file.
■ Place a link to the policy reference file in each HTML page on the site.
For more detailed information, see
http://www.w3.org/TR/p3pdeployment#Locating_
PRF
.

Displaying Special Characters on Linux Browsers
Understanding Web Applications, Servlets, and JSPs 2-7
2.8 Displaying Special Characters on Linux Browsers
To display special characters on Linux browsers, set the JVM's
file.encoding
system
property to
ISO8859_1
. For example,
java -Dfile.encoding=ISO8859_1
weblogic.Server
. For a complete listing, see
http://docs.oracle.com/javase/7/docs/technotes/guides/intl/encoding.doc.ht
ml
.

Displaying Special Characters on Linux Browsers
2-8 Developing Web Applications, Servlets, and JSPs for Oracle WebLogic Server

3
Creating and Configuring Web Applications 3-1
3
Creating and Configuring Web Applications
[3]
This chapter describes how to create and configure WebLogic Web applications.
This chapter includes the following sections:
■ Section 3.1, "WebLogic Web Applications and Java EE"
■ Section 3.2, "Directory Structure"
■ Section 3.3, "Main Steps to Create and Configure a Web Application"
■ Section 3.4, "Configuring How a Client Accesses a Web Application"
■ Section 3.5, "Configuring Virtual Hosts for Web Applications"
■ Section 3.6, "Targeting Web Applications to Virtual Hosts"
■ Section 3.7, "Loading Servlets, Context Listeners, and Filters"
■ Section 3.8, "Shared Java EE Web Application Libraries"
3.1 WebLogic Web Applications and Java EE
The Java EE programming model employs metadata annotations which simplify the
application development process by allowing a developer to specify within the Java
class itself how the application component behaves in the container, requests for
dependency injection, and so on. Annotations are an alternative to deployment
descriptors that were required by older versions of enterprise applications (Java EE 1.4
and earlier).
With Java EE annotations, the standard
application.xml
and
web.xml
deployment
descriptors are optional. The Java EE programming model uses the JDK annotations
feature for Web containers, such as EJBs, servlets, Web applications, and JSPs. See
Section 8, "WebLogic Annotation for Web Components" and
http://docs.oracle.com/javaee/6/api/
. For more information about Java EE Web
application technologies, see
http://www.oracle.com/technetwork/java/javaee/tech/webapps-138511.html
.
However, Web applications deployed on WebLogic Server can still use a standard Java
EE deployment descriptor file and a WebLogic-specific deployment descriptor file to
define their resources and operating attributes.
3.2 Directory Structure
Web applications use a standard directory structure defined in the Java EE
specification. You can deploy a Web application as a collection of files that use this
directory structure, known as exploded directory format, or as an archived file called a

Directory Structure
3-2 Developing Web Applications, Servlets, and JSPs for Oracle WebLogic Server
WAR file. Oracle recommends that you package and deploy your exploded Web
application as part of an enterprise application. This is an Oracle best practice which
allows for easier application migration, additions, and changes. Also, packaging your
Web application as part of an enterprise application allows you to take advantage of
the split development directory structure, which provides a number of benefits over
the traditional single directory structure.
The
WEB-INF
directory contains the deployment descriptors for the Web application
(
web.xml
and
weblogic.xml
) and two subdirectories for storing compiled Java classes
and library JAR files. These subdirectories are respectively named
classes
and
lib
.
JSP taglibs are stored in the
WEB-INF
directory at the top level of the staging directory.
The Java classes include servlets, helper classes and, if desired, precompiled JSPs.
All servlets, classes, static files, and other resources belonging to a Web application are
organized under a directory hierarchy.
The entire directory, once staged, is bundled into a WAR file using the
jar
command.
The WAR file can be deployed alone or as part of an enterprise application
(recommended) with other application components, including other Web applications,
EJB components, and WebLogic Server components.
JSP pages and HTTP servlets can access all services and APIs available in WebLogic
Server. These services include EJBs, database connections through Java Database
Connectivity (JDBC), JavaMessaging Service (JMS), XML, and more.
3.2.1 Accessing Information in WEB-INF
The
WEB-INF
directory is not part of the public document tree of the application. No
file contained in the
WEB-INF
directory can be served directly to a client by the
container. However, the contents of the
WEB-INF
directory are visible to servlet code
using the
getResource
and
getResourceAsStream()
method calls on the
ServletContext
or includes/forwards using the RequestDispatcher. Hence, if the
application developer needs access, from servlet code, to application specific
configuration information that should not be exposed directly to the Web client, the
application developer may place it under this directory.
Since requests are matched to resource mappings in a case-sensitive manner, client
requests for "
/WEB-INF/foo
", "
/WEb-iNf/foo
", for example, should not result in
contents of the Web application located under
/WEB-INF
being returned, nor any form
of directory listing thereof.
3.2.2 Directory Structure Example
The following is an example of a Web application directory structure, in which
myWebApp/
is the staging directory:
Example 3–1 Web Application Directory Structure
myWebApp/
WEB-INF/
web.xml
weblogic.xml
lib/
MyLib.jar
classes/
MyPackage/
MyServlet.class
index.html
index.jsp

Main Steps to Create and Configure a Web Application
Creating and Configuring Web Applications 3-3
3.3 Main Steps to Create and Configure a Web Application
The following steps summarize the procedure for creating a Web application as part of
an enterprise application using the split development directory structure. See
"Creating a Split Development Directory Environment", "Building Applications In a
Split Development Directory", and "Deploying and Packaging From a Split
Development Directory" in Developing Applications for Oracle WebLogic Server.
You may want to use developer tools included with WebLogic Server for creating and
configuring Web applications. See Section 2.4, "Web Application Developer Tools".
3.3.1 Step One: Create the Enterprise Application Wrapper
1. Create a directory for your root EAR file:
\src\myEAR\
2. Set your environment as follows:
– On Windows, execute the
setWLSEnv.cmd
command, located in the directory
WL_HOME\server\bin\
, where
WL_HOME
is the top-level directory in which
WebLogic Server is installed.
– On UNIX, execute the
setWLSEnv.sh
command, located in the directory
WL_
HOME/server/bin/
, where
WL_HOME
is the top-level directory in which
WebLogic Server is installed.
3. Package your enterprise application in the
\src\myEAR\
directory as follows:
a. Place the enterprise applications descriptors (
application.xml
and
weblogic-application.xml
) in the
META-INF\
directory. See "Enterprise
Application Deployment Descriptors" in Developing Applications for Oracle
WebLogic Server.
b. Edit the deployment descriptors as needed to fine-tune the behavior of your
enterprise application. See Section 2.4, "Web Application Developer Tools".
c. Place the enterprise application
.jar
files in:
\src\myEAR\APP-INF\lib\
3.3.2 Step Two: Create the Web Application
1. Create a directory for your Web application in the root of your EAR file:
\src\myEAR\myWebApp
2. Package your Web application in the
\src\myEAR\myWebApp\
directory as follows:
a. Place the Web application descriptors (
web.xml
and
weblogic.xml
) in the
\src\myEAR\myWebApp\WEB-INF\
directory. See Section B, "weblogic.xml
Deployment Descriptor Elements"
Note: On UNIX operating systems, the
setWLSEnv.sh
command
does not set the environment variables in all command shells. Oracle
recommends that you execute this command using the Korn shell or
bash shell.

Configuring How a Client Accesses a Web Application
3-4 Developing Web Applications, Servlets, and JSPs for Oracle WebLogic Server
b.
Edit the deployment descriptors as needed to fine-tune the behavior of your
enterprise application. See Section 2.4, "Web Application Developer Tools".
c. Place all HTML files, JSPs, images and any other files referenced by the Web
application pages in the root of the Web application:
\src\myEAR\myWebApp\images\myimage.jpg
\src\myEAR\myWebApp\login.jsp
\src\myEAR\myWebApp\index.html
d. Place your Web application Java source files (servlets, tag libs, other classes
referenced by servlets or tag libs) in:
\src\myEAR\myWebApp\WEB-INF\src\
3.3.3 Step Three: Creating the build.xml File
Once you have set up your directory structure, you create the
build.xml
file using the
weblogic.BuildXMLGen
utility.
3.3.4 Step Four: Execute the Split Development Directory Structure Ant Tasks
1. Execute the
wlcompile
Ant task to invoke the
javac
compiler. This compiles your
Web application Java components into an output directory:
/build/myEAR/WEB-INF/classes
.
2. Execute
wlappc
Ant task to invoke the
appc
compiler. This compiles any JSPs and
container-specific EJB classes for deployment.
3. Execute the
wldeploy
Ant task to deploy your Web application as part of an
archived or exploded EAR to WebLogic Server.
4. If this is a production environment (rather than development), execute the
wlpackage
Ant task to package your Web application as part of an archived or
exploded EAR.
3.4 Configuring How a Client Accesses a Web Application
You construct the URL that a client uses to access a Web application using the
following pattern:
http://hoststring/ContextPath/servletPath/pathInfo
Where
■
hoststring
is either a host name that is mapped to a virtual host or
hostname:portNumber
.
■
ContextPath
is the name of your Web application.
■
servletPath
is a servlet that is mapped to the
servletPath
.
■
pathInfo
is the remaining portion of the URL, typically a file name.
If you are using virtual hosting, you can substitute the virtual host name for the
hoststring portion of the URL.
Note: The
wlpackage
Ant task places compiled versions of your Java
source files in the build directory. For example:
/build/myEAR/myWebApp/classes
.

Loading Servlets, Context Listeners, and Filters
Creating and Configuring Web Applications 3-5
3.5 Configuring Virtual Hosts for Web Applications
WebLogic Server supports two methods for configuring virtual hosts for Web
applications:
■ Section 3.5.1, "Configuring a Channel-based Virtual Host"
■ Section 3.5.2, "Configuring a Host-based Virtual Host"
3.5.1 Configuring a Channel-based Virtual Host
The following is an example of how to configure a channel-based virtual host:
<VirtualHost Name="channel1vh" NetworkAccessPoint="Channel1" Targets="myserver"/>
<VirtualHost Name="channel2vh" NetworkAccessPoint="Channel2" Targets="myserver"/>
Where
Channel1
and
Channel2
are the names of
NetworkAccessPoint
configured in
the
config.xml
file.
NetworkAccessPoint
represents the dedicated server channel
name for which the virtual host serves HTTP requests. If the
NetworkAccessPoint
for a
given HTTP request does not match the
NetworkAccessPoint
of any virtual host, the
incoming HOST header is matched with the
VirtualHostNames
in order to resolve the
correct virtual host. If an incoming request does not match a virtual host, the request
will be served by the default Web server.
3.5.2 Configuring a Host-based Virtual Host
The following is an example of how to configure a host-based virtual host:
<VirtualHost Name="cokevh" Targets="myserver" VirtualHostNames="coke"/>
<VirtualHost Name="pepsivh" Targets="myserver" VirtualHostNames="pepsi"/>
3.6 Targeting Web Applications to Virtual Hosts
A Web application component can be targeted to servers and virtual hosts using the
WebLogic Administration Console.
If you are migrating from previous versions of WebLogic Server, note that in the
config.xml
file, all Web application targets must be specified in the targets attribute.
The targets attribute has replaced the virtual hosts attribute and a virtual host cannot
have the same name as a server or cluster in the same domain. The following is an
example of how to target a Web application to a virtual host:
<AppDeployment name="test-app" Sourcepath="/myapps/test-app.ear">
<SubDeployment Name="test-webapp1.war" Targets="virutalhost-1"/>
<SubDeployment Name="test-webapp2.war" Targets="virtualhost-2"/>
...
</AppDeployment>
3.7 Loading Servlets, Context Listeners, and Filters
Servlets, context listeners, and filters are loaded and destroyed in the following order:
Order of loading:
1. Context listeners
2. Filters
3. Servlets

Shared Java EE Web Application Libraries
3-6 Developing Web Applications, Servlets, and JSPs for Oracle WebLogic Server
Order of destruction:
1. Servlets
2. Filters
3. Context listeners
Servlets and filters are loaded in the same order they are defined in the
web.xml
file
and unloaded in reverse order. Context listeners are loaded in the following order:
1. All context listeners in the
web.xml
file in the order as specified in the file
2. Packaged JAR files containing tag library descriptors
3. Tag library descriptors in the
WEB-INF
directory
3.8 Shared Java EE Web Application Libraries
A Java EE Web application library is a standalone Web application module registered
with the Java EE application container upon deployment. With WebLogic Server,
multiple Web applications can easily share a single Web application module or
collection of modules.
A Web application may reference one or more Web application libraries, but cannot
reference other library types (EJBs, EAR files, plain JAR files). Web application libraries
are Web application modules deployed as libraries. They are referenced from the
weblogic.xml
file using the same syntax that is used to reference application libraries
in the
weblogic-application.xml
file, except that the
<context-root>
element is
ignored.
At deployment time, the classpath of each referenced library is appended to the Web
application's classpath. Therefore, the search for all resources and classes occurs first in
the original Web application and then in the referenced library.
The deployment tools, appc, wlcompile, and BuildXMLGen support libraries at the
Web application level in the same way they support libraries at the application level.
For more information about shared Java EE libraries and their deployment, see
"Creating Shared Java EE Libraries and Optional Packages" in Developing Applications
for Oracle WebLogic Server.

4
Creating and Configuring Servlets 4-1
4
Creating and Configuring Servlets
[4]
This chapter describes how to create and configure servlets.
This chapter includes the following sections:
■ Section 4.1, "Configuring Servlets"
■ Section 4.2, "Setting Up a Default Servlet"
■ Section 4.3, "Servlet Initialization Attributes"
■ Section 4.4, "Writing a Simple HTTP Servlet"
■ Section 4.5, "Advanced Features"
■ Section 4.6, "Complete HelloWorldServlet Example"
■ Section 4.7, "Debugging Servlet Containers"
4.1 Configuring Servlets
WebLogic Server supports the servlet 3.0 specification (see
http://jcp.org/en/jsr/detail?id=315
), which introduces the following new
features:
■ Asynchronous processing—a servlet no longer has to wait for a response from a
resource, such as a database, before its thread can continue. In other words, the
thread is not blocked.
■ Web module deployment descriptor fragments (web fragments)—The
web-fragment.xml
file enhances pluggability of library JARs which are packaged
under
WEB-INF/lib
. A web fragment is a part or all of the
web.xml
file that can be
specified and included in a library or framework JAR's
META-INF
directory.
If you selected to install the server examples, you will find these servlet 3.0 code
examples, "Using Annotations for Servlets, Filters and Listeners," "Asynchronous
Servlet and Request Handling," and "Servlet Web Fragments," in the
EXAMPLES_
HOME\wl_server\examples\src\examples\javaee6\servlet
directory of your
WebLogic Server distribution, where
EXAMPLES_HOME
represents the directory in
which the WebLogic Server code examples are configured. For more information
about the WebLogic Server code examples, see "Sample Applications and Code
Examples" in Understanding Oracle WebLogic Server.
Configuring Servlets
4-2 Developing Web Applications, Servlets, and JSPs for Oracle WebLogic Server
With Java EE metadata annotations, the standard
web.xml
deployment descriptor is
optional. The servlet specification states annotations can be defined on certain Web
components, such as servlets, filters, listeners, and tag handlers. The annotations are
used to declare dependencies on external resources. The container will detect
annotations on such components and inject necessary dependencies before the
component's life cycle methods are invoked. See Section 8, "WebLogic Annotation for
Web Components".
However, you can also define servlets as a part of a Web application in several entries
in the standard Web application deployment descriptor,
web.xml
. The
web.xml
file is
located in the
WEB-INF
directory of your Web application.
The first entry, under the root
servlet
element in
web.xml
, defines a name for the
servlet and specifies the compiled class that executes the servlet. (Or, instead of
specifying a servlet class, you can specify a JSP.) The
servlet
element also contains
definitions for initialization attributes and security roles for the servlet.
The second entry in
web.xml
, under the
servlet-mapping
element, defines the URL
pattern that calls this servlet.
4.1.1 Servlet Mapping
Servlet mapping controls how you access a servlet. The following examples
demonstrate how you can use servlet mapping in your Web application. In the
examples, a set of servlet configurations and mappings (from the
web.xml
deployment
descriptor) is followed by a table (see Table 4–1) showing the URLs used to invoke
these servlets.
Example 4–1 Servlet Mapping Example
<servlet>
<servlet-name>watermelon</servlet-name>
<servlet-class>myservlets.watermelon</servlet-class>
</servlet>
<servlet>
<servlet-name>garden</servlet-name>
<servlet-class>myservlets.garden</servlet-class>
</servlet>
<servlet>
<servlet-name>list</servlet-name>
<servlet-class>myservlets.list</servlet-class>
</servlet>
<servlet>
<servlet-name>kiwi</servlet-name>
<servlet-class>myservlets.kiwi</servlet-class>
</servlet>
<servlet-mapping>
Note: This release of WebLogic Server deprecates WebLogic
Server-specific annotations: @WLServlet, @WLFilter, and
@WLInitParam, in favor of the standard annotations defined in the
servlet 3.0 specification. In addition, instead of
weblogic.servlet.http.AbstractAsyncServlet
, you should use the
standard asynchronous processing model defined in the servlet 3.0
specification. For information on configuring servlet 3.0 asynchronous
processing, see
Section B.25, "async-descriptor"
in Section B,
"weblogic.xml Deployment Descriptor Elements".
Configuring Servlets
Creating and Configuring Servlets 4-3
<servlet-name>watermelon</servlet-name>
<url-pattern>/fruit/summer/*</url-pattern>
</servlet-mapping>
<servlet-mapping>
<servlet-name>garden</servlet-name>
<url-pattern>/seeds/*</url-pattern>
</servlet-mapping>
<servlet-mapping>
<servlet-name>list</servlet-name>
<url-pattern>/seedlist</url-pattern>
</servlet-mapping>
<servlet-mapping>
<servlet-name>kiwi</servlet-name>
<url-pattern>*.abc</url-pattern>
</servlet-mapping>
ServletServlet
can be used to create a default mappings for servlets. For example, to
create a default mapping to map all servlets to
/myservlet/*
, so the servlets can be
called using
http://host:port/web-app-name/myservlet/com/foo/FooServlet
, add
the following to your
web.xml
file. (The
web.xml
file is located in the
WEB-INF
directory
of your Web application.)
<servlet>
<servlet-name>ServletServlet</servlet-name>
<servlet-class>weblogic.servlet.ServletServlet</servlet-class>
</servlet>
<servlet-mapping>
<servlet-name>ServletServlet</servlet-name>
<url-pattern>/myservlet/*</url-pattern>
</servlet-mapping>
Table 4–1 url-patterns and Servlet Invocation
URL Servlet Invoked
http://host:port/mywebapp/fruit/summer/index.html watermelon
http://host:port/mywebapp/fruit/summer/index.abc watermelon
http://host:port/mywebapp/seedlist list
http://host:port/mywebapp/seedlist/index.html
The default servlet, if configured,
or an HTTP 404 File Not Found
error message.
If the mapping for the
list
servlet
had been
/seedlist*
, the
list
servlet would be invoked.
http://host:port/mywebapp/seedlist/pear.abc kiwi
If the mapping for the list servlet
had been
/seedlist*
, the list
servlet would be invoked.
http://host:port/mywebapp/seeds garden
http://host:port/mywebapp/seeds/index.html garden
http://host:port/mywebapp/index.abc kiwi

Setting Up a Default Servlet
4-4 Developing Web Applications, Servlets, and JSPs for Oracle WebLogic Server
4.2 Setting Up a Default Servlet
Each Web application has a default servlet. This default servlet can be a servlet that you
specify, or, if you do not specify a default servlet, WebLogic Server uses an internal
servlet called the
FileServlet
as the default servlet.
You can register any servlet as the default servlet. Writing your own default servlet
allows you to use your own logic to decide how to handle a request that falls back to
the default servlet.
Setting up a default servlet replaces the
FileServlet
and should be done carefully
because the
FileServlet
is used to serve most files, such as text files, HTML file,
image files, and more. If you expect your default servlet to serve such files, you will
need to write that functionality into your default servlet.
To set up a user-defined default servlet:
1. Define your servlet as described in Section 3.4, "Configuring How a Client
Accesses a Web Application".
2. Add a servlet-mapping with url-pattern = "
/
" as follows:
<servlet-mapping>
<servlet-name>MyOwnDefaultServlet</servlet-name>
<url-pattern>/myservlet/*(</url-pattern>
</servlet-mapping>
3. If you still want the
FileServlet
to serve files with other extensions:
a. Define a servlet and give it a
<servlet-name>
, for example
myFileServlet
.
b. Define the
<servlet-class>
as
weblogic.servlet.FileServlet
.
c. Using the
<servlet-mapping>
element, map file extensions to the
myFileServlet
(in addition to the mappings for your default servlet). For
example, if you want the
myFileServlet to serve.gif
files, map
*.gif
to the
myFileServlet
.
4.3 Servlet Initialization Attributes
You define initialization attributes for servlets in the Web application deployment
descriptor,
web.xml
, in the
init-param
element of the
servlet
element, using
param-name
and
param-value
tags. The
web.xml
file is located in the
WEB-INF
directory
of your Web application. For example:
Example 4–2 Example of Configuring Servlet Initialization Attributes in web.xml
<servlet>
<servlet-name>HelloWorld2</servlet-name>
<servlet-class>examples.servlets.HelloWorld2</servlet-class>
<init-param>
<param-name>greeting</param-name>
<param-value>Welcome</param-value>
</init-param>
Note: The
FileServlet
includes the
SERVLET_PATH
when
determining the source filename if the
docHome
parameter (deprecated
in this release) is not specified. As a result, it is possible to explicitly
serve only files from specific directories by mapping the
FileServlet
to /dir/*
, etc.

Writing a Simple HTTP Servlet
Creating and Configuring Servlets 4-5
<init-param>
<param-name>person</param-name>
<param-value>WebLogic Developer</param-value>
</init-param>
</servlet>
4.4 Writing a Simple HTTP Servlet
The section provides a procedure for writing a simple HTTP servlet, which prints out
the message
Hello World
. A complete code example (the
HelloWorldServlet
)
illustrating these steps is included at the end of this section. Additional information
about using various Java EE and WebLogic Server services such as JDBC, RMI, and
JMS, in your servlet are discussed later in this document.
1. Import the appropriate package and classes, including the following:
import javax.servlet.*;
import javax.servlet.http.*;
import java.io.*;
2. Extend
javax.servlet.http.HttpServlet
. For example:
public class HelloWorldServlet extends HttpServlet{
3. Implement a
service()
method.
The main function of a servlet is to accept an HTTP request from a Web browser,
and return an HTTP response. This work is done by the
service()
method of your
servlet. Service methods include response objects used to create output and request
objects used to receive data from the client.
You may have seen other servlet examples implement the
doPost()
and/or
doGet()
methods. These methods reply only to POST or GET requests; if you want
to handle all request types from a single method, your servlet can simply
implement the
service()
method. (However, if you choose to implement the
service()
method, you cannot implement the
doPost()
or
doGet()
methods,
unless you call
super.service()
at the beginning of the
service()
method.) The
HTTP servlet specification describes other methods used to handle other request
types, but all of these methods are collectively referred to as service methods.
All the service methods take the same parameter arguments. An
HttpServletRequest
provides information about the request, and your servlet
uses an
HttpServletResponse
to reply to the HTTP client. The service method
looks like the following:
public void service(HttpServletRequest req,
HttpServletResponse res) throws IOException
{
4. Set the content type, as follows:
res.setContentType("text/html");
5. Get a reference to a
java.io.PrintWriter
object to use for output, as follows:
PrintWriter out = res.getWriter();
6. Create some HTML using the
println()
method on the
PrintWriter
object, as
shown in the following example:
out.println("<html><head><title>Hello World!</title></head>");

Advanced Features
4-6 Developing Web Applications, Servlets, and JSPs for Oracle WebLogic Server
out.println("<body><h1>Hello World!</h1></body></html>");
}
}
7. Compile the servlet, as follows:
a. Set up a development environment shell with the correct classpath and path
settings.
b. From the directory containing the Java source code for your servlet, compile
your servlet into the
WEB-INF/classes
directory of the Web application that
contains your servlet. For example:
javac -d /myWebApplication/WEB-INF/classes myServlet.java
8. Deploy the servlet as part of a Web application hosted on WebLogic Server.
9. Call the servlet from a browser.
The URL you use to call a servlet is determined by:
– The name of the Web application containing the servlet and
– The name of the servlet as mapped in the deployment descriptor of the Web
application. Request parameters can also be included in the URL used to call a
servlet.
Generally the URL for a servlet conforms to the following:
http://host:port/webApplicationName/mappedServletName?parameter
The components of the URL are defined as follows:
–
host
is the name of the machine running WebLogic Server.
–
port
is the port at which the above machine is listening for HTTP requests.
–
webApplicationName
is the name of the Web application containing the servlet.
–
parameters
are one or more name-value pairs containing information sent
from the browser that can be used in your servlet.
For example, to use a Web browser to call the
HelloWorldServlet
(the example
featured in this document), which is deployed in the
examplesWebApp
and served
from a WebLogic Server running on your machine, enter the following URL:
http://localhost:7001/examplesWebApp/HelloWorldServlet
The
host:port
portion of the URL can be replaced by a DNS name that is mapped
to WebLogic Server.
4.5 Advanced Features
The preceding steps create a basic servlet. You will probably also use more advanced
features of servlets:
■ Handling HTML form data—HTTP servlets can receive and process data received
from a browser client in HTML forms.
– Section 9.3, "Retrieving Client Input"
■ Application design—HTTP servlets offer many ways to design your application.
The following sections provide detailed information about writing servlets:
– Section 9.2, "Providing an HTTP Response"

Complete HelloWorldServlet Example
Creating and Configuring Servlets 4-7
– Section 9.9, "Threading Issues in HTTP Servlets"
– Section 9.10, "Dispatching Requests to Another Resource"
■ Initializing a servlet—if your servlet needs to initialize data, accept initialization
arguments, or perform other actions when the servlet is initialized, you can
override the
init()
method.
– Section 9.1, "Initializing a Servlet"
■ Use of sessions and persistence in your servlet—sessions and persistence allow you
to track your users within and between HTTP sessions. Session management
includes the use of cookies. For more information, see the following sections:
– Section 10.6, "Session Tracking from a Servlet"
– Section 9.5, "Using Cookies in a Servlet"
– Section 10.3, "Configuring Session Persistence"
■ Use of WebLogic services in your servlet—WebLogic Server provides a variety of
services and APIs that you can use in your Web applications. These services
include Java Database Connectivity (JDBC) drivers, JDBC database connection
pools, Java Messaging Service (JMS), Enterprise JavaBeans (EJB), and Remote
Method Invocation (RMI). For more information, see the following sections:
– Section 9.7, "Using WebLogic Services from an HTTP Servlet"
– Section 9.8, "Accessing Databases"
4.6 Complete HelloWorldServlet Example
This section provides the complete Java source code for the example used in the
preceding procedure. The example is a simple servlet that provides a response to an
HTTP request. Later in this document, this example is expanded to illustrate how to
use HTTP parameters, cookies, and session tracking.
Example 4–3 HelloWorldServlet.java
import javax.servlet.*;
import javax.servlet.http.*;
import java.io.*;
public class HelloWorldServlet extends HttpServlet {
public void service(HttpServletRequest req,
HttpServletResponse res)
throws IOException
{
// Must set the content type first
res.setContentType("text/html");
// Now obtain a PrintWriter to insert HTML into
PrintWriter out = res.getWriter();
out.println("<html><head><title>" +
"Hello World!</title></head>");
out.println("<body><h1>Hello World!</h1></body></html>");
}
}
You can find the source code and instructions for compiling and running examples in
the
EXAMPLES_HOME\wl_server\examples\src\examples\splitdir\helloWorldEar
directory of your WebLogic Server distribution, where
EXAMPLES_HOME
represents the
directory in which the WebLogic Server code examples are configured. For more

Debugging Servlet Containers
4-8 Developing Web Applications, Servlets, and JSPs for Oracle WebLogic Server
information about the WebLogic Server code examples, see "Sample Applications and
Code Examples" in Understanding Oracle WebLogic Server.
4.7 Debugging Servlet Containers
The following sections provide information on debugging options available in the
WebLogic Server servlet container:
■ Section 4.7.1, "Disabling Access Logging"
■ Section 4.7.1.3, "Debugging Specific Sessions"
■ Section 4.7.2, "Tracking a Request Handle Footprint"
4.7.1 Disabling Access Logging
Logging access for servlets can be expensive with regard to server performance.
Therefore, in cases where access logging is not required, you can improve performance
by disabling logging to the access log file.
4.7.1.1 Usage
The optional
access-logging-disabled
property in the
container-descriptor
in
weblogic.xml
can be used to specify whether access logging for an underlying Web
application is disabled.
■ If the property is set as
true
, then application accesses are not logged.
■ If the property is not defined or is set as
false
, then application accesses are
logged.
4.7.1.2 Example
The following example demonstrates how to disable access logging:
<?xml version="1.0" encoding="ISO-8859-1"?>
<weblogic-web-app xmlns="http://xmlns.oracle.com/weblogic/weblogic-web-app">
<container-descriptor>
<access-logging-disabled>true</access-logging-disabled>
</container-descriptor>
</weblogic-web-app>
4.7.1.3 Debugging Specific Sessions
Tracking session change is very helpful when developing applications, especially for
replicated sessions. Although you can utilize
HttpSessionAttributeListener
to track
session changes at the Web application level, developers need a finer-grained
debugging option to track session changes during a specific request.
Note: The
access-logging-disabled
property functions at the Web
application level. Therefore, if it is defined in a Web application, it
does not affect other Web applications. This property works under
both development mode and production mode.

Debugging Servlet Containers
Creating and Configuring Servlets 4-9
4.7.1.4 Usage
The
wl_debug_session
request attribute or a same-named session attribute can log
attribute changes in the current session. When either flag is used, the container logs
the modifications of the underlying session in the server log.
You can enable specific session debugging by using either of the following methods:
■ Set the
wl_debug_session
attribute to the current session, as follows:
■
session.setAttribute('wl_debug_session', Boolean.TRUE);
■ Use the
wl_debug_session
attribute in the request query string as the indicator.
The container adds a
wl_debug_session
session attribute to the current session, as
shown in the following example:
http://localhost/foocontext/foo?wl_debug_session
To stop debugging a session, you can simply remove the
wl_debug_session
attribute.
4.7.2 Tracking a Request Handle Footprint
Tracking a request handle footprint is very helpful while in application development
mode. For example, when debugging an application, you need to know many pieces
of information. This includes such information as: what request is received, how it is
dispatched, what session it is bound to it, when the servlet is invoked, and what
response is sent. Finally, when a
ServletException
occurs, you need a way to link the
exception to corresponding request to find the root cause of the error.
4.7.2.1 Usage
The WebLogic Server servlet container provides more detailed log messages during
request handling to better describe each milestone in a request flow. No additional
configuration changes are required other than enabling the
DebugHttp
logger.
You can then find the footprint of a request handle in the server log. Once in
production mode, you should disable
DebugHttp
logger to maximize server
performance.
Note: This feature is available only in development mode. The
severity of the debug message is at the
debug
level. You need to adjust
the severity of the logger to
debug
or lower for the system logger to
output the debug message to the server log file.

Debugging Servlet Containers
4-10 Developing Web Applications, Servlets, and JSPs for Oracle WebLogic Server

5
Creating and Configuring JSPs 5-1
5
Creating and Configuring JSPs
[5]
This chapter describes how to create and configure JavaServer Pages (JSPs).
This chapter includes the following sections:
■ Section 5.1, "WebLogic JSP and Java EE"
■ Section 5.2, "Configuring JavaServer Pages (JSPs)"
■ Section 5.3, "Registering a JSP as a Servlet"
■ Section 5.4, "Configuring JSP Tag Libraries"
■ Section 5.5, "Configuring Welcome Files"
■ Section 5.6, "Customizing HTTP Error Responses"
■ Section 5.7, "Determining the Encoding of an HTTP Request"
■ Section 5.8, "Mapping IANA Character Sets to Java Character Sets"
■ Section 5.9, "Configuring Implicit Includes at the Beginning and End of JSPs"
■ Section 5.10, "Configuring JSP Property Groups"
■ Section 5.11, "Writing JSP Documents Using XML Syntax"
5.1 WebLogic JSP and Java EE
WebLogic Server supports the JSP 2.2 specification at
http://jcp.org/aboutJava/communityprocess/mrel/jsr245/index.html
. The main
theme for Java EE is ease of development. The platform's Web tier contributes
significantly to ease of development in two ways. First, the platform includes the
JavaServer Pages Standard Tag Library (JSTL) and JavaServer Faces technology.
Second, all the Web-tier technologies offer a set of features that make development of
Web applications on Java EE much easier, such as complete alignment of JavaServer
Faces technology tags and JavaServer Pages (JSP) software code. For more information
about the Java EE Web application technologies, see
http://www.oracle.com/technetwork/java/javaee/tech/webapps-138511.html
.
5.2 Configuring JavaServer Pages (JSPs)
In order to deploy JavaServer Pages (JSP) files, you must place them in the root (or in a
subdirectory below the root) of a Web application. You define JSP configuration
parameters in subelements of the
jsp-descriptor
element in the WebLogic-specific
deployment descriptor,
weblogic.xml
. These parameters define the following
functionality:

Registering a JSP as a Servlet
5-2 Developing Web Applications, Servlets, and JSPs for Oracle WebLogic Server
■ Options for the JSP compiler
■ Debugging
■ How often WebLogic Server checks for updated JSPs that need to be recompiled
■ Character encoding
For a complete description of these subelements, see Section B.11, "jsp-descriptor".
5.3 Registering a JSP as a Servlet
You can register a JSP as a servlet using the
servlet
element of the Java EE standard
deployment descriptor
web.xml
. (The
web.xml
file is located in the
WEB-INF
directory
of your Web application.) A servlet container maintains a map of the servlets known to
it. This map is used to resolve requests that are made to the container. Adding entries
into this map is known as "registering" a servlet. You add entries to this map by
referencing a
servlet
element in
web.xml
through the
servlet-mapping
entry.
A JSP is a type of servlet; registering a JSP is a special case of registering a servlet.
Normally, JSPs are implicitly registered the first time you invoke them, based on the
name of the JSP file. Therefore, the
myJSPfile.jsp
file would be registered as
myJSPfile.jsp
in the mapping table. You can implicitly register JSPs, as illustrated in
the following example. In this example, you request the JSP with the name
/main
instead of the implicit name
myJSPfile.jsp
.
In this example, a URL containing
/main
will invoke
myJSPfile.jsp
:
<servlet>
<servlet-name>myFoo</servlet-name>
<jsp-file>myJSPfile.jsp</jsp-file>
</servlet>
<servlet-mapping>
<servlet-name>myFoo</servlet-name>
<url-pattern>/main</url-pattern>
</servlet-mapping>
Registering a JSP as a servlet allows you to specify the load order, initialization
attributes, and security roles for a JSP, just as you would for a servlet.
5.4 Configuring JSP Tag Libraries
WebLogic Server lets you create and use custom JSP tags. Custom JSP tags are Java
classes you can call from within a JSP page. To create custom JSP tags, you place them
in a tag library and define their behavior in a tag library descriptor (TLD) file. You
make this TLD available to the Web application containing the JSP by defining it in the
Web application deployment descriptor. It is a good idea to place the TLD file in the
WEB-INF
directory of your Web application, because that directory is never available
publicly.
In the Web application deployment descriptor, you define a URI pattern for the tag
library. This URI pattern must match the value in the taglib directive in your JSP
pages. You also define the location of the TLD. For example, if the taglib directive in
the JSP page is:
<%@ taglib uri="myTaglib" prefix="taglib" %>
and the
TLD
is located in the
WEB-INF
directory of your Web application, you would
create the following entry in the Web application deployment descriptor:
<jsp-config>

Configuring Welcome Files
Creating and Configuring JSPs 5-3
<taglib>
<taglib-uri>myTaglib</taglib-uri>
<tablig-location>WEB-INF/myTLD.tld</taglib-location>
</taglib>
</jsp-config>
You can also deploy a tag library as a
.jar
file.
For more information on creating custom JSP tag libraries, see Developing JSP Tag
Extensions for Oracle WebLogic Server.
WebLogic Server also includes several custom JSP tags that you can use in your
applications. These tags perform caching, facilitate query attribute-based flow control,
and facilitate iterations over sets of objects. For more information, see:
■ Section 16, "Using Custom WebLogic JSP Tags (cache, process, repeat)"
■ Section 15, "Using WebLogic JSP Form Validation Tags"
5.5 Configuring Welcome Files
Web application developers can define an ordered list of partial URIs called welcome
files in the Web application deployment descriptor. The purpose of this mechanism is
to allow the deployer to specify an ordered list of partial URIs for the container to use
for appending to URIs when there is a request for a URI that corresponds to a
directory entry in the WAR not mapped to a Web component. This feature can make
your site easier to use, because the user can type a URL without giving a specific
filename.
Welcome files are defined at the Web application level. If your server is hosting
multiple Web applications, you need to define welcome files separately for each Web
application. You define welcome files using the
welcome-file-list
element in
web.xml
. (The
web.xml
file is located in the
WEB-INF
directory of your Web application.)
The following is an example welcome file configuration:
Example 5–1 Welcome File Example
<servlet>
<servlet-name>WelcomeServlet</servlet-name>
<servlet-class>foo.bar.WelcomeServlet</servlet-class>
</servlet>
<servlet-mapping>
<servlet-name>WelcomeServlet</servlet-name>
<url-pattern>*.foo</url-pattern>
</servlet-mapping>
<welcome-file-list>
<welcome-file>/welcome.foo</welcome-file>
</welcome-file-list>
For more information on welcome files, see the servlet 3.0 specification, section 10.10 at
http://jcp.org/aboutJava/communityprocess/mrel/jsr315/index.html
.
Note: Welcome files can be JSPs, static pages, or servlets.

Customizing HTTP Error Responses
5-4 Developing Web Applications, Servlets, and JSPs for Oracle WebLogic Server
5.6 Customizing HTTP Error Responses
You can configure WebLogic Server to respond with your own custom Web pages or
other HTTP resources when particular HTTP errors or Java exceptions occur, instead
of responding with the standard WebLogic Server error response pages.
You define custom error pages in the
error-page
element of the Java EE standard Web
application deployment descriptor,
web.xml
. (The
web.xml
file is located in the
WEB-INF
directory of your Web application.)
5.7 Determining the Encoding of an HTTP Request
WebLogic Server converts binary (bytes) data contained in an HTTP request to the
correct encoding expected by the servlet. The incoming post data might be encoded in
a particular encoding that must be converted to the correct encoding on the server side
for use in methods such as
request.getParameter(..)
.
There are two ways you can define the code set:
■ For a POST operation, you can set the encoding in the HTML
<form>
tag. For
example, this form tag sets
SJIS
as the character set for the content:
<form action="http://some.host.com/myWebApp/foo/index.html">
<input type="application/x-www-form-urlencoded; charset=SJIS">
</form>
When the form is read by WebLogic Server, it processes the data using the
SJIS
character set.
■ Because all Web clients do not transmit the information after the semicolon in the
above example, you can set the code set to be used for requests by using the
input-charset
element in the WebLogic-specific deployment descriptor,
weblogic.xml
.
The
java-charset-name
subelement defines the encoding used to convert data
when the URL of the request contains the path specified with the
resource-path
subelement.
This following example ensures that all request parameters that map to the pattern
/foo/*
are encoded using the Java character set SJIS.
<input-charset>
<resource-path>/foo/*</resource-path>
<java-charset-name>SJIS</java-charset-name>
</input-charset>
This method works for both
GET
and
POST
operations.
5.8 Mapping IANA Character Sets to Java Character Sets
The names assigned by the Internet Assigned Numbers Authority (IANA) to describe
character sets are sometimes different from the names used by Java. Because all HTTP
communication uses the IANA character set names and these names are not always
the same, WebLogic Server internally maps IANA character set names to Java
character set names and can usually determine the correct mapping. However, you can
resolve any ambiguities by explicitly mapping an IANA character set to the name of a
Java character set.
To map on IANA character set to a Java character, set the character set names in the
charset-mapping
element of the WebLogic-specific deployment descriptor,

Configuring JSP Property Groups
Creating and Configuring JSPs 5-5
weblogic.xml
. Define the IANA character set name in the
iana-charset-name
element
and the Java character set name in the
java-charset-name
element. See Section B.14.2,
"charset-mapping".
For example:
<charset-mapping>
<iana-charset-name>Shift-JIS</iana-charset-name>
<java-charset-name>SJIS</java-charset-name>
</charset-mapping>
5.9 Configuring Implicit Includes at the Beginning and End of JSPs
You can implicitly include preludes (also called headers) and codas (also called
footers) for a group of JSP pages by adding
<include-prelude>
and
<include-coda>
elements respectively within a
<jsp-property-group>
element in the Web application
web.xml
deployment descriptor. Their values are context-relative paths that must
correspond to elements in the Web application. When the elements are present, the
given paths are automatically included (as in an include directive) at the beginning
and end of each JSP page in the property group respectively. When there is more than
one include or coda element in a group, they are included in the order they appear.
When more than one JSP property group applies to a JSP page, the corresponding
elements will be processed in the same order as they appear in the JSP configuration
section.
Consider the following files:
/template/prelude.jspf
and
/template/coda.jspf
.
These files are used to include code at the beginning and end of each file in the
following example:
Example 5–2 Implicit Includes
<jsp-config>
<jsp-property-group>
<display-name>WebLogicServer</display-name>
<url-pattern>*.jsp</url-pattern>
<el-ignored>false</el-ignored>
<scripting-invalid>false</scripting-invalid>
<is-xml>false</is-xml>
<include-prelude>/template/prelude.jspf</include-prelude>
<include-coda>/template/coda.jspf</include-coda>
</jsp-property-group>
</jsp-config>
5.10 Configuring JSP Property Groups
A JSP property group is a collection of properties that apply to a set of files
representing JSP pages. You define these properties in one or more subelements of the
jsp-property-group
element in the
web.xml
deployment descriptor.
Most properties defined in a JSP property group apply to an entire translation unit,
that is, the requested JSP file that is matched by its URL pattern and all the files it
includes by way of the include directive. The exception is the
page-encoding
property,
which applies separately to each JSP file matched by its URL pattern. The applicability
of a JSP property group is defined through one or more URL patterns. URL patterns
use the same syntax as defined in chapter 12, "Mapping Requests to Servlets" of the
servlet 3.0 specification, but are bound at translation time. All the properties in the

Writing JSP Documents Using XML Syntax
5-6 Developing Web Applications, Servlets, and JSPs for Oracle WebLogic Server
property group apply to the resources in the Web application that match any of the
URL patterns. There is an implicit property—that of being a JSP file. JSP property
groups do not affect tag files.
5.10.1 JSP Property Group Rules
The following are some rules that apply to JSP property groups:
■ If a resource matches a URL pattern in both a
servlet-mapping
and a
jsp-property-group
, the pattern that is most specific applies (following the same
rules as the servlet specification).
■ If the URL patterns are identical, the
jsp-property-group
takes precedence over
the
servlet-mapping
.
■ If at least one
jsp-property-group
contains the most specific matching URL
pattern, the resource is considered to be a JSP file, and the properties in that
jsp-property-group
apply.
■ If a resource is considered to be a JSP file, all
include-prelude
and
include-coda
properties apply from all the
jsp-property-group
elements with matching URL
patterns. See Section 5.9, "Configuring Implicit Includes at the Beginning and End
of JSPs".
5.10.2 What You Can Do with JSP Property Groups
You can configure the
jsp-property-group
to do the following:
■ Indicate that a resource is a JSP file (implicit).
■ Control disabling of JSP expression language (JSP EL) evaluation.
■ Control disabling of Scripting elements.
■ Indicate page Encoding information.
■ Prelude and Coda automatic includes.
■ Indicate that a resource is a JSP document.
For more information on JSP property groups, see chapter 3, "JSP Configuration," of
the JSP 2.2 specification at
http://jcp.org/aboutJava/communityprocess/mrel/jsr245/index.html
.
5.11 Writing JSP Documents Using XML Syntax
The JSP 2.2 specification has improved upon the concept of JSP documents by
allowing them to leverage XML syntax. Also, JSP documents have been extended to
use property groups. A JSP document is a JSP page written using XML syntax. JSP
documents need to be described as such, either implicitly or explicitly, to the JSP
container, which then processes them as XML documents, checking for
well-formedness and applying requests like entity declarations, if present. JSP
documents are used to generate dynamic content using the standard JSP semantics.
The following is an example of a simple JSP document that generates, using the JSP
standard tag library, an XML document that has
table
as the root element. The table
element has three
row
subelements containing values
1
,
2
, and
3
. For more details and
other examples, see section 6.4, "Examples of JSP Documents," of the JSP 2.2
specification at
http://jcp.org/aboutJava/communityprocess/mrel/jsr245/index.html
.

Writing JSP Documents Using XML Syntax
Creating and Configuring JSPs 5-7
Example 5–3 Simple JSP Document
<table>
<c:forEach
xmlns:c="http://java.sun.com/jsp/jstl/core"
var="counter" begin="1" end="3">
<row>${counter}</row>
</c:forEach>
</table>
5.11.1 How to Use JSP Documents
You can use JSP documents in a number of ways including the following:
■ JSP documents can be passed directly to the JSP container. This is becoming more
important as more and more content is authored in XML. The generated content
may be sent directly to a client or it may be part of some XML processing pipeline.
■ JSP documents can be manipulated by XML-aware tools.
■ JSP documents can be generated from textual representations by applying an XML
transformation, such as XSLT.
■ A JSP document can be generated automatically, for example, by serializing some
objects.
5.11.2 Important Information about JSP Documents
The following are some important pieces of information pertaining to JSP documents:
■ By default, files with the filename extension
.jspx
or
.tagx
are treated as JSP
documents in the XML syntax.
■ JSP property groups defined in the
web.xml
deployment descriptor can control
which files in the Web application can be treated as being in the XML syntax. See
Section 5.10, "Configuring JSP Property Groups".
■ If a JSP file starts with
<jsp:root>
, then it is used in the XML syntax.
■ XML namespaces are used instead of
<%@taglib%>
taglib tags
(xmlns:prefix="...")
.
■ The
<jsp:scriptlet>
,
<jsp:declaration>
and
<jsp:expression>
tags are used
instead of
<%...%>
,
<%!...%>
, and
<%=...%>
.
■ The
<jsp:directive.page>
and
<jsp:directive.include>
tags are used instead
of
<%@page%>
and
<%@include%>
.
■ Inside of attribute values, instead of using
<%=...%>
to denote an expression, only
"
%...%
" is used.
For more information on JSP documents, see chapter 6, "JSP Documents," of the JSP 2.2
specification at
http://jcp.org/aboutJava/communityprocess/mrel/jsr245/index.html
.

Writing JSP Documents Using XML Syntax
5-8 Developing Web Applications, Servlets, and JSPs for Oracle WebLogic Server

6
Using JSF and JSTL 6-1
6
Using JSF and JSTL
[6]
This chapter describes how to use JavaServer Faces (JSF) and JSP Standard Tag Library
(JSTL) with WebLogic Server.
This chapter includes the following sections:
■ Section 6.1, "Using JSF and JSTL With Web Applications"
■ Section 6.2, "JSF Compatibility with Previous Releases"
6.1 Using JSF and JSTL With Web Applications
As of WebLogic Server 12.1.1, JSF 2.x and JSTL 1.2 have been incorporated directly in
the server's classpath. Your applications deployed to WebLogic Server can seamlessly
make use of JSF 2.x and JSTL 1.2 without requiring you to deploy and reference
separate shared libraries, as was the case in previous releases.
For backward compatibility, WebLogic Server provides JSF and JSTL libraries that can
be deployed and referenced by applications. See Section 6.2.1, "Deploying JSF 1.2 and
JSTL Libraries".
For information on referencing these shared libraries with your Web applications, see
"Creating Shared Java EE Libraries and Optional Packages" in Developing Applications
for Oracle WebLogic Server.
If your application includes JSF JARs that you want to reference instead of the
WebLogic Server bundled JSF shared libraries, you can configure a filtering classloader
in
weblogic.xml
(
.war
) or
weblogic-application.xml
(
.ear
) as shown below:
<prefer-application-packages>
<package-name>javax.faces.*</package-name>
<package-name>com.sun.faces.*</package-name>
<package-name>com.bea.faces.*</package-name>
</prefer-application-packages>
<prefer-application-resources>
<resource-name>javax.faces.*</resource-name>
<resource-name>com.sun.faces.*</resource-name>
<resource-name>com.bea.faces.*</resource-name>
<resource-name>META-INF/services/javax.servlet.ServletContainerInitializer</resour
ce-name>
<resource-name>META-INF/services/com.sun.faces.*</resource-name>
</prefer-application-resources>

JSF Compatibility with Previous Releases
6-2 Developing Web Applications, Servlets, and JSPs for Oracle WebLogic Server
6.1.1 JavaServer Faces (JSF)
JavaServer Faces technology simplifies building user interfaces for JavaServer
applications. Developers of various skill levels can quickly build Web applications by:
assembling reusable UI components in a page; connecting these components to an
application data source; and wiring client-generated events to server-side event
handlers.
WebLogic Server supports the JSF 2.1 specification at
http://jcp.org/aboutJava/communityprocess/mrel/jsr314/index2.html
. For more
information about JSF technology, see the product overview at
http://www.oracle.com/technetwork/java/javaee/javaserverfaces-139869.html
.
If you selected to install the server examples, you will find these JSF code examples,
"Incorporating AJAX in Web Applications," "Using Facelets and Templating," and
"Creating Bookmarkable Web Applications," in the
EXAMPLES_HOME\wl_
server\examples\src\examples\javaee6\jsf
directory of your WebLogic Server
distribution, where
EXAMPLES_HOME
represents the directory in which the WebLogic
Server code examples are configured. For more information about the WebLogic
Server code examples, see "Sample Applications and Code Examples" in Understanding
Oracle WebLogic Server.
6.1.2 JavaServer Pages Standard Tag Libraries (JSTL)
The JavaServer Pages Standard Tag Library (JSTL) encapsulates as simple tags the core
functionality common to many Web applications. JSTL has support for common,
structural tasks such as iteration and conditionals, tags for manipulating XML
documents, internationalization tags, and SQL tags. It also provides a framework for
integrating existing custom tags with JSTL tags.
WebLogic Server supports the JSTL 1.2 specification at
http://jcp.org/en/jsr/detail?id=52
. For more information about JSTL technology,
see the product overview at
http://www.oracle.com/technetwork/java/index-jsp-135995.html
.
6.2 JSF Compatibility with Previous Releases
If you prefer using shared libraries, the following packages are available:
■ JSF library –
http://javaserverfaces.java.net/
■ JSTL library –
http://jstl.java.net/
The JSF and JSTL libraries are bundled as WAR files and are located in the WL_
HOME
/common/deployable-libraries
directory. The JSF libraries include the JSTL
JAR files for convenience, so that if an application references a JSF library, it
automatically gets JSTL support as well.
Separate JSF and JSTL JAR files and implementation JAR files are also provided in the
WL_HOME
/server/lib/api.jar
file. You can reference these JAR files for
compilation purposes or when using other utilities while developing Web
applications.
Note: The
jsf-2.0.war
shared library is empty and is included for
backward compatibility for applications that have previously
referenced that shared library.

JSF Compatibility with Previous Releases
Using JSF and JSTL 6-3
For backward compatibility, JSF 1.2 and JSTL 1.1 packages are bundled with WebLogic
Server as shared libraries, though they are deprecated in this release. Existing Web
applications that use JSF 1.2 and JSTL 1.1 functionality can run on WebLogic Server.
Choose the appropriate JSF or JSTL library based on your Web application.
In this release, the
weblogic.xml
file in
jsf-1.2.war
configures a filtering classloader
for your application's JSF classes and resources.
6.2.1 Deploying JSF 1.2 and JSTL Libraries
When deploying JSF 1.2 applications, use the JSF and JSTL libraries which are
provided as Web application libraries. You must deploy the libraries before deploying
the Web application that is using JSF 1.2 or JSTL functionality. You can deploy the
libraries using the Administration Console or the command-line
weblogic.Deployer
utility.
Here's an example of deploying a JSF 1.2 library using the
weblogic.Deployer
command-line:
java weblogic.Deployer -adminurl t3://localhost:7001
-user weblogic -password weblogic
-deploy -library
d:/oracle_home/wlserver/common/deployable-libraries/jsf-1.2.war
This command deploys the JSF 1.2 library using the default
library-name
,
specification-version
and
implementation-version
defined by the
MANIFEST.MF
in
the library.
After a library is deployed, the
extension-name
,
specification-version
and
implementation-version
of the library can be found in Administration Console. This
information can also be found in the
MANIFEST.MF
file of the library
WAR
file.
For more information on deploying a Web module, see "Preparing Applications and
Modules for Deployment" in Deploying Applications to Oracle WebLogic Server.
6.2.2 Referencing a JSF or JSTL Library
To reference a JSF or JSTL library, a standard Web application can define a
<library-ref>
descriptor in the application's
weblogic.xml
file. Here is an example:
<library-ref>
<library-name>jsf</library-name>
<specification-version>1.2</specification-version>
<implementation-version>1.2</implementation-version>
<exact-match>false</exact-match>
</library-ref>
For more information on referencing a Web application library, see "Creating Shared
Java EE Libraries and Optional Packages" in Developing Applications for Oracle WebLogic
Server.
Note: In this release of WebLogic Server, you can deploy JSF 2.x and
JSTL 1.2 applications directly. For backward compatibility, use the
following directions when deploying JSF 1.x and JSTL 1.1
applications.

JSF Compatibility with Previous Releases
6-4 Developing Web Applications, Servlets, and JSPs for Oracle WebLogic Server

7
Configuring Resources in a Web Application 7-1
7
Configuring Resources in a Web Application
[7]
This chapter describes how to configure Web application resources in WebLogic
Server.
This chapter includes the following sections:
■ Section 7.1, "Configuring Resources in a Web Application"
■ Section 7.2, "Configuring Resources"
■ Section 7.3, "Referencing External EJBs"
■ Section 7.4, "More about the ejb-ref* Elements"
■ Section 7.5, "Referencing Application-Scoped EJBs"
■ Section 7.6, "Serving Resources from the CLASSPATH with the ClasspathServlet"
■ Section 7.7, "Using CGI with WebLogic Server"
7.1 Configuring Resources in a Web Application
The resources that you use in a Web application are generally deployed externally to
the Web application. JDBC data sources can optionally be deployed within the scope of
the Web application as part of an EAR file.
To use external resources in the Web application, you resolve the JNDI resource name
that the application uses with the global JNDI resource name using the
web.xml
and
weblogic.xml
deployment descriptors. (The
web.xml
file is located in the
WEB-INF
directory of your Web application.) See Section 7.2, "Configuring Resources" for more
information.
You can also deploy JDBC data sources as part of the Web application EAR file by
configuring those resources in the
weblogic-application.xml
deployment descriptor.
Resources deployed as part of the EAR file with their scope defined as application are
referred to as application-scoped resources. These resources remain private to the
application, and application components can access the resource names by adding
<resource-ref>
elements as explained in Section 7.2, "Configuring Resources".
7.2 Configuring Resources
When accessing resources such as a data source from a Web application through Java
Naming and Directory Interface (JNDI), you can map the JNDI name you look up in
your code to the actual JNDI name as bound in the global JNDI tree. This mapping is
made using both the
web.xml
and
weblogic.xml
deployment descriptors and allows
you to change these resources without changing your application code. You provide a
name that is used in your Java code, the name of the resource as bound in the JNDI

Referencing External EJBs
7-2 Developing Web Applications, Servlets, and JSPs for Oracle WebLogic Server
tree, and the Java type of the resource, and you indicate whether security for the
resource is handled programmatically by the servlet or from the credentials associated
with the HTTP request. You can also access JMS module resources, such as queues,
topics, and connection factories. For more information see, "Configuring JMS
Application Modules for Deployment" in Administering JMS Resources for Oracle
WebLogic Server.
To configure resources:
1. Enter the resource name in the deployment descriptor as you use it in your code,
the Java type, and the security authorization type.
2. Map the resource name to the JNDI name.
The following example illustrates how to use an external data source. It assumes
that you have defined a data source called
accountDataSource
. For more
information, see "JDBC Data Sources" in Oracle WebLogic Server Administration
Console Online Help.
Example 7–1 Using an External DataSource
servlet code:
javax.sql.DataSource ds = (javax.sql.DataSource) ctx.lookup
("myDataSource");
web.xml entries:
<resource-ref>
. . .
<res-ref-name>myDataSource</res-ref-name>
<res-type>javax.sql.DataSource</res-type>
<res-auth>CONTAINER</res-auth>
. . .
</resource-ref>
weblogic.xml entries:
<resource-description>
<res-ref-name>myDataSource</res-ref-name>
<jndi-name>accountDataSource</jndi-name>
</resource-description>
7.3 Referencing External EJBs
Web applications can access EJBs that are deployed as part of a different application (a
different EAR file) by using an external reference. The EJB being referenced exports a
name to the global JNDI tree in its
weblogic-ejb-jar.xml
deployment descriptor. An
EJB reference in the Web application module can be linked to this global JNDI name by
adding an
ejb-reference-description
element to its
weblogic.xml
deployment
descriptor.
This procedure provides a level of indirection between the Web application and an EJB
and is useful if you are using third-party EJBs or Web applications and cannot modify
the code to directly call an EJB. In most situations, you can call the EJB directly without
using this indirection. For more information, see Developing Enterprise JavaBeans,
Version 2.1, for Oracle WebLogic Server.
To reference an external EJB for use in a Web application:
1. Enter the EJB reference name you use to look up the EJB in your code, the Java
class name and the class name of the home and remote interfaces of the EJB in the

Referencing Application-Scoped EJBs
Configuring Resources in a Web Application 7-3
ejb-ref
element of the Java EE standard deployment descriptor,
web.xml
. (The
web.xml
file is located in the
WEB-INF
directory of your Web application.)
2. Map the reference name in the
ejb-reference-description
element of the
WebLogic-specific deployment descriptor,
weblogic.xml
, to the JNDI name
defined in the
weblogic-ejb-jar.xml
file.
If the Web application is part of an Enterprise Application Archive (EAR file), you
can reference an EJB by the name used in the EAR with the
ejb-link
element of
the Java EE standard deployment descriptor,
web.xml
.
7.4 More about the ejb-ref* Elements
The
ejb-ref
element in the
web.xml
deployment descriptor declares that either a
servlet or JSP is going to be using a particular EJB. The
ejb-reference-description
element in the
weblogic.xml
deployment descriptor binds that reference to an EJB,
which is advertised in the global JNDI tree.
The
ejb-reference-descriptor
element indicates which
ejb-ref
element it is
resolving with the
ejb-ref-name
element. That is, the
ejb-reference-descriptor
and
ejb-ref
elements with the same
ejb-ref-name
element go together.
With the addition of the
ejb-link
syntax, the
ejb-reference-descriptor
element is
no longer required if the EJB being used is in the same application as the servlet or JSP
that is using the EJB.
The
ejb-ref-name
element serves two purposes in the
web.xml
deployment descriptor:
■ It is the name that the user code (servlet or JSP) uses to look up the EJB. Therefore,
if your
ejb-ref-name
element is
ejb1
, you would perform a JNDI name lookup for
ejb1
relative to
java:comp/env
. The
ejb-ref-name
element is bound into the
component environment (
java:comp/env
) of the Web application containing the
servlet or JSP.
Assuming the
ejb-ref-name
element is
ejb1
, the code in your servlet or JSP
should look like:
Context ctx = new InitialContext();
ctx = (Context)ctx.lookup("java:comp/env");
Object o = ctx.lookup("ejb1");
Ejb1Home home = (Ejb1Home) PortableRemoteObject.narrow(o, Ejb1Home.class);
■ It links the
ejb-ref
and
ejb-reference-descriptor
elements together.
7.5 Referencing Application-Scoped EJBs
Within an application, WebLogic Server binds any EJBs referenced by other
application components to the environments associated with those referencing
components. These resources are accessed at run time through a JNDI name lookup
relative to
java:comp/env
.
The following is an example of an application deployment descriptor
(
application.xml
) for an application containing an EJB and a Web application, also
called an Enterprise Application. (For the sake of brevity, the XML header is not
included in this example.)
Example 7–2 Example Deployment Descriptor
<application>
<display-name>MyApp</display-name>

Referencing Application-Scoped EJBs
7-4 Developing Web Applications, Servlets, and JSPs for Oracle WebLogic Server
<module>
<web>
<web-uri>myapp.war</web-uri>
<context-root>myapp</context-root>
</web>
</module>
<module>
<ejb>ejb1.jar</ejb>
</module>
</application>
To allow the code in the Web application to use an EJB in
ejb1.jar
, the Java EE
standard Web application deployment descriptor,
web.xml
, must include an
ejb-ref
stanza that contains an
ejb-link
referencing the JAR file and the name of the EJB that
is being called.
The format of the
ejb-link
entry must be as follows:
filename#ejbname
where
filename
is the name of the JAR file, relative to the Web application, and
ejbname
is the EJB within that JAR file. The
ejb-link
element should look like the
following:
<ejb-link>../ejb1.jar#myejb</ejb-link>
Note that since the JAR path is relative to the WAR file, it begins with "
../
". Also, if
the
ejbname
is unique across the application, the JAR path may be dropped. As a
result, your entry may look like the following:
<ejb-link>myejb</ejb-link>
The
ejb-link
element is a sub-element of an
ejb-ref
element contained in the Web
application's
web.xml
descriptor. The
ejb-ref
element should look like the following:
Example 7–3 <ejb-ref> Element
<web-app>
...
<ejb-ref>
<ejb-ref-name>ejb1</ejb-ref-name>
<ejb-ref-type>Session</ejb-ref-type>
<home>mypackage.ejb1.MyHome</home>
<remote>mypackage.ejb1.MyRemote</remote>
<ejb-link>../ejb1.jar#myejb</ejb-link>
</ejb-ref>
...
</web-app>
Referring to the syntax for the
ejb-link
element in the above example,
<ejb-link>../ejb1.jar#ejb1</ejb-link>,
the portion of the syntax to the left of the
#
is a relative path to the EJB module being
referenced. The syntax to the right of
#
is the particular EJB being referenced in that
module. In the above example, the EJB JAR and WAR files are at the same level.
The name referenced in the
ejb-link
(in this example,
myejb
) corresponds to the
ejb-name
element of the referenced EJB's descriptor. As a result, the deployment
descriptor (
ejb-jar.xml
) of the EJB module that this
ejb-ref
element is referencing
should have an entry similar to the following:

Serving Resources from the CLASSPATH with the ClasspathServlet
Configuring Resources in a Web Application 7-5
Example 7–4 <ejb-jar> Element
<ejb-jar>
...
<enterprise-beans>
<session>
<ejb-name>myejb</ejb-name>
<home>mypackage.ejb1.MyHome</home>
<remote>mypackage.ejb1.MyRemote</remote>
<ejb-class>mypackage.ejb1.MyBean</ejb-class>
<session-type>Stateless</session-type>
<transaction-type>Container</transaction-type>
</session>
</enterprise-beans>
...
</ejb-jar>
Notice the
ejb-name
element is set to
myejb
.
At run time, the Web application code looks up the EJB's JNDI name relative to
java:/comp/env
. The following is an example of the servlet code:
MyHome home = (MyHome)ctx.lookup("java:/comp/env/ejb1");
The name used in this example (ejb1) is the ejb-ref-name defined in the
ejb-ref
element of the
web.xml
segment above.
7.6 Serving Resources from the CLASSPATH with the ClasspathServlet
If you need to serve classes or other resources from the system
CLASSPATH
, or from the
WEB-INF/classes
directory of a Web application, you can use a special servlet called
the
ClasspathServlet
. The
ClasspathServlet
is useful for applications that use
applets or RMI clients and require access to server-side classes. The
ClasspathServlet
is implicitly registered and available from any application.
The
ClasspathServlet
is always enabled by default. To disable it, set the
ServerMBean
parameter
ClassPathServletDisabled
to
true
(
default = false
).
The
ClasspathServlet
returns the classes or resources from the system
CLASSPATH
in
the following order:
1.
WEB-INF/classes
2. JAR files under
WEB-INF/lib/*
3. system
CLASSPATH
To serve a resource from the
WEB-INF/classes
directory of a Web application, call the
resource with a URL such as:
http://server:port/myWebApp/classes/my/resource/myClass.class
In this case, the resource is located in the following directory, relative to the root of the
Web application:
WEB-INF/classes/my/resource/myClass.class
Note: Because the
ClasspathServlet
serves any resource located in
the system
CLASSPATH
, do not place resources that should not be
publicly available in the system
CLASSPATH
.

Using CGI with WebLogic Server
7-6 Developing Web Applications, Servlets, and JSPs for Oracle WebLogic Server
7.7 Using CGI with WebLogic Server
WebLogic Server supports all CGI scripts through an internal WebLogic servlet called
the
CGIServlet
. To use CGI, register the
CGIServlet
in the Web application
deployment descriptor. See Section 3.4, "Configuring How a Client Accesses a Web
Application".
7.7.1 Configuring WebLogic Server to Use CGI
To configure CGI in WebLogic Server:
1. Declare the
CGIServlet
in your Web application by using the
servlet
and
servlet-mapping
elements in the Java EE standard Web application deployment
descriptor,
web.xml
. (The
web.xml
file is located in the
WEB-INF
directory of your
Web application.) The class name for the
CGIServlet
is
weblogic.servlet.CGIServlet
. You do not need to package this class in your Web
application.
2. Register the following initialization attributes for the
CGIServlet
by defining the
following
init-param
elements:
■
cgiDir
—The path to the directory containing your CGI scripts. You can
specify multiple directories, separated by a "
;
" (Windows) or a "
:
" (UNIX). If
you do not specify
cgiDir
, the directory defaults to a directory named
cgi-bin
under the Web application root.
■
useByteStream
—By default, character streams are used to read the output of
CGI scripts. When scripts produce binary data, the stream may become
corrupted due to character encoding. Use the useByteStream parameter to
keep the stream from becoming corrupted. Using this parameter for ascii
output also improves performance.
■
extension mapping
—Maps a file extension to the interpreter or executable
that runs the script. If the script does not require an executable, this
initialization attribute may be omitted.
■ The
param-name
for extension mappings must begin with an asterisk followed
by a dot, followed by the file extension, for example,
*.pl
.
■ The
param-value
contains the path to the interpreter or executable that runs
the script. You can create multiple mappings by creating a separate
init-param
element for each mapping.
Example 7–5 Example Web Application Deployment Descriptor Entries for Registering
the CGIServlet
<servlet>
<servlet-name>CGIServlet</servlet-name>
<servlet-class>weblogic.servlet.CGIServlet</servlet-class>
<init-param>
<param-name>cgiDir</param-name>
<param-value>
/bea/wlserver6.0/config/mydomain/applications/myWebApp/cgi-bin
</param-value>
Note: WebLogic Server provides functionality to support your legacy
Common Gateway Interface (CGI) scripts. For new projects, Oracle
recommends that you use HTTP servlets or JavaServer Pages.

Using CGI with WebLogic Server
Configuring Resources in a Web Application 7-7
</init-param>
<init-param>
<param-name>*.pl</param-name>
<param-value>/bin/perl.exe</param-value>
</init-param>
</servlet>
...
<servlet-mapping>
<servlet-name>CGIServlet</servlet-name>
<url-pattern>/cgi-bin/*</url-pattern>
</servlet-mapping>
7.7.2 Requesting a CGI Script
The URL used to request a Perl script must follow the pattern:
http://host:port/myWebApp/cgi-bin/myscript.pl
Where
host:port
—Host name and port number of WebLogic Server.
myWebApp
—Name of your Web application.
cgi-bin
—
url-pattern
name mapped to the
CGIServlet
.
myscript.pl
—Name of the Perl script that is located in the directory specified by the
cgiDir
initialization attribute.
7.7.3 CGI Best Practices
For a list of CGI Best Practices, see Section D.1, "CGI Best Practices".

Using CGI with WebLogic Server
7-8 Developing Web Applications, Servlets, and JSPs for Oracle WebLogic Server

8
WebLogic Annotation for Web Components 8-1
8
WebLogic Annotation for Web Components
[8]
This chapter describes how to annotate Web components in WebLogic Server.
This chapter includes the following sections:
■ Section 8.1, "Servlet Annotation and Dependency Injection"
■ Section 8.2, "Annotating Servlets"
8.1 Servlet Annotation and Dependency Injection
The servlet 3.0 specification (see
http://jcp.org/en/jsr/detail?id=315
) provides
annotations to enable declarative-style programming.
The servlet specification states that annotations can be defined on certain Web
components, such as servlets, filters, listeners, and tag handlers. The annotations are
used to declare dependencies on external resources. The container will detect
annotations on such components and inject necessary dependencies before the
component's life cycle methods are invoked. Dependency Injection (DI) will only be
done on certain components, as described in Section 8.1.1, "Web Component Classes
That Support Annotations".
Annotation processing and DI will be performed on all Web applications that have the
version set to 2.5 or higher. However, annotation processing is expensive and it can
increase the deployment time for Web applications depending on the size of the
included classes. Set the
metadata-complete
attribute to
true
in the
web.xml
descriptor if your Web application does not have any annotations and if you have the
version set to 2.5 or higher to avoid unnecessary scanning of the Web applications
classes for annotations. Alternatively, you can turn off annotation processing and DI
for all the Web applications by setting
-Dweblogic.servlet.DIDisabled=true
flag
when starting WebLogic Server.
For more information about using Java EE annotations and dependency injection with
WebLogic Server applications, see "Using Java EE Annotations and Dependency
Injection" and "Using Contexts and Dependency Injection for the Java EE Platform" in
Developing Applications for Oracle WebLogic Server. For detailed information about
Note: This release of WebLogic Server deprecates WebLogic
Server-specific annotations: @WLServlet, @WLFilter, @WLInitParam
in favor of the standard annotations defined in the servlet 3.0
specification. Also, instead of
weblogic.servlet.http.AbstractAsyncServlet
, you should use the
standard asynchronous processing model defined in the servlet 3.0
specification.
Servlet Annotation and Dependency Injection
8-2 Developing Web Applications, Servlets, and JSPs for Oracle WebLogic Server
EJB-specific annotations for WebLogic Server Enterprise JavaBeans, see Developing
Enterprise JavaBeans for Oracle WebLogic Server.
If you selected to install the server examples, you will find this servlet 3.0 annotation
code example, "Using Annotations for Servlets, Filters and Listeners," in the
EXAMPLES_
HOME\wl_server\examples\src\examples\javaee6\servlet
directory of your
WebLogic Server distribution, where
EXAMPLES_HOME
represents the directory in which
the WebLogic Server code examples are configured. For more information about the
WebLogic Server code examples, see "Sample Applications and Code Examples" in
Understanding Oracle WebLogic Server.
8.1.1 Web Component Classes That Support Annotations
This section describes the behavior of annotations and dependency injection (DI) of
resources in a Java EE compliant Web container.
The Web container only processes annotations for the types of classes listed in
Table 8–1.
The Web container will not process annotations on classes like Java Beans and other
helper classes. The Web container follows these steps to achieve DI:
1. Annotation Processing—The Web container processes annotations during the Web
application deployment phase. As annotations are processed, the container figures
out the relevant entries in the descriptor that get affected by the annotation and
updates the descriptor tree. The servlet specification indicates that all annotations
can be declared in the descriptor by defining an injection target. The Web
container updates the descriptor tree with the injection targets so that as
deployment continues the JNDI tree is updated with the necessary entries.
2. Dependency Injection (DI)—DI is done when instances are created (for the types
listed in Table 8–1). For listeners and filters, this occurs during the deployment
phase, and for servlets it can occur during deployment or run time.
8.1.2 Annotations Supported By a Web Container
Table 8–2 lists all the annotations that must be supported by the Web container.
Table 8–1 Web Components and Interfaces Supporting Annotations and Dependency
Injection
Component Type Interfaces
Servlets
javax.servlet.Servlet
Filters
javax.servlet.Filter
Listeners
javax.servlet.ServletContextListener
javax.servlet.ServletContextAttributeListener
javax.servlet.ServletRequestListener
javax.servlet.ServletRequestAttributeListener
javax.servlet.http.HttpSessionListener
javax.servlet.http.HttpSessionAttributeListener
javax.servlet.AsyncListener
Tag handlers
javax.servlet.jsp.tagext.SimpleTag
javax.servlet.jsp.tagext.BodyTag
Note: In any Web application component, if one DI fails, it will cause
all subsequent DIs upon the same component to be ignored.
Servlet Annotation and Dependency Injection
WebLogic Annotation for Web Components 8-3
The Web container makes use of the Java EE container's annotation processing and
dependency injection mechanisms to achieve this functionality.
The specification states that the Web container should not process annotations when
metadata-complete
attributes are set to
true
in the
web.xml
descriptor. If annotations
are properly defined and annotation processing succeeds and dependencies are
properly injected, the annotated fields are initialized properly and annotated methods
are invoked at the proper phase in the life cycle. If DI fails, these annotated fields will
be
null
.
8.1.2.1 Fault Detection and Recovery
Any failure during annotation processing will yield a deployment exception that will
prevent deployment of the Web application. If a failure happens during DI, the
container will log a warning message in the server logs indicating the reason for the
failure. The annotated fields in the instance of the class will be
null
and any life cycle
annotated methods will not be invoked in case of DI failure.
8.1.2.2 Limitations
The WebLogic servlet container supports annotations on Web components that are
declared in the
web.xml
descriptor. Any listeners, filters or servlets registered
Table 8–2 List of Supported Annotations
@Annotation Specification Reference
DeclaresRoles 15.5.1
EJB 15.5.2
EJBs 15.5.3
PersistenceContext 15.5.5
PersistenceUnit 15.5.7
PersistenceUnits 15.5.8
PersistenceContexts 15.5.6
PostConstruct 15.5.9
PreDestroy 15.5.10
Resource 15.5.4
Resources 15.5.11
WebServiceRef 15.5.13
WebServiceRefs 15.5.14
RunAs 15.5.12
Note: If multiple methods in a Web component class, such as a
servlet, filter, and such, are annotated with
PostConstruct
or
PreDestroy
, then the Web component will fail to deploy such an
application. Similarly, if an EJB component class, such as a session
bean, is annotated with
PostConstruct
or
PreDestroy
, or an EJB
interceptor is annotated with
PostConstruct
,
PreDestroy
,
PostActivate
, or
PrePassivate
, then the EJB component will also fail
to deploy such an application.
Annotating Servlets
8-4 Developing Web Applications, Servlets, and JSPs for Oracle WebLogic Server
dynamically via the
weblogic.servlet.WeblogicServletContext
method will not
have their annotations processed and no DI will be done for such components.
8.2 Annotating Servlets
The WebLogic servlet container provides the
@WLServlet
annotation for servlets and
the
WLFilter
annotation for filters that you develop in a Web application without
having to declare them in a
web.xml
descriptor. The WebLogic servlet container also
provides the
WLInitParam
annotation to specify the initial parameters for servlets and
filters declared using the
WLServlet
and
WLFilter
annotations.
All the required metadata can be annotated in the servlet or filter and the container
will detect them and update the descriptor tree so that the annotated servlet or filter is
deployed.
8.2.1 WLServlet
You can annotate a servlet class with
WLServlet
annotation
(
weblogic.servlet.annotation.WLServlet
). This annotation defines various
attributes for declaring parameters for the servlet. All attributes on this annotation are
optional.
8.2.1.1 Attributes
Example 8–1 illustrates the usage of the annotation in a servlet class.
Example 8–1 WLServlet Annotation
@WLServlet (
name = "FOO",
runAs = "SuperUser"
initParams = { @WLInitParam (name="one", value="1") }
mapping = {"/foo/*"}
Note: This release of WebLogic Server deprecates WebLogic
Server-specific annotations: @WLServlet, @WLFilter, @WLInitParam
in favor of the standard annotations defined in the servlet 3.0
specification.
Table 8–3 Attributes of WLServlet Annotation
Name Description Data Type Required?
displayName Display name for the servlet after
deployment
String No
description Servlet description String No
icon Icon location String No
name Servlet name String No
initParams Initialization parameters for the servlet WLInitParam[] No
loadOnStartup Whether the servlet should load on startup int No
runAs The run-as user for the servlet String No
mapping The url-pattern for the servlet String[] No

Annotating Servlets
WebLogic Annotation for Web Components 8-5
)
. . .
The WebLogic servlet container detects the annotation and installs this servlet for
deployment. During the annotation processing phase of the Web applications
deployment, the descriptor bean corresponding to
web.xml
descriptor is updated with
the relevant entries corresponding to the annotation.
Example 8–2 shows how the descriptor bean looks after being updated.
Example 8–2 Updated web.xml Descriptor
<web-app>
. . .
<servlet>
<servlet-name>FOO</servlet-name>
<servlet-class>my.TestServlet</servlet-class>
<init-param>
<param-name>one</param-name>
<param-value>1</param-value>
</init-param>
</servlet>
<servlet-mapping>
<servlet-name>FOO</servlet-name>
<url-pattern>/foo/*</url-pattern>
</servlet-mapping>
. . .
</web-app>
8.2.1.2 Fault Detection And Recovery
Any error during the processing of this annotation will result in a deployment error
with a proper message in the server logs.
8.2.2 WLFilter
You can annotate a filter class with
WLFilter
annotation
(
weblogic.servlet.annotation.WLFilter
). This annotation defines various attributes
for declaring parameters for the filter. All attributes on this annotation are optional.
8.2.2.1 Attributes
Example 8–3 illustrates the usage of the annotation in a filter class.
Table 8–4 Attributes of WLFilter Annotation
Name Description Data Type Required?
displayName Display name for the filter after
deployment
String No
description Filter description String No
icon Icon location String No
name Filter name String No
initParams Initialization parameters for the filter WLInitParam[] No
mapping The url-pattern for the filter String[] No

Annotating Servlets
8-6 Developing Web Applications, Servlets, and JSPs for Oracle WebLogic Server
Example 8–3 WLFilter Annotation
@WLFilter (
name = "BAR",
initParams = { @WLInitParam (name="one", value="1") }
Mapping = {"/bar/*"}
)
. . .
The WebLogic servlet container detects the annotation and installs this filter for
deployment. During the annotation processing phase of the Web application
deployment, the descriptor bean corresponding to
web.xml
descriptor is updated with
the relevant entries corresponding to the annotation.
Example 8–4 shows how the descriptor bean looks after being updated.
Example 8–4 Updated web.xml Descriptor
<web-app>
. . .
<filter>
<filter-name>BAR</filter-name>
<filter-class>my.TestFilter</filter-class>
<init-param>
<param-name>one</param-name>
<param-value>1</param-value>
</init-param>
</filter>
<filter-mapping>
<filter-name>BAR</filter-name>
<url-pattern>/bar/*</url-pattern>
</filter-mapping>
. . .
</web-app>
8.2.2.2 Fault Detection and Recovery
Any error during the processing of this annotation will result in a deployment error
with a proper message in the server logs.
8.2.3 WLInitParam
You can use the
@WLInitParam
annotation
(
weblogic.servlet.annotation.WLInitParam
) to specify the initial parameters for
servlets and filters declared using the
@WLServlet
and
@WLFilter
annotations.
8.2.3.1 Attributes
Example 8–5 provides an example of
WLInitParam
annotation.
Table 8–5 Attributes of WLFilter Annotation
Name Description Data Type Required?
name The initial parameter name. String No
value The initial parameter value. String No

Annotating Servlets
WebLogic Annotation for Web Components 8-7
Example 8–5 Example WLInitParam Annotation
initParams = {@WLInitParam(name="one", value="1"),
@WLInitParam(name="two", value="2")}
Annotating a servlet or filter class with the above annotation is equivalent to declaring
the init params in Example 8–6 in the
web.xml
descriptor.
Example 8–6 Init Params In web.xml
. . .
<init-param>
<param-name>one</param-name>
<param-value>1</param-value>
</init-param>
<init-param>
<param-name>two</param-name>
<param-value>2</param-value>
</init-param>
. . .

Annotating Servlets
8-8 Developing Web Applications, Servlets, and JSPs for Oracle WebLogic Server

9
Servlet Programming Tasks 9-1
9
Servlet Programming Tasks
[9]
This chapter describes how to write HTTP servlets in a WebLogic Server environment.
This chapter includes the following sections:
■ Section 9.1, "Initializing a Servlet"
■ Section 9.2, "Providing an HTTP Response"
■ Section 9.3, "Retrieving Client Input"
■ Section 9.4, "Securing Client Input in Servlets"
■ Section 9.5, "Using Cookies in a Servlet"
■ Section 9.6, "Response Caching"
■ Section 9.7, "Using WebLogic Services from an HTTP Servlet"
■ Section 9.8, "Accessing Databases"
■ Section 9.9, "Threading Issues in HTTP Servlets"
■ Section 9.10, "Dispatching Requests to Another Resource"
■ Section 9.11, "Proxying Requests to Another Web Server"
■ Section 9.12, "Clustering Servlets"
■ Section 9.13, "Referencing a Servlet in a Web Application"
■ Section 9.14, "URL Pattern Matching"
■ Section 9.15, "The SimpleApacheURLMatchMap Utility"
■ Section 9.16, "A Future Response Model for HTTP Servlets"
9.1 Initializing a Servlet
Normally, WebLogic Server initializes a servlet when the first request is made for the
servlet. Subsequently, if the servlet is modified, the
destroy()
method is called on the
existing version of the servlet. Then, after a request is made for the modified servlet,
the
init()
method of the modified servlet is executed. For more information, see
Section D.2, "Servlet Best Practices".
When a servlet is initialized, WebLogic Server executes the
init()
method of the
servlet. Once the servlet is initialized, it is not initialized again until you restart
WebLogic Server or modify the servlet code. If you choose to override the
init()
method, your servlet can perform certain tasks, such as establishing database
connections, when the servlet is initialized. (See Section 9.1.2, "Overriding the init()
Method".)

Initializing a Servlet
9-2 Developing Web Applications, Servlets, and JSPs for Oracle WebLogic Server
9.1.1 Initializing a Servlet when WebLogic Server Starts
Rather than having WebLogic Server initialize a servlet when the first request is made
for it, you can first configure WebLogic Server to initialize a servlet when the server
starts. You do this by specifying the servlet class in the
load-on-startup
element in
the Java EE standard Web application deployment descriptor,
web.xml
. The order in
which resources within a Web application are initialized is as follows:
1.
ServletContextListeners
—the
contextCreated()
callback for
ServletContextListeners
registered for this Web application.
2.
ServletFilters init()
method.
3.
Servlet init()
method, marked as
load-on-startup
in
web.xml
.
You can pass parameters to an HTTP servlet during initialization by defining these
parameters in the Web application containing the servlet. You can use these
parameters to pass values to your servlet every time the servlet is initialized without
having to rewrite the servlet.
For example, the following entries in the Java EE standard Web application
deployment descriptor,
web.xml
, define two initialization parameters:
greeting
, which
has a value of
Welcome
and
person
, which has a value of
WebLogic Developer
.
<servlet>
...
<init-param>
<description>The salutation</description>
<param-name>greeting</param-name>
<param-value>Welcome</param-value>
</init-param>
<init-param>
<description>name</description>
<param-name>person</param-name>
<param-value>WebLogic Developer</param-value>
</init-param>
</servlet>
To retrieve initialization parameters, call the
getInitParameter(String name)
method
from the parent
javax.servlet.GenericServlet
class. When passed the name of the
parameter, this method returns the parameter's value as a
String
.
9.1.2 Overriding the init() Method
You can have your servlet execute tasks at initialization time by overriding the
init()
method. The following code fragment reads the
<init-param>
tags that define a
greeting and a name in the Java EE standard Web application deployment descriptor,
web.xml
:
String defaultGreeting;
String defaultName;
public void init(ServletConfig config)
throws ServletException {
if ((defaultGreeting = getInitParameter("greeting")) == null)
defaultGreeting = "Hello";
if ((defaultName = getInitParameter("person")) == null)
defaultName = "World";
}

Providing an HTTP Response
Servlet Programming Tasks 9-3
The values of each parameter are stored in the class instance variables
defaultGreeting
and
defaultName
. The first code tests whether the parameters have
null values, and if null values are returned, provides appropriate default values.
You can then use the
service()
method to include these variables in the response. For
example:
out.print("<body><h1>");
out.println(defaultGreeting + " " + defaultName + "!");
out.println("</h1></body></html>");
The
init()
method of a servlet does whatever initialization work is required when
WebLogic Server loads the servlet. The default
init()
method does all of the initial
work that WebLogic Server requires, so you do not need to override it unless you have
special initialization requirements. If you do override
init()
, first call
super.init()
so that the default initialization actions are done first.
9.2 Providing an HTTP Response
This section describes how to provide a response to the client in your HTTP servlet.
Deliver all responses by using the
HttpServletResponse
object that is passed as a
parameter to the
service()
method of your servlet.
1. Configure the
HttpServletResponse.
Using the
HttpServletResponse
object, you can set several servlet properties that
are translated into HTTP header information:
– At a minimum, set the content type using the
setContentType()
method before
you obtain the output stream to which you write the page contents. For HTML
pages, set the content type to
text/html
. For example:
res.setContentType("text/html");
– (optional) You can also use the
setContentType()
method to set the character
encoding. For example:
res.setContentType("text/html;ISO-88859-4");
– Set header attributes using the
setHeader()
method. For dynamic responses,
it is useful to set the "
Pragma
" attribute to
no-cache
, which causes the browser
to always reload the page and ensures the data is current. For example:
res.setHeader("Pragma", "no-cache");
2. Compose the HTML page.
The response that your servlet sends back to the client must look like regular
HTTP content, essentially formatted as an HTML page.Your servlet returns an
HTTP response through an output stream that you obtain using the response
parameter of the
service()
method. To send an HTTP response:
a. Obtain an output stream by using the
HttpServletResponse
object and one of
the methods shown in the following two examples:
–
PrintWriter out = res.getWriter();
–
ServletOutputStream out = res.getOutputStream();
b. Write the contents of the response to the output stream using the
print()
method. You can use HTML tags in these statements. For example:
out.print("<html><head><title>My Servlet</title>");

Retrieving Client Input
9-4 Developing Web Applications, Servlets, and JSPs for Oracle WebLogic Server
out.print("</head><body><h1>");
out.print("Welcome");
out.print("</h1></body></html>");
Any time you print data that a user has previously supplied, Oracle
recommends that you remove any HTML special characters that a user might
have entered. If you do not remove these characters, your Web site could be
exploited by cross-site scripting. For more information, refer to Section 9.4,
"Securing Client Input in Servlets".
Do not close the output stream by using the
close()
method, and avoid
flushing the contents of the stream. If you do not close or flush the output
stream, WebLogic Server can take advantage of persistent HTTP connections,
as described in the next step.
3. Optimize the response.
By default, WebLogic Server attempts to use HTTP persistent connections
whenever possible. A persistent connection attempts to reuse the same HTTP
TCP/IP connection for a series of communications between client and server.
Application performance improves because a new connection need not be opened
for each request. Persistent connections are useful for HTML pages containing
many in-line images, where each requested image would otherwise require a new
TCP/IP connection.
Using the WebLogic Server Administration Console, you can configure the
amount of time that WebLogic Server keeps an HTTP connection open.
WebLogic Server must know the length of the HTTP response in order to establish
a persistent connection and automatically adds a
Content-Length
property to the
HTTP response header. In order to determine the content length, WebLogic Server
must buffer the response. However, if your servlet explicitly flushes the
ServletOutputStream
, WebLogic Server cannot determine the length of the
response and therefore cannot use persistent connections. For this reason, you
should avoid explicitly flushing the HTTP response in your servlets.
You may decide that, in some cases, it is better to flush the response early to
display information in the client before the page has completed; for example, to
display a banner advertisement while some time-consuming page content is
calculated. Conversely, you may want to increase the size of the buffer used by the
servlet engine to accommodate a larger response before flushing the response. You
can manipulate the size of the response buffer by using the related methods of the
javax.servlet.ServletResponse
interface. For more information, see the servlet
3.0 specification at
http://jcp.org/en/jsr/detail?id=315
.
The default value of the WebLogic Server response buffer is 12K and the buffer
size is internally calculated in terms of
CHUNK_SIZE
where
CHUNK_SIZE = 4088
bytes
; if the user sets 5Kb the server rounds the request up to the nearest multiple
of
CHUNK_SIZE
which is 2 and the buffer is set to 8176 bytes.
9.3 Retrieving Client Input
The HTTP servlet API provides a interface for retrieving user input from Web pages.
An HTTP request from a Web browser can contain more than the URL, such as
information about the client, the browser, cookies, and user query parameters. Use
query parameters to carry user input from the browser. Use the
GET
method appends
parameters to the URL address, and the
POST
method includes them in the HTTP
request body.

Retrieving Client Input
Servlet Programming Tasks 9-5
HTTP servlets need not deal with these details; information in a request is available
through the
HttpServletRequest
object and can be accessed using the
request.getParameter()
method, regardless of the send method.
Read the following for more detailed information about the ways to send query
parameters from the client:
■ Encode the parameters directly into the URL of a link on a page. This approach
uses the
GET
method for sending parameters. The parameters are appended to the
URL after a
?
character. Multiple parameters are separated by a
&
character.
Parameters are always specified in name=value pairs so the order in which they are
listed is not important. For example, you might include the following link in a
Web page, which sends the parameter color with the value
purple
to an HTTP
servlet called
ColorServlet
:
<a href=
"http://localhost:7001/myWebApp/ColorServlet?color=purple">
Click Here For Purple!</a>
■ Manually enter the URL, with query parameters, into the browser location field.
This is equivalent to clicking the link shown in the previous example.
■ Query the user for input with an HTML form. The contents of each user input
field on the form are sent as query parameters when the user clicks the form's
Submit button. Specify the method used by the form to send the query parameters
(
POST
or
GET
) in the
<FORM>
tag using the
METHOD="GET|POST"
attribute.
Query parameters are always sent in name=value pairs, and are accessed through the
HttpServletRequest
object. You can obtain an
Enumeration
of all parameter names in
a query, and fetch each parameter value by using its parameter name. A parameter
usually has only one value, but it can also hold an array of values. Parameter values
are always interpreted as
Strings
, so you may need to cast them to a more appropriate
type.
The following sample from a
service()
method examines query parameter names
and their values from a form. Note that
request
is the
HttpServletRequest
object.
Enumeration params = request.getParameterNames();
String paramName = null;
String[] paramValues = null;
while (params.hasMoreElements()) {
paramName = (String) params.nextElement();
paramValues = request.getParameterValues(paramName);
System.out.println("\nParameter name is " + paramName);
for (int i = 0; i < paramValues.length; i++) {
System.out.println(", value " + i + " is " +
paramValues[i].toString());
}
}
Note: Any time you print data that a user has supplied, Oracle
recommends that you remove any HTML special characters that a
user might have entered. If you do not remove these characters, your
Web site could be exploited by cross-site scripting. For more
information, refer to Section 9.4, "Securing Client Input in Servlets".

Retrieving Client Input
9-6 Developing Web Applications, Servlets, and JSPs for Oracle WebLogic Server
9.3.1 Methods for Using the HTTP Request
This section defines the methods of the
javax.servlet.HttpServletRequest
interface
that you can use to get data from the request object. You should keep the following
limitations in mind:
■ You cannot read request parameters using any of the
getParameter()
methods
described in this section and then attempt to read the request with the
getInputStream()
method.
■ You cannot read the request with
getInputStream()
and then attempt to read
request parameters with one of the
getParameter()
methods.
If you attempt either of the preceding procedures, an
IllegalStateException
is
thrown.
You can use the following methods of
javax.servlet.HttpServeletRequest
to
retrieve data from the request object:
■
HttpServletRequest.getMethod()
—Allows you to determine the request method,
such as
GET
or
POST
.
■
HttpServletRequest.getQueryString()
—Allows you to access the query string.
(The remainder of the requested URL, following the
?
character.)
■
HttpServletRequest.getParameter()
—Returns the value of a parameter.
■
HttpServletRequest.getParameterNames()
—Returns an array of parameter
names.
■
HttpServletRequest.getParameterValues()
—Returns an array of values for a
parameter.
■
HttpServletRequest.getInputStream()
—Reads the body of the request as
binary data. If you call this method after reading the request parameters with
getParameter()
,
getParameterNames()
, or
getParameterValues()
, an
IllegalStateException
is thrown.
9.3.2 Example: Retrieving Input by Using Query Parameters
In Example 9–1, the
HelloWorld2.java
servlet example is modified to accept a user
name as a query parameter, in order to display a more personal greeting. The
service()
method is shown here.
Example 9–1 Retrieving Input with the service() Method
public void service(HttpServletRequest req,
HttpServletResponse res)
throws IOException
{
String name, paramName[];
if ((paramName = req.getParameterValues("name"))
!= null) {
name = paramName[0];
}
else {
name = defaultName;
}
// Set the content type first
res.setContentType("text/html");
// Obtain a PrintWriter as an output stream
PrintWriter out = res.getWriter();

Securing Client Input in Servlets
Servlet Programming Tasks 9-7
out.print("<html><head><title>" +
"Hello World!" + </title></head>");
out.print("<body><h1>");
out.print(defaultGreeting + " " + name + "!");
out.print("</h1></body></html>");
}
The
getParameterValues()
method retrieves the value of the
name
parameter from the
HTTP query parameters. You retrieve these values in an array of type
String
. A single
value for this parameter is returned and is assigned to the first element in the
name
array. If the parameter is not present in the query data,
null
is returned; in this case,
name
is assigned to the default name that was read from the
<init-param>
by the
init()
method.
Do not base your servlet code on the assumption that parameters are included in an
HTTP request. The
getParameter()
method has been deprecated; as a result, you
might be tempted to shorthand the
getParameterValues()
method by tagging an
array subscript to the end. However, this method can return
null
if the specified
parameter is not available, resulting in a
NullPointerException
.
For example, the following code triggers a
NullPointerException
:
String myStr = req.getParameterValues("paramName")[0];
Instead, use the following code:
if ((String myStr[] =
req.getParameterValues("paramName"))!=null) {
// Now you can use the myStr[0];
}
else {
// paramName was not in the query parameters!
}
9.4 Securing Client Input in Servlets
The ability to retrieve and return user-supplied data can present a security
vulnerability called cross-site scripting, which can be exploited to steal a user's security
authorization. For a detailed description of cross-site scripting, refer to "Understanding
Malicious Content Mitigation for Web Developers" (a CERT security advisory) at
http://www.cert.org/tech_tips/malicious_code_mitigation.html
.
To remove the security vulnerability, before you return data that a user has supplied,
scan the data for any of the HTML special characters in Table 9–1. If you find any
special characters, replace them with their HTML entity or character reference.
Replacing the characters prevents the browser from executing the user-supplied data
as HTML.
Table 9–1 HTML Special Characters that Must Be Replaced
Replace this special character With this entity/character reference
<
<
>
>
( &40;
)
&41;
Using Cookies in a Servlet
9-8 Developing Web Applications, Servlets, and JSPs for Oracle WebLogic Server
9.4.1 Using a WebLogic Server Utility Method
WebLogic Server provides the
weblogic.servlet.security.Utils.encodeXSS()
method to replace the special characters in user-supplied data. To use this method,
provide the user-supplied data as input. For example, to secure the user-supplied data
in Example 9–1, replace the following line:
out.print(defaultGreeting + " " + name + "!");
with the following:
out.print(defaultGreeting + " " +
weblogic.security.servlet.encodeXSS(name) + "!");
To secure an entire application, you must use the
encodeXSS()
method each time you
return user-supplied data. While the previous example in Example 9–1 is an obvious
location in which to use the
encodeXSS()
method, Table 9–2 describes other locations
to consider.
9.5 Using Cookies in a Servlet
A cookie is a piece of information that the server asks the client browser to save locally
on the user's disk. Each time the browser visits the same server, it sends all cookies
relevant to that server with the HTTP request. Cookies are useful for identifying clients
as they return to the server.
Each cookie has a name and a value. A browser that supports cookies generally allows
each server domain to store up to 20 cookies of up to 4k per cookie.
9.5.1 Setting Cookies in an HTTP Servlet
To set a cookie on a browser, create the cookie, give it a value, and add it to the
HttpServletResponse
object that is the second parameter in your servlet's service
method. For example:
Cookie myCookie = new Cookie("ChocolateChip", "100");
myCookie.setMaxAge(Integer.MAX_VALUE);
response.addCookie(myCookie);
#
&35;
&
&38;
Table 9–2 Code that Returns User-Supplied Data
Page Type User-Supplied Data Example
Error page Erroneous input string, invalid
URL, user name
An error page that says user name is not
permitted access.
Status page User name, summary of input
from previous pages
A summary page that asks a user to
confirm input from previous pages.
Database
display
Data presented from a database A page that displays a list of database
entries that have been previously entered
by a user.
Table 9–1 (Cont.) HTML Special Characters that Must Be Replaced
Replace this special character With this entity/character reference

Using Cookies in a Servlet
Servlet Programming Tasks 9-9
This examples shows how to add a cookie called
ChocolateChip
with a value of
100
to
the browser client when the response is sent. The expiration of the cookie is set to the
largest possible value, which effectively makes the cookie last forever. Because cookies
accept only string-type values, you should cast to and from the desired type that you
want to store in the cookie. When using EJBs, a common practice is to use the home
handle of an EJB instance for the cookie value and to store the user's details in the EJB
for later reference.
9.5.2 Retrieving Cookies in an HTTP Servlet
You can retrieve a cookie object from the
HttpServletRequest
that is passed to your
servlet as an argument to the
service()
method. The cookie itself is presented as a
javax.servlet.http.Cookie
object.
In your servlet code, you can retrieve all the cookies sent from the browser by calling
the
getCookies()
method. For example:
Cookie[] cookies = request.getCookies();
This method returns an array of all cookies sent from the browser, or
null
if no cookies
were sent by the browser. Your servlet must process the array in order to find the
correct named cookie. You can get the name of a cookie using the
Cookie.getName()
method. It is possible to have more that one cookie with the same name, but different
path attributes. If your servlets set multiple cookies with the same names, but different
path attributes, you also need to compare the cookies by using the
Cookie.getPath()
method. The following code illustrates how to access the details of a cookie sent from
the browser. It assumes that all cookies sent to this server have unique names, and that
you are looking for a cookie called
ChocolateChip
that may have been set previously
in a browser client.
Cookie[] cookies = request.getCookies();
boolean cookieFound = false;
for(int i=0; i < cookies.length; i++) {
thisCookie = cookies[i];
if (thisCookie.getName().equals("ChocolateChip")) {
cookieFound = true;
break;
}
}
if (cookieFound) {
// We found the cookie! Now get its value
int cookieOrder = String.parseInt(thisCookie.getValue());
}
9.5.3 Using Cookies That Are Transmitted by Both HTTP and HTTPS
Because HTTP and HTTPS requests are sent to different ports, some browsers may not
include the cookie sent in an HTTP request with a subsequent HTTPS request (or
vice-versa). This may cause new sessions to be created when servlet requests alternate
between HTTP and HTTPS. To ensure that all cookies set by a specific domain are sent
to the server every time a request in a session is made, set the
cookie-domain
element
to the name of the domain. The
cookie-domain
element is a sub-element of the
session-descriptor
element in the WebLogic-specific deployment descriptor
weblogic.xml
. For example:
<session-descriptor>
<cookie-domain>mydomain.com</cookie-domain>

Response Caching
9-10 Developing Web Applications, Servlets, and JSPs for Oracle WebLogic Server
</session-descriptor>
The
cookie-domain
element instructs the browser to include the proper cookie(s) for
all requests to hosts in the domain specified by
mydomain.com
. For more information
about this property or configuring session cookies, see Section 10.2, "Setting Up
Session Management".
9.5.4 Application Security and Cookies
Using cookies that enable automatic account access on a machine is convenient, but
can be undesirable from a security perspective. When designing an application that
uses cookies, follow these guidelines:
■ Do not assume that a cookie is always correct for a user. Sometimes machines are
shared or the same user may want to access a different account.
■ Allow your users to make a choice about leaving cookies on the server. On shared
machines, users may not want to leave automatic logins for their account. Do not
assume that users know what a cookie is; instead, ask a question like:
Automatically login from this computer?
■ Always ask for passwords from users logging on to obtain sensitive data. Unless a
user requests otherwise, you can store this preference and the password in the
user's session data. Configure the session cookie to expire when the user quits the
browser.
9.6 Response Caching
The cache filter works similarly to the cache tag with the following exceptions:
■ It caches on a page level (or included page) instead of a JSP fragment level.
■ Instead of declaring the caching parameters inside the document you can declare
the parameters in the configuration of the Web application.
The cache filter has some default behavior that the cache tag does not for pages that
were not included from another page. The cache filter automatically caches the
response headers Content-Type and Last-Modified. When it receives a request that
results in a cached page it compares the If-Modified-Since request header to the
Last-Modified response header to determine whether it needs to actually serve the
content or if it can send an
302 SC_NOT_MODIFED
status with an empty content instead.
The following example shows how to register a cache filter to cache all the HTML
pages in a Web application using the
filter
element of the Java EE standard
deployment descriptor,
web.xml
.
<filter>
<filter-name>HTML</filter-name>
<filter-class>weblogic.cache.filter.CacheFilter</filter-class>
</filter>
<filter-mapping>
<filter-name>HTML</filter-name>
<url-pattern>*.html</url-pattern>
</filter-mapping>
The cache system uses soft references for storing the cache. So the garbage collector
might or might not reclaim the cache depending on how recently the cache was
created or accessed. It will clear the soft references in order to avoid throwing an
OutOfMemoryError.

Accessing Databases
Servlet Programming Tasks 9-11
9.6.1 Initialization Parameters
To make sure that if the Web pages were updated at some point you got the new
copies into the cache, you could add a timeout to the filter. Using the init-params you
can set many of the same parameters that you can set for the cache tag:
The initialization parameters are
■
Name
—The name of the cache. It defaults to the request URI for compatibility with
*.extension URL patterns.
■
Timeout
—The amount of time since the last cache update that the filter waits until
trying to update the content in the cache again. The default unit is seconds but you
can also specify it in units of ms (milliseconds), s (seconds), m (minutes), h (hours),
or d (days).
■
Scope
—The scope of the cache can be any one of request, session, application, or
cluster. Request scope is sometimes useful for looping constructs in the page and
not much else. The scope defaults to application. To use cluster scope you must set
up the ClusterListener.
■
Key
—Specifies that the cache is further specified not only by the name but also by
values of various entries in scopes. These are specified just like the keys in the
CacheTag although you do not have page scope available.
■
Vars
—The variables calculated by the page that you want to cache. Typically this
is used with servlets that pull information out of the database based on input
parameters.
■
Size
—Limits the number of different unique key values cached. It defaults to
infinity.
The following example shows where the
init-parameter
is located in the filter
code.
<filter>
<filter-name>HTML</filter-name>
<filter-class>weblogic.cache.filter.CacheFilter</filter-class>
<init-param>
■
Max-cache-size
—This limits the size of an element added to the cache. It defaults
to 64k.
9.7 Using WebLogic Services from an HTTP Servlet
When you write an HTTP servlet, you have access to many rich features of WebLogic
Server, such as JNDI, EJB, JDBC, and JMS.
The following documents provide additional information about these features:
■ Developing Enterprise JavaBeans, Version 2.1, for Oracle WebLogic Server
■ Developing JDBC Applications for Oracle WebLogic Server
■ Developing JNDI Applications for Oracle WebLogic Server
■ Developing JMS Applications for Oracle WebLogic Server
9.8 Accessing Databases
WebLogic Server supports the use of Java Database Connectivity (JDBC) from
server-side Java classes, including servlets. JDBC allows you to execute SQL queries
Threading Issues in HTTP Servlets
9-12 Developing Web Applications, Servlets, and JSPs for Oracle WebLogic Server
from a Java class and to process the results of those queries. For more information on
JDBC and WebLogic Server, see Developing JDBC Applications for Oracle WebLogic Server.
You can use JDBC in servlets as described in the following sections:
■ Section 9.8.1, "Connecting to a Database Using a DataSource Object".
■ Section 9.8.2, "Connecting Directly to a Database Using a JDBC Driver".
9.8.1 Connecting to a Database Using a DataSource Object
A
DataSource
is a server-side object that references a connection pool. The connection
pool registration defines the JDBC driver, database, login, and other parameters
associated with a database connection. You create
DataSource
objects and connection
pools through the Administration Console.
9.8.1.1 Using a DataSource in a Servlet
1. Register a connection pool using the Administration Console. For more
information, see "JDBC Data Source: Configuration: Connection Pool" in Oracle
WebLogic Server Administration Console Online Help.
2. Register a
DataSource
object that points to the connection pool.
3. Look up the
DataSource
object in the JNDI tree. For example:
Context ctx = null;
// Get a context for the JNDI look up
ctx = new InitialContext(ht);
// Look up the DataSource object
javax.sql.DataSource ds
= (javax.sql.DataSource) ctx.lookup ("myDataSource");
4. Use the
DataSource
to create a JDBC connection. For example:
java.sql.Connection conn = ds.getConnection();
5. Use the connection to execute SQL statements. For example:
Statement stmt = conn.createStatement();
stmt.execute("select * from emp");
. . .
9.8.2 Connecting Directly to a Database Using a JDBC Driver
Connecting directly to a database is the least efficient way of making a database
connection because a new database connection must be established for each request.
You can use any JDBC driver to connect to your database. Oracle provides JDBC
drivers for Oracle and Microsoft SQL Server. For more information, see Developing
JDBC Applications for Oracle WebLogic Server.
9.9 Threading Issues in HTTP Servlets
When you design a servlet, you should consider how the servlet is invoked by
WebLogic Server under high load. It is inevitable that more than one client will hit
Tip: Using a
DataSource
object is recommended when creating Java
EE-compliant applications.

Dispatching Requests to Another Resource
Servlet Programming Tasks 9-13
your servlet simultaneously. Therefore, write your servlet code to guard against
sharing violations on shared resources or instance variables.
It is recommended that shared-resource issues be handled on an individual servlet
basis. Consider the following guidelines:
■ Wherever possible, avoid synchronization, because it causes subsequent servlet
requests to bottleneck until the current thread completes.
■ Define variables that are specific to each servlet request within the scope of the
service methods. Local scope variables are stored on the stack and, therefore, are
not shared by multiple threads running within the same method, which avoids the
need to be synchronized.
■ Access to external resources should be synchronized on a Class level, or
encapsulated in a transaction.
9.10 Dispatching Requests to Another Resource
This section provides an overview of commonly used methods for dispatching
requests from a servlet to another resource.
A servlet can pass on a request to another resource, such as a servlet, JSP, or HTML
page. This process is referred to as request dispatching. When you dispatch requests,
you use either the
include()
or
forward()
method of the
RequestDispatcher
interface.
For a complete discussion of request dispatching, see section 9.2 of the servlet 3.0
specification (see
http://jcp.org/en/jsr/detail?id=315
).
By using the
RequestDispatcher
, you can avoid sending an HTTP-redirect response
back to the client. The
RequestDispatcher
passes the HTTP request to the requested
resource.
To dispatch a request to a particular resource:
1. Get a reference to a
ServletContext
:
ServletContext sc = getServletConfig().getServletContext();
2. Look up the
RequestDispatcher
object using one of the following methods:
■
RequestDispatcher rd = sc.getRequestDispatcher(String path);
■ where
path
should be relative to the root of the Web application.
■
RequestDispatcher rd = sc.getNamedDispatcher(String name)
;
Replace
name
with the name assigned to the servlet in the Java EE standard
Web application deployment descriptor,
web.xml
, with the
<servlet-name>
element.
■
RequestDispatcher rd = ServletRequest.getRequestDispatcher(String
path);
This method returns a
RequestDispatcher
object and is similar to the
ServletContext.getRequestDispatcher(String path)
method except that it
allows the
path
specified to be relative to the current servlet. If the path begins
with a
/
character it is interpreted to be relative to the Web application.
You can obtain a
RequestDispatcher
for any HTTP resource within a Web
application, including HTTP Servlets, JSP pages, or plain HTML pages by
requesting the appropriate URL for the resource in the

Dispatching Requests to Another Resource
9-14 Developing Web Applications, Servlets, and JSPs for Oracle WebLogic Server
getRequestDispatcher()
method. Use the returned
RequestDispatcher
object
to forward the request to another servlet.
3. Forward or include the request using the appropriate method:
■
rd.forward(request,response);
See Section 9.10.1, "Forwarding a Request".
■
rd.include(request,response);
See Section 9.10.2, "Including a Request"
.
9.10.1 Forwarding a Request
Once you have the correct
RequestDispatcher
, your servlet forwards a request using
the
RequestDispatcher.forward()
method, passing
HTTPServletRequest
and
HTTPServletResponse
as arguments. If you call this method when output has already
been sent to the client an
IllegalStateException
is thrown. If the response buffer
contains pending output that has not been committed, the buffer is reset.
The servlet must not attempt to write any previous output to the response. If the
servlet retrieves the
ServletOutputStream
or the
PrintWriter
for the response before
forwarding the request, an
IllegalStateException
is thrown.
All other output from the original servlet is ignored after the request has been
forwarded.
If you are using any type of authentication, a forwarded request, by default, does not
require the user to be re-authenticated. You can change this behavior to require
authentication of a forwarded request by adding the
check-auth-on-forward/
element to the
container-descriptor
element of the WebLogic-specific deployment
descriptor,
weblogic.xml
. For example:
<container-descriptor>
<check-auth-on-forward/>
</container-descriptor>
9.10.2 Including a Request
Your servlet can include the output from another resource by using the
RequestDispatcher.include()
method, and passing
HTTPServletRequest
and
HTTPServletResponse
as arguments. When you include output from another resource,
the included resource has access to the request object.
The included resource can write data back to the
ServletOutputStream
or
Writer
objects of the response object and then can either add data to the response buffer or
call the
flush()
method on the response object. Any attempt to set the response status
code or to set any HTTP header information from the included servlet response is
ignored.
In effect, you can use the
include()
method to mimic a "server-side-include" of
another HTTP resource from your servlet code.
9.10.3 RequestDispatcher and Filters
Servlet 2.3 and older specifications did not specify whether filters should be applied
on forwards and includes. The Servlet 2.4 specification clarifies this by introducing a
new
dispatcher
element in the
web.xml
deployment descriptor. Using this
dispatcher
element, you can configure a
filter-mapping
to be applied on
REQUEST/FORWARD/INCLUDE/ERROR
. In WebLogic Server 8.1, the default was
REQUEST+FORWARD+INCLUDE
. For the old DTD-based deployment descriptors, the

Proxying Requests to Another Web Server
Servlet Programming Tasks 9-15
default value has not been changed in order to preserve backward compatibility. For
the new descriptors (schema based) the default is
REQUEST
.
You can change the default behavior of dispatched requests by setting the
filter-dispatched-requests-enabled
element in
weblogic.xml
. This element
controls whether or not filters are applied to dispatched (include/forward) requests.
The default value for old DTD-based deployment descriptors is
true
. The default for
the new schema-based descriptors is
false.
For more information about RequestDispatcher and filters, see the servlet 3.0
specification at
http://jcp.org/en/jsr/detail?id=315
. For more information about
writing and configuring filters for WebLogic Server, see Section 14, "Filters".
9.11 Proxying Requests to Another Web Server
The following sections discuss how to proxy HTTP requests to another Web server:
■ Section 9.11.1, "Overview of Proxying Requests to Another Web Server"
■ Section 9.11.1.1, "Setting Up a Proxy to a Secondary Web Server"
■ Section 9.11.2, "Sample Deployment Descriptor for the Proxy Servlet"
9.11.1 Overview of Proxying Requests to Another Web Server
When you use WebLogic Server as your primary Web server, you may also want to
configure WebLogic Server to pass on, or proxy, certain requests to a secondary Web
server, such as Netscape Enterprise Server, Apache, or Microsoft Internet Information
Server. Any request that gets proxied is redirected to a specific URL.You can even
proxy to another Web server on a different machine.You proxy requests based on the
URL of the incoming request.
The
HttpProxyServlet
(provided as part of the distribution) takes an HTTP request,
redirects it to the proxy URL, and sends the response to the client's browser back
through WebLogic Server. To use the
HttpProxyServlet
, you must configure it in a
Web application and deploy that Web application on the WebLogic Server that is
redirecting requests.
9.11.1.1 Setting Up a Proxy to a Secondary Web Server
To set up a proxy to a secondary HTTP server:
1. Register the
proxy
servlet in your Web application deployment descriptor (see
Example 9–2)
.
The Web application must be the default Web application of the
server instance that is responding to requests. The class name for the proxy servlet
is
weblogic.servlet.proxy.HttpProxyServlet.
2. Define an initialization parameter for the
ProxyServlet
with a
<param-name>
of
redirectURL
and a
<param-value>
containing the URL of the server to which
proxied requests should be directed.
3. Optionally, define the following
<KeyStore>
initialization parameters to use
two-way SSL with your own identity certificate and key. If no
<KeyStore>
is
specified in the deployment descriptor, the proxy will assume one-way SSL.
■
<KeyStore>
—The key store location in your Web application.
■
<KeyStoreType>
—The key store type. If it is not defined, the default type will
be used instead.
■
<PrivateKeyAlias>
—The private key alias.

Proxying Requests to Another Web Server
9-16 Developing Web Applications, Servlets, and JSPs for Oracle WebLogic Server
■
<KeyStorePasswordProperties>
— A property file in your Web application
that defines encrypted passwords to access the key store and private key alias.
The file contents looks like this:
KeyStorePassword={3DES}i4+50LCKenQO8BBvlsXTrg\=\=
PrivateKeyPassword={3DES}a4TcG4mtVVBRKtZwH3p7yA\=\=
You must use the
weblogic.security.Encrypt
command-line utility to
encrypt the password. For more information on the
Encrypt
utility, as well as
the
CertGen
, and
der2pem
utilities, see "Using the WebLogic Server Java
Utilities" in the Command Reference for Oracle WebLogic Server.
4. Map the
ProxyServlet
to a
<url-pattern>
. Specifically, map the file extensions
you wish to proxy, for example
*.jsp
, or
*.html
. Use the
<servlet-mapping>
element in the
web.xml
Web application deployment descriptor.
If you set the
<url-pattern>
to "/", then any request that cannot be resolved by
WebLogic Server is proxied to the remote server. However, you must also
specifically map the following extensions:
*.jsp
,
*.html
, and
*.html
if you want
to proxy files ending with those extensions.
5. Deploy the Web application on the WebLogic Server instance that redirects
incoming requests.
9.11.2 Sample Deployment Descriptor for the Proxy Servlet
The following is an sample of a Web application deployment descriptor for using the
ProxyServlet
.
Example 9–2 Sample web.xml for Use with ProxyServlet
<?xml version="1.0" encoding="UTF-8"?>
<xsd:schema xmlns="http://www.w3.org/2001/XMLSchema"
targetNamespace="http://java.sun.com/xml/ns/j2ee"
xmlns:j2ee="http://java.sun.com/xml/ns/j2ee"
xmlns:xsd="http://www.w3.org/2001/XMLSchema"
elementFormDefault="qualified"
attributeFormDefault="unqualified"
version="2.4">
<web-app>
<servlet>
<servlet-name>ProxyServlet</servlet-name>
<servlet-class>weblogic.servlet.proxy.HttpProxyServlet</servlet-class>
<init-param>
<param-name>redirectURL</param-name>
<param-value>http://server:port</param-value>
</init-param>
<init-param>
<param-name>KeyStore</param-name>
<param-value>/mykeystore</param-value>
</init-param>
<init-param>
<param-name>KeyStoreType</param-name>
<param-value>jks</param-value>

Clustering Servlets
Servlet Programming Tasks 9-17
</init-param>
<init-param>
<param-name>PrivateKeyAlias</param-name>
<param-value>passalias</param-value>
</init-param>
<init-param>
<param-name>KeyStorePasswordProperties</param-name>
<param-value>mykeystore.properties</param-value>
</init-param>
</servlet>
<servlet-mapping>
<servlet-name>ProxyServlet</servlet-name>
<url-pattern>/</url-pattern>
</servlet-mapping>
<servlet-mapping>
<servlet-name>ProxyServlet</servlet-name>
<url-pattern>*.jsp</url-pattern>
</servlet-mapping>
<servlet-mapping>
<servlet-name>ProxyServlet</servlet-name>
<url-pattern>*.htm</url-pattern>
</servlet-mapping>
<servlet-mapping>
<servlet-name>ProxyServlet</servlet-name>
<url-pattern>*.html</url-pattern>
</servlet-mapping>
</web-app>
9.12 Clustering Servlets
Clustering servlets provides failover and load balancing benefits. To deploy a servlet
in a WebLogic Server cluster, deploy the Web application containing the servlet on all
servers in the cluster.
For information on requirements for clustering servlets, and to understand the
connection and failover processes for requests that are routed to clustered servlets, see
"Replication and Failover for Servlets and JSPs" in Administering Clusters for Oracle
WebLogic Server.
For information on the load balancing support that a WebLogic Server cluster provides
for servlets, and for related planning and configuration considerations for architects
and administrators, see "Load Balancing for Servlets and JSPs" in Administering
Clusters for Oracle WebLogic Server.
Note: Automatic failover for servlets requires that the servlet session
state be replicated in memory. For instructions, see "Configure
In-Memory HTTP Replication" in Administering Clusters for Oracle
WebLogic Server.

Referencing a Servlet in a Web Application
9-18 Developing Web Applications, Servlets, and JSPs for Oracle WebLogic Server
9.13 Referencing a Servlet in a Web Application
The URL used to reference a servlet in a Web application is constructed as follows:
http://myHostName:port/myContextPath/myRequest/myRequestParameters
The components of this URL are defined as follows:
■
myHostName
—The DNS name mapped to the Web Server defined in the WebLogic
Server Administration Console. This portion of the URL can be replaced with
host:port
, where
host
is the name of the machine running WebLogic Server and
port
is the port at which WebLogic Server is listening for requests.
■
port
—The port at which WebLogic Server is listening for requests. The servlet can
communicate with the proxy only through the listenPort on the Server MBean and
the SSL MBean.
■
myContextPath
—The name of the context root which is specified in the
weblogic.xml
file, or the URI of the Web module which is specified in the
config.xml
file.
■
myRequest
—The name of the servlet as defined in the
web.xml
file.
■
myRequestParameters
—Optional HTTP request parameters encoded in the URL,
which can be read by an HTTP servlet.
9.14 URL Pattern Matching
WebLogic Server provides the user with the ability to implement a URL matching
utility which does not conform to the Java EE rules for matching. The utility must be
configured in the
weblogic.xml
deployment descriptor rather than the
web.xml
deployment descriptor used for the configuration of the default implementation of
URLMatchMap
.
To be used with WebLogic Server, the URL matching utility must implement the
following interface:
Package weblogic.servlet.utils;
public interface URLMapping {
public void put(String pattern, Object value);
public Object get(String uri);
public void remove(String pattern)
public void setDefault(Object defaultObject);
public Object getDefault();
public void setCaseInsensitive(boolean ci);
public boolean isCaseInsensitive();
public int size();
public Object[] values();
public String[] keys();
}
9.15 The SimpleApacheURLMatchMap Utility
The included
SimpleApacheURLMatchMap
utility is not Java EE specific. It can be
configured in the
weblogic.xml
deployment descriptor file and allows the user to
specify Apache style pattern matching rather than the default URL pattern matching
provided in the
web.xml
deployment descriptor. For more information, see
Section B.16, "url-match-map".

A Future Response Model for HTTP Servlets
Servlet Programming Tasks 9-19
9.16 A Future Response Model for HTTP Servlets
In general, WebLogic Server processes incoming HTTP requests and the response is
returned immediately to the client. Such connections are handled synchronously by
the same thread. However, some HTTP requests may require longer processing time.
Database connection, for example, may create longer response times. Handling these
requests synchronously causes the thread to be held, waiting until the request is
processed and the response sent.
To avoid this hung-thread scenario, WebLogic Server provides two classes that handle
HTTP requests asynchronously by de-coupling the response from the thread that
handles the incoming request. The following sections describe these classes.
9.16.1 Abstract Asynchronous Servlet
The Abstract Asynchronous Servlet enables you to handle incoming requests and
servlet responses with different threads. This class explicitly provides a better general
framework for handling the response than the Future Response Servlet, including
thread handling.
You implement the Abstract Asynchronous Servlet by extending the
weblogic.servlet.http.AbstractAsyncServlet.java
class. This class provides the
following abstract methods that you must override in your extended class.
9.16.1.1 doRequest
This method processes the servlet request. The following code example demonstrates
how to override this method.
Example 9–3 Overriding doRequest in AbstractAsynchServlet.java
public boolean doRequest(RequestResponseKey rrk)
throws ServletException, IOException {
HttpServletRequest req = rrk.getRequest();
HttpServletResponse res = rrk.getResponse();
if (req.getParameter("immediate") != null) {
res.setContentType("text/html");
PrintWriter out = res.getWriter();
out.println("Hello World Immediately!");
return false ;
}
else {
TimerManagerFactory.getTimerManagerFactory()
.getDefaultTimerManager().schedule
(new TimerListener() {
public void timerExpired(Timer timer)
{try {
AbstractAsyncServlet.notify(rrk, null);
}
catch (Exception e) {
e.printStackTrace();
Note: As of this release, Oracle recommends that instead of the
WebLogic Server Abstract Asynchronous Servlet, you should use the
standard asynchronous processing model defined in the servlet 3.0
specification.

A Future Response Model for HTTP Servlets
9-20 Developing Web Applications, Servlets, and JSPs for Oracle WebLogic Server
}
}
}, 2000);
return true;
}
}
9.16.1.2 doResponse
This method processes the servlet response.
If an exception occurs during processing, the container returns an error to the client.
The following code example demonstrates how to override this method.
Example 9–4 Overriding doResponse() in AbstractAsyncServlet.java
public void doResponse (RequestResponseKey rrk, Object context)
throws ServletException, IOException
{
HttpServletRequest req = rrk.getRequest();
HttpServletResponse res = rrk.getResponse();
res.setContentType("text/html");
PrintWriter out = res.getWriter();
out.println("Hello World!");
}
9.16.1.3 doTimeOut
This method sends a servlet response error when the
notify()
method is not called
within the timeout period.
Example 9–5 Overriding doTimeOut() in AbstractAsyncServlet.java
public void doTimeout (RequestResponseKey rrk)
throws ServletException, IOException
{
HttpServletRequest req = rrk.getRequest();
HttpServletResponse res = rrk.getResponse();
res.setContentType("text/html");
PrintWriter out = res.getWriter();
out.println("Timeout!");
}
Note: The servlet instance that processed the
doRequest()
method
used to handle the original incoming request method will not
necessarily be the one to process the
doResponse()
method.
Note: The servlet instance that processed the
doRequest()
method
used to handle the original incoming request method will not
necessarily be the one to process the
doTimeOut()
method.

A Future Response Model for HTTP Servlets
Servlet Programming Tasks 9-21
9.16.2 Future Response Servlet
You can also use the Future Response Servlet to handle servlet responses with a
different thread than the one that handles the incoming request. You enable this servlet
by extending
weblogic.servlet.FutureResponseServlet.java
, which gives you full
control over how the response is handled and allows more control over thread
handling. However, using this class to avoid hung threads requires you to provide
most of the code.
The exact implementation depends on your needs, but you must override the
service()
method of this class at a minimum. The following example shows how you
can override the service method.
Example 9–6 Overriding the service() method of FutureResponseServlet.java
public void service(HttpServletRequest req, FutureServletResponse rsp)
throws IOException, ServletException {
if(req.getParameter("immediate") != null){
PrintWriter out = rsp.getWriter();
out.println("Immediate response!");
rsp.send();
} else {
Timer myTimer = new Timer();
MyTimerTask mt = new MyTimerTask(rsp, myTimer);
myTimer.schedule(mt, 100);
}
}
private static class MyTimerTask extends TimerTask{
private FutureServletResponse rsp;
Timer timer;
MyTimerTask(FutureServletResponse rsp, Timer timer){
this.rsp = rsp;
this.timer = timer;
}
public void run(){
try{
PrintWriter out = rsp.getWriter();
out.println("Delayed Response");
rsp.send();
timer.cancel();
}
catch(IOException e){
e.printStackTrace();
}
}
}
Note: As of this release, Oracle recommends that you use the
standard asynchronous processing model defined in the servlet 3.0
specification.

A Future Response Model for HTTP Servlets
9-22 Developing Web Applications, Servlets, and JSPs for Oracle WebLogic Server

10
Using Sessions and Session Persistence 10-1
10
Using Sessions and Session Persistence
[10]
This chapter describes how to set up and use HTTP sessions and session persistence in
WebLogic Server.
This chapter includes the following sections:
■ Section 10.1, "Overview of HTTP Sessions"
■ Section 10.2, "Setting Up Session Management"
■ Section 10.3, "Configuring Session Persistence"
■ Section 10.4, "Using a Database for Persistent Storage (JDBC Persistence)"
■ Section 10.5, "Using URL Rewriting Instead of Cookies"
■ Section 10.6, "Session Tracking from a Servlet"
10.1 Overview of HTTP Sessions
Session tracking enables you to track a user's progress over multiple servlets or HTML
pages, which, by nature, are stateless. A session is defined as a series of related browser
requests that come from the same client during a certain time period. Session tracking
ties together a series of browser requests—think of these requests as pages—that may
have some meaning as a whole, such as a shopping cart application.
10.2 Setting Up Session Management
WebLogic Server is set up to handle session tracking by default. You need not set any
of these properties to use session tracking. However, configuring how WebLogic
Server manages sessions is a key part of tuning your application for best performance.
When you set up session management, you determine factors such as:
■ How many users you expect to hit the servlet
■ How long each session lasts
■ How much data you expect to store for each user
■ Heap size allocated to the WebLogic Server instance
You can also store data permanently from an HTTP session. See Section 10.3,
"Configuring Session Persistence".
10.2.1 HTTP Session Properties
You configure WebLogic Server session tracking by defining properties in the
WebLogic-specific deployment descriptor,
weblogic.xml
. For a complete list of session

Setting Up Session Management
10-2 Developing Web Applications, Servlets, and JSPs for Oracle WebLogic Server
attributes, see Section B.10, "session-descriptor".
In a previous WebLogic Server release, a change was introduced to the SessionID
format that caused some load balancers to lose the ability to retain session stickiness. A
server startup flag,
-Dweblogic.servlet.useExtendedSessionFormat=true
, retains
the information that the load-balancing application needs for session stickiness. The
extended session ID format will be part of the URL if URL rewriting is activated, and
the startup flag is set to true.
10.2.2 Session Timeout
You can specify an interval of time after which HTTP sessions expire. When a session
expires, all data stored in the session is discarded. You can set the interval in either
web.xml
or
weblogic.xml
:
■ Set the
timeout-secs
parameter value in the
session-descriptor
element of the
WebLogic-specific deployment descriptor,
weblogic.xml
. This value is set in
seconds. For more information, see Section B.10, "session-descriptor".
■ Set the
session-timeout
element in the Java EE standard Web application
deployment descriptor,
web.xml
.
10.2.3 Configuring WebLogic Server Session Cookies
WebLogic Server uses cookies for session management when cookies are supported by
the client browser.
The cookies that WebLogic Server uses to track sessions are set as transient by default
and do not outlive the session. When a user quits the browser, the cookies are lost and
the session ends. This behavior is in the spirit of session usage and it is recommended
that you use sessions in this way.
You can configure session-tracking parameters of cookies in the WebLogic-specific
deployment descriptor,
weblogic.xml
. A complete list of session and cookie-related
parameters is available in Section B.10, "session-descriptor".
10.2.4 Configuring Application Cookies That Outlive a Session
For longer-lived client-side user data, you program your application to create and set
its own cookies on the browser via the HTTP servlet API. The application should not
attempt to use the cookies associated with the HTTP session. Your application might
use cookies to auto-login a user from a particular machine, in which case you would
set a new cookie to last for a long time. Remember that the cookie can only be sent
from that particular client machine. Your application should store data on the server if
it must be accessed by the user from multiple locations.
You cannot directly connect the age of a browser cookie with the length of a session. If
a cookie expires before its associated session, that session becomes orphaned. If a
session expires before its associated cookie, the servlet is not be able to find a session.
At that point, a new session is automatically assigned when the
request.getSession(true)
method is called.
You can set the maximum life of a cookie with the
cookie-max-age-secs
element in
the session descriptor of the
weblogic.xml
deployment descriptor. See Section B.10,
"session-descriptor".

Setting Up Session Management
Using Sessions and Session Persistence 10-3
10.2.5 Logging Out
User authentication information is stored both in the user's session data and in the
context of a server or virtual host that is targeted by a Web application. The
session.invalidate()
method, which is often used to log out a user, only invalidates
the current session for a user—the user's authentication information still remains valid
and is stored in the context of the server or virtual host. If the server or virtual host is
hosting only one Web application, the
session.invalidate()
method, in effect, logs
out the user.
There are several Java methods and strategies you can use when using authentication
with multiple Web applications. For more information see Section 10.6.7, "Logging Out
and Ending a Session".
10.2.6 Enabling Web Applications to Share the Same Session
By default, Web applications do not share the same session. If you would like Web
applications to share the same session, you can configure the session descriptor at the
application level in the
weblogic-application.xml
deployment descriptor. To enable
Web applications to share the same session, set the
sharing-enabled
attribute in the
session descriptor to
true
in the
weblogic-application.xml
deployment descriptor.
See "sharing-enabled" in Section B.10, "session-descriptor".
The session descriptor configuration that you specify at the application level overrides
any session descriptor configuration that you specify at the Web application level for
all of the Web applications in the application. If you set the
sharing-enabled
attribute
to true at the Web application level, it will be ignored.
All Web applications in an application are automatically started using the same session
instance if you specify the session descriptor in the
weblogic-application.xml
deployment descriptor and set the
sharing-enabled
attribute to
true
as in the
following example:
<?xml version="1.0" encoding="ISO-8859-1"?>
<weblogic-application
xmlns="http://xmlns.oracle.com/weblogic/weblogic-application";;>
...
<session-descriptor>
<persistent-store-type>memory</persistent-store-type>
<sharing-enabled>true</sharing-enabled>
...
</session-descriptor>
...
</weblogic-application>
10.2.7 Limiting Number of Concurrent Requests for a Session
The
weblogic.http.session.maxConcurrentRequest
property limits the number of
concurrent requests for a session. If the number of concurrent requests for a given
session exceeds the specified value, the servlet container will start rejecting requests.
By default, this property is set to
-1
, which indicates the servlet container does not
impose any restrictions.

Configuring Session Persistence
10-4 Developing Web Applications, Servlets, and JSPs for Oracle WebLogic Server
10.3 Configuring Session Persistence
You use session persistence to permanently store data from an HTTP session object to
enable failover and load balancing across a cluster of WebLogic Servers. When your
applications stores data in an HTTP session object, the data must be serializable.
The following session persistence implementations are supported:
■ Memory (single-server, non-replicated)
■ File system persistence
■ JDBC persistence
■ Cookie-based session persistence
■ In-memory replication using either WebLogic Server clusters or Coherence clusters
The first four are discussed here; in-memory replication is discussed in "HTTP Session
State Replication," in Administering Clusters for Oracle WebLogic Server. For detailed
information on using Coherence for session state replication, see User's Guide for Oracle
Coherence*Web.
File, JDBC, cookie-based, and memory (single-server, non-populated) session
persistence have some common properties. Each persistence method has its own set of
configurable parameters, as discussed in the following sections. These parameters are
subelements of the
session-descriptor
element in the
weblogic.xml
deployment
descriptor file.
10.3.1 Attributes Shared by Different Types of Session Persistence
This section describes parameters common to file and JDBC-based persistence. You
can configure the number of sessions that are held in memory by defining the
following parameters in the
session-descriptor
element in the
weblogic.xml
deployment descriptor file. These parameters are only applicable if you are using
session persistence:
■
cache-size
—Limits the number of cached sessions that can be active in memory
at any one time. If you expect high volumes of simultaneous active sessions, you
do not want these sessions to soak up the RAM of your server because this may
cause performance problems swapping to and from virtual memory. When the
cache is full, the least recently used sessions are stored in the persistent store and
recalled automatically when required. If you do not use persistence, this property
is ignored, and there is no soft limit to the number of sessions allowed in main
memory. By default, the number of cached sessions is 1028. To turn off caching, set
this to 0. See "cache-size" in Section B.10, "session-descriptor".
■
invalidation-interval-secs
—Sets the time, in seconds, that WebLogic Server
waits between doing house-cleaning checks for timed-out and invalid sessions,
and deleting the old sessions and freeing up memory. Use this element to tune
WebLogic Server for best performance on high traffic sites. See
"invalidation-interval-secs" in Section B.10, "session-descriptor".
The minimum value is every second (1). The maximum value is once a week
(604,800 seconds). If not set, the attribute defaults to 60 seconds.
Note:
cache-size
is used by JDBC and file-based sessions only for
maintaining the in-memory bubbling cache. It is not applicable for
other persistence types.

Using a Database for Persistent Storage (JDBC Persistence)
Using Sessions and Session Persistence 10-5
10.3.2 Using Memory-based, Single-server, Non-replicated Persistent Storage
When you use memory-based storage, all session information is stored in memory and
is lost when you stop and restart WebLogic Server. To use memory-based,
single-server, non-replicated persistent storage, set the
persistent-store-type
parameter in the
session-descriptor
element in the
weblogic.xml
deployment
descriptor file to
memory
. See Section B.10, "session-descriptor".
10.3.3 Using File-based Persistent Storage
To configure file-based persistent storage for sessions:
■ In the deployment descriptor file
weblogic.xml
, set the
persistent-store-type
parameter in the
session-descriptor
element in the
weblogic.xml
deployment
descriptor file to
file
. See "persistent-store-type" in Section B.10,
"session-descriptor".
■ Set the directory where WebLogic Server stores the sessions. See
"persistent-store-dir" in Section B.10, "session-descriptor".
10.4 Using a Database for Persistent Storage (JDBC Persistence)
JDBC persistence stores session data in a database table using a schema provided for
this purpose. You can use any database for which you have a JDBC driver. You
configure database access by using connection pools.
Because WebLogic Server uses the system time to determine the session life time when
using JDBC session persistence, you must be sure to synchronize the system clock on
all of the machines on which servers are running in the same cluster.
10.4.1 Configuring JDBC-based Persistent Storage
To configure JDBC-based persistent storage for sessions:
■ Set the
persistent-store-type
parameter in the
session-descriptor
element in
the
weblogic.xml
deployment descriptor file to
jdbc
. See Section B.10,
"session-descriptor".
■ Set a JDBC connection pool to be used for persistence storage with the
persistent-store-pool
or
persistent-data-source-jndi-name
parameter in the
session-descriptor
element in the
weblogic.xml
deployment descriptor file. Use
the name of a connection pool that is defined in the WebLogic Server
Administration Console. See Section B.10, "session-descriptor".
With asynchronous JDBC persistence for HTTP sessions in an application or Web
application, the
persistent-store-pool
parameter is ignored. To set a JDBC
connection pool for
async-jdbc
-based persistence, you must specify the
persistent-data-source-jndi-name
parameter in the
session-desciptor
element in the
weblogic.xml
deployment descriptor file. See Section B.10,
"session-descriptor".
Note: If you do not allocate sufficient heap size when running
WebLogic Server, your server may run out of memory under heavy
load.
Note: You must create this directory and make sure appropriate
access privileges have been assigned to the directory.
Using a Database for Persistent Storage (JDBC Persistence)
10-6 Developing Web Applications, Servlets, and JSPs for Oracle WebLogic Server
■ Set up a database table named
wl_servlet_sessions
for JDBC-based persistence.
The connection pool that connects to the database needs to have read/write access
for this table.
Set up column names and data types as follows:
If you are using an Oracle DBMS, use the following SQL statement to create the
wl_
servlet_sessions
table. Modify the SQL statement for use with your DBMS.
Example 10–1 Creating wl_servlet_sessions table with Oracle DBMS
create table wl_servlet_sessions
( wl_id VARCHAR2(100) NOT NULL,
wl_context_path VARCHAR2(100) NOT NULL,
wl_is_new CHAR(1),
wl_create_time NUMBER(20),
wl_is_valid CHAR(1),
wl_session_values LONG RAW,
wl_access_time NUMBER(20),
wl_max_inactive_interval INTEGER,
PRIMARY KEY (wl_id, wl_context_path) );
If you are using SqlServer2000, use the following SQL statement to create the
wl_
servlet_sessions
table. Modify the SQL statement for use with your DBMS.
Example 10–2 Creating wl_servlet_sessions table with SqlServer 2000
create table wl_servlet_sessions
( wl_id VARCHAR2(100) NOT NULL,
Note: Create indexes on
wl_id
and
wl_context_path
, if the database
does not create them automatically. Some databases create indexes
automatically for primary keys.
Table 10–1 Creating wl_servlet_sessions
Column Name Data Type
wl_id
Variable-width alphanumeric column, up to 100 characters;
for example, Oracle
VARCHAR2(100)
.
The primary key must be set as follows:
wl_id + wl_context_path
wl_context_path
Variable-width alphanumeric column, up to 100 characters;
for example, Oracle VARCHAR2(100). This column is used
as part of the primary key. (See the
wl_id
column
description.)
wl_is_new
Single char column; for example, Oracle
CHAR(1)
wl_create_time
Numeric column, 20 digits; for example, Oracle
NUMBER(20)
wl_is_valid
Single char column; for example, Oracle
CHAR(1)
wl_session_values
Large binary column; for example, Oracle
LONG RAW
wl_access_time
Numeric column, 20 digits; for example,
NUMBER(20)
wl_max_inactive_interval
Integer column; for example, Oracle
Integer
. Number of
seconds between client requests before the session is
invalidated. A negative time value indicates that the session
should never time out.

Using a Database for Persistent Storage (JDBC Persistence)
Using Sessions and Session Persistence 10-7
wl_context_path VARCHAR2(100) NOT NULL,
wl_is_new VARCHAR(1),
wl_create_time DECIMAL,
wl_is_valid VARCHAR(1),
wl_session_values IMAGE,
wl_access_time DECIMAL,
wl_max_inactive_interval INTEGER,
PRIMARY KEY (wl_id, wl_context_path) );
If you are using DB2, use the following SQL statement to create the
wl_servlet_
sessions
table. Modify the SQL statement for use with your DBMS.
Example 10–3 Creating wl_servlet_sessions table with DB2
CREATE TABLE WL_SERVLET_SESSIONS
(
WL_ID VARCHAR(100) not null,
WL_CONTEXT_PATH VARCHAR(100) not null,
WL_IS_NEW SMALLINT,
WL_CREATE_TIME DECIMAL(16),
WL_IS_VALID SMALLINT,
wl_session_values BLOB(10M) NOT LOGGED,
WL_ACCESS_TIME DECIMAL(16),
WL_MAX_INACTIVE_INTERVAL INTEGER,
PRIMARY KEY (WL_ID,WL_CONTEXT_PATH)
);
If you are using Sybase, use the following SQL statement to create the
wl_servlet_
sessions
table. Modify the SQL statement for use with your DBMS.
Example 10–4 Creating wl_servlet_sessions table with Sybase
create table WL_SERVLET_SESSIONS (
WL_ID varchar(100) not null ,
WL_CONTEXT_PATH varchar(100) not null ,
WL_IS_NEW CHAR(1) null ,
WL_CREATE_TIME decimal(16,0) null ,
WL_IS_VALID CHAR(1) null ,
WL_SESSION_VALUES image null ,
WL_ACCESS_TIME decimal(16,0) null ,
WL_MAX_INACTIVE_INTERVAL int null ,
)
go
alter table WL_SERVLET_SESSIONS
add PRIMARY KEY CLUSTERED (WL_ID, WL_CONTEXT_PATH)
go
10.4.2 Caching and Database Updates for JDBC Session Persistence
WebLogic Server does not write the HTTP session state to disk if the request is
read-only, meaning the request does not modify the HTTP session. Only the
wl_
access_time
column is updated in the database, if the session is accessed.
For non read-only requests, the Web application container updates the database for the
changes to session state after every HTTP request. This is done so that any server in
the cluster can handle requests upon failovers and retrieve the latest session state from
the database.

Using URL Rewriting Instead of Cookies
10-8 Developing Web Applications, Servlets, and JSPs for Oracle WebLogic Server
To prevent multiple database queries, WebLogic Server caches recently used sessions.
Recently used sessions are not refreshed from the database for every request. The
number of sessions in cache is governed by the
cache-size
parameter in the
session-descriptor
element of the WebLogic Server-specific deployment descriptor,
weblogic.xml
. See Section B.10, "session-descriptor".
10.4.3 Using Cookie-Based Session Persistence
Cookie-based session persistence provides a stateless solution for session persistence
by storing all session data in a cookie in the user's browser. Cookie-based session
persistence is most useful when you do not need to store large amounts of data in the
session. Cookie-based session persistence can make managing your WebLogic Server
installation easier because clustering failover logic is not required. Because the session
is stored in the browser, not on the server, you can start and stop WebLogic Servers
without losing sessions.
There are some limitations to cookie-based session persistence:
■ You can store only string attributes in the session. If you store any other type of
object in the session, an
IllegalArgument
exception is thrown.
■ You cannot flush the HTTP response (because the cookie must be written to the
header data before the response is committed).
■ If the content length of the response exceeds the buffer size, the response is
automatically flushed and the session data cannot be updated in the cookie. (The
buffer size is, by default, 8192 bytes. You can change the buffer size with the
javax.servlet.ServletResponse.setBufferSize() method.
■ You can only use basic (browser-based) authentication.
■ Session data is sent to the browser in clear text.
■ The user's browser must be configured to accept cookies.
■ You cannot use commas (,) in a string when using cookie-based session persistence
or an exception occurs.
To set up cookie-based session persistence:
■ Set the
persistent-store-type
parameter in the
session-descriptor
element in
the
weblogic.xml
deployment descriptor file to
cookie.
See Section B.10,
"session-descriptor".
■ Optionally, set a name for the cookie using the
persistent-store-cookie-name
element. The default is
WLCOOKIE
. See Section B.10, "session-descriptor".
10.5 Using URL Rewriting Instead of Cookies
In some situations, a browser or wireless device may not accept cookies, which makes
session tracking with cookies impossible. URL rewriting is a solution to this situation
that can be substituted automatically when WebLogic Server detects that the browser
does not accept cookies. URL rewriting involves encoding the session ID into the
hyperlinks on the Web pages that your servlet sends back to the browser. When the
user subsequently clicks these links, WebLogic Server extracts the ID from the URL
address and finds the appropriate
HttpSession
when your servlet calls the
getSession()
method.
Enable URL rewriting in WebLogic Server by setting the
url-rewriting-enabled
parameter in the WebLogic-specific deployment descriptor,
weblogic.xml
, under the
session-descriptor
element.
The default value for this attribute is
true
. See

Using URL Rewriting Instead of Cookies
Using Sessions and Session Persistence 10-9
Section B.10, "session-descriptor".
10.5.1 Coding Guidelines for URL Rewriting
Here are general guidelines for supporting URL rewriting.
■ Avoid writing a URL straight to the output stream, as shown here:
out.println("<a href=\"/myshop/catalog.jsp\">catalog</a>");
Instead, use the
HttpServletResponse.encodeURL()
method, for example:
out.println("<a href=\"
+ response.encodeURL("myshop/catalog.jsp")
+ "\">catalog</a>");
Calling the
encodeURL()
method determines whether the URL needs to be
rewritten. If it does need to be rewritten, WebLogic Server rewrites the URL by
appending the session ID to the URL, with the session ID preceded by a
semicolon.
■ In addition to URLs that are returned as a response to WebLogic Server, also
encode URLs that send redirects. For example:
if (session.isNew())
response.sendRedirect (response.encodeRedirectUrl(welcomeURL));
WebLogic Server uses URL rewriting when a session is new, even if the browser
does accept cookies, because the server cannot tell whether a browser accepts
cookies in the first visit of a session.
When a plug-in is used (Apache, NSAPI, ISAPI,
HttpClusterServlet
, or
HttpProxyServlet
) and URL rewriting is used at the back-end server using
response.sendRedirect(url)
or
response.encodeRedirectURL(url)
, then the
PathTrim
and
PathPrepend
parameters will be applied to the URL under the
following condition:
PathTrim
will only be applied to the URL if
PathPrepend
is
null or
PathPrepend
has been applied.
■ Your servlet can determine whether a given session ID was received from a cookie
by checking the Boolean returned from the
HttpServletRequest.isRequestedSessionIdFromCookie()
method. Your
application may respond appropriately, or simply rely on URL rewriting by
WebLogic Server.
10.5.2 URL Rewriting and Wireless Access Protocol (WAP)
If you are writing a WAP application, you must use URL rewriting because the WAP
protocol does not support cookies. In addition, some WAP devices have a
128-character limit on the length of a URL (including attributes), which limits the
amount of data that can be transmitted using URL rewriting. To allow more space for
attributes, you can limit the size of the session ID that is randomly generated by
WebLogic Server.
Note: The CISCO Local Director load balancer expects a question
mark "
?
" delimiter for URL rewriting. Because the WebLogic Server
URL-rewriting mechanism uses a semicolon ";" as the delimiter, our
URL rewriting is incompatible with this load balancer.
Session Tracking from a Servlet
10-10 Developing Web Applications, Servlets, and JSPs for Oracle WebLogic Server
In particular, to use the
WAPEnabled
attribute, use the Administration Console at
Server > Protocols > HTTP > Advanced Options. The
WAPEnabled
attribute restricts
the size of the session ID to 52 characters and disallows special characters, such as
!
and
#
. You can also use the IDLength parameter of
weblogic.xml
to further restrict the
size of the session ID. For additional details, see "id-length" in Section B.10,
"session-descriptor".
10.6 Session Tracking from a Servlet
Session tracking enables you to track a user's progress over multiple servlets or HTML
pages, which, by nature, are stateless. A session is defined as a series of related browser
requests that come from the same client during a certain time period. Session tracking
ties together a series of browser requests—think of these requests as pages—that may
have some meaning as a whole, such as a shopping cart application.
The following sections discuss various aspects of tracking sessions from an HTTP
servlet:
■ Section 10.6.1, "A History of Session Tracking"
■ Section 10.6.2, "Tracking a Session with an HttpSession Object"
■ Section 10.6.3, "Lifetime of a Session"
■ Section 10.6.4, "How Session Tracking Works"
■ Section 10.6.5, "Detecting the Start of a Session"
■ Section 10.6.6, "Setting and Getting Session Name/Value Attributes"
■ Section 10.6.7, "Logging Out and Ending a Session"
■ Section 10.6.8, "Configuring Session Tracking"
■ Section 10.5, "Using URL Rewriting Instead of Cookies"
■ Section 10.6.10, "URL Rewriting and Wireless Access Protocol (WAP)"
■ Section 10.6.11, "Making Sessions Persistent"
10.6.1 A History of Session Tracking
Before session tracking matured conceptually, developers tried to build state into their
pages by stuffing information into hidden fields on a page or embedding user choices
into URLs used in links with a long string of appended characters. You can see good
examples of this at most search engine sites, many of which still depend on CGI. These
sites track user choices with URL parameter name=value pairs that are appended to the
URL, after the reserved HTTP character
?
. This practice can result in a very long URL
that the CGI script must carefully parse and manage. The problem with this approach
is that you cannot pass this information from session to session. Once you lose control
over the URL—that is, once the user leaves one of your pages—the user information is
lost forever.
Note: If the
id-length
subelement of the
session-descriptor
element of the WebLogic Server-specific deployment descriptor,
weblogic.xml
, contains a value of less than 32, WebLogic Server
automatically increases the value to 32 and displays the following
message:
The IDLength is too short. It is not secure. WLS will raise the
length to 32.

Session Tracking from a Servlet
Using Sessions and Session Persistence 10-11
Later, Netscape introduced browser cookies, which enable you to store user-related
information about the client for each server. However, some browsers still do not fully
support cookies, and some users prefer to turn off the cookie option in their browsers.
Another factor that should be considered is that most browsers limit the amount of
data that can be stored with a cookie.
Unlike the CGI approach, the HTTP servlet specification defines a solution that allows
the server to store user details on the server beyond a single session, and protects your
code from the complexities of tracking sessions. Your servlets can use an HttpSession
object to track a user's input over the span of a single session and to share session
details among multiple servlets. Session data can be persisted using a variety of
methods available with WebLogic Service.
10.6.2 Tracking a Session with an HttpSession Object
According to the Java Servlet API, which WebLogic Server implements and supports,
each servlet can access a server-side session by using its
HttpSession
object. You can
access an
HttpSession
object in the
service()
method of the servlet by using the
HttpServletRequest
object with the variable
request
variable, as shown:
HttpSession session = request.getSession(true);
An
HttpSession
object is created if one does not already exist for that client when the
request.getSession(true)
method is called with the argument
true
. The session
object lives on WebLogic Server for the lifetime of the session, during which the
session object accumulates information related to that client. Your servlet adds or
removes information from the session object as necessary. A session is associated with
a particular client. Each time the client visits your servlet, the same associated
HttpSession
object is retrieved when the
getSession()
method is called.
For more details on the methods supported by the
HttpSession
, refer to the
HttpServlet API at
http://docs.oracle.com/javaee/6/api/javax/servlet/http/HttpSession.html
.
In the following example, the
service()
method counts the number of times a user
requests the servlet during a session.
public void service(HttpServletRequest request,
HttpServletResponse, response)
throws IOException
{
// Get the session and the counter param attribute
HttpSession session = request.getSession (true);
Integer ival = (Integer)
session.getAttribute("simplesession.counter");
if (ival == null) // Initialize the counter
ival = new Integer (1);
else // Increment the counter
ival = new Integer (ival.intValue () + 1);
// Set the new attribute value in the session
session.setAttribute("simplesession.counter", ival);
// Output the HTML page
out.print("<HTML><body>");
out.print("<center> You have hit this page ");
out.print(ival + " times!");
out.print("</body></html>");
}

Session Tracking from a Servlet
10-12 Developing Web Applications, Servlets, and JSPs for Oracle WebLogic Server
10.6.3 Lifetime of a Session
A session tracks the selections of a user over a series of pages in a single transaction. A
single transaction may consist of several tasks, such as searching for an item, adding it
to a shopping cart, and then processing a payment. A session is transient, and its
lifetime ends when one of the following occurs:
■ A user leaves your site and the user's browser does not accept cookies.
■ A user quits the browser.
■ The session is timed out due to inactivity.
■ The session is completed and invalidated by the servlet.
■ The user logs out and is invalidated by the servlet.
For more persistent, long-term storage of data, your servlet should write details to a
database using JDBC or EJB and associate the client with this data using a long-lived
cookie and/or user name and password.
10.6.4 How Session Tracking Works
How does WebLogic Server know which session is associated with each client? When
an
HttpSession
is created in a servlet, it is associated with a unique ID. The browser
must provide this session ID with its request in order for the server to find the session
data again. The server attempts to store this ID by setting a cookie on the client. Once
the cookie is set, each time the browser sends a request to the server it includes the
cookie containing the ID. The server automatically parses the cookie and supplies the
session data when your servlet calls the
getSession()
method.
If the client does not accept cookies, the only alternative is to encode the ID into the
URL links in the pages sent back to the client. For this reason, you should always use
the
encodeURL()
method when you include URLs in your servlet response. WebLogic
Server detects whether the browser accepts cookies and does not unnecessarily encode
URLs. WebLogic automatically parses the session ID from an encoded URL and
retrieves the correct session data when you call the
getSession()
method. Using the
encodeURL()
method ensures no disruption to your servlet code, regardless of the
procedure used to track sessions. For more information, see Section 10.5, "Using URL
Rewriting Instead of Cookies".
10.6.5 Detecting the Start of a Session
After you obtain a session using the
getSession(true)
method, you can tell whether
the session has just been created by calling the
HttpSession.isNew()
method. If this
method returns
true
, then the client does not already have a valid session, and at this
point it is unaware of the new session. The client does not become aware of the new
session until a reply is posted back from the server.
Design your application to accommodate new or existing sessions in a way that suits
your business logic. For example, your application might redirect the client's URL to a
login/password page if you determine that the session has not yet started, as shown in
the following code example:
HttpSession session = request.getSession(true);
if (session.isNew()) {
Note: Although this document states that sessions use cookies and
persistence internally, you should not use sessions as a general mechanism
for storing data about a user.

Session Tracking from a Servlet
Using Sessions and Session Persistence 10-13
response.sendRedirect(welcomeURL);
}
On the login page, provide an option to log in to the system or create a new account.
You can also specify a login page in your Web application using the
login-config
element of the Java EE standard Web application deployment descriptor,
web.xml
.
10.6.6 Setting and Getting Session Name/Value Attributes
You can store data in an
HttpSession
object using name=value pairs. Data stored in a
session is available through the session. To store data in a session, use these methods
from the
HttpSession
interface:
getAttribute()
getAttributeNames()
setAttribute()
removeAttribute()
The following code fragment shows how to get all the existing name=value pairs:
Enumeration sessionNames = session.getAttributeNames();
String sessionName = null;
Object sessionValue = null;
while (sessionNames.hasMoreElements()) {
sessionName = (String)sessionNames.nextElement();
sessionValue = session.getAttribute(sessionName);
System.out.println("Session name is " + sessionName +
", value is " + sessionValue);
}
To add or overwrite a named attribute, use the
setAttribute()
method. To remove a
named attribute altogether, use the
removeAttribute()
method.
10.6.7 Logging Out and Ending a Session
If your application deals with sensitive information, consider offering the ability to log
out of the session. This is a common feature when using shopping carts and Internet
email accounts. When the same browser returns to the service, the user must log back
in to the system.
10.6.7.1 Using session.invalidate() for a Single Web Application
User authentication information is stored both in the users's session data and in the
context of a server or virtual host that is targeted by a Web application. Using the
session.invalidate()
method, which is often used to log out a user, only invalidates
the current session for a user—the user's authentication information still remains valid
and is stored in the context of the server or virtual host. If the server or virtual host is
hosting only one Web application, the
session.invalidate()
method, in effect, logs
out the user.
Do not reference an invalidated session after calling
session.invalidate()
. If you do,
an
IllegalStateException
is thrown. The next time a user visits your servlet from the
same browser, the session data will be missing, and a new session will be created
Note: You can add any Java descendant of
Object
as a session
attribute and associate it with a name. However, if you are using
session persistence, your attribute value objects must implement
java.io.Serializable
.

Session Tracking from a Servlet
10-14 Developing Web Applications, Servlets, and JSPs for Oracle WebLogic Server
when you call the
getSession(true)
method. At that time you can send the user to
the login page again.
10.6.7.2 Implementing Single Sign-On for Multiple Applications
If the server or virtual host is targeted by many Web applications, another means is
required to log out a user from all Web applications. Because the servlet specification
does not provide an API for logging out a user from all Web applications, the
following methods are provided.
■
weblogic.servlet.security.ServletAuthentication.logout()
—Removes the
authentication data from the users's session data, which logs out a user but allows
the session to remain alive.
■
weblogic.servlet.security.ServletAuthentication.invalidateAll()
—Invalidate
s all the sessions and removes the authentication data for the current user. The
cookie is also invalidated.
■
weblogic.servlet.security.ServletAuthentication.killCookie()
—Invalidates th
e current cookie by setting the cookie so that it expires immediately when the
response is sent to the browser. This method depends on a successful response
reaching the user's browser. The session remains alive until it times out.
10.6.7.3 Exempting a Web Application for Single Sign-on
If you want to exempt a Web application from participating in single sign-on, define a
different cookie name for the exempted Web application. For more information, see
Section 10.2.3, "Configuring WebLogic Server Session Cookies".
10.6.8 Configuring Session Tracking
WebLogic Server provides many configurable attributes that determine how WebLogic
Server handles session tracking. For details about configuring these session tracking
attributes, see Section B.10, "session-descriptor".
10.6.9 Using URL Rewriting Instead of Cookies
In some situations, a browser may not accept cookies, which means that session
tracking with cookies is not possible. URL rewriting is a workaround to this scenario
that can be substituted automatically when WebLogic Server detects that the browser
does not accept cookies. URL rewriting involves encoding the session ID into the
hyperlinks on the Web pages that your servlet sends back to the browser. When the
user subsequently clicks these links, WebLogic Server extracts the ID from the URL
and finds the appropriate
HttpSession.
Then you use the
getSession()
method to
access session data.
To enable URL rewriting in WebLogic Server, set the
URL-rewriting-enabled
parameter to
true
in the
session-descriptor
element of the WebLogic Server-specific
deployment descriptor,
weblogic.xml
. See Section B.10, "session-descriptor".
To make sure your code correctly handles URLs in order to support URL rewriting,
consider the following guidelines:
■ You should avoid writing a URL straight to the output stream, as shown here:
out.println("<a href=\"/myshop/catalog.jsp\">catalog</a>");
Instead, use the
HttpServletResponse.encodeURL()
method. For example:
out.println("<a href=\""
+ response.encodeURL("myshop/catalog.jsp")

Session Tracking from a Servlet
Using Sessions and Session Persistence 10-15
+ "\">catalog</a>");
■ Calling the
encodeURL()
method determines if the URL needs to be rewritten and,
if necessary, rewrites the URL by including the session ID in the URL.
■ Encode URLs that send redirects, as well as URLs that are returned as a response
to WebLogic Server. For example:
if (session.isNew())
response.sendRedirect(response.encodeRedirectUrl(welcomeURL));
WebLogic Server uses URL rewriting when a session is new, even if the browser
accepts cookies, because the server cannot determine, during the first visit of a session,
whether the browser accepts cookies.
Your servlet may determine whether a given session was returned from a cookie by
checking the Boolean returned from the
HttpServletRequest.isRequestedSessionIdFromCookie()
method. Your application
may respond appropriately, or it may simply rely on URL rewriting by WebLogic
Server.
10.6.10 URL Rewriting and Wireless Access Protocol (WAP)
If you are writing a WAP application, you must use URL rewriting because the WAP
protocol does not support cookies. In addition, some WAP devices impose a
128-character limit (including parameters) on the length of a URL, which limits the
amount of data that can be transmitted using URL rewriting. To allow more space for
parameters, you can limit the size of the session ID that is randomly generated by
WebLogic Server by specifying the number of bytes with the
id-length
parameter in
the
session-descriptor
element of the WebLogic Server-specific deployment
descriptor,
weblogic.xml
. See Section B.10, "session-descriptor".
The minimum value is 32 bytes; the default value is 52 bytes; the maximum value is
Integer.MAX_VALUE
. (See the note in Section 10.5.2, "URL Rewriting and Wireless
Access Protocol (WAP)."
10.6.11 Making Sessions Persistent
You can set up WebLogic Server to record session data in a persistent store. If you are
using session persistence, you can expect the following characteristics:
■ Good failover, because sessions are saved when servers fail.
■ Better load balancing, because any server can handle requests for any number of
sessions, and use caching to optimize performance. For more information, see the
cache-size
property, at Section 10.3, "Configuring Session Persistence".
■ Sessions can be shared across clustered WebLogic Servers. Note that session
persistence is no longer a requirement in a WebLogic Cluster. Instead, you can use
in-memory replication of state. For more information, see Administering Clusters for
Oracle WebLogic Server.
■ For customers who want the highest in servlet session persistence, JDBC-based
persistence is the best choice. For customers who want to sacrifice some amount of
Note: The CISCO Local Director load balancer expects a question
mark "
?
" delimiter for URL rewriting. Because the WebLogic Server
URL-rewriting mechanism uses a semicolon "
;
" as the delimiter, our
URL rewriting is incompatible with this load balancer.

Session Tracking from a Servlet
10-16 Developing Web Applications, Servlets, and JSPs for Oracle WebLogic Server
session persistence in favor of drastically better performance, in-memory
replication is the appropriate choice. JDBC-based persistence is noticeably slower
than in-memory replication. In some cases, in-memory replication has
outperformed JDBC-based persistence for servlet sessions by a factor of eight.
■ You can put any kind of Java object into a session, but for file, JDBC, and
in-memory replication, only objects that are
java.io.Serializable
can be stored
in a session. For more information, see Section 10.3, "Configuring Session
Persistence".
10.6.11.1 Scenarios to Avoid When Using Sessions
Do not use session persistence for storing long-term data between sessions. In other
words, do not rely on a session still being active when a client returns to a site at some
later date. Instead, your application should record long-term or important information
in a database.
Sessions are not a convenience wrapper around cookies. Do not attempt to store
long-term or limited-term client data in a session. Instead, your application should
create and set its own cookies on the browser. Examples include an auto-login feature
that allows a cookie to live for a long period, or an auto-logout feature that allows a
cookie to expire after a short period of time. Here, you should not attempt to use
HTTP sessions. Instead, you should write your own application-specific logic.
10.6.11.2 Use Serializable Attribute Values
When you use persistent sessions, all attribute
value
objects that you add to the
session must implement
java.io.Serializable
.
If you add your own serializable classes to a persistent session, make sure that each
instance variable of your class is also serializable. Otherwise, you can declare it as
transient
, and WebLogic Server does not attempt to save that variable to persistent
storage. One common example of an instance variable that must be made
transient
is
the
HttpSession
object. (See the notes on using serialized objects in sessions in the
section Section 10.6.11, "Making Sessions Persistent".)
The
HttpServletRequest
,
ServletContext
, and
HttpSession
attributes will be
serialized when a WebLogic Server instance detects a change in the Web application
classloader. The classloader changes when a Web application is redeployed, when
there is a dynamic change in a servlet, or when there is a cross Web application
forward or include.
To avoid having the attribute serialized, during a dynamic change in a servlet, turn off
servlet-reload-check-secs
in
weblogic.xml
. There is no way to avoid serialization
of attributes for cross Web application dispatch or redeployment. See Section B.13.6,
"servlet-reload-check-secs".
10.6.11.3 Configuring Session Persistence
For details about setting up persistent sessions, see Section 10.3, "Configuring Session
Persistence".
10.6.12 Configuring a Maximum Limit on In-memory Servlet Sessions
Without the ability to configure in-memory servlet session use, as new sessions are
continually created, the server eventually throws out of memory. To protect against
this, WebLogic Server provides a configurable bound on the number of sessions
created. When this number is exceeded, the
weblogic.servlet.SessionCreationException
occurs for each attempt to create a

Session Tracking from a Servlet
Using Sessions and Session Persistence 10-17
new session. This feature applies to both replicated and non-replicated in-memory
sessions.
To configure bound in-memory servlet session use, you set the limitation in the
max-in-memory-sessions
element in the
weblogic.xml
deployment descriptor. See
Section B.10, "session-descriptor".
10.6.13 Enabling Session Memory Overload Protection
When memory is overloaded, a
weblogic.servlet.SessionCreationException
(RuntimeException)
for any
getSession(true)
attempts occurs. As the person
developing the servlet, you should handle this exception as follows:
■ Return the appropriate error message to the user when the exception occurs,
explaining the situation.
■ Map
weblogic.servlet.SessionCreationException
to an error page in the Java
EE standard Web application deployment descriptor,
web.xml
.
By default, memory overload protection is turned off. You can enable it with a
domain-level flag:
weblogic.management.configuration.WebAppContainerMBean.OverloadProtectionEnabled

Session Tracking from a Servlet
10-18 Developing Web Applications, Servlets, and JSPs for Oracle WebLogic Server

11
Application Events and Event Listener Classes 11-1
11
Application Events and Event Listener Classes
[11]
This chapter describes Web application events and event listener classes.
This chapter includes the following sections:
■ Section 11.1, "Overview of Application Event Listener Classes"
■ Section 11.2, "Servlet Context Events"
■ Section 11.3, "HTTP Session Events"
■ Section 11.4, "Servlet Request Events"
■ Section 11.5, "Configuring an Event Listener Class"
■ Section 11.6, "Writing an Event Listener Class"
■ Section 11.7, "Templates for Event Listener Classes"
■ Section 11.8, "Additional Resources"
11.1 Overview of Application Event Listener Classes
Application events provide notifications of a change in state of the servlet context (each
Web application uses its own servlet context) or of an HTTP session object. You write
event listener classes that respond to these changes in state, and you configure and
deploy them in a Web application. The servlet container generates events that cause
the event listener classes to do something. In other words, the servlet container calls
the methods on a user's event listener class.
The following is an overview of this process:
1. The user creates an event listener class that implements one of the listener
interfaces.
2. This implementation is registered in the deployment descriptor.
3. At deployment time, the servlet container constructs an instance of the event
listener class. (This is why the public constructor must exist, as discussed in
Section 11.6, "Writing an Event Listener Class".)
4. At run time, the servlet container invokes on the instance of the listener class.
For servlet context events, the event listener classes can receive notification when the
Web application is deployed or undeployed (or when WebLogic Server shuts down),
and when attributes are added, removed, or replaced.
For HTTP session events, the event listener classes can receive notification when an
HTTP session is activated or is about to be passivated, and when an HTTP session
attribute is added, removed, or replaced.
Servlet Context Events
11-2 Developing Web Applications, Servlets, and JSPs for Oracle WebLogic Server
Use Web application event listener classes to:
■ Manage database connections when a Web application is deployed or shuts down
■ Create standard counter utilities
■ Monitor the state of HTTP sessions and their attributes
11.2 Servlet Context Events
The following table lists the types of Servlet context events, the interface your event
listener class must implement to respond to each Servlet context event, and the
methods invoked when the Servlet context event occurs.
11.3 HTTP Session Events
The following table lists the types of HTTP session events your event listener class
must implement to respond to the HTTP session events and the methods invoked
when the HTTP session events occur.
Table 11–1 Servlet Context Events
Type of Event Interface Method
Servlet context is created.
javax.servlet.ServletContextListener contextInitialized()
Servlet context is about to be shut down.
javax.servlet.ServletContextListener contextDestroyed()
An attribute is added.
javax.servlet.
ServletContextAttributesListener
attributeAdded()
An attribute is removed.
javax.servlet.
ServletContextAttributesListener
attributeRemoved()
An attribute is replaced.
javax.servlet.
ServletContextAttributesListener
attributeReplaced()
Table 11–2 HTTP Session Events
Type of Event Interface Method
An HTTP session is activated.
javax.servlet.http.HttpSessionListener sessionCreated()
An HTTP session is about to be
passivated.
javax.servlet.http.HttpSessionListener sessionDestroyed()
An attribute is added.
javax.servlet.http.HttpSessionAttributeLi
stener
attributeAdded()
An attribute is removed.
javax.servlet.http.HttpSessionAttributeLi
stener
attributeRemoved()
An attribute is replaced.
javax.servlet.http.HttpSessionAttributeLi
stener
attributeReplaced()
Note: The servlet 3.0 specification also contains the
javax.servlet.http.HttpSessionBindingListener
and the
javax.servlet.http.HttpSessionActivationListener
interfaces.
These interfaces are implemented by objects that are stored as session
attributes and do not require registration of an event listener in
web.xml
.
Writing an Event Listener Class
Application Events and Event Listener Classes 11-3
11.4 Servlet Request Events
The following table lists the types of servlet request events, the interface your event
listener class must implement to manage state across the life cycle of servlet requests
and the methods invoked when the request events occur.
11.5 Configuring an Event Listener Class
To configure an event listener class:
1. Open the
web.xml
deployment descriptor of the Web application for which you are
creating an event listener class in a text editor. The
web.xml
file is located in the
WEB-INF
directory of your Web application.
2. Add an event declaration using the
listener
element of the
web.xml
deployment
descriptor. The event declaration defines the event listener class that is invoked
when the event occurs. The
listener
element must directly follow the
filter
and
filter-mapping
elements and directly precede the
servlet
element. You can
specify more than one event listener class for each type of event. WebLogic Server
invokes the event listener classes in the order that they appear in the deployment
descriptor (except for shutdown events, which are invoked in the reverse order).
For example:
<listener>
<listener-class>myApp.MyContextListenerClass</listener-class>
</listener>
<listener>
<listener-class>myApp.MySessionAttributeListenerClass</listener-class>
</listener>
3. Write and deploy the event listener class. For details, see the section, Section 11.6,
"Writing an Event Listener Class".
11.6 Writing an Event Listener Class
To write an event listener class:
1. Create a new event listener class that implements the appropriate interface for the
type of event to which your class responds. For a list of these interfaces, see
Section 11.2, "Servlet Context Events" or Section 11.3, "HTTP Session Events". See
Table 11–3 Servlet Request Events
Type of Event Interface Method
The request is about to go out of scope of
the Web application.
javax.servlet.ServletRequestListene
r
requestDestroyed()
The request is about to come into scope of
the Web application.
javax.servlet.ServletRequestListene
r
requestInitialized()
Notification that a new attribute was added
to the servlet request. Called after the
attribute is added.
javax.servlet.ServletRequestAttribu
teListener
attributeAdded()
Notification that a new attribute was
removed from the servlet request. Called
after the attribute is removed.
javax.servlet.ServletRequestAttribu
teListener
attributeRemoved()
Notification that an attribute was replaced
on the servlet request. Called after the
attribute is replaced.
javax.servlet.ServletRequestAttribu
teListener
attributeReplaced()

Templates for Event Listener Classes
11-4 Developing Web Applications, Servlets, and JSPs for Oracle WebLogic Server
Section 11.7, "Templates for Event Listener Classes" for sample templates you can
use to get started.
2. Create a public constructor that takes no arguments. For example:
public class MyListener {
// public constructor
public MyListener() { /* ... */ }
}
3. Implement the required methods of the interface. See the Java EE 6 API Reference
(Javadocs) at
http://docs.oracle.com/javaee/6/api/
for more information.
4. Copy the compiled event listener classes into the
WEB-INF/classes
directory of the
Web application, or package them into a JAR file and copy the JAR file into the
WEB-INF/lib
directory of the Web application.
The following useful classes are passed into the methods in an event listener class:
■
javax.servlet.http.HttpSessionEvent
—provides access to the HTTP
session object
■
javax.servlet.ServletContextEvent
—provides access to the servlet context
object.
■
javax.servlet.ServletContextAttributeEvent
—provides access to servlet
context and its attributes
■
javax.servlet.http.HttpSessionBindingEvent
—provides access to an
HTTP session and its attributes
11.7 Templates for Event Listener Classes
The following examples provide some basic templates for event listener classes.
11.7.1 Servlet Context Event Listener Class Example
package myApp;
import javax.servlet.http.*;
public final class MyContextListenerClass implements
ServletContextListener {
public void contextInitialized(ServletContextEvent event) {
/* This method is called prior to the servlet context being
initialized (when the Web application is deployed).
You can initialize servlet context related data here.
*/
}
public void contextDestroyed(ServletContextEvent event) {
/* This method is invoked when the Servlet Context
(the Web application) is undeployed or
WebLogic Server shuts down.
*/
}
}

Additional Resources
Application Events and Event Listener Classes 11-5
11.7.2 HTTP Session Attribute Event Listener Class Example
package myApp;
import javax.servlet.*;
public final class MySessionAttributeListenerClass implements
HttpSessionAttributeListener {
public void attributeAdded(HttpSessionBindingEvent sbe) {
/* This method is called when an attribute
is added to a session.
*/
}
public void attributeRemoved(HttpSessionBindingEvent sbe) {
/* This method is called when an attribute
is removed from a session.
*/
}
public void attributeReplaced(HttpSessionBindingEvent sbe) {
/* This method is invoked when an attibute
is replaced in a session.
*/
}
}
11.8 Additional Resources
■ Servlet 3.0 specification at
http://jcp.org/en/jsr/detail?id=315
■ Java EE 6 API Reference (Javadocs) at
http://docs.oracle.com/javaee/6/api/
■ The Java EE 6 tutorial at
http://docs.oracle.com/javaee/6/tutorial/doc/

Additional Resources
11-6 Developing Web Applications, Servlets, and JSPs for Oracle WebLogic Server

12
Using the HTTP Publish-Subscribe Server 12-1
12
Using the HTTP Publish-Subscribe Server
[12]
This chapter describes how to use the HTTP Publish-Subscribe Server, included in
WebLogic Server, with your Web applications.
This chapter includes the following sections:
■ Section 12.1, "Overview of HTTP Publish-Subscribe Servers"
■ Section 12.2, "Examples of Using the HTTP Publish-Subscribe Server"
■ Section 12.3, "Using the HTTP Publish-Subscribe Server: Typical Steps"
■ Section 12.4, "Getting Run-time Information about the Pub-Sub Server and
Channels"
■ Section 12.5, "Enabling Security"
■ Section 12.6, "Advanced Topic: Using JMS as a Provider to Enable Cluster Support"
■ Section 12.7, "Advanced Topic: Persisting Messages to Physical Storage"
12.1 Overview of HTTP Publish-Subscribe Servers
An HTTP Publish-Subscribe Server (for simplicity, also called pub-sub server in this
document) is a mechanism whereby Web clients subscribe to channels and then
publish messages to these channels using asynchronous messages over HTTP.
The simple request/response nature of a standard Web application requires that all
communication be initiated by the client; this means that the server can only push
updated data to its clients if it receives an explicit request. This mechanism is adequate
for traditional applications, such as shopping carts, in which data from the server is
required only when a client requests it, but inadequate for dynamic real-time
applications such as chat rooms and auction updates in which the server must send
data even if a client has not explicitly requested it. The client can use the traditional
HTTP pull approach to check and retrieve the latest data at regular intervals, but this
approach is lacking in scalability and leads to high network traffic because of
redundant checks. The HTTP Publish-Subscribe Server solves this problem by
allowing clients to subscribe to a channel (similar to a topic in JMS) and receive
messages as they become available.
The pub-sub server is based on the Bayeux protocol, see
http://svn.cometd.com/trunk/bayeux/bayeux.html
. The Bayeux protocol defines a
contract between the client and the server for communicating with asynchronous
messages over HTTP. It allows clients to register and subscribe to channels, which are
named destinations or sources of events. Registered clients, or the pub-sub server
itself, then publishes messages to these channels which in turn any subscribed clients
receive.
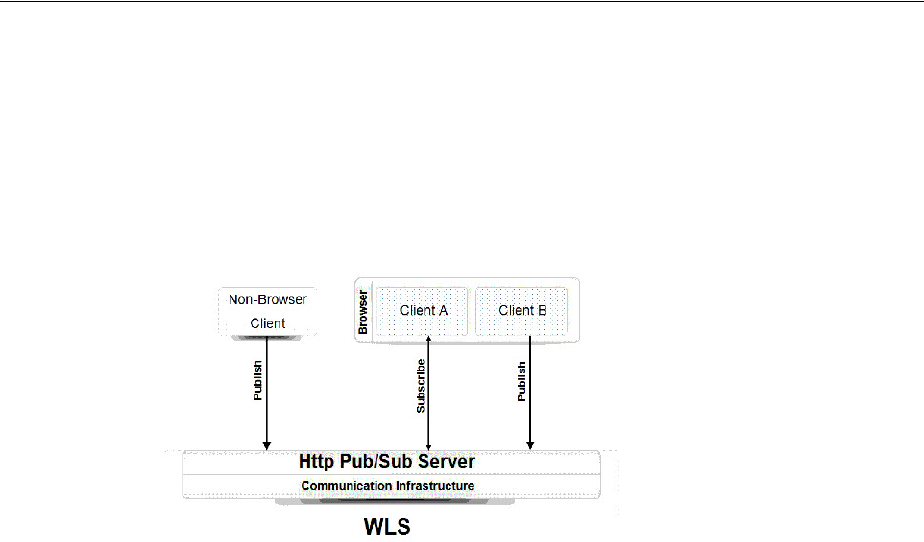
Overview of HTTP Publish-Subscribe Servers
12-2 Developing Web Applications, Servlets, and JSPs for Oracle WebLogic Server
The pub-sub server can communicate with any client that can understand the Bayeux
protocol. The pub-sub server is responsible for identifying clients, negotiating trust,
exchanging Bayeux messages, and, most importantly, pushing event messages to
subscribed clients.
The following figure describes the basic architecture of the pub-sub server included in
WebLogic Server.
Figure 12–1 HTTP Publish-Subscribe Server of WebLogic Server
12.1.1 How the Pub-Sub Server Works
There is a one-to-one relationship between a Web application and a pub-sub server; in
other words, each Web application has access to one unique pub-sub server. Each
pub-sub server has its own list of channels, which means that there can be channels
with the same name used in different Web applications within the same enterprise
application. The Web application uses a context object to get a handle to its associated
pub-sub server.
The pub-sub server itself is implemented as a Java EE library that its associated Web
application references in its
weblogic.xml
deployment descriptor.
The pub-sub server has its own deployment descriptor, called
weblogic-pubsub.xml
,
that lives in the same directory as other Web application descriptors (
WEB-INF
).
Developers use the descriptor to configure initial channels for the pub-sub server,
specify the transport and message handlers, and set up user authentication and
authorization.
Web application developers can optionally use server-side pub-sub APIs in their
servlets or Java classes to get the pub-sub server context, manage channels, and
manage the incoming and outgoing messages to and from the clients. It is not
required, however, to use server-side pub-sub APIs. For example, developers can use
the pub-sub server to implement a chat feature in their Web application. In a typical
chat application, clients perform all the subscribe and publish tasks themselves
without any need for additional server-side coding. If, however, developers need the
pub-sub server to perform additional steps, such as monitoring, collecting, or
interpreting incoming messages from clients, then they must use the server-side
pub-sub server APIs to program this functionality.
For Web 2.0 Ajax clients to communicate with the pub-sub server, the clients need a
JavaScript library that supports the Bayeux protocol. The pub-sub server provides the
Dojo JavaScript library implementation as part of its distribution sample. The Dojo
JavaScript library provides four different transports, of which two are supported by
the WebLogic pub-sub server: long-polling and callback-polling.

Overview of HTTP Publish-Subscribe Servers
Using the HTTP Publish-Subscribe Server 12-3
The pub-sub server can run in a clustered environment by using JMS to make the
messages shareable between nodes of the cluster. In this case, the pub-sub server
essentially delegates message handling to a JMS provider.
You can also specify that messages be persisted to physical storage such as a file
system or database. By default messages are not persisted.
The following sections provide additional information about the pub-sub server:
■ Section 12.1.2, "Channels"
■ Section 12.1.3, "Message Delivery and Order of Delivery Guarantee"
12.1.2 Channels
Channels are named destinations to which clients subscribe and publish messages.
Programmers define initial channels, channel mapping, and security by creating the
weblogic-pubsub.xml
deployment descriptor file and packaging it in the
WEB-INF
directory of the Web application, alongside the standard
web.xml
and
weblogic.xml
files. Programmers can optionally use the pub-sub server APIs in servlets to further
find, create, and destroy channels dynamically.
It is up to the programmer to decide whether clients can create and destroy channels.
This means that the programmer, if required, will have to constrain the use of the
create and destroy methods based on client authorization. Any attempt by an
unauthorized client to create or destroy a channel generates an error message.
When the pub-sub server destroys an existing channel, all the clients subscribed to that
channel and sub-channels of that channel are automatically unsubscribed.
Unsubscribed clients receive a disconnect response message from the pub-sub server
when it destroys the channel so that clients can try to reconnect and resubscribe to the
other channels.
The channel namespace is hierarchical. This means that a set of channels can be
specified for subscriptions by a channel gobbling pattern with wildcards like
*
and
**
.
The client is automatically registered with any channels that are created after the client
subscribed with a wildcard pattern.
12.1.3 Message Delivery and Order of Delivery Guarantee
The order of delivery of messages is not guaranteed between the client and the
pub-sub server. This means that if the pub-sub server publishes message1 and then
message2, the client may receive the messages in that order, or it may also receive
them in reverse order.
On the Web, clients are by definition loosely connected and it is possible that a
subscriber is inactive or not connected when the pub-sub server publishes a message.
The following rules govern the behavior of message delivery in this case:
■ Messages published by the pub-sub server when a client is unreachable are not
delivered to the client.
■ When the clients reconnects back, it will continue to receive newly published
messages.
■ In order to recover already-published messages, the pub-sub server must be
configured for persistent messages and the channel be configured as a persistent
channel.0

Examples of Using the HTTP Publish-Subscribe Server
12-4 Developing Web Applications, Servlets, and JSPs for Oracle WebLogic Server
12.2 Examples of Using the HTTP Publish-Subscribe Server
The information in this topic uses a very simple example to describe the basic
functionality and required tasks of using the HTTP pub-sub server. The example is a
Web application that consists of only the following components:
■ A
web.xml
deployment descriptor to configure the pub-sub Java EE library.
■ A
weblogic-pubsub.xml
deployment descriptor that configures the pub-sub server
itself.
■ An HTML file that allows users to subscribe and publish messages; the HTML file
uses the DOJO client JavaScript libraries as its programming model.
This example does not use any server-side programming using the pub-sub APIs.
A more complicated example is optionally provided in the WebLogic Server
distribution. The example describes a real-world scenario based on stock trading, and
makes extensive use of the pub-sub APIs in both the server and client components.
The example uses Dojo as its client-side programming framework and provides some
of the Dojo JavaScript libraries for your own testing use. The example also shows how
to add security to the pub-sub server and client. The example is in the following
directory:
EXAMPLES_HOME/wl_server/examples/src/examples/webapp/pubsub/stock
where
EXAMPLES_HOME
represents the directory in which the WebLogic Server code
examples are configured. For more information about the WebLogic Server code
examples, see "Sample Applications and Code Examples" in Understanding Oracle
WebLogic Server.
12.3 Using the HTTP Publish-Subscribe Server: Typical Steps
The following procedure describes the high-level steps to use the HTTP
Publish-Subscribe Server.
1. Update the
weblogic.xml
deployment descriptor of the Web application, located
in the
WEB-INF
directory, by adding a reference to the shared Java EE library
(always called
pubsub
) in which the pub-sub server is bundled, as shown in bold
below:
<?xml version='1.0' encoding='UTF-8'?>
<weblogic-web-app
xmlns="http://xmlns.oracle.com/weblogic/weblogic-web-app"
xmlns:xsi="http://www.w3.org/2001/XMLSchema-instance">
<library-ref>
<library-name>pubsub</library-name>
<specification-version>1.0</specification-version>
</library-ref>
</weblogic-web-app>
Note: In the procedure, it is assumed that you have already created a
basic Web application, along with its
web.xml
and
weblogic.xml
deployment descriptor files, JSPs, and servlets. For general details
about creating Web applications, see Section 3, "Creating and
Configuring Web Applications".

Using the HTTP Publish-Subscribe Server: Typical Steps
Using the HTTP Publish-Subscribe Server 12-5
See "Creating Shared Java EE Libraries and Optional Packages" in Developing
Applications for Oracle WebLogic Serverfor additional child elements of
<library-ref>
as well as additional general information about shared Java EE
libraries.
2. Create the
weblogic-pubsub.xml
file to configure initial channels, specify the
transport and message handlers, and set up user authentication and authorization.
See Section 12.3.1, "Creating the weblogic-pubsub.xml File".
3. Optionally add Java code to a component of your Web application, such as a
servlet, if you want the pub-sub server to publish messages to the channels, filter
messages from clients, or dynamically create or destroy channels. This step is not
necessary. See Section 12.3.2, "Programming Using the Server-Side Pub-Sub APIs".
4. Optionally program and configure a message filter chain if you want to
pre-process the messages you receive from a client. See Section 12.3.3,
"Configuring and Programming Message Filter Chains".
5. Update the browser client, such as an HTML file or JSP, to allow users to subscribe
to channels and send and receive messages. See Section 12.3.4, "Updating a
Browser Client to Communicate with the Pub-Sub Server".
6. Reassemble the Web application with new and updated deployment description
files and browser clients, and optionally recompile the servlet if you added
pub-sub server code.
Put the new
weblogic-pubsub.xml
deployment descriptor in the same WEB-INF
directory of the Web application that contains the
web.xml
and
weblogic.xml
files.
See Section 3, "Creating and Configuring Web Applications" for general
information about assembling Web applications.
7. If you have not already done so, deploy the shared Java EE library WAR file in
which the pub-sub server is bundled; you must perform this step before you
re-deploy the Web application that uses the pub-sub server, although you only
have to perform the step once for the entire WebLogic Server.
The pub-sub shared Java EE library WAR file is called
pubsub-1.0.war
and is
located in the following directory:
WL_HOME/common/deployable-libraries
where
WL_HOME
is the main WebLogic Server installation directory.
You can use either the Administration Console or the
weblogic.Deployer
command line tool. See "Install a Java EE Library" for instructions on using the
Administration Console or "Deploying Shared Java EE Libraries and Dependent
Applications" for details about using
weblogic.Deployer
.
8. Redeploy your updated Web application using the Administration Console or the
weblogic.Deployer
command-line tool.
See "Install a Web Application" for instructions on using the Administration
Console or "Deploying Applications and Modules with weblogic.Deployer" for
details about using
weblogic.Deployer
.
You can now start using the browser client to subscribe to a channel configured in the
weblogic-pubsub.xml
file and then send or receive messages.
After you have programmed your pub-sub application, you might want to start
monitoring it for run-time information; for details, see Section 12.4, "Getting Run-time
Information about the Pub-Sub Server and Channels".

Using the HTTP Publish-Subscribe Server: Typical Steps
12-6 Developing Web Applications, Servlets, and JSPs for Oracle WebLogic Server
See the following sections for more advanced features of the pub-sub server that you
might want to implement:
■ Section 12.5, "Enabling Security"
■ Section 12.6, "Advanced Topic: Using JMS as a Provider to Enable Cluster Support"
■ Section 12.7, "Advanced Topic: Persisting Messages to Physical Storage"
12.3.1 Creating the weblogic-pubsub.xml File
The
weblogic-pubsub.xml
deployment descriptor is an XML file that configures the
pub-sub server, in particular by specifying the initial channels, configuration
properties of the pub-sub server, and security specifications for the clients that
subscribe to the channels. Some of this information can be updated at run time by the
pub-sub server using the server-side APIs.
The root element of the deployment descriptor is
<wlps:weblogic-pubsub>
, where the
wlps
namespace is
http://xmlns.oracle.com/weblogic/weblogic-pubsub
.
For a full description of the elements of the
weblogic-pubsub.xml
file, see the schema.
The following list includes some of the more commonly used elements; see the end of
this section for a typical example of a
weblogic-pubsub.xml
file:
■
<wlps:server-config>
: Configures the pub-sub server. Child elements of this
element include:
–
<wlps:work-manager>
: Specifies the name of the work manager that delivers
messages to clients.
–
<wlps:publish-without-connect-allowed>
: Specifies whether clients can
publish messages without having explicitly connected to the pub-sub server.
–
<wlps:supported-transport>
: Specifies the supported transports. Currently,
the two supported transports are
long-polling
and
callback-polling
.
–
<wlps:client-timeout-secs>
: Specifies the number of seconds after which
the pub-sub server disconnects a client if the client does has not sent back a
connect/reconnect message
■
<wlps:channel>
: Defines and configures the initial channels. Child elements of
this element include:
–
<wlps:channel-pattern>
: Specifies the channel pattern, similar to the way
servlet URL patterns are specified, such as
/foo/bar, /foo/bar/*
,
/foo/bar/**
.
■
<wlps:channel-persistence>
: Specifies whether the channel is persistent. For
details, sees Section 12.7, "Advanced Topic: Persisting Messages to Physical
Storage".
–
<wlps:jms-handler-name>
: Specifies that this channel uses a JMS handler,
rather than the default. For details, see Section 12.6, "Advanced Topic: Using
JMS as a Provider to Enable Cluster Support".
–
<wlps:message-filter>
: Configures a message filter chain. For details, see
Section 12.3.3, "Configuring and Programming Message Filter Chains".
■
<wlps:channel-constraints>
: Configures security for the channel, such which
roles are allowed to perform which operations for a given channel. For details, see
Section 12.5, "Enabling Security".

Using the HTTP Publish-Subscribe Server: Typical Steps
Using the HTTP Publish-Subscribe Server 12-7
■
<wlps:jms-handler-mapping>
: Configures a JMS handler. For details, see
Section 12.6, "Advanced Topic: Using JMS as a Provider to Enable Cluster
Support".
The following sample
weblogic-pubsub.xml
file shows a simple configuration for an
application that uses the pub-sub server; see the explanation after the example for
details:
<?xml version="1.0" encoding="UTF-8"?>
<wlps:weblogic-pubsub
xmlns:wlps="http://xmlns.oracle.com/weblogic/weblogic-pubsub">
<wlps:server-config>
<wlps:publish-without-connect-allowed>true</wlps:publish-without-connect-allowed>
<wlps:supported-transport/>
<wlps:client-timeout-secs>100</wlps:client-timeout-secs>
<wlps:persistent-client-timeout-secs>400</wlps:persistent-client-timeout-secs>
<wlps:interval-millisecs>1000</wlps:interval-millisecs>
<wlps:multi-frame-interval-millisecs>2000</wlps:multi-frame-interval-millisecs>
</wlps:server-config>
<wlps:channel>
<wlps:channel-pattern>/chatrooms/**</wlps:channel-pattern>
</wlps:channel>
<wlps:channel-constraint>
<wlps:channel-resource-collection>
<wlps:channel-resource-name>all-permissions</wlps:channel-resource-name>
<wlps:description>Grant all permissions for everything by
everyone</wlps:description>
<wlps:channel-pattern>/chatrooms/*</wlps:channel-pattern>
</wlps:channel-resource-collection>
</wlps:channel-constraint>
</wlps:weblogic-pubsub>
In the preceding example:
■ The
<wlps:server-config>
element configures the pub-sub server itself. In
particular, it specifies that clients can publish messages to the pub-sub server
without explicitly connecting to it and that the server disconnects the client after
100 seconds if the client has not sent a reconnect message during that time. The
<wlps:persistent-client-timeout-secs>
element specifies that, in the case of
persistent channels, the client has up to 400 seconds to be disconnected to still
receive messages published during that time after it reconnects. The
<wlps:interval-milliseconds>
element specifies that the client can delay up to
1000 milliseconds subsequent requests to the /meta/connect channel. Finally, the
<wlps:multi-frame-interval-millisecs>
element specifies that the client can
delay up to 2000 milliseconds subsequent requests to the /meta/connect channel
when multi-frame is detected.
■ The
<wlps:channel>
element configures a single initial channel to which users can
subscribe. This channel is identified with the pattern
/chatrooms/**
; this pattern
is the top of the channel hierarchy.
■ The
<wlps:channel-constraints>
element provides security constraints about
how the
/chatrooms/**
channel can be used. In this case, all permissions are
granted to all users for all channels for all operations.

Using the HTTP Publish-Subscribe Server: Typical Steps
12-8 Developing Web Applications, Servlets, and JSPs for Oracle WebLogic Server
12.3.2 Programming Using the Server-Side Pub-Sub APIs
The pub-sub server itself might sometimes need to get messages from a channel so as
to monitor information or intercept incoming data before it gets published to
subscribed clients. The server might also want to publish messages to a channel
directly to, for example, make an announcement to all subscribed clients or provide
additional services. The pub-sub server might also need to perform maintenance on
the channels, such as create new ones or destroy existing ones.
WebLogic Server provides a pub-sub API in the
com.bea.httppubsub
package to
perform all of these tasks. Pub-sub programmers use the API in servlets or POJOs
(plain old Java objects) of the Web application that contains the pub-sub application.
Programming with the API is optional and needed only if the pub-sub server must
perform tasks additional to the standard publish and subscribe on the client side.
12.3.2.1 Overview of the Main API Classes and Interfaces
The following list describes the main interfaces and classes of the pub-sub server API:
■
com.bea.httppubsub.PubSubServer
—This is the most important interface of the
pub-sub server API. It represents an instance of the pub-sub server that is
associated with the current Web application; you use the context path of the
current servlet to get the associated pub-sub server. Using this interface,
programmers can manage channels, configure the pub-sub server, and create local
clients that are used to publish to and subscribe to channels.
■
com.bea.httppubsub.LocalClient
—After a programmer has instanciated an
instance of the current pub-sub server using the
PubSubServer
interface, the
programmer must then create a
LocalClient
, which is the client representative on
the server side. This client is always connected to the pub-sub server. Using this
client, programmers can publish and subscribe to channels. Remote clients, such
as browser-based clients, are represented with the
com.bea.httppubsub.Client
interface.
■
com.bea.httppubsub.ClientManager
—Interface for creating a new
LocalClient
.
■
com.bea.httppubsub.Channel
—Interface that represents a channel and all its
subchannels. With this interface, programmers can get the list of clients currently
subscribed to a channel and its subchannels, publish messages to a channel, get a
list of all subchannels, subscribe or unsubscribe to a channel, and destroy a
channel.
■
com.bea.httppubsub.MessageFilter
—Interface for creating message filters that
intercept the messages that a client publishes to a channel. See Section 12.3.3,
"Configuring and Programming Message Filter Chains" for details.
■
com.bea.httppubsub.DeliveredMessageListener
—Interface that programmers
use to create an object that listens to a channel and is notified every time a client
(remote or local) publishes a message to the channel.
■
com.bea.httppubsub.BayeuxMessage
—Interface that represents the messages that
are exchanged between the pub-sub server and a Bayeux client.
There are additional supporting classes, interfaces, enums, and exceptions in the
com.bea.httppubsub
package; see the "HTTP Pub-Sub API Javadoc" for the complete
documentation.
The following sections describe how to perform the most common server-side tasks
using the pub-sub API, such as publishing messages to and subscribing to a channel.
The sample snippets are taken from the Java source files of the pub-sub server sample
on the distribution kit:
EXAMPLES_HOME/wl_

Using the HTTP Publish-Subscribe Server: Typical Steps
Using the HTTP Publish-Subscribe Server 12-9
server/examples/src/examples/webapp/pubsub/stock/src/stockWar
, where
EXAMPLES_HOME
represents the directory in which the WebLogic Server code examples
are configured. For more information about the WebLogic Server code examples, see
"Sample Applications and Code Examples" in Understanding Oracle WebLogic Server.
12.3.2.2 Getting a Pub-Sub Server Instance and Creating a Local Client
Before you can perform any server-side tasks on the pub-sub server and its channels,
you must first instantiate a
PubSubServer
object which represents the pub-sub server
and then create a local client which you use to manipulate the channels on behalf of
the pub-sub server.
The following code snippet shows an example:
import com.bea.httppubsub.FactoryFinder;
import com.bea.httppubsub.LocalClient;
import com.bea.httppubsub.PubSubSecurityException;
import com.bea.httppubsub.PubSubServer;
import com.bea.httppubsub.PubSubServerException;
import com.bea.httppubsub.PubSubServerFactory;
import org.json.JSONObject;
public class ApiBasedClient implements Client {
private PubSubServer pubSubServer;
private LocalClient localClient;
public ApiBasedClient(String serverName) throws PubSubServerException {
PubSubServerFactory pubSubServerFactory =
(PubSubServerFactory)FactoryFinder.getFactory(FactoryFinder.PUBSUBSERVER_
FACTORY);
pubSubServer = pubSubServerFactory.lookupPubSubServer(serverName);
localClient = pubSubServer.getClientManager().createLocalClient();
}
...
}
The
FactoryFinder
class searches for an implementation of the
PubSubServerFactory
which in turn is used to create
PubSubServer
instances. The
lookupPubSubServer()
method of
PubSubServerFactory
returns a
PubSubServer
instance based the context
path of the servlet from which the method is run. Finally, the
createLocalClient()
method of the
ClientManager
of the
PubSubServer
instance returns a
LocalClient
object; this is the object that the pub-sub server uses to subscribe and publish to a
channel.
12.3.2.3 Publishing Messages to a Channel
To publish a message to a channel, use the
PubSubServer.publishToChannel()
method, passing it the
LocalClient
object, the name of the channel, and the text of the
message, as shown in the following code snippet:
public void publish(String channel, JSONObject data) throws IOException {
try {
pubSubServer.publishToChannel(localClient, channel, data.toString());
} catch (PubSubSecurityException e) {
throw new IOException(e);
}
}
In the example, the channel variable would contain the name of a channel, such as
/my/channel/**
.

Using the HTTP Publish-Subscribe Server: Typical Steps
12-10 Developing Web Applications, Servlets, and JSPs for Oracle WebLogic Server
The
publishToChannel()
method is asynchronous and returns immediately, or in
other words, the method does not wait for the subscribed clients to receive the
message.
12.3.2.4 Subscribing to a Channel
Subscribing to a channel from the server-side is a two step process:
1. Create a message listener and register it with the
LocalClient
2. Explicitly subscribe to the channel.
The message listener is a class that implements the
DeliveredMessageListener
interface. This interface defines a single callback method,
onPublish()
, which is
notified whenever the local client receives a message. The callback method is sent a
DeliveredMessageEvent
instance which represents the message sent to the local client.
To subscribe to a channel, use the
PubSubServer.subscribeToChannel()
method,
passing it the
LocalClient
object and the name of the channel.
The following code snippet shows an example of both of these steps; see a description
of the example directly after the code snippet:
pubSubServer.subscribeToChannel(localClient, "/management/publisher");
localClient.registerMessageListener(new DeliveredMessageListener() {
private InWebPublisher publisher = new InWebPublisher(contextPath);
private boolean publishing = false;
public void onPublish(DeliveredMessageEvent event) {
Object payLoad = event.getMessage().getPayLoad();
if (payLoad instanceof String) {
String command = (String)payLoad;
if ("start".equals(command) && !publishing) {
publisher.startup();
publishing = true;
} else if ("halt".equals(command) && publishing) {
publisher.halt();
publishing = false;
}
}
}
});
In the preceding example:
■ The pub-sub server subscribes to a channel called
/management/publisher
.
■ The message listener class is implemented directly in the
LocalClient.registerMessageListener()
method call.
12.3.3 Configuring and Programming Message Filter Chains
Pub-sub server application developers can program one or more message filters and
configure them for a channel so as to intercept the incoming messages from clients and
transform or additionally process the messages in some way. A message filter chain
refers to more than one filter attached to a channel, where the first configured filter
pre-processes the message and then passes it to the second configured filter, and so on.
This feature is similar to the filters that were introduced in the servlet 2.3 specification.
Message filters are useful for a variety of reasons. First, they provide the ability to
encapsulate recurring tasks in reusable units, which is good programming practice.
Second, they provide an easy and consistent way to pre-process an incoming message
from a client before the pub-sub server gets it and subsequently sends it out to the

Using the HTTP Publish-Subscribe Server: Typical Steps
Using the HTTP Publish-Subscribe Server 12-11
subscribers to the channel. Reasons for pre-processing the messages include validating
incoming data, gathering monitoring information, tracking the users of the pub-sub
application, caching, and so on.
There are two major steps to implementing message filter chains:
■ Section 12.3.3.1, "Programming the Message Filter Class"
■ Section 12.3.3.2, "Configuring the Message Filter Chain"
12.3.3.1 Programming the Message Filter Class
Each filter in the chain must have its own user-programmed filter class. The filter class
must implement the
com.bea.httppubsub.MessageFilter
interface. The
MessageFilter
interface includes a single method,
handleMessage(EventMessage)
; its
signature is as follows:
boolean handleMessage(EventMessage message);
The
com.bea.httppubsub.EventMessage
interface extends
BayeaxMessage
, which is a
JavaScript Object Notation (JSON) (see
http://www.json.org/
) encoded object. JSON
is a lightweight data-interchange format used by the Bayeux protocol. The
EventMessage
interface defines two methods,
getPayload()
and
setPayload()
, that
programmers use to access and process the incoming messages.
Because the
handleMessage()
method returns
boolean
, a programmer can interrupt all
further processing in the message filter chain by returning
false
in any of the filter
classes in the chain. This action not only interrupts the filter processing, but also
immediately returns the message back to the client that published it, without sending
it on to channel subscribers. This is a great way for programmers to ensure that there is
no problem identified in the incoming messages, and, if a problem is found, to prevent
the messages to be published to subscribers.
The following example shows a simple implementation of the
MessageFilter
interface:
package msgfilters;
public static class Filter1 implements MessageFilter {
public boolean handleMessage(EventMessage message) {
String msg = (String) message.getPayLoad();
message.setPayLoad("[" + msg.substring(1, msg.length()-1));
return true;
}
}
In the example, the
getPayload()
method gets the
String
message from the inputted
message
parameter; this
message
either comes directly from the client (if
Filter1
is the
first configured filter in the chain) or is the result of another filter class if
Filter1
is not
the first in the chain. The
setPayLoad()
method resets the message while performing
some data manipulation; in the example, the first character of the message is replaced
with a
[
.
12.3.3.2 Configuring the Message Filter Chain
You configure the message filters in the
weblogic-pubsub.xml
deployment descriptor
of the pub-sub server.
First, you declare the message filters using the
<wlps:message-filter>
child element
of the root
<wlps:weblogic-pubsub>
element. Then you configure a specific channel
by adding a
<wlps:message-filter>
element for each filter in the chain. The order in

Using the HTTP Publish-Subscribe Server: Typical Steps
12-12 Developing Web Applications, Servlets, and JSPs for Oracle WebLogic Server
which the filters are configured in the
<wlps:channel>
element is the order in which
they execute.
The following example shows how to configure message filters in the
weblogic-pubsub.xml
deployment descriptor; only relevant information is shown. See
the text after the example for an explanation:
<?xml version="1.0" encoding="UTF-8"?>
<wlps:weblogic-pubsub
xmlns:wlps="http://xmlns.oracle.com/weblogic/weblogic-pubsub">
<wlps:server-config>
...
</wlps:server-config>
<wlps:message-filter>
<wlps:message-filter-name>filter1</wlps:message-filter-name>
<wlps:message-filter-class>msgfilters.Fiter1</wlps:message-filter-class>
</wlps:message-filter>
<wlps:message-filter>
<wlps:message-filter-name>filter2</wlps:message-filter-name>
<wlps:message-filter-class>msgfilters.Filter2</wlps:message-filter-class>
</wlps:message-filter>
<wlps:channel>
<wlps:channel-pattern>/firstchannel/*</wlps:channel-pattern>
<wlps:message-filter>filter1</wlps:message-filter>
</wlps:channel>
<wlps:channel>
<wlps:channel-pattern>/secondchannel/*</wlps:channel-pattern>
<wlps:message-filter>filter2</wlps:message-filter>
<wlps:message-filter>filter1</wlps:message-filter>
</wlps:channel>
</wlps:weblogic-pubsub>
In the example, two filters are declared using the
<wlps:message-filter>
element:
filter1
implemented by the
msgfilters.Filter1
class and
filter2
implemented by
the
msgfilters.Filter2
class.
The channel with pattern
/firstchannel/*
is then configured with
filter1
. At run
time, this means that all messages published to the direct subchannels of
/firstchannel
are first pre-processed by the
msgfilters.Filter1
class.
The channel with pattern
/secondchannel/*
is configured with two filters:
filter2
and
filter1
. The order in which these two filters are configured is important. At run
time, all messages published to the direct subchannels of
/secondchannel
are first
intercepted and processed by the
msgfilters.Filter2
class, then the result of this
processing is sent to
msgfilters.Filter1
which then does its own processing, and
then the result is sent to the subscribers of the channel.
12.3.4 Updating a Browser Client to Communicate with the Pub-Sub Server
To update a browser, or any other Web-based client, to communicate with the pub-sub
server, you use a JavaScript library that supports the Bayeux protocol. You can use any
client-side programming framework of your choosing, provided that it supports the
Bayeux protocol. Typically you add the JavaScript to your JSP or HTML file, or
whatever implements the Web client.
This section shows an example of using Dojo as the client-side programming
framework and updating a JSP. Dojo is a JavaScript-based toolkit that supports the
Bayeux protocol as well as AJAX. Although WebLogic Server does not provide the
toolkit as an integral feature, it does include a subset of the libraries as part of the
installed pub-sub example; see Section 12.2, "Examples of Using the HTTP

Using the HTTP Publish-Subscribe Server: Typical Steps
Using the HTTP Publish-Subscribe Server 12-13
Publish-Subscribe Server" for details.
There are three main tasks you must perform when programming the Web client to
communicate with the pub-sub server:
■ Initialize the Dojo cometd environment.
The following example shows a typical way to perform this step:
dojo.io.cometd.init({}, "/context/cometd");
where
context
refers to the context path of the Web application that hosts the
pub-sub application. This initialization step creates a handshake with the pub-sub
server so as to determine the transport type for the connection. If the handshake is
successful, the client connects to the pub-sub server.
The
cometd
part of the initialization string is required, unless you specifically
override the default servlet mappings of the
pubsub
Java EE library that are
defined in the
web.xml
file of the library itself. For details of how to do this, see
Section 12.3.5, "Overriding the Default Servlet Mapping of the pubsub Java EE
Library".
■ Publish a message to a channel.
The message can be a simple string message or a JSON message. The following
example shows how to publish a simple message:
dojo.io.cometd.publish("/a/channel", "message content");
where
/a/channel
refers to the name of the channel to which you want to publish
the message and the second parameter is the text of the message. The following
example shows how to publish a JSON message:
dojo.io.cometd.publish("/a/channel", {"data": "content"});
■
In this example, the second parameter can be any JSON object.
■ Subscribe to a channel.
Before you can actually subscribe to a channel, you must first implement a
callback JavaScript function. This function can have any name; you will later
reference the function when you subscribe to a channel. The following example
shows how to implement a JavaScript function called
onUpdate
:
function onUpdate(message) {
if (!message.data) {
alert("bad message format "+message);
return;
}
// fetch the data published by other clients
var data = message.data;
}
To actually subscribe to a channel, use the following JavaScript:
dojo.io.cometd.subscribe("/a/channel", null, "onUpdate");
where
/a/channel
refers to the channel to which you want to subscribe and
onUpdate
is the name of the callback JavaScript function you previously defined.
This section covers only the minimal information on using the Dojo toolkit to update a
Web based client to communicate with the WebLogic pub-sub server; for additional
details, see
http://www.dojotoolkit.org/documentation
.

Getting Run-time Information about the Pub-Sub Server and Channels
12-14 Developing Web Applications, Servlets, and JSPs for Oracle WebLogic Server
12.3.5 Overriding the Default Servlet Mapping of the pubsub Java EE Library
The
web.xml
of the
pubsub
Java EE library defines the internal servlet (called
PubSubServlet
) that implements the pub-sub server as follows:
<web-app>
<servlet>
<servlet-name>PubSubServlet</servlet-name>
<servlet-class>com.bea.httppubsub.servlet.ControllerServlet</servlet-class>
<load-on-startup>1</load-on-startup>
</servlet>
<servlet-mapping>
<servlet-name>PubSubServlet</servlet-name>
<url-pattern>/cometd/*</url-pattern>
</servlet-mapping>
</web-app>
As shown by the code in bold, the URL pattern for the PubSubServlet is
/cometd/*
;
this is why by default you must use a string such as
/mywebapp/cometd
when
initializing a Web client that communicates with the pub-sub server.
If you need to override this default URL pattern, then update the
web.xml
file of your
Web application with something like the following:
<servlet-mapping>
<servlet-name>PubSubServlet</servlet-name>
<url-pattern>/web2/*</url-pattern>
</servlet-mapping>
Now you can specify this new URL pattern, rather than
cometd
, when using Dojo to
initialize a Web client:
dojo.io.cometd.init({}, "/context/web2");
12.4 Getting Run-time Information about the Pub-Sub Server and
Channels
The pub-sub server exposes all run-time monitoring information using Java
Management Extensions (JMX) MBeans. Examples of the type of information you can
gather at run time include details about registered clients, channel subscriptions, and
message counts.
The pub-sub server uses two kinds of run-time MBeans:
■
weblogic.management.runtime.WebPubSubRuntimeMBean
—Encapsulates run-time
information about the pub-sub server itself. Examples of information you can get
about a pub-sub server using this MBean include the context root of the associated
Web application and a handle to a configured channel.
■
weblogic.management.runtime.ChannelRuntimeMBean
—Encapsulates information
about the channels configured for the pub-sub server. Examples of information
you can get about a channel using the MBean include the number of published
messages to this channel, the number of current subscribers, and the list of
subscribers.
Both MBeans are registered in the WebLogic Server MBean tree and can be reached by
navigating through the tree. In particular,
WebPubSubRuntimeMBean
is registered under
WebAppComponentRuntimeMBean
of the current Web application and all
ChannelRuntimeMBeans
are registered under
WebPubSubRuntimeMBean
.

Enabling Security
Using the HTTP Publish-Subscribe Server 12-15
For complete information on these MBeans, go to the MBean Reference for Oracle
WebLogic Server, open the Runtime MBeans node in the left pane; the run-time MBeans
are listed in alphabetical order.
For general information about programming JMX MBeans, see Developing Manageable
Applications Using JMX for Oracle WebLogic Server.
12.5 Enabling Security
The pub-sub server offers the following security features:
■ Section 12.5.1, "Use Pub-Sub Constraints"
■ Section 12.5.2, "Map Roles to Principals"
■ Section 12.5.3, "Configure SSL for Pub-Sub Communication"
■ Section 12.5.4, "Additional Security Considerations"
The use of these features is described in the sections that follow.
12.5.1 Use Pub-Sub Constraints
The pub-sub server provides the capability to secure a channel via a combination of
two mechanisms: a channel constraint and an authorization constraint.
Conceptually, a channel constraint is a container that includes a collection of resources
to be protected and, optionally, authorization constraints on the specific resources in
the resource collection. The authorization constraints represent WebLogic Server roles
and policies, and answer the question "Who can perform a given operation on the
resources in the collection?"
You specify the pub-sub constraints in a configuration file,
weblogic-pub-sub.xml
.
The pub-sub server uses the channel constraint and any authorization constraints in
the
weblogic-pub-sub.xml
configuration file to set up roles and policies on the
channels.
Consider the example shown in Example 12–1. Significant sections are shown in bold.
Example 12–1 Pub/Sub Constraints
<wlps:channel-constraint>
<wlps:channel-resource-collection>
<wlps:channel-resource-name>publish</wlps:channel-resource-name>
<wlps:description>publish channel constraint</wlps:description>
<wlps:channel-pattern>/stock/* *</wlps:channel-pattern>
<wlps:channel-pattern>/management/publisher</wlps:channel-pattern>
<wlps:channel-operation>publish</wlps:channel-operation>
</wlps:channel-resource-collection>
<wlps:auth-constraint>
<wlps:description>publisher</wlps:description>
<wlps:role-name>publisher</wlps:role-name>
</wlps:auth-constraint>
</wlps:channel-constraint>
In this example, the operation
publish
for the
/stock/* *
and
/management/publisher
channels is available only to users with the WebLogic Server
role
publisher
.

Enabling Security
12-16 Developing Web Applications, Servlets, and JSPs for Oracle WebLogic Server
12.5.1.1 Specify Access to Channel Operations
Four types of actions (operations) are allowed on channels:
■ create
■ delete
■ subscribe
■ publish
By default (with no channel constraints defined), subscribe operations are open for all
users on all channels.
Similarly, create, delete, and publish operations are restricted for all users on all
channels by default. Create, delete, and publish operations are allowed only if
explicitly configured in channel constraints.
You use a combination of
<wlps:channel-operation>
and
<wlps:auth-constraint>
to specify access to a channel operation for a given role.
For example, in Example 12–2, the publish operation is permitted for authenticated
subjects with the publisher role, and denied to all other roles.
Example 12–2 Publisher Role Constraint
<wlps:channel-constraint>
<wlps:channel-resource-collection>
<wlps:channel-resource-name>publish</wlps:channel-resource-name>
<wlps:description>publish channel constraint</wlps:description>
<wlps:channel-pattern>/stock/* *</wlps:channel-pattern>
<wlps:channel-pattern>/management/publisher</wlps:channel-pattern>
<wlps:channel-operation>publish</wlps:channel-operation>
</wlps:channel-resource-collection>
<wlps:auth-constraint>
<wlps:description>publisher</wlps:description>
<wlps:role-name>publisher</wlps:role-name>
</wlps:auth-constraint>
</wlps:channel-constraint>
12.5.1.2 Restricting Access to All Channel Operations
The presence of an empty authorization constraint (
<wlps:auth-constraint>
</wlps:auth-constraint>
) means that all access is prohibited for the specified
channel operations, or all channel operations if
<wlps:channel-operation>
is not
specified.
Therefore, to restrict all channel operations for the channel for all users, set up your
weblogic-pub-sub.xml
configuration file with an empty
<wlps:auth-constraint>
element, as follows:
<wlps:channel-constraint>
<wlps:channel-resource-collection>
<wlps:description>Restrict All Acesss</wlps:description>
<wlps:channel-pattern>/**</wlps:channel-pattern>
</wlps:channel-resource-collection>
<wlps:auth-constraint> </wlps:auth-constraint>
</wlps:channel-constraint>

Enabling Security
Using the HTTP Publish-Subscribe Server 12-17
12.5.1.3 Opening Access to All Channel Operations
The absence of an authorization constraint within a channel constraint means that
access is not limited for the specified channel operations, or all channel operations if
<wlps:channel-operation>
is not specified.
(In contrast, the presence of an empty authorization constraint
(
<wlps:auth-constraint> </wlps:auth-constraint>
) means that all access is
prohibited for the specified channel operations, or all channel operations for that
channel if
<wlps:channel-operation>
is not specified.)
Therefore, to open up all channel operations for the channel for all users, set up your
weblogic-pub-sub.xml
configuration file without
<wlps:channel-operation>
or
<wlps:auth-constraint>
elements, as follows:
<wlps:channel-constraint>
<wlps:channel-resource-collection>
<wlps:description>All Acesss</wlps:description>
<wlps:channel-pattern>/**</wlps:channel-pattern>
</wlps:channel-resource-collection>
<!-- Not defining an auth-constraint will open up access to everyone -->
</wlps:channel-constraint>
12.5.1.4 Updating a Constraint Requires Redeploy of Web Application
Constraints cannot be updated dynamically. You must redeploy the Web application
for new settings to take effect.
12.5.2 Map Roles to Principals
The primary pub-sub security mechanism is authorization. As previously described,
the pub-sub server uses the a combination of
<wlps:channel-operation>
and
<wlps:auth-constraint>
elements to set up roles and policies on the channels. Each
bayeux packet corresponds to one bayeux request. One HTTP request can translate to
one or more bayeux requests. WebLogic Server (the servlet container) performs
authorization checks for the HTTP request, and the pub-sub server performs one
authorization check for each bayeux request.
To set up the pub-sub authorization, you must map the role names, which you specify
as
<wlps:role-name>some-role-name</wlps:role-name>
in your
weblogic-pub-sub.xml
file, to principal names using the
security-role-assignment
element configured in your
weblogic.xml
file.
As described in
security-role-assignment
, the
security-role-assignment
element
declares a mapping between a security role and one or more principals in the
WebLogic Server security realm.
Note: The pub-sub server does not directly perform authentication.
Rather, the pub-sub server runs on top of WebLogic Server (the servlet
container) and leverages the WebLogic authentication services.
Specifically, the pub-sub server uses the currently-authenticated user
(or anonymous) for requests originating from a given client.
Note: The absence of such a mapping in the
weblogic.xml
file will
cause the role to be used implicitly; this generates a warning.

Enabling Security
12-18 Developing Web Applications, Servlets, and JSPs for Oracle WebLogic Server
Example 12–3 shows how to use the
security-role-assignment
element to assign
principals to the publisher role.
Example 12–3 security-role-assignment Element
<weblogic-web-app>
<security-role-assignment>
<role-name>publisher</role-name>
<principal-name>Tanya</principal-name>
<principal-name>Fred</principal-name>
<principal-name>system</principal-name>
</security-role-assignment>
</weblogic-web-app>
12.5.3 Configure SSL for Pub-Sub Communication
By default, all pub-sub communication is via HTTP. However, you can configure the
pub-sub server to require SSL by modifying the
web.xml
file. Requiring SSL ensures
that all communication between the pub-sub server and the Web 2.0 clients happens
over SSL.
WebLogic Server establishes an SSL connection when the user is authenticated using
the INTEGRAL or CONFIDENTIAL transport guarantee, as specified in the
web.xml
file. In Example 12–4, the transport guarantee is set to integral.
Example 12–4 Requiring SSL Via web.xml
<security-constraint>
<web-resource-collection>
<web-resource-name>Success</web-resource-name>
<url-pattern>/cometd/*</url-pattern>
<http-method>GET</http-method>
<http-method>POST</http-method>
</web-resource-collection>
<user-data-constraint>
<transport-guarantee>INTEGRAL</transport-guarantee>
</user-data-constraint>
</security-constraint>
12.5.4 Additional Security Considerations
This section describes the following additional pub-sub security considerations:
■ Section 12.5.4.1, "Use AuthCookieEnabled to Access Resources"
■ Section 12.5.4.2, "Locking Down the Pub-Sub Server"
12.5.4.1 Use AuthCookieEnabled to Access Resources
WebLogic Server allows a user to securely access HTTPS resources in a session that
was initiated using HTTP, without loss of session data. To enable this feature, add
AuthCookieEnabled="true
" to the WebServer element in
config.xml
:
<WebServer Name="myserver" AuthCookieEnabled="true"/>
Enabling Security
Using the HTTP Publish-Subscribe Server 12-19
Setting AuthCookieEnabled to true, which is the default setting, causes the WebLogic
Server instance to send a new secure cookie, _WL_AUTHCOOKIE_JSESSIONID, to the
browser when authenticating via an HTTPS connection. Once the secure cookie is set,
the session is allowed to access other security-constrained HTTPS resources only if the
cookie is sent from the browser.
12.5.4.2 Locking Down the Pub-Sub Server
This section describes how to lock down the pub-sub server to prevent unauthorized
access. The steps described here offer additional security at the cost of reduced access.
It is up to you to decide which level of security is appropriate for your environment.
To lock down the pub-sub server, perform the following steps:
1. Configure SSL for pub-sub communication, as described in Section 12.5.3,
"Configure SSL for Pub-Sub Communication".
2. Require authentication (BASIC, FORM, and so forth.)
WebLogic Server sets the required authentication method for the Web application
in the
web.xml file
.
In the following example, HTTP BASIC authentication is required:
<login-config>
<auth-method>BASIC</auth-method>
<realm-name>default</realm-name>
</login-config>
3. Ensure auth-cookie is enabled for the Web applications, as described in
Section 12.5.4.1, "Use AuthCookieEnabled to Access Resources".
4. Ensure that all the channels are constrained in the
weblogic-pubsub.xml
file.
5. Lock subscribe operations, which are allowed by default.
<wlps:channel-constraint>
<wlps:channel-resource-collection>
<wlps:channel-resource-name>publish</wlps:channel-resource-name>
<wlps:description>publish channel constraint</wlps:description>
<wlps:channel-pattern>/stock/*</wlps:channel-pattern>
<wlps:channel-pattern>/management/publisher</wlps:channel-pattern>
<wlps:channel-operation>publish</wlps:channel-operation>
</wlps:channel-resource-collection>
<wlps:auth-constraint>
<wlps:description>publisher</wlps:description>
<wlps:role-name>publisher</wlps:role-name>
</wlps:auth-constraint>
</wlps:channel-constraint>
<wlps:channel-constraint>
<wlps:channel-resource-collection>
<wlps:channel-resource-name>subscribe</wlps:channel-resource-name>
Note: This feature will work even when cookies are disabled because
WebLogic Server will use URL rewriting over secure connections to
rewrite secure URLs in order to encode the authCookieID in the URL
along with the JSESSIONID.

Advanced Topic: Using JMS as a Provider to Enable Cluster Support
12-20 Developing Web Applications, Servlets, and JSPs for Oracle WebLogic Server
<wlps:description>subscribe channel constraint</wlps:description>
<wlps:channel-pattern>/stock/*</wlps:channel-pattern>
<wlps:channel-operation>subscribe</wlps:channel-operation>
</wlps:channel-resource-collection>
<wlps:auth-constraint>
<wlps:description>subscriber</wlps:description>
<wlps:role-name>subscriber</wlps:role-name>
</wlps:auth-constraint>
</wlps:channel-constraint>
12.6 Advanced Topic: Using JMS as a Provider to Enable Cluster Support
Pub-sub server applications can run in a WebLogic Server clustered environment so as
to provide scalability and server failover. However, pub-sub applications behave
differently depending on the message handler (pub-sub server itself or a JMS
provider) that is handling the published messages. In the default non-JMS case, the
pub-sub server handles all messages and each instance of the pub-sub server on each
node of the cluster is independent and isolated. This means that event messages
cannot be shared between different server instances. For example, if a client subscribes
to channel
/chat
on node A of the cluster, it cannot receive messages published to
channel
/chat
on node B of the cluster.
If, for a given channel, you want all messages published to all nodes of a cluster to be
shareable by all clients subscribed to the channel, then you must configure the channel
for JMS. You do this by updating the appropriate
<wlps:channel>
element in the
weblogic-pubsub.xml
deployment descriptor of your application.
When a client publishes a message to a JMS-configured channel, the pub-sub server
re-sends the message to a JMS topic. JMS message listeners running on each node of
the cluster retrieve the messages from the JMS topics and then deliver them to the
subscribed clients on their node.
12.6.1 Configuring JMS as a Handler
You configure the JMS as the message handler for an application in the
weblogic-pubsub.xml
deployment descriptor of the pub-sub server.
First, you declare the configuration of the JMS handler using the
<wlps:jms-handler-mapping>
child element of the root
<wlps:weblogic-pubsub>
element. This is where you specify the URL of the JMS provider, the connection factory
JNDI name, and the JMS topic JNDI name. Then you configure a specific channel to be
a JMS channel by adding a
<wlps:jms-handler-name>
child element.
The following example shows how to configure a JMS handler and channel in the
weblogic-pubsub.xml
deployment descriptor; only relevant information is shown in
bold. See the text after the example for an explanation.
<?xml version="1.0" encoding="UTF-8"?>
Note: It is assumed in this section that you have already configured
your JMS provider and created the connection factory and topic that
will be used for the pub-sub JMS channel. See Developing JMS
Applications for Oracle WebLogic Server for information about WebLogic
JMS or your provider's documentation for details.

Advanced Topic: Using JMS as a Provider to Enable Cluster Support
Using the HTTP Publish-Subscribe Server 12-21
<wlps:weblogic-pubsub
xmlns:wlps="http://xmlns.oracle.com/weblogic/weblogic-pubsub">
<wlps:server-config>
...
</wlps:server-config>
<wlps:jms-handler-mapping>
<wlps:jms-handler-name>DefaultJmsHandler</wlps:jms-handler-name>
<wlps:jms-handler>
<wlps:jms-provider-url>t3://localhost:7001</wlps:jms-provider-url>
<wlps:connection-factory-jndi-name>ConnectionFactoryJNDI</wlps:connection-factory-
jndi-name>
<wlps:topic-jndi-name>TopicJNDI</wlps:topic-jndi-name>
</wlps:jms-handler>
</wlps:jms-handler-mapping>
<wlps:channel>
<wlps:channel-pattern>/chat/**</wlps:channel-pattern>
<wlps:jms-handler-name>DefaultJmsHandler</wlps:jms-handler-name>
</wlps:channel>
</wlps:weblogic-pubsub>
In the preceding example:
■ The
<wlps:jms-handler-mapping>
element defines a JMS handler named
DefaultJmsHandler
. The
<wlps:jms-handler>
child element configures specific
properties of
DefaultJmsHandler
that the pub-sub server uses to delegate
messages to the JMS topic; in particular, the JMS provider URL that the pub-sub
server uses to access the JNDI tree of the JMS provider is
t3://localhost:7001
,
the connection factory JNDI name is
ConnectionFactoryJNDI
, and the JNDI name
of the topic to which the messages will be delegated is
TopicJNDI
.
■ The
<wlps:jms-handler-name>
child element of
<wlps:channel>
specifies that the
channel with pattern
/chat
is actually a JMS channel, with JMS configuration
options specified by the
DefaultJmsHandler
.
If you do not define
jms-provider-url
in
weblogic-pubsub.xml
, the Pub-Sub Server
uses the
connection-factory-jndi-name
and
topic-jndi-name
elements configured
in
weblogic-pubsub.xml
to look up the reference to the connection factory and topic,
as defined by the
resource-ref
element in
web.xml
and the
res-ref-name
element in
weblogic.xml
.
The following code example demonstrates:
■ defining
resource-ref
in
web.xml
(Example 12–5)
■ mapping
res-ref-name
to the actual JNDI name of the JMS resources in
weblogic.xml
(Example 12–6)
■ using the
connection-factory-jndi-name
and
topic-jndi-name
elements in
weblogic-pubsub.xml
to reference the connection factory and topic without
specifying
jms-provider-url
(Example 12–7)
Example 12–5 Defining resource-ref for the connection factory and topic in web.xml
<resource-ref>
<res-ref-name>web20/connectionFactory</res-ref-name>
<res-type>javax.jms.ConnectionFactory</res-type>
</resource-ref>
<resource-ref>
<res-ref-name>web20/topic</res-ref-name>
<res-type>javax.jms.Topic</res-type>
</resource-ref>

Advanced Topic: Using JMS as a Provider to Enable Cluster Support
12-22 Developing Web Applications, Servlets, and JSPs for Oracle WebLogic Server
Example 12–6 Mapping res-ref-name to the JNDI name in weblogic.xml
<resource-description>
<res-ref-name>web20/connectionFactory</res-ref-name>
<jndi-name> weblogic.web20.jms.TopicConnectionFactory</jndi-name>
</resource-description>
<resource-description>
<res-ref-name>web20/topic</res-ref-name>
<jndi-name>weblogic.web20.jms.chatTopic</jndi-name>
</resource-description>
Example 12–7 Using connection-factory-jndi-name and topic-jndi-name in
weblogic-pubsub.xml
<jms-handler-mapping>
<jms-handler-name>jms-fortest</jms-handler-name>
<jms-handler>
<connection-factory-jndi-name>
web20/connectionFactory
</connection-factory-jndi-name>
<topic-jndi-name>
web20/topic
</topic-jndi-name>
</jms-handler>
</jms-handler-mapping>
For the full list of JMS handler-related XML elements you can include in the
weblogic-pubsub.xml
deployment descriptor, see the
weblogic-pubsub.xsd
schema at
http://xmlns.oracle.com/weblogic/weblogic-pubsub
.
12.6.2 Configuring Client Session Failover
In addition to server failover, the pub-sub server also supports client session failover
in clustered environments. In client failover, whenever the status of the client changes,
such as when it subscribes or unsubscribes to a channel, the latest client status is
stored into a replicated HTTP session. If one node of the cluster crashes, WebLogic
Server attempts to recover the clients on the crashed node by moving them to other
available nodes using the replicated HTTP sessions.
To configure client session failover, update the
weblogic.xml
deployment descriptor
file of the Web application that hosts the pub-sub application by adding a
<session-descriptor>
child element of the root
<weblogic-web-app>
element and
specify that the persistent store type is
replicated_if_clustered
, as shown below;
only relevant sections of the file are shown in bold:
<?xml version='1.0' encoding='UTF-8'?>
<weblogic-web-app
xmlns="http://xmlns.oracle.com/weblogic/weblogic-web-app"
xmlns:xsi="http://www.w3.org/2001/XMLSchema-instance">
...
<session-descriptor>
<persistent-store-type>replicated_if_clustered</persistent-store-type>
</session-descriptor>
</weblogic-web-app>

Advanced Topic: Persisting Messages to Physical Storage
Using the HTTP Publish-Subscribe Server 12-23
12.7 Advanced Topic: Persisting Messages to Physical Storage
If you require that messages published to a particular channel be persisted, then you
should configure the channel as a persistent channel. In this case, all messages
published to this channel will be persisted to physical storage such as a database or the
file system. In particular, this physical storage must be a pre-configured WebLogic
persistent store. The WebLogic persistent store provides a built-in, high-performance
storage solution for WebLogic Server subsystems and services that require persistence.
The persistent store supports persistence to a file-based store or to a JDBC-enabled
database. For additional details, see "Using the WebLogic Persistent Store" in
Administering Server Environments for Oracle WebLogic Server.
Oracle recommends that you create your own file or JDBC store to store the persistent
messages and configure this store for the persistent channel. If, however, the pub-sub
server does not find a store with the configured name, then the server attempts to use
the default WebLogic persistent store to store the messages, and logs a warning
message to the log file.
The pub-sub server does not allow messages to live in the persistent store indefinitely;
rather, it uses a configured maximum duration property to regularly delete old
messages from the store after they have been in the store longer than the max
duration. By default, this maximum duration is 3600 seconds, but it can be configured
differently for each persistent channel.
A client that subscribes to a persistent channel is called a persistent client. The main
difference between normal clients and persistent clients is how the pub-sub server
handles timeouts. There are two different timeout configuration options when
configuring the pub-sub server; the following elements are children of
<wlps:server-config>
in the
weblogic-pubsub.xml
file:
■
<wlps:client-timeout-secs>
—Specifies the number of seconds after which
normal (non-persistent) clients are deleted and persistent clients are deactivated
by the pub-sub server, if during that time the client does not send a connect or
re-connect message. When deactivating, the server keeps all subscribed persistent
channels for the client and unsubscribes the non-persistent channels. The default
value is 60 seconds.
■
<wlps:persistent-client-timeout-secs>
—Specifies the number of seconds after
which persistent clients are disconnected and deleted by the pub-sub server, if
during that time the persistent client does not send a connect or re-connect
message. This value must be larger than
client-timeout-secs
. If the persistent
client reconnects before the persistent timeout is reached, the client receives all
messages that have been published to the persistent channel during that time; if
the client reconnects after the timeout, then it does not get the messages. The
default value is 600 seconds.
12.7.1 Configuring Persistent Channels
You configure a persistent channel in the
weblogic-pubsub.xml
deployment descriptor
file of the pub-sub server.
First configure the pub-sub by adding a
<wlps:persistent-client-timeout-secs>
child element of
<wlps:server-config>
if you want to change the default persistent
timeout value of 600 seconds. Then you configure a persistent channel by adding a
<wlps:channel-persistence>
child element of
<wlps:channel>
and specify the
maximum amount of time that messages for that channel should be persisted and the
name of the persistent store to which the messages should be persisted. The following
example shows the relevant sections of the
weblogic-pubsub.xml
file:

Advanced Topic: Persisting Messages to Physical Storage
12-24 Developing Web Applications, Servlets, and JSPs for Oracle WebLogic Server
<?xml version="1.0" encoding="UTF-8"?>
<wlps:weblogic-pubsub
xmlns:wlps="http://xmlns.oracle.com/weblogic/weblogic-pubsub">
<wlps:server-config>
...
<wlps:persistent-client-timeout-secs>400</wlps:persistent-client-timeout-secs>
</wlps:server-config>
<wlps:channel>
<wlps:channel-pattern>/chat/**</wlps:channel-pattern>
<wlps:channel-persistence>
<wlps:max-persistent-message-duration-secs>3000</wlps:max-persistent-message-durat
ion-secs>
<wlps:persistent-store>PubSubFileStore</wlps:persistent-store>
</wlps:channel-persistence>
</wlps:channel>
</wlps:weblogic-pubsub>
In the preceding example:
■ The persistent client timeout value is 400 seconds. This value applies to all
persistent channels of this pub-sub server.
■ The channel with pattern
/chat
, and all its subchannels, has been configured as a
persistent channel. The messages will be persisted to a WebLogic persistent store
called
PubSubFileStore
and they will live for a maximum of 3000 seconds in the
store.
It is assumed that you have already created and configured the
PubSubFileStore
using the WebLogic Server Administration Console; for details, see "Using the
WebLogic Persistent Store" in Administering Server Environments for Oracle WebLogic
Server.

13
WebLogic JSP Reference 13-1
13
WebLogic JSP Reference
[13]
This chapter provides reference information for writing WebLogic JavaServer Pages
(JSPs).
This chapter includes the following sections:
■ Section 13.1, "JSP Tags"
■ Section 13.2, "Defining JSP Versions"
■ Section 13.3, "Reserved Words for Implicit Objects"
■ Section 13.4, "Directives for WebLogic JSP"
■ Section 13.5, "Declarations"
■ Section 13.6, "Scriptlets"
■ Section 13.7, "Expressions"
■ Section 13.8, "Example of a JSP with HTML and Embedded Java"
■ Section 13.9, "Actions"
■ Section 13.10, "JSP Expression Language"
■ Section 13.11, "JSP Expression Language Implicit Objects"
■ Section 13.12, "JSP Expression Language Literals and Operators"
■ Section 13.13, "JSP Expression Language Reserved Words"
■ Section 13.14, "JSP Expression Language Named Variables"
■ Section 13.15, "Securing User-Supplied Data in JSPs"
■ Section 13.16, "Using Sessions with JSP"
■ Section 13.17, "Deploying Applets from JSP"
■ Section 13.18, "Using the WebLogic JSP Compiler"
13.1 JSP Tags
The following table describes the basic tags that you can use in a JSP page. Each
shorthand tag has an XML equivalent.

Defining JSP Versions
13-2 Developing Web Applications, Servlets, and JSPs for Oracle WebLogic Server
13.2 Defining JSP Versions
JSP 2.2 (
http://jcp.org/aboutJava/communityprocess/mrel/jsr245/index.html
) is
a maintenance release for JSP 2.1. The JSP 2.2 specification uses the servlet 3.0
specification for its Web semantics.
Because JSP 2.1 imported some new features, the same syntax could hold different
meanings between JSP 2.1 and JSP 2.0, so the JSP version must be defined to attain the
expected behavior. For example:
Table 13–1 Basic Tags for JSP Pages
JSP Tag Syntax Description
Scriptlet <% java_code %>
. . . or use the XML equivalent:
<jsp:scriptlet>
java_code
</jsp:scriptlet>
Embeds Java source code
scriptlet in your HTML page.
The Java code is executed and
its output is inserted in
sequence with the rest of the
HTML in the page. For details,
see Section 13.6, "Scriptlets".
Directive <%@ dir-type dir-attr %>
. . . or use the XML equivalent:
<jsp:directive.dir_type
dir_attr />
Directives contain messages to
the application server.
A directive can also contain
name/value pair attributes in
the form
attr="value"
, which
provides additional instructions
to the application server. See
Section 13.4, "Directives for
WebLogic JSP".
Declarations <%! declaration %>
. . . or use XML equivalent...
<jsp:declaration>
declaration;
</jsp:declaration>
Declares a variable or method
that can be referenced by other
declarations, scriptlets, or
expressions in the page. See
Section 13.5, "Declarations".
Expression <%= expression %>
. . . or use XML equivalent...
<jsp:expression>
expression
</expression>
Defines a Java expression that is
evaluated at page request time,
converted to a
String
, and sent
inline to the output stream of
the JSP response. See
Section 13.7, "Expressions".
Actions <jsp:useBean ... >
JSP body is included if the bean
is instantiated here
</jsp:useBean>
<jsp:setProperty ... >
<jsp:getProperty ... >
<jsp:include ... >
<jsp:forward ... >
<jsp:plugin ... >
Provide access to advanced
features of JSP, and only use
XML syntax. These actions are
supported as defined in the JSP
2.2 specification. See
Section 13.9, "Actions".
Comments <%/* comment */%>
Ensure that your comments are
removed from the viewable
source of your HTML files by
using only JSP comment tags.
HTML comments remain visible
when the user selects view
source in the browser.

Reserved Words for Implicit Objects
WebLogic JSP Reference 13-3
■
<%@ page deferredSyntaxAllowedAsLiteral="true" %>
is not allowed in JSP 2.0.
■
# {expr}
is valid in JSP 2.0 template text, but is invalid in JSP 2.1 by default.
13.2.1 Rules for Defining a JSP File Version
Since there is no explicit method of specifying a JSP page's version, its version is
eventually determined by the Web application version, as follows:
■ If
<jsp:root>
appears in a JSP document, its attribute version value will
determine that JSP document's version; otherwise, the Web application version
will determine it.
■ If the Web application version is determining the JSP version, then 2.5 indicates
the version is JSP 2.1 and 2.4 means the version is JSP 2.0.
■ If a JSP document contains
<jsp:root>
, and if Web application version is 2.4, the
<jsp:root>
version must not be higher than 2.0. However, if the Web application
version is 2.5, then the
<jsp:root>
version could be less than 2.1.
■ All Referred JSP tag versions must not be higher than current JSP file's version.
13.2.2 Rules for Defining a Tag File Version
All JSP tag file versions are defined by the version of the tag library they belong to.
■ Since an implicit tag library will be created for each directory, including tag files,
the implicit tag library's version is 2.0 by default. However, the version can be
configured by the
implicit.tld
file in same directory in JSP 2.1.
■ A
.tagx
file's
<jsp:root>
attribute version value must be same as the tag file's
version.
■ All Referred JSP tag versions must not be higher than current tag file's version.
13.3 Reserved Words for Implicit Objects
JSP reserves words for implicit objects in scriptlets and expressions. These implicit
objects represent Java objects that provide useful methods and information for your
JSP page. WebLogic JSP implements all implicit objects defined in the JSP 2.2
specification. The JSP API is described in the Javadocs available at
http://docs.oracle.com/javaee/6/api/
.
Note: Use these implicit objects only within scriptlets or expressions.
Using these keywords from a method defined in a declaration causes
a translation-time compilation error because such usage causes your
page to reference an undefined variable.
Table 13–2 Reserved Words for Implicit Objects
Reserved Word Description
request
Represents the
HttpServletRequest
object. It contains
information about the request from the browser and has several
useful methods for getting cookie, header, and session data.

Reserved Words for Implicit Objects
13-4 Developing Web Applications, Servlets, and JSPs for Oracle WebLogic Server
response
Represents the
HttpServletResponse
object and several useful
methods for setting the response sent back to the browser from
your JSP page. Examples of these responses include cookies and
other header information.
Note: You cannot use the
response.getWriter()
method from
within a JSP page; if you do, a run-time exception is thrown. Use
the
out
keyword to send the JSP response back to the browser
from within your scriptlet code whenever possible. The
WebLogic Server implementation of
javax.servlet.jsp.JspWriter
uses
javax.servlet.ServletOutputStream
, which implies that you
can use
response.getServletOutputStream()
. Keep in mind,
however, that this implementation is specific to WebLogic
Server. To keep your code maintainable and portable, use the
out
keyword.
out
An instance of
javax.jsp.JspWriter
that has several methods
you can use to send output back to the browser.
If you are using a method that requires an output stream, then
JspWriter
does not work. You can work around this limitation
by supplying a buffered stream and then writing this stream to
out
. For example, the following code shows how to write an
exception stack trace to
out
:
ByteArrayOutputStream ostr = new
ByteArrayOutputStream();
exception.printStackTrace(new PrintWriter(ostr));
out.print(ostr);
pageContext
Represents a
javax.servlet.jsp.PageContext object
. It is a
convenience API for accessing various scoped namespaces and
servlet-related objects, and provides wrapper methods for
common servlet-related functionality.
session
Represents a
javax.servlet.http.HttpSession
object for the
request. The session directive is set to true by default, so the
session
is valid by default. The JSP 2.1 specification states that if
the session directive is set to
false
, then using the
session
keyword results in a fatal translation time error.
application
Represents a
javax.servlet.ServletContext
object. Use it to
find information about the servlet engine and the servlet
environment.
When forwarding or including requests, you can access the
servlet
requestDispatcher
using the
ServletContext
, or you
can use the JSP
forward
directive for forwarding requests to
other servlets, and the JSP
include
directive for including
output from other servlets.
config
Represents a
javax.servlet.ServletConfig
object and provides
access to the servlet instance initialization parameters.
page
Represents the servlet instance generated from this JSP page. It is
synonymous with the Java keyword
this
when used in your
scriptlet code.
To use
page
, you must cast it to the class type of the servlet that
implements the JSP page, because it is defined as an instance of
java.lang.Object
. By default, the servlet class is named after
the JSP filename. For convenience, we recommend that you use
the Java keyword
this
to reference the servlet instance and get
access to initialization parameters, instead of using
page
.
Table 13–2 (Cont.) Reserved Words for Implicit Objects
Reserved Word Description

Declarations
WebLogic JSP Reference 13-5
13.4 Directives for WebLogic JSP
Use directives to instruct WebLogic JSP to perform certain functions or interpret the
JSP page in a particular way. You can insert a directive anywhere in a JSP page. The
position is generally irrelevant (except for the include directive), and you can use
multiple directive tags. A directive consists of a directive type and one or more
attributes of that type.
You can use either of two types of syntax: shorthand or XML:
■ Shorthand:
<%@ dir_type dir_attr %>
■ XML:
<jsp:directive.dir_type dir_attr />
Replace
dir_type
with the directive type, and
dir_attr
with a list of one or more
directive attributes for that directive type.
There are three types of directives page, taglib, or include.
13.4.1 Using the page Directive to Set Character Encoding
To specify a character encoding set, use the following directive at the top of the page:
<%@ page contentType="text/html; charset=custom-encoding" %>
The character set you specify with a
contentType
directive specifies the character set
used in the JSP as well as any JSP included in that JSP.
You can specify a default character encoding by specifying it in the WebLogic-specific
deployment descriptor for your Web application.
13.4.2 Using the taglib Directive
Use a
taglib
directive to declare that your JSP page uses custom JSP tag extensions
that are defined in a tag library. For details about writing and using custom JSP tags,
see Developing JSP Tag Extensions for Oracle WebLogic Server.
13.5 Declarations
Use declarations to define variables and methods at the class-scope level of the
generated JSP servlet. Declarations made between JSP tags are accessible from other
declarations and scriptlets in your JSP page. For example:
<%!
int i=0;
String foo= "Hello";
private void bar() {
// ...java code here...
}
%>
Remember that class-scope objects are shared between multiple threads being
executed in the same instance of a servlet. To guard against sharing violations,
synchronize class scope objects. If you are not confident writing thread-safe code, you
can declare your servlet as not-thread-safe by including the following directive:
<%@ page isThreadSafe="false" %>
By default, this attribute is set to true. Setting
isThreadSafe
to
false
consumes
additional memory and can cause performance to degrade.

Scriptlets
13-6 Developing Web Applications, Servlets, and JSPs for Oracle WebLogic Server
13.6 Scriptlets
JSP scriptlets make up the Java body of your JSP servlet's HTTP response. To include a
scriptlet in your JSP page, use the shorthand or XML scriptlet tags shown here:
Shorthand:
<%
// Your Java code goes here
%>
XML:
<jsp:scriptlet>
// Your Java code goes here
</jsp:scriptlet>
Note the following features of scriptlets:
■ You can have multiple blocks of scriptlet Java code mixed with plain HTML.
■ You can switch between HTML and Java code anywhere, even within Java
constructs and blocks. In Section 13.8, "Example of a JSP with HTML and
Embedded Java" the example declares a Java loop, switches to HTML, and then
switches back to Java to close the loop. The HTML within the loop is generated as
output multiple times as the loop iterates.
■ You can use the predefined variable
out
to print HTML text directly to the servlet
output stream from your Java code. Call the
print()
method to add a string to the
HTTP page response.
■ Any time you print data that a user has previously supplied, Oracle recommends
that you remove any HTML special characters that a user might have entered. If
you do not remove these characters, your Web site could be exploited by cross-site
scripting. For more information, refer to Section 13.10, "JSP Expression Language".
■ The Java tag is an inline tag; it does not force a new paragraph.
13.7 Expressions
To include an expression in your JSP file, use the following tag:
<%= expr %>
Replace expr with a Java expression. When the expression is evaluated, its
string
representation is placed inline in the HTML response page. It is shorthand for
<% out.print( expr ); %>
This technique enables you to make your HTML more readable in the JSP page. Note
the use of the expression tag in the example in the next section.
Expressions are often used to return data that a user has previously supplied. Any
time you print user-supplied data, Oracle recommends that you remove any HTML
special characters that a user might have entered. If you do not remove these
characters, your Web site could be exploited by cross-site scripting. For more
information, refer to Section 13.10, "JSP Expression Language".
13.8 Example of a JSP with HTML and Embedded Java
The following example shows a JSP with HTML and embedded Java:
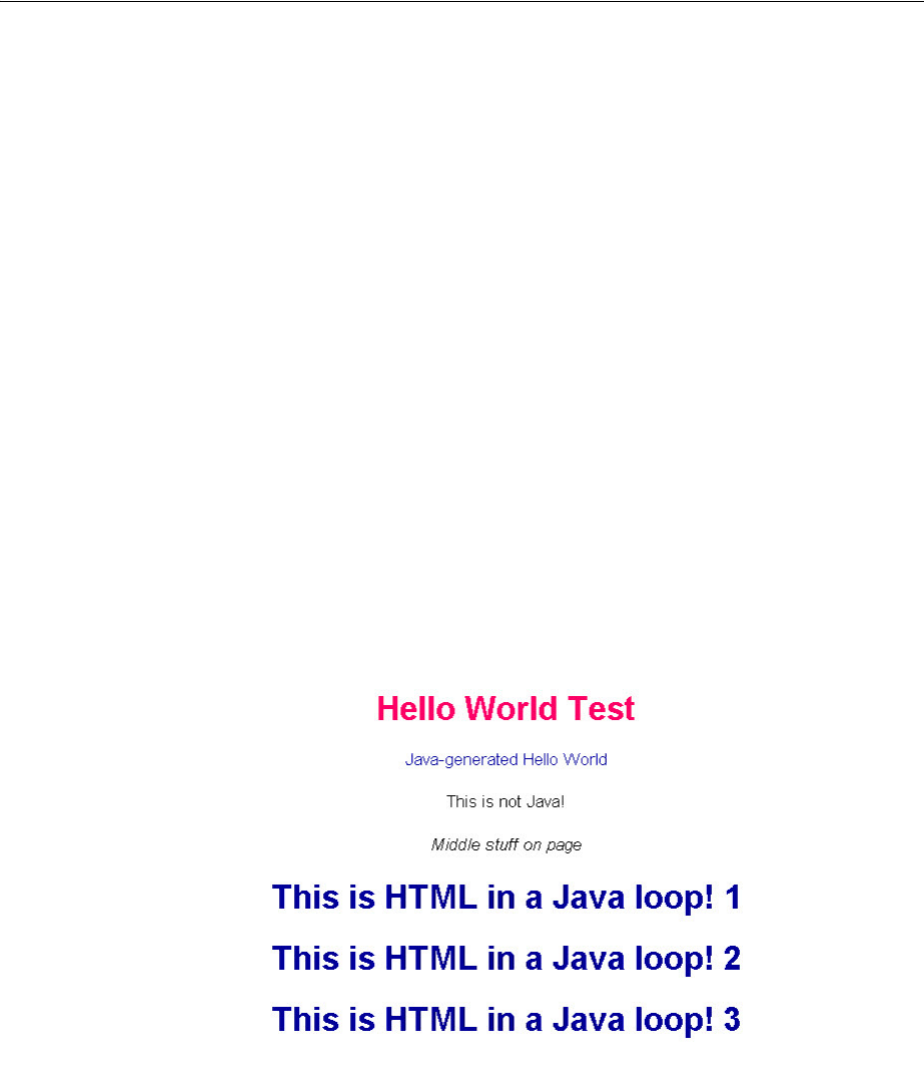
Actions
WebLogic JSP Reference 13-7
<html>
<head><title>Hello World Test</title></head>
<body bgcolor=#ffffff>
<center>
<h1> <font color=#DB1260> Hello World Test </font></h1>
<font color=navy>
<%
out.print("Java-generated Hello World");
%>
</font>
<p> This is not Java!
<p><i>Middle stuff on page</i>
<p>
<font color=navy>
<%
for (int i = 1; i<=3; i++) {
%>
<h2>This is HTML in a Java loop! <%= i %> </h2>
<%
}
%>
</font>
</center>
</body>
</html>
After the code shown here is compiled, the resulting page is displayed in a browser as
follows:
13.9 Actions
You use JSP actions to modify, use, or create objects that are represented by JavaBeans.
Actions use XML syntax exclusively.
13.9.1 Using JavaBeans in JSP
The
<jsp:useBean>
action tag allows you to instantiate Java objects that comply with
the JavaBean specification, and to refer to them from your JSP pages.
To comply with the JavaBean specification, objects need:

Actions
13-8 Developing Web Applications, Servlets, and JSPs for Oracle WebLogic Server
■ A public constructor that takes no arguments
■ A
setVariable()
method for each
variable
field
■ A
getVariable()
method for each
variable
field
13.9.1.1 Instantiating the JavaBean Object
The
<jsp:useBean>
tag attempts to retrieve an existing named Java object from a
specific scope and, if the existing object is not found, may attempt to instantiate a new
object and associate it with the name given by the
id
attribute. The object is stored in a
location given by the
scope
attribute, which determines the availability of the object.
For example, the following tag attempts to retrieve a Java object of type
examples.jsp.ShoppingCart
from the HTTP session under the name
cart
.
<jsp:useBean id="cart"
class="examples.jsp.ShoppingCart" scope="session"/>
If such an object does not currently exist, the JSP attempts to create a new object, and
stores it in the HTTP session under the name
cart
. The class should be available in the
CLASSPATH
used to start WebLogic Server, or in the
WEB-INF/classes
directory of the
Web application containing the JSP.
It is good practice to use an
errorPage
directive with the
<jsp:useBean>
tag because
there are run-time exceptions that must be caught. If you do not use an
errorPage
directive, the class referenced in the JavaBean cannot be created, an
InstantiationException
is thrown, and an error message is returned to the browser.
You can use the
type
attribute to cast the JavaBean type to another object or interface,
provided that it is a legal type cast operation within Java. If you use the attribute
without the
class
attribute, your JavaBean object must already exist in the scope
specified. If it is not legal, an
InstantiationException
is thrown.
13.9.1.2 Doing Setup Work at JavaBean Instantiation
The
<jsp:useBean>
tag syntax has another format that allows you to define a body of
JSP code that is executed when the object is instantiated. The body is not executed if
the named JavaBean already exists in the specified scope. This format allows you to set
up certain properties when the object is first created. For example:
<jsp:useBean id="cart" class="examples.jsp.ShoppingCart"
scope=session>
Creating the shopping cart now...
<jsp:setProperty name="cart"
property="cartName" value="music">
</jsp:useBean>
13.9.1.3 Using the JavaBean Object
After you instantiate the JavaBean object, you can refer to it by its
id
name in the JSP
file as a Java object. You can use it within scriptlet tags and expression evaluator tags,
Note: If you use the
type
attribute without the
class
attribute, a
JavaBean object is never instantiated, and you should not attempt to
use the tag format to include a body. Instead, use the single tag
format. In this case, the JavaBean must exist in the specified scope, or
an
InstantiationException
is thrown. Use an
errorPage
directive to
catch the potential exception.

Actions
WebLogic JSP Reference 13-9
and you can invoke its
setXxx()
or
getXxx()
methods using the
<jsp:setProperty>
and
<jsp:getProperty>
tags, respectively.
13.9.1.4 Defining the Scope of a JavaBean Object
Use the
scope
attribute to specify the availability and life-span of the JavaBean object.
The scope can be one of the following:
For more information about using JavaBeans, see
http://www.oracle.com/technetwork/java/javase/tech/index-jsp-138795.html
.
13.9.2 Forwarding Requests
If you are using any type of authentication, a forwarded request made with the
<jsp:forward> tag, by default, does not require the user to be re-authenticated. You can
change this behavior to require authentication of a forwarded request by adding the
<check-auth-on-forward/> element to the <container-descriptor> element of the
WebLogic-specific deployment descriptor, weblogic.xml. For example:
<container-descriptor>
<check-auth-on-forward/>
</container-descriptor>
13.9.3 Including Requests
You can use the <jsp:include> tag to include another resource in a JSP. This tag takes
two attributes:
page
—Use the page attribute to specify the included resource. For example:
<jsp:include page="somePage.jsp"/>
flush
—Setting this boolean attribute to
true
buffers the page output and then flushes
the buffer before including the resource. Setting
flush="false"
can be useful when the
<jsp:include>
tag is located within another tag on the JSP page and you want the
included resource to be processed by the tag.
Table 13–3 Defining the Scope attribute of a JavaBean Object
Scope Description
page
This is the default scope for a JavaBean, which stores the object in the
javax.servlet.jsp.PageContext
of the current page. It is available only from the
current invocation of this JSP page. It is not available to included JSP pages, and it is
discarded upon completion of this page request.
request
When the
request
scope is used, the object is stored in the current
ServletRequest
,
and it is available to other included JSP pages that are passed the same request
object. The object is discarded when the current request is completed.
session
Use the
session
scope to store the JavaBean object in the HTTP session so that it can
be tracked across several HTTP pages. The reference to the JavaBean is stored in the
page's
HttpSession
object. Your JSP pages must be able to participate in a session to
use this scope. That is, you must not have the
page
directive
session
set to
false
.
application
At the
application-scope
level, your JavaBean object is stored in the Web
application. Use of this scope implies that the object is available to any other servlet
or JSP page running in the same Web application in which the object is stored.

JSP Expression Language
13-10 Developing Web Applications, Servlets, and JSPs for Oracle WebLogic Server
13.10 JSP Expression Language
The JSP expression language is inspired by both ECMAScript and the XPath
expression languages. The JSP EL is available in attribute values for standard and
custom actions and within template text. In both cases, the JSP EL is invoked
consistently by way of the construct
#{expr}
or
${expr}
.
The
#{expr}
syntax refers to deferred expressions introduced in JSP EL 2.1.
Expressions delimited by "
#{}
" use "deferred evaluation" because the expression is not
evaluated until its value is needed by the system, and so can be processed by the
underlying mechanism at the appropriate moment within its life cycle. Whereas,
expressions delimited by "
${}
" use "immediate evaluation" because the expression is
compiled when the JSP page is compiled and it is executed when the JSP page is
executed. The deferred expression includes deferred
ValueExpression
and deferred
MethodExpression
. The
${expr}
syntax is supported in JSP EL 2.1.
The addition of the JSP EL to the JSP technology better facilitates the writing of
scriptlets JSP pages. These pages can use JSP EL expressions but cannot use Java
scriptlets, Java expressions, or Java declaration elements. You can enforce this usage
pattern through the
scripting-invalid
JSP configuration element of the
web.xml
deployment descriptor.
WebLogic Server now supports EL 2.2 which is a maintenance release for EL 2.1. For
more information on the JSP expression language, see
http://jcp.org/aboutJava/communityprocess/mrel/jsr245/index.html
.
13.10.1 Expressions and Attribute Values
You can use JSP EL expressions in any attribute that can accept a run-time expression,
whether it is a standard action or a custom action. The following are use-cases for
expressions in attribute values:
■ The attribute value contains a single expression construct of either
<some:tag
value="${expr}"/>
or
<some:tag value="#{expr}"/>
. In this case, the expression
is evaluated and the result is coerced to the attribute's expected type according to
the type conversion rules described in "Type Conversions," at
http://jcp.org/aboutJava/communityprocess/mrel/jsr245/index.html
.
■ The attribute value contains one or more expressions separated or surrounded by
text of either:
<some:tag value="some${expr}${expr}text${expr}"/>
or
<some:tag value="some#{expr}#{expr}text#{expr}"/>
. In this case, the
expressions are evaluated from left to right, coerced to Strings (according to the
type conversion rules described later), and concatenated with any intervening text.
The resulting String is then coerced to the attribute's expected type according to
the type conversion rules described in "Type Conversions," at
http://jcp.org/aboutJava/communityprocess/mrel/jsr245/index.html
.
■ The attribute value contains only text:
<some:tag value="sometext"/>
. In this
case, the attribute's String value is coerced to the attribute's expected type
according to the type conversion rules described in "Type Conversions," at
http://jcp.org/aboutJava/communityprocess/mrel/jsr245/index.html
.
The following two conditions must be satisfied when using JSPX:
Note: These rules are equivalent to the JSP 2.1 conversions, except
that empty strings are treated differently.

JSP Expression Language Implicit Objects
WebLogic JSP Reference 13-11
■
web.xml
– The
web-app
must define the servlet version attribute as
2.4
or higher;
otherwise, all EL functions are ignored.
■ TLD file – Namespace declaration is required for the
jsp
prefix, as follows:
<html xmlns:jsp="http://java.sun.com/JSP/Page";
The following shows a conditional action that uses the JSP EL to test whether a
property of a bean is less than 3.
<c:if test="${bean1.a < 3}">
...
</c:if>
Note that the normal JSP coercion mechanism already allows for: <mytags:if
test="true" />. There may be literal values that include the character sequence ${. If
this is the case, a literal with that value can be used as shown here:
<mytags:example code="an expression is ${'${'}expr}" />
The resulting attribute value would then be the string an expression is
${expr}
.
13.10.2 Expressions and Template Text
You can use the JSP EL directly in template text; this can be inside the body of custom
or standard actions or in template text outside of any action. An exception to this use is
if the body of the tag is tag dependent or if the JSP EL is turned off (usually for
compatibility issues) explicitly through a directive or implicitly.
The semantics of a JSP EL expression are the same as with Java expressions: the value
is computed and inserted into the current output. In cases where escaping is desired
(for example, to help prevent cross-site scripting attacks), you can use the JSTL core tag
<c:out>
. For example:
<c:out value="${anELexpression}" />
The following shows a custom action where two JSP EL expressions are used to access
bean properties:
<c:wombat>
One value is ${bean1.a} and another is ${bean2.a.c}.
</c:wombat>
13.11 JSP Expression Language Implicit Objects
There are several implicit objects that are available to JSP EL expressions used in JSP
pages. These objects are always available under these names:
■
pageContext
—Represents the
pageContext
object.
■
pageScope
—Represents a Map that maps page-scoped attribute names to their
values.
■
requestScope
—Represents a Map that maps request-scoped attribute names to
their values.
■
sessionScope
—Represents a Map that maps session-scoped attribute names to
their values.
■
applicationScope
—Represents a Map that maps application-scoped attribute
names to their values.
JSP Expression Language Literals and Operators
13-12 Developing Web Applications, Servlets, and JSPs for Oracle WebLogic Server
■
param
—Represents a Map that maps parameter names to a single String parameter
value (obtained by calling
ServletRequest.getParameter(String name)
).
■
paramValues
—Represents a Map that maps parameter names to a single
String[]
of all values for that parameter (obtained by calling
ServletRequest.getParameterValues(String name)
).
■
header
—Represents a Map that maps header names to a single String header
value (obtained by calling
ServletRequest.getHeader(string name)
).
■
headerValues
—Represents a Map that maps header names to a
String[]
of all
values for that header (obtained by calling
ServletRequest.getHeaders(String
name)
).
■
cookie
—Represents a Map that maps cookie names to a single Cookie object.
Cookies are retrieved according to the semantics of
HttpServletRequest.getCookies()
. If the same name is shared by multiple
cookies, an implementation must use the first one encountered in the array of
Cookie objects returned by the
getCookies()
method. However, users of the
cookie implicit objects must be aware that the ordering of cookies is currently
unspecified in the servlet specification.
■
initParam
—Represents a Map that maps context initialization parameter names to
their String parameter value (obtained by calling
ServletRequest.getInitParameter(String name)
).
Table 13–4 shows some examples of using these implicit objects:
13.12 JSP Expression Language Literals and Operators
These sections discuss JSP EL expression literals and operators. The JSP EL syntax is
pretty straightforward. Variables are accessed by name. A generalized [] operator can
be used to access maps, lists, arrays of objects and properties of JavaBean objects; the
operator can be nested arbitrarily. The . operator can be used as a convenient
shorthand for property access when the property name follows the conventions of Java
identifies. However the [] operator allows for more generalized access.
Relational comparisons are allowed using the standard Java relational operators.
Comparisons may be made against other values, or against boolean (for equality
comparisons only), String, integer, or floating point literals. Arithmetic operators can
be used to compute integer and floating point values. Logical operators are available.
13.12.1 Literals
Literals exist for boolean, integer, floating point, string, null.
■ Boolean - true and false
Table 13–4 Example Uses of Implicit Objects
Expression Description
${pageContext.request.re
questURI}
The request's URI (obtained from
HttpServletRequest
)
${sessionScope.profile}
The session-scoped attribute named profile (
null
if not found)
${param.productId}
The String value of the
productId
parameter (
null
if not
found).
${paramValues.productId}
The
String[]
containing all values of the
productId
parameter
(
null
if not found).

JSP Expression Language Literals and Operators
WebLogic JSP Reference 13-13
■ Integer - As defined by the
IntegerLiteral
construct in "Collected Syntax," in the
JSP 2.1 EL specification.
■ Floating point - As defined by the
FloatingPointLiteral
construct in "Collected
Syntax," in the JSP 2.1 EL specification.
■ String -With single and double quotes - " is escaped as \", ' is escaped as \', and \
is escaped as \\. Quotes only need to be escaped in a string value enclosed in the
same type of quote.
■ Null - null
13.12.2 Errors, Warnings, Default Values
JSP pages are mostly used in presentation, and in that usage, experience suggests that
it is most important to be able to provide as good a presentation as possible, even
when there are simple errors in the page. To meet this requirement, the JSP EL does
not provide warnings, just default values and errors. Default values are typecorrect
values that are assigned to a subexpression when there is some problem. An error is an
exception thrown (to be handled by the standard JSP machinery).
13.12.3 Operators
The following is a list of operators provided by the JSP expression language:
■ . and []
■ Arithmetic: +, - (binary), *, / and div, % and mod, - (unary)
■ Logical: and, &&, or, ||, not, !
■ Relational: ==, eq, !=, ne, <, lt, >, gt, <=, ge, >=, le. Comparisons can be made
against other values, or against boolean, string, integer, or floating point literals.
■ Empty: The empty operator is a prefix operation that can be used to determine
whether a value is null or empty.
■ Conditional: A ? B : C. Evaluate B or C, depending on the result of the evaluation
of A.
For more information about the operators and their functions, see the JSP 2.2
specification.
13.12.4 Operator Precedence
The following is operator precedence, from highest to lowest, left-to-right.
■ [] .
■ ()
■ - (unary) not ! empty
■ * / div % mod
■ + - (binary)
■ < > <= >= lt gt le ge
■ == != eq ne
■ && and
■ || or

JSP Expression Language Reserved Words
13-14 Developing Web Applications, Servlets, and JSPs for Oracle WebLogic Server
■ ? :
13.13 JSP Expression Language Reserved Words
The following words are reserved for the language and should not be used as
identifiers.
■ and
■ eq
■ gt
■ true
■ instanceof
■ or
■ ne
■ le
■ false
■ empty
■ not
■ lt
■ ge
■ null
■ div
■ mod
13.14 JSP Expression Language Named Variables
A core concept in the JSP EL is the evaluation of a variable name into an object. The
JSP EL API provides a generalized mechanism, a VariableResolver, that will resolve
names into objects. The default resolver is what is used in the evaluation of JSP EL
expressions in template and attributes. This default resolver provides the implicit
objects discussed in Section 13.11, "JSP Expression Language Implicit Objects".
The default resolver also provides a map for other identifiers by looking up its value
as an attribute, according to the behavior of
PageContext.findAttribute(String)
on
the
pageContext
object. For example:
${product}
.
This expression looks for the attribute named product, searching the page, request,
session, and application scopes, and returns its value. If the attribute is not found, null
is returned. See "Expression Language API," of the JSP 2.2 specification. for further
details on the VariableResolver and how it fits with the evaluation API.
Note: Many of these words are not in the language now, but they
may be in the future, so developers should avoid using these words
now.

Securing User-Supplied Data in JSPs
WebLogic JSP Reference 13-15
13.15 Securing User-Supplied Data in JSPs
Expressions and scriptlets enable a JSP to receive data from a user and return the user
supplied data. For example, the sample JSP in Example 13–1 prompts a user to enter a
string, assigns the string to a parameter named
userInput
, and then uses the
<%=
javax.servlet.ServletRequest.getParameter("userInput")%>
expression to return
the data to the browser.
Example 13–1 Using Expressions to Return User-Supplied Content
<html>
<body>
<h1>My Sample JSP</h1>
<form method="GET" action="mysample.jsp">
Enter string here:
<input type="text" name="userInput" size=50>
<input type=submit value="Submit">
</form>
<br>
<hr>
<br>
Output from last command:
<%= javax.servlet.ServletRequest.getParameter("userInput")%>
</body>
</html>
This ability to return user-supplied data can present a security vulnerability called
cross-site scripting, which can be exploited to steal a user's security authorization. For
a detailed description of cross-site scripting, refer to "Understanding Malicious
Content Mitigation for Web Developers" (a CERT security advisory) at
http://www.cert.org/tech_tips/malicious_code_mitigation.html
.
To remove the security vulnerability, before you return data that a user has supplied,
scan the data for any of the HTML special characters in Table 13–5. If you find any
special characters, replace them with their HTML entity or character reference.
Replacing the characters prevents the browser from executing the user-supplied data
as HTML.
13.15.1 Using a WebLogic Server Utility Method
WebLogic Server provides the
weblogic.servlet.security.Utils.encodeXSS()
method to replace the special characters in user-supplied data. To use this method,
provide the user-supplied data as input. For example:
<%= weblogic.servlet.security.Utils.encodeXSS(
javax.servlet.ServletRequest.getParameter("userInput"))%>
Table 13–5 HTML Special Characters that Must Be Replaced
Replace this special character: With this entity/character reference:
<
<
>
>
(
&40;
)
&41;
#
&35;
&
&38;
Using Sessions with JSP
13-16 Developing Web Applications, Servlets, and JSPs for Oracle WebLogic Server
To secure an entire application, you must use the
encodeXSS()
method each time you
return user-supplied data. While the previous example is an obvious location in which
to use the
encodeXSS()
method, Table 13–6 describes other locations to consider using
the
encodeXSS()
method.
13.16 Using Sessions with JSP
Sessions in WebLogic JSP perform according to the JSP 2.2 specification. The following
suggestions pertain to using sessions:
■ Store small objects in sessions. For example, a session should not be used to store
an EJB, but an EJB primary key instead. Store large amounts of data in a database.
The session should hold only a simple string reference to the data.
■ When you use sessions with dynamic reloading of servlets or JSPs, the objects
stored in the servlet session must be serializable. Serialization is required because
the servlet is reloaded in a new class loader, which results in an incompatibility
between any classes loaded previously (from the old version of the servlet) and
any classes loaded in the new class loader (for the new version of the servlet
classes). This incompatibility causes the servlet to return
ClassCastException
errors.
■ If session data must be of a user-defined type, the data class should be serializable.
Furthermore, the session should store the serialized representation of the data
object. Serialization should be compatible across versions of the data class.
13.17 Deploying Applets from JSP
Using the JSP provides a convenient way to include the Java Plug-in a Web page, by
generating HTML that contains the appropriate client browser tag. The Java Plug-in
allows you to use a Java Runtime Environment (JRE) instead of the JVM implemented
by the client Web browser. This feature avoids incompatibility problems between your
applets and specific types of Web browsers. The Java Plug-in is available at
http://www.oracle.com/technetwork/java/index-jsp-141438.html
.
Because the syntax used by Internet Explorer and Netscape is different, the servlet
code generated from the
<jsp:plugin>
action dynamically senses the type of browser
client and sends the appropriate
<OBJECT>
or
<EMBED>
tags in the HTML page.
The
<jsp:plugin>
tag uses many attributes similar to those of the
<APPLET>
tag, and
some other attributes that allow you to configure the version of the Java Plug-in to be
used. If the applet communicates with the server, the JVM running your applet code
must be compatible with the JVM running WebLogic Server.
In the following example, the plug-in action is used to deploy an applet:
<jsp:plugin type="applet" code="examples.applets.PhoneBook1"
Table 13–6 Code that Returns User-Supplied Data
Page Type User-Supplied Data Example
Error page Erroneous input string, invalid
URL, user name
An error page that says "user name is not
permitted access."
Status page User Name, summary of input
from previous pages
A summary page that asks a user to
confirm input from previous pages.
Database
display
Data presented from a database A page that displays a list of database
entries that have been previously entered
by a user.

Using the WebLogic JSP Compiler
WebLogic JSP Reference 13-17
codebase="/classes/" height="800" width="500"
jreversion="2.0"
nspluginurl=
"http://java.sun.com/products/plugin/1.1.3/plugin-install.html"
iepluginurl=
"http://java.sun.com/products/plugin/1.1.3/
jinstall-113-win32.cab#Version=1,1,3,0" >
<jsp:params>
<param name="weblogic_url" value="t3://localhost:7001">
<param name="poolname" value="demoPool">
</jsp:params>
<jsp:fallback>
<font color=#FF0000>Sorry, cannot run java applet!!</font>
</jsp:fallback>
</jsp:plugin>
The sample JSP syntax shown here instructs the browser to download the Java Plug-in
version 1.3.1 (if it has not been downloaded previously), and run the applet identified
by the
code
attribute from the location specified by
codebase
.
The
jreversion
attribute identifies the spec version of the Java Plug-in that the applet
requires to operate. The Web browser attempts to use this version of the Java Plug-in.
If the plug-in is not already installed on the browser, the
nspluginurl
and
iepluginurl
attributes specify URLs where the Java Plug-in can be downloaded from
http://www.oracle.com/technetwork/java/index-jsp-141438.html
. Once the
plug-in is installed on the Web browser, it is not downloaded again.
Because WebLogic Server uses the Java 1.3.x VM, you must specify the Java Plug-in
version 1.3.x in the
<jsp:plugin>
tag. To specify the 1.3 JVM in the previous example
code, replace the corresponding attribute values with the following:
jreversion="1.3"
nspluginurl=
"http://java.sun.com/products/plugin/1.3/plugin-install.html"
iepluginurl=
"http://java.sun.com/products/plugin/1.3/jinstall-131-win32.cab"
The other attributes of the plug-in action correspond with those of the
<APPLET>
tag.
You specify applet parameters within a pair of
<params>
tags, nested within the
<jsp:plugin>
and
</jsp:plugin>
tags.
The
<jsp:fallback>
tags allow you to substitute HTML for browsers that are not
supported by the
<jsp:plugin>
action. The HTML nested between the
<fallback>
and
</jsp:fallback>
tags is sent instead of the plug-in syntax.
13.18 Using the WebLogic JSP Compiler
For better compilation performance, the WebLogic JSP compiler transforms a JSP
directly into a class file on the disk instead of first creating a java file on the disk and
then compiling it into a class file. The java file only resides in memory.
Note: The WebLogic JSP compiler is deprecated. Oracle recommends
that you use the WebLogic appc compiler,
weblogic.appc
, to compile
EAR files, WAR files and EJBs. See "appc Reference" in Developing
Enterprise JavaBeans, Version 2.1, for Oracle WebLogic Server.

Using the WebLogic JSP Compiler
13-18 Developing Web Applications, Servlets, and JSPs for Oracle WebLogic Server
To see the generated java file, turn on the -keepgenerated flag which dumps the
in-memory java file to the disk.
13.18.1 JSP Compiler Syntax
The JSP compiler works in much the same way that other WebLogic compilers work
(including the RMI and EJB compilers). To start the JSP compiler, enter the following
command.
$ java weblogic.jspc -options fileName
Replace
fileName
with the name of the JSP file that you want to compile. You can
specify any
options
before or after the target
fileName
. The following example uses
the
-d
option to compile
myFile.jsp
into the destination directory,
weblogic/classes
:
$ java weblogic.jspc -d /weblogic/classes myFile.jsp
13.18.2 JSP Compiler Options
Use any combination of the following options:
Note: During JSP compilation, neither the command line flag
(compilerclass) nor the descriptor element is invoked.
Note: If you are precompiling JSPs that are part of a Web application
and that reference resources in the Web application (such as a JSP tag
library), you must use the
-webapp
flag to specify the location of the
Web application. The
-webapp
flag is described in the following listing
of JSP compiler options.
Table 13–7 JSP Compiler Options
Option Description
-classpath
Add a list (separated by semi-colons on Windows NT/2000
platforms or colons on UNIX platforms) of directories that make
up the desired
CLASSPATH
. Include directories containing any
classes required by the JSP. For example (to be entered on one
line):
$ java weblogic.jspc -classpath
java/classes.zip;/weblogic/classes.zip myFile.JSP
-charsetMap
Specifies mapping of IANA or unofficial charset names used in
JSP
contentType
directives to java charset names. For example:
-charsetMap x-sjis=Shift_JIS,x-big5=Big5
The most common mappings are built into the JSP compiler. Use
this option only if a desired charset mapping is not recognized.
-commentary
Causes the JSP compiler to include comments from the JSP in the
generated HTML page. If this option is omitted, comments do
not appear in the generated HTML page.
-compileAll
Recursively compiles all JSPs in the current directory, or in the
directory specified with the
-webapp
flag. (See the listing for
-webapp
in this list of options.). JSPs in subdirectories are also
compiled.

Using the WebLogic JSP Compiler
WebLogic JSP Reference 13-19
-compileFlags
Passes one or more command-line flags to the compiler. Enclose
multiple flags in quotes, separated by a space. For example:
java weblogic.jspc -compileFlags "-g -v" myFile.jsp
-compiler
Specifies the Java compiler to be used to compile the class file
from the generated Java source code. The default compiler used
is
jdt
. The Java compiler program should be in your
PATH
unless
you specify the absolute path to the compiler explicitly.
-compilerclass
Runs a Java compiler as a Java class and not as a native
executable.
-compressHtmlTemplate
Compress the HTML in the JSP template blocks to improve
run-time performance.
If the JSP's HTML template block contains the
<pre>
tag, do not
enable this option.
-d <dir>
Specifies the destination of the compiled output (that is, the class
file). Use this option as a shortcut for placing the compiled
classes in a directory that is already in your
CLASSPATH
.
-depend
If a previously generated class file for a JSP has a more recent
date stamp than the JSP source file, the JSP is not recompiled.
-debug
Compile with debugging on.
-deprecation
Warn about the use of deprecated methods in the generated Java
source file when compiling the source file into a class file.
-docroot directory
See
-webapp
.
-encoding default|named
character encoding
Valid arguments include (a)
default
which specifies using the
default character encoding of your JDK, (b) a named character
encoding, such as
8859_1
. If the
-encoding
flag is not specified,
an array of bytes is used.
-g
Instructs the Java compiler to include debugging information in
the class file.
-help
Displays a list of all the available flags for the JSP compiler.
-J
Takes a list of options that are passed to your compiler.
-k
When compiling multiple JSPs with a single command, the
compiler continues compiling even if one or more of the JSPs
failed to compile.
-keepgenerated
Keeps the Java source code files that are created as an
intermediary step in the compilation process. Normally these
files are deleted after compilation.
-noTryBlocks
If a JSP file has numerous or deeply nested custom JSP tags and
you receive a
java.lang.VerifyError
exception when
compiling, use this flag to allow the JSPs to compile correctly.
-nowarn
Turns off warning messages from the Java compiler.
-noPrintNulls
Shows "null" in jsp expressions as "".
-O
Compiles the generated Java source file with optimization
turned on. This option overrides the
-g
flag.
-optimizeJavaExpression
Optimize Java expressions to improve run-time performance.
-package packageName
Sets the package name that is prepended to the package name of
the generated Java HTTP servlet. Defaults to
jsp_servlet
.
Table 13–7 (Cont.) JSP Compiler Options
Option Description

Using the WebLogic JSP Compiler
13-20 Developing Web Applications, Servlets, and JSPs for Oracle WebLogic Server
13.18.3 Precompiling JSPs
You can configure WebLogic Server to precompile your JSPs when a Web application is
deployed or re-deployed or when WebLogic Server starts up by setting the
precompile
parameter to true in the
<jsp-descriptor>
element of the
weblogic.xml
deployment
descriptor. To avoid recompiling your JSPs each time the server restarts and when you
target additional servers, precompile them using weblogic.jspc and place them in the
WEB-INF/classes
folder and archive them in a
.war
file. Keeping your source files in a
separate directory from the archived
.war
file will eliminate the possibility of errors
caused by a JSP having a dependency on one of the class files.
13.18.3.1 Using the JSPClassServlet
Another way to prevent your JSPs from recompiling is to use the JSPClassServlet in
place of JSPServlet and to place your precompiled JSPs into the
WEB-INF/classes
directory. This will remove any possibility of the JSPs being recompiled, as the server
will not look at the source code. The server will not note any changes to the JSPs and
recompile them if you choose this option. This option allows you to completely
remove the JSP source code from your application after precompiling.
This is an example of how to add the JSPClassServlet to your Web application's
web.xml
file.
<servlet>
<servlet-name>JSPClassServlet</servlet-name>
<servlet-class>weblogic.servlet.JSPClassServlet</servlet-class>
</servlet>
<servlet-mapping>
<servlet-name>JSPClassServlet</servlet-name>
<url-pattern>*.jsp</url-pattern>
</servlet-mapping>
As when using virtual hosting, you must have physical directories that correspond to
the mappings you create to allow your files to be found by the server.
-superclass classname
Sets the classname of the superclass extended by the generated
servlet. The named superclass must be a derivative of
HttpServlet or GenericServlet
.
-verbose
Passes the
verbose
flag to the Java compiler specified with the
compiler
flag. See the compiler documentation for more
information. The default is
off
.
-verboseJavac
Prints messages generated by the designated JSP compiler.
-version
Prints the version of the JSP compiler.
-webapp directory
Name of a directory containing a Web application in exploded
directory format. If your JSP contains references to resources in a
Web application such as a JSP tag library or other Java classes,
the JSP compiler will look for those resources in this directory. If
you omit this flag when compiling a JSP that requires resources
from a Web application, the compilation will fail.
Table 13–7 (Cont.) JSP Compiler Options
Option Description

14
Filters 14-1
14
Filters
[14]
This chapter describes how to use Java classes known as filters in WebLogic Web
applications.
This chapter includes the following sections:
■ Section 14.1, "Overview of Filters"
■ Section 14.2, "Writing a Filter Class"
■ Section 14.3, "Configuring Filters"
■ Section 14.4, "Filtering the Servlet Response Object"
■ Section 14.5, "Additional Resources"
14.1 Overview of Filters
A filter is a Java class that is invoked in response to a request for a resource in a Web
application. Resources include Java servlets, JavaServer pages (JSP), and static
resources such as HTML pages or images. A filter intercepts the request and can
examine and modify the response and request objects or execute other tasks.
Filters are an advanced Java EE feature primarily intended for situations where the
developer cannot change the coding of an existing resource and needs to modify the
behavior of that resource. Generally, it is more efficient to modify the code to change
the behavior of the resource itself rather than using filters to modify the resource. In
some situations, using filters can add unnecessary complexity to an application and
degrade performance.
14.1.1 How Filters Work
You define filters in the context of a Web application. A filter intercepts a request for a
specific named resource or a group of resources (based on a URL pattern) and executes
the code in the filter. For each resource or group of resources, you can specify a single
filter or multiple filters that are invoked in a specific order, called a chain.
When a filter intercepts a request, it has access to the
javax.servlet.ServletRequest
and
javax.servlet.ServletResponse
objects that provide access to the HTTP request
and response, and a
javax.servlet.FilterChain
object. The
FilterChain
object
contains a list of filters that can be invoked sequentially. When a filter has completed
its work, the filter can either call the next filter in the chain, block the request, throw an
exception, or invoke the originally requested resource.
After the original resource is invoked, control is passed back to the filter at the bottom
of the list in the chain. This filter can then examine and modify the response headers
and data, block the request, throw an exception, or invoke the next filter up from the

Writing a Filter Class
14-2 Developing Web Applications, Servlets, and JSPs for Oracle WebLogic Server
bottom of the chain. This process continues in reverse order up through the chain of
filters.
14.1.2 Uses for Filters
Filters can be useful for the following functions:
■ Implementing a logging function
■ Implementing user-written security functionality
■ Debugging
■ Encryption
■ Data compression
■ Modifying the response sent to the client. (However, post processing the response
can degrade the performance of your application.)
14.2 Writing a Filter Class
To write a filter class, implement the
javax.servlet.Filter
interface (see
http://docs.oracle.com/javaee/6/api/javax/servlet/Filter.html
). You must
implement the following methods of this interface:
■
init()
■
destroy()
■
doFilter()
You use the
doFilter()
method to examine and modify the request and response
objects, perform other tasks such as logging, invoke the next filter in the chain, or
block further processing.
Several other methods are available on the
FilterConfig
object for accessing the name
of the filter, the
ServletContext
and the filter's initialization attributes. For more
information see the Java EE javadocs for
javax.servlet.FilterConfig
at
http://docs.oracle.com/javaee/6/api/javax/servlet/FilterConfig.html
.
To access the next item in the chain (either another filter or the original resource, if that
is the next item in the chain), call the
FilterChain.doFilter()
method.
14.3 Configuring Filters
You configure filters as part of a Web application, using the application's
web.xml
deployment descriptor. In the deployment descriptor, you specify the filter and then
map the filter to a URL pattern or to a specific servlet in the Web application. You can
specify any number of filters.
14.3.1 Configuring a Filter
To configure a filter:
1. Open the
web.xml
deployment descriptor in a text editor or use the
Administration Console. For more information, see Section 2.4, "Web Application
Note: The filter can modify the headers only if the response has not
already been committed.

Configuring Filters
Filters 14-3
Developer Tools". The
web.xml
file is located in the
WEB-INF
directory of your Web
application.
2. Add a filter declaration. The
filter
element declares a filter, defines a name for
the filter, and specifies the Java class that executes the filter. The
filter
element
must directly follow the
context-param
element and directly precede the
listener
and
servlet
elements. For example:
<context-param>Param</context-param>
<filter>
<icon>
<small-icon>MySmallIcon.gif</small-icon>
<large-icon>MyLargeIcon.gif</large-icon>
</icon>
<filter-name>myFilter</filter-name>
<display-name>My Filter</display-name>
<description>This is my filter</description>
<filter-class>examples.myFilterClass</filter-class>
</filter>
<listener>Listener</listener>
<servlet>Servlet</servlet>
The
icon
,
description
, and
display-name
elements are optional.
3. Specify one or more initialization attributes inside a
filter
element. For example:
<filter>
<icon>
<small-icon>MySmallIcon.gif</small-icon>
<large-icon>MyLargeIcon.gif</large-icon>
</icon>
<filter-name>myFilter</filter-name>
<display-name>My Filter</display-name>
<description>This is my filter</description>
<filter-class>examples.myFilterClass</filter-class>
<init-param>
<param-name>myInitParam</param-name>
<param-value>myInitParamValue</param-value>
</init-param>
</filter>
Your
Filter
class can read the initialization attributes using the
FilterConfig.getInitParameter()
or
FilterConfig.getInitParameters()
methods.
4. Add filter mappings. The
filter-mapping
element specifies which filter to execute
based on a URL pattern or servlet name. The
filter-mapping
element must
immediately follow the
filter
element(s).
– To create a filter mapping using a URL pattern, specify the name of the filter
and a URL pattern. URL pattern matching is performed according to the rules
specified in the servlet 3.0 specification at
http://jcp.org/en/jsr/detail?id=315
. For example, the following
filter-mapping
maps
myFilter
to requests that contain
/myPattern/
.
<filter-mapping>
<filter-name>myFilter</filter-name>
<url-pattern>/myPattern/*</url-pattern>
</filter-mapping>

Filtering the Servlet Response Object
14-4 Developing Web Applications, Servlets, and JSPs for Oracle WebLogic Server
– To create a filter mapping for a specific servlet, map the filter to the name of a
servlet that is registered in the Web application. For example, the following
code maps the
myFilter
filter to a servlet called
myServlet
:
<filter-mapping>
<filter-name>myFilter</filter-name>
<servlet-hame>myServlet</servlet-name>
</filter-mapping>
5. To create a chain of filters, specify multiple filter mappings. For more information,
see Section 14.3.2, "Configuring a Chain of Filters".
14.3.2 Configuring a Chain of Filters
WebLogic Server creates a chain of filters by creating a list of all the filter mappings
that match an incoming HTTP request. The ordering of the list is determined by the
following sequence:
1. Filters where the
filter-mapping
element contains a
url-pattern
that matches
the request are added to the chain in the order they appear in the
web.xml
deployment descriptor.
2. Filters where the
filter-mapping
element contains a
servlet-name
that matches
the request are added to the chain after the filters that match a URL pattern.
3. The last item in the chain is always the originally requested resource.
In your filter class, use the
FilterChain.doFilter()
method to invoke the next item in
the chain.
14.4 Filtering the Servlet Response Object
You can use filters to post-process the output of a servlet by appending data to the
output generated by the servlet. However, in order to capture the output of the servlet,
you must create a wrapper for the response. (You cannot use the original response
object, because the output buffer of the servlet is automatically flushed and sent to the
client when the servlet completes executing and before control is returned to the last
filter in the chain.) When you create such a wrapper, WebLogic Server must
manipulate an additional copy of the output in memory, which can degrade
performance.
For more information on wrapping the response or request objects, see
javax.servlet.http.HttpServletResponseWrapper
and
javax.servlet.http.HttpServletRequestWrapper
at
http://docs.oracle.com/javaee/6/api/javax/servlet/http/package-summary.htm
l
.
14.5 Additional Resources
■ Servlet 3.0 specification at
http://jcp.org/en/jsr/detail?id=315
■ Java EE API Reference (Javadocs) at
http://docs.oracle.com/javaee/6/api/index.html
■ The Java EE tutorial at
http://docs.oracle.com/javaee/6/tutorial/doc/

15
Using WebLogic JSP Form Validation Tags 15-1
15
Using WebLogic JSP Form Validation Tags
[15]
This chapter describes how to use WebLogic JavaServer Pages (JSP) form validation
tags.
This chapter includes the following sections:
■ Section 15.1, "Overview of WebLogic JSP Form Validation Tags"
■ Section 15.2, "Validation Tag Attribute Reference"
■ Section 15.3, "Using WebLogic JSP Form Validation Tags in a JSP"
■ Section 15.4, "Creating HTML Forms Using the <wl:form> Tag"
■ Section 15.5, "Using a Custom Validator Class"
■ Section 15.6, "Sample JSP with Validator Tags"
15.1 Overview of WebLogic JSP Form Validation Tags
WebLogic JSP form validation tags provide a convenient way to validate the entries an
end user makes to HTML form text fields generated by JSP pages. Using the WebLogic
JSP form validation tags prevents unnecessary and repetitive coding of commonly
used validation logic. The validation is performed by several custom JSP tags that are
included with the WebLogic Server distribution. The tags can
■ Verify that required fields have been filled in (
Required Field Validator
class).
■ Validate the text in the field against a regular expression (
Regular Expression
Validator
class).
■ Compare two fields in the form (
Compare Validator
class).
■ Perform custom validation by means of a Java class that you write (
Custom
Validator
class).
■ WebLogic JSP form validation tags include:
■
<wl:summary>
■
<wl:form>
■
<wl:validator>
When a validation tag determines that data in a field is not been input correctly, the
page is re-displayed and the fields that need to be re-entered are flagged with text or
an image to alert the end user. Once the form is correctly filled out, the end user's
browser displays a new page specified by the validation tag.

Validation Tag Attribute Reference
15-2 Developing Web Applications, Servlets, and JSPs for Oracle WebLogic Server
15.2 Validation Tag Attribute Reference
This section describes the WebLogic form validation tags and their attributes. Note
that the prefix used to reference the tag can be defined in the
taglib
directive on your
JSP page. For clarity, the
wl
prefix is used to refer to the WebLogic form validation tags
throughout this document.
15.2.1 <wl:summary>
<wl:summary>
is the parent tag for validation. Place the opening
<wl:summary>
tag
before any other element or HTML code in the JSP. Place the closing
</wl:summary>
tag anywhere after the closing
</wl:form>
tag(s).
■
name
—(Optional) Name of a vector variable that holds all validation error
messages generated by the
<wl:validator>
tags on the JSP page. If you do not
define this attribute, the default value,
errorVector
, is used. The text of the error
message is defined with the
errorMessage
attribute of the
<wl:validator>
tag.
To display the values in this vector, use the
<wl:errors/>
tag. To use the
<wl:errors/>
tag, place the tag on the page where you want the output to appear.
For example:
<wl:errors color="red"/>
Alternately, you can use a scriptlet. For example:
<% if (errorVector.size() > 0) {
for (int i=0; i < errorVector.size(); i++) {
out.println((String)errorVector.elementAt(i));
out.println("<br>");
}
} %>
Where errorVector is the name of the vector assigned using the
name
attribute of the
<wl:summary>
tag.
The
name
attribute is required when using multiple forms on a page.
■
headerText
—A variable that contains text that can be displayed on the page. If
you only want this text to appear when errors occur on the page, you can use a
scriptlet to test for this condition. For example:
<% if(summary.size() >0 ) {
out.println(headerText);
}
%>
Where summary is the name of the vector assigned using the
name
attribute of the
<wl:summary>
tag.
■
redirectPage
—URL for the page that is displayed if the form validation does not
return errors. This attribute is not required if you specify a URL in the
action
attribute of the
<wl:form>
tag.
Do not set the
redirectPage
attribute to the same page containing the
<wl:summary>
tag—you will create an infinite loop causing a
StackOverFlow
exception.

Validation Tag Attribute Reference
Using WebLogic JSP Form Validation Tags 15-3
15.2.2 <wl:form>
The
<wl:form>
tag is similar to the HTML
<form>
tag and defines an HTML form that
can be validated using the WebLogic JSP form validation tags. You can define multiple
forms on a single JSP by uniquely identifying each form using the
name
attribute.
■
method
—Enter
GET
or
POST
. Functions exactly as the
method
attribute of the HTML
<form>
tag.
■
action
—URL for the page that is displayed if the form validation does not return
errors. The value of this attribute takes precedence over the value of the
redirectPage attribute of the
<wl:summary>
tag and is useful if you have multiple
forms on a single JSP page.
Do not set the
action
attribute to the same page containing the
<wl:form>
tag—you will create an infinite loop causing a
StackOverFlow
exception.
■
name
—Functions exactly as the
name
attribute of the HTML
<form>
tag. Identifies
the form when multiple forms are used on the same page. The
name
attribute is
also useful for JavaScript references to a form.
15.2.3 <wl:validator>
Use one or more
<wl:validator>
tags for each form field. If, for instance, you want to
validate the input against a regular expression and also require that something be
entered into the field you would use two
<wl:validator>
tags, one using the
RequiredFieldValidator
class and another using the
RegExpValidator
class. (You
need to use both of these validators because blank values are evaluated by the Regular
Expression Field Validator as valid.)
■
errorMessage
—A string that is stored in the vector variable defined by the
name
attribute of the
<wl:summary>
tag.
■
expression
—When using the
RegExpValidator
class, the regular expression to be
evaluated. If you are not using
RegExpValidator
, you can omit this attribute.
■
fieldToValidate
—Name of the form field to be validated. The name of the field is
defined with the
name
attribute of the HTML
<input>
tag.
■
validatorClass
—The name of the Java class that executes the validation logic.
Three classes are provided for your use. You can also create your own custom
validator class. For more information, see Section 15.5, "Using a Custom Validator
Class".
The available validation classes are:
–
weblogicx.jsp.tags.validators.RequiredFieldValidator
—Validates that
some text has been entered in the field.
–
weblogicx.jsp.tags.validators.RegExpValidator
—Validates the text in the
field using a standard regular expression. Note: A blank value is evaluated as
valid.
–
weblogicx.jsp.tags.validators.CompareValidator
—Checks to see if two
fields contain the same string. When using this class, set the
fieldToValidate
attribute to the two fields you want to compare. For example:
fieldToValidate="field_1,field_2"
If both fields are blank, the comparison is evaluated as valid.
– myPackage.myValidatorClass—Specifies a custom validator class.

Using WebLogic JSP Form Validation Tags in a JSP
15-4 Developing Web Applications, Servlets, and JSPs for Oracle WebLogic Server
15.3 Using WebLogic JSP Form Validation Tags in a JSP
To use a validation tag in a JSP:
1. Write the JSP.
a. Enter a taglib directive to reference the
tag
library containing the WebLogic
JSP Form Validation Tags. For example:
<%@ taglib uri="tagl" prefix="wl" %>
Note that the prefix attribute defines the prefix used to reference all tags in
your JSP page. Although you may set the prefix to any value you like, the tags
referred to in this document use the
wl
prefix.
b. Enter the <wl:summary> ... </wl:summary> tags.
Place the opening <wl:summary ...> tag before any HTML code, JSP tag,
scriptlet, or expression on the page.
Place the closing </wl:summary> tag anywhere after the
</wl:form>
tag(s).
c. Define an HTML form using the <wl:form> JSP tag that is included with the
supplied tag library. For more information, see Section 15.2.2, "<wl:form>" and
Section 15.4, "Creating HTML Forms Using the <wl:form> Tag". Be sure to
close the form block with the
</wl:form>
tag. You can create multiple forms
on a page if you uniquely define the
name
attribute of the
<wl:form>
tag for
each form.
d. Create the HTML form fields using the HTML <input> tag.
2. Add <wl:validator> tags. For the syntax of the tags, see Section 15.2.3,
"<wl:validator>". Place
<wl:validator>
tags on the page where you want the
error message or image to appear. If you use multiple forms on the same page,
place the
<wl:validator>
tag inside the
<wl:form>
block containing the form
fields you want to validate.
The following example shows a validation for a required field:
<wl:form name="FirstForm" method="POST" action="thisJSP.jsp">
<wl:validator
errorMessage="Field_1 is required" expression=""
fieldToValidate="field_1"
validatorClass=
"weblogicx.jsp.tags.validators.RequiredFieldValidator"
>
<img src="images/warning.gif">
<font color=red>Field 1 is a required field</font>
</wl:validator>
<p> <input type="text" name = "field_1"> </p>
<p> <input type="text" name = "field_2"> </p>
<p> <input type="submit" value="Submit FirstForm"> </p>
</wl:form>
If the user fails to enter a value in
field_1
, the page is redisplayed, showing a
warning.gif
image, followed by the text (in red) "
Field 1 is a required
field,
" followed by the blank field for the user to re-enter the value.
3. Copy the
weblogic-vtags.jar
file from the
ext
directory of your WebLogic Server
installation into the
WEB-INF/lib
directory of your Web application. You may need
to create this directory.

Creating HTML Forms Using the <wl:form> Tag
Using WebLogic JSP Form Validation Tags 15-5
4.
Configure your Web application to use the tag library by adding a
taglib
element
to the
web.xml
deployment descriptor for the Web application. For example:
<taglib>
<taglib-uri>tagl</taglib-uri>
<taglib-location>
/WEB-INF/lib/weblogic-vtags.jar
</taglib-location>
</taglib>
15.4 Creating HTML Forms Using the <wl:form> Tag
This section contains information on creating HTML forms in your JSP page. You use
the
<wl:form>
tag to create a single form or multiple forms on a page.
15.4.1 Defining a Single Form
Use the
<wl:form>
tag that is provided in the
weblogic-vtags.jar
tag library: For
example:
<wl:form method="POST" action="nextPage.jsp">
<p> <input type="text" name ="field_1"> </p>
<p> <input type="text" name ="field_2"> </p>
<p> <input type="submit" value="Submit Form"> </p>
</wl:form>
For information on the syntax of this tag see Section 15.2.2, "<wl:form>".
15.4.2 Defining Multiple Forms
When using multiple forms on a page, use the
name
attribute to identify each form. For
example:
<wl:form name="FirstForm" method="POST" action="thisJSP.jsp">
<p> <input type="text" name="field_1"> </p>
<p> <input type="text" name="field_2"> </p>
<p> <input type="submit" value="Submit FirstForm"> </p>
</wl:form>
<wl:form name="SecondForm" method="POST" action="thisJSP.jsp">
<p> <input type="text" name="field_1"> </p>
<p> <input type="text" name="field_2"> </p>
<p> <input type="submit" value="Submit SecondForm"> </p>
</wl:form>
15.4.3 Re-Displaying the Values in a Field When Validation Returns Errors
When the JSP page is re-displayed after the validator tag has found errors, it is useful
to re-display the values that the user already entered, so that the user does not have to
fill out the entire form again. Use the
value
attribute of the HTML
<input>
tag or use a
tag library available from the Apache Jakarta Project. Both procedures are described
next.
15.4.3.1 Re-Displaying a Value Using the <input> Tag
You can use the
javax.servlet.ServletRequest.getParameter()
method together
with the
value
attribute of the HTML
<input>
tag to re-display the user's input when
the page is re-displayed as a result of failed validation. For example:

Using a Custom Validator Class
15-6 Developing Web Applications, Servlets, and JSPs for Oracle WebLogic Server
<input type="text" name="field_1"
value="<%= request.getParameter("field_1") %>" >
To prevent cross-site scripting security vulnerabilities, replace any HTML special
characters in user-supplied data with HTML entity references. For more information,
refer to Section 13.10, "JSP Expression Language".
15.4.3.2 Re-Displaying a Value Using the Apache Jakarta <input:text> Tag
You can also use a JSP tag library available free from the Apache Jakarta Project, which
provides the
<input:text>
tag as a replacement for the HTML
<input>
tag. For
example, the following HTML tag:
<input type="text" name="field_1">
could be entered using the Apache tag library as:
<input:text name="field_1">
For more information and documentation, download the Input Tag library, available at
http://attic.apache.org/projects/jakarta-taglibs.html
.
To use the Apache tag library in your JSP:
1. Copy the
input.jar
file from the Input Tag Library distribution file into the
WEB-INF/lib
directory of your Web application.
2. Add the following directive to your JSP:
<%@ taglib uri="input" prefix="input" %>
3. Add the following entry to the
web.xml
deployment descriptor of your Web
application:
<taglib>
<taglib-uri>input</taglib-uri>
<taglib-location>/WEB-INF/lib/input.jar</taglib-location>
</taglib>
15.5 Using a Custom Validator Class
To use your own validator class:
1. Write a Java class that extends the
weblogicx.jsp.tags.validators.CustomizableAdapter
abstract class. For more
information, see Section 15.5.1, "Extending the CustomizableAdapter Class".
2. Implement the
validate()
method. In this method:
a. Look up the value of the field you are validating from the
ServletRequest
object. For example:
String val = req.getParameter("field_1");
b. Return a value of
true
if the field meets the validation criteria.
3. Compile the validator class and place the compiled
.class
file in the
WEB-INF/classes
directory of your Web application.
4. Use your validator class in a
<wl:validator>
tag by specifying the class name in
the
validatorClass
attribute. For example:
<wl:validator errorMessage="This field is required" fieldToValidate="field_1"

Sample JSP with Validator Tags
Using WebLogic JSP Form Validation Tags 15-7
validatorClass="mypackage.myCustomValidator">
15.5.1 Extending the CustomizableAdapter Class
The CustomizableAdapter class is an abstract class that implements the
Customizable
interface and provides the following helper methods:
■
getFieldToValidate()
—Returns the name of the field being validated (defined by
the
fieldToValidate
attribute in the
<wl:validator>
tag)
■
getErrorMessage()
—Returns the text of the error message defined with the
errorMessage
attribute in the
<wl:validator>
tag.
■
getExpression()
—Returns the text of the
expression
attribute defined in the
<wl:validator>
tag.
Instead of extending the
CustomizableAdapter
class, you can implement the
Customizable
interface. For more information, see the Javadocs for
weblogicx.jsp.tags.validators.Customizable
.
15.5.2 Sample User-Written Validator Class
Example 15–1 Example of a User-written Validator Class
import weblogicx.jsp.tags.validators.CustomizableAdapter;
public class myCustomValidator extends CustomizableAdapter{
public myCustomValidator(){
super();
}
public boolean validate(javax.servlet.ServletRequest req)
throws Exception {
String val = req.getParameter(getFieldToValidate());
// perform some validation logic
// if the validation is successful, return true,
// otherwise return false
if (true) {
return true;
}
return false;
}
}
15.6 Sample JSP with Validator Tags
This sample code shows the basic structure of a JSP that uses the WebLogic JSP form
validation tags. A complete functioning code example is also available if you installed
the examples with your WebLogic Server installation. Instructions for running the
example are available at
samples/examples/jsp/tagext/form_
validation/package.html
, in your WebLogic Server installation.
Example 15–2 JSP with WebLogic JSP Form Validation Tags
<%@ taglib uri="tagl" prefix="wl" %>

Sample JSP with Validator Tags
15-8 Developing Web Applications, Servlets, and JSPs for Oracle WebLogic Server
<%@ taglib uri="input" prefix="input" %>
<wl:summary
name="summary"
headerText="<font color=red>Some fields have not been filled out
correctly.</font>"
redirectPage="successPage.jsp"
>
<html>
<head>
<title>Untitled Document</title>
<meta http-equiv="Content-Type" content="text/html; charset=iso-8859-1">
</head>
<body bgcolor="#FFFFFF">
<% if(summary.size() >0 ) {
out.println("<h3>" + headerText + "</h3>");
} %>
<% if (summary.size() > 0) {
out.println("<H2>Error Summary:</h2>");
for (int i=0; i < summary.size(); i++) {
out.println((String)summary.elementAt(i));
out.println("<br>");
}
} %>
<wl:form method="GET" action="successPage.jsp">
User Name: <input:text name="username"/>
<wl:validator
fieldToValidate="username"
validatorClass="weblogicx.jsp.tags.validators.RequiredFieldValidator"
errorMessage="User name is a required field!"
>
<img src=images/warning.gif> This is a required field!
</wl:validator>
<p>
Password: <input type="password" name="password">
<wl:validator
fieldToValidate="password"
validatorClass="weblogicx.jsp.tags.validators.RequiredFieldValidator"
errorMessage="Password is a required field!"
>
<img src=images/warning.gif> This is a required field!
</wl:validator>
<p>
Re-enter Password: <input type="password" name="password2">
<wl:validator
fieldToValidate="password,password2"

Sample JSP with Validator Tags
Using WebLogic JSP Form Validation Tags 15-9
validatorClass="weblogicx.jsp.tags.validators.CompareValidator"
errorMessage="Passwords don't match"
>
<img src=images/warning.gif> Passwords don't match.
</wl:validator>
<p>
<input type="submit" value="Submit Form"> </p>
</wl:form>
</wl:summary>
</body>
</html>

Sample JSP with Validator Tags
15-10 Developing Web Applications, Servlets, and JSPs for Oracle WebLogic Server

16
Using Custom WebLogic JSP Tags (cache, process, repeat) 16-1
16
Using Custom WebLogic JSP Tags (cache,
process, repeat)
[16]
This chapter describes the use of three custom JSP tags—
cache
,
repeat
, and
process
—provided with the WebLogic Server distribution.
This chapter includes the following sections:
■ Section 16.1, "Overview of WebLogic Custom JSP Tags"
■ Section 16.2, "Using the WebLogic Custom Tags in a Web Application"
■ Section 16.3, "Cache Tag"
■ Section 16.4, "Process Tag"
■ Section 16.5, "Repeat Tag"
16.1 Overview of WebLogic Custom JSP Tags
Oracle provides three specialized JSP tags that you can use in your JSP pages:
cache
,
repeat
, and
process
. These tags are packaged in a tag library jar file called
weblogic-tags.jar
. This jar file contains classes for the tags and a tag library
descriptor (TLD). To use these tags, you copy this jar file to the Web application that
contains your JSPs and reference the tag library in your JSP.
16.2 Using the WebLogic Custom Tags in a Web Application
Using the WebLogic custom tags requires that you include them within a Web
application.
To use these tags in your JSP:
1. Copy the
weblogic-tags.jar
file from the
ext
directory of your WebLogic Server
installation to the
WEB-INF/lib
directory of the Web application containing the
JSPs that will use the WebLogic Custom Tags.
2. Reference this tag library descriptor in the
<taglib>
element of the Java EE
standard Web application deployment descriptor,
web.xml
. For example:
<taglib>
<taglib-uri>weblogic-tags.tld</taglib-uri>
<taglib-location>
/WEB-INF/lib/weblogic-tags.jar
</taglib-location>
</taglib>
3. Reference the tag library in your JSP with the
taglib
directive. For example:

Cache Tag
16-2 Developing Web Applications, Servlets, and JSPs for Oracle WebLogic Server
<%@ taglib uri="weblogic-tags.tld" prefix="wl" %>
16.3 Cache Tag
The cache tag enables caching the work that is done within the body of the tag. It
supports both output (transform) data and input (calculated) data. Output caching
refers to the content generated by the code within the tag. Input caching refers to the
values to which variables are set by the code within the tag. Output caching is useful
when the final form of the content is the important thing to cache. Input caching is
important when the view of the data can vary independently of the data calculated
within the tag.
If one client is already recalculating the contents of a cache and another client requests
the same content it does not wait for the completion of the recalculation, instead it
shows whatever information is already in the cache. This is to make sure that the Web
site does not come to a halt for all your users because a cache is being recalculated.
Additionally, the async attribute means that no one, not even the user that initiates the
cache recalculation waits.
Two versions of the cache tag are available. Version 2 has additional scopes available.
16.3.1 Refreshing a Cache
You can force the refresh of a cache by setting the
_cache_refresh
object to
true
in the
scope that you want affected. For example, to refresh a cache at session scope, specify
the following:
<% request.setAttribute("_cache_refresh", "true"); %>
If you want all caches to be refreshed, set the cache to the
application
scope. If you
want all the caches for a user to be refreshed, set it in the
session
scope. If you want
all the caches in the current request to be refreshed, set the
_cache_refresh
object
either as a parameter or in the request.
The
<wl:cache>
tag specifies content that must be updated each time it is displayed.
The statements between the
<wl:cache>
and
</wl:cache>
tags are only executed if the
cache has expired or if any of the values of the key attributes (see the Section 16–1,
" Cache Tag Attributes" table) have changed.
16.3.2 Flushing a Cache
Flushing a cache forces the cached values to be erased; the next time the cache is
accessed, the values are recalculated. To flush a cache, set its
flush
attribute to
true
.
The cache must be named using the
name
attribute. If the cache has the
size
attribute
set, all values are flushed. If the cache sets the
key
attribute but not the
size
attribute,
you can flush a specific cache by specifying its
key
along with any other attributes
required to uniquely identify the cache (such as
scope
or
vars
).
For example:
1. Define the cache.
<wl:cache name="dbtable" key="parameter.tablename"
scope="application">
// read the table and output it to the page
</wl:cache>
2. Update the cached table data.

Cache Tag
Using Custom WebLogic JSP Tags (cache, process, repeat) 16-3
3.
Flush the cache using the
flush
attribute in an empty tag (an empty tag ends with
/
and does not use a closing tag). For example
<wl:cache name="dbtable" key="parameter.tablename" scope="application"
flush="true"/>
Table 16–1 Cache Tag Attributes
Attribute Required Default Value Description
timeout no -1
Cache timeout property. The amount of time, in
seconds, after which the statements within the
cache tag are refreshed. This is not proactive; the
value is refreshed only if it is requested. If you
prefer to use a unit of time other than seconds,
you can specify an alternate unit by postfixing the
value with desired unit:
■
ms = milliseconds
■
s = seconds (default)
■
m = minutes
■
h = hours
■
d = days
scope no application
Specifies the scope in which the data is cached.
Valid scopes include:
■ parameter, (versions 1,2)requests the HTTP
servlet request parameters
■ page, (versions 1,2)requests the JSP page
context attributes (This scope does not exist
for the cache filter.)
■ request, (versions 1,2)requests the servlet
request attributes. Request attributes are
valid for the entire request, including any
forwarded or included pages.
■ cookie, (version 2)requests the cookie values
found in the request. If there are multiple
cookies with the same name, this request
returns only the first value.
■ requestHeader, (version 2)requests the values
from the request Headers. If there are
multiple Headers with the same name, only
the value of the first is returned.

Cache Tag
16-4 Developing Web Applications, Servlets, and JSPs for Oracle WebLogic Server
scope
(cont.)
■ responseHeader, (version 2)requests the
values from the response Headers. If there
are multiple Headers with the same name,
only the value of the first is returned. If you
set a response header, all response headers
are replaced with the value you have set.
This scope should not be used for storing
content.
■ session, (versions 1,2)requests the values
from the session attributes of the current
user. If there is no session then one will not
be created by accessing the scope. The caches
can become very large if you are caching
content.
■ application, (versions 1,2)requests the values
found in the servlet context attributes.
■ cluster, (versions 1,2)requests the values from
the application scope, and when written to
replicates the information across the cluster.
Most caches will be either session or application
scope.
key no --
Specifies additional values to be used when
evaluating whether to cache the values contained
within the tags. Typically a given cache is
identified by the cache name that you configured
in
web.xml
. If that is not specified the request uri
is used as a cache name. Using keys you can
specify additional values to identify a tag. For
example, if you want to separate out the cache for
a given end user, then in addition to the cache
name you can specify the keys as the userid,
values for which you want to pick it up from the
request parameter scope (query param/post
params) plus perhaps a client ip. So you will
specify your keys as:
"
parameter.userid
,
parameter.clientip
" Here
"parameter" is the scope (request parameter
scope) and "userid"/"clientip" are the
parameters/attributes. This means the primary
key for the cache becomes the cache name
(request uri in this case) + value of userid request
param + value of clientip request param.
The list of keys is comma-separated. The value of
this attribute is the name of the variable whose
value you wish to use as a key into the cache. You
can additionally specify a scope by prepending
the name of the scope to the name. For example:
parameter.key | page.key | request.key |
application.key | session.key
It defaults to searching through the scopes in the
order shown in the preceding list. Each named
key is available in the cache tag as a scripting
variable. A list of keys is comma-separated.
async no false
If the
async
parameter is set to
true
, the cache
will be updated asynchronously, if possible. The
user that initiates the cache hit sees the old data.
Table 16–1 (Cont.) Cache Tag Attributes
Attribute Required Default Value Description

Cache Tag
Using Custom WebLogic JSP Tags (cache, process, repeat) 16-5
Additional properties of the cache system for version 2
■ Each cache also has additional arbitrary attributes associated with it that the end
user can manipulate and expect to be populated when the cache is retrieved.
■ Cache listeners can be registered by putting an object that implements
weblogicx.cache.CacheListener
in a
java.util.List
that is present in any scope
in the cache system under the "
weblogicx.cache.CacheListener
" key. If there is a
List
present in the scope, add your listener to the end.
The following examples show how you can use the
<wl:cache>
tag.
name no --
A unique name for the cache that allows caches to
be shared across multiple JSP pages. This same
buffer is used to store the data for all pages using
the named cache. This attribute is useful for
textually included pages that need cache sharing.
If this attribute is not set, a unique name is chosen
for the cache.
We recommended that you avoid manually
calculating the name of the tag; the
key
functionality can be used equivalently in all cases.
The name is calculated as
weblogic.jsp.tags.CacheTag.
plus the URI plus
a generated number representing the tag in the
page you are caching. If different URIs reach the
same JSP page, the caches are not shared in the
default case. Use named caches in this case.
System named caches can not be flushed and
refreshed automatically.
size no -1
(unlimited) For caches that use keys, the number of entries
allowed. The default is an unlimited cache of
keys. With a limited number of keys the tag uses a
least-used system to order the cache. Changing the
value of the size attribute of a cache that has
already been used does not change the size of that
cache.
vars no --
In addition to caching the transformed output of
the cache, you can also cache calculated values
within the block. These variables are specified
exactly the same way as the cache keys. This type
of caching is called Input caching.
Variables are used to do input caching. When the
cache is retrieved the variables are restored to the
scope you specified. For example, for retrieving
results from a database you used var1 from
request parameter and var2 from session. When
the cache is created the value of these variables
are stored with the cache. The next time the cache
is accessed these values are restored so you will
be able to access them from their respective
scopes. For example, var1 will be available from
request and var2 from session.
flush no none When set to true, the cache is flushed. This
attribute must be set in an empty tag (ends with
/).
Table 16–1 (Cont.) Cache Tag Attributes
Attribute Required Default Value Description

Process Tag
16-6 Developing Web Applications, Servlets, and JSPs for Oracle WebLogic Server
Example 16–1 Examples of Using the cache Tag
<wl:cache>
<!--the content between these tags will only be
refreshed on server restart-->
</wl:cache>
<wl:cache key="request.ticker" timeout="1m">
<!--get stock quote for whatever is in the request parameter ticker
and display it, only update it every minute-->
</wl:cache>
<!--incoming parameter value isbn is the number used to lookup the
book in the database-->
<wl:cache key="parameter.isbn" timeout="1d" size="100">
<!--retrieve the book from the database and display
the information -- the tag will cache the top 100
most accessed book descriptions-->
</wl:cache>
<wl:cache timeout="15m" async="true">
<!--get the new headlines from the database every 15 minutes and
display them-->
<!--do not let anyone see the pause while they are retrieved-->
</wl:cache>
16.4 Process Tag
Use the
<wl:process>
tag for query parameter-based flow control. By using a
combination of the tag's four attributes, you can selectively execute the statements
between the
<wl:process>
and
</wl:process>
tags. The process tag may also be used
to declaratively process the results of form submissions. By specifying conditions
based on the values of request parameters you can include or not include JSP syntax
on your page.
The following examples show how you can use the
<wl:process>
tag:
Example 16–2 Examples of Using the process tag:
<wl:process notname="update">
<wl:process notname="delete">
<!--Only show this if there is no update or delete parameter-->
<form action="<%= request.getRequestURI() %>">
<input type="text" name="name"/>
<input type="submit" name="update" value="Update"/>
<input type="submit" name="delete" value="Delete"/>
</form>
</wl:process>
Table 16–2 Process Tag Attributes
Tag Attribute Required Description
name no Name of a query parameter.
notname no Name of a query parameter.
value no Value of a query parameter.
notvalue no Value of a query parameter.

Repeat Tag
Using Custom WebLogic JSP Tags (cache, process, repeat) 16-7
</wl:process>
<wl:process name="update">
<!-- do the update -->
</wl:process>
<wl:process name="delete">
<!--do the delete-->
</wl:process>
<wl:process name="lastBookRead" value="A Man in Full">
<!--this section of code will be executed if lastBookRead exists
and the value of lastBookRead is "A Man in Full"-->
</wl:process>
16.5 Repeat Tag
Use the
<wl:repeat>
tag to iterate over many different types of sets, including
Enumerations, Iterators, Collections, Arrays of Objects, Vectors, ResultSets,
ResultSetMetaData, and the keys of a Hashtable. You can also just loop a certain
number of times by using the
count
attribute. Use the set attribute to specify the type
of Java objects.
The following example shows how you can use the
<wl:repeat>
tag.
Example 16–3 Examples of Using the repeat Tag
<wl:repeat id="name" set="<%= new String[] { "sam", "fred", "ed" } %>">
<%= name %>
</wl:repeat>
<% Vector v = new Vector();%>
<!--add to the vector-->
<wl:repeat id="item" set="<%= v.elements() %>">
<!--print each element-->
Table 16–3 Repeat Tag Attributes
Tag Attribute Required Type Description
set No Object The set of objects that includes:
■ Enumerations
■ Iterators
■ Collections
■ Arrays
■ Ve ct or s
■ Result Sets
■ Result Set MetaData
■ Hashtable keys
count No Int Iterate over first count entries in the set.
id No String Variable used to store current object being iterated
over.
type No String Type of object that results from iterating over the set
you passed in. Defaults to
Object
. This type must be
fully qualified.

Repeat Tag
16-8 Developing Web Applications, Servlets, and JSPs for Oracle WebLogic Server
</wl:repeat>

17
Using the WebLogic EJB to JSP Integration Tool 17-1
17
Using the WebLogic EJB to JSP Integration
Tool
[17]
This chapter describes how to use the WebLogic EJB-to-JSP integration tool to create
JSP tag libraries that you can use to invoke EJBs in a JavaServer Page (JSP). This
document assumes at least some familiarity with both EJB and JSP.
This chapter includes the following sections:
■ Section 17.1, "Overview of the WebLogic EJB-to-JSP Integration Tool"
■ Section 17.2, "Basic Operation"
■ Section 17.3, "Interface Source Files"
■ Section 17.4, "Build Options Panel"
■ Section 17.5, "Troubleshooting"
■ Section 17.6, "Using EJB Tags on a JSP Page"
■ Section 17.7, "EJB Home Methods"
■ Section 17.8, "Stateful Session and Entity Beans"
■ Section 17.9, "Default Attributes"
17.1 Overview of the WebLogic EJB-to-JSP Integration Tool
Given an EJB jar file, the WebLogic EJB-to-JSP integration tool will generate a JSP tag
extension library whose tags are customized for calling the EJB(s) of that jar file. From
the perspective of a client, an EJB is described by its remote interface. For example:
public interface Trader extends javax.ejb.EJBObject {
public TradeResult buy(String stockSymbol, int shares);
public TradeResult sell(String stockSymbol, int shares);
}
For Web applications that call EJBs, the typical model is to invoke the EJB using Java
code from within a JSP scriptlet
(<% ... %>)
. The results of the EJB call are then
formatted as HTML and presented to the Web client. This approach is both tedious
and error-prone. The Java code required to invoke an EJB is lengthy, even in the
simplest of cases, and is typically not within the skill set of most Web designers
responsible for HTML presentation.
The EJB-to-JSP tool simplifies the EJB invocation process by removing the need for java
code. Instead, you invoke the EJB is invoked using a JSP tag library that is custom
generated for that EJB. For example, the methods of the Trader bean above would be
invoked in a JSP like this:

Basic Operation
17-2 Developing Web Applications, Servlets, and JSPs for Oracle WebLogic Server
<%@ taglib uri="/WEB-INF/trader-tags.tld" prefix="trade" %>
<b>invoking trade: </b><br>
<trade:buy stockSymbol="BEAS" shares="100"/>
<trade:sell stockSymbol="MSFT" shares="200"/>
The resulting JSP page is cleaner and more intuitive. A tag is (optionally) generated for
each method on the EJB. The tags take attributes that are translated into the
parameters for the corresponding EJB method call. The tedious machinery of invoking
the EJB is hidden, encapsulated inside the handler code of the generated tag library.
The generated tag libraries support stateless and stateful session beans, and entity
beans. The tag usage scenarios for each of these cases are slightly different, and are
described below.
17.2 Basic Operation
You can run the WebLogic EJB-to-JSP integration tool in command-line mode using the
following command:
java weblogic.servlet.ejb2jsp.Main
or graphical mode. For all but the simplest EJBs, the graphical tool is preferable.
Invoke the graphical tool as follows:
java weblogic.servlet.ejb2jsp.gui.Main
Initially, no ejb2jsp project is loaded by the Web application. Create a new project by
selecting the File > New menu item, browsing in the file chooser to an EJB jar file, and
selecting it. Once initialized, you can modify, save, and reload ejb2jsp projects for
future modification.
The composition of the generated tag library is simple: for each method, of each EJB, in
the jar file, a JSP tag is generated, with the same name as the method. Each tag expects
as many attributes as the corresponding method has parameters.
17.3 Interface Source Files
When a new EJB jar is loaded, the tool also tries to find the Java source files for the
home and remote interfaces of your EJB(s). The reason is that, although the tool can
generate tags only by introspecting the EJB classes, it cannot assign meaningful
attribute names to the tags whose corresponding EJB methods take parameters. In the
Trader example in Section 17.1, "Overview of the WebLogic EJB-to-JSP Integration
Tool", when the EJB jar is loaded, the tool tries to find a source file called
Trader.java
.
This file is then parsed and detects that the
buy()
method takes parameters called
stockSymbol
and
shares
. The corresponding JSP tag will then have appropriately
named attributes that correspond to the parameters of the
buy()
method.
When a new EJB jar is loaded, the tool operates on the premise that the source
directory is the same directory where the EJB jar is located. If that is not the case, the
error is not fatal. After the new project is loaded, under the Project Build Options
panel, you can adjust the EJB Source Path element to reflect the correct directory. You
can then select the File -> Resolve Attributes menu to re-run the resolve process.
When looking for java source files corresponding to an interface class, the tool searches
in both the directory specified, and in a sub-directory implied by the interface's java

Troubleshooting
Using the WebLogic EJB to JSP Integration Tool 17-3
package. For example, for
my.ejb.Trader
, if the directory given is
C:/src
, the tool will
look for both
C:/src/Trader.java
and
C:/src/my/ejb/Trader.java
.
Access to the source files is not strictly necessary. You can always modify attribute
names for each tag in a project by using the tool. However, parsing the source files of
the EJB's public interface was developed as the quickest way to assign meaningful
attribute names.
17.4 Build Options Panel
Use this panel to set all parameters related to the local file system that are needed to
build the project. Specify the Java compiler, the Java package of the generated JSP tag
handlers, and whether to keep the generated Java code after a project build, which can
be useful for debugging.
You can also use this panel to specify the type of tag library output you want. For use
in a Java EE Web application, a tag library should be packaged one of two ways: as
separate class files and a Tag Library Descriptor (
.tld
) file, or as a single taglib jar file.
Either output type is chosen with the Output Type pull-down. For development and
testing purposes, DIRECTORY output is recommended, because a Web application in
WebLogic Server must be re-deployed before a jar file can be overwritten.
For either DIRECTORY or JAR, the output locations must be chosen appropriately so
that the tag library will be found by a Web application. For example, if you wish to use
the tag library in a Web application rooted in directory
C:/mywebapp
, then the
DIRECTORY classes field should be specified as:
C:/mywebapp/WEB-INF/classes
and the DIRECTORY .tld File field should be something like:
C:/mywebapp/WEB-INF/trader-ejb.tld
The Source Path, described earlier, is edited in the Build Options panel as well. The
Extra Classpath field can be used if your tag library depends on other classes not in the
core WebLogic Server or Java EE API. Typically, nothing will need to be added to this
field.
17.5 Troubleshooting
Sometimes, a project fails to build because of errors or conflicts. This section describes
the reasons for those errors, and how they may be resolved.
■ Missing build information: One of the necessary fields in the Build Options panel
is unspecified, like the java compiler, the code package name, or a directory where
the output can be saved. The missing field(s) must be filled in before the build can
succeed.
■ Duplicate tag names: When an EJB jar is loaded, the tool records a tag for each
method on the EJB, and the tag name is the same as the method name. If the EJB
has overloaded methods (methods with the same name but different signatures),
the tag names conflict. Resolve the conflict by renaming one of the tags or by
disabling one of the tags. To rename a tag, navigate to the tag in question using the
tree hierarchy in the left window of the tool. In the tag panel that appears in the
right window, modify the Tag Name field. To disable a tag, navigate to the tag in
question using the tree hierarchy in the left window of the tool. In the tag panel
that appears in the right window, deselect the Generate Tag box. For EJB jars that
contain multiple EJBs, you can disable tags for an entire bean may as well.

Using EJB Tags on a JSP Page
17-4 Developing Web Applications, Servlets, and JSPs for Oracle WebLogic Server
■
Meaningless attribute names arg0, arg1...
: This error occurs when
reasonable attribute names for a tag could not be inferred from the EJB's interface
source files. To fix this error, navigate to the tag in question in the project hierarchy
tree. Select each of the attribute tree leaves below the tag, in order. For each
attribute, assign a reasonable name to the Attribute Name field, in the panel that
appears on the right side of the tool.
■ Duplicate attribute names: This occurs when a single tag expecting multiple
attributes has two attributes with the same name. Navigate to the attribute(s) in
question, and rename attributes so that they are all unique for the tag.
17.6 Using EJB Tags on a JSP Page
Using the generated EJB tags on a JSP page is simply a matter of declaring the tag
library on the page, and then invoking the tags like any other tag extension:
<% taglib uri="/WEB-INF/trader-ejb.tld"
prefix="trade" %>
<trade:buy stockSymbol="XYZ" shares="100"/>
For EJB methods that have a non-void return type, a special, optional tag attribute "_
return", is built-in. When present, the value returned from the method is made
available on the page for further processing:
<% taglib uri="/WEB-INF/trader-ejb.tld"
prefix="trade" %>
<trade:buy stockSymbol="XYZ"
shares="100" _return="tr"/>
<% out.println("trade result: " + tr.getShares()); %>
For methods that return a primitive numeric type, the return variable is a Java object
appropriate for that type (for example, "int" -> java.lang.Integer, and such).
17.7 EJB Home Methods
EJB 2.0 allows for methods on the EJB home interface that are neither
create()
or
find()
methods. Tags are generated for these home methods as well. To avoid
confusion, the tool prepends "
home-
" to the tags for each method on an EJB's home,
when a new project is loaded. These methods may be renamed, if desired.
17.8 Stateful Session and Entity Beans
Typical usage of a "stateful" bean is to acquire an instance of the bean from the bean's
Home interface, and then to invoke multiple methods on a single bean instance. This
programming model is preserved in the generated tag library as well. Method tags for
stateful EJB methods are required to be inside a tag for the EJB home interface that
corresponds to a
find()
or
create()
on the home. All EJB method tags contained
within the find/create tag operate on the bean instance found or created by the
enclosing tag. If a method tag for a stateful bean is not enclosed by a find/create tag
for its home, a run-time exception occurs. For example, given the following EJB:
public interface AccountHome extends EJBHome {
public Account create(String accountId, double initialBalance);
public Account findByPrimaryKey(String accountID);
/* find all accounts with balance above some threshold */
public Collection findBigAccounts(double threshold);
}

Default Attributes
Using the WebLogic EJB to JSP Integration Tool 17-5
public interface Account extends EJBObject {
public String getAccountID();
public double deposit(double amount);
public double withdraw(double amount);
public double balance();
}
Correct tag usage might be as follows:
<% taglib uri="/WEB-INF/account-ejb.tld" prefix="acct" %>
<acct:home-create accountId="103"
initialBalance="450.0" _return="newAcct">
<acct:deposit amount="20"/>
<acct:balance _return="bal"/>
Your new account balance is: <%= bal %>
</acct:home-create>
If the "_return" attribute is specified for a find/create tag, a page variable will be
created that refers to the found/created EJB instance. Entity beans finder methods may
also return a collection of EJB instances. Home tags that invoke methods returning a
collection of beans will iterate (repeat) over their tag body, for as many beans as are
returned in the collection. If "_return" is specified, it is set to the current bean in the
iteration:
<b>Accounts above $500:</b>
<ul>
<acct:home-findBigAccounts threshold="500" _return="acct">
<li>Account <%= acct.getAccountID() %>
has balance $<%= acct.balance() %>
</acct:home-findBigAccounts>
</ul>
The preceding example will display an HTML list of all Account beans whose balance
is over $500.
17.9 Default Attributes
By default, the tag for each method requires that all of its attributes (method
parameters) be set on each tag instance. However, the tool will also allow "default"
method parameters to be specified, in case they are not given in the JSP tag. You can
specify default attributes/parameters in the Attribute window of the EJB-to-JSP tool.
The parameter default can come from an simple EXPRESSION, or if more complex
processing is required, a default METHOD body may be written. For example, in the
Trader example in Section 17.1, "Overview of the WebLogic EJB-to-JSP Integration
Tool", suppose you want the "buy" tag to operate on stock symbol "XYZ" if none is
specified. In the Attribute panel for the "stockSymbol" attribute of the "buy" tag, you
set the "Default Attribute Value" field to EXPRESSION, and enter "XYZ" (quotes
included!) in the Default Expression field. The buy tag then acts as if the
stockSymbol="XYZ" attribute were present, unless some other value is specified.
Or if you want the shares attribute of the "buy" tag to be a random number between
0-100, we would set "Default Attribute Value" to METHOD, and in the Default Method
Body area, you write the body of a Java method that returns int (the expected type for
the "shares" attribute of the "buy" method):
long seed = System.currentTimeMillis();
java.util.Random rand = new java.util.Random(seed);
int ret = rand.nextInt();
/* ensure that it is positive...*/
ret = Math.abs(ret);

Default Attributes
17-6 Developing Web Applications, Servlets, and JSPs for Oracle WebLogic Server
/* and < 100 */
return ret % 100;
Because your default method bodies appear within a JSP tag handler, your code has
access to the pageContext variable. From the JSP PageContext, you can gain access to
the current HttpServletRequest or HttpSession, and use session data or request
parameters to generate default method parameters. For example, to pull the "shares"
parameter for the "buy" method out of a ServletRequest parameter, you could write
the following code:
HttpServletRequest req =
(HttpServletRequest)pageContext.getRequest();
String s = req.getParameter("shares");
if (s == null) {
/* webapp error handler will redirect to error page
* for this exception
*/
throw new BadTradeException("no #shares specified");
}
int ret = -1;
try {
ret = Integer.parseInt(s);
} catch (NumberFormatException e) {
throw new BadTradeException("bad #shares: " + s);
}
if (ret <= 0)
throw new BadTradeException("bad #shares: " + ret);
return ret;
The generated default methods are assumed to throw exceptions. Any exceptions
raised during processing will be handled by the JSP's errorPage, or else by the
registered exception-handling pages of the Web application.

A
web.xml Deployment Descriptor Elements A-1
A
web.xml Deployment Descriptor Elements
The following sections describe the standard Java EE deployment descriptor elements.
With Java EE annotations, the standard
web.xml
deployment descriptor is optional.
According to the servlet 3.0 specification at
http://jcp.org/en/jsr/detail?id=315
,
annotations can be defined on certain Web components, such as servlets, filters,
listeners, and tag handlers. The annotations are used to declare dependencies on
external resources. See Section 8, "WebLogic Annotation for Web Components".
■ Section A.1, "web.xml Namespace Declaration and Schema Location"
■ Section A.2, "icon"
■ Section A.3, "display-name"
■ Section A.4, "description"
■ Section A.5, "distributable"
■ Section A.6, "context-param"
■ Section A.7, "filter"
■ Section A.8, "filter-mapping"
■ Section A.9, "listener"
■ Section A.10, "servlet"
■ Section A.11, "servlet-mapping"
■ Section A.12, "session-config"
■ Section A.13, "mime-mapping"
■ Section A.14, "welcome-file-list"
■ Section A.15, "error-page"
■ Section A.16, "jsp-config"
■ Section A.17, "resource-env-ref"
■ Section A.18, "resource-ref"
■ Section A.19, "security-constraint"
■ Section A.20, "login-config"
■ Section A.21, "security-role"
■ Section A.22, "env-entry"
■ Section A.23, "ejb-ref"
web.xml Namespace Declaration and Schema Location
A-2 Developing Web Applications, Servlets, and JSPs for Oracle WebLogic Server
■ Section A.24, "ejb-local-ref"
■ Section A.25, "web-app"
■ Section A.26, "message-destination-ref"
A.1 web.xml Namespace Declaration and Schema Location
The correct text for the namespace declaration and schema location for the
web.xml
file
is as follows.
<web-app xmlns:xsi="http://www.w3.org/2001/XMLSchema-instance"
xmlns="http://java.sun.com/xml/ns/javaee"
xmlns:web="http://java.sun.com/xml/ns/javaee/web-app_3_0.xsd"
xsi:schemaLocation="http://java.sun.com/xml/ns/javaee
http://java.sun.com/xml/ns/javaee/web-app_3_0.xsd"
id="WebApp_ID" version="3.0">
To view the schema for
web.xml
, go to
http://www.oracle.com/webfolder/technetwork/jsc/xml/ns/javaee/web-app_3_
0.xsd
.
A.2 icon
The
icon
element specifies the location within the Web application for a small and
large image used to represent the Web application in a GUI tool. (The
servlet
element
also has an element called the
icon
element, used to supply an icon to represent a
servlet in a GUI tool.)
The following table describes the elements you can define within an
icon
element.
A.3 display-name
The optional
display-name
element specifies the Web application display name, a
short name that can be displayed by GUI tools.
A.4 description
The optional description element provides descriptive text about the Web application.
Table A–1 Icon Elements
Element
Required/
Optional Description
<small-icon>
Optional Location for a small (16x16 pixel)
.gif
or
.jpg
image used
to represent the Web application in a GUI tool. Currently,
this is not used by WebLogic Server.
<large-icon>
Optional Location for a large (32x32 pixel)
.gif
or
.jpg
image used to
represent the Web application in a GUI tool. Currently, this
element is not used by WebLogic Server.
Table A–2 display-name Elements
Element
Required/
Optional Description
<display-name>
Optional Currently, this element is not used by WebLogic
Server.

context-param
web.xml Deployment Descriptor Elements A-3
A.5 distributable
The distributable element is not used by WebLogic Server.
A.6 context-param
The optional
context-param
element contains the declaration of a Web application's
servlet context initialization parameters.
The following table describes the reserved context parameters used by the Web
application container, which have been deprecated and have replacements in
weblogic.xml
.
Table A–3 description Elements
Element
Required/
Optional Description
<description>
Optional Currently, this element is not used by WebLogic
Server.
Table A–4 description Elements
Element
Required/
Optional Description
<distributable>
Optional Currently, this element is not used by WebLogic
Server.
Table A–5 context-parameter Elements
Element
Required/
Optional Description
weblogic.httpd.
clientCertProxy
optional This attribute specifies that certifications from clients of the
Web application are provided in the special
WL-Proxy-Client-Cert
header sent by a proxy plug-in or
HttpClusterServlet
.
This setting is useful if user authentication is performed on
a proxy server—setting
clientCertProxy
causes the proxy
server to pass on the certs to the cluster in a special header,
WL-Proxy-Client-Cer
t.
A
WL-Proxy-Client-Cert
header could be provided by any
client with access to WebLogic Server. WebLogic Server
takes the certificate information from that header, trusting
that is came from a secure source (the plug-in) and uses
that information to authenticate the user.
For this reason, if you set
clientCertProxy
, use a
connection filter to ensure that WebLogic Server accepts
connections only from the machine on which the plug-in is
running.
In addition to setting this attribute for an individual Web
application, you can define this attribute:
For all Web applications hosted by a server instance, on the
Server > Configuration > General page in the
Administration Console. For all Web applications hosted
by server instances in a cluster, on the Cluster >
Configuration > General page.

filter
A-4 Developing Web Applications, Servlets, and JSPs for Oracle WebLogic Server
A.7 filter
The
filter
element defines a filter class and its initialization attributes. For more
information on filters, see Section 14.3, "Configuring Filters".
The following table describes the elements you can define within a
filter
element.
Table A–6 Deprecated context-param Elements
Deprecated Parameter Description
Replacement Element in
weblogic.xml
weblogic.httpd.inputCharset Defines code set behavior for
non-unicode operations.
input-charset
(defined
within charset-param) in
weblogic.xml. See
Section B.14.1,
"input-charset".
weblogic.httpd.servlet.reloa
dCheckSecs
Define how often WebLogic Server
checks whether a servlet has been
modified, and if so, reloads it. A
value of -1 is never reload, 0 is
always reload. The default is set to
1 second.
servlet-reload-check-se
cs
(defined within
container-descriptor
)
in
weblogic.xml
.See
Section B.12, "auth-filter".
weblogic.httpd.servlet.class
path
When this values has been set, the
container appends this path to the
Web application classpath. This is
not a recommended method and is
supported only for backward
compatibility.
No replacement. Use other
means such as manifest
classpath or
WEB-INF/lib
or
WEB-INF/classes
or
virtual directories.
weblogic.httpd.defaultServl
et
Sets the default servlet for the Web
application. This is not a
recommended
method and is supported only for
backward compatibility.
No replacement. Instead
use the
servlet
and
servlet-mapping
elements
in
web.xml
to define a
default servlet. The URL
pattern for
default-servlet
should
be "/". See Section A.11,
"servlet-mapping". For
additional examples of
servlet mapping, see
Section 4.1.1, "Servlet
Mapping".
Table A–7 filter Elements
Element
Required/
Optional Description
<icon>
Optional Specifies the location within the Web application for a
small and large image used to represent the filter in a
GUI tool. Contains a small-icon and large-icon element.
Currently, this element is not used by WebLogic Server.
<filter-name>
Required Defines the name of the filter, used to reference the
filter definition elsewhere in the deployment
descriptor.
<display-name>
Optional A short name intended to be displayed by GUI tools.
<description>
Optional A text description of the filter.
<filter-class>
Required The fully-qualified class name of the filter.
servlet
web.xml Deployment Descriptor Elements A-5
A.8 filter-mapping
The following table describes the elements you can define within a
filter-mapping
element.
A.9 listener
Define an application listener using the
listener
element.
For more information, see Section 11.5, "Configuring an Event Listener Class".
A.10 servlet
The
servlet
element contains the declarative data of a servlet.
<init-param>
Optional Contains a name/value pair as an initialization
attribute of the filter.
Use a separate set of
<init-param>
tags for each
attribute.
Table A–8 filter-mapping Elements
Element
Required/
Optional Description
<filter-name>
Required The name of the filter to which you are mapping a
URL pattern or servlet. This name corresponds to the
name assigned in the
<filter>
element with the
<filter-name>
element.
<url-pattern>
Required -
or map by
<servlet>
Describes a pattern used to resolve URLs. The
portion of the URL after the
http://host:port
+
ContextPath
is compared to the
<url-pattern>
by
WebLogic Server. If the patterns match, the filter
mapped in this element is called.
Example patterns:
/soda/grape/*
/foo/*
/contents
*.foo
The URL must follow the rules specified in the
servlet 3.0 specification.
<servlet> Required -
or map by
<url-patt
ern>
The name of a servlet which, if called, causes this
filter to execute.
Table A–9 listener Elements
Element
Required/
Optional Description
<listener-class>
Optional Name of the class that responds to a Web application
event.
Table A–7 (Cont.) filter Elements
Element
Required/
Optional Description

servlet
A-6 Developing Web Applications, Servlets, and JSPs for Oracle WebLogic Server
If a
jsp-file
is specified and the
<load-on-startup>
element is present, then the JSP
is precompiled and loaded when WebLogic Server starts.
The following table describes the elements you can define within a
servlet
element.
A.10.1 icon
This is an element within the Section A.10, "servlet".
Table A–10 servlet Elements
Element
Required/
Optional Description
<icon>
Optional Location within the Web application for a small and large
image used to represent the servlet in a GUI tool.
Contains a small-icon and large-icon element.
Currently, this element is not used by WebLogic Server.
<servlet-name>
Required Defines the canonical name of the servlet, used to
reference the servlet definition elsewhere in the
deployment descriptor.
<display-name>
Optional A short name intended to be displayed by GUI tools.
<description>
Optional A text description of the servlet.
<servlet-class>
Optional The fully-qualified class name of the servlet.
As of servlet 3.0,
<servlet-class>
and
<jsp-file>
are
optional. Servlet configuration without
<servlet-class>
and
<jsp-file>
is considered preliminary; you should
use the programmatical Servlet API to register the servlet
dynamically, otherwise, deployment will fail.
<jsp-file>
Optional The full path to a JSP file within the Web application,
relative to the Web application root directory.
As of servlet 3.0,
<servlet-class>
and
<jsp-file>
are
optional. Servlet configuration without
<servlet-class>
and
<jsp-file>
is considered preliminary; you should
use the programmatical Servlet API to register the servlet
dynamically, otherwise, deployment will fail.
<init-param>
Optional Contains a name/value pair as an initialization attribute
of the servlet.
Use a separate set of
<init-param>
tags for each
attribute.
<load-on-startup>
Optional WebLogic Server initializes this servlet when WebLogic
Server starts up. The optional content of this element
must be a positive integer indicating the order in which
the servlet should be loaded. Lower integers are loaded
before higher integers. If no value is specified, or if the
value specified is not a positive integer, WebLogic Server
can load the servlet in any order during application
startup.
<run-as> Optional Specifies the run-as identity to be used for the execution
of the Web application. It contains an optional
description and the name of a security role.
<security-role-
ref>
Optional Used to link a security role name defined by
<security-role>
to an alternative role name that is hard
coded in the servlet logic. This extra layer of abstraction
allows the servlet to be configured at deployment
without changing servlet code.
servlet
web.xml Deployment Descriptor Elements A-7
The
icon
element specifies the location within the Web application for small and large
images used to represent the servlet in a GUI tool.
The following table describes the elements you can define within an
icon
element.
A.10.2 init-param
This is an element within the Section A.10, "servlet".
The optional
init-param
element contains a name/value pair as an initialization
attribute of the servlet. Use a separate set of
init-param
tags for each attribute.
You can access these attributes with the
javax.servlet.ServletConfig.getInitParameter()
method.
The following table describes the elements you can define within a
init-param
element.
A.10.3 security-role-ref
This is an element within the Section A.10, "servlet".
The
security-role-ref
element links a security role name defined by
<security-role>
to an alternative role name that is hard-coded in the servlet logic.
This extra layer of abstraction allows the servlet to be configured at deployment
without changing servlet code.
The following table describes the elements you can define within a
security-role-ref
element.
Table A–11 icon Elements
Element
Required/
Optional Description
<small-icon>
Optional Specifies the location within the Web application for a
small (16x16 pixel)
.gif
or
.jpg
image used to represent
the servlet in a GUI tool.
Currently, this element is not used by WebLogic Server.
<large-icon>
Optional Specifies the location within the Web application for a
small (32x32 pixel)
.gif
or
.jpg
image used to represent the
servlet in a GUI tool.
Currently, this element is not used by WebLogic Server.
Table A–12 init-param Elements
Element
Required/
Optional Description
<param-name>
Required Defines the name of this attribute.
<param-value>
Required Defines a
String
value for this attribute.
<description>
Optional Text description of the initialization attribute.
Table A–13 security-role-ref Elements
Element
Required/
Optional Description
<description>
Optional Text description of the role.
<role-name>
Required Defines the name of the security role or principal that is
used in the servlet code.
servlet-mapping
A-8 Developing Web Applications, Servlets, and JSPs for Oracle WebLogic Server
A.11 servlet-mapping
The
servlet-mapping
element defines a mapping between a servlet and a URL
pattern.
The following table describes the elements you can define within a
servlet-mapping
element.
A.12 session-config
The
session-config
element defines the session attributes for this Web application.
The following table describes the element you can define within a
session-config
element.
<role-link>
Required Defines the name of the security role that is defined in a
<security-role>
element later in the deployment
descriptor.
Table A–14 servlet-mapping Elements
Element
Required/
Optional Description
<servlet-name>
Required The name of the servlet to which you are mapping a URL
pattern. This name corresponds to the name you assigned a
servlet in a
<servlet>
declaration tag.
<url-pattern>
Required Describes a pattern used to resolve URLs. The portion of
the URL after the
http://host:port
+
WebAppName
is
compared to the
<url-pattern>
by WebLogic Server. If the
patterns match, the servlet mapped in this element will be
called.
Example patterns:
/soda/grape/*
/foo/*
/contents
*.foo
The URL must follow the rules specified in the servlet 3.0
specification.
For additional examples of servlet mapping, see
Section 4.1.1, "Servlet Mapping".
Table A–13 (Cont.) security-role-ref Elements
Element
Required/
Optional Description
welcome-file-list
web.xml Deployment Descriptor Elements A-9
A.13 mime-mapping
The
mime-mapping
element defines a mapping between an extension and a mime type.
The following table describes the elements you can define within a
mime-mapping
element.
A.14 welcome-file-list
The optional
welcome-file-list
element contains an ordered list of
welcome-file
elements.
When the URL request is a directory name, WebLogic Server serves the first file
specified in this element. If that file is not found, the server then tries the next file in
the list.
For more information, see Section 5.5, "Configuring Welcome Files".
The following table describes the element you can define within a
welcome-file-list
element.
Table A–15 session-config Elements
Element
Required/
Optional Description
<session-timeout>
Optional The number of minutes after which sessions in this Web
application expire. The value set in this element overrides
the value set in the
TimeoutSecs
attribute of the
<session-descriptor>
element in the WebLogic-specific
deployment descriptor
weblogic.xml
, unless one of the
special values listed here is entered.
Default value: 60
Maximum value: Integer.MAX_VALUE ÷ 60
Special values:
-1 = Sessions do not timeout. The value set in
<session-descriptor>
element of
weblogic.xml
is
ignored.
For more information, see Section B.10,
"session-descriptor".
Table A–16 mime-mapping Elements
Element
Required/
Optional Description
<extension>
Required A string describing an extension, for example:
txt.
<mime-type>
Required A string describing the defined mime type, for example:
text/plain.
Table A–17 welcome-file-list
Element
Required/
Optional Description
<welcome-file>
Optional File name to use as a default welcome file, such as
index.html

error-page
A-10 Developing Web Applications, Servlets, and JSPs for Oracle WebLogic Server
A.15 error-page
The optional
error-page
element specifies a mapping between an error code or
exception type to the path of a resource in the Web application.
When an error occurs—while WebLogic Server is responding to an HTTP request, or
as a result of a Java exception—WebLogic Server returns an HTML page that displays
either the HTTP error code or a page containing the Java error message. You can define
your own HTML page to be displayed in place of these default error pages or in
response to a Java exception.
For more information, see Section 5.6, "Customizing HTTP Error Responses".
The following table describes the elements you can define within an
error-page
element.
A.16 jsp-config
The
jsp-config
element is used to provide global configuration information for the
JSP files in a Web application. It has two sub-elements,
taglib
and
jsp-property-group
.
The following table describes the elements you can define within a
jsp-config
element.
A.16.1 taglib
This is an element within the Section A.16, "jsp-config".
The required
taglib
element provides information on a tag library that is used by a
JSP page within the Web application.
This element associates the location of a JSP Tag Library Descriptor (TLD) with a URI
pattern. Although you can specify a TLD in your JSP that is relative to the
WEB-INF
Note: Define either an
<error-code>
or an
<exception-type>
but
not both.
Table A–18 error-page Elements
Element
Required/
Optional Description
<error-code>
Optional A valid HTTP error code, for example,
404.
<exception-type>
Optional A fully-qualified class name of a Java exception type, for
example,
java.lang.string
<location>
Required The location of the resource to display in response to the
error. For example,
/myErrorPg.html.
Table A–19 jsp-config Elements
Element
Required/
Optional Description
<taglib>
Optional Provides information on a tag library that is used by a JSP
page within the Web application.
<jsp-property-grou
p>
Optional Used to group a number of files so they can be given global
property information. All files so described are deemed to
be JSP files.

jsp-config
web.xml Deployment Descriptor Elements A-11
directory, you can also use the
<taglib>
tag to configure the TLD when deploying
your Web application. Use a separate element for each TLD.
The following table describes the elements you can define within a
taglib
element.
A.16.2 jsp-property-group
This is an element within the Section A.16, "jsp-config".
The required
jsp-property-group
element is used to group a number of files so they
can be given global property information. All files so described are deemed to be JSP
files.
The following table describes the elements you can define within a
jsp-property-group
element.
Table A–20 taglib Elements
Element
Required/
Optional Description
<taglib-location>
Optional Gives the file name of the tag library descriptor relative to
the root of the Web application. It is a good idea to store the
tag library descriptor file under the
WEB-INF
directory so it
is not publicly available over an HTTP request.
<taglib-uri>
Optional Describes a URI, relative to the location of the
web.xml
document, identifying a Tag Library used in the Web
application.
If the URI matches the URI string used in the taglib
directive on the JSP page, this taglib is used.
Table A–21 jsp-property-group Elements
Element
Required/
Optional Description
<el-ignored>
Optional Controls whether EL is ignored. By default, the EL
evaluation is enabled for Web applications using a Servlet
2.4 or greater
web.xml
, and disabled otherwise.
<scripting-invalid
>
Optional Controls whether scripting elements are invalid in a group
of JSP pages. By default, scripting is enabled.
<page-encoding>
Optional Indicates pageEncoding information. It is a translation-time
error to name different encodings in the pageEncoding
attribute of the page directive of a JSP page and in a JSP
configuration element matching the page. It is also a
translation-time error to name different encodings in the
prolog or text declaration of a document in XML syntax
and in a JSP configuration element matching the document.
It is legal to name the same encoding through multiple
mechanisms.
<is-xml>
Optional Indicates that a resource is a JSP document (XML). If true,
denotes that the group of resources that match the URL
pattern are JSP documents, and thus must be interpreted as
XML documents. If false, the resources are assumed to not
be JSP documents, unless there is another property group
that indicates otherwise.
<include-prelude>
Optional A context-relative path that must correspond to an element
in the Web application. When the element is present, the
given path will be automatically included (as in an include
directive) at the beginning of each JSP page in this
jsp-property-group.
resource-env-ref
A-12 Developing Web Applications, Servlets, and JSPs for Oracle WebLogic Server
A.17 resource-env-ref
The
resource-env-ref
element contains a declaration of a Web application's reference
to an administered object associated with a resource in the Web application's
environment. It consists of an optional description, the resource environment reference
name, and an indication of the resource environment reference type expected by the
Web application code.
For example:
<resource-env-ref>
<resource-env-ref-name>jms/StockQueue</resource-env-ref-name>
<resource-env-ref-type>javax.jms.Queue</resource-env-ref-type>
</resource-env-ref>
The following table describes the elements you can define within a
resource-env-ref
element.
<include-coda>
Optional A context-relative path that must correspond to an element
in the Web application. When the element is present, the
given path will be automatically included (as in an include
directive) at the end of each JSP page in this
jsp-property-group
.
<deferred-syntax-a
llowed-as-literal>
Optional Controls whether the character sequence
#{
is allowed
when used as a String literal.
<trim-directive-wh
itespaces>
Optional Controls whether template text containing only white
spaces must be removed from the response output.
<url-pattern>
Required Describes a pattern used to resolve URLs. The portion of
the URL after the
http://host:port
+
ContextPath
is
compared to the
<url-pattern>
by WebLogic Server.
Example patterns:
/soda/grape/*
/foo/*
/contents
*.foo
The URL must follow the rules specified in the servlet 3.0
specification.
default-content-ty
pe
Optional Specifies the default
contentType
property. Valid values are
those of the
contentType
page directive. If the page
directive does not include a
contentType
attribute, it
specifies the default response
contentType
.
buffer
Optional Specifies the default buffering model for
JspWriter
. Valid
values are those of the buffer attribute of the page directive.
Specifies if buffering should be used for the output to
response, and if so, the size of the buffer to use.
error-on-undeclare
d-namespace
Optional Controls whether an error should be raised for the use of
an undeclared tag in a JSP document.
If set to true, when an undeclared tag is used in a JSP
document, an error must be raised during the translation
time. Disabled (false) by default.
Table A–21 (Cont.) jsp-property-group Elements
Element
Required/
Optional Description
resource-ref
web.xml Deployment Descriptor Elements A-13
A.18 resource-ref
The optional
resource-ref
element defines a reference lookup name to an external
resource. This allows the servlet code to look up a resource by a "virtual" name that is
mapped to the actual location at deployment time.
Use a separate
<resource-ref>
element to define each external resource name. The
external resource name is mapped to the actual location name of the resource at
deployment time in the WebLogic-specific deployment descriptor
weblogic.xml
.
The following table describes the elements you can define within a
resource-ref
element.
Table A–22 resource-env-ref
Element
Required/
Optional Description
<description>
Optional Provides a description of the resource environment
reference.
<resource-env-ref-
name>
Required Specifies the name of a resource environment reference; its
value is the environment entry name used in the Web
application code. The name is a JNDI name relative to the
java:comp/env
context and must be unique within a Web
application.
<resource-env-ref-
type>
Required Specifies the type of a resource environment reference. It is
the fully qualified name of a Java language class or
interface.
<lookup-name>
Optional The JNDI name to be looked up to resolve a resource
reference.
Table A–23 resource-ref Elements
Element
Required/
Optional Description
<description>
Optional A text description.
<res-ref-name>
Required The name of the resource used in the JNDI tree. Servlets in
the Web application use this name to look up a reference to
the resource.
<res-type>
Required The Java type of the resource that corresponds to the
reference name. Use the full package name of the Java type.
<res-auth>
Required Used to control the resource sign on for security.
If set to
APPLICATION,
indicates that the application
component code performs resource sign on
programmatically. If set to
Container
, WebLogic Server
uses the security context established with the
login-config
element. See Section A.20, "login-config".
<res-sharing-scope
>
Optional Specifies whether connections obtained through the given
resource manager connection factory reference can be
shared.
Valid values:
Shareable
Unshareable
<lookup-name>
Optional The JNDI name to be looked up to resolve a resource
reference.
security-constraint
A-14 Developing Web Applications, Servlets, and JSPs for Oracle WebLogic Server
A.19 security-constraint
The
security-constraint
element defines the access privileges to a collection of
resources defined by the
<web-resource-collection>
element.
For detailed instructions and an example on configuring security in Web applications,
see Securing Resources Using Roles and Policies for Oracle WebLogic Server. Also, for more
information on WebLogic Security, refer to Developing Applications with the WebLogic
Security Service.
The following table describes the elements you can define within a
security-constraint
element.
A.19.1 web-resource-collection
Each
<security-constraint>
element must have one or more
<web-resource-collection>
elements. These define the area of the Web application to
which this security constraint is applied.
This is an element within the Section A.19, "security-constraint".
The following table describes the elements you can define within a
web-resource-collection
element.
A.19.2 auth-constraint
This is an element within the Section A.19, "security-constraint".
Table A–24 security-constraint Elements
Element
Required/
Optional Description
<web-resource-
collection>
Required Defines the components of the Web application to which
this security constraint is applied.
<auth-constraint>
Optional Defines which groups or principals have access to the
collection of Web resources defined in this security
constraint. See also Section A.19.2, "auth-constraint".
<user-data-
constraint>
Optional Defines how the client should communicate with the
server.
See also Section A.19.3, "user-data-constraint".
Table A–25 web-resource-collection Elements
Element
Required/
Optional Description
<web-resource-
name>
Required The name of this Web resource collection.
<description>
Optional A text description of this security constraint.
<url-pattern>
Optional Use one or more of the <
url-pattern
> elements to declare
to which URL patterns this security constraint applies. If
you do not use at least one of these elements, this
<
web-resource-collection
> is ignored by WebLogic
Server.
<http-method>
Optional Use one or more of the <
http-method
> elements to declare
which HTTP methods (usually,
GET
or
POST
) are subject to
the authorization constraint. If you omit the
<
http-method
> element, the default behavior is to apply
the security constraint to all HTTP methods.
login-config
web.xml Deployment Descriptor Elements A-15
The optional
auth-constraint
element defines which groups or principals have access
to the collection of Web resources defined in this security constraint.
The following table describes the elements you can define within an
auth-constraint
element.
A.19.3 user-data-constraint
This is an element within the Section A.19, "security-constraint".
The
user-data-constraint
element defines how the client should communicate with
the server.
The following table describes the elements you may define within a
user-data-constraint
element.
A.20 login-config
Use the optional
login-config
element to configure how the user is authenticated; the
realm name that should be used for this application; and the attributes that are needed
by the form login mechanism.
If this element is present, the user must be authenticated in order to access any
resource that is constrained by a
<security-constraint>
defined in the Web
application. Once authenticated, the user can be authorized to access other resources
with access privileges.
The following table describes the elements you can define within a
login-config
element.
Table A–26 auth-constraint Elements
Element
Required/
Optional Description
<description>
Optional A text description of this security constraint.
<role-name>
Optional Defines which security roles can access resources defined
in this security-constraint. Security role names are mapped
to principals using the Section A.10.3, "security-role-ref"
.
Table A–27 user-data-constraint Elements
Element
Required/
Optional Description
<description>
Optional A text description.
<transport-
guarantee>
Required Specifies that the communication between client and
server.
WebLogic Server establishes a Secure Sockets Layer (SSL)
connection when the user is authenticated using the
INTEGRAL
or
CONFIDENTIAL
transport guarantee.
Range of values:
NONE—
The application does not require any transport
guarantees.
INTEGRAL—
The application requires that the data be sent
between the client and server in such a way that it cannot
be changed in transit.
CONFIDENTIAL—
The application requires that data be
transmitted so as to prevent other entities from observing
the contents of the transmission.

security-role
A-16 Developing Web Applications, Servlets, and JSPs for Oracle WebLogic Server
A.20.1 form-login-config
This is an element within the Section A.20, "login-config".
Use the
<form-login-config>
element if you configure the
<auth-method>
to
FORM
.
A.21 security-role
The following table describes the elements you can define within a
security-role
element.
Table A–28 config
Element
Required/
Optional Description
<auth-method>
Optional Specifies the method used to authenticate the user. Possible
values:
BASIC
—uses browser authentication. (This is the default
value.)
FORM
—uses a user-written HTML form.
CLIENT-CERT
You can define multiple authentication methods as a
comma separated list to provide a fall-back
mechanism. Authentication will be attempted in the
order the values are defined in the auth-method
list.
See "Providing a Fallback Mechanism for Authentication
Methods" in Developing Applications with the WebLogic
Security Service.
<realm-name>
Optional The name of the realm that is referenced to authenticate the
user credentials. If omitted, the realm defined with the
Auth Realm Name field on the Web application >
Configuration > Other tab of the Administration Console is
used by default.
The
<realm-name>
element does not refer to system
security realms within WebLogic Server. This element
defines the realm name to use in HTTP Basic authorization.
The system security realm is a collection of security
information that is checked when certain operations are
performed in the server. The servlet security realm is a
different collection of security information that is checked
when a page is accessed and basic authentication is used.
<form-login-
config>
Optional Use this element if you configure the
<auth-method>
to
FORM
. See Section A.20.1, "form-login-config".
Table A–29 form-login-config Elements
Element
Required/
Optional Description
<form-login-page>
Required The URI of a Web resource relative to the document root,
used to authenticate the user. This can be an HTML page,
JSP, or HTTP servlet, and must return an HTML page
containing a
FORM
-based authentication that conforms to a
specific naming convention.
<form-error-page>
Required The URI of a Web resource relative to the document root,
sent to the user in response to a failed authentication login.

ejb-ref
web.xml Deployment Descriptor Elements A-17
A.22 env-entry
The optional
env-entry
element declares an environment entry for an application. Use
a separate element for each environment entry.
The following table describes the elements you can define within an
env-entry
element.
A.23 ejb-ref
The optional
ejb-ref
element defines a reference to an EJB resource. This reference is
mapped to the actual location of the EJB at deployment time by defining the mapping
in the WebLogic-specific deployment descriptor file,
weblogic.xml
. Use a separate
<ejb-ref>
element to define each reference EJB name.
The following table describes the elements you can define within an
ejb-ref
element.
Table A–30 security-role Elements
Element
Required/
Optional Description
<description>
Optional A text description of this security role.
<role-name>
Required The role name. The name you use here must have a
corresponding entry in the WebLogic-specific deployment
descriptor,
weblogic.xml,
which maps roles to principals
in the security realm. For more information, see
Section B.4, "security-role-assignment".
Table A–31 env-entry Elements
Element
Required/
Optional Description
<description>
Optional A textual description.
<env-entry-name>
Required The name of the environment entry.
<env-entry-value>
Required The value of the environment entry.
<env-entry-type>
Required The type of the environment entry.
Can be set to one of the following Java types:
java.lang.Boolean
java.lang.String
java.lang.Integer
java.lang.Double
java.lang.Float
<lookup-name>
Optional The JNDI name to be looked up to resolve a resource
reference.
Table A–32 ejb-ref Elements
Element
Required/
Optional Description
<description>
Optional A text description of the reference.
<ejb-ref-name>
Required The name of the EJB used in the Web application. This
name is mapped to the JNDI tree in the WebLogic-specific
deployment descriptor
weblogic.xml
. For more
information, see Section B.8, "ejb-reference-description".
<ejb-ref-type>
Required The expected Java class type of the referenced EJB.
ejb-local-ref
A-18 Developing Web Applications, Servlets, and JSPs for Oracle WebLogic Server
A.24 ejb-local-ref
The
ejb-local-ref
element is used for the declaration of a reference to an enterprise
bean's local home. The declaration consists of:
■ An optional description
■ The EJB reference name used in the code of the Web application that references the
enterprise bean. The expected type of the referenced enterprise bean
■ The expected local home and local interfaces of the referenced enterprise bean
■ Optional ejb-link information, used to specify the referenced enterprise bean
The following table describes the elements you can define within an
ejb-local-ref
element.
<home>
Required The fully qualified class name of the EJB home interface.
<remote>
Required The fully qualified class name of the EJB remote interface.
<ejb-link>
Optional The
<ejb-name>
of an EJB in an encompassing Java EE
application package.
<run-as>
Optional A security role whose security context is applied to the
referenced EJB. Must be a security role defined with the
<security-role>
element.
<lookup-name>
Optional The JNDI name to be looked up to resolve a resource
reference.
Table A–33 ejb-local-ref Elements
Element
Required/
Optional Description
<description>
Optional A text description of the reference.
<ejb-ref-name>
Required Contains the name of an EJB reference. The EJB reference is
an entry in the Web application's environment and is relative
to the
java:comp/env
context. The name must be unique
within the Web application. It is recommended that name is
prefixed with
ejb/
.
For example:
<ejb-ref-name>ejb/Payroll</ejb-ref-name>
<ejb-ref-type>
Required The
ejb-ref-type
element contains the expected type of the
referenced enterprise bean. The
ejb-ref-type
element must
be one of the following:
<ejb-ref-type>Entity</ejb-ref-type>
<ejb-ref-type>Session</ejb-ref-type>
<local-home>
Required Contains the fully-qualified name of the enterprise bean's
local home interface.
<local>
Required Contains the fully-qualified name of the enterprise bean's
local interface.
Table A–32 (Cont.) ejb-ref Elements
Element
Required/
Optional Description

message-destination-ref
web.xml Deployment Descriptor Elements A-19
A.25 web-app
The XML schema for the servlet 3.0 deployment descriptor. WebLogic Server fully
supports HTTP servlets as defined at
http://jcp.org/en/jsr/detail?id=315
.
However, the
version
attributed must be set to
3.0
in order to enforce 3.0 behavior.
The following table describes the elements you can define within an
web-app
element.
A.26 message-destination-ref
The optional
message-destination-ref
element specifies a reference to a message
destination associated with a resource. The logical destination described by this
element is mapped to a physical destination in the deployment descriptor.
The following table describes the elements you can define within an
message-destination-ref
element.
<ejb-link>
Optional The
ejb-link
element is used in the
ejb-ref
or
ejb-local-ref e
lements to specify that an EJB reference is
linked to an EJB.
The name in the
ejb-link
element is composed of a path
name. This path name specifies the
ejb-jar
containing the
referenced EJB with the
ejb-name
of the target bean
appended and separated from the path name by
#
.
The path name is relative to the WAR file containing the Web
application that is referencing the EJB. This allows multiple
EJBs with the same
ejb-name
to be uniquely identified.
Used in:
ejb-local-ref
and
ejb-ref
elements.
Examples:
<ejb-link>EmployeeRecord</ejb-link>
<ejb-link>../products/product.jar#ProductEJB</ejb-lin
k>
<lookup-name>
Optional The JNDI name to be looked up to resolve a resource
reference.
Table A–34 web-app Elements
Element
Required/
Optional Description
<version>
Required All servlet deployment descriptors must indicate the 3.0
version of the schema in order to enforce servlet 3.0
behavior.
Table A–35 message-destination-ref Elements
Element
Required/
Optional Description
description
Optional Provides a description of the message destination
reference.
message-destinatio
n-name
Required Specifies a name for a message destination. This name
must be unique among the names of message destinations
within the deployment descriptor.
Table A–33 (Cont.) ejb-local-ref Elements
Element
Required/
Optional Description
message-destination-ref
A-20 Developing Web Applications, Servlets, and JSPs for Oracle WebLogic Server
mapped-name
Optional Maps this message destination to a "logical" name.
lookup-name
Optional The JNDI name to be looked up to resolve the message
destination.
message-destinatio
n-type
Required Specifies the type of the destination. The type is specified
by the Java interface expected to be implemented by the
destination.
Must be supplied unless an injection target is specified, in
which case the type of the target is used. If both are
specified, the type must be assignment compatible with the
type of the injection target.
message-destinatio
n-usage
Optional Specifies the use of the message destination indicated by
the reference. The value indicates whether messages are
consumed from the message destination, produced for the
destination, or both.
Valid values are one of the following:
■
Consumes
■
Produces
■
ConsumesProduces
If not specified,
ConsumesProduces
is assumed.
message-destinatio
n-link
Optional Links a message destination reference or message-driven
bean to a message destination.
Table A–35 (Cont.) message-destination-ref Elements
Element
Required/
Optional Description

B
weblogic.xml Deployment Descriptor Elements B-1
B
weblogic.xml Deployment Descriptor Elements
This document provides a complete reference for the elements in the WebLogic
Server-specific deployment descriptor
weblogic.xml
. If your Web application does not
contain a
weblogic.xml
deployment descriptor, WebLogic Server automatically selects
the default values of the deployment descriptor elements.
The following sections describe the complex deployment descriptor elements that can
be defined in the
weblogic.xml
deployment descriptor under the root element
weblogic-web-app
:
■ Section B.1, "weblogic.xml Namespace Declaration and Schema Location"
■ Section B.2, "description"
■ Section B.3, "weblogic-version"
■ Section B.4, "security-role-assignment"
■ Section B.5, "run-as-role-assignment"
■ Section B.6, "resource-description"
■ Section B.7, "resource-env-description"
■ Section B.8, "ejb-reference-description"
■ Section B.9, "service-reference-description"
■ Section B.10, "session-descriptor"
■ Section B.11, "jsp-descriptor"
■ Section B.12, "auth-filter"
■ Section B.13, "container-descriptor"
■ Section B.14, "charset-params"
■ Section B.15, "virtual-directory-mapping"
■ Section B.16, "url-match-map"
■ Section B.17, "security-permission"
■ Section B.18, "context-root"
■ Section B.19, "wl-dispatch-policy"
■ Section B.20, "servlet-descriptor"
■ Section B.21, "work-manager"
■ Section B.22, "logging"
■ Section B.23, "library-ref"

weblogic.xml Namespace Declaration and Schema Location
B-2 Developing Web Applications, Servlets, and JSPs for Oracle WebLogic Server
■ Section B.24, "fast-swap"
■ Section B.25, "async-descriptor"
■ Section B.26, "async-work-manager"
■ Section B.27, "Backwards Compatibility Flags"
■ Section B.28, "Web Container Global Configuration"
B.1 weblogic.xml Namespace Declaration and Schema Location
The correct text for the namespace declaration and schema location for the WebLogic
Server
weblogic.xml
file is as follows.
<weblogic-web-app xmlns="http://xmlns.oracle.com/weblogic/weblogic-web-app">
To view the schema for
weblogic.xml
, go to
http://xmlns.oracle.com/weblogic/weblogic-web-app/1.5/weblogic-web-app.xsd
.
B.2 description
The
description
element is a text description of the Web application.
B.3 weblogic-version
The
weblogic-version
element indicates the version of WebLogic Server on which this
Web application (as defined in the root element
weblogic-web-app
) is intended to be
deployed. This element is informational only and is not used by WebLogic Server.
B.4 security-role-assignment
The
security-role-assignment
element declares a mapping between a Web
application security role and one or more principals in WebLogic Server, as shown in
the following example.
<security-role-assignment>
<role-name>PayrollAdmin</role-name>
<principal-name>Tanya</principal-name>
<principal-name>Fred</principal-name>
<principal-name>system</principal-name>
</security-role-assignment>
You can also use it to mark a given role as an externally defined role, as shown in the
following example:
<security-role-assignment>
<role-name>roleadmin</role-name>
<externally-defined/>
</security-role-assignment>
Note: In the
security-role-assignment
element, either
principal-name
or
externally-defined
must be defined. Both cannot
be omitted.

run-as-role-assignment
weblogic.xml Deployment Descriptor Elements B-3
The following table describes the elements you can define within a
security-role-assignment
element.
If you do not define a
security-role-assignment
element and its sub-elements, the
Web application container implicitly maps the role name as a principal name and logs
a warning. The EJB container does not deploy the module if mappings are not defined.
Consider the following usage scenarios for the role name is "role_xyz"
■ If you map "role_xyz" to user "joe" in
weblogic.xml
, role_xyz becomes a local role.
■ If you specify role_xyz as an externally defined role, it becomes global (it refers to
the role defined at the realm level).
■ If you do not define a
security-role-assignment
element, role_xyz becomes a
local role, and the Web application container creates an implicit mapping to it and
logs a warning.
B.5 run-as-role-assignment
The
run-as-role-assignment
element maps a
run-as
role name (a sub-element of the
servlet
element) in
web.xml
to a valid user name in the system. The value can be
overridden for a given servlet by the
run-as-principal-name
element in the
servlet-descriptor
. If the
run-as-role-assignment
is absent for a given role name,
the Web application container uses the first
principal-name
defined in the
security-role-assignment
. The following example illustrates how to use the
run-as-role-assignment
element.
<run-as-role-assignment>
<role-name>RunAsRoleName</role-name>
<run-as-principal-name>joe</run-as-principal-name>
</run-as-role-assignment>
The following table describes the elements you can define within a
run-as-role-assignment
element.
Table B–1 security-role-assignment Elements
Element
Required/Optio
nal Description
role-name
Required Specifies the name of a security role.
principal-name
Required if
externally-def
ined
is not
defined.
Specifies the name of a principal that is defined in
the security realm. You can use multiple
principal-name
elements to map principals to a
role. For more information on security realms, see
Administering Security for Oracle WebLogic Server.
externally-defined
Required if
principal-name
is not defined.
Specifies that a particular security role is defined
globally in a security realm; WebLogic Server uses
this security role as the principal name, rather than
looking it up in a global realm. When the security
role and its principal-name mapping are defined
elsewhere, this is used as an indicative placeholder.
Table B–2 run-as-role-assignment Elements
Element
Required/
Optional Description
role-name
Required Specifies the name of a security role.
resource-description
B-4 Developing Web Applications, Servlets, and JSPs for Oracle WebLogic Server
B.6 resource-description
The
resource-description
element is used to map the JNDI name of a server resource
to an EJB resource reference in WebLogic Server.
The following table describes the elements you can define within a
resource-description
element.
B.7 resource-env-description
The
resource-env-description
element maps a
resource-env-ref
, declared in the
ejb-jar.xml
deployment descriptor, to the JNDI name of the server resource it
represents.
The following table describes the elements you can define within a
resource-env-description
element.
B.8 ejb-reference-description
The following table describes the elements you can define within a
ejb-reference-description
element.
B.9 service-reference-description
The following table describes the elements you can define within a
service-reference-description
element.
run-as-principal-n
ame
Required Specifies the name of a principal.
Table B–3 resource-description Elements
Element
Required/
Optional Description
res-ref-name
Required Specifies the name of a resource reference.
jndi-name
Required Specifies a JNDI name for the resource.
Table B–4 resource-env-description Elements
Element
Required/
Optional Description
res-env-ref-name
Required Specifies the name of a resource environment reference.
jndi-name
Required Specifies a JNDI name for the resource environment
reference.
Table B–5 ejb-reference-description Elements
Element
Required/
Optional Description
ejb-ref-name
Required Specifies the name of an EJB reference used in your Web
application.
jndi-name
Required Specifies a JNDI name for the reference.
Table B–2 (Cont.) run-as-role-assignment Elements
Element
Required/
Optional Description

session-descriptor
weblogic.xml Deployment Descriptor Elements B-5
B.10 session-descriptor
The following table describes the elements you can define within a
session-descriptor
element to define parameters for servlet sessions.
Table B–6 service-reference-description Elements
Element
Required/
Optional Description
service-ref-name
wsdl-url
call-property
The
call-property
element has the following
sub-elements:
name
value
port-info
The
port-info
element has the following sub-elements:
port-name
stub-property
call-property
Table B–7 session-descriptor
Element Name
Default
Value Value
timeout-secs 3600
Sets the time, in seconds, that WebLogic
Server waits before timing out a session.
The default value is 3600 seconds.
On busy sites, you can tune your
application by adjusting the timeout of
sessions. While you want to give a browser
client every opportunity to finish a session,
you do not want to tie up the server
needlessly if the user has left the site or
otherwise abandoned the session.
This element can be overridden by the
session-timeout
element (defined in
minutes) in
web.xml
.
invalidation-interval-secs 60
Sets the time, in seconds, that WebLogic
Server waits between doing house-cleaning
checks for timed-out and invalid sessions,
and deleting the old sessions and freeing
up memory. Use this element to tune
WebLogic Server for best performance on
high traffic sites.
The default value is 60 seconds.
invalidate-on-relogin false
Sets whether the container must invalidate
the current session if the currently
logged-in user switches to a different user
name (which is valid in the security realm)
and attempts to log in again.
If the value of this parameter is set to
true
,
the current session is invalidated if the user
attempts to log in again using a different
user name.

session-descriptor
B-6 Developing Web Applications, Servlets, and JSPs for Oracle WebLogic Server
sharing-enabled false
Enables Web applications to share HTTP
sessions when the value is set to
true
at the
application level.
This element is ignored if turned on at the
Web application level.
debug-enabled false
Enables the debugging feature for HTTP
sessions.
The default value is
false
.
id-length 52
Sets the size of the session ID.
The minimum value is 32 bytes and the
maximum value is
Integer.MAX_VALUE
.
Note: If a value lower than 32 bytes is set,
WebLogic Server automatically raises the
value to 32 and displays the following
message:
The IDLength is too short. It is not
secure. WLS will raise the length to
32.
If you are writing a WAP application, you
must use URL rewriting because the WAP
protocol does not support cookies. Also,
some WAP devices have a 128-character
limit on URL length (including attributes),
which limits the amount of data that can be
transmitted using URL rewriting. To allow
more space for attributes, use this attribute
to limit the size of the session ID that is
randomly generated by WebLogic Server.
You can also limit the length to a fixed 52
characters, and disallow special characters,
by setting the WAPEnabled attribute. For
more information, see Section 10.5.2, "URL
Rewriting and Wireless Access Protocol
(WAP)"
tracking-enabled true
Enables session tracking between HTTP
requests.
cache-size 1028
Sets the cache size for JDBC and
file-persistent sessions.
Table B–7 (Cont.) session-descriptor
Element Name
Default
Value Value

session-descriptor
weblogic.xml Deployment Descriptor Elements B-7
max-in-memory-sessions -1
Sets the maximum limit for
memory/replicated sessions.
Without the ability to configure bound
in-memory servlet session use, as new
sessions are continually created, the server
eventually grows out of memory. To protect
against this, WebLogic Server provides a
configurable bound on the number of
sessions created. When this number is
exceeded, the
weblogic.servlet.SessionCreationExcep
tion
occurs for each attempt to create a
new session. This feature applies to both
replicated and non-replicated in-memory
sessions.
To configure bound in-memory servlet
session use, you set the limitation in the
max-in-memory-sessions
element.
The default is
-1
(unlimited); any negative
value works as the same as
-1
.
max-save-post-size 4096
Sets the maximum size, in bytes, of the
POST data that the container saves/buffers
during FORM authentication.
The default value is
4096
bytes.
save-post-timeout-secs 40
Defines the timeout, in seconds, for the
session that saved/buffered POST data. For
FORM authentication, POST data is saved
in a session while the user is redirected to
the login form.
The default value is
40
seconds.
save-post-timeout-interval-secs 20
Sets the invalidation trigger interval, in
seconds, for saving POST data in a session.
The default value is
20
seconds.
cookies-enabled true
Use of session cookies is enabled by default
and is recommended, but you can disable
them by setting this property to
false
. You
might turn this option off to test.
cookie-name JSESSIONID
Defines the session tracking cookie name.
Defaults to
JSESSIONID
if not set. You may
set this to a more specific name for your
application.
cookie-path null
Defines the session tracking cookie path.
If not set, this attribute defaults to
/
(slash),
where the browser sends cookies to all
URLs served by WebLogic Server. You may
set the path to a narrower mapping, to limit
the request URLs to which the browser
sends cookies.
Table B–7 (Cont.) session-descriptor
Element Name
Default
Value Value
session-descriptor
B-8 Developing Web Applications, Servlets, and JSPs for Oracle WebLogic Server
cookie-domain null
Specifies the domain for which the cookie
is valid. For example, setting
cookie-domain
to
.mydomain.com
returns
cookies to any server in the
*.mydomain.com
domain.
The domain name must have at least two
components. Setting a name to
*.com
or
*.net
is not valid.
If not set, this attribute defaults to the
server that issued the cookie.
For more information, see
Cookie.setDomain()
in the Servlet
specification.
cookie-comment null
Specifies the comment that identifies the
session tracking cookie in the cookie file.
cookie-secure false
Tells the browser to only send the cookie
back over an HTTPS connection. This
ensures that the cookie ID is secure and
should only be used on Web sites that use
HTTPS. Session Cookies over HTTP no
longer work if this feature is enabled.
You should disable the
url-rewriting-enabled
element if you
intend to use this feature.
cookie-max-age-secs -1
Sets the life span of the session cookie, in
seconds, after which it expires on the client.
This value can be set as any integer; the
default value is -1 (unlimited).
For more information about cookies, see
Section 10, "Using Sessions and Session
Persistence".
Table B–7 (Cont.) session-descriptor
Element Name
Default
Value Value

session-descriptor
weblogic.xml Deployment Descriptor Elements B-9
persistent-store-type memory
Sets the persistent store method to one of
the following options:
■
memory
—Disables persistent session
storage.
■
replicated
—Same as
memory
, but
session data is replicated across the
clustered servers.
■
replicated_if_clustered
—If the Web
application is deployed on a clustered
server, the in-effect
persistent-store-type
will be
replicated. Otherwise,
memory
is the
default.
■
async-replicated
—Enables
asynchronous session replication in an
application or Web application. See
"Asynchronous HTTP Session
Replication" in Tuning Performance of
Oracle WebLogic Server.
■
async-replicated-if-clustered
—Enable
s asynchronous session replication in
an application or Web application
when deployed to a cluster
environment. If deployed to a single
server environment, then the session
persistence/replication defaults to
in-memory. This allows testing on a
single server without deployment
errors.
■
file
—Uses file-based persistence (See
also Section B.10, "session-descriptor").
■
async-jdbc
—Enables asynchronous
JDBC persistence for HTTP sessions in
an application or Web application. See
Section 10.3, "Configuring Session
Persistence".
■
jdbc
—Uses a database to store
persistent sessions. (see also
Section B.10, "session-descriptor").
■
cookie
—All session data is stored in a
cookie in the user's browser.
persistent-store-cookie-name WLCOOKIE
Sets the name of the cookie used for
cookie-based persistence. The
WLCOOKIE
cookie carries the session state, which
should not be shared between Web
applications.
For more information, see Section 10.4.3,
"Using Cookie-Based Session Persistence".
Table B–7 (Cont.) session-descriptor
Element Name
Default
Value Value

session-descriptor
B-10 Developing Web Applications, Servlets, and JSPs for Oracle WebLogic Server
persistent-store-dir session_db
Specifies the storage directory used for
file-based persistence
Ensure that you have enough disk space to
store the number of valid sessions
multiplied by the size of each session. You
can find the size of a session by looking at
the files created in the
persistent-store-dir
. Note that the size
of each session can vary as the size of
serialized session data changes.
Each server instance has a default
persistent file store that requires no
configuration. Therefore, if no directory is
specified, a default store is automatically
created in the
<
server-name
>\data\store\default
directory. However, the default store is not
shareable among clustered servers.
You can make file-persistent sessions
clusterable by creating a custom persistent
store in a directory that is shared among
different servers. However, this requires
you to create this directory manually.
persistent-store-pool None
Specifies the name of a JDBC connection
pool to be used for persistence storage.
persistent-data-source-jndi-name None
Specifies the data source JNDI name of a
JDBC connection to be used for
jdbc
- and
async-jdbc
-based persistence (see
persistent-store-type
above).
For
async-jdbc
-based persistence, you
must specify the
persistent-data-source-jndi-name
parameter to configure persistence storage.
persistent-store-table wl_
servlet_
sessions
Specifies the database table name used to
store JDBC-based persistent sessions. This
applies only when
persistent-store-type
is set to jdbc.
The
persistent-store-table
element is
used when you choose a database table
name other than the default.
jdbc-column-name-max-inactive-in
terval
Serves as an alternative name for the
wl_
max_inactive_interval
column name.
This
jdbc-column-name-max-inactive-interva
l
element applies only to JDBC-based
persistence. It is required for certain
databases that do not support long column
names.
url-rewriting-enabled true
Enables URL rewriting, which encodes the
session ID into the URL and provides
session tracking if cookies are disabled in
the browser.
Table B–7 (Cont.) session-descriptor
Element Name
Default
Value Value

jsp-descriptor
weblogic.xml Deployment Descriptor Elements B-11
B.11 jsp-descriptor
The
jsp-descriptor
element specifies a list of configuration parameters for the JSP
compiler. The following table describes the elements you can define within a
jsp-descriptor
element.
http-proxy-caching-of-cookies true
When set to
false
, WebLogic Server adds
the following header with the following
response:
"Cache-control: no-cache=set-cookie"
This indicates that the proxy caches do not
cache the cookies.
encode-session-id-in-query-param
s
false
The latest servlet specification requires
containers to encode the session ID in path
parameters. Certain Web servers do not
work well with path parameters. In such
cases, the
encode-session-id-in-query-params
element should be set to
true
. (The default
is
false
.)
runtime-main-attribute
Used in
ServletSessionRuntimeMBean
. The
getMainAttribute()
of the
ServletSessionRuntimeMBean
returns the
session attribute value using this string as a
key.
Example:
user-name
This element is useful for tagging session
runtime information for different sessions.
monitoring-attribute-name
Configures the monitoring ID for a given
HTTP session.
HTTP sessions are identified with a
monitoring ID. By default, the monitoring
ID for a given HTTP session is a random
string (not the same as a session ID for
security reasons). This monitoring ID can
be configured by setting the
monitoring-attribute-name
element in
session-descriptor of the
weblogic.xml
deployment descriptor and then setting a
session attribute the defined
monitoring-attribute-name
. The
toString()
of the session attribute value
will then be used as a monitoring ID.
This element is useful for tagging session
runtime information for different sessions.
For example, you can set it to "username",
if you have a "username" attribute that is
unique.
cookie-http-only true
Specifies whether
HttpOnly
cookies are
enabled. When this element is set to
true
,
all session cookies would be unavailable to
the browser scripts. The default value is
true
. Therefore,
HttpOnly
cookies are
enabled by default.
Table B–7 (Cont.) session-descriptor
Element Name
Default
Value Value

jsp-descriptor
B-12 Developing Web Applications, Servlets, and JSPs for Oracle WebLogic Server
Table B–8 jsp-descriptor Elements
Element Default Value Description
page-check-seconds 1
Sets the interval, in seconds, at which WebLogic Server
checks to see if JSP files have changed and need
recompiling. Dependencies are also checked and
recursively reloaded if changed.
■ The value
-1
means never check the pages. This is
the default value in a production environment.
■ The value
0
means always check the pages.
■ The value
1
means check the pages every second.
This is the default value in a development
environment.
In a production environment where changes to a JSP
are rare, consider changing the value of
pageCheckSeconds to 60 or greater, according to your
tuning requirements.
strict-stale-check true
Applies to exploded WARs only.
Checks for updated JSP files, in other words, whether
the timestamp on the file is later (more recent) than the
one in the build. Only newer files can replace older
ones.
When set to false, just checks whether the timestamp
has changed. If so, the file is replaced.
<?xml version="1.0" encoding="UTF-8"?>
<weblogic-web-app xmlns="http://
xmlns.oracle.com/weblogic/weblogic-web-app">
<jsp-descriptor>
<strict-stale-check>false
</strict-stale-check>
</jsp-descriptor>
</weblogic-web-app>
precompile false
When set to true, WebLogic Server automatically
precompiles all modified JSPs when the Web
application is deployed or re-deployed or when
starting WebLogic Server.
precompile-continu
e
false
When set to true, WebLogic Server continues
precompiling all modified JSPs even if some of those
JSPs fail during compilation. Only takes effect when
precompile is set to true.
keepgenerated false
Saves the Java files that are generated as an
intermediary step in the JSP compilation process.
Unless this parameter is set to
true
, the intermediate
Java files are deleted after they are compiled.
verbose true
When set to
true
, debugging information is printed
out to the browser, the command prompt, and
WebLogic Server log file.
working-dir internally
generated
directory
The name of a directory where WebLogic Server saves
the generated Java and compiled class files for a JSP.
Note: If
weblogic.xml
defines a
working-dir
,
WebLogic Server does not delete this directory when
the Web application is undeployed.
print-nulls null
When set to false, this parameter ensures that
expressions with "null" results are printed as " ".

container-descriptor
weblogic.xml Deployment Descriptor Elements B-13
B.12 auth-filter
The
auth-filter
element specifies an authentication filter HttpServlet class.
B.13 container-descriptor
The
container-descriptor
element specifies a list of parameters that affect the
behavior of the Web application.
B.13.1 check-auth-on-forward
Add the
check-auth-on-forward
element when you want to require authentication of
forwarded requests from a servlet or JSP. Omit the tag if you do not want to require
re-authentication. For example:
backward-compatibl
e
true
When set to
true
, backward compatibility is enabled.
For more information, see Section B.27, "Backwards
Compatibility Flags".
encoding ISO-8859-1
for JSP pages
and UTF-8 for
JSPX pages
Specifies the default character set used in the JSP page.
Use standard Java character set names (see
http://docs.oracle.com/javase/7/docs/technotes/
guides/intl/
).
If not set, this attribute defaults to the encoding for
your platform.
A JSP page directive (included in the JSP code)
overrides this setting. For example:
<%@ page contentType="text/html;
charset=custom-encoding"%>
package-prefix jsp_servlet
Specifies the package prefix into which all JSP pages
are compiled.
exact-mapping true
When true, upon the first request for a JSP the newly
created JspStub is mapped to the exact request. If
exactMapping is set to false, the Web application
container generates non-exact url mapping for JSPs.
exactMapping
allows path info for JSP pages.
default-file-name true
The default file name in which WebLogic Server saves
the generated Java and compiled class files for a JSP.
rtexprvalue-jsp-pa
ram-name
false
Allows run-time expression values in the name
attribute of the
jsp:param
tag. It is set to
false
by
default.
optimize-java-expr
ession
false
When set to true, the JSP compiler optimizes Java
expressions to improve run-time performance.
compress-html-temp
late
false
When set to true, compresses the HTML in the JSP
template blocks to improve run-time performance.
If the JSP's HTML template block contains the
<pre>
HTML tag, do not enable this feature.
Note: This is a deprecated element for the current release. Instead,
use servlet authentication filters.
Table B–8 (Cont.) jsp-descriptor Elements
Element Default Value Description

container-descriptor
B-14 Developing Web Applications, Servlets, and JSPs for Oracle WebLogic Server
<container-descriptor>
<check-auth-on-forward/>
</container-descriptor>
B.13.2 filter-dispatched-requests-enabled
The
filter-dispatched-requests-enabled
element controls whether or not filters are
applied to dispatched requests. The default value is
false
.
B.13.3 redirect-with-absolute-url
The
redirect-with-absolute-url
element controls whether the
javax.servlet.http.HttpServletResponse.SendRedirect()
method redirects using
a relative or absolute URL. Set this element to
false
if you are using a proxy HTTP
server and do not want the URL converted to a non-relative link.
The default behavior is to convert the URL to a non-relative link.
B.13.4 index-directory-enabled
The
index-directory-enabled
element controls whether or not to automatically
generate an HTML directory listing if no suitable index file is found.
The default value is
false
(does not generate a directory). Values are
true
or
false
.
B.13.5 index-directory-sort-by
The
index-directory-sort-by
element defines the order in which the directory listing
generated by
weblogic.servlet.FileServlet
is sorted. Valid sort-by values are
NAME
,
LAST_MODIFIED
, and
SIZE
. The default sort-by value is
NAME
.
B.13.6 servlet-reload-check-secs
The
servlet-reload-check-secs
element defines whether a WebLogic Server will
check to see if a servlet has been modified, and if it has been modified, reloads it.
■ The value
-1
means never check the servlets. This is the default value in a
production environment.
■ The value
0
means always check the servlets.
■ The value
1
means check the servlets every second. This is the default value in a
development environment.
Note: As a best practice, Oracle recommends that you do not enable
the
check-auth-on-forward
property.
Note: Because 2.4 servlets are backward compatible with 2.3 servlets
(per the 2.4 specification), when 2.3 descriptor elements are detected
by WebLogic Server, the
filter-dispatched-requests-enabled
element defaults to
true
.
Note: User readable data used in a redirect.

container-descriptor
weblogic.xml Deployment Descriptor Elements B-15
A value specified in the Administration Console will always take precedence over a
manually specified value.
B.13.7 resource-reload-check-secs
The
resource-reload-check-secs
element is used to perform metadata caching for
cached resources that are found in the resource path in the Web application scope. This
parameter identifies how often WebLogic Server checks whether a resource has been
modified and if so, it reloads it.
■ The value
-1
means never reload. This is the default value in a production
environment.
■ The value
0
means always reload.
■ The value
1
means reload every second. This is the default value in a development
environment.
Values specified for this parameter using the Administration Console are given
precedence.
B.13.8 single-threaded-servlet-pool-size
The
single-threaded-servlet-pool-size
element defines the size of the pool used
for
SingleThreadMode
instance pools. The default value is
5
.
B.13.9 session-monitoring-enabled
The
session-monitoring-enabled
element, if set to true, allows run-time MBeans to
be created for sessions. When set to
false
, the default value, run-time MBeans are not
created. A value specified in the Administration Console takes precedence over a
value set manually.
B.13.10 save-sessions-enabled
The
save-sessions-enabled
element controls whether session data is cleaned up
during redeploy or undeploy. It affects memory and replicated sessions. Setting the
value to true means session data is saved. Setting to false means session data will be
destroyed when the Web application is redeployed or undeployed. The default is
false
.
B.13.11 prefer-web-inf-classes
The
prefer-web-inf-classes
element, if set to true, will cause classes located in the
WEB-INF
directory of a Web application to be loaded in preference to classes loaded in
the application or system classloader. The default value is
false
. A value specified in
the Administration Console will take precedence over a value set manually.
Note: If the resource is a JSP, and if
page-check-seconds
is specified
in the
jsp-descriptor
element, the
page-check-seconds
value is used
to determine reload time for the JSP file.
Note:
SingleThreadMode
instance pools are deprecated in this
release.

container-descriptor
B-16 Developing Web Applications, Servlets, and JSPs for Oracle WebLogic Server
B.13.12 prefer-application-packages
The
prefer-application-packages
element specifies a list of packages for classes that
must always be loaded from the application. For more information, see
prefer-application-packages
in Developing Applications for Oracle WebLogic Server.
<?xml version="1.0" encoding="UTF-8"?>
<wls:weblogic-web-app
xmlns:wls="http://xmlns.oracle.com/weblogic/weblogic-web-app"
xmlns:xsi="http://www.w3.org/2001/XMLSchema-instance"
xsi:schemaLocation="http://java.sun.com/xml/ns/javaee
http://java.sun.com/xml/ns/javaee/ejb-jar_3_0.xsd
http://xmlns.oracle.com/weblogic/weblogic-web-app
http://xmlns.oracle.com/weblogic/weblogic-web-app/1.5/weblogic-web-app.xsd">
<wls:weblogic-version>12.1.1</wls:weblogic-version>
<wls:context-root>FilterWeb</wls:context-root>
<wls:container-descriptor>
<wls:prefer-application-packages>
<wls:package-name>com.oracle.foo</wls:package-name>
</wls:prefer-application-packages>
</wls:container-descriptor>
</wls:weblogic-web-app>
Note that in order to use
prefer-application-packages
or
prefer-application-resources
,
prefer-web-inf-classes
must be set to false.
B.13.13 prefer-application-resources
The
prefer-application-resources
element specifies a list of resources that must
always be loaded from the application, even if the resources are found in the system
classloader. For more information, see
prefer-application-resources
in Developing
Applications for Oracle WebLogic Server.
<?xml version="1.0" encoding="UTF-8"?>
<weblogic-web-app xmlns="http://xmlns.oracle.com/weblogic/weblogic-web-app">
<container-descriptor>
<prefer-web-inf-classes>false</prefer-web-inf-classes>
<prefer-application-packages>
<package-name>javax.faces.*</package-name>
<package-name>com.sun.faces.*</package-name>
<package-name>com.bea.faces.*</package-name>
</prefer-application-packages>
<prefer-application-resources>
<resource-name>javax.faces.*</resource-name>
<resource-name>com.sun.faces.*</resource-name>
<resource-name>com.bea.faces.*</resource-name>
<resource-name>META-INF/services/javax.servlet.ServletContainerInitializer</resour
ce-name>
</prefer-application-resources>
</container-descriptor>
Note: Neither
prefer-application-packages
nor
prefer-application-resources
can be specified when
prefer-web-inf-classes
is turned on in
weblogic.xml
.

container-descriptor
weblogic.xml Deployment Descriptor Elements B-17
</weblogic-web-app>
Note that in order to use
prefer-application-packages
or
prefer-application-resources
,
prefer-web-inf-classes
must be set to false.
B.13.14 default-mime-type
The
default-mime-type
element default value is
null
. This element allows the user to
specify the default mime type for a content-type for which the extension is not
mapped.
B.13.15 client-cert-proxy-enabled
The
client-cert-proxy-enabled
element default value is
true
. When set to true,
WebLogic Server passes identity certificates from the clients to the backend servers.
Also, WebLogic Server is notified whether to honor or discard the incoming
WL-Proxy-Client-Cert header.
A proxy-server plugin encodes each identity certification in the WL-Proxy-Client-Cert
header and passes it to the backend WebLogic Server instances. Each WebLogic Server
instance takes the certificate information from the header, ensures it came from a
secure source, and uses that information to authenticate the user. For the background
WebLogic Server instances, this parameter must be set to
true
(either at the
cluster/server level or at the Web application level).
If you set this element to
true
, use a weblogic.security.net.ConnectionFilter to ensure
that each WebLogic Server instance accepts connections only from the machine on
which the proxy-server plugin is running. If you specify
true
without using a
connection filter, a potential security vulnerability is created because the
WL-Proxy-Client-Cert header can be spoofed.
B.13.16 relogin-enabled
The
relogin-enabled
element is a backward compatibility parameter. If a user has
logged in already and tries to access a resource for which s/he does not have
privileges, a
FORBIDDEN (403)
response occurs.
B.13.17 allow-all-roles
In the security-constraints elements defined in the
web.xml
descriptor of a Web
application, the
auth-constraint
element indicates the user roles that should be
permitted access to this resource collection. Here role-name = "*" is a compact syntax
for indicating all roles in the Web application. In past releases, role-name = "*" was
treated as all users/roles defined within the realm.
This
allow-all-roles
element is a backward compatibility switch to restore old
behavior. The default behavior is to allow all roles defined in the Web application. The
value specified in
weblogic.xml
takes precedence over the value defined in the
WebAppContainerMBean
.
B.13.18 native-io-enabled
To use native I/O while serving static files with
weblogic.servlet.FileServlet
,
which is implicitly registered as the default servlet, set
native-io-enabled
to
true
.
(The default value is
false
.)
native-io-enabled
element applies only on Windows.

container-descriptor
B-18 Developing Web Applications, Servlets, and JSPs for Oracle WebLogic Server
B.13.19 minimum-native-file-size
The
minimum-native-file-size
element applies only when
native-io-enabled
is set
to
true
. It sets the minimum file size in Bytes for using native I/O. If the file being
served is larger than this value, native I/O is used. If you do not set this value, the
default value used is
4000
.
B.13.20 disable-implicit-servlet-mappings
When the
disable-implicit-servlet-mappings
flag is set to
true
, the Web
application container does not create implicit mappings for internal servlets (
*.jsp
,
*.class
, and so on); only for the default servlet mapping. A typical use case for
turning off implicit servlet mappings would be when configuring
HttpClusterServlet
or
HttpProxyServlet
.
The default value is
false
.
B.13.21 temp-dir
The
temp-dir
element specifies the location of the temporary directory for the Web
application, as returned by the
"javax.servlet.context.tempDir"
attribute.
B.13.22 optimistic-serialization
When
optimistic-serialization
is turned on, WebLogic Server does not
serialize-deserialize context and request attributes upon
getAttribute(name)
when
the request is dispatched across servlet contexts.
This means that you must make sure that the attributes common to Web applications
are scoped to a common parent classloader (application scoped) or you must place
them in the system classpath if the two Web applications do not belong to the same
application.
When
optimistic-serialization
is turned off (default value), WebLogic Server
serialize-deserializes context and request attributes upon
getAttribute(name)
to
avoid the possibility of ClassCastExceptions.
The
optimistic-serialization
value can also be specified at domain level in the
WebAppContainerMBean
, which applies for all Web applications. The value in
weblogic.xml
, if specified, overrides the domain-level value.
The default value is
false
.
B.13.23 show-archived-real-path-enabled
The
show-archived-real-path-enabled
element specifies the behavior of
getRealPath()
for archived Web applications.
When set to
true
,
getRealPath()
returns the canonical path of the resource files.
If the
show-archived-real-path-enabled
element is set to
false
, the servlet container
will return the real path of files in archived Web applications as
null
.
The default value is
false
.
B.13.24 require-admin-traffic
The
require-admin-trafffic
element defines whether traffic should go through the
administration channel. When set to
true
traffic is allowed to go through the

container-descriptor
weblogic.xml Deployment Descriptor Elements B-19
administration channel. Otherwise, traffic can only go through administration channel
when the Web application is in administrative mode. For example:
<container-descriptor>
<require-admin-traffic>true</require-admin-traffic>
</container-descriptor>
B.13.25 access-logging-disabled
The
access-logging-disabled
element defines whether to eliminate access logging of
the underlying Web application. Setting this property to
true
improves server
throughput by reducing the logging overhead. If the property is not specified or a
false
value is set, application accesses are logged.
B.13.26 prefer-forward-query-string
When
HttpServletRequest.getQueryString()
is invoked in a forwarding request,
WebLogic Server returns the queryString sent by the forwarding servlet via
RequestDispatcher and the original ones sent by the client.
When the
prefer-forward-query-string
flag is set to
true
, WebLogic Server returns
only the forwarded query string, if it is specified. The default value is
false
.
B.13.27 container-initializer-enabled
The
container-initializer-enabled
element controls whether or not to enable the
servlet container initializer.
In servlet 3.0 applications,
ServletContainerInitializer
is enabled by default. For
performance considerations, you can explicitly disable the servlet container initializer
by configuring the
container-initializer-enabled
element in the
weblogic.xml
deployment descriptor in the targeted Web application. For example:
<?xml version="1.0" encoding="UTF-8"?>
<weblogic-web-app xmlns="http://xmlns.oracle.com/weblogic/weblogic-web-app"
xmlns:xsi="http://www.w3.org/2001/XMLSchema-instance"
xsi:schemaLocation="http://java.sun.com/xml/ns/javaee
http://java.sun.com/xml/ns/javaee/web-app_2_5.xsd
http://xmlns.oracle.com/weblogic/weblogic-web-app
http://xmlns.oracle.com/weblogic/weblogic-web-app/1.5/weblogic-web-app.xsd">
...
<container-descriptor>
<container-initializer-enabled>false</container-initializer-enabled>
</container-descriptor>
...
</weblogic-web-app>
In pre-servlet 3.0 applications, you can explicitly enable the servlet container initializer
by setting the
container-initializer-enabled
element in the
weblogic.xml
deployment descriptor to
true
. For example:
<container-descriptor>
<container-initializer-enabled>true</container-initializer-enabled>
</container-descriptor>

charset-params
B-20 Developing Web Applications, Servlets, and JSPs for Oracle WebLogic Server
B.14 charset-params
The
charset-params
element is used to define code set behavior for non-unicode
operations. For example:
<charset-params>
<input-charset>
<resource-path>/*</resource-path>
<java-charset-name>UTF-8</java-charset-name>
</input-charset>
</charset-params>
B.14.1 input-charset
Use the
input-charset
element to define which character set is used to read
GET
and
POST
data. For example:
<input-charset>
<resource-path>/foo</resource-path>
<java-charset-name>SJIS</java-charset-name>
</input-charset>
For more information, see Section 5.7, "Determining the Encoding of an HTTP
Request".
The following table describes the elements you can define within a
input-charset
element.
B.14.2 charset-mapping
Use the
charset-mapping
element to map an IANA character set name to a Java
character set name. For example:
<charset-mapping>
<iana-charset-name>Shift-JIS</iana-charset-name>
<java-charset-name>SJIS</java-charset-name>
</charset-mapping>
For more information, see Section 5.8, "Mapping IANA Character Sets to Java
Character Sets".
The following table describes the elements you can define within a
charset-mapping
element.
Table B–9 input-charset Elements
Element
Required/
Optional Description
resource-path
Required A path which, if included in the URL of a request,
signals WebLogic Server to use the Java character set
specified by
java-charset-name
.
java-charset-name
Required Specifies the Java characters set to use.
Table B–10 charset-mapping Elements
Element
Required/
Optional Description
iana-charset-name
Required Specifies the IANA character set name that is to be mapped
to the Java character set specified by the
java-charset-name
element.

url-match-map
weblogic.xml Deployment Descriptor Elements B-21
B.15 virtual-directory-mapping
Use the
virtual-directory-mapping
element to specify document roots other than the
default document root of the Web application for certain kinds of requests, such as
image requests. All images for a set of Web applications can be stored in a single
location, and need not be copied to the document root of each Web application that
uses them. For an incoming request, if a virtual directory has been specified, the
servlet container will search for the requested resource first in the virtual directory and
then in the Web application's original document root. This defines the precedence if
the same document exists in both places.
Example:
<virtual-directory-mapping>
<local-path>c:/usr/gifs</local-path>
<url-pattern>/images/*</url-pattern>
<url-pattern>*.jpg</url-pattern>
</virtual-directory-mapping>
<virtual-directory-mapping>
<local-path>c:/usr/common_jsps.jar</local-path>
<url-pattern>*.jsp</url-pattern>
</virtual-directory-mapping>
The following table describes the elements you can define within the
virtual-directory-mapping
element.
The WebLogic Server implementation of virtual directory mapping requires that you
have a directory that matches the url-pattern of the mapping. The image example
requires that you create a directory named images at
c:/usr/gifs/images
. This allows
the servlet container to find images for multiple Web applications in the images
directory.
B.16 url-match-map
Use this element to specify a class for URL pattern matching. The WebLogic Server
default URL match mapping class is
weblogic.servlet.utils.URLMatchMap
, which is
based on Java EE standards. Another implementation included in WebLogic Server is
SimpleApacheURLMatchMap
, which you can plug in using the
url-match-map
element.
Rule for
SimpleApacheURLMatchMap
:
If you map
*.jws
to
JWSServlet
then
http://foo.com/bar.jws/baz
will be resolved to
JWSServlet
with
pathInfo = baz
.
java-charset-name
Required Specifies the Java characters set to use.
Table B–11 virtual-directory-mapping Elements
Element
Required/
Optional Description
local-path
Required Specifies a physical location on the disk.
url-pattern
Required Contains the URL pattern of the mapping. Must follow the rules
specified in Section 11.2 of the Servlet API Specification.
Table B–10 (Cont.) charset-mapping Elements
Element
Required/
Optional Description

security-permission
B-22 Developing Web Applications, Servlets, and JSPs for Oracle WebLogic Server
Configure the
URLMatchMap
to be used in
weblogic.xml
as in the following example:
<url-match-map>
weblogic.servlet.utils.SimpleApacheURLMatchMap
</url-match-map>
B.17 security-permission
The
security-permission
element specifies a single security permission based on the
security policy file syntax. Refer to the following URL for the implementation of the
security permission specification:
http://docs.oracle.com/javase/7/docs/technotes/guides/security/PolicyFiles
.html
.
Disregard the optional
codebase
and
signedBy
clauses.
For example:
<security-permission-spec>
grant { permission java.net.SocketPermission "*", "resolve" };
</security-permission-spec>
where:
■
permission java.net.SocketPermission
is the permission class name.
■
"*"
represents the target name.
■
resolve
indicates the action.
B.18 context-root
The
context-root
element defines the context root of this standalone Web application.
If the Web application is part of an EAR, not standalone, specify the context root in the
EAR's
META-INF/application.xml
file. A
context-root
setting in
application.xml
takes precedence over
context-root
setting in
weblogic.xml
.
Note that this
weblogic.xml
element only acts on deployments using the two-phase
deployment model.
The order of precedence for context root determination for a Web application is as
follows:
■ Check
context-root
and
web-uri
in
application.xml
for context root; if found,
use as Web application's context root.
■ If context root is not set in
application.xml
, and the Web application is being
deployed as part of an EAR, check whether context root is defined in
weblogic.xml
. If found, use as Web application's context root. If the Web
application is deployed standalone,
application.xml
does not come into play and
the determination for context-root starts at
weblogic.xml
and defaults to URI if it
is not defined there.
■ If context root is not defined in
weblogic.xml
or
application.xml
, then infer the
context path from the URI, giving it the name of the value defined in the URI
minus the WAR suffix. For instance, a URI
MyWebApp.war
would be named
MyWebApp
.
servlet-descriptor
weblogic.xml Deployment Descriptor Elements B-23
B.19 wl-dispatch-policy
Use the
wl-dispatch-policy
element to assign the Web application to a configured
Work Manager by identifying the Work Manager name. This Web application-level
parameter can be overridden by the dispatch policy setting at the individual servlet or
JSP level. You can set the dispatch policy by using:
■ The servlet's
wl-dispatch-policy
, using
<init-param>
of the
<servlet>
element
in
web.xml
■ The
<dispatch-policy>
element in the
<servlet-descriptor>
element of
weblogic.xml
B.20 servlet-descriptor
Use the
servlet-descriptor
element to aggregate the servlet-specific elements.
The following table describes the elements you can define within the
servlet-descriptor
element.
Note: The
context-root
element cannot be set for individual Web
applications in EAR libraries. It can only bet set for Web application
libraries.
Note: The
<dispatch-policy>
setting in
weblogic.xml
overrides the
wl-dispatch-policy
<init-param>
configuration in
web.xml
.
Table B–12 servlet-descriptor Elements
Element
Required/
Optional Description
servlet-name
Required Specifies the servlet name as defined in the servlet
element of the
web.xml
deployment descriptor file.
run-as-principal-name
Optional Contains the name of a principal against the
run-as-role-name
defined in the
web.xml
deployment descriptor.
init-as-principal-name
Optional Equivalent to
run-as-principal-name
for the
init
method for servlets. The identity specified
here should be a valid user name in the system. If
init-as-principal-name
is not specified, the
container uses the
run-as-principal-name
element.
destroy-as-principal-name
Optional Equivalent to
run-as-principal-name
for the
destroy
method for servlets. The identity
specified here should be a valid user name in the
system. If
destroy-as-principal-name
is not
specified, the container uses the
run-as-principal-name
element.
dispatch-policy
Optional This is a deprecated element. Used to assign a
given servlet to a configured Work Manager by
identifying the Work Manager name. This setting
overrides the Web application-level dispatch
policy defined by
wl-dispatch-policy
.

work-manager
B-24 Developing Web Applications, Servlets, and JSPs for Oracle WebLogic Server
B.21 work-manager
The
work-manager
element is a sub-element of the
weblogic-web-app
element. You can
define the following elements within the
work-manager
element.
Table B–13 work-manager Elements
Element
Required/
Optional Description
name
Required Specifies the name of the Work Manager.
response-time-request-cla
ss /
fair-share-request-class
/ context-request-class /
request-class-name
Optional You can choose between the following four
elements:
■
response-time-request-class
—Defines the
response time request class for the application.
Response time is defined with attribute
goal-ms in milliseconds. The increment is
((goal - T) Cr)/R, where T is the average
thread use time, R the arrival rate, and Cr a
coefficient to prioritize response time goals
over fair shares.
■
fair-share-request-class
—Defines the fair
share request class. Fair share is defined with
attribute percentage of default share.
Therefore, the default is 100. The increment is
Cf/(P R T), where P is the percentage, R the
arrival rate, T the average thread use time, and
Cf a coefficient for fair shares to prioritize
them lower than response time goals.
■
context-request-class
—Defines the context
class. Context is defined with multiple cases
mapping contextual information, like current
user or its role, cookie, or work area fields to
named service classes.
■
request-class-name
—Defines the request
class name.
min-threads-constraint,
min-threads-constraint-na
me
Optional You can choose between the following two
elements:
■
min-threads-constraint
—Used to guarantee
a number of threads the server allocates to
requests of the constrained work set to avoid
deadlocks. The default is zero. A min-threads
value of one is useful, for example, for a
replication update request, which is called
synchronously from a peer.
■
min-threads-constraint-name
—Defines a
name for the
min-threads-constraint
element.

logging
weblogic.xml Deployment Descriptor Elements B-25
B.22 logging
The
logging
element is a sub-element of the
weblogic-web-app
element. You can
define the following elements within the
logging
element.
max-threads-constraint,
max-threads-constraint-na
me
Optional You can choose between the following two
elements:
■
max-threads-constraint
—Limits the number
of concurrent threads executing requests from
the constrained work set. The default is
unlimited. For example, consider a constraint
defined with maximum threads of 10 and
shared by 3 entry points. The scheduling logic
ensures that not more than 10 threads are
executing requests from the three entry points
combined.
■
max-threads-constraint-name
—Defines a
name for the
max-threads-constraint
element.
capacity, capacity-name
Optional You can choose between the following two
elements:
■
capacity
—Constraints can be defined and
applied to sets of entry points, called
constrained work sets. The server starts
rejecting requests only when the capacity is
reached. The default is zero. Note that the
capacity includes all requests, queued or
executing, from the constrained work set. This
constraint is primarily intended for
subsystems like JMS, which do their own flow
control. This constraint is independent of the
global queue threshold.
■
capacity-name
—Defines a name for the
capacity
element.
Table B–14 logging Elements
Element
Required/
Optional Description
log-filename
Required Specifies the name of the log file. The full address of the
filename is required.
logging-enabled
Optional Indicates whether or not the log writer is set for either
the
ManagedConnectionFactory
or
ManagedConnection
.
If this element is set to true, output generated from
either the
ManagedConnectionFactory
or
ManagedConnection
will be sent to the file specified by
the
log-filename
element.
Failure to specify this value will result in WebLogic
Server using its defined default value.
Value Range:
true
|
false
Default Value:
false
Table B–13 (Cont.) work-manager Elements
Element
Required/
Optional Description

logging
B-26 Developing Web Applications, Servlets, and JSPs for Oracle WebLogic Server
rotation-type
Optional Sets the file rotation type.
Values are
bySize, byTIme, none
■
bySize
—When the log file reaches the size that you
specify in
file-size-limit
, the server renames the
file as
FileName.n
.
■
byTIme
—At each time interval that you specify in
file-time-span
, the server renames the file as
FileName.n
. After the server renames a file,
subsequent messages accumulate in a new file with
the name that you specified in
log-filename
.
■
none
—Messages accumulate in a single file. You
must erase the contents of the file when the size is
unwieldy.
Default Value:
bySize
number-of-files-limi
ted
Optional Specifies whether the number of files that this server
instance creates to store old messages should be limited.
(Requires that you specify a
rotation-type
of
bySize
).
After the server reaches this limit, it overwrites the
oldest file. If you do not enable this option, the server
creates new files indefinitely and you must clean up
these files as you require.
If you enable
number-of-files-limited
by setting it to
true
, the server refers to your
rotationType
variable to
determine how to rotate the log file. Rotate means that
you override your existing file instead of creating a new
file. If you specify
false
for
number-of-files-limited
,
the server creates numerous log files rather than
overriding the same one.
Value Range:
true
|
false
Default Value: false
file-count
Optional The maximum number of log files that the server
creates when it rotates the log. This number does not
include the file that the server uses to store current
messages. (Requires that you enable
number-of-files-limited
.)
Default Value:
7
file-size-limit
Optional The size that triggers the server to move log messages to
a separate file. (Requires that you specify a
rotation-type
of
bySize
.) After the log file reaches the
specified minimum size, the next time the server checks
the file size, it will rename the current log file as
FileName.n
and create a new one to store subsequent
messages.
Default Value:
500
rotate-log-on-startu
p
Optional Specifies whether a server rotates its log file during its
startup cycle.
Value Range:
true
|
false
Default Value: true
log-file-rotation-di
r
Optional Specifies the directory path where the rotated log files
will be stored.
Table B–14 (Cont.) logging Elements
Element
Required/
Optional Description

fast-swap
weblogic.xml Deployment Descriptor Elements B-27
B.23 library-ref
The
library-ref
element references a library module, which is intended to be used as
a Web application library in the current Web application.
Example:
<library-ref>
<library-name>WebAppLibraryFoo</library-name>
<specification-version>2.0</specification-version>
<implementation-version>8.1beta</implementation-version>
<exact-match>false</exact-match>
</library-ref>
Only the following sub-elements are relevant to Web applications:
library-name
,
specification-version
,
implementation-version
, and
exact-match
.
You can define the following elements within the
library-ref
element.
B.24 fast-swap
The following table describes the elements you can define within a
fast-swap
element.
For more information about FastSwap Deployment, see "Using FastSwap Deployment
to Minimize Redeployment" in Deploying Applications to Oracle WebLogic Server.
rotation-time
Optional The start time for a time-based rotation sequence of the
log file, in the format
k:mm
, where
k
is 1-24. (Requires
that you specify a
rotation-type
of
byTime
.) At the
specified time, the server renames the current log file.
Thereafter, the server renames the log file at an interval
that you specify in
file-time-span
.
If the specified time has already past, then the server
starts its file rotation immediately.
By default, the rotation cycle begins immediately.
file-time-span
Optional The interval (in hours) at which the server saves old log
messages to another file. (Requires that you specify a
rotation-type
of
byTime
.)
Default Value:
24
Table B–15 library-ref Elements
Element
Required/
Optional Description
library-name
Required Provides the library name for the library module
reference. The default value is
null
.
specification-version
Optional Provides the specification version for the library
module reference. The default value is
0
. (This is a
float.)
implementation-version
Optional Provides the implementation version for the library
module reference. The default value is
null
.
exact-match
Optional The default value is
false
.
Table B–14 (Cont.) logging Elements
Element
Required/
Optional Description
async-descriptor
B-28 Developing Web Applications, Servlets, and JSPs for Oracle WebLogic Server
B.25 async-descriptor
Use the
async-descriptor
element to configure the asynchronous processing behavior
of Web applications. The following table describes the elements you can define within
an
async-descriptor
element.
B.26 async-work-manager
Use the
async-work-manager
element to specify a Work Manager for asynchronous
jobs, including asynchronous dispatches initiated using the
AsyncContext
dispatch
methods and runnable jobs started using the
AsyncContext
start
method. If no Work
Manager is specified, the asynchronous jobs will be executed in the current request
Work Manager.
B.27 Backwards Compatibility Flags
For WebLogic Server, backward compatibility for WebLogic Server 9.2 or earlier is
supported via the
backward-compatible
element within the
jsp-descriptor
element.
Table B–16 fast-swap Elements
Element
Required/
Optional Description
enabled
Optional Set to
true
to enable FastSwap deployment in your
application.
refresh-interval
Optional FastSwap checks for changes in application classes when
an incoming HTTP request is received. Subsequent HTTP
requests arriving within the
refresh-interval
seconds
will not trigger a check for changes. The first HTTP
request arriving after the
refresh-interval
seconds
have passed, will cause FastSwap to perform a
class-change check again.
redefinition-task-li
mit
Optional FastSwap class redefinitions are performed
asynchronously by redefinition tasks. They can be
controlled and inspected using JMX interfaces.
Specifies the number of redefinition tasks that will be
retained by the FastSwap system. If the number of tasks
exceeds this limit, older tasks are automatically removed.
Table B–17 async-descriptor Elements
Element
Required/
Optional Description
timeout-secs
Optional Sets the time, in seconds, that WebLogic Server waits
before timing out an asynchronous job. The default
value is 120 seconds.
Setting the timeout to
-1
indicates that the
asynchronous job never times out.
timeout-check-interv
al-secs
Optional Sets the time, in seconds, that WebLogic Server waits
between doing checks for timed-out jobs. The default
value is 30 seconds.

Web Container Global Configuration
weblogic.xml Deployment Descriptor Elements B-29
B.27.1 Compatibility with JSP 2.0 Web Applications
JSP 2.1 is supported as of WebLogic Server 10.0. Depending on the version of the Web
application (version 2.4 or 2.5) and the setting of the
backward-compatible
element in
the weblogic.xml descriptor file, WebLogic Server will also support JSP 2.0.
B.27.1.1 JSP Behavior and Buffer Suffix
■ If a Web application version is 2.5 (for example, its
web.xml
has a version attribute
of 2.5) and the
backward-compatible
flag is set to
false
, then:
– All version 2.1 JSP/TAG files will follow the new JSP behavior.
– All version 2.0 or earlier JSP/TAG files will follow the previous JSP 2.0 or
earlier behavior.
■ If a Web application version is 2.5 and the
backward-compatible
flag is set to
true
,
then all JSP/TAG files will follow the previous JSP 2.0 or earlier behavior.
■ If the Web application version is 2.4 or earlier, then all JSP/TAG files will follow
the previous JSP 2.0 or earlier behavior no matter how the
backward-compatible
flag is set.
B.27.1.2 Implicit Servlet 2.5 Package Imports
The Servlet 2.5 specification mandates that only the
java.lang.*
,
javax.servlet.*
,
javax.servlet.jsp.*
, and
javax.servlet.http.*
packages be implicitly imported.
In compliance with the Servlet 2.5 specification, WebLogic Server will only import
these mandated packages. Whereas, previous releases of WebLogic Server also
imported the
java.io.*
,
java.util.*
, and
javax.servlet.jsp.tagext.*
packages.
WebLogic Server will follow the previous 2.4 or earlier behavior and import the
non-mandated packages, if any of the following occur:
■ The
backward-compatible
flag is set to
true
in the weblogic.xml descriptor file.
■ The Web application version is 2.4 or earlier.
■ The individual JSP/TAG files in a version 2.5 Web application are version 2.0 or
earlier.
B.28 Web Container Global Configuration
To configure your Web container at a global level, use the
WebAppContainerMBean
. For
information on the
WebAppContainerMBean
attributes and how to use them to specify
domain-wide defaults for all of your Web applications, see the
WebAppContainerMBean
.

Web Container Global Configuration
B-30 Developing Web Applications, Servlets, and JSPs for Oracle WebLogic Server
C
Support for GlassFish Deployment Descriptors C-1
C
Support for GlassFish Deployment Descriptors
WebLogic Server offers support for a subset of GlassFish deployment descriptors so
that basic Web applications which deploy and run on GlassFish Server can be
deployed on WebLogic Server.
If a Web application has both
weblogic.xml
and
glassfish-web.xml
or
sun-web.xml
,
WebLogic Server will use
weblogic.xml
and ignore the GlassFish deployment
descriptors. If a Web application has both
glassfish-web.xml
and
sun-web.xml
,
WebLogic Server will use
glassfish-web.xml
and ignore
sun-web.xml
.
If the GlassFish element is on the list of supported deployment descriptors described
in Table C–1, WebLogic Server will use the settings of its counterpart element in
weblogic.xml
. If the element is not on the list of supported deployment descriptors,
WebLogic Server will ignore the element.
When
glassfish-web.xml
or
sun-web.xml
is being used, WebLogic Server emits an
INFO level log message including whether individual settings are being used or
ignored. WebLogic Server will not generate or persist the corresponding
weblogic.xml
descriptor elements.
Table C–1 Supported GlassFish Deployment Descriptors
glassfish-web.xml Element Name Corresponding weblogic.xml Element Name
context-root context-root
security-role-mapping
■
role-name
■
principal-name
■
group-name
security-role-assignment
■
role-name
■
principal-name
■
principal-name
session-config
■
session-manager:manager-properties:reapIntervalSeconds
■
session-manager:manager-properties:maxSessions
■
session-manager:store-properties:directory
■
session-properties:timeoutSeconds
session-descriptor
■
invalidation-interval-seconds
■
max-in-memory-sessions
■
persistent-store-dir
■
timeout-secs
ejb-ref
■
ejb-ref-name
■
jndi-name
ejb-reference-description
■
ejb-ref-name
■
jndi-name
resource-ref
■
res-ref-name
■
jndi-name
resource-description
■
res-ref-name
■
jndi-name

C-2 Developing Web Applications, Servlets, and JSPs for Oracle WebLogic Server
resource-env-ref
■
resource-env-ref-name
■
jndi-name
resource-env-description
■
resource-env-ref-name
■
jndi-name
class-loader
■
delegate
container-descriptor
■
prefer-web-inf-classes
jsp-config
■
checkInterval
■
keepgenerated
■
scratchdir
jsp-descriptor
■
page-check-seconds
■
keepgenerated
■
working-dir
Table C–1 (Cont.) Supported GlassFish Deployment Descriptors
glassfish-web.xml Element Name Corresponding weblogic.xml Element Name

D
Web Application Best Practices D-1
D
Web Application Best Practices
The following sections contain Oracle best practices for designing, developing, and
deploying WebLogic Web applications and application resources:
■ Section D.1, "CGI Best Practices"
■ Section D.2, "Servlet Best Practices"
■ Section D.3, "JSP Best Practices"
■ Section D.4, "Best Practice When Subclassing ServletResponseWrapper"
D.1 CGI Best Practices
The following are CGI best practices with respect to calling a subscript:
■ You can use
sh subscript.sh
for both exploded (unarchived) Web applications
and archived Web applications (WAR files).
■ You can use
sh $PWD/subscript.sh
for both exploded (unarchived) Web
applications and archived Web applications (WAR files).
■ You can use
sh $DOCUMENT_ROOT/$PATH/subscript.sh
for exploded (unarchived)
Web applications. You cannot use it, however, for archived Web applications (WAR
files). This is due to the fact that the document root might point you to the root of
your WAR file, and the scripting language cannot open that WAR file and locate
the
subscript.sh
needed for execution. This is true not only for
sh
, but for any
scripting language.
D.2 Servlet Best Practices
Consider the following best practices when writing HTTP servlets:
■ Compile your servlet classes into the
WEB-INF/classes
directory of your Web
application.
■ Make sure your servlet is registered in the Java EE standard Web applications
deployment descriptor (
web.xml)
.
■ When responding to a request for a servlet, WebLogic Server checks the time
stamp of the servlet class file prior to applying any filters associated with the
servlet, and compares it to the servlet instance in memory. If a newer version of the
servlet class is found, WebLogic Server re-loads all servlet classes before any
filtering takes place. When the servlets are re-loaded, the
init()
method of the
servlet is called. All servlets are reloaded when a modified servlet class is
discovered due to the possibility that there are interdependencies among the
servlet classes.

JSP Best Practices
D-2 Developing Web Applications, Servlets, and JSPs for Oracle WebLogic Server
You can set the interval (in seconds) at which WebLogic Server checks the time
stamp with the
Servlet Reload
attribute. This attribute is set on the
Files
tab of
your Web application, in the Administration Console. If you set this attribute to
zero, WebLogic Server checks the time stamp on every request, which can be
useful while developing and testing servlets but is needlessly time consuming in a
production environment. If this attribute is set to
-1
, WebLogic Server does not
check for modified servlets.
D.3 JSP Best Practices
For a complete explanation on how to avoid JSP recompilation, see Avoiding
Unnecessary JSP Compilation at
http://www.oracle.com/us/solutions/midsize/index-155241.html
and specifically
the section called "Scenarios that Cause Recompilation of JSPs."
D.4 Best Practice When Subclassing ServletResponseWrapper
Java EE provides the class
javax.servlet.ServletResponseWrapper
, which you can
subclass in your Servlet to adapt its response.
Oracle recommends that if you create your own response wrapper by subclassing the
ServletResponseWrapper
class, you should always override the
flushBuffer()
and
resetBuffer()
methods. Not doing so might result in the response being committed
prematurely.
