
1
Last Updated: 05/2014
Step 4: Table of Contents
This PDF explains Step 4 of the step-by-step instructions that will help you
correctly format your ETD to meet UCF formatting requirements.
UCF requires that all items in the TOC, LIST OF TABLES, and LIST OF
FIGURES have internal (clickable) links within the PDF (i.e. click on an item
and go to that page).
Step 4 shows you how to create an interactive TABLE OF CONTENTS
(TOC).
To create an interactive TOC, you must have used Word styles to format all
headings and subheadings throughout the document. If you have not yet
implemented styles, see the Step 2: Headings and Subheadings help file
before continuing here.
If you have already created a working TOC, scroll down to learn how to
update a TOC, or how to eliminate title duplication within the TOC.
2
Last Updated: 05/2014
Creating a TABLE OF CONTENTS
As you will generate the TABLE OF CONTENTS from heading styles, verify that all headings and
subheadings have the particular heading style you intended.
Find your blank TABLE OF CONTENTS page. If you haven’t already done so, hit return
afterwards so that you have a blank line underneath the TABLE OF CONTENTS and
before the page break.
Be sure that the formatting of that line has been cleared.
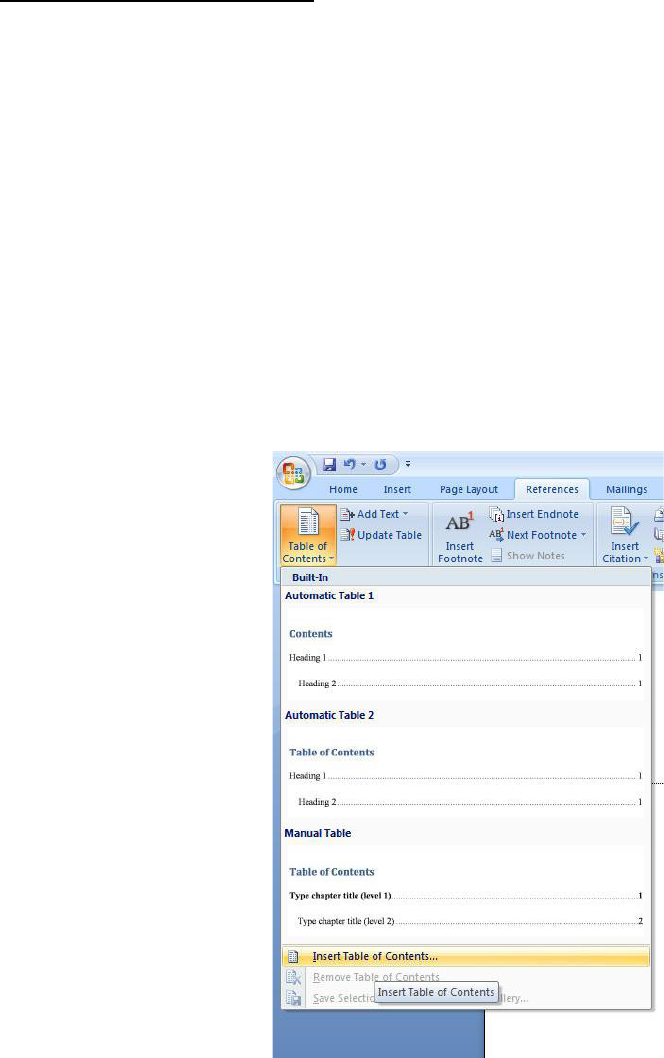
Find the References tab.
The farthest left section of the ribbon is for TABLE OF CONTENTS creation: click on Table
of Contents.
Choose Insert Table of Contents or Custom Table of Contents…
3
Last Updated: 05/2014
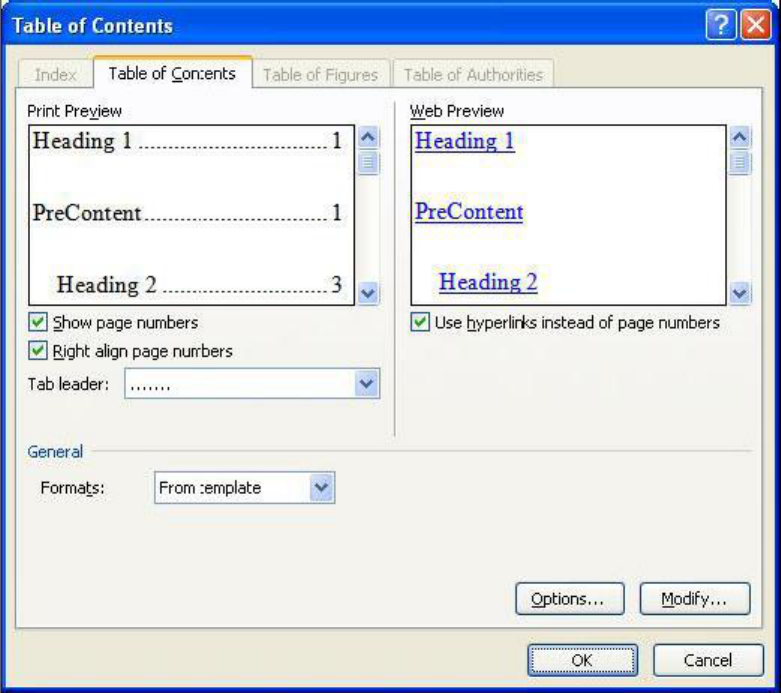
A menu will appear in the center of the page. Click on the second tab at the top of the menu -
labeled Table of Contents - to see the following menu:
Your TABLE OF CONTENTS should not include your Precontent; if it did, the TABLE OF
CONTENTS would be listed in your TABLE OF CONTENTS. To remove it:
Click on the button labeled Options
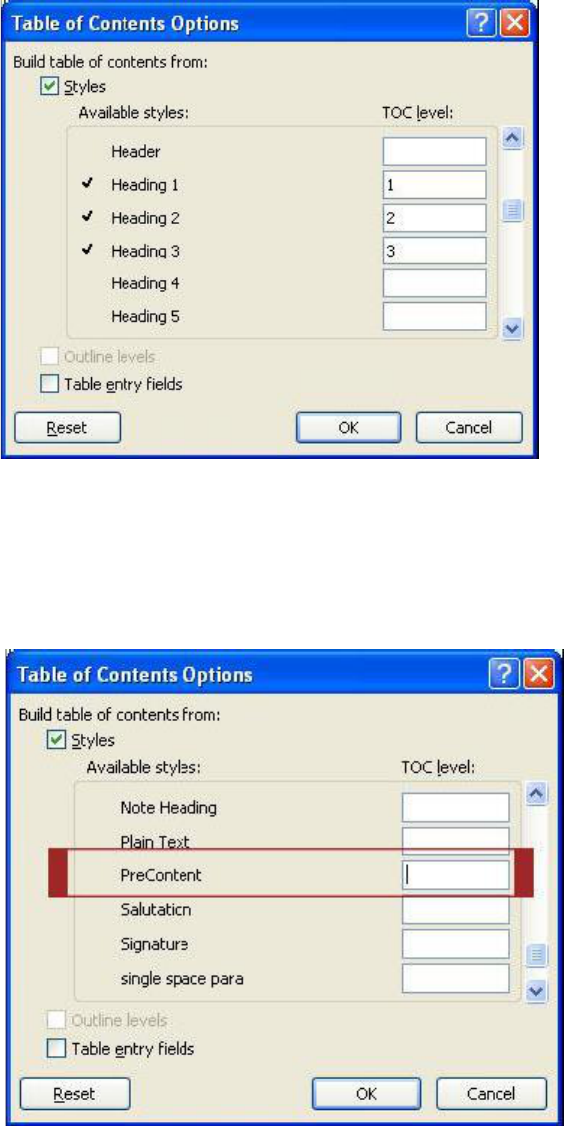
Another menu will appear. At least Heading 1, 2 and 3 should have the numbers 1, 2 and
3 associated respectively:
4
Last Updated: 05/2014
Scroll down until you see “Precontent.”
Highlight the number “1” associated with Precontent, and then hit Backspace on your
keyboard to remove the number.
Then hit OK.
5
Last Updated: 05/2014
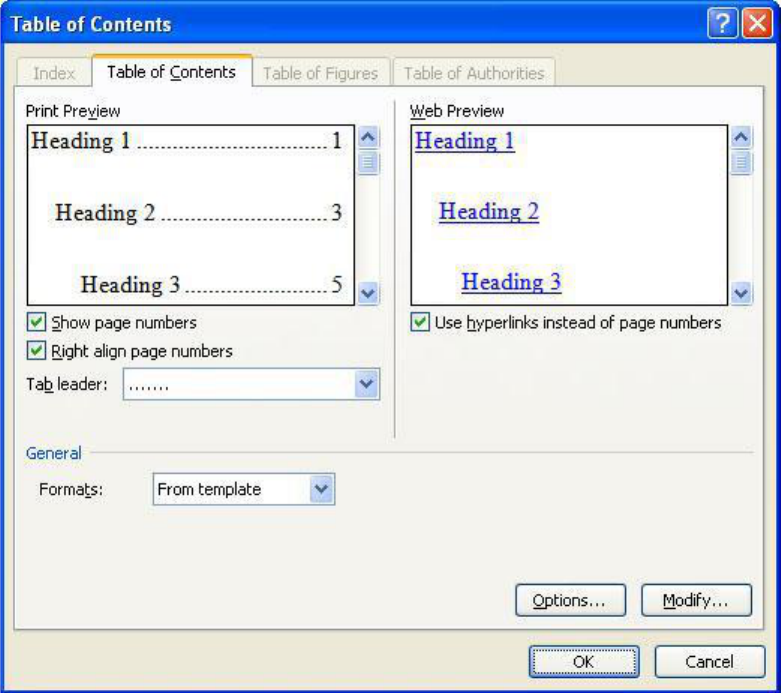
The menu shown before should now look like this, without Precontent listed as a heading:
Hit OK again.
The menu will disappear and the TABLE OF CONTENTS will be generated on the page. Should
you need to update the list (you’ve added sections or moved something), follow the next set of
directions below.
If not, you’re done with creating the TABLE OF CONTENTS.
PLEASE NOTE: If you see mistakes (misspellings, spacing problems) for items in your TABLE OF
CONTENTS, don’t type the corrections into the TABLE OF CONTENTS directly. This can cause
your links to work incorrectly in the final PDF. Instead, go to that heading in your document and
make the corrections to the actual heading and update the TABLE OF CONTENTS to reflect the
changes.
6
Last Updated: 05/2014
Updating the TABLE OF CONTENTS
There are two different ways to update the TABLE OF CONTENTS in Word 2007 or later
versions. Both ways are outlined here.
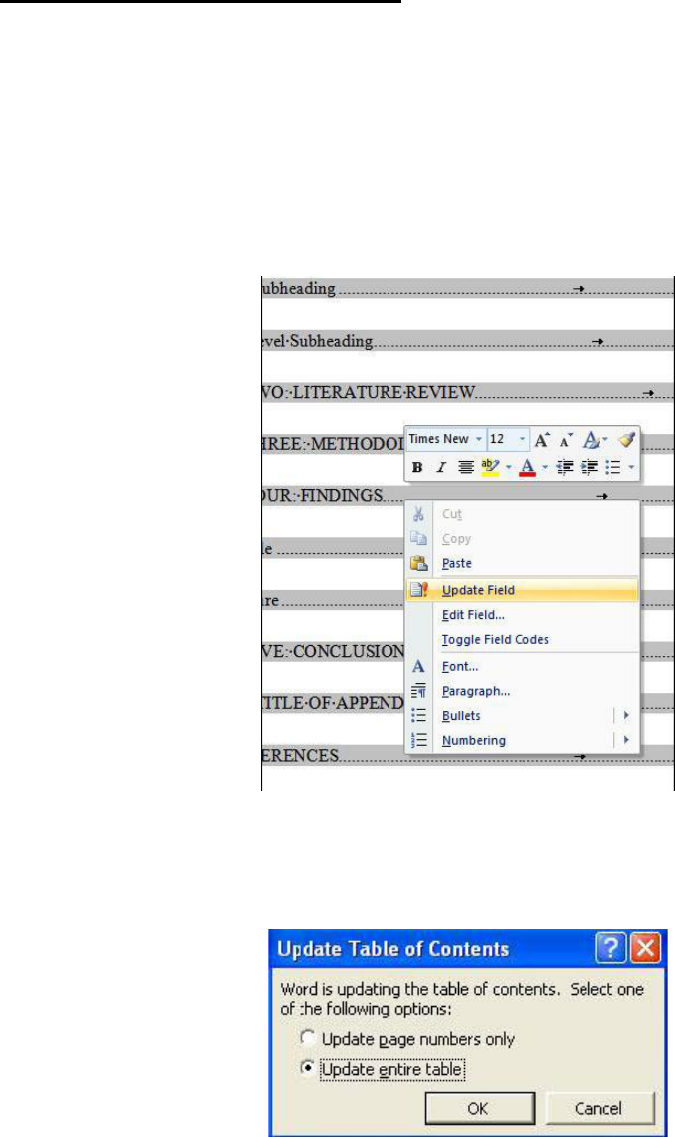
Right-click on the grey area (within the TABLE OF CONTENTS itself). You will see a small
menu popup.
Choose “Update Field”
Another small menu will pop up:
Choose “Update entire table” and hit OK.

7
Last Updated: 05/2014
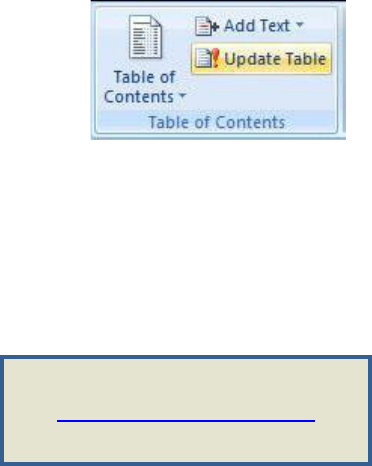
Alternately, you can use the Update Table option in the ribbon.
Click on the grey area of the TABLE OF CONTENTS.
Locate the Update Table option, and click it.
The TABLE OF CONTENTS should update.
Correcting TABLE OF CONTENTS Errors
Bookmark Not Defined
If you see one or more of your page numbers in the TABLE OF CONTENTS replaced with the
message “Error! Bookmark not defined” you will need to update the TABLE OF CONTENTS. See
instructions above.
If the error persists, go to that particular Heading, clear formatting, and reapply the heading
style.
Incorrect Margins
Usually, this is the result of modifying the “Normal” style. There are two ways to fix the
problem, one temporary and one permanent.
8
Last Updated: 05/2014
Temporary fix:
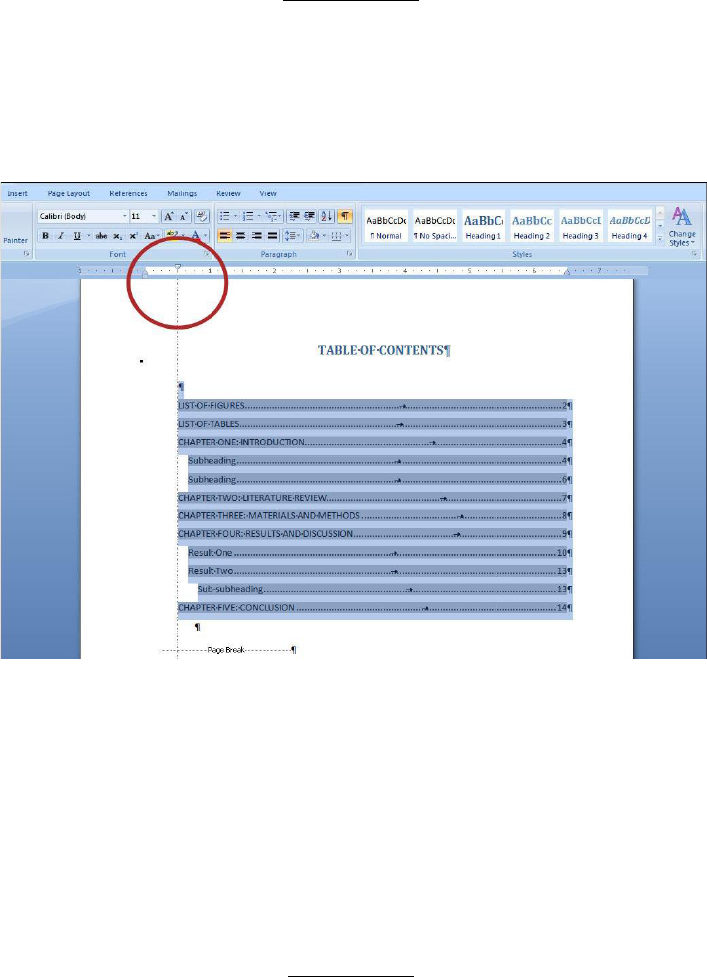
Highlight the TABLE OF CONTENTS.
Click on the upper triangle (indentation marker) in the ruler.
When you click on the triangle, a dotted line will appear on the page, as displayed above.
Drag the mouse back to the left margin, then let go of the mouse.
The TABLE OF CONTENTS will have shifted. If you need to re-insert the TABLE OF CONTENTS,
this margin fix will not stay in place. You will have to follow the temporary fix again OR make a
permanent fix to the TABLE OF CONTENTS.
Permanent fix:
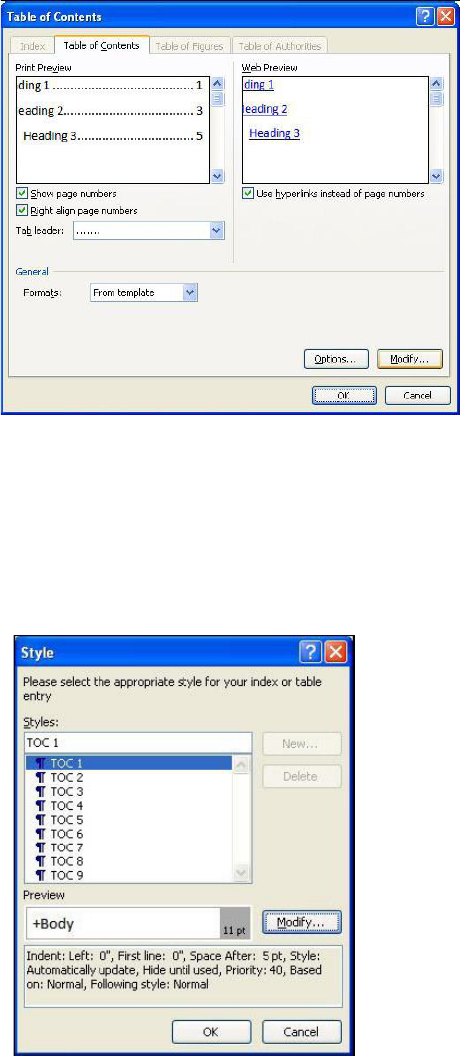
Place your cursor at the first entry in the TABLE OF CONTENTS.
Follow the same instructions to insert a TABLE OF CONTENTS: (References>Table of
Contents>Insert Table of Contents)
The Index and Tables menu box will appear in the middle of the screen.
9
Last Updated: 05/2014
Click on the “Modify” button in the lower right corner.
A Style menu will appear. This is where you will permanently modify the indentation of the
TABLE OF CONTENTS.
Click on the button labeled “Modify” in this menu.
Another menu box will appear; this box is similar to the one used to modify Headings.
Click on the button labeled “Format” in the lower left corner, then select “Paragraph.”
10
Last Updated: 05/2014
Another menu will appear.
11
Last Updated: 05/2014
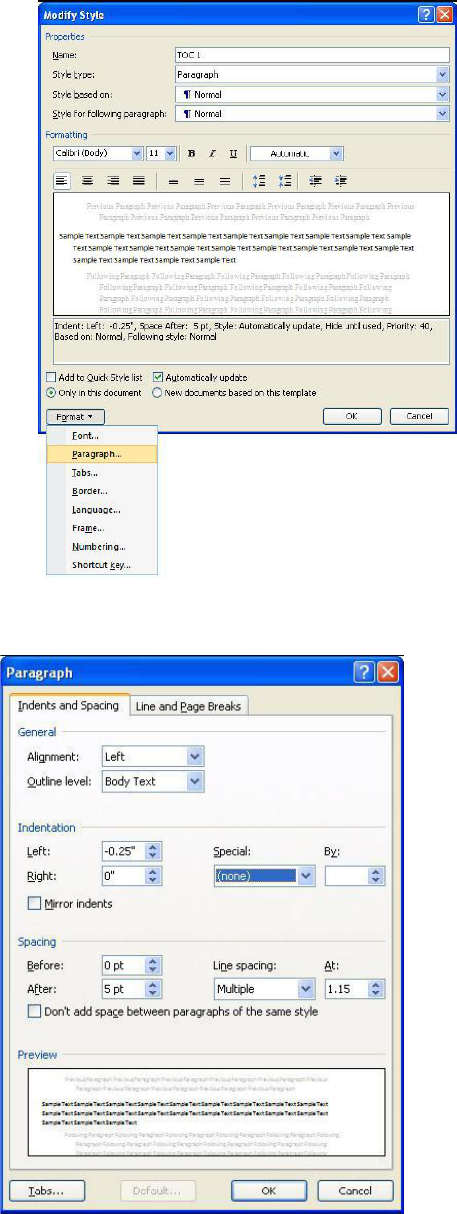
Under “Special,” choose “(none).”
Hit OK to clear the Paragraph menu.
Hit OK again to clear the Modify Style menu.
You will not only need to modify the first level of the TABLE OF CONTENTS, but all levels that
have corresponding Headings. If you have used up to Heading 3 in your document, you must go
back and modify paragraphs for TOC 2 and TOC 3.
Click on TOC2.
Click on Modify.
A new Modify Style menu will appear. As before, go to “Format” and select “Paragraph.”
Under “Special,” choose “(none).”
Hit OK to clear the Paragraph menu.
Hit OK again to clear the Modify Style menu.
Do the same for TOC 3 (and TOC 4 and 5 if you use those Headings).
When finished, Hit OK to clear all remaining menus.
Click YES to create a new TABLE OF CONTENTS.
Should you need to recreate the TABLE OF CONTENTS again, you will not have to reset the
margins.
Removing TABLE OF CONTENTS Item Duplication
Sometimes early headings (especially LIST OF TABLES or LIST OF FIGURES) can appear twice in
the TABLE OF CONTENTS. Both links may be active, but the TOC should only contain one entry.
DO NOT highlight the line and hit Backspace or Delete – this can cause you to lose the links
during conversion. Instead, follow these steps.
Find the first duplicated title in the document. For example, if your LIST OF TABLES
appears twice, go to the LIST OF TABLES page.
12
Last Updated: 05/2014
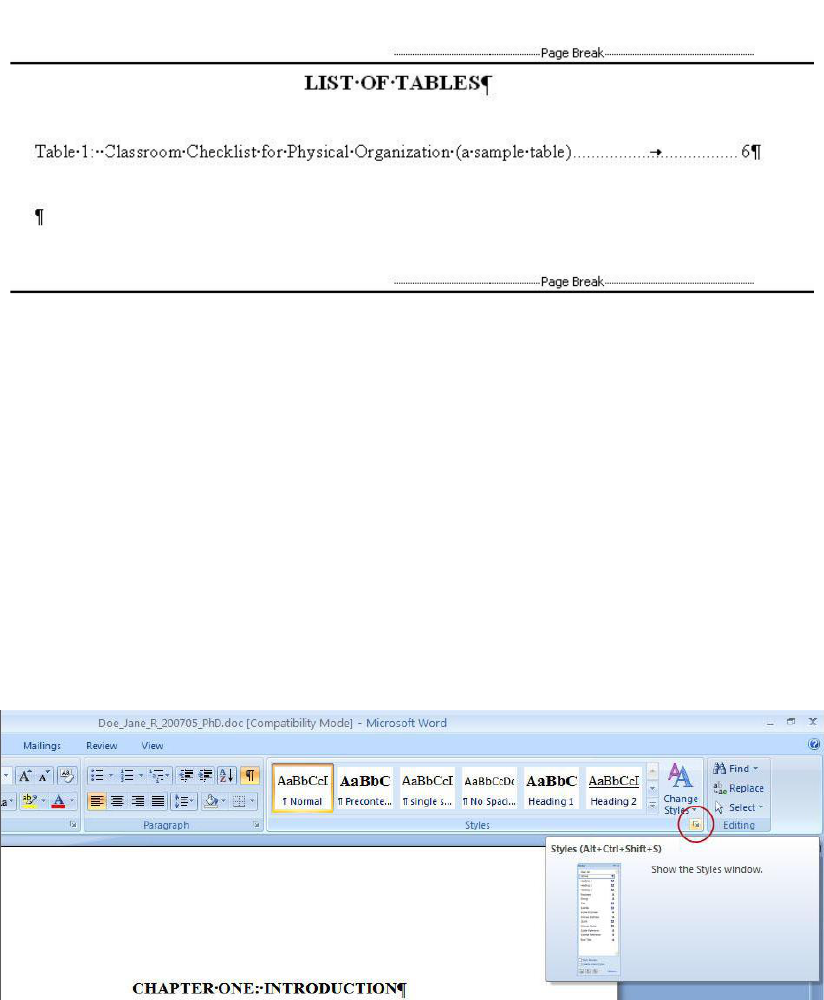
In this example, the page break is close to the words “LIST OF TABLES” without any hard returns
between. The proximity of the two items makes Word think that the page break is simply part
of the words “LIST OF TABLES,” so it marks (what it sees) as a heading entry on two pages. This
is why the duplication occurs.
Place your cursor before the word “List” and hit Enter. Another paragraph mark will
appear above.
In the Home tab, you will see a section of the ribbon called “Styles.” In the lower right-hand
corner of this section you will see a little diagonal arrow. Click on the arrow to bring up the
Styles menu.
You will see a list of all of the styles that have been used in the document so far.
Find “Clear All” at the top of the list and click on it. The paragraph mark should become much
smaller and left-aligned, and the page break should now stretch all the way across the previous
page.
13
Last Updated: 05/2014
Now, all that remains to be done is to update the TABLE OF CONTENTS.
Scroll back to the TABLE OF CONTENTS.
Click on the grey area (the Table itself).
Locate the Update Table option, and click it.
The TABLE OF CONTENTS should reflect only one title. If you have a second duplication, follow
the same steps again.
You are now ready for
Step 5: Figures and Tables
