1
AI Visualizer Installation process
Windows:
1. Download the ZIP archive - https://graphisoft.com/dl/AI_Visualizer/AI_Visualizer_Add-on-
27-INT-install_package-WIN.zip .
2. From the ZIP archive, copy the following files to the following locations:
o Copy the sd.webui folder into the C:\ root folder (the result should be
C:\sd.webui).
o Copy the Add-ons folder into your Archicad folder (where Archicad.exe is
located).
Mac Silicon:
1. Download the dmg archive - https://graphisoft.com/dl/AI_Visualizer/AI_Visualizer_Add-
on-27-INT-install_package-MAC.dmg .
2. Open Terminal: Press Command + Space and type Terminal, then hit Enter.
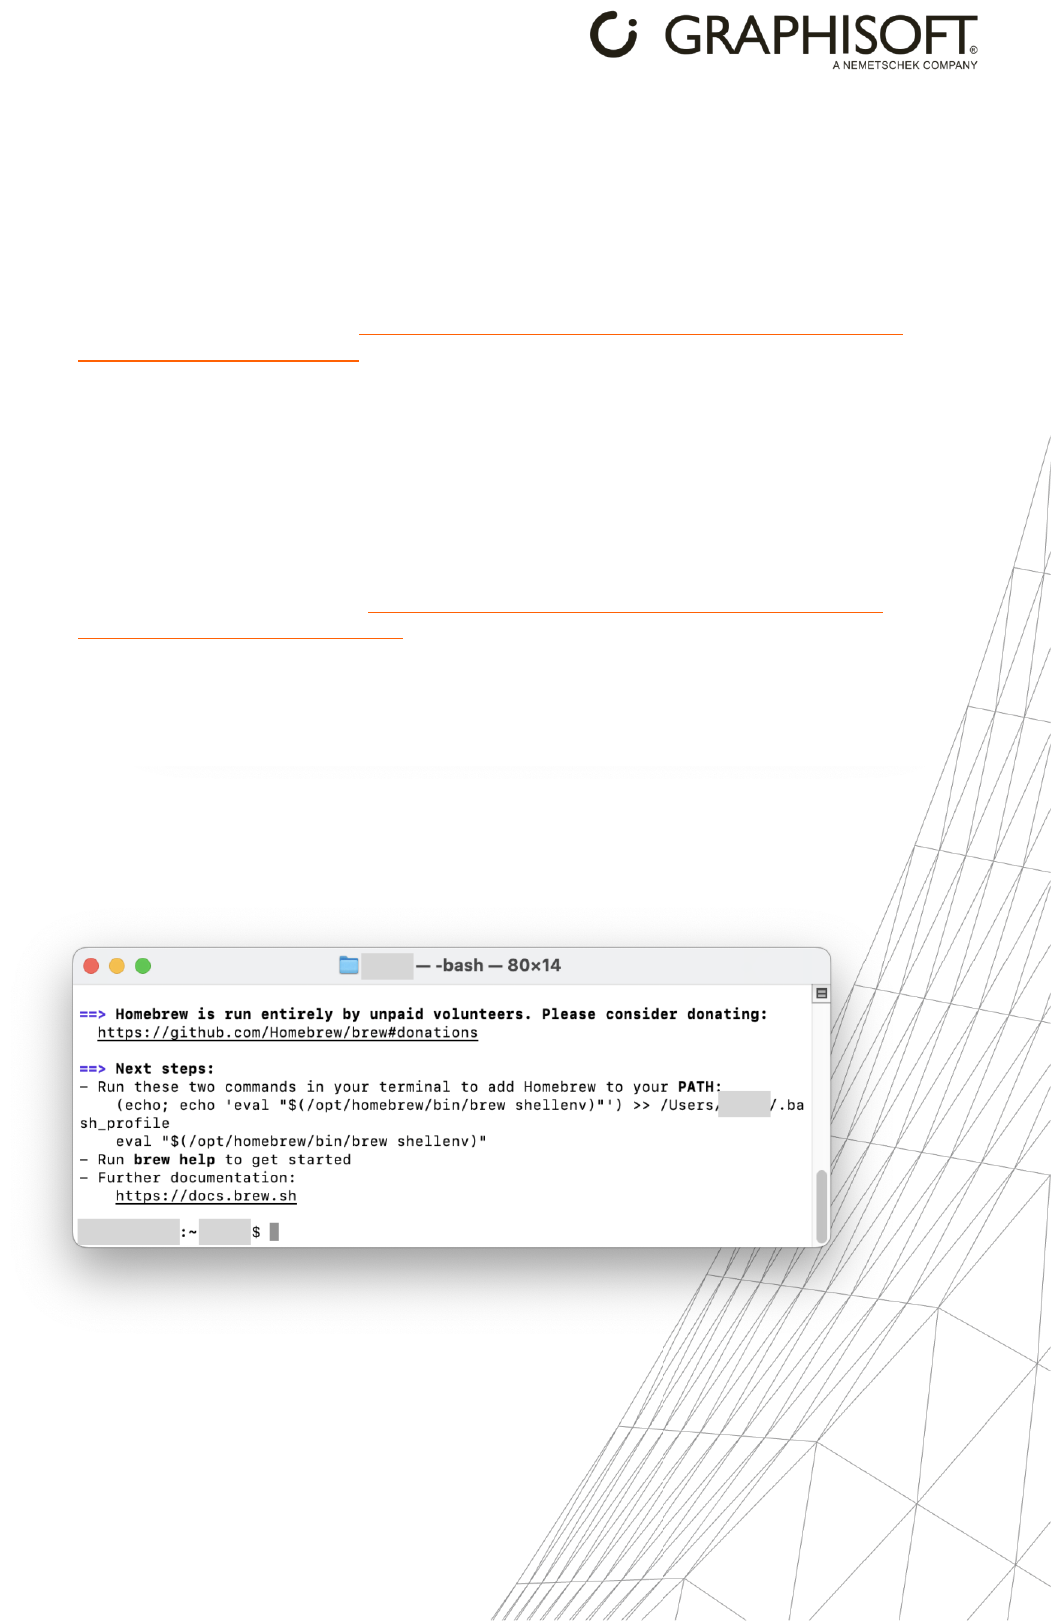
3. Download and install Homebrew. Please use the following terminal command:
/bin/bash -c "$(curl -fsSL https://raw.githubusercontent.com/Homebrew/install/HEAD/install.sh)"
Installation may take a while and appear idle during the process; please be patient and wait
until you are prompted to type your password. Once you provide your password and hit
Enter, installation will continue. When the installation is done, you will see the terminal
waiting for input again. See the following example:
Note:
Homebrew is a general package manager, so it might already be installed on the user's
computer. The latest terminal commands and packages are available on the brew.sh
webpage.
2
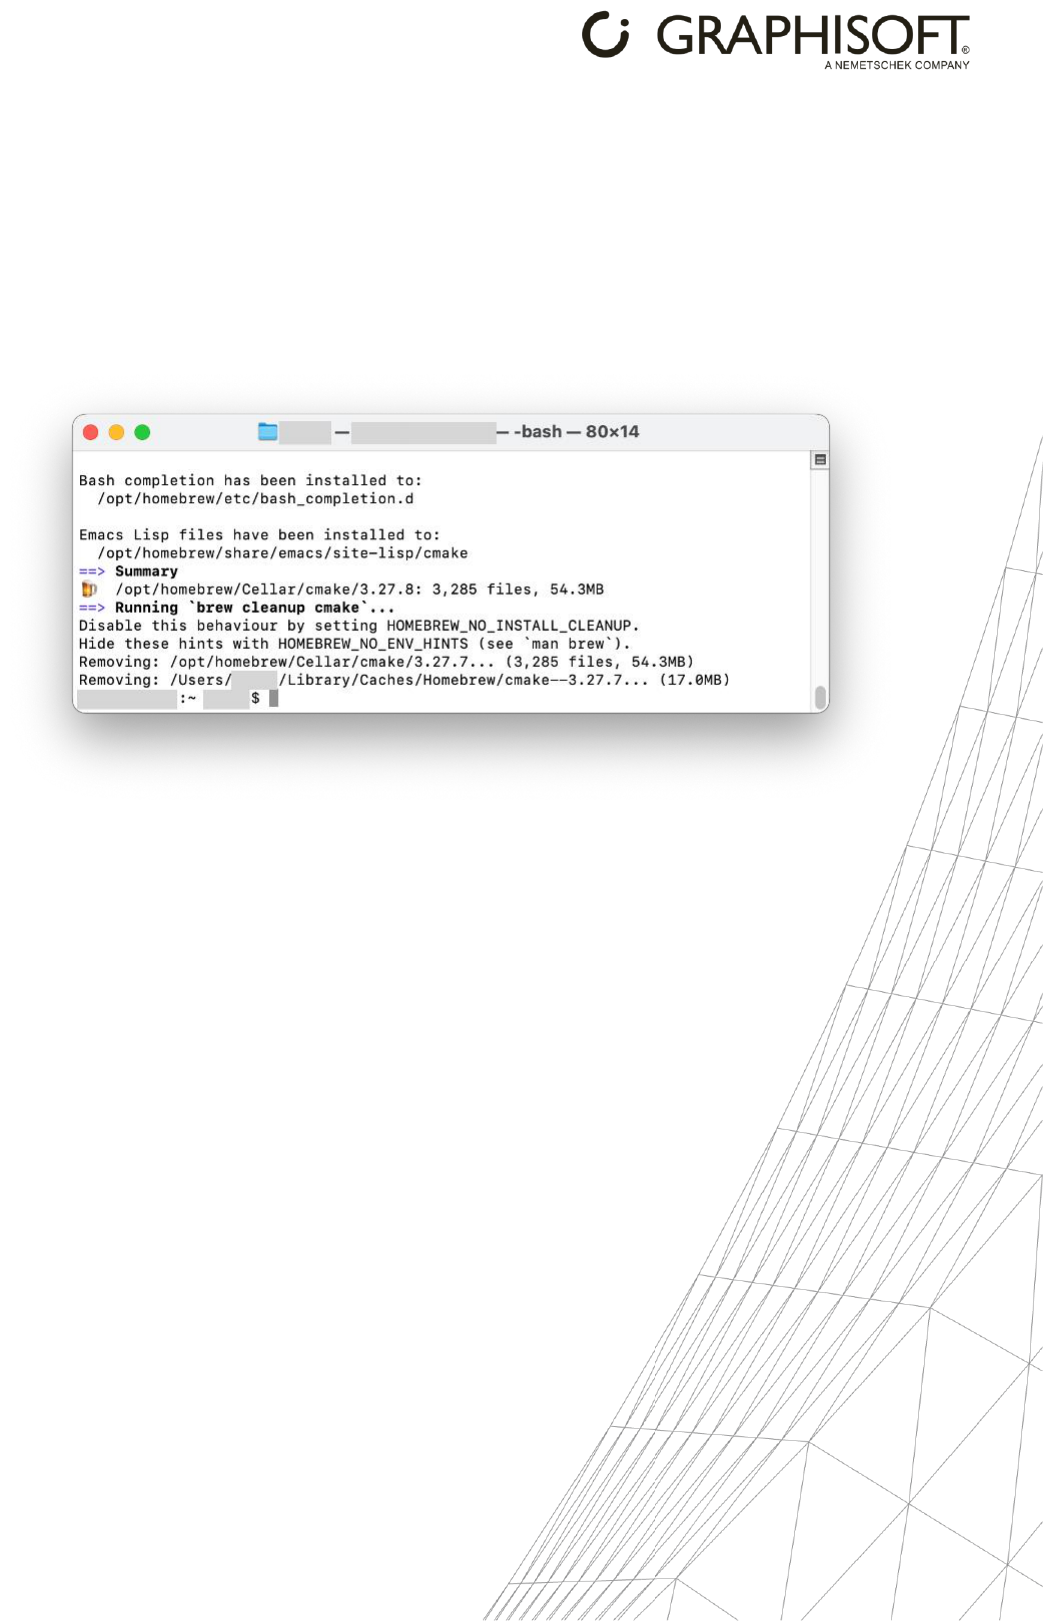
4. Install base packages with Homebrew from the system directory. Please use the
following terminal command:
/opt/homebrew/bin/brew install cmake protobuf rust [email protected] git wget
This will download packages and dependencies that to allow the AI Engine to work on your
Mac. The process may take a while; please wait until you see the terminal waiting for input
again. See the following example:
5. Copy the files from the .dmg archive (20Gb) to the following locations:
o Copy the sd.webui folder into the Archicad folder.
o In the .dmg archive, locate the appropriate folder depending on your Mac’s
architecture – AppleSiliconMac for Silicon chips, IntelMac for Intel chips. From that
folder, copy the Add-ons folder into the Archicad folder and make sure you
choose Merge when prompted.
6. Start run.sh by dragging it to the Terminal window and hit Enter. run.sh is located in
your Archicad folder/sd.webui folder.
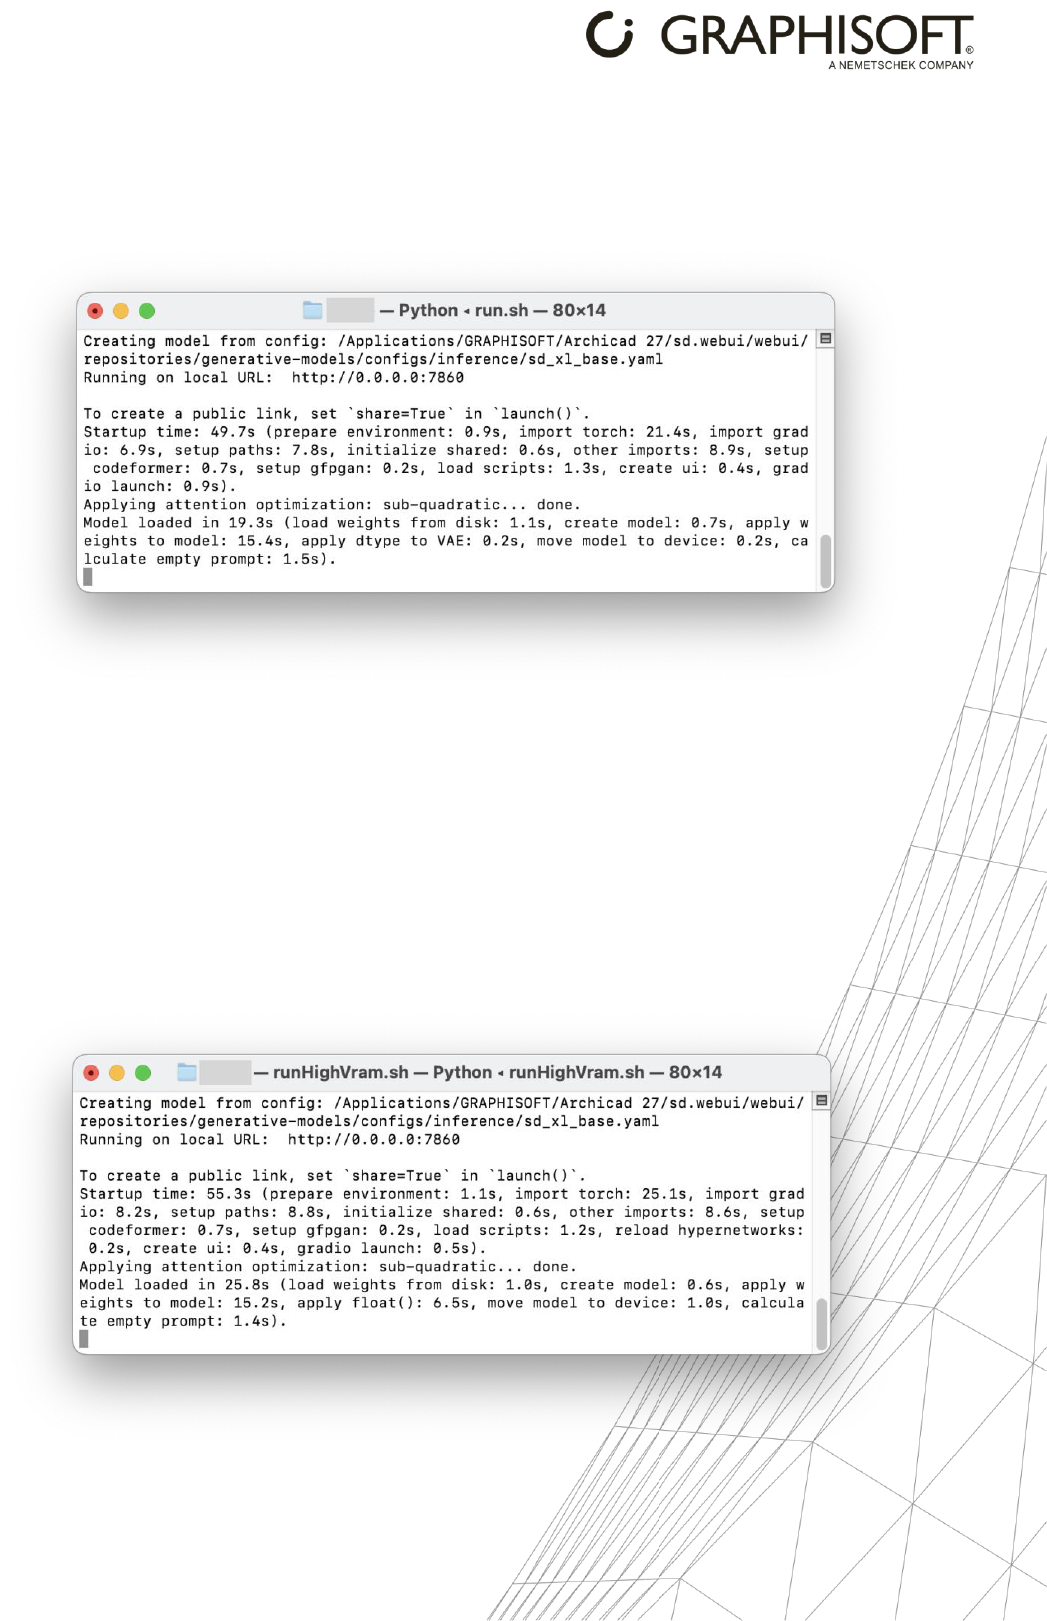
3
The first startup of the AI engine might take a couple of minutes. Packages and
dependencies will be downloaded once the AI engine starts in the Terminal window. If you
see an IP address like 127.0.0.1:7860 or 0.0.0.0:7860 in the Terminal, the AI server is fully
loaded and running. See the following example:
7.
When finished, please close the Terminal window.
Starting the Add-on and generating images (Windows and Mac):
1. Start Archicad.
2. Start AI Visualizer from Window > Palettes > AI Visualizer.
3. Click Start AI Engine in the AI Visualizer window.
The first startup of the AI engine could take a couple of minutes. A command prompt will
open where the AI engine is starting up. If you see an IP address like 127.0.0.1:7860 or
0.0.0.0:7860 in the command prompt, the AI server is fully loaded and running
.
See the following example:

4
Note:
You can also start the AI Engine manually with runHighVram.bat or run.bat (Archicad
folder/sd.webui) on Windows, and with runHighVram.sh or run.sh (Archicad folder/sd.webui)
on Mac.
4. Click on Generate to create an image, based on your 3D view, prompt and settings. Image
generation will start, and you will see the result when the process is finished.
Note: Make sure you keep the Terminal / Command Prompt open while using the Add-on and
the connecting server. Closing the Terminal / Command Prompt will result in server
shutdown, and you won’t be able to generate images.
Mac Intel as a client:
Mac Intel machines can run only the AI Visualizer add-on; the server must be installed on a different
Mac Silicon or Windows machine that meets the system requirements. In this setup, the Mac Intel
computer runs as a client which can connect to a local area network server, if that the server has been
already started manually.
Follow these steps to run AI Visualizer on a Mac Intel client + Mac Silicon / Windows server
configuration:
1. Download the dmg archive - https://graphisoft.com/dl/AI_Visualizer/AI_Visualizer_Add-on-
27-INT-install_package-MAC.dmg .
2. Copy the files from the .dmg archive (20Gb) to the following location on your Mac Intel
computer:
o In the .dmg archive, locate the appropriate folder depending on your Mac’s
architecture – IntelMac for Intel chips. From that folder, copy the Add-ons folder
into the Archicad folder and make sure you choose Merge when prompted.
3. Install the server: Based on your server architecture (Silicon or Windows), follow these
steps to install the server on the server machine.
o Mac Silicon:
▪ Follow the steps described above, at the Mac Silicon installation
section. (At step 5, only the sd.webui folder needs to be copied to
the server machine.)
▪ Start the server: Open Terminal and drag run.sh if your server computer
meets the minimum system requirements or drag runHighVram.sh if your
server meets the recommended system requirements.
▪ Check your server’s port. When the server is successfully started you can
see the server’s port in the command prompt. (The default is 7860).
▪ Check your server’s name. You can find the Name of your server under
System settings / General / About.
o Windows:
▪ Follow the steps described in the Windows installation section. (At
step 2, only the sd.webui folder needs to be copied to the server
machine.)
▪ Start the server: Start run.bat if your server computer meets the minimum
system requirements or drag runHighVram.bat if your server meets the
recommended system requirements.
▪ Check your server’s port. When the server has started successfully, you
can see the server’s port in the command prompt. (The default is 7860).
▪ Check your server’s name. Find the server’s name under “Device name”
in Start menu / Settings / System / About.

5
4. Start AI Visualizer on the Mac Intel client machine and type the AI Engine
Address. The AI Engine Address is the server’s name and port in the following format:
ServerName:0000
Note: When the server is running on another machine, you need to start it manually - hence
the Start Server button is disabled; but you will be able to stop and restart it from the client
interface when needed.
5. Click on Generate to create an image, based on your 3D view, prompt and settings. Image
generation will start, and you will see the result when the process is finished.
Note: Make sure you keep the Terminal / Command Prompt open while using the Add-on and
the connecting server. Closing the Terminal / Command Prompt will result in server
shutdown, and you won’t be able to generate images.
