
Manual - Xshell
Version 7 Help
Exported on 10/23/2020

Version 7 Help – Manual - Xshell
– 2
Table of Contents
1 Xshell Manual .......................................................................................................7
2 Content.................................................................................................................8
2.1 About Xshell............................................................................................................................... 8
2.2 Start ...........................................................................................................................................8
2.3 Session Management................................................................................................................ 8
2.4 Connection ................................................................................................................................ 9
2.5 Security......................................................................................................................................9
2.6 Tab Management ......................................................................................................................9
2.7 Tunneling Service...................................................................................................................... 9
2.8 Terminal Window Operations .................................................................................................. 9
2.9 Options Setting ....................................................................................................................... 10
2.10 File Transfer.............................................................................................................................10
2.11 Session Logging and Tracing.................................................................................................. 10
2.12 Printing .................................................................................................................................... 10
2.13 Using Xagent............................................................................................................................ 10
2.14 Using Scripts............................................................................................................................ 10
2.15 References............................................................................................................................... 11
3 About Xshell........................................................................................................12
3.1 Key Functions.......................................................................................................................... 12
3.2 Minimum System Requirements............................................................................................ 14
3.3 Install and Uninstall................................................................................................................ 14
4 Start ....................................................................................................................15
4.1 Create Session......................................................................................................................... 15
4.2 Connect to Remote Host......................................................................................................... 16
4.3 Exit Xshell ................................................................................................................................ 17
5 Session Management.........................................................................................18
5.1 Session Management.............................................................................................................. 18
5.2 Session Properties .................................................................................................................. 19

Version 7 Help – Manual - Xshell
– 3
5.2.1 Connection ............................................................................................................................................................ 19
5.2.2 Connection _ Authentication ............................................................................................................................... 20
5.2.3 Connection _ Authentication _ Login Prompts ................................................................................................... 20
5.2.4 Connection _ Login Scripts................................................................................................................................... 21
5.2.5 Connection _ SSH.................................................................................................................................................. 21
5.2.6 Connection _ SSH _ Security ................................................................................................................................ 22
5.2.7 Connection _ SSH _ Tunneling ............................................................................................................................. 22
5.2.8 Connection _ SSH _ SFTP ..................................................................................................................................... 22
5.2.9 Connection _ TELNET ........................................................................................................................................... 22
5.2.10 Connection _ RLOGIN ........................................................................................................................................... 22
5.2.11 Connection _ SERIAL............................................................................................................................................. 23
5.2.12 Connection _ PROXY ............................................................................................................................................. 23
5.2.13 Connection _ Keep Alive ....................................................................................................................................... 23
5.2.14 Terminal ................................................................................................................................................................ 23
5.2.15 Terminal _ Keyboard............................................................................................................................................. 24
5.2.16 Terminal _ VT Mode .............................................................................................................................................. 24
5.2.17 Terminal _ Advanced ............................................................................................................................................ 25
5.2.18 Appearance ........................................................................................................................................................... 26
5.2.19 Appearance _ Window .......................................................................................................................................... 26
5.2.20 Appearance _ Highlight ........................................................................................................................................ 27
5.2.21 Advanced............................................................................................................................................................... 27
5.2.22 Advanced _ Trace.................................................................................................................................................. 27
5.2.23 Advanced _ Bell..................................................................................................................................................... 28
5.2.24 Advanced _ Logging.............................................................................................................................................. 28
5.2.25 File Transfer........................................................................................................................................................... 29
5.2.26 File Transfer _ X_YMODEM .................................................................................................................................... 29
5.2.27 File Transfer _ ZMODEM........................................................................................................................................ 29
5.3 Export ...................................................................................................................................... 30
5.4 Import...................................................................................................................................... 30
6 Connection .........................................................................................................31
6.1 Connections without Session Files ........................................................................................ 31
6.2 Connections with Session Files .............................................................................................. 31
6.3 Sessions to Run on Xshell Startup.......................................................................................... 32
6.4 SERIAL Connection.................................................................................................................. 32

Version 7 Help – Manual - Xshell
– 4
6.5 Connection with Kerberos...................................................................................................... 32
6.6 Connection with PKCS _11 .....................................................................................................33
6.7 Proxy Setting ........................................................................................................................... 33
6.8 Jump host................................................................................................................................ 33
7 Security...............................................................................................................35
7.1 Public Key User Authentication0............................................................................................ 35
7.1.1 User Keys Dialog Box............................................................................................................................................. 36
7.2 Host Key Management............................................................................................................ 36
7.2.1 SSH Security Warning Dialog Box......................................................................................................................... 36
7.2.2 Host Keys Dialog Box ............................................................................................................................................ 37
7.3 Master Password..................................................................................................................... 37
8 Tab Management ...............................................................................................39
8.1 Tab ........................................................................................................................................... 39
8.2 Tab Group................................................................................................................................ 39
8.3 Split and Merge Tabs .............................................................................................................. 40
8.4 Arrange Tabs ........................................................................................................................... 40
9 Tunneling Service...............................................................................................41
9.1 TCP_IP Port Forwarding ......................................................................................................... 41
9.2 X11 Forwarding ....................................................................................................................... 41
9.3 SOCKS4_5 Dynamic Port Forwarding .................................................................................... 42
9.4 Instant Tunneling.................................................................................................................... 42
10 Terminal Window Operations ...........................................................................44
10.1 Copy and Paste........................................................................................................................ 44
10.2 Find String ...............................................................................................................................45
10.3 Font Change ............................................................................................................................ 45
10.4 Font Color and Background Color Setting............................................................................. 45
10.5 Cursor Change......................................................................................................................... 46
10.6 Window Handling.................................................................................................................... 47
10.7 Multi-session Handling ........................................................................................................... 48
10.8 Quick Command Sets Setting................................................................................................. 48
10.9 Terminal Output Encoding Change........................................................................................ 50

Version 7 Help – Manual - Xshell
– 5
10.10 Advanced Terminal Options Setting ...................................................................................... 50
10.11 Layout Management ............................................................................................................... 51
10.12 Highlight Sets Settings............................................................................................................ 51
11 Options Setting ..................................................................................................53
11.1 Session Folder and Startup Session....................................................................................... 53
11.2 History Clearing and Connection Log ....................................................................................53
11.3 Key Mapping Setting ............................................................................................................... 53
11.4 Mouse Setting.......................................................................................................................... 54
11.5 Transparency Setting.............................................................................................................. 54
11.6 Master Password Settings ...................................................................................................... 54
11.7 Screen Lock Settings............................................................................................................... 54
11.7.1 Auto Lock............................................................................................................................................................... 55
11.8 Live Update Settings............................................................................................................... 55
11.9 Advanced Settings .................................................................................................................. 56
12 File Transfer........................................................................................................58
12.1 File Transfer Using SFTP ......................................................................................................... 58
12.2 File Transfer Using FTP ...........................................................................................................58
12.3 File Transfer Using X_Y_ZMODEM .......................................................................................... 58
12.4 File Transfer Using Xftp........................................................................................................... 60
13 Session Logging and Tracing.............................................................................61
13.1 Session Logging ...................................................................................................................... 61
13.2 Session Tracing .......................................................................................................................61
14 Printing ...............................................................................................................62
15 Using Xagent.......................................................................................................63
15.1 Connecting to a Server Through Xagent................................................................................ 63
15.2 Using the Xagent User Key on a Remote Host .......................................................................63
16 Using Scripts.......................................................................................................65
16.1 Script Starting and Ending ..................................................................................................... 65
16.2 Script API .................................................................................................................................65
16.2.1 xsh.Session............................................................................................................................................................ 65
16.2.2 xsh.Screen ............................................................................................................................................................. 66

Version 7 Help – Manual - Xshell
– 6
16.2.3 xsh.Dialog .............................................................................................................................................................. 68
16.2.4 Script Example ...................................................................................................................................................... 68
16.3 Script Recording...................................................................................................................... 70
16.4 Multi-Session Script ................................................................................................................ 70
17 References..........................................................................................................71
17.1 Standard Buttons.................................................................................................................... 71
17.2 Address Bar.............................................................................................................................. 73
17.3 Xshell Local Command ........................................................................................................... 74
17.4 Xshell Command Line Option................................................................................................. 78
17.5 SFTP Command....................................................................................................................... 80
17.6 Regular Expression.................................................................................................................. 81
17.6.1 Pattern Match........................................................................................................................................................ 81
17.6.2 The shorthand of character classes ..................................................................................................................... 82
17.6.3 POSIX character classes........................................................................................................................................ 83
17.6.4 Example................................................................................................................................................................. 84
17.7 Pre-defined Shortcut Key ....................................................................................................... 84

Version 7 Help – Manual - Xshell
Xshell Manual – 7
1 Xshell Manual
The manual describe how to use the program's interface and will guide you through the basics.

Version 7 Help – Manual - Xshell
Content – 8
•
•
•
•
•
•
•
•
•
•
•
•
•
•
•
•
•
•
•
•
•
•
•
•
•
•
•
•
•
•
•
•
•
•
•
•
•
2 Content
2.1 About Xshell
Key Functions(see page 12)
Minimum System Requirements(see page 14)
Install and Uninstall(see page 14)
2.2 Start
Create Session(see page 15)
Connect to Remote Host(see page 16)
Exit Xshell(see page 17)
2.3 Session Management
Session Management(see page 18)
Session Properties(see page 19)
Connection(see page 19)
Connection _ Authentication(see page 20)
Connection _ Authentication _ Login Prompts(see page 20)
Connection _ Login Scripts(see page 21)
Connection _ SSH(see page 21)
Connection _ SSH _ Security(see page 22)
Connection _ SSH _ Tunneling(see page 22)
Connection _ SSH _ SFTP(see page 22)
Connection _ TELNET(see page 22)
Connection _ RLOGIN(see page 22)
Connection _ SERIAL(see page 23)
Connection _ PROXY(see page 23)
Connection _ Keep Alive(see page 23)
Terminal(see page 23)
Terminal _ Keyboard(see page 24)
Terminal _ VT Mode(see page 24)
Terminal _ Advanced(see page 25)
Appearance(see page 26)
Appearance _ Window(see page 26)
Appearance _ Highlight(see page 27)
Advanced(see page 27)
Advanced _ Trace(see page 27)
Advanced _ Bell(see page 28)
Advanced _ Logging(see page 28)
File Transfer(see page 29)
File Transfer _ X_YMODEM(see page 29)
File Transfer _ ZMODEM(see page 29)
Export(see page 30)
Import(see page 30)

Version 7 Help – Manual - Xshell
Content – 9
•
•
•
•
•
•
•
•
•
•
•
•
•
•
•
•
•
•
•
•
•
•
•
•
•
•
•
•
•
•
•
•
•
2.4 Connection
Connections without Session Files(see page 31)
Connections with Session Files(see page 31)
Sessions to Run on Xshell Startup(see page 32)
SERIAL Connection(see page 32)
Connection with Kerberos(see page 32)
Connection with PKCS _11(see page 33)
Proxy Setting(see page 33)
Jump host(see page 33)
2.5 Security
Public Key User Authentication0(see page 35)
User Keys Dialog Box(see page 36)
Host Key Management(see page 36)
SSH Security Warning Dialog Box(see page 36)
Host Keys Dialog Box(see page 37)
Master Password(see page 37)
2.6 Tab Management
Tab(see page 39)
Tab Group(see page 39)
Split and Merge Tabs(see page 40)
Arrange Tabs(see page 40)
2.7 Tunneling Service
TCP_IP Port Forwarding(see page 41)
X11 Forwarding(see page 41)
SOCKS4_5 Dynamic Port Forwarding(see page 42)
Instant Tunneling(see page 42)
2.8 Terminal Window Operations
Copy and Paste(see page 44)
Find String(see page 45)
Font Change(see page 45)
Font Color and Background Color Setting(see page 45)
Cursor Change(see page 46)
Window Handling(see page 47)
Multi-session Handling(see page 48)
Quick Command Sets Setting(see page 48)
Terminal Output Encoding Change(see page 50)
Advanced Terminal Options Setting(see page 50)
Layout Management(see page 51)

Version 7 Help – Manual - Xshell
Content – 10
•
•
•
•
•
•
•
•
•
•
•
•
•
•
•
•
•
•
•
•
•
•
•
•
•
•
•
Highlight Sets Settings(see page 51)
2.9 Options Setting
Session Folder and Startup Session(see page 53)
History Clearing and Connection Log(see page 53)
Key Mapping Setting(see page 53)
Mouse Setting(see page 54)
Transparency Setting(see page 54)
Master Password Settings(see page 54)
Screen Lock Settings(see page 54)
Auto Lock(see page 55)
Live Update Settings(see page 55)
Advanced Settings(see page 56)
2.10 File Transfer
File Transfer Using SFTP(see page 58)
File Transfer Using FTP(see page 58)
File Transfer Using X_Y_ZMODEM(see page 58)
File Transfer Using Xftp(see page 60)
2.11 Session Logging and Tracing
Session Logging(see page 61)
Session Tracing(see page 61)
2.12 Printing
2.13 Using Xagent
Connecting to a Server Through Xagent(see page 63)
Using the Xagent User Key on a Remote Host(see page 63)
2.14 Using Scripts
Script Starting and Ending(see page 65)
Script API(see page 65)
xsh.Session(see page 65)
xsh.Screen(see page 66)
xsh.Dialog(see page 68)
Script Example(see page 68)
Script Recording(see page 70)
Multi-Session Script(see page 70)

Version 7 Help – Manual - Xshell
Content – 11
•
•
•
•
•
•
•
•
•
•
•
2.15 References
Standard Buttons(see page 71)
Address Bar(see page 73)
Xshell Local Command(see page 74)
Xshell Command Line Option(see page 78)
SFTP Command(see page 80)
Regular Expression(see page 81)
Pattern Match(see page 81)
The shorthand of character classes(see page 82)
POSIX character classes(see page 83)
Example(see page 84)
Pre-defined Shortcut Key(see page 84)

1 http://ssh.com
Version 7 Help – Manual - Xshell
About Xshell – 12
•
•
•
•
•
•
•
•
•
•
•
•
•
•
•
•
•
•
•
•
•
•
•
3 About Xshell
Xshell is a powerful SSH, TELNET and RLOGIN terminal emulator software operating on the Windows platform.
Windows users can conveniently and securely access UNIX/Linux hosts using Xshell. SSH (secure shell) protocols
support encryption and user authentication for secure connections on the Internet and can replace legacy
protocols, such as TELNET and RLOGIN.
3.1 Key Functions
This section provides descriptions on key functions of Xshell.
General
Supports SSH1, SSH2, SFTP, TELNET, RLOGIN and SERIAL protocols
Supports Windows 7/8/10, Server 2008/2012/2016
Supports OpenSSH and ssh.com
1
servers
Supports having multi tabs in a single window
Supports displaying multiple tab groups in a single window
Multi-user setting
Keep alive option
SOCKS4/5, HTTP proxy connection
Custom key mapping
VB, Perl, Jscript scripting
IPv6 support
Kerberos(MIT Keberos, Microsoft SSPI) authentication support
SSH/Telnet 추적
Session Management
The Session Manager provides a convenient way to manage and run multiple sessions
Create and manage session files for both local and remote hosts
Supports Sessions dialog box, address bar, local prompt, shortcut to session, and links bar to open sessions
Provides a default session for quick connection
Simultaneous connection with multiple sessions
Address bar supports URL commands and allows connection to a remote host with or without a saved
session
Supports automatic login and login scripts
Supports folder and tree view in the Sessions dialog box
Batch update sessions
Import and export sessions
Security

Version 7 Help – Manual - Xshell
About Xshell – 13
•
•
•
•
•
•
•
•
•
•
•
•
•
•
•
•
•
•
•
•
•
•
•
•
•
•
•
•
•
•
•
•
•
•
•
•
•
•
•
•
•
•
•
•
•
•
RSA/DSA/ECDSA/ED25519 Public key, Password and Keyboard interactive user authentication
RSA/DSA/ECDSA/ED25519 New Key Wizard and import/export key
SSH PKCS#11 Support
User authentication using Xagent (SSH user authentication agent)
AES128/192/256, 3DES, BLOWFISH, CAST128, ARCFOUR and RIJNDAEL encryption algorithms
SHA1, SHA1-96, MD5, MD5-96 and RIPEMD160 MAC algorithms
zlib compression
Host Keys dialog box
User Keys dialog box
Supports using master password to encrypt password
Terminal
Unicode-based terminal buffer
VT100, VT220, VT320, XTERM, LINUX, SCOANSI and ANSI terminals
Fixed terminal size option for standardized output
Horizontal scroll bar while in fixed terminal size
Multi-language output encoding (UTF-8)
Compose Bar for sending strings to multiple sessions
Compose Pane for sending multiple lines of strings to multiple sessions
Scroll buffer enabling up to 2,147,483,647 lines to be saved
Character string search using regular expressions
Column unit text selection
Supports multi-byte character strings at copy & paste
Designates delimiters of double-click word selection in the terminal window
Triple click selects one line
Bold font and ANSI color code
Xterm terminal mouse
Xterm 256-color mode
Linux Meta key emulation
Prints terminal screen
Set line spacing and margins in the terminal window
Search a user specified web browser for selected text
Various bell options
Tunneling
TCP/IP and X11 forwarding
Dynamic port forwarding using SOCKS4/5
Tunneling pane for observing and managing active forwarding channels
Instand tunneling to add/remove or modify tunneling to the current connected session
Appearance
Dockable UI for the main window
Theme selection feature
Convenient and powerful user interface
Supports custom layout
Color schemes edit/import/export feature
Change cursor color and blinking
Easily changeable fonts via the Font button
Apply separate fonts for ASCII and non ASCII characters
Designate frequently used character strings as quick commands: Quick Commands Bar, Quick Commands
Pane
Customizable Standard Buttons on toolbar
Security–lock, session selection, and network up/down traffic information display in the status bar

Version 7 Help – Manual - Xshell
About Xshell – 14
•
•
•
•
•
•
•
•
•
•
•
•
•
•
•
•
•
•
•
•
•
•
•
•
Full screen view (Alt+Enter)
Transparency options
Local Command
Local shell prompt for advanced users
Local commands, including open, ssh, telnet, rlogin, sftp, and ftp
Local Windows commands, such as ping, ipconfig, netstat, and nslookup
Escape to the local prompt during connection
Interoperability
Interoperable with Xmanager program for X11 forwarding
Interoperable with Xagent program for agent authentication and forwarding
Interoperable with Xftp program for file transfers
Edits scroll buffer in notepad
Sequentially selects Xshell window via the menu command
String Transfer and File Management
Send and receives files via FTP/SFTP
Send and receives files via X/Y/Z MODEM
Send ASCII files
Send Delay for preventing data loss
Auto save and support for various logging formats during session logging
Page setting and print preview
3.2 Minimum System Requirements
Processor: Intel
®
compatible
Operating System:Microsoft Windows
®
7 or higher
Storage Space: 50MB of available space
Memory: 512 MB
Network: TCP/IP network
3.3 Install and Uninstall
The Xshell installation program was created using InstallShield
®
. A variety of installation options can be changed
during installation. However, it is often sufficient to simply click [Next].
To uninstall Xshell, use the standard Windows add/remove functions. Run [Add/Remove Program] in the control
panel and select to uninstall Xshell from the list. Even when the program is uninstalled, the registry information, log
files and data files created by the user are not removed. The information and files are available for reuse when the
program is reinstalled. If you want to remove all the files and registry information completely, remove the following
explicitly:
Registry Information:
\HKEY_CURRENT_USER\Software\NetSarang\Xshell
File and Folder:
"User's Docuements Folder"\Netsarang Computer\7\Xshell

Version 7 Help – Manual - Xshell
Start – 15
1.
2.
3.
4.
5.
6.
4 Start
This section provides descriptions of the methods to create a TELNET/RLOGIN or SSH session and to connect to
UNIX/Linux hosts. TELNET sessions are very simple. However, an SSH session occasionally requires a user key
registration in the server prior to connection. If you need user key registration for SSH sessions, see 'Public Key
User Authentication'.
4.1 Create Session
Select [New] from the [File] menu. New Session Properties dialog box is displayed.
Fig. 1: New Session Properties dialog box
Enter a session name in [Name].
Select an appropriate protocol from the [Protocol] list.
Enter server host name or IP address in [Host].
Enter port number used by the remote server in [Port Number].
Click [OK].
Version 7 Help – Manual - Xshell
Start – 16
1.
2.
3.
4.
5.
4.2 Connect to Remote Host
The following is the process for connecting to a remote host via an SSH session. If a session is not available, see
'Create Session'.
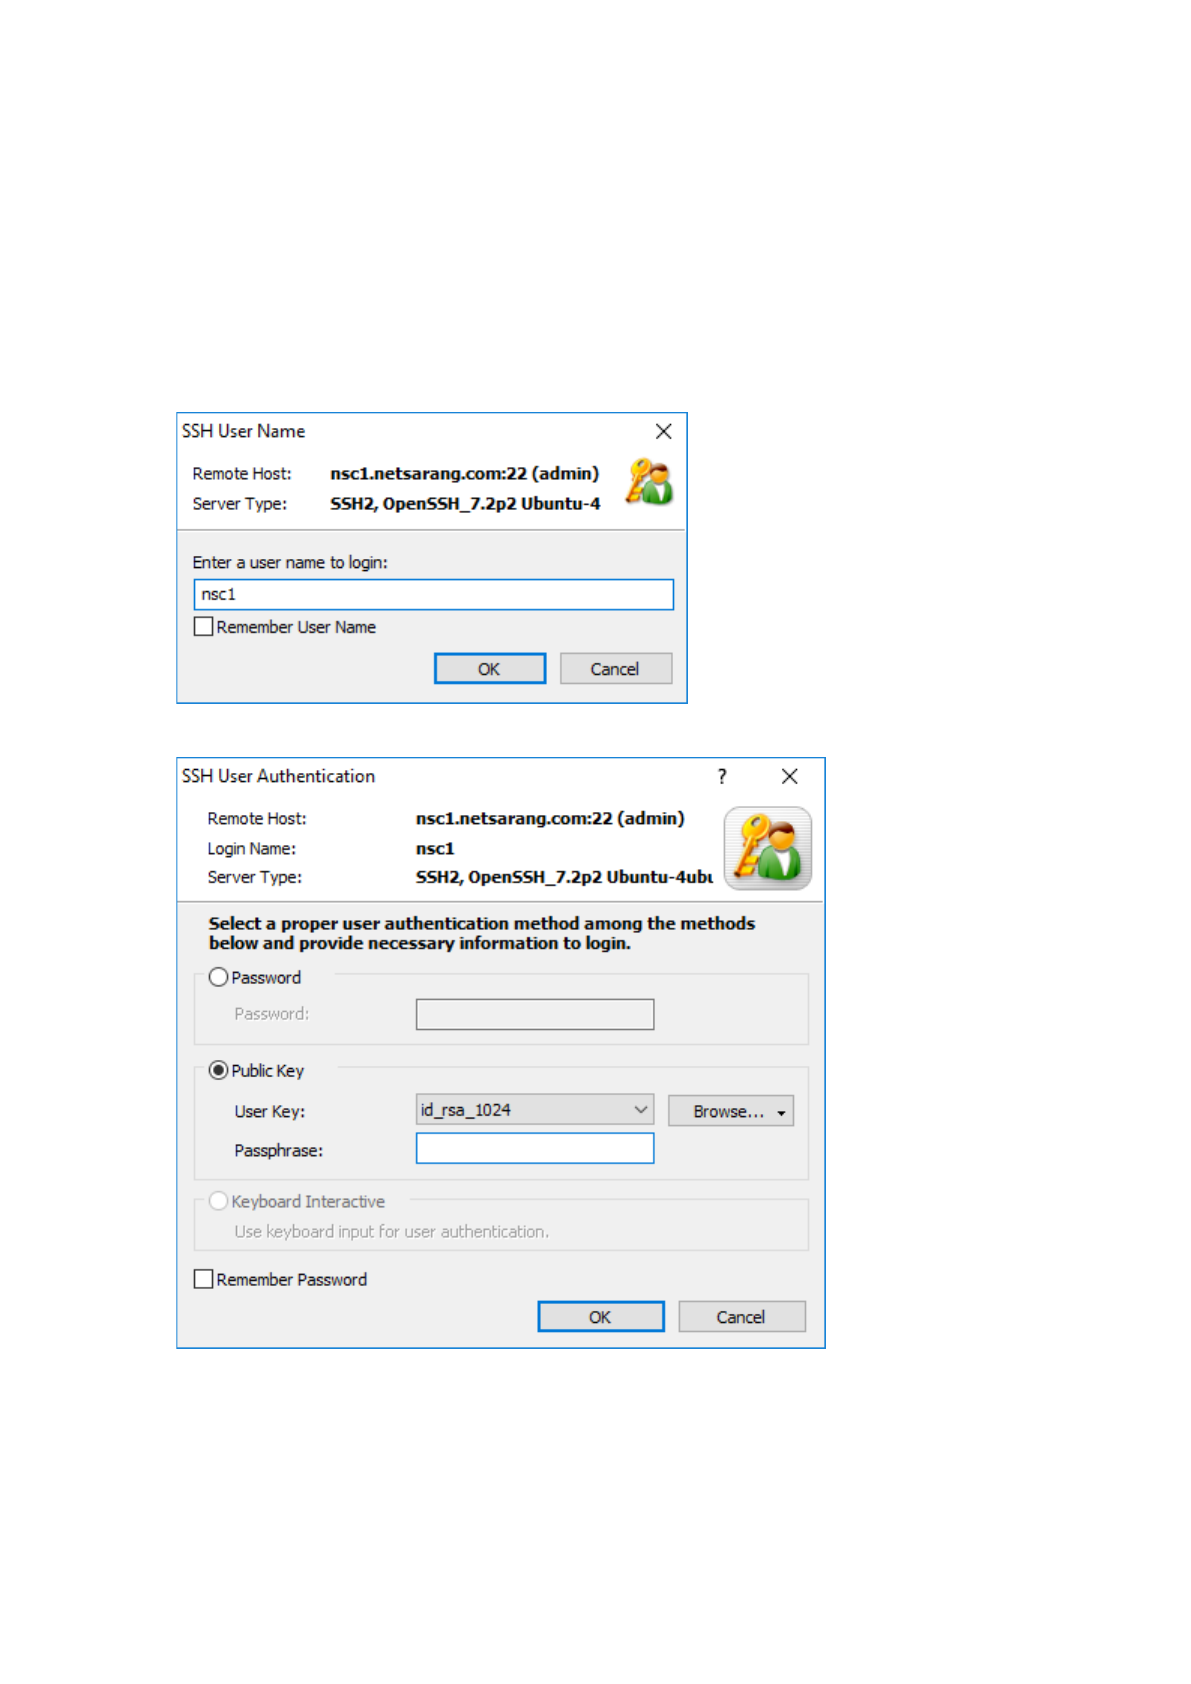
Select [Open] from the [File] menu. Sessions dialog box is displayed.
Select session for connection from the sessions list and click [Connect]. SSH User Name dialog box is
displayed.
Fig. 2: SSH User Name dialog box
Enter user name and click [OK]. SSH User Authentication dialog box is displayed.
Fig. 3: SSH User Authentication dialog box
To attempt Password authentication, enter password in [Password] and click [OK].
To attempt Public Key authentication, first select a user key from the list. Enter [Passphrase] of the selected
user key and click [OK].

Version 7 Help – Manual - Xshell
Start – 17
6.
Note
If a user key is not available, see 'Public Key User Authentication'.
To attempt Keyboard Interactive authentication, click [OK] and answer the questions given during
connection process.
4.3 Exit Xshell
To disconnect with a session, enter 'exit' in the terminal screen prompt or select [Disconnect] from the [File] menu.
Note
If a session is disconnected withthe [Revert to local shell when connection is closed] option selected, the
session tab remains open and reverts back to local shell. Under local shell status, the current session file's
path prompt is displayed in the terminal screen and local commands, such as open, telnet, ssh, and ping can
be executed.
To end Xshell, select [Exit] from the [File] menu.

Version 7 Help – Manual - Xshell
Session Management – 18
1.
2.
3.
•
•
1.
2.
3.
4.
1.
2.
3.
1.
2.
3.
1.
2.
3.
1.
2.
3.
4.
5 Session Management
Session is a file containing information about remote host connection setup. By creating a session, users can set
different options for different remote hosts. The Sessions dialog box shows all sessions created and enables to
create and edit sessions.
Users can connect to a remote computer without creating a session. For this purpose, Xshell provides a default
session which is ready to use after installation.
5.1 Session Management
To Create a New Session:
Open the New Session Properties dialog box by selecting [New] in the [File] menu.
Enter connection information.
Click [OK].
To Open the Sessions Dialog Box:
Select [Open] in the [File] menu.
Click the standard [Open] button.
To Edit a Session:
Open the Sessions dialog box.
Select a session to edit.
Click the standard [Properties] button.
Click [OK] after completing session editing.
Note
You can edit multiple sessions simultaneously simply by selecting all the sessions you want to edit and
clicking [Properties].
To Rename a Session:
Open the Sessions dialog box.
Right-click on the session to rename.
Select [Rename] in menu.
Note
Session name must be a valid file name.
To Copy a Session Under Different Name:
Open the Sessions dialog box.
Select a session to copy under a different name.
Click the standard [Save As] button.
To Delete a Session:
Open the Sessions dialog box.
Select the session to delete.
Click the standard [Delete] button.
To Create a Shortcut to Session:
Open the Sessions dialog box.
Select a session for which to create shortcut.
Click the standard [Create Shortcut] button.
Select a folder to save shortcut.

Version 7 Help – Manual - Xshell
Session Management – 19
5.
•
•
1.
2.
3.
1.
2.
3.
4.
5.
•
•
•
Click [OK].
To Change Default Session Properties:
To open the default Session Properties dialog box, select one of the following:
Select [Properties] from the [File] menu in local shell.
Click the arrow next to the standard [Properties] button in the main toolbar and select [Default Session]
from the list.
Note
Default session is used when connecting withSSH, TELNET, RLOGIN and SFTP using a local prompt or the
Address Bar.
To use a connection command in the local prompt, see 'Xshell Local Command'. For connections using the
address bar, see 'Address Bar'.
To Create a New Session Folder:
Open the Sessions dialog box.
Click an arrow next to the standard [New] button and select [Folder] from the list.
Enter folder name.
To Copy a Session file to Another Computer:
Select [Export] from the [File] Menu.
If you would like to use the session file's password on another device, set the Master Password.
Copy a session file (*.xsh) or email it to another computer.
On the device to use the session file, set the exact same Master Password.
Select [Import] from the [File] Menu.
5.2 Session Properties
Open the Session Properties dialog box to create a new session or to edit a session.
To Open the Session Properties Dialog Box:
Select [New] from the [File] menu.
Select [Properties] from the [File] menu.
Click the standard [Properties] button.
5.2.1 Connection
In the connection settings, information about session connections may be set. In most cases, users can connect to a
remote host with the connection settings only.
Name
Enter an intrinsic name for the session. The name becomes the session file name, and must be comprised of a valid
characters for a file name.
Protocol
Select a connection protocol to use when connecting to a remote computer. The protocols supported are SSH,
SFTP, TELNET, RLOGIN, SERIAL, and LOCAL.
Host
Enter host name or IP address of the remote computer.
Port Number
Enter the port number of the protocol selected above. When a protocol is selected from the protocols list, the
default protocol port number is automatically entered. If a remote computer is using another port number, the port
number must be directly entered. Default port numbers for each protocol are 22 for SSH/SFTP, 23 for TELNET, and
513 for RLOGIN. SERIAL and LOCAL sessions do not require a port number.

Version 7 Help – Manual - Xshell
Session Management – 20
Description
Add a short description about the session. This information will be displayed on the session tab after running the
session.
Reconnect
This setting is used to restart the session if the connection is lost. Set the number of seconds desired between
reconnection attempts. If a connection is not established during the user specified duration of minutes, the
connection will cease. If the specified time is set to 0, a connection will be attempted.
Use Nagle's algorithm
If this option is selected, transfer efficiency may be slightly higher at the expense of a slower key response rate.
5.2.2 Connection _ Authentication
In the user authentication settings, the authentication method, user name, password, user key, etc. may be
designated
Method
Select an authentication method among Password, Public Key, Keyboard Interactive, GSSAPI and PKCS11. If the
selected authentication method is not supported by the SSH server, a dialog box asking about the user
authentication method is displayed during connection.
Note
If the PC running Xshell is utilizing an Xshell supported Kerberos module, Xshell can only automatically
authenticate to the SSH server if GSSAPI authentication is selected.
User Name
Enter a user name for login. User name is the remote computer login account. If this field is left blank, a dialog box
asking for the user name is displayed during connection.
Password
Enter a remote user account password. This value is valid when Password authentication is selected. If this field is
left blank, a dialog box asking for the user authentication is displayed during connection. The password is encoded
and saved in the user's PC. For greater security, leave this field blank.
User Key
Select a user key to use when Public Key authentication is selected. If this field is left blank, a dialog box asking
about the user authentication is displayed during connection. If a user key is not in the list, a key must be created
and registered in the remote SSH server.
Passphrase
Enter the passphrase for the selected user key. The entered key passphrase is encoded and saved in the user's PC.
For greater security, leave this field blank.
5.2.3 Connection _ Authentication _ Login Prompts
It is necessary for Xshell to recognize the server user name/password prompt in order to automate the login
process for the TELNET or RLOGIN protocol. In general, the default value is used.
TELNET
Enter the user name and password prompt to automate TELNET login process. Note that blanks are recognized as
valid characters.
RLOGIN
Enter the password prompt for RLOGIN protocol. A password may not be needed depending on the RLOGIN server
settings. Note that blanks are recognized as valid characters.

Version 7 Help – Manual - Xshell
Session Management – 21
5.2.4 Connection _ Login Scripts
For the login script settings, commands to be automatically entered in the terminal may be defined. After a
successful login to a remote server, commands are sequentially executed in the order displayed in the list. This
feature is very useful when you login to another server after the first login to a remote server.
Execute the Following Expect and Send Rule
Select this option to use expect and send rule.
Add
Open the Expect and Send Rule dialog box. When rules editing is complete, the rule is added to the list.
Edit
Open the Expect and Send Rule dialog box and edit the selected rule.
Remove
Delete the Expect and Send Rule.
Move up
Move the Expect and Send Rule up.
Move Down
Move the Expect and Send Rule down
Execute script when session starts.
Set a script file to execute after a session connection.
5.2.5 Connection _ SSH
Set general SSH protocol options.
Remote Command
Specify the remote command to run after connection.*
Protocol Version Priority
Select which SSH version to prioritize. SSH2 is safer than SSH1 and offers more capabilities.
Use Xagent (SSH Agent) for authentication
Private keys for the public key authentication are provided by Xagent.* Using Xagent, entering a passphrase is not
required during the public key user authentication process.
Allow agent forwarding
Xagent allow the remote servers which are already connected with the SSH protocol to use its private keys.It can be
used when connecting to another remote server or using a remote service through public key authentication from a
remote server.*
Use ZLIB Compression
A compression algorithm is used to compress all SSH connection data. In an environment where network speed is
slow, use this option to improve the speed.
Do Not Allocate a Terminal
Select this option when not using terminal. If this option is turned on, a terminal(tty) for input/output is not
assigned and thus input/output on the screen is not possible. Use this option if you want to use tunneling only
without terminal access.
Accept and save host key automatically upon first connection
If the option is turned on when connecting to a server where the host key is not registered, the host key is
automatically saved without going through the authentication process.

Version 7 Help – Manual - Xshell
Session Management – 22
5.2.6 Connection _ SSH _ Security
Encryption
Encryption algorithms are used to encrypt and decrypt network traffics. Users may select a preferred encryption
algorithm from the list. If <Cipher List> is selected from the list, multiple algorithms may be attempted in the order
appearing in the list. To edit the list of <Cipher List>, click [Edit].
MAC (Message Authentication Code)
MAC is added in SSH2 for greater security and to ensure data integrity. If <MAC List> is selected from the list,
multiple algorithms are tried in the order appearing in the list. To edit the list of <MAC List>, click [Edit].
Key exchange
Users can select the intial Key Exchange for the SSH connection. The desired algorithm can be selected from the list.
If the server does not support the selected algorithm, the connection will fail.
5.2.7 Connection _ SSH _ Tunneling
In the tunneling setting, TCP/IP, Dynamic and X11 forwarding rules may be set. These settings are valid only when
the SSH protocol is selected in Connection setting.
For details on tunneling setting, see 'Tunneling Service'.
5.2.8 Connection _ SSH _ SFTP
Set SFTP protocol related options.
Startup Folder
Set a local and remote folder with which to start after a successful login via SFTP protocol.
5.2.9 Connection _ TELNET
Set TELNET protocol related options.
Use XDISPLOC Telnet Option
Uses XDISPLOC Telnet option to pass display (PC X server) information to server. If you are using a PC X server such
as Xmanager, use this option to execute remote X11 applications from a local PC.
Display
Enter the DISPLAY value to pass upon login. $PCADDR value is translated automatically to IP address of a local PC
right before it is passed to server. The DISPLAY number must match the DISPLAY number of the X server currently
running on the PC.
Option Negotiation
This option determines who initiates the attempt to negotiate additional TELNET options. When set to Active, after
a connection has started, Xshell intiates the negotation. Passive waits for the server to intiate the negotiation. The
values may have to be different depending on the server or firewall settings. If both the server and Xshell are set to
Passive, the negotiation will not proceed. Conversely, if Active is selected and the firewall is enabled on the server,
the negotiation may fail.
5.2.10 Connection _ RLOGIN
Set RLOGIN protocol related options.

Version 7 Help – Manual - Xshell
Session Management – 23
Terminal Speed
Designate terminal speed to be passed to rlogin server.
5.2.11 Connection _ SERIAL
In serial setting, serial connection options may be set. Instead of using the traditional terminal environment,
RS232C SERAL connection lets you use your PC to connect to UNIX machines that has no graphic card support or
where direct access to console is not available. To use Serial connection through Xshell, serial interface must be
installed in the host system.
For details on serial setting, see 'Serial Connection'.
5.2.12 Connection _ PROXY
Proxy Server
Select a proxy server to use in this session.
For details on proxy setting, see 'Proxy Setting'.
5.2.13 Connection _ Keep Alive
Send keep alive messages while this session is connected
Send keep alive messages every user defined interval (seconds) to a remote computer. This is useful when a
connection is unexpectedly closed while the connection is idle. In some network environments, the gateway or
firewall system forces a disconnection if data transfer is not made for a defined period of time.
Send string when network is idle
Certain systems, if there is not user key input, the sessions is automatically determined to be idle and the sesion is
ended. Typically, the NF value, /n, is used.
Send TCP keep alive packets when network is idle
Users cannot designate the interval or cycles in which keep alive packets are sent at the OS level.
5.2.14 Terminal
In the terminal setting, terminal types and other related options may be set.
Terminal Type
Select a terminal type to use. Xshell supports VT100, VT102, VT220, VT320, ANSI, SCOANSI, LINUX and XTERM
terminals. The terminal type may change after a connection is made depending on the remote user's settings. Users
can check the current terminal type using the echo $TERM command.
Terminal Size : Columns
Enter the number of columns in the terminal. The value is applied when the column size is fixed or if the terminal is
reset after the connection is made.
Terminal Size : Rows
Enter the number of lines in the terminal. The value is applied once the terminal is reset after the connection is
made.
Fixed column size
With this option selected and a connection established, even if the user changes the window size, the column size,
specified by the user, will not change. If the window size is smaller than the column size, a horizontal scroll bar will
be shown.

Version 7 Help – Manual - Xshell
Session Management – 24
Reset terminal size when connected
When a session is run, Xshell's window will be resized to the user defined terminal size.
Scroll Buffer
Designate the row unit scroll buffer size.
Push Erased Screen into Scroll Buffer
With this option enabled, clearing the screen or resetting the terminal will push the contents into the Scroll Buffer.
The erased contents can be viewed again using the mouse scroll.
Encoding
Select terminal output encoding. This value must be a language the remote server uses. If Default Language is
selected, Xshell uses the Windows encoding.
Treat Ambiguously sized characters as wide
Characters without size information will be treated as 2-byte characters.
5.2.15 Terminal _ Keyboard
In the keyboard settings, users may set the character strings sent by their PC's keyboard to the server.
Function Key Emulation
Set function keys appropriate for your terminal type. If <Default> is selected, the function key is automatically
assigned according to the terminal type designated in the 'Terminal' setting.
Specify an Alternate Key Mapping File
Using a custom key mapping file, users can manually assign a string to each function key (F1~F20) and it will be sent
to the server when pressed.
Delete Key Sequence, Backspace Key Sequence
Select a character string to be sent when the user presses the Delete or Backspace key.
Meta Key Emulation
Treat the Alt key as the Meta key for application programs which use meta keys, such as Emacs.
Use Left ALT Key as Meta key
Treat the Left Alt key as the Meta key.
Ctrl+Alt works as Alt Gr
If Ctrl + Alt are pressed simultaneously, it will be recognized as the Alt Gr key.
Use Right ALT key as Meta key
Treat the Right Alt key as the Meta key.
5.2.16 Terminal _ VT Mode
Set the initial values for each terminal mode.
Auto Wrap Mode (DECAWM)
Activate auto wrap mode at startup.
Origin Mode (DECOM)
Activate origin mode. When this option is activated, the cursor moves based on the location designated by the
server.
Reverse Video Mode (DECSCNM)
Enables Reverse Video Mode when the session starts. When this option is activated, the screen foreground and
background colors are reversed.

Version 7 Help – Manual - Xshell
Session Management – 25
New Line Mode (NLM)
Enables New Line Mode when the session starts. When this option is activated, both CR and LF are sent when Enter
key is pressed. If this option is not selected, Enter key sends CR only.
Insert Mode (IRM)
Enables Insert Mode. When this option is selected, characters received from the remote server are inserted into
where the cursor is located and the existing characters are not erased.
Echo Mode (SRM)
When this option is activated, a character string to send to server is displayed on screen and then transferred to
server.
Initial Cursor Key Mode (DECCKM)
Set initial cursor key mode value.
Initial Numeric Keypad Mode (DECNKM)
Set default setting for Keypad mode.
5.2.17 Terminal _ Advanced
Set advanced terminal options.
Restrict Mouse Use at Terminal with Shift Key
Some applications such as 'vi' and 'mc' can use mouse click and drag to make a selection or change the directory.
When this option is selected, press the Shift key while using the mouse and Xshell uses the mouse input to perform
actions such as making selection on the screen.
Erase Screen Using Background Color
Use the current terminal background color rather than the background color set in the color scheme when erasing
screen.
Receive LF as CR+LF
Display both CR and LF in the terminal screen when LF is received from the server.
Scroll to the Bottom when Pressing the Key
Scroll to the bottom of the terminal screen when a user enters a key.
Scroll to the Bottom at Terminal Input/Output
Scroll to the bottom of the screen when text is displayed on the terminal screen.
Enable Destructive Backspace
Erase a letter to the left of the cursor, when the Backspace key is pressed, and move the cursor to the erased
character's position.
Disable Blinking Text
Blinking texts do not blink and are displayed with solid color.
Disable Terminal Title Change
Do not change the Xshell title bar. In most cases, the title bar displays the folder and host name according to a
request from a remote computer.
Disable Terminal Printing Feature
Display the terminal on screen without printing it when a request for terminal printing is received from server.
Disable Switching to Alternate Terminal Screen
Do not use an alternate screen for certain application programs, such as vi. When an alternate screen is used, and
the application is terminated, the terminal area goes back to the screen before the application is started.

Version 7 Help – Manual - Xshell
Session Management – 26
Disable Terminal Size Change upon Request
Ignore a terminal size change signal from the server.
Answerback to ^E
For output ^E (ENQ, Enquiry), most terminal emulators will answerback with its name. Xshell defaults to the same
behavior, but the user may define which characters to answerback with.
Use the built-in font to draw line characters
When outputting lines or boxes with line characters (─,│,┌┘,├, etc.) use Xshell's default font instead of the user
defined font.
Use the built-in font to support Powerline
Enable this option for a cleaner ouput when using Powerline.
5.2.18 Appearance
In the appearance setting, the terminal window's colors and fonts may be set.
Color Scheme
Select a color scheme. Xshell provides several default color schemes. Add a new color scheme or edit an existing
color scheme in the Select Color Scheme dialog box.
Font
Select a font to be used for Roman characters and ASCII numbers. Only fixed width fonts are listed. A font may also
be selected by pressing the standard [Fonts] button.
Asian Font
Select the font to be used for non ASCII characters such as Chinese. If you change the font via the Standard Button
toolbar, this value will be replaced by the font selected for ASCII characters.
Font Size
Select the desired font size. If the desired font size is not displayed, it can be manually entered.
Font Quality
Select the quality of the characters displayed in the terminal.
Bold
Select a method to express bold characters.
Cursor Color
Select the cursor's color.
Text Color
Select the color for text within the cursor.
Use blinking cursor
Enable this option to have the cursor blink.
Speed
Select the speed at which to blink the cursor.
Appearance
Select the type of cursor.
5.2.19 Appearance _ Window
In the window settings, set the margins, spacing, tab color, and background of Xshell's terminal window.

Version 7 Help – Manual - Xshell
Session Management – 27
Margin
Set terminal window margins.
Spacing
Set spacing between lines and characters outputted in the terminal window.
Tab Color
Select or choose the color of the session tab.
Background Image
Select a BMP image file to set as the terminal's background image.
Background Image
Select a BMP image file to set as the terminal's background image.
5.2.20 Appearance _ Highlight
Highlighting will highlight user defined keywords with color or font conversions. Set the Highlight Set to be used to
manage keywords to emphasize. For more information on settings keywords and managing highlight sets, see
"Highlight Set Settings."
5.2.21 Advanced
In the advanced settings, set quick command sets, tracing, bell options, and log options.
Quick Command Set
Select the default quick command set to be used in a session. The selected quick command set is displayed in the
quick command bar when the session is started. For more information on quick commands and settings, see
"Quick Command Bar Settings."
Disable Shortcut Key to Quick Command
Ctrl+F1 and Ctrl+F2 keys are not used as shortcut keys to quick commands. The corresponding key values are sent
to the server.
Xftp Option
Xftp can be called from Xshell using the current connection's information. When the Telnet and Rlogin protocols are
being used, Xftp will utilize the FTP protocol. A port number other than 21 can be set here.
Send Delay
Pasting a large number of strings into a terminal may cause some of the data to be lost depending on the network
or server environment. In this case, it is recommended to use Send Delay to manually delay the transmission.
Send Delay : Character Delay
Set the string paste delay between the characters in milliseconds.
Send Delay : Line Delay
Set the string paste delay between lines in milliseconds.
Send Delay : Prompt
When pasting multiple lines in sequence, paste the following line only when this user defined string appears. Set a
"Max Wait" time to withold pasting the following line if the specified string does not appear.
5.2.22 Advanced _ Trace
In the tracing settings, set protocol tracing options. This feature is helpful when you want to trace detailed protocol
messages to solve a specific problem. A tracing message is displayed in the terminal screen.

Version 7 Help – Manual - Xshell
Session Management – 28
•
•
•
•
SSH Version, Algorithm Exchange and User Authentication
Display information about version exchange, encoding algorithm, compression method, and server and user
authentication.
SSH TCP/IP and X11 Tunneling
Display port forwarding information on screen.
SSH Packet
Display SSH Packet message ID information.
TELNET Option Negotiation
Display the TELNET option exchange process between Xshell and the telnet server on the screen.
5.2.23 Advanced _ Bell
Xshell incorporates several options to utilize the typical sytems' bell sounds using the ASCII character number 7(Bell
character, ^G).
Bell Settings
Select how to acknowledge the bell character.
None (Ignore bell request) : Do not respond to the server's bell character output
Default system alert sound : Play Window's default alert sound
PC Speaker : Play the bell sound via the PC's speakers
Play the following sound : Play a user defined .wav format file
Flash window and taskbar if window is not focused
If the bell enabled window is behind another window or if the user is working on another program, the icon on the
Windows taskbar and the window itself will flash to notifify the user that there was a bell ouput on the remote
system.
Ignore Bell
Non system alerts and etc. may cause unintendedl bell rings due to incorrect output strings in the terminal. Time
intervals can be set to avoid unintended bell rings.
Temporarily disable the bell if the bell request is received more than once during the following time duration.
Any bell requests made more than once during the time duration set here (seconds) will be ignored.
Re-enable it after the following period of time.
After a bell request has been ignored, bell requests will once again be accepted after no bell requests are made in
the time duration set here (seconds).
5.2.24 Advanced _ Logging
In the logging settings, set the options related to log creation.
File Path
Specifies the path of the log file. The string conversion formats available at file creation are %n: session name, %Y:
current 4 digit year, %m: current 2 digit month, %d: current 2 digit day, %t: current time (%H-%M-%s), %h: current 2
digit hour, %M: current 2 digit minutes, %s: current 2 digit seconds.
Overwrite if the file exists
If a file with the same name exists in the destination folder, specify whether or not to overwrite the file. If this option
is not selected, a sequence number is appended to the file name.
Start Logging upon connection
Logging is automatically started when a session is connected to a remote host.

Version 7 Help – Manual - Xshell
Session Management – 29
•
•
Prompt me to choose a file path when logging starts
A prompt will be displayed when logging starts which allows the user to specify where to save the log file rather
than the default path.
Include terminal code
Choose one of the following logging methods.
Record only printable text
Record terminal code as well as printable text
If you include terminal code, all contents (color, string output status, etc.) will be recorded.
Timestamp: Log file records
Log file records will show the time the log was output.
Timestamp : Format
This is how the the date and time are formatted: %n: session name, %Y: current 4 digit year, %m: current 2 digit
month, %d: current 2 digit day, %t: current time(%H-%M-%s), %h: current 2 digit hour, %M: current 2 digit minutes,
%s: current 2 digit seconds, %a: other OS expression for date and time, %I: line number.
Timestamp: Preview
Displays the formatted timestamp based on current date and time.
5.2.25 File Transfer
This sections deals with X/Y/Z modem protocol file transfers during a terminal connection.
Folder
When transferring a file from remote servers, users can specify whether to save to a predetermined path or to have
a prompt displayed so the user can specifiy each transfer.
Duplicate file handling
When a file with the same name exists, users can specify whether to automatically rename the file or to overwrite it.
Upload protocol
User can upload local files by simply dragging and dropping the file into Xshell. Specify which protocol to use during
these uploads.
5.2.26 File Transfer _ X_YMODEM
Set various options for file transers using X/Y modem.
Option
Select the packet size to be sent to the remote server. If 1024 bytes is selected, the transfer speed will be faster, but
it must be supported by the server.
Upload Command
When using the XMODEM or YMODEM commands in the File Menu or when dragging and dropping, the selected file
is automatically transferred. Set the commands the server will use to prepare to receive the files at this time. For X/Y
modem related commands, please refer to the related server manual.
5.2.27 File Transfer _ ZMODEM
In the ZMODEM settings, set various options relating to ZMODEM file transfers.

Version 7 Help – Manual - Xshell
Session Management – 30
1.
2.
3.
1.
2.
3.
4.
5.
Activate ZMODEM Automatically
Automatically start file send when remote ZMODEM program starts send. If this option is not set, the file must be
received by selecting [Send with ZMODEM] in the [File] > [Transfer] menu. X/YMODEM cannot automatically be
received and so [Receive with X/YMODEM] must be selected" from the [File] > [Transfer] menu.
5.3 Export
Sessions exported by Xshell are collected into a single convenient file. When this file is imported from another
computer where Xshell is installed, the imported sessions may be used without additional setup. However, the
password of the exported session file will not be available unless a Master Password has been set on the PC from
which the session file was exported and the same exact Master Password has been set on the PC into which the
session file is imported.
To Export Session:
Select [Export] from the [File] menu. The Import/Export Sessions wizard is displayed.
Select the position where the exported file is to be saved and click [Next]. Session export results will be
displayed.
Note
If 'Clear Password' is selected, the exported session file will not include the session password during
the export. Also, even if 'Clear Password' is not selected, the password will only be evailable if
imported into the same computer under the same user. To use the session with the session password
on another device you must first set a Master Password on the computer from which the session file
is being exported and the same exact Master Password must be set on the computer into which the
session file is to be imported.
Click [Finish] to complete sessions export.
5.4 Import
Xshell can import sessions exported by other computers.
To Import Session:
Select [Import] from the [File] menu. The Import/Export Sessions wizard is displayed.
Directly enter the file path exported from other computer or click the […] button to select the exported file
and click [Next]. Sessions are imported and the result is displayed.
Select how to handle sessions with the same file names.
Click [Next] to select the types of sessions to import.
Click [Finish] to complete session import.

Version 7 Help – Manual - Xshell
Connection – 31
1.
•
•
•
1.
•
•
•
2.
1.
2.
1.
2.
3.
1.
1.
6 Connection
Xshell provides various connection methods, such as the Sessions dialog box, local prompt, address bar, links bar,
and shortcuts to session.
6.1 Connections without Session Files
Connection from the Local Prompt:
Enter one of the following commands in the local prompt:
[C:~]$ telnet hostname
[C:~]$ ssh hostname
[C:~]$ rlogin hostname
Note
A port number must be designated if a remote host does not use the default port number. For information
on commands, see 'Xshell Local Command'.
Connection from the Address Bar:
Enter one of the following commands in the address bar:
telnet://hostname
ssh://hostname
rlogin://hostname
Press Enter or click [Connect].
Note
A user name and port number may be entered in the address bar. For details, see 'Address Bar'.
Connection from the Recent Sessions:
Select [Recent Sessions] in the [File] menu.
User authentication of the selected session is performed.
Note
If user authentication is registered in the registration information of the selected session, step 2 is skipped.
6.2 Connections with Session Files
Connection from the Sessions Dialog Box:
Open the Sessions dialog box.
Select a session for connection.
Click [Connect].
Note
If a remote host connection already exists, a new tab is opened or a new Xshell is started.
Connection from the Local Prompt:
Enter the following command in Xshell local prompt. [C:~]$ open session file name
Connection from a Shortcut:
Double-click the shortcut icon of a session.
Note
To obtain information about shortcut to session, see 'Session Management'.

Version 7 Help – Manual - Xshell
Connection – 32
1.
2.
1.
2.
1.
2.
3.
4.
5.
6.
7.
8.
9.
10.
11.
12.
13.
1.
2.
3.
4.
5.
6.
7.
Connection from the Session Manager:
Make sure the "Session Manager" is enabled in the [View] menu.
Select the session you want to connect to and double-click or press the Enter key.
6.3 Sessions to Run on Xshell Startup
Select 'Options' from the [Tools] menu.
In the 'General' tab, click 'Add' and select session files to automatically connect upon Xshell startup.
6.4 SERIAL Connection
RS232C SERIAL connections lets you use your PC as a terminal when there is no video card in the UNIX system or if
the console is not directly accessible. To use SERIAL connections via Xshell, the SERIAL interface must be installed
in the host system.
To Make Serial Connections:
Select [New] from the [File] menu. New Session Properties dialog box is displayed.
Enter a session name in [Session].
Select SERIAL from [Protocols] list.
Enter a host name in [Host]
Select [SERIAL] from [Category].
Select the RS232C serial port number connected with the PC where Xshell is installed from [Port]. If the port
number is not in the list or if the name is the same as the named pipe, enter it manually.
Select communication speed in [Baud Rate]. The value must match the server value. In general, 9600 is used.
Select the transferred data unit bit count in [Data Bits]. It must match the server value.
Select number of bits to indicate the end of data unit in [Stop Bits]. Make a selection according to server
settings.
[Parity] is to verify errors in transferred data. Select one from none, odd, even, mark and space according to
server settings.
[Flow Control] is for controlling data communications. Supported flow control methods are XON/XOFF and
RTS/CTS. If a flow control is not set(None), data may be lost if data is sent faster than the serial line.
Create a new session by clicking [OK].
Make a connection as described in 'Connection with Sessions Files' with the created session.
6.5 Connection with Kerberos
Xshell 6 supports MIT GSSAPI Kerberos and Microsoft's SSPI Kerberos authentication. This article assumes that you
have a working Kerberos server and client.
To create a new Kerberos session,
Select [New] from the [File] menu.
Enter a session name in [Name].
Select SSH from the [Protocols] list.
Enter a host name in [Host]
Select [Authentication] from under [Category].
Select GSSAPI from the [Method] list.
Note
If the PC running Xshell is utilizing an Xshell supported Kerberos module, Xshell can only
automatically authenticate to the SSH server if GSSAPI authentication is selected.
To change the GSSAPI settings, click the [Setup] button.

Version 7 Help – Manual - Xshell
Connection – 33
8.
9.
10.
11.
1.
2.
3.
4.
5.
6.
7.
8.
9.
10.
11.
12.
1.
2.
3.
4.
Note
To connect to another server using Kerberos authentication from a server using Kerberos
authentication, select the 'Allow GSSAPI credential delegation' option.
Click [OK] to save the GSSAPI settings.
Enter the user name.
Click [OK] to save the session file.
Click [Connect] to connect immediately or select the session file from the Sessions Dialog Box to connect.
You have finished creating a session that will use the Kerberos module. When this session opens, it will try to use the
Kerberos credential for the specified user. It has to be the same user you defined in the Network Identity Manager.
6.6 Connection with PKCS _11
PKCS #11 is one of the public key cryptography standards. Xshell 6 can connect to a remote SSH server using a PKCS
#11 encrypted hardware security token (HSM) or a smart card's RSA key.
To create a new PKCS #11 session:
Select [New] from the [File] menu.
Enter a session name in [Name].
Select SSH from the [Protocols] list.
Enter a host name in [Host]
Select [Authentication] from under [Category].
Select PKCS11 from the [Method] list.
Click the [Setup] button.
Enter the path of the middleware program that can connect to the hardware token that contains the user
key. Or click […] to browse for it.
If the pin number is set in the hardware token, enter the pin number.
Enter the user name.
Click [OK] to save the session file .
Click [Connect] to connect immediately or select the session file from the Sessions Dialog Box to connect.
6.7 Proxy Setting
Proxy server mediates between a network to which a user belongs and an external network to be connected with.
Add, edit and delete a proxy server in Proxy List dialog box.
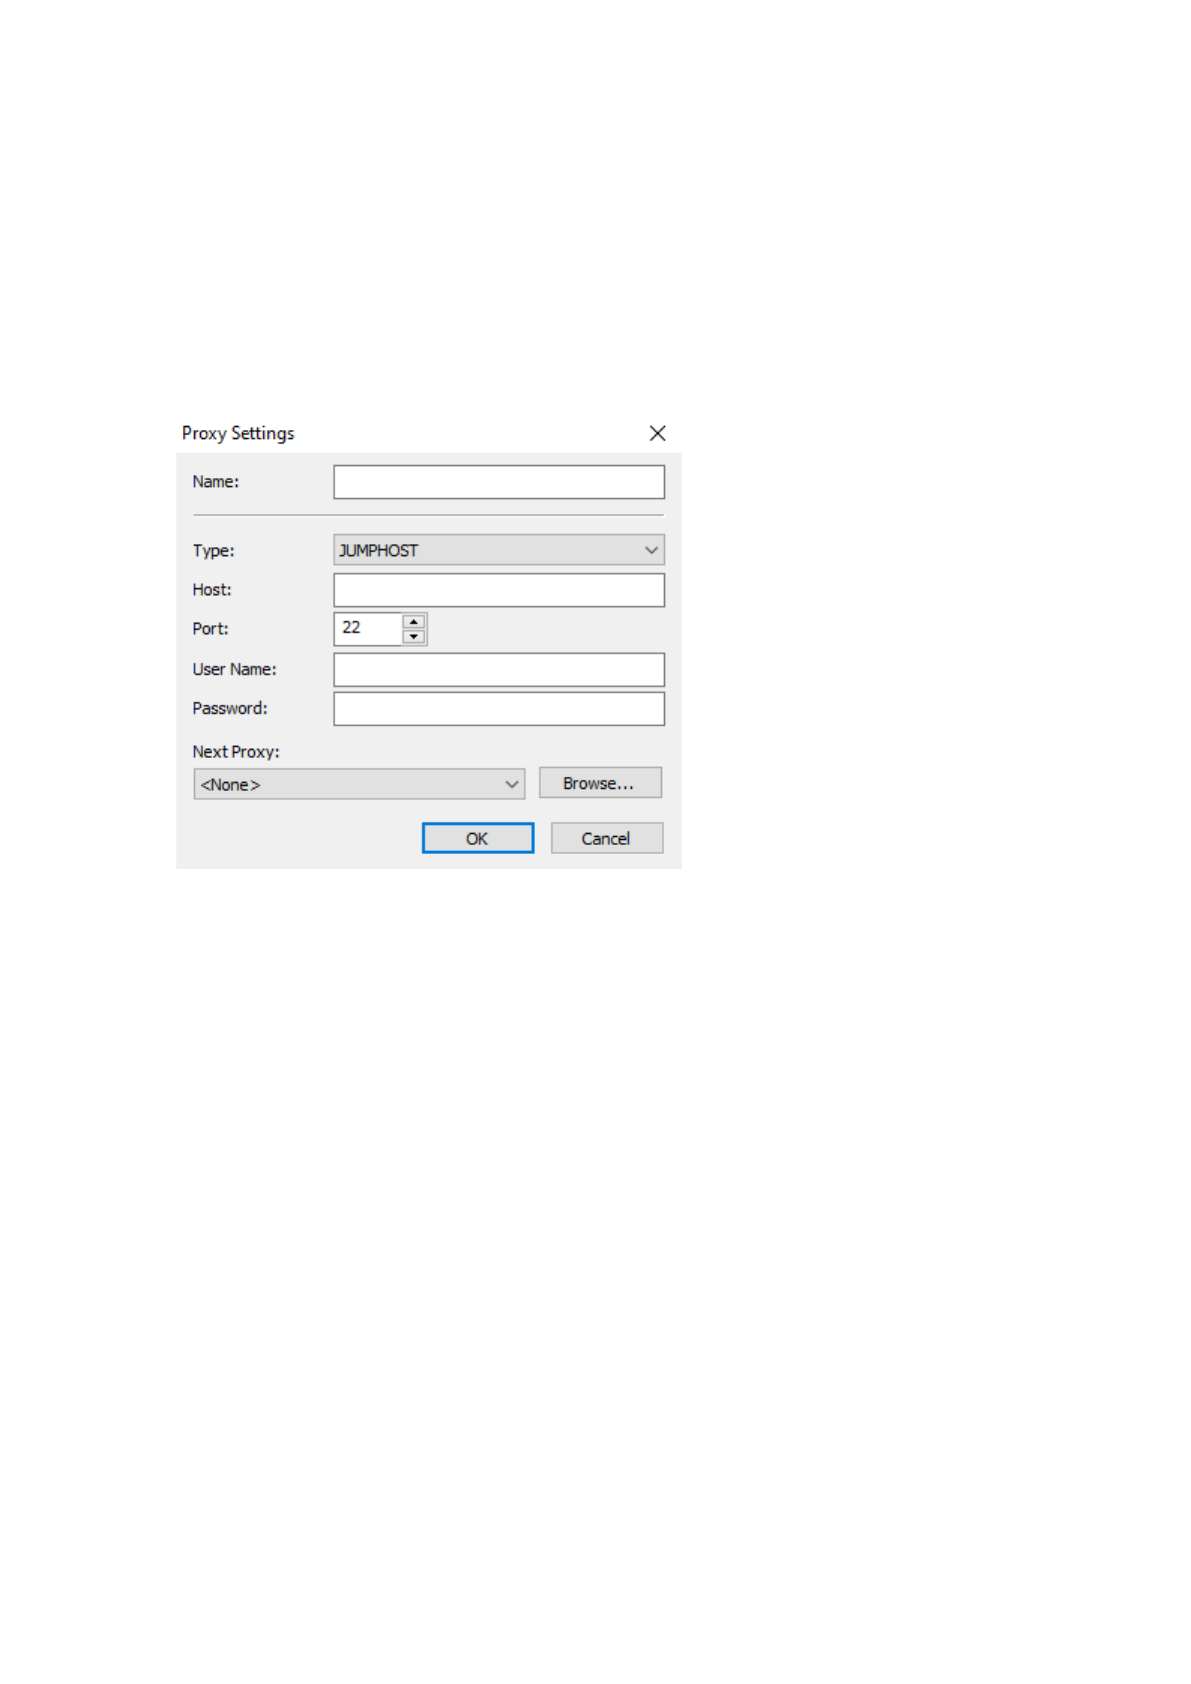
To Add Proxy Server:
In [Connection > Proxy] category of Session Properties dialog box, click [Browse] in [Proxy Server].
Click [Add] in Proxy List dialog box. Proxy Settings dialog box is displayed.
Enter proxy server name, proxy server type, host information and user information.
Press [OK] to add proxy server.
6.8 Jump host
The Jump Host feature is a proxy feature that allows you to utilize an intermediate SSH server in order to reach the
final destination server. As it uses Open-SSH’s TCP Tunneling, this feature can be used to connect to servers that
cannot directly connect to the firewall or network configuration.
To Connect Using the -J Parameter from the Local Shell:
Version 7 Help – Manual - Xshell
Connection – 34
1.
1.
2.
3.
4.
5.
6.
In the local shell, type ssh -J user1: passwd1 @ jump_host1, user2: passwd2 @ jump_host2
destination_host.
To Connect Through a Proxy:
Select [New…] from the [File] meun.
Enter the host of the destination server in [Host].
Select [Browse] in [Proxy Server].
Select [Add] to open the proxy creation window.
In [Proxy Settings], change [Type] to JUMPHOST and enter the remaining required information.
Fig 1: Proxy Settings Screen
Set the created proxy as the default in [Proxy Server].

2 http://ssh.com
Version 7 Help – Manual - Xshell
Security – 35
1.
2.
•
•
•
1.
2.
3.
4.
5.
6.
1.
2.
7 Security
Xshell provides public key user authentication. Host keys and user key databases created in Xshell may be used in
Xmanager and Xftp programs. Once a public key is created, it may be used in other programs without any
additional configuration.
7.1 Public Key User Authentication0
For public key user authentication, a pair of user keys must be created comprised of a public key and a private key.
While public key authentication is carried out, the private key is used by Xshell to create a user signature and the
public key is used by the SSH server to check the signature.
A user key may be created from the SSH server or Xshell. If the user key is created from the server, the private key
must be registered in the Xshell private key repository using Xshell import. If the user key is created from Xshell,
the public key must be registered in the server.
To Create a User Key:
Select [New User Key Wizard] from the [Tools] menu.
Create a user key according to instructions given by the New User Key Wizard.
Note
Register a public key on a server at the last stage of key creation. Registration methods vary depending on
server types.
SSH1: Copy the public key text and save it to $HOME/.SSH/authorized_keys file. Execute the following
command to turn off the write permission of the files and directories.
$ cd
$ chmod go-w . .SSH .SSH/authorized_keys
SSH2-OpenSSH: OpenSSH servers use this format. Copy the public key text and save it to
$HOME/.SSH/authorized_keys2 file. Execute the following command to turn off the write permission
of the files and directories.
$ cd
$ chmod go-w . .SSH .SSH/authorized_keys2
SSH2-IETF SECSH: Certain commercial SSH servers, such as ssh.com
2
server, use this format. Save a
public key under an intrinsic name, such as mypublickey.pub and copy it to $HOME/.ssh2 directory.
Add the following line to $HOME/.ssh2/authorization file:
Key mypublickey.pub
Execute the following command to turn off the write permission of the files and directories.
$ cd
$ chmod go-w . .ssh2$ chmod go-w .ssh2/authorization .ssh2/mypublickey.pub
To Register a Public Key in a Server:
Open the User Keys dialog box by selecting [User Key Manager] from the [Tools] menu.
Select a user key to register.
Click [Properties]. The User Key Properties dialog box is displayed.
Click the [Public Key] tab.
Select an appropriate type from the [Public Key Format] list.
Click [Save as a file] to save or copy the key content and register the key to the server according to the public
key registration method above.
To Change the User KeyPassphrase:
Open the User Keys dialog box.
Select a user key for which to change the passphrase.

3 http://SSH.com
Version 7 Help – Manual - Xshell
Security – 36
3.
4.
5.
Click [Properties]. The User Key Properties dialog box is displayed.
Click the [General] tab.
Click [Change Passphrase].
Note
Import, export, rename, delete, and create a user key in the 'User Keys Dialog Box'.
7.1.1 User Keys Dialog Box
The User Keys dialog box enables the creation and management of user keys. Open this dialog box by selecting
[User Key Manager] from the [Tools] menu.
Import
Select a user key file and import it by opening the Open dialog box. Currently, Xshell can read the SSH1 protocol
RSA key, the OpenSSH SSH2 protocol RSA/DSA key, the SSH.com
3
key and the NetSarang Computer user key
formats(*.pri).
Export
Save a selected user key file by opening the Save dialog box. Exported file types are NetSarang user keys or the
OpenSSH SSH2 format. NetSarang Computer user key format files(*.pri) can be used in programs developed by
NetSarang Computer, Inc.
Delete
Delete a selected user key from database.
Rename
Rename a selected user key. Key name must be valid as a file name.
Properties
Show user key attributes. Type, length, fingerprint, and public key may be viewed, and the key passphrase may be
changed.
Generate
Open the New User Key Wizard.
7.2 Host Key Management
A host key is a remote host public key, and users can verify the host via its fingerprint. When a connection is made,
the remote host sends its public key to Xshell. When the host key is valid and you trust it, you can save the host key
to the database in Xshell. If a host key is not saved in the database, the SSH Security Warning dialog box will
appear when you try to connect to the host.
7.2.1 SSH Security Warning Dialog Box
The SSH Security Warning dialog box is displayed when a remote host key is not saved in the host key database or
the fingerprints of the remote host key and the saved host key are different.
Accept Once
Accept host key for this connection only. The host key is not saved and the same dialog box opens at the next
connection. This is useful when a server host key changes often or the user rarely connects to the server.

Version 7 Help – Manual - Xshell
Security – 37
1.
2.
3.
4.
5.
6.
1.
Accept and Save
Save host key and process the connection. This dialog box does not open on the next connection. This is useful
when the fingerprint is correct and the user connects to the host frequently.
Cancel
Host key is not accepted and connection is cancelled.
7.2.2 Host Keys Dialog Box
The Host Keys dialog box permits users to manage host keys of remote hosts to which connection is allowed.
Import
Import a host key by opening the Open dialog box. The imported host key is saved in the host key database. Files
saved in the SECSH public key format can be imported.
Export
Export a selected host key by opening the Save dialog box. The exported keys are saved in the SECSH public key
format and can be used in other programs.
Remove
Remove a selected host key from the database.
View
Open a selected host key with notepad.
7.3 Master Password
Master password can be used to save passwords more securely using the user defined master password. Xshell
saves all password information in an encrypted format. However, since passwords are encrypted using a fixed key,
it has a risk of being exploited by hackers. When the master password is enabled and set, it is mixed in during
password encryption adding an additional layer of security.
Master password uses a user defined keyword to encrypt the password section of the session data. When the master
password is enabled, Xshell asks for the master password every time a new Xshell instance is started and a session
is open. If the correct master password in not inputted, the session's password is not able to be utilized and must be
entered again manually preventing unauthorized access.
Note
Be sure to remember your master password. If you lose your master password, there is no way to retrieve
the password information stored in the session files.Maser Password settings are applied simultaneously to
Xmanager, Xshell, and Xftp sessions.
To Enable Master Password:
Click on the Tools menu and then select Options.
Select the Security tab.
Click Set Master Password to open the Master Password dialog box.
In the Master Password dialog box, enter a new master password in the New Password field.
In the Confirm Password field, enter the new password again.
Click OK to save the changes.
Once master password is enabled, all sessions saved in the default location are re-encrypted using the new master
password.
To Change Master Password:
Click on the Tools menu and then select Options.

Version 7 Help – Manual - Xshell
Security – 38
2.
3.
4.
5.
6.
7.
8.
1.
2.
3.
4.
5.
1.
2.
3.
4.
5.
Select the Security tab.
Click Set Master Password to open the Master Password dialog box.
In the Change area click Change to open the Master Password Change dialog box..
Enter the current master password in the Current Password field.
Enter the new master password in the New Password field.
Enter the new password one more time in the Confirm Password field.
Click OK to save the changes.
To Disable Master Password:
Click on the Tools menu and then select Options.
Select the Security tab.
Click Set Master Password to open the Master Password dialog box.
Click the Remove button to open the Remove Master Password dialog box.
In the Remove Master Password dialog box, enter the master password and click OK.
To Reset the Master Password:
Click on the Tools menu and then select Options.
Select the Security tab.
Click Set Master Password to open the Master Password dialog box.
Click the Reset button to open the Reset Master Password dialog box.
In the Reset Master Password dialog box, click Reset Master Password and click OK.
Note
Reset of the master password can be used if your forgot your master password or if you would like to clear
all the passwords stored in your sessions.

Version 7 Help – Manual - Xshell
Tab Management – 39
•
•
•
•
•
1.
2.
1.
2.
1.
2.
3.
8 Tab Management
Xshell has a powerful tab management feature. You can connect to multiple hosts and compare them side by side
from a single window. The intuitive tab management feature is a unique Xshell feature that cannot be found in
other terminal emulators.
Each tab is associated to a single terminal and it belongs to a tab group. A tab group is a collection tabs. A single
Xshell window can have multiple tab groups and can be organized as desired.
8.1 Tab
There are several ways you can create a new tab. You can use any of the following methods:
Click the [Tab] menu and select [New Tab]
Double click on the tab bar in the background.
Use the keyboard shortcut, Shift + Alt + N.
To close a Tab:
Click the x button on the tab.
When focus is on the tab, press Ctrl+Shift+F4.
To close a tab from Terminal:
While connected to the remote host, enter 'exit'.
In Xshell's local shell, type 'exit' again.
Note
To close a tab from Terminal, you must not have selected the 'Revert to local shell when connection is
closed' option in the [Options] dialog box. Also, if the 'Exit Xshell when the last tab is closed' option is not
selected, you must select 'Exit' from the 'File' menu to exit Xshell.
8.2 Tab Group
A tab group is collection of multiple tabs. Use tab groups to neatly organize sessions. Only one tab from the tab
group is visible at any given moment. To view and compare multiple tabs simultaneously, you must separate the
tabs into different groups.
To Create a New Tab Group:
Right click on the tab background.
Point to [New Tab Group] and select a location you want to create a new tab group.
Note
If you want to create a new tab group with an existing tab, you can drag a tab to edge of the terminal until
you see the blue marker and drop it.
To Move a Tab to a Different Tab Group:
Select a tab you want to move to a new tab group.
While holding down the left mouse button, drag the tab to a different tab group.
Drop the tab to a new tab group.
To Delete a Tab Group:

Version 7 Help – Manual - Xshell
Tab Management – 40
1.
2.
3.
1.
2.
1.
2.
1.
2.
1.
2.
1.
2.
Select a tab group you want to close.
Right click on the tab group in the background.
Select the [Close This Tab Group] option.
To Combine All Tab Groups into one Tab Group
Select the Xshell window you would like to combine tab groups.
In the [Tab] menu, select 'Merge All Tab Groups' under 'Arrange.'
8.3 Split and Merge Tabs
Tabs can be separated to create new windows and you can combine tabs from different windows into one window.
To use this feature, you must turn off the 'Use single-process mode for better performance' in [Options >
Advanced].
To Detach a Tab and Create a New Window:
Select the tab you want to detach with the mouse.
Drag the tab and drop it outside of the Xshell Window.
To Detach and Tab and Add it to an Existing Window:
Select the tab from an Xshell Window.
Drag the tab and drop it into a tab group of an existing Xshell Window.
8.4 Arrange Tabs
Multiple tabs can be automatically arranged into horizontal, vertical, or tiled tab groups. This is useful for
concurrent operations on multiple servers.
To Arrange Tabs Horizontally, Vertically, or Tiled:
Select the Xshell window to be arranged.
In the [Tab] menu, under 'Arrange,' select the desired arrangement method.
To Combine an Auto-Arranged Group of Tabs into One Tab Group:
Select the Xshell window to be arranged.
In the [Tab] menu, under 'Arrange,' select 'Merge All Tab Groups.

Version 7 Help – Manual - Xshell
Tunneling Service – 41
1.
2.
3.
4.
5.
6.
7.
8.
9.
10.
11.
12.
1.
2.
3.
4.
5.
6.
1.
2.
3.
4.
5.
6.
9 Tunneling Service
Xshell provides TCP/IP and X11 forwarding functions, which creates a secure tunnel between a user's PC and
another computer connected across an unreliable network enviornment providing a way to safely transmit data.
9.1 TCP_IP Port Forwarding
To use port forwarding service via a secure tunnel, define port forwarding rules for each application program.
Note
For local forwarding, connection to alocal PC's listening port is forwarded to a specific destination host port.
For remote forwarding, connection to the remote host listening port is forwarded to a specific destination
host port.
Dynamic forwarding works the same as local forwarding. It automatically determines the host of delivery
destination and port according to the SOCKS protocol. The default port number of SOCKS protocol is 1080.
To Add a New Port Forwarding Rule to a Session:
Open the Sessions dialog box.
Select a session for which to edit port forwarding rule.
Click the standard [Properties] button.
Select [Connection > SSH > Tunneling] from [Category].
Click [Add] to open the Forwarding Rule dialog box.
Select connection type from the [Type] list.
Enter the localhost or IP address in [Source Host].
Enter the port number in [Listening Port] or select a service name.
Enter the name of the host or IP address where the server program operates in [Destination Host].
Enter the port number where server program is waiting in [Destination Port].
Enter a description of the forwarding rule in [Description].
Click [OK].
To Change Forwarding Rule:
Open the Sessions dialog box.
Select session for which to edit port forwarding rule.
Click the standard [Properties] button.
Select [Connection > SSH > Tunneling] from [Category].
Select a forwarding rule to change.
Click [Edit].
To Remove Port Forwarding Rule:
Open the Sessions dialog box.
Select session for which to edit port forwarding rule.
Click the standard [Properties] button.
Select [Connection > SSH > Tunneling] from [Category].
Select a forwarding rule to remove.
Click [Remove].
9.2 X11 Forwarding
X11 forwarding is a special TCP/IP port forwarding case. The X11 protocol is used by a PC X server software, such as
Xmanager, and the connection is established to a user PC from a remote host. It is thus the reverse situation from
other client programs, such as email or telnet. Using X11 forwarding, remote X11 application programs can be used

Version 7 Help – Manual - Xshell
Tunneling Service – 42
1.
2.
3.
4.
5.
6.
7.
1.
2.
3.
1.
2.
3.
1.
2.
3.
4.
5.
6.
7.
8.
in a user's PC via a secure encoding tunnel without complicated port forwarding settings.
To use the X11 forwarding service, you should configure both Xshell and the SSH server.
To Activate X11 Forwarding in Xshell:
Open the Sessions dialog box.
Select a session for which to activate X11 forwarding.
Click the standard [Properties] button.
Select [Connection > SSH > Tunneling] from [Category].
Select [Forward X11 Connections to].
If Xmanager
®
is installed in the user's PC, select [Xmanager]. If another PC X server is used, select [X DISPLAY]
and enter an appropriate DISPLAY.
Click [OK].
Note
In Xmanager, Xshell automatically finds the X DISPLAY option. In other PC X server programs, the option
must be set manually. If PC X server uses TCP 6000 port, DISPLAY is set as 'localhost:0.0'.
To Activate X11 Forwarding in an OpenSSH Server:
Open the /etc/ssh/sshd_config file.
Set X11Forwarding option value as follows: X11Forwarding yes
Restart SSH server.
To Activate X11 Forwarding in an ssh.com Server:
Open the /etc/ssh2/sshd2_config file.
Set AllowX11Forwarding option value as follows: AllowX11Forwarding yes
Restart SSH server.
9.3 SOCKS4_5 Dynamic Port Forwarding
Dynamic port forwarding is a method to forward a local network connection to an SSH server, where the
destination host and port are automatically determined by the SOCKS protocol. Using dynamic port forwarding,
Xshell can operate as a SOCKS proxy server.
To Add New Dynamic Port Forwarding Rule to a Session:
Open the Sessions dialog box.
Select a session for which to edit port forwarding rule.
Click the standard [Properties] button.
Select [Connection > SSH > Tunneling] from [Category].
Open the Forwarding Rule dialog box by clicking [Add].
Select Dynamic (SOCKS4/5) from [Type] list.
Enter port number in [Listening Port] or select a service name. The SOCKS proxy server default port is 1080.
Click [OK].
Note
For dynamic port forwarding, the destination host and port do not need to be entered.
9.4 Instant Tunneling
Instant tunneling enables users to add, remove, suspend, and resume a forwarding rule while a session is
connected. The current session tunneling status can be checked in the tunneling pane. To view the tunneling pane,
select [Tunneling Pane] from the [View] menu.

Version 7 Help – Manual - Xshell
Tunneling Service – 43
1.
2.
3.
1.
2.
3.
1.
2.
3.
1.
2.
3.
To Add Port Forwarding Rule in the Tunneling pane:
Click the [Forwarding Rules] tab in the tunneling pane.
Right-click on the list.
Select [Add] from menu. Forwarding Rule dialog box is displayed.
Note
Newly added rules are applied to the current connection. Unless you save the rules, they are deleted when
the connection is closed.
To Remove Port Forwarding Rules from the Tunneling pane:
Click the [Forwarding Rules] tab in the tunneling pane.
Right-click on a rule to remove from the [Forwarding Rules] list.
Select [Remove] from menu.
To Suspend Port Forwarding Rules:
Click the [Forwarding Rules] tab in the tunneling pane.
Right-click on a rule to suspend from the [Forwarding Rules] list.
Select [Suspend] from menu.
To Retry Port Forwarding Rules:
Click the [Forwarding Rules] tab in the tunneling pane.
Right-click on a rule to resume in the [Forwarding Rules] list.
Select [Resume] from menu.
Note
Resume can only be executed for a previously suspended rule.

Version 7 Help – Manual - Xshell
Terminal Window Operations – 44
1.
•
•
•
•
1.
2.
1.
2.
•
•
•
•
•
1.
2.
•
•
1.
•
•
•
•
10 Terminal Window Operations
Xshell provides a succinct and powerful terminal window enabling users to simultaneously use the remote terminal
and local prompt command interface. Terminal window provides a range of convenient functions, such as copy &
paste, find character string, change font and font color, and advanced terminal options.
10.1 Copy and Paste
To Select a Character String:
Do one of the following:
Press the left mouse button at the starting point of an area to select. While pressing the button, move
the mouse to the end of the area to be selected and release the button. The selected character string
is displayed in an inverted color.
Click the left mouse button at the starting point of an area to select. Move mouse to the end of the
area. While pressing Shift key, press the left button once again.
Double-click a word to select. The double-clicked word is selected.
Triple-click a row to select. The entire row is selected.
To Select Character Strings in a Column Unit:
Press Alt key.
Press the left mouse button at the starting point of an area to select. While pressing the button, move to the
end of the area to select and release the button.
To Copy Selected Character Strings to the Windows Clipboard:
Select a character string to copy.
Do one of the following:
Click the [Smart Selection] button and select [Copy].
Select [Copy] from the [Edit] menu.
Click the standard [Copy] button.
Press Ctrl+Insert key.
If [Copy Selected Texts to the Clipboard Automatically] is set in options, the selected text is
automatically copied.
To Copy Selected Character String to Notepad:
Select a character string to copy.
Do one of the following:
Click the [Smart Selection] button and select [To Text Editor].
Point to [To Text Editor] in the [Edit] menu and select [Selected Area].
Note
The scroll buffer and current screen may be copied as well as the selected character strings. A notepad
window is automatically displayed with the copied text. This does not copy character strings to the
clipboard.
To Paste Clipboard Contents to the Terminal Screen:
Do one of the following:
Select [Paste] from the [Edit] menu.
Click the standard [Paste] button.
Press Shift+Insert key.
If Paste the clipboard contents is selected for middle or right mouse button operation, click the
corresponding mouse button.

Version 7 Help – Manual - Xshell
Terminal Window Operations – 45
1.
2.
3.
4.
5.
1.
2.
3.
1.
2.
3.
4.
1.
•
•
1.
2.
3.
To Set Xterm Style Copy and Paste:
Open the Options dialog box.
Click the [Keyboard and Mouse] tab.
Select [Mouse] – [Middle Button] operation as Paste the clipboard contents.
Select [Selection] - [Copy Selected Texts to the Clipboard Automatically].
Click [OK].
Note
When a character string is selected, the xterm program copies it to clipboard. When the middle mouse
button is pressed, it is pasted to the terminal screen.
10.2 Find String
Search scroll buffer using a specific keyword or a regular expression.
To Find with Keyword:
Select [Find] from the [Edit] menu.
Enter a keyword in Find dialog box.
Click [Find Next].
To Find with Regular Expression:
Select [Find] from the [Edit] menu.
Enter a keyword in Find dialog box.
Select [Regular Expression].
Click [Find Next].
Note
For detailed information on regular expression, see 'Regular Expression'.
10.3 Font Change
In the terminal screen, characters must be displayed in rows and columns. In Xshell, only fixed width fonts may be
selected.
To Change Terminal Font and the Font Size:
Do one of the following:
Click the standard [Fonts] button and select a font and the font size.
Select [Appearance] in Session Properties dialog box and select a font and the font size.
To Change Bold Text:
Open the Session Properties dialog box.
Select [Appearance] from [Category].
Select an option from [Bold] field.
Note
As for Bold, either colors or bold font or both may be used.
10.4 Font Color and Background Color Setting
In a color scheme, font colors, background colors and ANSI 16 colors are saved. Xshell enables users to select/
change color schemes anytime while using Xshell. The selected color scheme is applied immediately.

Version 7 Help – Manual - Xshell
Terminal Window Operations – 46
1.
•
•
1.
2.
3.
4.
1.
2.
3.
4.
5.
6.
1.
2.
3.
4.
5.
1.
2.
3.
4.
1.
2.
3.
4.
5.
To Change Terminal Color:
Do one of the following:
Click the standard [Color Schemes] button to display the Select Color Scheme dialog box. Select a
color scheme in the dialog box and click [OK].
Select [Appearance] from [Category] in Session Properties dialog box, select a color scheme from
the [Color Scheme] and click [OK].
Note
Xshell provides several default color schemes. Users may edit the existing color schemes or create new color
schemes.
To Create New Color Scheme:
Open the Select Color Scheme dialog box.
Click [New]. A new color scheme is added to the list.
Select the new color scheme created.
Click [Edit]. Edit Color Scheme dialog box is displayed.
To Edit Color Scheme:
Open the Select Color Scheme dialog box.
Select a color scheme to edit.
Click [Edit]. Edit Color Scheme dialog box is displayed.
Select colors for normal text in [Normal Text].
Select colors for bold text in [Bold Text]. In general, colors lighter than the normal text are used for bold text.
[ANSI Colors] is used to express ANSI color code in terminal. The colors on top are for normal text, such as
black, red, green, yellow, blue, magenta, cyan and white, and the colors on the bottom are for bold text.
To Export Color Scheme:
Open the Select Color Scheme dialog box.
Select a color scheme to export.
Click [Export]. Save dialog box is displayed.
Select a folder and enter the file name to save.
Click [Save].
Note
Exported file is in '.xcs' format and may be used in Xshell only. A number of color schemes may be saved in a
single file. The color scheme names are also saved in the file.
To Import Color Scheme:
Open the Select Color Scheme dialog box.
Click [Import]. Open dialog box is displayed.
Select a color scheme file (.xcs) to import.
Click [Open].
10.5 Cursor Change
To Change Cursor Color:
Open the Session Properties dialog box.
Select [Appearance] from [Category].
Select [Cursor Color] value.
Select [Text Color] value.
Click [OK].

Version 7 Help – Manual - Xshell
Terminal Window Operations – 47
1.
2.
3.
4.
1.
2.
3.
4.
5.
1.
2.
3.
4.
1.
2.
3.
4.
1.
2.
3.
4.
1.
2.
3.
4.
1.
1.
1.
To Change Cursor Blinking:
Open the Session Properties dialog box.
Select [Appearance] from [Category].
Select or deselect [Use blinking cursor].
Click [OK].
To Change Cursor Blinking Speed:
Open the Session Properties dialog box.
Select [Appearance] from [Category].
Check [Use blinking cursor].
Enter cursor blinking speed by millisecond in [Speed].
Click [OK].
10.6 Window Handling
To Minimize to Notification Area:
Open the Options dialog box.
Click the [Advanced] tab.
Check [Send to the notification area when minimized] in [Window] options.
Save changes by clicking [OK].
To Minimize to Notification Area at Startup:
Open the Options dialog box.
Click the [Advanced] tab.
Check [Minimize to the notification area at Xshell startup] in [Window] options.
Save changes by clicking [OK].
To Exit Xshell when All Connections are Closed:
Open the Options dialog box.
Click the [Advanced] tab.
Check [Exit Xshell when all connections are closed] in [Session] options.
Click [OK].
To Exit to Local Shell when Connections are Closed:
Open the Options dialog box.
Click the [Advanced] tab.
Check [Revert to local shell when connection is closed] in [Session] options.
Click [OK].
To Create New Xshell Window:
Select [New Window] from the [Window] menu.
To Move to Another Xshell Window:
Select [Next] or [Previous] from the [Window] menu.
Note
The same functionmay be executed using Alt+Right and Alt+Leftkeys.
To Close All Xshell Windows Simultaneously:
Select [Close All] from the [Window] menu.
To Close All Xshell Windows Except the Current Window:

Version 7 Help – Manual - Xshell
Terminal Window Operations – 48
1.
1.
2.
3.
4.
1.
2.
1.
2.
1.
2.
1.
•
•
•
•
1.
Select [Close All but This] from the [Window] menu.
10.7 Multi-session Handling
'Multi-session' enables users to work and move between sessions using the sessions tab or sessions bar while
maintaining multiple connections in a single Xshell window.
To Open the Multiple Sessions in Single Xshell Window:
Open the Options dialog box.
Click the [Advanced] tab.
Check [Open multiple sessions in a single Xshell window] in [Session] options.
Save changes by clicking [OK].
To Create a New Connection in Sessions Tab:
Click the [+(Add Tab)] button at the far left of the sessions tab.
Select one from sessions list. The selected session is opened in a new tab.
To Create New Connection in Sessions Bar:
Click an icon at the far left of the sessions bar.
Select one from the sessions list. The selected session is opened in a new tab.
Note
To create a new connection, use a session as described in 'Session Management' or try a connectionwithout
a session.
To Connect with a Remote Computer by Entering a Command in Local Shell:
To open a local shell, click the [+(Add Tab)] button of the sessions tab and select [Local Shell] or double-
click a blank in the sessions tab.
In the local command prompt, connect to a remote computer using commands, such as ssh, telnet and sftp.
For details on using command, enter '?'.
Note
For detailed information on local commands, see 'Xshell Local Command'.
To Move Between Sessions at Multi-session Connection:
Do one of the following:
Click a sessions tab.
Click a session button from the sessions bar.
Use Ctrl+Tab, Shift+Tab or Ctrl+Shift+Tab.
Move between sessions using Alt+'session number'.
To Connect with Session in New Xshell Window:
Select [New Terminal] from the [Window] menu or click the standard [New Terminal] button. A new Xshell
window opens and connection is attempted with the same session information as the currently connected
session.
10.8 Quick Command Sets Setting
By designating frequently used character strings as quick commands, Users can avoid repeated keyboard inputs
and use simple mouse clicks to execute the commands. To display quick commands bar, check [Quick Commands]
in the [View] menu.
To Add Quick Command Set:

Version 7 Help – Manual - Xshell
Terminal Window Operations – 49
1.
2.
3.
1.
2.
3.
1.
2.
3.
4.
5.
1.
2.
3.
1.
1.
2.
3.
4.
5.
Select [Quick Command Sets] in the [Tools] menu. Quick Command Sets dialog box is displayed.
Click [New].
Enter the new quick command set name.
Note
To open the Quick Command Sets dialog box, click the [Quick Command Set] button(an icon at the far left)
in the quick commands bar and select [Browse] from the list.
To Add Quick Command on Quick Commands Bar:
Click an undefined Quick Command button in the quick commands bar or press a shortcut key (Ctrl+F1,
etc.). Edit Quick Command dialog box is displayed.
Enter the quick command name in [Label] and a frequently used command or character string in [Action]
area.
Click [OK].
Note
To edit the quick command set displayed in the quick commands bar, click the [Quick Command Set]
button(an icon at the far left) on the bar and select [Edit] from the list. Edit Quick Command Set dialog box
is displayed.
The order of quick commands listed in the quick command bar can be changed by dragging button.
To Add Quick Command to Quick Command Set:
Select [Quick Command Sets] from the [Tools] menu. Quick Command Sets dialog box is displayed.
Select a quick command set to which a quick command is to be added.
Click [Edit]. Edit Quick Command Set dialog box is displayed.
Select a quick command and click [Edit]. Edit Quick Command dialog box is displayed.
Enter the quick command name in [Label] and a frequently used command or character string in [Action]
area.
Note
You can use the %HOSTNAME variable to pass the host name of your PC. For example, if the host name for
your PC is 'COMPUTER_A', then if you use 'echo %HOSTNAME', 'echo COMPUTER_A' will be sent.
Click [OK].
To add more quick commands, repeat the process from 4 to 6.
Click [OK] in Edit Quick Command Set dialog box.
Note
In Edit Quick Command Set dialog box, add, delete, and edit quick commands. The order of quick
commands listed in the quick command bar may be changed.
To Display Another Quick Command Set in Quick Commands Bar:
Click the [Quick Command Set] button(an icon at the far left) in quick commands bar and select a quick
command set from the list. The buttons from the selected quick command set are listed.
To Select Quick Command Set Displayed when Session is Started:
Open the session's Session Properties dialog box.
Select [Advanced] from [Category].
Select a quick command set to be used in session.
Press [Browse] and select the quick command set or create a new quick command set in Quick Command
Sets dialog box.
Click [OK].

Version 7 Help – Manual - Xshell
Terminal Window Operations – 50
1.
•
•
2.
•
1.
2.
3.
4.
•
1.
2.
3.
4.
1.
2.
3.
4.
5.
6.
1.
2.
3.
4.
10.9 Terminal Output Encoding Change
Xshell uses the default user language in Windows system. Users can select and use various encodings which differ
from the Windows system according to remote host encoding.
To Change Session Encoding:
Do one of the following:
Click the standard [Encoding] button and select an encoding to use.
Open the Session Properties dialog box and select [Terminal] from [Category] and select an
encoding from the [Encoding] list.
Display UTF-8 Encoding:
If a remote computer is set to support unicode (UTF-8) and to use UTF-8, use 'Unicode (UTF-8)' as
encoding. UTF-8 encoding enables simultaneous output of character sets in various languages.
Note
To correctly display the selected encoding, the selected encoding language pack must be installed in the
Windows system concerned.
Encoding option does not change keyboard input values. If necessary, install the appropriate IME (Input
Method Editor) provided by Windows.
10.10 Advanced Terminal Options Setting
To Change Scroll Buffer Size:
Open the Session Properties dialog box.
Select [Terminal] from [Category].
Enter number of rows to use in [Scroll Buffer].
Click [OK].
Note
Scroll buffer size is a value between 0 and 2,147,483,647. 0 means that scroll buffer is not used.
To Change Terminal Type:
Open the Session Properties dialog box.
Select [Terminal] from [Category].
Select a terminal type from [Terminal Type].
Click [OK].
To Change Size at Terminal Startup:
Open the Session Properties dialog box.
Select [Terminal] from [Category].
Check [Use the following terminal size when connected] from the [Emulation] area.
Enter column size in [Columns].
Enter row size in [Rows].
Click [OK].
To Change Keypad Mode:
Open the Session Properties dialog box.
Select [Terminal > VT Modes] from [Category].
Select [Normal] or [Application] from [Initial Numeric Keypad Mode].
Click [OK].

Version 7 Help – Manual - Xshell
Terminal Window Operations – 51
1.
2.
3.
•
•
1.
2.
1.
2.
3.
1.
2.
1.
2.
1.
2.
3.
4.
5.
10.11 Layout Management
Layout management enables users to save Xshell window layout according to their preference. In Manage Layout
dialog box, change names or delete the saved layouts.
To Save Layout of the Current Xshell Window:
Select [Layout] from the [View] menu and select [Save As].
Enter [New name] in Save As dialog box.
Click [OK].
To Change Xshell Window to Another Layout:
Select [Layout] from the [View] menu and select one from the layouts list.
Press Alt+L to select one from the layouts list.
To Manage Registered Layouts List:
Select [Layout] from the [View] menu and select [Manage].
Delete the layout or rename it in Manage Layout dialog box.
10.12 Highlight Sets Settings
Strings you'd like to emphasize can be highlighted via color or font changes using Xshell's Highlight Sets.
To Add a Highlight Set:
From the [Tools] menu, select [Terminal Highlight Sets] to open the Highlight Sets dialog box.
Click [New] to create a new Highligt Set.
Enter the name for the new Highlight Set.
Note
You can also open the Highlight Sets dialog box using the Terminal Highlight Sets button on the standard
toolbar.
To Delete a Highlight Set:
From the [Tools] menu, select [Terminal Highlight Sets] to open the Highlight Sets dialog box.
Select the Highlight Set to delete and click [Delete].
To Apply a Highlight Set to a Session:
From the Highlight Sets Dialog box, select the desired Highlight Set.
Click [Set to Current].
Note
Highlight Sets can also be applied to sessions from a session's properties.
To Add Keywords to a Highlight Set:
From the Highlight Sets Dialog box, select the desired Highlight Set.
Click [Add] to open the Keyword dialog box.
Enter the keyword to highlight. To distinguish between upper/lower case, select the 'Case Sensitive' option.
To highlight strings based on regular expressions, select the 'Regular Expression' option.
Select the style of the highlight in the 'View' area. To change the color of the text without changing the
background color, select the 'Term Color' option.
Click [OK].
To Delete Keywords from a Highlight Set:

Version 7 Help – Manual - Xshell
Terminal Window Operations – 52
1.
2.
3.
1.
2.
3.
4.
From the Highlight Sets Dialog box, select the Highlight Set which contains the keyword.
Select the keyword to delete.
Click [Delete]
To Modify Keywords in a Highlight Set:
From the Highlight Sets Dialog box, select the Highlight Set which contains the keyword.
Select the keyword to modify.
Click [Edit] to open the keyword dialog box.
After completing your modification, click [OK].

Version 7 Help – Manual - Xshell
Options Setting – 53
1.
2.
1.
2.
3.
1.
2.
3.
4.
1.
2.
3.
4.
1.
2.
3.
4.
5.
6.
7.
11 Options Setting
In the Options dialog box, set global options applied to all sessions. The dialog box may be opened by selecting
[Options] in the [Tools] menu.
11.1 Session Folder and Startup Session
The Xshell session folder path can be changed. In the Sessions dialog box, all sessions of the changed path are
displayed. Select a network folder to share sessions with other users.
To Change Session Folder:
Open the Options dialog box.
Enter [Session Folder Path] in the [General] tab.
To Register Sessions to Open at Startup:
Open the Options dialog box.
Click [Add] under the [Sessions to open at startup] list in the [General] tab.
Select a session file from Open dialog box.
11.2 History Clearing and Connection Log
In Clear History dialog box, clear history of address bar, compose bar, search keyword, local shell and connection
log. In History Settings dialog box, designate a file to save connection log settings.
To Clear History:
Open the Options dialog box.
Click [Clear] in the [Security] tab.
Select contents to clear from Clear History dialog box.
Click [Clear].
To Save Connection Log:
Open the Options dialog box.
Click the [Log] tab.
Select [Log connection information on the following file.] from Connection Log area.
Enter a file to save information about connection server, connection protocol, connection time, exit time
and connection time.
11.3 Key Mapping Setting
In Custom Key Mapping dialog box, currently set shortcut key combinations are listed. The user can add, delete,
and edit key combinations.
To Change Key Mapping:
Open the Options dialog box.
Click the [Keyboard and Mouse] tab.
Click [Edit] in [Key Mapping]. Custom Key Mapping dialog box is displayed.
Select a key combination to change from [Current Key Setting] and click [Edit].
Select one from Menu, Send String, Run Script or Launch Application in [Type].
Enter the selected menu or character string in [Action].
Click [OK].

Version 7 Help – Manual - Xshell
Options Setting – 54
1.
2.
•
•
•
•
3.
1.
2.
1.
2.
3.
4.
5.
6.
11.4 Mouse Setting
The middle and right mouse button actions can be individually selected. The delimiters to be used when selecting a
word by double-clicking can be designated.
To Change Mouse Button Operation:
Open the Options dialog box.
Select one of the middle mouse button actions from the [Keyboard and Mouse] tab.
Do nothing.
Open the popup menu.
Paste the clipboard contents (default value).
Open Properties dialog.
Select one of the right button actions. The default action is [Open the popup menu].
To Change Delimiter for Selection by Double-clicking:
Open the Options dialog box.
Enter a delimiter to use when selecting a word in the [Keyboard and Mouse] tab [Selection] field.
11.5 Transparency Setting
Xshell offers a transparency setting.
To Set Window to Appear Transparent:
Select [Transparent] from the [View] menu.
Open the Options dialog box.
Set transparency in the [View] tab.
Set [Opacity]. The smaller the opacity is, the more transparent the Xshell window becomes.
If [Make window opaque on mouse over] option is selected, Xshell window is displayed opaque while mouse
is over the window even when it is set to display Xshell window transparent.
If [Always on Top when it is transparent] option is selected, Xshell window is displayed at the top of all
windows.
11.6 Master Password Settings
Master password can be used to save passwords more securely using the user defined master password.
Master password uses a user defined keyword to encrypt the password section of the session data. When the master
password is enabled, Xshell asks for the master password every time a new Xshell instance is started and a session
is open. If the correct master password in not inputted, the session's password is not able to be utilized and must be
entered again manually preventing unauthorized access.
For details on Master Password setting, see 'Master Password'.
11.7 Screen Lock Settings
You can lock the terminal screen while you are away from the PC to protect your session from unwanted use. When
the terminal is locked, the terminal screen changes to a grey and users cannot interact with terminal until the
correct password is received. Once the screen is locked, you cannot pass any data to the terminal. Xshell cannot be
closed until the correct password is received. However, connections will stay open and data will be still updated in

Version 7 Help – Manual - Xshell
Options Setting – 55
1.
2.
3.
4.
5.
1.
1.
2.
3.
4.
5.
1.
2.
3.
4.
5.
the terminal.
Set a Screen Lock Password
From the Tools menu, select Options.
Select the Security tab.
From the Lock Screen section, click Set Password to open the Lock Screen Password dialog box.
Enter the desired password into the 'Enter Password' and 'Confirm Password' fields.
Click OK to save.
Note
If a Lock Screen is attempted from the View menu when a password is not set, the user will be prompted to
first set a password.
To Lock Screen
Click on the View menu and select Lock Screen.
Note
If a Lock Screen is attempted from the View menu when a password is not set, the user will be prompted to
first set a password.
11.7.1 Auto Lock
Auto Lock can be used to lock the terminal screen automtacially after a duration of no interaction with the
terminal. This feature is especially useful if you are using your computer in an open area.
To Enable Auto Unlock
Click on the Tools menu and then select Options.
Click on the Security tab.
In the Screen Lock section, select the Automatically lock screen option.
Enter the number of minutes Xshell should wait for terminal input/ouput before the screen is locked
automatically.
Click OK to save.
Note
If a Lock Screen is attempted from the View menu when a password is not set, the user will be prompted to
first set a password.
11.8 Live Update Settings
Live update allows Xshell to check for software update at an interval defined by the user. By default, it checks for a
new update every 2 weeks. When the [Check for updates automatically] option is enabled, Xshell checks for the
updates with NetSarang's server upon startup.
To Enable Live Update
Click on the Tools menu and then select Options.
Click on the Update tab.
Select the Check for updates automatically option.
Enter the number of days you want to wait until Xshell checks for updates again.
Click OK to save the changes.
Note
You can always check for updates manually by selecting the Check for Updates in the Help menu.

Version 7 Help – Manual - Xshell
Options Setting – 56
11.9 Advanced Settings
Advanced options can be set in the Options dialog box [Advanced] tab.
Switch to English input when ESC key is pressed
When ESC key is pressed to move to command mode while entering Korean in certain applications, such as vi and
vim, the status is automatically changed to English input mode.
Use the Smart select button for easy copy and file download
Show or hide the [Smart Selection] button when selecting a terminal area with a mouse.
Disable on-the-fly highlight refreshing
Disable highlight refresh on a running tab.
Use true color
Set to support true color terminal.
Send to the notification area when minimized
When Xshell is minimized, it is minimized to the notification area.
Show session tab in full screen mode
Show the sessions tab in full screen mode.
Hide scroll bar in full screen mode
Hide the scroll bar in full screen mode.
Use the title bar in full screen mode
This hides the control window which normally appears in full screen mode. To exit full screen mode, the shortcut
key or terminal context menu must be used.
Arrange cascade windows in current window size
Uses the current window size to cascade Xshell windows. When this option is not selected, Xshell windows are
cascaded in default size.
Run Xshell at Windows startup
Xshell is automatically started when Windows is started.
Minimize to the notification area at Xshell startup
Minimize to the notification area when Xshell is started.
Open the Sessions dialog box at Xshell startup
Open the Sessions dialog box when Xshell is started.
Use Alt key to access menu
Open the menu by pressing Alt key.
Open multiple sessions in a single Xshell window
Opens multiple sessions in a single Xshell window. Move between sessions using the session tab or session bar. If
this option is not enabled, each session will open in a separate window when opening multiple sessions
simultaneously.
Confirm to disconnect when Xshell is terminated
Ask whether or not to terminate connected sessions when a program is terminated.
Confirm to disconnect when session is terminated
Ask whether to disconnect at session termination.
Revert to local shell when connection is closed
The session tab is maintained in local shell status when a connection is closed. In a local shell session, the Xshell

Version 7 Help – Manual - Xshell
Options Setting – 57
prompt is displayed in terminal screen and local commands, such as open, telnet, ssh and ping can be executed. To
view a list of commands, execute help or ? in the Xshell prompt.
Clear scrollback buffer when connection is closed
When a connection is closed, the scrollback buffer will be cleared.
Restore the last used tab group layout at Xshell startup
If Xshell is closed normally or abnormally, upon next startup Xshell will revert back to session connection status as
well as the tab arrangement state of Xshell before it was closed.
Auto-save session changes to current session file
When changes are made to the session properties by the user, the changed are automatically saved in the session
file. In the case of the default session, the changes are saved to the default session file.
Use single-process mode for better performance
Xshell's tabs can each have their own process (multi-process mode) or multiple tabs can run on the same process
(single process mode). Single-process mode consumes less system resources and can improve performance, but
tabs cannot be split to new windows and cannot be combined into one window.
[New File Transfer] opens an SFTP session in Xshell, not executing Xftp
Selecting [New File Transfer] from the [Window] menu opens an SFTP session in Xshell instead of opening Xftp even
if Xftp is installed on the computer. If the Xftp program is not installed, the SFTP session ignores this option.
Exit Xshell when all tabs are closed simultaneously
If this option is not enabled, Xshell will not exit even if all tabs are closed simultaneously. Instead, a local session
will begin to run.
Exit Xshell when the last tab is closed
If this option is not enabled, Xshell will not exit even if the last tab is closed. Instead, a local session will begin to run.

Version 7 Help – Manual - Xshell
File Transfer – 58
1.
2.
1.
2.
1.
2.
1.
2.
12 File Transfer
Xshell allows sending or receiving files using FTP/SFTP and the X/Y/ZMODEM protocols.
12.1 File Transfer Using SFTP
SFTP is an SSH-based file transfer protocol. Compared to FTP, X/Y/ZMODEM, it supports a safer and faster file
transfer.
To Receive Files with SFTP:
Connect with a host from which to receive a file using the sftp command in the local prompt.[C:~]$ sftp
hostname
Receive a file using get command in the sftp prompt. sftp:/home/user21> get filename
Note
For a detailed description of the sftp command supported by Xshell, run the help command at the sftp
command prompt.
To Send Files with SFTP:
Connect with a host to which to send a file using the sftp command in the local prompt. [C:~]$ sftp
hostname
Send a file using put command in the sftp prompt. sftp:/home/user21> put filename
Note
For a detailed explanation of the sftp command supported by Xshell, run the help command at the sftp
command prompt.
12.2 File Transfer Using FTP
Xshell supports the FTP file transfer protocol on a terminal basis.
To Receive Files with FTP:
Connect with a host from which to receive a file using the ftp command in the local prompt. [C:~]$ sftp
hostname
Receive a file using get command in the ftp prompt. ftp:/home/user21> get filename
Note
For a detailed explanation of the ftp command supported in Xshell, run the help command at the ftp
command prompt.
To Send Files with Ftp:
Connect with a host to which to send a file using the ftp command in the local prompt. [C:~]$ ftp hostname
Send a file using put command in the ftp prompt. ftp:/home/user21> put filename
Note
For a detailed explanation of the ftp command supported in Xshell, run the help command at the ftp
command prompt.
12.3 File Transfer Using X_Y_ZMODEM
Files transferred via X/Y/ZMODEM are saved in a folder designated by a user. Users may designate different folders
each time files are received. The method for file transfers using XMODEM and YMODEM is similar to ZMODEM. The

Version 7 Help – Manual - Xshell
File Transfer – 59
1.
2.
3.
1.
2.
3.
1.
2.
3.
4.
5.
6.
1.
2.
1.
2.
3.
4.
5.
1.
2.
3.
commands you use to send and received files fore X,Y, and ZMODEM are sx, sb, sb for receiving and rx, rb, rz for
sending respectively. The commands may differ between systems and it is recommend that users consult the
remote OS's manual. Below is a description of the average ZMODEM fil transfer.
To Receive File with ZMODEM:
Execute the following command in a remote host prompt:
$ sz file1 file2 …
Note
If [Activate ZMODEM automatically] is set in the Session Properties, the file receive process will be
started automatically, andthe following process in No. 2 and 3can be omitted.
Point to [Transfer] in the [File] menu.
Select [Receive with ZMODEM].
Note
If the sz command does not exist in a remote host, users must install it directly. In most cases, similar
commands exist.
To Receive File with ZMODEM in Xshell Terminal:
Select the name of a file to download in the Xshell terminal window. The [Smart Selection] button is
displayed around the selected file name.
Click the [Smart Selection] button.
Select [Download with ZMODEM].
To Send File with ZMODEM:
Execute the following command in remote prompt:
$ rz
Note
If [Activate ZMODEM automatically] is set in the Session Properties, the file sendprocess will be
started automatically, and the following process in No. 2 and 3 can be omitted.
Point to [Transfer] in the [File] menu.
Select [Send with ZMODEM].
Select a file to send from the Open File dialog box.
To send a file as ASCII, select [Send File as ASCII].
Click [Open].
To Send File with ZMODEM Using Drag & Drop:
Select a file to upload from the Windows file explorer.
Drag the file and drop it in Xshell terminal window. File transfer is carried out automatically.
To Change Default Folder to Save File:
Open the Session Properties dialog box.
Select [File Transfer] from [Category].
Select [Use the following download path] from [Receive folder].
Open the Browse For Folder dialog box by clicking […] button of the [Download Path] and select a folder
where the received files are to be saved.
Click [OK].
To View Files Received in the Default Path:
Open the Session Properties dialog box.
Select [File Transfer] from [Category].
Click [Open] in the [Download Path] field.

Version 7 Help – Manual - Xshell
File Transfer – 60
1.
2.
12.4 File Transfer Using Xftp
Xshell is interoperable with Xftp, a NetSarang Computer Inc. file transfer program. This allows for fast and
convenient FTP/SFTP connections with a host currently connected with Xshell.
To Create a Xftp Connection with a Host Currently Connected via Xshell:
Connect with the host of a file to be transferred using Xshell.
Select [New File Transfer] from the [Window] menu. Or, click the standard [New File Transfer] button.
Note
If a protocol Xshell uses is SSH, Xftp attempts an SFTP connection. If the protocol used by Xshell is TELNET
or RLOGIN, Xftp attempts an FTP connection.

Version 7 Help – Manual - Xshell
Session Logging and Tracing – 61
1.
2.
3.
4.
5.
1.
2.
3.
4.
5.
1.
2.
3.
4.
5.
1.
2.
3.
4.
13 Session Logging and Tracing
Xshell allows users to log the entire transcript of a session to a file. Trace may be used for debugging.
13.1 Session Logging
To Log Character Strings Only:
Point to [Log] in the [File] menu.
Select [Start]. Save As dialog box is displayed.
Enter the file name where log data is to be saved.
Clear [Record terminal code as well as normal text].
Click [Save].
Note
Logging continues until a session ends. To stop logging without ending a session, select [Stop] from the
[File] – [Log] menu. Files with different names in the Save As dialog box are file formats which were specified
the the logging options of a session's properties.
To Log Character Strings with Terminal Codes:
Point to [Log] in the [File] menu.
Select [Start]. Save As dialog box is displayed.
Enter the file name where log data is to be saved.
Check [Record terminal code as well as normal text].
Click [Save].
To Start Logging at Session Connection:
Open the Session Properties dialog box.
Select [Advanced > Logging] from [Category].
Select [Start logging upon connection].
Designate the folder or file name where the log is to be saved.
Click [OK].
13.2 Session Tracing
Using the trace option, trace protocol control data is exchanged with a remote host.
For SSH protocols, user authentication and algorithm exchange details may be displayed on the terminal screen.
For TELNET protocols, the exchange of various options can be traced. This is useful when problems occur in
connection with a remote host.
To Turn on or Turn off Trace Function:
Open the Session Properties dialog box.
Select [Advanced > Trace] from the [Category].
Select options appropriately.
Click [OK].

Version 7 Help – Manual - Xshell
Printing – 62
1.
2.
3.
4.
1.
2.
3.
14 Printing
Xshell provides the ability to print text in a terminal window via a local printer. Xshell uses fonts and colors used in
a terminal window for printing. The printing paper margins can be set in the Page Setup dialog box.
To Set Paper Size and Direction:
Select [Page Setup] from the [File] menu.
Select an appropriate paper size and direction.
Enter margins.
Click [OK] to save changes.
To Print:
Select [Print] from the [File] menu.
Select printer from the [Name] list.
Click [OK].

Version 7 Help – Manual - Xshell
Using Xagent – 63
1.
2.
3.
4.
1.
2.
3.
4.
1.
2.
15 Using Xagent
Xagent is an SSH authentication agent. Xagent holds a user key for public key user authentication and provides it
to Xshell when a user key is required by Xshell.
Xagent retains all user key lists and requests a passphrase input when necessary. When a user enters a passphrase,
Xagent decodes the user key and saves it in memory. Via Xagent, users may use the same key several times by
entering the passphrase once.
Xagent also works as an SSH authentication server for the SSH agent forwarding feature. You must use the SSH
agent forwarding feature when connecting to a different remote host from the first remote host. Typically, your
private key is only held in your local PC and an SSH client program on the first server cannot connect to a second
machine. However, using the SSH agent forwarding feature, the SSH client program on the first server requests a
private key from Xagent to enter into the second server.
Note
When Xagent is executed, the Xagent icon is created in the notification area. Even when the Xagent dialog
box is closed, Xagent is not closed and keeps running. To close Xagent or open the Xagent dialog box, use
the icon menus in the notification area.
15.1 Connecting to a Server Through Xagent
To Set Xshell to Use Xagent:
Open the Session Properties dialog box.
Select [Connection > SSH] from [Category].
Select [Use Xagent (SSH agent) for handling passphrase].
Click [OK].
To Connect with SSH Server Through Xagent:
Set Xshell to use Xagent.
Execute Xagent if Xagent is not running.
Connect to SSH server. In this case, the SSH server must support public key user authentication and the
public key section of the user key must be registered on the server.
Passphrase dialog box is displayed. Enter passphrase of the selected user key.
Note
When selecting [Launch Xagent automatically] in [Connection > SSH] setting, the process in No. 2 above may
be omitted. Passphrase dialog box is displayed only when the selected key status is Close. You can check
user key status in Xagent user keys list.
Note
Xshell will attempt to authenticate into the server by cycling through the keys managed by Xagent. Because
multiple attempts may need to be made before a key match is found, authetentication may fail if the
number of attempts exceeds the server's defined limit. In this case, the number of allowable authentication
attempts can be increased on the server or the number of keys must be adjusted in Xagent.
15.2 Using the Xagent User Key on a Remote Host
Using Xagent, the SSH client on a remote host can use a user key used by Xshell, which is a user key held by
Xagent. To use an Xagent user key on a remote host, both Xshell and the remote host SSH server must support
agent-forwarding.
To Activate Agent-Forwarding on the ssh.com Server:
Open the /etc/ssh2/sshd2_config file.
Set value for AllowAgentForwarding option as follows: AllowAgentForwardingyes

Version 7 Help – Manual - Xshell
Using Xagent – 64
3.
1.
2.
3.
4.
5.
Restart SSH server.
Note
OpenSSH servers automatically enable the agent forwarding feature unless user specifies the no-agent-
forwarding option.
To Use Xagent Key on the Remote Host:
Set Xshell to use Xagent.
Execute Xagent if Xagent is not running.
Connect to SSH server and login.
Note
If the SSH server supports the agent forwarding feature, the environment variable for agent
forwarding (SSH_AUTH_SOCK or SSH2_AUTH_SOCK) is set to a proper value.
Connect to another server, which supports public key authentication, from the remote server.
When Passphrase dialog box is displayed, enter passphrase to the selected user key.
Note
Passphrase dialog box is displayed only when the selected key status is Close. You can check user key status
in Xagent user keys list.

Version 7 Help – Manual - Xshell
Using Scripts – 65
1.
2.
3.
1.
16 Using Scripts
Script is a file that contains a set of commands to be executed at once. Repetitive tasks are conveniently collected
in a file and commands may be executed without needing to type them in one by one. Xshell supports Visual Basic
Script, JavaScript, and Python Script.
16.1 Script Starting and Ending
To Start a Script File:
Point to [Script] in the [Tools] menu and select [Run]. Open dialog box is displayed.
Select a script file.
Click [OK].
To Stop Script File Execution:
Point to [Script] in the [Tools] menu and select [Cancel].
16.2 Script API
Xshell provides the following script APIs. Use the APIs to automate repetitive tasks.
16.2.1 xsh.Session
The following functions and variables can be used in Xshell sessions. To use these functions and variables, execute
them together with xsh.Session. For example, to use 'Sleep()' function, use 'xsh.Session.Sleep(1000)'.
Functio
ns
Return
Value
Function Parameter Description
Void Open(LPCTSTR
lpszSession)
lpszSession
A character string of an Xshell
session path or URL format of
Xshell.
Open a new session or URL.
To open a session, place /s option in front
of a character string.
Ex.) To open the A.xsh session, use '/s
$PATH/A.xsh'.
Void Close() Close the currently connected session.
Void Sleep(long
timeout)
Timeout
Milisecond unit time value.
Make Xshell wait for the designated time.

Version 7 Help – Manual - Xshell
Using Scripts – 66
Void LogFilePath(
LPCTSTR
lpszNewFilePath)
lpszNewFilePath
File name including path
Designate log file.
void StartLog() Start logging for a session. Log is
designated with a path specified in
LogFilePath(). If a log file path is not
designated, the default path is used.
void StopLog() Stop logging.
Variable
Name Type Description
Connected BOOL Check whether current session is connected.
LocalAddress BSTR Retrieve the local address.
Path BSTR Retrieve the current session file path.
RemoteAddress BSTR Retrieve the remote address.
RemotePort long Retrieve the remote port.
Logging BOOL Check whether current session is recording log file.
LogFilePath BSTR Save as a log file.
16.2.2 xsh.Screen
The following functions and variables can be used when handling of the Xshell terminal screen. To use these
functions and variables, execute them together with the xsh.Screen. For example, to use 'Clear()' function, use
'xsh.Session.Clear()'.
Functions

Version 7 Help – Manual - Xshell
Using Scripts – 67
Return
Value
Function Parameter Description
void Clear() Clear terminal screen.
void Send(LPCTSTR
lpszStrToSend)
lpszStrToSend
Character string to
send
Send message to terminal.
BSTR Get(long nBegRow, long
nBegCol, long nEndRow, long
nEndCol)
nBegRow
Terminal row starting
position
nBegCol
Terminal column
starting position
nEndRow
Terminal row ending
position
nEndCol
Terminal column
ending position
Read the character string in the
specified terminal section and return
the value.
void WaitForString(LPCTSTR
lpszString)
lpszString
Character string to be
displayed on the
terminal.
Wait for message.
Long WaitForStrings(VARIANT FAR*
strArray, long nTimeout)
strArray
Character string to be
displayed on the
terminal
nTimeout
Wait time millisecond
value
Return Value
The number of found
strings.
Wait for message until timeout.
Variable
Name Type Description

Version 7 Help – Manual - Xshell
Using Scripts – 68
CurrentColumn long Return the current column.
CurrentRow long Return the current row.
Columns long Retrieve the total columns same as terminal width.
Rows long Retrieves the total row same as terminal lines
Synchronous BOOL Set screen synchronization (True means synchronize and false means do not
synchronize)
16.2.3 xsh.Dialog
You can use this to manipulate the Xshell terminal screen. To use the following function and variable, execute it
with xsh.Dialog. For example, if you want to use the MsgBox() function, append xsh.Dialog.MsgBox() in the front like
this: xsh.Dialog.MsgBox().
Functions
Return Value Function Parameter Description
Long MsgBox(LPCTSTR lpszMsg) LpszMsg
String you want to
send.
Open a message
box.
string Prompt(LPCTSTR lpszMessage, LPCTSTR
lpszTitle, LPCTSTR lpszDefault, BOOL
bHidden)
16.2.4 Script Example
Script file
Sub Main
' *** Connect the session ***
xsh.Session.Open "ssh://192.168.1.17"
' "/s C:\Users\Administor\AppData\Roaming\NetSarang\Xshell\Sessions\example.xsh"
xsh.Screen.Synchronous = true

Version 7 Help – Manual - Xshell
Using Scripts – 69
xsh.Screen.WaitForString "login: "
xsh.Screen.Send "username"
xsh.Screen.Send VbCr
xsh.Session.Sleep 100
xsh.Screen.WaitForString "Password: "
xsh.Screen.Send "password"
xsh.Screen.Send VbCr
xsh.Session.Sleep 100
' *** Wait for Prompt Message ***
xsh.Screen.WaitForString "username@password"
' *** Set File Format ***
Dim app, wb, ws
Set app= CreateObject("Excel.Application")
Set wb = app.Workbooks.Add
set ws = wb.Worksheets(1)
xsh.Session.LogFilePath = "c:\example.log"
xsh.Session.StartLog
Dim waitStrs
waitStrs = Array(Chr(10), "username@password") ' make wait message as array
Dim row, screenrow, readline, itmes
row = 1
' *** Send Command ***
xsh.Screen.Send "cat /etc/passwd"
xsh.Screen.Send VbCr
xsh.Session.Sleep 100
Dim result
' *** Read Data and Save it as an EXCEL File ***
Do
While true
result = xsh.Screen.WaitForStrings(waitStrs, 1000)
If result = 2 Then
Exit Do
End If
screenrow = xsh.Screen.CurrentRow - 1
readline = xsh.Screen.Get(screenrow, 1, screenrow, 40)
items= Split(readline, ":", -1)
ws.Cells(row,1).Value = items(0)
ws.Cells(row,2).Value = items(2)
row = row + 1

Version 7 Help – Manual - Xshell
Using Scripts – 70
1.
2.
3.
4.
1.
2.
3.
Wend
Loop
wb.SaveAs("C:\chart.xls") ' save file path
wb.Close
app.Quit
Set ws = nothing
Set wb = nothing
Set app = nothing
xsh.Screen.Synchronous = false
xsh.Session.StopLog
End Sub
16.3 Script Recording
Automatically generate script based on input (send) and output (expect). Use the generated script as a foundation
to create more complex and versatile script.
To Run a Script Recording:
Select [Script]-[Start Recording] from [Tools] menu.
Proceed with the action you want to record.
Select [Script]-[Stop Recording] from [Tools] menu.
Select and save the script file in the format you want to save.
16.4 Multi-Session Script
Target multiple tabs on which to apply your script. (This feature is only supported in single process mode).
To use the Multi-Session Script:
Select [Options…] from [Tools] menu.
Select [Use single-process mode for better performance] from [Advanced] tab and [OK] Click.
Specify the name of the tab you want to use the tab selection script for and run the script.
Sub Main
Dim bSelect
bSelect = xsh.Session.SelectTabName("Session Name")
if (bSelect) Then
xsh.Screen.Send("pwd" & VbCr)
End if
End Sub
Version 7 Help – Manual - Xshell
References – 71
17 References
This section provides referential information about using Xshell.
17.1 Standard Buttons
Xshell provides standard buttons for the frequently used tasks and commands.
The following are descriptions of the standard buttons.
Button Name Description
New Create a new session by opening New Session
Properties dialog box.
Open Open the Sessions dialog box.
Disconnect Close connection with the current session.
Reconnect Reconnect with the current tab session.
Properties Show current session properties. If the
session is not opened, default session properties is
displayed.
Copy Copy the selected field to clipboard.
Paste Paste clipboard contents.
Find Open the Find dialog box.
Print Open the Print dialog box.
Color Schemes Select color scheme.
Encoding List encodings available with the output language.
Version 7 Help – Manual - Xshell
References – 72
Button Name Description
Fonts List available font names and sizes. Fonts for the
currently Open the session can be changed. To change
the font for each session, select a session font from the
Session Properties dialog box.
New Terminal Open the a new Xshell window. Click this button while a
connection is being made to attempt connection using
the corresponding session's connection information.
New File Transfer
Execute Xftp if Xftp
™
is installed. Click this button while a
connection is being made to start a New File Transfer
session with the corresponding session's connection
information. If Xftp is not installed, the Xshell File
Transfer session itself is started.
Full Screen Convert to full screen mode. Screen changes to general
window mode when Alt+Enter is pressed.
Lock Convert to screen lock mode. User input is not received
until password is entered.
Key Mapping Open the Custom Key Mapping dialog box.
Highlight Sets Open the Highlight Sets dialog box.
Script Start Xshell script file.
Start Recording Start script recording
Pause Recording Pause script recording
Stop Recording Stop script recording
Start Logging Start logging.
Version 7 Help – Manual - Xshell
References – 73
•
•
•
•
•
Button Name Description
Stop Logging Stop logging.
New Tab Group Opens a new local shell tab in a new tab group. Can be
opened to the right, bottom, top, or left.
Sort Tabs Arrange the currently opened tabs horizontally,
vertically, or tiled. Or merge already arranged tabs.
Options Open the Options dialog box.
User Key Manager Open the User Keys dialog box.
Host Key Manager Open the Host Keys dialog box.
Xagent Execute Xagent program.
Help Open the Xshell help.
17.2 Address Bar
The address bar grammar is as follows:
[protocol://][user[:password]@]hostname[:port][/]
The available protocols are ssh, sftp, telnet, rlogin, and serial. The default protocol is a protocol selected in the
default session. Default port numbers by protocol are defined as follows:
ssh: 22
sftp: 22
telnet: 23
rlogin: 513
ftp: 21
A number of examples are given below.
Example Description
foobar.com Connect to foobar.com using the protocol and port number
designated in the default session.

Version 7 Help – Manual - Xshell
References – 74
Example Description
ssh://kay:[email protected]/ Connect to foobar.com using the SSH protocol. User account is
'kay' and password is 'passwd'. The default port number is used.
ssh://[email protected]:12345/ Connect to foobar.com port 12345 using the SSH protocol. User
account is kay.
telnet://foobar.com/ Connect to foobar.com via telnet protocol. User account is not
designated and connection is made with port 23, the default
port.
rlogin://[email protected]/ Connect to foobar.com using the rlogin protocol. The user
account is 'kay' and connection is made with port
513, the default port.
sftp://[email protected]/ Connect to foobar.com using the SFTP protocol. User account is
'kay' and the default port number is used.
ftp://foobar.com/test.zip Connect to foobar.com using the ftp protocol and download
test.zip file.
17.3 Xshell Local Command
Xshell provides local commands for advanced users familiar with the terminal environment.
Basically, Xshell prompt is displayed on the terminal screen when a remote host is not connected. When a session
is connected, press 'Ctrl+Alt+]' to exit to local prompt. To return to the remote host mode, enter 'exit' or press
'Ctrl+D'.
The following commands can be used.
Command Description
help
?
Display commands list on the terminal window.
new Open the New Session Properties dialog box.

Version 7 Help – Manual - Xshell
References – 75
Command Description
open the
[session]
Connect with the corresponding session when 'session' is designated. If a session is not
designated, the Sessions dialog box is opened.
edit
[session]
Open the Session Properties dialog box for the corresponding session if 'session' is designated.
Open the Session Properties dialog box for the default session if 'session' is not designated.
list Display a list of directories and information about sessions in the current directory.
cd Change the current task directory.
pwd Show the current path of the local PC. The default is the path to the session files.
clear Clear local shell command prompt screen, address bar history, and command history.The
available options are:
screen Clear the screen. This is the default value.
address Clear the history of the address bar.
history Clear the history of local shell commands.
exit
quit
Close Xshell session or return to remote host.

Version 7 Help – Manual - Xshell
References – 76
Command Description
set Configure the Xshell environment. Certain settings can be defined in the session properties or
options. To view the current configuration, type the set command without any command line
options.The available options are:
StartFolder This is the default path when the local shell starts. The default is 'User Data
Folder\Xshell\Sessions', which is the root of the session folder. User data folder can be set
in the program.
LogFolderPath This is the default folder to store logs for sessions. The default is 'User
Data Folder\Xshell\Logs'. The location where the session log is saved can be determined
separately for the session.
ScriptFolderPath This is the default folder that is opened when specified in a session file
or when calling a script from a menu. The default is 'User Data Folder\Xshell\Scripts'.
AutoSaveHostKey In case of SSH connection, fingerprint information on the host key is
automatically saved. If this is the first host to access or if the host key has been changed by
the administrator's setting, Xshell asks whether to save the host key. Default value is 0
(user confirmation)
InputCRLFYou can send the value of the Enter key to CRLF. The default value is 0 (only LF
is sent).
ExitAllTabClose Closes the Xshell window when all sessions are closed at the same time
while the Send command to all sessions light is on. The default is 0.
StopScrollOnLButtonDown Screen output is stopped while the mouse button is held
down. The default value is 1 (use).
OpenXftpNewWin Opens a new window when calling Xftp using the currently connected
session information. The default is 0 to open an existing window in a new tab.
ComposeBarHistoryCount The number of command history saved in the compose bar.
The default value is 50 (pcs).
ComposePaneHistoryCount The number of command history saved in the compose
window. The default value is 50 (pcs).
SaveAppLog Saves the program's own log to the [User Data Folder]\Applog folder. The
default value is 0 (do not store).
ImportFileOnDrop You can import user keys by dragging and dropping them into the
local shell. The default value is 0 (not used).
JumpHostListenPort This is the default port of the proxy server used as a jump host
when using the SSH jump host function. The default number is 10000.
PrintToEditor When the is set to 1, the output is not sent to the printer when the terminal
print code is received, but to the editor specified by the user. The default is 0.
help Show help for each command. For explanation of the ssh command, use the'help ssh' command.
If'help' is entered without command, this help is displayed.

Version 7 Help – Manual - Xshell
References – 77
Command Description
ssh[
user:pass
@]host
[port]
Connect using the SSH protocol.
-pa Use Password authentication. Ignore other auth parameters(-A -i).
-a Doe not use Xagent for user authentication.
-A Use Xagent for user authentication.
-i user_keyA user key authentication.
-J jump_host Use jump host proxy.*
user Indicate the user's login name.
pass If pass is defined, use password authentication.
host Indicates the name, alias, or Internet address of the remote host.
port Indicates a port number (address of an application). If the port is not specified, the
default ssh port (22) is used.
sftp
[user:pass
@]host
[port]
Connect using the SFTP protocol.
telnet
[user:pass
@]host
[port]
Connect using the telnet protocol.
rlogin
[user@]
host [port]
Connect using the rlogin protocol.
ftp
[user:pass
@]host
[port]
Connect using the ftp protocol.
ipconfig Execute Windows ipconfig command.
ping host Execute Windows ping command.
tracert host Show packet path to host.
netstat Execute Windows netstat command.

Version 7 Help – Manual - Xshell
References – 78
Command Description
nslookup Execute Windows nslookup command.
realcmd Execute Windows cmd command.
scpsrc...
[user:pass
@]host:dest
Use the scp protocol to send or get the file to another server.
-pa Use Password authentication. Ignore other auth parameters(-A -i).
-a Doe not use Xagent for user authentication.
-A Use Xagent for user authentication.
-i user_keyA user key authentication.
-J jump_host Use jump host proxy.*
-rCopy directory recursively.
-pPreserve modification and access time.
-PIndicates a port number (address of an application). If the port is not specified, the
default ssh port (22) is used.
user Indicate the user's login name.
pass If pass is defined, use password authentication.
host Indicates the name, alias, or Internet address of the remote host.
src ...Indicates the path of source files or directories.You can list files separated by a
space character.
destIndicates the path of a destination file or folder.
17.4 Xshell Command Line Option
The following are the command line parameter options recognized by Xshell. These parameters can be used when
executing Xshell from the Windows console program or other applications.
Option, Parameter Description
'session file' Execute the session. 'Session file' can include a path.
-folder 'session folder' Execute all folder sessions.

Version 7 Help – Manual - Xshell
References – 79
•
•
•
•
•
•
Option, Parameter Description
-url [protocol://]
[user[:password]@]host[:port]
Connect by directly entering URL, rather than using designated
session file. Usable protocols are SSH, SFTP, TELNET, RLOGIN and
FTP.
When protocol is omitted, use the default protocol designated in
the Options dialog box [General] tab.
When user and password are ommited, a window for the
authentication is displayed.
When a connection port is not designated, the connection
protocol default port of is used.
-open Open the Sessions dialog box.
-register Open the a dialog box for product registration.
-about Open the Xshell Information dialog box where product version
and license information is available.
-prop 'session file' Open the Session Properties dialog box. 'Session file' can include
a path.
-create 'session file' Create a new session.
-newwin Open the a new Xshell window.
-newtab 'tab name' Create a new tab with 'Tab Name'.
Example
Execute xdev.xsh session file.
Xshell 'c:\users\user\Documents\ NetSarang Computer\6\Xshell\Sessions\xdev.xsh'
Connect to foobar.com with the default protocol.
Xshell -url foobar.com
Connect to foobar.com with ssh.
Xshell -url ssh://foobar.com
Connect to foobar.com with ssh. User name and password are 'username' and 'deomopassword'
respectively.
Xshell –url ssh://username:[email protected]
Connect to foobar.com port 2300 using telnet protocol.
Xshell –url telnet://foobar.com:2300
Connect to foobar.com by executing a new Xshell window.
Xshell -newwin -url foobar.com

Version 7 Help – Manual - Xshell
References – 80
Note
If the [Open multiple sessions in a single Xshell window] option is set in the [Advanced] tab of Options dialog
box, All parameters with the exception of the '-newwin' are executed in the last Xshell window or a new tab.
The '-newwin' option can be used with other options. A new Xshell window is started with the options.
17.5 SFTP Command
Xshell provides commands similar to UNIX/Linux FTP for advanced users who are familiar with terminal
environments. Descriptions of each command are as follows. For details, enter 'help' command in the SFTP prompt.
Command Description
get file1 [file2] [file3] … Download files from the remote host.
put file1 [file2] [file3] … Upload files to the remote host.
mv path1 path2
rename path1 path2
Move/rename a file or directory on the remote host.
mkdir directory Create a designated directory on the remote host.
rmdir directory Delete a designated directory from the remote host.
rm file Delete a designated file from the remote host.
pwd Display the working directory of the remote host.
lpwd Display the working directory of the local host..
cd directory Change remote host working directory.
lcd directory Change local host working directory.
ls [directory] Display remote host files list.
lls [directory] Display local host files list.

Version 7 Help – Manual - Xshell
References – 81
Command Description
explore [directory] View the current (or designated) directory via Windows Explorer.
help [command] Show instructions for using SFTP commands list or designated
commands.
bye
exit
quit
End SFTP connection.
17.6 Regular Expression
This section provides descriptions of the regular expressions used in the Find dialog box.
17.6.1 Pattern Match
Pattern Description
. Any one character except newline character
[abs] One character of a, b or c
[a-z] One character from a to z
[^ac] One character excluding a and c
(x) x, x can be a regular expression.
x* x is repeated 0 time or more. x can be a regular expression.
x+ x is repeated 1 time or more. x can be a regular expression.
x{n,m} x is repeated n times or more and m times or less. x can be a regular
expression.

Version 7 Help – Manual - Xshell
References – 82
Pattern Description
x{n} x is repeated n times exactly. X can be a regular expression.
x{n,} x is repeated n times or more. X can be a regular expression.
x|y x or y, x and y can be regular expressions.
xy xy, x and y can be regular expressions.
^ Start of a line
\A Start of a line
$ End of a line
\z End of a line
\Z End of a line
\< Start of a word
\b Start of a word
\> End of a word
\B End of a word
17.6.2 The shorthand of character classes
Class Description
\w Characters comprising a word, as in [a-zA-Z0-9_]

Version 7 Help – Manual - Xshell
References – 83
Class Description
\W Characters not consisting a word, as in [^a-zA-Z0-9_]
\s Spaces
\S Characters excluding spaces
\d Numbers, as in [0-9]
\D Characters excluding numbers, as in [^0-9]
17.6.3 POSIX character classes
Class Description
[:alnum:] Letters and numbers, as in [a-zA-Z0-9]
[:alpha:] Letters, as in [a-zA-Z]
[:blank:] Blanks
[:cntrl:] Controls
[:digit:] Numbers, as in [0-9]
[:graph:] Printable characters (blanks excluded)
[:lower:] Small letters, as in [a-z]
[:print:] Characters which are not controls
[:punct:] Punctuations

Version 7 Help – Manual - Xshell
References – 84
Class Description
[:space:] Spaces
[:upper:] Capital letters, as in [A-Z]
[:xdigit:] Characters used to express a hexadecimal number, as in [0-9a-fA-F]
17.6.4 Example
Expression Description
[0-9]+ Pattern where a number is repeated more than once
(foo)|(bar) 'foo' or 'bar'
\.html$ Character string ending with '.html'
^\. Character string starting with '.'
17.7 Pre-defined Shortcut Key
The list below shows descriptions of shortcut keys defined in Xshell.
Shortcut Key Description
Alt + 1~9 Move session tab
Alt + A [View] Always on Top
Alt + C Same as Disconnect in the File menu

Version 7 Help – Manual - Xshell
References – 85
Shortcut Key Description
Alt + D Move keyboard focus to address bar
Alt + Enter Convert to full screen mode
Alt + I [Edit] Move to Compose Bar
Alt + Insert [Edit] Paste Selection
Alt + J [Edit] Move to Compose Pane
Alt + L Change layout
Alt + Left Same as Previous in the Window menu
Alt + M [Edit] Move to Session Manager
Alt + N Same as New in the File menu
Alt + O Same as Open the in the File menu
Alt + P [File] Session Properties
Alt + R [View] Transparent
Alt + Right Same as Next in the Window menu
Alt + S [View] Simple Layout Mode
Ctrl + Alt + ] Exit to local prompt during connection
Ctrl + Alt + F Same as New File Transfer in the Window menu

Version 7 Help – Manual - Xshell
References – 86
Shortcut Key Description
Ctrl + Alt + N [Window] New Window
Ctrl + Alt + T Same as New Terminal in the Window menu
Ctrl + F1~F12 [Quick Command] Command #01~#12
Ctrl + Insert [Edit] Copy
Ctrl + Pause [Edit] Send Break
Ctrl + Shift + A [Edit] Clear Screen and Scrollback Buffer
Ctrl + Shift + Alt + [ [View] Decrease Font Size
Ctrl + Shift + Alt + ] [View] Increase Font Size
Ctrl + Shift + B [Edit] Clear Scrollback Buffer
Ctrl + Shift + F4 [Tab] Close
Ctrl + Shift + L [Edit] Clear Screen
Ctrl + Shift + R [Connection] Reconnect
Ctrl + Shift + T [View] Session Tab
Ctrl + Shift + Tab [Tab] Move to previous session
Ctrl + Tab Move to the next session tab in a single Xshell window
Pause [Edit] Send Break

Version 7 Help – Manual - Xshell
References – 87
Shortcut Key Description
Shift + Alt + Enter [View] Multipane Full Screen
Shift + Alt + L [View] Choose Layout (Up)
Shift + Alt + N [Tab] Open New Tab
Shift + Alt + T [Connection] Duplicate Current Session
Shift + Down Arrow Downward scroll
Shift + End To end
Shift + Home To top
Shift + Insert [Edit] Paste
Shift + PgDn Page down
Shift + PgUp Page up
Shift + Tab Move to the recently used session tab in a single Xshell
window
Shift + Up Arrow Upward scroll
Note
Use the standard [Key Mapping] button to change shortcut keys. In the Custom Key Mapping dialog box,
change shortcut key combinations and allocate key operations such as menu, send character string, execute
script, and execute program.
