C More on Stata for Mac
Contents
C.1 Using Stata datasets and graphs created on other platforms
C.2 Exporting a Stata graph to another document
C.3 Stata and the Notification Manager
C.4 Stata(console) for Mac
C.5 Calling Stata from Python
C.6 Changing a Stata for Mac license
C.1 Using Stata datasets and graphs created on other platforms
Stata will open any Stata .dta dataset or .gph graph file, regardless of the platform on which it
was created, even if it was a Windows or Unix system. Also, Stata for Windows and Stata for Unix
users can use any files that you create. Remember that .dta and .gph files are binary files, not text
files, so they need no translation; simply copy them over to your hard disk as is.
Files created on other platforms can be directly opened in the Command window; for example,
you can load a dataset by typing use filename or by double-clicking on the file in the Finder.
C.2 Exporting a Stata graph to another document
Suppose that you wish to export a Stata graph to a document created by your favorite word
processor or presentation application. You have two main choices for exporting graphs: you may copy
and paste the graph by using the Clipboard, or you may save the graph in one of several formats and
import the graph into the application.
C.2.1 Exporting the graph by using the Clipboard
The easiest way to export a Stata graph into another application is to use drag and drop. You can
select the graph in the Graph window and drag it to the location you would like it in another open
application.
You can also export graphs by copying and pasting.
Either create your graph or redisplay an existing graph. To copy it to the Clipboard, right-click
on the Graph window, and select Copy. Stata will copy the graph in PDF format. This is the native
graphics format for macOS. Programs made to edit vector graphics can be used to edit the elements
of the graph.
After you have copied the graph to the Clipboard, switch to the application into which you wish
to import the graph and paste it. In most applications, this is accomplished by selecting Edit >
Paste. Some applications require you to first create a bounding box for the image to be placed in.
If pasting does not immediately work, see your application’s documentation on pasting images from
the Clipboard into documents.
1

2 [ GSM ] C More on Stata for Mac
C.2.2 Exporting the graph to a file
Stata can export graphs to several different file formats. If you right-click on a graph, select Save
as..., and then click on the drop-down menu next to File format, you will see that Stata can save in
the following file types:
Enhanced PostScript (EPS, .eps) with or without a TIFF Preview, Graphics Interchange Format
(GIF, .gif), Joint Photographic Experts Group (JPEG, .jpg) with High Quality or Maximum Quality,
Portable Document Format (PDF, .pdf), Portable Network Graphics (PNG, .png), PostScript (PS,
.ps), Scalable Vector Graphics (SVG, .svg), and Tag Image File Format (TIFF, .tif).
EPS, PDF, PS, and SVG are vector formats, whereas GIF, JPEG, PNG, and TIFF are bitmap formats.
If you wish to include a thumbnail of the graph with an EPS file, choose EPS with TIFF Preview
(*.eps). Choosing the preview option does not affect how the graph is printed. PNG and SVG are well
suited for placing graphs on a webpage. See [G-2] graph export for more information.
C.3 Stata and the Notification Manager
You may work in another application while Stata is processing a time-intensive command or do-file.
Stata will notify you when it has finished by playing a sound and bouncing its application icon on
the Dock. The default notification behavior is for Stata to bounce its application icon on the Dock
once. The notification feature works only if Stata is put into the background while it is executing a
command or do-file. Stata will not notify you if it is in the foreground or requires further interaction
from you (such as a more condition). You can control how notifications work in Stata’s preferences.
C.4 Stata(console) for Mac
C.4.1 Requirements
Stata(console) is included with both Stata/SE and Stata/MP for the Mac. It runs in a Terminal
window without a graphical user interface (GUI)—there are no Data Editor, Viewer, or Graph windows.
Graphs and datasets can be saved, as usual, they simply cannot be viewed interactively. Stata(console)
is meant for running Stata remotely and for running batch jobs in the background.
You can also run background jobs by using your standard Stata installation. The command line
options are given in [GSM] B.3 Stata batch mode.
You must already have Stata/SE or Stata/MP for the Mac installed and your license initialized
before installing Stata(console). If you have a single-user license and wish to have more than one
login ID use Stata at a time, please contact our sales department to purchase an upgrade to a multiuser
license. You should have some experience in working from a shell in Unix before attempting to set
up Stata(console). You must also have administrator access to your computer to complete the setup.
With administrator access, there is always the potential damaging your computer.
In the instructions that follow, use stata-mp in place of stata-se if you are installing the console
version of Stata/MP.
[ GSM ] C More on Stata for Mac 3
C.4.2 Installing Stata(console) using the Terminal utility
If you have installed Stata in its default location /Applications/Stata, Stata(console) can be
installed by selecting Stata > Install Terminal Utility.... You can then start the console version by
typing stata-se or stata-mp in a Terminal window.
If you rename Stata’s folder or move it out of the Applications folder after installing the utility,
the symbolic link to the console application will be broken. In this case, just reinstall the utility by
selecting Stata > Install Terminal Utility... again.
C.4.3 Installing Stata(console) by hand
If you would rather install Stata(console) by hand instead of using the built-in utility, read this
section. If you are not comfortable with Unix or are wary of damaging your computer, skip the rest
of this section. If you do not know when to use
setenv PATH /Applications/Stata:$PATH
and when to use
PATH=/Applications/Stata:$PATH
you should not attempt the installation.
1. Log in to your Mac with an account that has administrator privileges.
2. Install Stata/SE or Stata/MP in /Applications/Stata and initialize your license if Stata is not
already installed.
You have completed the installation process. We now wish to verify that everything is installed
properly as a regular user. To use Stata as a regular user, your path must include /Applica-
tions/Stata/StataSE.app/Contents/MacOS. For a quick test, we are going to be crude.
mymac: >
mymac: >
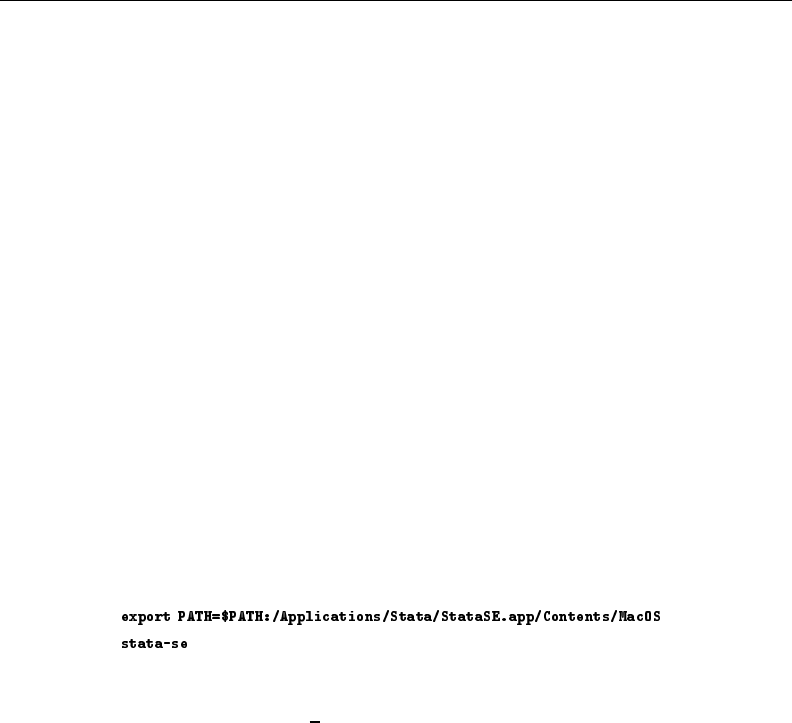
Stata should come up. Once you have verified that everything is working, make sure that your
users modify their shell startup script to include /Applications/Stata/StataSE.app/Contents/MacOS in
their path. If they do not have a .bash profile file already, they should make one and include the
following line:
export PATH=$PATH:/Applications/Stata/StataSE.app/Contents/MacOS
C.4.4 Updating Stata(console) in the future
Stata(console) is automatically updated when the regular Stata(GUI) application is updated. All
updating should be performed from within Stata(GUI).
C.5 Calling Stata from Python
You can call Stata from Python using the pystata Python package. This includes a suite of API func-
tions and IPython magic commands that can be used to interact with Stata and Mata. To learn more about
the pystata Python package, view the online documentation at https://www.stata.com/python/pystata.
Or see [P] PyStata module for more information.

4 [ GSM ] C More on Stata for Mac
C.6 Changing a Stata for Mac license
If you have already installed Stata and your license needs to be changed, go to Stata > About
Stata..., then click on the Update license... button on the lower left. You can either browse renewal
options or enter a new License and Activation Key.

[ GSM ] C More on Stata for Mac 5
Stata, Stata Press, and Mata are registered trademarks of StataCorp LLC. Stata and
Stata Press are registered trademarks with the World Intellectual Property Organization
of the United Nations. StataNow and NetCourseNow are trademarks of StataCorp
LLC. Other brand and product names are registered trademarks or trademarks of their
respective companies. Copyright
c
1985–2023 StataCorp LLC, College Station, TX,
USA. All rights reserved.
®
For suggested citations, see the FAQ on citing Stata documentation.
