Smeg Hob
Users Manual
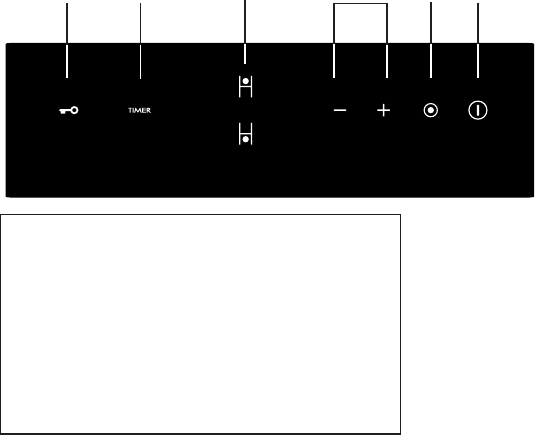
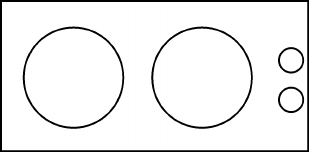
2.2 Control Panel
1
2
3
4
5
6
1. ON/OFF control
2. Power / Timer regulating controls
3. Heating zone selection controls
4. Timer control
5. K
eylock control
6. Double zone control
EN-7

3. Operation of Product
3.1 Touch Controls
• The controls respond to touch, so you don’t need to apply any pressure.
• Usetheballofyournger,notitstip.
• You will hear a beep each time a touch is registered.
• Make sure the controls are always clean, dry, and that there is no object (e.g. a
utensiloracloth)coveringthem.Evenathinlmofwatermaymakethecontrols
diculttooperate.
3.2 Choosing the right Cookware
Do not use cookware with jagged edges or a curved base.
Makesurethatthebaseofyourpanissmooth,sitsatagainsttheglass,andisthe
same size as the cooking zone. Always centre your pan on the cooking zone.Always
liftpansotheceramichob–donotslide,ortheymayscratchtheglass.
Alwaysliftpansotheceramichob–donotslide,ortheymayscratchtheglass.
3.3 How to use
3.3.1 Start cooking
After power on, the buzzer beeps once, all the indicators light up for 1 second then go
out, indicating that the ceramic hob has entered the stat of standby mode.
EN-8
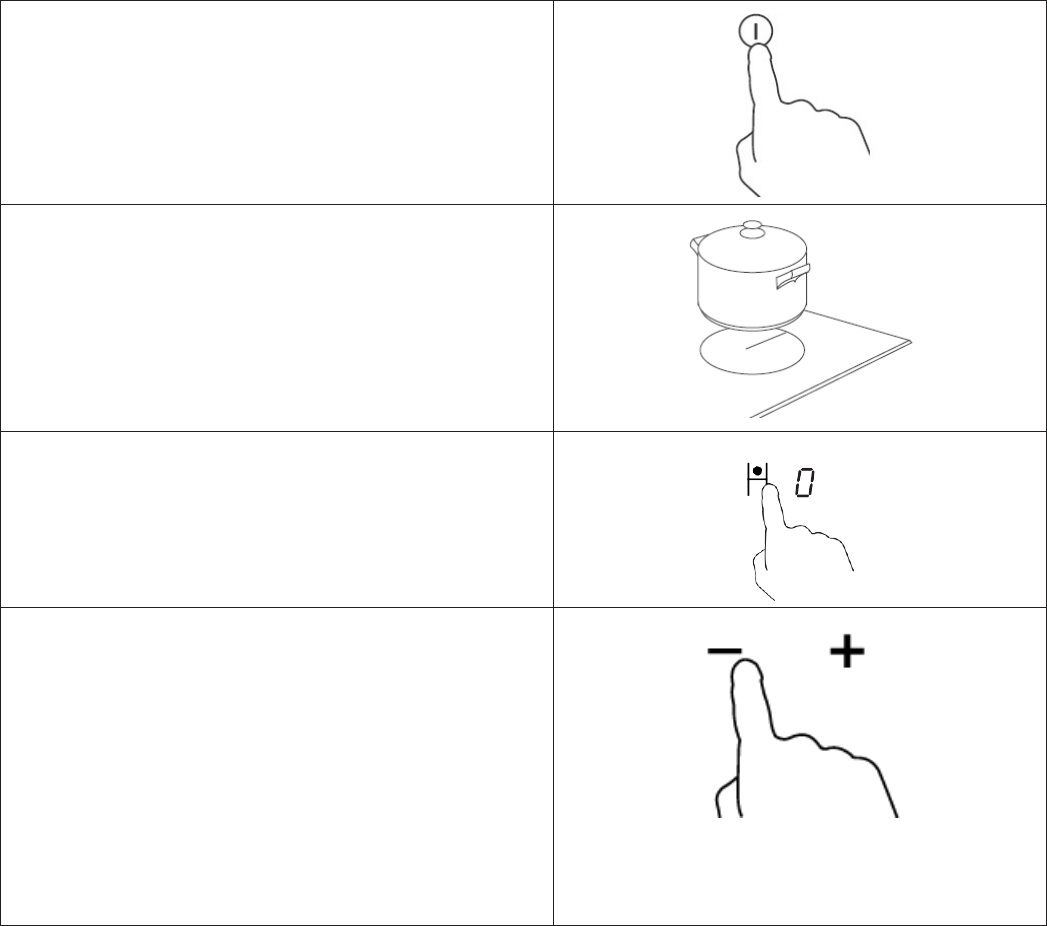
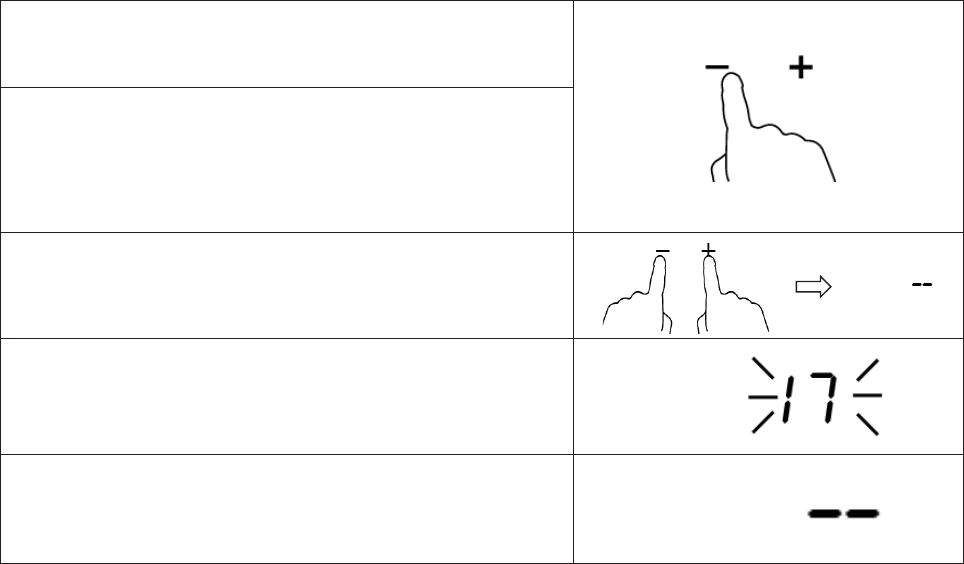
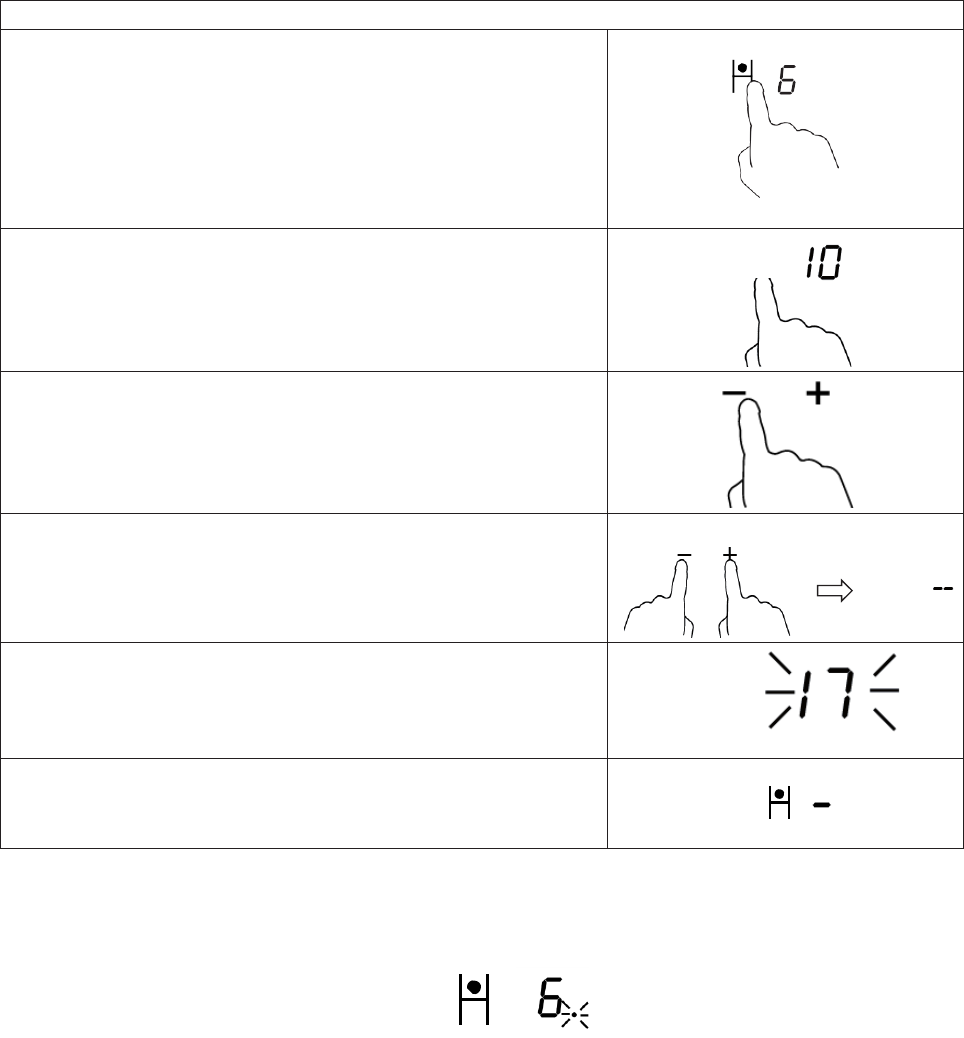
Touch the ON/OFF control. all the indicators
show “-”.
Place a suitable pan on the cooking zone
that you wish to use.
• Make sure the bottom of the pan and
the surface of the cooking zone are
clean and dry.
Touching the heating zone selection
control.
Select a heat setting by touching the “-” or
“+” control.
• If you don’t choose a heat setting
within 1 minute, the ceramic hob will
automaticallyswitcho.Youwillneed
to start again at step 1.
• You can modify the heat setting at any
time during cooking.
• By holding down either of these
buttons, the value will adjust up or
down.
EN-9
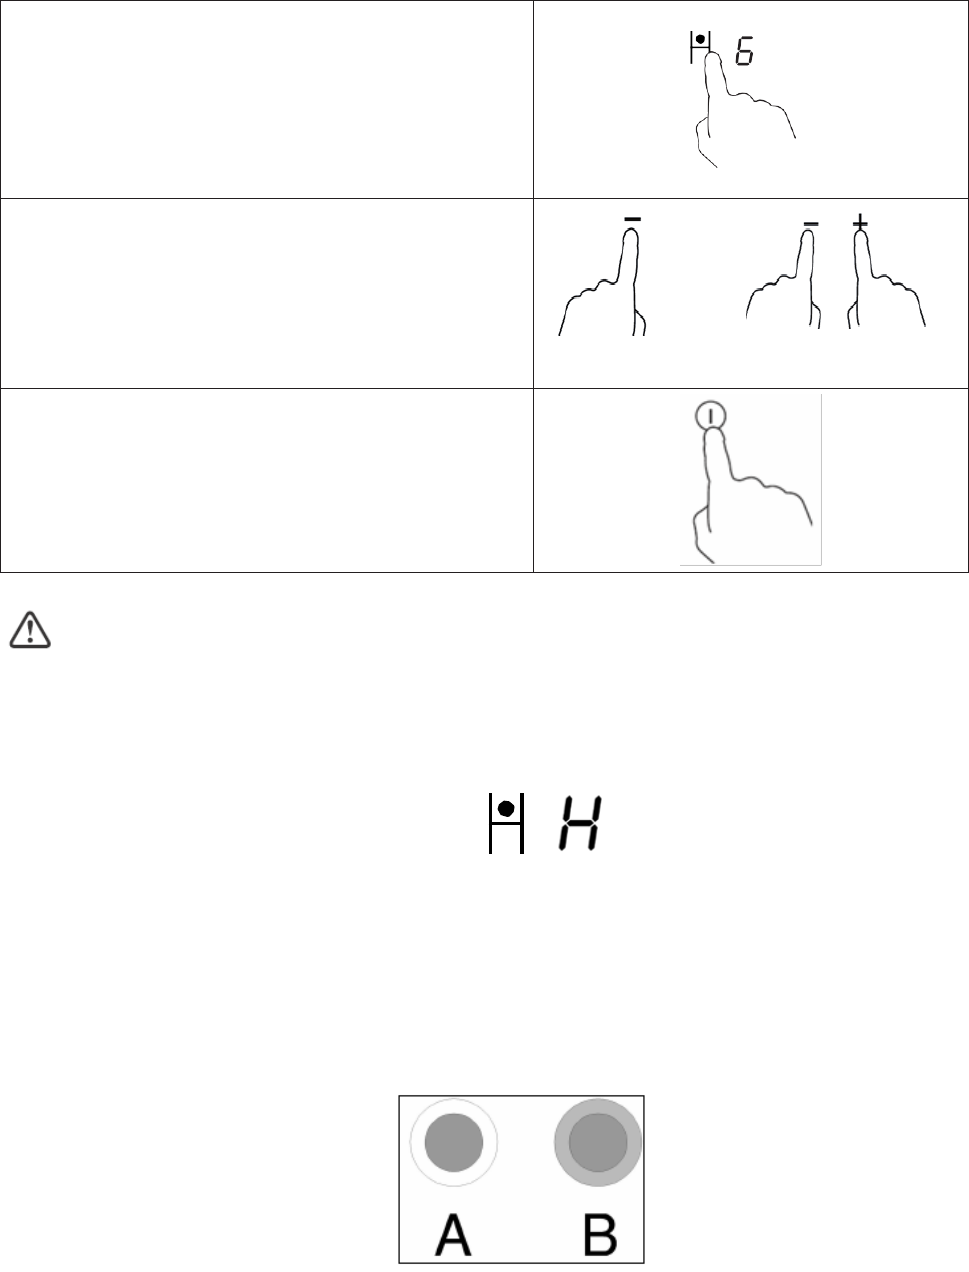
3.3.2 Finish cooking
Touching the heating zone selection
controlthatyouwishtoswitcho.
Turnthecookingzoneobyscrolling
down to “ 0 ” or touching “-” and “+”
control together.
OR
Turnthewholecooktopobytouching
the ON/OFF control.
Beware of hot surfaces
“H” will show which cooking zone is hot to touch. It will disappear when the surface has
cooled down to a safe temperature. It can also be used as an energy saving function if
you want to heat further pans, use the hotplate that is still hot.
3.3.3 Using the Double zone function
• The function only work in 2# cooking zone
• The Double cooking zone has two cooking areas that you can use a central
section and an outer section. You can use the central section (A) independently or
both sections (B)
EN-10

Activate the Double zone
Adjust the heating setting between power
levels 1 and 9 (e.g. 6).
Central section of the Double cooking zone will
switch on.
Touching the Double zone control “ ” once
time, the section (B) works.
The cooking zone indicator show “ ” and “ ”
alternately.
Deactivate the Double zone
Touching dual zone control “ ” again, the dual
zone function is deactivated.
The cooking zone indicator show “6”.
Note:
1 The double loop is available only in 2# cooking zone.
2 You can select the function from level 1 to level 9.
3 You can active the Dual zone only when the 2# cooking zone is selected.
3.3.4 Locking the Controls
• Youcanlockthecontrolstopreventunintendeduse(forexamplechildren
accidentally turning the cooking zones on).
• Whenthecontrolsarelocked,allthecontrolsexcepttheON/OFFcontrolare
disabled.
To lock the controls
Touch the lock control The timer indicator will show “ Lo ”
To unlock the controls
Make sure the ceramic hob is turned on Touch
and hold the lock control for a while.
Whenthehobisinthelockmode,allthecontrolsaredisableexcepttheON/OFF , you can always turn
theceramichobowiththeON/OFF controlinanemergency,butyoushallunlockthehobrstinthe
nextoperation.
EN-11
3.3.5 Timer control
Youcanusethetimerintwodierentways:
a) You can use it as a minute minder. In this case, the timer will not turn any
cookingzoneowhenthesettimeisup.
b) Youcansetittoturnoneormorecookingzonesoafterthesettimeisup.
• Thetimerofmaximumis99minutes
a) Using the Timer as a Minute Minder
If you are not selecting any cooking zone
Make sure the cooktop is turned on.
Note: you can use the minute minder even if
you’re not selecting any cooking zone.
Touch the timer control, the timer indicator
willash;Adjustthetimersettingbytouch
the “-” or “+” controls. The minute minder
indicatorwillstartashingandwillshowin
the timer display.
Touching the “-” and “+” together, the timer
is cancelled, and the “--” will show in the
minute display.
TIMER
When the time is set, it will begin to count
down immediately. The display will show the
remaining time and the timer indicator will
ashfor5seconds.
TIME
R
Buzzer will beep for 30 seconds and the timer
indicator shows “- -” when the setting time
nished.
TIMER
Hint:
a) Touch the “-” or “+” control of the timer once to decrease or increase by 1
minute.
b) Touch and hold the “-” or “+” control of the timer to decrease or increase by 10
minutes.
c) Ifthesettingtimeexceeds99minutes,thetimerwillautomaticallyreturnto0
minute.
EN-12
b) Settingthetimertoturnoneormorecookingzoneso
Set one zone
Touch the zone you want to set.
Touch the timer control, the timer indicator
show “10”.
TIMER
Set the time by touching the “-” or “+” control
of the timer.
Touching the “-” and “+” together, the timer is
cancelled, and the will show “--” in the minute
display.
TIMER
When the time is set, it will begin to count
down immediately. The display will show the
remainingtimeandthetimerindicatorashfor
5 seconds.
TIME
R
Whencookingtimerexpires,thecorresponding
cookingzonewillbeswitchedoautomatically.
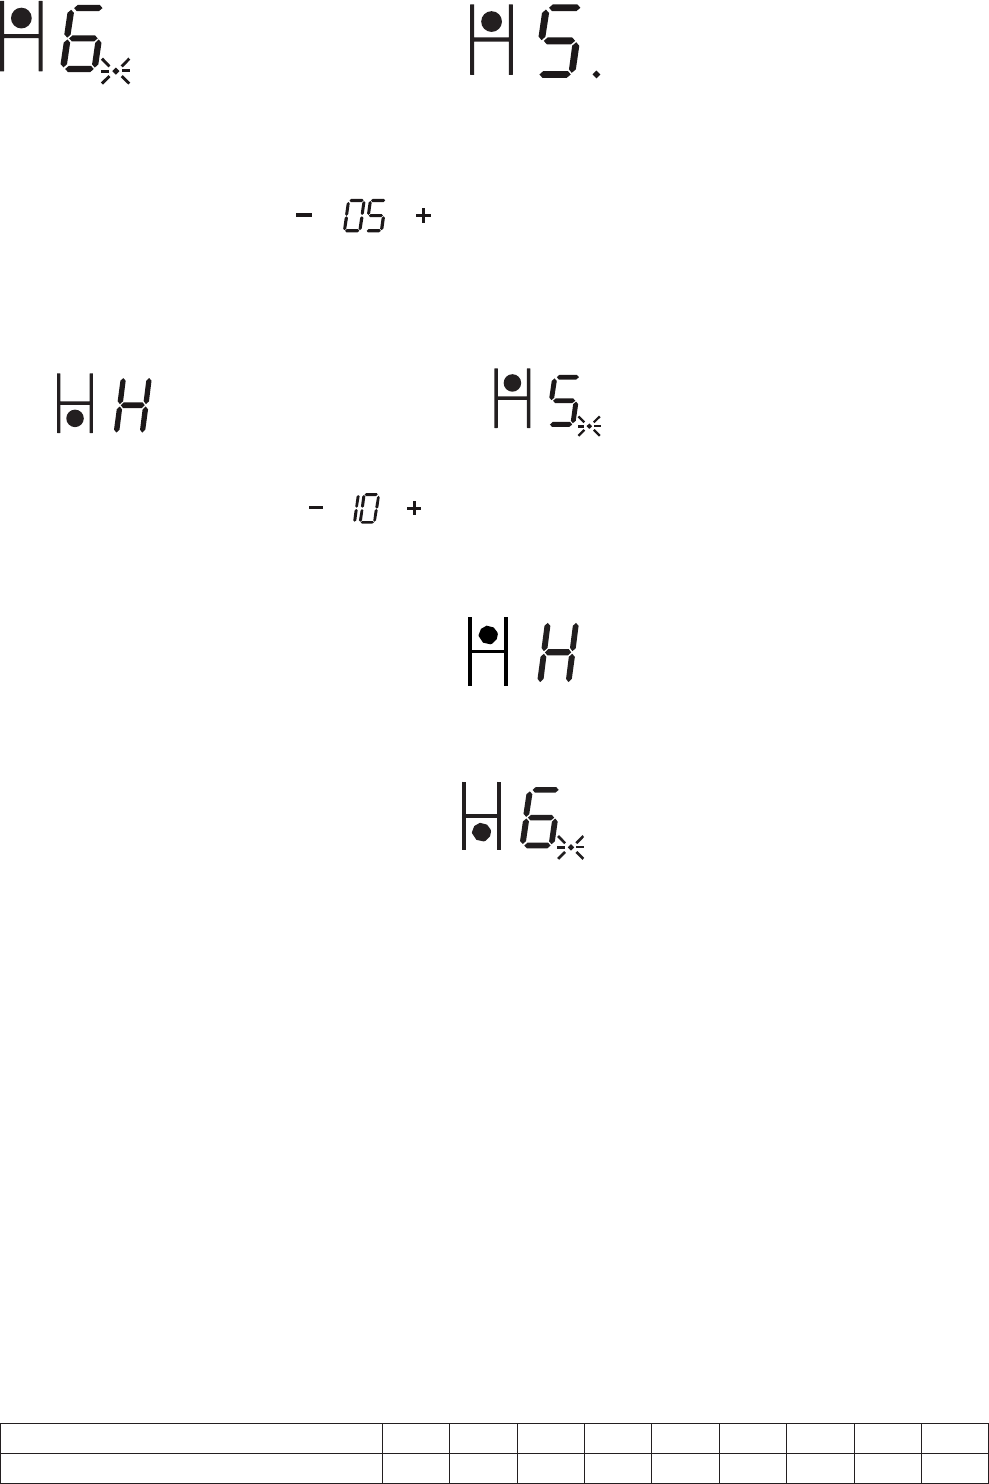
The display will show ”H” which means hot.
Note:
a) Thereddotnexttopowerlevelindicatorwillilluminateindicatingthatzoneis
selected.
b) If you want to change the time after the timer is set, you have to start from step
1.
c) The method for setting two zones is the same as mentioned above.
Settingthetimertoturnmorethanonecookingzoneso
a) If more than one heating zones use this function, the timer indicator will show the
lowest time.
(e.g. zone 1# setting time of 5 minutes, zone 2# setting time of 15 minutes, the
timer indicator shows “5”.)
NOTE:Thereddotnexttopowerlevelindicatorwillash.
EN-13
(set to 5 minutes)
(set to 15 minutes)
TIMER
b) Oncethecountdowntimerexpires,thecorrespondingzonewillswitcho.Thenit
willshowthenewmin.timerandthedotofcorrespondingzonewillash.
zone 1# zone 2#
TIMER
c) Whencookingtimerexpires,thecorrespondingcookingzonewillbeswitcho
automatically.
Note:
1) Thereddotnexttopowerlevelindicatorwillilluminateindicatingthatzoneis
selected.
2) If you want to change the time after the timer is set, you have to start from step 1.
3.3.6 Over-Temperature Protection
A temperature sensor equipped can monitor the temperature inside the ceramic hob.
Whenanexcessivetemperatureismonitored,theceramichobwillstopoperation
automatically.
3.3.7 Residual Heat Warning
When the hob has been operating for some time, there will be some residual heat.
The letter “ H ”appears to warn you to keep away from it.
3.3.8 Default working times
Another safety feature of the hob is automatic shutdown. This occurs whenever you
forgettoswitchoacookingzone.Thedefaultshutdowntimesareshowninthe
table below:
Power level
1 2 3 4 5 6 7 8 9
Default working timer (hour)
8 8 8 4 4 4 2 2 2
EN-14
