F.Y.B.B.A.(CA) Semester- II
2019-20
Lab Book
(Web Technology and RDBMS)
Roll No: ____________________________________
Name: ____________________________________
Introduction
1. About the Workbook:
This workbook is intended to be used by FYBBA(CA) students for Web Technology and
Relational Database Management System (RDBMS) Assignments in Semester–II. This
workbook is designed by considering all the practical concepts / topics mentioned in
syllabus.
2. The objectives of this Workbook are:
1) Defining the scope of the course.
2) To bring the uniformity in the practical conduction and implementation in all
colleges affiliated to SPPU.
3) To have continuous assessment of the course and students.
4) Providing ready reference for the students during practical implementation.
5) Provide more options to students so that they can have good practice before facing
the examination.
6) Catering to the demand of slow and fast learners and accordingly providing the
practice assignments to them.
3. How to use this Workbook:
The workbook is divided into two sections. Section-I is related to Web Technology
(WT) assignments and Section-II is related to RDBMS assignments.
The Section-I (WT) is divided into eight assignments. Each WT assignment has two
SET. It is mandatory for students to complete all the SET in given slot.
The Section-II (RDBMS) is divided into seven assignments. The assignments comprise
of activities to be carried out on given databases. The students have to create database,
insert appropriate records and then perform the activities specified in each of the
assignments. A pool of databases will get created as student progresses through the
assignments and these databases can be repeatedly used in subsequent assignments.
Each RDBMS assignment has two set of questions. It is mandatory for students to
complete all the SET in given slot.
4. Instructions to the students:
Please read the following instructions carefully and follow them.
• Students are expected to carry this workbook every time they come to the lab for
practical.
• Students should prepare for the assignment by reading the relevant material which is
mentioned in ready reference.
• Instructor will specify which problems to solve in the lab during the allotted slot and
student should complete them and get verified by the instructor. However, student
should spend additional hours in Lab and at home to cover all workbook assignments if
needed.
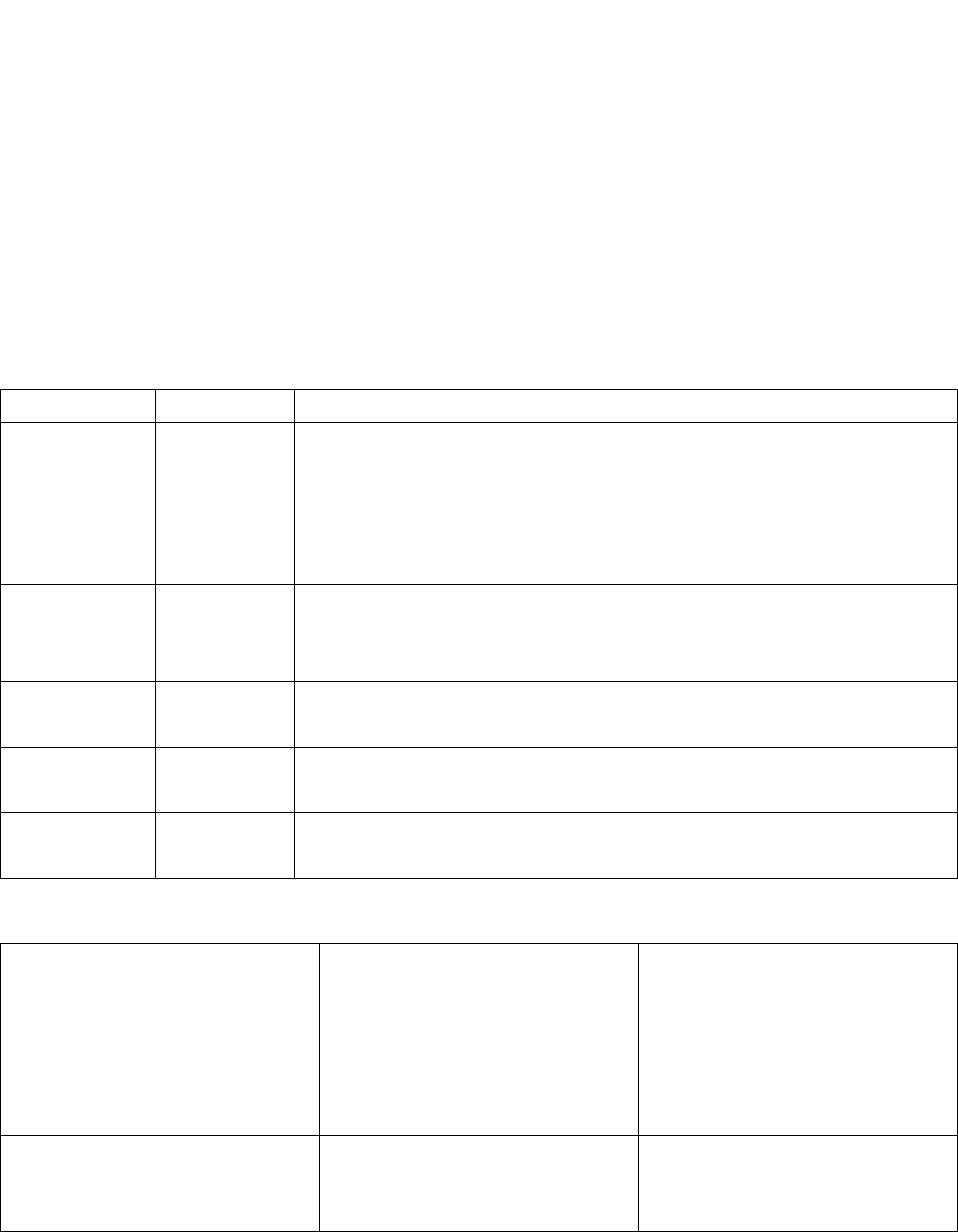
• Students will be assessed for each assignment on a scale from 0 to 5
Not done 0
Incomplete
1
Late Complete
2
Needs improveme
nt
3
Complete
4
Well Done
5
5. Instruction to the Instructors:
Make sure that students should follow above instructions.
Explain the assignment and related concepts using white board if required or by
demonstrating the software.
Give specific input to fill the blanks in queries which can vary from student to
student.
Evaluate each assignment carried out by a student on a scale of 5 as specified above
by ticking appropriate box.
The value should also be entered on assignment completion page of the respective
Lab course.
6. Instructions to the Lab administrator:
You have to ensure appropriate hardware and software is made available to each student.
Editors:
Mr. Yogesh Ingale
Dr. D. Y. Patil ACS College, Pimpri, Pune
Mr. Satyavan Kunjir
Dr. D. Y. Patil ACS College, Pimpri, Pune
Mrs. Malati V. Tribhuwan
Dr. D. Y. Patil ACS College, Pimpri, Pune
Reviewed By:
Dr. Ranjit D. Patil
Dr. D. Y. Patil ACS College, Pimpri, Pune
Section I
Web Technology
(HTML, CSS, Java Script)

Table of contents (Section-I: HTML and Java Script)
Exercise 1: Basic HTML Tags
Exercise 2: Creating List through HTML
Exercise 3: Creating Tables trough HTML
Exercise 4: Creating Frames through HTML
Exercise 5: Creating Forms through HTML
Exercise 6: Image Mapping
Exercise 7: Styling HTML with CSS
Exercise 8: JavaScript
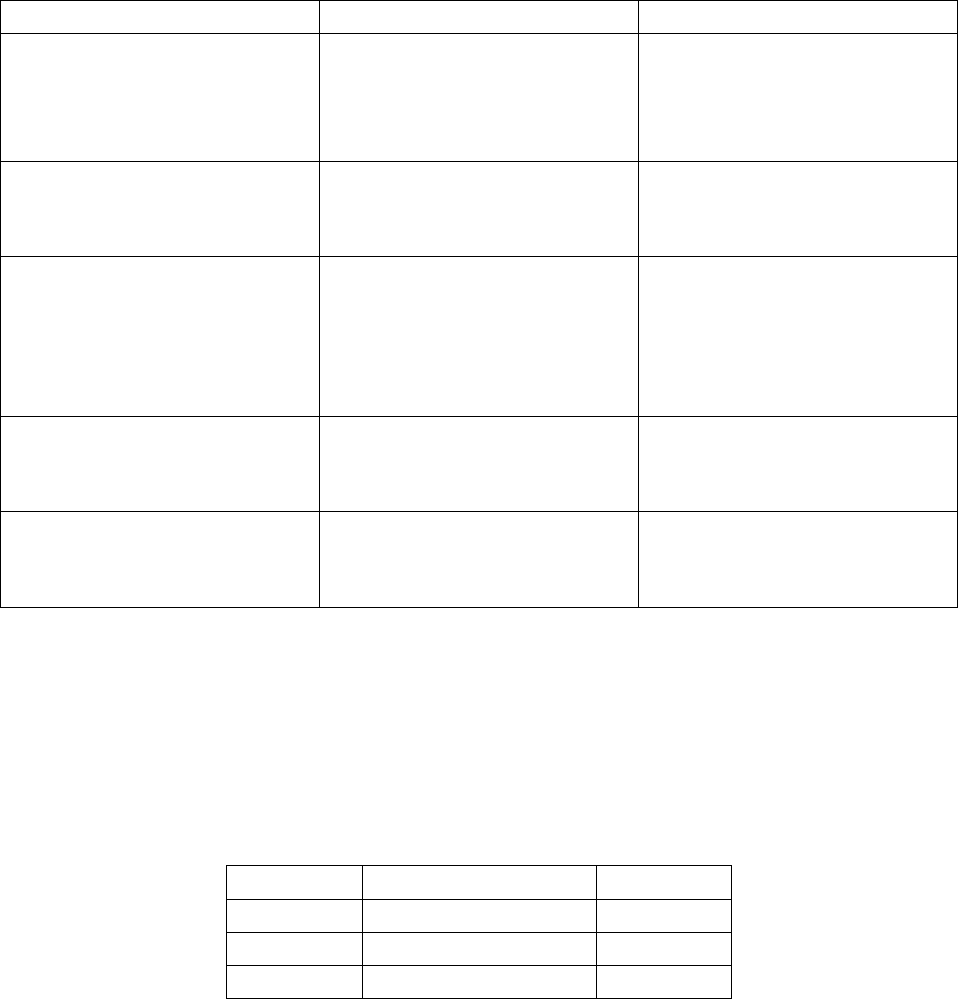
Assignment Completion Sheet
Sr. No
Assignment Marks
(out of 5)
Teacher
Sign
1
Basic HTML Tags
2
Creating List through HTML
3
Creating Tables through HTML
4
Creating Frames through HTML
5
Creating Forms through HTML
6
Image Mapping
7
Styling HTML with CSS
8
JavaScript
Total (out of 40)
Total (out of 10)
Exercise 1: Basic HTML Tags
Introduction:
Hypertext Markup Language (HTML) is the standard markup language used to
create web pages and web applications. HTML was invented in 1990 by a scientist
called Tim Berners-Lee
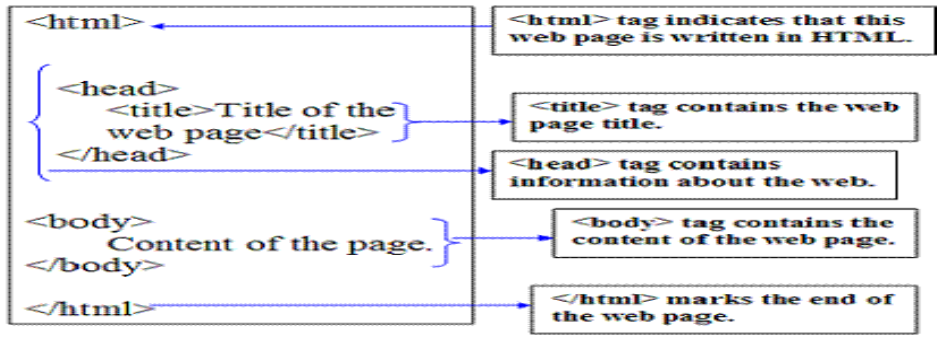
Following figure shows basic HTML structure
A Html document begins with opening <html> tag and end with closing </html>
tag and is divided into two sections
1. Head
2. Body
1. Head Section: This section contains title of a web page
2. Body section: The body element contains the information that you want to
display on a web page.
Html elements:
Html documents are simply a text file made up of html elements, these elements
are called as html tags
Html Tags:
Html tags tells the browser how to present information on web page
Html tag name must enclosed between opening and closing angle brackets < tag
name >
Html tags are not case sensitive
Html tags can be of two types
1. Paired tags:
In paired tag, first tag is called as opening tag and second tag is called as
closing tag.
The opening tag actives the effect and closing tag turns the effect off.
Paired tags has three parts i.e opening tag, tag content and closing tag
Eg. <b> Text in Bold </b>
2. Singular tags: the singular tags are stand-alone tags which does not require any
companion tag.
Tag Attribute:
Some html tag contains attributes, which provides additional information
about element
Attributes are always specified in the start tag and come in name=value pair
e.g. <font size=28> Text in Size 28 </font>
Common Html Tags:
1. Html Tag: <html> …</html>
The <html> tag represent the root of an html document
The <html> tag tells the browser that this is an html document
All other html tags are nested between the <html> and </html>
2. Head Tag: <head>..</head>
It is used for indicating the head section of html document
The head tag includes a title for the document, scripts, styles and so on
3. Title Tag: <title> .. </title>
The title tag is used for declaring title of the html document
The title usually displayed in the browsers title bar (at the top)
The title tag is placed between the opening and closing head tag
4. Body Tag: <body> … </body>
The body tag define the document body
The body tag is used for indicating the main content section of html
document
The body tag contains all the content of html document such as text, images,
lists, tables, hyperlink etc.
Attributes of Body Tag:
1. Bgcolor: specifies the background color for a web page
e.g. <body bgcolor=red> .. </body>
2. Background: specifies a background image of a web page
e.g. <body background=“ path of image file”>..</body>
3. Text: Specifies color of text for a web page
e.g. <body text=Yellow>..</body>
4. Link: specifies the color of unvisited links of a web page
e.g. <body link=blue> .. </body>
5. Vlink: specifies the color of visited links of a web page
e.g. <body vlink=green>.. </body>
Text Formatting Tags:
The html tags are used for formatting text are called as text formatting tags
1. <b>: The <b> tag defines bold text. Anything that appears in a <b>..</b>
elements is displayed in bold
e.g. <b> Bold text</b>
2. <i>: The content of <i> tag is usually displayed in italic
e.g. <i> italic text </i>
3. <u>: The <u> tag usually results in the text being underlined. Anything
appears in a <u>..</u> is displayed with underlined
e.g. <u> underlined text </u>
4. <s>: Anything that appears in <s>..</s> tag is displayed with strikethrough,
which is a thin line through the text
e.g. <s> Strike Text </s>
5. <big>: Displays text in big font
e.g. <big> Text in Big Font</b>
6. <small>: Displays text in small font
e.g. <small> Text in Small Font</small>
7. <sub>: This tag defines subscript text . Subscripted text can be used for
chemical formulas like H
2
O
e.g. H<sub>2</sub>O
8. <sup>: This tag defines superscript text. Superscript text can be used to
display matahematical formulas like 10X
2
+5Y
3
e.g. 10X<sup>2</sup>+5Y<sup>3<sup>
Comment Tag: <! .. >
The comment tag is used to insert comments in the source code
Comments are not displayed in the browser
e.g. <! Example of writing comment >
Heading Tags:
The html <h1> to <h6> tags are used to define html heading.
h1> defines the most important heading while <h6> defines the least
important heading
Heading tag has attribute “align” whose value can be left, right or center
<h1> …. </h1>
<h2 align=left> ….. </h2>
<h3 align=center> …. </h3>
<h4>….. </h4>
<h5> …..</h5>
<h6 align=right> …..</h6>
<p> Tag:
The html <p> tag is used to define a paragraph
<p> tag has attribute “align” whose value can be left, right, center or justify
<p> tag is a singular tag
e.g. <p> ….
<p align=center> ….
<br> Tag:
The html <br> tag is used to specify line break
<br> tag is a singular tag
Center Tag: <center> … </center>
The content enclosed between center tag will be aligned at center place of web
page
e.g. <center> Text aligned at enter </center>
Font Tag: <font>….</font>
<font> tag is used to add style, size an color to the text on your site
This tag specifies the font face, font size and font color of text
Attributes of Font tag:
1. color: specifies color of text
2. Face: specifies the font of the text
3. Size: specifies the size of text
e.g. <font color=red> Text in Red Color</font>
<font color=blue face=arial size=14> Sample Text</font>
Marquee Tag:
A marquee tag is used to display scrolling text on a web page
Scrolling text is displayed either horizontally across or vertically down of a web
page depending on the setting
Attributes of marquee tag:
1. Direction: specifies the direction of scrolling. This will have value either up,
down, left or right
2. Behavior: specifies type of scrolling. This will have value either scroll, slide
and alternate
3. Bgcolor: specifies background color for marquee text
4. Width: specifies width of marquee text. This will have value like 10%, 20%
and so on
5. Height: specifies Height of marquee text. This will have value like 10%,
20% and so on
<Abbr> Tag:
The <abbr> tag defines an abbreviation of something
<abbr> tag shows the full version of the abbreviation when mouse pointer is
moved on that element.
e.g. <abbr title=“World Wide Web”>WWW</abbr>
<div> Tag:
The <div> element is a block-level element.
The <div> element is often used as a container for other HTML elements.
The <div> tag defines a division or a section in an HTML document.
e.g. <div style = "background- color:brown" >
<h3>This is a heading</h3>
<p>This is a paragraph.
</div>
HTML <img> Tag:
The <img> tag defines an image in an HTML page. It is used to insert image on
web page
In HTML the <img> tag has no end tag.
Ex. <img src="smiley.jpg">
Commonly used attributes of <Img> tag:
align left
right
Specifies the alignment of an image according to
surrounding elements
border Pixels Specifies the width of the border around an image
height Pixels Specifies the height of an image
hspace Pixels Specifies the whitespace on left and right side of an image
src URL Specifies the URL of an image
vspace Pixels Specifies the whitespace on top and bottom of an image
width Pixels Specifies the width of an image

Creating Hyperlink through HTML:
Hyperlinks are the primary method used to navigate between pages and Web sites.
Links can point to other web pages, web sites, graphics, files, sounds, e-mail
addresses, and other locations on the same web page.
When you move the mouse over a link, the mouse arrow will turn into a little hand.
Hyperlinks are defined with the HTML <a> tag:
<a href="url">link text</a>
Ex.
<a href="C:\Yogesh\test.html">Click Here</a>
The href attribute specifies the destination address
The link text is the visible part (Click Here).
Clicking on the link text will send you to the specified address.
HTML Links - The target Attribute:
The target attribute specifies where to open the linked document.
The target attribute can have one of the following values:
•
_blank - Opens the linked document in a new window or tab
•
_self - Opens the linked document in the same window/tab as it was clicked
(this is default)
This example will open the linked document in a new browser window/tab:
<a href=”assignment1.html” target="_blank">Click Me</a>
HTML Links - Image as Link:
It is common to use images as links:
<a href="default.asp">
<img src="smiley.gif" width=10% height=10%>
</a>
HTML Links - Create a Bookmark:
HTML bookmarks are used to allow readers to jump to specific parts of a Web
page.
Bookmarks can be useful if your webpage is very long.

To make a bookmark, you must first create the bookmark, and then add a link to it.
When the link is clicked, the page will scroll to the location with the bookmark.
First, create a bookmark with the id attribute:
<h2 id="C4">Chapter 4</h2>
Then, add a link to the bookmark ("Jump to Chapter 4"), from within the same
page:
<a href="#C4">Jump to Chapter 4</a>
Assignment:
Set A:
1. Create an html5 page which will display names of your family members on
separate lines in different sizes. State size of each line in its text.
2. Create an html5 page which will display names of players of Indian cricket
team with all the different text styles (bold, italic and underlined) and its
combinations on separate lines. State style of each line in its text.
3. Create an html5 page containing the polynomial expression as follows
a
o
+ a
1
x+ a
2
x
2
+ a
3
x
3
Set B:
1. Create an html5 page with following specifications
a. Title should be about MYCOLLEGE
b. Put the windows Logo image in the background
c. Place your College name at the top of the page in large text followed
by address in smaller size
d. Add names of courses offered each in a different color, style and
typeface.
e. Add scrolling text with a message of your choice
f. Add college image at the bottom
2. Create an html5 page with following specifications
a. Title should be about MYCITY
b. Place your City name at the top of the page in large text and in blue
color
c. Add names of landmarks in your city each in a different color, style
and typeface
d. One of the landmark, your college name should be scrolling
e. Add scrolling text with a message of your choice
f. Add some image at the bottom
Assignment Evaluation
0: Not Done [ ] 1: Incomplete [ ] 2: Late Complete [ ]
3: Need Improvement [ ] 4: Complete [ ] 5: Well Done [ ]
Signature of Instructor
Exercise 2: Creating List through HTML
HTML offers web authors three ways for specifying lists of information. All lists
must contain one or more list elements. Lists may contain −
1.
<ul> − An unordered list. This will list items using plain bullets.
2.
<ol> − An ordered list. This will use different schemes of numbers to list
your items.
3.
<dl> − A definition list. This arranges your items in the same way as they
are arranged in a dictionary.
HTML Unordered Lists (<ul>):
An unordered list is a collection of related items that have no special order or
sequence. This list is created by using HTML <ul> tag. Each item in the list is
marked with a bullet.
The type Attribute:
You can use type attribute for <ul> tag to specify the type of bullet you like. By
default, it is a disc. Following are the possible options −
<ul type = "square">
<ul type = "disc">
<ul type = "circle">
HTML Ordered Lists:
If you are required to put your items in a numbered list instead of bulleted, then
HTML ordered list will be used. This list is created by using <ol> tag. The
numbering starts at one and is incremented by one for each successive ordered list
element tagged with <li>.
The type Attribute:
You can use type attribute for <ol> tag to specify the type of numbering you like.
By default, it is a number. Following are the possible options −
<ol type = "1"> - Default-Case Numerals.
<ol type = "I"> - Upper-Case Numerals.
<ol type = "i"> - Lower-Case Numerals.
<ol type = "A"> - Upper-Case Letters.
<ol type = "a"> - Lower-Case Letters.
The start Attribute:
You can use start attribute for <ol> tag to specify the starting point of numbering
you need. Following are the possible options −
<ol type = "1" start = "4"> - Numerals starts with 4.
<ol type = "I" start = "4"> - Numerals starts with IV.
<ol type = "i" start = "4"> - Numerals starts with iv.
<ol type = "a" start = "4"> - Letters starts with d.
<ol type = "A" start = "4"> - Letters starts with D.
HTML Definition Lists:
HTML supports a list style which is called definition lists where entries are listed
like in a dictionary or encyclopedia. The definition list is the ideal way to present
a glossary, list of terms, or other name/value list.
Definition List makes use of following three tags.
1.
<dl> − Defines the start of the list
2.
<dt> − A term
3.
<dd> − Term definition
Assignments:
Set A:
1. Write a HTML code to generate the following output
1. Undergraduate Courses
i. BBA(CA)
ii. BCA(Science)
iii. B.Sc.(Computer Science)
2. Post Graduate Courses
i. M.Sc.(Comp.Sci.)
ii. M.Sc.(CA)
iii. MCA
2. Write a HTML code to generate the following output
a. Flowering Plant
o Rose
o Lily
o Jasmin
b. Non Flowering Plant
Fern
Spore
Set B
1. Write HTML code which generates the following output And Display each
element of list in different size, color & font
1. DYP
• Courses
BCS
BCA
2. Indira
• Courses
BCA
MCs
3. ATSS
• Courses
BBA
BCS
2. Write HTML code which generates the following output and display each
element of list in different size, color & font
• Honda
Petrol
1) Honda City
2) Brio
Diesel
1) Amaze
2) Brio
• Maruti-Suzuki
Petrol
1) Swift
2) Ritz
Diesel
1) Swift-Desire
3. Write the HTML5 code which generates the following output.
1. Coffee
2. Tea
a. Green Tea
b. Black Tea
i. Africa
ii. China
3. Milk
Assignment Evaluation
0: Not Done [ ] 1: Incomplete [ ] 2: Late Complete [ ]
3: Need Improvement [ ] 4: Complete [ ] 5: Well Done [ ]
Signature of Instructor
Exercise 3: Creating Tables through HTML
Introduction:
The HTML <table> tag is used for defining a table. The table tag contains other
tags that define the structure of the table. The <table> tag defines an HTML table.
An HTML table consists of the <table> element and one or more <tr>, <th>,
and <td> elements.
The <tr> element defines a table row, the <th> element defines a table header, and
the <td> element defines a table cell.
Specific Attributes:
The HTML <table> tag also supports the following additional attributes −
Attribute Value Description
align right
left
center
justify
char
Specifies Visual alignment.
bgcolor rgb(x,x,x)
#hexcode
colorname
Specifies the background color of the table.
border Pixels Specifies the border width. A value of "0" means no
border.
cellpadding
pixels or
%
Specifies the space between the cell borders and their
contents.
cellspacing pixels or
%
Specifies the space between cells.
Attributes of <th> and <td> tag:
align left
right
center
justify
char
Aligns the content in a
cell
bgcolor rgb(x,x,x)
#xxxxxx
Specifies the background
color of a cell
colorname
colspan Number Specifies the number of
columns a cell should
span
rowspan Number Sets the number of rows a
cell should span
valign top
middle
bottom
baseline
Vertical aligns the content
in a cell
height pixels
%
Sets the height of a cell
width pixels
%
Specifies the width of a
cell
Assignments:
Set A
1. Write html code to create following table
RollNo Name Marks
101 Nilesh Patil 80.56%
102 Pranav Kadam 90.45%
103 Suhas Choudhari 67.89%
2. Write a HTML code to display Theory Time table of FYBBA(CA)
Set B
1. Write a HTML code to display calendar of current month in tabular format.
Use proper color for week days and holidays. Display month name, year
and images as advertisement at the beginning of the calendar.
2. Write the HTML code to create the following table
Book_No
Book_Name
Price
RS Paise
101 DBMS 200 50
102 C-Prog 150 75
103 JAVA 300 00
104 PHP 250 50
105 ASP 100 00
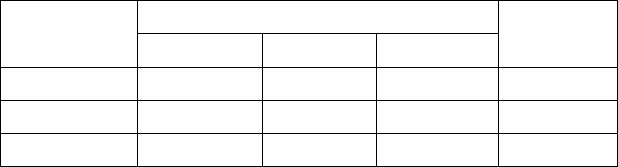
3. Write the HTML code which generates the following output.
Country Population (in Crores)
INDIA
1998 85
1999 90
2000 100
USA
1998 30
1999 35
2000 40
UK
1998 25
1999 30
2000 35
4. Write the HTML code which generates the following output.
Book_No
Book_Name
Price
RS Paise
101 DBMS 200 50
102 C-Prog 150 75
103 JAVA 300 00
104 PHP 250 50
105 ASP 100 00
5. Write HTML code to create following table.
Assignment Evaluation
0: Not Done [ ] 1: Incomplete [ ] 2: Late Complete [ ]
3: Need Improvement [ ] 4: Complete [ ] 5: Well Done [ ]
Signature of Instructor
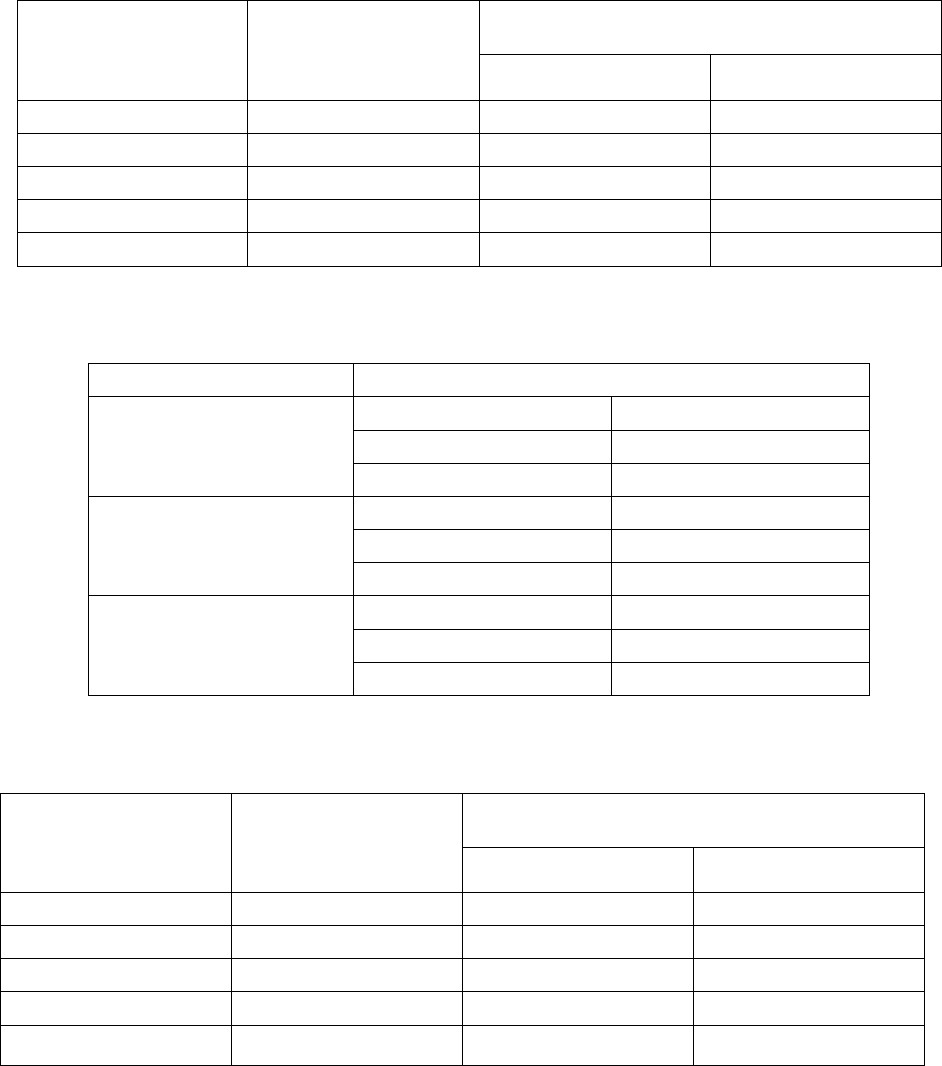
Course Fee Structure Year
FY SY TY
B.Sc.(CS)
20000 25000 30000 2017
BCA(Sci)
15000 20000 25000 2018
BBA(CA)
25000 30000 35000 2019
Exercise 4: Creating Frames through HTML
Introduction:
<Frameset> Tag:
The <frameset> tag defines a frameset.
The <frameset> element holds one or more <frame> elements. Each <frame>
element can hold a separate document.
The <frameset> element specifies HOW MANY columns or rows there will be in
the frameset, and HOW MUCH percentage/pixels of space will occupy each of
them.
Attributes of Frameset Tag:
Attribute Value Description
cols pixels
%
*
Specifies the number and
size of columns in a
frameset
rows pixels
%
*
Specifies the number and
size of rows in a frameset
<frame> tag:
The <frame> tag defines one particular window (frame) within a <frameset>.
Each <frame> in a <frameset> can have different attributes, such as border,
scrolling, the ability to resize, etc.
Attributes of <frame>:
Attribute Value Description
name Text Specifies the name of a
frame
scrolling yes
no
auto
Specifies whether or not
to display scrollbars in a
frame
src URL Specifies the URL of the
document to show in a
frame
Assignments:
Set A:
1. Write a HTML code to divide the web page into 4 setion using frame as
follows
2. Write a HTML code to divide the web browser in to 4 section using frame as
follows
Set B
1. Create HTML page to Divide the frames in to different sections as shown
below and add appropriate HTML files to each frame.
First Frame : Your Name and address
Second Frame : Third Frame :
Bulleted list of favourite colours Numbered List of Cities
Fourth Frame:
Scrolling Message
Fifth Frame:
Blinking Reminders
Sixth Frame:
Name of Countries
2. Write HTML code to design a web as per given specification. Divide the
browser screen into two frames. The first frame will display the heading.
Divide the second frame into two columns. The frame on the left should be
name of cities consisting of hyperlinks. Clicking on any one of these
hyperlinks will display related information in right hand side frame as shown
below
IT Industries in INDIA
City
1. Pune
2. Mumbai
Pune
• Infosys
• Persistent
3. Write a HTML code which will divide web page in three frames. First frame
should consists of name of college as heading. Second frame should consists
of name of courses with hyperlink. Once click on any course it should
display subject of that course in third frame.
Assignment Evaluation
0: Not Done [ ] 1: Incomplete [ ] 2: Late Complete [ ]
3: Need Improvement [ ] 4: Complete [ ] 5: Well Done [ ]
Signature of Instructor
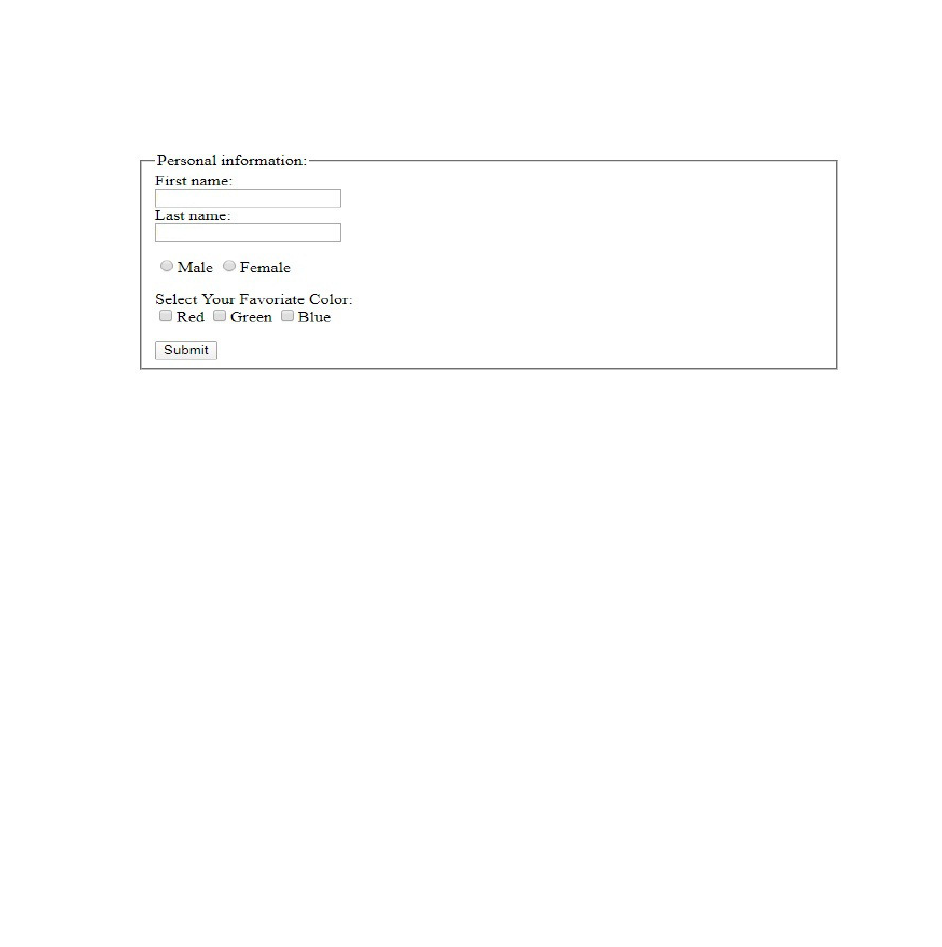
Exercise 5: Creating Form through HTML
Introduction:
The <form> Element:
The HTML <form> element defines a form that is used to collect user input. An
HTML form contains form elements.Form elements are different types of input
elements, like text fields, checkboxes, radio buttons, submit buttons, and more.
The <input> Element
The <input> element is the most important form element.The <input> element can
be displayed in several ways, depending on the type attribute.
Here are some examples:
Type Description
<input type="text"> Defines a one-line text input field
<input type="radio"> Defines a radio button (for selecting one
of many choices)
<input type="submit"> Defines a submit button (for submitting
the form)
Ex.
<input type="text" name="firstname">
<input type="radio" name="gender" value="male" checked> Male
<input type="radio" name="gender" value="female"> Female
The Submit Button:
<input type="submit"> defines a button for submitting the form data to a form-
handler. The form-handler is typically a server page with a script for processing
input data.
Ex. <input type="submit" value="Submit">
The Action Attribute:
The action attribute defines the action to be performed when the form is submitted.
Normally, the form data is sent to a web page on the server when the user clicks on
the submit button.
<form action="/action_page.php">
The Method Attribute: The method attribute specifies the HTTP method
(GET or POST) to be used when submitting the form data:

<form action="/action_page.php" method="get">
Grouping Form Data with <fieldset>:
The <fieldset> element is used to group related data in a form.
The <legend> element defines a caption for the <fieldset> element.
Ex
<form action="/action_page.php">
<fieldset>
<legend>Personal information:</legend>
First name:<br>
<input type="text" name="firstname" value="Mickey"><br>
Last name:<br>
<input type="text" name="lastname" value="Mouse"><br><br>
<input type="submit" value="Submit">
</fieldset>
</form>
The <select> Element:
The <select> element defines a drop-down list: The <option> elements defines an
option that can be selected. By default, the first item in the drop-down list is
selected. Use the multiple attribute to allow the user to select more than one value
To define a pre-selected option, add the selected attribute to the option:
Ex.
<select name="cars">
<option value="volvo">Volvo</option>
<option value="saab">Saab</option>
<option value="fiat">Fiat</option>
<option value="audi">Audi</option>
</select>
The <textarea> Element:
The <textarea> element defines a multi-line input field
<textarea name="message" >
The cat was playing in the garden.
</textarea>
The <button> Element:
The <button> element defines a clickable button:
<button type="button" onclick="alert('Hello World!')">Click Me!</button>

HTML Input Types:
Here are the different input types you can use in HTML:
<input type="text"> defines a one-line text input field:
Input Type Password:
<input type="password"> defines a password field:
Input Type Reset
<input type="reset"> defines a reset button that will reset all form values to their
default values:
Input Type Checkbox:
<input type="checkbox"> defines a checkbox.
Checkboxes let a user select ZERO or MORE options of a limited number of
choices.
Input Type Date:
The <input type="date"> is used for input fields that should contain a date.
Input Type Email:
The <input type="email"> is used for input fields that should contain an e-mail
address. Depending on browser support, the e-mail address can be automatically
validated when submitted.
Input Type File:
The <input type="file"> defines a file-select field and a "Browse" button for file
uploads.
Assignments:
Set A:
1) This is how the HTML code above will be displayed in a browser
Set B
2) Design an HTML form for customer registration visiting a departmental store.
Form should consists of fields such as name, contact no.,gender, preferred days
of purchasing, favorite item(to be selected from a list of items),suggestions
etc.. You should provide button to submit as well as reset the form contents.
3) Design an HTML form to take the information of a customer for booking a
travel plan consisting of fields such as name, address, contact no., gender,
preferred season(Checkboxes), location type(to be selected from a list) etc. You
should provide button to submit as well as reset the form contents. (All the
fields should be properly aligned)
4) Design a HTML form for Bus Ticket Reservation consisting of fields for Name,
Address, contact no, source station(Dropdown list), Destination station, Date of
booking, date of journey, no of passenger, name of passenger, gender of
passenger etc. (Use proper alignment)
Assignment Evaluation
0: Not Done [ ] 1: Incomplete [ ] 2: Late Complete [ ]
3: Need Improvement [ ] 4: Complete [ ] 5: Well Done [ ]
Signature of Instructor

Exercise 6: Image Mapping
Introduction:
With image maps, you can add clickable areas on an image.
Image Maps:
The <map> tag defines an image-map. An image-map is an image with clickable
areas. The idea behind an image map is that you should be able to perform
different actions depending on where in the image you click. To create an image
map you need an image, and a map containing some rules that describe the
clickable areas.
The Image:
The image is inserted using the <img> tag. The only difference from other images
is that you must add a usemap attribute:
<img src="workplace.jpg" usemap="#mymap”>
The usemap value starts with a hash tag # followed by the name of the image map,
and is used to create a relationship between the image and the image map.
The Map:
Then add a <map> element. The <map> element is used to create an image map,
and is linked to the image by using the name attribute:
<map name="mymap">
The name attribute must have the same value as the usemap attribute.
The Areas:
Then add the clickable areas.
A clickable area is defined using an <area> element.
Shape:
You must define the shape of the area, and you can choose one of these values:
•
rect - defines a rectangular region
•
circle - defines a circular region
•
poly - defines a polygonal region
•
default - defines the entire region
Coordinates:
You must define some coordinates to be able to place the clickable area onto the
image.

The coordinates come in pairs, one for the x-axis and one for the y-axis.
The coordinates 34, 44 is located 34 pixels from the left margin and 44 pixels from
the top:
Ex. <area shape="rect" coords="34, 44, 270, 350" href="computer.htm">
Circle:
To add a circle area, first locate the coordinates of the center of the circle:
337, 300
Then specify the radius of the circle:
44 pixels
<area shape="circle" coords="337, 300, 44" href="coffee.htm">
Assignments:
Set A:
Create a picture in paint brush consisting of circle, triangle and square. Insert this
picture on webpage. Create image map such that once click on circle shape it
should display web page about circle, once click on square square should display
separate page in new tab and so on
Set B
Display India.jpg image on web page consisting of different states. Once click on
any state, it should open new web page consisting of information about that state
Assignment Evaluation
0: Not Done [ ] 1: Incomplete [ ] 2: Late Complete [ ]
3: Need Improvement [ ] 4: Complete [ ] 5: Well Done [ ]
Signature of Instructor

Exercise 7: Styling HTML with CSS
Introduction:
CSS stands for Cascading Style Sheets.
CSS describes how HTML elements are to be displayed on screen, paper, or in
other media. CSS saves a lot of work. It can control the layout of multiple web
pages all at once.
CSS can be added to HTML elements in 3 ways:
1.
Inline - by using the style attribute in HTML elements
2.
Internal - by using a <style> element in the <head> section
3.
External - by using an external CSS file
Inline CSS:
An inline CSS is used to apply a unique style to a single HTML element. An inline
CSS uses the style attribute of an HTML element. This example sets the text color
of the <h1> element to blue:
Example:
<h1 style="color:blue;">This is a Blue Heading</h1>
Internal CSS:
An internal CSS is used to define a style for a single HTML page. An internal CSS
is defined in the <head> section of an HTML page, within a <style> element:
<html>
<head>
<style>
body {background-color: powderblue;}
h1 {color: blue;}
p {color: red;}
</style>
</head>
<body>
<h1>This is a heading</h1>
<p>This is a paragraph.</p>
</body>
</html>

External CSS:
An external style sheet is used to define the style for many HTML pages. With an
external style sheet, you can change the look of an entire web site, by changing one
file!. To use an external style sheet, add a link to it in the <head> section of the
HTML page:
<html>
<head>
<link rel="stylesheet" href="styles.css">
</head>
<body>
<h1>This is a heading</h1>
<p>This is a paragraph.</p>
</body>
</html>
An external style sheet can be written in any text editor. The file must not contain
any HTML code, and must be saved with a .css extension.
Here is how the "styles.css" looks:
body {
background-color: powderblue;
}
h1 {
color: blue;
}
p {
color: red;
}
External References:
External style sheets can be referenced with a full URL or with a path relative to
the current web page. This example uses a full URL to link to a style sheet:
<link rel="stylesheet" href="styles.css">
Most commonly used CSS properties:
Property Description Values
Color Sets the color of a text Color name
text-align
Aligns the text in an
element
left, right, center, justify
text-decoration Adds decoration to text
none, underline, overline,
line-through
Background-color
Sets background color for
the element
Color_name
font-family
Specifies the font family
for text
family-name, generic-
family, inherit
font-size
Specifies the font size of
text
xx-small, x-small, small,
medium, large, x-large,
xx-large, smaller, larger,
length, %, inherit
font-style
Specifies the font style for
text
normal, italic, oblique,
inherit
background-image Defines an element's
background image.
url of background-image
border Sets the width, style, and
color for all four sides of
an element's border.
Border_size
border-color Sets the color of the
border on all the four
sides of an element.
border-color
Assignments:
Set A
1. Create HTML web page with following specifications
i) Title should be about your College.
ii) Put image in the background
iii) Place your college name at the top of page in large text followed
by address in smaller size.
iv) Add names of courses offered, each in different color, style and
font
v) Add scrolling text about college.
vi) Add any image at the bottom.
(use External CSS to format the webpage)
2. Write HTML code to design a website for Online Shopping. Design home
page which consist of list of items each with hyperlink, clicking on which
should display related information on separate web page. (Use external CSS
to format each web page)
Set B
1. Write a HTML code to display Theory Time Table of FYBBA(CA). Use
internal CSS to format the table
2. Write HTML code which generates the following output And Display each
element of list in different size, color & font. Use external CSS to format the
list
• Non flowering plants
o Fern
o Spore
• Flowering plants
Lilly
Rose
1. Red Rose
2. Pink Rose
3. Create HTML page with following specifications
i. Title should be about your City.
ii. Color the background by Pink color.
iii. Place your city name at the top of page in large
text and in blue color.
iv. Add names of the landmarks in your city, each in
different color, style and font v) Add scrolling
text about your City.
v. Add any image at the bottom.
(Use inline CSS to format the web page)
Assignment Evaluation
0: Not Done [ ] 1: Incomplete [ ] 2: Late Complete [ ]
3: Need Improvement [ ] 4: Complete [ ] 5: Well Done [ ]
Signature of Instructor

Exercise 8: JavaScript
Introduction:
JavaScript is the programming language of HTML and the Web. JavaScript is one
of the 3 languages all web developers must learn:
1. HTML to define the content of web pages
2. CSS to specify the layout of web pages
3. JavaScript to program the behavior of web pages
The <script> Tag:
In HTML, JavaScript code must be inserted between <script> and </script> tags.
JavaScript Functions and Events. A JavaScript function is a block of JavaScript
code, that can be executed when called for. For example, a function can be called
when an event occurs, like when the user clicks a button.
JavaScript in <head> or <body>
You can place any number of scripts in an HTML document.
Scripts can be placed in the <body>, or in the <head> section of an HTML page, or
in both.
JavaScript in <head>
In this example, a JavaScript function is placed in the <head> section of an HTML
page. The function is invoked (called) when a button is clicked:
JavaScript Display Possibilities
JavaScript can "display" data in different ways:
•
Writing into an HTML element, using innerHTML.
•
Writing into the HTML output using document.write().
•
Writing into an alert box, using window.alert().
•
Writing into the browser console, using console.log().
Using innerHTML:
To access an HTML element, JavaScript can use
the document.getElementById(id) method. The id attribute defines the HTML
element. The innerHTML property defines the HTML content

JavaScript Programs:
A computer program is a list of "instructions" to be "executed" by a computer. In a
programming language, these programming instructions are called statements.
A JavaScript program is a list of programming statements. In HTML, JavaScript
programs are executed by the web browser.
JavaScript Statements:
JavaScript statements are composed of Values, Operators, Expressions, Keywords,
and Comments. Semicolons separate JavaScript statements.
Add a semicolon at the end of each executable statement:
var a, b, c; // Declare 3 variables
a = 5; // Assign the value 5 to a
b = 6; // Assign the value 6 to b
c = a + b; // Assign the sum of a and b to c
JavaScript Variables:
In a programming language, variables are used to store data values. JavaScript uses
the var keyword to declare variables. An equal sign is used to assign values to
variables. In this example, x is defined as a variable. Then, x is assigned (given)
the value 6:
var x;
x = 6;
Assignments:
Set A
1. Write a java script program to accept a number form user and display its
multiplication table
2. Write a java script program to accept a number form user and calculate and
display its sum of digits
3. Write a java script program to accept a number from user and check whether
it is Armstrong number or not
4. Write a java script program to accept a number from user and check whether
it is perfect number or not.
5. Write java script program to accept a number from user and check whether it
is prime number or not
6. Write a java script program to accept a string from user and display the
count of vowel characters from that string.
7. Write a java script program to accept a string and character from user and
check the count of occurrences of that character in string.
8. Write a JavaScript program to Display current Day, Date, Month, Year and
Time on the web
9. page and greet the user accordingly.
10. Write a java script program to accept the value of n and display all odd
numbers up to n.
11. Write a JavaScript program to construct the following pattern up to n lines,
using a nested for loop.
*
* *
* * *
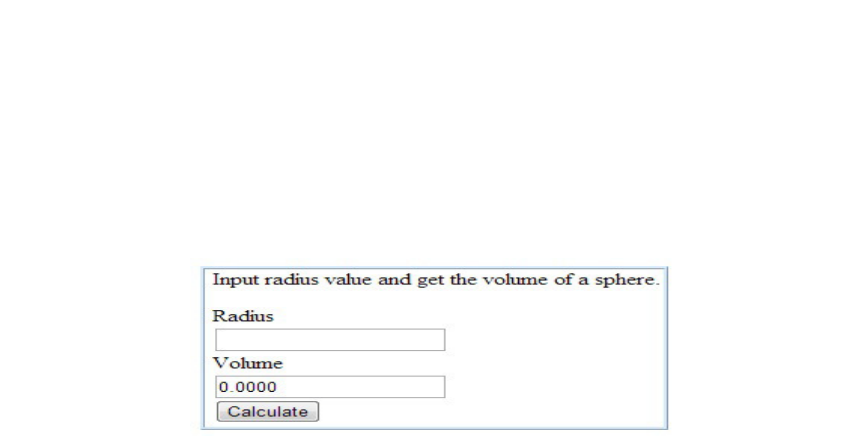
12. Write a JavaScript program to calculate the volume of a sphere.
Set B
13. Write a JavaScript Program to read a number from user, store its factors into
the array and display that array. (Handle onClick Event)
14. Design a student registration form with fields Name, Address, city and Pin-
Code.
15. Write a java script program to perform following validation Check name
should not be empty and contain alphabets onlyPin-code must be 6 digits
only
16. Design a login form with fields User Name, Password and Login button.
Write a java script code to accept username and password, validate login
details and display a message accordingly.
17. Write a java script code to accept a sentence from the user and alters it as
follows: Every space is replaced by * and digits are replaced by ?
18. Write a JavaScript Program to accept user name and password from an user,
if User name and Password is same then display his score card on the next
page as shown below.

19. Write a java script code to accept a number from user and write a function to
calculate sum of all odd digits of that number.
Assignment Evaluation
0: Not Done [ ] 1: Incomplete [ ] 2: Late Complete [ ]
3: Need Improvement [ ] 4: Complete [ ] 5: Well Done [ ]
Signature of Instructor
Section II
(RDBMS)
Table of Contents for Section-II (RDBMS)
Assignment No. 1 Data Type, PLSQL Block and Control Structure
Assignment No. 2 Error and Exception Handling
Assignment No. 3 Function
Assignment No. 4 Procedure
Assignment No. 5 Cursors
Assignment No. 6 Triggers
Assignment No. 7 Package
Assignment Completion Sheet
Sr. No
Assignment Marks
(out of 5)
Teacher
Sign
1
Data Type, PLSQL Block and
Control Structure
2
Error and Exception Handling
3
Function
4
Procedure
5
Cursor
6
Trigger
7
Package
Total (out of 40)
Total (out of 10)
Assignment No. 1: Data Type, PLSQL Block and Control Structure
A data type specifies, what kind of data you want to store in the table field.
While creating table, for each column, you have to use a datatype. There are
different categories of data types in PostgreSQL listed in the following
table
Type Data Type Description
Numeric
Smallint
2-byte small-range integer
Types
integer, int A signed, fixed precision 4-byte
Bigint stores whole numbers, large range 8 byte
Real 4-byte, single precision, floating-point number
Serial 4-byte auto incrementing integer
double precision 8-byte, double precision, floating-point number
numeric(m,d)
Where m is the total digits and d is the number of
digits after
the decimal.
Character
character(n), char(n) Fixed n-length character strings.
Types
character varying(n), A variable length character string with limit.
varchar(n)
Text
A variable length character string of unlimited
length.
Monetary
Types
Money currency amount,8 bytes
Boolean type
Boolean It specifies the state of true or false,1 byte.
Date/Time
Type
Date date (no time of day),4 byte.
Time time of day (no date),8 byte
time with time zone times of day only, with time zone,12 bytes

PLSQL Block:
A PL/SQL block is program structure which is used to write a SQL and PL/SQL
statements.
A PL/SQL block consists of three sections: declaration, executable, and exception-
handling section. In a block, the executable section is mandatory while the
declaration and exception-handling sections are optional.
Types of PL/SQL Block
1.
Named PL/SQL Block:
A PL/SQL block which has a name. Example: Functions or Procedures
written in PL/SQL are known as named PLSQL block . A named block is
stored into the Oracle Database server and can be reused later.
2.
Anonymous PL/SQL Block
A block without a name is an anonymous block. An anonymous block
is not saved in the Oracle Database server, so it is just for one-time use.
The PL/SQL block structure is represented as follows:
Declaration
Variable declaration section
Begin
Execution Section
Exception
Exception Section
End;
In the given structure,
1. Declaration Section: This section is used to declare variables, allocate
memory for cursors, and define data types.
2. Execution Section: A PL/SQL block has an executable section. An
executable section starts with the keyword BEGIN and ends with the
keyword END. This section should have at least one executable
statement.
3. Exception-handling section: A PL/SQL block has an exception-
handling section that starts with the keyword EXCEPTION. The
exception-handling section is where you catch and handle exceptions
(run time errors) raised by the code in the execution section.
PL/SQL Attribute:
PL/SQL variables and cursors have attributes, which are properties that let
you reference the datatype and structure of an item from table without repeating its
definition. A percent sign (%) is used to represent the attribute.
%TYPE
If you want to declare variables that will hold database values
then %TYPE attribute is used.
Syntax: VariableName TableName.ColumnName%TYPE;
Example: my_title books.title%TYPE;
%ROWTYPE
If you want to declare a variable that will hold number of records
then %ROWTYPE attribute is used
Syntax: VariableName Table_Name%ROWTYPE;
VaribleName Cursor_Name%ROWTYPE;
Example:
1. My_Book book%ROWTYPE;
2. CURSOR c1 is Select * from book;
Book_rec c1%ROWTYPE;
Steps for creating and executing PLSQL Block:
1. Write a PLSQL in Notepad
2. On SQL Command prompt type SET SERVEROUTPUT ON
3. Copy the PLSQL block and paste it on SQL prompt.
4. Compile the block by giving ‘/’ and press enter key.
5. If the block is compiled successfully the output will be displayed.
6. If the block consist some errors then you will receive a messes “PLSQL
block created with Compilation error”
7. Type Show Error command on SQL prompt, solve the error and recompile.
If the block is compiled successfully the output will be displayed.
Example 1: PLSQL block for addition of two numbers
declare
a number := &a;
b number :=&b;
c number;
begin
c:=a+b;
dbms_output.put_line('Addition is ' || c);
end;
Example 2: PL/SQL block which accept value from user to insert it into
student table (Using %TYPE attribute)
create table student(rno number primary key,sname varchar2(20),per
number(3,2));
declare
rn student.rno%TYPE;
name student.sname%TYPE;
p student.per%TYPE;
begin
rn:=&rn;
name:=’&name’;
p:=&p
insert into student values(rn,name,p);
dbms_output.put_line('One record inserted successfully…!’);
end;
Example 3: PL/SQL block which display the records from student table.
(Using %ROWTYPE attribute)
Declare
stud_rec student%ROWTYPE;
Begin
select * into stud_rec from student ;
dbms_output.put_line(‘Student Roll=’||stud_rec.rno);
dbms_output.put_line(‘Student Name=’||stud_rec.sname);
dbms_output.put_line(‘Student Percentage=’||stud_rec.per);
End;

Control Statement: According to the structure theorem, any computer program
can be written using the basic control structures. They can be combined in any way
necessary to deal with a given problem.
• The Condition structure tests a condition, then executes one sequence of
statements instead of another, depending on whether the condition is true or
false. A condition any variable or expression that returns a Boolean value
(TRUE or FALSE).
• The iteration structure executes a sequence of statements repeatedly as
long as a condition holds true. The sequence structure simply executes a
sequence of statements in the order in which they occur.
Conditional Statements:
A conditional statement specifies an action (or set of actions) that should
be executed by checking some logical condition, based on the result of
logical condition the sequence of statements are executed.
1. IF…. THEN Statement: IF….THEN statement, a statement or block of
statements is executed if given condition evaluates true.
Syntax:
IF condition THEN
Statements;
END IF;
Example:
IF class=’FY’ THEN
dbms_output.put_line('Welcome FY’);
END IF;
2. IF…. THEN…. ELSE Statement:
This statement allows to execute a block of statements if a condition
evaluates to true, otherwise a block of statements in else part is executed.

Syntax:
IF condition THEN
Statements;
ELSE
Statements;
END IF;
Example:
IF age>=18 THEN
dbms_output.put_line('Congratulations you are eligible for voting’)
ELSE
dbms_output.put_line('Not Eligible for voting);
END IF;
3. IF…. THEN…. ELSIF…. THEN…ELSE Statement: IF-THEN-
ELSIF provides a convenient method of checking multiple conditions.
Syntax:
IF condition THEN
Statements;
ELSIF condition THEN
Statements;
ELSIF condition THEN
Statements;
ELSE
Statements;
END IF;
Example:
IF ( a = 10 ) THEN
dbms_output.put_line('Value of a is 10' );
ELSIF ( a = 20 ) THEN
dbms_output.put_line('Value of a is 20' );
ELSIF ( a = 30 ) THEN
dbms_output.put_line('Value of a is 30' );
ELSE
dbms_output.put_line('None of the values is matching');
END IF;
4. CASE Statement: The PL/SQL CASE Statement provides facility to execute
a sequence of statements based on a selector. A selector may be variable, function
or an expression.
Syntax:
CASE [expression]
WHEN condition1 THEN result1
WHEN condition2 THEN result2
....................
WHEN condition_n THEN result_n
ELSE result
END;
Example:
DECLARE
grade char(1) := 'C';
BEGIN
CASE grade
when 'A' then
dbms_output.put_line('Distinction');
when 'B' then
dbms_output.put_line('First class');
when 'C' then
dbms_output.put_line('Second class');
when 'D' then
dbms_output.put_line('Pass class');
else
dbms_output.put_line('Failed');
END CASE;
END;
The Iteration Structure
Loops are iterative control statements. They are used to repeat execution of
one or more statements for defined number of times. The looping statements
are as follows:
1. PL/SQL Exit Loop: In this, the set of statements are executed at
least once before termination of loop. There should be an EXIT condition in
the loop, otherwise the loop will get into an infinite number of iterations.
Syntax
LOOP
Statements;
EXIT;
[or EXIT WHEN condition;]
END LOOP;
Example
DECLARE
i NUMBER := 1;
BEGIN
LOOP
dbms_output.put_line(i);
i := i+1;
EXIT WHEN i>5;
END LOOP;
END;
2. PL/SQL WHILE Loop: It is used when a set of statements should be executed
as long as condition is true. The condition is checked at the beginning of each
iteration and continues until condition becomes false.
Syntax:
WHILE [condition]
LOOP Statements;
END LOOP;
Example:
DECLARE
i INTEGER := 1;
BEGIN
WHILE i <= 5 LOOP
dbms_output.put_line(i);
i := i+1;
END LOOP;
END;
3. PL/SQL FOR Loop: It is used to execute a set of statements for a fixed number
of times. It is iterated between the start and end integer values.
Syntax:
FOR counter IN initial_value .. final_value LOOP
LOOP statements;
END LOOP;
Example
BEGIN
FOR k IN 1..5 LOOP
dbms_output.put_line(k) ;
END LOOP;
END;
Assignments:
SET A:
1. Write a PL/SQL block to accept a number and display multiplication
table of the given number.
2. Write a PL/SQL block which will accept student details, calculate the
class using per value and insert the record into Student (rno, sname, class,
per, class) table.
3. Write a PL/SQL block which will accept two numbers from user, check
whether numbers are positive or negative. If positive number then display
only the odd numbers between the entered numbers.
SET B
1. Write a PL/SQL block which will accept roll number of a student and
display record of student from student table( use %ROWTYPE attribute)
2. Write a PL/SQL block which will accept roll number from student, select
name and percentage of the student and calculate grade using percentage
value. Display the record.(use %TYPE)
3. Write a PL/SQL block which will display ‘FYBBA(CA)’ ten times on
screen. Odd index number must display ‘FYBBA(CA)’ and even index
number position in reverse case ‘fybba(ca)’.
Assignment Evaluation
0: Not Done [ ] 1: Incomplete [ ] 2: Late Complete [ ]
3: Need Improvement [ ] 4: Complete [ ] 5: Well Done [ ]
Signature of Instructor
Assignment No. 2: Error and Exception Handling
An error occurred during the execution (run time) of program is called exception
in PL/SQL. PL/SQL provides the facility to catch errors by declaring conditions in
exception block in the program and necessary action to be taken to rectify the
error. Exception can be User defined (these are logical error defined by user) or
System defined.
System defined (Internal) exceptions are raised automatically by the runtime
system. User defined exception should be raised explicitly by RAISE statements.
Syntax:
Declare
< Declaration Section>
Begin
<Statements>
Exception
When condition Then
Handler statements
End;
Example:
DECLARE
Salary number;
BEGIN
Salary:=&Salary;
EXCEPTION
WHEN Salary<=0 THEN
DBMS_OUTPUT.PUT_LINE('Error:: Salary must be a positive
number..');
END;
Types of Exception
1. Predefined / System Defined Exception :
Predefined exception is raised automatically whenever there is a violation of
Oracle coding rules. Predefined exceptions are those like ZERO_DIVIDE, which
is raised automatically when we try to divide a number by zero. Other built-in
exceptions are given below.
Unexpected Oracle errors can be handled using OTHERS handler. It can
handle all raised exceptions that are not handled by any other handler. It must
always be written as the last handler in exception block.
Exception Raised when
DUP_VAL_ON_INDEX When you try to insert a duplicate value into a
unique column.
INVALID_CURSOR It occurs when we try accessing an invalid cursor.
INVALID_NUMBER On usage of something other than number in place
of number value.
LOGIN_DENIED At the time when user login is denied.
TOO_MANY_ROWS When a select query returns more than one row and
the destination variable can take only single value.
VALUE_ERROR When an arithmetic, value conversion, truncation, or
constraint error occurs.
CURSOR_ALREADY_OP
EN
Raised when we try to open an already open cursor.
ZERO_DIVIDE, Raised automatically when we try to divide a
number by zero.
NO_DATA_FOUND Raise when no data is fetched in SELECT
statement.
OTHER Raise when no exception is matched

Example:
PL/SQL block to accept customer name, address and display. If not found
then use system defined exception.
DECLARE
c_id customers.id%type := 5;
c_name customers.name%type;
c_addr customers.address%type;
BEGIN
SELECT name, address INTO c_name, c_addr FROM customers
WHERE id = c_id;
DBMS_OUTPUT.PUT_LINE ('Name: '|| c_name);
DBMS_OUTPUT.PUT_LINE ('Address: ' || c_addr);
EXCEPTION
WHEN no_data_found THEN
dbms_output.put_line('No such customer!');
WHEN others THEN
dbms_output.put_line('Error!');
END;
2. User-defined Exceptions:
PL/SQL allows you to define your own exceptions according to the need of
your program. A user-defined exception must be declared and then raised
explicitly, using either a RAISE statement or the
procedure DBMS_STANDARD.RAISE_APPLICATION_ERROR
Syntax:
DECLARE
exception_name EXCEPTION;
BEGIN
<Execution block>
RAISE <exception_name>
EXCEPTION
WHEN <exception_name> THEN
<Handler>
END;
Steps to create User-Defined Exception:
1. Declare User-defined exception: Exception must be declared before it get
used.
Example:
exception_name EXCEPTION;
2. Raise Exception: Raise the exception when error condition occurs.
Example:
RAISE exception_name;
3. Handling exception: Once the exception is raised then control transfers to
the appropriate exception block, checks the name of the exception with in
exception block, if found then executes the error message or exception
handling code.
Example :
EXCEPTION
WHEN exception_nameTHEN
<Exception handling code>
Example :
Create an exception Negative_No and raise the exception when entered number is
negative.
Declare
Negative_No Exception;
Num number;
Begin
Num:=&Num;
if Num<0 then
RAISE Negative_No;
else
dbms_output.put_line('Num='||Num);
End If;
Exception
When Negative_No then
dbms_output.put_line('error:: Enter positive number...!');
End;
Assignments:
SET A:
Consider the following entities and their relationships.
Wholesaler (w_no, w_name, address, city)
Product (product_no, product_name, rate)
Relation between Wholesaler and Product is Many
to Many with quantity as descriptive attribute.
Constraint: Primary key, rate should be > 0.
Create a RDB in 3NF and write PL/SQL blocks in Oracle for the
following:
1. Write a function to accept quantity from user. Quantity must be within range
50-200. If user enters the quantity out of range then raise an user defined
exception “quantity_out_of _range” otherwise enter the record in table.
2. Write a PL/SQL block which accept rate from user. If user enters rate less
than or equal to zero then raise an user defined exception
“Invalid_Rate_Value” otherwise display message “Correct Input”.
3. Write a function to accept product name as parameter. If entered product
name is not valid then raise an user defined
exception”Invalid_Product_Name” otherwise display product details of
specified product.
SET B:
Consider the following entities and their relationships.
Student (rollno, sname, class, timetable, mobileno)
Lab (LabNo, LabName, capacity, equipment)
Relation between Student and Lab is Many to One.
Constraint: Primary Key, capacity should not be null.
Create a RDB in 3NF and write PL/SQL blocks in Oracle for the
following:
1) Write a function to accept lab number from user as parameter. ” if user
enters invalid lab number then raise an user defined exception
“Invalid_Lab_No” otherwise display the student details of the same lab.
2) Write a PL/SQL block which accept a mobile number from user. If
mobileno less than or more than 10 digits then raise an user defined
exception “Invalid_Mobile No” otherwise display the “Correct input…! “.
3) Write a PL/SQL block which accepts lab detail from user. If capacity is
more than 40 then raise an user defined exception
“Invalid_Capacity_Range” otherwise insert the record in the table.
Assignment Evaluation
0: Not Done [ ] 1: Incomplete [ ] 2: Late Complete [ ]
3: Need Improvement [ ] 4: Complete [ ] 5: Well Done [ ]
Signature of Instructor

Assignment No. 3: Procedure
The PL/SQL stored procedure or simply a procedure is a PL/SQL block which
performs one or more specific tasks. It is just like procedures in other
programming languages. The procedure contains a header and a body section
Header: The header contains the name of the procedure and the parameters
or variables passed to the procedure.
Body: The body contains a declaration section, execution section and
exception section similar to a general PL/SQL block.
Syntax:
CREATE [OR REPLACE] PROCEDURE procedure_name
(parameterName [parameterType(IN,OUT,INOUT])
parameterDatatype ]
IS
[declaration_section]
BEGIN
executable_section
[EXCEPTION
exception_section]
END [procedure_name];
Example:
CREATE OR REPLACE PROCEDURE display AS
BEGIN
dbms_output.put_line('This is a procedure demo…!');
END;
/
After executing above code using SQL prompt, it will show “Procedure Created
“message.
Executing Procedure:
A standalone procedure can be executed by using two ways
1. Using the EXECUTE keyword: The above procedure
named 'display' can be executed using EXECUTE keyword with the
following output

SQL> EXECUTE display;
This is a procedure demo…!
PL/SQL procedure successfully completed.
2. Calling the name of the procedure from a PL/SQL block: The
procedure can also be called from another PL/SQL block
Example :
BEGIN
display;
END;
The above call will display the output:
This is a procedure demo…!
PL/SQL procedure successfully completed.
Deleting a Standalone Procedure:
A standalone procedure can be deleted with the DROP
PROCEDURE statement. Following statement is used for deleting a
procedure.
DROP PROCEDURE procedure-name;
You can drop the “display” procedure by using the following statement
Example: DROP PROCEDURE display;
Parameter Modes in PL/SQL procedure
Parameter
Type
Description
IN Parameter This parameter is used for giving input to the procedure. It is a
read-only variable inside the procedure. Values of IN parameter
cannot be changed inside the procedure.
OUT Parameter This parameter is used for getting output from the procedure .It
is a read-write variable inside the procedure. Their values can
be changed inside the procedure.
INOUT
Parameter
This parameter is used for both giving input and for getting
output from the procedure. It is a read-write variable inside the
procedure. Their values can be changed inside the procedure.
Example 1: Using IN Parameter in Procedure: The following procedure is
accepting a name as a parameter and will display the message
CREATE OR REPLACE PROCEDURE Display_Msg (name IN VARCHAR2) IS
BEGIN
dbms_output.put_line (‘Welcome '|| name);
END;
Execute procedure and display output using following statement:
sql> EXECUTE Display_Msg(‘Aarushi’);
Welcome Aarushi
PL/SQL procedure successfully completed.
Example 2: Using OUT Parameter in Procedure: When OUT parameter is used
in procedure then the procedure must be call with in the PLSQL block.
The following example accepts two IN parameter and one OUT parameter and
checks the maximum number.
Create a procedure
Create or Replace PROCEDURE getMax(x IN number, y IN number, z OUT
number) IS
BEGIN
IF x < y THEN
z:= x;
ELSE
z:= y;
END IF;
END;
Calling a procedure in PLSQL block
DECLARE
a number;
b number;
c number;
BEGIN

a:= &a;
b:= &b;
getMax(a, b, c);
dbms_output.put_line(' Max Number is : ' || c);
END;
/
Execute the above PL/SQL block and you will get the output.
Example 3: Using IN OUT Parameter in Procedure:
The following example accepts one parameter as INOUT and calculate square of a
given number.
Create a procedure
Create or Replace PROCEDURE getSquare(num IN OUT number) IS
BEGIN
num:=num*num;
END;
Calling a procedure in PLSQL block
DECLARE
a number;
BEGIN
a:= &a;
getSquare(a);
dbms_output.put_line('Square is : ' || a);
END;
/
Execute the above PL/SQL block and you will get the output.
Assignments:
SET A:
Consider the following entities and their relationship.
Newspaper (name,language , publisher , cost )
Cities (pincode , city, state)

Relationship between Newspaper and Cities is many-to-many with
descriptive attribute daily required
Constraints: name and pincode primary key
Create a RDB in 3NF and write PL/SQL blocks in Oracle for the following:
1)
Write a procedure to calculate city wise total cost of each newspaper
2)
Write a procedure which display details of news papers having cost greater
than 2 Rs.
3)
Write a procedure which take display details of cities where English news
paper is supplied.
SET B:
Consider the following entities and their relationships.
Library(Lno, Lname, Location, Librarian, no_of_books)
Book(Bid, Bname, Author_Name, Price, publication)
Relation between Library and Book is one to many.
Constraint: Primary key, Price should not be null.
Create a RDB in 3NF and write PL/SQL blocks in Oracle for the
following:
1)
Write a procedure which will accept publication name from user and
display details of books published by it.
2)
Write a procedure which will accept Library number from user and
display Book name and their price.
3)
Write a procedure to display names of Libraries having books written by
“Mr. Patil”.
Assignment Evaluation
0: Not Done [ ] 1: Incomplete [ ] 2: Late Complete [ ]
3: Need Improvement [ ] 4: Complete [ ] 5: Well Done [ ]
Signature of Instructor

Assignment No. 4: Function
The PL/SQL Function is very similar to PL/SQL Procedure. The main difference
between procedure and a function is, a function must always return a value, and on
the other hand a procedure may or may not return a value. Except this, all the other
things of PL/SQL procedure are similar for PL/SQL function.
Syntax to create a function:
CREATE [OR REPLACE] FUNCTION function_name [parameters]
[(parameter_name [IN | OUT | IN OUT] datatype [, ...])]
RETURN return_datatype
{IS | AS}
BEGIN
< function_body >
END [function_name];
The function must contain a RETURN statement RETURN clause specifies the
data type returned by the function.
Functions are of two types:
1. Function with Parameter
2. Function without Parameter
As like procedure function can also use IN, OUT and INOUT parameter.
Steps for using function in PLSQL:
1. Create a function
2. Write a PLSQL block to call the function and execute block
Or execute function using select statement.
Example 1: Function without using parameter to calculate total bill of specific
table.
Step 1: Creating Function
REATE OR REPLACE FUNCTION disptotal
RETURN number IS
tot number(5) := 0;
BEGIN
SELECT sum(amount) into tot FROM Bill where tno=5;
RETURN tot;
END;
/
Step 2: Executing function using PLSQL block
DECLARE
t number(2);
BEGIN
t := disptotal();
dbms_output.put_line('Total Bill: ' || t);
END;
/
OR
Executing function using select statement
Select disptotal() from dual;
Example 2: Function with using IN parameter for addition of two numbers.
Step 1: Creating Function
CREATE or REPLACE FUNCTION add(n1 in number, n2 in number)
return number is
n3 number(5);
BEGIN
n3 :=n1+n2;
return n3;
END; /
Step 2: Executing function using PLSQL block
DECLARE
A number(5)
B number(5);
C number(5);
BEGIN
A:=&A;
B:=&B;
C := add(A,B);
dbms_output.put_line('Addition is: ' || C);
END;
/ OR
Executing function using select statement
Select add(3,4) as SUM from dual;
Assignments:
SET A :
Consider the following entities and their relationships.
Client (client_no, client_name, address, birthdate)
Policy_info (policy_no, desc, maturity_amt, prem_amt, date)
Relation between Client and Policy_info is Many to Many
Constraint: Primary key, prem_amt and maturity_amt
should be > 0
Create a RDB in 3NF and write PL/SQL blocks in Oracle for the
following:
1)
Write a function which will return total maturity amount of policies of a
particular client.
2)
Write a function which will return minimum maturity amount of all policies.
3)
Write a function which will return total number of policies opened no “1-
Jan-2020”
SET B:
Consider the following Item_Supplier database
Item (itemno, itemname )
Supplier (supplier_No , supplier_name, address, city )
Relationship between Item and Supplier is many-to-many with
descriptive attribute rate and quantity
Constraints: itemno ,supplier_No primary key
Create a RDB in 3NF and write PL/SQL blocks in Oracle for the
following:
1) Write function to print the total number of suppliers who
supplies “Keyboard”.
2) Write function which will return rate of “Harddisk” supplied by
“Mr. Patil”.
3) Write function which will take supplier number as input and
print the total number of items supplied by him.
Assignment Evaluation
0: Not Done [ ] 1: Incomplete [ ] 2: Late Complete [ ]
3: Need Improvement [ ] 4: Complete [ ] 5: Well Done [ ]
Signature of Instructor

Assignment No.5: Cursors
A cursor is a pointer that points to a result of a query. PL/SQL controls the context
area through a cursor. A cursor holds the rows (one or more) returned by a SQL
statement. The set of rows cursor holds is referred to as the active set.
PL/SQL has two types of cursors: Implicit cursors and Explicit cursors.
1. Implicit Cursor: The implicit cursors are automatically generated by
Oracle while an SQL statement is executed. These are created by default to
process the statements when DML statements like INSERT, UPDATE, and
DELETE etc. are executed. Oracle provides some attributes known as
Implicit cursor's attributes to check the status of DML operations. Some of
them are: %FOUND, %NOTFOUND, %ROWCOUNT and %ISOPEN.
The following table specifies the status of the cursor with each of its
attribute.
Attribute Description
%FOUND
Its return value is TRUE if DML statements like INSERT,
DELETE and UPDATE affect at least one row or more
rows or a SELECT INTO statement returned one or more
rows. Otherwise it returns FALSE.
%NOTFOUND Its return value is TRUE if DML statements like INSERT,
DELETE and UPDATE affect no row, or a SELECT INTO
statement return no rows. Otherwise it returns FALSE. It is
a just opposite of %FOUND.
%ISOPEN Return TRUE if the cursor is open. It always returns
FALSE for implicit cursors, because the SQL cursor is
automatically closed after executing its associated SQL
statements.
%ROWCOUNT
It returns the number of rows affected by DML statements
like INSERT, DELETE, and UPDATE or returned by a
SELECT INTO statement.
Example1 : Implicit Cursor
PL/SQL block to update employee table salary by adding 2000 amount in
the existing salary.

DECLARE
total_rows number(2);
BEGIN
UPDATE employee SET salary = salary + 2000;
IF sql%notfound THEN
dbms_output.put_line('No Employee updated..!);
ELSIF sql%found THEN
total_rows := sql%rowcount;
dbms_output.put_line( total_rows || ' customers updated ');
END IF;
END;
2. Explicit Cursor: Explicit cursors are created by user. These cursors should
be defined in the declaration section of the PL/SQL block. It is created on a
SELECT statement which returns more than one row.
Steps for creating Explicit cursor:
1. Declare the cursor
2. Open the cursor
3. Fetch the cursor to retrieve data.
4. Close the cursor to release allocated memory.
1. Declare the cursor to initialize in the memory: Declaring the cursor
defines the cursor with a name and the associated SELECT statement.
For example:
CURSOR Stud IS SELECT rno, name, per FROM Student;
Here Stud is name of the cursor
2. Open the cursor: Opening the cursor allocates the memory for the cursor
and makes it ready for fetching the rows returned by the SQL statement into
it.
For example, we will open the above defined cursor as follows
open Stud;
Fetch the cursor to retrieve data: Fetching the cursor involves accessing
one row at a time. For example, we will fetch rows from the above-opened
cursor as follows:
FETCH Stud INTO s_rno, s_name, s_per;
3. Close the cursor: Closing the cursor means releasing the allocated memory.
For example, we will close the above-opened cursor as follows
CLOSE Stud;
Example 1: PLSQL block to display student information using explicit cursor:
DECLARE
s_rno Student.rno%TYPE;
s_name Student.name% TYPE;
s_per Student.per% TYPE;
CURSOR Stud IS SELECT rno, name, per FROM Student;
BEGIN
OPEN Stud;
LOOP
FETCH Stud into s_rno, s_name, s_per;
EXIT WHEN c_customers%notfound;
dbms_output.put_line(s_rno || ' ' || s_name || ' ' || s_per);
END LOOP;
CLOSE Stud; END; /
Example 2: Display the record of a particular student using parameterized
cursor
DECLARE
Stud_rec Student%ROWTYPE;
CURSOR Stud(no number) IS SELECT * FROM Student where rno=no;
BEGIN
OPEN Stud(5);
LOOP
FETCH Stud into Stud_rec;
EXIT WHEN Stud%notfound;
dbms_output.put_line(Stud_rec.rno || ' ' || Stud_rec.name || ' ' ||
Stud_rec.per);
END LOOP;
CLOSE Stud;
END;
Assignments:
SET A:
Consider the following entities and their relationships.
Project (pno, pname, start_date, budget, status)
Department (dno, dname, HOD, loc)
The relationship between Project and Department is Many to One.
Constraint: Primary key.
Project Status Constraints: C – Completed,
P -
Progressive, I
– Incomplete
P
Create a RDB in 3NF and write PL/SQL blocks in Oracle for the
following:
1) Write a cursor which will display list of projects started in month of
“January” 2020.
2) Write a cursor which will display status wise project details of each
department.
3) Write a cursor which displays the details of project having budget more
than 100000 from ‘Computer Science Department’.
SET B:
Consider the following entities and their relationships.
Gym (Name, city, charges, scheme)
Member (ID, Name, PhoneNo, address)
Relation between Gym and member is one to many.
Constraint: Primary Key, charges must be greater than 0.
Create a RDB in 3NF and write PL/SQL blocks in Oracle for the following:

1) Write a cursor which will display Gym details having charges more than
5000 from ‘Pune’ city.
2) Write a cursor which will display city wise Gym details.
3) Write a cursor which will display gym wise member details.(Use
Parametrized Cursor)
Assignment Evaluation
0: Not Done [ ] 1: Incomplete [ ] 2: Late Complete [ ]
3: Need Improvement [ ] 4: Complete [ ] 5: Well Done [ ]
Signature of Instructor

Assignment No. 6: Triggers
A trigger is a stored procedure in database which automatically invokes
whenever a special event in the database occurs. For example, a trigger can be
invoked when a row is inserted into a specified table or when certain table columns
are being updated or deleted.
A trigger is fired when a DML statements like Insert, Delete, Update is executed
on a database table. A trigger is triggered automatically when an associated DML
statement is executed.
Syntax:
CREATE or REPLACE trigger [trigger_name]
[before | after]
{insert | update | delete}
on [table_name]
[for each row]
WHEN (condition)
DECLARE
Declaration-statements
BEGIN
Executable-statements
EXCEPTION
Exception-handling-statements
END;
Where,
• Create or Replace trigger [trigger_name]: Creates or replaces an existing
trigger with the trigger_name.
• [before | after]: This specifies when the trigger will be executed. Before or
after query execution.
• {insert | update | delete}: This specifies the DML operations performed by
the trigger.
• on [table_name]: This specifies the name of the table associated with the
trigger.
• [for each row]: This specifies a row-level trigger, i.e., the trigger will be
executed for each row being affected.
• [trigger_body]: This provides the operation to be performed as trigger is
fired. This is written in Declare, Begin, Exception and End block.

Types of Trigger
1. Row-Level Trigger: A row-level trigger fires once for each row that is
affected by a triggering event.
For example, if Delete operation is defined as a triggering event for a
particular table, and a single DELETE statement deletes five rows from that
table, the trigger fires five times, once for each row.
2. Statement-Level Trigger: A statement-level trigger fires only once for
each statement. Using the previous example, if deletion is defined as a
triggering event for a particular table, and a single DELETE statement
deletes five rows from that table, the trigger fires once.
3. BEFORE Trigger: BEFORE trigger executes before the DML statement
(INSERT, UPDATE, DELETE) execute.
4. AFTER Trigger: AFTER trigger executes after the DML statement
(INSERT, UPDATE, DELETE) executed.
5. Combination Trigger: Combination trigger are combination of two trigger
type,
Before Statement Trigger, Before Row Trigger, After Statement Trigger,
After Row Trigger
Variables used in trigger
1.
NEW: New refer to the new value for column. It is represented as
:NEW.columnName, where columnName is the name of a column in the
table on which the trigger is defined.
2.
OLD: Old refer to the old value for the column. It is represented as
:OLD.columnName, where columnName is the name of a column in the
table on which the trigger is defined.
Error statement in trigger is written using
Raise_application_error(Error Number,’Error Message’);
eg: Raise_application_error(-20003,'Error:: Salary must be a positive
number');
Example:
1) Before Update: This trigger will raise before salary is updated on “Employee”
table
Create or replace trigger emp_update before update on employee for each
row

Declare
invalid_salary Exception;
Begin
if(:new.salary<=0) then
raise invalid_salary;
end if;
Exception
when invalid_salary then
raise_application_error(-20003,'Error:: Salary must be a positive
number');
End;
SQL> update employee set salary=-4567;
update employee set salary=-4567
*
ERROR at line 1:
ORA-20003: Error:: Salary must be a positive number
ORA-06512: at "MVT.EMP_UPDATE", line 9
ORA-04088: error during execution of trigger 'MVT.EMP_UPDATE'
2) Before Insert or update: This trigger will raise before salary is inserted or
updated on
“Employee” table
Create or replace trigger emp_insert before insert or update on employee for
each row
Declare
invalid_salary Exception;
Begin
if(:new.salary<=0) then
raise invalid_salary;
end if;
Exception
when invalid_salary then
raise_application_error(-20002,'Error:: Salary must be a positive number');
End;
old 1: insert into employee
values(&eno,'&ename','&addr','&design',&salary)
new 1: insert into employee values(5,'EEE','baner','clerk',0)

insert into employee values(5,'EEE','baner','clerk',0)
*
ERROR at line 1:
ORA-20002: Error:: Salary must be a positive number
ORA-06512: at "MVT.EMP_INSERT", line 9
ORA-04088: error during execution of trigger 'MVT.EMP_INSERT'
3) Before Delete: This trigger will raise before salary is deleted on “Employee”
table
Create or replace trigger del_Emp before delete on employee for each row
Declare
del_Emp Exception;
Begin
raise del_Emp;
Exception
when del_Emp then
raise_application_error(-20001,'Error:: Record can not be deleted');
End;
Output:
delete from employee where eno=3;
delete from employee where eno=3
*
ERROR at line 1:
ORA-20001: Error:: Record can not be deleted
ORA-06512: at "MVT.DEL_EMP", line 9
ORA-04088: error during execution of trigger 'MVT.DEL_EMP'
4) After Insert: This trigger will raise after record is inserted and mobile number
is not with in
range on “Employee” table.
create or replace trigger emp_insert after insert on employee for each row
Declare
invalid_mobile Exception;
len number;
Begin
len:=length(:new.mobile);
if(len<10 or len>10) then
raise invalid_mobile;
end if;
Exception
when invalid_mobile then
raise_application_error(-20006,'Error:: Mobile number must be 10
digit....!');
End;
insert into employee
values(7,'Mr.Verma','pimpri','Programmer',45678,9822645);
insert into employee
values(7,'Mr.Verma','pimpri','Programmer',45678,9822645)*
ERROR at line 1:
ORA-20006: Error:: Mobile number must be 10 digit....!
ORA-06512: at "MVT.EMP_INSERT", line 11
ORA-04088: error during execution of trigger 'MVT.EMP_INSERT'
Assignments:
SET A :
Consider the following entities and their relationships.
Employee (emp_id, emp_name, address)
Investment (inv_no, inv_name, inv_date, inv_amount)
Relation between Employee and Investment is One to Many.
Constraint: Primary key, inv_amount should be > 0.
Create a RDB in 3NF and write PL/SQL blocks in Oracle for the
following:
1)
Write a trigger which will fire before insert or update on Investment having
investment amount less than 10000. (Raise user defined exception and give
appropriate message)
2)
Write a trigger which will fire before insert or update on Employee having
Emp id less than equal to zero (Raise user defined exception and give
appropriate message)
3)
Write a trigger which will fire before insert or update on Investment having
investment date greater than current date. (Raise user defined exception and
give appropriate message)
SET B :
Consider the following entities and their relationships.
Bill (billno, day, tableno, total)
Menu (dish_no, dish_desc, price)
The relationship between Bill and Menu is Many to Many with quantity as
descriptive attribute.
Constraint: Primary key, price should be > 0.
Create a RDB in 3NF and write PL/SQL blocks in Oracle for the
following:
1) Write a trigger which will fire before insert or update on Menu having
price less than or equal to zero. (Raise user defined exception and give
appropriate message)
2) Write a trigger which will fire before insert or update on Bill having day
other than seven week days. (Raise user defined exception and give
appropriate message)
3) Write a trigger which will fire before insert or update on Bill having total
less than or equal to 10 Rs. (Raise user defined exception and give
appropriate message)
Assignment Evaluation
0: Not Done [ ] 1: Incomplete [ ] 2: Late Complete [ ]
3: Need Improvement [ ] 4: Complete [ ] 5: Well Done [ ]
Signature of Instructor

Assignment No. 7: Package
Packages are schema objects that groups logically related PL/SQL types,
variables, and subprograms. A package will have two mandatory parts −
1. Package Specification:
Package specification contains the information about the content of the
package. It is the interface to the package which DECLARES the types, variables,
constants, exceptions, cursors, and subprograms that can be referenced from
outside the package.
All objects placed in the specification are called public objects.
The object not declared in package but used in package body is called a
private object.
2. Package body or definition
The package body has the codes for various methods declared in the package
specification and other private declarations, which are hidden from the code
outside the package.
The CREATE PACKAGE BODY Statement is used for creating the
package body.
3.
Using the Package Elements
The package elements (variables, procedures or functions) are accessed with the
following
Syntax: package_name.element_name;
Example:
DECLARE
//variable declaration
BEGIN
Package_name.Element_name (parameter);
……
…….
END;
/
The above code will be executed on SQL prompt and package will be executed
Steps for creating package
1. Creating a package body
2. Creating a package and calling package element into it.
3. Executing package
Example:
Following example creates a package which consist one function and one
procedure
1.
Creating a package body
create or replace package body emp_pack as
FUNCTION total_sal RETURN number IS
totalsal number := 0;
BEGIN
SELECT sum(salary) into totalsal FROM emp;
RETURN totalsal;
END;
procedure empdetails(e_no IN number, e OUT emp%rowtype ) IS
BEGIN
SELECT * into e
FROM emp where eno = e_no;
exception
when no_data_found then
dbms_output.put_line('Employee does not exist');
END;
end emp_pack;
2.
Creating a package and calling package element into it.
create or replace package emp_pack as
function total_sal return number;
procedure empdetails(e_no IN number, e OUT emp%rowtype );
end emp_pack;
3.
Executing package
Declare
enumber number:=&enumber;
emp1 emp%rowtype;
tsal number;
Begin
tsal:=emp_pack.total_sal();
emp_pack.empdetails(enumber,emp1);
dbms_output.put_line('Total salary of Employees is '||tsal);
dbms_output.put_line('Details of a given Employee is
'||emp1.eno||emp1.ename||emp1.salary);
End;
Assignments:
SET A:
Consider the following entities and their relationships.
College (code, college_name, address)
Teacher (teacher_id, teacher_name, Qualification, specialization,
salary, Desg)
Relation between Teacher and College is Many to One.
Constraint: Primary Key, qualification should not be null.
Create a RDB in 3NF and write PL/SQL blocks in Oracle for the
following:
1) Write a package, which consists of one procedure and one function. Pass
college code as a parameter to procedure and display details of college.
Write a function which will return teacher name having maximum salary.
2) Write a package, which consists of one cursor and one trigger. Cursor
should display teachers detail and trigger should fire on Teacher table
before insert or update salary having salary less than or equal to zero.
Assignment Evaluation
0: Not Done [ ] 1: Incomplete [ ] 2: Late Complete [ ]
3: Need Improvement [ ] 4: Complete [ ] 5: Well Done [ ]
Signature of Instructor
